1
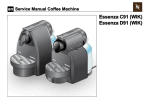
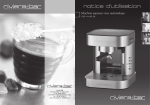
en Service Manual Coffee Machine
Essenza
EF 347 / C99
Essenza
EF 348 / D99
Version 1.0 en
Contents
Preface______________________________________________ 3
Replacing thermoblock ________________________________ 23
Replacing pump______________________________________ 24
Replacing electronic control board with button prints _________ 25
Replacing compact brewing unit _________________________ 26
Wiring diagram 220V - 240V IEC_________________________ 27
Wiring diagram 120V - 127V IEC_________________________ 28
General _____________________________________________ 3
Nespresso technical website_____________________________ 3
Content updates ______________________________________ 3
General Safety Notes ________________________________ 4
Main Components ___________________________________ 5
Overview ____________________________________________
Overview of rating plates________________________________
Rating Plates - Essenza machine partners __________________
Water circuit _________________________________________
Function Tests ______________________________________ 29
5
6
7
8
Safety instructions ____________________________________ 29
Measuring flow rate (1) ________________________________ 30
Measuring flow rate (2) ________________________________ 31
Checking for leaks and pump pressure (1) _________________ 32
Checking for leaks and pump pressure (2) _________________ 33
Measuring coffee temperature___________________________ 34
Protective earth continuity test (1) ________________________ 35
Protective earth continuity test (2) ________________________ 36
Protective insulation test (1) ____________________________ 37
Protective insulation test (2) ____________________________ 38
Protective insulation test (3) ____________________________ 39
Technical Data_______________________________________ 9
Operation __________________________________________ 10
Making coffee _______________________________________
Programming the water system__________________________
Emptying the water system _____________________________
Energy saving mode __________________________________
Reset to factory settings _______________________________
Coffee machine status (1) ______________________________
Coffee machine status (2) ______________________________
10
11
12
13
14
15
16
Maintenance ________________________________________ 40
Descaling (1) ________________________________________ 40
Descaling (2) ________________________________________ 41
Troubleshooting ____________________________________ 17
Spare Parts _________________________________________ 42
Check Machine on receipt______________________________ 17
Repair accessories ___________________________________ 42
Spare parts EF 347 / C99 ______________________________ 43
Spare parts EF 348 / D99 ______________________________ 46
Repair ______________________________________________ 20
Safety instructions ____________________________________ 20
General disassembly__________________________________ 21
Replacing NTC ______________________________________ 22
Service Manual EF 347 / EF 348
2
Version 1.0 en
Preface
General
Nespresso technical website
The purpose of this service manual is to
provide the service personnel with all necessary information with regards to correct
handling, maintenance and repair of the coffee
machines EF 347 and EF 348.
Visit the Nespresso technical website periodically to check for upgrades, technical modifications, counter measures etc. for this coffee
machine: https://business.nespresso.com
This manual should be used by the technicians as a valuable aid to guarantee the
permanent readiness for use of the machine.
In order to take full advantage of all the functions, it is absolutely necessary to follow the
instructions in this manual.
Service Manual EF 347 / EF 348
Access is restricted and can be
obtained by asking your Nespresso
technical contact person.
Content updates
The version number of this service
manual is printed on the lower right
corner of the page.
Version 1.0
First released service manual version.
Please keep this manual together with the
corresponding service documentation. This
way you are assured to have the necessary
information.
3
Version 1.0 en
General Safety Notes
•
•
•
Risk of fatal electrical shock and fire!
Mains voltage inside the coffee
machine.
Unplug appliance before cleaning.
Never clean wet or immerse plug,
cord or appliance in any fluid.
Disconnect the mains plug before
disassembly - the appliance must be
free of voltage.
Example illustrations of typical devices:
1
RESET
2
TEST
As an additional safety measure, the use of a
residual current device (RCD), also called a
ground fault circuit interrupter (GFCI), in the
repair centre is highly recommended.
3
This device does not protect against
electrical shock due to contact with
both circuit conductors.
RESET
4
Use a GFCI with a trip level of 4 - 6 mA
(USA) resp. a RCD with a trip level of
15 - 30 mA (Europe). A trip level
above 30 mA provides only very
limited protection against harm from
an electric shock.
•
Danger of burns!
Hot parts and water under pressure
inside the coffee machine (particularly in the thermoblock).
Let coffee machine cool down before
cleaning or disassembly.
Service Manual EF 347 / EF 348
1)
2)
3)
4)
TEST
RCD protected socket-outlet
Plug-in RCD unit
GFCI socket
Plug-in GFCI
4
Version 1.0 en
Main Components
Overview
1)
2)
3)
4)
5)
6)
7)
8)
9)
10)
11)
12)
13)
14)
15)
16)
17)
Closing handle
Cover
Compact brewing unit (TCBU)
Capsule inlet
Side panel
Espresso button, back lighted
Coffee outlet
Lungo button, back lighted
Container for used capsules
Drip grid
Drip tray
Lower chassis
Thermoblock
Electronic control board
Pump
Upper chassis
Water tank
10
1
2
9
11
3
4
6
17
7
8
5
16
14
12
15
13
Service Manual EF 347 / EF 348
5
Version 1.0 en
Main Components
Overview of rating plates
The rating plate can be found at the underside
of the coffee machine. It is of varying design
depending on the brand and carries the
following information:
1.
2.
3.
4.
5.
6.
7.
8.
9.
10.
Brand name
Voltage and power rating
Manufacturing country
Conformity with RoHS guidelines
Bar code
Serial number
Machine type
Special disposal icon
Sign of conformity (CE)
Article number of the rating plate
1
7
2
3
8
4
9
5
10
6
Serial number codification
Example: 121 243 47Q 1234 782 1Ke
12124
347
Q
1234
7
8
2
1K
e
production date: 124th day of year 2012
machine type (EF no.)
production site
incremental number per production day
machine partner codification
voltage
mains plug version
colour version
checksum number
Service Manual EF 347 / EF 348
6
Version 1.0 en
Main Components
Rating Plates Essenza machine partners
Service Manual EF 347 / EF 348
7
Version 1.0 en
Main Components
Water circuit
1)
2)
3)
4)
5)
6)
7)
Water tank
Water tank valve and connector
Pump
Thermoblock
Flowmeter
Coffee outlet
Compact brewing unit (TCBU)
7
6
1
5
2
3
4
Service Manual EF 347 / EF 348
8
Version 1.0 en
Technical Data
Mains
EF 347
291
EUR
USA / CAN
Approvals
mm
254mm
Cable length
230V / 50 Hz
120V / 60 Hz
SEV, CENELEC, CE-conform
UL, CUL, MITI
approx. 1.5 m
260mm
Energy efficiency class level
Daily energy consumption
Annual energy consumption
A - 40%
63.8 Wh
23.3 kWh
Various data
Pump data
166
EF 348
Energy consumption
(CECED / FEA 2009 method)
Pump pressure
- max. permissible
17,5 bar ± 1,5 bar
- during coffee preparation
9 - 13 bar
(depending on brand of coffee)
mm
291
Flow performance 120 - 240 ml/min. at 12 bar
mm
Pre-heating time approx.
~25 sec.
Storage temperature
-25° C up to 60° C
Safety temperature (thermal cut-off) 167° C
Coffee temperature at outlet
86° C ± 3° C
Weight of machine
(without water)
approx. 3 kg
Capacities
254 mm
260mm
166
mm
Water tank
Drip tray
Capsule container
0.9 l
approx. 100 ml
10 - 14 pcs.
Power consumption
220 V / 240 V
Service Manual EF 347 / EF 348
1’260 W
9
Version 1.0 en
Operation
Making coffee
1
2
1. Rinse then fill the water tank with potable
water.
2. a) Press the Espresso or Lungo button to
activate the machine.
b) Blinking Lights: heating up (25 sec).
Steady Lights: ready.
a
Never lift lever during operation and
refer to the safety precautions to
avoid possible harm when operating
the appliance.
During heat up, you can press either
coffee button while blinking. The
coffee will then flow automatically
when the machine is ready.
3. Lift the lever completely and insert a
Nespresso capsule.
4. Close the lever and place a cup under the
coffee outlet.
5. Press the Espresso (40 ml) or the Lungo
(110 ml) button to start. Preparation will
stop automatically. To stop the coffee flow
or top up your coffee, press again.
6. Remove the cup. Lift and close the lever
to eject the capsule into the used capsule
container.
Service Manual EF 347 / EF 348
4
3
10
5
b
6
Version 1.0 en
Operation
Programming the water system
1. Turn the machine on and wait for it to be
in ready mode (steady lights).
2. Fill the water tank with potable water and
insert a Nespresso capsule.
3. Place a cup under the coffee outlet.
4. Press and hold the Espresso or Lungo
button.
5. Release button once the desired volume
is served.
6. Water volume level is now stored.
2
1
3
Service Manual EF 347 / EF 348
4
11
Version 1.0 en
Operation
Emptying the water system
1
2
3
4
The machine will be blocked for
10 minutes after emptying mode.
1. To enter the emptying mode, press both
the Espresso and Lungo button to turn the
machine off.
2. Remove the water tank and open the
lever.
3. Press both the Espresso and Lungo
button for 3 seconds.
a) Both LEDs blink alternatively.
4. Close the lever.
5. Machine switches off automatically.
6. Empty and clean the used capsule
container and drip tray.
a
Service Manual EF 347 / EF 348
12
Version 1.0 en
Operation
Energy saving mode
1
2
3
4
5
6
This machine is equipped with an
energy saving feature. The machine
will automatically enter power off
mode after 9 minutes.
1. To turn the machine on either press the
Espresso or Lungo button.
2. To turn the machine off before automatic
Power Off mode, press both the Espresso
and Lungo button simultaneously.
To change this setting
3. With machine being turned off, press and
hold the Espresso button for 3 seconds.
4. The Espresso button will blink to indicate
the current setting.
5. To change this setting press the Espresso
button:
One time for power off mode after
9 minutes
One more time for power off mode after
30 minutes
One more time to deactivate
6. To exit the energy saving mode press the
Lungo button for 3 seconds.
Service Manual EF 347 / EF 348
13
Version 1.0 en
Operation
Reset to factory settings
1
2
1. With machine being turned off, press and
hold down the Lungo button for
5 seconds.
2. LEDS will blink fast 3 times to confirm
machine has been reset to factory
settings.
3. LEDs will then continue to blink normally,
as heating up, until ready. Steady lights:
machine ready
3x
Factory settings:
Espresso Cup: 40 ml
Lungo cup: 110 ml
Power off mode: 9 min.
3
Service Manual EF 347 / EF 348
14
Version 1.0 en
Operation
Coffee machine status (1)
After pressing the On/Off button, an automatic
self test is performed to check if
- the NTC is connected,
- the NTC is short circuited,
- the thermoblock reaches the standby
temperature within 2 minutes.
Operating modes and detected failures are
indicated by backlighted coffee buttons as
listed in the following table.
Service Manual EF 347 / EF 348
)
Led
signal
LED
signal
Operating mode
Small cup
Off
off
off
Ready
on
on
Error
blinking fast 3 times
every 2 sec.
blinking fast 3 times
every 2 sec
Heat up
Blinking slow
Blinking slow
Brewing small cup
Blinking slow
on
Brewing big cup
on
Blinking slow
Rinse small cup
Blinking slow
on
Rinse big cup
on
Blinking slow
15
Big cup
Version 1.0 en
Operation
Coffee machine status (2)
(
1
H
z
Led
signal
Operating mode
Small cup
Big cup
off
Power off Program
Blinking small cup
- 1x for 9 min.
(factory setting)
- 2 x for 30 min.
- 3 x for deactivated
Blinking fast
off
off
Blinking fast
Descaling ready
D. pump on descal)
D. pump off (descal)
Blinking fast
Blinking fast
Overheat
Blinking slow
Blinking slow
Order small cup
(during heat)
Blinking slow
off
LED
signal
Emptying
Service Manual EF 347 / EF 348
Order big cup (during heat) off
Blinking slow
No more stand by
No more power save
-
-
Resetting to factory
Blinking 3 Hz
Blinking 3 Hz
16
Version 1.0 en
Troubleshooting
Check Machine on receipt
The receipt check enables you to rapidly
locate faults on the machine and to initiate
appropriate repair action.
Check procedure
1 Check appliance for visible
damage
Follow the check procedure.
Repair any faults found and check if the
machine is operating perfectly.
Symptoms
Action / repair work
1.1 Parts of housing broken or damaged
YES - Replace parts if necessary
NO - Go to point 1.2
1.2 Mains cable damaged
YES - Replace mains cable
NO - Plug machine to the mains and go to point 2.1
Further action / repair work
YES - Go to point 2.2
2.1 Closing handle works correctly
2 Check mechanical elements
3 Fill water tank
YES - Screw on closing handle screws at defined
NO - It is hard or impossible to close the closing handle torque or replace CBU (see page 26)
NO - Replace the CBU
2.2 Is the capsule correctly ejected?
YES - Go to point 3
NO - Replace TCBU
3.1 Water tank is leaking
YES - Replace water tank
NO - Go to point 4
Service Manual EF 347 / EF 348
17
Version 1.0 en
Troubleshooting
Check procedure
4 Press any button to start coffee
machine to perform automatic self
test
Symptoms
4.1 Machine is not working (no function)
Action / repair work
Further action / repair work
YES - a) Check if mains cable is functional
YES - Go to point b)
NO - Replace it
YES - c) Check if pump is working (press coffee
button)
YES - Go to point f)
NO - Go to point d)
YES - d) Check if coffee button is functional
YES - Go to point e)
NO - Replace it
YES - e) Check if pump's thermal fuse (128°C) is
defective
YES - Replace pump (see page 24)
NO - Go to point f)
YES - f) Check if thermoblock’s thermal fuse (167°C)
is defective
YES - Replace thermal fuse and if necessary
thermoblock too (see page 23)
NO - Go to point g)
YES - g) Check if electrical wires are functional
YES - Replace elect. mainboard and the NTC
(see page 25)
NO - Replace defective(s) wire(s)
NO - Go to point 4.2
YES - Check if thermoblock heating element is func4.2 Backlighted coffee button blinks at irregular tional
intervals
NO - Self test ok. Go to point 5
5.1 No coffee at outlet
5 Check coffee temperature while
preparing a coffee (see page 34)
YES - Replace NTC (see page 22)
NO - Replace thermoblock (see page 23)
YES - a) Water system is empty
YES - Fill water system (see page 11)
NO - Go to point b)
YES - b) Pyramid plate is clogged
YES - Replace TCBU (see page 26)
NO - Go to point c)
YES - c) Machine is blocked by scale
YES - Descale machine (see page 40)
NO - Go to point 5.2
5.2 Temperature is too low (less than 83°C)
YES - Descale the machine (see page 40)
NO - Go to point 5.3
5.3 Temperature is too high (more than 89°C)
YES - Change NTC (see page 22)
NO - Go to point 6
Service Manual EF 347 / EF 348
18
Version 1.0 en
Troubleshooting
Check procedure
Symptoms
6.1 Leakage at extraction system
6 Check for leaks and check flow
6.2 Leakage at tubes connection
rate (see pages 28 and following)
7 Descaling process (if needed)
Action / repair work
Further action / repair work
YES - Replace TCBU (see page 26)
NO - Go to point 6.2
YES - Replace defective tube and seal
NO - Go to point 6.3
6.3 Flow rate out of range
YES - Machine is scaled
7.1 Machine scaled
YES - Descale machine (see page 40)
NO - Go to point 8
YES - Descale machine (see page 40)
NO - Replace pump
8 Final cleaning
End of check procedure
Service Manual EF 347 / EF 348
19
Version 1.0 en
Repair
Safety instructions
Risk of fatal electrical shock!
Mains voltage inside the coffee
machine.
Disconnect the mains plug before
disassembly - the coffee machine
must be free of voltage.
Danger of burns!
Hot parts and water under pressure
inside the coffee machine (thermoblock in particular).
Let coffee machine cool down before
disassembly.
Service Manual EF 347 / EF 348
20
Version 1.0 en
Repair
General disassembly
Tool:
-
5
Oval screwdriver
33
Procedure:
1. Remove water tank (33) and drip tray (8)
together with drip grid (7) and capsule
container (6).
2. Remove 2 screws (2) on the front side of
the machine.
3. Place machine on the repairing/service
holder device (see page 42).
4. Remove 6 screws (2) on the bottom of the
machine.
5. Swing out and remove both side panels (5).
6. Remove lower chassis (22).
22
2
5
6+7+8
2
Service Manual EF 347 / EF 348
21
Version 1.0 en
Repair
Replacing NTC
Tools:
-
Torx screwdriver Pin-TX10
Open-ended spanner 9 mm AF
Torque wrench
Procedure:
1. Follow general disassembly (see page
21).
2. Unplug NTC connector from electronic
control board (A).
3. Unscrew 3 screws (23) from thermobloc
cover.
4. Unscrew the screw fixing the cover to the
thermobloc and remove the cover.
5. Remove defective NTC temperature
sensor (43) from thermoblock (40) and
replace it with a new one.
6. Assemble in reverse sequence.
Re-use spring lock washer (42)
and tighten new NTC temperature
sensor (43) with torque wrench
(80 - 100 Ncm).
A
23
43
42
40
23
23
Service Manual EF 347 / EF 348
22
Version 1.0 en
Repair
Replacing thermoblock
Tools:
-
Torx screwdrivers Pin-TX10, TX20
Open-ended spanner 9 mm AF
Torque wrench
Procedure:
1. Follow general disassembly (see page 21).
2. Remove 3 screws (23) and separate thermoblock assembly from upper chassis (1).
3. Unplug NTC connector from electronic
control board (28).
4. Remove clips (D) and 2 hose connectors
(B + C) from thermoblock.
5. Remove ground wire and electrical
connections from thermoblock.
6. Replace thermoblock (40)
7. Mount a new NTC temperature sensor
(43) on the thermoblock (40).
8. Assemble in reverse sequence.
B
D
40*
28
40*
43
1
Use a torque wrench (80 - 100 Ncm)
to tighten NTC temperature sensor
(43) with spring lock washer (42).
40*
A
40*
23
* (complete thermoblock group)
Service Manual EF 347 / EF 348
23
Version 1.0 en
Repair
Replacing pump
Tools:
-
Torx screwdriver Pin-TX10
Long-nose pliers
Blade screwdriver, no. 7
T 128°C
Procedure:
1. Follow general disassembly (see page
21).
2. Remove clip (14) and O-ring (15).
3. Remove pump (17).
4. Remove electrical connections from
pump.
5. Replace defective pump (17).
6. Plug in electrical connections on pump.
L
Check for correct wiring of pump.
7. Insert new O-ring (15).
8. Mount angled hose (26) with clip (14).
14
26 15
Service Manual EF 347 / EF 348
24
17
Version 1.0 en
Repair
Replacing electronic control board
with button prints
Tools:
-
Torx screwdriver Pin-TX10
The service engineer must be
earthed using an earthing strap!
35
28
Only touch button prints with dedicated gloves to avoid oxydation.
Procedure:
1. Follow general disassembly (see page
21).
2. Remove 2 screws (55) and remove
housing (A) from electronic control board.
3. Unplug NTC and flowmeter and all wires
from electronic control board (28).
4. Remove the 2 screws (23) from cover
(35), open the lever (37) and lift up lightly
the front part of the cover so the buttons
prints wires can pass.
5. Replace defect electronic control (B)
board with button prints (B).
6. Assemble in reverse sequence.
37
23
55
B
A
Check for correct wiring of electronic
control board (see page 27).
Service Manual EF 347 / EF 348
25
Version 1.0 en
Repair
Replacing compact brewing unit
Tools:
-
Torx screwdriver Pin-TX10
Blade screwdriver no. 4
Long-nose pliers
Torque wrench
44
Procedure:
1. Remove water tank (33) and drip tray (8)
together with drip grid (7) and capsule
container (6).
2. Place machine on the repairing/service
holder device (see page 42).
3. Remove 4 screws (2) on the bottom of the
machine. Swing out and remove both side
panels (5).
4. Remove 2 screws (36) and pull off closing
handle (37).
5. Remove 2 screws (23) at the front and 1
screw (44) at the back to detach cover
(35).
C99 machine: All screws have the
same lenght.
D99 machine: The screw at the back
is longer than those at the front.
6. Remove clip (14) and hose (32) with Oring (15) from compact brewing unit.
Service Manual EF 347 / EF 348
2
34
35
24
5
36
14
37
36
15
23
3
7. Unlatch coffee outlet (3) from compact
brewing unit (34) with a blade screwdriver.
Take care not to damaged the ring, otherwise replace it
8. Remove 4 screws (24) and detach
compact brewing unit (34).
26
32
Tighten closing handle screws (21)
with a torque of 230 - 270 Ncm.
Version 1.0 en
Repair
Wiring diagram 220V - 240V IEC
Service Manual EF 347 / EF 348
27
Version 1.0 en
Repair
Wiring diagram 120V - 127V IEC
Service Manual EF 347 / EF 348
28
Version 1.0 en
Function Tests
Safety instructions
Some function tests are performed with an
energized, partly opened coffee machine.
2
1
Danger of electrocution!
Mains voltage inside the coffee
machine. Do not touch any live part
while performing tests.
Danger of burns!
Hot parts and water under pressure
inside the coffee machine. Do not
touch any hot parts while checking
for leakages! Always wear protective
goggles.
3
T2
T1
Required equipment
Pos.
Component
1
Pressure gauge (EFR no. 16195)
2
Essenza pressure gauge adapter (for part
number refer to EF webshop)
3
Electronic thermometer (or digital multimeter
suitable for temperature measurement)
4
Timer
5
Measuring beaker
6
Test equipment for protective earth continuity
test and protective insulation test
Service Manual EF 347 / EF 348
4
1
RE
HO
L
SUR
E
P
COM
0Ω A
OP
K/ST
DJ
T
LIGH
LOC
°C/°
F
E
MEA
MIN
T1
T1← T2
T2
NG
6
LD
MAX
RA
5
-200
-328 °C 13
°F
- 24 70°C
98°F
29
Version 1.0 en
Function Tests
Measuring flow rate (1)
Procedure:
1. Fill and insert water tank.
2. Open closing handle.
3. Insert connecting unit of pressure adapter
into capsule bay.
4. Push back sealing cone into capsule
cage.
5. Insert fixation unit of pressure adapter into
capsule bay.
6. Press down operating lever.
2
1
3
6
Continued on next page.
Service Manual EF 347 / EF 348
30
Version 1.0 en
Function Tests
Measuring flow rate (2)
Procedure (continued):
30 sec
7. Connect pressure hose to pressure tester.
8. Position measuring beaker underneath
exit tube of pressure tester.
9. Switch on machine.
10. Press coffee button after heating-up.
11. Open valve fully till water begins to flow.
12. Close valve slowly until 12 bar are indicated.
The manometer must be observed
continuously and the pressure regulated using the valve if necessary.
With increasing temperature the
pressure also increases, if necessary readjust the pressure to 12 bar.
13
7
11
12
9
10
8
14
13. Perform measurement for approx. 30 sec.
14. There must be at least 60 - 120 ml water
in the measuring beaker.
Notice:
- With a flow of < 60 ml the pump is defective
or there is a leak in the system.
- Large fluctuations in the pressure gauge
readings (± 4 bar) during measurement are
indicative of a defective pump.
Service Manual EF 347 / EF 348
31
Version 1.0 en
Function Tests
Checking for leaks and pump pressure (1)
The following components are checked for
leaks:
- Compact brewing unit (TCBU)
- Hose connections
- Thermoblock
- Pump
2
3
4
1
Preparation (unplug machine from mains):
1. Remove right side panel.
2. Open closing handle.
3. Insert connecting and fixation unit of pressure adapter into capsule bay (refer to
page 30).
4. Press down operating lever.
5. Position pot underneath exit tube of pressure plug.
6. Fill and insert water tank.
7. Connect mains cable.
Dangerous voltage inside coffee
machine! - Do not touch any live part
while performing checks.
Hot, pressurized parts inside coffee
machine! - Do not touch any hot part
while performing checks. Wear
safety glasses during inspection.
6
7
5
Continued on next page.
Service Manual EF 347 / EF 348
32
Version 1.0 en
Function Tests
Checking for leaks and pump pressure (2)
10 sec
9
Procedure (continued):
8. Press any button to start the coffee
machine. Press coffee button after
heating-up.
9. Open valve and leave water to run out for
approx. 10 sec.
10. Fully close valve. The pressure will rise
rapidly initially and stabilise between
16 - 19 bar (check of pump pressure).
10
8
8
The pressure will rise slowly due to
the temperature increase.
If the pressure exceeds 23 bar, the
machine has to be switched off and
pressure released through the pressure valve.
13
11. Perform visual and acoustic checks on all
pressurized connections.
The pump must not be in operation
for longer than 50 sec. without water
flow.
11
12
12. Open valve to empty pressure gauge.
Service Manual EF 347 / EF 348
33
Version 1.0 en
Function Tests
Measuring coffee temperature
10 sec
Procedure:
1. Press any button for start the coffee
machine.
2. Position measuring beaker underneath
coffee outlet.
3. After warming up, press coffee button.
4. Preheat coffee outlet for 10 sec. with hot
water.
5. Empty measuring beaker.
6. Insert a capsule (Cosi is the most suitable).
7. Press coffee button.
8. Wait until 20 ml coffee has flown in the
measuring beaker.
9. Measure the coffee temperature approx.
5 - 10 mm below the outlet opening.
1
4
3
2
6
Coffee temperature should be
approx. 86 °C ± 3 °C (187 °F ± 5.4 °F).
9
7
5
8
Service Manual EF 347 / EF 348
34
Version 1.0 en
Function Tests
Protective earth continuity test (1)
What coffee machine model has to be tested and when?
This test is necessary
- for class 1 equipment (three-wire power
cord with protective earth)
- after a repair whenever the housing was
opened and for example a general disassembly was performed.
Therefore all coffee machine models have to
be tested after opening the housing, except
country-specific models without a protective
earth connection.
General
Legal regulation
In case of a repair/modification of the coffee
machine, the repair centre is bound by law to
protect the user/consumer by
- restoring the regular condition of the appliance and
- performing the respective tests according
to EN/IEC 60335-1 “Safety of household
and similar electrical appliances” and
national regulations (e.g. DIN VDE 0701).
Service Manual EF 347 / EF 348
Description
Protective earth continuity measurements are
made between the protective earth terminal of
the power plug and
- the thermoblock,
- all conductive, touchable parts of the coffee
machine where dangerous voltage could
occur if the basic insulation was to fail.
This test assures that
- the ground (earth) connection does not
have an interruption between the power
plug and the thermoblock
- the permissible ground resistance is less
than 0.3 Ohms (with a test current of
200 mA DC).
Test equipment
Special test equipment is needed that
complies with the regulations to perform
protective earth continuity measurements.
Detailed requirements and tolerances must be
verified by your local authorities or measurement supplier in any case.
35
Test report
For legal reasons a repair or test report should
be prepared and filed with following information
- customer (name, address)
- type and serial number of coffee machine
- date of repair/test(s)
- performed test(s)/measuring value(s)
- used test equipment
- signature
Test sequence
Danger of electrocution!
Do not plug in the coffee machine
during the protective earth continuity test.
Read and observe safety instructions in user manual of test equipment.
This test sequence is not applicable
for coffee machines with two-wire
power cords (without ground pin).
Continued on next page.
Version 1.0 en
Function Tests
Protective earth continuity test (2)
2
1
Test sequence (continued):
1. Connect black measuring cable to ground
pin of power plug with an alligator clip
(example shown: Swiss power plug).
2. Switch on test equipment and select
protective earth continuity test.
MEA
SUR
E
P
T
LIGH
OP
K/ST
LOC
0Ω A
DJ
COM
Symbolic illustration of test equipment.
3. Touch thermoblock tube with tip of red test
probe.
4. Press "measure" button and read off
displayed resistance.
The resistance must be lower than
0.3 Ohm.
5. Fill in measured value in a test report.
4
Proceed with protective insulation
test before reassembling the
housing of the coffee machine.
MEA
What to do if the protective earth continuity
test fails
Check ground wire connection on thermoblock
(refer to wiring diagrams on page 27).
Service Manual EF 347 / EF 348
SUR
Ohmed
15
0.2 t pass
Tes
E
OP
K/ST
LOC
T
LIGH
0Ω A
P
DJ
COM
3
36
Version 1.0 en
Function Tests
Protective insulation test (1)
Perform the protective earth continuity test at first, if it is mandatory.
What is the protective insulation test
about?
This test is necessary
- for class 1 and 2 equipment (with/without
protective earth),
- after a repair whenever the housing was
opened and for example a general disassembly was performed.
General
Legal regulation
In case of a repair/modification of the coffee
machine, the repair centre is bound by law to
protect the user/consumer by
- restoring the regular condition of the appliance and
- performing the respective tests according
to EN/IEC 60335-1 “Safety of household
and similar electrical appliances” and
national regulations (e.g. DIN VDE 0701).
-
requirements after a repair,
rates the insulation capability of the coffee
machine,
is a very dangerous test because of a high
test voltage (500 V DC).
For the insulation test, phase and neutral wire
are shunted at the power plug. Then a test
voltage is applied between phase/neutral and
selected parts of the coffee machine.
Test equipment
Special test equipment is needed that complies
with the regulations to perform insulation and
withstanding voltage tests. Detailed requirements and tolerances must be verified with
your local authorities or measurement supplier
in any case.
Ideally the test equipment has a national
power socket for testing, so that the coffee
machine can plugged in directly. Otherwise a
special shunt is necessary to connect the
phase and neutral pin of the coffee machine’s
power plug.
Test sequence
Danger of electrical shock/short
circuit!
•
Do not plug in the coffee machine
during insulation test.
Danger of electrical shock!
•
•
•
Description
The insulation test
- assures that wiring and insulation of the
coffee machine fullfill the normative
Service Manual EF 347 / EF 348
Test report
For legal reasons a repair or test report should
be prepared and filed with following information
- customer (name, address)
- type and serial number of coffee machine
- date of repair/test(s)
- performed test(s)/measuring value(s), test
points
- used test equipment
- signature
Do not touch tip of test probes.
Do not touch metallic parts of coffee
machine during test.
Read and observe safety instructions
in user manual of test equipment.
Continued on next page.
37
Version 1.0 en
Function Tests
Protective insulation test (2)
Test sequence (continued):
3
1. Connect the phase and neutral pin of the
power plug together with a test adapter
(procured by the repair centre).
2
MEA
A Swiss power plug is shown here as
an example.
2. Connect the black measuring cable to the
test adapter (see image).
SUR
E
P
OP
K/ST
LOC
1
T
LIGH
0Ω A
DJ
COM
Use a short circuit plug or special
alligator clips etc. as substitute for
this test adapter.
3. Switch on test equipment and select an
insulation test voltage of 500 V DC.
Symbolic illustration of test equipment.
Continued on next page.
Service Manual EF 347 / EF 348
38
Version 1.0 en
Function Tests
Protective insulation test (3)
Test sequence (continued):
4. Touch closing handle screw with red test
probe.
7
Do not scratch surface of closing
handle with probe tip.
5. Press "measure" button.
6. Read off displayed insulation resistance
or test result.
8
The insulation resistance must be
higher than 300 kOhm (300,000 Ohm).
Tes
as
tp
sed
7. Fill in measured value in a test report.
8. Switch off test equipment.
9. Short red with black test probe to make
sure that test voltage is discharged.
What to do if the insulation test fails
Risk of damage!
A sparkover can damage the electronic control board and sensors etc.
Assume that the coffee machine is defect after
a failed insulation test.
Check wiring and locate fault.
After fault clearance proceed with troubleshooting check list (see page 16).
Service Manual EF 347 / EF 348
39
Version 1.0 en
Maintenance
Descaling (1)
Only use Nespresso decalcifier!
Decalcifier is aggressive to surfaces.
Immediately clean drops of
descaling solution.
This machine is equipped with a
descaling alarm (both LEDs blink
during ready mode).
Descaling duration:
approx. 15 minutes.
1
2
Carefully read safety instructions on
decalcifier package.
1. Remove the capsule and close the lever.
2. Empty the drip tray and used capsule
container.
3. Fill the water tank with 0.5 L of potable
water and add 1 Nespresso descaling
liquid.
3
Service Manual EF 347 / EF 348
40
Version 1.0 en
Maintenance
Descaling (2)
Procedure (continued):
4. Place a container (min. volume 1 l) under
the coffee outlet.
5. To enter the descaling mode, while the
machine is turned on, press both the
Espresso and Lungo button for 3
seconds.
6. Both LEDs blink.
7. Press the Lungo button and wait until the
water tank is empty.
8. Refill the water tank with the used
descaling solution collected in the
container and repeat step 4 and 6.
9. Empty and rinse the water tank. Fill with
potable water.
When ready, repeat step 4 and 6 to now
rinse the machine.
10. To exit the descaling mode, press both the
Epresso and Lungo button for 3 seconds.
11. The machine is now ready for use.
8
4
5
9
6
10
7
Service Manual EF 347 / EF 348
41
Version 1.0 en
Spare Parts
Repair accessories
Pos.
EFR No.
Component
1
*
2
42213
Manometer
3
60460
Pressure adapter G4
4
0004872
Screwdriver
5
0004878
Oval bit
-
64373
Repairing/service holder device
(for C99 or D99)
1
3
4
5
Spare part seal G4
* Repair accessories only available at
Nespresso. Please ask your Nespresso
technical contact person.
2
Manometer and pressure adapter are available at Eugster Frismag AG.
Service Manual EF 347 / EF 348
42
Version 1.0 en
Spare Parts
Spare parts EF 347 / C99
Service Manual EF 347 / EF 348
43
Version 1.0 en
Spare Parts
Draw. No.
Art. Nr.
Part Description
001
002
0077828
0024863
Holder 473 black V3
Screw safety KST/PT 3.0x12
bl galvan oval head (SFS-Remform)
003
005
0079793
0075782
Outlet
Side wall 347 taupe earth
high gl.
006
0059106
Capsule container
007
0077819
Drip grid 347 black V2
008
009
0075915
0005238
Drip tray
Hose silic 05.0x2.00mm
010
0042592
Valve lifter 704 cpl mount.
011
012
013
0077824
0039196
0037384
Pump holder 470 black V3
Pump holder 470 black 60 sh
Clip D=5mm browned
D=00,0mm, 2 fix holes 0,0mm
inox
014
015
016
017
018
021
0005470
0061701
0060761
0069200
0077573
0013299
Clip D=4mm L=14mm Inox
O-Ring 03.40x1.90 EPDM V3
Fluid connect elbow 90°
Pump SAP.HP4.V04
Hose FEP D=4.0/2.50x115mm
Rubber feet 9.0x 0.8mm
70 Shore black
black, 16.0x16.0mm crosspiece
230-240V/50Hz
2 clamp rings/2 tubul. rivets
white SJ-5832
022
023
024
025
026
027
0077833
0071635
0045182
0075931
0063089
0063049
Base 470 black
Screw KST/PT 3.0x12 bl galvan
Strain relief clamp 966
Line cord EU SF-71
Fluid connect elbow 90° V2
Fluid connect V shape 55° V3
rd head Torx-10
transp,screwable
H05VV-F3G0.75/L80/N180/PE40, assembled
black, 1xF, 1xmale, crosspiece
black, 2xF
028
029
0079586
0048034
Spare electronic 347 230V
Push-button 471 coffee V2
silic translucent
Service Manual EF 347 / EF 348
meter ware, 70 Shore, transp (di/W)
44
Version 1.0 en
Spare Parts
Draw. No.
Art. Nr.
Part Description
030
032
0048033
0079584
Push-button 474 Espresso V2
Spare hose FEP D4/2.5x230
silic translucent
clamp ring/tubul. rivet/Serto mount.
033
034
035
036
0060988
0065019
0077829
0076213
Water tank
Spare extract unit 473 cpl.
Hood 473 black V2
Screw KST/PT 4.0x16 blk galvan
TCBU, packed
gravure: Nespresso capsules only
rd head Torx-20
037
040
041
0075784
0079581
0043202
Lock rod 347
Thermobl 2010/L 230V/1200W
Insul. leeve Elbow connect
EF347 cpl V2
black, FH6,3 US
042
043
044
046
047
050
051
053
0044585
0064816
0071635
0043073
0067795
0077832
0075917
0079126
Spring ring M 5 bl galvan
Temperature gauge 710 cpl
Screw KST/PT 3.0x12 bl galvan
Molded tube 473 silic
Flow meter FHKSC 12 0°
Cover 470 main switch V3
Thermost TB02-B-B8D-105
Damping element 347 thermobl
NTC 104M5-S160A2
rd head Torx-10
neutral, flow meter pump
932-9521/A, double insulated
black
strd wires 95/150mm, 1xFHL6,3x0,8/1xFHL4,8x0,8
black, 60 Shore
054
055
056
0079698
0071635
0024374
Pump holder 348 cpl
Screw KST/PT 3.0x12 bl galvan
O-Ring 003,40x1.90 silic/2-K
rd head Torx-10
70 Shore red 2-comp silic
982
983
992
0078156
0050083
0047595
Polystyr. 347 2-part.
Covering box 475 slotted V2
Supplement ventilation
449x339x321mm
12-lang.
Service Manual EF 347 / EF 348
45
Version 1.0 en
Spare Parts
Spare parts EF 348 / D99
Service Manual EF 347 / EF 348
46
Version 1.0 en
Spare Parts
Draw. No.
Art. Nr.
Part Description
001
002
003
005
0077856
0024863
0079587
0075783
Holder 474 black V3
Screw safety KST/PT 3.0x12
Outlet 347 TCBU cpl
Side wall 348 white sand
006
0059105
Caps contain 471 V2 black
007
0077854
Drip grid 348 black V2
008
009
0077855
0005238
Drip tray 471 black V3
Hose silic 05.0x2.00mm
010
0042592
Valve lifter 704 cpl mount.
011
012
013
0077824
0039196
0037384
Pump holder 470 black V3
Pump holder 470 black 60 sh
Clip D=5mm browned
D=00.0mm, 2 fix holes 0.0mm
inox
014
015
016
017
018
021
0005470
0061701
0060761
0069200
0077573
0013299
Clip D=4mm L=14mm Inox
O-Ring 03.40x1.90 EPDM V3
Fluid connect elbow 90°
Pump SAP.HP4.V04
Hose FEP D=4.0/2,50x115mm
Rubber feet 9.0x0.8mm
70 Shore black
black, 16.0x16.0mm crosspiece
230-240V/50Hz
2 clamp rings/2 tubul. rivets
white SJ-5832
022
023
024
025
026
027
0077831
0071635
0045182
0075931
0063089
0063049
Base 471 black V4
Screw KST/PT 3.0x12 bl galvan
Strain relief clamp 966
Line cord EU SF-71
Fluid connect elbow 90° V2
Fluid connect V shape 55° V3
rd head Torx-10
transp, screwable
H05VV-F3G0,75/L80/N180/PE40, assembled
black, 1xF, 1xmale, crosspiece
black, 2xF
028
029
0079586
0048034
Spare electronic 347 230V
Push-button 471 coffee V2
silic translucent
Service Manual EF 347 / EF 348
bl galvan oval head (SFS-Remform)
black
high gl.
meter ware, 70 Shore, transp (di/W)
47
Version 1.0 en
Spare Parts
Draw. No.
Art. Nr.
Part Description
030
032
0048033
0079584
Push-button 474 Espresso V2
Spare hose FEP D=4/2.5x230
silic translucent
clamp ring/tubul. rivet/ Serto mount.
033
034
035
036
0060991
0079580
0077851
0076213
Water tank 471 cpl transp V2
Spare extract unit 473 cpl
Hood 474 black V2
Screw KST/PT 4.0x16 blk galvan
TCBU
gravure: Nespresso capsules only
rd head Torx-20
037
040
041
0075784
0079581
0043202
Lock rod 347
Thermobl 2010/L 230V/1200W
Insul. leeve Elbow connect
EF347 cpl V2
black, FH6,3 US
042
043
044
046
047
050
051
053
0044585
0064816
0018904
0043073
0067795
0077832
0075917
0079126
Spring ring M 5 bl galvan
Temperature gauge 710 cpl
Screw KST/PT 3.0x16 bl galvan
Molded tube 473 silic
Flow meter FHKSC 12 0°
Cover 470 main switch V3
Thermost TB02-B-B8D-105
Damping element 347 thermobl
NTC104M5-S160A2
rd head Torx-10 CA point
neutral, flow meter pump
932-9521/A, double insulated
black
strd wires 95/150mm, 1xFHL6,3x0,8/1xFHL4,8x0,8
black, 60 Shore
054
055
056
981
0079698
0071635
0024374
0077354
Pump holder 348 cpl
Screw KST/PT 3.0x12 bl galvan
O-Ring 03.40x1.90 silic/2-K
Picture carton 348 Nespresso
rd head Torx-10
70 Shore red 2-comp silic
D 99.331x215x314mm
982
983
0078157
0050083
Polystyr. 348 2-part.
Covering box 475 slotted V2
990
992
0077040
0047595
Instr. man. 348 Nespresso
Supplement ventilation
Service Manual EF 347 / EF 348
449x339x321mm
Essenza, 9-lang.NO/SW/DA/FI/GR/arabic/TR/FR/GB,
Zone 2
12-lang.
48
Version 1.0 en