1
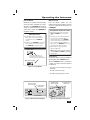
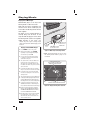
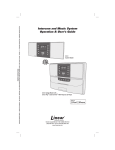
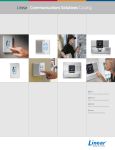
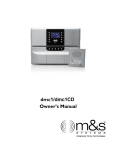
PRINTER’S INSTRUCTIONS:
MANUAL,OWNER’S,DMC1 - LINEAR P/N: 230508 AX1 - INK: BLACK - MATERIAL: 20 LB. MEAD BOND WITH 80 LB. WHITE COATED COVER - SIZE: 5.500” X 8.500” - SCALE: 1-1 - FOLDING: ALBUM FOLD - BINDING: SADDLE-STITCH
Intercom and Music System
Operation & User’s Guide
dmc1
System Master
dmc1 System Master with
dmc1 iPlay® Dock - MP3 Player & CD Player
USA & Canada (800) 421-1587 & (800) 392-0123
(760) 438-7000 - Toll Free FAX (800) 468-1340
www.linearcorp.com
Safety Warnings
CAUTION
RISK OF ELECTRIC SHOCK
DO NOT OPEN
CAUTION: TO REDUCE THE RISK
OF ELECTRIC SHOCK, DO NOT
REMOVE COVER (OR BACK). NO
USER-SERVICEABLE PARTS INSIDE,
REFER SERVICING TO QUALIFIED
SERVICE PERSONNEL.
CAUTION!
The exclamation point within an equilateral triangle is
intended to alert the user to the presence of important
operating and maintenance (servicing) instructions in
the literature accompanying the product.
SHOCK WARNING!
The lightning flash with arrowhead symbol within an
equilateral triangle is intended to alert the user to the
presence of un-insulated “dangerous voltage” within the
product’s enclosure that may be of sufficient magnitude
to constitute a risk of electric shock to persons.
READ ALL INSTRUCTIONS CAREFULLY BEFORE
INSTALLING OR USING THE DMC1 SYSTEM
THE DMC1 MUST BE INSTALLED BY TRAINED DEALERS OR
INSTALLERS, AND MUST CONFORM TO ALL LOCAL BUILDING AND
ELECTRICAL CODES.
Warning: Always follow these safety instructions.
Retain these instructions for future system reference.
DO NOT expose the dmc1 to moisture. Doing so can create fire or
shock hazards and impair the warranty.
DO NOT expose Patio Stations to direct water spray or damage to
the station may occur.
DO NOT attempt to service this product yourself as opening or
removing covers may expose you to dangerous voltage or other
hazards and will invalidate your warranty. Neither the Master Station
nor the Room/Patio Stations contain any user-serviceable parts.
REFER ALL SERVICING TO QUALIFIED SERVICE PERSONNEL.
USE ONLY M&S Systems replacement parts and have them installed
by an M&S Systems dealer or installer. Unauthorized substitutions
can result in fire, electric shock, or other hazards and will void the
warranty.
Upon completion of any service or product repair, have the M&S
Systems dealer or installer conduct a safety check to ensure the
system is in proper operating condition.
Use only a dry cloth to clean the Master Station, Room/Patio
Stations, Door Stations, and speakers. Do not use liquid cleaners or
aerosol cleaners.
Table of Contents
Introduction . . . . . . . . . . . . . . . . . . . . . . . . . 2
System Overview . . . . . . . . . . . . . . . . . . . . .
THE DMC1 SYSTEM . . . . . . . . . . . . . . . .
Master Station . . . . . . . . . . . . . . . . . . . . .
Room and Patio Stations . . . . . . . . . . . . .
Door Stations . . . . . . . . . . . . . . . . . . . . . .
3
3
3
4
4
System Setup . . . . . . . . . . . . . . . . . . . . . . . .
SYSTEM SETTINGS . . . . . . . . . . . . . . . . .
Display Brightness . . . . . . . . . . . . . . . . . .
Clock Settings . . . . . . . . . . . . . . . . . . . . .
Scan Mode . . . . . . . . . . . . . . . . . . . . . . . .
Music Auto On/Off. . . . . . . . . . . . . . . . . .
AUDIO SETTINGS . . . . . . . . . . . . . . . . . .
Music Volume . . . . . . . . . . . . . . . . . . . . .
Treble . . . . . . . . . . . . . . . . . . . . . . . . . . . .
Bass . . . . . . . . . . . . . . . . . . . . . . . . . . . . .
Master Station Volume . . . . . . . . . . . . . .
Loudness . . . . . . . . . . . . . . . . . . . . . . . . .
Intercom Volume . . . . . . . . . . . . . . . . . . .
5
5
5
5
6
6
7
7
7
7
7
7
7
Station Mode Switches . . . . . . . . . . . . . . . 8
STATION MODES . . . . . . . . . . . . . . . . . . . 8
Operating the Intercom. . . . . . . . . . . . . . . 10
INTERCOM FUNCTIONS . . . . . . . . . . . . 10
Intercom Talk . . . . . . . . . . . . . . . . . . . . . 10
Intercom Listen . . . . . . . . . . . . . . . . . . . 10
Intercom Monitor . . . . . . . . . . . . . . . . . . 11
Monitor Override . . . . . . . . . . . . . . . . . . 11
Station Privacy . . . . . . . . . . . . . . . . . . . . 11
DOOR STATION OPERATION . . . . . . . . 12
Door Talk / Listen . . . . . . . . . . . . . . . . . . 12
Door Release / Security Option . . . . . . . 12
ROOM & PATIO STATION OPERATION 13
Station Volume . . . . . . . . . . . . . . . . . . . 13
Intercom Listen . . . . . . . . . . . . . . . . . . . 13
Intercom Talk . . . . . . . . . . . . . . . . . . . . . 13
Station Privacy . . . . . . . . . . . . . . . . . . . . 13
Door Talk / Listen . . . . . . . . . . . . . . . . . . 13
Door Release / Security Option . . . . . . . 13
Playing Music . . . . . . . . . . . . . . . . . . . . . .
MASTER STATION CONTROLS . . . . . .
Music Source . . . . . . . . . . . . . . . . . . . . .
Radio Tuning . . . . . . . . . . . . . . . . . . . . .
Setting Radio Presets . . . . . . . . . . . . . .
Tuning Radio Presets . . . . . . . . . . . . . . .
ROOM & PATIO STATION CONTROLS
Music Source On / Off . . . . . . . . . . . . . .
Adjusting System Music Volume . . . . . .
Station Volume . . . . . . . . . . . . . . . . . . .
Selecting the Music Source. . . . . . . . . .
iPLAY DOCK . . . . . . . . . . . . . . . . . . . . . .
CD Player Source Selection . . . . . . . . . .
Selecting CD or Dock . . . . . . . . . . . . . . .
Playing from a Mobile Digital Device . .
Playing from an MP3 Player. . . . . . . . . .
Playing a CD . . . . . . . . . . . . . . . . . . . . . .
CD Playing Controls . . . . . . . . . . . . . . . .
Ejecting a CD . . . . . . . . . . . . . . . . . . . . .
6-DISC CD PLAYER . . . . . . . . . . . . . . . .
Playing a CD . . . . . . . . . . . . . . . . . . . . . .
CD Playing Controls . . . . . . . . . . . . . . . .
Ejecting the 6-Disc CD Cartridge . . . . . .
14
14
14
14
14
14
15
15
15
15
15
16
16
17
17
18
19
19
19
20
20
20
20
Notes . . . . . . . . . . . . . . . . . . . . . . . . . . . . . . 21
Index . . . . . . . . . . . . . . . . . . . . . . . . . . . . . . 22
Limited Warranty . . . . . . . . . . . . . . . . . . . . 24
2- Year Limited Warranty . . . . . . . . . . . 24
1
Introduction
The dmc1 is an intercom and sound system
designed for today’s home. Its compact size
and modern, elegant look complement any
décor. But it offers more than just sensible
good looks. It gives you peace of mind as
it allows you to communicate with family
members and monitor specified rooms.
Plus you can listen to music from AM or FM
radio and other sources throughout your
home with high-quality sound. With the
optional CD/MP3 Player, the system can
play from popular phone/music devices
and other portable media players.
Keep this manual in a safe place for future
reference. If you lose the manual, you
can download it from the Linear Web site:
www.linearcorp.com
Please read all of the instructions and
safety warnings before changing any
settings on your dmc1.
Wall-mount
Music
Speaker
Ceiling-mount
Music
Speaker
Room
Station
Room
Station
Room Station
w/Remote Scan
Up to 15 stations
and/or speakers
total can be in the system
Volume
Controls
Patio Station
dmc1
Music/Communication System
Optional
dmc1CD 6-Disc Changer or
dmc1MM CD/MP3 Player & Dock (shown)
External Input
Wall Plate
Figure 1. System Overview
2
Door
Station
Door Station
w/Bell Button
System Overview
THE DMC1 SYSTEM
The dmc1 System consists of three major
components:
• The Master Station — The Master Station
contains the central control electronics, radio
receiver, and optional CD/device player for
the system and is usually installed in the
kitchen or a central location.
• Room Stations & Patio Station — Up to
nine Room Stations in individual zones, or
15 Room Stations in shared zones, including
one Patio Station can be installed in rooms
and outside on the patio.
• Door Stations — Up to three Door Stations
can be installed at entry doors.
AUTO BUTTON
Turns on or off
the Auto Music
feature
Master Station
The Master Station gives you control
over the system intercom and music
capabilities.
The Master Station has switches that
determine how the Master Station and
each intercom station functions in the
system. Each room can be set to Intercom
Only, Radio and Intercom, Off, or Monitor.
The dmc1 provides the ability to monitor
other stations and communicate with Door
Stations at entry doors.
The system can also provide optional
electric door control, home security, or
home automation features if integrated by
your installer.
DISPLAY
Shows the time
and operating
information
POWER BUTTON
Turns the music part
of the system on & off
(intercom is always on)
TIME BUTTON
Sets clock and
music on/off time
SPEAKER
For music and
intercom
PRESET BUTTON
Sets AM & FM
radio station
presets
STATION MODE
SWITCHES
Switches behind cover
control each station
TONE BUTTON
Selects the
volume and tone
settings
SOURCE BUTTON
Selects the
music source
TUNE BUTTONS
Tunes AM & FM
radio stations
INTERCOM BUTTONS
Press to talk & listen
to other stations
Press both to talk
to door station
VOLUME BUTTONS
Changes volume,
adjusts tone &
time settings
Figure 2. Master Station Features
3
System Overview
Room and Patio Stations
The Room Stations and Patio Stations
provide intercom functions and system
music control capabilities. The dmc1
system supports up to 15 stations.
TALK
BUTTON
LISTEN
BUTTON
Depending on the station configuration at
the Master Station, a Room Station or Patio
Station can communicate with or monitor
other stations and communicate with the
Door Stations. The system’s music can be
turned on and off, music volume adjusted,
and music sources changed from certain
models of room stations.
PRIVACY
BUTTON
MUSIC
VOLUME -
MUSIC
VOLUME +
VOLUME
KNOB
Figure 3. Patio/Room Station Features
Door Stations
The Door Station is an exterior intercom
speaker and doorbell installed at home
entrances. The dmc1 system supports up
to three door stations. The door station
allows for communications from within the
house to visitors at the door. Any station
with its Intercom Selector Switches
set to INTERCOM or RADIO/INT can
communicate with the Door Station.
SPEAKER &
MICROPHONE
CHIME
BUTTON
Figure 4. Door Station Features
4
System Setup
SYSTEM SETTINGS
Several general system options are setup
at the Master Station including:
• Setting the display brightness.
• Setting the clock
• Setting the Scan Mode
• Setting the automatic music on and off times
• Setting the volume, loudness,
treble, and bass.
Clock Settings
You can set two clock functions:
• Time Display — Displays the current time of
day with AM or PM indication.
• Music Auto On/Off — Sets the times to
automatically turn the last music source on
and then off.
✓ NOTE: You can enable or disable the Music
Auto On/Off function.
Changing the Clock Settings:
Display Brightness
The display on the Master Station can be
set to three brightness levels to suit the
installation location.
1. Press TIME. The hour number blinks and
SET TIME appears on the display.
Setting the Display Brightness:
3. Press TIME. The minute number blinks.
1. Simultaneously press the TUNE ▲ and
POWER buttons. Each press will cycle the
display through the three brightness levels:
low, medium, then high.
2. Press the TUNE ▲ and POWER buttons
repeatedly until you reach the brightness
you prefer.
2. Press VOLUME ▲ or VOLUME ▼ to set
the current hour. An A or P indicates AM
or PM.
4. Press VOLUME ▲ or VOLUME ▼ to set
the current minute.
5. Press TIME. The hour number blinks and
AUTO SET ON TIME appears on the display.
6. Press VOLUME ▲ or VOLUME ▼ to set
the auto on time hour. An A or P indicates
AM or PM.
7. Press TIME. The minute number blinks.
8. Press VOLUME ▲ or VOLUME ▼ to set
the auto on time minute.
9. Press TIME. The hour number blinks and
AUTO SET OFF TIME appears on the display.
10. Press VOLUME ▲ or VOLUME ▼ to set
the auto off time hour. An A or P indicates
AM or PM.
11. Press TIME. The minute number blinks.
12. Press VOLUME ▲ or VOLUME ▼ to set
the auto off time minute.
13. Press TIME to return to current time
display.
Figure 5. Master Station Buttons
5
System Settings
Scan Mode
The Scan Mode determines how the
system will act when scan is selected from
a scan compatible room station or patio
station.
Music Auto On/Off
You can set the system to turn music on
automatically at the preset time and to turn
the music off automatically at the preset
time.
Two Scan Modes are available:
• Scan Mode 1 uses radio station presets. It
allows the Room & Patio stations to scan
through the four music sources (AUX, AM,
FM, and CD). On AM and FM radio bands,
Scan Mode 1 scans through the preset
radio stations: AM 1-8 and FM 1-8.
Automatically Turning Music
On and Off:
1. Set the Auto On/Off times as described
under Clock Settings.
2. Press the AUTO button to toggle between
On and Off. When the Auto function is on,
AUTO appears on the display.
• Scan Mode 2 stops at all strong radio
stations. Same selection of sources as Scan
Mode 1, but on AM and FM radio bands,
Scan Mode 2 scans all strong stations
before moving on to the next source.
Setting the Scan Mode:
1. To change the Scan Mode, simultaneously
press and release PRESET and SOURCE
buttons. The display shows either Scan1 or
Scan2.
2. Repeat Step 1 to select one Scan Mode or
the other.
✓ Note: Exit out of setting the scan mode
by pressing PRESET and SOURCE or wait
five seconds for the display to show the
clock time again.
SCAN MODE 1
SOURCE SELECTION ORDER
AUX
AM STATION
PRESETS 1-8
FM STATION
PRESETS 1-8
CD
SCAN MODE 2
SOURCE SELECTION ORDER
AUX
STRONG
AM STATIONS
STRONG
FM STATIONS
Figure 6. Scan Modes 1 and 2
6
CD
System Settings
AUDIO SETTINGS
The system’s audio can be adjusted at the
Master Station to suit your preferences.
The six system audio adjustment options
available. The system will return to normal
operation five seconds after the last
setting is made.
Music Volume
Adjusts the volume for system music.
Setting the System Music Volume:
1. Press POWER to turn on the music.
Master Station Volume
Adjusts the volume for intercom
communications through the speaker on
the Master Station ONLY.
Setting the Master Station Volume:
1. Press TONE until MASTER VOLUME is
displayed.
2. Use VOLUME ▲ and VOLUME ▼ to adjust
the Master Station’s intercom volume from
0-29.
✓ Note: When the music is off, use
VOLUME ▲ and VOLUME ▼ to set the
Master Station’s intercom volume.
2. The music volume setting will be the same
as it was last set.
3. Use VOLUME ▲ and VOLUME ▼ to adjust
the music volume from 0-29.
✓ Note: The music volume setting may vary
depending on which source is selected.
Loudness
When set to ON, adjusts the bass tone for
better listening at low audio levels.
Turning Loudness On and Off:
1. Press POWER to turn on the system.
Treble
Adjusts the level of the system’s high
frequency audio.
Setting the Treble Level:
1. Press POWER to turn on the system.
2. Press TONE until TREBLE is displayed.
3. Use VOLUME ▲ and VOLUME ▼ to adjust
the treble level from 0-14.
Bass
Adjusts the level of the system’s low
frequency audio.
2. Press TONE until LOUDNESS is displayed.
3. Press VOLUME ▲ to turn on the loudness
feature. ON will be displayed to the right of
the clock.
4. Press VOLUME ▼ to turn off the loudness
feature. OFF will be displayed to the right of
the clock.
Intercom Volume
Adjusts the volume for system intercom
communications to the Room Stations,
Door Stations, and Patio Stations.
Setting the Intercom Volume:
Setting the Bass Level:
1. Press POWER to turn on the system.
2. Press TONE until BASS is displayed.
3. Use VOLUME ▲ and VOLUME ▼ to adjust
the bass level from 0-14.
1. Press TONE until INTERCOM VOLUME is
displayed.
2. Use VOLUME ▲ and VOLUME ▼ to adjust
the intercom volume from 0-29.
✓ Note: The intercom volume sets the
audio level from the Master Station to
the Room Stations, Door Stations, and
Patio Stations. The Master Station’s
volume is set separately.
7
Station Mode Switches
STATION MODES
Behind the hinged cover on the left side of
the Master Station are 11 slide switches
and a PRIVACY pushbutton.
These switch settings determine how the
Master Station and each intercom station
functions in the system. The way the
operates is called the “Station Mode”.
These switch settings can be changed
at any time to adjust the way the system
operates. Over time, as rooms in your
residence are used for different members
of the family, or for different uses, you can
change these switch settings to suit your
own requirements.
✓ Note: When the system has more than nine
Room Stations, some intercom selector
switches will control two Room Stations.
STATION MODE SWITCHES
CAN BE SET TO THESE FOUR
DIFFERENT POSITIONS
MASTER STATION
MODE SWITCH
PULL ON TAB TO OPEN
MODE SWITCH COVER
EACH MODE SWITCH HAS
A NUMBER THAT CAN
BE USED TO LABEL THE
ROOM STATION'S LOCATION
INSIDE THE COVER
PATIO STATION
MODE SWITCH
MASTER STATION
PRIVACY BUTTON
Figure 7. Master Station Switches
8
Station Mode Switches
Each station can be set to one of the four
Station Modes using its mode switch:
Intercom Mode
Radio Intercom Mode
Station Switch Set to INTERCOM:
Station Switch Set to RADIO/INT:
• You can talk and listen from this station.
• You can talk and listen from this station.
• The station does not receive music.
• The station can receive music.
• The station cannot be continuously
monitored.
• The station can monitor any other station
that is set to MONITOR.
• The station cannot be used to hear other
rooms that are set to MONITOR.
✓ Note: When music is on, the audio from
a monitored room is heard in addition to
the music.
• The station hears the door chime and
users can talk and listen to the Door
Station.
• The station cannot be continuously
monitored.
✓ Note: When a station is set to INTERCOM,
the sound and activity in that room can
be heard by another Room Station
by manually pressing another Room
Station’s LISTEN button.
✓ Note: When a station is set to RADIO/
INT, the sound and activity in that room
can be heard by another Room Station
by manually pressing another Room
Station’s LISTEN button.
• The station hears the door chime and
users can talk and listen to the Door
Station.
Off Mode
Monitor Mode
Station Switch Set to OFF:
Station Switch Set to MONITOR:
• You can communicate from a Room
Station but you cannot communicate
from a Patio Station.
• Any station set to RADIO/INT can
continuously hear all sound and activity
in the this station’s room.
• Other Room Stations cannot listen to the
station.
• You can communicate with other Room
Stations.
• The station cannot receive music or
intercom-related audio.
• The station cannot hear the door chime.
• The station cannot be continuously
monitored.
• The station does not hear the door
chime and cannot talk and listen to the
Door Station.
• You can talk to the Door Station, but will
not be able to listen to it.
• The station cannot receive music.
• Other rooms can talk to a monitored
station, if the monitor override is set to
ON.
9
Operating the Intercom
INTERCOM FUNCTIONS
Operation of the intercom will vary
depending on the setting of the Station
Mode switches on the Master Station (see
Page 8).
The intercom operation methods detailed
here describe the how the system will
function with Station Mode switches set in
various positions.
Intercom Talk
Talk allows users to talk to all stations
set to INTERCOM or RADIO/INT on the
Master Station, unless the station has the
PRIVACY button pushed in.
Starting an Intercom Session:
1. Press TALK and begin speaking to the other
stations.
2. You can hear remote users if you press the
LISTEN button or if they press their TALK
button.
Intercom Listen
Listen allows users to manually listen to all
stations set to INTERCOM or RADIO/INT
on the Master Station. You cannot hear
stations that have their PRIVACY button
activated.
Listening with the Intercom:
1. Press the LISTEN button to listen to the
other stations.
2. Press TALK if you want to speak to the other
stations.
✓ Note: If a station has its PRIVACY button
pressed, you will not be able to listen to it.
SOURCE
TUNE
SOURCE
TUNE
Figure 8. Intercom Talk
Figure 9. Intercom Listen
10
Operating the Intercom
Intercom Monitor
Monitoring is useful for listening to baby’s
rooms, play rooms, and elderly care rooms.
All stations set to RADIO/INT on the Master
Station can continually hear the sound and
activity from a station set to MONITOR on
the Master Station.
Monitoring Stations:
1. On the Master Station, set the Station
Mode switch for the desired station(s) to
continually listen for to the MONITOR
position.
2. All stations set to RADIO/INT on the Master
Station will play sounds from all station(s)
set to MONITOR on the Master Station.
Monitor Override
From the Master Station, you can
temporarily override the Monitor function
so you can communicate with stations set
to MONITOR.
Turning Monitor Override On and Off:
1. On the Master Station, press and hold the
AUTO and POWER buttons at the same
time.
2. The display will show “MO” and ON or OFF
to the right of the clock. When Monitor
Override is OFF stations set to MONITOR
cannot hear any intercom communication or
the door chime. When Monitor Override is
ON, stations set to MONITOR can hear only
incoming talk from other room stations.
3. Repeat Step #1 to toggle the Monitor
Override to ON or OFF.
✓ Note: Exit the monitor override setting by
pressing AUTO and POWER or by waiting
five seconds.
Monitor Mode
SOUNDS FROM STATIONS SET TO
MONITOR MODE WILL BE PLAYED AT
STATIONS SET TO RADIO INTERCOM MODE
Radio Intercom Mode
Station Privacy
The Master Station and certain models of
Room Stations have a PRIVACY button.
When the PRIVACY button is activated at
a station, the station cannot be listened to
or monitored.
Figure 10. Intercom Monitor
• The station can still communicate using the
Talk feature.
• The station still receives music.
• The station will still hear the door chime.
ROOM STATION
PRIVACY BUTTON
MASTER STATION
PRIVACY BUTTON
BUTTON LOCKS IN
FOR PRIVACY
BUTTON LOCKS IN
FOR PRIVACY
Figure 11. Master Station Privacy Button
Figure 12. Room Station Privacy Button
11
Operating the Intercom
DOOR STATION OPERATION
The Door Stations are used to announce
visitors with the door chime. The chime can
be answered and persons in the residence
can have a conversation with the visitor.
When the button on the Door Station is
pressed, the chime is heard on all stations
set to INTERCOM or RADIO/INT, even if the
PRIVACY button is activated.
VISITOR
PRESSES
THE DOOR
STATION'S
BUTTON TO
SOUND CHIME
• All system audio (music and intercom) is
muted when the chime rings.
• If the Door Station is engaged in a talk or
listen session, the chime will be disabled until
the session is over.
Door Talk / Listen
On the Master Station (or on a Patio or
Room Station), press TALK and LISTEN
together to enter Door Talk Mode. This
allows you to talk to the Door Stations. All
other stations set to INTERCOM or RADIO/
INT can hear the conversation, unless they
have the PRIVACY button activated.
Release the TALK and LISTEN buttons to
listen to the Door Station. The Door Listen
Mode is active for a total of 25 seconds
after you release the TALK and LISTEN
buttons. You may talk again at any time
by pressing the TALK and LISTEN buttons.
Each time the buttons are released, you
can listen for another 25 seconds.
VISITOR AND
RESIDENT THEN
CAN TALK AND
LISTEN
Figure 13. Door Station Operation
ROOM STATION
OR
PATIO STATION
PRESS BOTH THE
LISTEN AND TALK
BUTTONS TO TALK
TO THE DOOR STATION
Figure 14. Door Talk / Listen
✓ Note: Door Talk mode is suspended at the
end of the 25 second listening period or if you
press either the TALK or the LISTEN button
individually.
Door Release / Security Option
This optional feature can control another
system connected by your installer. For
example, it may control a door release
mechanism, turn on the lights, or activate
an alarm.
Activating the Door Release Option:
1. Press and hold the VOLUME ▲ and
VOLUME ▼ buttons for about five seconds.
2. The display will indicate RELEASE when the
option is activated. The Door Release output
is active for as long as both buttons are held
pressed.
3. Release the buttons to stop the Door Release
output.
✓ Note: This function is available from the
Master Station and all remote scan Room
Stations. For security reasons, it is not
available from a Patio Station.
12
Operating the Intercom
ROOM & PATIO STATION
OPERATION
The Room Stations and Patio Stations
support the talk and listen intercom
functions of the system and also feature
several buttons and knobs that control the
system.
Station Volume
You can set the volume for each station
independently.
• Adjust the SPEAKER VOLUME knob to set
the station’s volume.
Intercom Listen
You can listen to all stations set to
INTERCOM or RADIO/INT, unless they
have their PRIVACY button pressed.
• Press the LISTEN button on the station to
listen to the other stations.
Intercom Talk
You can talk to all stations set to INTERCOM
or RADIO/INT.
• Press the TALK button on the station to talk
to the other stations.
Press both to
talk and listen
to Door Stations
Station Privacy
With the privacy feature, you can prevent
others from listening to a station.
• Press the PRIVACY button on the station
prevent listening by other stations. The button
will stay latched in.
• Press the PRIVACY button on the station
again to release the button latch to allow
listening by other stations.
Door Talk / Listen
When the door chime sounds, you can talk
and listen to Door Stations.
• Press TALK and LISTEN together to enter
Door Talk Mode and talk to the visitor.
• Release TALK and LISTEN to listen to the
visitor. Door Listen Mode lasts 25 seconds
each time the buttons are released.
Door Release / Security Option
You can activate the door release or
security option from Room Stations (not
allowed from Patio Stations).
• Press and hold the VOLUME + and
VOLUME - buttons on the station for about
five seconds to activate the Door Release
Output.
TALK BUTTON
Talk to all stations
set to INTERCOM
or RADIO/INT
LISTEN BUTTON
Listen to all stations set
to RADIO/INT, unless
they have PRIVACY
button pressed
MUSIC VOLUME Press and hold to turn off system music
Press to adjust system music volume
PRIVACY BUTTON
Disables listen and
monitor function
VOLUME KNOB
Adjusts room station
speaker volume
Press both to scan
music sources
MUSIC VOLUME +
Press and hold to turn on system music
Press to adjust system music volume
Figure 15. Room Station and Patio Station Intercom Controls
13
Playing Music
MASTER STATION
CONTROLS
The Master Station has controls for
operating the music functions of the
intercom system.
Setting Radio Presets
Up to eight presets can be stored for the
FM band. Up to eight presets can also be
stored for the AM band.
Setting Radio Station Presets:
Music Source
You can select from four music sources:
• AM — The AM radio band (530 to 1710 KHz).
1. Press POWER to turn on the music.
2. Press SOURCE to select FM or AM.
• FM — The FM radio band (87.5 to 107.9 MHz).
3. Use TUNE ▲ or TUNE ▼ to find a station.
See above for seek and scan functions.
• CD — The optional built-in CD Player or CD/
MP3 Player with dock.
4. Press and hold the TUNE ▲ and TUNE ▼
buttons to enter Store Preset mode. The
display shows PRESET and a preset number.
• AUX — Any source you connect to the
optional Audio Input Wall Plate, such as an
external CD player, portable music player, or
a stereo system.
1. Press POWER to turn on music.
5. If you want to select the preset number,
press the PRESET button repeatedly to cycle
through numbers 1-8 until you reach the
preset number you want. If you don’t want
to specify a preset number, go to Step 6 and
your selected radio station will automatically
be assigned to the preset number that is
displayed.
2. Press SOURCE repeatedly to cycle through
AM, FM, CD and AUX until you reach the
music source you prefer.
6. Wait 5 seconds. The display updates to
show the new station for the selected preset
number.
Selecting a Music Source:
✓ Note: The music volume setting may vary
depending on which source is selected.
Radio Tuning
FM or AM radio stations can be tuned
to manually or tuned with stored station
presets.
Tuning to a Radio Station:
1. Press POWER to turn on the music.
2. Press SOURCE to select FM or AM.
3. Use TUNE ▲ or TUNE ▼ to find a station.
If you press and release, within 1 second,
TUNE ▲ or TUNE ▼, the tuner goes into
Seek Mode and finds the next station with a
strong signal. If you press and hold TUNE ▲
or TUNE ▼, the tuner goes into Scan Mode
and scans all frequencies until you release
the button.
✓ Note: For the first two seconds, the
tuner scans at slow speed to allow for
fine tuning. After two seconds, the tuner
scans at fast speed.
14
✓ Note: This activity can be cancelled
at any time during the process by
pressing TUNE UP and TUNE DOWN
simultaneously again, and no new preset
is stored.
Tuning Radio Presets
Preset radio stations can be selected at
the Master Station.
Tuning to a Preset Radio Station:
1. Press POWER to turn on music.
2. Press SOURCE to select FM or AM.
3. Press PRESET to select one of the preset
stations. The station preset number is
indicated on the Master Station’s display.
Playing Music
ROOM & PATIO STATION
CONTROLS
The Room Stations and Patio Stations
support the music functions of the intercom
system.
Music Source On / Off
You can turn the Music Source on and off
from any Room Station or Patio Station.
Turning Music Source On or Off:
• To turn the Music Source on, press the
MUSIC VOLUME + button.
• To turn the Music Source off, press the
MUSIC VOLUME - button until the volume
level goes to zero.
Adjusting System Music Volume
You can adjust the system wide music
volume from any Room Station or Patio
Station.
Adjusting System Music Volume:
• Adjust the system music volume from any
Room/Patio Station by pressing VOLUME +
or VOLUME -.
Station Volume
You can set the volume for each station
independently.
Adjusting a Station’s Volume:
• Adjust the SPEAKER VOLUME knob to set
the station’s volume.
Selecting the Music Source
The system music source can be selected
from any Room Station or Patio Station.
The music sources that are available vary
depending on which Scan Mode is set in
the Master Station (see Page 6).
✓ Note: The music volume setting may vary
depending on which source is selected.
In the Master Station has two Scan Modes:
• Scan Mode 1 — Allows the Room/Patio
stations to scan through the four music
sources (AM, FM, CD, and AUX). On radio
bands AM and FM, Scan Mode 1 scans
through the preset radio stations: AM 1-8
and FM 1-8.
• Scan Mode 2 — Same selection of sources.
On radio bands AM and FM, Scan Mode 2
scans all strong stations before moving
on to the next source.
To Select a Music Source:
• Press and release the VOLUME + and
VOLUME - buttons at the same time to switch
music sources.
✓ Note: You cannot select specific tracks on a
CD or remotely control a portable device or
an MP3 player from a Room Station or Patio
Station.
VOLUME KNOB
ADJUSTS THIS
STATION'S VOLUME
MUSIC VOLUME PLUS & MINUS
ADJUSTS THE SYSTEM'S
MUSIC VOLUME
Figure 16. Room Station and Patio Station
Music Controls
15
Playing Music
iPLAY DOCK
One of the options for the system is the
CD/MP3 Player with a dock that can be
installed below the Master Station.
The multi-source player can provide music
from four types of devices:
• The CD player’s built-in dock charges and
plays from the connected device.
• Generic portable MP3 players connected
to the 3.5 mm audio input jack on the side
of the dock. The dock also provides a USB
connector for charging the portable MP3
player.
• Standard music CD discs. Also CD-ROMs
in standard CDA audio format burned by
computer CD writers on CD-R or CD-RW
recordable media.
• MP3 music CD discs. CD-ROMs of MP3
audio files burned by computer CD writers on
CD-R or CD-RW recordable media.
CD Player Source Selection
The system can play music from four
sources (AM, FM, CD, and AUX). Select the
CD source to play music from either the
CD/MP3 disc player or the dock.
CD PLAYER
DISC SLOT
MOBILE DIGITAL DEVICE DOCK DRAWER
Figure 17. DMC1 iPlay® Dock- MP3 & CD
Player
PRESS SOURCE BUTTON
UNTIL CD LIGHTS ON DISPLAY
CD
Selecting the CD Player as Source:
1. Press POWER to turn on the system.
2. On the master Station, press SOURCE
repeatedly to cycle through AM, FM, CD and
AUX until you reach CD.
BE SURE POWER IS ON
Figure 18. CD Player Source Selected
16
Playing Music
Selecting CD or Dock
The player will automatically detect if a
CD disc is in the player slot or if a portable
player is in the player dock.
If you have a CD in the player and there is
a portable player in the dock (or using the
audio input jack on the dock) the source
can be selected pressing the SOURCE/
EJECT button.
Playing from a Mobile Digital Device
Devices plug into the docking connector
in the retractable drawer on the CD player.
PUSH ON THE DOCK
DRAWER TO UNLATCH
AND SLIDE IT OUT
HALFWAY
USE THE PROPER DOCK
ADAPTER FOR THE DEVICE
(INCLUDED WITH DEVICE)
CAREFULLY INSERT THE MOBILE DIGITAL DEVICE
INTO THE DOCKING CONNECTOR
Playing from a Mobile Digital Device:
1. Press POWER to turn on the system.
INSERT AND REMOVE THE MOBILE DIGITAL DEVICE
STRAIGHT UP AND DOWN OR THE CONNECTOR
AND/OR THE DEVICE MAY BE DAMAGED!
2. On the master Station, press SOURCE
repeatedly to cycle through AM, FM, CD and
AUX until you reach CD.
Figure 19. Device in Dock
3. Press on the front of the docking drawer
to unlatch the spring lock and extend the
drawer half way out (you will feel the drawer
pop into a middle position).
✓ Note: To prevent damage, be sure to close
the docking drawer when a player is not
connected.
4. The dock contains a slide out rubber cover
that covers the dock’s connector for use with
other types of portable players. Slide the
rubber cover back in to expose the dock’s
connector.
5. Add the dock adapter (provided with your
device) into the docking well. Be sure to use
this adapter to reduce the stress on your
device’s connector.
6. Carefully insert your device into the docking
connector.
✓ Note: To prevent damage to the unit’s
connector, be sure to use the docking adapter
supplied with the mobile digital device.
THE DISPLAY WILL SHOW
THE CLOCK AND CD SOURCE ONLY
WHEN THE DOCK IS SELECTED
7. If a CD is inserted in the player, press the
SOURCE/EJECT button on the CD Player to
choose between the CD and the dock.
CD
8. Select your music or audio application on the
device and begin playing. THE BUTTONS ON
THE MASTER STATION DO NOT CONTROL
THE PLAYER, USE THE BUTTONS ON THE
DEVICE.
9. Use the system’s master and station volume
controls to adjust the volume level.
THE TRACK DISPLAY AREA WILL BE BLANK
Figure 20. Display Showing Dock Selection
17
Playing Music
Playing from an MP3 Player
Portable MP3 players sit on top of the
docking drawer’s rubber inner cover.
Audio from the player’s headphone jack
connects to the 3.5 mm audio input jack
on the side of the docking drawer with the
cable supplied.
The player can be charged (whether its
currently being used for music or not)
using the USB charging jack on the side of
the docking drawer (cable is not supplied).
✓ Note: Depending on their design, some
devices may not accept a battery charge
when connected to the USB charging jack on
the dock.
Playing a Portable MP3 Player:
1. Press POWER to turn on the system.
2. On the master Station, press SOURCE
repeatedly to cycle through AM, FM, CD
and AUX until you reach CD.
3. Press on the front of the docking drawer
to unlatch the spring lock and extend the
drawer all the way out.
4. The dock contains a slide out rubber cover
that covers the dock’s connector for use
with other types of portable players. Slide
the rubber cover all the way out to cover the
dock’s connector.
5. Connect the headphone jack on your MP3
Player to one end of the 3.5 mm audio cable.
USB
CHARGING
JACK
SET MP3 PLAYER ON
DOCK'S SLIDE OUT
RUBBER TRAY
CONNECT MP3 PLAYER
TO AUDIO INPUT JACK
Figure 21. MP3 Player on Docking Drawer
✓ Note: To prevent damage, be sure to close
the docking drawer when a player is not
connected.
THE DISPLAY WILL SHOW
THE CLOCK AND CD SOURCE ONLY
WHEN THE DOCK IS SELECTED
CD
6. Connect the other end of the audio cable
into the audio input jack on the side of the
docking drawer.
7. Set your MP3 Player on top of the rubber cover.
8. To charge the MP3 Player (optional) connect a
charging cable between the MP3 Player and
the USB jack on the side of the docking drawer.
9. If a CD is inserted in the player, press the
SOURCE/EJECT button on the CD Player to
choose between the CD and the MP3 Player.
10. Select your music MP3 Player and begin
playing. THE BUTTONS ON THE MASTER
STATION DO NOT CONTROL THE PLAYER,
USE THE BUTTONS ON THE PLAYER.
11. The MP3 player’s volume control will affect
the overall volume of the system, set it
about mid-level, then use the master and
station volume controls.
18
THE TRACK DISPLAY AREA WILL BE BLANK
Figure 22. Display Showing Dock Selection
Playing Music
Playing a CD
One standard CD disc or a CD-ROM
containing MP3 audio files can be played
at a time. The MODE button selects the
way the CD Player will play the CD:
USE MODE BUTTON TO SELECT CD PLAY MODE
CD
CD
1
1
REPEAT
• Normal play will play all the tracks on the CD
in order until the disc is finished.
• Repeat Song continuously plays the current
track on the CD.
• Repeat Disc continuously plays the entire
disc in normal track order.
SONG
REPEAT
TRACK
TRACK
DISC
CONTINUOUSLY PLAYS
CURRENT CD TRACK
CONTINUOUSLY PLAYS
CD IN NORMAL TRACK ORDER
CD
CD
1
1
RANDOM
RANDOM
ALL
TRACK
• Random Disc plays the entire disc once in
random order.
• Random All continuously plays the entire disc
in random track order.
TRACK
DISC
PLAYS CD ONCE IN
RANDOM TRACK ORDER
CONTINUOUSLY PLAYS
CD IN RANDOM TRACK ORDER
Figure 23. CD Mode Displays
CD Playing Controls
Five buttons are provided to control the
player when a CD is inserted.
THE TRACK DISPLAY SHOWS
THE TRACK NUMBER
Playing a CD:
"3" SHOWS WHEN
PLAYING AN MP3 CD
1. Press POWER to turn on the system.
2. On the master Station, press SOURCE
repeatedly to cycle through AM, FM, CD and
AUX until you reach CD.
CD
3. Insert a CD into the player’s slot.
1
4. Use the MODE button to choose a playing
mode. See Figure 23 for the display’s mode
indication.
5. Play the CD using the player’s controls (see
Figure 24). The display shows the current
player status (see Figure 25.)
TRACK
3
LINES MOVE AROUND THE TRACK NUMBER
TO INDICATE THAT THE DISC IS PLAYING OR PAUSED
Ejecting a CD
To eject a CD disc, press and hold the
SOURCE/EJECT button.
Figure 24. CD Status Display
NEXT TRACK
PRESS TO PLAY NEXT TRACK
SOURCE / EJECT
PRESS TO SWITCH
BETWEEN CD AND
DEVICE DOCK
SOURCE / EJECT
PRESS AND HOLD
TO EJECT CD DISC
MODE
PRESS TO CHANGE CD PLAY MODES
PRESS AND HOLD TO DISPLAY TOTAL
CD DISC TIME AND NUMBER OF TRACKS
(NOT AVAILABLE FOR MP3 CD-ROMS)
MODE
PREVIOUS TRACK
PRESS TO PLAY PREVIOUS TRACK
OR RESTART THE CURRENT TRACK
PRESS AND HOLD TO REVERSE
THROUGH CURRENT TRACK
DISABLED IN RANDOM MODES
PRESS AND HOLD TO FAST
FORWARD THROUGH THE
CURRENT TRACK
IN RANDOM DISC, SELECTS
THE NEXT RANDOM TRACK,
IN RANDOM ALL, SELECTS
ANY RANDOM TRACK
PLAY / PAUSE
PRESS TO PAUSE CD
PRESS AGAIN TO PLAY CD
Figure 25. CD Player Controls
19
Playing Music
6-DISC CD PLAYER
One of the options for the system is the
6-Disc CD Player that can be installed
below the Master Station.
USE MODE BUTTON TO SELECT CD PLAY MODE
CD
CD
6
1
1
6
REPEAT
REPEAT
2
SONG
The 6-Disc Player has a slide in cartridge
that holds up to six standard CDs.
Playing a CD
The MODE button selects the way the
6-Disc CD Player will play the CDs:
• Random Disc plays the current disc once in
random order.
• Random All randomly plays all discs in the
cartridge in random track order.
CD Playing Controls
Five buttons are provided to control the
player when a CD is inserted.
Playing a CD:
1. Load up to 6 CDs into the CD changer
cartridge and insert it into the player.
2. Press POWER to turn on the system.
3. On the master Station, press SOURCE
repeatedly to cycle through AM, FM, CD and
AUX until you reach CD.
4. Use the MODE button to choose a playing
mode. See Figure 26 for the display’s mode
indication.
5. Play the CDs using the player’s controls (see
Figure 27). The display shows the current
player status (see Figure 28.)
✓ Note: Initially the display shows six CD
discs loaded. If the CD player reaches
a empty CD position, the disc number is
removed from the display.
3
CD
1
RANDOM
4
1
6
RANDOM
ALL
2
TRACK
DISC
2
TRACK
3
PLAYS ONE CD ONCE IN
RANDOM TRACK ORDER
4
3
CONTINUOUSLY PLAYS ALL
CD'S IN RANDOM TRACK ORDER
Figure 26. 6-Disc CD Mode Display
MODE
NEXT DISC
PRESS TO CHANGE CD PLAY MODES; PRESS AND HOLD
TO DISPLAY TOTAL CD DISC TIME AND NUMBER OF TRACKS
PRESS TO PLAY THE NEXT DISC; PRESS AND HOLD TO
DISPLAY THE ELAPSED TIME OF THE CURRENT TRACK;
DISABLED IN RANDOM ALL MODE
PRESS TO PLAY PREVIOUS TRACK OR RESTART THE
CURRENT TRACK; PRESS AND HOLD TO REVERSE
THROUGH CURRENT TRACK; DISABLED IN RANDOM MODES
PRESS TO PAUSE CD
PRESS AGAIN TO PLAY CD
PRESS TO PLAY NEXT TRACK; PRESS AND HOLD TO FAST
FORWARD THROUGH THE CURRENT TRACK; IN RANDOM
DISC, SELECTS THE NEXT RANDOM TRACK; IN RANDOM ALL,
SELECTS ANY RANDOM TRACK FROM ALL DISCS
Figure 27. 6-Disc CD Player Controls
DISC NUMBER THAT'S
PLAYING IS CIRCLED
THE TRACK DISPLAY SHOWS
THE TRACK NUMBER
CD
6
1
2
5
TRACK
4
Ejecting the 6-Disc CD Cartridge
To eject the CD cartridge, press the EJECT
button located behind the CD door.
4
CONTINUOUSLY PLAYS
CD IN NORMAL TRACK ORDER
CD
• Normal play will play all the tracks on all the
CDs in order until the cartridge is finished.
• Repeat Disc continuously plays the current
disc in normal track order.
TRACK
DISC
3
CONTINUOUSLY PLAYS
CURRENT CD TRACK
6
• Repeat Song continuously plays the current
track on the CD.
2
TRACK
4
3
LINES MOVE AROUND THE TRACK NUMBER
TO INDICATE THAT THE DISC IS PLAYING OR PAUSED
Figure 28. 6-Disc CD Status Display
20
Notes
__________________________________________________________
__________________________________________________________
__________________________________________________________
__________________________________________________________
__________________________________________________________
__________________________________________________________
__________________________________________________________
__________________________________________________________
__________________________________________________________
__________________________________________________________
__________________________________________________________
__________________________________________________________
__________________________________________________________
__________________________________________________________
__________________________________________________________
__________________________________________________________
__________________________________________________________
__________________________________________________________
__________________________________________________________
__________________________________________________________
__________________________________________________________
21
Index
A
M
Adjusting system music volume 15
Adjusting the station’s volume 15
AM radio source 14
Audio settings 7
Auto button 3
Automatically turning music on and off 6
Auxiliary source 14
Master station 3
Master Station controls 14
Master Station display 3
Master Station speaker 3
Master Station switches 8
Master Station volume 7
Mode button 19
Mode button (6-disc player) 20
Monitoring stations 11
Monitor mode 9
Monitor override 11
Monitor override on and off 11
Music auto on/off 5, 6
Music source 14, 15
Music source on and off 15
Music volume 7
Music volume - 13
Music volume + 13
B
Bass adjustment 7
C
CD player source selection 16
CD playing controls 19, 20
CD source 14
Clock settings 5
Compatible mobile digital devices 21
D
Display brightness 5
Docking drawer 17
Dock rubber cover 17
Door chime 12
Door release 12, 13
Door Station 3, 4
Door Station features 4
Door Station operation 12
Door talk and listen 12, 13
E
Ejecting a CD 19
Ejecting the 6-disc CD cartridge 20
F
FM radio source 14
I
Intercom buttons 3
Intercom functions 10
Intercom listen 10, 13
Intercom mode 9
Intercom monitor 11
Intercom talk 10, 13
Intercom volume 7
iPlay dock 16
L
Listen button 13
Listening with the intercom 10
Loudness adjustment 7
22
N
Next track button 19
Normal play 19, 20
O
Off mode 9
Operating the intercom 10, 11, 12, 13
P
Patio Station 3, 4
Patio Station controls 15
Patio Station features 4
Patio Station operation 13
Patio Station volume knob 15
Playing a CD 19, 20
Playing a mobile digital device 17
Playing an MP3 CD-ROM 19
Playing from an MP3 player 18
Playing music 14, 15, 16, 17, 18, 19, 20
Play / pause button 19
Power button 3
Preset button 3
Preset radio stations 14
Previous track button 19
Privacy button 11, 12, 13
Index
R
T
Radio/intercom mode 9
Radio presets 14
Radio tuning 14
Random all 19, 20
Random disc 19, 20
Repeat disc 19, 20
Repeat song 19, 20
Room Station 3, 4
Room Station controls 15
Room Station features 4
Room Station operation 13
Room Station volume knob 15
Talk button 13
Time button 3
Time display 5
Tone button 3
Treble adjustment 7
Tune buttons 3
Tune radio up or down 14
Tuning radio presets 14
Tuning to a radio station 14
Turning loudness on and off 7
Turning music source on or off 15
U
S
USB charging jack 18
Safety warnings 2
Scan mode #1 6, 15
Scan mode #2 6, 15
Scan modes 6
Selecting a music source 14
Selecting CD or dock 17
Selecting CD player source 16
Selecting the music source 15
Setting radio presets 14
Setting system music volume 7
Setting the bass level 7
Setting the intercom volume 7
Setting the Master Station volume 7
Setting the scan mode 6
Setting the treble level 7
Six-disc CD player 20
Source button 3
Source button (6-disc player) 20
Source/eject button 17, 19
Speaker button 3
Speaker volume knob 13
Starting an intercom session 10
Station modes 8
Station mode switches 3, 8, 9
Station privacy 11, 13
Station volume 13, 15
Supported CD-ROM formats 16
System overview 3, 4
System overview diagram 2
System settings 5
System setup 5
V
Volume knob 13, 15
23
Limited Warranty
2- Year Limited Warranty
Linear LLC warrants these products to be free of defects for 2 years. The warranty period
begins on either (a) the date of purchase or installation date of this product or (b) the date
of closing on a new residence in which this product was originally installed. The warranty
extends to the original user of the product and to each subsequent owner of the product
during the term of the warranty. Linear LLC will repair or replace, at its option, parts and
materials at no charge. Parts supplied under this warranty may be new or rebuilt at the
option of Linear LLC.
If during the warranty period the product appears to have a defect, please call our toll
free service number (800-421-1587) prior to dismantling. Dismantling the product prior to
calling our service number may void the warranty. Before returning any product to Linear
LLC, obtain a Return Product Authorization Number (RPA) from our service department.
Linear LLC will return the repaired product freight prepaid within the continental United
States. ANY PRODUCT RETURNED TO LINEAR LLC WITHOUT A RPA NUMBER WILL BE
REFUSED.
This limited warranty is in lieu of any other warranties, express or implied, including any
implied warranty of merchantability or fitness for a particular purpose or otherwise, and
of any other obligations or liability on the seller’s part. This limited warranty does not
cover damage caused by improper installation, acts of God, criminal acts, the violation
of applicable building or electrical codes or the use of non-recommended wire, cable
(excluding CAT-5 and RG-6) or wall housings.
Under no circumstances shall Linear LLC be liable for consequential, incidental or special
damages arising in connection with use, or inability to use this product. In no event shall
Linear LLC liability hereunder exceed the cost of the product covered hereby. No person
is authorized to assume for us or obligate us for any other liability in connection with the
sale of this product. Some states do not allow the exclusion or limitation of consequential,
incidental or special damages, so the above limitation or exclusion may not apply to you.
This limited warranty gives you specific legal rights, and you may also have other rights,
which vary from state to state.
24
25
USA & Canada (800) 421-1587 & (800) 392-0123
(760) 438-7000 - Toll Free FAX (800) 468-1340
www.linearcorp.com
Copyright © 2012 Linear LLC
230508 AX1