1
Spectrum™ Technology Platform
Version 9.0
Dataflow Designer's Guide
Contents
Chapter 1: Getting Started..................................................................................7
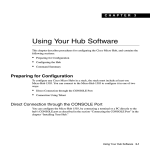
Installing the Client Tools.....................................................................................8
Starting the Client Tools.......................................................................................8
A First Look at Enterprise Designer....................................................................9
A First Look at Interactive Driver.......................................................................11
My First Dataflow (Job).......................................................................................11
My First Dataflow (Service)................................................................................14
Dataflow Templates.............................................................................................16
Creating a Dataflow Using a Template.......................................................17
Chapter 2: Dataflows.........................................................................................19
Designing Dataflows...........................................................................................20
Dataflow Fundamentals..............................................................................20
Reports.......................................................................................................34
Inspection...................................................................................................37
Dataflow Versions.......................................................................................40
Design Guidelines for Optimal Performance..............................................42
Performance Options..................................................................................49
Distributed Processing................................................................................52
Runtime Options for Dataflows...................................................................54
Running Dataflows..............................................................................................56
Running a Job in Enterprise Designer........................................................56
Running A Job from the Command Line....................................................56
Scheduling Jobs and Process Flows..........................................................63
Configuring Email Notification for a Dataflow.............................................64
Viewing Execution Status and History........................................................65
Pausing a Job.............................................................................................65
Canceling a Job..........................................................................................66
Testing a Service with Interactive Driver.....................................................66
Chapter 3: Subflows..........................................................................................67
Introduction to Subflows....................................................................................68
Using a Subflow as a Source.............................................................................68
Using a Subflow in the Middle of a Dataflow....................................................69
Using a Subflow as a Sink..................................................................................70
Modifying a Subflow...........................................................................................71
Deleting a Subflow..............................................................................................71
Exposing and Unexposing a Subflow...............................................................72
Converting a Stage to a Subflow.......................................................................72
Chapter 4: Process Flows................................................................................73
What is a Process Flow?....................................................................................74
Designing Process Flows...................................................................................74
Activities.....................................................................................................74
Creating Process Flow Variables................................................................76
Using Transition Options............................................................................77
Deleting Process Flows..............................................................................78
Running a Process Flow.....................................................................................78
Running a Process Flow in Enterprise Designer........................................78
Running a Process Flow from the Command Line.....................................78
Viewing Execution Status and History........................................................81
Chapter 5: Stages Reference...........................................................................83
Sources................................................................................................................84
Input............................................................................................................84
Read From DB............................................................................................87
Read From File...........................................................................................91
Read from Variable Format File................................................................102
Read From XML.......................................................................................111
Control Stages...................................................................................................116
Aggregator................................................................................................116
Broadcaster..............................................................................................120
Conditional Router....................................................................................120
Group Statistics........................................................................................123
Math..........................................................................................................131
Query DB..................................................................................................137
Record Combiner.....................................................................................138
Record Joiner...........................................................................................139
Sorter........................................................................................................141
Splitter......................................................................................................142
SQL Command.........................................................................................145
Stream Combiner.....................................................................................147
Transformer..............................................................................................147
Unique ID Generator................................................................................153
Primary Stages..................................................................................................158
Module Stages..........................................................................................158
User-Defined Stages................................................................................158
Sinks...................................................................................................................159
Execute Program......................................................................................159
4
Spectrum™ Technology Platform 9.0
Output.......................................................................................................160
Terminate Job...........................................................................................161
Write to DB...............................................................................................162
Write to File...............................................................................................166
Write to Null..............................................................................................177
Write to Variable Format File....................................................................177
Write to XML.............................................................................................184
Chapter 6: About Spectrum Technology Platform.......................................191
What Is Spectrum™ Technology Platform?....................................................192
Enterprise Data Management Architecture.....................................................193
Spectrum™ Technology Platform Architecture..............................................196
Modules and Components...............................................................................199
Appendix..........................................................................................................203
Appendix A: Country ISO Codes and Module Support.....................205
Country ISO Codes and Module Support.................................................206
Dataflow Designer's Guide
5
Getting Started
In this section:
•
•
•
•
•
•
•
Installing the Client Tools . . . . . . . . . . . . . . . . . . . . . . . . . .8
Starting the Client Tools . . . . . . . . . . . . . . . . . . . . . . . . . . . .8
A First Look at Enterprise Designer . . . . . . . . . . . . . . . . . .9
A First Look at Interactive Driver . . . . . . . . . . . . . . . . . . .11
My First Dataflow (Job) . . . . . . . . . . . . . . . . . . . . . . . . . . .11
My First Dataflow (Service) . . . . . . . . . . . . . . . . . . . . . . . .14
Dataflow Templates . . . . . . . . . . . . . . . . . . . . . . . . . . . . . .16
1
Installing the Client Tools
Installing the Client Tools
The Spectrum™ Technology Platform client tools are Windows applications that you use to administer
your server and design and run dataflows and process flows. You must install your Spectrum™ Technology
Platform server before installing the client tools.
Before installing, be sure to read the release notes. The release notes contains important compatibility
information as well as release-specific installation notes.
This procedure describes how to install the following client tools:
• Enterprise Designer— Use Enterprise Designer to create, modify, and run dataflows.
• Management Console—Use the Management Console to perform administrative tasks such as setting
service defaults, scheduling jobs, managing users and security, and so on.
• Interactive Driver—Use Interactive Driver to test different processing settings. Interactive Driver allows
you to run a small number of records through a process to preview the result.
• Job Executor—Job Executor is a command line tool that allows you to run a job from a command
line or script. The job must have been previously created and saved on Spectrum™ Technology
Platform using Enterprise Designer.
• Process Flow Executor—Process Flow Executor is a command line tool that allows the execution
of a process flow from a command line or script. The process flow must have been previously created
and saved on Spectrum™ Technology Platform using Enterprise Designer.
To install the client tools:
1. Open a web browser and go to the Spectrum™ Technology Platform Welcome Page at:
http://<servername>:<port>
For example, if you installed Spectrum™ Technology Platform on a computer named
"myspectrumplatform" and it is using the default HTTP port 8080, you would go to:
http://myspectrumplatform:8080
2. Click Platform Client Tools.
Related Links
Getting Started on page 7
Starting the Client Tools
The client tools (Enterprise Designer, Management Console, or Interactive Driver) are Windows
applications that you launch from the Start menu. They are easy to launch but there are a few things to
keep in mind.
To start a Spectrum™ Technology Platform client:
1. Select Start > Programs > Pitney Bowes > Spectrum™ Technology Platform > Client Tools.
2. Select the client you wish to start (Management Console, Enterprise Designer, or Interactive Driver).
3. Type in the server name or select it from the drop-down list.
Note: If you have multiple instances of the Management Console accessing the same Spectrum™
Technology Platform server, it is possible for one user to overwrite another user's changes.
Therefore, it is recommended that you do not run multiple instances of the Management
Console against the same server.
4. Enter your user name and password.
5. In the Port field, enter the network port that the server has been configured to use for Spectrum™
Technology Platform communication. The default port number is 8080.
8
Spectrum™ Technology Platform 9.0
Chapter 1: Getting Started
6. Click Use secure connection if you want communication between the client and the server to take
place over an HTTPS connection.
Note: A secure connection is only available if HTTPS communication has been configured on the
server.
7. Click Login.
Related Links
Getting Started on page 7
A First Look at Enterprise Designer
Enterprise Designer is a visual tool for creating dataflows. Using this client, you can:
• Create and modify jobs, services, subflows, and process flows
• Test dataflows for problems
• Expose and hide services
• Generate reports
The Enterprise Designer window looks like this:
Figure 1: Enterprise Designer Window
In order to work with dataflows you will need to understand a few important terms:
Canvas
The canvas is the main work area. The picture above shows the canvas open with a dataflow
named ValidateUSAndCanadianAddresses. It is a job dataflow, which means it performs
Dataflow Designer's Guide
9
A First Look at Enterprise Designer
batch processing by reading data from a file and writing output to a file. In this case, the
dataflow is writing output to two files.
Stage
Stages, represented by icons on the canvas, perform a specific type of activity, such as
sorting records, validating addresses, matching similar records, and so on. To add a stage,
drag the stage from the Palette (on the left side of the window) onto the canvas.
Channel Once two or more stages are on the canvas, they can be connected with a channel. A
channel is a connection between two or more stages through which records are passed
from one stage to another. In the above example, you can see that the Read from File stage
is connected to the ValidateAddress stage with a channel. Records are read into the dataflow
in Read from File then sent to ValidateAddress through this channel. ValidateAddress is
then connected to Conditional Router through a channel. Conditional Router, which analyzes
records and sends them along different paths in a dataflow depending on the conditions
defined by the dataflow designer, has two channels going out of it, one to a Write Validated
stage and one to a Write Failed stage.
Port
If you look closely at the stage icons you will notice small triangular or diamond shaped ports
on the sides of each stage. A port is the mechanism by which a stage sends data into, or
reads data from, a channel. Stages that read data into the dataflow (called "sources") only
have output ports since they are always at the start of a dataflow. Stages that send data out
of the dataflow (called "sinks") only have input ports since they are always at the end of a
dataflow. All other stages have both input and output ports. In addition, some stages have
error ports, which are used to output records that cause errors during the stage's processing,
and some stages have report ports, which are used to generate reports about the stage's
output.
In addition, the Enterprise Designer window has the following features:
Table 1: Other Features of the Enterprise Designer Window
Feature
Description
Tasks
Provides a quick way to create a new job, service, subflow, or process
flow. Also allows you to open dataflows that were recently open.
Server Explorer
Shows the services that are available on the Spectrum™ Technology
Platform server. If the server explorer this is not visible, select View >
Server Explorer. You can organize services into folders. To create a
folder, right-click the server name and select New Folder.
Palette
Contains all the stages and reports you can add to your dataflow. The
stages available in the palette depend on the modules you have licensed.
Canvas
The work area onto which you drag stages and connect them with
channels to make dataflows. You can have several dataflow canvases
open at once.
Versions
The Versions feature in Enterprise Designer allows you to keep a revision
history of your dataflows. You can view previous versions of a dataflow,
expose older versions for execution, and keep a history of your changes
in case you ever need to revert to a previous version of a dataflow.
Related Links
Getting Started on page 7
10
Spectrum™ Technology Platform 9.0
Chapter 1: Getting Started
A First Look at Interactive Driver
Interactive Driver is a tool for testing services. It allows you to send test data to a service and see the
response from the service. You can also change a service's options to see how the change affects the
processing of the test data. If you develop service dataflows you can use Interactive Driver to test your
dataflows after they are exposed as a service on the Spectrum™ Technology Platform server.
The Interactive Driver window looks like this:
The left pane lists the services available on the Spectrum™ Technology Platform server. The right pane
contains two tabs for each service: the Options tab and the Preview tab.
Options Tab
Contains the options that can be set when the service is called. You can modify
the options here to test how different settings affect the processing of your data.
Any changes you make to a service's settings in Interactive Driver are only in
effect for your session and cannot be saved.
Preview Tab
On this tab you enter test data and view the results of processing your test data
through the service.
Related Links
Getting Started on page 7
Testing a Service with Interactive Driver on page 66
My First Dataflow (Job)
In this topic you will create a simple dataflow that reads data from a file, sorts it, then writes it to a file.
Since this dataflow reads data from a file and writes its output to a file, it is a "job", which is a dataflow
that performs batch processing. (The other primary type of dataflow, a "service", performs interactive
processing via an API or web service call to the server.)
Dataflow Designer's Guide
11
My First Dataflow (Job)
1. The first step will be to create some sample data to use as input to your dataflow. Using a text editor,
create a file that looks like this:
FirstName,LastName,Region,Amount
Alan,Smith,East,18.23
Jeannie,Wagner,North,45.43
Joe,Simmons,East,10.87
Pam,Hiznay,Central,98.78
2. Save the file in a convenient location.
3. Select Start > Programs > Pitney Bowes > Spectrum™ Technology Platform > Client Tools >
Enterprise Designer.
4. Select File > New > Dataflow > Job.
5. You are now ready to begin creating your dataflow. The first step is to define the input to the dataflow.
To do this:
a) Drag a Read from File stage onto the canvas:
b)
c)
d)
e)
f)
Double-click the Read from File stage on the canvas.
In the File name field, specify the file you created in step 1 on page 12.
In the Field separator field, select Comma (,).
Click the Fields tab.
Click Regenerate then click Yes.
The stage is automatically configured for the fields in your input file.
g) Click Detect Type. This scans the input file and determines the appropriate data type for each
field. Notice that the type for the Amount filed changes from string to double.
h) You have finished configuring Read from File. Click OK.
6. Next, you will add a stage that will sort the records by region. To do this:
a) Drag the Sorter stage onto the canvas
12
Spectrum™ Technology Platform 9.0
Chapter 1: Getting Started
b) Click the solid black triangle on the right side of the Read from File stage (the output port) and
drag it to the left side of the Sorter stage on the canvas to create a channel connecting Read
from File and Sorter.
Your dataflow should look like this:
c)
d)
e)
f)
Double-click the Sorter stage on the canvas.
Click Add.
In the Field Name field, select Region.
You have finished configuring Sorter. Click OK.
7. Finally, you will define the output file where the dataflow will write its output. To do this:
a) Drag a Write to File stage onto the canvas.
b) Click the solid black triangle on the right side of the Sorter stage and drag it to the left side of the
Write to File stage on the canvas.
Your dataflow should look like this:
c)
d)
e)
f)
g)
h)
i)
j)
Double-click the Write to File stage.
In the File name field, specify an output file. This can be any file you want.
In the Field separator field, select Comma (,).
Check the First row is header record box.
Click the Fields tab.
Click Quick Add.
Click Select All then click OK.
Using the Move Up and Move Down buttons, reorder the fields so that they are in the following
order:
FirstName
LastName
Region
Amount
This will make the records in your output file have the fields in the same order as your input file.
k) You have finished configuring Write to File. Click OK.
8. In Enterprise Designer, select File > Save.
9. Give your dataflow a name and click OK.
10. Your dataflow is now ready to run. Select Run > Run Current Flow.
11. The Execution Details window appears and shows the status of the job. Click Refresh. Once the
status shows Succeeded click Close.
Open the output file you specified in the Write to File stage. You will see that the records have been
sorted by region as you specified in the Sorter stage.
FirstName,LastName,Region,Amount
Pam,Hiznay,Central,98.78
Alan,Smith,East,18.23
Joe,Simmons,East,10.87
Jeannie,Wagner,North,45.43
Dataflow Designer's Guide
13
My First Dataflow (Service)
Congratulations! You have designed and executed your first job dataflow.
Related Links
Getting Started on page 7
My First Dataflow (Service)
In this topic you will create a simple dataflow that accepts data from an API or web service call, processes
the data, and returns a response via the API or web service. Since this dataflow is intended to be exposed
as a service on the Spectrum™ Technology Platform server, it is a "service" dataflow. (The other primary
type of dataflow, a "job", performs batch processing, reading data from a file or database, processing
the data, then writing the output to a file or database.)
1. Select Start > Programs > Pitney Bowes > Spectrum™ Technology Platform > Client Tools >
Enterprise Designer.
2. Select File > New > Dataflow > Service.
3. You are now ready to begin creating your dataflow. The first step is to define the input to the dataflow.
Your datafow will take two fields as input: FirstName and LastName.
a) Drag an Input stage from the palette onto the canvas.
b)
c)
d)
e)
f)
g)
h)
i)
14
Double-click the Input stage on the canvas.
Click Add, then click Add again.
In the Field name field, type FirstName.
Click OK, then click OK again.
Click Add then click Add again.
In the Field name field, type LastName.
Click OK, then click OK again.
You have finished defining the dataflow input. Click OK.
Spectrum™ Technology Platform 9.0
Chapter 1: Getting Started
4. Next, you will add a stage to change the casing of the data in the FirstName and LastName fields to
all upper case.
a) Drag a Transformer stage from the palette onto the canvas.
b) Click the solid black triangle on the right side of the Input stage (the output port) and drag it to
the left side of the Transformer stage on the canvas to create a channel connecting Input and
Transformer.
Your dataflow should look like this:
c)
d)
e)
f)
g)
h)
i)
j)
k)
Double-click the Transformer stage.
Click Add.
In the tree on the left side, under Formatting click Case.
In the Field field, select FirstName. Leave Upper selected.
Click Add.
In the Field field, select LastName. Leave Upper selected.
Click Add.
Click Close.
You have finished configuring Transformer to change the value in the FirstName and LastName
fields to upper case. Click OK.
5. Finally, you will define the output for the dataflow. Your dataflow will return the FirstName and
LastName fields as output.
a) Drag an Output stage onto the canvas.
b) Click the solid black triangle on the right side of the Transformer stage and drag it to the left side
of the Output stage on the canvas.
Your dataflow should look like this:
c) Double-click the Output stage on the canvas.
d) Check the Expose box. The check boxes next to FirstName and LastName should now be
checked.
e) Click OK.
6. In Enterprise Designer, select File > Save.
7. Give your dataflow the name MyFirstDataflow-Service and click OK.
8. Select File > Expose/Unexpose and Save. This exposes your dataflow, making it available as a
service on the server.
9. To test your service:
a) Select Start > Programs > Pitney Bowes > Spectrum™ Technology Platform > Client Tools >
Interactive Driver.
b) In the list of services, find the service MyFirstDataflow-Service and click it.
c) Click the Preview tab.
d) Enter a name in the FirstName field in all lower case letters.
e) Enter a name in the LastName field in all lower case letters.
f) Click Run Preview.
You can see that the service made the first name field all upper case letters, as you specified in
your dataflow's Transformer stage.
Dataflow Designer's Guide
15
Dataflow Templates
Congratulations! You have designed and executed your first service dataflow. The service is now available
on the server and can be accessed via an API or web services call. The resource URL for this service's
SOAP endpoint is:
http://<ServerName>:<Port>/soap/MyFirstDataflow-Service
The resource URL for this service's REST endpoint is:
http://<ServerName>:<Port>/rest/MyFirstDataflow-Service
Related Links
Getting Started on page 7
Dataflow Templates
Dataflow templates illustrate ways in which you can use Spectrum™ Technology Platform and its modules
to meet your business needs. They show how particular modules solve various requirements, such as
parsing, standardizing, and validating names and addresses, geocoding addresses, and so on.
Dataflow templates are delivered with each module that you license. For instance, if you are licensed
for the Data Normalization Module, you receive the Standardizing Personal Names dataflow template.
If you are licensed for the Universal Addressing Module, you receive the Validating U.S. and Canadian
Addresses dataflow templates.
Depending on the purpose of each template, it may be a job with sample data or it may be a service with
no sample data. You can use dataflows in their original state and run those that are delivered as jobs to
see how they function. Alternatively, you can manipulate the dataflows by changing input and output
files or by bringing services into your own jobs and adding input and output files.
16
Spectrum™ Technology Platform 9.0
Chapter 1: Getting Started
Note: These samples are intended as illustrations of various Spectrum™ Technology Platform features.
They are not intended to be complete solutions to your particular business environment.
Related Links
Getting Started on page 7
Creating a Dataflow Using a Template on page 17
Creating a Dataflow Using a Template
Dataflow templates are delivered with each module that you license. To create a dataflow using a
template,
• In Enterprise Designer go to File > New > Dataflow > From Template.
• Or, you can click the New icon and select New Dataflow From Template.
A list of templates available for the modules you have installed is displayed.
Related Links
Dataflow Templates on page 16
Dataflow Designer's Guide
17
Dataflows
In this section:
• Designing Dataflows . . . . . . . . . . . . . . . . . . . . . . . . . . . . . .20
• Running Dataflows . . . . . . . . . . . . . . . . . . . . . . . . . . . . . . .56
2
Designing Dataflows
Designing Dataflows
Dataflow Fundamentals
Related Links
Dataflows on page 19
Dataflow Types on page 20
Data Models on page 21
Data Types on page 23
Automatic Data Type Conversion on page 24
Changing a Field's Data Type on page 31
Changing a Field's Name on page 32
Managing Malformed Input Records on page 32
Exposing a Service as a Web Service on page 33
Importing and Exporting Dataflows on page 34
Dataflow Types
A dataflow is a series of operations that takes data from some source, processes that data, then writes
the output to some destination. The processing of the data can be anything form simple sorting to more
complex data quality and enrichment actions. The concept of a dataflow is simple, but you can design
very complex dataflows with branching paths, multiple sources of input, and multiple output destinations.
There are three types of dataflows: jobs, services, and subflows.
Job
A job is a dataflow that performs batch processing. A job reads data from one or more files or databases,
processes that data, and writes the output to one or more files or databases. Jobs can be executed
manually in Enterprise Designer or can be run from a command line using the job executor.
The following dataflow is a job. Note that it uses the Read from File stage for input and two Write to File
stages as output.
Service
A service is a dataflow that you can access as web services or using the Spectrum™ Technology Platform
API. You pass a record to the service and optionally specify the options to use when processing the
record. The service processes the data and returns the data.
Some services become available when you install a module. For example, when you install the Universal
Addressing Module the service ValidateAddress becomes available on your system. In other cases, you
must create a service in Enterprise Designer then expose that service on your system as a user-defined
service. For example, the Location Intelligence Module's stages are not available as services unless you
first create a service using the module's stages.
20
Spectrum™ Technology Platform 9.0
Chapter 2: Dataflows
You can also design your own custom services in Enterprise Designer. For example, the following
dataflow determines if an addresses is at risk for flooding:
Note: Since the service name, option name, and field name ultimately become XML elements, they
may not contain characters that are invalid in XML element names (for example, spaces are not
valid). Services not meeting this requirement will still function but will not be exposed as web
services.
Subflow
A subflow is a dataflow that can be reused within other dataflows. Subflows are useful when you want
to create a reusable process that can be easily incorporated into dataflows. For example, you might want
to create a subflow that performs deduplication using certain settings in each stage so that you can use
the same deduplication process in multiple dataflows. To do this you could create a subflow like this:
You could then use this subflow in a dataflow. For example, you could use the deduplication subflow
within a dataflow that performs geocoding so that the data is deduplicated before the geocoding operation:
In this example, data would be read in from a database then passed to the deduplication subflow, where
it would be processed through Match Key Generator, then Intraflow Match, then Best of Breed, and
finally sent out of the subflow and on to the next stage in the parent dataflow, in this case Geocode US
Address. Subflows are represented as a puzzle piece icon in the dataflow, as shown above.
Subflows that are saved and exposed are displayed in the User Defined Stages folder in Enterprise
Designer.
Related Links
Dataflow Fundamentals on page 20
Data Models
Spectrum™ Technology Platform supports flat data and hierarchical data. In general you can use either
flat or hierarchical data as input and output for a dataflow. A few stages in the Enterprise Routing Module
require data to be in a hierarchical format.
Dataflow Designer's Guide
21
Designing Dataflows
Flat Data
Flat data consists of records, one on each line, and fields in each record. Fields are delimited by a specific
character or positioned in a defined location on the line. For example, this is flat data with comma-delimited
fields:
Sam,43,United States
Jeff,32,Canada
Mary,61,Ireland
To read flat data into a dataflow, you can use the Read from File, Read from DB, or Input stages. To
write flat data output from a dataflow, you can use the Write to File, Write to DB, or Output stages.
Hierarchical Data
Hierarchical data is a tree-like structure with data elements that have parent/child relationships. Spectrum™
Technology Platform can read and write hierarchical data in XML and Variable Format File format. For
example, this shows hierarchical data in XML:
<customers>
<customer>
<name>Sam</name>
<age>43</age>
<country>United States</country>
</customer>
<customer>
<name>Jeff</name>
<age>32</age>
<country>Canada</country>
</customer>
<customer>
<name>Mary</name>
<age>61</age>
<country>Ireland</country>
</customer>
</customers>
This example shows a structure where <customer> represents a record and each record consists of
simple XML elements (<name>, <age>, and <country>).
Converting Data
There are many cases where you might need to convert data from flat to hierarchal, or from hierarchical
to flat. For example, you may have data flow input in hierarchical format but want the data flow to output
flat data. You may also need to convert flat input data to hierarchical data for certain stages (especially
stages in the Location Intelligence Module) then convert the data back to flat data for output.
To convert data from flat to hierarchical you can use the following:
• The Process List tool
• The Aggregator stage in a dataflow
To convert data from hierarchical to flat use the Splitter stage.
Related Links
Dataflow Fundamentals on page 20
Process List on page 22
Process List
Process List is a tool you can use within a service or subflow to turn flat data into a list. This is useful if
your dataflows include stages that require list input, such as those in the Location Intelligence Module.
1. With an existing dataflow in place, right-click the stage whose output you want to convert into a list.
This could be any stage except Input or Output.
22
Spectrum™ Technology Platform 9.0
Chapter 2: Dataflows
2. Select Process List. You will see the stage within a blue square background.
3. To move a stage into and out of the process list, press the Shift key while dragging the additional
stage.
Note: If you have several stages whose data you would like Process List to handle, consider creating
a subflow, bringing it into your dataflow, and applying the Process List feature to the subflow
as a whole.
4. The input and output fields of a process list are called "ListField." Using the Rename Fields function,
you must map your input stage field to "ListField" in the input channel, and map "ListField" to your
output stage field. For more information, see Changing a Field's Name on page 32.
5. If you want the list to keep the data in the same order in which it was input, right-click the Process
List box and select Options. Then check the Maintain sort order box.
6. To confirm that the data input into the next stage will be formatted as a list, validate or inspect the
dataflow. For more information on inspecting data, see Inspecting a Dataflow on page 37.
Related Links
Data Models on page 21
Data Types
Spectrum™ Technology Platform supports a variety of numeric, string, and complex data types. Depending
on the type of processing you want to perform you may use one or more of these. For an address
validation dataflow you might only use string data. For dataflows that involve the mathematical
computations you may use numeric or Boolean data types. For dataflows that perform spatial processing
you may use a complex data type. For dataflows that combine these, you may use a variety of data
types.
Spectrum™ Technology Platform supports the following data types.
bigdecimal
A numeric data type that supports 38 decimal points of precision. Use this data type
for data that will be used in mathematical calculations requiring a high degree of
precision, especially those involving financial or geospatial data. The bigdecimal data
type supports more precise calculations than the double data type.
boolean
A logical type with two values: true and false.
date
A data type that contains a month, day, and year. For example, 2012-01-30 or January
30, 2012. You can specify a default date format in Management Console.
datetime
A data type that contain a month, day, year, and hours, minutes, and seconds. For
example, 2012/01/30 6:15 PM.
double
A numeric data type that contains both negative and positive double precision numbers
-1074
-52
1023
between 2
and (2-2 )×2
. In E notation, the range of values is 4.9E-324 to
1.7976931348623157E308. For information on E notation, see
en.wikipedia.org/wiki/Scientific_notation#E_notation.
float
A numeric data type that contains both negative and positive single precision numbers
-149
23
127
between 2
and (2-2 )×2 . In E notation, the range of values is 1.4E-45 to
3.4028235E38. For information on E notation, see
en.wikipedia.org/wiki/Scientific_notation#E_notation.
integer
A numeric data type that contains both negative and positive whole numbers between
31
31
-2 (-2,147,483,648) and 2 -1 (2,147,483,647).
list
Strictly speaking, a list is not a data type. However, when a field contains hierarchical
data, it is treated as a "list" field. In Spectrum™ Technology Platform a list is a collection
of data consisting of multiple values. For example, a field Names may contain a list of
name values. This may be represented in an XML structure as:
<Names>
<Name>John Smith</Name>
<Name>Ann Fowler</Name>
</Names>
Dataflow Designer's Guide
23
Designing Dataflows
It is important to note that the Spectrum™ Technology Platform list data type different
from the XML schema list data type in that the XML list data type is a simple data type
consisting of multiple values, whereas the Spectrum™ Technology Platform list data
type is similar to an XML complex data type.
long
A numeric data type that contains both negative and positive whole numbers between
63
63
-2 (-9,223,372,036,854,775,808) and 2 -1 (9,223,372,036,854,775,807).
string
A sequence of characters.
time
A data type that contains the time of day. For example, 21:15:59 or 9:15:59 PM.
Specifying a Field's Data Type
You can specify the data type for a field in these situations:
• Source stages: Specifying data types allows you to set the data type at the beginning of a dataflow,
eliminating the need for data type conversions later in the dataflow. Note that for Read from DB, the
data type is selected automatically and cannot be changed.
• Sink stages: Specifying data types allows you to control the data format returned by the dataflow.
Note that for Write to DB, the data type is selected automatically and cannot be changed.
• Transformer stage: You can specify data types in this stage if you use a custom script.
• Math stage and Group Statistics stage: Since these stages perform mathematical calculations,
choosing to use a particular numeric data type can have an effect on the results of the calculations,
such as the precision of a division operation. If you specify a data type for a field that is different than
the data type of the field coming into the stage, the downstream channel will automatically convert the
field to the data type you specify, as described in Automatic Data Type Conversion on page 24.
Note: Each stage supports different data types. For a description of the supported data types for each
stage, see the documentation for the stage.
Related Links
Dataflow Fundamentals on page 20
Automatic Data Type Conversion
When the data presented to a stage is of an inappropriate type, Spectrum™ Technology Platform can,
in some cases, automatically convert the data to the appropriate type. For example, Validate Address
accepts only string data as input. If the PostalCode input field is of type integer, Spectrum™ Technology
Platform can automatically convert the field to string and successfully process the PostalCode field.
Likewise, the Math stage needs data to be of a numeric data type. If the incoming data is of type string,
Spectrum™ Technology Platform can convert the data to the data type specified in the Math stage's
Fields tab.
Automatic data type conversions happen in the channels of a dataflow. If a channel is converting a data
type, there will be a blue dot in the middle of the channel:
If you double-click the channel you can see the data type conversion that's occurring. In this case, string
data is being converted to integer data:
24
Spectrum™ Technology Platform 9.0
Chapter 2: Dataflows
Note that you cannot change the data type in this dialog box for automatic data type conversions. The
output data type is determined by settings in the downstream stage.
Fields that do not contain valid values cannot be converted. You can specify what Spectrum™ Technology
Platform should do in these cases by using the type conversion options.
Related Links
Dataflow Fundamentals on page 20
Setting Type Conversion Options for a Dataflow on page 25
Date and Time Patterns on page 26
Number Patterns on page 28
Setting Type Conversion Options for a Dataflow
Spectrum™ Technology Platform automatically converts data to the data type needed by each stage in
a dataflow. In addition, you can convert data between string and numeric or date/time data types in some
stages, such as Read from File. By default dataflows use the default data type conversion options
specified in the Management Console when a data type conversion fails. However you can override the
default options for a job or service by following the procedure below.
Note: Subflows inherit the type conversion settings from the dataflow they are in. You cannot specify
type conversion settings for subflows.
1. Open the dataflow in Enterprise Designer.
2. Select Edit > Type Conversion Options.
3. Check the box Override system default options with the following values.
4. Choose how to handle data type conversion options by selecting one of the following options. These
options specify what to do when Spectrum™ Technology Platform is unable to convert a field's data
to the data type required by a stage.
Fail the dataflow
If a field cannot be converted the dataflow will fail.
Fail the record
If a field cannot be converted the record will fail but the dataflow will
continue to run.
Initialize the field using
default values
If a field cannot be converted the field's value is replaced with the
value you specify here. This option is useful if you know that some
records contain bad data and you want to replace the bad data with
a default value. Specify a value for each data type.
5. Specify the formats that you want to use for date and time data that is converted to a string. When
the data or time is converted to a string, the string will be in the format you specify here.
Dataflow Designer's Guide
25
Designing Dataflows
a) In the Locale field, select the country whose format you want to use for dates converted to a
string. Your selection will determine the default values in the Date, Time, and DateTime fields.
Your selection will also determine the language used when a month is spelled out. For example,
if you specify English the first month of the year would be "January" but if you specify French it
would be "Janvier."
b) In the Date field, select the format to use for date data when it is converted to a string. A list of
the most commonly used formats for the selected locale is provided.
For example, if you choose the format M/D/YY and a date field contains 2012-3-2, that date data
would be converted to the string 3/2/12.
c) In the Time field, select the format to use for time data when it is converted to a string. A list of
the most commonly used formats for the selected locale is provided.
For example, if you choose the format h:mm a and a time field contains 23:00, that time data
would be converted to the string 11:00 PM.
d) In the DateTime field, select the format to use for fields containing the DateTime data type when
converted to a string. A list of the most commonly used formats for the selected locale is provided.
For example, if you choose the format M/d/yy h:mm a and a DateTime field contains 2012-3-2
23:00, that DateTime data would be converted to the string 3/2/12 11:00 PM.
e) In the Whole numbers field, select the formatting you want to use for whole numbers (data types
float and double).
For example, if you choose the format #,### then the number 4324 would be formatted as 4,324.
Note: If you leave this field blank, numbers will be formatted in the same way they were in
Spectrum™ Technology Platform 8.0 and earlier. Specifically, no thousands separator is
-3
used, the dot (".") is used as the decimal separator, numbers less than 10 or greater
7
than or equal to 10 are shown in scientific notation, and negative numbers have a minus
sign ("-") in front of them. Also note that if you leave this field blank, numbers that use the
bigdecimal data type will always be in the format #,###.000.
f) In the Decimal numbers field, select the formatting you want to use for numbers that contain a
decimal value (data types integer and long).
For example, if you choose the format #,##0.0# then the number 4324.25 would be formatted as
4,324.25.
Note: If you leave this field blank, numbers will be formatted in the same way they were in
Spectrum™ Technology Platform 8.0 and earlier. Specifically, no thousands separator is
-3
used, the dot (".") is used as the decimal separator, numbers less than 10 or greater
7
than or equal to 10 are shown in scientific notation, and negative numbers have a minus
sign ("-") in front of them. Also note that if you leave this field blank, numbers that use the
bigdecimal data type will always be in the format #,###.000.
You can also specify your own date, time, and number formats if the ones available for selection do
not meet your needs. To specify your own date or time format, type the format into the field using
the notation described in Date and Time Patterns on page 26. To specify your own number format,
type the format into the file using the notation described in Number Patterns on page 28.
Related Links
Automatic Data Type Conversion on page 24
Defining Fields In a Delimited Input File on page 94
Date and Time Patterns
When defining data type options for date and time data, you can create your own custom date or time
pattern if the predefined ones do not meet your needs. To create a date or time pattern, use the notation
described in the following table. For example, this pattern:
dd MMMM yyyy
Would produce a date like this:
26
Spectrum™ Technology Platform 9.0
Chapter 2: Dataflows
14 December 2012
Letter
Description
Example
G
Era designator
AD
yy
Two-digit year
96
yyyy
Four-digit year
1996
M
Numeric month of the year.
7
MM
Numeric month of the year. If the number is less
than 10 a zero is added to make it a two-digit
number.
07
MMM
Short name of the month
Jul
MMMM
Long name of the month
July
w
Week of the year
27
ww
Two-digit week of the year. If the week is less than 06
10 an extra zero is added.
W
Week of the month
2
D
Day of the year
189
DDD
Three-digit day of the year. If the number contains 006
less than three digits, zeros are added.
d
Day of the month
dd
Two-digit day of the month. Numbers less than 10 09
have a zero added.
F
Day of the week in month
2
E
Short name of the day of the week
Tue
EEEE
Long name of the day of the week
Tuesday
a
AM/PM marker
PM
H
Hour of the day, with the first hour being 0 and the 0
last hour being 23.
HH
Two-digit hour of the day, with the first hour being 08
0 and the last hour being 23. Numbers less than
10 have a zero added.
k
Hour of the day, with the first hour being 1 and the 24
last hour being 24.
kk
Two-digit hour of the day, with the first hour being 02
1 and the last hour being 24. Numbers less than
10 have a zero added.
K
Hour hour of the morning (AM) or afternoon (PM), 0
with 0 being the first hour and 11 being the last
hour.
KK
Two-digit hour of the day, with the first hour being 02
1 and the last hour being 24. Numbers less than
10 have a zero added.
Dataflow Designer's Guide
10
27
Designing Dataflows
Letter
Description
Example
h
Hour of the morning (AM) or afternoon (PM), with 12
1 being the first hour and 12 being the last hour.
hh
Two-digit hour of the morning (AM) or afternoon
09
(PM), with 1 being the first hour and 12 being the
last hour. Numbers less than 10 have a zero added.
m
Minute of the hour
mm
Two-digit minutes of the hour. Numbers less than 05
10 have a zero added.
s
Second of the minute
ss
Two-digit second of the minute. Numbers less than 02
10 have a zero added.
S
Millisecond of the second
SSS
Three-digit millisecond of the second. Numbers
978
containing fewer than three digits will have one or 078
two zeros added to make them three digits.
008
z
Time abbreviation of the time zone name. If the
PST
time zone does not have a name, the GMT offset. GMT-08:00
zzzz
The full time zone name. If the time zone does not Pacific Standard Time
have a name, the GMT offset.
GMT-08:00
Z
The RFC 822 time zone.
-0800
X
The ISO 8601 time zone.
-08Z
XX
The ISO 8601 time zone with minutes.
-0800Z
XXX
The ISO 8601 time zone with minutes and a colon -08:00Z
separator between hours and minutes.
30
55
978
Related Links
Automatic Data Type Conversion on page 24
Number Patterns
When defining data type options for numeric data, you can create your own custom number pattern if
the predefined ones do not meet your needs. A basic number pattern consists of the following elements:
• A prefix such as a currency symbol (optional)
• A pattern of numbers containing an optional grouping character (for example a comma as a thousands
separator)
• A suffix (optional)
For example, this pattern:
$ ###,###.00
Would produce a number formatted like this (note the use of a thousands separator after the first three
digits):
$232,998.60
28
Spectrum™ Technology Platform 9.0
Chapter 2: Dataflows
Patterns for Negative Numbers
By default, negative numbers are formatted the same as positive numbers but have the negative sign
added as a prefix. The character used for the number sign is based on the locale. The negative sign is
"-" in most locales. For example, if you specify this number pattern:
0.00
The number negative ten would be formatted like this in most locales:
-10.00
However, if you want to define a different prefix or suffix to use for negative numbers, specify a second
pattern, separating it from the first pattern with a semicolon (";"). For example:
0.00;(0.00)
In this pattern, negative numbers would be contained in parentheses:
(10.00)
Scientific Notation
If you want to format a number into scientific notation, use the character E followed by the minimum
number of digits you want to include in the exponent. For example, given this pattern:
0.###E0
The number 1234 would be formatted like this:
1.234E3
3
In other words, 1.234 x 10 .
Note the following:
• The number of digit characters after the exponent character gives the minimum exponent digit count.
There is no maximum.
• Negative exponents are formatted using the localized minus sign, not the prefix and suffix from the
pattern.
• Scientific notation patterns cannot contain grouping separators (for example, a thousands separator).
Special Number Pattern Characters
The following characters are used to produce other characters, as opposed to being reproduced literally
in the resulting number. If you want to use any of these special charters as literal characters in your
number pattern's prefix or suffix, surround the special character with quotes.
Symbol
Description
0
Represents a digit in the pattern including zeros where needed to fill in
the pattern. For example, the number twenty-seven when applied to
this pattern:
0000
Would be:
0027
#
Represents a digit but zeros are omitted. For example, the number
twenty-seven when applied to this pattern:
####
Would be:
27
Dataflow Designer's Guide
29
Designing Dataflows
Symbol
Description
.
The decimal separator or monetary decimal separator used in the
selected locale. For example, in the U.S. the dot (.) is used as the
decimal separator but in France the comma (,) is used as the decimal
separator.
-
The negative sign used in the selected locale. For most locals this is
the minus sign (-).
,
The grouping character used in the selected locale. The appropriate
character for the selected locale will be used. For example, in the U.S.,
the comma (,) is used as a separator.
The grouping separator is commonly used for thousands, but in some
countries it separates ten-thousands. The grouping size is a constant
number of digits between the grouping characters, such as 3 for
100,000,000 or 4 for 1,0000,0000. If you supply a pattern with multiple
grouping characters, the interval between the last one and the end of
the integer is the one that is used. For example, all the following patterns
produce the same result:
#,##,###,####
######,####
##,####,####
E
Separates mantissa and exponent in scientific notation. You do not need
to surround the E with quotes in your pattern. See Scientific Notation
on page 29.
;
Separates positive and negative subpatterns. See Patterns for Negative
Numbers on page 29.
%
Multiply the number by 100 and show the number as a percentage. For
example, the number .35 when applied to this pattern:
##%
Would produce this result:
35%
¤
The currency symbol for the selected locale. If doubled, the international
currency symbol is used. If present in a pattern, the monetary decimal
separator is used instead of the decimal separator.
'
Used to quote special characters in a prefix or suffix. For example:
"'#'#"
Formats 123 to:
"#123"
To create a single quote itself, use two in a row:
"# o''clock"
Related Links
Automatic Data Type Conversion on page 24
30
Spectrum™ Technology Platform 9.0
Chapter 2: Dataflows
Changing a Field's Data Type
Spectrum™ Technology Platform automatically changes field data types as needed using the type
conversion settings specified in Management Console, or the dataflow's type conversion options specified
in Enterprise Designer. In most situations you do not need to manually change field data types because
any necessary data type conversions are handled automatically. However, in cases where a stage is
unable to convert incoming data to the necessary data type, you may need to manually change the data
type in the upstream channel.
There are only a few possible type conversions that you can perform manually. Those are:
• Polygon and MultiPolygon types can be converted to and from a geometry type.
• Date, time, and datetime data types can be converted to and from a string type.
To manually change a field's data type, follow this procedure.
1. In Enterprise Designer, double-click the channel where you want to change the field's data type. A
channel is the line that connects two stages on the canvas.
2. Click the small square button next to the data type that you want to change.
Note: If a small square button is not visible next to the data type, then manual data type conversion
is not available for your situation.
3. For date, time, and datetime data types, do the following:
Note: Only the appropriate options will be displayed depending on the data type chosen.
a) In the Locale field, select the country whose format you want to use for dates converted to a
string. Your selection will determine the default values in the Date, Time, and DateTime fields.
Your selection will also determine the language used when a month is spelled out. For example,
if you specify English the first month of the year would be "January" but if you specify French it
would be "Janvier."
b) In the Date field, select the format to use for date data when it is converted to a string. A list of
the most commonly used formats for the selected locale is provided.
For example, if you choose the format M/D/YY and a date field contains 2012-3-2, that date data
would be converted to the string 3/2/12.
c) In the Time field, select the format to use for time data when it is converted to a string. A list of
the most commonly used formats for the selected locale is provided.
For example, if you choose the format h:mm a and a time field contains 23:00, that time data
would be converted to the string 11:00 PM.
d) In the DateTime field, select the format to use for fields containing the DateTime data type when
converted to a string. A list of the most commonly used formats for the selected locale is provided.
For example, if you choose the format M/d/yy h:mm a and a DateTime field contains 2012-3-2
23:00, that DateTime data would be converted to the string 3/2/12 11:00 PM.
e) In the Whole numbers field, select the formatting you want to use for whole numbers (data types
float and double).
For example, if you choose the format #,### then the number 4324 would be formatted as 4,324.
Note: If you leave this field blank, numbers will be formatted in the same way they were in
Spectrum™ Technology Platform 8.0 and earlier. Specifically, no thousands separator is
-3
used, the dot (".") is used as the decimal separator, numbers less than 10 or greater
7
than or equal to 10 are shown in scientific notation, and negative numbers have a minus
sign ("-") in front of them. Also note that if you leave this field blank, numbers that use the
bigdecimal data type will always be in the format #,###.000.
f) In the Decimal numbers field, select the formatting you want to use for numbers that contain a
decimal value (data types integer and long).
For example, if you choose the format #,##0.0# then the number 4324.25 would be formatted as
4,324.25.
Dataflow Designer's Guide
31
Designing Dataflows
Note: If you leave this field blank, numbers will be formatted in the same way they were in
Spectrum™ Technology Platform 8.0 and earlier. Specifically, no thousands separator is
-3
used, the dot (".") is used as the decimal separator, numbers less than 10 or greater
7
than or equal to 10 are shown in scientific notation, and negative numbers have a minus
sign ("-") in front of them. Also note that if you leave this field blank, numbers that use the
bigdecimal data type will always be in the format #,###.000.
4. Click OK.
The color of the data type name changes to green.
5. Click OK again to save the change.
Related Links
Dataflow Fundamentals on page 20
Changing a Field's Name
There are a variety of situations where you may need to rename a field in a dataflow. For example:
• A stage's input requires certain field names but the previous stage's output uses other field names
• There is data in a field which you want to preserve when a downstream stage write data to a field of
the same name
Note: After a field is renamed, it is no longer available in subsequent stages with the old name.
1. In a dataflow, double-click the channel between two stages. The Field Transform Options dialog
box appears.
2. Change the field name(s) as desired.
For example, the latter stage could require "AddressLine3" but the former stage uses "FirmName"
instead. In this case, you would click the drop-down arrow in the Input Field Name that corresponds
to AddressLine3 as the Output Field Name and then select "FirmName."
The color of the output field name changes to green.
3. Click OK.
Related Links
Dataflow Fundamentals on page 20
Managing Malformed Input Records
A malformed record is one that Spectrum™ Technology Platform cannot parse. When Spectrum™
Technology Platform encounters a malformed record, it can do one or more of the following:
•
•
•
•
Terminate the job
Continue processing
Continue processing until a certain number of bad records are encountered
Continue processing but write bad records to a log file (via an optional sink stage)
Note: Malformed records functionality is limited to sources configured to read from files local to the
server and that do not have sorting configured. When a source is configured with either a remote
file or with sort fields and the source encounters a malformed record, the job will fail regardless
of the configuration for malformed records.
To manage malformed records,
1. Add a malformed records sink in your dataflow.
a) Create your job by defining your input file and source stage and adding services and subflows
to your dataflow.
b) Do one of the following:
32
Spectrum™ Technology Platform 9.0
Chapter 2: Dataflows
• Connect a sink stage to the optional output port on the source stage in your dataflow. The
optional port is the clear output port just beneath the black output port on your source stage.
If you mouse over this port, you will see a tool tip that says, "error_port." Malformed records
are written to this sink.
• Connect nothing to the optional output port on the source stage in your dataflow, which causes
Spectrum™ Technology Platform to ignore malformed records.
The completed dataflow should look something like this:
When you run your job, the Execution History will contain a column that shows the number of
malformed records that were encountered during the job.
2. By default Spectrum™ Technology Platform will abort a job when it encounters a malformed record.
Override this setting by following these steps:
a) Within an open job, go to Edit > Job Options.
b) Select either Do not terminate the job on a malformed record or select Terminate the job
after encountering this many malformed records and enter the number of malformed records
you will allow a job to encounter before terminating.
Related Links
Dataflow Fundamentals on page 20
Sorting Input Records on page 98
Read From File on page 91
The File Definition Settings File on page 98
Exposing a Service as a Web Service
Spectrum™ Technology Platform services can be made available as REST and/or SOAP web services.
To make a service available on your server as a web service:
1. Open Enterprise Designer.
2. Open the service that you want to expose as a web service.
3. Go to Edit > Web Service Options.
4. Select one of the following options:
SOAP
Expose the service via enhanced SOAP, which provides more options,
including faults, basic authentication, and more.
REST
Expose the service via REST.
5. Click OK.
To verify that the service is now exposed as a web service, go to one of the following URLs:
• For REST: http://server:port/rest
• For SOAP: http://server:port/soap
Where server is the name or IP address of your Spectrum™ Technology Platform server and port is the
port used for HTTP communication.
Related Links
Dataflow Fundamentals on page 20
Dataflow Designer's Guide
33
Designing Dataflows
Importing and Exporting Dataflows
You can exchange dataflows with other Enterprise Designer users with the import and export features.
Note: Dataflows can only be exchanged between identical versions of Spectrum™ Technology Platform.
• To export a dataflow, select File > Export. If you have used the Versions feature to save versions of
the dataflow, the version you have currently selected is the version that is exported.
Note: Do not use special characters in the name of the services and jobs you define. Doing so may
result in an error during export.
• To import a process flow, select File > Import > Process Flow.
• To import a dataflow, select File > Import > Dataflow. The stages in the dataflow must be available
on your system before you import the dataflow. If the dataflow you import contains unavailable stages,
you will see an error.
• If you use Server Explorer to organize your dataflows you can also export a dataflow by right-clicking
it and selecting Export. To import a dataflow using Server Explorer, right-click in the location in Server
Explorer where you want to import the dataflow and select Import.
Related Links
Dataflow Fundamentals on page 20
Reports
Spectrum™ Technology Platform provides reporting capabilities for jobs. You can use standard reports
that come with some modules or you can design your own reports. When a report is included in a dataflow
the entire dataflow runs, and after completion the report stages in the dataflow are executed and the
reports are saved in the format you choose, for example PDF.
Related Links
Dataflows on page 19
Adding a Standard Report to a Job on page 34
Setting Report Options for a Job on page 35
Viewing Reports on page 35
Using Custom Reports on page 35
Adding a Standard Report to a Job
A standard report is a pre-configured report that is included with a Spectrum™ Technology Platform
module. For example, the Location Intelligence Module includes the Point In Polygon Summary report,
which summarizes the results of point in polygon calculations, such as the number of polygon matches,
the database used for the job, and other information.
The following procedure describes how to add a standard report to a job.
1. In Enterprise Designer, on the left side of the window under Palette, click Reports.
A list of available reports appears.
2. Drag the report you want onto the canvas. You do not need to connect the report icon to anything.
3. Double-click the report.
4. Select the stages that you want to contribute to the report.
5. Click the Parameters tab.
6. Clear the Use default reporting options check box and select the appropriate output format if you
wish to specify a format other than PDF (such as html or txt).
Related Links
Reports on page 34
34
Spectrum™ Technology Platform 9.0
Chapter 2: Dataflows
Setting Report Options for a Job
Reports provide summary information about a job, such as the number of records processed, the settings
used for the job, and so on. Report options specify how to handle the reports generated by a job, such
as the output format and archiving options. Default values for report options are specified in Management
Console but you can override the default options for a job in Enterprise Designer.
The following procedure describes how to specify report options for a job.
1. Open the job in Enterprise Designer and go to Edit > Job Options.
2. Click the Reporting tab.
3. Clear the Use global reporting options check box.
4. Select the format to use for reports by selecting html, pdf, or txt.
5. Check the Store report snapshot box to have the system store information indicating that a report
was registered as well as the actual report snapshot.
6. Check the Archive reports box if you wish to save report snapshots. In the Report archive location
field, specify the location where you want to keep the archived reports.
7. Check Overwrite existing reports if you want new reports to replace previous reports.
8. Complete the naming template to reflect how you want to name your reports.
9. Click OK.
When you run your job, the Execution History will contain a column that shows if there are any reports
that are associated with the job. An empty icon indicates no reports, one document icon indicates one
report, and multiple documents icons indicate multiple reports. You can use the Job Detail to view, save,
or print the report.
Note: To delete a report, right-click the report icon on the canvas and select Delete.
Related Links
Reports on page 34
Viewing Reports
To view reports, first run the job then do one of the following:
• In Enterprise Designer, the Execution Details window will appear when you run your job. Select the
report you want to view.
• In the Management Console, in the Execution node, click History then select the job whose reports
you want to view, then click Details.
Related Links
Reports on page 34
Using Custom Reports
Spectrum™ Technology Platform modules come with reports that are useful for basic reporting. However,
if you have report requirements that are not met by the standard reports, you can create your own custom
reports and include them in your dataflow.
1. Create the report template using the report design tool of your choice. Your design tool must be able
to export the report in the JasperReports format (.jrxml).
2. Copy your .jrxml file to the server\app\import folder on the Spectrum™ Technology Platform
server.
Within a few seconds, the report template will be imported into the system and made available in
Enterprise Designer.
3. In Enterprise Designer, open the job to which you want to add your custom report.
4. On the left side of the window, under Palette, click Reports.
5. Drag your custom report to the canvas.
Dataflow Designer's Guide
35
Designing Dataflows
6. Specify the data source for the report by doing one of the following:
Option
Description
To report on the
dataflow's input
Connect the report to the source stage you want to report on using the gray
diamond-shaped report port as shown here:
The report will be based on the dataflow's input data and will not reflect any of
the processing that occurs in the dataflow.
To report on the Connect the report to the sink stage you want to report on using the gray
dataflow's output diamond-shaped report port as shown here:
The report will be based on the dataflow's output data and will reflect the
dataflow's effect on the data.
To use a query
If the report template contains an embedded SQL query in the <queryString>
embedded in the element of the JRXML file, double-click the report icon and check the Use
report template
embedded query box, then select the database connection to use for the
query.
Note: If you need to define a database connection, open the Management
Console and go to Resources, then Connections.
You can connect multiple reports to a source or sink, as shown here:
7. If the report contains user-defined parameters:
a) Double-click the report icon on the canvas.
b) On the Parameters tab, specify the values you want to use for the report's user-defined
parameters.
8. Optional: If necessary, right-click on the channel and map the fields from the source or sink to the
fields in the report.
Related Links
36
Spectrum™ Technology Platform 9.0
Chapter 2: Dataflows
Reports on page 34
Inspection
Inspecting a Dataflow
To view the effect of your dataflow on the input data at different points in the dataflow, use the inspection
tool in Enterprise Designer. Inspection enables you to isolate problems or identify records that contain
defects. Typically you should inspect outer points on the dataflow first and then move inward to narrow
down where a problem may be.
1. Specify the data to use for inspection.
The data should be representative of actual data, or, if you are troubleshooting a specific issue,
should be the data that causes the issue you are troubleshooting. There are two ways to specify the
data to use for inspection, depending on whether you are inspecting a service or a job.
Option
Description
To specify inspection
data for a job
When inspecting a job, the data used for inspection is the data specified
in the source stage. The inspection tool can process a maximum of 50
records, which by default is the first 50 records in the input file or
database. If you want to use data that starts somewhere other than the
first record, double-click the Read From File stage and complete the
Starting record field in the Runtime tab.
To specify inspection
data for a service
Dataflows that use an Input stage do not have access to data when you
are editing the dataflow. For these dataflows you must define inspection
data in the Input stage. For information on defining inspection data, see
Defining Inspection Data on page 86.
2. Indicate the point in the dataflow where you want to view data by adding an inspection point.
You can inspect data at a point in a channel. You can also inspect data within a subflow embedded
in your dataflow.
Option
Description
To add an
inspection
point to a
channel
Right-click to the left of the Rename node on a channel and select Add Inspection
Point.
A point is added to the job:
Dataflow Designer's Guide
37
Designing Dataflows
Option
Description
To inspect a Right-click the subflow stage and select Inspect this Dataflow:
subflow
embedded in
a job or
service
The input data (in a job) or the inspection data (in a service) is automatically passed
to the subflow, so there is no need to enter inspection data in the subflow's Input
stage.
Note: When you inspect a subflow, the exposed version of the subflow is shown.
If make a change to the subflow and want to re-run inspection, you need
to expose the new version.
3. Select Run > Inspect Current Flow or click the Inspect Current Flow button on the toolbar.
The Inspection Results pane opens on the bottom of the screen, showing the inspected data in
horizontal view. This window also includes a toolbar that allows you to refresh data and change how
you view information.
Note: Date and time data is displayed in the format specified in the type conversion options.
Tip: You can move an inspection point by dragging it to another channel. The inspection data
updates automatically.
The following table describes the Inspection Results toolbar.
Table 2: Inspection Results Toolbar
Icon
Description
Refreshes data.
Splits two panes vertically.
38
Spectrum™ Technology Platform 9.0
Chapter 2: Dataflows
Icon
Description
Splits two panes horizontally.
View data horizontally.
View data vertically.
Note: If your inspection data is hierarchical, it cannot be viewed vertically.
4. When you update or make changes to the dataflow, click Run > Inspect Current Flow to refresh
the inspection results.
5. When you close the Inspection Results pane, the inspection data is lost. Similarly, when you close
a job, the inspection points and inspection data are lost. To save the inspection results to a file:
a) In the inspection results grid, select the rows you wish to save. You can select all data by
right-clicking in either pane and clicking Select All.
b) Select Copy from the context menu.
c) Open the application into which you want to save the data (for example, Microsoft Excel or
Notepad).
d) In the application, paste the data.
e) Save the file.
Related Links
Dataflows on page 19
Inspecting Data at Two Points in a Dataflow on page 39
Inspecting Data at Two Points in a Dataflow
If you have two inspections points in the dataflow, you can compare data at one point with data at another.
This makes it easy to see how specific records change as they move through the dataflow.
1. Add two inspection points.
2. Go to Run > Inspect Current Flow or click the Inspect Current Flow button on the Toolbar. The
Inspection Results pane opens on the bottom of the screen, showing the inspected data in two panes.
The left pane shows the upstream data (the left-most inspection point in the job) and the right pane
shows the downstream data (the right-most inspection point in the job).
The columns in the upstream data are in alphabetical order. The downstream column order is based
on the column order of the upstream data as default. New columns are shown after the preserved
columns in alphabetical order.
3. Click a row in the left pane. You will likely see a highlighted, correlating row in the right pane. (Similarly,
if you click a row in the right pane, you will see a correlating row in the left pane.) Note the following:
• As you manually scroll through either pane, the data in the alternate pane will auto-scroll with you.
When you scroll upstream data, the system scrolls to the record in the downstream data that
correlates to the first visible record in the upstream data. Similarly, when you scroll downstream
Dataflow Designer's Guide
39
Designing Dataflows
•
•
•
•
•
•
data, the system scrolls to the record in the upstream data that correlates to the first visible record
in the downstream data.
Records added to the second inspection point will display at the bottom of the list (because they
will not be correlated with records from the first inspection point).
If you create a stage with a pass-through field turned off in between inspection points and a new
row is created, no correlation will exist (though data will still be present).
Sort data by clicking a field name in one pane. The data will sort in ascending or descending order
and will correlate in the other pane, with the data in the other pane automatically sorted based on
the same record order of the first pane. Uncorrelated records are appended at the end.
Choose fields to display by clicking on the Choose Fields icon to the left of the field names.
To change the column order, drag and drop the column headings into the order you want. The
column order in both grids is updated.
Filter records based on values in a field by clicking the funnel icon to the right of any field name
and selecting the data you wish to view (such as postal code, state, city, etc.).
Related Links
Dataflows on page 19
Inspecting a Dataflow on page 37
Dataflow Versions
The Versions feature in Enterprise Designer allows you to keep a revision history of your dataflows. You
can view previous versions of a dataflow, expose older versions for execution, and keep a history of
your changes in case you ever need to revert to a previous version of a dataflow.
Related Links
Dataflows on page 19
Saving a Dataflow Version on page 40
Viewing a Dataflow Version on page 41
Editing a Dataflow Version on page 41
Editing Version Properties on page 41
Exposing a Version on page 42
Saving a Dataflow Version
There are two ways to save a version of your dataflow in Enterprise Designer:
• Expose your dataflow. Each time you expose a dataflow, either by selecting File > Expose/Unexpose
and save or by clicking the light bulb in the tool bar, Enterprise Designer automatically saves a version
of the dataflow.
• Manually save a version in the Versions pane in Enterprise Designer.
Note: A dataflow version is not created when you simply save a dataflow.
The following procedure describes how to manually save a version in the Versions pane of Enterprise
Designer.
1. In Enterprise Designer, open the dataflow.
2. If the Versions pane is not visible, select View > Versions
3. Make sure that the latest saved version is selected in the Versions list. This is the version at the top
of the list.
4. Click the green plus icon in the Versions pane.
A new version of the dataflow is saved and added to the Versions pane.
Related Links
Dataflow Versions on page 40
40
Spectrum™ Technology Platform 9.0
Chapter 2: Dataflows
Viewing a Dataflow Version
You can view a previous version of a dataflow. This allows you to see how a dataflow was designed in
the past before more recent changes were made. Previous versions can only be viewed, not modified.
In order to modify a previous version it must first be promoted to the latest saved version.
1. In Enterprise Designer, open the dataflow.
2. If the Versions pane is not visible, select View > Versions
3. Select the version that you want to view.
The selected version is displayed on the dataflow canvas.
Related Links
Dataflow Versions on page 40
Editing a Dataflow Version on page 41
Editing a Dataflow Version
You can edit a previous version of a dataflow by promoting it to the latest-saved version. Promoting a
dataflow version moves it to the latest-saved version, making it available for editing.
Note: Before performing this procedure, note that the existing latest-saved version will be overwritten
by the version you promote and edit. If you want to preserve a copy of the existing latest-saved
version, save it as a version before promoting the older version.
1. In Enterprise Designer, open the dataflow.
2. If the Versions pane is not visible, select View > Versions
3. Select the version that you want to edit.
4. Click the promote icon.
The selected version is promoted to the latest-saved version. You can now edit the dataflow.
Related Links
Dataflow Versions on page 40
Viewing a Dataflow Version on page 41
Editing Version Properties
When you save a dataflow version, it is given a default version number. You can modify the version
number and add comments to document the version's changes or purpose.
1. In Enterprise Designer, open the dataflow.
2. If the Versions pane is not visible, select View > Versions
3. Select the version that you want to modify.
4. Click the properties icon:
5. In the Name field, enter a name for the version. You can use version numbers or any meaningful
name. The name can be anything you choose.
6. In the Comment field, you can enter a longer comment that describes in more detail the purpose of
the version of the changes you made. Adding a comment is optional.
7. Click OK.
Dataflow Designer's Guide
41
Designing Dataflows
Related Links
Dataflow Versions on page 40
Exposing a Version
If you have saved multiple versions of a dataflow you can choose which version to expose for execution.
1. In Enterprise Designer, open the dataflow.
2. If the Versions pane is not visible, select View > Versions
3. In the Versions pane, select the version of the dataflow that you want to expose.
4. Select File > Expose/Unexpose and Save
The selected version is now exposed and available for execution. The version with the light bulb next to
it is the version that is exposed, as shown here:
When a dataflow is exposed the light bulb button in the Enterprise Designer tool bar indicates that the
dataflow is exposed as shown here:
The light bulb indicates that the dataflow is exposed even if you are viewing a version other than the
exposed version. If you click the light bulb while viewing an unexposed version it will switch the exposed
version to the version you are currently viewing. If you click the light bulb while viewing the exposed
version, it will unexpose the dataflow.
Related Links
Dataflow Versions on page 40
Design Guidelines for Optimal Performance
Carefully designing your dataflows to optimize performance is the most important thing you can do to
achieve good performance on Spectrum™ Technology Platform. The following guidelines describe
techniques you can use optimize dataflow performance.
Minimize the Number of Stages
Spectrum™ Technology Platform achieves high performance through parallel processing. Whereas many
traditional workflow servers process each step in a workflow serially (meaning the first step processes
all the data and then passes it on to the next step), Spectrum™ Technology Platform processes each
stage asynchronously in its own thread, allowing for parallel processing and high performance execution
of dataflows.
42
Spectrum™ Technology Platform 9.0
Chapter 2: Dataflows
However, it is possible to overthread the processor(s) when executing certain types of dataflows - meaning
that the system spends as much or more time managing threads as doing "real work". We have seen
dataflows with as many as 130 individual stages that perform very poorly on smaller servers with one
or two processors.
So the first consideration in designing dataflows that perform well is to use as many stages as needed,
but no more. Some examples of using more stages than needed are:
• Using multiple conditional routers where one would suffice
• Defining multiple transformer stages instead of combining the transforms in a single stage
Fortunately it is usually possible to redesign these dataflows to remove redundant or unneeded stages
and improve performance.
Reduce Record Length
Since data is being passed between concurrently executing stages, another consideration is the length
of the input records. Generally input with a longer record length will take longer to process than input
with a shorter record length, simply because there is more data to read, write, and sort. Dataflows with
multiple sort operations will particularly benefit from a reduced record length. In the case of very large
record lengths it can be faster to remove the unnecessary fields from the input prior to running the
Spectrum™ Technology Platform job and then append them back to the resulting output file.
Use Sorting Appropriately
Another consideration is to minimize sort operations. Sorting is often more time consuming than other
operations, and can become problematic as the number and size of input records increases. However,
many Spectrum™ Technology Platform stages either require or prefer sorted input data. The Universal
Addressing Module and Enterprise Geocoding Module, for example, perform optimally when the input
is sorted by country and postal code. Stages such as Intraflow Match and Interflow Match require that
the input be sorted by the "group by" field. In some cases you can use an external sort application to
presort the input data and this can be faster than sorting within the Spectrum™ Technology Platform
dataflow.
Related Links
Dataflows on page 19
Optimizing Matching on page 43
Optimizing Candidate Finder on page 45
Optimizing Transforms on page 45
Optimizing Sorting on page 46
Optimizing Table Lookups on page 47
Optimizing Write to DB on page 48
Optimizing Address Validation on page 48
Optimizing Geocoding on page 48
Optimizing Matching
Matching is typically one of the most time-consuming operations in any data quality implementation,
making it important to ensure that matching is operating as efficiently as possible. There is always a
balance between matching results and performance. If every record in a file is compared to every other
record, you can be quite confident that all matches will be identified. However, this approach is
unsustainable as the volume of data grows. For example, given an input file of 1 million records, matching
each record to every other record would require nearly 1 trillion comparisons to evaluate each match
rule.
Given that most records in a file do not match, the general approach to solving this problem is to define
a match key and only compare those records that have the same match key. Proper match key definition
is the most critical variable affecting performance of the matching engine. To define a proper match key,
you must understand how the matching engine processes records and the options that are available.
Dataflow Designer's Guide
43
Designing Dataflows
The default matching method performs an exhaustive comparison of the record in a match queue to
identify the maximum number of matches. Because of this, it is often the most time consuming way to
do matching. Under the default matching method, the first record in the match queue becomes the
suspect record. The next record is compared, and if it matches it is written out as a duplicate. If it does
not match, it is added as a suspect, and the next record is compared to the two active suspects. Consider
the following match queue:
Unique ID
Match Key
1
123A
2
123A
3
123A
4
123A
5
123A
6
123A
7
123A
8
123A
9
123A
10
123A
First, record 2 would be compared to record 1. Assuming it does not match, record 2 would be added
as a suspect. Then record 3 would be compared to records 1 and 2, and so on. If there are no matching
records, the total number of comparisons would be 45. If some records match, the number of comparisons
will be less. For a match queue of a given size N, the maximum number of comparisons will be N×(N-1)÷2.
When the queue size is small this is not noticeable, but as the queue size grows the impact is significant.
For example, a queue size of 100 could result in 4,450 comparisons, and a queue size of 500 could
result in 124,750 comparisons.
Defining an Appropriate Match Key
To define an appropriate match key, consider the following:
• The most important thing to remember is most records do not match. Therefore you want to compare
only records that are likely to match.
• Only records with the same match key will be compared.
• Performance is a key consideration:
• The match key determines the size of the match queue.
• For a given number of records, as the match queue size doubles, execution time doubles.
• A "tight" match key results in better performance. A "tight" match key is one that is specific, containing
more characters from possibly more fields.
• A "loose" match key may result in more matches. A "loose" match key is one that is less specific,
containing fewer characters from possibly fewer fields.
Finding a Balance Between Performance and Match Results
To find a good balance between performance and results, consider the match rule and the density of
the data.
• Consider the match rules:
• Fields requiring an exact match could be included in the match key.
• Build an appropriate key for the match rule. For example, for a phonetic match rule, a phonetic match
key is probably appropriate.
44
Spectrum™ Technology Platform 9.0
Chapter 2: Dataflows
• A match key will often consist of parts of all the fields being matched.
• Be aware of the effects of missing data.
• Consider the density of the data:
• For example, in address matching, the match key would likely be tighter if all the records are in a
single town instead of a national dataset.
• Consider the largest match queue, not just the average. Review the Match Summary report to find
the largest match queue.
• When using transactional match, the same considerations apply to the SELECT statement in Candidate
Finder.
Express Match Key
In a typical file, most of the duplicate records match either exactly or nearly exactly. Defining an express
match key allows the matching engine to perform an initial comparison of the express match keys to
determine that two records are duplicates. This can significantly improve performance by avoiding the
need to evaluate all the field level match rules.
Intraflow Match Methods
The default Intraflow Match match method compares all records having the same match key. For a match
queue size of N, the default method performs anywhere from N−1 to N×(N−1) comparisons. If all records
match, the number of comparisons is N−1. If no records match the number of comparisons is N×(N−1).
Usually the number of comparisons is somewhere in the upper part of this range.
If performance is a priority, consider using the sliding window match method instead of the default method.
The sliding window match method compares each record to the next W records (where W is the window
size). For a given file size N, the sliding window method performs no more than N×W comparisons. This
can lead to better performance, but some matches may be missed.
Related Links
Design Guidelines for Optimal Performance on page 42
Optimizing Candidate Finder
Candidate Finder selects candidate records from a database for comparison by Transactional Match.
Since transactional match compares the suspect record to all of the candidate records returned by
Candidate Finder, the performance of Transactional Match is proportional to the number of comparisons.
However, there are things you can do to improve the performance of Candidate Finder. To maximize
the performance of Candidate Finder, a database administrator, or developer with extensive knowledge
of the database schema and indexes, should tune the SQL SELECT statement in Candidate Finder.
One of the most common performance problems is a query that contains a JOIN that requires a full table
scan. In this case, consider adding an index or using a UNION instead of a JOIN. As a general rule, SQL
queries should be examined and optimized by qualified individuals.
Related Links
Design Guidelines for Optimal Performance on page 42
Optimizing Transforms
The Transformer stage provides a set of predefined operations that can be performed on the input data.
Generally, these predefined transforms execute faster than custom transforms, since they are already
compiled. However, when defining a large number of transforms, a custom transform will frequently
Dataflow Designer's Guide
45
Designing Dataflows
execute faster. For example, to trim a number of fields, the following custom transform will typically
execute faster than nine separate trim transforms.
data['AddressLine1'] = (data['AddressLine1'] != null) ?
data['AddressLine1'].trim() : null;
data['AddressLine2'] = (data['AddressLine2'] != null) ?
data['AddressLine2'].trim() : null;
data['AddressLine3'] = (data['AddressLine3'] != null) ?
data['AddressLine3'].trim() : null;
data['AddressLine4'] = (data['AddressLine4'] != null) ?
data['AddressLine4'].trim() : null;
data['City'] = (data['City'] != null) ? data['City'].trim() : null;
data['StateProvince'] = (data['StateProvince'] != null) ?
data['StateProvince'].trim() : null;
data['PostalCode'] = (data['PostalCode'] != null) ?
data['PostalCode'].trim() : null;
data['LastName'] = (data['LastName'] != null) ? data['LastName'].trim() :
null;
data['FirstName'] = (data['FirstName'] != null) ? data['FirstName'].trim()
: null;
Related Links
Design Guidelines for Optimal Performance on page 42
Optimizing Sorting
Sorting can be one of the most time-consuming operations performed during batch processing, so
performance optimization is important. The Sorter stage, and all other stages that include a sort operation,
contain options that can impact the performance of the sort.
The first one is the number of records to sort in memory. By default, a sort of 10,000 records or less will
be done in memory and a sort of more than 10,000 records will be performed as a disk sort. Typically
an in-memory sort is much faster than a disk sort, so this value should be set high enough so that most
of the sorts will be in-memory sorts and only large sets will be written to disk.
The second option controls the number of temporary files that will be used for a disk sort. Using a larger
number of temporary files can result in better performance; however, the optimal number is highly
dependent on the configuration of the server running Spectrum™ Technology Platform. It may be
advantageous to observe the effect on performance of using more or fewer temporary files. A rule of
thumb for a starting point is:
(Number of records × 2) ÷ In-memory record limit = number of temp files
To specify default settings for the number of records to sort in memory and the number of temporary
files, open the Management Console, then browse to Execution, then Sort Performance:
46
Spectrum™ Technology Platform 9.0
Chapter 2: Dataflows
Related Links
Design Guidelines for Optimal Performance on page 42
Optimizing Table Lookups
For 64-bit systems only, you can choose to load tables used by Advanced Transformer, Open Parser,
and Table Lookup into memory. By default, these tables are read from disk. Loading them into memory
can improve performance. You will need to increase the maximum Java heap space to 4 GB if you want
to load these tables into memory.
To load these tables into memory:
1. Go to server/bin/wrapper.
2. Open the file wrapper.conf in a text editor.
3. Set the property wrapper.java.maxmemory to 4096:
# Maximum Java Heap Size (in MB)
wrapper.java.maxmemory=4096
4. Save and close the file.
5. Go to /server/modules/cdqdb/library.
6. Open the appropriate properties file in a text editor:
• Advanced Transformer tables: tablemanagement-cdq-AdvTransformer.properties
• Open Parser tables: tablemanagement-cdq-OpenParser.properties
• Table Lookup tables: tablemanagement-cdq-Standardization.properties
7. Change the value of the reader.default property to MEMORY:
reader.default=MEMORY
8. Save and close the file.
9. Restart the Spectrum™ Technology Platform server.
Dataflow Designer's Guide
47
Designing Dataflows
Related Links
Design Guidelines for Optimal Performance on page 42
Optimizing Write to DB
By default the Write to DB stage commits after each row is inserted into the table. However, to improve
performance enable the Batch commit option. When this option is enabled, a commit will be done after
the specified number of records. Depending on the database this can significantly improve write
performance.
When selecting a batch size, consider the following:
• Data arrival rate to Write To DB stage: If data is arriving at slower rate than the database can process
then modifying batch size will not improve overall dataflow performance. For example, dataflows with
address validation or geocoding may not benefit from an increased batch size.
• Network traffic: For slow networks, increasing batch size to a medium batch size (1,000 to 10,000)
will result in better performance.
• Database load and/or processing speed: For databases with high processing power, increasing
batch size will improve performance.
• Multiple runtime instances: If you use multiple runtime instances of the Write to DB stage, a large
batch size will consume a lot of memory, so use a small or medium batch size (100 to 10,000).
• 32-bit systems: For 32-bit systems use a small batch size (100 to 1,000).
• Database roll backs: Whenever a statement fails, the complete batch is rolled back. The larger the
batch size, the longer it will take to perform the to rollback.
Related Links
Design Guidelines for Optimal Performance on page 42
Optimizing Address Validation
Validate Address provides the best performance when the input records are sorted by postal code. This
is because of the way the reference data is loaded in memory. Sorted input will sometimes perform
several times faster than unsorted input. Since there will be some records that do not contain data in
the postal code field, the following sort order is recommended:
1.
2.
3.
4.
Country (Only needed when processing records for multiple countries)
PostalCode
StateProvince
City
Related Links
Design Guidelines for Optimal Performance on page 42
Optimizing Geocoding
Geocode US Address and the other country-specific geocoding stages provide the best performance
when the input records are sorted by postal code. This is because of the way the reference data is loaded
in memory. Sorted input will sometimes perform several times faster than unsorted input. Since there
will be some records that do not contain data in the postal code field, the following sort order is
recommended:
1. PostalCode
2. StateProvince
3. City
Related Links
Design Guidelines for Optimal Performance on page 42
48
Spectrum™ Technology Platform 9.0
Chapter 2: Dataflows
Performance Options
Runtime performance options control how individual stages in a dataflow are executed and provide
settings you can use improving the performance of your dataflow. The settings available to you depend
on how your Spectrum™ Technology Platform environment has been configured.
• The Local option is the default setting in which stages run on the local Spectrum™ Technology Platform
server and use one runtime instance. The runtime instances setting can be increased, thereby utilizing
parallel processing and improving performance.
• The Distributed option can be used if your environment has been configured to support distributed
processing, which involves installing a load balancer, message queue software, and multiple Spectrum™
Technology Platform servers. Note that this configuration requires Pitney Bowes Software Professional
Services assistance to set up.
• The Remote option can be used if your environment consists of multiple Spectrum™ Technology
Platform servers but is not configured for distributed processing. This option allows you to have a
stage's processing performed by another server.
Related Links
Dataflows on page 19
Configuring Local Runtime Instances on page 49
Configuring Distributed Processing on page 50
Running a Stage on a Remote Server on page 51
Configuring Local Runtime Instances
Each stage in a dataflow operates asynchronously in its own thread and is independent of any other
stage. This provides for parallel processing of stages in a dataflow, allowing you to utilize more than one
runtime instance for a stage. This is useful in dataflows where some stages process data faster than
others. This can lead to an unbalanced distribution of work among the threads. For example, consider
a dataflow consisting of the following stages:
Depending on the configuration of the stages, it may be that the Validate Address stage processes
records faster than the Geocode US Address stage. If this is the case, at some point during the execution
of the dataflow all the records will have been processed by Validate Address, but Geocode US Address
will still have records to process. In order to improve performance of this dataflow, it is necessary to
improve the performance of the slowest stage - in this case Geocode US Address. One way to do that
is to specify multiple runtime instances of the stage. Setting the number of runtime instances to two, for
example, means that there will be two instances of that stage, each running in its own thread, available
to process records.
Note: Using multiple runtime instances only improves performance when running jobs or when running
service requests with more than one record.
The following procedure describes how to set a stage to use multiple runtime instances.
1. Open the dataflow in Enterprise Designer.
2. Double-click the stage that you want to set to use multiple runtime instances.
3. Click Runtime.
For example, the following shows the Runtime button in the Geocode US Address stage.
Dataflow Designer's Guide
49
Designing Dataflows
Note: Not all stages are capable of using multiple runtime instances. If there is no Runtime button
at the bottom of the stage's window, the stage is not capable of using multiple runtime
instances.
4. Select Local and specify the number of runtime instances that this stage should use.
As a general rule, the number of runtime instances should be at least equal to the number of instances
of the remote component. See the Spectrum™ Technology Platform Administration Guide for
information about remote components. While specifying multiple runtime instances can help improve
performance, setting this value too high can strain your system resources, resulting in decreased
performance.
5. Click OK to close the Runtime Performance window, then click OK to close the stage.
Related Links
Performance Options on page 49
Configuring Distributed Processing
If your Spectrum™ Technology Platform environment has been set up to support distributed processing,
you can configure the processing of subflows to be distributed among several instances of the Spectrum™
Technology Platform server. If you are unsure if your Spectrum™ Technology Platform has been configured
to support distributed processing, contact your administrator.
Note: Before using this option, you must first work with Professional Services to configure a distributed
processing environment. You also must have a properly designed dataflow that contains a
subflow.
1. Open the dataflow in Enterprise Designer.
2. Double-click the subflow that you want to configure to use distributed processing.
3. Enter the number of microflows to be sent to each server.
4. Enter the number of records that should be in each microflow batch.
5. Optional: (Optional) Check Group field name and select the name of the field by which the microflow
batches should be grouped.
50
Spectrum™ Technology Platform 9.0
Chapter 2: Dataflows
If you provide a group field, your batch sizes could be greater than the number you specified in the
Micro flow batch size field because a group will not be split across multiple batches. For example,
if you specify a batch size of 100, but you have 108 records within the same group, that batch will
include 108 records. Similarly, if you specify a batch size of 100, and a new group of 28 records with
the same ID starts at record 80, you will have 108 records in that batch.
Related Links
Performance Options on page 49
Overview of Distributed Processing on page 52
Designing a Dataflow for Distributed Processing on page 53
Running a Stage on a Remote Server
If your system administrator has enabled remote servers in Management Console, you can have stages
in your dataflow execute their processing on a remote server. Using remote servers can improve
performance by spreading dataflow processing among multiple Spectrum™ Technology Platform servers.
Your system administrator may have already designated certain stages to run on a remote server. If a
stage is already routed to a remote server, you will see a red star in the top-left corner of the stage icon
on the canvas in Enterprise Designer.
This procedure describes how to configure remote processing for a stage in a dataflow.
1. Open the dataflow in Enterprise Designer.
2. Double-click the stage you want to route to a remote server.
3. Click Runtime.
The Runtime Performance dialog appears.
4. Click Remote and select the remote server to which you wish to route the process for this stage.
5. Click OK.
Related Links
Performance Options on page 49
Troubleshooting Remote Server Errors on page 51
Troubleshooting Remote Server Errors
This section discusses possible errors you may experience when using remote servers.
Module Not Licensed
The remote server must have a realtime license for the module to execute remote server requests. If
you try to run a job but the remote server does not have a realtime license for the module, you will receive
an error similar to the following:
StageException: No license for stage GetCandidateAddresses on remote server
myremoteserver. A realtime license is required.
Remote Server Not Available
If the remote server is not running or is not reachable for any other reason, the remote services will
become unavailable in Enterprise Designer and Management Console. You will see a yellow hazard
icon in the status bar at the bottom of the screen:
Click this icon to see an error message that describes which remote servers are not available.
In addition, in Enterprise Designer any stages that use a remote stage will be replaced with an icon
showing you the stage is no longer available:
Dataflow Designer's Guide
51
Designing Dataflows
Routing Has Changed
If you delete or undeploy a service that is installed both locally and remotely and has been routed through
a remote server, and then click that service within Management Console, you will see a routing change
indicator (a blinking exclamation point) next to the routing button on the Options tab for that service. This
indicator means the routing has changed for that service.
Related Links
Running a Stage on a Remote Server on page 51
Distributed Processing
Overview of Distributed Processing
If you have a very complex job, or you are processing a very large data set such as one containing
millions of records, you may be able to improve dataflow performance by distributing the processing of
the dataflow to multiple instances of the Spectrum™ Technology Platform server on one or more physical
servers.
To take advantage of distributed processing, Spectrum™ Technology Platform must be installed and
configured to run in a cluster. Contact Pitney Bowes Software for information on a professional services
engagement. Because of the complexity of a clustered configuration, you should not attempt to set up
clustering without consulting professional services.
Once your clustered environment is set up, you can build distributed processing into a dataflow by
creating subflows for the parts of the dataflow that you want to distributed to multiple servers. Spectrum™
Technology Platform manages the distribution of processing automatically after you specify just a few
configuration options for the subflow.
The following diagram illustrates distributed processing:
52
Spectrum™ Technology Platform 9.0
Chapter 2: Dataflows
As records are read into the subflow, the data is grouped into batches. These batches are then written
to the cluster and automatically distributed to the a node in the cluster which processes the batch. This
processing is called a microflow. A subflow may be configured to allow multiple microflows to be processed
simultaneously, potentially improving performance of the dataflow. When the distributed instance is
finished processing a microflow, it sends the output back into the parent dataflow.
The more Spectrum™ Technology Platform nodes you have the more microflows can be processed
simultaneously, allowing you to scale your environment as needed to obtain the performance you require.
Once set up, a clustered environment is easy to maintain since all nodes in the cluster automatically
synchronize their configuration, which means the settings you apply through the Management Console
and the dataflows you design in Enterprise Designer are available to all instances automatically.
Related Links
Dataflows on page 19
Designing a Dataflow for Distributed Processing on page 53
Configuring Distributed Processing on page 50
Designing a Dataflow for Distributed Processing
Distributed processing takes parts of your dataflow and distributes the processing of those parts to a
cluster of Spectrum™ Technology Platform servers. For example, your dataflow may perform geocoding,
and you might want to distribute the geocoding processing among several Spectrum™ Technology
Platform nodes in a cluster to improve performance.
When designing a dataflow to utilize distributed processing, decide which stages of your dataflow you
want to distribute, then create a subflow containing the stages that you want to distribute.
Do not use the following stages in a subflow that will be used for distributed processing:
• Sorter
Dataflow Designer's Guide
53
Designing Dataflows
• Unique ID Generator
• Record Joiner
• Interflow Match
The following sets of stages must be used together in a subflow for distributed processing:
• Matching stages (Intraflow Match and Transactional Match) and consolidation stages (Filter, Best of
Breed and Duplicate Synchronization).
• Aggregator and Splitter
Do not include other subflows within the subflow (nested subflows).
Once you have created your subflow for the portion of the dataflow you want to distribute, add the subflow
to the parent dataflow and connect it to an upstream and downstream stage. Subflows used for distributed
processing may have only one input port.
To enable distributed processing for the subflow, right-click the subflow and select Options. The Runtime
Performance window appears. For information about the distributed processing options, click Help.
The following example shows a dataflow where a subflow named My Distributed Subflow has been
configured to run in distributed mode:
Considerations for Using Matching with Distributed Processing
Note the following if you will be performing matching operations in a subflow used for distributed
processing:
• Sorting must be done in the job and not in the subflow. You must turn sort off in the stage and put the
sort at job level.
• Match Analysis is not supported in a distributed subflow
• Collection numbers will be reused within a microflow batch group
Considerations for Using the Business Steward Module Write Exception Stage with Distributed
Processing
Using a Write Exception stage in a subflow may produce unexpected results. Instead, you should add
this stage to your dataflow at the job level.
Related Links
Dataflows on page 19
Overview of Distributed Processing on page 52
Configuring Distributed Processing on page 50
Runtime Options for Dataflows
Creating Dataflow Runtime Options
You can configure dataflows so that the options of the stages are exposed for configuration when the
dataflow runs. This allows for flexibility since the dataflow can be configured to use different settings
54
Spectrum™ Technology Platform 9.0
Chapter 2: Dataflows
each time it runs. For example, you could choose to allow the casing of the output to be specified at run
time, allowing you to choose the casing when it runs rather than having to have separate dataflows each
with a a different casing setting.
This procedure describes how to configure a dataflow to support runtime options.
1. Create a new job or service or open an existing job, service, or subflow.
2. Click the Dataflow Options icon on the toolbar or click Edit Dataflow > Dataflow Options. The
Dataflow Options dialog box appears.
3. Click Add. The Define Dataflow Options dialog box appears.
4. In the Option name field, specify the name you want to use for this option. This is the option name
that will have to be specified at runtime in order to set this option.
5. In the Label field, you can specify a different label or keep it the same as the option name.
6. Enter a description of the option in the Description field.
7. In the Target field, chose whether you want this option to be applied to all stages in the dataflow or
only certain stages.
Selected stage(s)
Select this option if you want the option to only be applied to the stages you specify.
All stages
Select this option if you want the option to be applied to all stages in the dataflow.
Includes transforms
Select this option if you want the runtime option to be made available to custom
transforms in Transformer stages in the dataflow. If you choose this option you can
access the value specified at runtime in the Groovy script of a custom transform by
using the following syntax:
options.get("optionName")
For example, to access an option named casing, you would include this in your
custom transform script:
options.get("casing")
8. If you chose Selected stage(s) in the Target field, the Map dataflow options to stages table
displays a list of the stages in the dataflow. Select the option that you want to expose as a dataflow
option. You will see the Default value and Legal values fields be completed with data when you
select your first item.
Note: You can select multiple options so that the dataflow option can control multiple stages options.
If you do this, each of the stage options you select must share legal values. For example,
one option has values of Y and N, each of the additional options must have either Y or N in
their set of values, and you can only allow the value in common to be available at runtime.
So, if you select an option with Y and N values, you cannot select an option with the values
of E, T, M, and L, but you could select an option with the values of P, S, and N because both
options share "N" as a value. However, only "N" would be an available value for this option,
not "Y", "P", or "S".
9. If you want to limit the values that can be specified at runtime, edit the options in the Legal values
field by clicking on the icon just to the right of the field.
10. If you want to change the default value, specify a different value int he Default value field.
11. Click OK.
12. Continue adding options as desired.
13. Click OK in the Dataflow Options dialog box when you are done adding options.
The dataflow is now configured to allow options to be specified at runtime. You can now specify the
settings at runtime through the following means:
• For jobs, the options can be specified using a dataflow options property file and job executor's -o
argument.
Dataflow Designer's Guide
55
Running Dataflows
• For services, the options become available as API options.
• For services exposed as web service, the options become available as web service parameters.
• For subflows, the options are inherited by the parent dataflow and exposed through one of the above
means, depending on the parent dataflow type (job, service, or service exposed as a web service).
Related Links
Dataflows on page 19
Modifying Dataflow Options
1. Open the job, service, or subflow.
2. Click the Dataflow Options icon or click Edit > Dataflow Options. The Dataflow Options dialog
box appears.
3. Highlight the option you want to change and click Modify. The Define Dataflow Option dialog box
appears.
4. Make changes as desired and click OK.
Related Links
Dataflows on page 19
Deleting Dataflow Options
1. Open the job, service, or subflow.
2. Click the Dataflow Options icon or click Edit > Dataflow Options. The Dataflow Options dialog
box appears.
3. Highlight the option you want to delete and click Remove.
Related Links
Dataflows on page 19
Running Dataflows
Running a Job in Enterprise Designer
The following procedure describes how to manually run a job in Enterprise Designer.
1. In Enterprise Designer, select File > Open and open the dataflow you want to run.
2. Validate a dataflow prior to running it to ensure that it contains no errors. To validate a dataflow,
select Run > Validate.
3. Select Run > Run current flow.
Related Links
Dataflows on page 19
Running A Job from the Command Line
Before you can run a job from the command line, it must be exposed. To expose a job, open the job in
Enterprise Designer and select File > Expose/Unexpose and Save.
To run a job from the command line, you must install the job executor utility on the system where you
want to run the job. The Job Executor is available from the Spectrum™ Technology Platform Welcome
page on the Spectrum™ Technology Platform server (for example, http://myserver:8080).
The Job Executor usage is:
56
Spectrum™ Technology Platform 9.0
Chapter 2: Dataflows
java -jar jobexecutor.jar [arguments]
For example, this is a basic command line entry with a job name, user name, and password:
java -jar jobexecutor.jar -j Job1 -u Bob1234 -p ""
This example shows the same information as above but with additional arguments.
java -jar jobexecutor.jar -j validateAddressJob1 -u Bob1234 -p "" -h
server.mydomain.com -s 8888 -w -d "%" -i 1 -t 9999
The following table lists the Job Executor arguments.
Property=<Argument>
Description
-?
Prints usage information.
-d=<delimiter>
Sets instance/status delimiter. This appears in synchronous output only.
-e
Use a secure SSL connection for communication with the Spectrum™
Technology Platform server.
-f=<property file>
Specifies a path to a job property file. A job property file contains job
executor arguments. For more information on job property files, see
Creating a Job Property File on page 61.
-h=<host name>
Specifies the name or IP address of the Spectrum™ Technology Platform
server.
-i=<poll interval>
Specifies how often to check for completed jobs, in seconds. This applies
only in synchronous mode.
-j=<job1,job2...>
A comma-separated list of jobs to run. Job names are case-sensitive.
Jobs are started in the order listed.
-n <email list>
Specifies a comma-separated list of additional email addresses for
configured job notifications.
-o=<property file>
Specifies a path to a dataflow options property file. A dataflow options
property file contains options that control how the dataflow processes
data. For example, a dataflow options properties file for a dataflow that
contains an Assign GeoTAX Info stage may look like this:
OutputCasing=U
UseStreetLevelMatching=N
TaxKey=T
Database.GTX=gsl
For more information about dataflow options, see Creating Dataflow
Runtime Options on page 54.
-p=<password>
The password of the user.
-r
Returns a delimited list with the following information about the job
written to standard output:
•
•
•
•
•
Dataflow Designer's Guide
Position 1—Name of job
Position 2—Job process ID
Position 3—Status
Position 4—Start Date/Time (MM/DD/YYYY HH:MM:SS)
Position 5—End Date/Time (MM/DD/YYYY HH:MM:SS)
57
Running Dataflows
Property=<Argument>
Description
•
•
•
•
Position 6—Number of successful records
Position 7—Number of failed records
Position 8—Number of malformed records
Position 9—Currently unused
The information is delimited using the delimiter specified in the -d
argument. For example:
MySimpleJob|4|succeeded|04/09/2010 14:50:47|04/09/2010
14:50:47|100|0|0|
-s=<port>
The socket (port) on which the Spectrum™ Technology Platform server
is running. The default value is 8080.
-t=<timeout>
Sets the timeout (in seconds) for synchronous mode. The default is
3600. The maximum is 2147483. This is a global, aggregate timeout
and represents the maximum time to wait for all spawned jobs to
complete.
-u=<user name>
The login name of the user.
-v
Return verbose output.
-w
Specifies to wait for jobs to complete in a synchronous mode.
<stage
Overrides the input or output file specified in Read from File or Write to
name>=<protocol>:<file File. For more information, see Overriding Input and Output Files at
the Command Line on page 58.
name>
<stage
Overrides the file layout definition specified in Read from File or Write
name>:schema=<protocol>:<schema to File with one defined in a schema file. For more information, see
Overriding the File Format at the Command Line on page 60.
file>
Example Use of Job Executor
The following example shows command line invocation and output:
D:\g1\job-executor>java -jar jobexecutor.jar -u guest -p "" -j
validateAddressJob1 -h g1server.mydomain.com -s 8888 -w -d "%"
-i 1 -t 9999
validateAddressJob1%105%succeeded
In this example, the output indicates that the job named 'validateAddressJob1' ran
(with identifier 105) with no errors. Other possible results include "failed" or "running."
Related Links
Dataflows on page 19
Overriding Input and Output Files at the Command Line on page 58
Overriding the File Format at the Command Line on page 60
Creating a Job Property File on page 61
Creating a Job Property File on page 61
Overriding Input and Output Files at the Command Line
When you run a job at the command line using job executor, you can override the input file specified in
the dataflow's source stage (such as Read from File), as well as the output file specified in the dataflow's
58
Spectrum™ Technology Platform 9.0
Chapter 2: Dataflows
sink stage (such as Write to File). To do this, specify the following at the end of the job executor command
line command:
<stage name>=<protocol>:<file name>
Where:
<stage name>
The stage label shown under the stage's icon in the dataflow in
Enterprise Designer. For example, if the stage were labeled "Read from
File" you would specify Read from File for the stage name.
<protocol>
A communication protocol. One of the following:
file
Use the file protocol if the file is on the same machine as the
Spectrum™ Technology Platform server. For example, on
Windows specify:
"file:C:/myfile.txt"
On Unix or Linux specify:
"file:/testfiles/myfile.txt"
esclient Use the esclient protocol if the file is on the same machine
as Job Executor.
Note: If the client and server are running on the same
machine, you can use either the file or esclient
protocol, but are likely to have get better performance
using the file protocol
ftp
Use the ftp protocol if the file is on an FTP file server. The
file server must be defined in Management Console as a
resource. Use the following format:
ftp:<file server>//<path to file>.
For example,
ftp://FS/testfiles/myfile.txt
Where FS is a file server resource defined in Management
Console.
webhdfs Use the webhdfs protocol if the file is on a Hadoop Distributed
File Server. The HDFS server must be defined in
Management Console as a resource. Use the following
format:
webhdfs:<file server>//<path to file>
For example,
webhdfs:myserver/testfiles/myfile.txt
Where myserver is a file server resource defined in
Management Console.
<file name>
The full path to the file you want to use as input or output.
Note: You must use forward slashes (/) in file paths, not backslashes.
Dataflow Designer's Guide
59
Running Dataflows
Example File Override
The following job executor command would use the file C:/myfile_input.txt as
the input file for the Read from File stage and would use the file
C:/myfile_output.txt as the output file for the Write to File stage.
java -jar jobexecutor.jar -j Job1 -u Bob1234 -p "" "Read from
File"="file:C:/myfile_input.txt" "Write to
File"="file:C:/myfile_output.txt"
Related Links
Running A Job from the Command Line on page 56
Overriding the File Format at the Command Line
When you run a job at the command line using job executor, you can override the file layout (or schema)
of the file specified in the dataflow's Read from File stage and Write to File stage. To do this, specify the
following at the end of the job executor command line command:
<stage name>:schema=<protocol>:<settings file>
Where:
<stage name>
The stage label shown under the stage's icon in the dataflow in
Enterprise Designer. For example, if the stage were labeled "Read from
File" you would specify Read from File for the stage name.
<protocol>
A communication protocol. One of the following:
file
Use the file protocol if the file is on the same machine as the
Spectrum™ Technology Platform server. For example, on
Windows specify:
"file:C:/myfile.txt"
On Unix or Linux specify:
"file:/testfiles/myfile.txt"
esclient Use the esclient protocol if the file is on the same machine
as Job Executor.
Note: If the client and server are running on the same
machine, you can use either the file or esclient
protocol, but are likely to have get better performance
using the file protocol
ftp
Use the ftp protocol if the file is on an FTP file server. The
file server must be defined in Management Console as a
resource. Use the following format:
ftp:<file server>//<path to file>.
For example,
ftp://FS/testfiles/myfile.txt
Where FS is a file server resource defined in Management
Console.
webhdfs Use the webhdfs protocol if the file is on a Hadoop Distributed
File Server. The HDFS server must be defined in
60
Spectrum™ Technology Platform 9.0
Chapter 2: Dataflows
Management Console as a resource. Use the following
format:
webhdfs:<file server>//<path to file>
For example,
webhdfs:myserver/testfiles/myfile.txt
Where myserver is a file server resource defined in
Management Console.
<settings file>
The full path to the settings file that defines the layout you want to use.
Note: You must use forward slashes (/) in file paths, not backslashes.
To create a settings file, define the layout you want in Read from File
or Write to File, then click the Export button to create an XML file that
defines the layout. For more information about the settings file, see The
File Definition Settings File on page 98.
Note: You cannot override a field's data type in a settings file when
using job executor. The value in the <Type> element, which is
a child of the <FieldSchema> element, must match the field's
type specified in the dataflow's Read from File or Write to File
stage.
Example File Format Override
The following job executor command would use the file C:/myschema.xml as the
layout definition for the file read in by the Read from File stage.
java -jar jobexecutor.jar -j Job1 -u Bob1234 -p "" "Read from
File":schema="file:C:/myschema.xml"
Related Links
Running A Job from the Command Line on page 56
Creating a Job Property File
A job property file contains job executor arguments. Use a job property file if you want to reuse arguments
by specifying a single job executor argument (-f) rather than specifying each argument individually at
the command line.
To create a property file, open a text editor and put one argument on each line. Save the file with a file
extension of .properties (for example, "myjob.properties"). The property file must contain, at minimum,
the job (-j) and user ID (-u).
For example:
D=property=true
d=%
h=g1server.mydomain.com
i=30
j=validateAddressJob1
u=user
p=password
s=8888
t=9999
w=true
X=Xmx=1024M
A combination of both command-line entry and property-file entry is also valid. For example:
Dataflow Designer's Guide
61
Running Dataflows
java -jar jobexecutor.jar -f /dcg/job.properties -j job1
In this case command line arguments take precedence over arguments specified in the properties file.
In the above example, the job job1 would take precedence over a job specified in the properties file.
The job property file can contain these arguments:
Property=<Argument>
Description
-?
Prints usage information.
-d=<delimiter>
Sets instance/status delimiter. This appears in synchronous output only.
-e
Use a secure SSL connection for communication with the Spectrum™
Technology Platform server.
-f=<property file>
Specifies a path to a job property file. A job property file contains job
executor arguments. For more information on job property files, see
Creating a Job Property File on page 61.
-h=<host name>
Specifies the name or IP address of the Spectrum™ Technology Platform
server.
-i=<poll interval>
Specifies how often to check for completed jobs, in seconds. This applies
only in synchronous mode.
-j=<job1,job2...>
A comma-separated list of jobs to run. Job names are case-sensitive.
Jobs are started in the order listed.
-n <email list>
Specifies a comma-separated list of additional email addresses for
configured job notifications.
-o=<property file>
Specifies a path to a dataflow options property file. A dataflow options
property file contains options that control how the dataflow processes
data. For example, a dataflow options properties file for a dataflow that
contains an Assign GeoTAX Info stage may look like this:
OutputCasing=U
UseStreetLevelMatching=N
TaxKey=T
Database.GTX=gsl
For more information about dataflow options, see Creating Dataflow
Runtime Options on page 54.
-p=<password>
The password of the user.
-r
Returns a delimited list with the following information about the job
written to standard output:
•
•
•
•
•
•
•
•
•
62
Position 1—Name of job
Position 2—Job process ID
Position 3—Status
Position 4—Start Date/Time (MM/DD/YYYY HH:MM:SS)
Position 5—End Date/Time (MM/DD/YYYY HH:MM:SS)
Position 6—Number of successful records
Position 7—Number of failed records
Position 8—Number of malformed records
Position 9—Currently unused
Spectrum™ Technology Platform 9.0
Chapter 2: Dataflows
Property=<Argument>
Description
The information is delimited using the delimiter specified in the -d
argument. For example:
MySimpleJob|4|succeeded|04/09/2010 14:50:47|04/09/2010
14:50:47|100|0|0|
-s=<port>
The socket (port) on which the Spectrum™ Technology Platform server
is running. The default value is 8080.
-t=<timeout>
Sets the timeout (in seconds) for synchronous mode. The default is
3600. The maximum is 2147483. This is a global, aggregate timeout
and represents the maximum time to wait for all spawned jobs to
complete.
-u=<user name>
The login name of the user.
-v
Return verbose output.
-w
Specifies to wait for jobs to complete in a synchronous mode.
<stage
Overrides the input or output file specified in Read from File or Write to
name>=<protocol>:<file File. For more information, see Overriding Input and Output Files at
the Command Line on page 58.
name>
<stage
Overrides the file layout definition specified in Read from File or Write
name>:schema=<protocol>:<schema to File with one defined in a schema file. For more information, see
Overriding the File Format at the Command Line on page 60.
file>
Related Links
Running A Job from the Command Line on page 56
Running A Job from the Command Line on page 56
Scheduling Jobs and Process Flows
If you have jobs or process flows that you want to run automatically at a specified time, use the
Management Console to set up job and process flow execution schedules.
1. If you have not already done so, expose the job or process flow.
You can expose jobs an process flows by opening the job or process flow in Enterprise Designer
and selecting File > Expose/Unexpose and Save.
2. Open the Management Console.
3. Browse to Execution then click Scheduling.
4. Click Add to create a new schedule or, if you want to modify an existing schedule, choose the
schedule and click Modify.
5. In the Add Task or Modify Task window, choose the settings for this task.
• Task Name—The name you want to give to this scheduled task. This is the name that will be
displayed in the task listing.
• Flow type—Choose the type of process you are scheduling, either a job or a process flow.
• Flow name—Select the job or process flow that you want to schedule. Only jobs and process flows
that are saved and exposed are available here. If the job or process flow that you want is not shown,
open the job or process flow in Enterprise Designer then select File > Expose/Unexpose and
Save.
• Enable task—Check this box to run the job or process flow at the specified time. Clear this box
to suspend the schedule.
• Schedule—Specify the date and time you want the job or process flow to run.
Dataflow Designer's Guide
63
Running Dataflows
6. If the dataflow uses files for input or output, those files must reside on the Spectrum™ Technology
Platform server or on a file server defined as an external resource in Management Console. This
applies both to jobs as well as job activities within a process flow. If a source or sink stage references
a file on a client-only computer, perform one of the following procedures:
Option
Description
Option 1: Modify the
dataflow
Move the file to the Spectrum™ Technology Platform server or file server
then modify the dataflow:
1.
2.
3.
4.
Open the dataflow in Enterprise Designer.
Double-click the source or sink stage.
In the File name field, click the browse button.
Click Remote Machine then select the file you want.
Note: If you are running Enterprise Designer on the same machine
as the Spectrum™ Technology Platform server, it will appear
that clicking Remote Machine is no different than clicking My
Computer. However, you must select the file using Remote
Machine in order for the system to recognize the file as being
on the Spectrum™ Technology Platform server.
Option 2: Override the You can override the file references contained in the flow when this
dataflow file location schedule runs.
when this schedule
1. Click Options.
runs
2. Under Stage file locations select the stage that references a local
file.
3. Click Modify and select the file on the Spectrum™ Technology
Platform server.
7. If you want the job or process flow to run on a recurring schedule, check the Task recurrence check
box then click the Recurrence button and complete the fields.
8. If the dataflow has been configured for email notification, you can specify additional recipients for
the notifications that will be sent when the dataflow runs.
a) Click Options.
b) Under Notification, click Add.
c) Enter the email address you want the notification to be sent to. For example,
me@mycompany.com.
d) Click OK.
Note: Notification must be configured in Management Console in order for email notifications to
work. In addition, verify that the dataflow has been configured to support notification. To do
this, open the dataflow in Enterprise Designer, select Edit > Notifications.
9. Click OK.
Related Links
Dataflows on page 19
Configuring Email Notification for a Dataflow
You can have Spectrum™ Technology Platform notify you of certain conditions that arise during execution.
Follow the steps below to set notifications.
Note: A mail server must be configured in Management Console before you can set up notification for
a dataflow. See the Spectrum™ Technology Platform Administration Guide for more information.
1. With a dataflow or process flow open in Enterprise Designer, select Edit > Notifications.
2. Click Add.
3. In the Send Notification To field, enter the e-mail address to which notifications should be sent.
4. Select the events you want to be notified about.
64
Spectrum™ Technology Platform 9.0
Chapter 2: Dataflows
5. In the Subject field, enter the text you would like to appear in the subject line of the e-mail.
6. In the Message field, enter the text you would like to appear in the body of the e-mail.
You can choose to include information about the job in the email by clicking Click Here to Insert a
Field in the Subject or Message. Some examples of job information are: start time, end time, and
number of records failed.
7. Click Preview if you wish to see what the notification will look like.
8. Click OK. The Notifications dialog box will reappear with the new notification listed.
9. Click OK.
Related Links
Dataflows on page 19
Viewing Execution Status and History
To track the progress of job execution and view execution history:
1. In Enterprise Designer, select View > Execution History.
The Execution History dialog box contains two tabs: Jobs and Process Flows. The Jobs tab is used
to monitor job status and to pause, resume, or cancel jobs that are running as well as delete completed
jobs. Note the following:
• The Succeeded column shows the number of records that have an empty value in the Status field
going to all sinks.
• The Failed column shows the number of records that have a value of F in the Status field going
to all sinks.
• The Malformed column shows the number of records coming out of all source stage error ports.
2. Select the fields you want displayed in the Execution History.
a) Click the icon just to the left of the first column.
b) Select or deselect fields to include in the Execution History. The fields will populate and unpopulate
automatically.
c) Click the "x" in the top-right corner of the box to close the Field Chooser.
3. Group columns as desired. To do this, highlight a column name (such as ID or Name) and drag it up
to the area that says, "Drag a column header here to group by that column."
4. Sort and filter the job list.
a)
b)
c)
d)
Click on the drop-down list next to Show only jobs where to select a variable (such as ID).
Select one of the criterion in the next drop-down (such as "greater than or equal to").
Type in a comparison value (such as zero) in the last box.
Click Refresh to refresh the data.
5. View job details.
The Details screen allows you to view the job definition, which shows the dataflow. It also allows
you to see how a dataflow was built if it is no longer accessible by Enterprise Designer.
a) In the Jobs tab, select a job you wish to view and click Details....
b) If you are looking at a job, click the name of a report under Reports to view its output. You can
save or print reports by clicking the appropriate icon at the top of the right pane.
Related Links
Dataflows on page 19
Pausing a Job
To pause a job, select View > Execution History then click Pause. To continue a paused job, click
Resume.
Related Links
Dataflows on page 19
Dataflow Designer's Guide
65
Running Dataflows
Canceling a Job
To cancel a job that is running, select View > Execution History then click Cancel.
Related Links
Dataflows on page 19
Testing a Service with Interactive Driver
Interactive Driver is a tool for sending test data to a service and viewing the response from the service.
1. Select Start > Programs > Pitney Bowes > Spectrum™ Technology Platform > Client Tools >
Interactive Driver.
2. Click Tools > Options.
3. Click the Run Service Settings tab.
4. In the Maximum number of records to process field, specify the maximum number of records to
process. The maximum entry is 100.
5. If you intend to import the input data from a file, select the input file's field separator in the File field
separator field. If your file includes a different field separator than those listed, click the ... button
and specify the character you want.
6. Click OK.
7. Click the service you want to test.
8. Click the Preview tab.
9. Enter the input data you want to use for your test. To import data from a file, click Import Data.
10. Click Run Preview.
Related Links
Dataflows on page 19
A First Look at Interactive Driver on page 11
66
Spectrum™ Technology Platform 9.0
Subflows
In this section:
•
•
•
•
•
•
•
•
Introduction to Subflows . . . . . . . . . . . . . . . . . . . . . . . . . .68
Using a Subflow as a Source . . . . . . . . . . . . . . . . . . . . . . .68
Using a Subflow in the Middle of a Dataflow . . . . . . . . . .69
Using a Subflow as a Sink . . . . . . . . . . . . . . . . . . . . . . . . .70
Modifying a Subflow . . . . . . . . . . . . . . . . . . . . . . . . . . . . . .71
Deleting a Subflow . . . . . . . . . . . . . . . . . . . . . . . . . . . . . . .71
Exposing and Unexposing a Subflow . . . . . . . . . . . . . . . .72
Converting a Stage to a Subflow . . . . . . . . . . . . . . . . . . . .72
3
Introduction to Subflows
Introduction to Subflows
A subflow is a dataflow that can be reused within other dataflows. Subflows are useful when you want
to create a reusable process that can be easily incorporated into dataflows. For example, you might want
to create a subflow that performs deduplication using certain settings in each stage so that you can use
the same deduplication process in multiple dataflows. To do this you could create a subflow like this:
You could then use this subflow in a dataflow. For example, you could use the deduplication subflow
within a dataflow that performs geocoding so that the data is deduplicated before the geocoding operation:
In this example, data would be read in from a database then passed to the deduplication subflow, where
it would be processed through Match Key Generator, then Intraflow Match, then Best of Breed, and
finally sent out of the subflow and on to the next stage in the parent dataflow, in this case Geocode US
Address. Subflows are represented as a puzzle piece icon in the dataflow, as shown above.
Subflows that are saved and exposed are displayed in the User Defined Stages folder in Enterprise
Designer.
Related Links
Subflows on page 67
User-Defined Stages on page 158
Using a Subflow as a Source
You can use a subflow as the first stage in a dataflow to read data from a source and even perform some
processing on the data before passing it to the parent dataflow. You can create a subflow that is as
simple as a single source stage that is configured in a way that you want to reuse in multiple dataflows,
or you could create a more complex subflow that reads data and then processes it in some way before
passing it to the parent dataflow.
1. In Enterprise Designer, click File > New > Dataflow > Subflow.
2. Drag the appropriate data source from the palette onto the canvas and configure it.
For example, if you want the subflow to read data from a comma-separated file, you would drag a
Read from File stage onto the canvas.
3. If you want the subflow to process the data in some way before sending it to the parent dataflow,
add additional stages as needed to perform the preprocessing you want.
4. At the end of the dataflow, add an Output stage and configure it.
This allows the data from the subflow to be sent to the parent dataflow.
For example, if you created a subflow that reads data from a file then uses a Transformer stage to
trim white space and standardize the casing of a field, you would have a subflow that looks like this:
68
Spectrum™ Technology Platform 9.0
Chapter 3: Subflows
5. Double-click the Output stage and select the fields you want to pass into the parent dataflow.
6. Select File > Save and save the subflow.
7. Select File > Expose to make the subflow available to include in dataflows.
8. In the dataflow where you want to include the subflow, drag the subflow from the palette onto the
canvas.
9. Connect the subflow to the dataflow stage you want.
Note: Since the subflow contains a source stage rather than an Input stage, the subflow icon only
has an output port. It can only be used as a source in the dataflow.
The parent dataflow now uses the subflow you created as input. For example, if you created a subflow
named "Read from File and Transform" and you add the subflow and connect it to a Broadcaster
stage, your dataflow would look like this:
Related Links
Subflows on page 67
Using a Subflow in the Middle of a Dataflow
You can use a subflow in the middle of a dataflow to perform processing that you want to make reusable
in other dataflows. In effect, the subflow becomes a custom stage in your dataflow.
1. In Enterprise Designer, click File > New > Dataflow > Subflow.
2. Drag an Input stage from the palette to the canvas.
This allows data from the parent dataflow to be sent into the subflow.
3. Double-click the Input stage and add the fields that the subflow will receive from the dataflow in which
it is used.
4. After configuring the Input stage, add additional stages as needed to perform the processing that
you want.
5. At the end of the dataflow, add an Output stage.
This allows the data from the subflow to be sent to the parent dataflow.
For example, you might want to create a subflow that performs deduplication using certain settings
in each stage so that you can use the same deduplication process in multiple dataflows. To do this
you could create a subflow like this:
Dataflow Designer's Guide
69
Using a Subflow as a Sink
6. Select File > Save and save the subflow.
7. Select File > Expose to make the subflow available to include in dataflows.
8. In the dataflow where you want to include the subflow, drag the subflow from the palette onto the
canvas.
9. Connect the subflow to the dataflow stage you want.
For example, you could use the deduplication subflow within a dataflow that performs geocoding so
that the data is deduplicated before the geocoding operation:
Related Links
Subflows on page 67
Using a Subflow as a Sink
You can use a subflow as the last stage in a dataflow to write data to a file or database and even perform
some processing on the data before writing the data to the output destination. You can create a subflow
as simple as a single sink stage that is configured in a way that you want to reuse in multiple dataflows,
or you could create a more complex subflow that processes data in some way before writing it to the
output destination.
1. In Enterprise Designer, click File > New > Dataflow > Subflow.
2. Drag an Input stage from the palette to the canvas.
3. Double-click the Input stage and add the fields that the subflow will receive from the dataflow in which
it is used.
4. After configuring the Input stage, add additional stages as needed to perform the post-processing
that you want.
5. At the end of the subflow, add the appropriate sink.
For example, if you created a subflow that uses a Transformer stage to trim white space and
standardize the casing of a field then writes it to a database, you would have a subflow that looks
like this:
6. Select File > Save and save the subflow.
7. Select File > Expose to make the subflow available to include in dataflows.
8. In the dataflow where you want to include the subflow, drag the subflow from the palette onto the
canvas and connect it to the last stage in the dataflow.
Note: Since the subflow contains a sink stage rather than an Output stage, the subflow icon only
has an input port. It can only be used as a sink in the dataflow.
The parent dataflow now uses the subflow you created as a sink. For example, if you created a
subflow named "Transform and Write to DB" and you add the subflow and connect it to a Geocode
US Address stage, your dataflow would look like this:
70
Spectrum™ Technology Platform 9.0
Chapter 3: Subflows
Related Links
Subflows on page 67
Modifying a Subflow
1. Open the subflow in Enterprise Designer.
2. Before modifying the subflow, you may want to consider how the change will impact the dataflows
using the subflow. To see which dataflows are using the subflow, select Tools > Used By.
3. Modify the subflow as needed.
Note the following:
• When you delete an Input or Output stage or add an additional Input or Output stage, Enterprise
Designer displays a warning message reminding you that other dataflows are using the subflow
and giving you the option of seeing which dataflows use the subflow. If you continue saving the
reusable stage, Enterprise Designer will unexpose all dataflows used by the subflow.
• If you change a subflow in another way, such as by changing a file name or the stage configurations,
Enterprise Designer will display a warning message reminding you that other dataflows are using
the subflow and give you the option of seeing which dataflows use the subflow. You can continue
without unexposing those dataflows.
4. When you are done making your changes, select File > Save.
5. Select View > Refresh in order for the changes to be reflected in the parent dataflow.
Note: If you have more than one version of the subflow, remember that the version that is used in
the parent dataflow is the exposed version. When you make a change to a subflow, be sure
to expose the most recent version in order for your changes to take effect in the dataflows
that use the subflow.
Related Links
Subflows on page 67
Deleting a Subflow
If you try to delete an exposed subflow, Enterprise Designer displays a warning message reminding you
that other dataflows are using the subflow you are about to delete. If you continue to delete the subflow,
Enterprise Designer unexposes all connected dataflows.
Related Links
Subflows on page 67
Dataflow Designer's Guide
71
Exposing and Unexposing a Subflow
Exposing and Unexposing a Subflow
In order for a subflow to be available for use within a dataflow the subflow must be exposed. To expose
a subflow, open the subflow in Enterprise Designer and go to File > Expose/Unexpose and Save. This
will make the subflow available for use in other dataflows.
Note: If you have more than one version of the subflow, remember that the version that is used in the
parent dataflow is the exposed version. When you make a change to a subflow, be sure to expose
the most recent version in order for your changes to take effect in the dataflows that use the
subflow.
To unexpose a subflow, open the subflow in Enterprise Designer and select File > Expose/Unexpose
and Save. When you unexpose a subflow, Enterprise Designer displays a warning message reminding
you that other dataflows are using the subflow you are about to alter. If you continue to unexpose the
subflow, Enterprise Designer unexposes all dataflows that use the subflow.
Related Links
Subflows on page 67
Converting a Stage to a Subflow
1. Create a new job, service, or subflow.
2. Add the stage you would like to include in the job, service, or subflow.
3. If you wish to configure the stage at this point, right-click the stage and select Options. Then configure
the stage options as desired and click OK.
4. Right-click the stage you want to convert and select Convert Stage to Subflow. The Save As dialog
box appears.
5. Enter the name you want to give the subflow and click OK, then save the service. The name must
be unique to the system. Three things happen:
• The system creates a new subflow that includes the following:
•
•
•
•
the stage you selected
a dataflow input for each input port on the stage
a dataflow output for each output port on the stage
connections between the stage and its inputs and outputs
• The system replaces your selected stage with the new subflow.
• The system exposes the new subflow. You will see it in the Server Explorer and in the User Defined
Stages section of the toolbox.
After you have created a subflow and used it in other dataflows, you can see what other dataflows are
using the subflow. Open the subflow and go to Tools > Used By. (Alternately, you can right-click the
subflow in Server Explorer and select Used By.) This will show a list of dataflows that use the current
subflow, allowing you to see which dataflows would be affected if you changed the current subflow.
Related Links
Subflows on page 67
72
Spectrum™ Technology Platform 9.0
Process Flows
In this section:
• What is a Process Flow? . . . . . . . . . . . . . . . . . . . . . . . . . .74
• Designing Process Flows . . . . . . . . . . . . . . . . . . . . . . . . .74
• Running a Process Flow . . . . . . . . . . . . . . . . . . . . . . . . . .78
4
What is a Process Flow?
What is a Process Flow?
A process flow executes a series of activities such as Spectrum™ Technology Platform jobs and external
applications. For example, a process flow could run a Spectrum™ Technology Platform job to standardize
names, validate addresses, then invoke an external application to sort the records into the proper
sequence to claim postal discounts. Such a process flow would look like this:
In this example, the jobs StandardizeNames and ValidateAddresses are exposed jobs on the Spectrum™
Technology Platform server. Run Program invokes an external application, and the Success activity
indicates the end of the process flow.
Related Links
Process Flows on page 73
Designing Process Flows
Related Links
Process Flows on page 73
Activities on page 74
Creating Process Flow Variables on page 76
Using Transition Options on page 77
Deleting Process Flows on page 78
Activities
Process flows consist of these activities:
• Run Program
• Jobs
• Success
Related Links
Designing Process Flows on page 74
Run Program on page 74
Jobs on page 75
Success on page 76
Run Program
The Run Program activity executes an external application.
Table 3: Run Program Options
74
Option Name
Description
Program name
The path to the executable you wish to run.
Spectrum™ Technology Platform 9.0
Chapter 4: Process Flows
Option Name
Description
Arguments
Specifies command line arguments to pass to the
program specified in the Program name field.
Separate multiple arguments with spaces. You can
use variables defined on the Variables tab as
arguments by clicking Insert Variable. For more
information on variables, see Creating Process
Flow Variables on page 76.
Time out (in seconds)
Specifies an amount of time to wait for the program
specified in the Program name field to respond. If
the program is unresponsive for the amount of time
specified the process flow will fail.
Environment variables
Specifies environment variable values to use when
running this program. If you specify values here
the program will use these environment variables
instead of those specified on your system.
Otherwise, it will use the environment variables
specified on your system. Note that if the program
you are calling uses multiple environment variables
you must either define values for all of them or none
of them. Specifying values here does not change
the environment variable definitions on your
system.
Click Add and enter the name of the variable in the
Variable Name field. An example might be
"JAVA_HOME". Enter the value of the variable in
the Variable Value field. An example might be
"C:\Program Files\Java\jdk1.6.0_17." Instead of
entering a value you can click Insert Variable to
set it to the value of a variable defined in on the
Variables tab. For instructions on defining variables,
see Creating Process Flow Variables on page
76.
Related Links
Activities on page 74
Jobs
Process flows can execute any exposed job. Exposed jobs are listed in the Activities palette in Enterprise
Designer when you open a process flow. If the job you want is not available, open the job in Enterprise
Designer and select File > Expose.
When you add a job to a process flow, you can double-click the job to access the Options tab and the
Variables tab.
Options Tab
The Options tab allows you to view and override dataflow options that were set for the job you brought
into the process flow. For example, if one of your job's dataflow options is to return the distance from
one point to another in miles (an option with the Get Travel Directions service), you could override that
option here and have your process flow's job activity output returned in kilometers instead. Similarly, if
one of your job's dataflow options is to perform Canadian processing on your input file that contains
addresses (an option with the Validate Address service), represented by "Y" for "yes", you could override
that option here and choose not to perform Canadian processing, represented by "N" for "no". Finally,
Dataflow Designer's Guide
75
Designing Process Flows
if one of your job's dataflow options include returning a maximum of 50 results for a city/state/province
search within a particular postal code (an option with the Get City State Province service), you could
override that option here and choose to return a maximum of 100 results instead.
1. With your process flow open, double-click the Job stage.
2. Click the option you want to override.
3. Click the drop-down and change the option's value accordingly, or enter the new value if values are
not provided. Using the Get Travel Directions example above, you would click the drop-down and
select "Kilometers". Using the Validate Address example, you would click the drop-down and select
"U". Using the Get City State Province example, you would enter "100".
Variables Tab
The Variables tab allows you to specify the files to use for input and output. This is useful if you want to
use a different input or output file than those specified in the job dataflow's input and output stages.
For input select one of the following:
Use file specified in job
Choose this option if you want to use the file specified in the job's
input stage.
Browse for file on the server
Choose this option if you want to specify a path and filename for
the input file to use.
Reference an upstream activity's Choose this option if you want to reference a file whose name and
file
location is defined in an upstream activity's Read from File or Write
to File stage or an upstream activity's variable.
For output select one of the following:
Use file specified in job
Choose this option if you want to use the file specified in the job's
output stage.
Browse for file on the server Choose this option if you want to specify a path and filename for the
output file.
Temporary file managed by
server
Choose this option if you want this variable to reference a temporary
file that will be automatically created and deleted as needed. This
option is useful in cases where a file used only as an intermediate
step in a process flow and is not needed once the process flow
completes.
Related Links
Activities on page 74
Success
A Success activity indicates the end of a process flow. A process flow must have at least one Success
activity.
Related Links
Activities on page 74
Creating Process Flow Variables
Variables are used in Run Program activities to reference input and output files used in upstream activities,
reference a defined file, or reference temporary files. For example, if you have a process flow where the
output file for the first activity is the input for one or more downstream activities, you could easily point
to that file using a variable that points the output file defined in the upstream activity's Write to File stage.
Now you only need to reference the variable when you want to point to that file. If the upstream activity's
Write to File stage is ever modified to point to another file, the variable will still point to the correct file.
76
Spectrum™ Technology Platform 9.0
Chapter 4: Process Flows
Another advantage of variables is that you do not need to know the file path and name of upstream
activities' input and output files to point to them with variables.
1. In a process flow, double-click a Run Program activity.
2. Click the Variables tab.
3. Click the Add button next to the kind of variable you want to create. There are three kinds of variables:
• Inputs—These variables point to files that contain data that you want to use as input to the program
you are calling with Run Program.
• Outputs—These variables refer to files that get written to by the program you are calling with Run
Program.
• Control files—Control file variables reference configuration files used by the program you are
calling with Run Program. For example, if you are calling VeriMove you could specify a VeriMove
control file.
4. In the Name field, give the variable a name.
5. For input and output variables, select an option in the Location field. The options available depend
on if you are creating an input or output variable.
For input variables select one of the following:
• Browse for file on the server—Choose this option if you want to specify a path and filename for
this variable to reference.
• Reference an upstream activity's file—Choose this option if you want to reference a file whose
name and location is defined in an upstream activity's Read from File or Write to File stage or an
upstream activity's variable.
For output variables select one of the following:
• Browse for file on the server—Choose this option if you want to specify a path and filename for
this variable to reference.
• Let the server manage this file—Choose this option if you want this variable to reference a
temporary file that will be automatically created and deleted as needed. This option is useful in
cases where a file used only as an intermediate step in a process flow and is not needed once the
process flow completes.
6. If you are creating a control file for use with an external program such as VeriMove, specify the
contents of the control file in the Contents field. You can use input and output variables in the control
file. To use the control file, specify the control file variable as an argument on the Options tab. Any
variables you specify in the control file are updated with actual values, and the control file is passed
to the program. See the program's documentation for additional information about creating and using
control files.
Related Links
Designing Process Flows on page 74
Using Transition Options
Transition options specify which return codes from the previous activity will trigger a particular outgoing
transition.
1. In a process flow, double-click a transition between two activities of the flow. The Transition Options
dialog box appears.
2. Select the type of transition you wish to add: simple, conditional, or otherwise. If you select Conditional,
include a numeric value. Specify any combination of discrete integer values, open-ended ranges, or
closed-ended ranges.
For example, if the execution of a Run Program activity results in 0, 1, or -1, you would you could
enter 0, 1, or -1 in the Conditional field of a transition after the activity to control the behavior based
on the result code.
Note: Only one "otherwise" transition can exist among the transitions leading from an activity.
3. Click OK.
Dataflow Designer's Guide
77
Running a Process Flow
4. Right-click the activity, point to Input Modes, and select All or First. If you select First, when the first
transition into this activity is taken, this activity will begin and any further transitions are ignored. If
you select All, this activity does not begin until all transitions into this activity are taken.
5. Right-click the activity, point to Output Modes, and select All or First. If you select First, the first
transition that evaluates to true is taken. If you select All, all transitions that evaluate to true are taken.
Related Links
Designing Process Flows on page 74
Deleting Process Flows
1. Go to File > Manage. The Manage dialog box will appear.
2. Right-click on the process flow you want to delete and select Delete.
3. Click OK.
Related Links
Designing Process Flows on page 74
Running a Process Flow
Related Links
Process Flows on page 73
Running a Process Flow in Enterprise Designer on page 78
Running a Process Flow from the Command Line on page 78
Viewing Execution Status and History on page 81
Running a Process Flow in Enterprise Designer
Before running a process flow you can check it for errors by selecting Run > Validate in Enterprise
Designer.
To run a process flow, select Run > Run current flow. The Execution Details dialog box appears.
Click on one of the activities under the Execution Information tree to see the return code for that individual
activity.
Related Links
Running a Process Flow on page 78
Running a Process Flow from the Command Line
Install the Process Flow Executer by downloading it from the Spectrum™ Technology Platform Welcome
page (for example, http://myserver:8080).
The Process Flow Executor usage is:
java -jar pflowexecutor.jar -r <flowname> -u <userID> -p <password>
[OptionalArguments]
The following table lists the Process Flow Executor arguments.
78
Spectrum™ Technology Platform 9.0
Chapter 4: Process Flows
Table 4: Process Flow Executor Arguments
Argument
Description
-?
Prints usage information.
-d <delimiterChar>
Sets an instance/status delimiter. This appears in synchronous output
only and defaults to "|".
-e
Use a secure SSL connection for communication with the Spectrum™
Technology Platform server.
-f
<pathToPropertyFile>
Specifies a path to a property file. For more information on property
files, see Using a Process Flow Property File on page 81.
-h <hostname>
Specifies the name or IP address of the Spectrum™ Technology Platform
server.
-i <pollInterval>
Specifies how often to check for completed jobs, in seconds. The default
is "5".
-p <password>
The password of the user. Required.
-r <pflow1,pflow2...> A comma-separated list of process flows to run. Required.
-s <port>
The socket (port) on which the Spectrum™ Technology Platform server
is running. The default value is 8080.
-t <timeoutInSeconds> Sets the timeout (in seconds) for synchronous mode. The default is
3600).
-u <username>
The login name of the user. Required.
-v
Return verbose output.
-w
Specifies to wait for process flows to complete in a synchronous mode.
stagename=filename
Overrides the input or output file specified in the job. For more
information, see Overriding Read from File and Write to File
Locations on page 80.
Examples
This is a basic command-line entry, with a process flow name and user ID, and
password:
java -jar pflowexecutor.jar -r MyFlow1 -u Bob1234 -p
"mypassword1"
This example shows the same information as above but with additional arguments:
java -jar pflowexecutor.jar -r Flow1 -u Bob1234 -p
"mypassword1" -h g1server.mydomain.com -s 8888 -w -d "%" -i
1 -t 9999
The following example shows command line invocation and output.
D:\g1\pflow-executor>java -jar pflowexecutor.jar -u guest -p
"mypassword1" -r
validateAddressFlow1 -h g1server.mydomain.com -s 8888 -w -d
Dataflow Designer's Guide
79
Running a Process Flow
"%" -i
1 -t 9999
validateAddressJob1%111%succeeded
In this example, the process flow named validateAddressFlow1 ran (with identifier
111). No errors occurred. Other possible results include "failed" or "running."
Overriding Read from File and Write to File Locations
To override the Read from File or Write to File locations, specify the Read from File or Write from File
stage names along with the input or output file as the last arguments like this:
"<jobname>|<stagename>"="<filename>"
Where:
<jobname> is the name of a job referenced in the process flow.
<stagename> is the name of a Read from File or Write to File stage in the job.
<filename> is the full path to the file.
For example:
java -jar pflowexecutor.jar -r Flow1 -u Bob1234 -p "mypassword1" -h
g1server.mydomain.com -s 8888 -w -d "%" -i 1 -t 9999 "Job1|Read from
File"="file:C:/myfile_input.txt" "Job1|Write to
File"="file:C:/myfile_output.txt"
Note: You must use forward slashes (/) in file paths, not backslahes.
The stage name specified in the command line must match the stage label shown under the stage's icon
in the dataflow. For example, if the input stage is labeled "Read From File" you would specify:
"Job1|Read From File"="file:C:/inputfile.txt"
If the input stage is labeled "Illinois Customers" you would specify:
"Job1|Illinois Customers"="file:C:/inputfile.txt"
When overriding a Read from File or Write to File location you need to specify a protocol:
• If the file is on the same machine as the Spectrum™ Technology Platform server, start the path with
the "file:" protocol. For example, on Windows specify "file:C:/myfile.txt" and on Unix or Linux
specify "file:/testfiles/myfile.txt".
• If the file is on the same machine as Process Flow Executor, start the path with the "esclient:" protocol.
For example, on Windows specify "esclient:C:/myfile.txt" and on Unix or Linux specify
"esclient:/testfiles/myfile.txt".
• If the client and server are running on the same machine, you can use either protocol, but are likely
to have get better performance using the "file:" protocol
• To use a file server defined in the Management Console, use the following format: "ftp:<name of
the file server>/<path to file>". For example, ftp://FS/testfiles/myfile.txt
where FS is a file server resource defined in Management Console.
Related Links
Running a Process Flow on page 78
Using a Process Flow Property File on page 81
80
Spectrum™ Technology Platform 9.0
Chapter 4: Process Flows
Using a Process Flow Property File
A property file contains arguments that you can reuse by specifying the path to the property file with the
-f argument in the process flow executor. The property file must contain, at minimum, the process flow
(r), user ID (u), and password (p).
1. Open a text editor.
2. Specify one argument on each line as shown in the following example. See Running a Process
Flow from the Command Line on page 78 for a list of arguments.
D=property=true
d=%
h=myserver.mydomain.com
i=30
u=user
p=password
r=MyFlow1
s=8888
t=9999
w=true
X=Xmx=1024M
3. Save the file with a file extension of .properties (for example, "example.properties").
4. When you run the process flow executor, specify the path to the property file using the -f argument.
A combination of both command-line entry and property-file entry is also valid. Command line
arguments take precedence over arguments specified in the properties file.
java -jar pflowexecutor.jar -f /dcg/flow.properties -r MyFlow2
In the above example, the process flow MyFlow2 would take precedence over a process flow specified
in the properties file.
Related Links
Running a Process Flow from the Command Line on page 78
Viewing Execution Status and History
To track the progress of process flow execution and view execution history, select View > Execution
History in Enterprise Designer. The Execution History dialog box contains two tabs: Jobs and Process
Flows. The Process Flows tab shows information about the process flow as well as status.
To view Activity Status information for the process flow, click the plus sign next to a process flow. The
following information is displayed:
• ActivityName—includes the names of all activities, including any success activities, that make up the
process flow
• State—the status of the activity (failed, succeeded, running, cancelled)
• ReturnCode—any codes that were returned when the activity ran
• Started—the date and time the activity started
• Finished—the date and time the activity ended
• Comment—any comments associated with the activity
To cancel a process flow that is running, select the process flow then click Cancel.
To select which fields you want displayed in the Execution History list, click the icon just to the left of the
first column. The Field Chooser dialog box appears.
You can group types of information together in the Execution History. Simply highlight a column name
(such as ID or Name) and drag it up to the area that says, "Drag a column header here to group by that
column." The information will then be grouped by that type of information.
To sort the process flow list, click the column name. To change the list of process flows shown:
Dataflow Designer's Guide
81
Running a Process Flow
1. Click on the drop-down list under Show only process flows where to select a variable (such as
ProcessID).
2. Select one of the comparisons in the next list.
3. Type in a comparison value (such as zero) in the last box.
4. Click Refresh.
Related Links
Running a Process Flow on page 78
82
Spectrum™ Technology Platform 9.0
Stages Reference
In this section:
•
•
•
•
Sources . . . . . . . . . . . . . . . . . . . . . . . . . . . . . . . . . . . . . . . .84
Control Stages . . . . . . . . . . . . . . . . . . . . . . . . . . . . . . . . .116
Primary Stages . . . . . . . . . . . . . . . . . . . . . . . . . . . . . . . . .158
Sinks . . . . . . . . . . . . . . . . . . . . . . . . . . . . . . . . . . . . . . . . .159
5
Sources
Sources
To define the input for a dataflow, use a "source" stage. A source is the first stage in a dataflow. It defines
the input data you want to process. In a job, input data can come from a file or a database. In a service,
input data comes from the API call made to the server.
Note: When designing a job, it is a good idea to account for the possibility of malformed input records.
A malformed record is one that cannot be parsed using one of the parser classes provided by
Spectrum™ Technology Platform. For information on handling malformed input records, see
Managing Malformed Input Records on page 32.
Related Links
Input on page 84
Read From DB on page 87
Read From File on page 91
Read from Variable Format File on page 102
Read From XML on page 111
Input
The Input stage defines the input fields for a service or subflow. It also defines test data to use during
data inspection.
Defining Input Fields
1. Drag an Input icon on the canvas then double-click it. The Input Options dialog box appears.
2. Select the fields you want to use for input. The list of fields shown depends on the stage that the
Input stage is connected to.
3. To add a new field to the field list, click Add. The Add Custom Field dialog box appears. You can
also modify or delete a custom field.
4. Click Add again.
5. Type the field name in the text box.
6. Select the Data type and press OK. The following data types are supported:
84
bigdecimal
A numeric data type that supports 38 decimal points of precision. Use this data type
for data that will be used in mathematical calculations requiring a high degree of
precision, especially those involving financial or geospatial data. The bigdecimal
data type supports more precise calculations than the double data type.
boolean
A logical type with two values: true and false.
date
A data type that contains a month, day, and year. For example, 2012-01-30 or
January 30, 2012. You can specify a default date format in Management Console.
datetime
A data type that contain a month, day, year, and hours, minutes, and seconds. For
example, 2012/01/30 6:15 PM.
double
A numeric data type that contains both negative and positive double precision
-1074
-52
1023
numbers between 2
and (2-2 )×2
. In E notation, the range of values is
4.9E-324 to 1.7976931348623157E308. For information on E notation, see
en.wikipedia.org/wiki/Scientific_notation#E_notation.
float
A numeric data type that contains both negative and positive single precision numbers
-149
23
127
between 2
and (2-2 )×2 . In E notation, the range of values is 1.4E-45 to
3.4028235E38. For information on E notation, see
en.wikipedia.org/wiki/Scientific_notation#E_notation.
Spectrum™ Technology Platform 9.0
Chapter 5: Stages Reference
integer
A numeric data type that contains both negative and positive whole numbers between
31
31
-2 (-2,147,483,648) and 2 -1 (2,147,483,647).
list
Strictly speaking, a list is not a data type. However, when a field contains hierarchical
data, it is treated as a "list" field. In Spectrum™ Technology Platform a list is a
collection of data consisting of multiple values. For example, a field Names may
contain a list of name values. This may be represented in an XML structure as:
<Names>
<Name>John Smith</Name>
<Name>Ann Fowler</Name>
</Names>
It is important to note that the Spectrum™ Technology Platform list data type different
from the XML schema list data type in that the XML list data type is a simple data
type consisting of multiple values, whereas the Spectrum™ Technology Platform list
data type is similar to an XML complex data type.
long
A numeric data type that contains both negative and positive whole numbers between
63
63
-2 (-9,223,372,036,854,775,808) and 2 -1 (9,223,372,036,854,775,807).
string
A sequence of characters.
time
A data type that contains the time of day. For example, 21:15:59 or 9:15:59 PM.
You can also add a new, user-defined data type if necessary, and that new type can be a list of any
defined data type. For example, you could define a list of names (string), or a new data type of
addresses that includes AddressLine1 (string), City (string), StateProvince(string) and PostalCode
(string). After you create the field, you can view the data type by accessing the Input Options dialog
and pressing the button in the Data Type column. The Data Type Details dialog box will appear,
showing the structure of the field.
7. Press OK again.
8. Click the check box next to Expose to select the check box of all fields in the field list. Selecting a
field in the field list exposes it to the dataflow for stage operations. Click the check box again to clear
the check box for all fields in the list. Clearing the check box of one or more fields in the field list and
clicking OK deletes the field from the field list.
Note: If you define hierarchical data in the input fields, you will not be able to import data or view the
data vertically.
Defining a Web Service Data Type
The Data type name field allows you to control the WSDL (SOAP) and WADL (REST) interfaces for the
service you are creating. The name of the Rows element is determined by the name you give this stage
in the service, and the name of the Row element is determined by the text you enter here.
Note: For WSDL, both requests and responses are affected, but for WADL only responses are affected.
Prior to naming this stage and entering text in this field, your code might look like this:
<Rows>
<Row>
<FirstName>John</FirstName>
<LastName>Doe</LastName>
</Row>
<Row>
<FirstName>Jane</FirstName>
<LastName>Doe></LastName>
</Row>
</Rows>
Dataflow Designer's Guide
85
Sources
After naming this stage and entering text in this field, your code might look like this:
<Names>
<Name>
<FirstName>John</FirstName>
<LastName>Doe</LastName>
</Name>
<Name>
<FirstName>Jane</FirstName>
<LastName>Doe></LastName>
</Name>
</Names>
Defining Inspection Data
To use data inspection you must enter test data by following the steps below.
Note: The Inspection Data tab allows you to specify test input records to use with the Data Inspection
tool. For more information on data inspection, see Inspecting a Dataflow on page 37.
1. Drag an Input icon on the canvas then double-click it. The Input Options dialog box appears.
2. Click the Inspection Input tab.
3. Enter inspection data using one of the following methods:
Note: You can specify a maximum of 50 records. Likewise, certain field types have the restrictions
when using inspection:
Data Type
Description
double and float
Can process numeric data only; supports up to 16 digits and 6 decimal
places. Exponential notation is not supported.
integer and long
Can process numeric data only.
• Manually enter data—If you want to use just a few records for inspection, you can manually type in
the data, one record per line.
• Import data from a file—If you have data in a CSV or TXT file, you can import the data by clicking
Import Data. The data must use one of the following delimiters:
•
•
•
•
\t
|
,
;
• Copy and paste data—You can copy delimited data from another application and paste it into the
inspection data editor.
The Inspection Input tab indicates pass-through data by enclosing the field name in parentheses, as
shown here:
86
Spectrum™ Technology Platform 9.0
Chapter 5: Stages Reference
Related Links
Sources on page 84
Read From DB
The Read From DB stage reads data from a database table or view as input to a dataflow. Read From
DB is available for jobs and subflows but not services.
General Tab
Field Name
Description
Connection
Select the database connection you want to use. Your choices vary
depending on what connections are defined in the Connection Manager
of the Management Console. If you need to make a new database
connection, or modify or delete an existing database connection, click
Manage.
If you are adding or modifying a database connection, complete these
fields:
SQL
Connection name
Enter a name for the connection. This can be
anything you choose.
Database driver
Select the appropriate database type.
Connection options
Specify the host, port, instance, user name,
and password to use to connect to the
database.
In this field, enter the SQL query to identify which records in the database
to read into the dataflow. You can manually type the SQL query or you
can use Visual Query Builder to construct the query by clicking Build
SQL. For more information, see Visual Query Builder on page 88.
To see a sample of the records that match the SQL query, click Preview.
Related Links
Sources on page 84
Dataflow Designer's Guide
87
Sources
Visual Query Builder on page 88
Write to DB on page 162
Write to DB on page 162
Visual Query Builder
Visual Query Builder provides a visual interface for building complex SQL queries in the Read from DB
stage. To work with Visual Query Builder, you need basic knowledge of SQL concepts.
To access Visual Query Builder, click the Build SQL button in Read from DB.
The query builder main window is divided into the following parts:
• The Query Building Area is the main area where the visual representation of query will be displayed.
This area allows you to define source database objects, define links between them and configure
properties of tables and links.
• The Columns Pane is located below the query building area. It is used to perform all necessary
operations with query output columns and expressions. Here you can define field aliases, sorting and
grouping, and define criteria.
• The page control above the query building area will allow you to switch between the main query and
sub-queries.
Related Links
Read From DB on page 87
Adding Objects to a Query on page 88
Setting Object Aliases on page 88
Joining Tables on page 88
Selecting Output Fields on page 89
Sorting a Dataset on page 89
Defining Criteria on page 90
Grouping Output Fields on page 90
Defining SQL Query Properties on page 90
Adding Objects to a Query
To add an object to a query, use the tree that displays the database objects. The objects within the tree
are grouped by database, schema, and type. Browse to the object you want to add, then double-click
the object to add it to the query building area.
Related Links
Visual Query Builder on page 88
Setting Object Aliases
To set an alias for an object or derived table in the query, double-click the object and select Properties.
The Datasource Properties dialog appears. It may contain other server-specific datasource options,
but the Alias property is the same for all database servers.
Related Links
Visual Query Builder on page 88
Joining Tables
When two objects referenced with a foreign key relationship are added to the query, they become joined
automatically with INNER JOIN. For those servers that do not support the JOIN clause, the query builder
adds a condition to the WHERE part of the query.
To join two objects manually, select the field by which you want to link the object with another and drag
it to the corresponding field of the other object. After you finish dragging, a line connecting the linked
fields will appear. Key cardinality symbols are placed at the ends of link when a corresponding relationship
exists in the database.
88
Spectrum™ Technology Platform 9.0
Chapter 5: Stages Reference
To remove a link between objects, double-click the link line and select Remove.
To change the join type, double click the link line.
Related Links
Visual Query Builder on page 88
Selecting Output Fields
To add a field to the list of query output fields, check the box at the left of the field name in the datasource
field list in the Query Building area. To include all the fields of the object, check the box at the left of
the asterisk item in the datasource field list. You may also drag fields from the Query Building area to
the Columns pane to get the same result.
If you do not select any fields from the query datasources, an asterisk item will be added to the select
list of the resulting query ("Select * From ..."). This is because a SELECT query without any columns will
produce an error for most database servers. The asterisk item is removed from the query if you select
any field or add any output expression to the query.
Tip: Another way to add a field is to select a field name from the drop-down list of the Expression
column in the Columns pane. You may also type any valid expression in the Expression column
in the Columns pane. To insert an empty line to the Columns pane, press the Alt+Insert key.
To remove a field from the Columns pane, clear the check box at the left of the field name in the Query
Building area or press the Alt+Delete key in the Columns pane.
To move a line up press the Alt+Up key. To move a line down press the Alt+Down key.
To remove an expression from the SELECT list of the query, clear the check box in the Output column.
To set an alias for an expression, enter the alias in the Alias column. Aliases become the headings of
columns in the resulting dataset.
Related Links
Visual Query Builder on page 88
Sorting a Dataset
To sort the resulting dataset, use the Sort Type and Sort Order columns of the Columns pane. The Sort
Type column allows you to sort in ascending or descending order. The Sort Order column allows you to
set up the order in which fields will be sorted, if more than one field will be sorted.
To disable sorting by a field, clear the Sort Type column for the field.
Dataflow Designer's Guide
89
Sources
Related Links
Visual Query Builder on page 88
Defining Criteria
To define criteria, use the Criteria column and the Or columns of the Columns pane. When writing
conditions in these columns, omit the expression itself. For example, to get the following criteria in your
query:
WHERE
(Field1 >= 10) AND (Field1 <= 20)
Type the following in the Criteria cell of the Field1 expression:
>= 10 AND <= 20
Criteria placed in the Or columns will be grouped by columns using the AND operator and then
concatenated in the WHERE (or HAVING) clause using the OR operator. For example, the criteria shown
below will produce the SQL statement below. Please note that criteria for Field1 is placed both to the
Criteria and Or columns.
WHERE (Field1= 10) AND ((Field2 < 0) OR (Field2 > 10))
Some expressions may be of Boolean type, for example the EXISTS clause. In this case you should
type "= True" in the Criteria column of such expressions or "= False" if you want to place a NOT operator
before the expression.
Related Links
Visual Query Builder on page 88
Grouping Output Fields
To build a query with grouping, mark expressions for grouping with the Grouping check box.
A query with grouping may have only grouping or aggregate expressions in the SELECT list. Thus the
query builder allows you to set the Output check box for grouping and aggregate expressions. If you try
to set this check box for a column without the grouping or aggregate function set, a Grouping check box
will be set automatically to maintain the validity of resulting SQL query.
When the Columns pane contains columns marked with the Grouping check box, a new column called
Criteria for appears in the grid. This column applies criteria to expression groups or to their values.
For example, you have a column "Quantity" with Aggregate function "Avg" in your query and you type
> 10 in the Criteria column. Having the "for groups" value set in the Criteria for column, the resulting
query will contain only groups with an average quantity greater than 10, and your query will have the
"Avg(Quantity) > 10" condition in a HAVING clause. Having the "for values" value set in the Criteria for
column, the result query will calculate the Average aggregate function only for records with Quantity
value greater than 10, and your query will have the "Quantity > 10" condition in WHERE clause.
Related Links
Visual Query Builder on page 88
Defining SQL Query Properties
You can define options specific to your database server by using the context popup menu of the Query
Building area.
90
Spectrum™ Technology Platform 9.0
Chapter 5: Stages Reference
Related Links
Visual Query Builder on page 88
Read From File
The Read from File stage specifies an input file for a job or subflow. It is not available for services.
Note: If you want to use an XML file as input for your dataflow, use the Read from XML stage instead
of Read from File. If you want to use a variable format file as input, use Read from Variable
Format File.
File Properties Tab
Field Name
Description
Server name
Indicates whether the file you select in the File name field is located on
the computer running Enterprise Designer or on the Spectrum™
Technology Platform server. If you select a file on the local computer,
the server name will be My Computer. If you select a file on the server
the server name will be Spectrum™ Technology Platform.
File name
Specifies the path to the file. Click the ellipses button (...) to browse to
the file you want.
Note: If the Spectrum™ Technology Platform server is running on
Unix or Linux, remember that file names and paths on these
platforms are case sensitive.
Record type
Character encoding
Dataflow Designer's Guide
The format of the records in the file. One of the following:
Line
Sequential
A text file in which records are separated by an
end-of-line (EOL) character such as a carriage
return/line feed (CR/LF) and each field has a fixed
starting and ending character position.
Fixed Width
A text file in which each record is a specific number of
characters in length and each field has a fixed starting
and ending character position.
Delimited
A text file in which records are separated by an
end-of-line (EOL) character such as a carriage
return/line feed (CR/LF) and each field is separated by
a designated character such as a comma.
The text file's encoding. One of the following:
UTF-8
Supports all Unicode characters and is
backwards-compatible with ASCII. For more
information on UTF, see
unicode.org/faq/utf_bom.html.
UTF-16
Supports all Unicode characters but is not
backwards-compatible with ASCII. For more
information on UTF, see
unicode.org/faq/utf_bom.html.
US-ASCII
A character encoding based on the order of the
English alphabet.
91
Sources
Field Name
Field separator
Description
UTF-16BE
UTF-16 encoding with big endian byte serialization
(most significant byte first).
UTF-16LE
UTF-16 encoding with little endian byte serialization
(least significant byte first).
ISO-8859-1
An ASCII-based character encoding typically used
for Western European languages. Also known as
Latin-1.
ISO-8859-3
An ASCII-based character encoding typically used
for Southern European languages. Also known as
Latin-3.
ISO-8859-9
An ASCII-based character encoding typically used
for Turkish language. Also known as Latin-5.
CP850
An ASCII code page used to write Western European
languages.
CP500
An EBCDIC code page used to write Western
European languages.
Shift_JIS
A character encoding for the Japanese language.
Specifies the character used to separate fields in a delimited file. For
example, the following record uses a pipe (|) as a field separator:
7200 13TH ST|MIAMI|FL|33144
By default, the following characters are available to define as field
separators:
•
•
•
•
•
•
Space
Tab
Comma
Period
Semicolon
Pipe
If the file uses a different character as a field separator, click the ellipses
button to select another character as a delimiter.
Text qualifier
The character used to surround text values in a delimited file. For
example, the following record uses double quotes (") as a text qualifier.
"7200 13TH ST"|"MIAMI"|"FL"|"33144"
By default, the following characters are available to define as text
qualifiers:
• Single quote (')
• Double quote (")
If the file uses a different text qualifier, click the ellipses button to select
another character as a text qualifier.
Record separator
92
Specifies the character used to separate records in line a sequential or
delimited file. This field is not available if you check the Use default
Spectrum™ Technology Platform 9.0
Chapter 5: Stages Reference
Field Name
Description
EOL check box. By default, the following record separator settings are
available:
Unix (U+000A)
A line feed character separates the records. This
is the standard record separator for Unix
systems.
Macintosh
(U+000D)
A carriage return character separates the
records. This is the standard record separator
for Macintosh systems.
Windows (U+000D A carriage return followed by a line feed
U+000A)
separates the records. This is the standard
record separator for Windows systems.
If your file uses a different record separator, click the ellipses button to
select another character as a record separator.
Use default EOL
Specifies that the file's record separator is the default end of line (EOL)
character(s) used on the operating system on which the Spectrum™
Technology Platform server is running.
Do not select this option if the file uses an EOL character that is different
from the default EOL character used on the server's operating system.
For example, if the file uses a Windows EOL but the server is running
on Linux, do not check this option. Instead, select the Windows option
in the Record separator field.
Record length
For fixed width files, specifies the exact number of characters in each
record.
For line sequential files, specifies the length, in characters, of the longest
record in the file.
First row is header record
Specifies whether the first record in a delimited file contains header
information and not data. For example, the following shows a header
row in the first record.
"AddressLine1"|"City"|"StateProvince"|"PostalCode"
"7200 13TH ST"|"MIAMI"|"FL"|"33144"
"One Global View"|"Troy"|"NY"|12180
Treat records with fewer fields Delimited file records containing fewer fields than are defined on the
than defined as malformed
Fields tab will be treated as malformed.
Import
Imports the file layout definition, encoding setting, and sort options from
a settings file. The settings file is created by exporting settings from
another Read from File or Write to File stage that used the same input
file or a file that has the same layout as the file you are working with.
Export
Saves the file layout definition, encoding setting, and sort options to a
settings file. You can then import these settings into other Read from
File or Write to File stages that use the same input file or a file that has
the same traits as the file you are working with now. You can also use
the settings file with job executor to specify file settings at runtime.
For information about the settings file, see The File Definition Settings
File on page 98.
Dataflow Designer's Guide
93
Sources
Fields Tab
The Fields tab defines the names, positions, and, for fixed width and line sequential files, lengths of fields
in the file. For more information, see the following topics:
Defining Fields In a Delimited Input File on page 94
Defining Fields In a Line Sequential or Fixed Width File on page 96
Sort Fields Tab
The Sort Fields tab defines fields by which to sort the input records before they are sent into the dataflow.
Sorting is optional. For more information, see Sorting Input Records on page 98.
Runtime Tab
Field Name
Description
File name
Displays the file defined on the File Properties tab.
Starting record
If you want to skip records at the beginning of the file when reading
records into the dataflow, specify the first record you want to read. For
example, if you want to skip the first 50 records, in a file, specify 51.
The 51st record will be the first record read into the dataflow.
All records
Select this option if you want to read all records starting from the record
specified in the Starting record field to the end of the file.
Max records
Select this option if you want to only read in a certain number of records
starting from the record specified in the Starting record field. For
example, if you want to read the first 100 records, select this option and
enter 100.
Related Links
Sources on page 84
Defining Fields In a Delimited Input File on page 94
Defining Fields In a Line Sequential or Fixed Width File on page 96
Sorting Input Records on page 98
The File Definition Settings File on page 98
The File Definition Settings File on page 98
Managing Malformed Input Records on page 32
Sorting Input Records on page 98
Defining Fields In a Delimited Input File
In the Read from File stage, the Fields tab defines the names, position, and, for some file types, lengths,
of the fields in the file. After you define an input file on the File Properties tab you can define the fields.
If the input file contains a header record, you can quickly define the fields by clicking Regenerate. Then,
click Detect Type. This will automatically set the data type for each field based on the first 50 records
in the file.
If the input file does not contain a header record, or if you want to manually define the fields, follow these
steps:
1. On the Fields tab, click Add.
2. In the Name field, choose the field you want to add or type the name of the field.
3. In the Type field, you can leave the data type as string if you do not intend to perform any mathematical
or date/time operations with the data. However, if you intend to perform these kinds of operations,
94
Spectrum™ Technology Platform 9.0
Chapter 5: Stages Reference
select an appropriate data type. This will convert the string data from the file to a data type that will
enable the proper manipulation of the data in the dataflow.
Spectrum™ Technology Platform supports the following data types:
bigdecimal
A numeric data type that supports 38 decimal points of precision. Use this data type
for data that will be used in mathematical calculations requiring a high degree of
precision, especially those involving financial or geospatial data. The bigdecimal
data type supports more precise calculations than the double data type.
boolean
A logical type with two values: true and false.
date
A data type that contains a month, day, and year. For example, 2012-01-30 or
January 30, 2012. You can specify a default date format in Management Console.
datetime
A data type that contain a month, day, year, and hours, minutes, and seconds. For
example, 2012/01/30 6:15 PM.
double
A numeric data type that contains both negative and positive double precision
-1074
-52
1023
numbers between 2
and (2-2 )×2
. In E notation, the range of values is
4.9E-324 to 1.7976931348623157E308. For information on E notation, see
en.wikipedia.org/wiki/Scientific_notation#E_notation.
float
A numeric data type that contains both negative and positive single precision numbers
-149
23
127
between 2
and (2-2 )×2 . In E notation, the range of values is 1.4E-45 to
3.4028235E38. For information on E notation, see
en.wikipedia.org/wiki/Scientific_notation#E_notation.
integer
A numeric data type that contains both negative and positive whole numbers between
31
31
-2 (-2,147,483,648) and 2 -1 (2,147,483,647).
list
Strictly speaking, a list is not a data type. However, when a field contains hierarchical
data, it is treated as a "list" field. In Spectrum™ Technology Platform a list is a
collection of data consisting of multiple values. For example, a field Names may
contain a list of name values. This may be represented in an XML structure as:
<Names>
<Name>John Smith</Name>
<Name>Ann Fowler</Name>
</Names>
It is important to note that the Spectrum™ Technology Platform list data type different
from the XML schema list data type in that the XML list data type is a simple data
type consisting of multiple values, whereas the Spectrum™ Technology Platform list
data type is similar to an XML complex data type.
long
A numeric data type that contains both negative and positive whole numbers between
63
63
-2 (-9,223,372,036,854,775,808) and 2 -1 (9,223,372,036,854,775,807).
string
A sequence of characters.
time
A data type that contains the time of day. For example, 21:15:59 or 9:15:59 PM.
4. If you selected a date, time, or numeric data type, you can use the default date/time or number format
or you can specify a different format for this specific field. The default format is either the system
default format that has been set in the type conversion options in Management Console, or it is the
dataflow's default format specified in the type conversion options in Enterprise Designer. The format
that is in effect is displayed. To use the default format, leave Default selected. To specify a different
format, choose Custom and follow these steps:
Note: It is important that you choose a date and time format that accurately reflects the data you
are reading from the file. For example, if the file contains date data in the format
Month/Day/Year but you choose Day/Month/Year, any date calculations you perform in the
dataflow, such as sorting by date, will not reflect the correct date. In addition, records may
fail type conversion, in which case the failure behavior specified in the type conversion options
in Management Console or Enterprise Designer will take effect.
a) In the Locale field, select the country whose formatting convention you want to use. Your selection
will determine the default values in the Format field. For date data, your selection will also
Dataflow Designer's Guide
95
Sources
determine the language used when a month is spelled out. For example, if you specify English
the first month of the year would be "January" but if you specify French it would be "Janvier."
b) In the Format field, select the format for the data. The format depends on the data type of the
field. A list of the most commonly used formats for the selected locale is provided.
An example of the selected format is displayed to the right of the Format field.
You can also specify your own date, time, and number formats if the ones available for selection
do not meet your needs. To specify your own date or time format, type the format into the field
using the notation described in Date and Time Patterns on page 26. To specify your own number
format, type the format into the file using the notation described in Number Patterns on page
28.
5. In the Position field, enter the position of this field within the record.
For example, in this input file, AddressLine1 is in position 1, City is in position 2, StateProvince is in
position 3, and PostalCode is in position 4.
"AddressLine1"|"City"|"StateProvince"|"PostalCode"
"7200 13TH ST"|"MIAMI"|"FL"|"33144"
"One Global View"|"Troy"|"NY"|12180
6. If you want to have any excess space characters removed from the beginning and end of a field's
character string, select the Trim Spaces check box.
7. Click Add.
Related Links
Read From File on page 91
Setting Type Conversion Options for a Dataflow on page 25
Defining Fields In a Line Sequential or Fixed Width File
In the Read from File stage, the Fields tab defines the names, position, and, for some file types, lengths,
of the fields in the file. After you define an input file on the File Properties tab you can define the fields.
1. On the Fields tab, under Preview, click at the beginning of a field and drag to the left so that the
desired field is highlighted, as shown here:
2. In the Name field, enter the field you want to add.
3. In the Type field, you can leave the data type as string if you do not intend to perform any mathematical
or date/time operations with the data. However, if you intend to perform these kinds of operations,
select an appropriate data type. This will convert the string data from the file to a data type that will
enable the proper manipulation of the data in the dataflow.
Spectrum™ Technology Platform supports the following data types:
96
bigdecimal
A numeric data type that supports 38 decimal points of precision. Use this data type
for data that will be used in mathematical calculations requiring a high degree of
precision, especially those involving financial or geospatial data. The bigdecimal
data type supports more precise calculations than the double data type.
boolean
A logical type with two values: true and false.
date
A data type that contains a month, day, and year. For example, 2012-01-30 or
January 30, 2012. You can specify a default date format in Management Console.
Spectrum™ Technology Platform 9.0
Chapter 5: Stages Reference
datetime
A data type that contain a month, day, year, and hours, minutes, and seconds. For
example, 2012/01/30 6:15 PM.
double
A numeric data type that contains both negative and positive double precision
-1074
-52
1023
numbers between 2
and (2-2 )×2
. In E notation, the range of values is
4.9E-324 to 1.7976931348623157E308. For information on E notation, see
en.wikipedia.org/wiki/Scientific_notation#E_notation.
float
A numeric data type that contains both negative and positive single precision numbers
-149
23
127
between 2
and (2-2 )×2 . In E notation, the range of values is 1.4E-45 to
3.4028235E38. For information on E notation, see
en.wikipedia.org/wiki/Scientific_notation#E_notation.
integer
A numeric data type that contains both negative and positive whole numbers between
31
31
-2 (-2,147,483,648) and 2 -1 (2,147,483,647).
list
Strictly speaking, a list is not a data type. However, when a field contains hierarchical
data, it is treated as a "list" field. In Spectrum™ Technology Platform a list is a
collection of data consisting of multiple values. For example, a field Names may
contain a list of name values. This may be represented in an XML structure as:
<Names>
<Name>John Smith</Name>
<Name>Ann Fowler</Name>
</Names>
It is important to note that the Spectrum™ Technology Platform list data type different
from the XML schema list data type in that the XML list data type is a simple data
type consisting of multiple values, whereas the Spectrum™ Technology Platform list
data type is similar to an XML complex data type.
long
A numeric data type that contains both negative and positive whole numbers between
63
63
-2 (-9,223,372,036,854,775,808) and 2 -1 (9,223,372,036,854,775,807).
string
A sequence of characters.
time
A data type that contains the time of day. For example, 21:15:59 or 9:15:59 PM.
4. If you selected a date, time, or numeric data type, you can use the default date/time or number format
or you can specify a different format for this specific field. The default format is either the system
default format that has been set in the type conversion options in Management Console, or it is the
dataflow's default format specified in the type conversion options in Enterprise Designer. The format
that is in effect is displayed. To use the default format, leave Default selected. To specify a different
format, choose Custom and follow these steps:
Note: It is important that you choose a date and time format that accurately reflects the data you
are reading from the file. For example, if the file contains date data in the format
Month/Day/Year but you choose Day/Month/Year, any date calculations you perform in the
dataflow, such as sorting by date, will not reflect the correct date. In addition, records may
fail type conversion, in which case the failure behavior specified in the type conversion options
in Management Console or Enterprise Designer will take effect.
a) In the Locale field, select the country whose formatting convention you want to use. Your selection
will determine the default values in the Format field. For date data, your selection will also
determine the language used when a month is spelled out. For example, if you specify English
the first month of the year would be "January" but if you specify French it would be "Janvier."
b) In the Format field, select the format for the data. The format depends on the data type of the
field. A list of the most commonly used formats for the selected locale is provided.
An example of the selected format is displayed to the right of the Format field.
You can also specify your own date, time, and number formats if the ones available for selection
do not meet your needs. To specify your own date or time format, type the format into the field
using the notation described in Date and Time Patterns on page 26. To specify your own number
format, type the format into the file using the notation described in Number Patterns on page
28.
Dataflow Designer's Guide
97
Sources
5. The Start Position and Length fields are automatically filled in based on the selection you made in
the file preview.
6. If you want to have any excess space characters removed from the beginning and end of a field's
character string, select the Trim Spaces check box.
7. Click OK.
Related Links
Read From File on page 91
Sorting Input Records
In the Read from File stage, the Sort Fields tab defines fields by which to sort the input records before
they are sent into the dataflow. Sorting is optional.
1. In Read from File, click the Sort Fields tab.
2. Click Add.
3. Click the drop-down arrow in the Field Name column and select the field you want to sort by. The
fields available for selection depend on the fields defined in this input file.
4. In the Order column, select Ascending or Descending.
5. Repeat until you have added all the input fields you wish to use for sorting. Change the order of the
sort by highlighting the row for the field you wish to move and clicking Up or Down.
6. Default sort performance options for your system are set in the Management Console. If you want
to override your system's default sort performance options, click Advanced. The Advanced Options
dialog box contains the following sort performance options:
In memory record limit
Specifies the maximum number of data rows a sorter will hold in
memory before it starts paging to disk. Be careful in environments
where there are jobs running concurrently because increasing the
In memory record limit setting increases the likelihood of running
out of memory.
Maximum number of
temporary files to use
Specifies the maximum number of temporary files that may be used
by a sort process.
Enable compression
Specifies that temporary files are compressed when they are written
to disk.
Note: The optimal sort performance settings depends on your server's hardware configuration.
Nevertheless, the following equation generally produces good sort performance:
(InMemoryRecordLimit × MaxNumberOfTempFiles ÷ 2) >=
TotalNumberOfRecords
Related Links
Read From File on page 91
Managing Malformed Input Records on page 32
Read From File on page 91
The File Definition Settings File on page 98
The File Definition Settings File
A file definition settings file contains the file layout, encoding, and sort options that have been exported
from a Read from File or Write to File stage. The file definitions settings file can be imported into Read
from File or Write to File to quickly set the stage's options instead of manually specifying the options.
The easiest way to create a file definition settings file is to use specify the file settings using Read from
File or Write to File, then click the Export button to generate the file definitions settings file.
However, for your information the schema of the file definition settings file is shown below. Each element
in the XML file has a type, and if that type is anything other than string or integer, the acceptable values
are shown. These values correspond directly to options in the stage's dialog box. For example, the
98
Spectrum™ Technology Platform 9.0
Chapter 5: Stages Reference
FileTypeEnum element corresponds to the Record Type field on the File Properties tab, and the following
three values are shown in the schema: linesequential, fixedwidth, and delimited.
Note: If you enter "custom" for the LineSeparator, FieldSeparator or TextQualifier fields, a corresponding
custom element must also be included (for example, "CustomLineSeparator",
"CustomFieldSeparator", or "CustomTextQualifier") with a hexadecimal number representing the
character, or sequence of characters, to use.
<?xml version="1.0" encoding="utf-8"?>
<xs:schema elementFormDefault="qualified"
xmlns:xs="http://www.w3.org/2001/XMLSchema">
<xs:element name="FileSchema" nillable="true" type="FileSchema"/>
<xs:complexType name="FileSchema">
<xs:sequence>
<xs:element
minOccurs="0"
maxOccurs="1"
default="linesequential"
name="Type"
type="FileTypeEnum"/>
<xs:element
minOccurs="0"
maxOccurs="1"
default="UTF-8" name="Encoding" type="xs:string"/>
<xs:element
minOccurs="0"
maxOccurs="1"
name="RecordLength"
type="xs:int"/>
<xs:element
minOccurs="0"
maxOccurs="1"
default="default"
name="LineSeparator"
type="LineSeparatorEnum"/>
<xs:element
minOccurs="0"
maxOccurs="1"
name="CustomLineSeparator"
type="xs:string"/>
<xs:element
minOccurs="0"
maxOccurs="1"
default="comma"
name="FieldSeparator"
type="FieldSeparatorEnum"/>
<xs:element
minOccurs="0"
maxOccurs="1"
name="CustomFieldSeparator"
type="xs:string"/>
<xs:element
minOccurs="0"
maxOccurs="1"
default="none"
name="TextQualifier"
type="TextQualifierEnum"/>
<xs:element
minOccurs="0"
maxOccurs="1"
name="CustomTextQualifier"
type="xs:string"/>
<xs:element
minOccurs="0"
maxOccurs="1"
default="false"
name="HasHeader"
type="xs:boolean"/>
<xs:element
Dataflow Designer's Guide
99
Sources
minOccurs="0"
maxOccurs="1"
default="true"
name="EnforceColumnCount"
type="xs:boolean"/>
<xs:element
minOccurs="0"
maxOccurs="1"
name="Fields"
type="ArrayOfFieldSchema"/>
</xs:sequence>
</xs:complexType>
<xs:simpleType name="FileTypeEnum">
<xs:restriction base="xs:string">
<xs:enumeration value="linesequential"/>
<xs:enumeration value="fixedwidth"/>
<xs:enumeration value="delimited"/>
</xs:restriction>
</xs:simpleType>
<xs:simpleType name="LineSeparatorEnum">
<xs:restriction base="xs:string">
<xs:enumeration value="default"/>
<xs:enumeration value="windows"/>
<xs:enumeration value="unix"/>
<xs:enumeration value="mac"/>
<xs:enumeration value="custom"/>
</xs:restriction>
</xs:simpleType>
<xs:simpleType name="FieldSeparatorEnum">
<xs:restriction base="xs:string">
<xs:enumeration value="comma"/>
<xs:enumeration value="tab"/>
<xs:enumeration value="space"/>
<xs:enumeration value="semicolon"/>
<xs:enumeration value="period"/>
<xs:enumeration value="pipe"/>
<xs:enumeration value="custom"/>
</xs:restriction>
</xs:simpleType>
<xs:simpleType name="TextQualifierEnum">
<xs:restriction base="xs:string">
<xs:enumeration value="none"/>
<xs:enumeration value="single"/>
<xs:enumeration value="double"/>
<xs:enumeration value="custom"/>
</xs:restriction>
</xs:simpleType>
<xs:complexType name="ArrayOfFieldSchema">
<xs:sequence>
<xs:element
minOccurs="0"
maxOccurs="unbounded"
name="Field"
nillable="true"
type="FieldSchema"/>
</xs:sequence>
</xs:complexType>
<xs:complexType name="FieldSchema">
<xs:sequence>
<xs:element
minOccurs="0"
maxOccurs="1"
name="Name"
type="xs:string"/>
<xs:element
minOccurs="0"
maxOccurs="1"
default="string"
name="Type"
type="xs:string"/>
<xs:element
100
Spectrum™ Technology Platform 9.0
Chapter 5: Stages Reference
minOccurs="1"
maxOccurs="1"
name="Position"
type="xs:int"/>
<xs:element
minOccurs="0"
maxOccurs="1"
name="Length"
type="xs:int"/>
<xs:element
minOccurs="0"
maxOccurs="1"
default="false"
name="Trim"
type="xs:boolean"/>
<xs:element
minOccurs="0"
maxOccurs="1"
name="Locale"
type="Locale"/>
<xs:element
minOccurs="0"
maxOccurs="1"
name="Pattern"
type="xs:string"/>
<xs:element
minOccurs="0"
maxOccurs="1"
default="none"
name="Order"
type="SortOrderEnum"/>
</xs:sequence>
</xs:complexType>
<xs:complexType name="Locale">
<xs:sequence>
<xs:element
minOccurs="0"
maxOccurs="1"
name="Country"
type="xs:string"/>
<xs:element
minOccurs="0"
maxOccurs="1"
name="Language"
type="xs:string"/>
<xs:element
minOccurs="0"
maxOccurs="1"
name="Variant"
type="xs:string"/>
</xs:sequence>
</xs:complexType>
<xs:simpleType name="SortOrderEnum">
<xs:restriction base="xs:string">
<xs:enumeration value="none"/>
<xs:enumeration value="ascending"/>
<xs:enumeration value="descending"/>
</xs:restriction>
</xs:simpleType>
</xs:schema>
Related Links
Read From File on page 91
Write to File on page 166
Read From File on page 91
Managing Malformed Input Records on page 32
Sorting Input Records on page 98
Dataflow Designer's Guide
101
Sources
Read from Variable Format File
Read from Variable Format File reads data from a file containing records of varying layout. Each record
is read in as a list field. You can specify the tag that indicates the parent record type, and all other record
types will become list fields under the parent.
Variable format files have these characteristics:
• Records in the file may have different fields, and different numbers of fields.
• Each record must contain a tag (usually a number) identifying the type of record.
• Hierarchical relationships are supported.
Example of a Variable Format File
The following example shows a variable format file containing information about
checking account activity for two customers, Joe Smith and Anne Johnson. In this
example, the file is a delimited file that uses a comma as the field delimiter.
001
100
200
001
100
200
200
Joe,Smith,M,100 Main St,555-234-1290
CHK12904567,12/2/2007,6/1/2012,CHK
1000567,1/5/2012,Fashion Shoes,323.12
Anne,Johnson,F,1202 Lake St,555-222-4932
CHK238193875,1/21/2001,4/12/2012,CHK
1000232,3/5/2012,Blue Goose Grocery,132.11
1000232,3/8/2012,Trailway Bikes,540.00
The first field in each record contains the tag which identifies the type of record and
therefore the record's format:
• 001: Customer record
• 100: Account record
• 200: Account transaction record
For delimited files it is common for the tag value (001, 100, 200) to be in a fixed number
of bytes at the start of the record as shown in the above example.
Each record has its own format:
• 001: FirstName,LastName,Gender,Address,PhoneNumber
• 100: AccountID,DateOpened,ExpirationDate,TypeOfAccount
• 200: TransactionID,DateOfTransaction,Vendor,Amount
Record format 100 (account record) is a child of the previous 001 record, and record
format 200 (account transaction record) is a child of the previous record 100 (account
record). So in the example file, Joe Smith's account CHK12904567 had a transaction
on 1/5/2012 in the amount of 323.12 at Fashion Shoes. Likewise, Anne Johnson's
account CHK238193875 had two transactions, one on 3/5/2012 at Blue Goose Grocery
and one on 3/8/2012 at Trailway Bikes.
File Properties Tab
102
Option Name
Description
Server name
Indicates whether the file you select in the File name field is located on
the computer running Enterprise Designer or on the Spectrum™
Technology Platform server. If you select a file on the local computer,
the server name will be My Computer. If you select a file on the server
the server name will be Spectrum™ Technology Platform.
Spectrum™ Technology Platform 9.0
Chapter 5: Stages Reference
Option Name
Description
File name
Specifies the path to the file. Click the ellipses button (...) to browse to
the file you want.
Note: If the Spectrum™ Technology Platform server is running on
Unix or Linux, remember that file names and paths on these
platforms are case sensitive.
Record type
Character encoding
Dataflow Designer's Guide
The format of the records in the file. One of the following:
Line
Sequential
A text file in which records are separated by an
end-of-line (EOL) character such as a carriage
return/line feed (CR/LF) and each field has a fixed
starting and ending character position.
Fixed Width
A text file in which each record is a specific number of
characters in length and each field has a fixed starting
and ending character position.
Delimited
A text file in which records are separated by an
end-of-line (EOL) character such as a carriage
return/line feed (CR/LF) and each field is separated by
a designated character such as a comma.
The text file's encoding. One of the following:
UTF-8
Supports all Unicode characters and is
backwards-compatible with ASCII. For more
information on UTF, see
unicode.org/faq/utf_bom.html.
UTF-16
Supports all Unicode characters but is not
backwards-compatible with ASCII. For more
information on UTF, see
unicode.org/faq/utf_bom.html.
US-ASCII
A character encoding based on the order of the
English alphabet.
UTF-16BE
UTF-16 encoding with big endian byte serialization
(most significant byte first).
UTF-16LE
UTF-16 encoding with little endian byte serialization
(least significant byte first).
ISO-8859-1
An ASCII-based character encoding typically used
for Western European languages. Also known as
Latin-1.
ISO-8859-3
An ASCII-based character encoding typically used
for Southern European languages. Also known as
Latin-3.
ISO-8859-9
An ASCII-based character encoding typically used
for Turkish language. Also known as Latin-5.
CP850
An ASCII code page used to write Western European
languages.
CP500
An EBCDIC code page used to write Western
European languages.
103
Sources
Option Name
Description
Shift_JIS
A character encoding for the Japanese language.
Record length
For fixed width files, specifies the exact number of characters in each
record.
Field separator
Specifies the character used to separate fields in a delimited file. For
example, the following record uses a pipe (|) as a field separator:
7200 13TH ST|MIAMI|FL|33144
By default, the following characters are available to define as field
separators:
•
•
•
•
•
•
Space
Tab
Comma
Period
Semicolon
Pipe
If the file uses a different character as a field separator, click the ellipses
button to select another character as a delimiter.
Text qualifier
The character used to surround text values in a delimited file. For
example, the following record uses double quotes (") as a text qualifier.
"7200 13TH ST"|"MIAMI"|"FL"|"33144"
By default, the following characters are available to define as text
qualifiers:
• Single quote (')
• Double quote (")
If the file uses a different text qualifier, click the ellipses button to select
another character as a text qualifier.
Record separator
Specifies the character used to separate records in line a sequential or
delimited file. This field is not available if you check the Use default
EOL check box. By default, the following record separator settings are
available:
Unix (U+000A)
A line feed character separates the records. This
is the standard record separator for Unix
systems.
Macintosh
(U+000D)
A carriage return character separates the
records. This is the standard record separator
for Macintosh systems.
Windows (U+000D A carriage return followed by a line feed
U+000A)
separates the records. This is the standard
record separator for Windows systems.
If your file uses a different record separator, click the ellipses button to
select another character as a record separator.
104
Spectrum™ Technology Platform 9.0
Chapter 5: Stages Reference
Option Name
Description
Root tag name
The tag to use for records that are a parent of other record types. For
example if you have three record types 001, 100, and 200, and record
types 100 and 200 are children of record type 001, then 001 is the root
tag.
Use fixed-width tags
Specifies whether to allocate a fixed amount of space at the beginning
of each record in which to place the record tag. For example, the
following shows a file with the tags 001, 100, and 200 in a fixed-width
field:
001
100
200
Joe,Smith,M,100 Main St,555-234-1290
CHK12904567,12/2/2007,6/1/2012,CHK
1000567,1/5/2012,Mike's Shoes,323.12
Tag start position
If you check the Use fixed-width tags box, this option specifies the
position in each record where the tag begins. For example, if the tag
begins in the fourth character in the record, you would specify 4.
Tag width
If you check the Use fixed-width tags box, this option specifies the
number of spaces to allocate for tags starting from the position specified
in the Tag start position field. For example, if you specify 3 in the Tag
start position field and you specify 7 in the Tag width field, then
positions 4 though 10 would be considered the record tag. The value
you specify must be large enough to include all the characters of the
longest tag name.
The value in the Tag width field is automatically increased if you
lengthen the tag name in the Root tag name field.
The maximum tag width is 1024.
Use default EOL
Specifies that the file's record separator is the default end of line (EOL)
character(s) used on the operating system on which the Spectrum™
Technology Platform server is running.
Do not select this option if the file uses an EOL character that is different
from the default EOL character used on the server's operating system.
For example, if the file uses a Windows EOL but the server is running
on Linux, do not check this option. Instead, select the Windows option
in the Record separator field.
Treat records with fewer fields If you enable this option, child records that contain fewer fields than a
than defined as malformed
complete record are considered malformed. When a malformed record
is encountered, processing advances to the next root tag, ignoring all
child tags in between. An exception is written to the log containing
information about the malformed child records along with a line number.
Note: Records are always considered malformed in the following
situations, regardless of whether you enable this option.
•
•
•
•
Dataflow Designer's Guide
The tag is unknown
The line is empty
There is a tag with no data
A record with a tag that is a child of another tag appears
immediately after a record with a root tag
105
Sources
Fields Tab
The Fields tab specifies the characteristics of each field read in from the file.
Defining Fields in Delimited Variable Format Files on page 106
Defining Fields in a Line Sequential or Fixed Width Variable Format File on page 108
Runtime Tab
Field Name
Description
File name
Displays the file defined on the File Properties tab.
Starting record
If you want to skip records at the beginning of the file when reading
records into the dataflow, specify the first record you want to read. For
example, if you want to skip the first 50 records, in a file, specify 51.
The 51st record will be the first record read into the dataflow.
All records
Select this option if you want to read all records starting from the record
specified in the Starting record field to the end of the file.
Max records
Select this option if you want to only read in a certain number of records
starting from the record specified in the Starting record field. For
example, if you want to read the first 100 records, select this option and
enter 100.
Related Links
Sources on page 84
Defining Fields in Delimited Variable Format Files on page 106
Defining Fields in a Line Sequential or Fixed Width Variable Format File on page 108
Flattening Variable Format Data on page 110
Defining Fields in Delimited Variable Format Files
This procedure describes how to define fields in the Read from Variable Format File stage for delimited
files.
1. In the Read from Variable Format File stage, click the Fields tab.
2. Click Regenerate.
A list of all the fields for each record type is displayed. For each field the following information is
displayed:
Parent
The tag from the input file indicating the record type in which the field appears. If the
tag begins with a number, the tag is prefixed with "NumericTag_". For example, a
tag named 100 would become NumericTag_100. The prefix is necessary because
dataflow field names cannot begin with a number.
Field
The name that will be used in the dataflow for the field. By default, fields are given
names in the format <Tag Name>_<Column n>. For example, the first field of record
type Owner would be Owner_Column1, the second would be Owner_Column2, and
so on.
Type
The field's data type.
Note: The first 50 records are used to generate the fields list. The input file must contain at least
two root tags in order to generate a fields list.
3. If you want to modify the parent/child relationships between the tags:
a) Click Modify Tag Hierarchy.
b) Click and drag the tags to define the tag hierarchy you want.
106
Spectrum™ Technology Platform 9.0
Chapter 5: Stages Reference
c) Click OK.
4. If you want to modify the a field's name or data type, select the field and click Modify.
5. In the Name field, choose the field you want to add or type the name of the field.
Typically you will want to replace the default names with meaningful names to represent the data in
the field. For example, consider this input data:
001
Joe,Smith,M,100 Main St,555-234-1290
This record has a parent tag of 001 and would have these fields created by default:
NumericTag_001_Column1: Joe
NumericTag_001_Column2: Smith
NumericTag_001_Column3: M
NumericTag_001_Column4: 100 Main St
NumericTag_001_Column5: 555-234-1290
You would probably want to rename the fields so that the names describe the data. For example:
FirstName: Joe
LastName: Smith
Gender: M
AddressLine1: 100 Main St
PhoneNumber: 555-234-1290
Note: You cannot rename list fields. List fields, which contain all the fields for a given record type,
always use the tag name from the input file as the field name.
6. To change a field's data type, select the data type you want in the Type field.
The following data types are available:
bigdecimal
A numeric data type that supports 38 decimal points of precision. Use this data type
for data that will be used in mathematical calculations requiring a high degree of
precision, especially those involving financial or geospatial data. The bigdecimal
data type supports more precise calculations than the double data type.
boolean
A logical type with two values: true and false.
date
A data type that contains a month, day, and year. For example, 2012-01-30 or
January 30, 2012. You can specify a default date format in Management Console.
datetime
A data type that contain a month, day, year, and hours, minutes, and seconds. For
example, 2012/01/30 6:15 PM.
double
A numeric data type that contains both negative and positive double precision
-1074
-52
1023
numbers between 2
and (2-2 )×2
. In E notation, the range of values is
4.9E-324 to 1.7976931348623157E308. For information on E notation, see
en.wikipedia.org/wiki/Scientific_notation#E_notation.
float
A numeric data type that contains both negative and positive single precision numbers
-149
23
127
between 2
and (2-2 )×2 . In E notation, the range of values is 1.4E-45 to
3.4028235E38. For information on E notation, see
en.wikipedia.org/wiki/Scientific_notation#E_notation.
integer
A numeric data type that contains both negative and positive whole numbers between
31
31
-2 (-2,147,483,648) and 2 -1 (2,147,483,647).
list
Strictly speaking, a list is not a data type. However, when a field contains hierarchical
data, it is treated as a "list" field. In Spectrum™ Technology Platform a list is a
collection of data consisting of multiple values. For example, a field Names may
contain a list of name values. This may be represented in an XML structure as:
<Names>
<Name>John Smith</Name>
<Name>Ann Fowler</Name>
</Names>
Dataflow Designer's Guide
107
Sources
It is important to note that the Spectrum™ Technology Platform list data type different
from the XML schema list data type in that the XML list data type is a simple data
type consisting of multiple values, whereas the Spectrum™ Technology Platform list
data type is similar to an XML complex data type.
long
A numeric data type that contains both negative and positive whole numbers between
63
63
-2 (-9,223,372,036,854,775,808) and 2 -1 (9,223,372,036,854,775,807).
string
A sequence of characters.
time
A data type that contains the time of day. For example, 21:15:59 or 9:15:59 PM.
7. If you selected a date, time, or numeric data type, you can use the default date/time or number format
or you can specify a different format for this specific field. The default format is either the system
default format that has been set in the type conversion options in Management Console, or it is the
dataflow's default format specified in the type conversion options in Enterprise Designer. The format
that is in effect is displayed. To use the default format, leave Default selected. To specify a different
format, choose Custom and follow these steps:
Note: It is important that you choose a date and time format that accurately reflects the data you
are reading from the file. For example, if the file contains date data in the format
Month/Day/Year but you choose Day/Month/Year, any date calculations you perform in the
dataflow, such as sorting by date, will not reflect the correct date. In addition, records may
fail type conversion, in which case the failure behavior specified in the type conversion options
in Management Console or Enterprise Designer will take effect.
a) In the Locale field, select the country whose formatting convention you want to use. Your selection
will determine the default values in the Format field. For date data, your selection will also
determine the language used when a month is spelled out. For example, if you specify English
the first month of the year would be "January" but if you specify French it would be "Janvier."
b) In the Format field, select the format for the data. The format depends on the data type of the
field. A list of the most commonly used formats for the selected locale is provided.
An example of the selected format is displayed to the right of the Format field.
You can also specify your own date, time, and number formats if the ones available for selection
do not meet your needs. To specify your own date or time format, type the format into the field
using the notation described in Date and Time Patterns on page 26. To specify your own number
format, type the format into the file using the notation described in Number Patterns on page
28.
8. Click OK.
Related Links
Read from Variable Format File on page 102
Defining Fields in a Line Sequential or Fixed Width Variable Format File
This procedure describes how to define fields in the Read from Variable Format File stage for line
sequential or fixed width files.
1. In the Read from Variable Format File stage, click the Fields tab.
2. Click Get Tags.
A list of all the fields for each record type is displayed. For each field the following information is
displayed:
108
Parent
The tag from the input file indicating the record type in which the field appears. If the
tag begins with a number, the tag is prefixed with "NumericTag_". For example, a
tag named 100 would become NumericTag_100. The prefix is necessary because
dataflow field names cannot begin with a number.
Field
The name that will be used in the dataflow for the field. By default, fields are given
names in the format <Tag Name>_<Column n>. For example, the first field of record
type Owner would be Owner_Column1, the second would be Owner_Column2, and
so on.
Type
The field's data type.
Spectrum™ Technology Platform 9.0
Chapter 5: Stages Reference
Note: The first 50 records are used to generate the fields list. The input file must contain at least
two root tags in order to generate a fields list.
3. In the Filter field, select the tag for the record type whose fields you want to define then click Add.
Note: The filter does not have any impact on which fields are read into the dataflow. It only filters
the list of fields to make it easier to browse.
4. In the Name field, choose the field you want to add or type the name of the field.
5. In the Type field, you can leave the data type as string if you do not intend to perform any mathematical
or date/time operations with the data. However, if you intend to perform these kinds of operations,
select an appropriate data type. This will convert the string data from the file to a data type that will
enable the proper manipulation of the data in the dataflow.
Spectrum™ Technology Platform supports the following data types:
bigdecimal
A numeric data type that supports 38 decimal points of precision. Use this data type
for data that will be used in mathematical calculations requiring a high degree of
precision, especially those involving financial or geospatial data. The bigdecimal
data type supports more precise calculations than the double data type.
boolean
A logical type with two values: true and false.
date
A data type that contains a month, day, and year. For example, 2012-01-30 or
January 30, 2012. You can specify a default date format in Management Console.
datetime
A data type that contain a month, day, year, and hours, minutes, and seconds. For
example, 2012/01/30 6:15 PM.
double
A numeric data type that contains both negative and positive double precision
-1074
-52
1023
numbers between 2
and (2-2 )×2
. In E notation, the range of values is
4.9E-324 to 1.7976931348623157E308. For information on E notation, see
en.wikipedia.org/wiki/Scientific_notation#E_notation.
float
A numeric data type that contains both negative and positive single precision numbers
-149
23
127
between 2
and (2-2 )×2 . In E notation, the range of values is 1.4E-45 to
3.4028235E38. For information on E notation, see
en.wikipedia.org/wiki/Scientific_notation#E_notation.
integer
A numeric data type that contains both negative and positive whole numbers between
31
31
-2 (-2,147,483,648) and 2 -1 (2,147,483,647).
list
Strictly speaking, a list is not a data type. However, when a field contains hierarchical
data, it is treated as a "list" field. In Spectrum™ Technology Platform a list is a
collection of data consisting of multiple values. For example, a field Names may
contain a list of name values. This may be represented in an XML structure as:
<Names>
<Name>John Smith</Name>
<Name>Ann Fowler</Name>
</Names>
It is important to note that the Spectrum™ Technology Platform list data type different
from the XML schema list data type in that the XML list data type is a simple data
type consisting of multiple values, whereas the Spectrum™ Technology Platform list
data type is similar to an XML complex data type.
long
A numeric data type that contains both negative and positive whole numbers between
63
63
-2 (-9,223,372,036,854,775,808) and 2 -1 (9,223,372,036,854,775,807).
string
A sequence of characters.
time
A data type that contains the time of day. For example, 21:15:59 or 9:15:59 PM.
6. If you selected a date, time, or numeric data type, you can use the default date/time or number format
or you can specify a different format for this specific field. The default format is either the system
default format that has been set in the type conversion options in Management Console, or it is the
dataflow's default format specified in the type conversion options in Enterprise Designer. The format
Dataflow Designer's Guide
109
Sources
that is in effect is displayed. To use the default format, leave Default selected. To specify a different
format, choose Custom and follow these steps:
Note: It is important that you choose a date and time format that accurately reflects the data you
are reading from the file. For example, if the file contains date data in the format
Month/Day/Year but you choose Day/Month/Year, any date calculations you perform in the
dataflow, such as sorting by date, will not reflect the correct date. In addition, records may
fail type conversion, in which case the failure behavior specified in the type conversion options
in Management Console or Enterprise Designer will take effect.
a) In the Locale field, select the country whose formatting convention you want to use. Your selection
will determine the default values in the Format field. For date data, your selection will also
determine the language used when a month is spelled out. For example, if you specify English
the first month of the year would be "January" but if you specify French it would be "Janvier."
b) In the Format field, select the format for the data. The format depends on the data type of the
field. A list of the most commonly used formats for the selected locale is provided.
An example of the selected format is displayed to the right of the Format field.
You can also specify your own date, time, and number formats if the ones available for selection
do not meet your needs. To specify your own date or time format, type the format into the field
using the notation described in Date and Time Patterns on page 26. To specify your own number
format, type the format into the file using the notation described in Number Patterns on page
28.
7. In the Start position field, enter the position of the first character of the field, and in the Length field
enter the number of characters in the field.
For example, if the field starts at the tenth character of the record and is five characters long, you
would specify a starting position of 10 and a length of 5.
8. Click Add.
9. Repeat this process to add additional fields to the record type, or click Close if you are done adding
fields.
Related Links
Read from Variable Format File on page 102
Flattening Variable Format Data
Variable format file data often contains records that have a hierarchical relationship, with one record
type being a parent to other record types. Since many stages require data to be in a flat format, so you
may have to flatten the data in order to make the data usable by downstream stages. For example,
consider this input data:
001
100
200
001
100
200
200
Joe,Smith,M,100 Main St,555-234-1290
CHK12904567,12/2/2007,6/1/2012,CHK
1000567,1/5/2012,Fashion Shoes,323.12
Anne,Johnson,F,1202 Lake St,555-222-4932
CHK238193875,1/21/2001,4/12/2012,CHK
1000232,3/5/2012,Blue Goose Grocery,132.11
1000232,3/8/2012,Trailway Bikes,540.00
You may want to flatten the records so that you have one record per transaction. In the above example,
that would mean taking the transaction records (records with the tag 200) and flattening them to include
the account owner information (records with the tag 001) and the account details (records with the tag
100).
The following procedure describes how to use Splitter stages to flatten records.
1. Add a Read from Variable Format File stage to your data flow and configure the stage. For more
information, see Read from Variable Format File on page 102.
2. Add a Splitter stage and connect it to Read from Variable Format File.
3. Add additional Splitter stages as needed so that you have one splitter stage for each child record
type in your input data.
110
Spectrum™ Technology Platform 9.0
Chapter 5: Stages Reference
4. Connect all the Splitter stages.
You should now have a data flow that looks like this:
5. Double-click the first Splitter stage to open the stage options.
6. In the Split at field, select one of the child record types.
7. Click OK.
8. Configure each additional Splitter stage, selecting a different child record type in each Splitter's Split
at field.
Related Links
Read from Variable Format File on page 102
Read From XML
The Read from XML stage reads an XML file into a job or subflow. It defines the file's path and data
format, including XML schema and data element details.
Simple XML elements are converted to flat fields and passed on to the next stage. Simple XML data
consists of records made up of XML elements that contain only data and no child elements. For example,
this is a simple XML data file:
<customers>
<customer>
<name>Sam</name>
<gender>M</gender>
<age>43</age>
<country>United States</country>
</customer>
<customer>
<name>Jeff</name>
<gender>M</gender>
<age>32</age>
<country>Canada</country>
</customer>
<customer>
<name>Mary</name>
<gender>F</gender>
<age>61</age>
<country>Australia</country>
</customer>
</customers>
Notice that in this example each record contains simple XML elements such as <name>, <gender>,
<age>, and <country>. None of the elements contain child elements.
The Read from XML stage automatically flattens simple data like this because most stages require data
to be in a flat format. If you want to preserve the hierarchical structure, use an Aggregator stage after
Read from XML to convert the data to hierarchical data.
Complex XML elements remain in hierarchical format and are passed on as a list field. Since many
stages require data to be in a flat format, so you may have to flatten the complex XML elements in order
to make the data usable by downstream stages. For more information, see Flattening Complex XML
Elements on page 114.
Note: Read From XML does not support the XML types xs:anyType and xs:anySimpleType.
Dataflow Designer's Guide
111
Sources
File Properties Tab
Table 5: File Properties Tab
Option Name
Description
Schema file
Specifies the path to an XSD schema file. Click the ellipses button (...)
to browse to the file you want. Note that the schema file must be on the
server in order for the data file to be validated against the schema. If
the schema file is not on the server, validation is disabled.
Alternatively, you can specify an XML file instead of an XSD file. If you
specify an XML file the schema will be inferred based on the structure
of the XML file. Using an XML file instead of an XSD file has the following
limitations:
• The XML file cannot be larger than 1 MB. If the XML file is more than
1 MB in size, try removing some of the data while maintaining the
structure of the XML.
• The data file will not be validated against the inferred schema.
Note: If the Spectrum™ Technology Platform server is running on
Unix or Linux, remember that file names and paths on these
platforms are case sensitive.
Data file
Specifies the path to the XML data file. Click the ellipses button (...) to
browse to the file you want.
Note: If the Spectrum™ Technology Platform server is running on
Unix or Linux, remember that file names and paths on these
platforms are case sensitive.
Preview
Displays a preview of the schema or XML file. When you specify an
XSD file, the tree structure reflects the selected XSD. Once you specify
both a schema file and a data file, you can click on the schema elements
in bold to see a preview of the data that the element contains.
Fields Tab
Table 6: Fields Tab
112
Option Name
Description
Filter
Filters the list of elements and attributes to make it easier to browse.
The filter does not have any impact on which fields are included in the
output. It only filters the list of elements and attributes to make it easier
to browse.
XPath
The XPath column displays the XPath expression for the element or
attribute. It is displayed for information purposes only. For more
information on XPath, see www.w3schools.com/xpath/.
Field
The name that will be used in the dataflow for the element or attribute.
To change the field name, double-click and type the field name you
want.
Type
The data type to use for the field.
Spectrum™ Technology Platform 9.0
Chapter 5: Stages Reference
Option Name
Description
bigdecimal A numeric data type that supports 38 decimal points of
precision. Use this data type for data that will be used in
mathematical calculations requiring a high degree of
precision, especially those involving financial or geospatial
data. The bigdecimal data type supports more precise
calculations than the double data type.
boolean
A logical type with two values: true and false.
date
A data type that contains a month, day, and year. Dates
must be in the format yyyy-MM-dd. For example,
2012-01-30.
datetime
A data type that contains a month, day, year, and hours,
minutes, and seconds. Datetime must be in the format
yyyy-MM-dd'T'HH:mm:ss. For example,
2012-01-30T06:15:30
double
A numeric data type that contains both negative and
-1074
positive double precision numbers between 2
and
-52
1023
(2-2 )×2
. In E notation, the range of values is
4.9E-324 to 1.7976931348623157E308. For information
on E notation, see
en.wikipedia.org/wiki/Scientific_notation#E_notation.
float
A numeric data type that contains both negative and
-149
positive single precision numbers between 2
and
23
127
(2-2 )×2 . In E notation, the range of values is 1.4E-45
to 3.4028235E38. For information on E notation, see
en.wikipedia.org/wiki/Scientific_notation#E_notation.
integer
A numeric data type that contains both negative and
31
positive whole numbers between -2 (-2147483648) and
31
2 -1 (2147483647).
list
Strictly speaking, a list is not a data type. However, when
a field contains hierarchical data, it is treated as a "list"
field. In Spectrum™ Technology Platform a list is a
collection of data consisting of multiple values. For
example, a field Names may contain a list of name values.
This may be represented in an XML structure as:
<Names>
<Name>John Smith</Name>
<Name>Ann Fowler</Name>
</Names>
It is important to note that the Spectrum™ Technology
Platform list data type different from the XML schema list
data type in that the XML list data type is a simple data
type consisting of multiple values, whereas the Spectrum™
Technology Platform list data type is similar to an XML
complex data type.
long
Dataflow Designer's Guide
A numeric data type that contains both negative and
63
positive whole numbers between -2
63
(-9223372036854775808) and 2 -1
(9223372036854775807).
113
Sources
Option Name
Include
Description
string
A sequence of characters.
time
A data type that contains the time of day. Time must be in
the format HH:mm:ss. For example, 21:15:59.
Specifies whether to make this field available in the dataflow or to
exclude it.
Example: Simple XML File
In this example, you want to read the following file into a dataflow:
<addresses>
<address>
<addressline1>One Global View</addressline1>
<city>Troy</city>
<state>NY</state>
<postalcode>12128</postalcode>
</address>
<address>
<addressline1>1825B Kramer Lane</addressline1>
<city>Austin</city>
<state>TX</state>
<postalcode>78758</postalcode>
</address>
</addresses>
In this example, you could choose to include the <addressline1>, <city>,
<state>, and <postalcode>. This would result in one record being created for each
<address> element because <address> is the common parent element for
<addressline1>, <city>, <state>, and <postalcode>.
Related Links
Sources on page 84
Flattening Complex XML Elements on page 114
Data Types on page 23
Flattening Complex XML Elements
Most stages in a dataflow require data to be in a flat format. This means that when you read hierarchical
data from an XML file into a dataflow, you will have to flatten it if the data contains complex XML elements.
A complex XML element is an element that contain other elements or attributes. For example, in the
following data file the <address> element and the <account> element are complex XML elements:
<customers>
<customer>
<name>Sam</name>
<gender>M</gender>
<age>43</age>
<country>United States</country>
<address>
<addressline1>1253 Summer St.</addressline1>
<city>Boston</city>
<stateprovince>MA</stateprovince>
<postalcode>02110</postalcode>
</address>
<account>
<type>Savings</type>
<number>019922</number>
</account>
114
Spectrum™ Technology Platform 9.0
Chapter 5: Stages Reference
</customer>
<customer>
<name>Jeff</name>
<gender>M</gender>
<age>32</age>
<country>Canada</country>
<address>
<addressline1>26 Wellington St.</addressline1>
<city>Toronto</city>
<stateprovince>ON</stateprovince>
<postalcode>M5E 1S2</postalcode>
</address>
<account>
<type>Checking</type>
<number>238832</number>
</account>
</customer>
<customer>
<name>Mary</name>
<gender>F</gender>
<age>61</age>
<country>Australia</country>
<address>
<addressline1>Level 7, 1 Elizabeth Plaza</addressline1>
<city>North Sydney</city>
<stateprovince>NSW</stateprovince>
<postalcode>2060</postalcode>
</address>
<account>
<type>Savings</type>
<number>839938</number>
</account>
</customer>
</customers>
The following procedure describes how to use Splitter stages to flatten XML data containing multiple
complex XML elements.
Note: If your data contains a single complex XML element, you can use a single Splitter stage to flatten
the data by simply connecting the Read from XML stage to the Splitter stage. You do not need
to use the Broadcaster and Record Combiner stages as described in this procedure for data files
containing a single complex XML element.
1. Add a Read from XML stage to your data flow and configure the stage. For more information, see
Read From XML on page 111.
2. Add a Broadcaster stage and connect Read from XML to it.
3. Add a Splitter stage for each complex XML element in your data.
4. Connect the Broadcaster stage to each Splitter.
5. Add a Record Combiner stage and connect each Splitter to it.
You should now have a data flow that looks like this:
6. Double-click the first Splitter stage to open the stage options.
7. In the Split at field, select one of the complex fields. In the example data file above, this could be
the address field.
Dataflow Designer's Guide
115
Control Stages
8. Click OK.
9. Configure each additional Splitter stage, selecting a different complex XML element in each Splitter's
Split at field.
The data flow is now configured to take XML input containing records with complex XML elements and
flatten the data. The resulting records from Record Combiner can be sent to any stage that requires flat
data. For example, you could attached the Record Combiner stage to a Validate Address stage for
address validation.
Related Links
Read From XML on page 111
Control Stages
Control stages perform common tasks such as routing records to different paths in the dataflow, sorting,
and transforming.
Related Links
Aggregator on page 116
Broadcaster on page 120
Conditional Router on page 120
Group Statistics on page 123
Math on page 131
Query DB on page 137
Record Combiner on page 138
Record Joiner on page 139
Sorter on page 141
Splitter on page 142
SQL Command on page 145
Stream Combiner on page 147
Transformer on page 147
Unique ID Generator on page 153
Aggregator
Aggregator converts flat data to hierarchical data. It takes input data from a single source, creates a
schema (a structured hierarchy of data) by grouping the data based on fields you specify, and then
constructs the groups in the schema.
Note: If your data includes a field by which you will group your data, such as an ID field, you must sort
your data before running it through an Aggregator. You can do this by sorting the data prior to
bringing it into the dataflow, by sorting the input file within Enterprise Designer (for jobs or subflows,
but not services) or by adding a Sorter stage to your dataflow (for jobs, services, or subflows).
Group By
Choose the field you want to use as the basis for aggregating into a hierarchy by selecting Group by in
the tree then clicking Add. Records that have the same value in the field you choose will have their data
aggregated into a single hierarchy. If you select multiple fields then the data from all fields must match
in order for the records to be grouped into a hierarchy.
For example, if you want to group data by account number you would select the account number field.
All incoming records that have the same value in the account number field would have their data grouped
into a single hierarchical record.
116
Spectrum™ Technology Platform 9.0
Chapter 5: Stages Reference
Note: You must connect a stage to the Aggregator input port in order for a list of fields to be available
to choose from.
Output Lists
The fields you choose under Output lists determine which fields are included in each record created
by Aggregator. To add a field, select Output lists then click Add and choose one of the following options:
Existing field
Select this option if you want to add a field from the dataflow to the
hierarchy.
New data type
Select this option if you want to create a parent field to which you can then
add child fields.
Template
This option allows you to add a field based on data in the stage connected
to the Aggregator's output port.
If you want the field to have child fields, check the List box.
Enter the name of the field in the Name text box, or leave it as-is if it auto-filled and you are satisfied
with the name. Keep in mind that the Aggregator stage does not allow invalid XML characters in field
names; it does allow alphanumeric characters, periods (.), underscores (_), and hyphens (-).
Click Add to add the field. You can specify another field to add to the same level in the hierarchy or you
can click Close.
To add child fields to an existing field, select the parent field then click Add.
Note: You can modify the field group by highlighting a row and clicking Modify, and you can remove
a field group by highlighting a row and clicking Remove. You can also change the order of fields
by clicking a field and clicking Move Up or Move Down.
Example of Aggregator
An example of the Aggregator's function is to take a group of street addresses and
turn them into driving directions. You could do this with two points, such as a start
point and an end point, or you could do this with multiple points along a route. The
dataflow for this type of function might look like the following:
The dataflow performs the function as follows:
1. The Read from File stage contains street addresses in a flat file. The fields in this
file include the following:
• an ID, which identifies a particular address in the file
• a Type, which indicates whether the address is a "From" address or a "To"
address
• an AddressLine1 field, which provides the street address
• a LastLine field, which includes such information as a city, state, and/or postal
code
2. The Field Transform between the Read from File stage and the Math stage
changes the format of the ID field from string to double because the Math stage
does not accept string data.
Dataflow Designer's Guide
117
Control Stages
3. The Math stage creates an expression that establishes a Group ID field to be used
downstream in the dataflow. In this example, it calculates the Group ID as the floor
of, or rounds down, the value of the ID field divided by 2. So, if the ID is 3, then
the expression is 3/2, which equals 1.5. When you round down 1.5, it becomes 1.
If the ID is 2, then the expression is 2/2, which equals 1, and there is no need to
round down. Therefore, IDs 2 and 3 have the same Group ID of 1.
4. Geocode US Address obtains latitudes and longitudes for each address.
5. The Aggregator stage establishes that the data should be grouped by the GroupID
field and that the output lists should include Route Points devised of latitudes and
longitudes.
The instructions below show how to manually configure the Aggregator stage for
this dataflow:
• Double-click the Aggregator stage, and then double-click Group by.
• Select the GroupID field and click OK. Using this field will allow us to include
route points for the next stage in the dataflow. Route points are essential for a
dataflow that produces directions.
• Double-click Output lists. The Field Options dialog box appears.
• Select New data type. In the Type name field enter RoutePoint. In the Name
field enter RoutePoints. By default, this is a list and cannot be changed, so
the checkbox is grayed out.
• Press OK.
• Click RoutePoints and click Add. The Field Options dialog box appears again.
• Route Points are made up of latitudes and longitudes, so we need to first add
an Existing field from the existing input field Latitude. The Name field will
auto-populate.
118
Spectrum™ Technology Platform 9.0
Chapter 5: Stages Reference
Repeat this step for Longitude.
The completed Aggregator stage will appear as follows:
6. Get Travel Directions provides driving instructions from point IDs 0, 2, and 4 to
point IDs 1, 3, and 5, respectively.
Dataflow Designer's Guide
119
Control Stages
7. The Splitter stage establishes that the data should be split at the Route Directions
field and that the output lists should include all of the possible fields from the Get
Travel Directions stage.
8. The Write to File stage writes the directions to an output file.
Related Links
Control Stages on page 116
Creating Complex XML from Flat Data on page 187
Broadcaster
A Broadcaster takes a stream of records and splits it into multiple streams, allowing you to send records
to multiple stages for simultaneous processing.
Broadcaster has no settings to change.
Related Links
Control Stages on page 116
Conditional Router
Conditional Router sends records to different paths in the dataflow depending on the criteria you specify.
Conditional Router can have one or more output ports, depending on how you define them. Output ports
are numbered consecutively, beginning with 1 (which displays as "port"). The output ports connect to
different stages that you want to send data to, depending on a condition. For example, you can send
one group of records to a "successful match" output file on port 1 and the other group to a "failed match"
output file on port 2.
1. Under Control Stages, click the Conditional Router and drag it to the canvas, placing it where you
want on the dataflow.
2. Connect the router to other stages on the canvas.
Note: You must complete this step before defining settings or the ports will not be available for
editing.
3. Double-click the Conditional Router. The Conditional Router Options dialog box appears.
4. Click the square button under "Condition/Expression" for port. The Expressions Editor dialog box
appears.
5. In the Choose Expression Type field, select one of the following:
• Custom expression—Select this option to write an expression using Groovy scripting. For more
information, see Using Groovy Scripting.
• Default expression—Select this to route records to this port by default. Records that do not match
any of the other ports' expressions will be routed to this port. You should always have an output
port with "default" as the expression to ensure that all rows are written from the router.
• Expression created with Expression Builder—Select this option to create a basic expression.
If you select this option:
1. In the Combine expression method field, choose All if you you want all the expressions to
evaluate to true in order for the record to be routed to this port; select Any if you want records
to be routed to this port if one or more of the expressions is true.
2. Click Add and specify the field to test, the operator, and a value. The operators are listed in the
following table.
120
Spectrum™ Technology Platform 9.0
Chapter 5: Stages Reference
Table 7: Expression Builder Operators
Operator
Description
Is Equal
Checks if the value in the field matches the value specified.
Supports Boolean, double, float, integer, long, and string data types.
Is Not Equal
Checks if the value in the field does not match the value specified.
Supports Boolean, double, float, integer, long, and string data types.
Is Null
Checks if the field is a null value.
Supports Boolean, double, float, integer, long, and string data types.
Is Not Null
Checks if the field is not a null value.
Supports Boolean, double, float, integer, long, and string data types.
Is Empty
Checks if the field is null or a string with a length of 0.
Supports string data types.
Is Not Empty
Checks if the field is neither null nor a string with a length of 0.
Supports string data types.
Is Less Than
Checks if the field has a numeric value that is less than the value
specified.
Supports double, float, integer, long, and string data types.
Is Less Than Or Equal Checks if the field has a numeric value that is less than or equal to
To
the value specified.
Supports double, float, integer, long, and string data types.
Is Greater Than
Checks if the field has a numeric value that is greater than the value
specified.
Supports double, float, integer, long, and string data types.
Is Greater Than Or
Equal To
Checks if the field has a numeric value that is greater than or equal
to the value specified.
Supports double, float, integer, long, and string data types.
Starts With
Checks if the field begins with the characters specified.
Supports string data types.
Does Not Start With
Checks if the field does not begin with the characters specified.
Supports string data types.
Contains
Checks if the field contains the string specified.
Supports string data types.
Does Not Contain
Checks if the field does not contain the string specified.
Supports string data types.
Ends With
Checks if the field ends with the characters specified.
Supports string data types.
Does Not End With
Dataflow Designer's Guide
Checks if the field ends with the characters specified.
121
Control Stages
Operator
Description
Supports string data types.
Matches Regular
Expression
Matches the field with a regular expression for identifying strings of
text of interest, such as particular characters, words, or patterns of
characters. The value field should contain a valid regular expression
pattern.
Supports string data types.
Writing a Custom Expression
You can write your own custom expressions to control how Conditional Router routes records. To do
this you use the Groovy language to create an expression. If you are not familiar with Groovy, see this
website for complete information on Groovy:
groovy.codehaus.org
Groovy expressions used in Conditional Router must evaluate to a Boolean value (true or false) which
indicates whether the record should be written to the port. The record is routed to the first output port
whose expression evaluates to true.
For example, if you wanted to route records with a validation confidence level of >=85 to one stage and
records with a validation confidence level of <85 to another stage, your script would look like:
data['Confidence']>=85
The script for the other port would look like:
data['Confidence']<85
The router would evaluate the value of the Confidence field against your criteria to determine which
output port to send it to.
Checking a Field for a Single Value
This example evaluates to true if the Status field has 'F' in it. This would have to be
an exact match, so 'f' would not evaluate to true.
return data['Status'] == 'F';
Checking a Field for Multiple Values
This example evaluates to true if the Status field has 'F' or 'f' in it.
boolean returnValue = false;
if (data['Status'] == 'F' || data['Status'] == 'f')
{
returnValue = true;
}
return returnValue;
122
Spectrum™ Technology Platform 9.0
Chapter 5: Stages Reference
Evaluating Field Length
This example evaluates to true if the PostalCode field has more than 5 characters.
return data['PostalCode'].length() > 5;
Checking for a Character Within a Field Value
This example evaluates to true if the PostalCode field has a dash in it.
boolean returnValue = false;
if (data['PostalCode'].indexOf('-') != -1)
{
returnValue = true;
}
return returnValue;
Common Mistakes
The following illustrate common mistakes when using scripting.
The following is incorrect because PostalCode (the column name) must be in single or double quotes
return data[PostalCode];
The following is incorrect because no column is specified
return data[];
The following is incorrect because row.set() does not return a Boolean value. It will always evaluate to
false as well as change the PostalCode field to 88989.
return row.set('PostalCode', '88989');
Use a single equals sign to set the value of a field, and a double equals sign to check the value of a field.
Related Links
Control Stages on page 116
Group Statistics
The Group Statistics stage allows you to run statistical operations across multiple data rows broken
down into groups that you want to analyze. If no groups are defined all rows will be treated as belonging
to one group.
Groups are defined by one or more fields that have the same value across multiple data rows. For
example, the data in the following table could be grouped by region, state, or both.
Region
State
East
MD
East
MD
East
CT
West
CA
West
CA
Dataflow Designer's Guide
123
Control Stages
A group by Region would yield East and West. A group by State would yield California, Connecticut, and
Maryland. A group by Region and State would yield East/Maryland, East/Connecticut, and West/California.
Input
The Group Statistics stage takes any field as input. Grouping can be performed on numeric or string
data. Operations can only be performed on numeric input data.
Options
Table 8: Operations Tab
Option Name
Description
Input fields
Lists the fields in the dataflow which you can use to group records and perform
calculations.
Note: Operations work only on numeric data.
Row
Specifies the field or fields you want to use as categories for the calculations.
For example, if you had data that included a Region field and you wanted to
calculate total population by region, you would group by the Region field.
To add a field, select the field in the Input fields list then click >>.
Column
Optional. For creating a pivot table, specifies the field or fields whose values
you want to pivot into columns for the purposes of cross tabulation. For
example, if you had data that included a Regions and ship dates, and you
wanted to tally the number of shipments per day for each state, you would
specify the state field as a row and the shipment date field as a column.
To add a field, select the field in the Input fields list then click >>.
Operation
Specifies the calculation to perform on each group. To add an operation,
select the field in the Input fields list that you want to use for the operation
then click >>.
The following calculations are available:
Average
For each group, calculates the average value of a given field.
For example, if you had a group of records with values 10, 12,
1, and 600 in a given field, the average value of that field for
that group would be 155.75, calculated as (10+12+1+600)÷4.
Maximum
For each group, returns the largest value in a given field. For
example, if you had a group of records with values 10, 12, 1,
and 600 in a given field, the maximum value of that field for
that group would be 600.
Minimum
For each group, returns the smallest value in a given field. For
example, if you had a group of records with values 10, 12, 1,
and 600 in a given field, the minimum value of that field for
that group would be 1.
Percent
Rank
For each record within a group, calculates the percentile rank
of a value in a given field relative to other records in the group.
The percentile rank represents the percentage of records in
the group with lower values in the field.
Percentile For each group, calculates the value that would represent the
percentile you specify (0 - 100) for a given field. A percentile
124
Spectrum™ Technology Platform 9.0
Chapter 5: Stages Reference
Option Name
Description
represents the percentage of records that have a lower score.
For example, if you have a group of records with values 22,
26, and 74, and you perform a percentile calculation specifying
the 60th percentile, the operation would return 35.6. This
means that a record with a value of 35.6 in the given field
would be in the 60th percentile of records in the group.
Type
Standard
Deviation
For each group, calculates the standard deviation for a given
field. The standard deviation measures the amount of
dispersion within the group. The lower the standard deviation,
the more the values are centered around the mean value, and
therefore the less dispersed the values. The higher the value,
the more widely dispersed the values. The standard deviation
is expressed in the same units as the data. The standard
deviation is the square root of the variance.
Sum
For each group, calculates the sum of the values for a given
field.
Variance
For each group, calculates the variance for a given field. The
variance measures the amount of dispersion within the group.
It is the square of the standard deviation.
ZScore
For each record in a group, returns the ZScore. The ZScore
indicates how many standard deviations a value is above or
below the group's mean.
For the input and output fields, specifies the data type. One of the following:
Integer
A numeric data type that contains both negative and positive
31
31
whole numbers between -2 (-2,147,483,648) and 2 -1
(2,147,483,647)
Long
A numeric data type that contains both negative and positive
63
whole numbers between -2 (-9,223,372,036,854,775,808)
63
and 2 -1 (9,223,372,036,854,775,807)
Float
A numeric data type that contains both negative and positive
-149
single precision numbers between 2
(1.4E-45) and
23
127
(2-2 )×2
(3.4028235E38)
Double
A numeric data type that contains both negative and positive
-1074
double precision numbers between 2
(4.9E-324) and
1023
(2-2-52)×2
(1.7976931348623157E308)
Note: When using the integer and long types, data can be lost if the input
number or calculated number from an operation contains decimal
data.
Table 9: Fields Tab
Option
Description
The Fields tab is used when creating a pivot table. For more information, see Creating a Pivot Table
on page 129.
Dataflow Designer's Guide
125
Control Stages
Table 10: Output Tab
Option
Description
Return one row per group
For each group of rows, return a single row that contains the aggregated
data for all rows in the group. Individual rows will be dropped. If this
option is not selected, all rows will be returned. No data will be dropped.
This option is not available if you use the Percent Rank or ZScore
operations.
Return a count of rows in
each group
Returns the number of rows in each group. The default output field name
that will contain the count is GroupCount.
Return a unique ID for each
group
Returns a unique ID for each group of rows. The ID starts at 1 and
increments by 1 for each additional group found. The default field name
is GroupID.
Output
Table 11: Group Statistics Output
Field Name
Description / Valid Values
<Operation>Of<InputFieldName> Contains the result of a calculation. Group Statistics creates one output
field per operation and names the field based on the operation and field.
For example, the default field name for a sum operation performed on
a field named "Population" would be SumOfPopulation.
<Value>_<Operation>
Contains the result of a pivot, where <Value> is one of the values in a
pivot column and <Operation> is the operation performed on the column.
For more information, see Creating a Pivot Table on page 129.
GroupCount
Indicates the number of records in the group.
GroupID
A unique number assigned to each group sequentially. The first group
has a GroupID value of 1, the second has a value of 2, and so on.
Status
Reports the success or failure of the Group Statistics calculations.
Status.Code
null
Success
F
Failure
Reason for failure, if there is one. One of the following:
UnableToDoGroupStatistics The Group Statistics stage was unable
to perform its calculations.
Error calculating percentile The percentile value could not be
value
calculated using the input data
provided.
Status.Description
A verbose description of the error.
The input field value could A number in an input field is larger
not be converted to the field than the data type allows. Try
type. It might be overflow! converting to a data type that supports
larger numbers, such as double.
126
Spectrum™ Technology Platform 9.0
Chapter 5: Stages Reference
Group Statistics Example
The following input data shows the number of customers you have in certain counties.
The data also shows the U.S. state in which the county is located (MD, VA, CA, and
NV), as well as the region (East or West). The first row is a header record.
Region|State|County|Customers
East|MD|Calvert|25
East|MD|Calvert|30
East|MD|Prince Georges|30
East|MD|Montgomery|20
East|MD|Baltimore|25
East|VA|Fairfax|45
East|VA|Clarke|35
West|CA|Alameda|74
West|CA|Los Angeles|26
West|NV|Washoe|22
If you wanted to calculate the total number of customers for each region, you would
define the Region field as a row in the Operations tab. For the operation, you would
perform a sum operation on the Customers field.
You would get the following results:
Region|SumOfCustomers
East|210.0
West|122.0
:eto
N
This example shows a basic group statistics operation using only
rows to aggregate data. You can also create a pivot table, which
aggregates both rows and columns, by specifying a column to group
by in the Operations tab. For more information on creating a pivot
table, see Creating a Pivot Table on page 129.
Related Links
Control Stages on page 116
Pivot Tables on page 127
Pivot Tables
A pivot table aggregates and transposes column values in the dataflow to make it easier analyze data
visually. With pivot, you can arrange input columns into a cross tabulation format (also known as crosstab)
that produces rows, columns and summarized values. You can also use fields as input and not display
them. You can use pivot to pivot on two dimensions or to group aggregate data on one dimension.
This example shows sales data for shirts.
Dataflow Designer's Guide
127
Control Stages
Table 12: Input Data
Region
Gender
Style
Ship Date Units
Price
Cost
East
Boy
Tee
1/31/2010 12
11.04
10.42
East
Boy
Golf
6/31/2010 12
13.00
10.60
East
Boy
Fancy
2/25/2010 12
11.96
11.74
East
Girl
Tee
1/31/2010 10
11.27
10.56
East
Girl
Golf
6/31/2010 10
12.12
11.95
East
Girl
Fancy
1/31/2010 10
13.74
13.33
West
Boy
Tee
1/31/2010 11
11.44
10.94
West
Boy
Golf
2/25/2010 11
12.63
11.73
West
Boy
Fancy
2/25/2010 11
12.06
10.51
West
Girl
Tee
2/25/2010 15
13.42
13.29
West
Girl
Golf
6/31/2010 15
11.48
10.67
North
Boy
Tee
2/25/2010 17
16.04
10.42
North
Boy
Fancy
2/25/2010 12
11.56
12.42
North
Girl
Tee
2/25/2010 16
12.32
18.42
North
Boy
Golf
1/31/2010 18
11.78
13.23
North
Girl
Tee
2/25/2010 12
18.45
11.64
North
Girl
Golf
2/25/2010 14
11.23
19.85
North
Boy
Fancy
1/31/2010 16
12.54
13.42
North
Girl
Tee
2/25/2010 17
181.73
15.83
South
Boy
Fancy
1/31/2010 19
14.15
13.42
South
Girl
Tee
2/25/2010 11
11.85
12.92
South
Girl
Fancy
1/31/2010 13
11.54
14.35
South
Boy
Tee
2/25/2010 15
14.14
14.73
South
Boy
Golf
2/25/2010 16
17.83
17.83
South
Girl
Fancy
6/31/2010 11
18.24
12.35
South
Girl
Tee
1/31/2010 20
19.94
12.95
South
Boy
Golf
2/25/2010 12
21.25
19.56
We want to be able to determine how many units we sold in each region for every ship
date. To do this, we use pivot to generate this table:
Table 13: Pivot Table
128
Region
1/31/2010_ShipDate 2/25/2010_ShipDate 6/31/2010_ShipDate
East
32
12
North
34
88
South
52
54
22
11
Spectrum™ Technology Platform 9.0
Chapter 5: Stages Reference
Region
1/31/2010_ShipDate 2/25/2010_ShipDate 6/31/2010_ShipDate
West
11
37
15
In this case, the column is Ship Date, the row is Region, and the data we would like
to see is Units. The total number of units shipped is displayed here using a sum
aggregation.
Related Links
Group Statistics on page 123
Creating a Pivot Table on page 129
Creating a Pivot Table
A pivot table summarizes data for easier analysis by creating table row and column categories based
on input data. For more information, see Pivot Tables on page 127.
1. Add a Group Statistics stage to your dataflow.
2. In the Group Statistics stage, click the Operations tab.
3. In the Input Fields field, select the field that contains the data you want to use as the row labels in
your pivot table then click the >> button next to the Rows field.
4. In the Input Fields field, select a field that contains the data you want to use as the columns in your
pivot table then click the >> button next to the Columns field.
Tip: At this point, run inspection to see the results of your selections. This will help you visualize
the results of the cross tabulations based on the columns and rows you have selected.
5. Click the Fields tab.
6. Define a field for each column in the pivot table.
Tip: In order to do define fields accurately, you should run inspection to see the column names
generated by your data.
a) Click Add.
The Add Field window appears.
b) In the Add Field window, the name of the first field is based on the data in the field you chose in
the Columns field of the Operations tab. Enter a value in this first field that is exactly the same
as one of the column headings shown in inspection.
For example, if you selected an input field called ShipDate for a column, the first field in the Add
Field window would be labeled ShipDate. In the ShipDate field you would enter a value that is
present in the ShipDate field in your dataflow's input data, such as 1/31/2010.
c) In the Operation field, select the operation that the field represents. Note that the operation you
select only affects the field name. It does not control the actual calculation. To change the operation
itself, use the Operations field on the Operations tab.
d) Click Add.
Based on your selections in the first field and the Operation field, a new field name is created in
the format <Data>_<Operation>, where <Data> is the value you specified in the first field and
<Operation> is the operation you selected in the Operation field.
e) Repeat this process for each column shown in inspection.
7. Click OK.
Pivot Table Example
You have the following data which shows shipping information from your fulfillment
department.
Region,State,County,ShipDate,Unit
East,MD,Calvert,1/31/2010,212
East,MD,Calvert,6/31/2010,212
Dataflow Designer's Guide
129
Control Stages
East,MD,Calvert,1/31/2010,633
East,MD,Calvert,6/31/2010,234
East,MD,Prince Georges,2/25/2010,112
East,MD,Montgomery,1/31/2010,120
East,MD,Baltimore,6/31/2010,210
East,VA,Fairfax,1/31/2010,710
West,CA,SanJose,1/31/2010,191
West,CA,Alameda,2/25/2010,411
West,CA,Los Angeles,2/25/2010,311
West,CA,Los Angeles,2/25/2010,215
West,CA,Los Angeles,6/31/2010,615
West,CA,Los Angeles,6/31/2010,727
You want to create a pivot table that shows how many shipments went out on each
date for each state. To do this, you would configure the Group Statistics stage as
follows:
You would configure the fields as shown below. Note that the first portion of the field
name must use the exact dates that appear in the ShipDate field of the dataflow's
input data.
130
Spectrum™ Technology Platform 9.0
Chapter 5: Stages Reference
This would result in the following output. The first row is a header record.
State|1/31/2010_GroupCount|2/25/2010_GroupCount|6/31/2010_GroupCount
VA|1||
CA|1|3|2
MD|3|1|3
Related Links
Pivot Tables on page 127
Math
The Math stage handles mathematical calculations on a single data row and allows you to conduct a
variety of math functions using one or more expressions. Data is input as strings but the values must be
numeric or Boolean, based on the type of operation being performed on the data.
1. Under Control Stages, click the Math stage and drag it to the canvas, placing it where you want on
the dataflow.
2. Connect the stage to other stages on the canvas.
3. Double-click the Math stage. The Math Options dialog box appears, with the Expressions tab open.
This view shows the input fields, the Calculator, and the Expressions canvas. Alternately, you can
click the Functions tab to use functions instead of the Calculator.
The Input fields control lists the valid fields found on the input port. Field name syntax is very flexible but
has some restrictions based on Groovy scripting rules. If you are not familiar with Groovy scripting, see
this website for complete information on Groovy:groovy.codehaus.org
Related Links
Control Stages on page 116
Using the Calculator on page 132
Using Functions and Constants on page 132
Using Conditional Statements on page 134
Using the Expressions Console on page 135
Using the Fields Control on page 136
Dataflow Designer's Guide
131
Control Stages
Using the Preview Control on page 137
Using the Calculator
The Calculator control contains buttons for entering numeric constants and operators into an expression.
Double-clicking fields, constants, operators, and functions will insert them into an expression.
Table 14: Calculator Operators
Operator
Description
Backspace
Used to go back one space in an expression
pi
Pi, a mathematical constant which is the ratio of the circumference of a
circle to its diameter
e
Euler's Number, a mathematical constant that is the base of the natural
logarithm
/
Division
*
Multiplication
+
Addition
-
Subtraction
x^y
Power of (e.g., x^2 is x to the power of 2)
Mod
Modulo, the remainder of an operation
;
Semicolon, used at the end of expressions
=
Assignment operator
()
Parentheses, to represent hierarchy in an expression
.
Decimal point
if\else
Conditional statement to take action if a condition is true, otherwise, take
a different action
if\else if\else
Multiple conditional statement to take action if a condition is true,
otherwise, take a different action
==
Equal to, in a math function
!=
Not equal to
&&
Logical and
||
Logical or
>
Greater than
>=
Greater than or equal to
<
Less than
<=
Less than or equal to
Related Links
Math on page 131
Using Functions and Constants
The Math stage provides several functions that can be used in an expression. Functions take the general
form function(parameter); function(parameter,parameter); function(parameter,...), where "parameter" is
132
Spectrum™ Technology Platform 9.0
Chapter 5: Stages Reference
a numeric constant, a variable, or a math expression. Functions can be used with other math expressions
(e.g., x=Sin(y)*Cos(z)).
Constants, Conversion, Math, and Trigonometry. Each of the supported functions is listed below within
its corresponding category.
Table 15: Supported Functions
Function
Description
Constants
e
A mathematical constant that is the base of the natural algorithm.
false
A Boolean constant that represents the value false.
Infinity
A mathematical constant that represents infinity.
NaN
A mathematical constant that represents a value that is not a number.
Pi
A mathematical constant that is the ratio of the circumference of a circle to
its diameter.
true
a Boolean constant that represents the value true.
Conversion
Abs (value)
Takes one parameter.
Returns the absolute value of the given value.
Ceil (value)
Takes one parameter.
Returns a rounded-up value (e.g., Ceil(5.5) returns 6).
DegToRad (value)
Takes one parameter.
Converts a given value from degrees to radians.
Floor (value)
Takes one parameter.
Returns a rounded-down value (e.g., Floor(5.5) returns 5).
RadToDeg (value)
Takes one parameter.
Converts a given value from radians to degrees.
Round (value)
Takes one parameter.
Returns a rounded value.
Math
Avg (value, value,...)
Takes one or more parameters.
Returns the average of all given values.
Exp (value)
Takes one parameter.
Returns Euler's number raised to the power of the value.
Fac (value)
Takes one parameter.
Returns the factorial of a given value (e.g., Fac(6) is computed to
6*5*4*3*2*1 and returns 720).
Ln (value)
Takes one parameter.
Returns the natural logarithm (base e) of a given value.
Log (value)
Takes one parameter.
Returns the natural logarithm (base 10) of a given value.
Max (value, value,...)
Takes one or more parameters.
Returns the maximum value passed in.
Dataflow Designer's Guide
133
Control Stages
Function
Description
Min (value, value,...)
Takes one or more parameters.
Returns the minimum value passed in.
Sqrt (value)
Takes one or more parameters.
Returns the square root of the value passed in.
Sum (value)
Takes one parameter.
Returns the sum of the given values.
Trigonometry
ArcCos (value)
Takes one parameter.
Returns the arc cosine of a value.
ArcSin (value)
Takes one parameter.
Returns the arc sine of a value.
ArcTan (value)
Takes one parameter.
Returns the arc tangent of a value.
Cos (value)
Takes one parameter.
Returns the cosine of a value.
Ln (value)
Takes one parameter.
Returns the natural logarithm (base e) of a given value.
Sin (value)
Takes one parameter.
Returns the sine of a value.
Tan (value)
Takes one parameter.
Returns the tangent of a value.
Related Links
Math on page 131
Using Conditional Statements
Conditional statements can be used to take actions depending on whether various conditions evaluate
to true or false. Grouping using parentheses ( and ) can be used for more complex conditions.
Table 16: Conditions
134
Condition
Description
Equals
expression = = expression
Not Equals
expression != expression
Greater Than
expression > expression
Greater Than or Equal To
expression >= expression
Less Than
expression < expression
Less Than or Equal To
expression <= expression
Not condition
!condition
And
condition && condition
Spectrum™ Technology Platform 9.0
Chapter 5: Stages Reference
Condition
Description
Or
condition || condition
If Statement
if(condition)
{
actions to take if condition is true
}
Brackets are needed only if more than one statement is executed after the "if."
If-Else If Statements
if(condition)
{
actions to take if condition is true
}
else if(condition)
{
actions to take if condition is true
}
else if...
if(SideLength != NaN)
{
AreaOfPolygon=
((SideLength^2)*NumberOfSides)/
(4*Tan(pi/NumberOfSides));
}
else if(Radius != NaN)
{
AreaOfPolygon=
(Radius^2)*NumberOfSides*Sin((2*pi)/NumberOfSides)/2;
}
One or more else if statements can be specified. Brackets are needed only if more than one statement
is executed after the "if-else- if-else."
Else-If Statement
if(condition)
{
actions to take if condition is true
}
else if(condition)
{
actions to take if condition is true
}
else if...
else
{
actions to take if no conditions are met
}
Related Links
Math on page 131
Using the Expressions Console
The Expressions console is used to enter math expressions to be evaluated by the Math stage. The
Input, Calculator, and Functions controls are used to insert values into this console. You can also manually
type expressions into the console. Expressions take the form of a constant, variable, or math operation,
and consist of numeric constants and variables. Numeric constants are whole or decimal numbers, which
Dataflow Designer's Guide
135
Control Stages
can be signed. Variables represent data from the incoming row; for example, if fields x, y, and z are
defined in the input, then x, y, and z can be used in an expression. Variables are replaced with field
values at runtime.
The Math stage also allows grouped expressions, which involve using parentheses to group expressions
and override operator precedence. For example, 2*5^2 equals 50, while (2*5)^2 equals 100.
Note: Every expression you enter must end with a semi-colon.
Additionally, conditional statements can be used in the Expressions console to take actions depending
on whether various conditions evaluate to true or false. See Using Conditional Statements on page
134 for more information on conditional statements.
The Math stage deals primarily with assignment expressions, in which the output from an expression is
assigned to a variable. Multiple assignment operations are supported in the stage and can use the output
of a previous assignment operation.
Assignment Expression Examples
In the scenario below, x=10 and z=1000:
x=5+5
z=x*100
In the scenario below, the area of a polygon is calculated based on the length of one
side and the number of sides.
AreaOfPolygon=
((SideLength^2)*NumberOfSides)/
(4*Tan(pi/NumberOfSides));
Related Links
Math on page 131
Using the Fields Control
The Fields control allows you to change input and output field types. You can change field types from
within this control by clicking the drop-down arrow in the Type column and selecting from the list, which
includes the following options:
bigdecimal
A numeric data type that supports 38 decimal points of precision. Use this data type
for data that will be used in mathematical calculations requiring a high degree of
precision, especially those involving financial or geospatial data. The bigdecimal data
type supports more precise calculations than the double data type.
boolean
A logical type with two values: true and false. Boolean variables can be used in
conditional statements to control flow. The following code sample shows a Boolean
expression:
if(x && y)
z=1;
else if(x)
z=2;
else if(y)
z=3;
else
z=4;
double
136
A numeric data type that contains both negative and positive double precision numbers
-1074
-52
1023
between 2
and (2-2 )×2
. In E notation, the range of values is 4.9E-324 to
1.7976931348623157E308. For information on E notation, see
en.wikipedia.org/wiki/Scientific_notation#E_notation.
Spectrum™ Technology Platform 9.0
Chapter 5: Stages Reference
float
A numeric data type that contains both negative and positive single precision numbers
-149
23
127
between 2
and (2-2 )×2 . In E notation, the range of values is 1.4E-45 to
3.4028235E38. For information on E notation, see
en.wikipedia.org/wiki/Scientific_notation#E_notation.
integer
A numeric data type that contains both negative and positive whole numbers between
31
31
-2 (-2,147,483,648) and 2 -1 (2,147,483,647).
long
A numeric data type that contains both negative and positive whole numbers between
63
63
-2 (-9,223,372,036,854,775,808) and 2 -1 (9,223,372,036,854,775,807).
Related Links
Math on page 131
Using the Preview Control
The Preview control allows you to test math expressions. Fields are listed in the Input Data area; you
can provide specific values to pass to the expression and view the output in the Results area beneath
Input Data.
Numeric fields are initialized to 0 (0.000 for double) and boolean fields are initialized to False. Double
and float fields are limited to four decimal places, and integer and long fields have no decimal places.
Related Links
Math on page 131
Query DB
The Query DB stage allows you to use fields as parameters into a database query and return the results
of the query as new fields in the dataflow.
Note: If you want to query a spatial database, use Query Spatial Data instead of Query DB.
General Tab
Option
Description
Connection
Select the database connection you want to use. Your choices vary
depending on what connections are defined in the Connection Manager
of the Management Console. If you need to make a new database
connection, or modify or delete an existing database connection, click
Manage.
If you are adding or modifying a database connection, complete these
fields:
Connection name
Enter a name for the connection. This can be
anything you choose.
Database driver
Select the appropriate database type.
Connection options
Specify the host, port, instance, user name,
and password to use to connect to the
database.
Table/View
Specifies the table or view in the database that you want to query.
Where
If you want to use a WHERE statement, enter it here. Note that you should
not actually include the word WHERE in the statement. The purpose of
Dataflow Designer's Guide
137
Control Stages
Option
Description
a WHERE statement is to return only the data from records that match
the condition you specify.
To specify a value from a dataflow field, use this syntax:
${<field name>}
Where <field name> is the name of a field in the dataflow.
For example:
account_number=${customer_key}
In this example, the query would return data from records where the
value in the table column account_number matches the value in the
dataflow field customer_key.
Click Preview to see a preview of the data (first 50 records) based on
the criteria you defined.
Note: The preview feature in Query DB does not work if you use a
dataflow field in the WHERE statement. Instead, you can preview
the result using the dataflow inspection tool in Enterprise
Designer.
Return records with no results Check this box if you want records whose queries return no results to
still be returned by Query DB. If you clear this check box, the record will
not be returned. We recommend that you leave this option checked.
Include
In the fields table, select the fields you want to include by clicking the
Include box next to the field.
Sort Tab
If you want to sort records based on the value of a field, specify the fields you want to sort on.
Related Links
Control Stages on page 116
Record Combiner
Record Combiner combines two or more records from multiple streams into a single record. Record
Combiner can have one or more stage input ports. For example, you can have one group of records
from one stage input (port) and the other group from a second stage input (port 2), and the records will
merge into a single record. If you delete a middle stage, the ports will not renumber consecutively.
Note: Record Combiner will not release a record on output until each of its input ports has received a
record. It must combine as many records as it has input ports before outputting a record.
You can specify which port should be preserved in cases where the input streams have fields of the
same name. For example, if you are combining records from two streams, and both streams contain a
field named AccountNumber, you could specify which stream's AccountNumber field you want to preserve
by choosing the Record Combiner input port that corresponds to the stream you want to preserve. The
data from the AccountNumber field in the other stream would be discarded.
Related Links
Control Stages on page 116
138
Spectrum™ Technology Platform 9.0
Chapter 5: Stages Reference
Record Joiner
Record Joiner performs a SQL-style JOIN operation to combine records from different streams based
on a relationship between fields in the streams. You can use Record Joiner to join records from multiple
files, multiple databases, or any upstream channels in the dataflow. You must connect at least two input
channels to Record Joiner. The results of the JOIN operation are then written to one output channel.
Optionally, records that do not match the join condition can be written to a separate output channel.
Note: Before using Record Joiner you should have a good understanding of the SQL JOIN operation.
For more information, see wikipedia.org/wiki/Join_(SQL).
Join Definition
Option
Description
Left port
The port whose records you want to use as the left table in the JOIN
operation. All other input ports will be used as right tables in the JOIN
operation.
Note: "Left" table and "right" table are SQL JOIN concepts. Before
using Record Joiner you should have a good understanding of
the SQL JOIN operation. For more information, see
wikipedia.org/wiki/Join_(SQL).
Join type
Join Fields
The type of JOIN operation you want to perform. One of the following:
Left
Outer
Returns all records from the left port even if there are no
matches between the left port and the other ports. This
option returns all records from the left port plus any records
that match in any of the other ports.
Full
Returns all records from all ports.
Inner
Returns only those records that have a match between the
left port and another port. For instance, if you have four
input sources and port 1 is the left port, an inner join will
return records that have matching fields between port 1
and port 2, port 1 and port 3, and port 1 and port 4.
The field or fields from the left port that must match the data in a field
from another port in order for the records to be joined.
Note: Only fields that have a data type of string or integer can be used
as join fields.
Data from the left port is
sorted
Specifies whether the records in the left port are already sorted by the
field specified in Join Fields. If the records are already sorted, checking
this box can improve performance. If you do not check this box, Record
Joiner will sort the records according to the field specified in Join Fields
before performing the join operation.
If you have specified multiple join fields, then the records must be sorted
using the order of the fields listed in Join Fields. For example, if you
have two join fields:
Amount
Region
Then the records must be sorted first by the Amount field, then by the
Region field.
Dataflow Designer's Guide
139
Control Stages
Option
Description
Important: If you select this option but the records are not sorted,
you will get incorrect results from Record Joiner. Only
select this option if you are sure that the records in the
left port are already sorted.
Join Definitions
Describes the join conditions that will be used to determine if a record
from the left port should be joined with a record from one of the other
ports. For example:
port1.Name = port2.Name
This indicates that if the value in the Name field of a record from port1
matches the value in the Name field of a record from port2, the two
records will be joined.
To modify a join condition, click Modify. Select a field from the right port
whose data must match the data in the join field from the left port in
order for the records to be joined. If you want to change the left port
field, click Cancel and change it in the Join Fields field. If the records
in the right port are sorted by the join field, check the box Data from
the right port is sorted. Checking this box can improve performance.
Important: If you select Data from the right port is sorted but the
records are not sorted, you will get incorrect results from
Record Joiner. Only select this option if you are sure that
the records in the right port are already sorted.
Field Resolution
This tab specifies which port's data to use in the joined record in cases where the same field name exists
in more than one input port. For example, if you are performing a join on two sources of data, and each
source contains a field named DateOfBirth, you can specify which port's data to use in the DateOfBirth
field in the joined record.
If there are fields of the same name but with different data, and you want to preserve both fields' data
in the joined record, you must rename one of the fields before the data is sent to Record Joiner. You
can use the Transformer stage to rename fields.
Handling Records That Are Not Joined
In order for a record to be included in the Record Joiner output it must meet the join condition, or a join
type must be selected that returns both joined records and those that did not meet the join condition.
For example, a full join will return all records from all input ports regardless of whether a record meets
the join condition. In the case of a join type that does not return all records from all ports, such as a left
outer join or an inner join, only records that match the join condition are included in the Record Joiner
output.
To capture the records that are not included in the result of the join operation, use the not_joined output
port. The output from this port contains all records that were not included in the regular output port. The
not_joined output port is the white triangle on the right side of the Record Joiner stage as shown here:
140
Spectrum™ Technology Platform 9.0
Chapter 5: Stages Reference
Records that come out of this port have the field InputPortIndex added to them. This field contains the
number of the Record Joiner input port where the record came from. This allows you to identify the
source of the record.
Related Links
Control Stages on page 116
Sorter
Sorter sorts records using the fields you specify. For example, you can have records sorted by names,
cities, or any other field in your dataflow.
Related Links
Control Stages on page 116
Sorting Records with Sorter on page 141
Sorting Records with Sorter
The Sorter stage allows you to sort records using the fields you specify.
1. Under Control Stages, drag Sorter to the canvas, placing it where you want on the dataflow.
2. Double-click Sorter.
3. Click Add.
4. Click the down-arrow in the Field Name column and select the field that you want to sort on.
Note: The list of available fields is based on the fields used in the previous stages in the dataflow.
5. In the Order column, choose whether you want to sort in ascending or descending order.
6. In the Type column, select the field's data type.
Note: If your incoming data is not in string format, the Type column will be disabled.
bigdecimal
A numeric data type that supports 38 decimal points of precision. Use this data type
for data that will be used in mathematical calculations requiring a high degree of
precision, especially those involving financial or geospatial data. The bigdecimal
data type supports more precise calculations than the double data type.
double
A numeric data type that contains both negative and positive double precision
-1074
-52
1023
numbers between 2
and (2-2 )×2
. In E notation, the range of values is
4.9E-324 to 1.7976931348623157E308. For information on E notation, see
en.wikipedia.org/wiki/Scientific_notation#E_notation.
float
A numeric data type that contains both negative and positive single precision
-149
23
127
numbers between 2
and (2-2 )×2 . In E notation, the range of values is
1.4E-45 to 3.4028235E38. For information on E notation, see
en.wikipedia.org/wiki/Scientific_notation#E_notation.
integer
A numeric data type that contains both negative and positive whole numbers between
31
31
-2 (-2,147,483,648) and 2 -1 (2,147,483,647).
long
A numeric data type that contains both negative and positive whole numbers between
63
63
-2 (-9,223,372,036,854,775,808) and 2 -1 (9,223,372,036,854,775,807).
string
A sequence of characters.
Dataflow Designer's Guide
141
Control Stages
7. To remove blank space from before and after the value before sorting, check the box in the Trim
column. The trim option does not modify the value of the field. It only trims the value for the purpose
of sorting. Note that if your incoming data is not in string format, the Trim column will be disabled.
8. Repeat until you have added all the fields you want to sort.
9. Rearrange the sort order as desired by clicking Up or Down. This allows you to sort first by one field,
then sort the resulting order again by another field.
10. If you want to override the default sort performance options that have been defined by your
administrator, click Advanced, check the Override sort performance options box, then specify
the following options:
In memory record limit
Specifies the maximum number of data rows a sorter will hold in
memory before it starts paging to disk. Be careful in environments
where there are jobs running concurrently because increasing the
In memory record limit setting increases the likelihood of running
out of memory.
Maximum number of
temporary files to use
Specifies the maximum number of temporary files that may be used
by a sort process.
Enable compression
Specifies that temporary files are compressed when they are written
to disk.
Note: The optimal sort performance settings depends on your server's hardware configuration.
Nevertheless, the following equation generally produces good sort performance:
(InMemoryRecordLimit × MaxNumberOfTempFiles ÷ 2) >=
TotalNumberOfRecords
11. Click OK.
Note: You can remove the sort criteria as desired by highlighting a row and clicking Remove.
Related Links
Sorter on page 141
Splitter
A Splitter converts hierarchical data to flat data. Splitters have one input port and one output port that
delivers data from the Splitter to the next stage. One way you could use the Splitter's functionality is to
take a list of information in a file and extract each discrete item of information into its own data row. For
example, your input could include landmarks within a certain distance of a latitudinal/longitudinal point,
and the Splitter could put each landmark into a separate data row.
Using the Splitter Stage
1. Under Control Stages, click the Splitter and drag it onto the canvas, placing it where you want on
the dataflow and connecting it to input and output stages.
2. Double-click the Splitter. The Splitter Options dialog box appears.
3. Click the Split at drop-down to see other list types available for this stage. Click the list type you
want the Splitter to create. The Splitter Options dialog box will adjust accordingly with your selection,
showing the fields available for that list type.
Alternatively, you can click the ellipses (...) button next to the Split at drop-down. The Field Schema
dialog box appears, showing the schema for the data coming into the Splitter. The list types are
shown in bold, followed by the individual lists for each type. Also shown is the format of those fields
(string, double, and so on). Click the list type you want the Splitter to create and click OK. The Splitter
Options dialog box will adjust accordingly with your selection, showing the fields available for that
list type.
4. Select which fields you want the Splitter to include on output by checking the Include box for those
fields.
142
Spectrum™ Technology Platform 9.0
Chapter 5: Stages Reference
5. Click OK.
Splitter Example
The following example takes output from a routing stage that includes driving directions
and puts each direction (or list item) into a data row. The dataflow looks like this:
The dataflow performs the function as follows:
1. The Read from File stage contains latitudes, longitudes, and input key values to
help you identify the individual points.
2. The Aggregator stage builds up the data from the Read from File stage into a
schema (a structured hierarchy of data) and identifies the group of latitudes and
longitudes as a list of route points, which is a necessary step for the next stage to
work correctly.
3. Location Intelligence Module's Get Travel Directions stage creates directions
from one location to another using the route points from step 2.
Dataflow Designer's Guide
143
Control Stages
4. The Splitter stage establishes that the data should be split at the Route Directions
field and that the output lists should include all of the possible fields from the Get
Travel Directions stage.
The schema is structured as follows, with Route Directions and Route Points being
the available list types for this job:
5. The Write to File stage writes the output to a file.
Related Links
Control Stages on page 116
144
Spectrum™ Technology Platform 9.0
Chapter 5: Stages Reference
SQL Command
SQL Command executes one or more SQL commands for each record in the dataflow. You can use
SQL Command to:
• Execute complex INSERT/UPDATE statements, such as statements that have subqueries/joins with
other tables.
• Update tables after inserting/updating data to maintain referential integrity.
• Update or delete a record in a database before a replacement record is loaded.
• Update multiple tables in a single transaction.
You can execute additional SQL commands before and after executing the main SQL commands, and
you can invoke stored procedures.
Note: Stored procedures invoked from SQL Command must not use OUT parameters.
General
The General tab is where you specify dynamic SQL statements that you want to execute once for each
record. The following table lists the options available on the General tab.
Option
Description
Connection
Select the database connection you want to use. Your choices vary
depending on what connections are defined in the Connection Manager
of the Management Console. If you need to make a new database
connection, or modify or delete an existing database connection, click
Manage.
If you are adding or modifying a database connection, complete these
fields:
SQL statements
Connection name
Enter a name for the connection. This can be
anything you choose.
Database driver
Select the appropriate database type.
Connection options
Specify the host, port, instance, user name,
and password to use to connect to the
database.
Enter the SQL statements you want to execute for each record in the
dataflow. As you begin to type, an auto-complete pop-up window will
display the valid SQL commands. Separate multiple SQL statements
with a semicolon (;).
To specify a value from a dataflow field, use this syntax:
${<field name>}
Where <field name> is the name of a field in the dataflow.
For example:
UPDATE MyDatabase.dbo.customer
SET name=${Name}
WHERE id=${ID};
In this example ${Name} will be replaced with the value from the
dataflow's Name field and ${ID} will be replaced with the value from
the dataflow's ID field.
Dataflow Designer's Guide
145
Control Stages
Option
Description
Note: Queries must use the fully-qualified name. For example,
MyDatabase.dbo.customer.
Transaction processing
Error processing
Specifies whether to process records in batches or to process all records
at the same time. One of the following:
Batch size
Groups records into batches of the size you specify
and processes one batch at a time.
Entire Run
Creates one large batch for all records and
processes all transactions at the same time.
Specifies what to do if an error is encountered while executing the SQL
commands. One of the following:
Do not terminate the
dataflow on error
The dataflow continues to run if the
database returns an error while
executing the SQL commands.
Terminate the dataflow
after encountering this
many errors
The dataflow will stop running after the
database returns the specified number
of errors.
Note: If there is a syntax error in the SQL, the dataflow will always
terminate regardless of which setting you choose here.
In addition, you can optionally write error records to a sink by connecting
the SQL Command error port to the type of sink you want. The error
port is the white triangle on the right side of the stage icon in the
dataflow. For example, to write error records to a flat file, you would
connect the SQL Command error port to a Write to File stage, as shown
here:
Pre/Post SQL
The Pre/Post SQL tab is where you specify SQL statements that you want to execute once per dataflow
run, as opposed to once per record as is the case with the SQL you specify on the General tab. The
following table lists the options available on the Pre/Post SQL tab.
146
Option
Description
Pre-SQL
Type one or more SQL statements that you want to execute before the
records coming into the stage are processed. The SQL statements you
Spectrum™ Technology Platform 9.0
Chapter 5: Stages Reference
Option
Description
enter here are executed once per run after the dataflow starts running
but before the SQL Command stage processes the first records.
An example use of pre-SQL would be to create a table for the records
that will be processed.
Autocommit pre-SQL
Check this box to commit the pre-SQL statements before executing the
SQL statements on the General tab.
If you do not check this box, the pre-SQL statements will be committed
in the same transaction as the SQL statements on the General tab.
Note: If you check neither the Autocommit pre-SQL nor the
Autocommit post-SQL boxes, then all SQL statements for the
stage are committed in one transaction.
Post-SQL
Type one or more SQL statements that you want to execute after all the
records are processed. The SQL statements you enter here are executed
once per run after the SQL Command stage is finished but before the
dataflow finishes.
An example use of pre-SQL would be to build an index after processing
the records.
Autocommit post-SQL
Check this box to commit the post-SQL statements in their own
transaction after the SQL commands on the General tab are committed.
If you do not check this box, the post-SQL statements will be committed
in the same transaction as the SQL statements on the General tab.
Note: If you check neither the Autocommit pre-SQL nor the
Autocommit post-SQL boxes, then all SQL statements for the
stage are committed in one transaction.
Related Links
Control Stages on page 116
Stream Combiner
Stream Combiner joins two or more streams of records from multiple stages. Stream Combiner has one
or more stage input ports. For example, you can have one group of records from one stage and another
group from a second stage, and the records will merge into a single stream.
Stream Combiner has no settings.
Related Links
Control Stages on page 116
Transformer
The Transformer stage modifies field values and formatting. You can perform more than one transform
on a field as long as the input and output field names are identical.
General Transforms
Construct Field
Appends and concatenates constant values and input fields based on "template".
It provides the functionality of both the "transformer create value" and "concatenation
function" transformer in a single transform.
Dataflow Designer's Guide
147
Control Stages
Copy
Copies the value from one field to another.
Custom
Allows you to define your own transform using the Groovy language. For more
information, see Creating a Custom Transform on page 149.
For users of the Location Intelligence Module, custom transforms can access spatial
datasets. See Spectrum™ Technology Platform Spectrum Spatial Stages Guide
on support.pb.com.
Rename
Changes the name of a field. You can select from a list of field names already in
the dataflow or you can type the name you want.
Status
Changes the Status field to a value of either Success or Fail. When set to Fail, an
optional Description and Code may also be set.
Formatting Transforms
Case
Changes casing upper or lower case.
Mask
Applies or removes characters from a field. For more information, see Using a
Mask Transform on page 152.
Pad
Adds characters to the left or right of the field value.
String Transforms
Minimize Whitespace
Removes whitespace at the beginning and end of the field. It also replaces
any sequence of whitespaces (such as multiple, consecutive spaces) to a
single whitespace character.
Remove Substring
Removes all occurrences of a string from a field. For example, you could
remove "CA" from the StateProvince field.
Substring
Copies a contiguous sequence of characters from one field to another.
Trim
Removes specified characters from the left, right, or both sides of a field.
Note that this transform is case-sensitive.
Truncate
Removes a specified number of characters from the left, right, or both sides
of a field.
Related Links
Control Stages on page 116
Changing the Order of Transforms on page 148
Creating a Custom Transform on page 149
Using a Mask Transform on page 152
Changing the Order of Transforms
If you have more than one transform to be executed on a particular output field, you can define the order
in which they are executed.
Note: If you map a single field to two different output fields (for example, ValidateAddress.City to
Output.City1 and ValidateAddress.City to Output.City2), and you add transforms to each field,
the transform for the secondary field must be executed first. You must change the execution
order of the transforms to execute the second field transform (Output.City2) first.
1. Double-click the Transformer stage. The Transformer Options dialog box appears.
2. Select a transform and use the Move Up and Move Down buttons to rearrange the order of the
transforms. The top transform will be executed first.
Note: Dependent transforms cannot be moved above primary transforms (the transforms upon
which the dependent transforms rely).
148
Spectrum™ Technology Platform 9.0
Chapter 5: Stages Reference
3. Click OK.
Related Links
Transformer on page 147
Creating a Custom Transform
The Transformer stage has predefined transforms that perform a variety of common data transformations.
If the predefined transforms do not meet your needs, you can write a custom transform script using
Groovy. This procedure describes how to create basic custom transforms using Groovy. For complete
documentation on Groovy, see groovy.codehaus.org/Documentation.
1. In Enterprise Designer, add a Transformer stage to the dataflow.
2. Double-click the Transformer stage.
3. Click Add.
4. Under General, click Custom.
5. In the Custom transform name field, enter a name for the transform you will create. The name can
be anything you choose.
6. Click Script Editor.
This editor provides a variety of features to make developing your transform easier, such as code
completion and palettes listing functions and fields.
Task
Instructions
To add a
function
In the Functions pane, double-click the function you want to add.
Note: The functions listed in the editor are functions provided to make writing
custom transform scripts easier. They perform functions that would otherwise
require multiple lines of Groovy code to accomplish. They are not standard
Groovy functions.
To get the
In the Input Fields pane, double-click the input field you want. The following will be
value from a added to your script:
dataflow
data['FieldName']
field
For example, if you want to get the value from the field CurrentBalance, the following
would be added:
data['CurrentBalance']
To set the
value of a
dataflow
field
Enter the following code in the script editor:
data['FieldName']=NewValue
For example, to set the field Day to the day of the week contained in the field
PurchaseDate:
data['Day']=dayOfWeek(data['PurchaseDate'])
In this example, the function dayOfWeek() is used to get the day from the date
value in the PurchaseDate field, and the result is written to the Day field.
Tip: You can double-click the name of the output field in the Output Fields pane
to add the field reference to the script.
To create a
new field
using a
numeric
data type
Enter the following code in the script editor:
data['FieldName'] = new constructor;
Where constructor is one of the following:
java.lang.Double(number)
Dataflow Designer's Guide
149
Control Stages
Task
Instructions
Creates a field with a data type of Double.
java.lang.Float(number)
Creates a field with a data type of Float.
java.lang.Integer(number)
Creates a field with a data type of Integer. You can also create
a new integer field by specifying a whole number. For
example, this will create an integer field with a value of 23:
data['MyNewField'] = 23;
java.lang.Long(number)
Creates a field with a data type of Long.
java.math.BigDecimal(number)
Creates a field with a data type of BigDecimal. You can also
create a new BigDecimal field by specifying a value containing
a decimal. For example, this will create an BigDecimal field
with a value of 23.11:
data['MyNewField'] = 23.11;
For example, to create a new field named "Transactions" with a data type of Double
and the value 23.10, you would specify the following:
data['Transactions'] = new com.java.lang.Double(23.10);
To create a Enter the following code in the script editor:
new field
using a date data['FieldName'] = new constructor;
or time data
Where constructor is one of the following:
type
com.pb.spectrum.api.datetime.Date(year,month,day)
Creates a field with a data type of date. For example,
December 23, 2013 would be:
2013,12,23
com.pb.spectrum.api.datetime.Time(hour,minute,second)
Creates a field with a data type of time. For example, 4:15
PM would be:
16,15,0
.
com.pb.spectrum.api.datetime.DateTime(year,month,day,hour,minute,second)
Creates a field with a data type of DateTime. For example,
4:15 PM on December 23, 2013 would be:
2013,12,23,16,15,0
For example, to create a new field named "TransactionDate" with a data type of
Date and the value December 23, 2013, you would specify the following:
data['TransactionDate'] = new
com.pb.spectrum.api.datetime.Date(2013,12,23);
150
Spectrum™ Technology Platform 9.0
Chapter 5: Stages Reference
Task
Instructions
To create a
new field
with a data
type of
Boolean
Enter the following code in the script editor:
data['FieldName'] = true or false;
For example, to create a field named IsValidated and set it to false, you would specify
the following:
data['IsValidated'] = false;
To
Use the + symbol. For example, the following concatenates the FirstName field and
concatenate the LastName field into a value and stores it in the FullName field
fields
String fullname = data['FirstName'] + ' ' + data['LastName'];
data['FullName']=fullname;
In the following example there are two input fields (AddressLine1 and AddressLine2)
which are concatenated and written to the output field Address.
address1 = data['AddressLine1'];
address2 = data['AddressLine2'];
data['Address']=address1+ ',' + address2;
To parse a
field
Identify a separation character then use substring to parse the field. In the following
example, if the PostalCode field is greater than five characters, it separates the
five-character ZIP Code and the +4 portion and writes them to separate fields in the
output record.
if (data['PostalCode'].length() > 5)
{
String postalCode = data['PostalCode'];
int separatorPosition = postalCode.indexOf('-');
String zip = postalCode.substring(0, separatorPosition);
String plusFour = postalCode.substring(
separatorPosition + 1,
postalCode.length();
data['Zip']=zip;
data['PlusFour']=plusFour;
}
To perform
conditional
processing
Use an if or switch statement. These are the most common conditional processing
constructs. For more information see groovy.codehaus.org/Logical+Branching.
This example sets the field AddressCity to the first address line and city name if the
city is Austin.
city = data['City'];
address1 = data['AddressLine1']
if(city.equals('Austin'))
data['AddressCity']=address1 +',' + city;
To perform
looping
Use the for loop. This is the only looping construct you should need. For more
information on looping or syntax see groovy.codehaus.org/Looping.
To augment Define a constant and use the concatenation character +. For example, the following
data
script appends the word "Incorporated" to the FirmName field.
firmname = data['FirmName'];
constant = 'Incorporated';
if(firmname.length() > 0)
data['FirmName']=firmname + ' ' + constant;
Dataflow Designer's Guide
151
Control Stages
Task
Instructions
To access
an option
specified at
runtime
If the dataflow has runtime options enabled, you can access settings passed to the
dataflow at runtime by using this syntax:
options.get("optionName")
For example, to access an option named casing, you would include this in your
custom transform script:
options.get("casing")
7. After you are done entering your script, click the "X" button in the window to close the editor.
8. In the Input fields field, select the field or fields to which you want to apply the transform.
9. In the Output fields field, specify the field to which you want to write the output from the transform.
If necessary, you can define a new field by clicking the Add button to the right of the Output fields
field.
10. When you are done, click the Add button at the bottom of the window.
11. Click OK.
Related Links
Transformer on page 147
Using a Mask Transform
You can use the Transformer stage to apply a mask transform to a field. A mask transform applies
characters to a field, or removes characters from a field, using a specified pattern. For example, using
a mask transform you could format a string of numbers like 8003685806 into a phone number like this:
(800) 368 5806.
1. In Enterprise Designer, drag a Transformer stage onto the canvas and connect it in the desired
location.
2. Double-click the Transformer stage.
3. Click Add.
4. Expand Formatting and select Mask.
5. Select the type of mask you want to use.
Apply
Adds characters to a field to form the string into a new pattern.
Remove
Extracts a pattern of characters from a string.
6. In the Mask string field, specify the pattern you want to use when either adding characters or removing
characters.
There are two types of characters you use when specifying the mask string: literal characters and
mask characters.
Literal characters represent actual characters that are present in the string. When a remove mask
is used, the input character must match the literal character exactly. If that is the case, then they will
be removed from the input. Similarly, the literal characters will be added to the input in the position
indicated by the mask definition when the apply mask is used.
The other type of character you can use in a mask string is a mask character. A mask character
indicates the type of character that can be in a particular location of the input string. For instance, if
you have an input where the first character is a number, the first mask character needs to be #.
Anything in the input that matches this mask character will be kept in the output.
The following table lists the mask characters you can use in the Mask string field:
152
Spectrum™ Technology Platform 9.0
Chapter 5: Stages Reference
Table 17: Mask Characters
Character
Definition
#
Any number.
'
Escape character, used to escape any of the special formatting characters.
U
Any character. All lowercase letters are mapped to upper case.
L
Any character. All upper case letters are mapped to lower case.
A
Any character or number.
?
Any character.
*
Anything.
H
Any hex character (0-9, a-f or A-F).
7. Click Add.
8. Click OK.
Mask Transform Examples
This is an apply mask that applies formatting to a string. Because "(" and ")" and
<space> are literals, they will be added to the output. All the numbers will be kept
because # is a mask character.
Input: 8003685806
Mask string: (###) ### ####
Output: (800) 368 5806
The following example is a remove mask that extracts a pattern of characters from a
string. Because there are no literals in this mask, nothing will be removed (mask
character * allows anything).
Input: (800) 368 5806
Mask string: *###*###*####
Output: (800) 368 5806
Related Links
Transformer on page 147
Unique ID Generator
The Unique ID Generator stage creates a unique key that identifies a specific record. A unique ID is
crucial for data warehouse initiatives in which transactions may not carry all name and address data,
but must be attributed to the same record/contact. A unique ID may be implemented at the individual,
household, business, and/or premises level. Unique ID Generator provides a variety of algorithms to
create unique IDs.
The unique ID is based on either a sequential number or date and time stamp. In addition, you can
optionally use a variety of algorithms to generate data to appended to the ID, thereby increasing the
likelihood that the ID will be unique. The sequential number or date and time stamp IDs are required and
cannot be removed from the generated ID.
Unique ID Generator can be used to generate a non-unique key using one of the key generation
algorithms. In non-unique mode, you can create keys to use for matching. This may be useful in a data
Dataflow Designer's Guide
153
Control Stages
warehouse where you have already added keys to a dimension and you want to generate a key for new
records in order to see if the new records match an existing record.
The following example shows that each record in the input is assigned a sequential record ID in the
output.
Record
RecordID
John Smith
0
Mary Smith
1
Jane Doe
2
John Doe
3
The Unique ID stage produces an output field named RecordID which contains the unique ID.
Related Links
Control Stages on page 116
Defining a Unique ID on page 154
Using Algorithms to Augment a Unique ID on page 155
Defining a Non-Unique ID on page 156
Defining a Unique ID
By default, the Unique ID Generator stage creates a sequential ID, with the first record having an ID of
0, the second record having an ID of 1, the third record having an ID of 2, and so on. If you want to
change how the unique ID is generated, follow this procedure.
1. In the Unique ID Generator stage, on the Rules tab, click Modify.
2. Choose the method you want to use to generate the unique ID.
Options
Description
Sequential Numeric tag
starting at
Assigns an incremental numeric value to each record starting with
the number you specify. If you specify 0, the first record will have
an ID of 0, the second record will have an ID of 1, and so on.
Sequential Numeric tag
Assigns an incremental numerical value to each record starting
starting at value in a database with the maximum number read from the database field. This
field
number is then incremented by 1 and assigned to the first record.
For example, if the number read from the database field is 30, the
first record will have an ID of 31, the second record will have an
ID of 32, and so on.
Connection Select the database connection you want to use.
Your choices vary depending on what connections
are defined in the Connection Manager of the
Management Console. If you need to make a new
database, or modify or delete an existing
connection, click Manage
If you are adding or modifying a database
connection, complete these fields:
Connection name
Enter a name for the connection. This can be
anything you choose.
Database driver
Select the appropriate database type.
Connection options
154
Spectrum™ Technology Platform 9.0
Chapter 5: Stages Reference
Options
Description
Specify the host, port, instance, user name, and
password to use to connect to the database.
Table view Specifies the table or view in the database that you
want to query.
Database
field
Select a column from the list to generate a unique
key. Note that Database field will only list the
integer type columns.
Date/Time stamp
Creates a unique key based on the date and time stamp instead
of sequential numbering.
Off
Select this option only if you want to generate a non-unique key
using an algorithm.
3. Click OK.
Related Links
Unique ID Generator on page 153
Defining a Non-Unique ID on page 156
Using Algorithms to Augment a Unique ID
Unique ID Generator generates a unique ID for each record by either numbering each record sequentially
or generating a date/time stamp for each record. You can optionally use algorithms to append additional
information to the sequential or date/time unique ID, thereby creating a more complex unique ID and
one that is more likely to be truly unique.
1. In the Unique ID Generator stage, click Add.
2. In the Algorithm field, select the algorithm you want to use to generate additional information in the
ID. One of the following:
Consonant
Returns specified fields with consonants removed.
Double
Metaphone
Returns a code based on a phonetic representation of their characters. Double
Metaphone is an improved version of the Metaphone algorithm, and attempts to
account for the many irregularities found in different languages.
Koeln
Indexes names by sound, as they are pronounced in German. Allows names with
the same pronunciation to be encoded to the same representation so that they
can be matched, despite minor differences in spelling. The result is always a
sequence of numbers; special characters and white spaces are ignored. This
option was developed to respond to limitations of Soundex.
MD5
A message digest algorithm that produces a 128-bit hash value. This algorithm is
commonly used to check data integrity.
Metaphone
Returns a Metaphone coded key of selected fields. Metaphone is an algorithm for
coding words using their English pronunciation.
Metaphone
(Spanish)
Returns a Metaphone coded key of selected fields for the Spanish language. This
metaphone algorithm codes words using their Spanish pronunciation.
Metaphone 3
Improves upon the Metaphone and Double Metaphone algorithms with more exact
consonant and internal vowel settings that allow you to produce words or names
more or less closely matched to search terms on a phonetic basis. Metaphone 3
increases the accuracy of phonetic encoding to 98%. This option was developed
to respond to limitations of Soundex.
Nysiis
Phonetic code algorithm that matches an approximate pronunciation to an exact
spelling and indexes words that are pronounced similarly. Part of the New York
State Identification and Intelligence System. Say, for example, that you are looking
for someone's information in a database of people. You believe that the person's
name sounds like "John Smith", but it is in fact spelled "Jon Smyth". If you
Dataflow Designer's Guide
155
Control Stages
conducted a search looking for an exact match for "John Smith" no results would
be returned. However, if you index the database using the NYSIIS algorithm and
search using the NYSIIS algorithm again, the correct match will be returned
because both "John Smith" and "Jon Smyth" are indexed as "JAN SNATH" by the
algorithm.
Phonix
Preprocesses name strings by applying more than 100 transformation rules to
single characters or to sequences of several characters. 19 of those rules are
applied only if the character(s) are at the beginning of the string, while 12 of the
rules are applied only if they are at the middle of the string, and 28 of the rules are
applied only if they are at the end of the string. The transformed name string is
encoded into a code that is comprised by a starting letter followed by three digits
(removing zeros and duplicate numbers). This option was developed to respond
to limitations of Soundex; it is more complex and therefore slower than Soundex.
Soundex
Returns a Soundex code of selected fields. Soundex produces a fixed-length code
based on the English pronunciation of a word.
Substring
Returns a specified portion of the selected field.
3. In the Field name field, choose the field to which you want to apply the algorithm. For example, if
you chose the soundex algorithm and chose a field named City, the ID would be generated by applying
the soundex algorithm to the data in the City field.
4. If you selected the substring algorithm, specify the portion of the field you want to use in the substring:
a) In the Start position field, specify the position in the field where you want the substring to begin.
b) In the Length field, select the number of characters from the start position that you want to include
in the substring.
For example, say you have the following data in a field named LastName:
Augustine
If you specified 3 as the start position and 6 as the end position, the substring would produce:
gustin
5. Check the Remove noise characters box to remove all non-numeric and non-alpha characters such
as hyphens, white space, and other special characters from the field before applying the algorithm.
6. For consonant and substring algorithms, you can sort the data in the field before applying the algorithm
by checking the Sort input box. You can then choose to sort either the characters in the field or
terms in the field in alphabetical order.
7. Click OK to save your settings.
8. Repeat as needed if you want to add additional algorithms to produce a more complex ID.
Note: The unique key definition is always displayed in a different color and cannot be deleted.
Related Links
Unique ID Generator on page 153
Defining a Non-Unique ID
Unique ID Generator can be used to generate a non-unique key using one of the key generation
algorithms. In non-unique mode, you can create keys to use for matching. This may be useful in a data
warehouse where you have already added keys to a dimension and you want to generate a key for new
records in order to see if the new records match an existing record.
1. In the Unique ID Generator stage, on the Rules tab, click Modify.
2. Select Off.
This turns off the unique ID portion of the ID generation rules. With this option off, only the algorithm
you choose in the following steps will be used to create the ID. This means that any records that
have the same data in the fields you use to generate the ID will have the same ID. You can then use
the ID for matching.
3. Click OK.
156
Spectrum™ Technology Platform 9.0
Chapter 5: Stages Reference
4. At the warning prompt, click Yes.
5. In the Unique ID Generator stage, click Add.
6. In the Algorithm field, select the algorithm you want to use to generate additional information in the
ID. One of the following:
Consonant
Returns specified fields with consonants removed.
Double
Metaphone
Returns a code based on a phonetic representation of their characters. Double
Metaphone is an improved version of the Metaphone algorithm, and attempts to
account for the many irregularities found in different languages.
Koeln
Indexes names by sound, as they are pronounced in German. Allows names with
the same pronunciation to be encoded to the same representation so that they
can be matched, despite minor differences in spelling. The result is always a
sequence of numbers; special characters and white spaces are ignored. This
option was developed to respond to limitations of Soundex.
MD5
A message digest algorithm that produces a 128-bit hash value. This algorithm is
commonly used to check data integrity.
Metaphone
Returns a Metaphone coded key of selected fields. Metaphone is an algorithm for
coding words using their English pronunciation.
Metaphone
(Spanish)
Returns a Metaphone coded key of selected fields for the Spanish language. This
metaphone algorithm codes words using their Spanish pronunciation.
Metaphone 3
Improves upon the Metaphone and Double Metaphone algorithms with more exact
consonant and internal vowel settings that allow you to produce words or names
more or less closely matched to search terms on a phonetic basis. Metaphone 3
increases the accuracy of phonetic encoding to 98%. This option was developed
to respond to limitations of Soundex.
Nysiis
Phonetic code algorithm that matches an approximate pronunciation to an exact
spelling and indexes words that are pronounced similarly. Part of the New York
State Identification and Intelligence System. Say, for example, that you are looking
for someone's information in a database of people. You believe that the person's
name sounds like "John Smith", but it is in fact spelled "Jon Smyth". If you
conducted a search looking for an exact match for "John Smith" no results would
be returned. However, if you index the database using the NYSIIS algorithm and
search using the NYSIIS algorithm again, the correct match will be returned
because both "John Smith" and "Jon Smyth" are indexed as "JAN SNATH" by the
algorithm.
Phonix
Preprocesses name strings by applying more than 100 transformation rules to
single characters or to sequences of several characters. 19 of those rules are
applied only if the character(s) are at the beginning of the string, while 12 of the
rules are applied only if they are at the middle of the string, and 28 of the rules are
applied only if they are at the end of the string. The transformed name string is
encoded into a code that is comprised by a starting letter followed by three digits
(removing zeros and duplicate numbers). This option was developed to respond
to limitations of Soundex; it is more complex and therefore slower than Soundex.
Soundex
Returns a Soundex code of selected fields. Soundex produces a fixed-length code
based on the English pronunciation of a word.
Substring
Returns a specified portion of the selected field.
7. In the Field name field, choose the field to which you want to apply the algorithm. For example, if
you chose the soundex algorithm and chose a field named City, the ID would be generated by applying
the soundex algorithm to the data in the City field.
8. If you selected the substring algorithm, specify the portion of the field you want to use in the substring:
a) In the Start position field, specify the position in the field where you want the substring to begin.
b) In the Length field, select the number of characters from the start position that you want to include
in the substring.
For example, say you have the following data in a field named LastName:
Augustine
Dataflow Designer's Guide
157
Primary Stages
If you specified 3 as the start position and 6 as the end position, the substring would produce:
gustin
9. Check the Remove noise characters box to remove all non-numeric and non-alpha characters such
as hyphens, white space, and other special characters from the field before applying the algorithm.
10. For consonant and substring algorithms, you can sort the data in the field before applying the algorithm
by checking the Sort input box. You can then choose to sort either the characters in the field or
terms in the field in alphabetical order.
11. Click OK to save your settings.
12. Repeat as needed if you want to add additional algorithms to produce a more complex ID.
Note: The unique key definition is always displayed in a different color and cannot be deleted.
Related Links
Unique ID Generator on page 153
Defining a Unique ID on page 154
Primary Stages
Primary stages are the core of any dataflow. They generally perform the processing necessary to achieve
a specific business goal, such as standardizing addresses, geocoding, or name standardization.
Related Links
Module Stages on page 158
User-Defined Stages on page 158
Module Stages
Modules provide a variety of processing capabilities, such as address validation, geocoding, matching,
and more. When you license one of these modules, the module's stages are available in the Primary
Stages folder in Enterprise Designer. To use one of these stages, drag the stage from the palette to the
canvas.
Information on configuring module stages can be accessed by double-clicking the stage on the canvas
and clicking the help icon. You can also see the following documents for complete information about
using the module stages:
Addressing Guide
Data Quality Guide
Enterprise Data Integration Guide
Enterprise Tax Guide
Global Sentry Guide
Master Data Management Guide
Spectrum Spatial Guide
Related Links
Primary Stages on page 158
User-Defined Stages
User-defined stages are subflows and services created in Enterprise Designer.
Related Links
Primary Stages on page 158
158
Spectrum™ Technology Platform 9.0
Chapter 5: Stages Reference
Introduction to Subflows on page 68
Sinks
Sinks define what to do with the output (write to a file or database, or return it in an API response) and
can also perform other actions at the end or a dataflow, such as executing a program.
Related Links
Execute Program on page 159
Output on page 160
Terminate Job on page 161
Write to DB on page 162
Write to File on page 166
Write to Null on page 177
Write to Variable Format File on page 177
Write to XML on page 184
Execute Program
An Execute Program Stage invokes an executable, such as a program or command line command, when
it receives a record. To use an Execute Program stage in your dataflow:
Options
Option
Description
Command-line
The executable name and arguments (if applicable). The arguments
can be data available in the dataflow. To access that data, click the [...]
(Browse) button. You can select from the following three contexts:
Current Job ID, Current Job Name, or Current User Name. You can
also select from the available fields. For example, JobStatus and
JobComment.
Timeout
Specifies whether to cancel the execution if the command does not
respond within a given amount of time. One of the following:
Environment Variables
No timeout
Do not cancel the execution if the command
fails to respond.
Timeout in
milliseconds
Cancels the execution attempt if the command
does not respond in the specified number of
milliseconds.
Optional. Specifies environment variables to use when executing the
command. To add an environment variable click Add.
Enter the appropriate key word in the Key field. An example might be
"JAVA_HOME".
Enter the appropriate value in the Value field. An example might be
C:\Java\jre7. Alternatively, you can select a field from the Field List
dialog box by clicking the [...] (Browse) button. You can select from the
following three contexts: Current Job ID, Current Job Name, or Current
User Name. You can also select from the available fields. For example,
JobStatus and JobComment.
Dataflow Designer's Guide
159
Sinks
Related Links
Sinks on page 159
Output
The Output stage defines the output fields that the service or subflow returns. Follow the steps below to
define the service output.
1. Double-click the Output icon on the canvas. The Output Options dialog box appears. When you
open the Output Options dialog box for the first time, a list of fields defined in the Input is displayed.
2. To add a new field to the field list, click Add. The Add Custom Field dialog box appears. You can
also modify or delete a custom field.
3. Click Add again.
4. Type the field name in the text box.
5. Select the Data type and press OK. The following data types are supported:
bigdecimal
A numeric data type that supports 38 decimal points of precision. Use this data type
for data that will be used in mathematical calculations requiring a high degree of
precision, especially those involving financial or geospatial data. The bigdecimal
data type supports more precise calculations than the double data type.
boolean
A logical type with two values: true and false.
date
A data type that contains a month, day, and year. For example, 2012-01-30 or
January 30, 2012. You can specify a default date format in Management Console.
datetime
A data type that contain a month, day, year, and hours, minutes, and seconds. For
example, 2012/01/30 6:15 PM.
double
A numeric data type that contains both negative and positive double precision
-1074
-52
1023
numbers between 2
and (2-2 )×2
. In E notation, the range of values is
4.9E-324 to 1.7976931348623157E308. For information on E notation, see
en.wikipedia.org/wiki/Scientific_notation#E_notation.
float
A numeric data type that contains both negative and positive single precision numbers
-149
23
127
between 2
and (2-2 )×2 . In E notation, the range of values is 1.4E-45 to
3.4028235E38. For information on E notation, see
en.wikipedia.org/wiki/Scientific_notation#E_notation.
integer
A numeric data type that contains both negative and positive whole numbers between
31
31
-2 (-2,147,483,648) and 2 -1 (2,147,483,647).
list
Strictly speaking, a list is not a data type. However, when a field contains hierarchical
data, it is treated as a "list" field. In Spectrum™ Technology Platform a list is a
collection of data consisting of multiple values. For example, a field Names may
contain a list of name values. This may be represented in an XML structure as:
<Names>
<Name>John Smith</Name>
<Name>Ann Fowler</Name>
</Names>
It is important to note that the Spectrum™ Technology Platform list data type different
from the XML schema list data type in that the XML list data type is a simple data
type consisting of multiple values, whereas the Spectrum™ Technology Platform list
data type is similar to an XML complex data type.
160
long
A numeric data type that contains both negative and positive whole numbers between
63
63
-2 (-9,223,372,036,854,775,808) and 2 -1 (9,223,372,036,854,775,807).
string
A sequence of characters.
time
A data type that contains the time of day. For example, 21:15:59 or 9:15:59 PM.
Spectrum™ Technology Platform 9.0
Chapter 5: Stages Reference
You can also add a new, user-defined data type if necessary, and that new type can be a list of any
defined data type. For example, you could define a list of names (string), or a new data type of
addresses that includes AddressLine1 (string), City (string), StateProvince (string) and PostalCode
(string). After you create the field, you can view the data type by accessing the Input Options dialog
and pressing the button in the Data Type column. The Data Type Details dialog box will appear,
showing the structure of the field.
6. Click OK again.
7. Click the check box next to Expose to select the check box of all fields in the field list. Selecting a
field in the field list exposes it to the dataflow for stage operations. Click the check box again to clear
the check box for all fields in the list. Clearing the check box of one or more fields in the field list and
clicking OK deletes the field from the field list.
Note: If you define heirarchical data in the input fields, you will not be able to import data or view
the data vertically.
8. Click OK to return to the canvas.
Defining a Web Service Data Type
The Data type name field allows you to control the WSDL (SOAP) and WADL (REST) interfaces for the
service you are creating. The name of the Rows element is determined by the name you give this stage
in the service, and the name of the Row element is determined by the text you enter here.
Note: For WSDL, both requests and responses are affected, but for WADL only responses are affected.
Prior to naming this stage and entering text in this field, your code might look like this:
<Rows>
<Row>
<FirstName>John</FirstName>
<LastName>Doe</LastName>
</Row>
<Row>
<FirstName>Jane</FirstName>
<LastName>Doe></LastName>
</Row>
</Rows>
After naming this stage and entering text in this field, your code might look like this:
<Names>
<Name>
<FirstName>John</FirstName>
<LastName>Doe</LastName>
</Name>
<Name>
<FirstName>Jane</FirstName>
<LastName>Doe></LastName>
</Name>
</Names>
Related Links
Sinks on page 159
Terminate Job
The Terminate Job stage is used in combination with Conditional Router to end a job if certain criteria
are found within a record. If a record is sent to Terminate Job, the job ends.
Note: Terminate Job is not available in services or subflows.
Dataflow Designer's Guide
161
Sinks
To use Terminate Job, add a Conditional Router and a Terminate Job stage to your dataflow. Then
connect the stages and configure the Conditional Router. The Conditional Router should be configured
to contain the criteria you want to trigger job termination. When a record is found that meets the criteria,
it is passed to Terminate Job and the job terminates, producing a message that says "Job terminated
by stage: <stage label>." The completed dataflow should look something like this:
Related Links
Sinks on page 159
Write to DB
The Write to DB stage writes the output of a dataflow to a database.
Note: Significant performance improvements can be achieved by using multiple runtime instances of
Write to DB. To specify multiple runtime instances, click the Runtime button.
General Tab
Option Name
Description
Connection
Select the connection for the database you want to use in the Connection
field. To make a new database connection, click Manage. For more
information on creating database connections, see Database
Connection Manager.
Table/View
After selecting a connection, specify the table or view to write to. Click
the browse button ([...]) to navigate to the table or view that you want
to use, or click Create Table to create a new table in the database.
Note: If you are writing to a SQL database, you cannot write to views
that reference more than one table. This is due to a limitation
in SQL Server.
Create Table
Creates a new table in the selected database. Choose the owner for
the table in the Table owner field and specify the name for the new
table in the Table name field. Also, specify the fields you want to write
to the new table by checking the box in the Include column. Note that
you can edit the column name by changing the value in the Output Fields
column.
The Create Table button supports table creation in the following
databases:
•
•
•
•
•
•
•
162
Axion
DB2
Derby/Cloudscape
Firebird
HSQLDB
Interbase
MaxDB/SapDB
Spectrum™ Technology Platform 9.0
Chapter 5: Stages Reference
Option Name
Description
•
•
•
•
•
•
McKoi
MySQL
Oracle
PostgreSQL
SQL Server
Sybase
Note: For DB2 databases, if you try to create a table and the page
size is smaller than the total length of all string columns, you
will get an error that says "Failed to build body from content.
Serializable class not available to broker."
Stage Fields
In the Stage Fields column you can specify the field you want to write
to the database field shown in the Database Field column.
Include
The Include column allows you to select the fields you want to write to.
Note: To prevent poor performance you should have a sorted index
or key in the database table.
Database Connection Manager
The Database Connection Manager allows you to manage registered database connections. To add,
modify, delete, and test connections:
1. In the Write To DB Options dialog box, click Manage.
2. Click Add, Modify, or Delete.
3. If you are adding or modifying a database connection, complete these fields:
• Connection name—Enter the name of the new connection.
• Database driver—Select the appropriate database type.
• Connection Options—Specify all the options, typically host, port, instance, user name, and password.
Note: You can test the connection by clicking Test.
4. If you are deleting a database connection, select the connection you want to remove and click Delete.
Runtime Tab
Option Name
Description
Write Mode
Specifies the type of actions to take when writing to the database. One
of the following:
Insert
Insert new records into the database but do not update
existing records. This is the default setting.
Update
Update existing records in the database but do not
insert new records.
Note: If you select Update, the primary key column
name used in the input table must match the
primary key column name in the output table.
If you try to update a table where the primary
key column name does not match the input, or
Dataflow Designer's Guide
163
Sinks
Option Name
Description
where the primary key column is not defined,
the update will not work.
Insert if not
able to
update
Insert new records into the database if the record does
not exist, otherwise update the existing record.
Batch commit
Select this option to commit changes to the database after a specified
number of records are processed. By default this option is not selected,
which means that changes are committed after each record is processed.
Selecting this option can significantly improve the performance of the
Write to DB stage.
Batch size
If you enable the Batch commit option, specifies the number of records
to commit to the database in each batch. The default is 1,000. For
dataflows created in Spectrum™ Technology Platform 7.0 and earlier,
the default is 100.
A larger batch size does not always offer better load performance.
Consider the following factors when choosing a batch size:
• Data arrival rate to Write To DB stage: If data is arriving at slower
rate than the database can process then modifying batch size will not
improve overall dataflow performance. For example, dataflows with
address validation or geocoding may not benefit from an increased
batch size.
• Network traffic: For slow networks, increasing batch size to a medium
batch size (1,000 to 10,000) will result in better performance.
• Database load and/or processing speed: For databases with high
processing power, increasing batch size will improve performance.
• Multiple runtime instances: If you use multiple runtime instances
of the Write to DB stage, a large batch size will consume a lot of
memory, so use a small or medium batch size (100 to 10,000).
• 32-bit systems: For 32-bit systems use a small batch size (100 to
1,000).
• Database roll backs: Whenever a statement fails, the complete batch
is rolled back. The larger the batch size, the longer it will take to
perform the to rollback.
Truncate table before
inserting data
Select this option if you want to clear all data from the table before writing
to the database.
Drop and recreate the table if Select this option to delete and recreate the table before writing the
it already exists
dataflow's output to the table. This option is useful if you want the table's
schema to match the fields from the dataflow and not contain any
extraneous schema information.
The table that will be deleted and recreated is the one specified in the
Table/View field on the General tab. For example, if you specify the
Customers table in the Table/View field, and you select Drop and
recreate the table if it already exists, then the Customers table will
be deleted from the database, and a new table named Customers will
be created with a schema that matches the actual fields written to the
table.
164
Spectrum™ Technology Platform 9.0
Chapter 5: Stages Reference
Related Links
Sinks on page 159
Configuring Error Handling in Write to DB on page 165
Read From DB on page 87
Read From DB on page 87
Configuring Error Handling in Write to DB
The Write to DB stage has an error port which allows you to filter out records that cause database errors
when writing the record to a database, such as a primary key constraint violation or a unique constraint
violation. These records can then be routed along another path in the dataflow while other records are
successfully committed. For example, if you are processing 100 records and records 4, 23, and 56 cause
a database error, these three records would be routed through the error port while the other 97 records
would be committed to the database.
Note: Using the error port is optional. If you do not use the error port, the job will fail if any record causes
an error.
1. From the palette, choose the type stage you want to handle error records (for example, Write to File)
and drag it onto the canvas. You have a couple options for selecting a stage:
• To write failed records to a file, drag one of the following onto the canvas: Write to File, Write to
XML, or Write to Variable Format File,.
• To simply discard failed records, drag Write to Null onto the canvas.
2. Connect the error port on Write to DB to the stage you want to handle failed records.
The following example shows the error port on Write to DB connected to a Write to File stage. In this
example, records that cause an error when written to the database are instead written to the file
specified in the Write to File stage.
When you run the dataflow, records that cause an error are routed through the error port. The records
from the error port contain the fields specified in Write to DB plus the following fields:
Error.code
This field contains the numeric error code returned from the database. For
example, given the error ORA-00001: unique constraint
ANKUSH.SYS_C0010018) violated, the value in the Error.code field would
be 1. See your database software's documentation for a listing of error codes.
Error.Message
This field contains the error message returned from the database. For example:
ORA-01034 ORACLE not available. In this case, ORACLE not available
would be the value in the Error.Message field. See your database software's
documentation for a listing of error messages.
Error.SQLState
This field contains the SQLSTATE code which provides detailed information
about the cause of the error. For a listing of SQLSTATE codes, see your database
software's documentation.
Timestamp
The date and time on the Spectrum™ Technology Platform server when the error
occurred.
Username
The name of the Spectrum™ Technology Platform user that ran the dataflow.
Related Links
Write to DB on page 162
Dataflow Designer's Guide
165
Sinks
Write to File
Write to File writes dataflow output to a flat file. The records all contain the same fields. If you want to
write records of varying format, see Write to Variable Format File on page 177. If you want to write
records to an XML file, see Write to XML on page 184.
Tip: You can copy your source and paste it as the sink into your dataflow to quickly set up the file and
use the same fields as you defined in your source.
File Properties Tab
Field Name
Description
Server name
Indicates whether the file you select in the File name field is located on
the computer running Enterprise Designer or on the Spectrum™
Technology Platform server. If you select a file on the local computer,
the server name will be My Computer. If you select a file on the server
the server name will be Spectrum™ Technology Platform.
File name
Specifies the path to the file. Click the ellipses button (...) to browse to
the file you want.
Note: If the Spectrum™ Technology Platform server is running on
Unix or Linux, remember that file names and paths on these
platforms are case sensitive.
Record type
Character encoding
166
The format of the records in the file. One of the following:
Line
Sequential
A text file in which records are separated by an
end-of-line (EOL) character such as a carriage
return/line feed (CR/LF) and each field has a fixed
starting and ending character position.
Fixed Width
A text file in which each record is a specific number of
characters in length and each field has a fixed starting
and ending character position.
Delimited
A text file in which records are separated by an
end-of-line (EOL) character such as a carriage
return/line feed (CR/LF) and each field is separated by
a designated character such as a comma.
The text file's encoding. One of the following:
UTF-8
Supports all Unicode characters and is
backwards-compatible with ASCII. For more
information on UTF, see
unicode.org/faq/utf_bom.html.
UTF-16
Supports all Unicode characters but is not
backwards-compatible with ASCII. For more
information on UTF, see
unicode.org/faq/utf_bom.html.
US-ASCII
A character encoding based on the order of the
English alphabet.
UTF-16BE
UTF-16 encoding with big endian byte serialization
(most significant byte first).
Spectrum™ Technology Platform 9.0
Chapter 5: Stages Reference
Field Name
Field separator
Description
UTF-16LE
UTF-16 encoding with little endian byte serialization
(least significant byte first).
ISO-8859-1
An ASCII-based character encoding typically used
for Western European languages. Also known as
Latin-1.
ISO-8859-3
An ASCII-based character encoding typically used
for Southern European languages. Also known as
Latin-3.
ISO-8859-9
An ASCII-based character encoding typically used
for Turkish language. Also known as Latin-5.
CP850
An ASCII code page used to write Western European
languages.
CP500
An EBCDIC code page used to write Western
European languages.
Shift_JIS
A character encoding for the Japanese language.
Specifies the character used to separate fields in a delimited file. For
example, the following record uses a pipe (|) as a field separator:
7200 13TH ST|MIAMI|FL|33144
By default, the following characters are available to define as field
separators:
•
•
•
•
•
•
Space
Tab
Comma
Period
Semicolon
Pipe
If the file uses a different character as a field separator, click the ellipses
button to select another character as a delimiter.
Text qualifier
The character used to surround text values in a delimited file. For
example, the following record uses double quotes (") as a text qualifier.
"7200 13TH ST"|"MIAMI"|"FL"|"33144"
By default, the following characters are available to define as text
qualifiers:
• Single quote (')
• Double quote (")
If the file uses a different text qualifier, click the ellipses button to select
another character as a text qualifier.
Record separator
Dataflow Designer's Guide
Specifies the character used to separate records in line a sequential or
delimited file. This field is not available if you check the Use default
EOL check box. By default, the following record separator settings are
available:
167
Sinks
Field Name
Description
Unix (U+000A)
A line feed character separates the records. This
is the standard record separator for Unix
systems.
Macintosh
(U+000D)
A carriage return character separates the
records. This is the standard record separator
for Macintosh systems.
Windows (U+000D A carriage return followed by a line feed
U+000A)
separates the records. This is the standard
record separator for Windows systems.
If your file uses a different record separator, click the ellipses button to
select another character as a record separator.
Use default EOL
Specifies that the file's record separator is the default end of line (EOL)
character(s) used on the operating system on which the Spectrum™
Technology Platform server is running.
Do not select this option if the file uses an EOL character that is different
from the default EOL character used on the server's operating system.
For example, if the file uses a Windows EOL but the server is running
on Linux, do not check this option. Instead, select the Windows option
in the Record separator field.
Record length
For fixed width files, specifies the exact number of characters in each
record.
For line sequential files, specifies the length, in characters, of the longest
record in the file.
First row is header record
Specifies whether the first record in a delimited file contains header
information and not data. For example, the following shows a header
row in the first record.
"AddressLine1"|"City"|"StateProvince"|"PostalCode"
"7200 13TH ST"|"MIAMI"|"FL"|"33144"
"One Global View"|"Troy"|"NY"|12180
Treat records with fewer fields Delimited file records containing fewer fields than are defined on the
than defined as malformed
Fields tab will be treated as malformed.
Import
Imports the file layout definition, encoding setting, and sort options from
a settings file. The settings file is created by exporting settings from
another Read from File or Write to File stage that used the same input
file or a file that has the same layout as the file you are working with.
Export
Saves the file layout definition, encoding setting, and sort options to a
settings file. You can then import these settings into other Read from
File or Write to File stages that use the same input file or a file that has
the same traits as the file you are working with now. You can also use
the settings file with job executor to specify file settings at runtime.
For information about the settings file, see The File Definition Settings
File on page 98.
168
Spectrum™ Technology Platform 9.0
Chapter 5: Stages Reference
Fields Tab
The Fields tab defines the names, positions, and, for fixed width and line sequential files, lengths of fields
in the file. For more information, see the following topics:
Defining Fields In a Delimited Output File on page 170
Defining Fields In a Line Sequential or Fixed Width File on page 171
Sort Fields Tab
The Sort Fields tab defines fields by which to sort the output records before they are written to the output
file. Sorting is optional. For more information, see Sorting Output Records on page 173.
Runtime Tab
Option Name
Description
File name
This displays the file defined on the File Properties tab.
Generate multiple files
Select this option to write records to different files instead of writing all
records to one file. The file to which each record is written is specified in
the record itself. Each record must contain a field that specifies either a
file name or the full file path of the file to which you want the record written.
For example - if you want to send the stock prices of different companies
(of various groups) to all the clients separately, this feature writes the stock
prices of different companies into separate files that may be sent to each
of the clients, if you so wish.
Note: Use this feature when record contains either a file name or the
full file path of the file.
File path field
Selects the field that contains the path (either a file name or the full file
path) of the file to which you want to write the record. This field is only
enabled if you select Generate multiple files.
Write Mode
Specifies whether to add the dataflow's output to the end of the file or to
delete the existing data in the file before writing the output. One of the
following:
Overwrite
Replaces the existing data in the output file each time
the dataflow runs.
Append
Adds the dataflow's output to the end of the file without
erasing the file's existing data.
Note: If you enable the Generate multiple file option you must specify an output file on either the
Spectrum server or on an FTP server. If you want to write data to a file on an FTP server you
must define a connection to the file server using Management Console.
Related Links
Sinks on page 159
Defining Fields In a Delimited Output File on page 170
Defining Fields In a Line Sequential or Fixed Width File on page 171
Sorting Output Records on page 173
The File Definition Settings File on page 98
Dataflow Designer's Guide
169
Sinks
Defining Fields In a Delimited Output File
In the Write to File stage, the Fields tab defines the names, position, and, for some file types, lengths,
of the fields in the file. After you define an output file on the File Properties tab you can define the fields.
If the output file contains a header record, you can quickly define the fields by clicking Regenerate.
To define fields with default values for position, length, and data type, click Quick Add and select the
fields to add.
If the input file does not contain a header record, or if you want to manually define the fields, follow these
steps:
1. Click Add.
2. In the Name field, choose the field you want to add.
3. In the Type field, select the data type of the field coming from the dataflow.
Spectrum™ Technology Platform supports the following data types:
bigdecimal
A numeric data type that supports 38 decimal points of precision. Use this data type
for data that will be used in mathematical calculations requiring a high degree of
precision, especially those involving financial or geospatial data. The bigdecimal
data type supports more precise calculations than the double data type.
boolean
A logical type with two values: true and false.
date
A data type that contains a month, day, and year. For example, 2012-01-30 or
January 30, 2012. You can specify a default date format in Management Console.
datetime
A data type that contain a month, day, year, and hours, minutes, and seconds. For
example, 2012/01/30 6:15 PM.
double
A numeric data type that contains both negative and positive double precision
-1074
-52
1023
numbers between 2
and (2-2 )×2
. In E notation, the range of values is
4.9E-324 to 1.7976931348623157E308. For information on E notation, see
en.wikipedia.org/wiki/Scientific_notation#E_notation.
float
A numeric data type that contains both negative and positive single precision numbers
-149
23
127
between 2
and (2-2 )×2 . In E notation, the range of values is 1.4E-45 to
3.4028235E38. For information on E notation, see
en.wikipedia.org/wiki/Scientific_notation#E_notation.
integer
A numeric data type that contains both negative and positive whole numbers between
31
31
-2 (-2,147,483,648) and 2 -1 (2,147,483,647).
list
Strictly speaking, a list is not a data type. However, when a field contains hierarchical
data, it is treated as a "list" field. In Spectrum™ Technology Platform a list is a
collection of data consisting of multiple values. For example, a field Names may
contain a list of name values. This may be represented in an XML structure as:
<Names>
<Name>John Smith</Name>
<Name>Ann Fowler</Name>
</Names>
It is important to note that the Spectrum™ Technology Platform list data type different
from the XML schema list data type in that the XML list data type is a simple data
type consisting of multiple values, whereas the Spectrum™ Technology Platform list
data type is similar to an XML complex data type.
long
A numeric data type that contains both negative and positive whole numbers between
63
63
-2 (-9,223,372,036,854,775,808) and 2 -1 (9,223,372,036,854,775,807).
string
A sequence of characters.
time
A data type that contains the time of day. For example, 21:15:59 or 9:15:59 PM.
4. If you selected a date, time, or numeric data type, you can use the default date/time or number format
or you can specify a different format for this specific field. The default format is either the system
170
Spectrum™ Technology Platform 9.0
Chapter 5: Stages Reference
default format that has been set in the type conversion options in Management Console, or it is the
dataflow's default format specified in the type conversion options in Enterprise Designer. The format
that is in effect is displayed. To use the default format, leave Default selected. To specify a different
format, choose Custom and follow these steps:
a) In the Locale field, select the country whose formatting convention you want to use. Your selection
will determine the default values in the Format field. For date data, your selection will also
determine the language used when a month is spelled out. For example, if you specify English
the first month of the year would be "January" but if you specify French it would be "Janvier."
b) In the Format field, select the format for the data. The format depends on the data type of the
field. A list of the most commonly used formats for the selected locale is provided.
An example of the selected format is displayed to the right of the Format field.
You can also specify your own date, time, and number formats if the ones available for selection
do not meet your needs. To specify your own date or time format, type the format into the field
using the notation described in Date and Time Patterns on page 26. To specify your own number
format, type the format into the file using the notation described in Number Patterns on page
28.
5. Click Add.
After defining the fields in your output file, you can edit its contents and layout.
Option Name
Description
Add
Adds a field to the output. You can append a field to the end of the
existing layout, or you can insert a field into an existing position and
Write to File will adjust the remaining fields accordingly.
Modify
Modifies the field's name and type.
Remove
Removes the selected field from the output.
Move Up/Move Down
Reorders the selected field.
Related Links
Write to File on page 166
Defining Fields In a Line Sequential or Fixed Width File
In the Write to File stage, the Fields tab defines the names, position, and, for some file types, lengths,
of the fields in the file. After you define an output file on the File Properties tab you can define the fields.
To define fields with default values for position, length, and data type, click Quick Add and select the
fields to add.
To add fields manually from a list of fields used in the dataflow, follow this procedure:
1. Click Add.
2. In the Name field, choose the field you want to add.
3. In the Type field, select the data type of the field coming from the dataflow.
Spectrum™ Technology Platform supports the following data types:
bigdecimal
A numeric data type that supports 38 decimal points of precision. Use this data type
for data that will be used in mathematical calculations requiring a high degree of
precision, especially those involving financial or geospatial data. The bigdecimal
data type supports more precise calculations than the double data type.
boolean
A logical type with two values: true and false.
date
A data type that contains a month, day, and year. For example, 2012-01-30 or
January 30, 2012. You can specify a default date format in Management Console.
Dataflow Designer's Guide
171
Sinks
datetime
A data type that contain a month, day, year, and hours, minutes, and seconds. For
example, 2012/01/30 6:15 PM.
double
A numeric data type that contains both negative and positive double precision
-1074
-52
1023
numbers between 2
and (2-2 )×2
. In E notation, the range of values is
4.9E-324 to 1.7976931348623157E308. For information on E notation, see
en.wikipedia.org/wiki/Scientific_notation#E_notation.
float
A numeric data type that contains both negative and positive single precision numbers
-149
23
127
between 2
and (2-2 )×2 . In E notation, the range of values is 1.4E-45 to
3.4028235E38. For information on E notation, see
en.wikipedia.org/wiki/Scientific_notation#E_notation.
integer
A numeric data type that contains both negative and positive whole numbers between
31
31
-2 (-2,147,483,648) and 2 -1 (2,147,483,647).
list
Strictly speaking, a list is not a data type. However, when a field contains hierarchical
data, it is treated as a "list" field. In Spectrum™ Technology Platform a list is a
collection of data consisting of multiple values. For example, a field Names may
contain a list of name values. This may be represented in an XML structure as:
<Names>
<Name>John Smith</Name>
<Name>Ann Fowler</Name>
</Names>
It is important to note that the Spectrum™ Technology Platform list data type different
from the XML schema list data type in that the XML list data type is a simple data
type consisting of multiple values, whereas the Spectrum™ Technology Platform list
data type is similar to an XML complex data type.
long
A numeric data type that contains both negative and positive whole numbers between
63
63
-2 (-9,223,372,036,854,775,808) and 2 -1 (9,223,372,036,854,775,807).
string
A sequence of characters.
time
A data type that contains the time of day. For example, 21:15:59 or 9:15:59 PM.
4. If you selected a date, time, or numeric data type, you can use the default date/time or number format
or you can specify a different format for this specific field. The default format is either the system
default format that has been set in the type conversion options in Management Console, or it is the
dataflow's default format specified in the type conversion options in Enterprise Designer. The format
that is in effect is displayed. To use the default format, leave Default selected. To specify a different
format, choose Custom and follow these steps:
a) In the Locale field, select the country whose formatting convention you want to use. Your selection
will determine the default values in the Format field. For date data, your selection will also
determine the language used when a month is spelled out. For example, if you specify English
the first month of the year would be "January" but if you specify French it would be "Janvier."
b) In the Format field, select the format for the data. The format depends on the data type of the
field. A list of the most commonly used formats for the selected locale is provided.
An example of the selected format is displayed to the right of the Format field.
You can also specify your own date, time, and number formats if the ones available for selection
do not meet your needs. To specify your own date or time format, type the format into the field
using the notation described in Date and Time Patterns on page 26. To specify your own number
format, type the format into the file using the notation described in Number Patterns on page
28.
5. The Start Position and Length fields are automatically filled in based on the data in the dataflow
and number of fields you have already added.
6. Click Add.
Alternatively, you can also add a field by first defining the starting position and length of the field. To
do this, under Sample File click at the position where you want to begin a field and drag to the left
so that the desired field is highlighted, as shown here:
172
Spectrum™ Technology Platform 9.0
Chapter 5: Stages Reference
After defining the fields in your output file, you can edit its contents and layout. The Recalculate start
position option tells the Write to File stage to recalculate the positions of the fields when you modify,
move, or remove a field in the output file. Uncheck this box if you do not want the positions recalculated
and instead want the fields to stay in their existing position after you edit the output file.
Option Name
Description
Add
Adds a field to the output.
Modify
Modifies the field's name, type, start position, and length.
Remove
Removes the selected field from the output.
Move Up/Move Down
Reorders the selected field.
Related Links
Write to File on page 166
Sorting Output Records
In the Write to File stage, the Sort Fields tab defines fields by which to sort the output records before
they are written to the output file. Sorting is optional.
1. In Write to File, click the Sort Fields tab.
2. Click Add.
3. Click the drop-down arrow in the Field Name column and select the field you want to sort by. The
fields available for selection depend on the fields in the dataflow.
4. In the Order column, select Ascending or Descending.
5. Repeat until you have added all the output fields you wish to use for sorting. Change the order of the
sort by highlighting the row for the field you wish to move and clicking Up or Down.
6. Default sort performance options for your system are set in the Management Console. If you want
to override your system's default sort performance options, click Advanced. The Advanced Options
dialog box contains the following sort performance options:
In memory record limit
Specifies the maximum number of data rows a sorter will hold in
memory before it starts paging to disk. Be careful in environments
where there are jobs running concurrently because increasing the
In memory record limit setting increases the likelihood of running
out of memory.
Maximum number of
temporary files to use
Specifies the maximum number of temporary files that may be used
by a sort process.
Enable compression
Specifies that temporary files are compressed when they are written
to disk.
Dataflow Designer's Guide
173
Sinks
Note: The optimal sort performance settings depends on your server's hardware configuration.
Nevertheless, the following equation generally produces good sort performance:
(InMemoryRecordLimit × MaxNumberOfTempFiles ÷ 2) >=
TotalNumberOfRecords
Related Links
Write to File on page 166
The File Definition Settings File
A file definition settings file contains the file layout, encoding, and sort options that have been exported
from a Read from File or Write to File stage. The file definitions settings file can be imported into Read
from File or Write to File to quickly set the stage's options instead of manually specifying the options.
The easiest way to create a file definition settings file is to use specify the file settings using Read from
File or Write to File, then click the Export button to generate the file definitions settings file.
However, for your information the schema of the file definition settings file is shown below. Each element
in the XML file has a type, and if that type is anything other than string or integer, the acceptable values
are shown. These values correspond directly to options in the stage's dialog box. For example, the
FileTypeEnum element corresponds to the Record Type field on the File Properties tab, and the following
three values are shown in the schema: linesequential, fixedwidth, and delimited.
Note: If you enter "custom" for the LineSeparator, FieldSeparator or TextQualifier fields, a corresponding
custom element must also be included (for example, "CustomLineSeparator",
"CustomFieldSeparator", or "CustomTextQualifier") with a hexadecimal number representing the
character, or sequence of characters, to use.
<?xml version="1.0" encoding="utf-8"?>
<xs:schema elementFormDefault="qualified"
xmlns:xs="http://www.w3.org/2001/XMLSchema">
<xs:element name="FileSchema" nillable="true" type="FileSchema"/>
<xs:complexType name="FileSchema">
<xs:sequence>
<xs:element
minOccurs="0"
maxOccurs="1"
default="linesequential"
name="Type"
type="FileTypeEnum"/>
<xs:element
minOccurs="0"
maxOccurs="1"
default="UTF-8" name="Encoding" type="xs:string"/>
<xs:element
minOccurs="0"
maxOccurs="1"
name="RecordLength"
type="xs:int"/>
<xs:element
minOccurs="0"
maxOccurs="1"
default="default"
name="LineSeparator"
type="LineSeparatorEnum"/>
<xs:element
minOccurs="0"
maxOccurs="1"
name="CustomLineSeparator"
type="xs:string"/>
<xs:element
minOccurs="0"
maxOccurs="1"
default="comma"
174
Spectrum™ Technology Platform 9.0
Chapter 5: Stages Reference
name="FieldSeparator"
type="FieldSeparatorEnum"/>
<xs:element
minOccurs="0"
maxOccurs="1"
name="CustomFieldSeparator"
type="xs:string"/>
<xs:element
minOccurs="0"
maxOccurs="1"
default="none"
name="TextQualifier"
type="TextQualifierEnum"/>
<xs:element
minOccurs="0"
maxOccurs="1"
name="CustomTextQualifier"
type="xs:string"/>
<xs:element
minOccurs="0"
maxOccurs="1"
default="false"
name="HasHeader"
type="xs:boolean"/>
<xs:element
minOccurs="0"
maxOccurs="1"
default="true"
name="EnforceColumnCount"
type="xs:boolean"/>
<xs:element
minOccurs="0"
maxOccurs="1"
name="Fields"
type="ArrayOfFieldSchema"/>
</xs:sequence>
</xs:complexType>
<xs:simpleType name="FileTypeEnum">
<xs:restriction base="xs:string">
<xs:enumeration value="linesequential"/>
<xs:enumeration value="fixedwidth"/>
<xs:enumeration value="delimited"/>
</xs:restriction>
</xs:simpleType>
<xs:simpleType name="LineSeparatorEnum">
<xs:restriction base="xs:string">
<xs:enumeration value="default"/>
<xs:enumeration value="windows"/>
<xs:enumeration value="unix"/>
<xs:enumeration value="mac"/>
<xs:enumeration value="custom"/>
</xs:restriction>
</xs:simpleType>
<xs:simpleType name="FieldSeparatorEnum">
<xs:restriction base="xs:string">
<xs:enumeration value="comma"/>
<xs:enumeration value="tab"/>
<xs:enumeration value="space"/>
<xs:enumeration value="semicolon"/>
<xs:enumeration value="period"/>
<xs:enumeration value="pipe"/>
<xs:enumeration value="custom"/>
</xs:restriction>
</xs:simpleType>
<xs:simpleType name="TextQualifierEnum">
<xs:restriction base="xs:string">
<xs:enumeration value="none"/>
<xs:enumeration value="single"/>
<xs:enumeration value="double"/>
<xs:enumeration value="custom"/>
</xs:restriction>
Dataflow Designer's Guide
175
Sinks
</xs:simpleType>
<xs:complexType name="ArrayOfFieldSchema">
<xs:sequence>
<xs:element
minOccurs="0"
maxOccurs="unbounded"
name="Field"
nillable="true"
type="FieldSchema"/>
</xs:sequence>
</xs:complexType>
<xs:complexType name="FieldSchema">
<xs:sequence>
<xs:element
minOccurs="0"
maxOccurs="1"
name="Name"
type="xs:string"/>
<xs:element
minOccurs="0"
maxOccurs="1"
default="string"
name="Type"
type="xs:string"/>
<xs:element
minOccurs="1"
maxOccurs="1"
name="Position"
type="xs:int"/>
<xs:element
minOccurs="0"
maxOccurs="1"
name="Length"
type="xs:int"/>
<xs:element
minOccurs="0"
maxOccurs="1"
default="false"
name="Trim"
type="xs:boolean"/>
<xs:element
minOccurs="0"
maxOccurs="1"
name="Locale"
type="Locale"/>
<xs:element
minOccurs="0"
maxOccurs="1"
name="Pattern"
type="xs:string"/>
<xs:element
minOccurs="0"
maxOccurs="1"
default="none"
name="Order"
type="SortOrderEnum"/>
</xs:sequence>
</xs:complexType>
<xs:complexType name="Locale">
<xs:sequence>
<xs:element
minOccurs="0"
maxOccurs="1"
name="Country"
type="xs:string"/>
<xs:element
minOccurs="0"
maxOccurs="1"
name="Language"
type="xs:string"/>
<xs:element
176
Spectrum™ Technology Platform 9.0
Chapter 5: Stages Reference
minOccurs="0"
maxOccurs="1"
name="Variant"
type="xs:string"/>
</xs:sequence>
</xs:complexType>
<xs:simpleType name="SortOrderEnum">
<xs:restriction base="xs:string">
<xs:enumeration value="none"/>
<xs:enumeration value="ascending"/>
<xs:enumeration value="descending"/>
</xs:restriction>
</xs:simpleType>
</xs:schema>
Related Links
Read From File on page 91
Write to File on page 166
Read From File on page 91
Managing Malformed Input Records on page 32
Sorting Input Records on page 98
Write to Null
The Write to Null stage discards records. Records are counted but discarded. Use this stage if there are
records that you do not want to preserve after the dataflow finishes.
Related Links
Sinks on page 159
Write to Variable Format File
Write to Variable Format File writes records of varying layout to a file.
Variable format files have these characteristics:
• Records in the file may have different fields, and different numbers of fields.
• Each record must contain a tag (usually a number) identifying the type of record.
• Hierarchical relationships are supported.
Example of a Variable Format File
The following example shows a variable format file containing information about
checking account activity for two customers, Joe Smith and Anne Johnson. In this
example, the file is a delimited file that uses a comma as the field delimiter.
001
100
200
001
100
200
200
Joe,Smith,M,100 Main St,555-234-1290
CHK12904567,12/2/2007,6/1/2012,CHK
1000567,1/5/2012,Fashion Shoes,323.12
Anne,Johnson,F,1202 Lake St,555-222-4932
CHK238193875,1/21/2001,4/12/2012,CHK
1000232,3/5/2012,Blue Goose Grocery,132.11
1000232,3/8/2012,Trailway Bikes,540.00
The first field in each record contains the tag which identifies the type of record and
therefore the record's format:
• 001: Customer record
• 100: Account record
• 200: Account transaction record
Dataflow Designer's Guide
177
Sinks
For delimited files it is common for the tag value (001, 100, 200) to be in a fixed number
of bytes at the start of the record as shown in the above example.
Each record has its own format:
• 001: FirstName,LastName,Gender,Address,PhoneNumber
• 100: AccountID,DateOpened,ExpirationDate,TypeOfAccount
• 200: TransactionID,DateOfTransaction,Vendor,Amount
Record format 100 (account record) is a child of the previous 001 record, and record
format 200 (account transaction record) is a child of the previous record 100 (account
record). So in the example file, Joe Smith's account CHK12904567 had a transaction
on 1/5/2012 in the amount of 323.12 at Fashion Shoes. Likewise, Anne Johnson's
account CHK238193875 had two transactions, one on 3/5/2012 at Blue Goose Grocery
and one on 3/8/2012 at Trailway Bikes.
File Properties Tab
Option Name
Description
Server name
Indicates whether the file you select in the File name field is located on
the computer running Enterprise Designer or on the Spectrum™
Technology Platform server. If you select a file on the local computer,
the server name will be My Computer. If you select a file on the server
the server name will be Spectrum™ Technology Platform.
File name
Specifies the path to the file. Click the ellipses button (...) to browse to
the file you want.
Note: If the Spectrum™ Technology Platform server is running on
Unix or Linux, remember that file names and paths on these
platforms are case sensitive.
Root tag name
The tag to use for records that are a parent of other record types. For
example if you have three record types 001, 100, and 200, and record
types 100 and 200 are children of record type 001, then 001 is the root
tag.
Use fixed-width tags
Specifies whether to allocate a fixed amount of space at the beginning
of each record in which to place the record tag. For example, the
following shows a file with the tags 001, 100, and 200 in a fixed-width
field:
001
100
200
Tag width
Joe,Smith,M,100 Main St,555-234-1290
CHK12904567,12/2/2007,6/1/2012,CHK
1000567,1/5/2012,Mike's Shoes,323.12
If you check the Use fixed-width tags box, this option specifies the
number of spaces to allocate for tags at the beginning of each record.
For example, if you specify 7, then the first seven positions in each
record will be reserved for the tag. The value you specify must be greater
than or equal to the size in characters of the longest tag name. For
information on tag names, see Tag Names in Variable Format Files
on page 183.
The value in the Tag width field is automatically increased if you add
fields on the Fields tab that have a name that is longer than the value
specified.
178
Spectrum™ Technology Platform 9.0
Chapter 5: Stages Reference
Option Name
Description
The maximum tag width is 1024.
Remove numeric tag prefix
Removes the "NumericTag_" portion of the field name before writing
the tag to the file. The "NumericTag_" prefix is added to tag names by
the Read from Variable Format File stage for any tag names that start
with a number. This is because the tag name is used as the name of a
list dataflow field which contains the data in the record, and dataflow
field names cannot begin with a number. For example, a tag 100 would
by changed to list field named "NumericTag_100". If you enable this
option, this field would be written to the output file as a record with a tag
of "100" instead of "NumbericTag_100".
Character encoding
The text file's encoding. One of the following:
Field separator
UTF-8
Supports all Unicode characters and is
backwards-compatible with ASCII. For more
information on UTF, see
unicode.org/faq/utf_bom.html.
UTF-16
Supports all Unicode characters but is not
backwards-compatible with ASCII. For more
information on UTF, see
unicode.org/faq/utf_bom.html.
US-ASCII
A character encoding based on the order of the
English alphabet.
UTF-16BE
UTF-16 encoding with big endian byte serialization
(most significant byte first).
UTF-16LE
UTF-16 encoding with little endian byte serialization
(least significant byte first).
ISO-8859-1
An ASCII-based character encoding typically used
for Western European languages. Also known as
Latin-1.
ISO-8859-3
An ASCII-based character encoding typically used
for Southern European languages. Also known as
Latin-3.
ISO-8859-9
An ASCII-based character encoding typically used
for Turkish language. Also known as Latin-5.
CP850
An ASCII code page used to write Western European
languages.
CP500
An EBCDIC code page used to write Western
European languages.
Shift_JIS
A character encoding for the Japanese language.
Specifies the character used to separate fields in a delimited file. For
example, the following record uses a pipe (|) as a field separator:
7200 13TH ST|MIAMI|FL|33144
By default, the following characters are available to define as field
separators:
• Space
Dataflow Designer's Guide
179
Sinks
Option Name
Description
•
•
•
•
•
Tab
Comma
Period
Semicolon
Pipe
If the file uses a different character as a field separator, click the ellipses
button to select another character as a delimiter.
Text qualifier
The character used to surround text values in a delimited file. For
example, the following record uses double quotes (") as a text qualifier.
"7200 13TH ST"|"MIAMI"|"FL"|"33144"
By default, the following characters are available to define as text
qualifiers:
• Single quote (')
• Double quote (")
If the file uses a different text qualifier, click the ellipses button to select
another character as a text qualifier.
Record separator
Specifies the character used to separate records in line a sequential or
delimited file. This field is not available if you check the Use default
EOL check box. By default, the following record separator settings are
available:
Unix (U+000A)
A line feed character separates the records. This
is the standard record separator for Unix
systems.
Macintosh
(U+000D)
A carriage return character separates the
records. This is the standard record separator
for Macintosh systems.
Windows (U+000D A carriage return followed by a line feed
U+000A)
separates the records. This is the standard
record separator for Windows systems.
If your file uses a different record separator, click the ellipses button to
select another character as a record separator.
Use default EOL
Specifies that the file's record separator is the default end of line (EOL)
character(s) used on the operating system on which the Spectrum™
Technology Platform server is running.
Do not select this option if the file uses an EOL character that is different
from the default EOL character used on the server's operating system.
For example, if the file uses a Windows EOL but the server is running
on Linux, do not check this option. Instead, select the Windows option
in the Record separator field.
Fields Tab
The Fields tab controls which fields from the dataflow are included in the output file.
180
Spectrum™ Technology Platform 9.0
Chapter 5: Stages Reference
Option Name
Description
Add
Click to add a field to the output.
For information about constructing dataflow fields for use with Write to
Variable Format File, see Writing Flat Data to a Variable Format File
on page 182.
Modify
Click to modify the name of the tag. This button is only enabled when
a tag is selected. If the Use fixed-width tags option is enabled on the
File Properties tab, the tag width is automatically adjusted if you enter
a longer tag name.
Note: Using this button to modify the root tag name has the same
effect as modifying the value of the Root tag name field on the
File Properties tab.
Remove
Removes the selected field from the output. If you remove a list field all
child fields are also removed. If you remove a child field, just the selected
child field is removed from the list field.
Remove All
Removes all the fields from the output.
Move Up/Move Down
Reorders the selected field.
Runtime Tab
Option Name
Description
File name
This displays the file defined on the File Properties tab.
Generate multiple files
Select this option to write records to different files instead of writing all
records to one file. The file to which each record is written is specified in
the record itself. Each record must contain a field that specifies either a
file name or the full file path of the file to which you want the record written.
For example - if you want to send the stock prices of different companies
(of various groups) to all the clients separately, this feature writes the stock
prices of different companies into separate files that may be sent to each
of the clients, if you so wish.
Note: Use this feature when record contains either a file name or the
full file path of the file.
File path field
Selects the field that contains the path (either a file name or the full file
path) of the file to which you want to write the record. Note that only the
simple type elements mapped directly to a root tag will be listed in the File
path field. This field is only enabled if you select the Generate multiple
files.
Write Mode
Specifies whether to add the dataflow's output to the end of the file or to
delete the existing data in the file before writing the output. One of the
following:
Dataflow Designer's Guide
Overwrite
Replaces the existing data in the output file each time
the dataflow runs.
Append
Adds the dataflow's output to the end of the file without
erasing the file's existing data.
181
Sinks
Note: If you enable the Generate multiple file option you must specify an output file on either the
Spectrum server or on an FTP server. If you want to write data to a file on an FTP server you
must define a connection to the file server using Management Console.
Related Links
Sinks on page 159
Writing Flat Data to a Variable Format File on page 182
Tag Names in Variable Format Files on page 183
Writing Flat Data to a Variable Format File
In a Spectrum™ Technology Platform dataflow each record has the same fields. However, in a variable
format file, not all records contain the same fields. In order to write flat data from a dataflow to a variable
format file you need to break up each record in the dataflow, grouping the fields from each record into
list fields corresponding to the record types you want to use for the variable format file. A list field is a
collection of fields. For example, the fields FirstName, LastName, Gender, Address, and Phone could
be grouped together into a list field called AccountOwner.
To write flat data to a variable format file, use an Aggregator stage to group fields into list fields
corresponding to the record types you want to write to the variable format file. Do to this:
1. Place an Aggregator stage in your dataflow anywhere upstream from the Write to Variable Format
File stage.
2. Double-click the Aggregator stage to open its options window.
3. Select Group by then click Add.
4. In the Group By field, select the field that contains a unique identifier that can be used to identify
related data. This field's value should be unique across the records in the flat data. For example, an
account number, a social security number, or a phone number.
Note: The field you select should be sorted. If it is not, use a Sorter stage to sort the records by the
field.
5. Click OK.
6. Select Output lists then click Add.
Each output list will represent one record type in the variable format file.
7. Select New data type and in the Type name field specify the type of information that will be contained
in this data type. This will become a record type in the variable format file. For example, this data
type will contain records related to account transactions, you could name the type
"AccountTransaction".
8. In the Name field, enter the name you want to give to this field. This may be the same name you
specify in the Type name field.
9. Click OK.
10. Select the data type you just created and click Add.
11. Leave the option Existing field selected and select one of the fields you want to include in this data
type then click OK. Remember that this will become a record type in the variable format file. Repeat
to add additional fields to this record type.
12. Create additional output lists for each record type you want to have in the variable format file. When
finished, click OK to close the Aggregator options.
The fields coming out of the Aggregator stage are now grouped into list fields that correspond to the
record types you want to include in the variable format file output.
For example, given this flat data:
FIRSTNAME,LASTNAME,ADDRESS,ACCOUNTNUMBER,DATE_OPENED,TRANSACTION_NUMBER,TRANSACTION_DATE,AMOUNT
Joe,Smith,100 Main St,CHK12904567,12/2/2007,1000567,1/5/2012,323.12
182
Spectrum™ Technology Platform 9.0
Chapter 5: Stages Reference
You would want to convert it to something like this in the variable format file:
AccountOwner
AccountInformation
Transaction
Joe,Smith,100 Main St
CHK12904567,12/2/2007
1000567,1/5/2012,323.12
To accomplish this, you would create an Aggregator stage that is configured like this:
Related Links
Write to Variable Format File on page 177
Tag Names in Variable Format Files
In a variable format file, each record in the output file has a tag which indicates the record type. In Write
To Variable Format File, the field name is used as the tag name in the output file. For example, consider
these fields:
Dataflow Designer's Guide
183
Sinks
These fields would be written to the file as follows. Note that in this example the account has two
AccountTransaction records.
AccountOwner
AccountDetails
AccountTransaction
AccountTransaction
Anne,Johnson,F,1202 Lake St,555-222-4932
CHK238193875,1/21/2001,4/12/2012,CHK
1000232,3/5/2012,Blue Goose Grocery,132.11
1000232,3/8/2012,Trailway Bikes,540.00
Note: Only list fields containing simple fields such as strings are written to the output file. If a list field
consists only of other list fields it is not written to the output file. In the above example, no record
with an AccountActivity tag would be written to the output file because AccountActivity consists
only of other list fields (AccountOwner, AccountDetails, and AccountTransaction).
Related Links
Write to Variable Format File on page 177
Write to XML
The Write to XML stage writes the output of a job or subflow to an XML file.
File Properties Tab
Field Name
Description
Data file
Specifies the path to the output XML file. Click the ellipses button (...)
to browse to the file you want.
Note: If the Spectrum™ Technology Platform server is running on
Unix or Linux, remember that file names and paths on these
platforms are case sensitive.
Actual File
Displays the structure specified in the Fields tab. If you click an element
and the file specified in the Data file field contains the element, a preview
of the data will be displayed. Note that only data from simple elements
can be displayed in the preview.
Export Schema
Click this button to save an XSD file that represents the schema shown
in the Actual File view. The schema file is immediately saved to the
location you specify.
Fields Tab
The Fields tab defines the fields you want to include in the output XML file. When you add fields, they
are displayed in a tree structure. The tree displays the name of the element or attribute that will be written
to the XML file. In parentheses following the element/attribute name is the name of the dataflow field
followed by the data type. For example:
This indicates that four elements and one attribute will be written to the XML file. The attribute is indicated
by the red "@" sign.
184
Spectrum™ Technology Platform 9.0
Chapter 5: Stages Reference
Note that the element State will contain the data from the field StateProvince and be string data. Likewise,
the element ZIP will contain data from the PostalCode field and be string data. The XML file might look
like this:
<XmlRoot>
<Customer Status="0">
<AddressLine1>7713 Mullen Dr</AddressLine1>
<City>Austin</City>
<State>TX</State>
<ZIP>78757-1346</ZIP>
</Customer>
<Customer Status="0">
<AddressLine1>1825B Kramer Ln</AddressLine1>
<City>Austin</City>
<State>TX</State>
<ZIP>78758-4260</ZIP>
</Customer>
</XmlRoot>
Note: The root element name (in this example <XmlRoot>) is specified on the File Properties tab.
The following table describes the options on the Fields tab.
Option Name
Description
Add
Adds a field to the output.
Modify
Modifies how the field is written to XML. You can specify the following:
Output type
This option is available if you are modifying a simple
field. It specifies whether the dataflow field should be
written to an XML element or attribute.
Element
Select this to write the field's data to an
XML element. Specify the element name
you want to use in the Element name
field.
Attribute Writes the field's data to an attribute of
the parent element. Specify the attribute
name you want to use in the Attribute
name field.
Element
Specifies the name of the element or attribute to be
name/Attribute written to the XML file. The default name is the
name
dataflow field name.
Change all
children to
This option is available if you are modifying a complex
element. It specifies the type of XML you want the
complex element to contain. One of the following:
No change The child types remain as they are
currently defined, either element or
attribute. You can specify the type for
each field individually by selecting the
field and clicking Modify.
Dataflow Designer's Guide
Elements
All simple fields under the element are
written as XML elements.
Attributes
All simple fields under the element are
written as XML attributes.
185
Sinks
Option Name
Description
Namespace
If you want to specify an XML namespace to use for
the element or attribute, select it here. You can create
namespaces on the Fields tab of the Write to XML
stage.
Include
empty fields
Check this box to include in the output file XML
elements that have a null value or no data. If you do
not check this box, empty elements will not be included
in the output.
For example, if you define an element named <City>
but there is a record that does not have any data in
the City field, the XML output will contain the following
if you check Include empty fields:
<City xs:nil="true"></City>
If you do not check this box the <City> element will
not be written to the output file.
Note: Dataflow field displays the field whose data will be written to
the element or attribute. This is displayed so that if you change
the element or attribute name to something different you can
still see which field's data is contained in the element or
attribute.
Remove
Removes the selected field from the output. If you remove a list field all
child fields are also removed. If you remove a child field, just the selected
child field is removed from the list field.
Remove All
Removes all the fields from the output.
Move Up/Move Down
Reorders the selected field.
Note that you cannot move simple elements into complex elements. If
you want to modify the elements in a complex element, you must modify
your dataflow's Aggregator stage to include the dataflow fields you want
in the complex element. For more information, see Creating Complex
XML from Flat Data on page 187.
Regenerate
Replaces the fields currently defined with the fields coming into Write
to XML from the upstream channel.
Runtime Tab
Option Name
Description
Generate multiple files
Select this option to write records to different files instead of writing all
records to one file. The file to which each record is written is specified in
the record itself. Each record must contain a field that specifies either a
file name or the full file path of the file to which you want the record written.
For example - if you want to send the stock prices of different companies
(of various groups) to all the clients separately, this feature writes the
stock prices of different companies into separate files that may be sent
to each of the clients, if you so wish.
Note: Use this feature when record contains either a file name or the
full file path of the file.
186
Spectrum™ Technology Platform 9.0
Chapter 5: Stages Reference
Option Name
Description
File path field
Selects the field that contains the path (either a file name or the full file
path) of the file to which you want to write the record. Note that only the
simple type elements mapped directly to a root will be listed in the File
path field. This field is only enabled if you select the Generate multiple
files.
Note: If you enable the Generate multiple file option you must specify an output file on either the
Spectrum server or on an FTP server. If you want to write data to a file on an FTP server you
must define a connection to the file server using Management Console.
Related Links
Sinks on page 159
Using Namespaces in an XML Output File on page 187
Creating Complex XML from Flat Data on page 187
Using Namespaces in an XML Output File
Namespaces allow you to have duplicate element and attribute names in your output file by assigning
each element or attribute to an XML namespace.
1. In Enterprise Designer, open the dataflow.
2. Double-click the Write to XML stage on the canvas.
3. Click the Fields tab.
4. Define one ore more namespaces:
a) In the Prefix column, enter the prefix you want to use to associate an element or attribute with
the namespace.
b) In the Namespace column, specify the URL of the namespace.
c) Repeat to define as many namespaces as you want to use for the output XML file.
5. Associate one or more elements or attributes to the namespace.
a) On the Fields tab, select the element or attribute you want to associate with a namespace then
click Modify, or create a new element or attribute by clicking Add.
b) In the Namespace field, choose the namespace prefix you want to associate with the element
or attribute.
c) Click OK.
Related Links
Write to XML on page 184
Creating Complex XML from Flat Data
Dataflows often produce records containing flat fields which get written to XML as a simple XML elements.
If you want to organize flat fields into complex XML elements to produce hierarchical data, you can do
so using one or more Aggregator stages.
For example, given this flat data where the first line is a header record:
addressline1,age,city,country,gender,name,number,postalcode,stateprovince,type
1253 Summer St.,43,Boston,United States,M,Sam,019922,02110,MA,Savings
You might want to group the fields of data related to the address and fields related to the account into
complex XML elements named <Address> and <Account> as shown here:
<CustomerRecord>
<name>Sam</name>
<age>43</age>
<gender>M</gender>
Dataflow Designer's Guide
187
Sinks
<country>United States</country>
<Address>
<addressline1>1253 Summer St.</addressline1>
<city>Boston</city>
<stateprovince>MA</stateprovince>
<postalcode>02110</postalcode>
</Address>
<Account>
<number>019922</number>
<type>Savings</type>
</Account>
</CustomerRecord>
1. Add an Aggregator stage to the point in the dataflow where you want to construct complex elements.
2. Double-click the Aggregator stage to open the stage options.
3. Select Group by and click Add.
4. Select the field that contains a unique value for each record, such as an account number and click
OK.
5. If there are other simple fields you want to pass through, select Group by and click Add again and
add all the simple fields you want to include.
For example, in this case there are five simple fields that will be included in each record: number,
name, age, gender, and country.
6. Select Output lists and click Add.
7. Select New data type. This will have the effect of defining a new complex element. Enter a description
for the kind of data that this complex element will contain. For example, you could enter "Complex"
since you are constructing a complex XML element. The data type name can be anything you want.
188
Spectrum™ Technology Platform 9.0
Chapter 5: Stages Reference
8. In the Name field, enter the name to use for the field. This will also be the name of the XML element.
9. Click OK.
10. Select the field you just created and click Add.
11. With Existing field selected, choose a field that you want to add as a child field to the complex
element and click OK.
12. Repeat the previous two steps to add additional fields to the complex element.
13. Add additional complex fields as needed.
When you are finished, you should have an Aggregator stage that lists each simple and complex
field you want to include in each record. For example:
14. Click OK.
Related Links
Write to XML on page 184
Aggregator on page 116
Dataflow Designer's Guide
189
About Spectrum Technology
Platform
In this section:
•
•
•
•
What Is Spectrum™ Technology Platform? . . . . . . . . . .192
Enterprise Data Management Architecture . . . . . . . . . .193
Spectrum™ Technology Platform Architecture . . . . . . .196
Modules and Components . . . . . . . . . . . . . . . . . . . . . . . .199
6
What Is Spectrum™ Technology Platform?
What Is Spectrum™ Technology Platform?
Spectrum™ Technology Platform is a system that improves the completeness, validity, consistency,
timeliness, and accuracy of your data through data standardization, verification and enhancement.
Ensuring that your data is accurate, complete, and up to date enables your firm to better understand
and connect with your customers.
Note: For more information on Spectrum™ Technology Platform, please visit the Spectrum™
Technology Platform Video Tutorials site.
Spectrum™ Technology Platform aids in the design and implementation of business rules for data quality
by performing the following functions.
Parsing, Name Standardization, and Name Validation
To perform the most accurate standardization you may need to break up strings of data into multiple
fields. Spectrum™ Technology Platform provides advanced parsing features that enable you to parse
personal names, company names, and many other terms and abbreviations. In addition, you can create
your own list of custom terms to use as the basis of scan/extract operations. The Universal Name Module
provides this functionality.
Deduplication and Consolidation
Identifying unique entities enables you to consolidate records, eliminate duplicates and develop
"best-of-breed" records. A "best-of-breed" record is a composite record that is built using data from other
records. The Advanced Matching Module and Data Normalization Module provide this functionality.
Address Validation
Address validation applies rules from the appropriate postal authority to put an address into a standard
form and even validate that the address is a deliverable address. Address validation can help you qualify
for postal discounts and can improve the deliverability of your mail. The Universal Addressing Module
and the Address Now Module provide this functionality.
Geocoding
Geocoding is the process of taking an address and determining its geographic coordinates (latitude and
longitude). Geocoding can be used for map generation, but that is only one application. The underlying
location data can help drive business decisions. Reversing the process, you can enter a geocode (a
point represented by a latitude and longitude coordinate) and receive address information about the
geocode. The Enterprise Geocoding Module provides this functionality.
Location Intelligence
Location intelligence creates new information about your data by assessing, evaluating, analyzing and
modeling geographic relationships. Using location intelligence processing you can verify locations and
transform information into valuable business intelligence. The Location Intelligence Module provides this
functionality.
Master Data Management
Master data management enables you to create relationship-centric master data views of your critical
data assets. The Data Hub Module helps you identify influencers and non-obvious relationships, detect
fraud, and improve the quality, integration, and accessibility of your information.
192
Spectrum™ Technology Platform 9.0
Chapter 6: About Spectrum Technology Platform
Tax Jurisdiction Assignment
Tax jurisdiction assignment takes an address and determines the tax jurisdictions that apply to the
address's location. Assigning the most accurate tax jurisdictions can reduce financial risk and regulatory
liability.
Spectrum™ Technology Platform software from Pitney Bowes Software integrates up-to-date jurisdictional
boundaries with the exact street addresses of your customer records, enabling you to append the correct
state, county, township, municipal, and special tax district information to your records. Some example
uses of tax jurisdiction assignment are:
• Sales and use tax
• Personal property tax
• Insurance premium tax
The Enterprise Tax Module provides this functionality.
Related Links
About Spectrum Technology Platform on page 191
Enterprise Data Management Architecture
With Spectrum™ Technology Platform, you can build a comprehensive enterprise data management
process, or you can target those individual areas in which your company needs improvement. The
following diagram illustrates a complete solution that takes data from its source, through data enrichment
and data quality processes, feeding a master data management hub which makes a single view of the
data available to multiple business applications.
Dataflow Designer's Guide
193
Enterprise Data Management Architecture
Data Discovery
Data discovery is the process of scanning your data resources to get a complete inventory of your data
landscape. Spectrum™ Technology Platform can scan structured data, unstructured data, and
semi-structured data using a wide array of data profiling techniques. The results of the scan are used
to automatically generate a library of documentation describing your company's data assets and to create
a metadata repository. This documentation and accompanying metadata repository provide the insight
you need before beginning data integration, data quality, data governance, or master data management
projects.
For more information on the Spectrum™ Technology Platform Data Discovery Module, contact your
account executive.
Data Integration
Once you have an inventory of your data landscape, you need to consider how you will access the data
you need to manage. Spectrum™ Technology Platform can connect to data in multiple sources either
directly or through integration with your existing data access technologies. It supports batch and real
time data integration capabilities for a variety of business needs including data warehousing, data quality,
194
Spectrum™ Technology Platform 9.0
Chapter 6: About Spectrum Technology Platform
systems integration, and migration. Spectrum™ Technology Platform can access data in RDBMS
databases, data warehouses, XML files, flat files, and variable format files. Spectrum™ Technology
Platform supports SQL queries with complex joins and aggregations and provides a visual query
development tool. In addition, Spectrum™ Technology Platform can access data over REST and SOAP
web services.
Spectrum™ Technology Platform can trigger batch processing based on the appearance of one or more
source files in a specified folder. This "hot folder" trigger is useful for monitoring FTP uploads and
processing them as they occur.
Some of these data integration capabilities require a license for the Enterprise Data Integration Module.
For more information, contact your account executive.
Finally, Spectrum™ Technology Platform can integrate with packaged applications such as SAP and
Siebel.
Data Quality/Governance
Data quality and data governance processes check your data for duplicate records, inconsistent
information, and inaccurate information.
Duplicate matching identifies potential duplicate records or relationships between records, whether the
data is name and address in nature or any other type of customer information. Spectrum™ Technology
Platform allows you to specify a consistent set of business match rules using boolean matching methods,
scoring methods, thresholds, algorithms and weights to determine if a group of records contains duplicates.
Spectrum™ Technology Platform supports extensive customization so you can tailor the rules to the
unique needs of your business.
Once duplicate records have been identified, you may wish to consolidate records. Spectrum™ Technology
Platform allows you to specify how to link or merge duplicate records so you can create the most accurate
and complete record from any collection of customer information. For example, a single best-of-breed
record can be built from all of the records in a household. The Advanced Matching Module is used to
identify duplicates and eliminate them.
Data quality processes also standardize your data. Standardization is a critical process because
standardized data elements are necessary to achieve the highest possible results for matching and
identifying relationships between records. While several modules perform standardization of one type
or another, the Spectrum™ Technology Platform Data Normalization module provides the most
comprehensive set of standardization features. In addition, the Universal Name module provides specific
data quality features for handling personal name and business name data.
Standardized data is not necessarily accurate data. Spectrum™ Technology Platform can compare your
data to known, up-to-date reference data for correctness. The sources used for this process may include
regulatory bodies such as the U.S. Postal Service, third-party data providers such as Experian or D&B,
or your company's internal reference sources, such as accounting data. Spectrum™ Technology Platform
is particularly strong in address data validation. It can validate or standardize addresses in 250 countries
and territories around the world. There are two modules that perform address validation: the Address
Now Module and the Universal Addressing Module.
To determine which one is right for you, discuss your needs with your account executive.
While Spectrum™ Technology Platform can automatically handle a wide range of data quality issues,
there are some situations where a manual review by a data steward is appropriate. To support this, the
Business Steward Module provides a way to specify the rules that will trigger a manual review, and it
provides a web-based tool for reviewing exception records. It includes integrated access to third-party
tools such as Bing maps and Experian data to aid data stewards in the review and resolution process.
Data Enrichment
Data enrichment processes augment your data with additional information. Enrichment can be based
on spatial data, marketing data, or data from other sources that you wish to use to add additional detail
to your data. For example, if you have a database of customer addresses, you could geocode the address
to determine the latitude/longitude coordinates of the address and store those coordinates as part of the
Dataflow Designer's Guide
195
Spectrum™ Technology Platform Architecture
record. Your customer data could then be used to perform a variety of spatial calculations, such as
finding the bank branch nearest the customer. Spectrum™ Technology Platform allows you to enrich
your data with a variety of information, including geocoding (with the Enterprise Geocoding Module), tax
jurisdiction assignment (with the Enterprise Tax Module), geospatial calculations (with the Location
Intelligence Module), and driving and walking directions between points (with the Enterprise Routing
Module).
Master Data Management Hub
The Master Data Management (MDM) hub allows for rapid modeling of entities and their complex
relationships across roles, processes and interactions. It provides built-in social network analysis
capabilities to help you understand influencers, predict churn, detect non-obvious relationships and
fraudulent patterns, and provide recommendations.
Spectrum™ Technology Platform supports two approaches to the MDM hub. In the master hub approach,
the data is maintained in a single MDM database and applications access the data from the MDM
database. In the registry approach, the data is maintained in each business application and the MDM
hub registry contains keys which are used to find related records. For example, a customer's record may
exist in an order entry database and a customer support database. The MDM registry would contain a
single key which could be used to access the customer data in both places.
The Data Hub Module provides MDM capabilities.
Related Links
About Spectrum Technology Platform on page 191
Spectrum™ Technology Platform Architecture
Spectrum™ Technology Platform software from Pitney Bowes Software includes a server that supports
a number of modules. These modules provide different functions, such as address validation, geocoding,
and advanced parsing, among others. The following diagram illustrates the Spectrum™ Technology
Platform architecture.
196
Spectrum™ Technology Platform 9.0
Chapter 6: About Spectrum Technology Platform
Server
The foundation of the Spectrum™ Technology Platform is the server. The server handles data processing,
synchronizes repository data, and manages communication between the client and the transformation
modules via TCP/IP. It provides job management and security features.
Modules
Modules are sets of features that perform a specific function. For example, if you want to standardize
your customers' addresses to conform to USPS standards, you would license the Universal Addressing
module. If you want to determine the tax jurisdictions that apply to each of your customers, you would
license the Enterprise Tax module. You can license just one module or multiple modules, depending on
your specific needs. Most modules consist of "components" and databases.
Components
A component is a basic building block in a customer data quality process. Each component performs a
specific function. For example, the Enterprise Geocoding module's Geocode US Address component
takes an address and returns the latitude and longitude coordinates for that address; the Universal
Addressing module's Get City State Province takes a postal code and returns the city and state/province
where that postal code is located.
Some components must first be combined with other components into a job, service, or subflow before
they can be executed. Use Enterprise Designer to create jobs, services, subflows, and process flows.
For more information, see Enterprise Designer on page 198.
The components that you have available on your system depend on which Spectrum™ Technology
Platform modules you have licensed from Pitney Bowes Software.
Dataflow Designer's Guide
197
Spectrum™ Technology Platform Architecture
Databases
Modules often include databases that contain the data needed by the components in the module. For
example, the Universal Addressing module needs to have access to USPS data in order to verify and
standardize addresses. So, the Universal Addressing module comes with the U.S. Postal Database,
which you must load into a location that is accessible by your Spectrum™ Technology Platform system.
Modules have both required and optional databases. Optional databases provide data needed for certain
features that can greatly enhance your Spectrum™ Technology Platform process.
Management Console
The Management Console is a Windows-based tool for administering Spectrum™ Technology Platform.
You can use the Management Console to:
•
•
•
•
•
Specify a server access address
Select component access method (local or hosted)
Specify the default settings for Spectrum™ Technology Platform components
Manage user accounts, including permissions and passwords
Set up logging, tracking, and reporting.
Enterprise Designer
Enterprise Designer is a Windows-based tool for creating Spectrum™ Technology Platform jobs, services,
subflows, and process flows. It utilizes an easy drag-and-drop interface to allow you to graphically create
complex dataflows.
198
Spectrum™ Technology Platform 9.0
Chapter 6: About Spectrum Technology Platform
API
The Spectrum™ Technology Platform API, which is provided in the Spectrum™ Technology Platform
Client API, is designed to provide simple integration, streamline record processing, and support backward
compatibility of future versions. The Spectrum™ Technology Platform API can be accessed through:
•
•
•
•
•
•
C
C++
COM
Java
.NET
Web services
Related Links
About Spectrum Technology Platform on page 191
Modules and Components
Table 18: Modules, Components, and Databases
Module
Description
Components
Address Now Module
Provides enhanced validation and
standardization for addresses outside the
U.S., and other address processing.
Build Global Address
Get Global Candidate
Addresses
Validate Global Address
Dataflow Designer's Guide
199
Modules and Components
Module
Description
Components
Advanced Matching
Module
Matches records within and/or between input Best Of Breed
files.
Candidate Finder
Duplicate Synchronization
Filter
Interflow Match
Intraflow Match
Match Key Generator
Transactional Match
Business Steward
Module
Identifies exception records and provides a
browser-based tool for manually reviewing
exception records.
Exception Monitor
Read Exceptions
Write Exceptions
Country Identifier
Takes a country name or a combination of
Country Identifier
postal code and state/province and returns
the two-character ISO country code, the
three-character Universal Postal Union (UPU)
code, and the English country name.
Data Hub Module
Links and analyzes data, identifying
relationships and trends.
Write to Hub
Read From Hub
Query Hub
Graph Visualization
Data Integration Module Provides capabilities useful in data
warehousing, data quality, systems
integration, and migration.
Field Selector
Generate Time Dimension
Query Cache
Write to Cache
Data Normalization
Module
Removes inconsistencies in data.
Advanced Transformer
Open Parser
Table Lookup
Transliterator
Enterprise Data
Integration
Connects to data in multiple sources for a
variety of business needs including data
warehousing, data quality, systems
integration, and migration.
Call Stored Procedure
Field Selector
Generate Time Dimension
Query Cache
Write to Cache
Enterprise Geocoding
Module
Determines the geographic coordinates for
an address. Also determines the address of
a given latitude and longitude.
Geocode Address AUS
Geocode Address GBR
Geocode Address Global
Geocode Address World
Geocode US Address
GNAF PID Location Search
Reverse APN Lookup
200
Spectrum™ Technology Platform 9.0
Chapter 6: About Spectrum Technology Platform
Module
Description
Components
Reverse Geocode Address
Global
Reverse Geocode US
Location
Enterprise Routing
Module
Obtains driving or walking directions,
Get Travel Boundary
calculates drive time and drive distance, and
Get Travel Cost Matrix
identifies locations within a certain time or
distance from a starting point.
Get Travel Directions
Enterprise Tax Module
Determines the tax jurisdictions that apply to Assign GeoTAX Info
a given location.
Calculate Distance
GeoConfidence Module Determines the probability that an address or Geo Confidence Surface
street intersection is within a given area.
CreatePointsConvexHull
Global Sentry
Attempts to match transactions against
Global Sentry
government-provided watch lists that contain
Global Sentry Address Check
data from different countries.
Global Sentry ID Number
Check
Global Sentry Name Check
Global Sentry Other Data
Check
Location Intelligence
Module
Performs point in polygon and radial analysis Closest Site
against a variety of geospatial databases.
Find Nearest
Point In Polygon
Query Spatial Data
Read Spatial Data
Spatial Calculator
Spatial Union
SAP Module
Enables Spectrum™ Technology Platform to SAP Generate Match Key
interface with SAP Customer Relationship
SAP Generate Match Score
Management Module applications.
SAP Generate Search Key
SAP Generate Search Key
Constant
SAP Generate Search Key
Metaphone
SAP Generate Search Key
Substring
SAP Validate Address With
Candidates
Siebel Module
Enables Spectrum™ Technology Platform to Siebel Generate Match Key
interface Siebel applications.
Siebel Generate Match Score
Siebel Generate Search Key
Siebel Business Name
Standardization
Siebel Standardize Name
Dataflow Designer's Guide
201
Modules and Components
Module
Description
Components
Siebel Geocode US Address
With Candidates
Siebel Geocode US Address
With No Candidates
Siebel Get Global Candidate
Addresses
Siebel Validate Address With
Candidates
Siebel Validate Address With
No Candidates
Universal Addressing
Module
Standardizes and validates addresses
Get Candidate Addresses
according to the postal authority's standards.
Get City State Province
Get Postal Codes
Validate Address
Validate Address AUS
Validate Address Global
Universal Name Module Parses personal names, company names,
addresses, and many other terms and
abbreviations.
Name Parser (Deprecated)
Name Variant Finder
Open Name Parser
Related Links
About Spectrum Technology Platform on page 191
202
Spectrum™ Technology Platform 9.0
Appendix
In this section:
• Country ISO Codes and Module Support . . . . . . . . . . . . . . . . . . . . . . . . . . . . . . . . .205
Country ISO Codes and
Module Support
In this section:
• Country ISO Codes and Module Support . . . . . . . . . . . .206
A
Country ISO Codes and Module Support
Country ISO Codes and Module Support
The following table lists the ISO codes for each country as well as the modules that support addressing,
geocoding, and routing for each country.
1
206
ISO Country Name (English) ISO 3116-1
Alpha-2
ISO 3116-1
Alpha-3
Supported Modules
Afghanistan
AF
AFG
Address Now Module
Universal Addressing Module
Aland Islands
AX
ALA
Address Now Module
Universal Addressing Module
Albania
AL
ALB
Address Now Module
Universal Addressing Module
Algeria
DZ
DZA
Address Now Module
Universal Addressing Module
American Samoa
AS
ASM
Address Now Module
Universal Addressing Module
Andorra
AD
AND
Address Now Module
1
Enterprise Geocoding Module
Universal Addressing Module
Angola
AO
AGO
Address Now Module
Enterprise Geocoding Module
Universal Addressing Module
Anguilla
AI
AIA
Address Now Module
Universal Addressing Module
Antarctica
AQ
ATA
Address Now Module
Universal Addressing Module
Antigua And Barbuda
AG
ATG
Address Now Module
Universal Addressing Module
Argentina
AR
ARG
Address Now Module
Enterprise Geocoding Module
Universal Addressing Module
Armenia
AM
ARM
Address Now Module
Universal Addressing Module
Aruba
AW
ABW
Address Now Module
Universal Addressing Module
Australia
AU
AUS
Address Now Module
Enterprise Geocoding Module
Enterprise Routing Module
Universal Addressing Module
Andorra is covered by the Spain geocoder
Spectrum™ Technology Platform 9.0
Appendix A: Country ISO Codes and Module Support
ISO Country Name (English) ISO 3116-1
Alpha-2
ISO 3116-1
Alpha-3
Supported Modules
Austria
AT
AUT
Address Now Module
Enterprise Geocoding Module
Enterprise Routing Module
Universal Addressing Module
Azerbaijan
AZ
AZE
Address Now Module
Universal Addressing Module
Bahamas
BS
BHS
Address Now Module
Enterprise Geocoding Module
Universal Addressing Module
Bahrain
BH
BHR
Address Now Module
Universal Addressing Module
Bangladesh
BD
BGD
Address Now Module
Universal Addressing Module
Barbados
BB
BRB
Address Now Module
Universal Addressing Module
Belarus
BY
BLR
Address Now Module
Universal Addressing Module
Belgium
BE
BEL
Address Now Module
Enterprise Geocoding Module
Enterprise Routing Module
Universal Addressing Module
Belize
BZ
BLZ
Address Now Module
Universal Addressing Module
Benin
BJ
BEN
Address Now Module
Enterprise Geocoding Module
Universal Addressing Module
Bermuda
BM
BMU
Address Now Module
Universal Addressing Module
Bhutan
BT
BTN
Address Now Module
Universal Addressing Module
Bolivia, Plurinational State Of BO
BOL
Address Now Module
Universal Addressing Module
Bonaire, Saint Eustatius And BQ
Saba
BES
Address Now Module
Universal Addressing Module
Bosnia And Herzegovina
BA
BIH
Address Now Module
Universal Addressing Module
Botswana
BW
BWA
Address Now Module
Enterprise Geocoding Module
Universal Addressing Module
Dataflow Designer's Guide
207
Country ISO Codes and Module Support
208
ISO Country Name (English) ISO 3116-1
Alpha-2
ISO 3116-1
Alpha-3
Supported Modules
Bouvet Island
BV
BVT
Address Now Module
Universal Addressing Module
Brazil
BR
BRA
Address Now Module
Enterprise Geocoding Module
Enterprise Routing Module
Universal Addressing Module
British Indian Ocean Territory IO
IOT
Address Now Module
Universal Addressing Module
Brunei Darussalam
BN
BRN
Address Now Module
Universal Addressing Module
Bulgaria
BG
BGR
Address Now Module
Universal Addressing Module
Burkina Faso
BF
BFA
Address Now Module
Enterprise Geocoding Module
Universal Addressing Module
Burundi
BI
BDI
Address Now Module
Enterprise Geocoding Module
Universal Addressing Module
Cambodia
KH
KHM
Address Now Module
Universal Addressing Module
Cameroon
CM
CMR
Address Now Module
Enterprise Geocoding Module
Universal Addressing Module
Canada
CA
CAN
Address Now Module
Enterprise Geocoding Module
Enterprise Routing Module
Universal Addressing Module
Cape Verde
CV
CPV
Address Now Module
Universal Addressing Module
Cayman Islands
KY
CYM
Address Now Module
Universal Addressing Module
Central African Republic
CF
CAF
Address Now Module
Universal Addressing Module
Chad
TD
TCD
Address Now Module
Universal Addressing Module
Chile
CL
CHL
Address Now Module
Enterprise Geocoding Module
Universal Addressing Module
Spectrum™ Technology Platform 9.0
Appendix A: Country ISO Codes and Module Support
ISO Country Name (English) ISO 3116-1
Alpha-2
ISO 3116-1
Alpha-3
Supported Modules
China
CN
CHN
Address Now Module
Enterprise Geocoding Module
Universal Addressing Module
Christmas Island
CX
CXR
Address Now Module
Universal Addressing Module
Cocos (Keeling) Islands
CC
CCK
Address Now Module
Universal Addressing Module
Colombia
CO
COL
Address Now Module
Universal Addressing Module
Comoros
KM
COM
Address Now Module
Universal Addressing Module
Congo
CG
COG
Address Now Module
Enterprise Geocoding Module
Universal Addressing Module
Congo, The Democratic
Republic Of The
CD
COD
Address Now Module
Enterprise Geocoding Module
Universal Addressing Module
Cook Islands
CK
COK
Address Now Module
Universal Addressing Module
Costa Rica
CR
CRI
Address Now Module
Universal Addressing Module
Côte d'Ivoire
CI
CIV
Address Now Module
Universal Addressing Module
Croatia
HR
HRV
Address Now Module
Enterprise Geocoding Module
Universal Addressing Module
Cuba
CU
CUB
Address Now Module
Universal Addressing Module
Curacao
CW
CUW
Address Now Module
Universal Addressing Module
Cyprus
CY
CYP
Address Now Module
Universal Addressing Module
Czech Republic
CZ
CZE
Address Now Module
Enterprise Geocoding Module
Universal Addressing Module
Denmark
DK
DNK
Address Now Module
Enterprise Geocoding Module
Enterprise Routing Module
Universal Addressing Module
Dataflow Designer's Guide
209
Country ISO Codes and Module Support
2
210
ISO Country Name (English) ISO 3116-1
Alpha-2
ISO 3116-1
Alpha-3
Supported Modules
Djibouti
DJ
DJI
Address Now Module
Universal Addressing Module
Dominica
DM
DMA
Address Now Module
Universal Addressing Module
Dominican Republic
DO
DOM
Address Now Module
Universal Addressing Module
Ecuador
EC
ECU
Address Now Module
Universal Addressing Module
Egypt
EG
EGY
Address Now Module
Universal Addressing Module
El Salvador
SV
SLV
Address Now Module
Universal Addressing Module
Equatorial Guinea
GQ
GNQ
Address Now Module
Universal Addressing Module
Eritrea
ER
ERI
Address Now Module
Universal Addressing Module
Estonia
EE
EST
Address Now Module
Enterprise Geocoding Module
Universal Addressing Module
Ethiopia
ET
ETH
Address Now Module
Universal Addressing Module
Falkland Islands (Malvinas)
FK
FLK
Address Now Module
Universal Addressing Module
Faroe Islands
FO
FRO
Address Now Module
Universal Addressing Module
Fiji
FJ
FJI
Address Now Module
Universal Addressing Module
Finland
FI
FIN
Address Now Module
Enterprise Geocoding Module
Enterprise Routing Module
Universal Addressing Module
France
FR
FRA
Address Now Module
Enterprise Geocoding Module
Enterprise Routing Module
Universal Addressing Module
French Guiana
GF
GUF
Address Now Module
2
Enterprise Geocoding Module
Universal Addressing Module
French Guiana is covered by the France geocoder
Spectrum™ Technology Platform 9.0
Appendix A: Country ISO Codes and Module Support
3
4
ISO Country Name (English) ISO 3116-1
Alpha-2
ISO 3116-1
Alpha-3
Supported Modules
French Polynesia
PF
PYF
Address Now Module
Universal Addressing Module
French Southern Territories
TF
ATF
Address Now Module
Universal Addressing Module
Gabon
GA
GAB
Address Now Module
Enterprise Geocoding Module
Universal Addressing Module
Gambia
GM
GMB
Address Now Module
Universal Addressing Module
Georgia
GE
GEO
Address Now Module
Universal Addressing Module
Germany
DE
DEU
Address Now Module
Enterprise Geocoding Module
Enterprise Routing Module
Universal Addressing Module
Ghana
GH
GHA
Address Now Module
Enterprise Geocoding Module
Universal Addressing Module
Gibraltar
GI
GIB
Address Now Module
3
Enterprise Geocoding Module Universal
Addressing Module
Greece
GR
GRC
Address Now Module
Enterprise Geocoding Module
Universal Addressing Module
Greenland
GL
GRL
Address Now Module
Universal Addressing Module
Grenada
GD
GRD
Address Now Module
Universal Addressing Module
Guadeloupe
GP
GLP
Address Now Module
4
Enterprise Geocoding Module
Universal Addressing Module
Guam
GU
GUM
Address Now Module
Universal Addressing Module
Guatemala
GT
GTM
Address Now Module
Universal Addressing Module
Guernsey
GG
GGY
Address Now Module
Universal Addressing Module
Gibraltar is covered by the Spain geocoder
Guadeloupe is covered by the France geocode
Dataflow Designer's Guide
211
Country ISO Codes and Module Support
5
212
ISO Country Name (English) ISO 3116-1
Alpha-2
ISO 3116-1
Alpha-3
Supported Modules
Guinea
GN
GIN
Address Now Module
Universal Addressing Module
Guinea-Bissau
GW
GNB
Address Now Module
Universal Addressing Module
Guyana
GY
GUY
Address Now Module
Universal Addressing Module
Haiti
HT
HTI
Address Now Module
Universal Addressing Module
Heard Island and McDonald
Islands
HM
HMD
Address Now Module
Universal Addressing Module
Holy See (Vatican City State) VA
VAT
Address Now Module
5
Enterprise Geocoding Module
Universal Addressing Module
Honduras
HN
HND
Address Now Module
Universal Addressing Module
Hong Kong
HK
HKG
Address Now Module
Enterprise Geocoding Module
Universal Addressing Module
Hungary
HU
HUN
Address Now Module
Enterprise Geocoding Module
Universal Addressing Module
Iceland
IS
ISL
Address Now Module
Universal Addressing Module
India
IN
IND
Address Now Module
Enterprise Geocoding Module
Universal Addressing Module
Indonesia
ID
IDN
Address Now Module
Enterprise Geocoding Module
Universal Addressing Module
Iran, Islamic Republic Of
IR
IRN
Address Now Module
Universal Addressing Module
Iraq
IQ
IRQ
Address Now Module
Universal Addressing Module
Ireland
IE
IRL
Address Now Module
Enterprise Geocoding Module
Enterprise Routing Module
Universal Addressing Module
The Vatican is covered by the Italy geocoder
Spectrum™ Technology Platform 9.0
Appendix A: Country ISO Codes and Module Support
ISO Country Name (English) ISO 3116-1
Alpha-2
ISO 3116-1
Alpha-3
Supported Modules
Isle Of Man
IM
IMN
Address Now Module
Universal Addressing Module
Israel
IL
ISR
Address Now Module
Universal Addressing Module
Italy
IT
ITA
Address Now Module
Enterprise Geocoding Module
Enterprise Routing Module
Universal Addressing Module
Jamaica
JM
JAM
Address Now Module
Universal Addressing Module
Japan
JP
JPN
Address Now Module
Enterprise Geocoding Module
Universal Addressing Module
Jersey
JE
JEY
Address Now Module
Universal Addressing Module
Jordan
JO
JOR
Address Now Module
Universal Addressing Module
Kazakhstan
KZ
KAZ
Address Now Module
Universal Addressing Module
Kenya
KE
KEN
Address Now Module
Enterprise Geocoding Module
Universal Addressing Module
Kiribati
KI
KIR
Address Now Module
Universal Addressing Module
Korea, Democratic People's
Republic Of
KP
PRK
Address Now Module
Universal Addressing Module
Korea, Republic Of
KR
KOR
Address Now Module
Universal Addressing Module
Kosovo
KS
KOS
Address Now Module
Universal Addressing Module
Kuwait
KW
KWT
Address Now Module
Universal Addressing Module
Kyrgyzstan
KG
KGZ
Address Now Module
Universal Addressing Module
Lao People's Democratic
Republic
LA
LAO
Address Now Module
Universal Addressing Module
Latvia
LV
LVA
Address Now Module
Enterprise Geocoding Module
Universal Addressing Module
Dataflow Designer's Guide
213
Country ISO Codes and Module Support
6
7
214
ISO Country Name (English) ISO 3116-1
Alpha-2
ISO 3116-1
Alpha-3
Supported Modules
Lebanon
LB
LBN
Address Now Module
Universal Addressing Module
Lesotho
LS
LSO
Address Now Module
Enterprise Geocoding Module
Universal Addressing Module
Liberia
LR
LBR
Address Now Module
Universal Addressing Module
Libyan Arab Jamahiriya
LY
LBY
Address Now Module
Universal Addressing Module
Liechtenstein
LI
LIE
Address Now Module
6
Enterprise Geocoding Module
Enterprise Routing Module
Universal Addressing Module
Lithuania
LT
LTU
Address Now Module
Enterprise Geocoding Module
Universal Addressing Module
Luxembourg
LU
LUX
Address Now Module
7
Enterprise Geocoding Module
Enterprise Routing Module
Universal Addressing Module
Macao
MO
MAC
Address Now Module
Enterprise Geocoding Module
Universal Addressing Module
Macedonia, Former Yugoslav MK
Republic Of
MKD
Address Now Module
Universal Addressing Module
Madagascar
MG
MDG
Address Now Module
Universal Addressing Module
Malawi
MW
MWI
Address Now Module
Universal Addressing Module
Malaysia
MY
MYS
Address Now Module
Enterprise Geocoding Module
Enterprise Routing Module
Universal Addressing Module
Maldives
MV
MDV
Address Now Module
Universal Addressing Module
Mali
ML
MLI
Address Now Module
Enterprise Geocoding Module
Universal Addressing Module
Liechtenstein is covered by the Switzerland geocoder
Luxembourg is covered by the Belgium geocoder
Spectrum™ Technology Platform 9.0
Appendix A: Country ISO Codes and Module Support
8
9
10
ISO Country Name (English) ISO 3116-1
Alpha-2
ISO 3116-1
Alpha-3
Supported Modules
Malta
ML
MLT
Address Now Module
Universal Addressing Module
Marshall Islands
MH
MHL
Address Now Module
Universal Addressing Module
Martinique
MQ
MTQ
Address Now Module
Enterprise Geocoding Module
Guadeloupe is covered by the France
geocode Universal Addressing Module
Mauritania
MR
MRT
Address Now Module
Universal Addressing Module
Mauritius
MU
MUS
Address Now Module
Universal Addressing Module
Mayotte
YT
MYT
Address Now Module
Enterprise Geocoding Module Universal
Addressing Module
Mexico
MX
MEX
Address Now Module
Enterprise Geocoding Module
Universal Addressing Module
Micronesia, Federated States FM
Of
FSM
Address Now Module
Universal Addressing Module
Moldova, Republic Of
MD
MDA
Address Now Module
Universal Addressing Module
Monaco
MC
MCO
Address Now Module
Enterprise Geocoding Module
10
Universal Addressing Module
Mongolia
MN
MNG
Address Now Module
Universal Addressing Module
Montenegro
ME
MNE
Address Now Module
Universal Addressing Module
Montserrat
MS
MSR
Address Now Module
Universal Addressing Module
Morocco
MA
MAR
Address Now Module
Enterprise Geocoding Module
Universal Addressing Module
Mozambique
MZ
MOZ
Address Now Module
Enterprise Geocoding Module
Universal Addressing Module
Martinique is covered by the France geocoder.
Mayotte is covered by the France geocoder.
Monaco is covered by the France geocoder
Dataflow Designer's Guide
215
Country ISO Codes and Module Support
216
ISO Country Name (English) ISO 3116-1
Alpha-2
ISO 3116-1
Alpha-3
Supported Modules
Myanmar
MM
MMR
Address Now Module
Universal Addressing Module
Namibia
NA
NAM
Address Now Module
Enterprise Geocoding Module
Universal Addressing Module
Nauru
NR
NRU
Address Now Module
Universal Addressing Module
Nepal
NP
NPL
Address Now Module
Universal Addressing Module
Netherlands
NL
NLD
Address Now Module
Enterprise Geocoding Module
Enterprise Routing Module
Universal Addressing Module
New Caledonia
NC
NCL
Address Now Module
Universal Addressing Module
New Zealand
NZ
NZL
Address Now Module
Enterprise Geocoding Module
Enterprise Routing Module
Universal Addressing Module
Nicaragua
NI
NIC
Address Now Module
Universal Addressing Module
Niger
NE
NER
Address Now Module
Enterprise Geocoding Module
Universal Addressing Module
Nigeria
NG
NGA
Address Now Module
Enterprise Geocoding Module
Universal Addressing Module
Niue
NU
NIU
Address Now Module
Universal Addressing Module
Norfolk Island
NF
NFK
Address Now Module
Universal Addressing Module
Northern Mariana Islands
MP
MNP
Address Now Module
Universal Addressing Module
Norway
NO
NOR
Address Now Module
Enterprise Geocoding Module
Enterprise Routing Module
Universal Addressing Module
Oman
OM
OMN
Address Now Module
Universal Addressing Module
Spectrum™ Technology Platform 9.0
Appendix A: Country ISO Codes and Module Support
11
ISO Country Name (English) ISO 3116-1
Alpha-2
ISO 3116-1
Alpha-3
Supported Modules
Pakistan
PK
PAK
Address Now Module
Universal Addressing Module
Palau
PW
PLW
Address Now Module
Universal Addressing Module
Palestinian Territory,
Occupied
PS
PSE
Address Now Module
Universal Addressing Module
Panama
PA
PAN
Address Now Module
Universal Addressing Module
Papua New Guinea
PG
PNG
Address Now Module
Universal Addressing Module
Paraguay
PY
PRY
Address Now Module
Universal Addressing Module
Peru
PE
PER
Address Now Module
Universal Addressing Module
Philippines
PH
PHL
Address Now Module
Enterprise Geocoding Module
Universal Addressing Module
Pitcairn
PN
PCN
Address Now Module
Universal Addressing Module
Poland
PL
POL
Address Now Module
Enterprise Geocoding Module
Enterprise Routing Module
Universal Addressing Module
Portugal
PT
PRT
Address Now Module
Enterprise Geocoding Module
Enterprise Routing Module
Universal Addressing Module
Puerto Rico
PR
PRI
Address Now Module
Universal Addressing Module
Qatar
QA
QAT
Address Now Module
Universal Addressing Module
Reunion
RE
REU
Address Now Module
Enterprise Geocoding Module
11
Universal Addressing Module
Romania
RO
ROU
Address Now Module
Universal Addressing Module
Reunion is covered by the France geocoder
Dataflow Designer's Guide
217
Country ISO Codes and Module Support
12
218
ISO Country Name (English) ISO 3116-1
Alpha-2
ISO 3116-1
Alpha-3
Supported Modules
Russian Federation
RU
RUS
Address Now Module
Enterprise Geocoding Module
Universal Addressing Module
Rwanda
RW
RWA
Address Now Module
Enterprise Geocoding Module
Universal Addressing Module
Saint Barthelemy
BL
BLM
Address Now Module
Universal Addressing Module
Saint Helena, Ascension &
Tristan Da Cunha
SH
SHE
Address Now Module
Universal Addressing Module
Saint Kitts and Nevis
KN
KNA
Address Now Module
Universal Addressing Module
Saint Lucia
LC
LCA
Address Now Module
Universal Addressing Module
Saint Martin (French Part)
MF
MAF
Address Now Module
Universal Addressing Module
Saint Pierre and Miquelon
PM
SPM
Address Now Module
Universal Addressing Module
Saint Vincent And The
Grenadines
VC
VCT
Address Now Module
Universal Addressing Module
Samoa
WS
WSM
Address Now Module
Universal Addressing Module
San Marino
SM
SMR
Address Now Module
12
Enterprise Geocoding Module
Universal Addressing Module
Sao Tome And Principe
ST
STP
Address Now Module
Universal Addressing Module
Saudi Arabia
SA
SAU
Address Now Module
Universal Addressing Module
Senegal
SN
SEN
Address Now Module
Enterprise Geocoding Module
Universal Addressing Module
Serbia
RS
SRB
Address Now Module
Universal Addressing Module
Seychelles
SC
SYC
Address Now Module
Universal Addressing Module
San Marino is covered by the Italy geocoder
Spectrum™ Technology Platform 9.0
Appendix A: Country ISO Codes and Module Support
ISO Country Name (English) ISO 3116-1
Alpha-2
ISO 3116-1
Alpha-3
Supported Modules
Sierra Leone
SL
SLE
Address Now Module
Universal Addressing Module
Singapore
SG
SGP
Address Now Module
Enterprise Geocoding Module
Enterprise Routing Module
Universal Addressing Module
Sint Maarten (Dutch Part)
SX
SXM
Universal Addressing Module
Slovakia
SK
SVK
Address Now Module
Enterprise Geocoding Module
Universal Addressing Module
Slovenia
SI
SVN
Address Now Module
Enterprise Geocoding Module
Universal Addressing Module
Solomon Islands
SB
SLB
Address Now Module
Universal Addressing Module
Somalia
SO
SOM
Address Now Module
Universal Addressing Module
South Africa
ZA
ZAF
Address Now Module
Enterprise Geocoding Module
Universal Addressing Module
South Georgia And The South GS
Sandwich Islands
SGS
Address Now Module
Enterprise Geocoding Module
Universal Addressing Module
South Sudan
SS
SSD
Address Now Module
Universal Addressing Module
Spain
ES
ESP
Address Now Module
Enterprise Geocoding Module
Enterprise Routing Module
Universal Addressing Module
Sri Lanka
LK
LKA
Address Now Module
Universal Addressing Module
Sudan
SD
SDN
Address Now Module
Universal Addressing Module
Suriname
SR
SUR
Address Now Module
Universal Addressing Module
Svalbard And Jan Mayen
SJ
SJM
Address Now Module
Universal Addressing Module
Swaziland
SZ
SWZ
Address Now Module
Enterprise Geocoding Module
Universal Addressing Module
Dataflow Designer's Guide
219
Country ISO Codes and Module Support
220
ISO Country Name (English) ISO 3116-1
Alpha-2
ISO 3116-1
Alpha-3
Supported Modules
Sweden
SE
SWE
Address Now Module
Enterprise Geocoding Module
Enterprise Routing Module
Universal Addressing Module
Switzerland
CH
CHE
Address Now Module
Enterprise Geocoding Module
Enterprise Routing Module
Universal Addressing Module
Syrian Arab Republic
SY
SYR
Address Now Module
Universal Addressing Module
Taiwan, Province of China
TW
TWN
Address Now Module
Universal Addressing Module
Tajikistan
TJ
TJK
Address Now Module
Universal Addressing Module
Tanzania, United Republic Of TZ
TZA
Address Now Module
Enterprise Geocoding Module
Universal Addressing Module
Thailand
TH
THA
Address Now Module
Enterprise Geocoding Module
Enterprise Routing Module
Universal Addressing Module
Timor-Leste
TL
TLS
Address Now Module
Universal Addressing Module
Togo
TG
TGO
Address Now Module
Enterprise Geocoding Module
Universal Addressing Module
Tokelau
TK
TKL
Address Now Module
Universal Addressing Module
Tonga
TO
TON
Address Now Module
Universal Addressing Module
Trinidad and Tobago
TT
TTO
Address Now Module
Universal Addressing Module
Tunisia
TN
TUN
Address Now Module
Enterprise Geocoding Module
Universal Addressing Module
Turkey
TR
TUR
Address Now Module
Enterprise Geocoding Module
Universal Addressing Module
Turkmenistan
TM
TKM
Address Now Module
Universal Addressing Module
Spectrum™ Technology Platform 9.0
Appendix A: Country ISO Codes and Module Support
ISO Country Name (English) ISO 3116-1
Alpha-2
ISO 3116-1
Alpha-3
Supported Modules
Turks And Caicos Islands
TC
TCA
Address Now Module
Universal Addressing Module
Tuvalu
TV
TUV
Address Now Module
Universal Addressing Module
Uganda
UG
UGA
Address Now Module
Enterprise Geocoding Module
Universal Addressing Module
Ukraine
UA
UKR
Address Now Module
Enterprise Geocoding Module
Universal Addressing Module
United Arab Emirates
AE
ARE
Address Now Module
Universal Addressing Module
United Kingdom
GB
GBR
Address Now Module
Enterprise Geocoding Module
Enterprise Routing Module
Universal Addressing Module
United States
US
USA
Address Now Module
Enterprise Geocoding Module
Enterprise Routing Module
Universal Addressing Module
United States Minor Outlying UM
Islands
UMI
Address Now Module
Universal Addressing Module
Uruguay
UY
URY
Address Now Module
Enterprise Geocoding Module
Universal Addressing Module
Uzbekistan
UZ
UZB
Address Now Module
Universal Addressing Module
Vanuatu
VU
VUT
Address Now Module
Universal Addressing Module
Venezuela, Bolivarian
Republic Of
VE
VEN
Address Now Module
Enterprise Geocoding Module
Universal Addressing Module
Viet Nam
VN
VNM
Address Now Module
Universal Addressing Module
Virgin Islands, British
VG
VGB
Address Now Module
Universal Addressing Module
Virgin Islands, U.S.
VI
VIR
Address Now Module
Universal Addressing Module
Wallis and Futuna
WF
WLF
Address Now Module
Universal Addressing Module
Dataflow Designer's Guide
221
Country ISO Codes and Module Support
ISO Country Name (English) ISO 3116-1
Alpha-2
ISO 3116-1
Alpha-3
Supported Modules
Western Sahara
EH
ESH
Address Now Module
Universal Addressing Module
Yemen
YE
YEM
Address Now Module
Universal Addressing Module
Zambia
ZM
ZMB
Address Now Module
Enterprise Geocoding Module
Universal Addressing Module
Zimbabwe
ZW
ZWE
Address Now Module
Enterprise Geocoding Module
Universal Addressing Module
Related Links
Country ISO Codes and Module Support on page 205
222
Spectrum™ Technology Platform 9.0
Notices
©
2013 Pitney Bowes Software Inc. All rights reserved. MapInfo and Group 1 Software are trademarks
of Pitney Bowes Software Inc. All other marks and trademarks are property of their respective holders.
®
USPS Notices
®
Pitney Bowes Inc. holds a non-exclusive license to publish and sell ZIP + 4 databases on optical and
magnetic media. The following trademarks are owned by the United States Postal Service: CASS, CASS
Link
Link
Certified, DPV, eLOT, FASTforward, First-Class Mail, Intelligent Mail, LACS , NCOA , PAVE,
Link
PLANET Code, Postal Service, POSTNET, Post Office, RDI, Suite
, United States Postal Service,
Standard Mail, United States Post Office, USPS, ZIP Code, and ZIP + 4. This list is not exhaustive of
the trademarks belonging to the Postal Service.
®
Link®
Pitney Bowes Inc. is a non-exclusive licensee of USPS for NCOA
processing.
Prices for Pitney Bowes Software's products, options, and services are not established, controlled, or
™
approved by USPS® or United States Government. When utilizing RDI data to determine parcel-shipping
®
costs, the business decision on which parcel delivery company to use is not made by the USPS or
United States Government.
Data Provider and Related Notices
Data Products contained on this media and used within Pitney Bowes Software applications are protected
by various trademarks and by one or more of the following copyrights:
©
Copyright United States Postal Service. All rights reserved.
©
2013 TomTom. All rights reserved. TomTom and the TomTom logo are registered trademarks of
TomTom N.V.
©
Copyright NAVTEQ. All rights reserved
Data © 2013 NAVTEQ North America, LLC
Fuente: INEGI (Instituto Nacional de Estadística y Geografía)
Based upon electronic data © National Land Survey Sweden.
©
Copyright United States Census Bureau
©
Copyright Nova Marketing Group, Inc.
Portions of this program are © Copyright 1993-2007 by Nova Marketing Group Inc. All Rights Reserved
©
Copyright Canada Post Corporation
This CD-ROM contains data from a compilation in which Canada Post Corporation is the copyright owner.
©
2007 Claritas, Inc.
The Geocode Address World data set contains data licensed from the GeoNames Project
(www.geonames.org) provided under the Creative Commons Attribution License ("Attribution License")
located at http://creativecommons.org/licenses/by/3.0/legalcode. Your use of the GeoNames data
(described in the Spectrum™ Technology Platform User Manual) is governed by the terms of the Attribution
License, and any conflict between your agreement with Pitney Bowes Software, Inc. and the Attribution
License will be resolved in favor of the Attribution License solely as it relates to your use of the GeoNames
data.
ICU Notices
Copyright © 1995-2011 International Business Machines Corporation and others.
All rights reserved.
Permission is hereby granted, free of charge, to any person obtaining a copy of this software and
associated documentation files (the "Software"), to deal in the Software without restriction, including
without limitation the rights to use, copy, modify, merge, publish, distribute, and/or sell copies of the
Software, and to permit persons to whom the Software is furnished to do so, provided that the above
224
Spectrum™ Technology Platform 9.0
Copyright
copyright notice(s) and this permission notice appear in all copies of the Software and that both the
above copyright notice(s) and this permission notice appear in supporting documentation.
THE SOFTWARE IS PROVIDED "AS IS", WITHOUT WARRANTY OF ANY KIND, EXPRESS OR
IMPLIED, INCLUDING BUT NOT LIMITED TO THE WARRANTIES OF MERCHANTABILITY, FITNESS
FOR A PARTICULAR PURPOSE AND NONINFRINGEMENT OF THIRD PARTY RIGHTS. IN NO
EVENT SHALL THE COPYRIGHT HOLDER OR HOLDERS INCLUDED IN THIS NOTICE BE LIABLE
FOR ANY CLAIM, OR ANY SPECIAL INDIRECT OR CONSEQUENTIAL DAMAGES, OR ANY DAMAGES
WHATSOEVER RESULTING FROM LOSS OF USE, DATA OR PROFITS, WHETHER IN AN ACTION
OF CONTRACT, NEGLIGENCE OR OTHER TORTIOUS ACTION, ARISING OUT OF OR IN
CONNECTION WITH THE USE OR PERFORMANCE OF THIS SOFTWARE.
Except as contained in this notice, the name of a copyright holder shall not be used in advertising or
otherwise to promote the sale, use or other dealings in this Software without prior written authorization
of the copyright holder.
Dataflow Designer's Guide
225