1
AccuRange AR700™ Laser Distance Gauge
User’s Manual
Rev. 1.4
For use with AR700™ Rev. 0.10
December 12, 2008
Acuity
A product line of Schmitt Industries, Inc.
2765 NW Nicolai St.
Portland, OR 97210
www.acuitylaser.com
AR700 User’s Manual
Rev 1.4 12/08
Limited Use License Agreement
YOU SHOULD CAREFULLY READ THE FOLLOWING TERMS AND CONDITIONS BEFORE OPENING THE PACKAGE
CONTAINING THE COMPUTER SOFTWARE AND HARDWARE LICENSED HEREUNDER. CONNECTING POWER TO THE
MICROPROCESSOR CONTROL UNIT INDICATES YOUR ACCEPTANCE OF THESE TERMS AND CONDITIONS. IF YOU DO NOT
AGREE WITH THEM, YOU SHOULD PROMPTLY RETURN THE UNIT WITH POWER SEAL INTACT TO THE PERSON FROM
WHOM IT WAS PURCHASED WITHIN FIFTEEN DAYS FROM DATE OF PURCHASE AND YOUR MONEY WILL BE REFUNDED BY
THAT PERSON. IF THE PERSON FROM WHOM YOU PURCHASED THIS PRODUCT FAILS TO REFUND YOUR MONEY, CONTACT
SCHMITT INDUSTRIES INCORPORATED IMMEDIATELY AT THE ADDRESS SET OUT BELOW.
Schmitt Industries Incorporated provides the hardware and computer software program contained in the microprocessor control unit, and licenses
the use of the product to you. You assume responsibility for the selection of the product suited to achieve your intended results, and for the
installation, use and results obtained. Upon initial usage of the product your purchase price shall be considered a nonrefundable license fee unless
prior written waivers are obtained from Schmitt Industries incorporated.
LICENSE
You are granted a personal, nontransferable and non-exclusive license to use the hardware and software in this Agreement. Title and
ownership of the hardware and software and documentation remain in Schmitt Industries, Incorporated;
b. the hardware and software may be used by you only on a single installation;
c. you and your employees and agents are required to protect the confidentiality of the hardware and software. You may not distribute,
disclose, or otherwise make the hardware and software or documentation available to any third party;
d. you may not copy or reproduce the hardware and software or documentation for any purpose;
e. your may not assign or transfer the hardware and software or this license to any other person without the express prior written consent of
Schmitt Industries Incorporated;
f. you acknowledge that you are receiving only a LIMITED LICENSE TO USE the hardware and software and related documentation and that
Schmitt Industries Incorporated retains title to the hardware and software and documentation. You acknowledge that Schmitt Industries
Incorporated has a valuable proprietary interest in the hardware and software and documentation.
YOU MAY NOT USE, COPY, MODIFY, OR TRANSFER THE HARDWARE AND SOFTWARE, IN WHOLE OR IN ANY PART,
WITHOUT THE PRIOR WRITTEN CONSENT OF SCHMITT INDUSTRIES, INCORPORATED.
IF YOU TRANSFER POSSESSION OF ANY PORTION OF THE HARDWARE OR SOFTWARE TO ANOTHER PARTY, YOUR LICENSE
IS AUTOMATICALLY TERMINATED.
TERM
The license is effective until terminated. You may terminate it at any other time by returning all hardware and software together with all copies
of associated documentation. It will also terminate upon conditions set forth elsewhere in this Agreement or if you fail to comply with any term
or condition of this Agreement. You agree upon such termination to return the hardware and software together with all copies of associated
documentation. In the event of termination the obligation of confidentiality shall survive.
a.
12 MONTH LIMITED WARRANTY
EXCEPT AS STATED BELOW IN THIS SECTION THIS PRODUCT IS PROVIDED “AS IS” WITHOUT WARRANTY OF ANY KIND,
EITHER EXPRESSED OR IMPLIED, INCLUDING, BUT NOT LIMITED TO, THE IMPLIED WARRANTIES OF MERCHANTABILITY
AND FITNESS FOR A PARTICULAR PURPOSE.
Schmitt Industries Incorporated does not warrant that the functions contained in the product will meet your requirements or that the operation of
the product will be uninterrupted or error free.
Schmitt Industries Incorporated does warrant as the only warranty provided to you, that the product which is furnished to you, will be free from
defects in materials and workmanship under normal use for a period of twelve (12) months from the date of delivery to you as evidenced by a
copy of your warrant receipt.
LIMITATIONS OF REMEDIES
Schmitt Industries Incorporated’s entire liability and your exclusive remedy shall be:
1. the replacement of any hardware and software not meeting Schmitt Industries’ “Limited Warranty” and which is returned to Schmitt
Industries Incorporated or an authorized Schmitt Industries dealer with a copy of your purchase receipt, or
2. if Schmitt Industries Incorporated or the dealer is unable within ninety (90) days to deliver a replacement product which is free of defects in
material or workmanship, you may terminate this Agreement by returning the product and your money will be refunded to you by the dealer
from whom you purchased the product.
IN NO EVENT WILL SCHMITT INDUSTRIES INCORPORATED BE LIABLE TO YOU FOR ANY DAMAGES, INCLUDING ANY LOST
PROFITS, LOST SAVINGS OR OTHER INCIDENTAL OR CONSEQUENTIAL DAMAGES ARISING OUT OF THE USE OR INABILITY
TO USE SUCH PRODUCTS EVEN IF SCHMITT INDUSTRIES INCORPORATED OR AN AUTHORIZED DEALER HAD BEEN
ADVISED OF THE POSSIBILITY OF SUCH DAMAGES, OR FOR ANY CLAIM BY ANY OTHER PARTY.
SOME AREAS DO NOT ALLOW THE LIMITATIONS OR EXCLUSION OF LIABILITY FOR INCIDENTAL OR CONSEQUENTIAL
DAMAGES SO THE ABOVE LIMITATION OR EXCLUSION MAY NOT APPLY TO YOU.
GENERAL
You may not sublicense, assign or transfer the license or the hardware, software, and documentation except as expressly provided in this
Agreement. Any attempt otherwise to sublicense, assign or transfer any of the rights, duties or obligations hereunder is void.
This Agreement will be governed by the laws of the United States and the State of Oregon, United States of America.
Should you have any questions concerning this Agreement, you may contact Schmitt Industries Incorporated by writing to:
Schmitt Industries Incorporated
2765 NW Nicolai St.
Portland, Oregon 97210 USA
YOU ACKNOWLEDGE THAT YOU HAVE READ THIS AGREEMENT, UNDERSTAND IT AND AGREE TO BE BOUND BY ITS
TERMS AND CONDITIONS. YOU FURTHER AGREE THAT IT IS THE COMPLETE AND EXCLUSIVE STATEMENT OF THE
AGREEMENT BETWEEN YOU AND SCHMITT INDUSTRIES INCORPORATED AND ITS DEALER (“US”) WHICH SUPERSEDED
ANY PROPOSAL OR PRIOR AGREEMENT, ORAL OR WRITTEN, AND ANY OTHER COMMUNICATIONS BETWEEN US RELATING
TO THE SUBJECT MATTER OF THIS AGREEMENT.
AR700 User’s Manual
Rev 1.4 12/08
Procedures for Obtaining Warranty Service
1. Contact your Acuity distributor or call Schmitt Industries, Inc. to obtain a return
merchandise authorization (RMA) number within the applicable warranty period.
Schmitt Industries will not accept any returned product without an RMA number.
2. Ship the product to Schmitt Industries, postage prepaid, together with your bill of sale
or other proof of purchase. your name, address, description of the problem(s). Print the
RMA number you have obtained on the outside of the package.
This device has been tested for electromagnetic emissions and immunity and has
been found to be in compliance with the following directives for class A equipment:
EN 61000-6-2:2001
EN 61326:1997 (Amended by A1:1998 and A2:2001 and A3:2003)
This device complies with part 15 of the FCC Rules. Operation is subject to the
following two conditions:
(1) This device may not cause harmful interference, and (2) this device must accept
any interference received, including interference that may cause undesired
operation.
Note: This equipment has been tested and found to comply with the limits for a Class A
digital device, pursuant to part 15 of the FCC rules. These limits are designed to provide
reasonable protection against harmful interference when the equipment is operated in a
commercial environment. This equipment generates, uses, and can radiate radio
frequency energy and, if not installed and used in accordance with the instruction manual,
may cause harmful interference to radio communications. Operation of this device in a
residential area is likely to cause harmful interference in which case the user will be
required to correct the interference at his own expense.
This manual copyright © 2008, Schmitt Industries, Inc.
AR700 User’s Manual
Rev 1.4 12/08
i
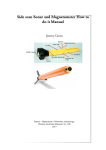
User’s Manual for the
AR700™ Series Laser Distance Gauge
Rev. 1.4
For use with AR700 Rev. 0.10
Table of Contents
1.
INTRODUCTION............................................................................................................................................... 5
1.1.
GENERAL OVERVIEW.................................................................................................................................. 5
1.2.
OPERATING GUIDELINES – SAFETY ISSUES ................................................................................................. 6
1.3.
DEFINITION OF TERMS ................................................................................................................................ 6
1.4.
QUICK START INSTRUCTIONS ..................................................................................................................... 7
1.4.1.
Mounting ............................................................................................................................................... 7
1.4.2.
Power Signals ....................................................................................................................................... 7
1.4.3.
Serial Data Wires.................................................................................................................................. 7
1.4.4.
Analog Output Signals .......................................................................................................................... 7
1.4.5.
Limit Signals ......................................................................................................................................... 7
1.4.6.
Laser Disable Wire ............................................................................................................................... 8
1.4.7.
Important Configuration Considerations.............................................................................................. 8
1.4.7.1.
Sample Interval (S) ........................................................................................................................... 8
1.4.7.2.
Background Light Elimination (L) ................................................................................................... 8
1.4.7.3.
Sample Priority (P) .......................................................................................................................... 8
1.4.7.4.
Serial Output Rate Considerations................................................................................................... 8
1.5.
ROAD PROFILE OPERATION (ROAD PROFILER MODELS ONLY) .................................................................. 9
2.
GENERAL DESCRIPTION ............................................................................................................................ 10
2.1.
2.2.
2.3.
2.4.
2.5.
2.6.
2.7.
2.8.
2.9.
3.
PRINCIPLES OF OPERATION ....................................................................................................................... 10
MECHANICAL DIMENSIONS ...................................................................................................................... 11
ELECTRICAL INSTALLATION ..................................................................................................................... 12
MECHANICAL / OPTICAL INSTALLATION................................................................................................... 12
LASER SAFETY.......................................................................................................................................... 13
SENSOR MAINTENANCE ............................................................................................................................ 13
SENSOR SERVICE ...................................................................................................................................... 14
ENVIRONMENTAL MATERIALS .................................................................................................................. 14
SENSOR SPECIFICATIONS .......................................................................................................................... 14
INSTALLATION AND CHECKOUT ............................................................................................................ 15
3.1.
3.2.
3.2.1.
3.2.2.
3.3.
3.4.
3.5.
3.5.1.
3.5.2.
MOUNTING ............................................................................................................................................... 15
CABLING ................................................................................................................................................... 15
Standalone Cabling............................................................................................................................. 15
Connection to a Host Computer.......................................................................................................... 15
POWER ON ................................................................................................................................................ 15
VERIFYING OPERATION ............................................................................................................................ 16
TROUBLESHOOTING .................................................................................................................................. 16
Serial Communications Check ............................................................................................................ 17
Sensor Output Check........................................................................................................................... 17
AR700 User’s Manual
Rev 1.4 12/08
ii
4.
SIGNAL AND POWER INTERFACE ........................................................................................................... 18
4.1.
SENSOR CABLE WIRE COLORS AND FUNCTIONS ....................................................................................... 18
4.1.1.
Power Supply (Black, Red).................................................................................................................. 18
4.1.2.
Shield (Clear) ...................................................................................................................................... 19
4.1.3.
Serial Communications (Green, Yellow, Blue, Violet) ........................................................................ 19
4.1.4.
Analog Output (Brown, Orange)......................................................................................................... 19
4.1.4.1.
4-20 mA Current Loop Output (Orange)........................................................................................ 20
4.1.4.2.
0 – 10 V Voltage Output (Orange) ................................................................................................. 20
4.1.5.
Limit Outputs (Pink, Gray).................................................................................................................. 21
4.1.6.
Laser Disable and Trigger (White) ..................................................................................................... 21
4.2.
OTHER INTERFACES .................................................................................................................................. 22
4.2.1.
Optional Interface Kit with Serial Cable and Power Supply .............................................................. 22
4.2.2.
Interlock Box ....................................................................................................................................... 22
4.2.3.
OEM Models (Class 3B without Interlock Box) .................................................................................. 22
5.
SERIAL INTERFACE OPERATION ............................................................................................................ 23
5.1.
SERIAL HARDWARE INTERFACE................................................................................................................ 23
5.1.1.
Serial Communication Mode (RS232, RS422) .................................................................................... 23
5.1.1.1.
RS232 (function button parameter 9, setting 1 [default]................................................................ 23
5.1.1.2.
RS422 (function button parameter 9, setting 2).............................................................................. 23
5.1.1.3.
RS422 Terminated (function button parameter 9, setting 3) .......................................................... 23
5.1.2.
Baud Rate (B)...................................................................................................................................... 23
5.1.3.
Serial Output Flow Control (T)........................................................................................................... 24
5.1.3.1.
Output Flow Control OFF (T2[default])........................................................................................ 24
5.1.3.2.
Hardware Output Flow Control (T1) ............................................................................................. 24
5.1.3.3.
Soft Output Flow Control (T3) ....................................................................................................... 24
5.1.4.
Input Flow Control.............................................................................................................................. 24
5.2.
SERIAL DATA OUTPUT (A, N)................................................................................................................... 24
5.2.1.
Serial Output Off (A3) ......................................................................................................................... 24
5.2.2.
ASCII Native Format (A0, A4, A7)...................................................................................................... 24
5.2.3.
ASCII Distance.................................................................................................................................... 25
5.2.3.1.
Error Modes (Q1[default], Q2, Q3)............................................................................................... 25
5.2.3.2.
ASCII English (A1[default], A5, A8) .............................................................................................. 25
5.2.3.3.
ASCII Metric (A2, A6, A9).............................................................................................................. 26
5.2.3.4.
English and Metric Output Formats............................................................................................... 26
5.2.4.
3-Byte Binary Data format (N0, N2) ................................................................................................... 26
5.2.5.
2-Byte Binary Data format (N1, N3) ................................................................................................... 26
5.2.6.
Zero-Point (Z) – Span-Point (U) ......................................................................................................... 27
5.2.6.1.
Unbiased Output Units (A7, A8, A9, N2, N3)................................................................................. 27
5.2.6.2.
Zero-Based Output Units (A0, A1[default], A2, N0, N1) ............................................................... 28
5.2.6.3.
Offset-Based Output Units (A4, A5, A6)......................................................................................... 28
6.
ANALOG OUTPUT OPERATION (X).......................................................................................................... 29
6.1.
6.2.
6.3.
6.4.
6.4.1.
6.4.2.
7.
LIMIT OUTPUT OPERATION (J, K) ........................................................................................................... 31
7.1.
7.2.
7.3.
8.
ANALOG OUTPUT OFF (X5)...................................................................................................................... 29
CURRENT LOOP OUTPUT (X1[DEFAULT], X3) .......................................................................................... 29
VOLTAGE OUTPUT (X2, X4)..................................................................................................................... 29
ZERO-POINT (Z) – SPAN-POINT (U) .......................................................................................................... 29
Unbiased Analog Output (X3, X4) ...................................................................................................... 30
Zero-Span Biased Output (X1, X2)...................................................................................................... 30
LIMIT SWITCHES BOTH OFF BETWEEN LIMITS, INCLUSIVE (J<K) ............................................................. 31
LIMIT SWITCHES BOTH ON BETWEEN LIMITS, INCLUSIVE (J>K) ............................................................... 31
LIMIT OUTPUT TOGGLE (J=K) FOR ANALOG OUTPUT TIMING .................................................................. 31
PERFORMANCE OPTIMIZATION ............................................................................................................. 32
AR700 User’s Manual
Rev 1.4 12/08
iii
8.1.
SAMPLE DEFINITION ................................................................................................................................. 32
8.2.
SAMPLE INTERVAL (S).............................................................................................................................. 32
8.2.1.
Background Light Elimination (BLE) (L) ........................................................................................... 32
8.2.1.1.
BLE ON (L1[default]) .................................................................................................................... 32
8.2.1.2.
BLE OFF (L2) ................................................................................................................................ 32
8.2.1.3.
ROAD PROFILING (L3 – Default in Road Profiler Models (section 1.5)) ................................... 33
8.2.2.
Sample Exposure and Priority (P) ...................................................................................................... 33
8.2.2.1.
Quality sets Priority (P1[default]) ................................................................................................. 33
8.2.2.2.
Rate sets Priority (P2 – forced in Road Profiler Modes (section 1.5)) .......................................... 33
8.2.2.3.
Exposure Limit (M – limited in Road Profiler Modes (section 1.5)) .............................................. 33
8.3.
SAMPLING CONTROL (H, E)...................................................................................................................... 34
8.3.1.
Sampling On – Laser On (H1) ............................................................................................................ 34
8.3.2.
Sampling Off – Laser Off (H2) ............................................................................................................ 34
8.3.3.
Sampling Off – Laser On (H3) ............................................................................................................ 34
8.3.4.
Hardware Trigger Mode – Laser Off (H4) ......................................................................................... 34
8.3.5.
Measure Single Sample (E) ................................................................................................................. 34
8.3.6.
High Speed Sampling Tips .................................................................................................................. 35
8.3.7.
High Speed Single Sample Tips........................................................................................................... 35
8.4.
MEASUREMENT RESOLUTION ................................................................................................................... 35
8.5.
SERIAL DATA RATE .................................................................................................................................. 36
9.
NONVOLATILE MEMORY STORAGE ...................................................................................................... 37
9.1.
CALIBRATION ........................................................................................................................................... 37
9.2.
CONFIGURATION ....................................................................................................................................... 37
9.2.1.
Default Configuration ......................................................................................................................... 37
9.2.2.
Write Configuration Data Command (W1234) ................................................................................... 37
9.2.3.
Read Configuration Data Command (R)............................................................................................. 37
9.2.4.
Initialize Configuration Data Command (I – Except Serial) .............................................................. 38
9.2.5.
Initialize Configuration Data Command (Q8) .................................................................................... 38
9.2.6.
Show Version, Configuration Command (V1234)............................................................................... 38
9.2.7.
Show Version Command (V1235) ....................................................................................................... 38
10.
AR700 COMMAND SET........................................................................................................................... 39
10.1.
‘CURRENT STATUS’ COMMANDS (Z, U, J, K, M) ...................................................................................... 39
10.2.
SERIAL COMMAND OPERATION ................................................................................................................ 39
10.2.1. Serial Command Communications...................................................................................................... 39
10.2.2. Serial Command Format..................................................................................................................... 39
10.2.3. Serial Command Execution................................................................................................................. 40
10.2.4. Serial Command Response.................................................................................................................. 40
10.3.
FUNCTION BUTTON COMMAND OPERATION ............................................................................................. 40
10.3.1. Function Display LEDs....................................................................................................................... 40
10.3.2. Function Display LED codes .............................................................................................................. 41
10.3.3. Function Button: Displaying a Parameter .......................................................................................... 41
10.3.4. Function Button: Changing a Setting.................................................................................................. 41
10.3.5. Function Display Error Codes............................................................................................................ 42
10.4.
SAVING THE CONFIGURATION .................................................................................................................. 42
11.
SERIAL COMMAND QUICK REFERENCE ........................................................................................ 43
12.
FUNCTION BUTTON COMMAND QUICK REFERENCE ................................................................ 44
13.
COMMAND INDEX .................................................................................................................................. 45
AR700 User’s Manual
Rev 1.4 12/08
iv
1.
Introduction
This section is a guide to getting started with the AR700 and this manual. The AR700 has a number
of configurable parameters, but many applications can use the sensor in its default configuration.
The recommended order for reading the manual is:
General Overview – Gives a brief understanding of the sensor operation.
Operating Guidelines – Provides a few important safety tips.
Definition of Terms – An aid for proper communication.
Quick Start Instructions – This should provide the information necessary to connect the
sensor and verify its operation, either with a serial terminal program at 9600 baud, or by
connecting the current loop or Limit Output interface.
General Description – Gives important laser, operation, mechanical, and mounting
information.
Installation and Checkout – Tailor the application. Use the other chapters for reference:
Signal and Power Interface – how to hook everything up
Serial Interface Operation – modes, formats, bias
Analog Output Operation – current loop, voltage, scaling
Limit Output Operation – limit switch settings
Performance Optimization – Sample Rate, Background Elimination, Exposure control
AR700 Command Set – explains all commands for customizing the application
1.1.
General Overview
The AR700 is a triangulation sensor that measures distance using a laser beam, a camera, and a
microprocessor. A variety of models are specified, each to allow a different measurement range.
Models vary in range from 0.125 to 50 inches (3.175 to 1270 mm).
The accuracy is generally specified with a linearity of about +/- 0.03% of the range.
A variety of configuration settings can be selected via the serial port or by using the function
button and the function display LEDs. The complete list of settings is found in the AR700
Command Set chapter and each setting is discussed in detail in a specific operation chapter.
The Sample Rate can be specified and the sensor has capability above 9400 samples per second.
Background Light Elimination, Sample Priority, and Exposure Limit controls enhance the
performance. Sampling may be turned on and off. It can even be triggered using an input signal
wire or a serial command.
Measurement output can be in the form of serial data (RS232 or RS422), Analog Output (4-20mA
current loop or 0-10V voltage), and Limit Outputs (two switches). Serial data, with optional flow
control, is available in five formats: Metric, English, Native, and two binary output modes.
Offsets, scaling, and a selection of 10 baud rates are provided.
After making changes to the configuration, it may be viewed, saved in non-volatile memory, and
restored. At power-on the sensor uses the most recently saved configuration settings.
AR700 User’s Manual
Rev 1.4 12/08
5
1.2.
Operating Guidelines – Safety issues
Use protective eyewear whenever there is a risk of being exposed to the output beam of a
class 3B AR700. Use eyewear specifically designed to block laser light of the wavelength used
by the sensor. Use eyewear through which the green “LASER ON” LED is visible.
Do not point the sensor at any person, particularly a person’s eyes or face.
Do not attempt to disassemble the sensor. Improper disassembly will destroy the optical
alignment of the sensor and necessitate factory repairs.
Do not operate the sensor in areas where the sensor is exposed to direct sunlight for
extended periods or where the air temperature is more than 40 C (104 F) or less than 0°C
(32°F).
Avoid excessive vibration and shocks. The sensor contains securely mounted but precisely
aligned optical components.
Do not scratch the windows on the front face of the sensor. Keep the front windows clean
with a damp cotton cloth. The windows are glass with an anti-reflection coating. Avoid the use
of cleaning solvents other than alcohol.
Operate only with DC supply voltages between 15 and 24 volts. A 15 volt standard AC to DC
power supply is optionally provided with the sensor.
1.3.
Definition of Terms
Sensor – The complete AR700 measurement device.
Target – The object of measurement. The relative distance from the sensor to the target is
measured by the sensor.
Laser, Laser beam – This bright light is emitted from the sensor, reflected from the target, and
collected by the camera lens.
Camera, Detector – An internal imaging device that views the laser spot on the target.
<Range> – The maximum relative distance measurable by the sensor.
Range – 1. <Range>, 2. The region over which the target can be measured. At the near end of the
range the sensor measures zero. At the far end of the range the sensor measures its
maximum value (its Range value).
Scan – A single exposure of the camera.
Scan Cycle – A complete camera operation, sufficient to produce a result. Two scans with BLE
On, one scan with BLE Off.
Sample – A complete sensor measurement with calculated calibrated output. Often it is the
average of many scan cycles.
Above, Too Far – A target location further from the sensor than the end of the range, but where
the laser spot is still visible to the camera. In this condition the sensor can report the
subjective location (too far), but not the distance (a number).
Below, Too Close – A target location closer to the sensor than the start of the range, but where
the laser spot is still visible to the camera. In this condition the sensor can report the
subjective location (too close), but not the distance (a number).
AR700 User’s Manual
Rev 1.4 12/08
6
1.4.
Quick Start Instructions
This will get the sensor running in its default configuration.
Only one output type (Serial, Analog, or Limit) is needed to indicate sensor operation.
1.4.1. Mounting
Caution for Class 3B sensors: be sure that the laser will not cause an eye hazard. Use eyewear
specifically designed to block laser light of the wavelength used by the sensor. Use eyewear
through which the green “LASER ON” LED is visible.
Quick suggestion: Lay the sensor on the floor or a table. It may need to be held in place with
a clamp or a weight. Orient the laser so that the laser and return paths are not obstructed. Use
a piece of paper such as a business card to insert into the beam to use as a measurement
target.
Mount the sensor in such a way that the unit is not twisted or warped. Using three hard points
along the front and back edges or a slightly compliant mounting system are the best methods.
Do not clamp or squeeze the sensor excessively. If the sensor is distorted, its sensitivity and
accuracy may be affected.
1.4.2. Power Signals
Connect the red (Supply +) and black (Supply Common) wires of the sensor cable to a 15 to
24 volt DC power supply (or use the power supply if the sensor came with one).
To be sure that the sensor is using default settings, press the function button while turning on
the power, then after the function display LEDs start cycling, release the button.
1.4.3. Serial Data Wires
Quick suggestion: Connect the wires to a 9 pin D-SUB male connector that can be plugged
into a COM port of a PC (RS232): Black (Ground) to pin 5, Green (Transmit) to pin 2, and
Yellow (Receive) to pin 3. (If the sensor has an interface box, its connector is already wired
for this.) Start a HyperTerminal program on the PC and set it for that COM port at 9600 baud,
8 bit, 1 start, 1 stop, no flow control.
The sensor will report its present measurements five times per second in inches. If a target
surface is placed in the measurement range of the sensor, the screen should display distance
information. The distance is measured from the start of the measurement range. If there is no
target in the measurement range, the sensor will output an error code and the laser may flash
ten times per second.
1.4.4. Analog Output Signals
Quick suggestion: connect a DVM (digital volt meter) to the wires: Brown to Common,
Orange to mA input.
The default mode is 4-20mA current loop. The meter should read near 4 mA when a target is
placed in the laser beam near the start of the measurement range and 20 mA near the end.
1.4.5. Limit Signals
Quick suggestion: connect a 1K resistor in series with an LED (cathode to the resistor, anode
to the Power Supply) to each wire: Pink and Grey.
The default action is: Limit 1 will go active (LED lights) if a target is missing or placed in the
laser beam slightly before the start of the measurement range. Limit 2 will go active (LED
AR700 User’s Manual
Rev 1.4 12/08
7
lights) if a target is missing or placed in the laser beam slightly after the end of the
measurement range..
1.4.6. Laser Disable Wire
Quick suggestion: Leave the white wire disconnected to allow the laser to operate.
Connect the white wire to Ground (black wire) to disable the laser (sensor won’t operate).
1.4.7. Important Configuration Considerations
There are several configuration settings that significantly affect the sensor’s measurement
characteristics. Using the configuration commands to customize these settings for each
specific application will help optimize the sensors operation. See Performance Optimization
(section 8) for more details on these and other settings.
1.4.7.1.
Sample Interval (S)
Use the Sample Interval command to set the maximum average rate at which the sensor
produces output. The command’s parameter has a range of 21 to 999999 in units of 5 µs. The
Sample Rate is therefore 200000 divided by the parameter value. The default setting is 40000
which sets the rate at 5 samples per second (200000 / 40000 = 5). Type ‘S20000<Enter>’ in
HyperTerminal to change it to 10 samples per second (200000 / 20000 = 10).
This command sets the maximum average rate. The rate may need to be slowed down if the
sensor’s camera requires more time to acquire a sufficient image for measurements. Two
other commands affect the operation that may cause the samples to be generated at a slower
rate.
1.4.7.2.
Background Light Elimination (L)
The default setting for Background Light Elimination (BLE) is ON (L1). In this mode the
camera makes two measurements, one with the laser on and one with the laser off, and
subtracts them to remove the effects of background lighting. When BLE is OFF (L2) the
sensor captures a single image and uses it alone to generate the output. Therefore for any
given exposure required by the camera, the sample rate with BLE ON is half of the sample
rate available with BLE OFF. Type ‘L2’ in HyperTerminal to turn BLE OFF.
The measurement of brightly illuminated targets with shiny facets may be improved with
BLE ON. If the environmental lighting is changing rapidly, the improvement may be
reduced. (Note that most non-incandescent lighting is turning on and off 120 times per
second.)
1.4.7.3.
Sample Priority (P)
The default for the Sample Priority setting is RATE (P1). In this mode the Sample Rate takes
priority over sample quality by limiting the camera exposure time. In order to guarantee that
samples have sufficient exposure time, change the priority to QUALITY (P2) by typing ‘P2’
in HyperTerminal. The Sample Rate, if reduced by QUALITY mode, isn’t easily determined.
1.4.7.4.
Serial Output Rate Considerations
It is common to request a Sample Interval shorter than the time it takes to transmit the serial
data. If one sample is being transmitted and another is waiting to be transmitted, then any
new sample will replace the waiting sample (the previous waiting sample is ‘lost’). For
example, it normally takes about 9 milliseconds to send an ASCII sample value at 9600 baud
which limits the average serial data rate to about 110 samples per second.
AR700 User’s Manual
Rev 1.4 12/08
8
Note that the Analog Output and Limit Outputs are updated for every sample, even for those
for which the serial data is ‘lost’ due to insufficient serial data rates. Serial flow control also
doesn’t stop the sensor from sampling.
See Serial Data Rate (section 8.5) for more information.
1.5.
Road Profile Operation (Road Profiler Models Only)
Road Profile (RP) operation is provided in Road Profiler models, AR700RP. Road Profile
operation differs from standard operation in several ways. The RP operating mode is designed to
measure the distance to a surface that is moving quickly in a direction perpendicular to the laser
beam. Special algorithms are designed to measure as much of the surface as possible during the
sample period. This has the effect of averaging over small cracks or pits in the surface being
measured.
A few specific differences in the RP operations are noted:
Road Profile operation can only be selected in RP models. The operator selects the RP
operating mode via the BLE command. L3 selects RP mode and is the default BLE mode in
the RP model. L1 (BLE ON) and L2 (BLE OFF) commands will select normal AR700
operating modes in the RP models.
In the RP operating mode the BLE mode is turned OFF. This is because the laser is always
turned on allowing the camera to expose as much of the surface as possible.
In the RP operating mode the Priority is changed to RATE. Attempts to change the priority
will be ignored while in the RP mode (L3).
Generally, a more powerful laser is used for the RP model in order to get a high rate of
exposures needed to characterize a surface at highway speeds.
The V1234 command will report “AR700RP-“ instead of “AR700-“, allowing the user to
verify the Road Profiler firmware installation.
The Exposure Limit will have no effect for values greater than M52.
In the RP operating mode the maximum trigger speed is about 3500 Hz with M39 used to
help achieve this rate.
Measurement exposures require a tighter tolerance than standard sensors. Each out-oftolerance measurement will report an error rather than a computed value.
AR700 User’s Manual
Rev 1.4 12/08
9
2.
General Description
The AR700 is a laser diode based distance measurement sensor for ranges from 0.125 to 50 inches
(3.175 to 1270 mm). The accuracy is generally specified with a linearity of +/- 0.03% of the range.
There are many different models as specified in the data sheet. Each model has a different standoff
distance, range, and linearity specification. For more detailed specifications see the data sheet. The
standoff distance represents the distance from the face of the sensor to the center of the measurement
range. The range <Range> is the distance from the start of the measurement range to the end of the
range.
2.1.
Principles of Operation
The AR700 uses triangulation to measure distance. The laser beam is projected from the
housing’s aperture and shines on a target surface, where it is focused to a small spot. From there
the laser light is scattered in all directions. A collection lens is located in the sensor to the side of
the laser aperture. It focuses an image of the spot on a linear array camera, which views the entire
measurement range. The position of the laser spot imaged in the camera is then processed to
determine the distance to the target. The sensor controls the exposure according to the amount
light falling on it, so longer exposure times allow greater sensitivity to targets with weak
reflections.
The exposure time and laser power level are controlled to optimize the accuracy of the
measurements for the signal strength and environmental light level measured. Internal averaging
is performed for all scan cycles that fit in the programmed sample interval. Measurement time
and laser power are adjusted for the next scan cycle based on the results from the previous scan
cycle, so rapidly changing conditions may result in momentary loss of signal or overexposure. If
the sensor cannot acquire a usable scan cycle within the sample interval then an error code (no
target) will be generated.
As described in Quick Start (section 1.4), there are several configuration settings that
significantly affect the behavior of the sensor. The first of these is Sample Interval. Longer
sample intervals allow more averaging of the scan cycles and lower noise levels. Shorter sample
intervals give the best results when the reflected signal is relatively strong.
The Sample Priority setting is also used to control the exposure. With priority set to QUALITY,
the sensor is allowed to use a longer measurement time than would normally fit in the
programmed sample interval if it is needed for a good exposure. Under reduced reflection
conditions this can causes the samples to be generated at a slower rate than expected. With
priority set to RATE, the sensor limits the measurement time so that a sample can always be
reported at the expected sample rate, even if the measurement is too short to acquire a good
signal, resulting in an error code.
If high levels of ambient light are present, the use of the Background Light Elimination mode
may improve measurement quality. With this mode ON, a camera exposure is taken with the laser
off and subtracted from a subsequent exposure with the laser on. This will eliminate many
ambient light effects, unless the ambient light levels in the target area are changing rapidly. In this
case the light measured during the laser on exposure may be different from that during the laser
off exposure, reducing the benefits of this mode. The total time required for obtaining a sample in
this mode will be approximately twice what it is with background light elimination OFF.
If the sensor cannot detect a distinct peak in the camera data or the measurement is just beyond
the end of the full scale range (but with the spot still on the camera near one end), the sensor will
AR700 User’s Manual
Rev 1.4 12/08
10
output zero distance. If there is no target in the measurement range and background light
elimination is on, the sensor will generally put out zeros. However, if lighting conditions are
changing rapidly or if background light elimination is off, a bright spot can be misinterpreted as
the laser spot and generate a false distance reading when there is no target in range. Reducing the
Exposure Limit can eliminate this problem in most cases.
2.2.
Mechanical Dimensions
The following diagram shows the mechanical dimensions for the small AR700. For this unit, the
rectangular window on the front contains both the laser exit port and the return light collection
optics. In larger units the exit port and collection optics have separate windows. The sensor has
two #4 (M3) clearance holes for mounting the sensor. The rear face of the sensor has the cable,
the function button, the green “LASER ON” LED, and the function display LEDs. The cable is
for power and all communication (serial, analog, limits, and laser enable). The housing of the
sensor is anodized aluminum. The front windows and the housing parts are sealed, creating a
dustproof, splash proof enclosure.
Typical Labels
The Beam Attenuator is supplied for Class 3B sensor models. Rotate the beam attenuator to block
the laser aperture as required in your system. The sensor will not operate correctly with the beam
blocked.
AR700 User’s Manual
Rev 1.4 12/08
11
2.3.
Electrical Installation
The AR700 sensor’s electrical connections are all provided through an attached cable. Included
are power, input, output, communications, and shielding. The sensor is ON whenever power is
applied to the cable. See Signal and Power Interface (section 4). Note that class 3B operation
requires interlocks and other safety features that can be satisfied with the Interlock Box option.
2.4.
Mechanical / Optical Installation
The AR700 sensor is typically installed by affixing the sensor to a machined bracket with bolts
through the two mounting holes in the sensor. Their location is shown in the mechanical drawing
above.
Laser light is emitted from the laser aperture, which is close to the “Laser Aperture” placard as
shown. The laser beam then strikes the target at a position along its range. Some of the laser light
reflected from the target is collected by the camera lens.
The Optical Base defines the distance from the laser aperture to the camera lens. The Optical
Base and Optical Width define the area between the laser, target, and lens that must be kept clear
throughout the full measurement range. This way the camera can always see the laser spot on the
target, a requirement for the measurement process.
The “Range” is the sensor’s full measurement range. This is the range over which the sensor’s
output distance measurement is calibrated.
The Target Standoff is the approximate distance from the sensor face to the midpoint of the
measurement range. This is a non-calibrated distance that is used primarily for sensor selection
and installation design.
AR700 User’s Manual
Rev 1.4 12/08
12
2.5.
Laser Safety
Caution: This laser device should not be aimed at the human eye. Installers of laser sensors
should follow precautions set forth by ANSI Z136.1 Standard for the Safe Use of Lasers or by
their local safety oversight organization. Be sure that the laser will not cause an eye hazard.
For Class 3B models:
Class 3B operation requires interlocks and other safety features that are not supplied with the
AR700 sensor. It is the responsibility of the installer to ensure that the complete system meets
all applicable safety standards for Class 3B laser products. This may include but not be
limited to a beam attenuator, compliant power supply interlocks, external interlock switches,
emission indicators, and user warning labels that may be required to be visible during use.
The AR700 Interlock Box option can be used to satisfy these requirements.
Use eyewear specifically designed to block laser light of the wavelength emitted by the
sensor and through which the green “LASER ON” LED is visible.
Several lasers are used in the AR700 sensor models.
Wavelength (nm)
650
670
660
Power Limit (mW)
1
5
25
Safety Classification
Class 2
Class 3R
Class 3B
Color
Red
Red
Red
The laser safety classification reflects worst case situations. The laser is considered to be
continuous, not pulsed. When the laser pulses in normal operation, the level of laser light does not
increase.
The housing is sealed with tamper-resistant fasteners. Do not attempt to open the sensor. A higher
level of laser light could be accessible inside.
2.6.
Sensor Maintenance
The AR700 sensor requires little maintenance from the user. The sensor window(s) should be
kept clean of dust buildup as a part of regular preventative maintenance. Use compressed air to
blow dirt off the window or use delicate tissue wipes and a light solvent such as isopropyl alcohol
AR700 User’s Manual
Rev 1.4 12/08
13
or water. Avoid using pressurized water and do not use abrasive wipes on the optical glass. If
your sensor does not function according to specifications, contact Schmitt Industries, Inc.
The housing is sealed with tamper-resistant fasteners. Do not attempt to open the sensor. It is not
user serviceable. A higher level of laser light could be accessible inside. The accuracy of the unit
will be degraded if the sensor is opened.
2.7.
Sensor Service
The AR700 sensor has no user-serviceable parts. Refer all service questions to Schmitt Industries,
Inc.
The housing is sealed with tamper-resistant fasteners Do not attempt to open the sensor. A higher
level of laser light could be accessible inside. The accuracy of the unit will be degraded if the
sensor is opened.
2.8.
Environmental Materials
The AR700 is produced in compliance with the RoHS directive regarding reduction in the use of
lead and other hazardous substances.
2.9.
Sensor Specifications
Go to http://www.acuitylaser.com/AR700/sensor-technical-data.shtml
AR700 User’s Manual
Rev 1.4 12/08
14
3.
Installation and Checkout
3.1.
Mounting
Mount the sensor in such a way that the unit is not twisted or warped. Using three hard points
along the front and back edges or a slightly compliant mounting system are the best methods. Do
not clamp or squeeze the sensor excessively. If the sensor is distorted, the sensitivity and
accuracy may be affected.
3.2.
Cabling
The AR700 has a multipurpose cable with solder tail wires. If the AR700 is ordered with a
power supply, the sensor cable will be connected to the power supply. Connection and
termination according to the instructions is essential for correct sensor operation. Read the wire
descriptions for connection information.
3.2.1. Standalone Cabling
To use the AR700 without a serial connection to a host computer, the only connections
necessary are the power and ground wires, the analog output wires, and optionally the limit
output wires connecting to your data display, recording, or control equipment. See Signal and
Power Interface (section 4) for wire connections. In its default configuration, the AR700 will
begin measuring and transmitting measurement data on power-up.
In 4-20mA analog output mode, the best accuracy and linearity for the current loop is
obtained with a 500-ohm load to current loop return at the measurement point, converting it
to a voltage of 2-10V. The limit outputs can be used to indicate the analog output validity.
In 0-10V analog output mode, the best accuracy and linearity for the voltage output is
obtained with a 10K-ohm load to the voltage output return at the measurement point. The
limit outputs can be used to indicate the analog output validity.
In limits-only mode, one or both of the two limit output wires can be used to connect to
control equipment. Using both wires allows the sensor measurement validity to be indicated.
3.2.2. Connection to a Host Computer
A 9-pin serial D-sub serial connector can be attached to the serial output wires to connect the
AR700 directly to an IBM-PC compatible 9-pin serial port. Connect a 15 volt power supply
to the power and ground lines of the sensor cable. See Signal and Power Interface (section 4)
for wire connections. Only the power and ground need be connected for operation in addition
to the serial interface. For testing use a terminal emulation program such as the Windows
HyperTerminal, set to 9600 baud, 8 bits, no parity, 1 stop bit to communicate with a sensor in
the default configuration.
3.3.
Power On
Caution: be sure that the laser will not cause an eye hazard. Use eyewear specifically designed to
block laser light of the wavelength used by the sensor. Use eyewear through which the green
“LASER ON” LED is visible.
AR700 User’s Manual
Rev 1.4 12/08
15
When power is applied some function display LEDs may flash briefly and go off. Then the
“LASER ON” LED will come on and stay on. Then the laser beam will be emitted from the front
laser aperture window. In most models the laser beam will be bright red, but some have invisible
or nearly invisible laser light. The sensor will begin transmitting measurement readings as soon as
the laser comes on.
3.4.
Verifying Operation
In its default configuration, the AR700 transmits 5 samples per second at 9600 baud over the
serial signals, and transmits measured distance over the current loop output at the same update
rate. The current loop should put out 4 mA at the near end of the measurement range, and 20 mA
at the far end. Check either, or both, signals to verify basic sensor operation.
3.5.
Troubleshooting
The sensor can display simple error indications using its function display LEDs.
shooting steps are shown below:
Symptom
“LASER ON” LED
never turns on
Possible Cause
Trouble
Correction
Power lines not connected
Check wire connections
Power lines reversed polarity
Check wire connections
Power supply voltage too low or too Check power supply voltage
high
when loaded
No laser light and no
sample data
Sampling is turned off
Turn Sampling on
Serial output is turned off
Turn Serial Output mode on.
Power supply voltage is too low
Check power supply input
voltage
Ambient light level is too high
Reduce the ambient light
level.
P
S
Function display
LEDs flash
pattern P0S6
Configuration data lost
Press function button,
default configuration is
loaded
P
S
Function display
LEDs flash
pattern P0S8
Calibration data lost
Call Schmitt Industries for
instructions
P
S
Function display
LEDs flash
pattern P0S10
Waiting for Class 3B laser to start
This time-out finishes in 5
seconds.
AR700 User’s Manual
Rev 1.4 12/08
16
3.5.1. Serial Communications Check
If no information is received over the serial port, check the power supply and serial wire
connections. The sensor may be in a configuration that prevents serial communication, such
as being set at the wrong baud rate.
To reset the sensor to the default: Turn the power off, press the function button on the
AR700, and turn the power on with the button held down. The function display LEDs should
cycle through a pattern that illuminates each, one at a time. When the button is released, the
sensor will reset to the default configuration (9600 baud, 8 bits, no parity, 1 stop bit), and
should enable serial RS232 communication with the host system.
3.5.2. Sensor Output Check
If the sensor output value is in error, check that the sensor and target are stationary and stable,
that the target is in the middle of the measurement range as an initial test distance, and that
the laser beam is hitting the target.
The Zero-Point and Span-Point configuration settings may alter the values output by the
sensor. Reset the sensor to the default to remove their effect.
The sensor may need to warm up for 5-10 minutes before reaching full accuracy. Leave it on
for a few minutes and re-check the sensor accuracy.
AR700 User’s Manual
Rev 1.4 12/08
17
4.
Signal and Power Interface
The AR700 has a multipurpose cable (sensor cable) with solder tail wires. If the AR700 is ordered
with a power supply, the sensor cable will be connected to the power supply. Connection and
termination according to the instructions is essential for correct sensor operation. Read the wire
descriptions for connection information.
4.1.
Sensor Cable Wire Colors and Functions
The tables below shows the wiring on systems ordered without power supplies.
Wire
Red
Black
White
Clear
Pink
Grey
Function in All Modes
Power Supply, +15V (15 VDC min to 24 VDC max)
Ground - Power Supply Common Return
Laser Disable (connect to ground to disable)
(Shield) Ground at Supply End
Limit 1 Output (open collector NPN switch to ground)
Limit 2 Output (open collector NPN switch to ground)
The analog output wires can be used for 4-20 mA current output or 0-10V voltage output.
Wire
Orange
Brown
Function in Selected Analog Mode
4-20mA
0-10V
Current Loop Output
Voltage Output
Current Loop Return
Voltage Return
The serial communications wires can be used for RS232 or RS422.
Wire
Yellow
Green
Blue
Violet
Function in Selected Serial Mode
RS232
RS422
RxD – Receive Data
RX– : Receive Data –
TxD – Transmit Data
TX– : Transmit Data –
RTS – Request To Send
TX+ : Transmit Data +
CTS – Clear To Send
RX+ : Receive Data +
4.1.1. Power Supply (Black, Red)
The Black wire is the Power Supply Common return, also named Ground. It carries the return
current for the power supply, the Limit Outputs, the Laser Enable, and the serial data signals.
Note that the ground current for the Limit Outputs may be up to 100 mA each.
The Red wire is the Power Supply Input to the sensor. The sensor requires +15 VDC power at
120 mA to 200 mA (depending on the internal laser used). The sensor uses a surge of up to
350 mA at power on. The Analog Output uses an additional current up to 20 mA. The
maximum ripple allowed on the supply is 100 mVpp.
Power supplies from 15 VDC to 24 VDC may be used. Higher voltages will result in
excessive current drawn by the over-voltage protection circuitry and may cause permanent
damage. Voltages less than 14 VDC may result in inaccurate measurement readings.
Class 3B laser operation requires interlocks and other safety features that can be satisfied
with the Interlock Box option.
AR700 User’s Manual
Rev 1.4 12/08
18
4.1.2. Shield (Clear)
The Clear wire is the cable and housing shield and is connected to ground inside the sensor. It
should also be connected to ground at the power supply end of the cable.
4.1.3. Serial Communications (Green, Yellow, Blue, Violet)
A standard 9-pin D-SUB serial connector can be built to interface with an IBM or compatible
computer using connection the pin out table below. The RS422 pin-out shown is not a
standard. This pin-out is not compatible with the AR600.
Pin #
DCE RS232 Function
(PC compatible)
Signal Direction
Wire Color
RS422 Function
(not PC compatible)
1
Data Carrier Detect (DCD)
To Computer
N/C
2
Transmitted Data
To Computer
Green (TXD/TX-)
TX-
3
Received Data
From Computer
Yellow (RXD/RX-)
RX-
4
DTE Ready
From Computer
N/C
5
GND
Reference
Black (COM)
6
DCE Ready
To Computer
N/C
7
Clear To Send (Optional)
From Computer
Violet (CTS/RX+)
RX+
8
Request To Send (Optional)
To Computer
Blue (RTS/TX+)
TX+
9
Ring Detect
To Computer
N/C
Reference
RS232 and RS422 modes are compatible with the associated ANSI standards.
See Serial Interface Operation (section 5) for more information.
4.1.4. Analog Output (Brown, Orange)
The Brown wire is the return signal for the Analog Output. It is connected to ground inside
the sensor and should not be connected to ground outside the sensor. Inadvertently
connecting it to ground may cause a reduction in accuracy of the analog output, especially in
voltage mode.
AR700 User’s Manual
Rev 1.4 12/08
19
4.1.4.1.
4-20 mA Current Loop Output (Orange)
In Current Loop mode the Orange wire delivers a current proportional to the measured
distance.
The best conversion to voltage is obtained by connecting a 500-ohm load resistor (1/4
Watt minimum) between the orange and brown wires at the measurement point. This
gives a 2 volt to 10 volt output range.
See Analog Output Operation (section 6) for mode selection and scaling options.
The sensor may be connected directly to a meter or a filter may be inserted to reduce
noise. The filter shown will pass the signal at full speed (nearly 10000 samples per
second). To filter better at slower speeds, use a 0.01 uF capacitor (1000 samples per
second) or a 0.1 uF capacitor (100 samples per second).
4.1.4.2.
0 – 10 V Voltage Output (Orange)
In Voltage mode the Orange wire delivers a voltage proportional to the measured
distance. A load resistance of 10K-ohms or more may be connected between the orange
and brown wires in this mode.
Note that the output voltage does not go all the way to zero but the output is linear from
about 10 mV (at position = 0) to 10 V.
See Analog Output Operation (section 6) for mode selection and scaling options.
The sensor may be connected directly to a meter or a filter may be inserted to reduce
noise. The filter shown will pass the signal at full speed (nearly 10000 samples per
second). To filter better at slower speeds, use a 0.01 uF capacitor (1000 samples per
second) or a 0.1 uF capacitor (100 samples per second).
AR700 User’s Manual
Rev 1.4 12/08
20
4.1.5. Limit Outputs (Pink, Gray)
The Pink wire is the Limit 1 Output.
The Gray wire is the Limit 2 Output.
See Limit Output Operation (section 7) for operation options and details.
Each Limit Output is an open collector NPN transistor switch to Ground. When a Limit
Output is not active, its output will be high impedance and no current will flow through it.
When a Limit Output is active (On) it can sink up to 100mA of current. A current limiting
circuit will cause the transistor to turn off in the case of a current overload. The transistor will
remain off until the sensor’s measurement conditions cause it to turn off and then back on
again.
The load for each output should be connected to the Power Supply (Red wire). The voltage
on these wires must not exceed the limits of the Power Supply connection voltages (red and
black wires), or excessive current may flow into the sensor and cause damage.
4.1.6. Laser Disable and Trigger (White)
The White wire is the Laser Disable input. Connecting it to Ground (black wire) will
disable the laser (turn it off). It is normally left unconnected to enable the laser.
If this input will be controlled by an operator from more than two meters from the sensor,
then an emission indicator near the operator control area may be necessary to comply with
laser safety regulations.
This signal can be driven by a switch, an open collector transistor, or by TTL or 3 to 5 volt
CMOS level signals. This signal must be held in one state for at least 70 µs in order to
guarantee that the state is recognized. A low signal (0 volt state) disables the laser. A high
state (3 to 5 volts) enables the laser.
Additionally this input can be used to trigger a single measurements in the sensor. If the
Sampling Control is set to HARDWARE TRIGGER mode then a single sample will be
measured each time this signal transitions from low to high. The measurement will begin
within 70 µs of the transition. Note that the Laser Disable input signal must remain
‘enabled’ (signal state high) until the sample is acquired or the laser will turn off and
disable the sensor’s ability to sample. A mechanical switch is not recommended for
triggering unless the switch has excellent ‘bounce’ characteristics.
For the fastest possible trigger speed, use an open collector transistor and use a trigger
pulse that goes low (0 volt state) for 70 µs and remains high the rest of the time. Use BLE
OFF (L2), Rate Priority (P2), and limit the exposure. 4500 samples per second can be
achieved in this way if the target is close and highly reflective enough to operate with an
exposure limit of M33 and a Sample interval of S21.
See Performance Optimization (section 8) for more about Sampling Control.
AR700 User’s Manual
Rev 1.4 12/08
21
4.2.
Other Interfaces
Terminal block connections can be provided for user connections.
4.2.1. Optional Interface Kit with Serial Cable and Power Supply
The Acuity AR700 Interface Kit (p/n AQ7000001) provides an interface box with terminal
block connections, a serial cable for connecting to a PC, and a Power Supply.
One terminal block in the interface box connects to the AR700 sensor. A second terminal
block allows user access to all other connections as needed.
A standard 9-pin D-SUB serial connector is provided in the interface box. It provides the pinout described in the Serial Communications subsection, above. In addition, it ties pins 4 (DTE
Ready), 6 (DCE Ready,) and 1 (DCD) together, a standard connection used with a PC. A
standard 9-pin cable is supplied to connect the interface box to a PC.
The interface box has a jack to accept the plug from a standard 15V Power Supply, also
supplied with the Interface Kit.
4.2.2. Interlock Box
The Interlock Box option may be added to sensors with a Class 3B lasers in order to provide
some of the safety features required for compliance with laser regulations.
It provides the same features as the Interface Kit and also includes a beam attenuator, a key
switch, a laser interlock connector, and a second laser emission indicator.
4.2.3. OEM Models (Class 3B without Interlock Box)
A Class 3B sensor that doesn’t have the Interlock Box option is for use only as a component
for incorporation into a system that must include all applicable safety components prior to
use. It is the responsibility of the installer to ensure that the complete system meets all
applicable safety standards for Class 3B laser products. This may include but not be limited
to a beam attenuator, compliant power supply interlocks and safety switches, emission
indicators and user warning labels that may be required to be visible during use.
AR700 User’s Manual
Rev 1.4 12/08
22
5.
Serial Interface Operation
5.1.
Serial Hardware Interface
The serial port hardware mode can operate in RS232 or RS422 mode. The hardware mode can
not be selected using a serial command and must be selected through the use of the function
button. The default serial port mode is RS232. In RS422 terminated mode, the serial port is set for
full-duplex transmission with an internal 120 ohm termination connected between the receiver
pair’s wires. In RS422 unterminated mode, the serial port is set for full-duplex transmission and
the 120 ohm termination is not connected.
5.1.1. Serial Communication Mode (RS232, RS422)
The Serial Communication Mode command is used to set the hardware communication mode
used by the sensor. It can only be set using the function button. See Function Button
Command Operation (section 10.3) for instructions.
5.1.1.1.
RS232 (function button parameter 9, setting 1 [default]
This command sets the serial communications mode to RS232 using four
signals, TX, RX, CTS, and RTS.
5.1.1.2.
RS422 (function button parameter 9, setting 2)
This command sets the serial communications mode to RS422 with no
termination provided. Two signal pairs (TX and RX) use four wires. CTS and
RTS are not available.
5.1.1.3.
RS422 Terminated (function button parameter 9, setting 3)
This command sets the serial communications mode to RS422 with and internal
120 Ohm termination on RX. Two signal pairs (TX and RX) use four wires. CTS
and RTS are not available.
P
S
P
S
P
S
5.1.2. Baud Rate (B)
The Baud Rate is selectable via the function button. Although changing the Baud Rate using
the serial port is also allowed, it requires the host device to change its own Baud Rate after
commanding the sensor to change.
The following Baud Rates are provided (with corresponding serial command):
300
B1
1200
B2
2400
B3
4800
B4
9600
B5 (default)
19200
B6
38400
B7
57600
B8
115200
B9
230400
B0
AR700 User’s Manual
Rev 1.4 12/08
23
5.1.3. Serial Output Flow Control (T)
The Serial Flow Control command is used to select the serial output flow control mode.
Whenever sampling is enabled the measurement, analog output, and limit output operations
continue, even though serial output flow may be stopped.
5.1.3.1.
Output Flow Control OFF (T2[default])
In this mode waiting characters are always transmitted.
5.1.3.2.
Hardware Output Flow Control (T1)
This mode uses the RS232 control signal CTS. In this mode the sensor will not transmit
any characters if the CTS signal is not active. It will immediately begin transmitting any
waiting characters when CTS becomes active. Hardware flow control is not operational
in RS422 mode.
This mode responds on a character by character basis.
5.1.3.3.
Soft Output Flow Control (T3)
In this mode the sensor responds to software flow control characters (Ctrl-S and Ctrl-Q).
It will stop the flow of serial sample data after Ctrl-S is received. The sensor will resume
the flow after Ctrl-Q is received. Non sample data information will be transmitted
regardless of the flow control characters (Show Version command, for example).
This mode stops the transmission of complete samples. Once the first character of a
sample is transmitted, all the characters of the sample will transmit.
5.1.4. Input Flow Control
The sensor provides hardware input flow control in RS232 mode using the RTS signal, which
is set active to indicate that the sensor is able to receive at least two more characters.
Hardware flow control is not operational in RS422 mode.
The sensor does not transmit software flow control characters (Ctrl-S and Ctrl-Q). If the host
is transmitting command sequences that are more than 10 bytes in length, pause for 0.1
seconds between commands.
5.2.
Serial Data Output (A, N)
The Serial Data Format, units, and offsets modes are selectable using the Serial Output Control
command. Serial data is transmitted from the AR700 as 8 data bits with no parity and 1 stop bit.
The sample data sent represents calibrated distance readings.
Available units are Native (0 to 50000), English, Metric, and Short (0 to 16378).
Output Formats are ASCII, 3 byte binary, and 2 byte binary.
Adjustable offset modes are Unbiased, Zero-Based, and Offset-Based.
5.2.1. Serial Output Off (A3)
In this mode no serial data is transmitted. Analog and Limit Outputs continue to function.
5.2.2. ASCII Native Format (A0, A4, A7)
Native is the format used for many commands (Z, J, K, U) and it is also provided as an output
format. Native has valid measurement values between 0 and 50000, inclusive. The output is
AR700 User’s Manual
Rev 1.4 12/08
24
up to five digits followed by <CR><LF> (Carriage Return and Line Feed characters) that
represent a measured distance computed as:
Distance = <Range> * value / 50000
(<Range> is the sensor’s numeric Range)
Errors are represented by values over 50000:
Error
Native Units value
1 - Target too near
50001<CR><LF>
2 - Target not seen
50002<CR><LF>
3 - Target too far
50003<CR><LF>
4 - Laser Off
50004<CR><LF>
5.2.3. ASCII Distance
In these modes, each sample consists of a string of characters as follows: optional minus sign
(see Offset-Based Output – section 5.2.6.3), up to 7 distance digits plus a decimal point
(depending on model range – section 5.2.3.4), and followed by <CR><LF>, for a maximum
of 10 characters including <CR><LF> characters. Leading zeros are not transmitted except a
single zero prior to the decimal point. The maximum number of characters is dependent on
the sensor’s <Range> and the measurement units selected. Output formats are as follows:
5.2.3.1.
Error Modes (Q1[default], Q2, Q3)
Three user selectable modes of error indication can be set for ASCII distance formats by
the Error Report Mode command:
code
plus
natural
Q1
Q2
Q3
‘E’ + Error + <CR><LF>
‘+’ + ErrorValue + <CR><LF>
ErrorValue + <CR><LF>
E1<CR><LF>
+5.0001<CR><LF>
5.0001<CR><LF>
Error values are indicated by out-of-range distances (see Native Format – section 5.2.2).
The numeric error codes are coded as:
ErrorValue = <Range> * ( 50000 + Error ) / 50000
Any numeric output value inclusive of 0.0000 and <Range> is a valid distance
measurement. For a 1” sensor 1.00000 is a valid output and 1.00006 represents error 3
(too far). For the same sensor in metric 25.4000 is a valid output and 25.4015 represents
error 3. Examples in the sub-sections below represent the output from a 5 inch range
sensor for clarity.
5.2.3.2.
ASCII English (A1[default], A5, A8)
Error codes for English units (inches) are as follows (AR700-0.500 model):
Error
1 - Target too near
2 - Target not seen
3 - Target too far
4 - Laser Off
AR700 User’s Manual
Rev 1.4 12/08
Q1 (default)
‘Code’ mode
E1<CR><LF>
E2<CR><LF>
E3<CR><LF>
E4<CR><LF>
25
Q2
‘+’ mode
+0.50001<CR><LF>
+0.50002<CR><LF>
+0.50003<CR><LF>
+0.50004<CR><LF>
Q3
natural mode
0.50001<CR><LF>
0.50002<CR><LF>
0.50003<CR><LF>
0.50004<CR><LF>
5.2.3.3.
ASCII Metric (A2, A6, A9)
Error codes for Metric units (mm) are as follows (AR700-0.500 model):
Error
1 - Target too near
2 - Target not seen
3 - Target too far
4 - Laser Off
5.2.3.4.
Q1 (default)
‘Code’ mode
E1<CR><LF>
E2<CR><LF>
E3<CR><LF>
E4<CR><LF>
Q2
‘+’ mode
+12.7003<CR><LF>
+12.7005<CR><LF>
+12.7008<CR><LF>
+12.7010<CR><LF>
Q3
natural mode
12.7003<CR><LF>
12.7005<CR><LF>
12.7008<CR><LF>
12.7010<CR><LF>
English and Metric Output Formats
Sensor Range
0.125 in:
0.250 in:
0.500 in:
1.0 in:
2.0 in:
4.0 in:
6.0 in:
8.0 in:
12.0 in:
16.0 in:
24.0 in:
32.0 in:
50.0 in:
English
-0.xxxxxx in
-0.xxxxxx in
-0.xxxxx in
-x.xxxxx in
-x.xxxxx in
-x.xxxxx in
-x.xxxxx in
-x.xxxxx in
-xx.xxxx in
-xx.xxxx in
-xx.xxxx in
-xx.xxxx in
-xx.xxx in
Metric
(Metric Range)
-x.xxxxx mm
3.17500 mm
-x.xxxxx mm
6.35000 mm
-xx.xxxx mm
12.7000 mm
-xx.xxxx mm
25.4000 mm
-xx.xxxx mm
50.8000 mm
-xxx.xxx mm
101.600 mm
-xxx.xxx mm
152.400 mm
-xxx.xxx mm
203.200 mm
-xxx.xxx mm
304.800 mm
-xxx.xxx mm
406.400 mm
-xxx.xxx mm
609.600 mm
-xxx.xxx mm
812.800 mm
-xxxx.xx mm
1270.00 mm
5.2.4. 3-Byte Binary Data format (N0, N2)
LH<FF>
In this mode, each sample data output consists of 3 bytes representing a value in Native
Units: a low byte (L), a high byte (H), and a termination byte (<FF>). The low byte has a
value of 0 to 255. The high byte has a value of 0 to 195. The termination byte always has a
value of 255. For synchronizing, note that the termination byte (always 255) immediately
follows the high byte (never 255). To convert the two bytes to an output value, use the
following equation:
Bin3out = H * 256 + L.
Distance = Range * Bin3out / 50000
Just as in Native mode, valid measurements are indicated by values between 0 and 50000,
inclusive. Errors are represented by values over 50000:
Error
1 - Target too near
2 - Target not seen
3 - Target too far
4 - Laser Off
value
50001<CR><LF>
50002<CR><LF>
50003<CR><LF>
50004<CR><LF>
Offset-Based Zero-Point output is not available in binary mode (no negative numbers).
5.2.5. 2-Byte Binary Data format (N1, N3)
LH
In this mode, each sample data output consists of 2 bytes: a low byte (L) and a high byte (H).
The low byte has a value of 0 to 127. The high byte has a value of 128 to 255. For
AR700 User’s Manual
Rev 1.4 12/08
26
synchronizing, note that the bigger value (H) always follows the smaller value (L). To
convert the two bytes to an output value, use the following equation:
Bin2out = ( H – 128 ) * 128 + L.
Note:
Distance = Range * Bin2out / 16378
Native = 50000 * Bin2out / 16378
(except errors)
(except errors)
In this mode valid measurements are indicated by values between 0 and 16378, inclusive.
Errors are represented by values over 16378:
Error
1 - Target too near
2 - Target not seen
3 - Target too far
4 - Laser Off
value
16379<CR><LF>
16380<CR><LF>
16381<CR><LF>
16382<CR><LF>
Offset-Based Zero-Point output is not available in binary mode (no negative numbers).
5.2.6. Zero-Point (Z) – Span-Point (U)
NOTE: The Zero-Point (Z) and Span-Point (U) parameters may also affect the Analog
Output.
The location of the Zero-Point may be changed with the Zero-Point command (Z). The
direction of increasing output serial values from the Zero-Point may be reversed by issuing
the Span-Point command (U) with a value smaller than that used in the Zero-Point command.
Example:
Z25000
Z/
U12500
Set Zero-Point to middle of range (0 to 50000).
Set Zero-Point to current location.
Set Span-Point at 1/4 of range.
Z represents the Zero-Point Value
5.2.6.1.
U represents the Span-Point value
Unbiased Output Units (A7, A8, A9, N2, N3)
This mode reports the distance without applying the Zero-Point value. The Zero-Point
value can still be applied to the analog output.
Measurement
(below)
10
19990
20000
20010
49990
(above)
AR700 User’s Manual
Rev 1.4 12/08
Z = 20000, U > 20000
50001
10
19990
20000
20010
49990
50003
27
Z = 20000, U < 20000
50001
10
19990
20000
20010
49990
50003
5.2.6.2.
Zero-Based Output Units (A0, A1[default], A2, N0, N1)
This mode reports the distance as positive from the Zero-Point value (zero) up to the limit
of the sensor. No negative values are transmitted.
Measurement
(below)
10
19990
20000
20010
49990
(above)
5.2.6.3.
Z = 20000, U > 20000
50001
50001
50001
0
10
29990
50003
Z = 20000, U < 20000
50001
19990
10
0
50003
50003
50003
Offset-Based Output Units (A4, A5, A6)
This mode reports the signed distance from the Zero-Point value (up to the limit of the
sensor. This mode is not available in binary modes (no negative numbers).
Measurement
(below)
10
19990
20000
20010
49990
(above)
AR700 User’s Manual
Rev 1.4 12/08
Z = 20000, U > 20000
50001
-19990
-10
0
10
29990
50003
28
Z = 20000, U< 20000
50001
19990
10
0
-10
-29990
50003
6.
Analog Output Operation (X)
The analog output uses two wires not used in the basic configuration. The output is Orange and the
return is Brown. The return wire is connected to ground inside the sensor and should not be connected
to ground outside the sensor. Three modes, Voltage, Current Loop, or Off may be selected with the
Analog Output Control command.
The analog output is updated with each sample measured. The analog output can keep up with the
sensor’s fastest measurement rate.
The analog output is not updated (does not change) if a sample is not determined to be valid and
within the sensor’s measurement range.
6.1.
Analog Output Off (X5)
In this mode no analog output is generated on the analog output wires.
6.2.
Current Loop Output (X1[default], X3)
In 4-20mA analog mode, the analog output will deliver a current which increases linearly from 4
mA at the Zero-Point to 20 mA at the Span-Point.
Best accuracy and noise immunity is obtained by connecting a 500 Ohm resistor to the current
return wire at the measurement point. The default configuration is for calibrated output, with the
Zero-Point at zero (Z0), and the Span-Point at full scale (U50000).
6.3.
Voltage Output (X2, X4)
In 0-10V voltage mode, the analog output will deliver a voltage which increases linearly from 0V
at the Zero-Point to 10V at the Span-Point.
Best accuracy and noise immunity is obtained by connecting a 10K Ohm resistor to the voltage
return wire at the measurement point. The default configuration is for calibrated output, with the
Zero-Point at zero (Z0), and the Span-Point at full scale (U50000).
6.4.
Zero-Point (Z) – Span-Point (U)
NOTE: The Zero-Point (Z) and Span-Point (U) parameters may also affect the Serial Output.
The location of the Zero-Point may be changed with the Zero-Point command (Z). The direction
of increasing output serial values from the Zero-Point may be reversed by issuing the Span-Point
command (U) with a value smaller than that used in the Zero-Point command.
Example:
Z25000
Z/
U12500
Set Zero-Point to middle of range (0 to 50000).
Set Zero-Point to current location.
Set Span-Point at 1/4 of range.
Z represents the Zero-Point Value
AR700 User’s Manual
Rev 1.4 12/08
29
U represents the Span-Point value
6.4.1. Unbiased Analog Output (X3, X4)
Unbiased mode ignores the Zero-Point and Span-Point settings. The analog voltage (X4) or
current (X3) output is at a minimum at the near end of the measurement range and a
maximum at the far end of the measurement range.
Measurement
(below)
10
19990
20000
20010
49990
(above)
Z and U = don’t care
(no change)
0.012 V, 4.003 mA
4.014 V, 10.397 mA
4.016 V, 10.400 mA
4.018 V, 10.403 mA
9.998 V, 19.997 mA
(no change)
6.4.2. Zero-Span Biased Output (X1, X2)
The Zero-Point (Z - the measurement distance of the minimum analog output), and the SpanPoint (U - the measurement distance of full-scale analog output) may be set anywhere within
the measurement range of the sensor. See Zero-Point and Span-Point (section 5.2.6). The
minimum distance between Zero-Point and Span-Point is 5% of the full sensor range.
Attempts to set a smaller span will be scaled such that the full analog output range will
represent 5% of the sensor range. Note that the full scale value may not be generated if its
required location is outside the sensor’s range. Example ZP=49000 and SP=50000. 5% of
range (5% of 50000) is 2500. Actual ZP=49000 and the effective SP=51500. Since the sensor
can never measure past 50000, the analog output would never go above 40% of full scale
(50000 is 40% of the way from 49000 to 51500).
Setting the Span-Point to a value lower than the Zero-Point will reverse the direction of
increasing output.
Measurement
(below)
10
20000
20010
30010
49990
(above)
AR700 User’s Manual
Rev 1.4 12/08
Z = 20000, U = 50000
(no change)
0.010 V, 4.000 mA
0.010 V, 4.000 mA
0.013 V, 4.005 mA
3.343 V, 9.339 mA
9.997 V, 19.995 mA
(no change)
30
Z = 40000, U = 20000
(no change)
10.000 V, 20.000 mA
10.000 V, 20.000 mA
9.995 V, 19.992 mA
5.000 V, 11.992 mA
0.010 V, 4.000 mA
(no change)
7.
Limit Output Operation (J, K)
The limit outputs use two wires not used in the basic configuration.
Limit 1:
Limit 2:
Pink
Grey
Associated with Parameter J and the Limit 1 command
Associated with Parameter K and the Limit 2 command
The limit outputs are updated with each sample measured. The limit outputs can keep up with the
sensor’s fastest measurement rate.
Example:
J25000
J/
K12500
Set Limit 1 to middle of range (0 to 50000).
Set Limit 1 to current location.
Set Limit 2 at 1/4 of range.
The limit outputs are set based on the sensor reading in Native units. Note that ‘valid’ measurements
include values that the sensor detects out of range and an invalid measurement is one for which the
sensor cannot determine position.
7.1.
Limit Switches both OFF between limits, inclusive (J<K)
This mode is determined by the J parameter having a value less than the K parameter.
Limit 1 is ON for a measurement that is invalid or <J (including below range).
Limit 1 is OFF for a measurement that is valid and >=J (including above range).
Limit 2 is ON for a measurement that is invalid or >K (including above range).
Limit 2 is OFF for a measurement that is valid and <=K (including below range).
This mode is default (J=0, K=50000).
7.2.
Limit Switches both ON between limits, inclusive (J>K)
This mode is determined by the J parameter having a value greater than the K parameter.
Limit 1 is ON for a measurement that is valid and <=J (including below range).
Limit 1 is OFF for a measurement that is invalid or >J (including above range).
Limit 2 is ON for a measurement that is valid and >=K (including above range).
Limit 2 is OFF for a measurement that is invalid or <K (including below range).
7.3.
Limit Output Toggle (J=K) for Analog Output Timing
This mode is determined by the J parameter having a value equal to the K parameter. The Limit
outputs change at the same time the analog output changes.
If J=K<=30000 then Limit 1 is OFF for any valid measurement and ON if invalid.
If J=K>30000 then Limit 1 is ON for any valid measurement and OFF if invalid.
Limit 2 toggles from ON to OFF or OFF to ON for every sample, valid or invalid.
AR700 User’s Manual
Rev 1.4 12/08
31
8.
Performance Optimization
8.1.
Sample Definition
A Sample consists of one or more scan cycles. A scan cycle is performed in the sensor by
scanning its camera. Scan cycles are performed continuously and as fast as possible in the sensor
and then reported at the Sample Rate. If more than one scan cycle is performed during a Sample
Period, then the results of those cycles are averaged, allowing slower sample rates to be less
noisy.
Note that there is not a direct time correlation between scan cycles and samples. One or more
scan cycles take place and are averaged within a sample period, but the exact time of those scan
cycles are not known within the sample period.
Samples are not completed at an exact rate, but at an average rate with a small amount of
fluctuation. The fluctuation is on the order of 30 microseconds, so it would only make a
noticeable difference at very high sample rates.
8.2.
Sample Interval (S)
The Sample Interval command (S) controls the maximum average Sample Rate. Its parameter has
a resolution and units of 5 µs (micro seconds). The command accepts parameter values from S0
to S999999. Note that any value below S22 is taken as S21 (maximum rate is about 9434 samples
per second). The sample frequency and period are calculated as:
Sample Rate = 200000 / S
Sample Period = 5 * S
(samples per second)
(microseconds per sample)
The minimum sample rate is 200000 / 999999 = 0.5 samples per second.
Example:
S40/
Sets the sample rate to 5000 per second (200000/40).
The maximum possible sample rates are limited by the sensor internal processes.
Two configuration settings can limit the actual or maximum sample rate.
8.2.1. Background Light Elimination (BLE) (L)
BLE (or Background Light Elimination) is controlled by the Background Light Elimination
Mode command (L).
8.2.1.1.
BLE ON (L1[default])
When BLE mode is ON the sensor scans its camera two times per scan cycle, once with
the laser off and once with the laser on. The two scans are subtracted to enhance the laser
image and reduce the background image.
The maximum sample rate with BLE ON is about 4717 samples per second (S<43).
8.2.1.2.
BLE OFF (L2)
When BLE mode is OFF the sensor scans the camera once per scan cycle and processes
the image. This can be done at twice the speed as with BLE ON because the camera is
scanned half as often per scan cycle.
The maximum sample rate with BLE OFF is 9433 samples per second (S<22).
AR700 User’s Manual
Rev 1.4 12/08
32
8.2.1.3.
ROAD PROFILING (L3 – Default in Road Profiler Models (section 1.5))
This is the mode of operation is allowed only in Road Profiler models. This mode
behaves as if BLE is OFF (section 8.2.1.2) and forces RATE Priority (section 8.2.2.2). It
is described in detail in section 1.5. An attempt to set this mode in a standard (non-RP)
model will be ignored.
8.2.2. Sample Exposure and Priority (P)
Each scan cycle (camera scan) is checked for the correct exposure. The sensor controls the
exposure by varying the strength of the laser beam and the camera’s shutter time. For optimal
speed performance, the laser power is increased before the shutter time is increased.
Shorter exposure times generally occur with more reflective targets, measurements that are
closer to a sensor (shorter range), and with higher power lasers. Longer exposure times
generally occur with less reflective targets, measurements that are farther from a sensor
(longer range), and with lower power lasers.
Note that because each exposure is based on what the camera saw on the previous scan cycle,
there can be a delay of several scan cycles in acquiring the correct exposure. If the reflectance
characteristics of the target are changing rapidly, then the required exposure is constantly
changing and correcting. For fast changing targets (position or texture) the quality of the
measurement will be reduced.
When the exposure time is greater than the requested sample period (S command) then the
priority command determines how the camera’s shutter time is calculated.
8.2.2.1.
Quality sets Priority (P1[default])
In this mode the sample rate may be slowed down from the programmed value in order to
attain the optimum shutter time. If the sample rate is slowed, then that rate is
uncontrolled.
8.2.2.2.
Rate sets Priority (P2 – forced in Road Profiler Modes (section 1.5))
In this mode the shutter time is limited in order to guarantee the programmed sample rate.
If the exposure is too low, then the sample quality (accuracy) may be reduced. If the
shutter time is limited in this mode, then there will only be only one scan cycle per
sample (no averaging).
8.2.2.3.
Exposure Limit (M – limited in Road Profiler Modes (section 1.5))
When the sensors camera doesn’t ‘see’ a laser spot on a target, then it increases the
exposure in order to try to see one. If there is no target within range, then the exposure
can be increased to just over 0.1 second. Once a target comes into range, it may take the
sensor a very long time (up to 0.5 seconds) to get the correct exposure. Also under this
condition it is easy for a background point of light to be interpreted as a laser spot.
The Exposure Limit command is provided in order to significantly reduce both of these
effects. It can be manually set from M0 to M80, but it is not easy to understand the effect
of the value of the parameter:
ExposureLimit = MaxExposure * 2 ( 0.25 * ( M – 80 )). Note that MaxExposure is in
units of time * laser power.
However, it is easy to have it acquire a value automatically. Get the least reflective target
material that is to be used in an application and position it at the far end of the range such
AR700 User’s Manual
Rev 1.4 12/08
33
that it is getting a good measurement. Issue the M command without a parameter and it
will set the Exposure Limit for about 1.5 times the exposure required at the measured
location. This value will be sufficient for most applications. To see what value has been
set, use the Show Version command (V1234) to display all of the current parameter
settings. Once the approximate M value is known, a slightly different one can be used if
adjustment is necessary.
8.3.
Sampling Control (H, E)
The sensor is able to sample the distance using measurement scans on a continual basis.
Whenever sampling is on, the sensor continually updates the limit outputs. If an analog output is
enabled, then it is updated with each sample. If serial data is on, then it is updated with each
sample.
Sampling may be turned off as needed.
8.3.1. Sampling On – Laser On (H1)
In this mode sampling is on continuously. The laser is on. Enabled outputs are updated at the
sample rate.
8.3.2. Sampling Off – Laser Off (H2)
In this mode sampling is off. There is no output. The laser is off. The camera does not track
the exposure. This mode is used for measuring single samples, but without the laser being on
continuously.
8.3.3. Sampling Off – Laser On (H3)
In this mode sampling is off. There is no output. The laser is on so that the sensor’s camera
can keep the exposure up to date.
This mode is useful when single samples will be commanded but the target reflectivity or
position may change significantly between each sample.
8.3.4. Hardware Trigger Mode – Laser Off (H4)
In this mode sampling is off. There is no output. The laser is off. The Laser Disable input is
used to trigger a single sample measurement each time the signal changes from ‘disabled’ to
‘enabled’. The camera does not track the exposure.
This mode is useful for synchronizing single samples with a hardware input signal. Single
samples can also be requested by command in this mode.
Note that the Laser Disable input signal must remain ‘enabled’ until the sample is acquired or
the laser will turn off and disable the sensor’s ability to sample.
8.3.5. Measure Single Sample (E)
This command is normally used when sampling is off. It causes a single sample to be
measured and outputs to be generated (analog, limit, and serial).
This command is ignored if sampling is on.
This command does not change any configuration settings.
Note: Sending the E command while a sample is in progress will cause a new sample to
follow.
AR700 User’s Manual
Rev 1.4 12/08
34
8.3.6. High Speed Sampling Tips
High speed sampling can be hindered by several things.
The sensor gives no indication if the specified sample rate is not being met.
Targets that are dark and/or distant require longer exposure times to obtain good samples,
making higher speeds more difficult to attain.
With BLE ON (L1) the exposure time required is double that needed with BLE OFF
(L2), and will reduce the sampling speed by up to 50%.
Priority must be set to Rate (P2) to assure sampling takes place at the specified rate.
8.3.7. High Speed Single Sample Tips
The speed of single sample operation is further hindered. Several operations that are
overlapped during normal operation must be performed in sequence during single sample
operation, particularly at high speed.
The maximum exposure time for single sampling is controlled by the S command as if the
sensor were in continuous sampling mode.
The single sample rate can be increased slightly by using the exposure limit command (M) to
reduce the exposure. Note that reducing the exposure can also reduce the signal quality.
Use commands S21, L2, and P2 to get the fastest rate.
Use M34 to get a maximum rate of about 4500 samples per second.
Reducing the value to M13 will not make a significant difference in sample speed.
From M12 to M2 the maximum rate may increase slightly. At M2 the rate may exceed
5200 samples per second, but the low exposure may result in no sample signal.
At M40 the maximum single sample rate is about 3450.
Above M40 the M command is no longer influencing an increase in the single sample
rate.
8.4.
Measurement Resolution
The sensor output data was described in the sections on Serial Data Output and Analog Output,
where the resolution is defined in terms of how many digits are calculated for the results.
This section discusses measurement resolution: How much does the target need to move before a
reliable distance change appears in the measurement.
A target material that is smooth and opaque, such as an enamel painted surface, will measure
more reliably than a rough or porous surface such as paper or anodized aluminum.
AR700 User’s Manual
Rev 1.4 12/08
35
This function is dependent on the measurement quality and the sample period and is related to
noise and sample quality. In general, the resolution will improve as the square root of the number
of scan cycles averaged. The number of cycles averaged is generally proportional to the sample
period. Rate priority mode can reduce the resolution if it reduces the signal quality in order to
increase the rate. Once the sensor is controlling the exposure time, the target reflectance and
distance affect the resolution. Then the number of scan cycles averaged can increase
proportionally to the target reflectance. Note that target reflectance refers to the amount of laser
light scattered in the direction of the sensor’s lens. A mirror can be highly reflective, but it can
reflect nearly all the light away from the lens and have a very low reflectance to the sensor. A flat
black surface can appear to have a much higher reflectance to the sensor than the mirror. The
number of scan cycles averaged will decrease as the square of the distance from the sensor’s lens
to the target.
That being said, the sensor with default settings should have a resolution of 1 part in 20000 for a
diffuse white target normal to the laser at the middle of the sensor’s range.
8.5.
Serial Data Rate
Serial data is transmitted from the AR700 at a variety of formats and baud rates. The time it takes
to transmit a measurement is highly dependent on the format and baud rate. The amount of time
can be computed as:
TransmitTime (in seconds) = 10 * (Number of characters) / (Baud Rate)
If a typical sensor sends 9 characters per sample at a default baud rate of 9600, this equates to
about 94 ms per sample, or about 107 samples per second ( 1 / TransmitTime ). The AR700
sensor is capable of generating samples at more than 800 times that rate, over 9400 samples per
second. At a baud rate of 230400, the nine character samples can be transmitted at only 2560
samples per second. Even using 3-byte binary mode only gets the rate up to 7680 samples per
second. Only by using 2-byte binary mode at 230400 baud can the sensor transmit the serial data
at the full measurement rate of the sensor.
If the serial data rate is faster than the sample rate, then a single sample is transmitted serially for
each sample measured.
When the serial data rate can’t keep up with the sample rate, the actual sample rate continues
without delay, but the serial sample rate is reduced by skipping samples. Once a sample has
finished being transmitted, the most recent new sample is used for the next serial output.
AR700 User’s Manual
Rev 1.4 12/08
36
9.
Nonvolatile Memory Storage
The AR700 stores its configuration settings and calibration information in electronically erasable
non-volatile memory.
9.1.
Calibration
The calibration information is specific to the sensor, and cannot be changed by the user.
If the sensor cannot validate the calibration information when the sensor is turned on, then the
function display LEDs will flash code 08 and the sensor will continuously transmit the following
message at 9600 baud using RS232 communication mode:
“CALIBRATION DATA CORRUPTED, RELOAD”
The sensor cannot be used if the calibration data is not valid. Contact the factory for return
instructions.
9.2.
Configuration
9.2.1. Default Configuration
Default configuration values are stored for the configuration settings when the sensor is
shipped, and the default configuration settings may be restored at any time using the Default
command. The easiest way is to hold the function button down and then apply power to the
sensor. Once the function display LEDs start sequencing, release the button and the
configuration will be set to the default settings.
If the sensor cannot validate the configuration information when the sensor is turned on, then
the function display LEDs will flash code 06 and the sensor will continuously transmit the
following message at 9600 baud (default) using RS232 communication mode (default):
“SAVED SETTINGS INVALID - USING DEFAULT”
Pushing the function button will stop the light from flashing, stop the error message from
transmitting, and will start the sensor using the default configuration. The sensor can also
send this message as the result of the Read Configuration Data command with configuration
data that is not valid.
The default settings described in this manual are the “standard” default settings. Custom
default settings may be generated by special factory order.
9.2.2. Write Configuration Data Command (W1234)
The commands used to change the configuration do not automatically store the changes to the
nonvolatile memory. The Write Configuration Data command must be used to make these
changes permanent. The Write Configuration Data command stores all of the current
configuration settings, so it can be used after making several changes.
The Write command should not be issued repeatedly under computer control, since the
nonvolatile memory expected lifetime is 1,000,000 writes.
9.2.3. Read Configuration Data Command (R)
The Read Configuration Data command is used to restore the saved configuration from
nonvolatile memory, and will immediately replace the sensor’s configuration settings.
AR700 User’s Manual
Rev 1.4 12/08
37
9.2.4. Initialize Configuration Data Command (I – Except Serial)
This Initialize Configuration Data command is used to immediately restore the default
configuration setting, EXCEPT for the Serial port communication mode and baud rate. The
Write Configuration Data command must be used to save these settings permanently.
9.2.5. Initialize Configuration Data Command (Q8)
This Initialize Configuration Data command is used to immediately restore the complete
default configuration setting. The Write Configuration Data command must be used to save
these settings permanently.
9.2.6. Show Version, Configuration Command (V1234)
This command causes the current configuration settings and other information about the
sensor to be transmitted out the serial port.
If sampling is on, use a data capture program to save the information in a file for viewing.
Sampling can be turned off (H2) to keep the information from scrolling off the screen, but
that changes the sampling mode that is displayed by the command.
The following is sample output from the command:
AR700-0.500 Rev 0.10 - Copyright 2007-2008, Schmitt Industries, Inc.
Zero Point: 0
Span Point: 50000
Sample Interval: 40000
Analog Output Mode: Zero Based Current
Background Light Elimination: On
Sampling Mode: On
Serial Mode: RS232
Baud Rate: 9600
Output Data: Zero Based English
Error Mode: Code
Sample Priority: Rate
Serial Output Flow Control: Off
Limit 1: 0
Limit 2: 50000
Exposure Limit: 80
Class 3B: NO
Serial Number: 000001
In addition to the configuration settings, the output contains the sensor’s model (Road
Profiler and Range), firmware revision, serial number, and information on whether the laser
is class 3B.
9.2.7. Show Version Command (V1235)
This command causes the model, firmware version, and serial number of the sensor to be
transmitted out the serial port.
AR700 User’s Manual
Rev 1.4 12/08
38
10. AR700 Command Set
The AR700 commands are used to operate the sensor, change the sensor’s configuration, or check the
configuration. There are two different means provided to command the sensor, although their
capabilities doesn’t completely overlap.
Commands may be sent over the serial port. The serial commands provide the best resolution for
most settings, but can’t be used to set the Serial Communications Mode (RS232, RS422, etc). The
serial commands use ASCII characters and any device that can communicate over a serial port
may send the commands.
Commands may be entered manually by using the function button and the function display LEDs.
The function button provides limited resolution, but is required for setting the Serial
Communications Mode.
Configuration settings may be retained through power cycling with the Write command (see
Nonvolatile Memory Storage – section 9).
10.1. ‘Current Status’ Commands (Z, U, J, K, M)
Several commands may be used to acquire the current location or current exposure as the
command’s parameter value. When using these commands, make sure the target is stable and the
sensor is actively measuring the target (sampling is not off, etc.) to ensure that a valid
measurement is acquired for the command.
10.2. Serial Command Operation
The sensor is always receptive to serial commands. Once a command is recognized as complete,
it is executed immediately.
10.2.1. Serial Command Communications
Serial commands may only be processed when the serial port characteristics match the serial
communications mode and baud rate.
Use the function button to set the Serial Communications Mode (RS232 or RS422).
Although the baud rate may be set using the serial commands, it may be easier to set the baud
rate using the function button.
10.2.2. Serial Command Format
ASCII commands have a general form of a command letter, an optional parameter value
made of up to 6 numeric digits, and may optionally have a terminating character.
Each command letter represents a different command. The letter is not case sensitive. It may
be upper or lower case.
Some commands do not have parameters. They are executed as soon as the letter is received.
The remaining commands may be followed by a parameter value made of up to six numeric
digits. The maximum number of digits depends on the individual command. For some
commands the parameter is optional.
Commands with incorrect parameters are ignored.
The following all send a valid Sample Interval command with parameter = 50:
AR700 User’s Manual
Rev 1.4 12/08
39
S50/
s000050
S50A2
(Terminating character [slash] after only 2 of 6 digits entered.)
(Executed automatically after 6th digit entered.)
(The ‘A’ command [Serial Output Control] terminates the ‘S’ command.)
10.2.3. Serial Command Execution
Each command is executed when it is recognized as complete. There is no specific
termination character. Commands are completed in the following ways:
When the maximum number of parameter digits is received. Note that for some
commands the maximum number of digits is zero and the command letter itself is the
complete command.
When a non numeric character is received. This may be a new command letter or some
other character such as a period, slash, space, or Carriage Return (<CR>).
It is advisable to terminate a command if uncertain as to whether is has been terminated. Use
a character such as period, slash, space, or <CR> to ensure immediate command execution.
Extra characters of this type have no ill effects.
When a command is executed, it is first evaluated. If the parameter is valid the command
execution is completed. A command with an invalid command is ignored.
Commands are executed in the order received. A command’s execution is completed before
the next command is evaluated.
10.2.4. Serial Command Response
There is no acknowledgement character from the sensor when a command is received,
evaluated, or executed. If the command is a valid it will be executed. If the command is not
valid it is ignored.
All commands interrupt the sampling process momentarily when they are executed. In some
cases this is negligible. Commands that change non-volatile memory may take up to 100 ms
to complete. Commands that alter the sampling mode cause a restart of sampling.
Multiple commands may be grouped together in a single transmission. However, sending
more than 10 characters in a single transmission at high baud rates may result in loss of
characters.
In RS232 mode, the sensor always uses the RTS signal to indicate when there is a danger of
losing characters. Enable hardware flow control on the sending system to avoid the loss of
characters. The sensor does not send software flow control characters.
Note that a special response is returned for the V command.
10.3. Function Button Command Operation
The function button is used in conjunction with the function display LEDs in order to display or
change many of the configuration settings (or parameter settings).
10.3.1. Function Display LEDs
There is only one button on the sensor, the function button. Below the function
button are the function display LEDs. They are organized as two sets of four
LEDs. The LEDs marked P represent the function Parameter and the LEDs
marked S represent the parameter Setting.
AR700 User’s Manual
Rev 1.4 12/08
40
P
S
10.3.2. Function Display LED codes
Each set of LEDs has 16 different combinations in which the
LEDs can be illuminated to represent numbers. They are
shown here (black dot = ON). Note that the LEDs are
illuminated in groups in a clockwise direction. The first
illuminated LED is next to a number (1, 4, 7, or 10). Add 1 to
this number for each extra illuminated LED. For example,
number 8 has #7 as the first illuminated LED (going
clockwise) plus one more is 8. 13, 14 and 15 don’t fit this rule,
but the illumination patterns shown represent the indicated
values.
0
1
2
3
4
5
6
7
8
9
10
11
12
13
14
15
10.3.3. Function Button: Displaying a Parameter
Normally all function display LEDs are off and the “LASER ON” LED is on indicating
normal operation. There is no parameter number zero. This condition indicates that the
function display is idle, no parameters are displayed.
Each momentary push of the function button (less than one second) will advance the display
to the next parameter. All parameters can be viewed in increasing order, one at a time. After
the last parameter, a momentary push of the function button cycles the display back off.
For each parameter displayed, the setting for that parameter is displayed on the setting LEDs.
The setting LEDs will display 0 (all off) if the parameter’s current setting does not match one
of the possible selections available from the function button. For example, there are nearly a
million possible settings for the Sample Interval parameter, but only fifteen possible setting
values are available from the function button.
If a parameter has been displayed for ten seconds without a push of the function button, then
the function display will return to idle. The LEDs will go off.
10.3.4. Function Button: Changing a Setting
The function button can be used to change the setting of a displayed parameter. While the
parameter is being displayed, the setting LEDs do not flash. Push and hold the function
button for at least one second. The next available setting for that parameter will flash
continuously on the setting LEDs. Note that the parameter LEDs continue to display the
parameter value and do not flash.
A value flashing on the setting LEDs indicates an available setting value, not the current
setting value.
Each momentary push of the function button (less than one second) will advance the setting
LEDs to display the next available setting value (again, flashing). After the last available
setting is displayed, a momentary push of the function button cycles the setting LEDs back to
displaying the current setting (not flashing).
When the desired selection is flashing, push and hold the function button for at least one
second. The selection will become active and the settings LEDs will stop flashing and display
the current setting for the parameter, normally the one selected.
Some parameter settings are functions and not settings, so the display will not show the
function that was activated, but instead revert to the current parameter setting.
If a setting has been flashing for ten seconds without a push of the function button, then the
function display will return to displaying the current setting (not flashing).
AR700 User’s Manual
Rev 1.4 12/08
41
10.3.5. Function Display Error Codes
The function display error codes will display by flashing all LEDs. Typical error codes have
the parameter LEDs all off, so they don’t flash while the setting LEDs flash. Common codes
are shown in the Troubleshooting section.
10.4. Saving the Configuration
Any configuration changes will not be saved unless a Write Configuration Data command is
issued before turning off the power. This can be done using either serial communications or the
function button.
The serial command is “W1234”.
The function button is parameter 10 setting 9. Push the function button (10 times)
until parameter 10 is displayed on the parameter LEDs. Push and hold the function
button until the setting LEDs flash. Push the function button several times until the
setting LEDs flash the code for “9”. Push and hold the function button until the
setting LEDs stop flashing. The configuration is saved.
AR700 User’s Manual
Rev 1.4 12/08
42
P
S
11. Serial Command Quick Reference
The maximum number of digits is shown. Example: Snnnnnn indicates 6 digits maximum.
Command Name
AR-700 Configuration Data Settings (Serial)
Serial Command Serial Code / Function
Sample Interval
Zero-Point
Sampling Control
Serial Flow Control
Serial Output Control
Baud Rate
Span-Point
Limit 1
Limit 2
Analog Output Control
Background Light Elimination
Mode
Sample Priority
Error Report Mode
Read Configuration Data
Write Configuration Data
Initialize Configuration Data
Take Single Sample
Show Version, Configuration
Exposure Limit
Serial Communication Mode
AR700 User’s Manual
Rev 1.4 12/08
Function Button
Parameter
Default
3
S40000
(5Hz)
1
Z0
6
H1
(On)
8
T2
(Off)
11
A1
(in)
Snnnnnn 21 = Interval = 999999 (5µs increments ) (f = 200,000/S)
Z
(none) Saves present location as Zero-Point
Znnnnn 0 = Zero-Point = 50000 (where 50000 = full scale)
1 = On – continuous output – laser is on
2 = Off – laser is off (no output)
Hn
3 = Off – laser is on (no output, but tracks exposure)
4 = Hardware Trigger Mode – laser is off (no output)
1 = On: Hardware (Any chars Transmit only if CTS is true)
Tn
2 = Off (Always transmit)
3 = On: Software (CTRL-S stops sample output, CTRL-Q allows)
0 = Zero Based Native (0-50000) (Zero-Point Subtracted, negatives = 0)
1 = Zero Based English Units
2 = Zero Based Metric Units
3 = Off
4 = Offset Based Native (Zero-Point subtracted, negatives reported)
An
5 = Offset Based English
6 = Offset Based Metric
7 = Unbiased Native (Zero-Point ignored)
8 = Unbiased English
9 = Unbiased Metric
0 = Zero Based 3-Byte Binary
1 = Zero Based 2-Byte Binary
Nn
2 = Unbiased 3-Byte Binary
3 = Unbiased 2-Byte Binary
1 = 300, 2 = 1200, 3 = 2400, 4 = 4800, 5 = 9600, 6 = 19200, 7 = 38400, 8 = 57600.
Bn
9 = 115200, 0 = 230400
U
(none) Saves present location as Span-Point
Unnnnn 0 = Span = 50000 (where 50000 = full scale)
J
(none) Saves present location as Limit 1
0 = Limit 1 = 50000 (where 50000 = full scale)
Jnnnnn
if J=K then {toggle limit2, limit1: if J>30000 then ON else OFF = GOOD}
K
(none) Saves present location as Limit 2
0 = Limit 2 = 50000 (where 50000 = full scale)
Knnnnn
if J=K then {toggle limit2, limit1: if J>30000 then ON else OFF = GOOD}
1 = Zero-Span Based Current Loop (4 - 20 ma)
2 = Zero-Span Based Voltage (0 – 10 V)
Xn
3 = Unbiased Current Loop (4 - 20 ma)
4 = Unbiased Voltage (0 – 10 V)
5 = Off
1 = On (Difference of alternate sample with laser on/off)
Ln
2 = Off (Laser is on for every sample)
3 = RP (Selects Road Profile Mode – In RP version only – default in RP)
1 = Sample Quality has priority over sample rate
Pn
2 = Sample Rate has priority over sample quality (Forced in RP mode)
1 = Send Error Code (E1..E5)
Qn
2 = Send ‘+’ prefix to output value (above range limit)
3 = Send output value (above range limit, the only binary error mode)
R
(none) Restores saved settings (also done at power on)
Wnnnn 1234 = Save the current settings
I
(none) Restore Default, excluding Serial Communications and Baud Rate
Q8
Restore Default, including Serial Communications and Baud Rate
E
(none) Valid when Sample Mode is not On (not H1)
1234 = Send the current version and configuration (Response is very long)
Vnnnn
1235 = Send the Model, version, and serial number (Short response)
M
(none) uses current exposure x 1.5 as Max Exposure
Mnn
0 <= nn <= 80; use MAX x 2**(0.25 * (nn-80)) as Max Exposure
-
43
7
2
13
B5
(9600)
U50000
(Full)
J0
14 K50000
4
X1
(Cur
Loop)
L1
(On)
L3 (RP)
P2
12
(Rate)
5
10
Q1
(Code)
10
10
-
10
-
-
-
-
-
M80
15
(MAX)
1
9
(RS232)
12. Function Button Command Quick Reference
Serial
AR-700 Configuration Data Settings (Function Buttons)
Command Function Button Parameter
Function Button Setting (X), *Special Function Codes
1 = S40, 2 = S100, 3 = S400, 4 = S1000, 5 = S4000, 6 = S10000, 7 = S40000, 8=
Sample Interval
S 3
S100000, 9 = 400000, 10 = S999999 (5 µs increments, F=200000/S)
1 = Uses present location as Zero-Point
Zero-Point
Z 1
2 = 0, 3 = 10000, 4 = 20000, 5 = 30000, 6 = 40000, 7 = 50000
1 = On – continuous output – laser is on
2 = Off – laser is off
Sampling Control
H 6
3 = Off – laser is on
4 = Hardware Trigger Mode – laser is off (no output)
1 = Hardware (transmit character disable by CTS)
Serial Flow Control
T 8 2 = Off (transmit not disabled)
3 = Software (transmit sample disabled by CTRL-S, enabled by CTRL-Q)
10 = Zero Based Native
1 = Zero Based English Units
2 = Zero Based Metric Units
3 = Off
4 = Offset Based
A
5 = Offset Based English
6 = Offset Based Metric
Serial Output Control
11
7 = Unbiased Native
8 = Unbiased English
9 = Unbiased Metric
11 = Zero Based 3-Byte Binary
12 = Zero Based 2-Byte Binary
N
13 = Unbiased 3-Byte Binary
14 = Unbiased 2-Byte Binary
1 = 300, 2 = 1200, 3 = 2400, 4 = 4800, 5 = 9600, 6 = 19200, 7 = 38400, 8 = 57600,
Baud Rate
B 7
9 = 115200 10 = 230400
1 = Uses present location as Span-Point
Span-Point
U 2
2 = 0, 3 = 10000, 4 = 20000, 5 = 30000, 6 = 40000, 7 = 50000
1 = Uses present location as Limit 1
Limit 1
J 13
2 = 0, 3 = 10000, 4 = 20000, 5 = 30000, 6 = 40000, 7 = 50000
1 = Uses present location as Limit 2
Limit 2
K 14
2 = 0, 3 = 10000, 4 = 20000, 5 = 30000, 6 = 40000, 7 = 50000
1 = Zero-Span Based Current Loop (4 - 20 ma)
2 = Zero-Span Based Voltage (0 – 10 V)
Analog Output Control
X 4 3 = Unbiased Current Loop (4 - 20 ma)
4 = Unbiased Voltage (0 – 10 V)
5 = Off
1 = On
Background Light Elimination
L 5 2 = Off
3 = RP (Road Profile version only – default in RP version)
1 = Quality
Sample Priority
P 12
2 = Rate (Forced in Road Profile mode)
1 = Codes (E1..E5)
Error Report Mode
Q 10 2 = Send ‘+’ prefix to values (above range limit)
3 = Send output value (above range limit, the only binary error mode)
Read Configuration Data
R 10 *6 = Restore saved settings
Write Configuration Data
W 10 *9 = Save the current settings
I
*7 = Restore Default, excluding Serial Communications and Baud Rate
Initialize Configuration Data
10
Q8
*8 = Restore Default, including Serial Communications and Baud Rate
Take Single Sample
E
- n/a
Show Version, Configuration
V - n/a
15 = uses current exposure * 1.5 as Max Exposure
Exposure Limit
M 15
nn = 6*X-4 (X:nn -> 1:2, 2:8, 3:13, 4:20, 5:26, … 13:74, 14:80)
Command Name
Serial Communication Mode
AR700 User’s Manual
Rev 1.4 12/08
-
9
1 = RS232, 2 = RS422, 3 = RS422 Terminated
44
Default
7
(5Hz)
2
(0)
1
(On)
2
(Off)
1
(inch)
5
(9600)
7
(50000)
2
(0)
7
(50000)
1
(Cur
Loop)
1
(On)
3 (RP)
2
(Rate)
1
(Code)
14
(80)
1
(RS232)
13. Command Index
See the two quick reference chapters (sections 11 and 12) for programming reference (not operation).
All commands and their interactions are described in detail in the operation section appropriate for
each command.
(button)
An, Nn
Bn
Hn
I
J[nnnnn]
K[nnnnn]
Ln
M[nn]
Pn
Qn
R
Snnnnnn
Tn
U[nnnnn]
V1234
W1234
Xn
Z[nnnnn]
AR700 User’s Manual
Rev 1.4 12/08
Serial Communication Mode
Serial Output Control
Baud Rate
Sampling Control
Initialize Configuration Data
Limit 1
Limit 2
Background Light Elimination
Exposure Limit
Sample Priority
Error Report Mode
Read Configuration Data
Sample Interval
Serial Flow Control
Span Point
Show Version, Configuration
Write Configuration Data
Analog Output Control
Zero Point
45
8, 10,
8,
8,
27,
37,
27,
23
24
23
34
38
31
31
32
33
10
25
37
32
24
29
38
42
29
29