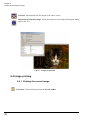
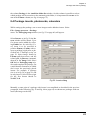
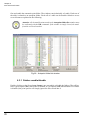
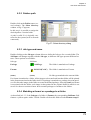
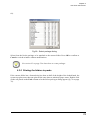
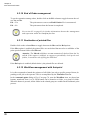
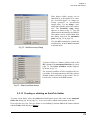
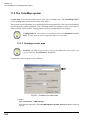
1
76 LASERLAB 30”
50 LASERLAB 20”
30 LASERLAB 12”
INSTRUCTIONS FOR INSTALLATION, USE AND MAINTENANCE
ImageLab® Rel. 4.x
A.B. & A.B.
Last Update: 2006, November 17
This manual is an important part of the LaserLab equipment. Hold it with care during the whole equipment lifetime .
READ CAREFULLY THE MANUAL BEFORE EVERY OPERATION ON THE
EQUIPMENT.
LaserLab instructions for use
Our products are subject of constant technical improvements. Accordingly we reserve the right to modify them at any time, with respect to the text and illustrations
and features. In every case safety and safety indications are guaranteed.
All products, names and services are trademarks or registered trademarks of their
respective companies.
All rights reserved. No part of this book may be reproduced, in any form or
by any means, without permission in writing from the Poliettronica.
POLIELETTRONICA S.p.A.
Via Nazionale 51/B - 45030 S.Maria Maddalena (ROVIGO) - ITALY
Tel. +39 0425757375 - Telefax +39 0425756255
URL: www.polielettronica.it
Email: staff@poliettronica.it
LaserLab instruction for use
Contents
1 General informations . . . . . . . . . . . . . . . . . . . . . . . . . . . . . . . . . . . . . . 1
1.1 Definitions . . . . . . . . . . . . . . . . . . . . . . . . . . . . . . . . . . . . . . . . . . . . . . . . . . . . . . . . 1
1.2 Warning and caution symbols. . . . . . . . . . . . . . . . . . . . . . . . . . . . . . . . . . . . . . . . . 2
1.3 General safety warnings . . . . . . . . . . . . . . . . . . . . . . . . . . . . . . . . . . . . . . . . . . . . . 2
2 Producer and equipment identification . . . . . . . . . . . . . . . . . . . . . . . . 3
2.1 Technical service information . . . . . . . . . . . . . . . . . . . . . . . . . . . . . . . . . . . . . . . . . 3
2.2 General safety information . . . . . . . . . . . . . . . . . . . . . . . . . . . . . . . . . . . . . . . . . . . 3
2.3 Attached documents . . . . . . . . . . . . . . . . . . . . . . . . . . . . . . . . . . . . . . . . . . . . . . . . 4
3 Technical features . . . . . . . . . . . . . . . . . . . . . . . . . . . . . . . . . . . . . . . . 5
3.1 General description, use and limits. . . . . . . . . . . . . . . . . . . . . . . . . . . . . . . . . . . . . 5
3.2 System components . . . . . . . . . . . . . . . . . . . . . . . . . . . . . . . . . . . . . . . . . . . . . . . . 6
3.2.1 LaserLab 30 (12”) . . . . . . . . . . . . . . . . . . . . . . . . . . . . . . . . . . . . . . . . . . . . . . . . . . 6
3.2.2 LaserLab 50 (20”) and 76 (30”) . . . . . . . . . . . . . . . . . . . . . . . . . . . . . . . . . . . . . . . . 7
3.3 Accessories. . . . . . . . . . . . . . . . . . . . . . . . . . . . . . . . . . . . . . . . . . . . . . . . . . . . . . .
3.4 Printable sizes. . . . . . . . . . . . . . . . . . . . . . . . . . . . . . . . . . . . . . . . . . . . . . . . . . . . .
3.5 Technical data. . . . . . . . . . . . . . . . . . . . . . . . . . . . . . . . . . . . . . . . . . . . . . . . . . . . .
3.6 Applicable standards and directives . . . . . . . . . . . . . . . . . . . . . . . . . . . . . . . . . . . .
3.7 Notice . . . . . . . . . . . . . . . . . . . . . . . . . . . . . . . . . . . . . . . . . . . . . . . . . . . . . . . . . . .
8
8
8
9
9
4 Installation, Connection and Placing . . . . . . . . . . . . . . . . . . . . . . . . . 11
4.1 Inspection and preliminary operations . . . . . . . . . . . . . . . . . . . . . . . . . . . . . . . . .
4.2 Environment and placing . . . . . . . . . . . . . . . . . . . . . . . . . . . . . . . . . . . . . . . . . . .
4.3 Printer - paper processor coupling . . . . . . . . . . . . . . . . . . . . . . . . . . . . . . . . . . . .
4.4 Electrical connections . . . . . . . . . . . . . . . . . . . . . . . . . . . . . . . . . . . . . . . . . . . . . .
4.4.1 UPS unit . . . . . . . . . . . . . . . . . . . . . . . . . . . . . . . . . . . . . . . . . . . . . . . . . . . . . . . .
4.4.2 Connection between printer and processor . . . . . . . . . . . . . . . . . . . . . . . . . . . . . .
4.4.3 Connection to the power group . . . . . . . . . . . . . . . . . . . . . . . . . . . . . . . . . . . . . . .
4.4.4 Fan group and air filter connections . . . . . . . . . . . . . . . . . . . . . . . . . . . . . . . . . . . .
4.4.5 Connection to the personal computer. . . . . . . . . . . . . . . . . . . . . . . . . . . . . . . . . . .
4.4.6 Connections to the laser optical group . . . . . . . . . . . . . . . . . . . . . . . . . . . . . . . . . .
11
11
12
14
14
16
16
16
17
18
4.5 Heat dissipation . . . . . . . . . . . . . . . . . . . . . . . . . . . . . . . . . . . . . . . . . . . . . . . . . . 19
5 Start up operation, Start/Stop sequence . . . . . . . . . . . . . . . . . . . . . . 21
5.1 Inspection before switching on . . . . . . . . . . . . . . . . . . . . . . . . . . . . . . . . . . . . . . .
5.2 Switching on with cold printer . . . . . . . . . . . . . . . . . . . . . . . . . . . . . . . . . . . . . . . .
5.3 Warming up. . . . . . . . . . . . . . . . . . . . . . . . . . . . . . . . . . . . . . . . . . . . . . . . . . . . . .
5.4 Starting ImageLab® . . . . . . . . . . . . . . . . . . . . . . . . . . . . . . . . . . . . . . . . . . . . . . .
5.5 Quitting ImageLab® . . . . . . . . . . . . . . . . . . . . . . . . . . . . . . . . . . . . . . . . . . . . . . .
5.6 Stopping the whole equipment . . . . . . . . . . . . . . . . . . . . . . . . . . . . . . . . . . . . . . .
5.7 Mains supply failure (blackout) . . . . . . . . . . . . . . . . . . . . . . . . . . . . . . . . . . . . . . .
21
21
21
22
22
23
23
6 Loading and printing an image . . . . . . . . . . . . . . . . . . . . . . . . . . . . . 25
6.1 Main window and main bars: a brief description . . . . . . . . . . . . . . . . . . . . . . . . . . 25
6.1.1 Main Bar . . . . . . . . . . . . . . . . . . . . . . . . . . . . . . . . . . . . . . . . . . . . . . . . . . . . . . . . 26
6.1.2 View Bar . . . . . . . . . . . . . . . . . . . . . . . . . . . . . . . . . . . . . . . . . . . . . . . . . . . . . . . . . 27
LaserLab instructions for use
6.1.3 Resize Bar . . . . . . . . . . . . . . . . . . . . . . . . . . . . . . . . . . . . . . . . . . . . . . . . . . . . . . .
6.1.4 LaserLab Bar . . . . . . . . . . . . . . . . . . . . . . . . . . . . . . . . . . . . . . . . . . . . . . . . . . . . .
6.1.5 Color Adjust Bar . . . . . . . . . . . . . . . . . . . . . . . . . . . . . . . . . . . . . . . . . . . . . . . . . . .
6.1.6 Processor Status Bar . . . . . . . . . . . . . . . . . . . . . . . . . . . . . . . . . . . . . . . . . . . . . . .
6.1.7 Status Bar. . . . . . . . . . . . . . . . . . . . . . . . . . . . . . . . . . . . . . . . . . . . . . . . . . . . . . . .
27
27
28
29
29
6.2 Open file and create a new image . . . . . . . . . . . . . . . . . . . . . . . . . . . . . . . . . . . . 30
6.3 Viewing the image and image informations . . . . . . . . . . . . . . . . . . . . . . . . . . . . . 31
6.4 Image printing . . . . . . . . . . . . . . . . . . . . . . . . . . . . . . . . . . . . . . . . . . . . . . . . . . . . 32
6.4.1 Printing the current image . . . . . . . . . . . . . . . . . . . . . . . . . . . . . . . . . . . . . . . . . . . 32
6.4.2 Multiple prints . . . . . . . . . . . . . . . . . . . . . . . . . . . . . . . . . . . . . . . . . . . . . . . . . . . . . 33
6.4.3 Pack printing. . . . . . . . . . . . . . . . . . . . . . . . . . . . . . . . . . . . . . . . . . . . . . . . . . . . . . 34
6.5 Creating a photo index (index print) . . . . . . . . . . . . . . . . . . . . . . . . . . . . . . . . . . . 35
6.6 Images density and color correction . . . . . . . . . . . . . . . . . . . . . . . . . . . . . . . . . . . 37
6.6.1 Image menu correction options . . . . . . . . . . . . . . . . . . . . . . . . . . . . . . . . . . . . . . . 38
6.7 Setting up a correction profile . . . . . . . . . . . . . . . . . . . . . . . . . . . . . . . . . . . . . . . . 39
6.8 Resizing and basic manipulation (Resize Bar) . . . . . . . . . . . . . . . . . . . . . . . . . . . 40
6.8.1 Cropping . . . . . . . . . . . . . . . . . . . . . . . . . . . . . . . . . . . . . . . . . . . . . . . . . . . . . . . . 40
6.8.2 Resizing . . . . . . . . . . . . . . . . . . . . . . . . . . . . . . . . . . . . . . . . . . . . . . . . . . . . . . . . . 42
6.9 Rotation and inversion . . . . . . . . . . . . . . . . . . . . . . . . . . . . . . . . . . . . . . . . . . . . .
6.10 Filters . . . . . . . . . . . . . . . . . . . . . . . . . . . . . . . . . . . . . . . . . . . . . . . . . . . . . . . . .
6.11 Saving and closing an image . . . . . . . . . . . . . . . . . . . . . . . . . . . . . . . . . . . . . . .
6.12 Preferences configuration . . . . . . . . . . . . . . . . . . . . . . . . . . . . . . . . . . . . . . . . . .
6.13 Function Keys . . . . . . . . . . . . . . . . . . . . . . . . . . . . . . . . . . . . . . . . . . . . . . . . . . .
43
44
47
47
49
7 Paper loading and management . . . . . . . . . . . . . . . . . . . . . . . . . . . . 51
7.1 Selecting paper magazine and profile. . . . . . . . . . . . . . . . . . . . . . . . . . . . . . . . . . 51
7.2 Centering and Aligning images . . . . . . . . . . . . . . . . . . . . . . . . . . . . . . . . . . . . . . . 52
7.2.1 Transport offset parameters . . . . . . . . . . . . . . . . . . . . . . . . . . . . . . . . . . . . . . . . . 53
7.3 Fine centering and alignment due to paper box position . . . . . . . . . . . . . . . . . . . 53
7.4 Loading Paper. . . . . . . . . . . . . . . . . . . . . . . . . . . . . . . . . . . . . . . . . . . . . . . . . . . . 54
7.4.1 LaserLab 50 (20”) and LaserLab 76 (30”) . . . . . . . . . . . . . . . . . . . . . . . . . . . . . . . 54
7.4.2 LaserLab 30 (12”) . . . . . . . . . . . . . . . . . . . . . . . . . . . . . . . . . . . . . . . . . . . . . . . . . . 56
8 Package and School printing . . . . . . . . . . . . . . . . . . . . . . . . . . . . . . 59
8.1 How to start. . . . . . . . . . . . . . . . . . . . . . . . . . . . . . . . . . . . . . . . . . . . . . . . . . . . . .
8.2 Package set up . . . . . . . . . . . . . . . . . . . . . . . . . . . . . . . . . . . . . . . . . . . . . . . . . . .
8.3 Manual and automatic printing of a package . . . . . . . . . . . . . . . . . . . . . . . . . . . .
8.4 Package inserts, photocards, calendars . . . . . . . . . . . . . . . . . . . . . . . . . . . . . . . .
59
59
61
63
8.4.1 Different images in the same package . . . . . . . . . . . . . . . . . . . . . . . . . . . . . . . . . 67
8.4.2 Printing text insertion in the packages . . . . . . . . . . . . . . . . . . . . . . . . . . . . . . . . . . 68
9 Auto Print and formats . . . . . . . . . . . . . . . . . . . . . . . . . . . . . . . . . . . 69
9.1 Introduction . . . . . . . . . . . . . . . . . . . . . . . . . . . . . . . . . . . . . . . . . . . . . . . . . . . . . . 69
9.2 Starting, Completion, Stopping . . . . . . . . . . . . . . . . . . . . . . . . . . . . . . . . . . . . . . . 70
9.3 Automatic printing folders options. . . . . . . . . . . . . . . . . . . . . . . . . . . . . . . . . . . . . 71
9.3.1 Folders enable/disable . . . . . . . . . . . . . . . . . . . . . . . . . . . . . . . . . . . . . . . . . . . . .
9.3.2 Folders path . . . . . . . . . . . . . . . . . . . . . . . . . . . . . . . . . . . . . . . . . . . . . . . . . . . . . .
9.3.3 Job type and name . . . . . . . . . . . . . . . . . . . . . . . . . . . . . . . . . . . . . . . . . . . . . . . . .
9.3.4 Matching a format or a package to a folder . . . . . . . . . . . . . . . . . . . . . . . . . . . . . .
9.3.5 Printing the folders in packs . . . . . . . . . . . . . . . . . . . . . . . . . . . . . . . . . . . . . . . . . .
9.3.6 Shears configuration for HSCutter . . . . . . . . . . . . . . . . . . . . . . . . . . . . . . . . . . . . .
9.3.7 Limiting the maximum transport length. . . . . . . . . . . . . . . . . . . . . . . . . . . . . . . . . .
9.3.8 Spacing the copies and/or adding cutmarks. . . . . . . . . . . . . . . . . . . . . . . . . . . . . .
9.3.9 Choosing the paper box for a folder . . . . . . . . . . . . . . . . . . . . . . . . . . . . . . . . . . . .
LaserLab instruction for use
72
73
73
73
75
76
76
77
77
9.3.10 End of Order management . . . . . . . . . . . . . . . . . . . . . . . . . . . . . . . . . . . . . . . . . .
9.3.11 Destination of printed files . . . . . . . . . . . . . . . . . . . . . . . . . . . . . . . . . . . . . . . . . .
9.3.12 Workflow management with Autoprint . . . . . . . . . . . . . . . . . . . . . . . . . . . . . . . . .
9.3.13 Creating or deleting an AutoPrint folder . . . . . . . . . . . . . . . . . . . . . . . . . . . . . . . .
78
78
78
79
9.4 Unprintable files management . . . . . . . . . . . . . . . . . . . . . . . . . . . . . . . . . . . . . . . 80
9.5 Autoprint orders separation. . . . . . . . . . . . . . . . . . . . . . . . . . . . . . . . . . . . . . . . . . 81
9.5.1 EndOfOrder files and index print . . . . . . . . . . . . . . . . . . . . . . . . . . . . . . . . . . . . . . 81
9.6 Modifying and creating formats. . . . . . . . . . . . . . . . . . . . . . . . . . . . . . . . . . . . . . . 82
9.6.1 Format setting: size and border . . . . . . . . . . . . . . . . . . . . . . . . . . . . . . . . . . . . . . .
9.6.2 Format setting: special attributes . . . . . . . . . . . . . . . . . . . . . . . . . . . . . . . . . . . . . .
9.6.3 Format setting: scope . . . . . . . . . . . . . . . . . . . . . . . . . . . . . . . . . . . . . . . . . . . . . . .
9.6.4 Format settings: options . . . . . . . . . . . . . . . . . . . . . . . . . . . . . . . . . . . . . . . . . . . . .
9.6.5 Format settings: quality . . . . . . . . . . . . . . . . . . . . . . . . . . . . . . . . . . . . . . . . . . . . .
9.6.6 Format settings: effects . . . . . . . . . . . . . . . . . . . . . . . . . . . . . . . . . . . . . . . . . . . . .
9.6.7 Modifying an existing format. . . . . . . . . . . . . . . . . . . . . . . . . . . . . . . . . . . . . . . . . .
9.6.8 Creating a new format . . . . . . . . . . . . . . . . . . . . . . . . . . . . . . . . . . . . . . . . . . . . . .
9.6.9 Deleting a format . . . . . . . . . . . . . . . . . . . . . . . . . . . . . . . . . . . . . . . . . . . . . . . . . .
83
83
83
83
84
85
85
86
86
9.7 Generating photo indexes in Autoprint mode . . . . . . . . . . . . . . . . . . . . . . . . . . . . 87
9.7.1 Thumbnail properties and dimensions . . . . . . . . . . . . . . . . . . . . . . . . . . . . . . . . . . 89
9.7.2 Header options . . . . . . . . . . . . . . . . . . . . . . . . . . . . . . . . . . . . . . . . . . . . . . . . . . . . 89
9.7.3 Background and logo options . . . . . . . . . . . . . . . . . . . . . . . . . . . . . . . . . . . . . . . . . 90
9.8 Programming cutmarks. . . . . . . . . . . . . . . . . . . . . . . . . . . . . . . . . . . . . . . . . . . . . 90
10 Paper calibration: daily alignment and creating new profiles . . . . . 93
10.1 Introduction . . . . . . . . . . . . . . . . . . . . . . . . . . . . . . . . . . . . . . . . . . . . . . . . . . . . . 93
10.2 Starting up the calibration sequence. . . . . . . . . . . . . . . . . . . . . . . . . . . . . . . . . . 93
10.2.1 Densitometer setup . . . . . . . . . . . . . . . . . . . . . . . . . . . . . . . . . . . . . . . . . . . . . . . 94
10.2.2 Printing the target . . . . . . . . . . . . . . . . . . . . . . . . . . . . . . . . . . . . . . . . . . . . . . . . . 95
10.3 Reading the test . . . . . . . . . . . . . . . . . . . . . . . . . . . . . . . . . . . . . . . . . . . . . . . . . 95
10.3.1 Balanced test . . . . . . . . . . . . . . . . . . . . . . . . . . . . . . . . . . . . . . . . . . . . . . . . . . . . 96
10.3.2 Not balanced test . . . . . . . . . . . . . . . . . . . . . . . . . . . . . . . . . . . . . . . . . . . . . . . . . 97
10.4 Manual refinement of the calibration. . . . . . . . . . . . . . . . . . . . . . . . . . . . . . . . . . 98
10.5 Back up. How to save the settings . . . . . . . . . . . . . . . . . . . . . . . . . . . . . . . . . . . 98
11 The ColorMap Color Management System . . . . . . . . . . . . . . . . . . 101
11.1 Quick start. . . . . . . . . . . . . . . . . . . . . . . . . . . . . . . . . . . . . . . . . . . . . . . . . . . . . 101
11.2 The CMS standard system . . . . . . . . . . . . . . . . . . . . . . . . . . . . . . . . . . . . . . . . 101
11.2.1 Manual mode options . . . . . . . . . . . . . . . . . . . . . . . . . . . . . . . . . . . . . . . . . . . . 103
11.3 The ColorMap system. . . . . . . . . . . . . . . . . . . . . . . . . . . . . . . . . . . . . . . . . . . . 104
11.3.1 Creating a color map . . . . . . . . . . . . . . . . . . . . . . . . . . . . . . . . . . . . . . . . . . . . . 104
11.3.2 Binding a color map to a format . . . . . . . . . . . . . . . . . . . . . . . . . . . . . . . . . . . . . 106
12 Error messages and system diagnostics. . . . . . . . . . . . . . . . . . . . 109
12.1 The message window . . . . . . . . . . . . . . . . . . . . . . . . . . . . . . . . . . . . . . . . . . . . 109
12.2 Error messages. . . . . . . . . . . . . . . . . . . . . . . . . . . . . . . . . . . . . . . . . . . . . . . . . 110
12.3 Log files management. . . . . . . . . . . . . . . . . . . . . . . . . . . . . . . . . . . . . . . . . . . . 112
13 LaserLab 76 (30”) . . . . . . . . . . . . . . . . . . . . . . . . . . . . . . . . . . . . . 113
13.1 Using the 50 (20”) paper box on the LaserLab 76 (30”) . . . . . . . . . . . . . . . . . . 113
13.2 Managing rolls winded with emulsion inside (LaserLab 30”) . . . . . . . . . . . . . . 114
14 HS Cutting Station. . . . . . . . . . . . . . . . . . . . . . . . . . . . . . . . . . . . . 117
LaserLab instructions for use
14.1 Description and warnings . . . . . . . . . . . . . . . . . . . . . . . . . . . . . . . . . . . . . . . . . 117
14.2 Installation. . . . . . . . . . . . . . . . . . . . . . . . . . . . . . . . . . . . . . . . . . . . . . . . . . . . . 117
14.2.1 Connecting the serial data to PCI adapter between the PC and the cutter . . . . 120
14.3 Function keyboard and display . . . . . . . . . . . . . . . . . . . . . . . . . . . . . . . . . . . . .
14.4 Mode of operation . . . . . . . . . . . . . . . . . . . . . . . . . . . . . . . . . . . . . . . . . . . . . . .
14.5 LaserLab setup for HSCutter . . . . . . . . . . . . . . . . . . . . . . . . . . . . . . . . . . . . . .
14.6 Using the HS Cutter . . . . . . . . . . . . . . . . . . . . . . . . . . . . . . . . . . . . . . . . . . . . .
121
123
124
125
14.6.1 Automatic mode . . . . . . . . . . . . . . . . . . . . . . . . . . . . . . . . . . . . . . . . . . . . . . . . . 125
14.6.2 Manual mode . . . . . . . . . . . . . . . . . . . . . . . . . . . . . . . . . . . . . . . . . . . . . . . . . . . 127
14.7 Autoprint and format settings for HS Cutter . . . . . . . . . . . . . . . . . . . . . . . . . . . 127
14.7.1 Wasteless HSCutter formats . . . . . . . . . . . . . . . . . . . . . . . . . . . . . . . . . . . . . . . 128
14.7.2 Wasting paper formats . . . . . . . . . . . . . . . . . . . . . . . . . . . . . . . . . . . . . . . . . . . . 129
14.8 Placing manually the blades: Shear simulator . . . . . . . . . . . . . . . . . . . . . . . . . 129
14.8.1 Limitations in use . . . . . . . . . . . . . . . . . . . . . . . . . . . . . . . . . . . . . . . . . . . . . . . . 131
14.8.2 Shears simulator and Autoprint . . . . . . . . . . . . . . . . . . . . . . . . . . . . . . . . . . . . . 132
14.9 HSCutting Station MSA. . . . . . . . . . . . . . . . . . . . . . . . . . . . . . . . . . . . . . . . . . . 133
14.9.1 Keyboard and display . . . . . . . . . . . . . . . . . . . . . . . . . . . . . . . . . . . . . . . . . . . . 133
14.9.2 ImageLab® settings and end order management . . . . . . . . . . . . . . . . . . . . . . . 133
14.9.3 Guides for the input formats . . . . . . . . . . . . . . . . . . . . . . . . . . . . . . . . . . . . . . . . 134
14.10 Error messages. . . . . . . . . . . . . . . . . . . . . . . . . . . . . . . . . . . . . . . . . . . . . . . . 135
14.11 Error conditions. . . . . . . . . . . . . . . . . . . . . . . . . . . . . . . . . . . . . . . . . . . . . . . . 136
15 Managing multiformat orders: OrderMakerMF® . . . . . . . . . . . . . . 139
15.1 The OrderMakerMF® software . . . . . . . . . . . . . . . . . . . . . . . . . . . . . . . . . . . . . 139
15.2 Network settings for a correct use of OrderMakerMF® . . . . . . . . . . . . . . . . . . 139
15.2.1 Checking the IP address for the LaserLab printers . . . . . . . . . . . . . . . . . . . . . . 139
15.2.2 Mapping network drives of the LaserLab printers. . . . . . . . . . . . . . . . . . . . . . . . 141
15.3 Installing OrderMakerMF® . . . . . . . . . . . . . . . . . . . . . . . . . . . . . . . . . . . . . . . . 144
15.4 Starting OrderMakerMF® . . . . . . . . . . . . . . . . . . . . . . . . . . . . . . . . . . . . . . . . . 146
15.5 Creating an order . . . . . . . . . . . . . . . . . . . . . . . . . . . . . . . . . . . . . . . . . . . . . . . 148
15.5.1 Removing/modifying images from the order . . . . . . . . . . . . . . . . . . . . . . . . . . . 149
15.6 Sending the order . . . . . . . . . . . . . . . . . . . . . . . . . . . . . . . . . . . . . . . . . . . . . . . 150
15.6.1 Options for the contact sheet . . . . . . . . . . . . . . . . . . . . . . . . . . . . . . . . . . . . . . . 152
15.7 Other features of OrderMakerMF® . . . . . . . . . . . . . . . . . . . . . . . . . . . . . . . . . . 153
15.7.1 Autoprint and OrderMakerMF® . . . . . . . . . . . . . . . . . . . . . . . . . . . . . . . . . . . . . 153
15.7.2 Using OrderMakerMF® with the HSCutter MSA . . . . . . . . . . . . . . . . . . . . . . . . 153
15.8 Message errors. Solving the problems . . . . . . . . . . . . . . . . . . . . . . . . . . . . . . . 154
15.8.1 Missing connection errors . . . . . . . . . . . . . . . . . . . . . . . . . . . . . . . . . . . . . . . . . 154
15.8.2 No printer located over the network . . . . . . . . . . . . . . . . . . . . . . . . . . . . . . . . . . 154
16 Upkeeping . . . . . . . . . . . . . . . . . . . . . . . . . . . . . . . . . . . . . . . . . . . 155
16.1 Daily maintenance: compressor condense discharging . . . . . . . . . . . . . . . . . .
16.2 Weekly maintenance: cleaning the air filters. . . . . . . . . . . . . . . . . . . . . . . . . . .
16.3 Monthly maintenance: replacing the air filters. . . . . . . . . . . . . . . . . . . . . . . . . .
16.4 Sled cleaning . . . . . . . . . . . . . . . . . . . . . . . . . . . . . . . . . . . . . . . . . . . . . . . . . .
16.5 Yearly maintenance: pressure reduction group filters replacement . . . . . . . . .
16.6 Yearly maintenance: replacement of the brushes in the cutter internal motor .
16.7 Machine working statistics . . . . . . . . . . . . . . . . . . . . . . . . . . . . . . . . . . . . . . . .
155
156
156
157
157
157
158
17 Attached documents . . . . . . . . . . . . . . . . . . . . . . . . . . . . . . . . . . . 159
17.1 Attached documents list . . . . . . . . . . . . . . . . . . . . . . . . . . . . . . . . . . . . . . . . . . 159
17.2 Declaration of conformity . . . . . . . . . . . . . . . . . . . . . . . . . . . . . . . . . . . . . . . . . 159
17.3 Warranty . . . . . . . . . . . . . . . . . . . . . . . . . . . . . . . . . . . . . . . . . . . . . . . . . . . . . . 160
LaserLab instruction for use
17.4 Spare parts - failure report - information request module . . . . . . . . . . . . . . . . . 161
LaserLab instructions for use
LaserLab instruction for use
Chapter 1
General informations
1 General informations
The informations included in this manual are intended for a correct use of the LaserLab equipment. Correct use and limits are also indicated.
Follow carefully the manual instructions in order to guarantee the operator safety, optimize the
work and increase the equipment lifetime.
For any information please contact us at the following phone number:
(+39) 0425757375
Or send an email to the following address:
service@polielettronica.it
Or send us our spare parts order request - failure report -information request module to the following address:
Polielettronica S.p.A.
45030 S.Maria Maddalena (RO) ITALY - Via Nazionale 55
1.1 Definitions
In this sections we describe the definitions used in this manual. The § symbol marked definitions are in compliance with the CEI60950 norm.
§ Tool
Screwdriver or any other object used to move a screw or a fixing part.
§ Service personnel
Experienced and properly trained person to be aware of any possible danger of a service operation, and of every safety precaution.
§ Operator
Each person using the equipment but not included in the service personnel. In this manual the
terms user and operator have the same meaning.
Polielettronica technician
A technician allowed to perform any service operation, including the ones not described in this
manual.
1
Chapter 1
General informations
1.2 Warning and caution symbols
WARNING. It denotes a hazard. It calls attention to a procedure,
practice, or the like, which, if not correctly performed or adhered
to, could result in injury or death. Do not proceed beyond a warning until the indicated conditions are fully understood and met.
CAUTION. It denotes a hazard. It calls attention to a procedure, practice,
or the like, which, if not correctly performed or adhered to, could result
in damage or destruction of part or all of the product. Do not proceed beyond a warning until the indicated conditions are fully understood and
met.
ADVISE. It calls attention to a procedure, practice, or the like, to be performed
carefully following the manual instructions.
1.3 General safety warnings
Before executing any operation requiring opening the equipment
and accessing internal parts, switch off the equipment in safety
conditions:
1) Switch off the equipment through its proper MAIN SWITCH;
2)Disconnect the equipment from the general mains supply.
2
Chapter 2
Producer and equipment identification
2 Producer and equipment
identification
The identification plate is placed on the rear side of the panel, near the electrical connections. It
is shown in fig. 1
Fig.1 - Identification plate
2.1 Technical service information
Please contact us at the following phone number:
(+39) 0425757375
Or send an email to the following address:
service@polielettronica.it
2.2 General safety information
Read carefully this manual before starting up and using the equipment or before
performing any technical operation on the equipment.
Read carefully the equipment warranty included to this manual. Warranty void
for failure or damages due to operations performed not in accord to this manual
instructions.
3
Chapter 2
Producer and equipment identification
ATTENTION. The equipment power supply must be connected to
an electric panel featuring a 16A safety switch (overcurrent and
ground fault protection).
This equipment cannot be placed and used in any explosion risk
environment. It is absolutely forbidden to use the equipment for
any other use except the ones indicated in this manual. Do not
modify any part of the equipment to fit them to other devices.
2.3 Attached documents
To this manual are attached the following documents:
1) CE declaration of conformity.
2) Warranty.
3) Spare parts order, failure report and information request module.
Found in Chapter 17 “Attached documents” on page 159.
4) Complete list of spare parts.
Found in the manual EXPLODED VIEW section.
Other attached documents:
5) UPS unit manual for use and maintenance.
6) Monitor manual for use and maintenance.
4
Chapter 3
Technical features
3 Technical features
3.1 General description, use and limits.
The LaserLab is a color laser printer working on photographic paper.
The quality of the results is ensured only if the photographic paper is designed
for digital printing. The system works only with rolls of paper winded with
emulsion out (sensitive side)
Resolution. Two output resolutions are available:
254dpi
(10 dots/mm)
305dpi
(12dots/mm)
The resolution can be set during paper calibration.
Attention: the precision on the paper transport is ±1mm guaranteed.
The system has to be considered as a single unit, even though it appears to be
composed of different components. The computer, the interface unit, the exposure unit and the paper processor are strictly connected. Attention: The computer is an integral part of the printer, the operating system and the
management software ImageLab are the only parts that can be installed and
executed on the unit.
The installation of any other software or peripherals is not allowed; Only
Polielettronica S.p.A. can authorize installation of software or hardware
units. If the previous directives are not followed by the user, Polielettronica S.p.A. cannot warranty the integrity of the system and it proper operation, the LaserLab system is considered out of warranty.
The connection to a network is allowed only for printing data transfer (files
where the images are stored). The user is responsable to check out the presence
of any software viruses that can compromise the integrity of the LaserLab system.
The compressed air, necessary to operate, must be absolutely humidity
free and perfectly filtered, to avoid risks of serious damagement to the
printing section. Warranty void for any damagement caused if the previous directives are not respected.
5
Chapter 3
Technical features
The printing correct performance is guaranteed only in the following environmental conditions:
Temperature: 21÷27°C
Moisture: 40÷50% Rh
3.2 System components
3.2.1 LaserLab 30 (12”)
The components of the LaserLab 30 are shown in fig. 2.
2
1
5
3
4
6
UPS
Fig.2 - LaserLab 30 (12”) components
1) PC monitor.
2) PC cabinet
3) Table.
4) UPS unit.
5) Transport and printing section.
6) Laser optics section.
Inside the transport section (5) is placed the LMI panel.
Inside the laser optics section are placed:
-
6
The laser group, together with the laser power supply and the modulator control panel
Chapter 3
Technical features
(see fig. 10 on page 19).
-
The power group (M707 DC power supply, DRLIMO linear motor driver and the
220VAC service sockets). It is placed behind the laser optics group (see fig. 7 on page
16).
-
The fan group, as shown in fig. 8 on page 17.
3.2.2 LaserLab 50 (20”) and 76 (30”)
The components of the LaserLab 50 and 76 are shown in fig. 3.
Fig.3 - LaserLab 50/76 (20”/30”) components
1) PC monitor.
2) PC cabinet
3) Table.
4) UPS unit.
5) Transport and printing section.
6) Laser optics section.
7) Power supply trolley and fans section.
Inside the transport section (5) is placed the LMI panel.
Inside the section number (7) are placed:
-
The power supply trolley, shown in fig. 7 on page 16.
-
The fan group, shown in fig. 8 on page 17.
7
Chapter 3
Technical features
3.3 Accessories
-
Densitometer.
-
Dry air compressor.
To purchase these articles please contact our sales office.
Polielettronica S.p.A. can choose among different accessories models to be coupled to the LaserLab equipment, depending on the customer request and on the technology state of the art.
3.4 Printable sizes
Model Laserlab 30 (12”):
305x500mm (12x19½”) MAX
102x89mm (4x3½”)
MIN.
Model Laserlab 50 (20”):
508x820mm (20x32”)
203x178mm (8x7”)
MAX
MIN.
Model Laserlab 76 (30”):
762x1250mm (30x49”)
508x300mm (20x12”)
MAX
MIN.
3.5 Technical data
-
Weight Kg 625.
-
Power supply mains voltage: 230V~ 1 phase 50/60Hz.
ATTENTION: if the RA4 paper processor is coupled with the LaserLab, the customer must specify the mains voltage frequency (50
or 60Hz). A three phase mains supply is necessary too.
8
-
Maximum sinked current: 10A. Medium sinked current is 6A, increasing up to 10A
due to laser tubes aging.
-
Maximum absorbed power: 2300VA. Medium absorbed power is 1500VA, increasing
up to 2300VA due to laser tubes aging.
-
Power factor: 0,8 minimum.
-
Autonomy in case of mains supply loss: 10 minutes.
-
Transport section fan air output: about 485m3/hour, increasing of 6,5°C the environment temperature.
-
Stocking temperature: -30°C / 60°C.
Chapter 3
Technical features
-
Air sinking from the compressor unit: less than 25l/min.
3.6 Applicable standards and directives
73/23/EEC (Low Voltage Directive):
EN60950 European Standard.
89/336/EEC (EMC Directive):
EN55022 European Standard.
EN55024 European Standard.
See also section 17 “Attached documents” on page 159.
3.7 Notice
This system uses technology under license to U.S. patent No. 5,459,505 owned by Esko-Graphics A/S.
9
Chapter 3
Technical features
10
Chapter 4
Installation, Connection and Placing
4 Installation, Connection and
Placing
4.1 Inspection and preliminary operations
Before any operation on the equipment, unpack the shipping cartons
and inspect every item for evidence of damage. If any item appears to be
damaged, don’t try to fix it, refer to your seller.
ATTENTION: the items weighting more than 20Kg must be moved and
placed by more than one person.
The installation must be performed by service personnel only.
Before installing the equipment it is necessary to remove the plate locking the
laser group and the sled lock.
4.2 Environment and placing
Placement and vibrations. For the best results, it is necessary to take extreme
care in positioning LaserLab; it must be placed on a stable floor, without vibrations and oscillations. The presence of heavy traffic, railways or underground in the proximity of the labs can generate vibrations, and these
vibrations damage the results of the prints.
Attention! No object and no person should touch the main body of the
LaserLab during printing, as they could induce vibrations visible on the
print.
Room temperature. The temperature into the working place should fit within
the 21-27oC range. Inside the printer there are flexible transmission systems;
these transmission system can lose this flexibility if the temperature becomes
too low and this could cause also vibrations on the print. An excessive temperature can cause problems to the temperature regulation system.
11
Chapter 4
Installation, Connection and Placing
Humidity. The humidity must fit into the 40-50% Rh range. A lower value causes curling on the paper, and the print will be not flat when on the exposure
drum. Another problem caused by poor humidity is the dust, which remains
suspended in the atmosphere and the air filters of the LaserLab cannot eliminate it completely. An excessive humidity rate is dangerous for the electronic
components, as it induces also a fast opacification of the optical transmission
system.
Attention! In every case, A good cleaning of the working place is extremely important.
4.3 Printer - paper processor coupling
Although the printer plus the processor is an integrated printing system, the printing section is
not mechanically connected to the paper processor as a few millimeters separate the two units;
this way, no vibration is transmitted from the paper processor to the printer.
The first step is to put in perfect level the printer section. The operation has to be performed by
using a centesimal level (0,02mm/m). The reference point for the level is the bar of the air bearing slide.
Attention! the level has to be placed with care on the bar, this is necessary to avoid scratches or damages of the bar itself.
Check again the level 24 hours after the installation as it could have changed, requiring an adjustment. To do that it is possible to use the air bearing slide, in the following manner:
1) Switch on the air compressor or feed the printer with air, absolutely do not switch the unit
on!
2) Now the air bearing slide can be moved without any efforts is needed, it is now an high precision level.
3) Handling it with care, move the slide to the centre, and check in which direction it moves,
adjust the level of the printer till the slide does not move.
While processing the paper processor creates vibrations, they can be transmitted to the printer
12
Chapter 4
Installation, Connection and Placing
trough the floor. To avoid the vibrations problem the paper processor is delivered with a set of
Fig.4 - Anti-vibration feet placement
anti-vibrations feet, they have to be placed during the installation as shown on fig. 4. The plastic
base of the existing feet has to be removed and the rubber feet have to be placed following the
reference numbers labeled on them.
Attention! The feet has different diameters depending from the weight of
the processor on each corner.
The coupling with the paper processor must be made so that the first crossover, during the rotation of its rolls, does not touch or brush the output deflector of the printer. The output deflector
has its regulation screws, that allow wide movements to put the deflector in the right position.
To help the coupling during the installation some adhesive arrows have been placed on printer
and paper processor, a value is write on, indicating the distance and the difference in depth between the two units, by respecting these values the coupling is nearly perfect.
An optimal regulation is the one where the output deflector does not make contact between deflector and top or bottom roll of the first crossover. Please note that during production the paper
processor could make small oscillations, and so the first crossover too; don’t forget this during
the coupling, give a short range of movements to the unit.
13
Chapter 4
Installation, Connection and Placing
4.4 Electrical connections
The LaserLab equipment has its own proper overload and short circuit protections. In every
case it is needed a two pole grounded socket, 16A/250V~ meeting the IEC309 standard.
The mains supply network and the ground network must be in working
order and in compliance to the laws in force.
Attention: no LaserLab component can be supplied directly from the
mains. Supply every component only by the UPS unit output.
If an (optional) air compressor is present, this one MUST be connected
directly to the mains network (230Vac 8A).
Start from the UPS (Uninterruptible Power Supply shown on fig. 5). Connect first the input plug
(220Vac 16Amp). This because it is necessary, since the beginning, to have a good earth connection to discharge static electricity that can damage some components of the system.
4.4.1 UPS unit
Check the UPS to stay off. First of all, connect the 220VAC 16A supply plug to the mains supply.
Fig.5 - UPS unit
14
Chapter 4
Installation, Connection and Placing
Make the ground connection available as soon as possible, to avoid
electro static discharges through sensible electronic components.
Connect the 5 sockets holder as shown in fig. 5 on page 14.
Attention: the supply input cable and the output cable of the UPS unit must be
kept as separated as possible. The two cables are not to be parallel, otherwise
the resulting electrical noise could affect the print quality.
See fig. 6.
NO
YES
Fig.6 - Correct placement of the cables for the UPS unit
Connect now the trolley with the electronic units placed under the printer section (see fig. 7 on
page 16).
15
Chapter 4
Installation, Connection and Placing
4.4.2 Connection between printer and processor
Connect the PROCESSOR cable coming from the printer to the PROCESSOR connector on
the processor.
4.4.3 Connection to the power group
The power group is placed behind the optical laser group. It shown in fig. 7. Connect the plug
labeled TO CONTINUOUS POWER UNIT to the UPS.
M707 DC POWER SUPPLY
ALIMENTATORE DC M707
220 VAC SOCKETS
PRESE DI SERVIZIO 220VAC
DRLIMO linear
motor driver
POWER GROUP
GRUPPO DI POTENZA
Fig.7 - Power group
Connect the cable coming from the printing section labeled DC POWER SUPPLY to the
M707 DC power supply.
Connect the cables coming from the printing section, labeled CUSTOMERS inputs/outputs
DIGITAL, MOTOR CONNECTION and POSITION ENCODER ANALOG, to the
DRLIMO Linear Motor Driver. Check the power switch to stay on I (On).
Check all the supply plugs to be connected to the 220VAC sockets group.
Check the laser supply power switch to stay on I (On).
4.4.4 Fan group and air filter connections
Change now to the connection of the fans and filter box shown on fig. 8 on page 17. Connect
the plug labeled VACUUM FAN to the corresponding socket coming from the printing section.
Connect the two tubes for air recirculation coming from the printing section.
Connect the compressed air input to the existing distribution system or to the air compressor.
16
Chapter 4
Installation, Connection and Placing
The two compressed air outputs must be connected, one to the linear motor (sled) and the second one to the DRLIMO driver air input (see fig. 7 on page 16). To lock the tubes push them
well into the holder.
Fig.8 - Fan group
4.4.5 Connection to the personal computer
It is possible now to connect the computer and the rest of the electronic units, see fig. 9 on page
18.
Let to 0 (Off) position all the power supply switches.
Connect the four feeding cables (220Vac) to the multiple socket connected to the UPS.
Connect the mouse and computer keyboard as shown on fig. 9 on page 18.
Connect the monitor signal cable to the respective connectors on monitor and computer.
Connect the densitometer (optional) to the COM1 PC serial port.
Connect the serial cable (coming from the printer) labeled with COM2 PC serial port.
Connect the WRITING SYSTEM (optional) serial cable, labeled with COM3, to the COM3
PC serial port.
Attention: the densitometer and the WRITING SYSTEM are optional features.
17
Chapter 4
Installation, Connection and Placing
Consult our sales office for more information.
.
220Vac in
Power switch
Interruttore
Mouse
0
1
Network connection
Connessione rete
Keyboard
Tastiera
COM1
Densitometer
Densitometro
COM2
Serial Cable from
transport unit
Cavo seriale da
elettronica trasporto
Monitor signals input
Ingresso Segnali monitor
PBI connector
Connettore PBI
220Vac
Monitor signals output
Uscita Segnali monitor
Fig.9 - Connections to the Personal Computer
Switch to I (On) the power switches on the two electronic units (LMI and modulators driver
unit) and the two power supplies of the computer. Check the monitor switch to be in the I (On)
position.
4.4.6 Connections to the laser optical group
Connect the three RGB cables coming from the LMI panel to the driver inputs on the modulator
control panel, placed near the laser group (see fig. 10).
Bring to I position the power switches of the LMI unit (placed inside the transport section) and
the modulator control panel.
18
Chapter 4
Installation, Connection and Placing
Cooling Fan / Ventola
BLUE
MOD IN
B
MOD IN
G
LASER POWER SUPPLY
MOD IN
R
RED
GREEN
Fig.10 - Connections to the optical group
4.5 Heat dissipation
The LaserLab equipment generates heat. This heat has to be dissipated, as hot air, to keep stable
the internal working temperature. There are two outputs for the hot air, they can be directed outside from the working place to avoid excessive warming up.
Attention! No hot air output has to be connected to a vacuum system, as
they already have their own fans and this causes problem to the internal
temperature auto regulation system.
19
Chapter 4
Installation, Connection and Placing
20
Chapter 5
Start up operation, Start/Stop sequence
5 Start up operation, Start/Stop
sequence
5.1 Inspection before switching on
Before switching on check the following points:
-
The warning signals have not been removed.
-
The air tubes are in good conditions and properly connected. The air filters are in good
conditions.
-
The mains presence LED on the UPS is ON.
-
The safety switch placed on the 220VAC sockets group is in the ON position.
-
The two supply switch on the rear panel of the PC cabinet (see fig. 9 on page 18) are
in the ON position.
-
The monitor switch button is pressed.
5.2 Switching on with cold printer
Attention! Never touch the ON/OFF battery switch placed on the rear side of
the UPS, since it cuts off the battery supply and disables the UPS.
Start the unit by pressing the I button on the UPS unit. If nothing happens, check that the on/off
switch on the same panel stays on the ON position.
As soon the system is switched on, check:
1. The manometer pressure indication has to stay between 1.8 and 2 bar
(fig. 8 on page 17).
2. The modulator control panel cooling fan to be properly connected and
working (fig. 10 on page 19).
5.3 Warming up
The laser group heating requires about 30 minutes. During this time, the emission is unstable and the results, thus, unreliable.
21
Chapter 5
Start up operation, Start/Stop sequence
We suggest to consider this time while calculating a correct start-up time for the system.
If the printer is coupled to the RA4 processor, it is necessary to consider the
processor warm-up time too, which is about the same (30-45 minutes), but is
much more subject to ambient temperature.
5.4 Starting ImageLab®
After a few minutes, the Windows® working window will appear. Double
click on the ImageLab icon (fig. 11) placed on the desktop, and the application will start.
Fig.11 ImageLab
icon
The reader is supposed to know the basic operations in the Windows® operating system: launching programs, opening and closing folders and so on. Refer
to the Windows® manual supplied with the equipment.
5.5 Quitting ImageLab®
Select the top left corner of the ImageLab window as
shown (fig. 12). Selecting Close, after all the jobs have
been completed, ImageLab will quit.
Fig.12 - Closing ImageLab
Wait for the quit procedure to finish, as indicated by the progress bar.
22
Chapter 5
Start up operation, Start/Stop sequence
Fig.13 - Closing ImageLab
5.6 Stopping the whole equipment
To stop completely the system follow the instructions of Windows® (Start > Shut down the
computer). Once it is safe to switch off the computer, it will be displayed on the monitor. At that
moment, do not switch only the computer off, but the whole system from the O button of the
continuous power supply unit (UPS).
Attention! the system has to be switched OFF and ON, only by using the
O and I buttons on the continuous power supply unit (UPS). Never
switch OFF or ON any component singularly.
5.7 Mains supply failure (blackout)
In case of blackout the autonomy of 10 minutes is guaranteed.
Close all the jobs, and follow the instructions of section 5.5 for laser
cooling down and switching off the equipment.
This procedure has also to be performed in case of mains supply instability (brown-out) or subjected to frequent blackouts.
23
Chapter 5
Start up operation, Start/Stop sequence
24
Chapter 6
Loading and printing an image
6 Loading and printing an
image
6.1 Main window and main bars: a brief description
Fig.14 - ImageLab main window
After starting the program, the main window will be presented as in fig. 14. From this window
every control, manipulation and correction that ImageLab allows can be accessed. The icons are
designed to offer an access as quick and intuitive as possible to these options. These icons are
gathered in several menu bars as described in the following:
1) Main Bar (section 6.1.1 on page 26).
2) View Bar (section 6.1.2 on page 27).
3) Resize Bar (section 6.1.3 on page 27).
4) LaserLab Bar (section 6.1.4 on page 27).
5) Color Adjust Bar (section 6.1.5 on page 28).
6) Processor Status bar (section 6.1.6 on page 29).
7) Status Bar (section 6.1.7 on page 29).
25
Chapter 6
Loading and printing an image
6.1.1 Main Bar
The Main Bar is shown in fig. 15.
Fig.15 - Main bar
This group of icons is dedicated to common file operations: open, close, save.
See sections 6.2 on page 30 and 6.11 on page 47 for more informations.
This group of icons is intended for managing the printing option, including the packages and format setup,
and the automatic print. From left to right:
Insert Image
manual insertion of an image.
Automatic print
This button activates the Image Processor dialog to access the
Autoprint options. This function is explained at chapter 9 on
page 69.
Image processor setup
This button activates the Autoprint folder list dialog to create
and modify the Autoprint folders. See section 9.3 on page 71 for
further details.
Format setup
This button activates the Format setup dialog to create and
modify the format folders. This function is explained at section
9.6 on page 82.
Package setup
This button activates the Packaging setup dialog to create and
modify the packages. This function is explained at section 8.2 on
page 59.
These two icons are related to the Order Processor options.
To have these buttons active, it is necessary to get the optional OrderMakerMF® installed. See
the chapter 15 “Managing multiformat orders: OrderMakerMF®” on page 139 for further details.
26
Chapter 6
Loading and printing an image
6.1.2 View Bar
The View Bar is shown in fig. 16.
Fig.16 - View bar
The icons of the View Bar are intended to perform basic operations on the images, like viewing
and zoom operations, rotating and inverting the image. These functions are explained in details
in the following sections:
-
Section 6.3 “Viewing the image and image informations” on page 31.
-
Section 6.9 “Rotation and inversion” on page 43.
6.1.3 Resize Bar
The Resize Bar is shown in fig. 17.
Fig.17 - Resize bar
The icons are intended to perform basic cropping and resizing operations on the image. Resize
Bar functions are explained at section 6.8 on page 40.
6.1.4 LaserLab Bar
The LaserLab Bar is shown in fig. 18.
Fig.18 - LaserLab bar
27
Chapter 6
Loading and printing an image
Use the first three icons to launch a print, either a single one or multiple prints, or a pack of prints. For further details, see the following
sections:
-
Section 6.4.2 “Multiple prints” on page 33.
-
Section 6.4.3 “Pack printing” on page 34.
The other icons are intended for settings of hardware or some direct command to the system.
The Writing System icon is enabled only it the optional writing system component is mounted on the equipment.
This button enables the Paper box dialog for selecting the paper box to load. See section 7.1 “Selecting paper magazine and profile” on page 51, for further details.
This button enables the Processor status window, showing several parameters
about the status of the RA4 processor coupled to the Laserlab. For further details,
please consult the processor user manual.
This button enables the Load paper function, useful when beginning a new roll of
paper. For further, see section 7.4 “Loading Paper” on page 54.
This button, if selected, resets completely the printer settings.
This button starts the paper calibration procedure. See chapter 10 “Paper calibration:
daily alignment and creating new profiles” on page 93 for further details.
6.1.5 Color Adjust Bar
The Color Adjust Bar is shown in fig. 19.
Fig.19 - Color adjust bar
Through the icons in this bar are deceased the functions for correction in color, density, gamma
and others. Every option about color correction is explained at section 6.6 “Images density and
color correction” on page 37.
28
Chapter 6
Loading and printing an image
6.1.6 Processor Status Bar
The processor status bar is shown in fig. 20.
Fig.20 - Processor status bar
This window gives indications about the state of several parameters of the processor: temperature of the chemical and of the dryer. Also, it is also possible to access the processor settings
through the Setup button.
Please consult the processor user manual.
6.1.7 Status Bar
Once an image has been opened, the Status Bar shows several image properties. The Status Bar
features are shown in fig. 21.
Fig.21 - Status bar
-
The on-screen densitometer is related to the mouse position over the opened image.
-
The frame in the center gives the current image dimensions (in mm).
-
At the right there are informations about the paper: the type of paper loaded and the
left paper in the current roll.
29
Chapter 6
Loading and printing an image
6.2 Open file and create a new image
Open. Select the icon of the Main Bar shown on left. You are presented the menu
shown in fig. 22 on page 30. From here it is possible to select the peripheral on which
the file is placed and the file to open itself.
From the bottom of the
pull-down menu it’s
possible to select the
graphic format type of
the image to open; but
the graphic format recognition procedure remains automatic.
Fig.22 - Opening files
Select the image to open and click
Open; The Convert to profile window
appears, as shown in fig. 23. Click OK
to accept the default options.
Fig.23 - Color profile selection
Color profiles management is explained at chapter 11 “The ColorMap Color
Management System” on page 101.
30
Chapter 6
Loading and printing an image
New image. By selecting the icon shown on
left (Main Bar) you are presented the window to create a new image (fig. 24).
Image size: is a menu that allow you to select one of
the defined formats.
Width - Height (mm) Here, it is possible to type in
directly the needed size, without using standard sizes.
Printer size. Sets automatically the size to the maximum allowed from the printer (width=762mm(always) Height = loaded paper)
R: G: B: or Color allow to define the color of the
background. By using R, G and B the color can be
changed manually (all R=G=B=0 means black and
R=G=B=255 means white). Color allows to select
one of the defined colors or grey level.
Fig.24 - New image dialog
Warning: Although it is possible to open and create more than one image in
the work window, each one uses more and more of the computer’s resources,
up to a critical point where it will be impossible to continue. For this reason,
we suggest to open only the images on which you are effectively going to use.
6.3 Viewing the image and image informations
The first part of the View Bar is intended for this operations (see fig. 25).
Fig.25 - View functions
Zoom out: it reduces the magnification of the image on the monitor.
Zoom in: it increases the magnification of the image on the monitor.
Zoom%. The box placed on the right of the two zoom keys shows the image
magnification. It is possible to type any value inside the box (press ↵ENTER
to confirm) or selecting a defined value from the corresponding pull-down
menu.
31
Chapter 6
Loading and printing an image
Zoom fit: automatically fits the image to the entire screen.
Informations about the image. Select this button to let an image information dialog
appear (fig. 26).
Fig.26 - Image properties
6.4 Image printing
6.4.1 Printing the current image
Print now! Select this button from the LaserLab Bar.
32
Chapter 6
Loading and printing an image
Or select
the Laser Printer > Print Now!
from the main menu (see fig. 27) or the function key F12:
the LaserLab will take the image as shown and send it to
the printer.
During exposure on the status bar (top of image) the message: @ in progress #1 will be displayed.
Fig.27 - Laser printer menu
It is possible to select a new image during an exposure and give it the command Print now or F12. In this case the message Waiting is displayed on the
status bar till the previous exposure is completed.
6.4.2 Multiple prints
Print copies. If the current image must be printed in more than one copy, select this
button from the LaserLab Bar.
Or select
Laser Printer > Number of copies...
from the sub menu. The Select number of repetitions
window shown in fig. 28 will appear. Input the quantity of
prints that are required, and select OK to launch the print
cycle.
Fig.28 - Multiple prints
Attention. This function is intended to print one single image on every sheet.
This could cause waste of paper if image dimensions do not match exactly the
paper band in use.
To pack the copies in a single sheet, see section 6.4.3 “Pack printing” on page
34.
33
Chapter 6
Loading and printing an image
6.4.3 Pack printing
Pack printing is the repetition of the same print. All the pictures are placed on a same sheet instead of using a sheet for each one.
Attention: this function will work only if the image format is small enough to
fit one or more times in the selected format of the sheet.
To use it, select the Print pack of images button placed on the LaserLab Bar.
Or select
Laser Printer > Print Pack of images...
or the function key F9: the Print pack repetitions dialog (fig. 29) appears.
Fig.29 - Print pack repetition dialog
The area on the right represent the layout of the pack. The red rectangle is the total sheet area,
while in blue is indicated the used area. The yellow lines represent the separation between the
copies.
For great number of repetitions, not all the copies will be shown in that area.
The number of pages is shown in the Total pages field, at the top right corner
of the window. Select First to see the layout of the first page (being the same
of all the others, except for the last one). Select Last to see the layout of the
last page.
34
Chapter 6
Loading and printing an image
The available options are:
Repetition
Sets the number of copies in the pack. Modify the number
through the arrow buttons or the mouse wheel. The print layout
will be adjusted as well, and the result will be immediately visible in the window.
Full size
As many images as possible are placed on the maximum transportable format. In this mode it is allowed to eventually change
the orientation of some copies to minimize the waste of paper.
For example, in fig. 29 the last two copies on the left are rotated
of 90°.
Cutmarks
Adds the cutmarks between copies to the layout (see 7.5 “Programming cut bars” on page 26).
Space
Selects the space in pixels (1pixel = 1/10mm) between the copies.
Columns
Use this option to limit the maximum sheet length to a fixed
number of columns.
HSCutting Station
Fits the layout to be managed by the Polielettronica HS Cutting
Station (see chapter 14 “HS Cutting Station” on page 117). In
that case all the copies have the same orientation.
Select Start to launch the print cycle.
6.5 Creating a photo index (index print)
It is possible to generate automatically an index of the images contained in a folder or an index
of some selected images.
To start this process it is necessary to have an image shown on the window of
ImageLab.
The image is needed to define the size of the index and to give, if it is needed,
a background to the index. If there are not image available or you aren’t able
to create a new one see 6.2 “Open file and create a new image” on page 30.
35
Chapter 6
Loading and printing an image
Select the menu items
Image > Generate index...
or the function key F2, the Open window (fig. 22 on
page 30) window will appear. It is possible to select
the path, the folder that contains the images and then
all the images to be included in the index.
Select now Open, the Generate index window will
appear as shown in fig. 30.
On it the following options are available:
Fig.30 - Creating photo indexes
Information text
Gives the text contained in the index header. Select the Add
header box to use this function.
Image size
Allows to select one of the defined sizes. We suggest to use
Automatic, in this way the size of the icons is the maximum
allowed on the index.
Attention! By using a fixed defined size not all the icons could be arranged on
the index area.
Page to load
(only if multipage):
36
Chooses which page of the image load and open to generate the
index (if the source is a Photo CD or similar).
Write file name
Add on bottom of the generated icon the name of the source file.
Interpolation:
Selection of the interpulation method for the thumbnails.
Add header
Enables the title presence on top of the index, by default the text
is the date, if an extra description is needed write it in the single
Chapter 6
Loading and printing an image
line window named Information text.
Auto orientation
Turns the image to match it with the frame of the index. The
frame of the index is always horizontal.
Add black frame
Adds a black frame around each icon of the index, to make it evidence.
Crop to fit
adapts the image to the size of the index icon, eventually cropping it.
6.6 Images density and color correction
The ImageLab software allows to correct an image before printing it. This correction is realtime shown on the monitor. The Color Adjust bar, shown in fig. 31, is placed at the bottom left
of the monitor.
Fig.31 - Color Adjust bar
Available commands allow to modify (from left to right in the figure):
Brightness;
Contrast;
Gamma;
Cross-contrast;
To set the desired values use the arrows placed at the right of each box, or select the box and
rotate the mouse middle wheel, or just type directly the value in the box. The correction is in
density if the DENS button is selected. It is possible to correct the single color by selecting one
of the C, M, Y buttons.
For example, load an image and set to 0.85 the cross contrast and to 0.95 the γ value. The image
saturation will immediately increase.
To view the modification the Enable button has to be selected. Deselect the same to view the
original image. To delete all the changes select the Reset button.
37
Chapter 6
Loading and printing an image
The modifications will be brought only to the printed image, not on the original source one.
6.6.1 Image menu correction options
Other correction options are available in the
Image menu. Select it from the main menu
bar, as shown in fig. 32.
Convert to grayscale: converts the current
image to B&W (grayscale).
Color brightness: changes the color saturation of the current image to reach more (or
less, if desired) brilliant colors. It is possible
to introduce a value from -30 to 100. A negative number means the saturation to decrease, a positive number increases the
saturation.
Convert to wide RGB: applies to the current image a color profile in order to have
the monitor colors on the printing paper.
Convert with ColorMap: applies the ColorMap procedure to the current image.
Automatic image correction: starts an automatic correction procedure.
Fig.32 - Image menu
The Convert with color map and Profile to profile conversion options are
about the color profile management.
See chapter 11 “The ColorMap Color Management System” on page 101, for
further details.
Attention: all the corrections above described are seen on the prints but they
are not saved on the original image file. To save the changes, use the
Edit > Apply changes or the
File > Save
commands.
38
Chapter 6
Loading and printing an image
6.7 Setting up a correction profile
The correction procedure of the section 6.6 works only on a single image. If the same correction
is required on more images, it is possible to define a correction profile an apply it on them all.
Once the desired correction are applied on
the current image (through the Color adjust bar) to apply the same correction to the
next images to be opened, select
Laser printer > Main paper balance
from the main menu. The Output color
balance window appears, as shown in
Fig.33.
Fig.33 - Output color balance
Select the Get current filtration values button: the previous image correction
values will be automatically applied to the proper boxes.
To restore the original settings, select Reset. When the Enable box and the Apply button are
selected, the window can be closed. All the next images will be printed (both in manual and in
Autoprint mode) with the defined corrections.
To disable the correction select again
Laser printer > Main paper balance.
In the Output color balance window deselect the Enable box and confirm with Apply.
It is possible to save the correction profiles. Select the New button and type the profile name in
the save window.
To recall a previously defined profile just choose it from the Profile pull-down menu.
Attention: the described correction procedure can’t be used for balancing a
wrong paper calibration.
See chapter 10 “Paper calibration: daily alignment and creating new profiles”
on page 93.
Attention: This option, if enabled, is automatically applied to every Autoprint
folder. See chapter 9 “Auto Print and formats” on page 69, for more details.
We suggest to keep this option disabled when it is not used.
39
Chapter 6
Loading and printing an image
6.8 Resizing and basic manipulation (Resize Bar)
In most cases, a newly loaded image is not in the desired printing size and a cropping of the original image could be required. After loading a file, its format is shown in the center of the bar at
the bottom of the window (Status Bar).
In this case (shown on fig. 34) the format is 177,8 mm of
width (horizontal size) and 127 for height (vertical size).
Fig.34 - Image dimensions
The resizing operations are available from the Resize Bar (shown
in fig. 35), the three buttons are Crop Selection, Resize to Fit Paper and Resize Image.
Fig.35 - Resize Bar
6.8.1 Cropping
Crop Selection
Allows to select the section of the image that is needed for the
print.
Select the first button and the Crop size window shown on fig. 36 will appear.
The Choose size from format menu shows the
defined available sizes. The items Width (horizontal arrows) and Height (vertical arrows) allow to insert manually the needed crop size. The
cropping window will be shown as a shaded line
frame. The cropping window follows the movement of the mouse. To change the size of the
cropping frame torn the mouse wheel (middle
button of the mouse), to increase the speed of
the mouse wheel hold the Ctrl key.
Fig.36 - Crop size dialog
40
Chapter 6
Loading and printing an image
When the left button of the mouse will be pressed, the section of the image inside the frame will be saved, and the external part will be deleted.
The cropping operation is shown in fig. 37.
Fig.37 - Cropping example
The option Resize after crop, when selected, resize automatically the selected image after the
crop to the size selected on the Crop size window. The option Fit to window adapts the size of
the cropping frame to show it fully on the image.
To avoid the operation select the Crop Selection button again.
41
Chapter 6
Loading and printing an image
6.8.2 Resizing
Resize to fit paper
The second button of the Resize bar, resizes automatically the image to the maximum allowed size depending
from the paper width in use.
The resize takes effect without making any clipping of the original image.
The resize operation never exceed the paper size or the maximum length of 762mm (30”).
Resize image
The third button of the Resize bar it is used to resize the full
image to any size.
Press the third button to let the Resize image dialog appear (fig. 38).
The Destination size menu allows to select a defined size (see 9.6 “Modifying
and creating formats” on page 82).
Width (horizontal arrows) and Height
(vertical arrows) are updated automatically if a predefined format is selected;
but they can also be modified freely.
The Width<->Height option switches
the height with the width (vertical or
horizontal format) if the image orientation does not match the printing orientation.
The Max size option sets the values to
the maximum print size that the current
loaded paper format allows.
The Cut frame (mm) option eliminates
a frame along the perimeter of the image
after the resizing, useful if the acquiring
system has added a undesired black
frame.
Fig.38 - Resize image dialog
The Crop to exactly fit option adapts the image (by cut) to the printing format. E.g.: let’s suppose to have a square image which needs to be printed on a 20x30. If this option is not selected,
the result from a resize will be a 20x20; if it is selected, a 20x30 will be produced, although the
top and bottom parts of the images will be cut to adapt the image to a rectangular format.
The Border (mm) option, generates automatically a white border (frame) around the image of
the selected thickness, the total size of the image including frame does not change.
The Fill with white option, works in case the Crop to fit option is not selected. It force the final
42
Chapter 6
Loading and printing an image
size of the image by filling the empty space with white. Suppose to have in origin a square image
and the needed size is 30x45 (12x18”); the final result will be a 30x45 where the image is a
30x30, on head and tail will be added white spaces till the length of 45 is reached.
6.9 Rotation and inversion
The View bar contains five icons intended for
these operations (fig. 39). The first two icons do
a specular inversion of the image; the remaining
three do, in order: clockwise 90o rotation, counterclockwise 90o rotation, and 180o rotation.
Fig.39 - Rotation and inversion options
Flip Horizontally. Specular (horizontal) inversion of the image.
Flip Vertically. Specular (vertical) inversion of the image.
Rotate 90° clockwise.
Rotate 90° counterclockwise.
Rotate 180°.
If it is required to rotate the image of a different angle, select
Image > Rotate > any angle
The Rotation window shown in fig. 40 will appear. In rotation angle, insert the desired angle of rotation (from 0 to
360); then, select one of the two available rotation options.
Fig.40 - Rotation dialog
43
Chapter 6
Loading and printing an image
The Clip image option rotates the image without changing
the graphic format, meaning that the corner will be cut as
shown on fig. 41. This way the printing format will remain
the same as in origin.
Fig.41 - Clip image
The Expand image option rotates the image modifying
automatically its format, so that no corner is cut (see fig.
42). Of course, the printing format will be greater than
the previous one; you can see it on the window’s bottom
bar (see fig. 34 on page 40).
Fig.42 - Expand image
Background color. Image rotation usually leaves some free space (colored in black in fig. 42
and fig. 44). Background color can be selected by acting on the R, G, B boxes or pressing the
Color selector button.
6.10 Filters
Attention: the functions described in this section are available on most image
processing commercial programs. For a better description of the filtering functions, please consult your software user manual.
To view all the available filters, select the Filters menu from the main menu bar of the ImageLab window, as shown in fig. 43.
44
Chapter 6
Loading and printing an image
Fig.43 - Filters menu
The following functions are available:
Sharpen. Usually, the images acquired in digital systems require a detail sharpening. This is particularly
necessary if the image needs to be or has already been
interpolated through change of format or resizing. The
sharpen effect can be selected for up to seven levels; we
suggest to run some tests to familiarize better with this
function. To activate this function, select the
Filters > Sharpen
menu item or the function key F4: the window shown
on fig. 44 will appear, inside of which it is possible to
run and select the depth of the sharpening.
Fig.44 - Sharpen dialog
We suggest to make several tests on different images, to take confidence with
this function and select the best sharpen level that meets your request
Smooth. The Smoothing parameters window is shown in fig. 45.
Available values for the Smooth factor parameter are 1 to 4.
Fig.45 - Smoothing
parameters dialog
45
Chapter 6
Loading and printing an image
Median. The Median filter window is shown in fig.
46. It is possible to set the dimensions (Width and
Height) of the filter matrix.
Fig.46 - Median filter dialog
Unsharp Mask. Selecting this item, the Sharpen options window appears (fig. 47).
Fig.47 - Sharpen options dialog
In this window it is possible to preview the effect of the procedure on the image.
Panning the image. Place the mouse pointer on the frame and keep pressed
the mouse left button. The pointer arrow becomes an hand and allows to pan
the image.
When the pointer becomes an hand, the frame shows the image as it is, without
the sharpen effect. When the left button is released, the sharpen comes active
again. This is useful to compare images with and without the sharpen.
For a better comparison, choose the Zoom between the three values available (1x, 1.5x, 2x).
46
Chapter 6
Loading and printing an image
The available parameters are:
Radius
It gives the dimensions of the area around the “borders” to be
sharpened. This parameter should not be kept too high to avoid
the presences of halos.
Threshold
It gives the “difference” (in color) between pixels to be considered a “border” inside the image. Keeping this parameter near to
zero makes the sharpen more visible, but the risk is to emphasize
the negative grain.
Reduce grain
Micro cleaner
Sharpening can cause the emphasizing of grain and micro defects.
Use these options to reduce this effect.
Suggested values: Radius=0.9, Threshold=8.
6.11 Saving and closing an image
ImageLab is strictly oriented towards image printing, not image altering, as more suitable programs already exist in commerce.
For this reason, when an image is closed the user won’t be prompted to save any changes made,
and the image will be closed without modifying the original no matter what operations have
been executed during work.
Any modification can be saved by selecting Apply in Edit menu then the disk icon
or the Save command from the File menu, or press the button Save on the Main Bar
shown on the left.
To simply close an image, click on the X button on the top-right corner of the window containing the image.
6.12 Preferences configuration
Select the menu item
File > Preferences > General...
47
Chapter 6
Loading and printing an image
The setting window for the preferences will appear (fig. 48).
The item Configuration folder: allows to select the working folder to
save the setting of the packages (see
chapter 8 “Package and School printing” on page 59). The Browse... button allows to select the path where
the folder is placed.
The item Resize to fit interpulation
method: allows to select the method
to be used when the Crop to fit and
Crop selection options are selected
(6.8 “Resizing and basic manipulation (Resize Bar)” on page 40).
Two different options are available:
when reducing or enlarging the image.
Fig.48 - General preferences dialog
Please note that the most accurate interpolation methods (like the bicubic) are
also the slowest ones to be accomplished. On the other hand, fast methods like
the linear are expected to be the least accurate ones.
The item Most recent used files: allows to select the number of recent used files that will be
shown in the File menu item.
The item Options: New Image after crop activates the function generating a new image, after
a Crop selection operation, without changing the original one. Without this option activated the
original image will be modified.
48
Chapter 6
Loading and printing an image
6.13 Function Keys
List of the most important operations direct available from the function keys.
F1
Help
F2
Index (generates a photo index)
F3
Add frame (add a colored frame)
F4
Sharp (contrast mask filter)
F5
Resize (resize to a free size)
F6
Resize to fit paper (resize on loaded band width)
F7
Flip horizontal (reflects the image horizontally)
F8
Rot 90° cw (rotates the image 90° clockwise)
F9
Print pack (print a package of the same image)
F10
File (opens the File menu of ImageLab)
F11
Print number (repeats the print of the current image)
F12
Print now (prints the current image)
49
Chapter 6
Loading and printing an image
50
Chapter 7
Paper loading and management
7 Paper loading and
management
7.1 Selecting paper magazine and profile
ImageLab can manage more than one paper magazine, memorizing the paper type
loaded and the quantity left in each magazine. Select the Paper box button on the LaserLab Bar.
Or select:
Calibration > Paper box
The Paper box window of fig. 49 appears.
Select the desired magazine (from 1
to 8)
Set in Roll length the length (in
meters) of the roll to load.
Select from the Paper Width menu
the width of the paper to load.
Select from the Paper profile menu
the name of the profile corresponding
to the paper type which is going to be
used.
Fig.49 - Paper box dialog
Warning! The profile selected here is what the LaserLab will actually use to
print!
Select the New roll command ONLY if a new roll is about to be loaded; a confirmation request
will appear, select Yes there. Exit, and return to the main window.
Insert the paper magazine in the LaserLab, hook and close the panel, then select Laser lab >
Load menu of the main window. Confirmation will be requested: select Yes. (See also 7.4
“Loading Paper” on page 54).
51
Chapter 7
Paper loading and management
7.2 Centering and Aligning images
After a mechanical or electronic service, it might happen that prints have a white border on
them, or the image is not perfectly centered on the paper.
Select
Calibrations > Transport...
from the main menu bar.
To correct the centering, use the Image centering (mm) parameters on the Transport system
Fig.50 - Transport system dialog
window shown in fig. 50.
The window features a table (Image centering); each row represents a different paper band.
Attention: depending on your printer model, only the printable paper bands
will be available.
The first row is for paper widths from 306 to 508 mm, identified with Width 508mm (20”)
The second row is for paper widths from 204 to 305 mm, identified with Width 305mm (12”)
The third row is for paper width from 153 to 203 mm, identified with Width 203mm (8”)
The fourth row is for paper width from 103 to 152 mm, identified with Width 152mm (6”)
The fifth row is for paper width equal or below 102 mm, identified with Width 102mm (4”)
The X and Y values are referred to the sample image shown in the window. Confront the printed
images and measure of how many millimeters it must be centered horizontally (X) or vertically
(Y). Increase X (Y) to move the image right (down), decrease X (Y) to move it left (up). Note
52
Chapter 7
Paper loading and management
that the parameter X is common for the all the bands (20”,12”,8” 6” and 4”), while Y can be
modified independently for each band.
Attention: the above mentioned parameters are general, i.e. they modify the
setting of the whole printer and on every paper setting.
7.2.1 Transport offset parameters
Once the image is centered, it might be possible to see white borders on the prints, due to positioning tolerance. In this case just set to -1 the Transport offset parameter in the Transport
system window of fig. 50. This ensures the copy to be always 1 mm shorter than the image, always covering the format.
If the parameter is set to positive values the paper results always longer than the image.
Attention: the above mentioned parameters are general, i.e. they modify the
setting of the whole printer and on every paper setting.
7.3 Fine centering and alignment due to paper box position
It is possible for some little alignment error to be seen only on a specific paper box.
When it is necessary to correct a little gap in the centering, due to the
paper box, select
Calibrations > Paper box...
The Paper box window shown in
fig. 51 will appear. Set the Box offset(mm): The correction system is
the same of the one described in 7.2,
but it is related only with the paper
box in use.
Fig.51 - Box offset
53
Chapter 7
Paper loading and management
Every box has its own regulation which is independent from the others.
As described in 7.2, increase X (Y) to move the image right (down), decrease X (Y) to move it
left (up).
7.4 Loading Paper
7.4.1 LaserLab 50 (20”) and LaserLab 76 (30”)
Warning: the LaserLab 50 (20”)can work only if the paper roll is winded
with the emulsion on the outer side.
The use of rolls winded with emulsion on the inner side causes transport problems; the aspiration system is unable to sustain and transport the paper.
Please ensure that Your supplier can procure the rolls winded the right way.
LaserLab 76 (30”) can work with rolls winded with emulsion both inside and
outside (only for 76 (30”) band).
See 13.2 “Managing rolls winded with emulsion inside (LaserLab 30”)” on page 114 for further
informations.
LaserLab 76 (30”) can work with 50 (20”) and 76 (30”) paper boxes. The
box type must be selected before inserting it.
See 13.1 “Using the 50 (20”) paper box on the LaserLab 76 (30”)” on page
113.
Attention: the loading of the paper roll inside the box must be performed in
the darkroom.
The box components are described above (see fig. 52 on page 55):
54
1.
Stepper flange lever.
2
Paper roll flange
3
Paper guides.
4
Stopper lever for locking paper passage.
Chapter 7
Paper loading and management
5
Transport lower roller.
6
Transport upper roller.
7
Opening-locking lever for paper passage.
8
Manual advancement-rewinding knob.
9
Transport roller fitting in lever.
10
Paper guides adjusting knob.
11
Take-up pulley.
To load the paper proceed as follows (see fig. 52):
Fig.52 - Paper box for LaserLab 50 (20”) and 76 (30”)
1) Opening the two side hooks, remove the cover panel; then, rotating the handle (fig. 52 nr.
10) widen the paper guides well beyond the actual width of the paper to be loaded.
2) Lift the lever at the side of the roll-holding flanges (fig. 52 nr.1). In a darkroom, insert the
flanges directly on the roll, then press on the relative small lever to block the flanges themselves.
3) Insert the roll in the magazine, rotate the handle (fig. 52 nr.10) to close the roll’s paper
guides (fig. 52 nr.3).
Warning: Do not exercise excessive force on the guides regulation handle; if it is too hard to move yet the roll isn’t still perfectly in place, rotate
the roll while turning the handle.
4) After the regulation is completed, rotate the handle of a ¼ of a complete turn in the opposite
direction, so that the roll can turn freely.
5) Open the guillotine latch of the paper slit (fig. 52 nr.7 bis) pulling the lever to the right (fig.
52 nr.7). The lever can be locked in this position by pressing on the smaller lever (fig. 52
nr.4) to the left.
6) Let the paper pass below the tenser roll (fig. 52 nr.11) and between the transport roll and
counter roll.
55
Chapter 7
Paper loading and management
7) Let the paper exit from the magazine slit by rotating the transport handle. Take note that the
paper shouldn’t get out of the magazine for more than 1 cm.
8) Close the paper slit by pulling the lever (fig. 52, nr.7) fully to the right then releasing; replace
the cover, locking the two lateral hooks: if these hooks seem too hard to close, the cover is
not correctly positioned.
9) Insert the magazine on the sled inside the printer, press fully until the locking hook engages.
10)Move the lever (fig. 52 nr.9) on the box in loading position, then, rotating the handle (fig. 52
nr.8) counterclockwise, bring the paper to the transport roll. Press briefly the PAPER FEED
button to verify if the paper has been hooked (the handle on the box must turn automatically).
If the paper doesn’t seem to be hooked, advance it a bit by rotating the handle manually,
then test again by pressing briefly the PAPER FEED button.
11)Move the lever (fig. 52 nr.9) in work position, and close the door of the transport section.
Select
Laser printer > Load paper
from ImageLab main menu: at the confirmation request, select Yes. If the paper has been
hooked correctly, the loading procedure is run by eliminating the part of paper that got exposed during the insertion.
7.4.2 LaserLab 30 (12”)
Attention: the loading of the paper roll inside the box must be performed in
the darkroom.
The box components are described above (see fig. 53 on page 57):
1.
Paper height adjustable flanges.
2.
Index point for adjusting paper guides.
3.
Adjustable paper guides.
4.
Manual paper advancement-rewinding knob.
5.
Deblocking lever, for manual rewinding.
6.
Paper roll dispenser with index point for adjusting flanges.
7.
Paper transport roller and counterroller.
To load the paper proceed as follows:
1) Adjust the guides for the selected paper width in daylight (fig. 53 nr. 3).
2) Position a flange on the selected paper width (fig. 53 nr. 1).
3) Take off the hub (fig. 53 nr. 6) and insert the paper roll in the darkroom. Position the second
flange till beating.
4) Insert paper in the box in order to have the emulsion side towards the bottom when it is inserted between roller and counterroller (fig. 53 nr. 7).
5) Trim the paper border in order to have no creasing or tears. Insert the paper between the
guide combs and push it lightly between the rollers till reach the light tight door of the pas-
56
Chapter 7
Paper loading and management
sage slot.
Fig.53 - Paper box for LaserLab 30 (12”)
6) To release the pressure between roller and counterroller just push up the lever (fig. 53 nr.
5) near to the paper manual transport knob (can be turned only counterclockwise to push
the paper out of the box).
7) Turn counterclockwise the knob that turns the hub (fig. 53 nr. 4) of the paper to put it in light
traction.
8) Close the cover verifying by touch that it is well inside the grooves and the latches are
blocked.
9) Once the paper has been loaded, insert the paper cassette inside the guides. Push it till the
clamp blocks it. Close the stop knob.
10)Turn the knob placed on the top of the paper box (fig. 53 nr. 4) till advancing the paper beyond the cutter rollers. Through a little pressure on the PAPER FEED push-button the paper has to go out for a little in the left of the suction plate. Verify the knob to turn by itself.
If the paper does not seem yet locked, turn a little the knob and push again the PAPER
FEED button.
11)Close the doors. Select
Laser printer > Load paper
from the main menu. Confirm with the Yes command. If the paper is correctly locked, the
first fogged piece of paper will be loaded and eliminated.
57
Chapter 7
Paper loading and management
58
Chapter 8
Package and School printing
8 Package and School printing
8.1 How to start
The first important thing is to have a sketch or a drawing with the exact size of the whole package and the size of the single formats that compose it.
On fig. 54 is shown a sample of a theoretic package, start now by setting the single formats (see
Fig.54 - Example of a package
9.6 “Modifying and creating formats” on page 82).
It is suggested to set up the needed formats by giving them mnemonic names that make their
identification easy; for example Pkg_89x127_Vert. or Pkg_89x127_Hor. Both the names
shown on first characters that the format is set to be used in a package, the numbers identify the
size and the last characters indicates the orientation of the format.
To work easily we suggest to use the capability to assign mnemonic names to the format.
8.2 Package set up
The examples that follows are installed together with ImageLab software, the operator can follow these instructions step by step.
Select the menu item
File > Image processor > Package....
The package configuration dialog window (Packaging setup) will be shown (see fig. 55)
59
Chapter 8
Package and School printing
The item Package name: indicates the reference name of the composition we are setting, to cre-
Fig.55 - Packaging setup dialog
ate a new package select New and then type the name. The values Package dimension (mm)
indicate the whole package.
Put the attention now at the real generation of the package. The reference is the drawing on fig.
54 on page 59, select the first programming row (identified with 0) the columns X(mm) and
Y(mm) indicate the coordinates where the format has to be placed, the values will be 0 and 0
because the top left corner of the package is the start point.
The column Format: allows to select the format to associate at the row, it is a curtain menu, by
clicking on the down arrow the list of the formats available will be shown, select the
Pkg_182x254_Vert.
The columns Number of repetitions:, Horizontal: and Vertical:, allow to set automatically
the repetition, if needed, of the same format, if only 1 image is needed set Horizontal and Vertical to 1.
Check now the second row, identified with 1, the source point for the second image will be
X=182 and Y=0.
The X value is 182 because the first format has used 182mm of paper from the left edge of the
60
Chapter 8
Package and School printing
print. Y is 0 because the vertical source is the top edge of the print.
The format to select is the Pkg_127x178_Hor as shown on the drawing, the repetition is vertical
1 and horizontal 1 because only 1 image is required.
Have a step now to the fourth row (identified with 3). The source point, to place the four images
44.5x63.5, will be X=182 (first image 182x254) + 89 (third image 89x127))=271mm. While
Y=127 because the source point is 127 mm lower then the top edge of the paper.
The repetition for row number 3 has to be set horizontal 2 and vertical 2, as you can see on the
drawing (see fig. 54 on page 59).
To continue this operation or modify the existing package, it is enough to remember that the
source point is the left top corner of the print.
In a similar way to photo indexes (see 6.5 “Creating a photo index (index print)” on page 35),
it’s possible to set a separation thickness (in pixels) between two images using the Space between formats field. Cutmark setting is also available (Use cutmarks). For more informations
see 9.8 “Programming cutmarks” on page 90.
Don’t forget to calculate the total length of the package and put it in the Package dimension(mm):. Be careful in exactly matching the most external images with the package size, otherwise they’ll be lost.
The package can be built starting from a background image (by Use background command).
Its path is selected by Browse command. If Resize to package size option is enabled, the background will be automatically resized to the selected package size. On the other side, one can enable the option called Use dimension of background image to resize the package to the
background.
The Auto orientation option, if selected, allows the package automatic orientation during the
print in order to minimize the waste of paper. See also 9.6 “Modifying and creating formats” on
page 82.
Attention! always select Save before exiting, otherwise the new setting will be
lost.
8.3 Manual and automatic printing of a package
The manual printing allows to verify the result, on the monitor, of the package being generated
on previous paragraph.
Load an image, it will be used to generate the package. Select the menu item
Image > Generate package....
The Process package dialog window for package generation will appear (see fig. 56).
61
Chapter 8
Package and School printing
Select the down arrow on the dialog window to show the list of the available packages. In the example the package Sample1
has been selected.
Select Ok to generate the package, few second will pass before the generated package
will appear on the monitor.
Fig.56 - Package generation
If it is not completely shown (usually the zoom factor exceed) select the zoom to
fit icon shown on side (zoom fit).
The result should be the one you can see on fig. 57. To have a better view and make the sample
understandable, each single size has been generated with 1mm of white border, in this way is
possible to appreciate the separation between the images.
Fig.57 - Finished package
It is suggested to continue by making some tests, modifying the package Sample1 and generating new formats.
The automatic print can be set as described on chapter 9 “Auto Print and formats” on page 69.
The difference, between standard format auto print and package auto print, is the selection of
62
Chapter 8
Package and School printing
the column Package in the AutoPrint folder list window. On this column is possible to select
which package will be associate to the automatic print folder, it is important select none as format in the Format column (see fig. 66 on page 72).
8.4 Package inserts, photocards, calendars
While setting up the package, one or more images can be added as inserts. Select
File > Image processor > Package
menu. The Packaging setup window (see fig. 55 on page 60) will appear.
Select Inserts: as in fig. 58, the Inserts window will be shown. Up to
five inserts can be added (by selecting Enable box for each one). Every insert is to be specified in
position X(mm) e Y(mm) with respect to package origin point, as described in 8.2 “Package set up” on
page 59. Select image format by
Format pull-down menu, and the
related path, by Browse command,
showed in the Image field. Select
OK back to Packaging setup window and complete the package. Be
careful that the formats to be added
don’t cover the previously placed
inserts. For example, if package
size is as in fig. 54 on page 59, and
its only insert is 182x254, the origin
for the first format should be
X=182, Y=0.
Fig.58 - Inserts dialog
Manually or auto print of a package with inserts is accomplished as described in the previous
paragraph. In the following (fig. 59 and fig. 60 on page 64) are shown two packages with one
insert (the image on the left).
63
Chapter 8
Package and School printing
Fig.59 - Package with an insert
Fig.60 - Another package with an insert
64
Chapter 8
Package and School printing
Photocards and calendars are made in this way,
simply using a proper text as an insert. The fig. 61
shows an example of a photocards.
Fig.61 - Photocard
Attention: Polielettronica S.p.a. does not supply any tool for making photocards or calendars.
65
Chapter 8
Package and School printing
It is possible to insert an image
with a shading border. For example, open the Calendar200x.jpg
image, found in the F:\Greetings. Then select
Image > Generate Package
from the main menu. In the Process package dialog select Calendar&Mask from the pulldown menu. Confirm with OK.
After some seconds the subject
will appear under the shading
frame, as shown in fig. 62.
In the same folder the
Calendar200xMask.jpg
is
found. This image is grayscale
frame with a shaded border
where the subject is to be placed.
This mask will not be printed as it
is only used to define the frame.
In the darkest zones the foreground is visible, but not the subject. In the middle zone both
images are visible, while in the
clearer one is visible the subject
but not the foreground.
66
Fig.62 - Calendar
Chapter 8
Package and School printing
The Calendar&Mask packaging setup is shown in fig. 63.
Fig.63 - Packaging setup for a calendar
This option is enabled by selecting the Enable foreground image box in (4)Foreground image frame of that window. In this frame it is possible to select both the foreground (Image) and
the border (Mask), by using the Browse command.
Attention: the subject and the frame must have the same format and the same
dimensions (rounded to 1mm, i.e. 10 pixels). If it not so, an error message will
appear.
8.4.1 Different images in the same package
The example above discussed is related to a package featuring only one image repeated several
times. It is possible to create packages including up to five images. Refer to the Packaging Setup window of fig. 55 on page 60. Enable the Different images frame through the Enable box.
The column ImageID(1÷5) will be highlighted. Insert in this column the number of the desired
image.
67
Chapter 8
Package and School printing
The image number gives the arriving order of the images in the LaserLab print
spooler.
8.4.2 Printing text insertion in the packages
In the Packaging Setup window (see fig. 55 on page 60), selecting the (5)Text command allows to include in the prints the two text lines coming from the file name:
T1_text1_T2_text2_cpy0000
Attention: it is not possible to insert text in the images through the ImageLab
software. The above described command only shows on prints a text already
present. See Digital Imager instructions for more details.
When the Text command is selected the dialog window shown in fig. 64 appears. The dialog is divided in two sections, each one is
related to one row of text. It is possible to set:
The position (X and Y).
The dimensions (Width and Height).
The Color of the frame including the text line.
The angle of rotation of the frame including
the text (only multiples of 90°).
The font of the characters.
Select the EXT box to keep the text from the
original file name (T1 and T2, if present).
Fig.64 - Text dialog
The only text option accessible through Imagelab is to write the file name.
In this case deselect the EXT box and check the Text is filename one.
68
Chapter 9
Auto Print and formats
9 Auto Print and formats
9.1 Introduction
In section 6.4 “Image printing” on page 32, is explained how to print single images, in one or
more copies.
To manage a typical work flow, requiring to print a large amount of images all in the same format, the Autoprint function is available. In this mode of operation, an ImageLab internal program called Print Spooler scans continuously a set of folders, called Autoprint folders, takes
the images from each folder, and print them according to the format and the other options stored
in the folder itself.
In ImageLab are already set many Autoprint folders, responding to the most
common printing requirements.
To create or modify Autoprint folders see section 9.3 on page 71.
To print images in Autoprint mode just copy them in the folders of the desired format. Use the
Copy and Paste Windows® functions or drag and drop the images from a window to the ImageLab one.
It is possible to copy in the Autoprint folders not only single files, but whole
image folders.
Attention: If the LaserLab is connected to the Polielettronica Digital Imager,
many functions described in this chapter are fully automatized. Please refer to
the Digital Imager instructions manual.
69
Chapter 9
Auto Print and formats
9.2 Starting, Completion, Stopping
Selecting the icon shown on the left (Main Bar) the Image processor dialog window is shown (fig. 65).
Fig.65 - Image processor window
This window allows to start/stop the automatic printing process. Plus, it indicates the state of
printing in each autoprint folder. In the upper part are shown the box and the media (paper type)
currently in use, plus the paper left to be printed.
Each row in the table is related to a different folder. For each folder are indicated the number of
images present, the orders related to that folder and eventually the printing errors occurred.
Attention: the network connection must be available when the Autoprint
starts.
Select Start to begin the automatic printing process. The Print Spooler begins to scan the folders. The green arrow indicates the current folder. The system actually prints the images in the
folder when one of the two conditions is true:
1) In the folder there are enough images to fill a sheet.
70
Chapter 9
Auto Print and formats
2) In a folder a file called EndOfOrder is found. This forces to print all the images in the folder
before the EndOfOrder.
See sections 9.3.10 “End of Order management” on page 78 and 9.5 “Autoprint orders separation” on page 81 for further details. It is always possible to force the print of the images in all
the folders simply selecting the Complete button. All the images found in the folders by the
Print Spooler will be immediately printed.
To stop the automatic printing, first select the Stop command, then wait for the End command
to be available. The arrow stops near to the last scanned folder and becomes red. This will be
the starting position when the Autoprint cycle will be started again.
The Status box shows the current status of the automatic print, which can be one of the following:
1) Waiting for Images or orders...: there are no images to print or there are not enough to
fill a sheet (see next paragraph). Use the Complete command to force the printing of the
images left.
2) Processing: the images are being processed for the print (see 9.6 “Modifying and creating
formats” on page 82)
3) Printing: the images after being charged and processed is on print.
When it is necessary to repeat the print of the same image (quantity), the name of the image
has to be modified: add to the name the following characters: cpy000 where 000 is the amount
of needed prints. The quantity must be required by using always 3digits, if five copy are needed
the correct message is cpy005, if the system finds cpy5 the command is ignored and only one
copy will be printed. The maximum value allowed is 999. Example of correct name: the original
file name is PIPPO1, to get 35 copy the modified name could be cpy035PIPPO1 or
PIPPO1cpy035, also cpy035 is a valid name to get the correct amount of prints.
Attention! By default, the printing operation deletes the printed files from the
folder.
It is possible modify this setting, forcing the already printed files to be moved to a subfolder of
the printing folder. See the Move item described at section 9.3.11 on page 78.
Tip. It is possible to customize the automatic print. Depending on the different
jobs or different operators, it is possible to group one or more folder, and activate them all together by pressing one of the numbered buttons in the Automatic print window.
See 9.3.12 “Workflow management with Autoprint” on page 78.
9.3 Automatic printing folders options
Press the button shown on the left (Main Bar), or select the
File > Image processor > Autoprint folders
menu. The Autoprint Folders list dialog of will appear. From here, it is possible to create, de-
71
Chapter 9
Auto Print and formats
fine and enable the automatic print folder. The window consist basically of a table. Each row of
the table is related to an autoprint folder. Each cell of a table can be double-clicked to access
several features explained in the following.
Attention: all the modifications made in the Autoprint folder list window must
be confirmed with the OK command. If the window is simply closed, the modifications will be discarded.
..
Fig.66 - Autoprint folder list window
9.3.1 Folders enable/disable
Double-clicking on the first column (Status), one can enable or disable the folders. The cell features a green square (On) if the folder is enabled, or a red square (Off) when disabled. If a folder
is disabled, the print spooler will simply ignore the files stored into it.
72
Chapter 9
Auto Print and formats
9.3.2 Folders path
Double-click on the Folder name (second column). The Select directory
window of fig. 67 appears.
In this way it is possible to assign the
desired path to a certain folder.
A path is valid if it is logically connected to the system (local or network
connected).
Fig.67 - Select directory dialog
9.3.3 Job type and name
Double-clicking on the Job type column allows to define the Job type for a certain folder. The
JobName cell changes together with the Job type, as different Job types present different features. Three options are available:
Job type
JobName
Package
13x18Logo
Format
203x254 (8”x10”) The folder is matched to a Format.
(none)
(none)
The folder is matched to a Package.
No Job type matched to the current folder.
If a format is matched to a folder, all the images to be transferred into that folder will be printed
in the format associated to the folder itself. If a package is matched to a package, the print spooler will collect the images in the folder to create the defined package. Selecting (none) no format
is associated with the folder; each image is then printed in the original format in which it was
saved. See the next section to know how to match packages or formats to the folders.
9.3.4 Matching a format or a package to a folder
As described in 9.3.3, if the Job type of a folder is Format, the corresponding JobName field
features a yellow square with a F inside. Double-click on this field to let the Format setup di-
73
Chapter 9
Auto Print and formats
alog appear (fig. 68).
Fig.68 - Format setup window
The desired format can be chosen from the list placed on the left side of the window. Selecting
an item of the list, all the related format features will be shown in the window.
The format name (Job name) is only a mnemonic. Please refer to the Format
setup window to know exactly all the format features.
The right part of the window is about creating a new format and will be explained in detail at section 9.6 on page 82.
If the Job type of the folder is Package, the corresponding JobName field features a green
square with a P inside. Double-click on this field to let the Select package dialog appear (fig.
74
Chapter 9
Auto Print and formats
69).
Fig.69 - Select package dialog
Select from the list the package to be matched to the current folder. Press OK to confirm or
Cancel to exit the window without modifications.
See section 8.2 on page 59 to learn how to create packages.
9.3.5 Printing the folders in packs
If the current folder has a format being less then an half of the height of the loaded band, the
system can place more than one print on the same sheet to minimize paper waste. Double-click
on the cell placed on the Pack column to let the Select pack type dialog appear (fig. 70 on page
76).
75
Chapter 9
Auto Print and formats
Four options are available:
1) None: each image is printed on a separate sheet, no matter how much paper is
wasted.
2) Vertical: the images are positioned vertically, until the height of the paper is
reached.
3) Full size: as many images as possible are
placed on the maximum transportable format.
4) Continuous: This pack is used to cut
prints with cutters different from Polielettronica HSCutter. Contact our technical staff for further informations.
5) HS cutter: the resulting layout is fit to be
processed by the High Speed Cutter. See
section 14.7 “Autoprint and format settings
for HS Cutter” on page 127 for further informations.
Fig.70 - Select pack type dialog
9.3.6 Shears configuration for HSCutter
Double click on the Shears column to match a shears configuration to the current autoprint folder.
This argument is related to the HSCutter device and it is explained at section
14.8.2 “Shears simulator and Autoprint” on page 132.
9.3.7 Limiting the maximum transport length
In same cases it could be useful to limit the maximum transport length. This operation is accomplished by limiting the number of columns present on the same sheet (this does not produce
waste of paper).
Double-click on the Col column to let the Insert
number of columns window appear (fig. 71).
Type the desired number or select Automatic
(default) to let the system fill the sheet with the
maximum allowed number of columns.
Give OK to confirm the modifications, Cancel to
discard them.
Fig.71 - Insert number of columns
dialog
76
Chapter 9
Auto Print and formats
This command is applicable only if the Full size pack is selected on the Pack
column.
9.3.8 Spacing the copies and/or adding cutmarks
It is possible to select the type and the size of the separation between the copies when they are
placed in a pack: blank space or cutmarks. Double-click the cell on the Cutmark column to toggle between the two options Space and Mark.
The settings for the cutmarks are explained at section 9.8 “Programming cutmarks” on page 90.
If the Space option is enabled, type the desired amount of blank space in the box Space between
copies (pixels), placed at the window bottom.
Please note that:
1 pixel = 1/10mm for the printers with 254dpi resolution. That is, if a blank
space of 0,5mm is required, it is necessary to introduce 5 pixels.
1 pixel = 1/12mm for the printers with 305dpi resolution. That is, if a blank
space of 0,5mm is required, it is necessary to introduce 6 pixels.
9.3.9 Choosing the paper box for a folder
Double-click on the Box column to let the
Select box dialog appear (fig. 72).
In this window it is possible to match a box
(and a paper type) to a specific folder. If the
folder has to be printed regardless from the
paper used, select Any mounted box (default).
Fig.72 - Select box dialog
77
Chapter 9
Auto Print and formats
9.3.10 End of Order management
To set the separation among orders, double-click on the EO column to toggle between the values Yes and No.
EO = Yes
The print starts as soon as an EndOf Order file is encountered.
EO = No
The print starts when the format is completed.
See section 9.5 on page 81 for further informations about order management
and separation within the Autoprint function.
9.3.11 Destination of printed files
Double-click on the column Move to toggle between the Mov and the Del options.
If the Mov option is enabled, the printed files are not deleted but moved to a subfolder of the
print spooler format folder called Moved.
Attention: The Moved subfolders are not automatically deleted from the LaserLab. If this option is enabled, we suggest to periodically clean up the subfolders, to avoid the risk of filling the hard disk.
If the Del option is enabled (default choice), the printed files are deleted.
9.3.12 Workflow management with Autoprint
It is often requested to launch the print not of all folder, but only a specific group of them, depending on the job or the operator. This is accomplished by the Workflow function.
In the Automatic print dialog of fig. 65 on page 70, near the Workflow item, are placed ten
buttons, numbered from 1 to 10. Each button can be bound to a folder, or a group of folder.
When the button is pressed, all the folder in the related group are enabled in the automatic print
process.
78
Chapter 9
Auto Print and formats
Each button (folder group) can be
identified by a description. For example: “Lucid 300 paper”, or “image correcting operators” or “professional
opaque print”. Use the Setup... command placed on the right of the ten buttons. The Workflow setup dialog
appears, as shown in fig. 73. Type the
comment near the button to be enabled.
The buttons can be enabled both from
this dialog and from the Automatic
print one (fig. 65 on page 70).
Fig.73 - Workflow setup dialog
Give the OK command to confirm the
modifications, or the Cancel command
to discard them.
To bind a folder to a button, double-click on the
WF column of the Autoprint folder list (fig. 66 on
page 72). The Select workflow window appears,
as shown in fig. 74.
The selected workflow will be coupled to the current folder. Selecting Any keeps the folder always
enabled without reference to any button. The selected value is shown in the WF column.
Fig.74 - Select workflow dialog
9.3.13 Creating or deleting an AutoPrint folder
To create a new folder, select the Add button found on the lower left corner of the Autoprint
folder list dialog (fig. 66 on page 72). A new row will be added at the bottom of the list.
First select the new row. The new folder is not enabled by default (Off on the Status column)
and the Folder field displays (Empty).
79
Chapter 9
Auto Print and formats
Fig.75 - Select directory dialog
Double-click on the Folder column. The Select directory dialog appears, as shown in fig. 75.
Reach the desired folder and
then click select to add it the list
of the available ones. If the folder does not yet exist, it can be
created on the fly by selecting
the Create New Folder icon,
then typing the format to bind to
it as its name.
Warning: The name is not the actual format, but simply a reminder to the operator about which format is bound to the folder.
In the row related to the new folder, now the new path and name is shown
(Folder column). From now on it is possible to give to the folder all the desired features, as described in the previous sections (9.3.1 - 9.3.12).
1) The new folder is disabled by default. Enable it by double-clicking on the Status column
(section 9.3.1 on page 72).
2) Decide if matching the new folder to a format or a package by double-clicking on the Job
Type column (9.3.3 on page 73).
3) Assign the specific package/folder by double-clicking on the JobName field. See par.9.3.4
on page 73.
4) Set the pack printing, if desired, by double-clicking on the Pack column (None is the default
option). See 9.3.5 on page 75.
5) Set the other folder properties by double.clicking on the proper columns. Properties include:
cutmarks, paper box, printed files destination, workflow management and others. Refer to
the proper sections.
To delete a folder, select the corresponding row and press the Delete button. Give OK to the
confirmation request.
9.4 Unprintable files management
Autoprint folders can include files that are not printable for several reasons: for example, files
that are not images or images in not a supported format.
80
Chapter 9
Auto Print and formats
View these files management options through selecting the item:
File > Image processor > Unprintable files options...
The Unprintable files options window is shown in fig. 76.
Fig.76 - Unprintable files options dialog
Unprintable files destination folder: select the destination folder for the unprintable files acting on the pull-down menu.
Enable unprintable files relocation: if this box is selected, the unprintable files will be relocated in the destination folder. If the box is not selected, the unprintable files will be left in the
original autoprint folders (default option).
Stop if unprintable files are more than: if this option is enabled, the printing process will stop
and produce an error message as soon as the number of unprintable files found will exceed the
number introduced in the box.
9.5 Autoprint orders separation
By default, autoprint system tries always to print first the first arrived files in a folder, when their
number can fill a whole sheet. When two orders come to LaserLab from two different operators
(working on two different folders), this could generate confusion.
To solve this problem, set to Yes the EO column in the Autoprint folder list window (see.fig.
66 on page 72).
From now on, the system doesn’t print any EO enabled folder file until the reception of an EndofOrder called file. This file is present for example in Print Spooler folder, just copy it in your
folder. When EndofOrder file is received, the system begins to print all the files in that folder.
When more than one order is to be placed in the same folder, separate them by using the EndofOrder* called file. The asterisk represents a progressive number, or order reference number.
We suggest again to refer to EndofOrder files present in the Print Spooler folder.
The EndOfOrder is a text file readable by a text editor (Notepad, for example).
9.5.1 EndOfOrder files and index print
A command line can be typed in a EndOfOrder file, in order to generate a photo index (see
81
Chapter 9
Auto Print and formats
also section 6.5 “Creating a photo index (index print)” on page 35). Attention: it is necessary
to press the ENTER key after typing the command. Two options are available. If Index=1 +
[ENTER] is typed, ImageLab will generate the index at the end of the order, and will print the
index after the images. If Index=2 + [ENTER] is typed, only the index (and not the images)
will be printed. This last option could be useful in automatic contact sheet work mode.
Attention: if the LaserLab is connected with the Digital Imager, the option Index=1 is automatically included in the EndOfOrder file when sending the
folders to the printers.
9.6 Modifying and creating formats
The formats, that can be associated to the automatic printing or used in the direct resizing (see
6.8 “Resizing and basic manipulation (Resize Bar)” on page 40), must be operator defined.
Fig.77 - Format setup dialog
Select the
File > Image processor > Formats
82
Chapter 9
Auto Print and formats
menu item, or select the Format button on the Main Bar (shown at the left) to let the
Format setup window (shown in fig. 77 on page 82) appear.
The list on the left is the list of all available format. The current format is indicated in the Format field placed at the top left corner of the window. To select an existing format, just click on
it in the list. All the fields will show the options related to that format.
9.6.1 Format setting: size and border
The options included in the Dimensions (mm) frame of the Format setup window allow to set
the size of the current format. The width is indicated by the horizontal arrows and the height
by the vertical arrows.
The dimensions are in millimeters.
In the Border frame it is possible to add a border to the printed images.
Type a number greater than zero in this box to add a border of the desired
size to the image. The zero value means no border. The border color is selectable by the three color boxes below.
Using the Clone option it is possible to copy the image colors on the added border. This could
be useful when the print has to be processed by an automatic cutter.
9.6.2 Format setting: special attributes
This option is used when the LaserLab is connected to the Polielettronica HS Cutting station.
See section 14.7 “Autoprint and format settings for HS Cutter” on page 127, for more details.
9.6.3 Format setting: scope
In progress. This option will be fully working with the next releases of ImageLab.
9.6.4 Format settings: options
In the following is given the explanation of the fields in the Options frame of the Format setup
window (fig. 77 on page 82).
Auto orientation
to match format
Automatically changes the image orientation to make it match the
printing format orientation. In the example of fig. 78 on page 84
are shown two examples: the top one shows an horizontal image,
a vertical format and the result if the option is left unchecked; in
the second example, the situation is the same but the option is
83
Chapter 9
Auto Print and formats
checked: the result is an automatic rotation of the image to match
the format. If the image is perfectly square or is already in the correct format, this option will not do anything.
Fig.78 - Auto orientation
Cut frame (mm)
Certain images are built with a frame (e. g. photo CD); select this
option to set the width (in millimeters) for frame elimination.
Crop to exacly fit
The image may not be completely in canon with the printing format; for example, the image is in a 1000x1200 pixel format, but
the printing format is be a 20x30. Possibilities are two:
The option is unchecked. This leads, in the example, to a height
of 20, but also two white bands on the 30 side, because the original image cannot cover the entire length.
The option is checked. The result is a full 20x30 format where
two bands of the pictures got cut (at the top and at the bottom) to
fit inside the printing format.
Write file name
This selection adds file name on the print border. It is possible to
select the position of the text. The size of the text is selectable
too.
9.6.5 Format settings: quality
In the Quality frame of the Format setup window (fig. 77 on page 82) are found several options allowing to include image enhancement procedures in the format.
Automatic
84
Leaves fully to the system the image enhancement. The only
option is to choose if the enhancement procedure should be as
Chapter 9
Auto Print and formats
accurate as possible (Best option), being a little slower, or as fast
as possible (Fast option), losing a little quality. The Good option
represents a good compromise between the other two.
If a better control on the enhancement is required, select Custom.
Pre apply sharpen and
Post apply sharpen
The Sharpen or contrast mask can be applied to the image before
or after a scaling/resizing operation. The level of sharpening can
be selected, from 0 to 9.
It is hard to foresee when and how much Sharpen is needed; it depends on the
source and quality of the original image. Only experience in production can
be of help to apply this effect correctly.
Enlarge and
Reduce
These are two pull-down menus that allow the user to select
which interpolation method to use when the image is reduced or
enlarged (see 6.8 on page 40).
9.6.6 Format settings: effects
An effect, or a group of effects, can be applied to the current format. These ones are listed in the
Effects frame of the Format setup window (fig. 77 on page 82).
Convert to grayscale
Converts the images in the current format to B&W.
Convert to sepia
Converts the images in the current format to Sepia. The Sepia
tone is adjustable through the R, G, B boxes.
Auto density
Enables an automatic density correction procedure for the current format.
Auto colors
Enables an automatic color correction procedure for the current
format.
ColorMap
Translates the image using a color management system called
ColorMap. See section 11.3 “The ColorMap system” on page
104, for more details.
Bright colors
By introducing a negative (positive) number, the color saturation
decreases (increases). The valid range is from -30 to 100. Suggested value is 15.
9.6.7 Modifying an existing format
85
Chapter 9
Auto Print and formats
To modify an existing format proceed as follows:
1) Open the Format setup window of fig. 77 on page 82, by selecting:
File > Image processor > Formats...
from the main menu.
2) Select the row corresponding to format to be modified.
3) Modify one or more parameters in the window (refer to the previous sections 9.6.1 - 9.6.6).
4) Select Apply to confirm the modifications.
Attention! any modification made on a printing format will be reported on
any auto print folder which has that format selected!
5) Select OK to close the window.
9.6.8 Creating a new format
To create a new format proceed as follows:
1) Open the Format setup window of fig. 77 on page 82, by selecting:
File > Image processor > Formats...
from the main menu.
2) Select the New command. Type the
new format name in the New window of
fig. 79. Give the OK command to close
the window.
Fig.79 - New window
3) The new format name will appear in the Format setup window list.
4) Modify one or more parameters in the window (refer to the previous sections 9.6.1 - 9.6.6).
5) Select Apply to confirm the modifications.
6) Select OK to close the Format setup window.
7) To bind one or more autoprint folders to the new format, follow the instructions at section
9.3.4 on page 73.
9.6.9 Deleting a format
To delete a format proceed as follows:
1) Open the Format setup window of fig. 77 on page 82, by selecting:
File > Image processor > Formats...
86
Chapter 9
Auto Print and formats
from the main menu.
2) Select the row corresponding to format to be modified.
3) Select the Delete command.
4) Select Yes in the confirm request window of fig. 80.
Fig.80 - ImageLab confirm dialog
5) Close the Format setup window through the OK command.
Attention: If the format has been assigned to an auto print folder it cannot be
deleted!
An attempt to remove a format of that kind
will produce an error message (fig. 81).
Fig.81 - ImageLab error dialog
9.7 Generating photo indexes in Autoprint mode
It is possible to automatically generate a photo index in autoprint mode (see also section 6.5
“Creating a photo index (index print)” on page 35). The index format will be same of the automatic print folder. For example, if the printing format is 13x18 (5”x7”), the index will be generated in one or more 13x18 pages.
Index print is enabled by the EndOfOrder file, if it includes one of the command lines Index=1
or Index=2. See section 9.5 “Autoprint orders separation” on page 81, for more details.
Attention: if the print folders are sent from a Digital Imager, with a 15.6 or further VAnalyser software release, the EndOfOrder file automatically includes
the Index=1 command.
87
Chapter 9
Auto Print and formats
To generate the Autoprint photo index, select File > Image processor > Index... from the main
bar menu. The Index options window appears, as shown in fig. 82.
Fig.82 - Contact sheet options dialog
Proceed as follows:
1) Select the desired format in the pull-down menu placed in upper right corner of the window
(see fig. 83, nr.1).
2) Select the Preview button placed in the lower right corner of the Contact sheet options
window. A preview of the index will be created and shown in the right part of the window.
3) Once generated the preview, at side of the format a number appears. In our example (fig.
83, nr. 2) it is #3.
Fig.83 - Matching a format to the index
4) This number indicates which button to select in the upper row (fig. 83, nr. 3). In our example,
the button to select is 3 - 203x254 (8x12”).
88
Chapter 9
Auto Print and formats
Once matched the desired format to the index, it is possible to tune several parameters, like the
position and size of the thumbnails, the background color and so on. These options are explained
in the next sections.
There are preset configuration for the formats 10x15 and 13x18, corresponding to the Preset 10x15 (4x6”) and Preset 13x18 (5x7”) buttons respectively.
Just press one of the two buttons and give OK.
9.7.1 Thumbnail properties and dimensions
In the Thumbnail properties frame it is possible to set the dimensions of the thumbnails. Use the horizontal arrows box to modify
the width of the thumbnail, and the vertical arrows box to modify
its height.
Auto
Sets automatically the dimensions of the thumbnail in a way that
the index print falls in exactly one print format.
Write sequential number
Writes under every thumbnail the sequential number of the
image inside the order.
Write image filename
Writes the image name under every thumbnail.
Crop to fit
If necessary, cuts the thumbnail to fit the desired size.
Auto orientation
Chooses the best orientation for the thumbnails to minimize the
number of sheets for the index.
9.7.2 Header options
In the Header options frame it is possible to set the
header properties.
Fill with the desired text the Header text box (leave
empty = no header).
The Bind options gives the size of the space left for
eventually binding the index sheets (leave to zero= no bind). It is also possible to add the date
to the index (Add date checkbox.)
89
Chapter 9
Auto Print and formats
9.7.3 Background and logo options
In the Background frame one can be choose an image to load as the background for the index.
Leaving this box empty means no background image, the color background can be chosen with
the color keys or the SELECT button (Windows® color chooser). Use the Browse key to select
the image, the same for the logo to add in the Logo frame (leave empty = no logo image).
9.8 Programming cutmarks
Attention: the software package described in this section is optional and has to
be purchased separately.
Cutmarks allow certain cutters to recognize the separation point between each
copy both horizontally and vertically, and
must be setup according to the specifications given by the cutter’s manufacturer.
Select the
File > Image processor > Cutmark
menu. The Cutmark Setup window
shown in fig. 84 appears.
Fig.84 - Cutmark setup window
90
Chapter 9
Auto Print and formats
The values to be set are five:
W1: start space (white) from image to L1.
L1: size of the first cutbar (black).
L2: size of the separator space between cutbars (white).
L3: size of the second cutbar (black).
W2: final space (white) from L3 to next image.
Each value is expressed in pixels.
Please note that:
1 pixel = 1/10mm for the printers with 254dpi resolution. That is, if a blank
space of 0,5mm is required, it is necessary to introduce 5 pixels.
1 pixel = 1/12mm for the printers with 305dpi resolution. That is, if a blank
space of 0,5mm is required, it is necessary to introduce 6 pixels.
It possible to select different values for horizontal and vertical cutmarks, as two different
frames, Horizontal and Vertical, are present.
The Cutmark frame options allow to insert the cutmarks also on the external edges of the sheet
that contains the image: this is intended to have a perfect clipping of the image on all its four
edges. Top, Left, Right (mm) indicate the distance from the edge of the paper to the beginning
of the cutmark independently for each one of the edges.
The Continuous pack frame is reserved for use of LaserLab with automatic cutters. Please contact Polielettronica for more informations about these functions.
91
Chapter 9
Auto Print and formats
92
Chapter 10
Paper calibration: daily alignment and creating new profiles
10 Paper calibration: daily
alignment and creating new
profiles
10.1 Introduction
Attention: For a correct and stable printing performance of the equipment, it
is necessary to make a daily alignment test, or a test every 8 hours in case of
permanent work.
The test compensates every printing drift, included those ones due to the development processing. When it is correctly aligned, the system keeps automatically the color balance with no need
of any further correction.
It is necessary to repeat the whole calibration procedure:
-
When changing the emulsion/roll
-
When a new type of paper is loaded.
10.2 Starting up the calibration sequence
Access the calibration procedure by selecting:
Calibration > Guided paper calibration
from the main menu (fig. 85).
Fig.85 - Calibrations menu
93
Chapter 10
Paper calibration: daily alignment and creating new profiles
The Media calibration window appears, as shown in fig. 86.
Fig.86 - Media calibration window
10.2.1 Densitometer setup
Attention: if the densitometer is used for the first time, or it has been replaced,
it is needed to set it up.
94
Chapter 10
Paper calibration: daily alignment and creating new profiles
Select the Setup densitometer button placed on the lower left corner. The Setup dialog appears
(fig. 87).
Fig.87 - setup dialog for the densitometer
10.2.2 Printing the target
At the beginning, the writing Print! is seen in the canter of the Media Calibration window.
Select the Print button to print target shown in fig. 88.
Fig.88 - Strip for the densitometer reading
10.3 Reading the test
Once finished to print, the Read! writing appear in the middle
of the Media calibration window. Select the Read button.
95
Chapter 10
Paper calibration: daily alignment and creating new profiles
Fig.89 - Reading positions on the densitometer (balanced test)
1) Select on the densitometer the position nr.1 (fig. 89 - a). Insert the target by the 1 side, following the direction shown by the arrow.
2) Select on the densitometer the position nr.2 (fig. 89 - b). Insert the target by the 2side, following the direction shown by the arrow.
Once the reading has finished, in the upper left corner of the window are shown the densitometer reading for the three layers of the strip
Fig.90 - Reading results
10.3.1 Balanced test
If the test is balanced, the Done! writing appears
in the middle of the Media Calibration window.
The calibration is finished. The three values C,
M, Y in the Balance frame are few percent, this
means that the reading is basically balanced.
96
Chapter 10
Paper calibration: daily alignment and creating new profiles
10.3.2 Not balanced test
If the test is far from balance, the reading of the densitometer in position 2 fails. The following
message appears on the densitometer display:
invalid reading
In this case, reset the densitometer through the RESET key and repeat the reading of the strip
part 2 in position 2a (fig. 91 - c).
Even the reading fails even in this position, reset again the densitometer through the RESET key
and repeat the reading of the strip part 2 in position 2b (fig. 91 - d).
Fig.91 - Reading positions of the densitometer (not balanced test)
If the test is very far from calibration, the system can ask to
reset the calibration settings, as shown in fig. 92. At this
point, it is possible either to reset or not, keeping in mind
that:
Fig.92 - Calibration reset
-
With a calibration reset, the final result is the best possible, but it is needed to start
again the procedure from the beginning (Print phase).
-
Without the calibration reset, the procedure is faster (no need to print the target again)
but the result could not be the best possible.
In every case, the procedure finishes when the densitometer reading ends without error and the
Done! writing appears in the middle of the Media calibration window.
97
Chapter 10
Paper calibration: daily alignment and creating new profiles
10.4 Manual refinement of the calibration
Attention: only experienced users should read this section.
Black offset function. If, after the printing of the target, the black on the test is not satisfactory,
it is possible to correct it through the Black offset boxes (fig. 93) in the Media calibration dialog.
Fig.93 - Black offset
The black correction requires the target to be printed again.
Visual balance function. Once the calibration id finished,
if the prints in grayscale are not satisfactory, it is possible
to correct manually the black acting on the three sliders in
the Visual balance frame (fig. 94) of the Media calibration window.
Fig.94 - Visual balance
Please note that the Visual balance acts on all the prints.
10.5 Back up. How to save the settings
The following procedure will save all the settings available on ImageLab software, including
paper box mechanical offset, printing formats, packages and so on.
Select Start from Windows command bar then select Run... The Run dialog window shown on
98
Chapter 10
Paper calibration: daily alignment and creating new profiles
fig. 95 will appear.
Fig.95 - Run window
Type in regedit then select OK, the Registry Editor
window will appear (see fig. 96).
Select HKEY_CURRENT_USER then Software
and then Polielettronica as shown on fig. 96.
Fig.96 - Registry editor
We suggest to operate with the maximum attention to avoid to alter the
settings of the rest of the system.
99
Chapter 10
Paper calibration: daily alignment and creating new profiles
Select the menu item Registry hen Export Registry
File... as shown in fig. 97.
Fig.97 - Exporting the registry
From the Export Registry File window (shown in fig. 97) is now possible to select on which
unit save the backup file.
Fig.98 - Export Registry File window
A floppy disk has enough space to contain the back up file, since its size is only
some ten kilobytes.
To restore the backup it is enough a double click on the file itself, the system will restore the
setting automatically.
100
Chapter 11
The ColorMap Color Management System
11 The ColorMap Color
Management System
11.1 Quick start
In the following we give a brief and simplified description of a color management system and
what is used for.
1) There is a great variety of several image acquisition and printing systems. The main difference is the way of each system to acquire, view and reproduce colors.
2) Example: the color of a real flower is reproduced in one way on the monitor, but in a different
way by the printing system. This will happen even if the system are balanced each other.
An answer: all the color you see on the monitor are reproduced with the same fidelity on the
prints?
3) As different systems work in different ‘color spaces’, the acquisition system can ‘see’ some
colors the printing system cannot reproduce. The different color spaces will not perfectly
overlay, leaving some colors not managed by all systems. This means that, while transferring the images from a system to another, some colors are perfectly reproduced while other
ones can never be.
4) Some operation is needed, to understand which colors cannot be reproduced, and replace
those ones with other colors managed by the system. The new colors should be as close
as possible to the original ones. This operation is accomplished by the Color Management
System (CMS).
5) To work, the CMS has to know ‘who saw the color’ and ‘who has to reproduce it’. It works
like an interpreter, knowing the language of who is speaking and the language of who is
hearing, too. The input profile is the language of ‘who saw the color’: it includes the informations about the device having been generated the image. The output profile is the language of ‘who has to reproduce the color’.
6) To use a CMS an input profile and an output one are needed.
7) The input profile is usually embedded in a .tiff file.
8) The output profile depends on the printing device (LaserLab, in our case) and the used support: different manufacturers, emulsions and surfaces require different profiles.
Attention: Polielettronica S.p.A. does not supply any color profile, neither
CMS nor ColorMap.
11.2 The CMS standard system
We suggest to use this system to the ones who are already experienced with
the color profiles (.icc and .icm file extensions).
The CMS system works correctly if both the input and output profiles are of a good quality. If
101
Chapter 11
The ColorMap Color Management System
the profiles are accurate, the result will be accurate as well.
The profile generation must be performed on site, where the equipment is
working, through proper hardware and software instrumentation. The profiles
supplied by Polielettronica are for demonstration and making examples only.
Select
File > Preferences > CMS settings...
From the main menu bar, to let the Color Management System settings window appear (fig.
99).
Fig.99 - Color Management System settings dialog
Make sure that the Enable color profile box is enabled (with the check mark
inside it).
We suggest to let the default option Microsoft ICM enabled.
The CMS system requires the image files to be coupled to an input profile. If the device generating the image does not include a color management system, no profile will be associated to
the file. It is still possible to process the images by coupling them to a default input profile. En-
102
Chapter 11
The ColorMap Color Management System
able the RGB input profile if not embedded box and choose the proper profile from the pulldown menu.
In this window the output profile is not shown, since it does not depend on the printer but on the
paper, too. To view the output profile select
Calibration > Media parameters
The Transfer function
window appears, as shown
in fig. 100. In the Media
menu is shown the paper
model, in the Color profile
menu is shown the printer
CMS output profile.
Fig.100 - Color profile in the Transfer function dialog
11.2.1 Manual mode options
In the Manual mode frame (ColorMap CMS settings window, see fig. 99 on page 102), one
can choose in which way the system converts the newly opened files. the following options are
available:
Ask when opening
Do not ask,
perform conversion
Do nothing
It is the default option. The system requires the input profile each
time a new image is opened. This cause the Convert to profile
window (fig. 23 on page 30) to appear before opening the image.
If enabled, applies the programmed profile to the newly opened
image without confirm request.
Disables everything.
103
Chapter 11
The ColorMap Color Management System
11.3 The ColorMap system
A color map is a conversion table from a color space to another one. The ColorMap CMS is
a color management system based on the color maps.
This system has the advantage to be independent from any particular color conversion technology developed by single producers. The ColorMap model can manage a color conversion already available on the market, keeping and accurately reproducing its own features.
In ImageLab 2.0, color maps are intended to work with Autoprint and formats. To each format can be assigned a different color map.
11.3.1 Creating a color map
Attention: the following procedure requires an additional color profile conversion software, not included in ImageLab.
To generate a color map proceed as follows:
Fig.101 - Creation of a color map
1) Select
File > Preferences > CMS settings...
from the main menu bar. The Color Management System settings window is shown in
fig. 101.
104
Chapter 11
The ColorMap Color Management System
Make sure that both the Enable color profile box is disabled (no check mark
inside).
2) The Color profiles folder box features the destination folder for the color maps. Use the
Browse command to select or even to create the folder. The Select directory window appears, as shown in fig. 102. Use the Create New Folder command if necessary.
Fig.102 - Select directory dialog
The default folder for the color profiles is C:\WINNT\system32\spool\drivers\color standard folder.
3) To create a color map select again
File > Preferences> CMS settings...
In the ColorMap CMS settings... window of fig. 101 on page 104, select the Save source
ColorMap... command. In the Save as window select the name and the destination folder
of the color map. In the example of fig. 103, first the ColorMapFolder has been created, and
then the MyColorMap.bmp file has been saved on it.
Fig.103 - Save as dialog
105
Chapter 11
The ColorMap Color Management System
Attention! It is necessary to add the file extension .bmp to the color map file
name.
After the Save command has been given, the ImageLab will request to choose between two
color map quality levels: Standard and High.
4) Open the above defined color map with a software capable of color profile conversion (not
supplied with ImageLab). Apply the desired color conversion (an example could be from
the sRGB color profile to the Kodak Digital III one. Save the modifications on the color map
file, keep it in the original folder.
5) To apply the defined color conversion to an image, open it in ImageLab® and select
Image > Convert with Colormap
in the main menu. The Convert with colormap window is shown in fig. 104. On this window
one can select a color map from the list of the available ones (ColorMap pull-down menu).
Fig.104 - Convert with colormap window
The *DEFAULT* color map is predefined in Imagelab, the other ones are
user defined.
11.3.2 Binding a color map to a format
To bind a color map to a print folder proceed as follows:
1) Open the Color Management System settings window (fig. 99 on page 102) by selecting:
File > Preferences > CMS settings
from the main menu.
2) Uncheck the Enable color profiles box (no check mark inside).
3) Close the window with the OK command.
4) Select
File > Image processor > Formats
from the main menu bar, to let the Format setup window (fig. 77 on page 82) appear.
106
Chapter 11
The ColorMap Color Management System
5) In the Effects frame, shown in fig. 105, select
the ColorMap box and choose the desired
profile in the pull-down menu.
Fig.105 - Effects frame
6) Close the window with OK to confirm the modifications.
107
Chapter 11
The ColorMap Color Management System
108
Chapter 12
Error messages and system diagnostics
12 Error messages and system
diagnostics
12.1 The message window
When an error in operations occurs, on the lower left corner of the screen the following window
appears (fig. 106):
Fig.106 - Message viewer window
This window is called the Message viewer. All the message from LaserLab are stored here. For
each message is indicated the time when it was generated, so one can trace the machine errors
history. The blue writing gives to time when LaserLab began to send the messages. The red
writings are related to the error that stopped the operation, the black ones are service and information messages.
The text inside can be selected with the mouse and copied (press together the
Ctrl and the c key). Once copied, it can be pasted (press together the Ctrl and
the v key) to a text editor (Windows® Notepad for example) or directly in a email message. This could be useful to communicate to a service center what is
going wrong with the appliance.
To close the window select the Hide command. The window can be opened again in every moment by selecting the
View > Message window
menu item.
To clear all select the Clear messages command.
109
Chapter 12
Error messages and system diagnostics
12.2 Error messages
In the following are shown the most frequent error messages from ImageLab software. Some of
these are shown in the Message viewer window immediately after ImageLab has been
launched. Some others messages appear only because of a print attempt in anomalous conditions. In this last case one after another will appear:
1) The error message, indicating the cause of anomaly;
2) The message Images left to be printed, the number of the images left to be printed when
the error has occurred.
Attention! These images are lost, they need to be launched again after removing the error cause.
Linear motor failure
Blue Laser off
(Work Enable off)
Either linear motor driver is not supplied, or is in alarm state.
When error condition is verified, the message is shown as soon
as ImageLab is launched. Driver state can be read watching the
two LEDs (red and green) on the top of it. If driver is not supplied they are both off: this could happen if the pressure switch
detects a pressure lower than 1.8 atm. (see fig. 8 on page 17):
increase pressure by acting on pressure regulator. If only the red
led is on, the driver is in alarm state. The driver could have
received a disabling signal from the electronic control board
inside the machine: in that case, please call an authorized service
center.
Both blue laser and rotating mirror motor are off. To set the correct working, select
Calibration > Advanced
and then Work Enable. After this, if the problem is not solved,
please call an authorized service center.
Printer paper finished
There is no paper detection in input of the transport. Among the
possible causes there could be:
1. Paper finished: change the paper box.
2. There is paper in the box, but it’s not correctly loaded.
In both cases we suggest to read 7.4 “Loading Paper” on page 54.
110
Chapter 12
Error messages and system diagnostics
LMI Board not ready
Printer paper
not in developer
This message could appear together with Printer paper finished
if a print have been launched without loading the paper. It means
a fault in synchronization for LMI unit. In this case just load correctly the paper.
If error conditions are different from the ones above mentioned,
please call an authorized service center.
The paper hasn’t been reached the paper processor input after the
printing process.
This message could be shown together with Printer paper finished. In this case just load correctly the paper.
Other error causes: the paper is not correctly kept close to the carpet, or the processor paper input is not aligned with the printer paper output. In both cases, please call an authorized service center.
Printer paper locked
The paper has reached the paper processor, but it is locked near
the its input. Typically, some prints have been launched the paper
processor being off. This means that the first print has stopped at
the processor paper input. When the second print is finished, the
system doesn’t succeed in carrying the second copy in the paper
processor and sends the error message. Switching on the paper
processor ensures correct operation completing without any loss
of prints.
Linear motor in progress
A print has been launched in the first two-three minutes after the
switching on of the system, before the correct completing of its
own starting sequence. This print has been lost, try again after
some time.
Printing in progress
The second copy of the current image was launched during the
processing of the first copy. The second copy is lost, try again
after some time. To avoid this problem we suggest to use multiple prints option (6.4.2 “Multiple prints” on page 33).
Autocalibration failed
The system isn’t able to complete its own automatic calibration
procedure. This message could appear even there isn’t any image
being printed: autocalibration is automatically repeated every
five minutes. Among the possible causes there could be:
1. The paper box isn’t correctly selected in Calibration > Paper
box window (fig. 49 on page 51). In this case give the command
Laser printer > Load paper
(see par.7.4 “Loading Paper” on page 54). The box will be automatically matched with the related paper format.
111
Chapter 12
Error messages and system diagnostics
2. One of the three lasers is damaged, or switched off. Switch off
the printer and check the electrical connection (see 4.4 “Electrical connections” on page 14). After this, if the problem is not
solved, please call an authorized service center. Is to be noticed
that this situation is immediately seen in print quality, before getting the error message.
12.3 Log files management
In the Log files are registered some of the system activities. These files can be useful in diagnostics or in keeping trace of the works done.
Select
File > Setup > Log files settings...
from the main menu bar. The Log file options window appears, as shown in fig. 107.
Fig.107 - Log file options window
In this window it is possible to select the files destination folder (Log file destination folder
menu). The option are all selected by default, we suggest not to modify this setting. Select Enable log file to enable the writing of the files on the destination folder.
Attention: the Log files are never removed automatically by the ImageLab.
We suggest to remove them each time the work is finished, to avoid to fill up
the hard disk space during the machine life time.
112
Chapter 13
LaserLab 76 (30”)
13 LaserLab 76 (30”)
13.1 Using the 50 (20”) paper box on the LaserLab 76 (30”)
The fig. 108 shows respectively the lever position for the two boxes.
Fig.108 - Selecting the paper box on LaserLab 76 (30”)
113
Chapter 13
LaserLab 76 (30”)
Attention! Position the lever BEFORE inserting the box.
When a LaserLab 50 box is used, the automatic box detection is disabled. By default, every box
is detected as number 1 box.
It is always possible to load in the 76 box every paper band, from the 50 (20”)
to the 76 (30”).
13.2 Managing rolls winded with emulsion inside (LaserLab
30”)
We suggest to use:
1)The rolls with emulsion outside for every band.
2)The rolls with emulsion inside can be used only for the 76 (30”) band.
3)For not paper based media (Trans, Clear, Flex Metal, etc.) use exclusively rolls
winded with emulsion outside.
When the ImageLab is running, select: Calibrations > Media parameters
Fig.109 - Selecting the media for Laserlab 76 (30”)
114
Chapter 13
LaserLab 76 (30”)
In the Transfer function dialog of fig. 109 the Emulsion IN box is highlighted.
When this option is selected, a mechanical device called bender is enabled, to perfectly fit the
paper curvature to the printing exposition drum.
ATTENTION:
ALWAYS select the Emulsion IN box to use rolls winded with emulsion
INSIDE.
- NEVER select the Emulsion IN box to use rolls winded with emulsion
OUTSIDE.
115
Chapter 13
LaserLab 76 (30”)
116
Chapter 14
HS Cutting Station
14 HS Cutting Station
14.1 Description and warnings
The HS (High Speed) Cutting Station is a device for cutting the photographic paper.
HS Cutting Station can only be joined to the LaserLab 50 (20”) printer.
The cutter is set and works only with 508mm (20”) paper band. On each sheet sent to the cutter,
the images must have all the same format. Different formats are allowed for different sheets.
If the format changes between one sheet and the subsequent one, a little delay is set to let the
cutting blades change their position. No delay if there is no change of format between the sheets.
Attention: the cutting formats and references can only be generated through
the Imagelab v2.0 or later versions. The cutter cannot be used together with
older version of Imagelab or other software.
Images and windows showed in this section come from Imagelab v2.0 or later
versions.
14.2 Installation
The HS Cutting station is independent from the other units. It is only necessary to connect the
Cutting Station supply plug (220Vac) to one of the LaserLab UPS output sockets.
PATH OF SHEETS
TO BE CUT
PATH OF SHEETS
TO BE CUT
PATH OF SHEETS
NOT TO BE CUT
PAPER PROCESSOR
CUTTING STATION
PAPER PROCESSOR
CUTTING STATION
Fig.110 - HSCutting Station: managing the output sheets
If a sheet contains frames to be cut, it is brought to the processor rear side. The sheets with single
images, or not to be cut are placed at the usual dryer output chute of the paper processor. The
117
Chapter 14
HS Cutting Station
two different paths are shown in fig. 110.
The installation steps are the following:
1) Rotate the fan placed over the processor dryer, as shown in fig. 111.
2) Mount the motorized transport unit. The positions of the mounting holes are shown in fig.
111.
Respect the quotes in the figure!
ROTATE 180°
115
16
586
ALL 4,8x16 SELF-TAPPING SCREWS
VITI 4,8X16 AUTOFILETTANTI
820
4,5
4,5
4,5
130
161,5
VENTOLA ASPIRAZIONE VAPORI
STEAM SUCKING FAN
4,5
4,5
4,5
130
115
16
72,5
445
PARTE SUPERIORE FORNO
DRYER TOP VIEW
Fig.111 - Mounting the HSCutting Station
ATTENTION. As soon as finished, verify that the copy stays exactly in
the middle while passing through the transport unit.
3) Mount the guide for reversing the copies.
4) Act on the HS wheels: bring the cutting station at the same level of the transport unit: in this
118
Chapter 14
HS Cutting Station
way it is possible to insert the knobs placed on the chute in the transport unit proper site
(see fig. 112).
Fig.112 - Mounting the HSCutting Station
5) Lock the unit wheels through the proper lever.
6) Connect to the cutter the two connectors coming from the transport unit.
7) Connect the Cutting Station supply plug (220Vac) to one of the LaserLab UPS output sockets.
After having been switched on, the HS C.S. will start an automatic setup procedure with no need
of operators.
119
Chapter 14
HS Cutting Station
14.2.1 Connecting the serial data to PCI adapter between the
PC and the cutter
Install the PCI to serial port adapter board into the computer’s motherboard. Connect the 4X
serial port cable to the adapter output. See fig. 113.
Fig.113
The serial connector numbered 1 and 2 have already fitted a 9-pin female-female adapter. The
two connectors are reserved respectively for:
1.
Writing system (COM3)
2.
HS Cutter (COM4)
Connect the connector numbered 2 with the serial cable coming from the cutter.
120
Chapter 14
HS Cutting Station
14.3 Function keyboard and display
The keyboard and display are shown in fig. 114.
EJECT START
OFF
LINE
MAN
AUT
CUT
TEST 1 TEST 2 TRANSP
HEAD
READY
PAGE DOWN
UP
ENTER
Fig.114 - HSCutting Station keyboard
When the cutter is ready, all the red LEDs placed on the buttons are off and
the green READY LED is blinking. The message shown on the display is HS
CUTTER.
The function of each key is explained in the following:
EJECT
Press this button to eject of a copy not cut. The copy is not cut if
it features neither cutmarks nor barcode.
ADV
Starts the cutting procedure if a copy with cutmarks and barcode
is already present inside the cutter.
CUT
Makes a vertical cut.
121
Chapter 14
HS Cutting Station
Don’t use this function during the usual work. Use it only to check the cutter
motor.
>>
Moves forward the copy.
<<
Moves backward the copy
OFF LINE
Cuts off the communication between the cutter and the LaserLab
computer unit (LED is ON).
MAN / AUTO
Disables / enables the automatic mode. If the LED is ON, the
cutter is disabled and every sheet is brought to the usual dryer
output. If the LED is off, the device starts automatically to cut
the sheet, as soon as the latter one arrives to the cutter.
The MAN/AUTO LED is on if some error has been detected (see also14.9 on
page 133). In this case the cutter is disabled. Press the MAN/AUTO button
to enable the cutter again.
TEST 1
Reserved for technical service. Don’t use it during the normal
work.
If the TEST 1 button has been pressed by accident, don’t do any other thing
but waiting the device to complete its automatic cycle. At the end, press again
TEST 1and then MAN/AUTO to enable the cutter.
122
TEST 2
Reserved for technical service. Don’t use it during the normal
work. Same as TEST 1.
TRANSP/HEAD
Reserved for technical service. Don’t use it during the normal
work. Same as TEST 1.
PAGE
Reserved for technical service. Don’t use it during the normal
work. Same as TEST 1.
DOWN / UP
Reserved for technical service. Don’t use it during the normal
work. Same as TEST 1.
ENTER
Alarm reset and global system restore. See also 14.9 “HSCutting
Station MSA” on page 133.
Chapter 14
HS Cutting Station
14.4 Mode of operation
The cutter is supplied with 4 mobile blades for horizontal cut (X axis) and one blade for vertical
cut (Y axis). See fig. 115 on page 123 for more details.
The 4 blades for horizontal cut can divide the 508mm band into 5x102mm, or 4x127mm, or
3x169mm, or 2x254mm bands. All the formats based on these bands are cut with no waste of
paper, except for the sheet header (which is necessary to drive the cutter) and the blades thickness.
The thickness of the horizontal blades are: 5mm for the middle one, and 3mm for the other three.
The thickness of the vertical blade is 3mm.
The number of vertical cuts and the spacing among them are depending on the chosen format.
For example, one cut every 10cm if the format is 10x10, or one cut every 15cm if the format is
10x15.
Fig.115 - HSCutting Station mode of operation
123
Chapter 14
HS Cutting Station
In the following table there are some examples of formats being cut with no paper waste:
BAND
WASTELESS FORMATS
102
10x10 - 10x13 - 10x15 - 10x20
127
13x9 - 13x13 - 13x18 - 13x20
254
25x20 - 25x25 - 25x38
All the formats included in the 508 band are allowed. The formats not mentioned in the table
could produce waste of paper: for example, cutting the 24x18 or 24x30 formats will produce a
20mm waste for every sheet. All the copies will be cut and refined without white borders.
14.5 LaserLab setup for HSCutter
To let the printer and the cutter work together, it is necessary to set some parameters in the
Hardware setup window shown in fig. 116.
Fig.116 - Hardware setup window: settings for HSCutter
Attention: the use of the Hardware setup window parameters is reserved
to service personnel only.
Press the keys CTRL + ALT + SHIFT + C to let the window appear. Find the frame HSCutting station inside the window.
124
Chapter 14
HS Cutting Station
The settings must be the same of the ones shown in fig. 116.
14.6 Using the HS Cutter
The cutter can be used in two ways:
In the automatic (default) mode the work flow is totally under control of the Imagelab software. It automatically detected which sheets have to be cut or simply brought to the front chute.
In the manual mode it is possible to select manually to destination of each sheet: the cutter or
the dryer output chute.
14.6.1 Automatic mode
This is the default mode. When the system is switched on, the Imagelab software takes control
of the cutter and checks its state.
The cutter must be switched on. The LEDs OFFLINE and MAN/AUTO on
the keyboard are both off.
Fig.117 - Processor status dialog
125
Chapter 14
HS Cutting Station
For each sheet, Imagelab selects to ones to be cut (presenting barcode and cutmarks) and to one
to be brought to the front chute with no cutting.
It is possible to know in every moment the processing state of one’s order. Select the
icon shown above (processor status button). The Processor status dialog shown in fig.
117 will appear.
The red colored tanks show where the copies are currently placed. The table shows the sending
time of the copies, their length and size, and the current position inside the processor. If the
Pack column shows HSCutting, the copy is to be cut. The copies not to be cut are marked with
none/other.
Attention: if the deflector changes its position in the wrong moment, act as
follows:
Keep the mouse pointer over the processor picture shown in fig. 117, and click the right button.
The Processor setting dialog (fig. 118) appears. In this window it is possible to modify and cor-
Fig.118 - Processor settings dialog
rect the processing time of each single copy. The normal time is 3’30” (210 seconds), corresponding to a 45” developer time. Modify this value if the deflector moves at the wrong
moment.
It is to be considered normal a deflector movement after the copy is out for 20 - 30 cm. Press
OK once finished.
126
Chapter 14
HS Cutting Station
14.6.2 Manual mode
To switch to manual mode press the OFF LINE key (see section 14.3 on page 121). In this state
one can manually separate the copies to be cut, from the others to be simply brought to the front
chute. Simply press the MAN/AUTO button on the keyboard.
When the MAN/AUTO LED is off (AUTO function enabled) it is possible to
insert manually the copies in the cutter. The copies must feature cutmarks.
14.7 Autoprint and format settings for HS Cutter
Select the
File > Image processor > Autoprint
menu item.
To let the Autoprint folder list dialog appear (fig. 119).
Fig.119 - Settings formats for HSCutter
Each row is a print folder. The column Pack shows which pack has been matched to that folder.
To change it, double-click on the pack to let the Select pack type dialog appear, as shown in
the middle of fig. 119. The five available options are: None, vertical, Full size, Continuous,
HSCutter.
127
Chapter 14
HS Cutting Station
Select HSCutter and then OK. The pack will be shown in the box.
Now, to select the format, double-click on the format box. The Format setup dialog window
will be shown (fig. 121 on page 128). Select the desired format and give OK. Once finished,
give OK in the Autoprint folder list window (fig. 119) to confirm the modifications.
14.7.1 Wasteless HSCutter formats
Refer to the Format setup window, shown in fig. 121 on page 128.
Look at the frame placed about in middle and called Special Attributes. The frame is shown in fig. 120.
Fig.120 - HSCUtter
formats
Select the box HSCutter divide and the 5 box. Then give the Apply command in the Format setup window (fig. 121).
Fig.121 - Format setup window
128
Chapter 14
HS Cutting Station
Now the box for setting the format height is disabled. The height of the copies
has been calculated automatically, since the band has to be divided in five
parts horizontally. The height is 50cm / 5 bands = 10 cm.
The box for setting the format length is still enabled, to let the user customize
the current format. In this situation it is possible to set for example 10x10,
10x15, etc.
Once the format has been set, confirm with OK. Going back to the Format setup dialog, the
pack box will be marked with HS to record that the images of that format will be sent to the
cutter.
Attention: the effective paper format must be exactly set up to ensure the correct cutting position.
The paper declared 508mm (20”) is a little narrower, usually 507 - 508mm. Set this parameter
in the
Calibration > Paper box
Dialog. We suggest always to verify the correct format of the paper roll. Just tune the Paper
box parameter, and the formats involved will be automatically corrected.
14.7.2 Wasting paper formats
The “not HSCutter” formats are allowed, too. In that case the band is not exactly divided in subbands. The requested format are arranged into the sheet to minimize the waste of paper.
Attention. Every format to be sent to the cutter (both HS and not HSCutter) is
limited in length. The maximum allowed length is 420mm, over that the device gets wrong in cutting the paper.
14.8 Placing manually the blades: Shear simulator
The HS Cutting Station Shear simulator allows to place manually the blades. In this way the cut
is not dependent from the format.
This is useful when the print layout has not been generated from ImageLab,
but has to be printed and cut on the LaserLab. It is also useful when it is needed to print and cut a package with all the images in only one column.
Select
File > Image processor > HSCutter Shears
129
Chapter 14
HS Cutting Station
To let the HSCutter Shear simulator window appear, as in fig. 122.
Fig.122 - HSCutter shears simulator dialog
The values in the figure are related to the “Sample for shears” package. To generate that package, first open an image and then select:
Image > Generate package
from the main menu. In the Process package window (fig. 56 on page 62) select the “Sample
for shears” item.
See section 8.2 on page 59 for further details about packages.
The whole resulting image is a 203x507mm size, including the images:
nr. 1
15x20 horizontal;
nr. 1
20x25 vertical;
nr. 3
5x7 horizontal B&W;
nr. 3
5x7 horizontal.
An example is shown in fig. 123 on page 131.
It is requested to cut the package as shown in fig. 124 on page 131. The first parameter to set in
the window is Step to 203, giving the transport length.
Attention: if this value is wrong, the vertical cuts (Y) will be placed incorrectly.
130
Chapter 14
HS Cutting Station
Fig.124 - Cut sheet
Fig.123 - Sheet to be cut
Then start from the bottom of the image:
1) Place the first knife to cut the three little color images. So Knife 1 is selected and its value
is set to 51.
2) The value for Knife 2, cutting the three little B&W images, is 51 too. Note that this knife is
always selected, as gives the reference for the other three.
3) Finally, Knife 3 has to cut the big vertical image, so it is selected and its value is set to 254.
4) Knife 4 is not selected, as it does not cut anything in the example.
The Total field gives the height of the whole image (357mm in the example). Give the Apply
command to confirm what done and then OK to close the window.
14.8.1 Limitations in use
When working in automatic mode the formats are placed to respect the following limitations:
1.
The Step (transport length) range is from 89mm to 400mm.
2.
Knife 2 must be placed in the first half of the cutter (508/2 = 254mm). Please note that
Knife 1 position is measured with respect to the origin, while Knife 2 position is measured with respect to Knife 1 position. So, in the window the above condition becomes:
Knife1 + Knife2 <= 254
3.
It is not possible to cut or trim formats less than 8mm.
131
Chapter 14
HS Cutting Station
14.8.2 Shears simulator and Autoprint
See section 9.3 on page 71 for further details about Autoprint folders.
To match an Autoprint folder to the shear simulator operate as follows:
1) Select
File > Image processor > Autoprint folders
menu item. The Autoprint folder list dialog of fig. 66 on page 72 appears.
2) Create a new folder as described in section 9.3.13 “Creating or deleting an AutoPrint folder”
on page 79.
Attention: it is not possible to match a Shears Configuration to a folder having the HSCutter enabled in the Pack column.
See section 14.7 for further details.
3) Select the row of the new folder. Double-click on the Shear column. The HSCutter Shear
simulator window appears, as in fig. 125.
4) Select an existing configuration from the Configuration name list.
5) If a new configuration needs to be created, select New. Introduce the values for the knife
positions and the transport as above described.
6) Confirm with OK, either an existing configuration has been chosen or a new one has been
created. The Configuration name appears in the Shears column.
7) Give OK in the Autoprint folder list window.
To disable the shears configuration of a
folder, double-click on the Shears column in the Autoprint folder list window. The HSCutter shear simulator
window now features the Disable button, as shown in fig. 125. Press it and
give OK to disable the current shears
configuration.
Fig.125 - Disable button
132
Chapter 14
HS Cutting Station
14.9 HSCutting Station MSA
HSCutting Station MSA is a standalone cutter that does not connect to LaserLab.
The settings for the cutting is made through ImageLab® (see previous sections). To activate the
cutter, just introduce the sheet to be cut with the proper cutbars, the equipment will drag the
sheet and cut it following the desired settings.
14.9.1 Keyboard and display
This cutter is equipped with the same keyboard and display of the in-line HS Cutting Station.
For further details, see section 14.3 “Function keyboard and display” on page 121.
14.9.2 ImageLab® settings and end order management
To set the cutting parameters, it is necessary to access to Hardware setup dialog through the
combination of keys ALT+CTRL+SHIFT+C.
Attention: the Hardware setup window tuning is reserved for service personnel only.
In the Hardware setup window, the frame of interest is the one named HSCutting Station (see
fig. 116 on page 124).
Two possible settings are available:
With the settings shown in fig. 126, the LaserLab
will cut the sheet exactly at the end of each order. In
this way it is not possible for one single sheet to feature more than one order. On the other hand, one single order can occupy more than one sheet. Refer to
the progressive number marked on each sheet to
gather the order.
Fig.126 - HSC MSA (normal)
133
Chapter 14
HS Cutting Station
With the settings shown in fig. 127, the LaserLab
will always try to cut the longest possible sheet. In
this way, one single sheet could feature more than
one order. When the cutter meets an EndOrder, it
stops and its pushbutton begins to blink, to let the
operator gather the images of the order.
Press the button to start again the cutter with the next
order to process.
Fig.127 - HSC MSA (EndOrder)
The latter mode of operation (“EndOrder”) needs one more setting through the cutter keyboard
(see section 14.3 “Function keyboard and display” on page 121). Though the PAGE key, reach
the page shown in fig. 128:
Fig.128 - Display page for HSC MSA
The value of the man.sep.order must be 01. If it not so, modify it through the UP and DOWN
keys and confirm through the ENTER key.
14.9.3 Guides for the input formats
It is possible to set the input paper band by adding the proper guides supplied with the cutter, as
shown in fig. 129 on page 135. The figure is referred to a 76 (30”) model.
To use the 76 (30”) format, no guide has to be mounted.
To use the 50 (20”) format, the two guides (1) have to be mounted.
To use the 40 (16”) format, the guides (1) + (2) have to be mounted.
To use the 30 (12”) format, the guides (1) + (2) + (3) have to be mounted.
134
Chapter 14
HS Cutting Station
Fig.129 - Guide positioning for HSCutter MSA
14.10 Error messages
The following messages can be displayed both on the HSCutting Station and
on the HSCUtting MSA display.
header line failed
BARCODE ERROR
The introduced copy does not feature any cutmark, or the present
cutmarks have not been detected. Press EJECT to eject the copy.
The barcode is not readable, the cutter does not detect the format.
135
Chapter 14
HS Cutting Station
header MARK ERROR
The marker for positioning the horizontal blades is missing.
In presence of one of these errors, verify the following:
paper overlap
cutmark failed
-
The copy is set for cutting.
-
The images are centered on the paper.
-
The cutmark is actually printed on paper (the image could be too big
for that format).
-
The copy is obscured.
A new sheet has arrived to the cutter input while the cutter was
processing an old one. Remove the copy with the EJECT key
and launch again the print.
The internal sheet marker is missing and it is not possible to
complete the cutting operation. Press EJECT to remove the
copy.
14.11 Error conditions
An obscured or damaged copy can cause an error when enters the cutter (see section 14.9). To
restore to cutter to the original state operate as follows:
1) If by mistake a copy not to be cut has arrived at the cutter input, just press the EJECT button
on the keyboard: The copy will exit within few seconds with no cut.
2) If the copy features the cutmarks, press the MAN/AUTO button (see section 14.3 on page
121). If the header is normal, the sheet will be cut. Otherwise, press the EJECT button.
In case of error the Imagelab Autoprint function stops immediately. Each
copy will be brought to the front chute.
To restore the Autoprint function act as follows:
-
If the copy that have caused the error is still in the cutter, press EJECT.
-
Press the ENTER button to cancel the error message on the display.
-
Press the MAN / AUTO to restore the automatic operation mode on the cutter.
Press the Reset button in the main bar of Imagelab software.
In case of not reversible error act as follows:
-
Cut off the cutter supply.
Press the Reset button in the main bar of Imagelab software.
136
Chapter 14
HS Cutting Station
From now on all to copies will be brought to the front chute.
Contact an authorized technical service center.
137
Chapter 14
HS Cutting Station
138
Chapter 15
Managing multiformat orders: OrderMakerMF®
15 Managing multiformat
orders: OrderMakerMF®
15.1 The OrderMakerMF® software
OrderMakerMF® is a software capable of managing orders including different formats in themselves (multiformat orders). It is not included in the normal supply of LaserLab, since it is necessary to purchase a separate licence.
One licence of OrderMakerMF® is supplied for free when purchasing a HS
Cutting Station.
Once purchased a licence, there are no limitations on the maximum number of PCs OrderMakerMF® can be installed on. It is possible to install it on every PC connected to a LaserLab printer through a network.
All the way, to avoid net overload, we suggest not to install the program on
more than 5 PCs connected to same network.
15.2 Network settings for a correct use of OrderMakerMF®
Before installing the program it is good to make some checking over the network of LaserLab
printers.
15.2.1 Checking the IP address for the LaserLab printers
The following procedure must be accomplished for every LaserLab printer in
the network.
1) Click with the right mouse button on the icon called My Network Places over the desktop.
139
Chapter 15
Managing multiformat orders: OrderMakerMF®
Select Properties from the pull-down menu (fig. 130).
Fig.130 - My Network places
2) The window Network and dial-up connections appears. Click with the right mouse button
on the icon Local area connections. Select the Properties item from the pull-down menu
to let the window Local area connection properties appear (fig. 131).
We suggest to disable the NetBEUI protocol.
3) Select Internet Protocol (TCP/IP) and then the button Properties.
Fig.131 - Local Area Connection Properties
4) In the Internet Protocol Properties window of fig. 132, take note of the IP address (could
140
Chapter 15
Managing multiformat orders: OrderMakerMF®
be for example: 192.168.1.177).
Fig.132 - Finding the IP address
The IP address is composed by four digits.
The first three digits must be the same for every LaserLab printer
in the network and for every PC with OrderMakerMF installed on.
In the default configuration, all the addresses should be like this:
192.168.1.x
Where x is a number between 1 and 255.
15.2.2 Mapping network drives of the LaserLab printers
The following procedure must be accomplished for every LaserLab printer in
the network.
1) Double-click on My network places icon. In the window called My Network Places, select
the operating LaserLab printer.
141
Chapter 15
Managing multiformat orders: OrderMakerMF®
2) Double-click on the printer’s icon to view its contents. Localize the folder Data (fig. 133).
Fig.133 - Data folder of the LaserLab printer
3) Select the Data folder. Right-click on it, and choose from the pull-down menu (fig. 133) the
item Map Network drive...
Fig.134 - Map Network Drive window
142
Chapter 15
Managing multiformat orders: OrderMakerMF®
The window Map Network Drive appears (fig. 134 on page 142). In the Driver pull-down
menu, we suggest to choose the Z: letter, or anyway the last letter available. This to avoid
undesired renominations in case of hardware replacement/upgrade.
4) Give OK to close the window. The result of the operation can be seen by clicking on the
icon My computer placed in the desktop. As shown in fig. 135, now is present the drive Z
referred to the Data folder of the LaserLab printer.
Fig.135 - New driver for the Data folder
5) The network drive must appear in the Order Manager main settings, as shown in fig. 136.
to let this window appear, select:
File > Order processor > Order Manager main settings...
From Imagelab® main menu.
Fig.136 - Order Manager main settings window
143
Chapter 15
Managing multiformat orders: OrderMakerMF®
15.3 Installing OrderMakerMF®
Start the installation by double-clicking on the icon named OrderMakerMF 1.xx.yyy full install.exe shown in the fig. 137 (where
xx.yyy is the release number).
Fig.137 OrderMaker icon
The start screen of the installation program is
shown in fig. 138. Select Next to go to the
next step.
Fig.138 - Installing OrderMakerMF (1)
Read carefully the licence agreement (fig.
139). Select I accept the terms in the license agreement, then Next.
Fig.139 - Installing OrderMakerMF (2)
144
Chapter 15
Managing multiformat orders: OrderMakerMF®
In the next window (fig. 140) is shown the
folder for the program to be installed. We
suggest to keep the default folder. Select
Next to go further.
Fig.140 - Installing OrderMakerMF (3)
In the window of fig. 141, select Install to
start the installation in the chosen folder.
Fig.141 - Installing OrderMaker (4)
145
Chapter 15
Managing multiformat orders: OrderMakerMF®
After few seconds the installation will be
completed. Again, select Next.
Fig.142 - Installing OrderMakerMF (5)
In the following window, shown in fig. 143,
select Finish to exit the installation procedure.
Fig.143 - Installing OrderMakerMF (6)
Once completed, a link to the OrderMakerMF® executable will be shown on the desktop.
15.4 Starting OrderMakerMF®
Attention: it is necessary for all the PCs having OrderMakerMF® installed on
them to have the same user name and the same password
We suggest to keep the default setting, that is Administrator as user name and
no password.
146
Chapter 15
Managing multiformat orders: OrderMakerMF®
Double click on the desktop link to run OrderMakerMF®. First, the software attempts to locate all
the LaserLab printers connected to the network
(fig. 144).
Fig.144 - Starting OrderMakerMF
Attention: OrderMakerMF® can only work together with LaserLab printers
having ImageLab® version 3 (or higher) installed on them.
If software fails locating the printer, it will not start. Please refer to section
15.8 on page 154 to solve this kind of problems.
Once the program has started, the main window appears as shown in fig. 145. Divided in tabs,
in the window upper part can be seen all the printers located. Each print has a mark associated
whose color can be:
RED:
On the printer is installed ImageLab® rel.3 or higher, but it is not
running at the moment.
YELLOW:
On the printer the software ImageLab® rel.3 or higher, is present
and running, but it is not printing at the moment.
GREEN:
On the printer the software ImageLab® rel.3 or higher, is present
and running, and it is printing at the moment.
147
Chapter 15
Managing multiformat orders: OrderMakerMF®
Fig.145 - OrderMakerMF main window
Selecting the tab corresponding to the desired printer, all the printable formats of that printer
will be shown (that is, the contents of its print spooler).
15.5 Creating an order
To create an order, select the printer where the order is supposed to be printer, then simply drag
the images and drop them in the OrderMakerMF® main window, on the desired format.
Multiple images can be dragged and dropped at the same time, by using the
CTRL and/or SHIFT keys, following the common Windows® operations.
148
Chapter 15
Managing multiformat orders: OrderMakerMF®
When dropping the images, a dialog will appear. Using this dialog
it is possible to set the number of copies of that order to be printed.
The order structure is visible in the main window. For example, consider the order shown in fig.
147 on page 150. In the left column the total number of images (Total prints) can be read. Follows a list of the images composing the order (Image). Selecting one of the images, in the Job
frame are shown the related format, and for each format the number of copies to be printed. In
the example, 3 copies of the AAF1429.JPG image will be printed, one in 10x15 format, and the
other two in 13x18 format.
15.5.1 Removing/modifying images from the order
Select an image and double-click on one of its
formats (Job section): it is possible to modify
the number of copies to be printed in that format (Job options window, fig. 146).
Fig.146 - Job options window
To delete all the copies in a certain format, select that format and press the DEL key.
If instead the image is selected, pressing the DEL key will delete the image together with all its
149
Chapter 15
Managing multiformat orders: OrderMakerMF®
formats.
Fig.147 - OrderMakerMF main window
15.6 Sending the order
Once completed the order, select the Send Order button on the upper right corner of the main
window.
150
Chapter 15
Managing multiformat orders: OrderMakerMF®
The Send order... window appears, as shown in fig. 148.
Fig.148 - Send order dialog
Send
Select this button to send the order
Priority
In this frame it is possible to choose the level of priority of the
order between three: URGENT (red), NORMAL (green), LOW
(yellow).
Layout options
In this frame it is possible to set some aspects of the layout of the
images on the sheet. Select Format size correction to add 3mm
and compensate the effect of the cutter. And with the Optimization options it is possible to reduce or eliminate the waste of
paper of the cutter.
The option Optimization 1 places the images on the sheet in a
way to minimize the waste of paper. In this way, it can happen to
have images still presenting a thin white border, then a manual
refinement could be necessary after the cut.
The option Optimization 3 completely eliminates the need of
manual refinement after the cut. On the other hand, this cut in
based on a non-optimized use of the sheet, since the waste of
paper is not minimized.
The best compromise between the to options above is the Optimization 2*, which is also the default option.
Paper type
In the right column it is possible to choose the paper type on
which the order has to printed. Selecting Any, the order will be
151
Chapter 15
Managing multiformat orders: OrderMakerMF®
printed anyway, regardless of the paper actually loaded on the
printer.
Attention: if the paper type is different from the one actually loaded, the order
will wait until the requested paper is loaded on the printer.
Customer ID
A text line (for example, name of the customer) can be added to
appear in the photo index.
Contact sheet
This frame contains the options for the photo index, enabled by
selecting the Print contact sheet box. The options At last print
places the contact sheet as the last to be printed (otherwise, with
the optimization settings, could be placed anywhere in the sheet).
Just contact sheet prints only the contact sheet and not the
order.
15.6.1 Options for the contact sheet
Press the Settings... button in the Send order window, to let appear the Contact sheet settings
window (fig. 149).
Fig.149 - Contact sheet settings dialog
Most of options are self-explanatory. The dimensions of the index and the ones of the Thumbnails can be set. The HSCutter pre-defined formats can be chosen. The Header section is dedicated to the text that can be added to the index. It is also possible to set the Background (either
a color or an image), or insert a Logo.
152
Chapter 15
Managing multiformat orders: OrderMakerMF®
15.7 Other features of OrderMakerMF®
15.7.1 Autoprint and OrderMakerMF®
Even if OrderMakerMF® is installed in the system, it is still possible to use the Autoprint folders to send orders.
Select
File > Order Processor > Settings...
From the main bar, the OrderProcessor setup dialog will appear (fig. 150).
Fig.150 - OrderProcessor setup dialog
In the ImageProcessor as OrderMaker frame, check mark the Enable box. Also, we suggest
to enable all the shown formats.
In this way the user can go on using the Autoprint folders, these ones will be processed transparently by OrderMakerMF®.
15.7.2 Using OrderMakerMF® with the HSCutter MSA
When using a HScutter MSA 50 or 76, in the OrderProcessor setup window (fig. 150) select
Cut sheet on order change. In this way the sheet will always be cut on the end of order.
When using a HScutter MSA 76 together with a LaserLab 76 or 76 Compact, modify the
Maximum transport value from the default 820 to 1250.
153
Chapter 15
Managing multiformat orders: OrderMakerMF®
15.8 Message errors. Solving the problems
15.8.1 Missing connection errors
If OrderMakerMF® is not able to connect to the printer the order has been sent to, the message
Can’t connect to ImageLab will be presented on the Message viewer window (fig. 151). Among
the causes of this fact there can be:
-
Network connection has accidentally been lost after the order transmission. Check the
network connection and send again the order.
-
Due to heavy traffic over the network, timeout has expired. Send again the order when
the traffic is lower.
-
The ImageLab® configuration is not corrected or has not been completed in the LaserLab printer. Repeat the procedure explained in section 15.2 “Network settings for a
correct use of OrderMakerMF®” on page 139.
Fig.151 - Message viewer window
15.8.2 No printer located over the network
If the software can’t locate any of the printers, it simply does
not start and show the message shown in fig. 152. In this case
the network settings are not correct. Repeat carefully the procedure explained in section 15.2 “Network settings for a correct use of OrderMakerMF®” on page 139.
Fig.152 - Error message
154
Chapter 16
Upkeeping
16 Upkeeping
ATTENTION: every maintenance operation must be performed
only after the equipment has been switched off and all the components plugs have been removed from the UPS output socket. After every operation check again the correct working of all the
equipment components.
Do not use any benzine, thinner or strong solvent to clean the plastic parts of
the equipment.
16.1 Daily maintenance: compressor condense discharging
Every day the condense accumulation in the filter group must be checked, and it must never exceed the allowed level. See fig. 153.
Fig.153
1) Condense filter
2) Oil filter
3) Dust filter
4) Pressure reducer
5) Manometer
Usually the filter numbered 1, 2 and 3 discharge automatically the condense, but the continue
presence of air pressure can cause a fault in self discharging. To discharge manually the filters
numbered 2 and 3, it is necessary to push up the cap placed on bottom of each filter, the con-
155
Chapter 16
Upkeeping
dense inside will come out. To discharge the filter numbered 1, unscrew the cap placed on the
bottom, until the air comes out. Screw again the cap once the operation is completed.
The quantity of condense inside the filters depend from the humidity and temperature of the
working place, could be normal don’t find condense inside the filters.
Attention: air filters inside filtering-pressure control unit have to be replaced
yearly.
If the dry air compressor (optional) is supplied, we remember to read the instructions enclosed,
it is important to replace the salt filter that condense the humidity. This air compressor is able
to supply compressed air at a very low RH%.
16.2 Weekly maintenance: cleaning the air filters
The filters help to limit the gathering of dust inside the printing box: dust cannot only darken
the laser beams transmission system, weighing down significantly the print quality, but also
form deposits on the sled guide bar (See 16.4 “Sled cleaning” on page 157). The filter is placed
inside the printing section, behind the paper box; apart from air filtering, it helps spreading the
air flow. If the air flow entered the printing section directly it could induce vibrations, corrupting
the quality of prints. It should be cleaned with compressed air weekly.
Fig.154
16.3 Monthly maintenance: replacing the air filters
The air filters placed inside the transport unit must be replaced monthly (see fig. 154). Also, replace monthly the external ring filter.
156
Chapter 16
Upkeeping
16.4 Sled cleaning
Attention: the compressed is NECESSARY to move the sled. Do not
force the sled movement when the equipment is off and there is no compressed air.
The sled can be moved only on the guide bar axis, absolutely do not try
to move it in any other direction!
The sled guide bar can gather antistatic dust falling from the paper or residues from cutting operations. A periodical cleaning with compressed air is useful, though not sufficient. With humidity, dust tend to paste and it is thus necessary to clean the guide bar monthly with a piece of
cotton dipped in alcohol.
Clean the above and lateral parts of the guide with care; do not apply any pressure or repetitive
movements as it may be scratched.
ATTENTION. When cleaning the sled, do not press or brush too much,
to avoid any scratch on its surface.
To clean the rest of the bar the sled should be moved on the opposite side (check the compressed
air to be present!). Now, with minimal force, and using maximum carefulness, the sled can be
moved. When the cleaning is completed, the sled must run perfectly free, with nearly no force
required to it for the movement.
16.5 Yearly maintenance: pressure reduction group filters
replacement
At least yearly, the three filters numbered 1, 2 and 3 in fig. 153 on page 155 have to be replaced.
The filters are supplied as spare parts by Polielettronica.
16.6 Yearly maintenance: replacement of the brushes in the
cutter internal motor
Important: it is necessary to replace the cutter motor brushes once a
year.
Micro short circuits are generated when the brushes in the motor are worn. These short circuits
may generate unwanted starts of the linear motor before the expiring of the correct exposure
time. This may cause prints with a border on top. The fault appears randomly.
157
Chapter 16
Upkeeping
The brushes are supplied as spare part by Polielettronica.
16.7 Machine working statistics
Selecting from menu bar View, LaserLab Statistics... the Machine statistics window of fig. 155 appears. Three counters are shown, for total paper
meters used, total paper surface used, and total number of prints done. The User counter frame shows
three similar counters, except for the fact that they’re
user resettable.
Fig.155
158
Chapter 17
Attached documents
17 Attached documents
17.1 Attached documents list
1) CE declaration of conformity.
2) Warranty.
3) Spare parts, failure report, information request module.
17.2 Declaration of conformity
Polielettronica S.p.A., located in S.Maria Maddalena (RO - ITALY) at the address: Via Nazionale 55
DECLARES
Under its responsibility that the LaserLab color photographic printing equipment conforms to
the following EEC directives and European standards:
Directive: 73/23/EEC (Low Voltage Directive) and further modifications. Applicable Standards:
-
European Standard: EN60950 (96/Oct.). Information technology equipment - Safety.
-
European Standard: EN60950/A4 (97/Oct.). Information technology equipment Safety.
Directive: 89/336/EEC, 92/31/EEC, 93/68/EEC (EMC Directive). Applicable Standards:
-
European Standard: EN55022 - Class B (96/Oct.). Information technology equipment
- Radio disturbance characteristics - Limits and methods of measurement.
-
European Standard: EN55024 (97/Oct.). Information technology equipment - Immunity characteristics - Limits and methods of measurement.
S. Maria Maddalena 2002 - June 20
02
159
Chapter 17
Attached documents
17.3 Warranty
Polielettronica S.p.A. guarantees the LaserLab for the duration of 12 months.
Polielettronica S.p.A. will repair or replace free of charge any part that, during the warranty period, should present manufacture problem. This warranty excludes any sort of compensation for
any damage, direct or indirect, to persons or things.
Any defect not clearly attributable to the material or to the manufacturing will be examined in
our Technical Support Centers or at our factory.
Should the faulty part claim be unjustified, all the replacement or the repair expenses substained
by Polielettronica S.p.A. will be paid by the customer.
The warranty certificate and the fiscal document must be shown to the technical personnel that
effectuate the repairing, or must be included with the machine if shipped for repairs.
There will be no elongation for the warranty subsequent a technical intervention on the equipment. If the repairs are made in the main Technical Support Center in Italy, all transport expenses are to be paid by the customer, unless otherwise decided.
The warranty certificate excludes any damage from transport, lack of maintenance, inadequate
handling, ignoring the warnings inside the manual, or any other phenomena independent from
the normal operating condition of the equipment.
This warranty is void if the equipment has been repaired by unauthorized personnel, or after
the use of any accessory not supplied, recommended, or approved by Polielettronica S.p.A.,
or in case of removal or alteration of equipment serial number during the warranty period.
Polielettronica S.p.A. declines all the responsibility for damage, to persons or things, due to
improper use or misuse of the equipment.
Any controversy will be handled by:
FORO GIUDIZIARIO DI ROVIGO
(ITALY)
160
Chapter 17
Attached documents
17.4 Spare parts - failure report - information request
module
TO.......................................................................................................................
DATE.......................
Customer:
Country:
Address:
Tel.
Model:
Serial number:
Your ref.
Fax.
Spare parts order table:
Table N°
Code N°
Description
Q.ty
Notes
Technician request for the following reasons:
.................................................................................................................
.................................................................................................................
.................................................................................................................
.................................................................................................................
.................................................................................................................
.................................................................................................................
.................................................................................................................
CUSTOMER STAMP AND SIGNATURE:
161
Chapter 17
Attached documents
162
Index
Index
A
Add frame 49
Air filter 156
Auto Print 69
Automatic correction 38
Autoprint folders 71
Autoprint folders (create new) 79
Autoprint folders (modify) 79
B
Backup 98
Box offset 53
C
Calendar&Mask 66
Calendars 63
CMS 101
Color brightness 38
Color conversion 104
ColorMap CMS 104
Compressor 155
Correction (density and color) 37
Correction profile 39
cpy00 71
Crop Selection 40
D
Densitometer 94
Diagnostics 109
Digital Imager 69, 82
E
Emulsion inside (LaserLab 30") 54, 114
Emulsion outside (LaserLab 20") 54
EndofOrder 81
F
File 30, 49
Flip horizontal 49
Format 40, 59, 82
Frame (cutmark) 91
Frame (of the index) 37
G
Grayscale 38
H
Help 49
I
Image centering 52
1
Index
Imagelab 22, 25
Images left to be printed 110
Index 35, 49
Index (automatic) 87
Index=1 82
Index=2 82
Inserts (in the package) 63
Inversion (of the image) 43
L
Laser 19, 21, 23, 110
LaserLab 30 (12") 6, 8
LaserLab 76x100 (paper box) 54, 113
Loading 51, 54
Log files 112
M
Median filter 46
Multiple prints (pack printing) 34
Multiple prints (repetition) 33
O
Order separation (autoprint) 81
P
Package 59
paper box 53, 98, 110
Paper box (LaserLab 12") 56
Paper box (LaserLab 20") 54
Paper box (LaserLab 30") 54, 113
Paper ColorMap 85
Paper profile 51
Photocards 63
Preferences 47
Print 25, 33, 49
Print number 49
Print pack 34, 49
Q
Quantity 71
R
Resize 40, 49
Resize after crop 41
Resize image 42
Resize to fit paper 42, 49
Rotation 43, 49
S
Sharp 49
Size (of prints) 8
Smooth filter 45
Statistics (of the printer) 158
2
Index
W
White borders (on prints) 53
Z
Zoom to fit 62
3
Index
4