1
_,r_,_r "r,
,/r'
._
'
? _,_-_
r._
.,,r,
IIIIIIIIIIIIIIIIIIIIIIIIIIIIIIIIIhi,:;;;;
.......................................................................................................................................
',
''''''''''''''''''''''''''''''''''''''''''''''''''''''''''''''''''''''''''''''''i'
Need help?
Call us!
Philips representatives are ready to
help you with any questions about
your new product. We can guide
you through Connections, First-time
Setup, or any of the Features.
We want you to start enjoying your
new product right away!
CALL US BEFORE YOU
CONSIDER
RETURNING
THE PRODUCT
1-800-531-0039
Or
Visit us on the web at
www.philips.com
Once your PHILIPS purchase is registered, you're eligible to receive all the privileges of owning a PHILIPS So complete
and return the Warranty
benefits.
Registration Card enclosed with your purchase at once. And take advantage of these important
PHILIPS
Congratulations
. Know these
safetysymbols
on your purchase,
and welcome to the "family!"
Dear
PHILIPS
product
owner:
Thank you for your confidence in PHILIPS. You've
of the best-built,
do everything
best-backed
in our power
products
you're
entitled
by one of the most comprehensive
outstanding service networks
your purchase guarantees
This "bolt ofmateriaJ
uninsulated
lightning"
within
indicates
your
available today. We'll
unit may cause an electrical
shock. For the safety of everyone in your
house-hoJd, please do not remove product
to keep you happy with your
purchase for many years to come.
As a member of the PHILIPS "family,"
protection
selected one
to
in the industry. What's
you'll
covering.
warranties
and
more,
receive all the information
,_
and
special offers for which you qualify, plus easy access to
accessories
from
our convenient
Most importantly,
commitment
home shopping network.
you can count on our uncompromising
to your total satisfaction. All of this is our way of
saying welcome
product.
- and thanks for investing in a PHILIPS
attention
The
"exclamation
to features
point"
for which
tails
you
should read the enclosed
literature closely to prevent operating and
maintenance problems.
WARNING:
TO PREVENT FIRE OR
SHOCK HAZARD, DO NOT EXPOSE
THIS EQUIPMENT TO RAIN OR
MOISTURE.
CAUTION:
To prevent electric shock,
match wide blade of plug to wide slot, fully
insert.
Sincerely,
ATTENTION:
Lawrence
President
J. glanford
and Chief Executive
Pour _viter les choc
_lectriques, introduire la lame la plus large
de Jafiche dans la borne correspondante de
Japrise et pousser jusqu'au fond.
Officer
For Customer
Use
Enter below the Serial No. which
P.S.Remember,
product,
to get the most
you must
Registration
Card
it to us right
now!
return
within
from
your
your
PHILIPS
Warranty
10 days. So please
is located on the rear of the
cabinet.Retain
mail
for future
Model
this information
reference.
No.: DVDR
Serial No.
77/17
Safety
Information
Safety Precautions
Warning: To prevent fire or shock hazard, do not expose this equipment to rain or moisture.
FederalCommunications Commission (FCC) Warning: Any unauthorized changesor modifications to this equipment void the user's
authority to operate it.
Laser Safety
This unit employs a laser. Only a qualified service person should remove the cover or attempt to service this device, due to possible
eye injury.
CAUTION: Use of controls or adjustments or performance of procedures other than those specified herein may result in hazardous
radiation exposure. The set complies with the FCC-Rules, Part 15 and with 21 CFR 1040.I0.
CAUTION: Visible and invisible laser radiation when open and interlock defeated. Do not stare into the beam. The beam is located
inside, near the deck mechanism.
Special Information
for Canadian
Users
This digital apparatus does not exceed the Class B limits for radio noise emissions from digital apparatus as set out in the Radio
Interference Regulations of the Canadian Department of Communications.
Radio/TV
Interference
This equipment has been tested and found to comply with the limits for a Class B digital device, pursuant to Part 15 of the FCC
Rules.These limits are designed to provide reasonable protection against harmful interference in a residential installation. This
equipment generates, uses,and can radiate radio frequency energy and, if not installed and used in accordance with the instructions,
may cause harmful interference to radio communications. However, there is no guarantee that interference will not occur in a
particular installation.If this equipment does cause harmful interferenceto radio or television reception, which can be determined by
turning the equipment off and on, the user is encouraged to try to correct the interference by one or more of the following
measures:
I)
2)
3)
4)
Reorlent or relocate the receiving antenna.
Increase the separation between the equipment and the receiver.
Connect the equipment into an outlet on a circuit different from that to which the receiver is connected.
Consult the dealer or an experienced radio/TV technician for help.
Note to Cable TV system installer:
This reminder isprovided to call the Cable TV(CATV) system installer's attention to Article 820-40 of the NEC (National Electrical
Code) that provides guidelines for proper grounding and, in particular, specifies that the cableground shall be connected to the
grounding system of the building, as close to the point of cable entry as practical.
Copyright
Protection
Unauthorized copying, broadcasting, public performance and lending of Discs are prohibited. This product incorporatescopyright
protection technology that is protected by method claims of certain U.S. patents and other intellectual property rights owned by
Macrovision Corporation and other rights owners. Use of this copyright protection technology must be authorized by Macrovision
Corporation and is intended for home and other limited viewing uses only unless otherwise authorized by Macrovision Corporation.
Reverse engineering or disassemblyis prohibited.
Declaration
of Conformity
Model Number:
DVDR 77/I 7
Trade Name:
PHILIPS
Responsible Party:
Philips Consumer Electronics N.A.
P.O. Box 14810,Knoxville, TN 37914-1810 1-800-531-0039
IMPORTANT
I.
SAFETY
Read these instructions.
INSTRUCTIONS
I I. Only
use attachments/accessories
specified by the
manufacturer.
2.
Keep these instructions.
3.
Heed all warnings.
4.
Follow all instructions.
5.
Do not use this apparatus
6. Clean
Use only with a cart, stand,tripod, bracket, or
table specifiedby the manufacturer or sold with the
apparatus. When a cart is used, use caution when
moving the cart/apparatus combination to avoid
injury from tip-over.
near water.
13. Unplug this apparatus during lightning storms or when
unusedfor long periods of time.
only with dry cloth.
7.
Do not block any of the ventUation openings. Install
in accordance with the manufacturer's
instructions.
8.
Do not install near any heat sources such as radiators,
heat registers, stoves, or other apparatus (including
amplifiers)
9.
that produce
heat.
Do not defeat the safety purpose
of the polarized or grounding-type
plug. A polarized plug has two blades
with one wider than the other.
¢ PoIarized
Plug
A grounding type plug has two blades and a third grounding
prong. The wide blade or the third prong are provided for
your safety. If the provided plug does not fit into your
outlet, consult an electrician for replacement of the obsolete
Outlet.
I O. Protect the power cord from being walked on or
pinched, particularly at plugs, convenience receptacles, and
the point where they exit from the apparatus.
14. Refer all servicing to qualified service personnel.
Servicing is required when the apparatus has been damaged
in any way, such as power-supply cord or plug isdamaged,
liquid has been spilled or objects havefallen into the
apparatus, the apparatus hasbeen exposed to rain or
moisture, does not operate normally, or has been dropped.
15. Battery usage CAUTION
- To prevent battery
leakage which may result in bodily injury, property damage,
or damage to the unit:
• Install all batteries correctly, + and - as marked on the
unit.
• Do not mix batteries (old and new or carbon and
alkaline, etc.).
• Remove batteries when the unit is not used for a
Iongtime.
EL 6474-E004:02/8
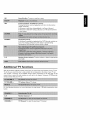
The
remote
control
STANDBY©
Switch on or off: To switch set on or off, interrupt
interrupt a programmed recording (TIMER)
REC MODE
Recording mode
recording duration
T_DVD
TV/DVD:
(quality):
menu
To select the maximum
function,
possible
To connect the antenna signal directly to the TV, This button
lets you switch between the DVD Recorder
and the antenna signal This
function
is connected
operates when the DVD Recorder
to the TV with
only an antenna cable.
DIM
Dimmer: This button allows you to adjust the display brightness in two
steps or shut it off (BRIGHT, DIMMED, OFF).
TIC
Title/Chapter: To directly select a
in the menu
bar using • , • .
If 'i ?_F_'appears in the display, the index menu of the loaded disc will
appear or an introduction will play In this case, this function will not be
available.
AUDIO
Audio:
To select the audio language. For SAP recording
ZOOM
Zoom:
Enlarge the picture
CLEAR
Delete:
To delete last entry or clear programmed
PHOTO
Digital
Photo
SYSTEM-MENU
System
'T'(title)PC'(chapter)
Menu:
Manager
CHANNEL -I-
Plus : Next channel
(TIMER)
Open the Digital Photo Manager'
To display/hide
screen)
recording
the main menu (menu bar at top of
OK
Store/Confirm:
To store or confirm
Previous
Chapter
Pressing this button
Track/Reverse
search:
once during playback will return to the previous
chapter track! title
If this button is held down
If this button is held down
in slow motion.
PAUSEII
Pause(still
an entry
during playback,
it will search
during a still picture,
forward.
it will search
backward
picture):
If this button
is pressed during playback, the DVD
Recorder
switches to
pause, You will see a still picture, [f this button is pressed during
recording, the DVD Recorder will also switch to pause,
/tr
Number.lLetter
0..9
buttons:
To enter
numbers
or letters
in appropriate
entry fields
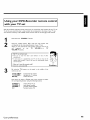
Additional
TV functions
With the enclosed
multicode
remote
control you can control the main functions of your TV set.
To do this, you must first enter a code number that corresponds
to the make of your TV set.
You will find a summary
of all available remote
control
commands
manual How to enter this code number
you will read in the chapter
remote
control
with your
TV VOLUME --
For the following
button
CHANNEL
TV set'.
TV volume: Reduce TV volume
functions,
you must hold down
Number
0..9
--
on the last page of this
'Using your DVD-Recorder
TV
buttons:
Channel:
the side button
oTV while
0 - 9
To select
the next lower
TV channel.
pressing the other
!
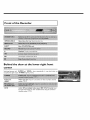
Front
of the Recorder
OPEN/CLOSE
A_
Open/close
EJECT
Eject
I1.-
Playback:
disc tray: Open/dose
PC=(PCMCIA)
card:
To play a recorded disc.
next chapter track!forward
Behind
corner
between
occupied,
the signal at jack S-VIDEO
DV IN
jack
search
the door at the lower
Switching
Yellow
VIDEO
disc tray
jack
S-VIDEO
Video
number
and
VIDEO
is done
right front
automatically,
In case both
jacks
are
is given priority,
input jack: Input for camcorders
or video recorders
(channel
LF_I_I)
i.Link / DV jack (digital
for digital Camcorders
(channel number
video input,
or other
'L-F_12')
IEEE
1394, Firewire):
Input
suitable devices using this connector
!
Back of the Recorder
ANTENNAIN
Input
Antenna
input:
jacks (IN-EXT2)
Video in
Video
input (yellow
(channel number
Input
Connect your antenna or Cable TV signal here
jacks (IN-EXT
COMPONENT
VIDEO IN
jack): Connection
for an additional device
'EXT2')
1)
Component
additional
video
input (redlbluelgreen
jack): Connection
for an
device with component video output (channel number
'EXT1')
Output
jacks (OUT-2)
VIDEO (CVBS)
OUT
Video output (yellow jack): Connection to a TV with video input
(CVBS,
Composite
Video)
Output
jacks (OUT-I
COMPONENT
VIDEO OUT
Output
Component video output (red/blue/green jack): Connection for
an additional device with component video/progressive scan input
jacks (DIGITAL
OPTICAL AUDIO
OUT
480p/480i)
Optical
AUDIO
digital
OUT)
audio
output:
The symbols on your DVD
Recorder
d,splay
The following
symbols may appear on your
DVD
Recorder
display:
II1111111111111
Disc bar: Displays the current position on the disc (disc pointer).
P_/Record: single flashing segment at the current position.
Pause:flashingsegment on both sides of the current position.
_:
flashingsegment at the current position,
TV
Modulator is switched off The antennasignal (RF signal) is only
connected to the TV when the modulator is switched off.
O(((
Remote control
command
has been sent
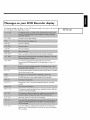
Messages
The following
on your
DVD
messages may appear on your
DVD
Recorder
Recorder
display
display. If you name a disc, the disc
name will appear on the display panel as well
No signal or poor signal strength
uPE_, _
Disc tray is opening.
FI
Disc tray is closing.
rTC
f _lF
LLU_ __
After
r-¢7
rTT:
,_uF_
?fT,_
_1¢7
I_U
33 j C_JJ J Z3L
_US_
a successful recording,
the list of disc contents
You received a copy-protected
copy-protected
DVD/videotape
channel.
is updated.
signal. This may come from a
of a DVD/video player or from a TV
No disc has been inserted. If a disc has been inserted, then it is possible
that the disc cannot be read.
The DVD Recorder
is busy making changes DVD-compatible.
Inserted disc is new or has been completely
erased (no recordings
present).
_
_/
j
J JLE
The maximum
number of titles has been reached for the disc. Each disc
can have a maximum
of 48 titles
Disc is full. There is no room
for new recordings.
A disc with NTSC recordings has been inserted and an attempt was
made to record a PAL signal Insert a new disc or use a disc containing
PAL recordings.
TtTF
FF_EE
.... E
_,,5E ERR
_J
C
T_l
:£
,,JR
r3r-¢
An empty tile was selected.
An error occurred when writing the title. If this happens often, please
clean the disc or use a new one.
Read section 'Cleaning discs' in the next chapter on how to clean the
disc.
After the automatic channel search, the menu for setting the time/date
appears on the screen.
71
It is not possible to close/open
ACT
r3
_ ,R,T
P_:_,
-F_t'7,
After
CT
The DVD-Recorder
_{33
, _Eu
the creation
the disc tray,
of the menu structure
the disc is prepared
has been switched off
The Digital Photo Manager
will be switched
off
Table
of contents
_lllntroduction
....................................
3
D
Playback
........................................
34
Dear Philips customer .....................................................................................
3
General
Region codes .....................................................................................................
Technical data ...................................................................................................
6
6
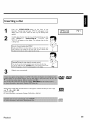
Inserting a disc ................................................................................................
information regarding playback ................................................... 34
Accessories
35
........................................................................................................
6
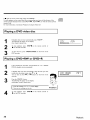
Playing a DVD video disc .............................................................................. 36
Playing a DVD+RW or DVD+R ................................................................. 36
important notes regarding operation ..........................................................
Cleaning discs ...................................................................................................
7
8
Playing audio CDs ..........................................................................................
Playing MP3 CDs ............................................................................................
37
37
Special functions
9
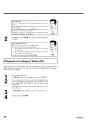
Playback of a (Super) Video
38
of your
new DVD
I_lconnectingthe
Preparing the remote
Recorder
DVD
control
........................................
Recorder...
for operation
II
..........................................
II
Connecting
Connecting
your DVD Recorder to the TV ............................................
with a Component Video (Y PB PR) cable ........................
II
12
Connecting
Connecting
with a S-Video (YIC) cable ....................................................
with Video (CVBS) cable ........................................................
14
IS
Connecting
only with the antenna cable ...................................................
16
D
Connecting
additional
video recorder,
devices
DVD
....
DOther
playback
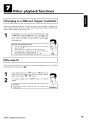
Changing to a different chapter trackltide
............................................... 39
Disc search ...................................................................................................... 39
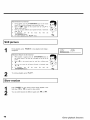
Still picture .......................................................................................................
Slow motion ....................................................................................................
40
40
Search with time entry ..................................................................................
41
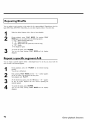
RepeatinglShuffle ............................................................................................ 42
Repeat a specific segment A-B .................................................................... 42
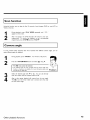
Scan function ................................................................................................... 43
Changing audio language ...............................................................................
Subtitles ............................................................................................................
44
45
player .........................
18
the satellite receiver using a cinch or an S-video cable _,
additional devices only via aerial cable ................................
19
19
Connecting
Connecting
a camcorder to the front jacks ............................................. 20
audio devices to analog audio jacks ..................................... 20
Connecting
audio devices to the digital audio jacks ............................... 21
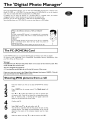
IrlThe
'Digital
The PC (PCMCIA)
recorder
......
39
43
44
an additional
DVD
.............
Camera angle ...................................................................................................
Zoom function ................................................................................................
Connecting
Connecting
your
functions
18
Connecting
Ellnstalling
CD ................................................................
22
Initial installation .............................................................................................
22
TV channel search .....................................................................
24
Adding and deleting TV channels manually ...............................................
25
Setting the language .......................................................................................
Switching audio recording (Stereo, SAP) ..................................................
26
27
Manager'
.......
46
Card ...............................................................................
47
Inserting the PC Card ...................................................................................
47
Removing the PC Card .................................................................................
47
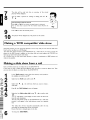
ShowingJPEG
Automatic
Photo
pictures from a roll ............................................................. 48
Editing JPEG pictures .....................................................................................
Slide show ........................................................................................................
49
49
Advanced editing of the JPEG pictures ...................................................... S0
Making a DVD compatible slide show ....................................................... 53
Assigning the VCR Plus+® Guide channel numbers ................................ 28
Making a slide show from a roll .................................................................. 53
Making a slide show from an album ........................................................... 54
Setting the timeld_te
automatically ............................................................
29
Creating
Manually setting the time & date ................................................................
30
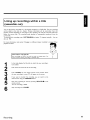
Adding pictures
an album ..........................................................................................
Changing the picture order within
I_llnformation
on the
TV
screen
....
31
Editing pictures
55
to an album ........................................................................ 55
an album ........................................... 56
in an album ......................................................................... 57
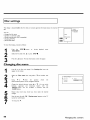
Changing album settings ...............................................................................
58
Changing the cover picture .......................................................................... 58
Changing the album name ............................................................................ 58
Menu bar icons ...............................................................................................
31
Menu bar I .......................................................................................................
31
Menu bar 2 .......................................................................................................
31
Changing the album date .............................................................................. 59
Calling the album overview directly ........................................................... 59
Field for temporary messages .....................................................................
Status box ........................................................................................................
3l
32
Copying
Erasing an album .............................................................................................
60
Disc type icons ................................................................................................
Disc status icons .............................................................................................
32
32
Changing roll settings ....................................................................................
60
Tuner info box ................................................................................................
33
Changing the rolls name ...............................................................................
60
Changing the rolls date .................................................................................
61
'Live picture' in the 'Tuner information box' ,..........................................
Timer info box ................................................................................................
33
33
an album ........................................................................................... 59
Calling roll overview directly ....................................................................... 61
Deleting a roll .................................................................................................. 61
Storing rolls/albums
Table of contents
on a DVD+RW/+R
.................................................. 62
Preparing a DVD+RW/+R ...........................................................................
62
Transfer the photos to a DVD+RW/+R ..................................................
63
Changingthe media settings ........................................................................
64
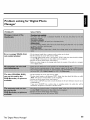
Problem solving for 'Digital Photo Manager'............................................
65
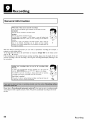
ILL1Recording
......................................
66
_'lAccess
control
(Child
lock)
.........
96
Child lock (DVD and VCD) ........................................................................
96
ActivatinglDeactivating
t he child lock ........................................................
96
Authorizing discs ............................................................................................
Locking authorized discs ...............................................................................
97
97
66
Parental control (DVD video only) ............................................................ 98
ActivatinglDeactivating
the parental control ............................................ 98
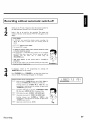
Recording without automatic switch-off ................................................... 67
Pausing recording ........................................................................................... 69
Changing the country .................................................................................... 99
Changing the PIN ......................................................................................... I00
General information ......................................................................................
Recording with automatic switch-off (OTR one-touch-recording)
._, 69
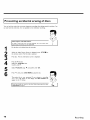
Preventing accidental erasing of discs ........................................................ 70
Lining up recordings within a title (assemble cut) .................................. 71
Selecting the recording mode (picture quality) ....................................... 72
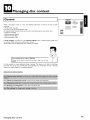
[]Managing
disc content
.................
73
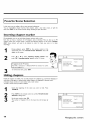
Favorite Scene Selection ...............................................................................
74
Inserting chapter marker ..............................................................................
Hiding chapters ...............................................................................................
74
74
Deleting chapter markers .............................................................................
Changing the index picture ..........................................................................
76
76
Changing the menu background
.................................................................
77
Splitting titles ...................................................................................................
77
Editing recording
titles (name) ....................................................................
78
Playing the entire title ...................................................................................
Deleting recordingsltitles
.............................................................................
78
79
Disc settings ....................................................................................................
Changing disc name .......................................................................................
80
80
Finalize editing .................................................................................................
Finalizing DVD+R discs .................................................................................
81
82
Erasing DVD+RWs
82
r_lprogramming
(TIMER)
General .............................................................................................................
.
a recording
Programming a recording
How to change or delete
_J User preferences
83
83
recordings
.......................................... 88
..........................
89
Picture settings ................................................................................................
90
Sound settings .................................................................................................
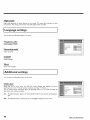
Language settings ............................................................................................
91
92
Additional settings ..........................................................................................
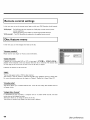
Remote control settings ...............................................................................
Disc feature menu ..........................................................................................
92
94
94
DVD-Recorder
101
.
wlth
the _VCR Plus +® system I ...................... 83
without the VCR Plus +® system ................. 85
a programmed
recording
(TIMER) ............. 87
Problem solving for programmed
Using your
support
a recording
..............................................
,
Programming
you call technical
73
General .............................................................................................................
........................................................................................
_lJBefore
remote
control
with your TV set ............ 95
Table of contents
Introduction
Dear
Philips customer,
Instruction manuals are usually very dry since they are technically-oriented
translated, I have been employed by Philips for this reason.
Allow
me to introduce
and often poorly
myself.
My name is Phil. I will be guiding you through the instruction manual and try to be of help in
operating your new device. At appropriate
points along the way, I will be providing you with the
following
information:
|
/
(Question)?
Tip
Problem
Here I will be explaining
seemingly unimportant things.
Here I will be giving you
instructions on functions that
Here I will help you find the
cause of problems and their
solutions
help make it easier to use your
DVD Recorder.
I hope you have lots of fun with your new DVD Recorder.
Phil
P.S.: If you have questions
information
problem,
in the chapter
or
if problems
come
'Before you call technical
please call the customer
support
service
up during
please see the
helpful
help you resolve the
for your country
The corresponding
telephone
this instruction manual
numbers
You can also visit the website
'http://www.p4c.philips.com'
Introduction
operation,
support'. If this doesn't
and e-mail addresses
can be found
on the last page of
3
Welcome
to the large family
of PHILIPS
DVD
owners.
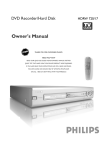
Thank you for buying a DVDR 77/17.
Please take the time to read this owner's
manual before
important
operation.
The DVD
information
and notes regarding
Recorder
should
not
be turned
using your
on immediately
cold to a hot area or vice versa, or in conditions of extreme
Wait at least three
hours after transporting
acclimate to its new environment
(temperature,
Your
transportation
Philips team
It contains
from
a
Recorder
needs this
to
hopes you will enjoy
DVD
Recorder.
is a DVD?
DVDs
(Digital
combines
digital
Versatile
Discs)
the convenience
video
are
the
new
of the Compact
technology.
compression
technology
5-inch disc,
How
after
Recorder
humidity.
the device. The DVD
air humidity, etc.).
using your new
What
DVD
DVD
Video
that allows
storage
Disc with
medium
uses state-of-the-art
an entire
high is the resolution compared
that
the latest advanced
MPEG2
data
film to be put on a single
to VHS?
The c_stal-cleardigital
pictureshave a resolutionof over 500 lines,
with
720
pixels (picture elements) per line.This resolution is more
double that of VHS
compared
What
and is superior to Laser Discs. The
to digital
masters made in recording studios,
is DVD+RW?
DVD+ReWritable
technology
(DVD+RW)
that formed
uses
pbase-change
the basis for CD-ReWritable.
media,
the
What
(recordable
be recorded
continue
once.
DVD),
In contrast
If a disc has not
to be recorded
upon
For this disc to be played
DVD Recorder,
can be added.
can my
After
DVD
Philips DVD
•)existing
pre-recorded
•)recordings
players
to be finalized
4
Recorder
Recorder
discs, with a two-way
This means thac
made on
DVDs
your
player,
it can
Old recordings
The deleted
can
titles
are
it must be 'finalized' in the
completed,
no further
recordings
do?
is a Recorder
compatibility
and DVD-ROM
before
has been
this disc can only
after recording,
Recorder.
be overwritten.
in a DVD
this
to DVD+RW,
been finalized
in the DVD
be later deleted, but they cannot
marked as 'Deleted
title;
Video
laser
process
is DVD+R?
DVD+R
Your
same
A bigb-power
is used to change the reflectivity
of the recording
layer, This
means the disc can be recorded
on more than a thousand times.
What
than
qualitycan be
and Player for
to the universal DVD
digital
video
Video standard,
can be played.
DVD
Recorder
drives,
In some
they will play on other
can
play on
existing
DVD
cases, the discs may have
DVD
players.
Introduction
Compatible
{
discs
Using this DVD
Recorder,
you can play and record
Recording
and Playback
on the following
discs:
DVD÷_Wri_a_l_
DVD+R (Digital Versatile Disc + recordable); can be recorded on once,
DVD÷_
Playback
only:
VIDEO
DVD-R (DVD-Recordab{e)
Can on{y be p{ayed back when the recording
and the recording was finalized.
was made in 'video mode'
_
_
R
Q
O
W
Audio CD (Compact
Video CD (Formats
i
Disc Digital Audio)
10, I I, 2.0)
iiiii iiiii iii iii iii iii iii iii iii iii iii iii iii iii iii iii iii iii iii iii iii ii!iii
CD-R (CD-Recordable) Audio/MP3 contents
Picture CD, CD-R/RW with JPEGcontent
Introduction
5
Region
codes
Because DVD films are usually not released at the same time in all regions of the world, all DVD
players are keyed to a specific region code, Discs can be assigned an optional region code, If the
region codes of the player and disc do not coincide, playback is not possible,
@
Technical
data
Voltage:
I I 0-130V/60Hz
Power consu mption:
31W
Power consumption
(Standby):
Less than 7W (clock display off)
Measurements
in inches (WIHID):
17 2/3.0/13.30 (disc tray closed), 18.58 (disc tray open)
Weight
without
Power
failure/no
packaging
power
approx.: 40kg
supply:
Channel and timer
data will remain stored for approx.
the clock data for approx.
Operating
position:
Ambient
temperature:
Humidity:
I year,
12 hours.
max. inclination of 10 degrees in any direction
59 °F - 95 °F
25% - 75%
Accessories
Owner's
manual
Warranty
booklet
Quick-start guide
Remote control and batteries
Antenna
Power
6
cable
cable
Introduction
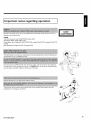
Important
notes
regarding
operation
Becauseof the danger of eye injury, only qualified service personnel should remove the cover or
attempt to service this device.
LASER
Type: Semiconductor
Wavelength:
Output
laser InGaAIP (DVD),
660nm (DVD),
power
AIGaAs (CD)
780nm (CD)
(out of objective):
20mW
(DVD+RW
writing),
0.8mW
(DVD
reading), 0.3mW
(CD
reading),
Beam divergence:
82 degrees (DVD),
54 degrees (CD)
The machine does not contain any components that can be repaired by the customer. Pleaseleave
all maintenance work to qualified personnel.
If you disconnect the DVD Recorder from the power supply, pull out the power cord's plug from
the wall outlet, not only the plug from the jack tx_ MAINS at the rear of the set. Children playing
near the device could suffer injuries at the free end of the cable.
Deposit
old batteries
at the appropriate
collection
points.
This electronic device contains many materials that can be recycled Pleaseenquire about the
possibilities for recycling your old device.
Introduction
7
Make sure that air can circulate freely through the ventilation slots on the machine. Do not place
the device on an unsteady base.
Keep the DVD Recorder away from domestic heating equipment and other sources of heat, as well
asdirect sunlight.
Make sure children
do not place any foreign objects into the openings or the disc tray
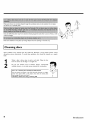
Cleaning
Some
problems
disruptions,
basis.
discs
occur
picture
because
distortions)
the
disc inside the
Recorder
To avoid these problems,
is dirty
(frozen
picture,
sound
discs should be cleaned on a regular
When a disc is dirty, clean it with a soft cloth. Wipe the disc
from the center to the edge in a straight line.
Do not use solvents such as benzine, thinner,
commercially
available cleaners, or anti-static sprays intended for analog discs.
Can I use a cleaning disc intended for DVD
players?
Since the optical unit (laser) of the DVD Recorder operates at a higher
power than regular DVD or CD players, these kinds of cleaning CDs
may damage the optical unit (Iaser).
Therefore,
8
refrain from
using a cleaning CD
Introduction
Special
functions
of your
new DVD
Recorder
Your PHILIPSDVD Recorder has special functions that will make day-to-day use of your new
DVD Recorder easier for you
The Type-2 PC Card slot (media slot) allows you to use an ATA FlashCard or other memory
cards using a PC Card adapter
Mullibrand
1!/c0nlr01
This connection
transfer
is also known as 'FireWire'
of high bandwidth
to transmit
and 'IEEE 1394.' This connection
is used for the
digital signals as used by digital video (DV) camcorders,
Its cable is used
audio and video signals. Along with DV and HiE camcorders, some personal computers
with digital video outputs
can also be connected
to this digital input,
This function can be usedto delete commercial interruptions during a film as well as other scenes.
The corresponding scenes are marked, then skipped asdesired. This is saved on the DVD so any
DVD player will also skip these scenes.You must make edits compatible.
As a rule, a recording is made at the current position. This is similar to a video tape, e.g. in the
middle of the tape. By holding down the REC/OTR
• button, the recording will be made at the
Safe Record
end of all other recordings This helps avoid ove_riting
previous recordings.
New recordings on a DVD+R disc will always be added after the end of all recordings
B
Introduction
9
This is a standard from
Dolby Laboratories
for the transmission
of 5.1 channel sound. This
acoustical playback system is used to transmit five full channels. In addition, one channel is used
exclusively for low frequencies (effects). Speakers are positioned at front left, center, and front
right, as well as rear left and right. This is currently
theaters.
This DVD Recorder
records
the most common
each sound in two-channel
DIGITAL
system, also used in movie
Dolby Digital on a DVD+RW
Manufactured under license from Dolby Laboratories. Dolby and the double-D symbol are
trademarks of Dolby Laboratories
This product incorporates copyright protection technology that is protected by US patent numbers
4631603, 4577216, 4819098, and 4907093, as well as other intellectual property rights. Use of this
copyright protection technology must be authorized by Macrovision Corporation, and is only
intended for home use and other pay-per-view applications. Macrovision must provide written
authorization for any other use. Changes to the device, reverse engineering, or disassembly is
prohibited.
]DCD
_ped >NI
by t AROUDJA
:hatc_I_p
Simple programming system for DVD recorders. Simply enter the number code associated with
your television program. This number is located in your television listings magazine.
VCR Plus+ and PlusCode are registered
VCR Plus+ system is manufactured
trademarks
of Gemstar
under license from
Gemstar
Development
Corporation.
The
Development
Corporation.
US
patent Nr: 6,466,734; 6,430,359; 6,091,882; 6,049,652; 5,335,079; 5,307,173
In order to identify your machine for service questions or in the event of theft, enter the serial
number here, The serial number (PROD. NO) is printed on the type plate fixed at the rear of
the recorder:
MODEL
NO.
DVDR
77/I 7
PHILIPS
PROD. NO.
I0
Introduction
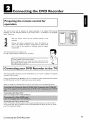
Connecting
Prepar!ng
the DVD
the remote
control
Recorder
for
operation
The remote control and its batteries are packed separately in the original DVD Recorder
packaging. You must install the batteries in the remote control - as described in the paragraph
below - before use.
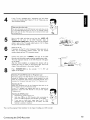
Take the remote
batteries).
control
and the enclosed batteries (2 AA
Remove the battery compartment lid, insert the batteries as
shown, then replace the battery compartment lid. Always install
the +/- ends of the batteries as indicated inside the battery
compartment.
The remote
control
is now ready to use.
Its range is approximately
16-32 feet (5 to 10 meters).
In the following sections, you require the remote contro+ for the first
time.
Whenaiming'
using the
remote
contro+,
always aim the front part of it at
Correct
of the
remote
control
the DVD recorder, not the TV.
Connecting
your
DVD Recorder
Tip
to the TV
The necessary cable connections must be made before you can record or playback TV programs
using your DVD recorder.
Connect the DVD Recorder directly to the TV. Connecting a video cassette Recorder between
the DVD Recorder and the TV could result in poor picture quality.
When you install your DVD
Recorder
'Connecting
(Y/C)'
with
S-Video
If your TV is equipped
'Connecting
for the first time, select one of the following
options:
with a S-Video (SVHS) jack.
only with
the antenna
If your TV has only an Antenna-In
cable'
jack (no other
audio and video in jacks) or you do not wish to
use any other cable. The TV's Antenna In jack may be labeled ANT
IN, RF IN, 75 ohm, etc Check
your TV instructions for details
Connecting
the DVD Recorder
I I
Connecting
with
a Component
Video
(Y PB PR) cable
Component
Video
is the highest
quality
a system for
transmitting
video
by splitting
the video
signal into the Y (brightness), U and V (blue minus brightness, red minus brightness) components
The signals are sent over separate lines The plus for these cables and the corresponding
jacks
are usually red, green, and blue.
In addition,
the signal can be 'interlaced'
or use 'progressive
scan.'
Interlaced
The regular videolTV signal is interlaced, ie. the even and odd lines are formed
in an alternate fashion.
as half pictures
Progressive scan
With progressive scan, each picture is structured (approx. 50/60 times per second depending on
the TV system) as a complete picture, i.e. the even and odd lines are formed together
Disruptive picture flickering is avoided as is the case with 100 Hz TV devices
Have the following cables ready:
an antenna cable (I, supplied), a power cable (2, supplied), a Component Video (Y PB PR) cable
(3, red, green, blue jack) or a corresponding video-compatible cinch cable, an audio cable (4,
red/white jack)
1
I
2
3
4
Remove the antenna cable plug from your TV. Insert it into the
ANTENNA IN jack at the back of the DVD recorder.
ANTENNA
2
3
insert
one
end
of
the
supplied
OUT jack at the back of the
DVD
antenna
Recorder
cable
the
TV
and the other
into
end
into the antenna input jack at the back of the TV
Use a Component Video (Y PB PR) cable and connect one end
to the red, blue, green COMPONENT VIDEO OUT jacks at the
back of the DVD Recorder and the other end to the Component
Video In jacks of the TV
f_
_NENT
VIDEO
OUT
12.
Connecting
the DVD Recorder
4
If your
TV set is equipped
with
a 'progressive
scan' jack, please
use this jack. (Usually called 'Video In Y Cb Cr'. Please see your
TV's instruction
manual).
The colors of the jacks on the DVD Recorder must match those on the
Please note the color order
TV (red-redlblue-bluelgreen-green).
If they are not matched properly,
this could
cause the color oft he picture
Ibe no picture
5
cable
and
OUT jack
the
back
at
COMPONENT
VIDEO
of
end
the
into the
DVD
could
AUDIO
Recorder
) and the other
L/R
(next
to
into the redlwhite
In jacks of the TV (usually called Audio
in', 'AV in'. Please
manual).
Switch on the TV
If necessary, set the TV to the Component
Video input jacks or
select the corresponding
channel number.
For the channel
number,
7
plug one
OUT
see your TV's instruction
6
or there
Tip
Use an audio
Audio
to be reversed
at all.
please see your TV's instruction
Connect
the
mains
jack
manual.
tx_MAINSat
the
back
of the
DVD
Recorder with the power supply using the supplied power cable.
The most important
features of the DVD Recorder will appear
on the display.
After the initial
installation
is completed,
this
function
will
be
switched off. How you switch on this function again, read in the
chapter 'User preferences' in the section 'Standby'
8
Press
STANDBY-ONOon
the
recorder.
'15
TY u_r
n_,
will
appear on the display
Switching
TV
The factory
selected
switch
the
the
necessary,
and
settings
DVD
Recorder
of the DVD
'Progressive
scan'
'Component
output'
Video
during
of the
input'
scan' for
TV instruction
manual.
with
input
TV
Progressive,
'Progressive
Switching
is equipped
connect
power
If
you
the Component
separate
DVD
Recorder
to
the
DVD
Connecting
Video
jacks
for
the
jack
must
and,
input
on the
Interlaced
that
if
scan.'
and
supports
Recorder
the recorder's
down
I_
on
cord. 'PRO'
want
to
the
power
(progressive
switch
cord.
DVD
Recorder
'Initial installation'
back,
repeat
in the chapter
the DVD Recorder
while
scan) will appear
(progressive
scan) will
disappear
from
Recorder is switched to 'Interlaced. _
Then, read the paragraph
Recorder
scan. _
Disconnect
Hold
the
If you
you
of the TV to 'Progressive
TV. If necessary,
If your
installation,
DVD
Switching
the TV
Please select 'Progressive
see your
scan'
are set to 'Interlaced'.
connection
Video
the 'Component
to 'Progressive
Recorder
steps
the
reconnecting
the
on the display.
1 and
display,
2.
'PRO'
The
DVD
Tip
'Installing
your
DVD
recorder'.
13
Connecting
with
a S-Video
(Y/C)
cable
This connecting cable, also known as the SVHS cable, is used to transmit the brightness signal (Y
signal) and color signal (C signal) separately This mini DIN jack/plug is also called a Hosiden
jack!plug.
Have the following
cables ready:
an antenna cable (I, supplied), a power
cable (4, with red/white
1
cable (2, supplied), a S-video (SVHS) cable (3), an audio
ends)
Remove the antenna cable plug from your TV. Insert it into the
ANTENNA IN jack at the back of the DVD recorder.
ANTENNA
2
3
4
5
14
Insert
one
end
of
the
supplied
OUT jack at the back of the
DVD
antenna
Recorder
cable
the
TV
and the other
into
end
into the antenna input jack at the back of the TV
Use a S-Video (SVHS) cable and plug one end into the S-VIDEO
OUT jack at the back of the DVD Recorder and the other end
into the S-Video (SVHS) In jack of the TV (usually called S-Video
in or SVHS in See your TV's instruction manual)
Use an audio (cinch) cable and plug one end into the red/white
cinch jack AUDIO L/R OUT at the back of the DVD Recorder
(next to S-VIDEO OUT) and the other into the corresponding
red/white audio input jack of the TV (usually called Audio in', 'AV
in'. See your TV's instruction manual).
Switch on the TV. Then switch the set to the SVHS input jack or
select the corresponding channel number. For the channel
number, please see your TV's instruction manual.
Connecting
the DVD Recorder
6
Connect
the
mains
on the display.
After the initial
switched
7
jack
tx_MAINSat
the
installation
off. How
is completed,
you switch
chapter
'User preferences'
Press
of the
DVD
STANDBY-ON(_on
this
on this function
in the section
the
function
will
be
again, read in the
'Standby'
recorder.
'15
T_' ,_r_r
n g, will
appear on the display
Then, read the paragraph
Connecting
'Initial installation'
in the chapter
'Installing
DVD
recorder'.
cable
cinch plugs, is used for transmitting
the Composite
Video
of transmission the color signal and the brightness signal are
transmitted on the same cable. Under certain circumstances,
picture, such as 'Moire' patterns
Have the following
your
with Video (CVBS)
This cable, usually featuring yellow
signal (FBAS, CVBS). In this method
this may lead to problems
with
the
cables ready:
an antenna cable (I, supplied),
a power
ends), and an audio cable (4 with
1
back
Recorder with the power supply using the supplied power cable.
The most important
features of the DVD Recorder will appear
cable (2, supplied),
red/white
a video
(CVBS) cable (3, with yellow
ends).
Remove the antenna or cable TV signal from your TV. Connect it
to the ANTENNA IN jack at the back of the DVD recorder.
ANTENNA
2
3
4
Insert
one
end
of
the
supplied
OUT jack at the back of the
DVD
antenna
Recorder
cable
into
the
TV
and the other end
into the antenna input jack at the back of the TV.
Use a video (CVBS) cable and plug one end into the yellow jack
VIDEO (CVBS) OUT at the back of the DVD Recorder and the
other end into the Video In jack (usually yellow) of the TV
(usually called Video in or AV in See your TV's instruction
manual)
Use an audio (cinch) cable and plug one end into the red/white
cinch jack AUDIO L/R OUT at the back of the DVD Recorder
(under to Video in) and the other into the corresponding
red/white audio input jack of the TV (usually called Audio in', 'AV
in'. See your TV's instruction manual).
Connecting
the DVD Recorder
VIDEO
(CVBS)
OUT
o
_AAU
.._:
DIO OUT
15
5
6
Switch on the TV. Then
switch
the TV to the Video/Audio
jack or select the corresponding
number,
channel number.
please see your TV's instruction
mains
jack
manual
Connect
the
Recorder
with the power supply using the supplied power
The most important
on the display.
_MAINSat
features
input
For the channel
the
of the DVD
back
of the
Recorder
DVD
cable.
will
appear
After the initial installation
is completed,
this function will be
switched off. How you switch on this function again, read in the
7
chapter
'User preferences'
Press
STANDBY-ON©on
the
'Standby'
recorder.
'15
TY L,_r
_ _' will
appear on the display
Then, read the paragraph
'Initial installation'
Connecting
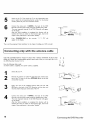
USE THIS
in the section
only with
CONNECTIONN
IF YOUR
'Installing
your
DVD
recorder'.
the antenna
TV ONLY
DOES NOT HAVE ANY AUDIO/VIDEO
the DVD-Recorder
(channel 3 or 4).
Have the following
in the chapter
HAS A SINGLE
JACKS. Please observe
cable
ANTENNA
IN JACK
AND
I
Z
that you must adjust the TV to
cables ready:
an antenna cable (I, supplied),
and a power
cable (2, supplied)
Switch off your TV.
Remove the antenna or Cable TV signal from the antenna input
jack of the TV Insert it into the ANTENNA IN jack at the back
of the DVD recorder
3
4
Insert
one
end
of
the
supplied
OUT jack at the back of the
DVD
antenna
cable
Recorder
the
TV
and the other
into
end
ANTENNA
into the antenna input jack at the back of the TV
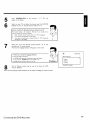
Connect
the
Recorder
with the power supply using the supplied power
The most
mains
important
jack
tx_MAINSat
features
the
of the DVD
back
Recorder
of the
will
DVD
cable.
appear
on the display.
After
the
switched
chapter
16
initial
installation
off. How
is completed,
you switch
'User preferences'
this
on this function
in the section
function
will
be
again, read in the
'Standby'
Connecting
the DVD Recorder
5
6
Press
appear
STANDBY-ON_)on
on the
the
recorder,
'IS
T__ u_r
ng'
will
display,
Switch on your TV and select the channel used for DVDNCR
playback on your TV Choose between channel 3 or 4.
How do I switch the Recorder between
channel 3 and 4?
The factory setting is for channei 3, However, if you would like to
switch to channel 4, proceed as follows:
Hold 4on the remote control while 'fS T_' 0,_C' is displayed.
'Lr0_' (channel 4) will appear on the display,
If you want to switch back to channel 3, hold 3. 'Cun_' (channel 3)
will appear on the display.
7
Switch your TV to the selected
therefor your TV remote control,
The menu for language selection
channel
(channel
3 or 4). Use
will appear on the screen.
Inidal Setup
I don t see a menu for language selection
¢_ Check the cable connections.
_ls ,D%'DRi (DVD Recorder operation) lit up'in the display?
I
Menu Language
Problem
f not, press
the channel
TV/DMD3button
untiltheDVDR
Change
between
and 4 on
TV, is lit.
i
English
Espa_ol
Fran§ais
:
Press OKto continue
recorder
playback. number
This TV channel
Then, read the paragraph
Connecting
must be used in the future
'Initial installation'
in the chapter
the DVD Recorder
'Installing
for
your
DVD
DVD
recorder'.
17
Connecting
You can connect additional
S-VIDEO
IN, Video in,
IN jacks
on
automatically.
the
additional
devices
devices such as decoders, satellite receivers, camcorders, etc. to the
COMPONENT
VIDEO IN and the IN AUDIO L/R,
AUDIO
L/R
recorder
Switching
between
In case both jacks are occupied,
jack
S-VIDEO
the signal at jack
IN and
S-VIDEO
Video
in is done
IN is given priority
The DVD recorder must be connected directly to the TV set (S-VIDEO OUT, VIDEO
(CVBS) OUT, or COMPONENT VIDEO OUT socket directly to the TV set), If there is a
video recorder in between the picture quality may be poor because of the copy protection
system built into the DVD recorder
Tbe COMPONENT
VIDEO IN jacks are only used for 'interlaced'
signals.
Signals
using progressive
scan with
cannot
be processed
by the DVD
oan I also
connect
other devices
'Progressive
scan'?
recorder.
Connecting
DVD
You
an additional
Please
recorder,
player
can also connect
S-VIDEO
video
a video
IN jack and the
recorder
IN AUDIO
or
a DVD
player to
the
L/R jacks for SVHS video
input jacks. Please use the
recorders.
be aware
Most pre-recorded
video cassettes and DVDs are copy protected,
When
them, the ,rm
nT, message will appear in the DVD Recorder display
L,_PL3 P_u,
xWhen
copying
DVD
video
Recorder
¢_ Check whether
cassettes
may not be able to detect
¢_ Tbis
copying
when
video cassettes.
is distorted
cassettes
18
from
is grainy
occurs
appears
in
the
the cable plugs fit correctly.
¢_ In case of bad, non-standard
picture
SI_NRL'
to copy
display
¢_ If the recording is made from
on the video recorder.
xWhen
'_D
you attempt
on
and
video
the
you
input
or
adjust the
signals, the
pre-copied
brightness
attempt
to
the picture
a DVD+R(W).
cannot be copied
recorder,
DVD
"tracking"
Recorder
the signal.
DVDs
Although
a video
without
video
cassettes,
the
fluctuates.
copy
Copy-protected
these
DVDs
copy-protected
on the TV is OK,
disruptions,
or
the recording
DVDs
and
video
Problem
Connecting
additional
devices
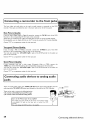
Connecting the satellite receiver
cinch or an S-video cable
You can connect
additional
to the
IN or
S-VIDEO
Switching
between
devices such as decoders,
Video
sockets
satellite
in input sockets and the
S-VIDEO
IN and
Video
using a
receivers,
IN AUDIO
camcorders,
in is done
automatically.
available at both sockets at the same time, the signal at the
S-VIDEO
The aerial cable must be connected
and the DVD
to the satellite
receiver
and the like
L/R audio sockets
If a signal
is
IN socket has priority
recorder.
Connect the DVD recorder directly to the TV set (cable from the S-VIDEO OUT, VIDEO
(CVBS) OUT output sockets is directly connected to the TV set). If there is a video recorder
or an additional device in between, the picture quality may be poor because of the copy
protection system built into the DVD recorder.
Connecting additional
aerial cable
devices
only via
If you want to connect additional devices (e.g. satellite receiver...) only via aerial cable, please
observe the following:
The DVD-Recorder
additional
must be connected
directly
to the TV set. If there is a video recorder
or an
device in between, the picture quality may be poor because of the copy protection
system built into the DVD-Recorder.
The additional
device (satellite receiver)
device - DVD recorder
must be connected
before
the DVD
- TV set). Only the TV set must be connected
o) If there is interference in the picture when the satellite receiver
to the
recorder
(additional
TV OUT jack.
is switched on, a TV
broadcaster may be transmitting on the same channel or a channel very close to that of the
satellite receiver (e.g.: TV broadcaster on channel 3, satellite receiver also on channel 3). In this
case, change the channel of the satellite
receiver.
receiver.
You must also store this channel on the DVD
from the satellite receiver,
Consult the instruction manual of the satellite
recorder
•) Switch on the additional device during the installation
to be able to record
of the DVD recorder.
automatic channel search, the channel on which the additional
stored as a TV channel.
Connecting
additional
devices
TV programmes
During the
device is transmitting
will be
19
Connecting
The front
recorder
video
a camcorder
and audio
jacks
can be used to
These jacks are behind the door
Best
Picture
to the front
easily connect
in the lower right corner
a camcorder
of the front
or Digital 8 camcorder,
connect
the
the
DVD
DV IN IN jack of the DVD
Recorder to the corresponding
DV OUT jack on the camcorder.
When films are transferred, the original recording date and time are stored
as DVD subtitles.
playback, you can display this data on the TV screen by using the '(_'
Choose
',_rR,_2'as a programme
Very
good
Picture
If you are using a Hi8
Recorder
to
panel
Quality
If you are using a Digital Video
During
jacks
number
(Subtitle).
for this input jack.
Quality
or S-VHS(C)
to the corresponding
You must also connect
function
the
camcorder,
connect
the
S-VIDEO
in jack of the
DVD
S-video out jack on the camcorder.
left AUDIO
right
in jacks of the DVD
Recorder
to the audio out
jacks on the camcorder.
Choose
',_rR,__' as a programme
Good
Picture
Quality
If
camcorder
only
your
VIDEO
input of the DVD
You must also connect
number
uses
a video
Recorder
the
for this input jack.
output
(Composite
to the corresponding
left AUDIO
right
Video
output
or
CVBS).
connect
the
jack on the camcorder
in jacks of the DVD
Recorder
to the audio out
jacks on the camcorder
Choose
,rf_,_ _. as a programme
number
for this input jack.
I
Connecting
audio devices to analog audio
lacks
There two analog audio output jacks AUDIO LIR OUT (audio signal output left/right) and two
audio input jacks IN AUDIO L/R (audio input left/right) on the back of the DVD Recorder
These can be used to connect
o) A receiver
o) A receiver
with
with
Can
the following
I
_Z
devices:
Dolby Surround
Pro Logic
two-channel
analog stereo
I use the
This amplifier
'Phono
jack (input)
input'
of my
amplifier?
should only be used for record
players without
recorder.
a pre-amplifier.
this input
to connect
This
could damageDothe not
DVD use
Recorder
or thejack
amplifier.
20
I
the
DVD
Connecting
additional
devices
Connecting
audio devices to the digital
audio lacks
The back of the
DVD
Recorder
OUT for an optical cable and
It can be used to connect
•) an Audio/Video
sound decoder
•) a receiver
Digital
multi-channel
need a multi-channel
formats
audio
output
jacks
OPTICAL
AUDIO
cable (cinch cable).
devices:
digital
multi-channeI
of the audio
digital
or an Audio/Video
two-channel
Digital
two
OUT for a coaxial
the following
receiver
with
features
COAX
stereo
amplifier
with
a digital
multi-channel
AUDIO
OUT
\\
(PCM)
sound
sound
A]V
provides
maximum
sound
receiver or amplifier
of the DVD
Recorder
quality.
You
will
that supports at least one
(MPEG2,
Dolby
Digital,
and
DTS),
Consult
the instruction
formats
it supports.
¢ Tile
receiver
recorder.
manual
does not
The
audio
of your
support
format
tile
receiver
digital
of the inserted
to find
audio
DVD
out which
format
of the
is displayed
audio
DVD
in the
display panel when another
language is switched
on. Playback using
I xA6-channel
loud distorted
sound is
comingis only
from possible
my speakers
digital surround
sound
when the receiver
has a digital multi-channel
sound decoder,
Connecting
additional
devices
Problem
21
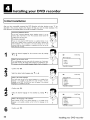
Installing
Initial
your
DVD
recorder
installation
After you have successfully connected the DVD Recorder and other devices to your TV (as
described in the previous chapter), this chapter will help you start the initial installation The
DVD Recorder automatically seeks and stores all available TV channels
Connecting additional devices
if you have connected additional devices (satellite receiver,...) via the
antenna cable, switch them on now. The automatic channel search will
recognize them and save them,
No antenna connected
If you are only using the DVD Recorder as a playback device or you
only have a satellite receiver connected, you still need to perform the
initial installation, This is necessary so the basic settings can be saved
correctiy. After the initial installation is completed once, you can use the
DVD Recorder normally.
1
Tip
Select the desired language for the on-screen menu by pressing
Vor
A.
_Z
Menu Language
l
English
Espa_ol
Fran§ais
The multi-language on-screen menu takes the mystery out of using your
new
All menu?
settings and/or functions are displayed on your
What DVD
is anrecorder,
on-screen
TV screen in one of the available [anguages(English, French, or Spanish).
Initial Setup
:
Press OKto continue
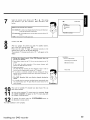
2
3
Confirm
Select
the
with
OK.
desired
audio
language
•
or
language
audio will
is not
available
language if it is available
Confirm
on the
with
DVD,
the
audio
disc menu will
will
appear
play
Audio Lan,qua,qe
English
EspaSol
Fran§ais
PO_LUgU_S
Italiano
Press OKto continue
If this
in the
first
in the selected
on the disc.
will
be in the
selected
language
language
available, of subtitles
will be in the
What
is is
thenotlanguage
the subtitles?
DVD.
Confirm
with
f
or
_Z
subtitles
Initial Setup
OK.
Select the desired language for the subtitles by pressing •
DVD
22
.
play in the selected language if it is available.
What
language
is on
the the
audio
DVD,language?
The DVD
6
•
_Z
The DVD
5
using
if it is available.
first
language
If this
on the
?
Subtitle Language
English
EspaS01
Fran§ais
P0r[ugu_s
Italiano
Press OKto continue
Initial Setup
f
OK.
Installing your DVD recorder
7
Select the
desired
only functions
format.
screen format
if you
have
with
inserted
•
or
a DVD
•
. This
setting
recorded
Ini6al Setup
in this
TV Shape
4:3 letterbox
Which
screen
formats
'4:3 letterboxfor
8
9
After
a full-height
screen.
with the sides trimmed
with
you
Press 0Kto continue
to fig you TV
TV (16:9) aspect ratio
connect
sure
picture
with black bars
OK.
etc.) to the DVD
Make
format)
of the picture.
wide-screen
Confirm
display (theatrical
at the top and bottom
'4:3 panscanfor
'16:gfor
a wide-screen
f
4:3 panscan
16:9
can I choose?
the
the antenna
recorder,
cable
TV
(or
cable TV,
press
OK.
signal
is connected
satellite
receiver,
securely
to
the
Antenna jack on the rear of the DVD Recorder
The automatic TV channel search starts '_JF_iT' will appear on the
display.
XDuring
find
the
any TV
channel
search,
if the
DVD
Recorder
does
Instaflati0n
Auto Ch. Programming
not
channels:
¢" Select another
screen_
Searching forTV channels
channel on the TV. Do you see chat channel on the TV
600 Channels found
If not, check the cable connection
between the DVD Recorder and TV.
of
the
antenna
(antenna
jack)
¢" Please have patience.
The DVD
Recorder
searches
the
entire
find and save the largest possible number
¢" If no antenna
desired,
is connected,
complete
start the automatic
frequency
range in order
to
Please wait
of TV channels.
the
basic settings
channel search (see section
and then,
'Automatic
if
TV
channel search').
xThe
DVD
search,
Recorder
¢_ It is possible
not
properly
switch
Wait
finds
that the automatic
detect
your
TV
very
few/no
switching
channels
between
signah Read the
during
antennalcable
section
about
the
does
how to
Problem
manually,
until all available TV
channels
have been
found.
This can
take several minutes,
As soon as the automatic
ch. search
the number
L
_1_
The
initial
the
To
installation
TV channel search is completed,
'Auto
complete'
will appear on the TV screen along with
of channels found.
Recorder's
remove
the remote
menus, control.
press
is now
the
SYSTEM-MENU
button
on
complete.
Installing your DVD recorder
23
Automatic
During
TV channel
installation,
all
available
TV
channels
search
are
searched
for
and
saved.
If
the
channel
assignments of your cable or satellite TV provider
change or if you are reinstalling the DVD
recorder, e.g. after moving, you can start this procedure again. This will replace the TV channels
already saved with the new ones.
Turn on your TV Select the channel number for the DVD
Recorder (channel 3 or 4 or the Audio/Video In channel)
Turn on the DVD Recorder by pressing STANDBY-ON
3
4
Press
SYSTEM-MENU
remote
control.
The menu
bar
will appear at the top of the TV screen.
Select 'T_'
Press
6
7
8
9
on the
(_.
•
using 41 or
•
continuously
.
to select the
line 'Installation'
the second screen of menus,) Confirm
with
Select line 'Auto
using •
Press
the
•
. The automatic
DVD
Recorder
procedure
When
Ch. Programming'
TV channel
to
save
the
channel
few
¢_ During
search
TV
starts. This allows
TV
channels.
is completed,
'Auto
ch.
This
search
Installation
Auto Ch. Programming
were
TV
signal
must search the channels
do
so, select
Programming'
'Cable',
'Anten.',
your
Confirm
Press
type
the setting
Recorder
is connected.
very
few
TV
detects
If you
have
channels,
you
Please wait
manually,
channels
instead
with
1-125 will
_
of
line
'Auto
Ch.
.
be available.
channels 2-69 will be available.
automatically
with
SYSTEM-MENUto
channel
but found
of connection
or 'Auto.'
DVD
signal
in step 6 and confirm
If you select
'Cable'
the
TV
'Cable/Antenna'
If you select
Select
found
search'
or a cable
a cable
Searching f0rTV channels
all the menus
000 Channels found
channel
an antenna
connected
repeatedly to remove
channels
'Automatic
whether
start
search
available
will appear on the TV screen
Press SYSTEM-MENU
from the screen
To
or •
may take several minutes
complete'
x Very
all
(It is on
•
by pressingll_
repeatedly:
detects
one you have.
which
'Anten.',
OK,
go
search as prompted
the channel search is complete,
to remove all the menus.
to
the
next
menu,
by the on-screen
press
Press
OKto
message. When
SYSTEM-MENU
repeatedly
Problem
You can read about how to search for a TV channel manually in the following section 'Adding
and clearing TV channels manually'
24
Installing your DVD recorder
Adding and deleting TV channels manually
With
this function
you can delete/switch
They will be skipped when the
off TV
CHANNEL'F
channels
on which
and CHANNEL--
reception
buttons
is not
possible,
are selected,
Turn on your TV. If required, select the TV's Audio/Video In (or
channel 3 or 4).
Press STANDBY_to
turn on the DVD recorder. Press the
SYSTEM=MENU button on the remote control. The menu bar
will appear at the top of the screen.
3
4
5
6
7
8
9
10
Select 'T_'
Press
•
using _
repeatedly
or
or •
,
to select 'Installation'
Select line 'Add/Delete
Using •
or add.
•
Channels'
and then press
using •
or •
•
,
the press
select the TV channel that you want to delete
Press • or _I to choose 'Adcf or 'Delete'
Repeat steps 6 to 7 until you have added/deleted all the TV
channels you want.
To save your channel selections,
press OK.
Installation
Add/Delete Channels
Channel001
Channel002
Channel003
Channel004
Channel005
Channel006
Add
Add
Delete
Delete
Delete
Delete
To exitpress
SYSTEM MENU
To remove the menus, press SYSTEM=MENU repeatedly
Installing your DVD recorder
25
Setting
the language
You can select the language for subtitles and audio for DVD playback. Please observe that with
some DVDs, you can change the audio language and/or subtitle language only via the DVD disc
menu
Moreover, when recording the sound of a TV channel, you can switch between stereo and an
additional language (SAP - Secondary Audio Program) See the following section on 'Switching
audio recording (stereo, SAP)'
Plus, you have the option of setting one of the displayed languagesfor the recorder's on-screen
menu However, the DVD Recorder will only display text in English, regardless of this setting•
Turn on your TV• If required, select the channel number for the
DVD Recorder (channel 3 or 4).
Turn on the DVD Recorder by pressing STANDBY-ON
3
4
5
6
Press
SYSTEM-MENU
Select '1"_' using _I or
_
control.
The menu
bar
.
Select the line 'Language'
Select the corresponding
settings
'Playback
'Subtitle':
'Menu':
using •
line and confirm
or
•
with
and confirm with
_
•
can I choose?
audio':
'Recording
26
remote
will appear.
Which
7
8
on the
O •
audio':
Language
Playback audio
The DVD will play back in the ianguage you have
chosen.
Type of audio recording
'Stereo'
Recording audio
Subtitle
or 'SAP
Menu
Subtitle language
Language of the OSD menu
Select the correspondingsetting with •
OK
Tip
or •
and confirm with
To end, press SYSTEM-MENU
Installing your DVD recorder
Switching
audio recording
(Stereo,
SAP)
Some TV programs broadcast additional audio (SAP - Secondary Audio Program). In most cases
this means an additional language is available. In most cases this means that an additional language
is available. For example, if a program is available in English and Spanish, Spanish can be broadcast
as the additional audio program (SAP).
To record TV programs in stereo or SAP, you can select Stereo or SAP as the default setting.
This setting does not become active until the sound of a TV program is transmitted in Stereo or
SAP.
When you playback the recording, you can playback the sound only in the setting you selected
for recording (a recording in SAP can be played back only in SAP).
Switch on the TV. If required, select the channel number for the
DVD Recorder (channel 3 or 4).
Turn on the DVD Recorder by pressing STANDBY-ON
3
4
5
6
7
Press SYSTEM-MENU
will appear
Select 'T_'
using _I or
on the remote control. The menu bar
_
.
Select the line 'Language'
Select line 'Recording
O.
using •
audio'
or
and confirm
•
with
and confirm with
_
.
Language
Playback audio
Recordiag audio
]
Subtitle
Select 'Stereo' or 'SAP using •
or •
and confirm with OK.
Menu
'SAP'?
A TV program is only available in 'Stereo' but my setting is
If the setting for 'Recording
audio' is 'SAP but the TV channel
stereo,
Ibroadcasts
only in stereo
8
during
recording,
the recording
will be done in
To end, press SYSTEM-MENU
Installing your DVD recorder
27
Assigning the VCR Plus+ ®Guide channel
numbers
If you intend to use the VCR Plus+ ® programming
numbers to the TV channels
Press
SYSTEM-MENU
on the
system, you must first assign Guide
remote
control.
The menu
channel
bar
will appear.
Select '1"_' using •
3
4
5
6
7
8
28
Select line 'Installation'
Select the
with •.
line
'VCR
or
•
.
using
Plus+
•
Oh.'
or
•
and confirm
using
•
or
•
with
•
.
and confirm
Use • or • to select the Guide channel number you want to
assign to a TV channel.
Use
•
channel
overview
or
•
buttons
corresponding
to this
Guide
of guide numbers/TV
channels
daily newspaper
Confirm
, or use the number
or in your TV listings
the allocation
with
0_9 to select the TV
channel
number.
An
can be found in your
Installati0n
VCR Plus+ Ch.
VCRPlus+ Ch.
ooi
002
003
004
005
Channet
-----------
OK.
To exit press
SYSTEM MENU
To end, press SYSTEM-MENU
Installing your DVD recorder
Setting
This function
the time/date
uses the
information
automatically
sent via
the
local
PBS channel
to
automatically
set the
time/date. For this reason, you must enter the PBS channel that sends this additional information.
When the DVD Recorder chooses a wrong PBS channel or the displayed time/date is wrong,
you must manually set the date/time
Press
(see section 'Manually setting the time & date')•
SYSTEM-MENU
on the
remote
control•
The menu
bar
will appear.
Select 'T_'
3
4
5
6
7
using _i or
_
•
Select line 'Installation'
using
Select line 'Time/Date'
using •
Select 'Automatic'
with
Select the corresponding
Select the channel
line 'PBS
Channer
will check whether
x 'Clock
which
not
set,
•
•
or
or
•
or •
•
and confirm
and confirm
line with
•
or
•
and confirm
with
channeF
with _
with
with
_
_
•
•
•
•
sends the timeldate
OK.
or not the information
check
and confirm
Time/Date
Automatic
information
The DVD
transfer
will appear
Recorder
Select one of the following
'On':
on the
settings in line 'Daylight
The time set corresponds
activated)
'Off: The time set corresponds
to
summer
time
Auto.
Off
Auto.
is possible.
TV
screen
v_ No time/date data can be received from this TV channel.
Select a different channel or 'Auto:
in line 'PBS Channel.
8
PBS Channel
Daylight Saving
Time Zone
in the
To exit press
SYSTEMMENU
Problem
Saving':
(summer
time
to the winter time (summer
time
is off)
9
In the line 'Time
If you
'Auto.'
10
11
Zone',
select your time zone if the PBS channel
entered was for a different time zone. This is the only way to set
the time correctly, or, if necessary, to correct it.
Confirm
want
use the
time
the changes with
OK•
To end, press
to
zone
of the
PBS channel,
select
SYSTEM-MENU,
The time and date are automatically transferred
'PBS channel' after the Recorder is shut off
Installing your DVD recorder
from the selected
29
Manually
setting
If the time is incorrect,
switch off the automatic
Press
the time
& date
this could be due to a weak or disrupted
function
SYSTEM-MENU
on the
remote
control.
TV signal If this is the case,
The menu
bar
will appear.
Select 'T_'
3
4
using •
7
8
9
_
.
select line 'Installation'
using
Select line 'Time/Date'
using •
Select 'Manual
6
or
Confirm
with
with
•
or
•
or •
•
and confirm
and confirm
with
with
_
_
.
.
•.
OK.
Change the time in line 'Time'
your remote
or
using the number
buttons
0,,9 on
control
Check 'AM/Pf_, 'Year _, 'Month', and 'Date' in the same way
To select between the fields, use • or •
Change the information with • , _ or the number buttons
0,,9.
Select one of the following
'On':
The time
settings in line 'Daylight
set corresponds
to
the summer
Saving':
time
(summer
Time/Date
Manual
Time
AM/PM
Year
Month
Date
Daylight Saving
09:02
AM
2003
01
01
Off
To exit press
SYST£M MENU
time is on)
'Of/':
The time set corresponds
to the winter
time (summer
time
is off)
10
11
If the setting
30
When
all settings are correct,
confirm
with
OK.
To end, press SYSTEM-MENU
has been confirmed
with
OK the automatic
system is disabled.
Installing your DVD recorder
Information
on the TV screen
You can check!change many functions and settings of your
bar The menu bar cannot be displayed during recording.
DVD
Recorder
via the system menu
Menu bar icons
The
SYSTEM-MENU
and
•
buttons
button
is used to call up the menu bar (main menu)
are used to select the corresponding
function.
The
and to close it. The
•
button
confirms
the
function and either leads you to an additional menu or executes the function.
Depending on the disc inserted, some functions may not be available.
Menu bar I
T
Current
(l_"
Audio
Camera
Title/Track
Language
Angle
Menu bar 2
While
menu bar I is being displayed, you can press
41"1_
Picture
•
repeatedly
to display menu bar 2,
by Picture
Fast motion
Field for temporary
There
is a field
in the top
left corner
regarding different
operating functions.
certain disc functions are activated.
messages
of the menu
This
bar which
information
displays temporary
appears
briefly
on
the
information
screen
when
Scan: Play introduction to each track
Information
on the TV screen
31
_
Repeat
current
title
Repeat
current
chapter
Repeat
A to B
_E
..........
Child
...........
Status
lock on
Action
prohibited
box
The status box displays the current
This display can be turned
status of the DVD
Recorder
and the type of disc inserted
off
Disc type icons
DVD+R
Video-CD
Q
error
Disc error
Disc status icons
s_0p
ii
pa_se
Stop
Pause
play
Fast forward
slow
32
(x8)
Slow motion
Information on the TV screen
Tuner
info box
This box appears in the bottom
left corner
of the TV screen.
signal, the TV channel, and the channel name of the program
_'_X
No Signal
TV channel is not available or reception
connected or is turned off
'Live picture'
box'
in the 'Tuner
It displays the
current
antenna
you just selected.
to too weak I Device is not
information
Instead of the information about the aerial signal or the TV channel, you can watch the picture
of the selected TV channel or the signal on the input socket,
In
the
system
symbol '[_'
In the line 'Live
or 'Off
3
(button
SYSTEM-MENU)
with
source
select
view
select 'On'
to view
this picture
OK and then
SYSTEM-MENU
info box
This box is located
above the tuner
info box. When
a recording
is programmed
the time symbol and the start time or the date of the first programmed
When no timer is programmed, the current time will be displayed.
This box is not displayed
an OTR recording
during disc playback or recording.
by pressing
OTR
Information
the
•
to switch this picture off.
End with
Timer
menu
and confirm
However,
(timer),
it shows
recording.
you can access it duriong
SYSTEM-MENU.
recording
will run until
on the TV screen
displayed
stop time
33
Playback
General
The DVD
information
Recorder
regarding
can be used with the following
•) DVD Video
•) Video CD or Super Video
playback
systems:
CD
•) DVD+RW
•) DVD+R
•) DVD-RW
(video mode, finalized)
0) DVD-R
0) CD-R
0) CD-RW
0) Audio CD
0) MP3-CD
•) Picture-CD
(JPEG-data)
You can operate the
the DVD recorder,
x'p_N'
DVD-Recorder
using the
appears
display,
on the
¢_ The child lock
was activated
and _Authorizing
x I see an 'X'
¢_ DVDs
in the
x I see region
¢_ Because
code.
menu
DVD
appears
code
films
of the world,
Discs
inserted
bar on the
screen,
in such a way that certain
information
usually
all DVD
are possible
screen,
on
not
the
¢_ There
34
are no region
player
at the
are keyed
can be assigned an optional
a DVD
region
of
lock _
are
playback.
When
function
is not
same time
in all
to a specific
region
code.
region
playback
can be found
codes for DVD+Rs.
operations
on the front
screen.
released
players
during
the selected
codes of the player and disc do not coincide,
¢_ The region code for
back of the device.
or the buttons
disc. Read 'Child
chapter.
on the
are
control
lock'
or onIy specific functions
the 'X' symbol
available.
regions
for the
discs' in the 'Child
can be manufactured
required
remote
If the
is not possible,
on a label at the
Problem
Playback
Inserting
1
2
!
a disc
Press the
OPEN/CLOSEA-_
button
on
the
front
of
I
the
Recorder. The disc tray will open. '_PENI_' will appear in the
display, then 'TP,F_ ,gPEN' when the disc tray has already been
opened.
I_Ivf_l_Ii l_II-1
PLI
I
IlIIIIIllllllllllllll
Carefully place the disc into the tray with the label facing up, then
press
PLAYI_ or
OPEN/CLOSE_
'L-L_5;_'_' then
'F_EF_I_' will appear on the display This indicatesthat the disc
is being read
How do I insert double-sided
DVDs?
Double-sided DVDs do not have labels on either side. The label for each
side is placed in the middle (on the inner ring). To play a specific side,
the abe on the side you want to pay must be on top.
?
I Opening/Closing the tray using
the remote control
You can also use the remote control to open and close the disc tray.
To do this, hold down the STOP • button on the remote control until
I'_E_',JL_' (opens) or 'EL_S ?',5' (closes) appears in the display.
3
Tip
Playback starts automatically.
Q
0
VIDEO
When playing a DVD+RW,
the Index Picture screen appears. Choose the title you want to play
with • , •
or _
, I_1_1
Confirm
with
OVE2÷RoWrI_a_
OK.
For more information,
read section 'Playing a DVD+RW
or DVD+R'
DIGIT_L A_DIO
Playback
35
If 11' lights up on the screen, begin replay with
PLAY
I_
.
If a menu appears on the screen, select the corresponding
menu item with the buttons of the
remote control indicated on the screen (PREV= _
, NEXT= _
) or with the remote control
buttons 0-9.
For more information,
read section 'Playback of a (Super) Video CD'.
Playing a DVD video disc
1
2
3
If playback does not start automatically,
The following
title, chapter,
PLAYI_
.
,_,_,,
if the
or DVD+R
inserted disc has been write-protected
DVD+R,
or it is a finalized
playback starts automatically.
If playback
does not start
automatically, select the title
you want
to play from the index screen using • or •
You can also use the 1_14 or I_1_ buttons on the front
I
f-t--I 4I
I_1_1
of the
IIIIIIIIIIIIIIIIIIIII
recorder
Press the
PLAYI_
F_I_II_IF_
PI_I
1
I
button.
The following will appear on the display:
title/chapter
number, elapsed time.
xl see the message
36
g-_4
To eject the disc, press OPEN/CLOSE-AA on the front of the
DVD recorder.
E_FP_,_L
on the display
Problem
¢_ There are no recordings on this disc.
4
I
2:,gLl
IIIIIIIIIIIIIIIIIIIII
I
To stop playback, press STOP • on the remote control or
• on the DVD recorder.
Playing a DVD+RW
1
2
3
press
will appear on the display:
elapsed time.
To stop playback, press
• on the DVD recorder.
STOP
•
on
the
remote
control
1
or
Playback
5
To eject the disc, press
DVD recorder_
have
been
During
recorded
playback,
OPEN/CLOSE
in different
A
recording
the device will automatically
on the front
of the
modes?
switch to the proper
mode
'M1,
M2,
M4, attention
M_.
What
do M2x,
Iinformation,
mustM3, pay
regard Selecting
to recordings
that
For more
please read tothewithsection
the recording
mode (picture
Playing
quality)'
_Manual recording',
audio CDs
You can also use the DVD
1
in the chapter
Recorder
Insert an audio CD
to pay audio CDs
Playback starts automatically
Audio CO display
If the TV is turned on, the Audio CD display will appear on the screen,
During playback, the number of the current track wili be shown on the
screen and display.
2
Stop playback with
STOP
•
Track
number
and total
Tip
play time
are displayed.
Playing MP3 CDs
MP3 (MPEGI Audio Layer-3) files are highly compressed pieces of music. Using this technology
the data volume can be compressed by a factor of l0 This enables you to fit up to 10 hours of
CD quality music on a single CD-ROM.
When creating MP3 CDs, keep the following in mind:
Data system supported: ISO9660
Directory structure: maximum of 8 levels
Formats: *.rap3
File names: maximum of 12 characters (8+3)
Maximum of 32 albums, 999 titles
Sampling frequency supported: 32, 44 I, 48 (kHz). Music pieces with different frequencies will be
skipped.
Bit rate supported: 32, 64, 96, 128, 192, 256 (kbit/s)
ID3 Tag: Version I, II In the case of later versions, the directory name will appear as the
album and the file name as the title.
Important
information
regarding
Only the first session of a multisession
insert an MP3 CD
Playback
playback:
CD is played back.
Playback starts automatically
37
MP3 CD display
If the TV is turned on, the MP3 CD display will appear on the TV
screen.
During playback, the number of the current track wil{ be shown on the
screen and display.
During interrupted playback (using STOP • ), the album numbers will
be shown on the TV and on the display.
If available on the CD in a so-called ID tag, more information on album,
track, and artist will appear on the display,
2
Stop playback with
STOP
•
The number
Tip
of albums appears on
the display
Other
playback functions
Select the previous or next track with I_
or _
.
You can also use TIC to select tracks and albums.
¢
Press TIC and then select symbol 'T' for album or 'C' for track
with It- or 41 .
2
Select the number of the album/track with
buttons 0..9 on the remote control.
•
, •
or the number
Tip
You can also use repeat functions ( PLAY MODE ),
Playback
(Super)
Video
of a (Super)
CDs may feature
special playback functions
'PBC' is turned
Video
'PBC' (Play Back Control).
CD
This allows
the direct
(menus). The Video CD must be PBC-compatible
selection
of
(see CD packaging).
on by default.
Insert a (Super) Video CD,
If the '•' appears on the display, begin playback with PLAYI_
,
If a menu appears on the screen, select the corresponding
menu
item with the buttons of the remote control indicated on the
screen (PREV=
buttons 0.,9.
If the
I,,
PBC menu
, NEXT=
contains
I_
) or with
a title
list, the
the remote
desired
title
control
can be
chosen directly.
3
4
38
The
RETURN
button
Stop playback with
will take you back to the previous
STOP
menu
•
Playback
Other
playback
Changing to a different
When
a disc contains
more
than one track, title,
functions
chapter
track/title
or chapter, you can change to a different
title or chapter as follows. However, if a title contains
selection is then possible via the menu bar only.
several chapters,
track,
these are selected. Title
the
button you
Usingcan
thego _to the
button,
can reach the using
start
DuringIH_Iplayback,
next you
title/chapter/track
of the current
title/chapter/track.
By pressing the _
button
twice,
you
can
return
to
the
start
or
the
previous
title/chapter/track.
Using
the
T/C (title/chapter)
button
Press the TIC (title/chapter)
title with • or •,
Hake sure that the 'T' (title)
You
can also select
Press
T/C and select
Then select
button
icon is selected
a chapter
within
'C' (chapter)
the corresponding
and select
the
corresponding
in the menu bar.
a title
using the
TIC button.
using I_ .
chapter
with
•
or
•
Tip
,
Disc search
You can fast forward
other
a disc at four or thirty
two
times
normal
playback speed. You can select
speeds only via the menu bar (ll_).
1
2
During playback, hold down I_1< (reverse) or
switch to the search function You can switch
speed modes using the
To
continue
playback,
/ IH_I buttons.
press
PLAY_"
twice
at
the
desired
position.
During
search
I ¢_
x No
sound
DVD recorder.
Other
_
IH_I (forward)
to
between different
the sound
playback functions
is turned
off. This
is not
a defect
of your
Problem
]
39
Search
function
via menu
bar
During playback, press the SYSTEM-MENU button on the remote
control. The menu bar will appear at the top of the screen.
Select the '_1_' symbol on the second menu bar using •
• and confirm with • .
or
Now you can select different search speeds forwards or backwards
using • or •.
If
necessary,
SYSTEM-MENU
turn
off
button.
the
menu
To continue playback,press PLAYI_
line
with
the
Tip
twice,
Still picture
1
During playback, press PAUSEII
still picture.
I
to stop playback and display a
I
1
LLI
IIIIIIIIIIIIIIIIIIIII
Still picture features
via the menu bar
While playback is paused, press the SYSTEM-MENU button on
the remote control. Tbe menu bar will appear at the top of the
screen.
Select '4N)'
•.
in the second menu bar with
•
or
•
then press
You can now move the still picture forward
• or •.
or backward using
If
necessary,
SYSTEM-MENU
line
To continue
turn
off
button,
playback, press
the
PLAYI_
menu
with
the
Tip
.
Slow motion
Press PAUSE II on the remote control during playback. Then
hold down I,_1 or I_IH to switch to slow motion.
You can switch
40
between
the different
speeds with
1_14 or
_
.
Other
playback functions
Slow
motion
via menu
During
playback,
SYSTEM-MENU
bar
press
button
the
PAUSE II button
on the remote
control.
and
The
then
menu
the
bar
will appear at the top of the screen,
Select 'D_' with
•
or
< and confirm
You can now move forwards
<or
•.
If
necessary,
SYSTEM-MENU
To continue
Search
1
2
3
4
playback, press
with
Using this function,
turn
button.
time
with
or backwards
off
the
•
,
at different
menu
line
speeds using
with
the
Tip
PLAYI_
twice
entry
you can select where playback should start (elapsed time)
During
playback,
remote
screen
control
Select '_-)' with
stopped
press
The
•
or
the
menu
_
SYSTEM-MENUbutton
bar will
and confirm
and the screen displays how
appear
with
at the
•
on
top
. The playback
much play time
the
of the
is
has already
elapsed.
Enter the desired
buttons 0.,9.
Confirm
with
start
time
for the
playback
using the
number
OK.
¢_ Tbe selected title is shorter than the time entered. Enter a new time
I xThe time that I entered is blinking on the screen
or cancel the function with SYSTEM-MENU
5
Other
Problem
1
Playback will now start at the time you entered.
playback functions
41
Repeating/Shuffle
You can select an entire section or the entire disc for repeat playback. Depending on the disc
type (DVD-Video, DVD+RW, Video-CDs), you can select chapters, titles or the entire disc.
Select the desired
chapter,
title or disc and start playback.
During playback, press PLAY MODE.
By pressing
MODE again, you can select from the following options:
) _
Repeat chapter (DVD only)
•) '_o
':Repeat track/title
•
.
) repe_
_-_t _,.Repeat enure
d , sc (video CD, audio CD only)
) ._
Shuffle
•) No display:no repeat
3
Repeat
To cancel the repeat, press STOP •
You can also keep pressing PLAY
disappear
PLAY
MODE until the displays
a specific segment
A-B
You can repeat a specific segment within a title/chapter/track. To do this, you must mark the
start and end of the desired segment.
1
2
3
4
42
During
playback,
press
the
PAUSE
II
at the
desired
starting
position.
You will see a still picture.
Keep pressing PLAY MODE until the ' _ ' symbol appears
on the TV screen. This will store the start point.
Start playback with PLAYI_ .
At the desired stop point, press the OK button. ' _
' appears
on the TV screen Playback will now resume repeating the
selected segment.
To cancel the repeat, press STOP •
You can also keep pressing PLAY
disappear
MODE until the displays
Other
playback functions
Scan
function
Using this function, you can play the first 10 seconds of each chapter (DVD) or track (CD or
VCD) on the disc•
During playback, press PLAY
appears on the screen
After
l0
seconds,
chapter/track•
chapter/track,
Camera
To
the
DVD
resume
press STOP
MODE repeatedly until ' ?_2" '
Recorder
the
•
will
playback
and then
switch
at
the
PLAY
to
the
next
corresponding
I_
angle
If a disc contains video sequencesthat were recorded with different camera angles, you can
select different angles for playback•
During playback, press PAUSE II • You will see a still picture.
Press the SYSTEM-MENU
I
X
The
{_
ICOn
cannot
button and select '_'
using •
be selected,
function is, therefore, not available.For more information, pleaseread
I ¢_ Tbe
selected
scene
wasdisc.
only
the label
of your
DVD
3
4
Other
recorded
with
one
camera angle. Tbis
Problem
Select the desired angle with • or • . You can also directly
enter the number with the number buttons 0..9 •
After a short pause, playback will resume from the new angle.
The '_'
icon will remain visible until a section starts that only
has one camera angle•
playback functions
43
Zoom function
Using this function,
you can enlarge the video image and pan through
the enlarged image.
During playback, press ZOOM. The DVD Recorder switches to
'PAUSE'. You will see a still picture.
Use
3
4
5
6
•
or
•
to select the desired zoom factor.
As soon as 'press
OK
to pan'
appears,
the zoom
process
is
complete,
Press
OK.
Use
•
image that you want
, •
, _
, and
to look at more
•
to select an area of the
closely
Confirm with OK.
To stop zooming,
press
PLAYli_
and then
SYSTEM-MENU.
Changing audio language
Pre-recorded
DVDs
often come in different
languages. The language used for playback is the one
that you selected during the initial installation of the Recorder or the
DVD. However, you can change the audio language of a disc at any time.
default
language of the
Please note that the audio language can be changed via the menu ( DISC-MENU
button)
inserted
playback in the
disc as well as with
two menus may be different.
menu
Press
Use
AUDIO
•
directly
3
44
or
enter
•
the
AUDIO
button.
Some DVD's
The audio languages for DVD
only allow
of the
you to change the language in the DVD
during playback.
to select the desired
the number
audio language. You can also
with the number
buttons
0..9.
Playback will now resume with the new audio language.
Other
playback functions
Subtitles
Pre-recorded DVDs sometimes come with different subtitle languages. The language used for
playback is the one that you selected during the initial installation or the default of the DVD.
However, you can change the subtitle languageof a disc at any time.
Please note that the subtitle languagecan be changed via the menu ( DISC-MENU button) of the
inserted disc as well as with the SUBTITLE button It is possible for the subtitle languagesof
the two menus to be different.
1
2
Other
Press SUBTITLE during playback.
Use • or • to select the desired subtitle language.You can
also directly enter the number with the number buttons 0..9.
You can shut the subtitles off with number buttons 0 or by
selecting 'off.
Playback will now resume with the new subtitle
playback functions
language.
45
The 'Digital
Photo
Manager'
In addition, you can store the pictures in a so-called album in a specific order, yet without
changing the order in which the pictures are stored on the memory card.
Moreover, you can view the pictures in a slide show at adjustable intervals.
Store the slide show on a DVD+RW/+R so you can view them on a DVD player
How
many
pictures
Since the storage
(quality,
picture
camera,...)
You
can be organized
size of a JPEG picture
information,
the limitation
can store
JPEG
or memory
In case
recorded
you want
by the
DVD+R,
DVD),
of 999
'Showing
parameters
resolution
storage
capacity,
photos
in one
of
album
the
on
a
to store
pictures
on a medium
that
cannot
be
DVD
recorder
(Picture
CD,
CD-ROM,
finalized
you
can store
up to a maximum
albums will
with the appropriate
disc ID-number,
the different disc is possible,
the followin_
DVD-Recorder?
on different
card.
album in 20 albums. These
Select from
the
compression,
is only the available
up to a maximum
DVD+RWI+R
from
depends
be stored
With
of
I00
pictures
in the internal
this number
per
memory
the allocation
to
"7
chapters:
JPEG pictures
from
a roll',
in order to view and modify the pictures and create slide shows from the roll.
'Creating
an album',
to arrange
pictures
from
different
rolls
in a definite
order
and to create
a slideshow
from
the
album.
'Storing
rolls/albums
on a DVD+RWI+R',
Store your JPEG pictures for archiving on a DVD+RWI+R.
'Changing
album
settings',
to modify the albums to your personal
What
is the
difference
preferences.
between
a 'RolF
and an 'Albums'?
'Roll'
A folder
35ram
digital
containing JPEG pictures,
film
for
cameras,
It is comparable
Rolls will
be created
with
a conventional
automatically
from
the
cameras.
'Albums'
A binary
file
comparable
pictures
containing
with
of different
You can delete
46
references
a conventional
to
photo
the
pictures
album
that
on
the
may
rolls,
It is
contain
the
films (rolls).
an album
without
deleting
the pictures
of the rolls.
The 'Digital Photo Manager'
The
PC (PCMClA)
Card
In this DVD-Recorder you can use the following types of memory cards with an adapter:
o) SD memory cards
o) Multimedia Card
o) CompactFlash
o) SmartMedia
o) Memory Stick/Memory Stick pro
o) Micro Drive
o) xD Picture Card
The DVD-Recorder
can read/write
systems FAT 8, FAT 12, FATI6
than 2 GB.
Inserting
1
2
files, which
were
stored
on
memory
cards
using the
and FAT 32. This means that it can handle memory
file
cards larger
the PC Card
If necessary, insert the memory card into the PC Card adapter
first.
The label must be facing up.
The contacts must be facing the device.
insert the PC Card into the media slot in the front of the
recorder until the EJECT button sticks out of the device front
completely. Press this button only if you want to remove the PC
Card
Removing
the PC Card
Press the EJECT button
next to the PC Card.
This will push the card out of its slot.
If the card remains in the slot, insert the PC Card once again and
press the EJECT button again
Warning
!
Insert/Remove
could
the
damage
You can recognise
•) A moving
If you were
PC Card
the memory
the
disc symbol
not
only when
there
is no access to the
memory
card.
This
card.
access by:
lights up on the top left corner
sure, press in the 'Digital
take you directly into the 'Media menu'
offwith
the STANDBY
_) button.
The 'Digital Photo Manager'
Photo
screen.
Manager'
of the screen
the button
PHOTO.
This will
You can also switch the DVD-Recorder
47
Showing JPEG pictures from a roll
The DVD
a DVD
recorder
and write
can read JPEG pictures
them on a DVD+RW/+R
stored
on a CD-ROM,
or memory
Picture
CD, memory
card, or
card.
Please observe the following:
•) The file extension hasto be '*.JPG'and not '*.JPEG'.
•) These pictures must be stored in the root directory or in a subfolder called 'DCIM'. These
will be recognized by the DVD recorder as rolls (comparable with a 35ram roll for cameras)
You can select the directories (folders) as rolls in the 'Media menu'
•) This device is compatible with still pictures (JPEG)
•) It can only display DCF-standard still pictures or JPEG pictures e.g. TIFF. It cannot play back
moving pictures, Motion JPEG, and other formats, or pictures in formats other than JPEG, or
pictures associated with sound e.g. AVI-files
Insert the medium
you want to use (CD, DVD+RW/+R,
memory
card)
Press PHOTO on the remote control
The 'Media menu' will
appear
3
4
Use • or • to select the medium you want to process (disc
or memory card). If you did not insert the corresponding medium
(disc or memory card), a warning sign will appear above the
symbol on the left hand side of the screen
Confirm
with
_
.
Select 'Roll' using •
6
7
8
9
or
•
and confirm
with
You will see an overview with the first picture of each roll that
contains pictures, The display and the description
of the roll will
depend on the camera or the computer
this roll
Select the desired
The
data
pictures
will
be
roll using •
read
or
and then
•
program
and confirm
an overview
used to create
with
of
OK
the
stored
will be displayed,
You can select a picture for viewing or editing with
•
, _ ,
l With
Fast browsing
the switch
pictures
_
or _trough
you can
one page forward or backward,
You can also select a picture with the number buttons 0..9 on the
Ir_mote.
48
Tip
The 'Digital Photo Manager'
0OKtose,ectt
!
The picture
Editing
1
2
will be displayed as a full picture
on the screen
JPEG pictures
On the corresponding pictures press SELECT to select them
for editing.
The picture frame appears in a different color•
If you want to deselect the pictures, press SELECT on the
selected pictures again.
Keep pressing • until the menu bar is selected. Select one of
the displayed functions with the • or • button
Which
options are available?
'Menu': leave the menu
'Play_: Starts the slide show
'Erase': Erasesthe selected pictures
'Rotate': Rotates the selected pictures by 90°
'Cops/: Copies the selected pictures on the other loaded media (from
memory card to DVD+RW/+R or vice versa)
'Select all: Selects all pictures
'Cancel: Cancels the changes
Using the buttons on the remote
'Play_: Button PLAY I1_
'Erase': Button CLEAR and then OK
'Rotate': Button ANGLE
Tip
Slide show
You can display JPEG pictures
intervals.
Starting
roll automatically
one after the other
at adjustable
the slide show
Press
Interrupting
in the selected
PLAYID-
to start the slide show•
the slide show
Press PAUSEII
pictures
Press
PLAY_
• This will stop the automatic display of the
to resume the slide show
The 'Digital Photo Manager'
49
Closing
the slide show
Press
Changing
STOP
•
. The
picture
overview
will
appear.
the slide show settings
Press
SYSTEM-MENU
during
playback of the slide show.
Select one of the displayed functions
Which
options
'OvervieW:
'Play:
41 or
Select one of various
Confirm with OK.
overview.
PLAY
Switches repeat playback
the
buttons
on the
Button
PLAY
Enlarge pictures:
Button
ZOOM
Advanced
Button
I_
I_ .
of the s_ide show on and off
MODE
Tip
in the DVD
of the JPEG
recorder
or a DVD+RW/+R.
The original
stored on the medium.
picture
Please make sure the
card or
memory
as PLAY
•
EDIT
editing
You can edit the pictures
I
as
remote
Repeat playback:
Edit pictures:
button.
Has the same function
speeds by pressing
Start the slide show with
'Repeal:
_
are available?
Returns to the picture
STOP •
Resumes the slide show, Has the same function
'Timef:
Using
with the
and then store
remains
unchanged,
DVD+RW/+R
pictures
them back on the memory
and the modified
is not write-protected
card
one is additionally
and has enough
storage space.
Press at the required
picture the button
Select one of the displayed functions
Using
the
ANGLE
ZOOM
STOP
CLEAR
50
buttons
on the
EDIT
with the
_I or
_
button.
remote
: Rotates the picture
: Enlarge the picture
•
: Returns to the picture overview
: Discard
the changes. The picture
will be reloaded.
Tip
The 'Digital Photo Manager'
'Overview'
Returns
to the picture overview
'Rotate'
Rotates the picture
by 90 ° each time you press OK,
'Flip'
Mirrors
the picture
along its vertical
axis when you press
OK
'Zoom'
Using this function,
you can enlarge the picture
and pan through
the enlarged picture.
Press OK to activate the zoom function.
Select the area to be enlarged with _I , •
3
4
, •
, •
You can press ZOOM to enlarge the selected area at several
steps
Press OK to return to the normal picture size.
'Filters'
Using this function,
1
you can modify the picture
Press • and select one of the displayed functions using •
•
Confirm with •
Which
options
'Sepia:
Displays the entire
are
'antique'
'Nega6ve':
picture
Converts
negative':
'Black
& white':
Keep pressing
colors,
It gives the picture
the picture into a black-and-white
Converts
Converts
Use this function
from
in brown
an
appearance,
'Color
'Soften':
or
available?
the picture
to a color
2
properties.
edge blurring
•
negative.
into a color negative. Comparable
negative film.
the picture
to reduce
into a black-and-white
picture
sharpness in three
to a visible blur.
picture,
steps,
Tip
until the menu bar is selected.
The 'Digital Photo Manager'
51
'Color'
Using this function,
you can change the red, green, and blue color
components
of the picture,
Press •_
Use
3
4
•
or
•
to select the corresponding
Change the color
using
Keep pressing
until the menu bar is selecte&
•
_I or
color control
•
'Resef
This setting
will
appear only
discard the changes, confirm
if changes have already
with
been made to the
picture.
If you want
to
been made to the
picture.
If you want to
OK.
'Save'
This setting
will appear only
save the changes, confirm
52
with
if changes have already
OK.
The 'Digital Photo Manager'
Making
a DVD
Using this function,
compatible
you can record
the pictures
slide show
in such a way, that you can view the slide show
from a roll or an album on a DVD player.
The slide show will be stored on the DVD+RW/+R
as a video
title.
If you want
to store
the
DVD+RW
so
of JPEG photos
and
photos in the JPEG format in addition to the video title, you must prepare the
that you can store both pictures and videos. See section 'Preparing a DVD+RW/+R'.
On a DVD+R
you can only
store
either
photos
or videos
A combination
video is not possible.
Making a slide show from a roll
Each roll will be stored
If you want
as one video title on the DVD+RW/+R
to make a video
tide from
different
rolls, you have to create
an album first. Then
you can store the album as a video tide on the DVD+RW/+R.
Select in the 'Media
the middle)
menu'
and confirm
Select the line 'Rolls'
3
4
Select with
video title,
Press
•
•
, •
the 'Roll
Settings'
will appear
with
•
(symbol
in
.
video
menu will appear.
title' using
•
, •
an confirm
in the display and the screen will
on the DVD+RW/+R
It will appear in the index picture
This video
card
•
and confirm
time left until completion.
The new roll will be stored
(movie).
title.
screen the memory
, the roll from which you want to make a
Select the line 'Make
OK.
'Sf_'I_'_'
with
will be recorded
automatically
overview
with
show the
as a video
title
as a separate
after the last recording,
No existing titles will be overwritten,
Ensure that there is enough space on the disc.
6
To end, press DISC-MENU
The 'Digital Photo Manager'
53
Making a slide show from an album
1
3
4
5
Select the
with I_
Add
disc
pictures
pictures
(top
to
symbol)
the
in the
album
'Media
menu'
as described
and
confirm
in chapter
'Adding
to the album'
You can change the
pictures, enter a new
picture
of the album,
personal preferences.
order
of the pictures,
erase
name for an album, or change
until
the
album
corresponds
Select 'Make video title' in the menu 'Album
V,A.
unwanted
the cover
to
your
Settings' using
Confirm with OK. '5_'I_'
will appear in the display and the
screen will show the time left until completion
The new album will be stored on the DVD+RW/+R as a video
title (movie), It will appear in the index picture overview as a
separate title.
This video
will be recorded
automatically
after the last recording,
No existing titles will be overwritten
Ensure that there
6
54
is enough space on the disc.
To end, press DISC-MENU
The 'Digital Photo Manager'
Creating
an album
You can store pictures contained in a memory card or DVD+RW/+R in a so-called 'Albums' in
a different order. Albums are binary files containing information on the orientation and storage
location of the pictures.
Albums from a medium that cannot be recorded by the DVD recorder (Picture CD, CD-ROM,
finalized DVD+R), will be stored in the internal memory of the DVD recorder. You can store up
to a maximum of 100 pictures per album in 20 albums.
Adding
pictures
Select 'Albums'
confirm with •
to an album
in the
'Media
menu'
using
•
or
•
and
An overview of the albums you already created will appear Select
'New album' with • to create a new album.
3
4
5
6
7
8
9
Press
•
. The menu 'Album
photos'
will appear
is already highlighted
Confirm with OK.
The roll overview
Use
•
pictures
or
•
will appear
to select
the
roll from
which
you
want
to
add
to the album.
Confirm with •
.
The picture overview will appear
Use _ , •
the album
, •
, •
to select the pictures you want to add to
Confirm each selected picture with SELECT.
Do not pay
attention to the order of the pictures. You can change it later in
the album
If you want
to store
many pictures
Then use SELECTto
album.
Select all pictures
These pictures
10
11
Settings'
In a new album, the line 'Add
Keep
pressing
Select 'Done'
album.
in the album, select
select the pictures
you don't
Select
want
all,
to add to the
Tip
will be deselected.
•
with
until
the
_I or
The 'Digital Photo Manager'
menu
•
bar
is highlighted
to add all selected
pictures
to the
55
f_
Confirm
_'
The album will be created.
while the album is created
Do not
13
OK.
with
remove
the
The menu 'Album
,cnF_,,,_m
_,_J w •ll appear
medium
Settings'
from
use •
Repeat
the
5 to
14 until
display
the device!
will then automatically
To add additional pictures,
confirm with OK.
steps
in the
to select
album
appear
'Add
contains
photos'
all
the
and
desired
pictures
Changing the picture order within
album
You can change the order of the pictures
pictures of the rolls remains unchanged
1
2
3
4
5
6
7
in the
'Media
an album as you
menu'
using
of the albums you already created
Press
select
•
to
•
wish
or
•
The
order
of the
and
.
An overview
the
desired
album
The
will appear.
'Album
Settings'
menu will appear.
Select 'Overview
by pressing •
The 'Overview
be found on the second menu page
Confirm
with
Press
SELECT.
Select 'Move'
option can
OK.
Use • , • , • , •
a different position.
Keep pressing
8
9
to select the picture you want to move to
The picture
•
frame appears in a different
color.
until the menu bar is highlighted
using
•
or
•
and confirm
with
OK
Use • , • , • , • to select the position before which the
desired picture is to be moved.
0
56
Select 'Albums'
confirm with •
within
an
Confirm
with
OK.
The picture will be inserted,
The 'Digital Photo Manager'
Editing
pictures
in an album
You can also erase, rotate, or hide pictures in an album. These changes will
album. The pictures on the disc or the memory card will remain unchanged.
Select the pictures you want to change in the 'Album
only
affect the
overview
using SELECT,
Keep pressing
3
•
until the menu bar is highlighted
Select one of the displayed functions
What
'Menu':
'Play:
do the
individual
functions
Closes the current
with the
<I or
b, button.
mean?
menu
Starts the slide show of the album
'Move':
Changes the order of pictures
'Erase':
Erases the pictures
from
within an a]bum.
an album, The picture
on the media
remains unchanged.
'Rotate:
'Hide':
'Select
'Cancel:
Using
Rotates
pictures
Hides pictures
air:
by 90 °
for the slide show
Selects all pictures
Discards all changes
of the
buttons
on the
remote
'Play: Button PLAY MODE
'Erase':
Button
CLEAR
'Rotate':
Button
ANGLE
The 'Digital Photo Manager'
$7
Changing
album
You can adjust various
album settings to your
date of an album. Moreover,
Changing
settings
individual
needs. You can change the name and
you can copy or delete the album
the cover
You can change the picture
picture
used to represent
a certain
album in the 'Album
rule, the first picture of an album is used as the cover picture.
However,
overvieW.
As a
you can use any picture
in the album as a 'cover picture'.
1
2
3
Select
• ,•
'New
cover
photo'
in the
and confirm with OK,
'Album
The album will be read and a picture
overview
Use
of the album will
•
, •
, •
, •
to select the picture
you want to
use as
the 'cover picture'.
Confirm with OK.
The new 'cover picture' appears in the bottom left corner of the
'Album Settings'
You can re-enter
the album
name
or change the name of an existing
album.
Select the 'Album name' in the 'Album
• and confirm with • .
Type the new album name using the
do on a cellular
How
can I enter
Press a number
appears.
or
the
can enter
on
The position
To switch
as often
I_
0..9 buttons
with
_
language
using •
the
dependent
like you would
•
buttons
character
characters
character
,
, •
0-9
where
. Change
?
or the number
with
the buttons
e.g,: '_', button
2for
'a'
as often as '_' appears,
press the button
for the following
character
a space press the button
over
using
as the required
the corresponding
For special characters
To enter
characters
button
You
and then with
Settings'
phone. You can also move to the position
you want to enter or change a character
the characters with • , • .
to upper
To erase a character
58
using
appear.
Changing
3
Settings'
will be selected
automatically,
I .
case characters
press
I repeatedly.
press
SELECT.
CLEAR.
To end, press OK.
The 'Digital Photo Manager'
Changing
the album
Select 'Date'
in the
confirm with •
'Album
date
Settings'
Select the field you want to change using
3
4
Change the date using •
the numbers•
, •
using
•
, •
•,
•
and
•
or use the 0,,9 buttons to enter
Confirm the changes with OK•
Calling
the album
overview
directly
Select 'Overview
(second page) in the 'Album
• , • and confirm with OK
Settings'
using
This will take you directly into the album overview where you
can make changes
Copying
an album
Using this function,
you can:
0) Copy albums created on a memory card to a DVD+RWI+R
0) Copy albums created on a DVD or a CD-ROM to a memory
This will also store the pictures
1
Select
using •
'Copy
, •
album'
(second
and confirm
with
page)
in the
Insert a DVD+RWI+R
disc or insert
The 'Digital Photo Manager'
'Album
Settings'
OK•
Copy album
Ix It is not possible to select
¢_ There is no media in the DVD-Recorder
I
card,
used for the album.
to store
a memory
card.
an album/'Roll'.
Problem
]
59
Erasing
an album
It is also possible to erase an album. The pictures within an album will
remain on the storage medium (disc or memory card) unchanged.
Select 'Remove
using •
, •
album'
(second
and confirm
with
page) in the 'Album
not be deleted
and shall
Settings'
OK.
If you really want to erase the album, press OK to confirm,
otherwise cancel the function using • .
3
The overview
Changing
of all albums will then be displayed
roll settings
You can adjust various
of a roll
Changing
roll settings to your individual
needs. You can change the name and date
the rolls name
You can re-enter or changethe name of an existing roll.
The name on the storage media will not be changed. The new name will be stored additionally.
Select 'Roll
name'
• and confirm with
in the
_ .
menu
'Roll
Settings'
using
•
,
Type the new roll name using the 0_9 buttons like you would
do on a cellular phone. You can also move to the position where
you want to enter or change a character using _I , _ .
3
Enter the new name with the buttons
Enter
the
characters
Press a number
appears.
or
_
on the corresponding
_
The position
as often
60
language
0-9
dependent
character
characters
character
press the button
character
a space press the button
over
.
or the number
with
e.g.: _, button
the buttons
2 for a and
as _ appears,
for the following
press
CLEAR.
I repeatedly.
will be selected
automatically,
1 .
to upper case characters
To erase a character
4
buttons
, •
as the required
can enter
For special characters
To switch
the
as often
You
then with
To enter
with
button
•
press
SELECT.
Tip
To end, press OK.
The 'Digital Photo Manager'
Changing
the rolls date
Select 'Date'
confirm with
in the
• .
menu
'Roll
Settings'
Select the field you want to change using
3
4
Change the date using •
the numbers.
, •
Confirm
OK.
Calling
the changes with
roll overview
Select 'Overview
confirm with OK.
in the
This will take you directly
•
using
, •
•
,
•
and
.
or use the 0..9 buttons to enter
directly
'Roll
Settings'
using
into the roll overview
•
,
where
•
, and
you can
make changes.
Deleting
a roll
WARNING!
This procedure cannot be reversed, since the rolls will also be erased from the corresponding
media. Deleting a roll will also affect any album that uses pictures contained in this roll
Therefore, apply this function with particular care.
Select 'Erase roll in the menu 'Roll
and confirm with OK.
Settings'
If you really want to delete the roll, press
otherwise cancel the function using • .
3
The overview
using •
, •
,
OK to confirm,
of all rolls will then be displayed,
The 'Digital Photo Manager'
61
Storing
rolls/albums
If you want to store the JPEG pictures
on a DVD+RW/+R
from
the rolls/albums
on a DVD+RW/+R,
you must first
prepare the disc.
Preparing
a DVD+RW/+R
Press PHOTO on the remote control
The media menu will
appear
Use • or • to select the disc alone as a medium. If you did
not insert a disc, a warning sign will appear above the symbol on
the left hand side of the screen
3
4
5
Press • .
Select 'Media
Use
•
or
only_or
Please
settings'
•
'Video
note,
prepared
to
using •
select
& photo'
that
whether
together
DVD+R's
for 'Photo
and confirm
you
with
OK.
to
store
want
'Photo
on this disc.
or
memory
cards
can
only
be
only
What is the difference?
'Photo only'
The DVD+RW/+R will
on the entire disc (4,4
'Video a photo'
On the DVD+RW/+R
pictures additionally to
after the movie.
be prepared so that only pictures can be stored
GB),
a space (650 MB) will be reserved for storing
movies. So you can store the appropriate photos
A DVD+R can not be prepared for 'Video & photo'
How long does this process last?
To prepare a disc for 'Video & photo', a new DVD+RW has to be
formatter first. This can take up to 25 minutes. You can speed up the
process, if you use a prerecorded disc.
6
7
8
62
Confirm with OK.
WARNING!
All data on the disc will be erased.
If you want to continue,
press
To cancel the process, press
P_?EPF_?,_
will
appear
OK.
•
in the
or
•
display
.
until
the
preparation
is
complete.
The 'Digital Photo Manager'
9
If the disc has been successfully
menu will
for 'Photo
Transfer
indicating
onlyI650MB
you can store
prepared,
the 'Media
the available storage
for 'Video
the photos
Using this function,
memory
appear,
settings'
space. (4.4 GB
& photo')
to a DVD+RW/+R
the pictures
card. You can handle these pictures
on the DVD+RW/+R
in the same format
as if they were stored
on a memory
If you want to play this DVD on a computer
drive, ensure that the operating
computer can handle the file system UDF 15 (Universal Disc Format).
If you want
compatible
to
play back a DVD+RW/+R
on
a DVD
player,
read section
as on a
card.
system
of your
' Making
a DVD
slide show '
Press PHOTO on the remote control
The 'Media
menu' will
appear
Use • or • to select the disc with the memory card (last
symbol). If you did not insert a disc, a warning sign will appear
above the symbol on the left hand side of the screen
3
4
Press • .
Use
•
memory
or
•
to select whether
card into
you want
a roll or to create
album that contains the same pictures
the album makes edits easier
to copy the complete
additionally
as the roll
to the roll an
The creation
of
Attention!
Ensure that
the data of the
space on the DVD+RW/+R.
video).
memory
Storing the album will also store
5
Confirm
with
A bar with
OK.
a time
card
(4,4GB photo
fits
on the
only/650MB
the corresponding
available
photo
and
pictures.
,cnRv,,
J'_'r' will appear on the display.
display
will
appear
on
the screen
until
the
process has been completed.
The 'Digital Photo Manager'
63
Changing
the media
settings
You can adjust various settings for a DVD+RWI+R or a memory card. If a CD-R/RW is loaded
no changes can be made, because this media cannot be recorded by the DVD recorder
1
2
Press
PHOTO
on
the
control.
The
'Media
menu'
Use • or • to select the medium you want to process (disc
or memory card). If you did not insert the corresponding medium
(disc or memory card), a warning sign will appear above the
symbol on the left hand side of the screen
Press
I_.
Select the line 'Media
'Media
remote
screen will appear.
settings'
and confirm
with
OK.
name'
The name of the media will be created
by the digital camera
'Media protecte_
The write
protection
of the media can be switched
You can use this function
only if the write
not select this line if your memory
'Prepare
card was equipped
a DVD
'Finalize
will be prepared
+
RW/
+
pictures
Once this process
for the data transfer.
64
Read further
information in the section
on a DVD+R,
is complete,
you
no further
DVD+R
is loaded
have to finalize
the
disc to play it on a DVD-player
changes can be made.
media'
these setting
or memory
You can
switch.
disc'
If you store
With
off by a software.
with a mechanically
R.
You can select this line only if a 'not finalized'
'Erase
can be switched
media'
The DVD+RW/+R
, Preparing
,
on or off.
protection
all data (rolls
card). This procedure
and albums) can be erased on a recordable
media (DVD+RW
cannot be reversed
The 'Digital Photo Manager'
Problem,solving
for 'Digital
Photo
Manager
PROBLEM
SOLUTION
Error message 'Media does
not contain photos':
•_On the inserted media (disc or memory card) no photo can be found.
•_The file extension has to be *JPG and not *JPEG.
•_The storage media should contain a sub directory 'DCIM', Under that there should be folders
so called 'Roils' Only pictures in these folders can be recognised
•_Pictures can also be stored in the root directory,
•_Before you make changes to the storage media check the content of the media in a computer
or in a digital camera.
The disc (CD-ROM,
•_The file extension
can not
DVD)
be read by the
DVD-Recorder,
available:
no pictures
•_The disc should
'Rolls'
has to be *JPG and not *JPEG.
contain
Only pictures
•_Pictures can also be stored
•_lf you create a CD-ROM,
a DVD+RW/+R
If you use a CD-ROM
searched for the photos
The 'Digital Photo Manager'
a sub directory
in these folders
in the root
'DCIM'.
Under
that there
should be folders so called
can be recognised.
directory.
you have to store the photos in the same directory
from a photo shop or something
on the basis of the disc format.
similar,
the
structure
whole
as on
disc will
be
65
Recording
General
information
What kind of discs can be used for recording?
You can used two different types of DVDs with this DVD recorder:
DVD+RW
This disc can be recorded on and then erased.
DVD+R
This disc can only be recorded oll once,
For this DVD to be played in a DVD player, it must be finalized with
'Finalize disc', After this is done, no more recordings can be added to
this disc,
If this disc is only to be played in the DVD recorder, then it does not
have to be finalized, Recordings can be added and then deleted,
However, the location (playing time) of the deleted recording (title) will
no ionger be available,
With the 'Manual recording' function you can make a spontaneous recording (for example, a
program currently being shown)
To do this, select the title to be overwritten or choose an 'Empty title' in the 'index screen'
with the • , • buttons.
If the recording is to be inserted between existing recordings, please note the length of the old
and new recording. If the new recording is too long, the recording (title/chapter) following it will
be overwritten.
Adding new
Record)
recordings
after
the end of all
recordings
(Safe
To add a new recording after the last recording on a disc, press and
hold the REC/OTR • button until 'JrHFEFc_E[
' appears in the display.
For DVD+R, each new recording is always placed after al{ previous
recordings since previous recordings cannot be overwritten,
End of disc is reached
If the end of a disc is reached during recording, recording will stop and
the Recorder will turn itself off automatically,
Please refer to 'Recording
and conclude it within
the disc,
66
with
automatic
switch-off,
Tip
if you want to start a recording
a specific amount of time, This permits accidentally
recording
manually
to the end of
Recording
Recording
without
automatic
!
switch-off
Switch on the TV and, if required, select the channel number for
the DVD Recorder (channel 3 or 4 or Audio In channel).
Insert a disc to be used for the recording.
The system and
content of the disc will be checked. '_ERIr_
_,r,
will• appear on the
display.
x Index
¢_ A
display
DVD+RW
• and
started,
x E
P_ _
¢" The
xA
•
was
to
_L
dialog
DVD
box
with
DVD
x'Title
n the
appears
the
recordings.
recording
Use
should
be
display.
asking
if the
contents
should
be erased
be ejected.
whose
(e,g. a data
until
the
• button.
limi_
contains
where
disc is a DVD+RW
Video
recordings
REC/OTR
already
is empty.
disc should
¢_ The inserted
that
a location
appears
inserted
or the
inserted
select
disc),
entire
appears
on
contents
This
disc
the
are not compatible
disc
is
screen
cannot
be
erased
when
a
used for
using
the
recording
is
attempted.
¢_ A disc can only contain a max, of 48 titles
Erase the titles or change the disc.
3
4
If necessary, switch to TV programming
MONITOR button on the remote.
Use
CHANNEL+
want to record
Channel
'EXT2'
or
number
of the
IN AUDIO
automatically.
'E_
'E_'
I'
Audio
Video
jacks
S-VIDEO
SVHS-/Audio
jacks
on
AUDIO
front
Switching
S-VIDEO
Digital
jack
(CVBS)
Video
and Video
jack.
IN and
Video
jacks are occupied,
jacks
L/R
between
the back
IIIIIIIIIIIIIIIIIIIII
in,
in is done
the signal at jack
COMPONENT
IN for Component
S-VIDEO/
Video/AudiofrontiacksA/V
automatically.
'E_2'
I FREETI TLE P,_,,
IN Video
IN is given priority.
Component
IN,
by pressing the
to select the channel you
L/R for SVHS-jack
jack
In case both
S-VIDEO
Problem
inputs:
S-VIDEO
between
titles),
will appear on the display:
external
(Y/C)
jack
Switching
'E;(T_'
CHANNEL--
The following
SVHS jack
Audio
Recording
(including the empty
left AUDIO
VlDEO
jack
In case both
S-VIDEO
/ left
AUDIO
and
jacks are occupied,
VIDEO
Video
right
right
VIDEO
is
done
the signal at jack
is given priority.
video
(i,Link)
front
jack
DV IN
Tip
67
5
To start recording, press REC/OTR • on the remote control
or RECORD on the DVD recorder
To start the recording after all other recordings on the disc,
press and hold the REC/OTR • button until '5_FE REE' appears
in the display.
For DVD+Rs, each recording is always started after all previous
recordings since previous recordings cannot be overwritten.
The display panel will appear similar to the example shown
below.
Inserting
I_1_1 I
chapter markers
1"
IIIIIIIIIIIIIIIIIIIII
During recording, scenes can be marked so they can be found or hidden
later.
During recording, press EDITat the start of the desired location.
'Inserting
marke/; appears on the TV screen, In the display, the
number of 'CHAPTERS' is increased by one.
For more information about title/chapter, please read the section
'Changing to a different chapter track!title' in the chapter 'Other
playback functions'.
6
Tip
You can stop recording by pressing STOP • on the remote or
• on the recorder. '_IE_4b'UP_T' will appear on the display. The
DVD Recorder is preparing the list of contents. Wait until this
message disappears in the display, then the recording is
completed
recording
Ix¢" The
If display
readscould
'_I S[notE_ be
_' completed correctly because of a disc
I
error, Check and clean the inserted disc if necessary,
Problem
1
If you want to playback recordings on a DVD player, you must first
I Making recordings on DVD+R discs compatible
finalize the disc in the DVD recorder, You can use the 'Finalizing'
,
. .
+
•
T
problem. Please read paragraph Fmahzmg DVD R discs _n the chapter
unction ondisc
thecontent',
DVD so that it can be read by the DVD player without
'Managing
68
Tip
Recording
Pausing recording
1
2
During
recording
recording
press
PAUSE
II
,
for
example
to
avoid
the commercials
To continue
recording,
press
REC/OTR
Ending recording
To stop recording, press the STOP I
•.
button. Wait until "FE ._ ._P_'
Tip
disappears from tbe disp ay before you try another feature.
Recording with automatic
one-touch-recording)
switch-off
]
(OTR
I
Insert a disc.
If necessary, switch to TV programming
MONITOR button on the remote.
3
4
5
Use CHANNEL+
want to record,
Press
REC/OTR
Each time
Press
REC/OTR
the
an entry,
can I check
control
•
you will add 30 minutes
wiII
recording
time
CLEAR
while
press
the
SYSTEM-MENU
the recording
box.
Recording
on the remote
to select the channel you
to
time.
can I delete
To delete
time.
How
•
you press
the recording
How
or CHANNEL--
by pressing the
remaining
while
end will
recording
an OTR
appear
I just entered?
tbe display sbows die recording
time?
is in progress.
on the TV
screen
The time
at which
in the timer
info
69
Preventing
accidental
erasing of discs
You can lock the entire
disc to prevent
can only lock the entire
disc It is not possible to lock individual recordings.
important
recordings
from being erased by accident. You
As long as these discs have not been finalized, you can protect them
What happens withDVD+R
discs?
against being overwri_en justlike DVD+RW.
]
Put the disc to be locked into the recorder.
While the Index Picture Screen is displayed,
the remote control. The first title is selected.
3
4
5
6
Press
•
Press the
. The disc information
_
Select 'Protected
•
STOP
I
on
screen is displayed.
button.
Select the 'Protection'
Confirm with _ .
Press
press
line.
using •
, then press
and confirm with OK
DISC-MENU
The entire disc is now
_, _L _-u_J' will appear
to play the disc.
protected.
If you attempt
on the display and 'Disc
a recording,
locked
will
appear on the TV screen
ll'Unprotected
you later decide
to record
at step
5,
70
on the disc, follow
these
steps but select
Tip
]
Recording
Lining up recordings
(assemble
You can add further
a title
cut)
recordings
will be added to the title
location onward. Depending
follow the current
current title,
within
title.
to a title already
contained
on a DVD+RW.
The new recording
as a chapter. Previous information
will be overwritten
on the length of the recording, this will also overwrite
The
To play back this recording,
also use TIC
recording
press
mode
(quality)
SYSTEM-MENU
is automatically
from this
titles that
transferred
and select 'C' (chapter)
using
from
•
the
You can
For more information, read section 'Changing to a different chapter track/title' in chapter 'Other
playback functions'.
New recordings on DVD+R can only be made on existing space, You
what happens
with DVD+Rs?
cannot overwr ....te ex st ng record ngs on DVD + R, d. sos.
In the index
to be added
display, find the title
to which
the new
recording
1
is
Look at the last minute of the old recording.
3
4
Press PAUSE II on the remote control at the location where
the new recording is to start. 11 ' will appear on the screen.
If you want to monitor the recording, you can switch to the
internal tuner using the MONITOR button.
Now
start
remote
The
6
Recording
new
recording
as usual
by
pressing
REC/OTR
•
on
the
control.
recording
Stop recording
with
is added.
STOP
•
71
Selecting
the recording
(picture
By selecting
quality)
a recording
mode,
you define
recording time for a disc.
To check the quality of a recording
recording
mode. Check during
For playback, the correct
1
the picture quality
mode
of recordings
you can make a 'test
and the maximum
recording'
with
the
desired
playback the quality of this 'test recording'.
picture
quality will automatically
be selected.
Switch on the TV, If required, select the channel number for the
DVD recorder (channel 3 or 4 or the Audio/Video In channel)
Select the record
remote control,
Which
recording
Please
during
STOP
observe,
recording.
• button.
mode
'M2':
Standard
quality with
'M2x':
modes
'M3':
recording
a total
Play (better
I also change
1
Press the
2
Select 'T_'
3
Select
4
At 'Rec
Mode;
5
Confirm
with
6
If you select
the
using
picture
recording
•
or
select
MODE
on the
with
a total
offers
recording
excellent
picture
S-VHS
picture
quality)
offers
time of 2,5 hours.
Total
recording
picture
quality).
mode
time of 3 hours,
quality).
Total
Total
recording
recording
time
of 6
via a menu?
button.
•
.
settings'
using
the recording
OK and end with
the 'M3',
than
quality).
SYSTEM-MENU
line 'Record
quality)
recording
than VHS
Long Play (VHS
Can
quality
DVD
(better
with
Long Play (S-VHS picture
the 'Stndrd
in the 'Filter
REC
time of 2 hours.
Play plus
quality
'M4':
Extended
time of 4 hours,
button
the best picture
Play (pre-recorded
a total
picture
'M6':
Super
hours.
the
can I choose?
offers
Standard
excellent
with
that
you can not switch
the recording
type
You have to interrupt
the recording
with the
'M/':
High Quality
time of I hour.
72
mode
•
or
•
and confirm
mode using
•
or
•
with
.
SYSTEM-MENU,
'M4' or 'M6'
(standard) or 'Spoi'f
mode' line.
recording
(for
quick
modes,
you can select
movements)
settings
Tip
Recording
Managing
disc content
General
A
ChMy
1
00:29:59.
M1
Fr_5/02/2003
When a recording is made on a disc, the following information is saved at the start of each
recording:
•) Name of the recording
If no name is sent by the broadcaster, then
the channel number (channel name) and time the recording started is saved as the name
•) Length of recording
•) Recording mode (quality)
•) Date of the recording
•) Recording index screen
If 'Auto
chapters'
is turned
on in the 'Record
settings'
menu, a marking
will
Empty title
01:30:01
be made every
5-6 minutes. These markers are called chapter markers.
These markers can be changed after the recording is complete.
1
Markings can be made on these discs as long as they have not been
ICan
markings also be made on DVD+Rs?
finalized.
It is also possible
you don't
without
to create additional
chapter
want to see (e.g. commercials).
the hidden chapter as a complete
Select from
the followin_
Read 'Editing
Read 'Deleting
recording
markings,
During
?
/
|
This allows you to hide or skip things
playback you would
then
see your
recording
sequence.
chaoters:
titles
recordings/titles'
Managing disc content
(name)'
to learn how to change recording
names,
to learn how to erase the title.
73
Favorite
Scene
Selection
In this menu, you can adjust a title to your personal
You can insert/delete
chapter markers,
title. Press EDIT on the remote control
Inserting
preferences.
hide chapters, select a new index screen,
during recording to open this menu
or split the
chapter marker
During playback, you can set and delete chapter markers within a title.
Each disc can have a maximum of 124 chapters, and an individual Title can have up to 99
chapters. When one of these values is reached, the following appears on the screen: 'Chapter
limif. Some markers will need to be deleted in order to create new ones or to make
recordings.
1
2
During playback, press EDIT on the remote control at the
appropriate point. The 'Favorite Scene Selection' menu will
appear on the screen
Press
•
press
OK.
or
•
to
'Inserting
select
'Inserting
chapter
marker
then
market _ appears on the TV screen
Inserting chapter marker
Press OK
Deletechaptermarker
Deleteallchapte/markers
This DVD is protected or a finalized DVD-R was inserted, You cannot
'X' appears on the TV screen,
make any changes to it,
3
To remove the menu, press
Current chapte/
[visible
I
Tip
Press EDIT to exit
EDIT.
Hiding chapters
initially all chapters are visible. You can hide chapters for playback (e.g. commercial skipping) or
make them visible again in editing mode, hidden chapters are displayed in dimmed mode..
A chapter always consists of a start marker and an end marker
To hide a certain scene, proceed as follows:
1
2
3
Search the beginning of the scene you want to hide. Press
PAUSE II
Press
EDIT on the remote
Selection'
editing
control
to call the 'Favorite
Scene
T
C
menu,
Faro[ire Scer_e Selectiott
Set the start marker
The number
one,
using OK.
of chapters
('C')
in the
menu line will
increase
by
Inserting chapter marker
Press OK
Deletechaptermarker
Deleteallchapte/_arkers
Current chapte/
[visible
I
Press EDIT to exit
74
Managing disc content
4
Search for the end of the scene. You can also use NN or
_NI to search faster for the end of the scene,
Make sure that you do not jump into the next title (title number
'T' must not change) Only chapters within a title can be hidden
Press PAUSEII
6
at the corresponding position.
Set the end marker
with
OK
This will also be the start marker
of the next chapter
The number
xThe
of chapters
number
('C') in the menu line increases by one.
of chapters ('C') has increased by two or more
numbers
¢_ This is the case when you want to hide a chapter that, due to
automatic chapter numbering (if switched on), stretches over two or
more chapters. In this case, you must delete the start of the
automatically generated chapter:
Press T/C t_vice while the editing menu is displayed to change the
chapter number.
Select the chapter between the new markers using •
Press PAUSEII
.
or
•
.
Select 'Delete chapter marker with • to delete the current
chapter marker. Confirm with OK. The current chapter number
decreases by one.
7
8
9
10
11
Press
TIC twice
to change the chapter number
Select the previous
chapter with
next chapter (end of the chapter
•
'C'.
, since you are already in the
is also the beginning of the next
chapter).
Wait
until the chapter
has been played and press
PAUSE
II
to
stop playback.
Select 'Current
Using
•
select
chaptef
'hidden'
Switching
quickly
You can ,switch
between
using •
The
show
or •
picture
chapters
is shown
,
(visible)
(hidden)
quickly and easily using SELECT,
This function is independent from the se ected
2
Problem
To end, press
darker
,
and hide
chapters
Tip
line.
EDIT
During playback this chapter will be skipped.
if the chapter is not visible, select 'visible'
in step 3 with
Managing disc content
•
.
75
Deleting
Within
chapter
a title, you can either
1
markers
delete individual chapter markers
or all markers.
During playback of the corresponding
chapter, press EDIT on
the remote control. The 'Favorite
Scene Selection'
menu will
appear on the screen.
Inserting chapter marke/
Press OK
Deletechaptermarker
Deleteallchapte/markers
How
2
3
4
can I select
other
Press
2
displayed at the top of the screen,
Select the title (3-) or chapter (C) with
3
Select thettle/chapter
V,
the
select
remote
Currerlt chapte/
1
Using
TIC on
chapters?
control,
Titles
I_ or
you want to edtwth
either
'Delete
all
Confirm
(You will be prompted
with
OK.
chapter
really want
want to, press the
to delete
will
•
]
Press EDIT to exit
or
•
Tip
.
market"
for
for all chapters
to press
all markers.
[visible
be
this
of the
OK again to
If you do not
"i button.)
To remove the menu, press
Changing
markers'
chapters
4 .
chapter
chapter or 'Delete
selected title.
make sure you
and
the index
EDIT.
picture
Normally, a frame from the begin of a recording is shown as the title's index picture. You can,
however, use any picture as an index picture.
1
2
3
During playback, find the location that you want to use as the
new index picture. Press the PAUSE II button to pause play.
Press the EDIT button, The 'Favorite
will appear on the screen.
Scene Selection'
menu
T
C
Faro[ire
Sterne
Se{ectio_t
Select the line 'New
index
picture'
and confirm
with
OK.
New i_de× picture
Press OK
New background
Divldetitle
screen,
Start the action with
OK.
'Updating
DVD
Recorder
menu'
appears on the TV
Press EDIT to exit
When
successfully
picture
screen.
76
completed,
the
automatically
brings
you
back
to
the
index
Managing disc content
Changing
the menu
background
You can, however, use any picture as the menu background. This setting is stored on the
inserted DVD. Pleasenote that after the modification the 'originalbackground' will be lost.
If you erase the complete disc (close the disc tray with CLEARand make a recording) the
'original background' will be restored.
1
2
3
During playback, find the location that you want to use as the
new index picture. Press the PAUSE II button to pause play.
Press the EDIT button, The 'Favorite Scene Selection' menu
T
C
will appear on the screen.
Favorite Scene Selectio_t
Select the line 'New
backgrouncf
and confirm
with
OK
New i_de× picture
Press OK
New background
Divldetitle
TV
Startscreen.
the change with
OK.
'Updating
menu'
appears on the
Press E[31Tto exit
When successfully completed, the DVD Recorder automatically brings you back to the index
picture screen.
Splitting
A title
titles
can be split into several parts (titles)
characterized
Warning!
Once a title
is split, it cannot
Because recordings
can I also divide
to divide cities.
1
2
3
no matter
how
large. Each of these parts
(titles)
is
by its own index picture,
be reversed.
on DVD+Rs cannot be overwritten,
titles on DVD+Rs?
it is not possible
Press EDIT on the remote control during playback of the
corresponding title. The 'Favorite Scene Selection' menu will
appear on the screen
Select 'Divide
title'
and confirm
with the
1
T
C
Favorite Scene Selectio_t
New i_de× picture
OK button
Press OK
New background
Divldetitle
If you are certain, start the process with
will appear on the screen.
index
picturethe overview
Wait until
new title
The process of splitting
is displayed
with
OK
'Dividing
title'
Press E[31Tto exit
an index
picture
in the
the title is now complete.
Managing disc content
77
Editing
recording
titles
(name)
The channel number and time of the recording are stored as the name. The name of the
recording can only be changed after the recording has been completed
Press STOP • to stop playback if necessary
Using •
with •
or • , select the title you want to edit and confirm
The menu for editing names will appear
._
3
4
5
Select 'Name'
using •
or
•
and confirm
with
•
_,
Name
Settings for title Charly I [ Cha[Iy 1
Play full t_tle
L
Eraselhstt
L
Name
Settings for title Charlyl
Play fu_lt_tle
.
Using • or _1, select the character position
letter/number/symbol is to be changed or reentered.
e
where the
Change the desired character using • or • . You can switch
between
uppercase
and
lowercase letters
with
the
SELECT button You can re-delete a character with the
CLEAR button
Playing
the entire
title
If you have hidden certain chapters of a title, with this setting you can view the entire title
including the hidden chapters Proceed as follows:
Press the
STOP•
DISC-MENU.
Using
•
confirm
3
button,
or
•
select the title
with
•
The title
Select 'Play
full
title'
using
during
playback
press
that you want to play back and
editing menu will appear.
•
or
•
and confirm
with
OK.
J
[ ChalIV 1
Press OK
Erase lh_s title
Playback starts automatically.
chapters
78
or
The full
title
- including
the
hidden
- is played.
Managing disc content
Deleting
recordings/titles
You can delete specific recordings
from
a disc. Proceed as follows:
Press the
STOP•
DISC=MENU.
button,
or
during
playback
press
Use • or • to select the title to be deleted and confirm with
The title editing menu will appear.
3
4
5
6
Select 'Erase
'This
will
confirm'
this
title' using
completely
•
or
erase
•
this
and confirm
with
title'.'Press
OK
'Erasing
Name
Settings for title Charly I
Play fu_lt_tle
_ Eras_lhstt
e
Press OK
Otherwise,
title' will appear on the screen
'Empty
title'
index picture
location
box
screen
will now
New
appear
recordings
at this
also be deleted
location
in the
can now be added at this
If the deleted title was too short (less than
'Empty
title' will appear at this point.
Can titles
,_
to
will appear on the screen.
If you want to delete this title, confirm with OK
end by pressing •
An
OK.
one
minute),
no
on DVD+Rs?
Titles
DVD+Rinstead
are only
marked title.
as deleted.
appears title
on
the TVonscreen
of Empty
During 'Deleted
playback, title
the deleted
reused since the title has not been physically deleted, After
will
skipped,no The
location
on can
the be
discmade.
used for this title
been be
finalized,
further
changes
Managing disc content
a disc has
cannot be
79
Disc settings
This display is located
disc.
before
the first title
and contains general information
about
the inserted
Philipsl
0035:59used
Frl5/02/2003
You can:
•) change the disc name
•) protect or unprotect a disc
•) finalize editing (make DVD compatible)
•) finalizing DVD+Rs
•) Erase DVD+RWs
To show this display, proceed
3
NTSC
DVDplayback
r_
as follows:
Press the
STOP •
DISC-MENU.
button,
Select the first title with
•
Press the
•
button
or
during
or press STOP
The disc information
playback
•
press
.
screen will appear.
Changing disc name
1
2
3
4
5
6
7
80
Press
•
in the 'Disc info display'. The 'Settings
for' menu will
appear on the screen,
Select the 'Disc name' line using •
or •
and confirm with
Using
position
• Disc ilame
•
or
_I select
letter/number/symbol
the
where
the
is to be changed/re-entered.
t
I,
PhHipsl
Protection
Erase dlsc
Settings for Philipsl
Change the desired character using • or • . You can switch
between
uppercase
and
lowercase
letters
with
the
SELECT button You can re-delete a character with the
CLEAR button
Repeat
step
3and
step
4 until
you
have
made
the
desired
changes.
Save the
screen
new
for
title
with
OK.
'Storing
name'
appears
on
the
TV
confirmation
To end, press
_I .
Managing disc content
How can I enter the characters with the buttons
0..9 ?
Press a number button as often as the required character or the number
appears. You can enter language dependent characters with the buttons
MP< or I_H on the corresponding character e,g.: _, button 2 for 'a' and
then with IHH as often as '_' appears.
For special characters press the button I repeatedly.
The position for the following character will be selected automatically,
To enter a space press the button I .
To switch over to upper casecharacters press SELECT.
To erase a character press CLEAR.
8
9
10
Repeat steps 4 and 5 until you have made the desired
Save the new name with OK
TV screen for confirmation
To end, press
Finalize
'Storing
changes,
name' appears on the
<I •
editing
If one or more
titles
have been edited,
it is possible
that another
original tides. You can prepare your disc so that a DVD
Press
•
DVD
Player will display the
player can play the edited version
in the 'Disc info display'• The 'Settings
fo? menu will
appear on the screen
Select the line 'Make
confirm with OK•
x
edits
compatible'
The I, ne Make edits compatible
=
using
•
or
•
and
does not appear
¢_ Your disc is already compatible. It does not need to be converted.
To end, press SYSTEM-MENU.
3
4
'This
will take...'
will
appear
on the screen
to show
how
Problem
1
long
this process will last.
To confirm,
bar
moving
press
OK.
from
left
'Working...'
to
right
will
will
appear
show
the
on the
progress
screen
of
A
the
conversion,
Managing disc content
81
Finalizing DVD+R
discs
This function is necessary so that a DVD+R can be played in a DVD player. When this function
is completed, no further recordings or changescan be made to the disc.
Press • in the 'Disc info display'. The 'Settings fop menu will
appear on the screen
Select 'Finalize
X
"
.
Finalze
disc'
using
•
or
.
disc
does not appear
•
and confirm
with
OK,
n the display,
¢_ Either no DVD+R was inserted or the disc has already been finalized,
To end, press SYSTEM-MENU.
x The 'Settings for_ menu does not appear
If the disc was made on another DVD recorder, it is possible that this
menu cannot be opened. In this case, use the 'Finalize disc' function
in the 'T_' menu, submenu 'Features'.
3
4
Erasing
'This
will take.,.'
will
appear
on the screen
to show
how
Problem
long
this process will last.
To confirm,
press OK.
bar moving
from
left
'Working.,.'
to
right
will appear on the screen
will
show
the
progress
of
A
the
editing process,
DVD+RWs
appear on the screen
1
Select
using display'.
• or The
• and
confirmfop with
Press •'Erase
in the disc'
'Disc info
'Settings
menu OK,
will
["
'This will erase all titles' Press OK to confirm' appearson
Settings for Philipsl
the screen,
Disc name
Phillpsl
Protection
_1_ Eras_ dlsc
'Erasing
disc' will appear on the TV screen.
screen
will disc
be empty
After the
has been
I If the
82
disc
is empty
already,
successfully
you
cannot
erased,
select
l Erase
Pfe_s OK
l
the
index picture
disc. ,
Tip
]
Managing disc content
Programming
a recording
(TIMER)
General
Use programmed
recording
(TIMER) to automatically
start and stop a recording
at a later date.
The DVD Recorder will switch to the right channel and begin recording at the correct time.
With this DVD recorder, you can pre-program up to 6 recordings within a period of one year.
To make a programmed
recording,
your DVD
Recorder
needs to know:
* the date of the recording
* the channel number of the TV channel
* the start and stop time of the recording
* the recording
mode ('M1/M2/M2x/M3/M4/M6')
You can select also the recording mode F_ .
I Fit to space Recording
With these setting the recording mode (bit rate) will be automatically
calculatedto use the complete empty space (title 'Empty).
If the empty space is too small the recording wil{ be stopped to prevent
Ithe following titles from being overwritten.
This information
Tip
is saved in a TIMER block.
Before you begin, make sure the clock
appear when you press the
TIMER
is set. If the clock
is not set, the 'Time/Date'
menu will
Q button.
I
Programming
Plus+ ®system
a recording
with the 'VCR
I
I
Thanks to this programming system, you no longer need to tediously enter the date, TV channel,
start and end times. All the information needed for programming is contained in the PlusCode
programming number. This 8-digit PlusCode number is found in most TV listings for magazines
Switch on the TV. Select the channel number for the DVD
Recorder (channel 3 or 4 or the Audio/Video In channel).
With
the Recorder
The programming
3
on, press TIMER
method
Select line 'VCR Plus+ system'
with •
Programming
a recording
® on the remote
control.
selected last is marked.
(TIMER)
using •
or
•
and confirm
83
4
Enter the entire PlusCode number• This number is up to 8 digits
long and can be found next to the start time of the TV program
in your TV listings magazine•
e.g.: 5-234-89 or 5 234 89
Enter 523489 for the RusCode number•
If you make a mistake, you can clear the entry with CLEAR •
Timer
VCR Plus+ system
I
I
:tCo%ng
op ,ons
PlusCode number
Mo-Fr':
Repeated daily recordings from Monday to Friday,
Weekly' Repeated weekly recordings (every week on the same day),
M0-FrANeekly
Press SELECT
5
Confirm
with
OK.
xThe following message appears
channel numbed
¢_ The channel
number
the PlusCode
on the screen: 'Please
of the TV channel
number.
Using
•
following
number
¢_ The
message
entered
DVD
on
buttons
channel
the
0..9 on
number
screen:
(name)
'PlusCode
wt'ong _
PlusCode
cancel using the
¢_ Check
appears
enter
has not yet been assigned to
, _ or the number
the remote control,
select the corresponding
of the TV channel and confirm with OK,
xThe
To store
Press OK
number
SYSTEM-MENU
the time/date
is incorrect.
Repeat
your
entry
or
button.
(see 'Setting the time
& date'
in 'lnstaliing
your
recorder').
x The following message appears on the screen: 'Date does not
match Mon-FrP
¢_ A daily recording was entered for the wrong clay, Daily programming
can only be used for recordings to be made from Monday to Friday,
6
The decoded data appears after confirmation. You can go back
and change the data Select the appropriate input field with _ or
4.
Change the information with A,
• or the number
buttons 0..9.
Change
Changing
the
•
, •
button
recording
Select 'RecMode'
Using
Timer
VCR Plus+ system
Date Ch.
01/22 001
Rec
Start
End
Mode
08:3fiAM 10:00PM M1
'AM/PM'
Use the SELECT
'Start'
and 'End.
84
Problem
using
, select
to
select
'AM
or
'P/_"
in the
input fields
To store
Press OK
mode
•
•
the recording
mode 'M1,
MZ
M2x,
M3, M4, M_.
Tip
Programming
a recording
(TIMER)
Fit to space Recording
You can select also the recording mode 'F_ ,
With these setting the recording mode (bit rate) will be automatically
calculated to use the complete empty space (title 'Empty).
If the empty space is too small the recording will be stopped to prevent
the following titles from being overwritten.
Do not use this function under the following conditions:
•) more then one programmed recording
•) daily/weekly repeated recordings
be the calculation of the recording mode can not function properly.
7
If all information is correct, press
information is stored in a TIMER block,
8
9
To end, press
TIMER
Insert a recordable
the
OK button
Tip
The
_.
disc in the Recorder.
The disc is checked.
recording.
_
Press
STOP
•.
Switch the Recorder off with STANDBY
(_.
Locate on the disc the position where you want to start the
The programmed
recording will only function properly when the
DVD
Recorder
has
been
switched
off
using
the
STANDBY
_ button.
If any of the TIMER blocks are in use, 'TIMER'
Programming
VCR
will light up on the display
a recording
without
the
Plus+ ®system
Switch on the TV, Select the channel number for the DVD
Recorder (channel 3 or 4 or the Audio/Video In channel),
With
the Recorder
The programming
3
4
5
on, press
method
Select line 'Timer
with •
TIMER
® on the remote
control.
selected last is marked.
Programming'
using
•
or
•
and confirm
The information will be displayed
Select the entry
field with
Enter information with
In the entry
date.
Programming
field 'Date',
a recording
•
•
, •
or
Timer
Timer Programming
Date
01/22
Ch.
01
Rec
Start
End
Mode
OS:30AM 10:0OPM M1
•
or the number
you first enter
(TIMER)
buttons
the month
0..9.
and then the
Mo-FrANeekly
Press S£LECT
To store
Press OK
85
Selecting
daily/weekly
recordings
in 'Date'
use SELECT
'Mo-Fr':
Repeated daily recordings
'Mo':
Repeated
to select from
weekly
recordings
the following
from
options:
Monday to Friday
(every
week
on
the
same
day, e,g.
Monday)•
Program
numbers
'EXTI'
and
recordings from
IN,
or
Video
Change
in ('EXTI')
Changing
'EXT2'
the
button
recording
VIDEO
to
or
select 'AM
S-ViDEO
IN ('EXTZ).
Use
the recording
, •
to select
TIMER
in the
input fields
Tip
mode,
If all information
is correct,
press
information is stored in a TIMER block.
To end, press
'P/_
quality
input field using I_ .
the
OK button
The
C) •
The disc you have inserted
Search the position
will be checked.
on the disc where
the recording
The
recording will
Switchprogrammed
off with STANDBY
_). only function
DVD
Recorder
has
been
switched
STANDBY
© button•
If any of the TIMER blocks are in use, 'TIMER'
86
socket
sources via
COMPONENT
Select the 'RecMode'
•
cinch
external
'AM/PM'
Use the SELECT
'Star_ and 'Enc[_
6
7
of the
You can also program
should
properly
off
begin•
when the
using
the
will light up on the display
Programming
a recording
(TIMER)
How to change or delete a programmed
recording
(TIM ER)
Switch on the TV. If required, select the channel number for the
DVD Recorder (channel 3 or 4).
With the Recorder
The programming
3
4
Select 'Timer
on, press
method
Lisf
TIMER
(_) on the remote
control.
selected last is marked.
using •
or
•
and confirm
with
•
Select the programmed recording (TIMER) you want to check,
change, or delete with • or •
Timer
Timer List
aec
Date
01/22
Delete programmed
recording
--/--
Ch.
01
Start
End
Mode
04:25PM 06:05PM M2
:"
":
Press the CLEAR button,
Confirm with OK. 'Timer
Cleared
will briefly appear on the TV
Total record time: 01:40
screen.
'--' appears rather than the displayed values
Tip
To end, press TIMERC).
To change
Press _
To exit
Press TIMER
Press •.
Select the entry
field with
•
or
•
If required, change the information
buttons 0..9.
6
7
8
9
In 'Date',
Confirm
you first enter
with
To end, press
Switch off with
Programming
,
with
•
, •
or the number
the month and then the date.
OK.
TIMER
C).
STANDBY
a recording
_3.
(TIMER)
87
Problem solving for programmed
record,ngs
PROBLEM
SOLUTION
'Switch off, timer recording'
flashes on the TV screen.
•_The DVD Recorder was switched on a few minutes before the start of a programmed
recording.
Turn off the DVD Recorder by pressing STANDBYS).
A programmed recording (timer)
will only function if the DVD Recorder is switched off (button STANDBY C_).
iiiiiii
The error
message
'Disc
locked'
appears
the screen.
briefly
The
message
'Data
appears
88
error'
on the screen.
on
•_A protected disc was inserted. Undo the erase protection (chapter 'Manual recording', section
'Preventing accidental erasing of discs '), or insert a different disc
•_The data for the recording could not be transferred
time of the programmed recording.
Please check date, start time, and end
Programming
a recording
(TIMER)
User
preferences
This section explains how to customize the DVD Recorder to your
indicate the following:
*_
preferences
These icons
Sound settings
Additional
settings
Disc settings
_'
Installation
Switch on the TV. If required,
DVD
Recorder
Press
select the channel
(channel 3 or 4 or AudiolVideo
SYSTEM-MENU
on the
remote
number
for the
In channel).
control.
The menu
bar
will appear at the top of the TV screen.
3
4
5
6
7
8
Select 'T_'
with
Select the
with •.
corresponding
Select the
corresponding
the
•
button.
instructions
•
or
•
Choose
provided
•
the instructions
Confirm
or
function
with
line with
•
an item you
•
function
. Choose
provided
•
.
or
or
•
want
•
and confirm
and confirm
to
adjust,
with
using the
pages.
with
•
•
, or select the
to adjust, using
on the following
To close the menu item, press
•
an item you want
the new setting by pressing
User preferences
with
on the following
Select the corresponding
setting with
and confirm
or
pages
OK.
•
89
Picture
settings
You can select the following
functions
in this menu:
' TV shape'
The picture
signal can be adjusted to fit your TV:
Picture
TVshape
'4:3 letterbox':
for a 'wide-screen' display with black bars on the top and bottom
'4:3 panscan': for a full-height picture with the sides trimmed
'16:9' : for wide-screen TV (frame ratio 16:9)
[i
shift
Blacklew_shi{t
Vertical video
EXT1vide0 at_enuat{0_
[_]
Vide00utput
[Interlaced
]
]
'Black level shif_
Adapts the color
'Vertical
dynamic for NTSC playback when set to 'On'
video shif_
This allows you to move the picture
the picture
to your
left or right using the
•
, •
buttons
in order
to adjust
TV screen
'EXT1 video attenuation'
With the buttons • , • you can attenuate or boost the component video signal on the input
socket COMPONENT VIDEO IN These setting concerns only the input signal The component
video output signal leaves unchanged
' Video outpuf
This allows
Scan.'
Warning
you
If your
to switch
the
Component
Video
TV has separate connections
not switch automatically
after it is switched from
between the two,
one to the other.
for 'Interlaced'
it is possible
Select the setting you need with
SELECT.
Scan only if your TV has Progressive
Confirm
90
with
signal between
'interlaced'
and 'Progressive
that no picture
Choose
and 'Progressive
Scan' or it does
will appear
on the TV
Progressive
Scan.
OK.
User preferences
x No
picture
appears
on the
Check the display of your
'PRO':
No
TV
DVD
after
switching
recorder.
'Progressive Scan' is on
display:
input
'Interlaced'
jack
switch
or
select
is on. Switch
the
the Component
Disconnect
Hold
video
output
the recorder's
down
power
I_
on
cord. 'PRO'
If you want
the
corresponding
You
can
also
cord.
DVD
Recorder
while
scan) appears
back, repeat
from the display. The DVD
TV to the
connection,
signal as to{lows:
power
(progressive
to switch
your
corresponding
reconnecting
steps I and 2.
Recorder
the
on the display.
is switched
'PRO' disappears
to 'Interlaced.'
Problem
Sound
Depending
settings
on the audio outputs
being used, this menu provides
If you are only using the analog audio outputs
OUT jacks), select 'Off
'Digital
You
output
menu.
settings
for
you with a selection
AUDIO
LIR
OUT,
of settings.
AUDIO
LIR
outpu_
can select
OUT or
in the 'Digital
(red and white
one of the
OPTICAL
following
AUDIO
devices
that
are connected
to
the
COAX
OUT jacks:
S0u_d
Bigitaloutput
Anal0g0ulput
'All'
:
Dolby
Digital and DTS signals are going out unchanged to the digital output,
multi-channel
signals are converted
Use receivers/amplifiers
'POM
only' :
with
MPEG-2
[Steree
]
Nighlmode
to PCM (Pulse Code Modulation).
a digital
multi-channel
Dolby Digital and MPEG-2 multi-channel
sound decoder
signals are converted to PCM (Pulse Code
Modulation),
For receivers/amplifiers
'Of/'
:
without
a digital
multi-channel
sound decoder.
digital output is off
For devices with
'Analog
an analog
output'
You can select from
the following
L/R OUT,
UR OUT ),
'Stereo'
'Surround'
audio input,
AUDIO
:
settings for devices connected
to the analog outputs ( AUDIO
For devices that use neither DolbySurround
nor TruSurround.
when the DVD Recorder is connected to a stereo TV
:
Dolby Digital and MPEG-2 multi-channel
two-channel
output
For devices with
User preferences
Only use this setting
are mixed to a Dolby
Surround-compatible
signal
a Dolby
Surround
/ Pro Logic decoder.
91
'Night mode'
Night
mode optimizes
environments.
the sound dynamics at low voiume_ This causes less disturbance
This setting only functions
Language
Audio
Digital Audio
in quiet
on DVDs.
settings
You can select the following
'Playback
with Dolby
settings in this menu:
audio'
language of DVDs
Language
Playback audio
Recordin_ audi0
'Recording
Audio
[Stereo
]
Subtitle
audio'
Menu
recording
'Subtitle'
Subtitle language
'Menu'
Screen menu language
Additional
settings
You can select the following
'Status
Along
functions
in this menu:
box _
with
the
on
screen
menu,
the
OSD
operating status on the TV screen (counter,
You can switch off the information
about
information
'On':
(On
Screen
Display)
also
displays
playback, recording, TV channeL_),
the operating status so as to avoid
the
current
recording
this
Live source view
Autostandby
when making recordings,
The OSD information
Features
S[atusb0x
Standby
appears with every selected mode for a few seconds, then disappears
[Normal
]
BispEay
again.
'Of/':
92
The OSD information is switched
off_ It can no longer
be displayed on the screen_
User preferences
'Live source
With
this function
channel/input
view'
you can switch
socket
between
in the 'Tuner
the live picture
information
or the information of the selected TV
box' (left-hand
corner
of the screen).
'On':
The live picture of the selected TV channel or signal on the input sockets
'Off':
The information
is visible.
about the selected TV channel or signal on the input sockets is visible.
'Auto standby'
If you haven't
used the
switch to standby
television receiver
DVD-recorder
automatically.
for a few
You
minutes
in certain
can cancel this function
'On':
The DVD-Recorder
'Off':
The DVD-Recorder will be switched to standby,
to
modes (e.g.: STOP),
use the
DVD-recorder
it will
as a
leave switched on
'Standby'
To
save energy,
you
can switch
off the
clock
(TIMER) recordings will still take place.
Moreover, you can present the most important
display
features
on
the
DVD
of the DVD
recorder.
Recorder
Programmed
in scrolling
text
in the display (demo)
'Low poweF:
'Normal':
'Demo
If the DVD Recorder is switched off using STANDBY O, the clock display is not
visible,
If the DVD
mode':
Recorder
If the DVD
is switched off using STANDBY
Recorder
most important
is switched
off with the
_), the clock display is visible.
STANDBY
(_ button, a list of the
features is shown in the display.
'Display'
You can change the brightness of the display on the DVD
DVD Recorder when it is switched on.
You can also adjust this setting with the
'Bright:
on the remote
This setting
only affects the
control
The display appears with normal brightness
'Dimmed':
'Off':
DIM button
recorder.
The display appears less bright.
The display is switched
User preferences
off.
93
Remote
control
In this menu you can set the remote
settings
control
type to which your
DVD
Recorder
should
respond:
'DVD player':
The DVD Recorder also responds to a DVD player remote control (remote
control code RC-6).
Choose this setting if your Philips TV remote supports DVD functions.
'DVD recorder':
The DVD Recorder only responds to the supplied remote control.
Disc feature
menu
In this menu you can make changes that relate to the disc:
'Access
control
Please read the next chapter on 'Access control (child lock)'.
Access co_tlml
[ E_t_erco_e
]
'Auto resume'
If playback of a pre-recorded DVD or VCD is interrupted ( STOP • or OPEN/CLOSE • ),
playback will be restarted at the exact location when the disc is reinserted. This function does
not only apply to the current disc but also to the last 20 discs you played
If desired,
this function
can be turned
off
'PBC'
This line only appears when a VCD has been inserted.
This function is used to activate or deactivate the PBC menu (playback control) of Video CDs.
For more information,please see the chapter on 'Playback', 'Playback of a (Super) Video CD'
'Finalize
disc'
This feature allows you to finalize DVD+R discs If the disc has already been finalized this line
will appear darker
'Adapt disc formal
If a DVD+RW has been recorded in a computer drive or in another DVD recorder, the index
screen may not be displayed correctly
This feature allows you to changethe format of the disc
This function is therefore only visible if the disc format is different.
94
User preferences
I
Using your
with
With
DVD-Recorder
your
remote
control
TV set
the enclosed multicode
remote
control
you can control
the main functions
I
I
of your TV set.
To do this, you must first enter a code number that corresponds to the make of your TV set.
You will find a summary of all available remote control codes on the last page of this manual
Hold down
Using
the
the
STANDBY
number
corresponds
buttons
TV
0..9,
set will
¢_ Also try
to
manufacturers.
not
the code
number
that
of your TV set.
the code number check that, the TV set
the
TV
VOLUME-or
TV
react
enter
the
other
¢ In some cases, it is possible
selected
enter
to the make (manufacturer)
When you have entered
will
responds
to
VOLUME + buttons.
XMy
O button.
code numbers.
code
that
If this
your
numbers
TV
or
set will
is the case, you
that
not
of
react
unfortunately
other
to the
cannot
use this function.
x How
can | reset
the
¢_ Enter the code number
3
By using
control,
the
TV
remote
code?
Problem
000
buttons
on
the
panel
in the
middle
of
the
you can:
TV VOLUME +
TV VOLUME -MUTE _
increasethe TV volume
decrease the TV volume
switch off sound
Hold down the button
,TV (left side of the remote)
the corresponding
function using the following buttons
STANDBY
CHANNEL+
CHANNEL0..9
User preferences
and select
switch off the TV set
next channel number
previous channel number
Number buttons 9.0
95
Access control
Child lock (DVD
This function
can prevent
children
(Child
lock)
and VCD)
from
viewing discs.
When in use, a four-digit code (PIN) must be entered in order to play a disc.
In addition, you can set a disc to be played 'always' or 'once' despite the child lock.
•)'Play
always':
This disc has been placed in a list that fits S0 such 'child safe discs'. When more than S0 discs
have been added to the list, the oldest disc is removed to make room for the new one, 'Child
safe' will appear on the screen at the start of playback.
•)'Play
once':
This disc can be played only once. The PIN must be reentered
disc.
Activating/Deactivating
the child lock
Switch on the TV. If required,
DVD
Recorder
96
Recorder
Press SYSTEM-MENU.
the screen.
Select 'T_'
number
control
by pressing
for the
In channel).
STANDBY-ON
(_.
The menu bar will appear at the top of
using _I or
Select line '_(Disc
'Access
select the channel
(channel 3 or 4 or the AudiolVideo
Turn on the DVD
3
4
5
6
7
8
9
the next time you try to play the
•
.
features)' using •
or •
will be selected. Press •
and confirm with
.
Press the number buttons to enter a four-digit
code of your
choice. If this is you first time entering your code, you must
enter this code a second time to confirm it.
Select 'Child lock'
using
Select
or
'i_'
using
•
•
•
or
•
and press
•
Access colllro4
r Enter co_e
]
(Child
lock)
Aut_ _e_ume
.
.
Access
control
con rmw,tho
!
To end, press
If you activated
discs.
To deactivate
Child
_ and
Lock,
SYSTEM-MENU
you will need to enter
the four-digit
PIN in order
to
play locked
the child lock, select the 'r_' icon in 9
Authorizing
discs
Insert the disc. After a short check, the access control menu will
appear on the screen
Using •
3
or •
Use the number
, select 'Play once' or 'Play always;
buttons
0..9 to enter your
PiN,
Double-sided DVDs can have a unique ID number for each side. To completely authorize these
discs, you must authorize each side separately. 'Multi-volume' VCDs can also have a unique ID
number for each volume. To authorize the complete set, each volume must be authorized
separately
Locking
authorized
Proceed as follows
to lock an authorized
discs
disc
Insert the disc Playback starts automatically. If playback does not
start automatically, press PLAY I_
Press
STOP
icon will
•
while the
change to
_
icon
Q
is being displayed,
This disc is now
The
locked for further
use,
Access control
(Child lock)
97
Parental
control
(DVD
video
only)
Movies on DVDs may contain scenes which are not suitable for children. DVDs sometimes come
with rating information for the entire DVD or only for certain scenes.
Affected scenes are rated from I to 8. If a scene with such a rating is recognized during
playback, the DVD Recorder compares the Parental control rating with that of the DVD scene.
If the scene rating exceeds the Parental control rating, an alternative scene will be played back (if
available).
Most DVDs apply the rating to an entire DVD. Therefore, if certain scenes exceed the rating
you select, the entire disc will be blocked from viewing.
Activating/Deactivating
control
the parental
Switch on the TV. If required, select the channel number for the
DVD Recorder (channel 3 or 4 or the Audio/Video In channel).
Turn on the DVD Recorder by pressing STANDBY-ON
3
4
Press SYSTEM-MENU
of the TV screen
Select 'T_'
using _I or
Select line '_(Disc
6
7
8
9
The menu
•
Enter a four-digit
using •
contror
code of your
level
with
•
choice,
or
What
do the
gating
0 (displayed
parental
Rating
I (childsafe)
on the top
parental
levels
and confirm with
.
If you are entering
the
Access CO_Irol
it again to confirm
•
bar appears for selecting the parental
Select the corresponding
number buttons
0,,9
or •
by pressing •
code for the first time, you must enter
Select 'Parental
appear
,
features)'
Confirm the line 'Access
bar will
O.
and confirm
control
level
with
•
.A
•
or
the
[ E_er co_e
]
level
using
•
,
mean?
as L_') parental
control
is not active.
scene
with
Rating 8 (for adults only)
What
happens
authorized
If the
Recorder
until the four-digit
98
when
a DVD
a higher
rating
than
is played?
cannot
find
a suitable
code is entered.
alternative,
playback
is stopped
Tip
Access control
(Child lock)
m
_1_
U
Confirm
with
OK
SYSTEM-MENU.
To
end,
press
repeatedly
•
and
i
then
U
Changing the country
The
Parental
Therefore,
control
levels
depend
on
it is necessary that you enter
the
country
the country
in which
for which
the
DVD
was
manufactured•
these filter values apply•
Switch on the TV, If required, select the channel number for the
DVD Recorder (channel 3 or 4 or the Audio/Video In channel)•
Turn on the DVD Recorder by pressing STANDBY-ON
3
4
5
6
7
8
9
10
Press
SYSTEM-MENU
Select 'T_'
using •
Select line '_(Disc
Confirm
Press
The menu bar will appear
or
•
•
features)' using •
the line 'Access
the
number
control'
buttons
to
or •
by pressing
enter
and confirm with
•
a four-digit
of
your
code,
you
must
and confirm
with
•
choice• If this is you first time entering your
enter this code a second time to confirm it.
Select 'Change
country
Select your country
confirm with OK.
To end, press
Access control
•
_ •
using
or that
and then
(Child lock)
•
or
of the
•
DVD
using
code
•
or
•
Access
Auto
cot_l_o4
]
_sum_
•
and
SYSTEM-MENU
99
Changing
the PIN
Switch on the TV, If required, select the channel number for the
DVD Recorder (channel 3 or 4 or the Audio/Video In channel)•
Turn on the DVD Recorder by pressing STANDBY-ON
3
4
5
6
7
8
9
10
Press SYSTEM-MENU
Select 'T_'
using _
Confirm
The menu bar will appear
or
Select line '_(Disc
_ •
•
.
features)' using •
the line 'Access
control'
or •
by pressing
and confirm with
•
Press the number buttons to enter your four-digit code• If this is
you first time entering your code, you must enter this code a
second time to confirm it,
Select the line 'Change code' using •
or •
[ EIIter code
]
A[Jto Te_ume
and confirm with
Enter the new code with the number buttons 0..9, Re-enter the
code for confirmation•
To end, press
_I and
:f::ng:_ a:_sC:o:ethe
SYSTEM-MENU,
code (step 7), press the STOP • button four
:omweSea,:_r
h:inewPrc,
oSdeOsKc_esTchreb:ddaebe:te:y
is now deactivated• You ca,]
100
Access COlllrO4
Tip
Access control
(Child lock)
Before
you call technical
support
If you have any problems using this DVD recorder, it may be caused by one of the following
reasons You can also call the customer service center in your country.
The telephone numbers can be found in the back of this instruction manual.
You can also visit our web page 'http:llwww.p4c.philips.com'
Have the model number (MODEL NO) and the production number (PROD.NO) ready.
The serial number (PROD. NO.) is printed on the type plate fixed at the rear of the set.
PROBLEM
The device
SOLUTION
does not
react
to the touch of a button,
the remote
control is
•PDealer Mode' is on: All buttons at the front of the DVD Recorder are locked
To switch off this function:
working:
1
2
Disconnect the DVD Recorder from the power outlet.
Press and hold down • and OPEN/CLOSE A and re-connect the Recorder to
a
As soon as the time or '--:--' appears in the display (6 - l0 seconds), release •
OPEN/CLOSE A ,
the power supply.
Resetting
the
Recorder
settings
to default
DVD
factory
and
,l_/arning:
All the information stored in the memory (programs, time, TIMER) will be reset (deleted)
1
2
Disconnect the DVD Recorder from the power outlet.
Press and hold down the STANDBY-ON _) button on the front of the Recorder
while reconnecting to the power outlet.
a
Release STANDBY-ON(_when
'15 T_' _#_'7' appears in the display. All the
information stored in the memory (programs, time, TIMER) will be reset (cleared).
Read paragraph 'Initial Installation' in 'Installingyour DVD Recorder'.
Before you call technical support
I 01
PROBLEM
No playback
recorder:
Poor
playback
Recorder
SOLUTION
on DVD
on DVD
(distorted
/There is no recording on the disc: Change disc.
_ou inserted the wrong disc type: Your Recorder can play the following disc types: DVD
Video, (Super)Video-CD, DVD+R(W), Audio-CD,, MP3-CDs
_ou inserted the disc the wrong way: Insert the disc with the label facing up.
/The disc is dirty. Clean the disc.
¢_!rong region code: The region code of the DVD and the DVD Recorder must match.
€The child lock is on. Read chapter 'Access Control (Child Lock)'
_ou have selected or set the wrong channel number on the TV for the DVD recorder: Select
the correct channel number on the TV (channel 3 or 4).
€The cable connecting the TV and the DVD Recorder may be loose. Check the cable.
_our
€The
TV is not properly
adjusted,
disc is dirty: Clean the disc.
recorder.
Programmed
recording
does not work:
_ou have set the wrong time or date: Check time/date.
_ou have not set the TIMER properly: Check the programmed recordings (TIMER block).
_A locked disc was inserted: Remove disc lock.
CA finalized DVD+R has been inserted. Change disc.
There is picture or sound
interference
with the TV
_Before recording, select the recording mode as described in chapter 'Manual Recording',
section 'Selecting the recording mode (quality)'
_Change the modulator channel. During standby hold on the remote the button 3 pressed to
switch to channel 3. With button 4 you switch to channel 4.
_Have your antenna or cable TV signal checked
reception.
102
Before you call technical support
PROBLEM
The
picture
SOLUTION
is distorted
black-and-white
during
playback.
A DVD+RW
cannot
played on certain
players
be
DVD
or
•ZThe TV system of the disc does not match that of your TV (PAL/NTSC).
•_The recording can be made in color only when the TV channels or the connected additional
device sends a color signal Black-and-white signals without color information (color
subcarriers) cannot be recorded in color•
•Zlf a recording is too short, it is possible that a DVD player cannot detect it: Please observe
the following 'Minimum recording times':
Recording mode 'MI': 5 minutes, 'M2': 10 minutes, 'M2x_: 13 minutes, 'M._: 15 minutes, 'M4':
20 minutes 'M6': 30 minutes
•ZSome DVD players cannot playback DVD+RW recordings. You can solve this problem by
using a special function:
1
2
Open the disc tray with OPEN/CLOSE • • Insert the disc but do not close the
tray.
Hold down the number button 2 on the remote control until the tray closes The
disc is modified.
3
If this fails to produce the desired result, repeat the procedure using the number
button 3 on the remote control
4
You can restore the disc to its original condition by pressing and holding 1 •
Warning!
There is a risk that you can no longer play the disc on other DVD
procedure• Therefore, apply this function with particular care.
players after this
103
PROBLEM
Other disc errors (DVD+R),
'Disc contains unknown
data'
SOLUTION
•_This message may appear
been finalized
recording.
if you instert a disc that was not
are very sensitive
To use the disc again, follow
to fingerprints,
finalized
DVD+R's
that have not
dust, or dirt, This may cause problems
during
the next steps
1
Make sure that the surface of the disc is clean.
2
Open the disc tray with
OPEN/CLOSE
A
Insert the defect DVD+R
but do
not
close the tray.
3
Hold
down
(??ER_I_E'
5 on the
appears
remote
on
the
control
display)
until
and the
process This may take up to four times
error occurred.
4
If the disc is recovered,
Please observe the following:
Error during recording: The title
104
the
tray closes.
DVD
recorder
The disc will
will
start
as much time as the recording,
be read
the
the index screen will appear
may be missing.
Error
while changing the title/index
Error
while finalizing: The disc appears not to have been finalized.
picture:
The original
title/index
repair
in which
picture may be visible.
the
Limited
Warranty
DVD
Recorder
One year Free Labor / One year Parts Exchange
This product must be carried in for repair.
WHO
IS COVERED?
MAKE
You must have proof of purchase to receive warranty service.
A salesreceipt or other document showing that you purchased
the product is considered proof of purchase.
WHAT
After one year from the day of purchase,you pay for the
replacement or repair of all parts, and for all labor charges.
All parts, including repaired and replaced parts, are covered
only for the original warranty period. When the warranty on
the product expires, the warranty on all replaced and repaired
parts also expires.
Your
IS EXCLUDED?
warranty
does
not
cover:
• labor charges for installationor setup of the product,
adjustment of customer controls on the product, and
installation or repair of antenna systems outside of the
product.
• product repair and/or part replacement becauseof misuse,
accident, unauthorized repair or other cause not within the
control of Philips.
• reception problems caused by signalconditions or cable or
antenna systems outside the unit.
•a product that requires modification or adaptation to enable it
to operate in any country other than the country for which it
was designed,manufactured, approved and/or authorized, or
repair of products damagedby these modifications.
• incidental or consequential damages resulting from the
product. (Some states do not allow the exclusion of incidental
or consequential damages,so the above exclusion may not
apply to you. This includes, but is not limited to, prerecorded
material, whether copyrighted or not copyrighted.)
•a product that is used for commercial or institutionalpurposes
(including but not limited to rental purposes).
WHERE
YOU
KEEP...
Pleasekeep your sales receipt or other document showing
proof of purchase. Attach it to the owner's manual and keep
both nearby. Also keep the original box and packing material in
case you need to return your product.
IS COVERED?
Warranty coverage beginsthe day you buy your product.
For one yearthereafter, all parts will be repaired or replaced, and
labor is free.
WHAT
SURE
IS SERVICE
AVAILABLE?
Warranty service isavailablein all countries where the product
is officially distributed by Philips. In countries where Philips does
not distribute the product, the local Philips service organization
will attempt to provide service (although there may be a delay if
the appropriate spare parts and technical manual(s) are not
readily available).
BEFORE
REQUESTING
SERVICE...
Pleasecheck your owner's manual before requesting service.
Adjustments of the controls discussedthere may save you a
service call.
TO
GET
WARRANTY
U.S.A.,
PUERTO
ISLANDS...
RICO,
P.O.
OR U.S.
IN THE
VIRGIN
Take the product to a Philips factory service center (see
enclosed list) or authorized service center for repair. When the
product has been repaired, you must pick up the unit at the
center. Centers may keep defective parts.
(In the U.S.A.,Puerto Rico, and U.S.Virgin Islands,all implied
warranties, including implied warranties of merchantability and
fitness for a particular purpose, are limited in duration to the
duration of this express warranty. Because some states do not
allow limitations on how long an implied warranty may last, this
limitation may not apply to you.)
TO GET WARRANTY
CANADA...
SERVICE
IN
Pleasecontact Philips at:
1-800-531-0039 (English or SpanishSpeaking)
1-800-661-6162 (French Speaking)
(In Canada,this warranty is given in lieu of all other warranties.
No other warranties are expressed or implied, including any
implied warranties of merchantability or fitness for a particular
purpose. Philips is not liable under any circumstances for any
direct, indirect, special,incidental or consequential damages,
howsoever incurred, even if notified of the possibility of such
damages.)
REMEMBER...
Pleaserecord below the model and serial numbers found on the
product. Also, please fill out and mail your warranty registration
card promptly. It will be easier for us to notify you if necessary.
Model Number:
DVDR
77/17
Serial Number:
Philips,
SERVICE
Box 520890, Miami,
FL 33152,
EL6506E0_3
/ 09-0_
(402)
536-417
I
A Mark ........................................
146
Action ...........................................
116
Admiral .... 093, 134,209, 262, 306,
332
Aiko .. 013,246, 248, 250, 255, 266
Akai .. 002, 113, 114, 140, 216, 246,
248, 250, 255,266, 285, 292,
305, 324, 332
Akura ......... 217, 222, 246, 250, 266
Alba . 201,217, 219, 232, 246, 249,
250, 266, 272, 281
Amstrad ... 201,228, 232, 234, 246,
250, 261,266, 280, 332
Amtron ...........................................
28
Anam .............................................
115
Anam National ..........003,028, 118
Anglo .............................................
246
Anitech ..... 201,246, 250, 256, 332
Ansonic .... 246, 247, 250, 257, 272,
275, 283
AOC 004, 005, 006, 007, 113, 120,
131, 146, 154
Arc en Ciel ...................................
319
Aristona ...............................247, 250
ASA ._ 209, 21 I, 254, 258, 279, 306
Asberg ..................................
250, 256
Astra ..............................................
332
Atlantic ................................250, 312
Atori ..............................................
246
Audiosonic .................250, 266, 332
AudioTon .....................................
332
Audiovox ...........028, 116, 154, 157
Ausind ...........................................
256
Autovox ......................209, 256, 272
Awa ......................................
305, 332
Baird
Centurion .....................................
250
Century ......................209,272,306
CGE ....................256,272,332,338
Cimline ...............201,219,246, 266
Citizen...... 004, 006,008,013, 028,
058,091
Classic ..................................113, 140
Clatronic. 231,246,250,256,257,
266,272
Colortyme 004, 006,114, 130, 134,
141,144, 151
Condor....231,246,250,257,272,
283,332
Contec.....201,246,249,260,330,
332
Contec Cony ......................115, 116
Contec/Cony.... 009, 010, 01 I, 028
Continental Edison............ 319, 343
Cosmel .................................
246, 332
Craig. 028, 115, 116, 128, 137, 141
Crosley.....134,209,256,272,306
Crown......028,037,137,146,201,
231,246,250,256,266,
289,332
CS Electronics ....................266, 272
CTC ...............................................
272
Curtis ..........................113,144, 152
Curtis Mathes.. 001,004,006, 012,
058,091,111,114,
120,131, 134, 141,
146,147
069,091,113,118,120,
131, 144,146,
147, 152,
154, 155,157,
201,233,
246,250,266,332,337
Bang &Olu_en
........................... 209
Barco ............................................. 310
Dainichi ................................ 217, 266
Dansai .................................. 248, 250
Baur.. 202, 237,240,242,
Daytron
250, 264
Beko ............................ 231,250,338
... 004, 006, 091, 128, 131,
146,152,154,201,246
Bell & Howell ..................... 134, 262
Beon .............................................. 250
Decca 220,250,
255, 305,309,339
Denon ........................................... 158
Blaupunkt
Desmet
214, 215, 22 I, 240, 242,
264, 303,316, 324
BPL .................................................
Brandt
250
.................................. 226, 278
BrionvegL
Broksonic
209, 250,303,306,
312
................... 113, 115, 134
250
Diamond
....................................... 332
Dimensia
.............................. 001, III
Dixi .............................. 201,246, 250
Dual ............................. 250,288,332
Dumont-.004,082,208,209,211,
Bruns .................................... 209, 306
BSR .............................. 224,276,330
.........................................
254,257,306
Dynatron
...................................... 250
BTC ...................................... 217,266
Bush. 201,217,
219,224,
229, 232,
233, 246, 249,250,
266, 276,
281,288
Carrefour ..........................249, 254
Cascade ......................201,246,250
Cathay ...........................................
250
CCE ...............................................
134
Celebrity ............................................
2
106
018,019, 020,021,022,
023,024,025,026,027,
028,029, 030,031,032,
068, 091,094, 095, 100,
110,112,113,114,115,
116,128,131,136,137,
141, 146, 151,157, 209,
250, 254, 261,262, 272,
306
Envision..............004, 006, 114,120
Erres ............................203, 247,250
Europhon ....................250, 257,272
Expert ...........................................
312
Fenner ................................246,332
Ferguson..213,226,263,278,291,
303,341
Fidelity ...........................................
250
Finlandia...............................216,279
Finlux 208. 209, 211,212,250, 254,
255,256,257,258,262,279,
283
Firstline.... 201,219, 224,225, 246,
250, 255, 257,272, 276,
277,283
Fisher 033. 044,096, 129,140, 149,
211,216, 231,249,253,255,
260,306
Formenti .....................209, 256,312
Frontech ............222, 246, 272,332
Fujitsu .................032, 255, 257,266
Funai 028,032, 115, 116,136, 222,
224,262,276,330,332
Daewoo,004,005,006,013,014,
................. 255,263,298,305
Emerson .. 004,006, 009,016,017,
Elbe. 250, 266, 275, 283, 312, 322
Elcit .......................................
257, 272
Electroband.......................................
2
Electrohome .... 003,004, 006, 015,
113, 114, 131, 146
Bin .... 21 I, 246, 250, 258, 312, 332
Elite ..............................217, 250, 266
Elman.............................................
257
Elm ...............................201,246, 332
Galaxi ........................250, 257, 338
Galaxis .................................
250,257
GBC ....................246,266,305,332
GE .... 001,003,004, 006,034,049,
097,111, 113, I15, I18, 122,
123,124, 130, 131,141, 142,
143, 146, 153,157
GEC..205,250,251,255,305,333
Geloso ...... 201,246, 266, 272,332
Genexxa .....................217,250,266
GoldHand .....................................
332
Goldline ........................................
250
GoldStar .. 004, 005, 006, 009, 015,
091,092,113,114,117,
120, 121, 131,146, 147,
148, 223,246,250, 272,
282,295,297,307,323,
332
Goodmans219,232,233,246,248,
249, 250, 255,262, 285,
332
Gorenje ........................................
231
GPM .............................217,266,332
Gradiente ..........006, 114, 139,140
Granada... 006,071,146,216,227,
247,249,250,253,255,
256,268,278,320
Grandin ................................301,337
Grundig.... 135,142, 146, 208,214,
215,240, 242, 250, 254,
256,264, 266, 301,311,
313,316,320,324,325,
330, 335,343
Hallmark ..................004, 006,113
Hanseatic. 243,246, 250, 275,276,
288,313
Hantarex .....................246, 250,332
HarmanKardon ..........................113
Harwood .............................246,250
HCM.201,234,246,250,266,332
Hinari201, 217,219, 246,249,250,
262,266,281,309,332,333,
334,339
Hisawa ...........................................
266
Hitachi...... 004,006,009,010,011,
035,036,071,072,073,
074,075, 076, 077. 078,
079,080,081,095,101,
109,112,126,127,131,
142,146,154,158,205,
206,212,218,235,244,
249,250, 251,252,255,
258,259, 262, 267,269,
286,297,299,307,327,
333, 334,336
Hornyphone ................................250
Hoshai ...........................................
266
Huanyu ..........................................
233
Hyper .................246,266,272,332
ICE ............222,232,246,250,266
Imperial..... 231,250, 256, 272,338
Infinity ..................................
006,037
Ingersol .........................................
246
Inno Hit ... 239,246, 250, 255,256,
266,272,305,322,323,
332
Interbuy ...............................246,272
Interfunk.. 247,250,274,306,319,
320
Intervision 222,250, 257, 266,272,
282,288
Irradio ...... 246,250, 256, 266,272,
323,332
ITS................................232, 250,266
ITT ...............................262, 279,285
ITV ........................................
250.272
JBL .......................................
006,037
JC Penney 001,004, 005, 006,008,
034,044,049, 058,091,
092,097,111, I13,120,
122,124,141,142,146,
148,149
Jensen..........................004,006, 114
JVC,,.009,010,011.034,036,038,
039,040, 085,086, II0, 132,
[39, 141,142,207, 213, 232,
249, 263, 266, 290, 296, 344
Kaisui20[, 217,246,250, 266, 332
Kapsch..................................
2[I, 312
Karcher .......................250, 257, 332
Kathrein ........................................
243
Kawasho. 002, 004,006, 120, 140,
145
Kendo 2[9, 250, 257,272, 283, 332
Kennedy ........................................
312
Kenwood.004,006,0[5,113,114,
120, [30, 151
Kloss Novabeam028, 04[, 042, 118
306, 308, 31 I, 313. 324, 325
MGA 004, 005, 006, 015,047, 114,
266
Minerva ._ 208, 240, 242, 254, 256,
264, 31 I, 324, 325
Minoka .................................
234, 250
Mission ..........................................
304
Mitsubishi 004, 005,006, 0[5, 047,
268, 273, 293,313,315,
320,331
Panavision............................250, 283
Pathe Cinema .....................275,338
PatheMarconi .............................319
Roadsrar,,201,217,222,246,266,
Perdio ...................................
250,255
Philco 003,004,005, 006,008,009,
015,037,041,042,046,071,
Saba 209,226,278,291,303,306,
310,319
Saisho201, 219,222, 228,246,261,
[[3, 114, 120, [31, 146,
[50, 209, 228, 240, 249,
250, 280, 306, 309, 324,
332
Mivar .........223,239, 256, 275, 322
Motoro)a .............................003,093
MTC 004, 005, 006, 058, [ [3, 120,
134, 14[, [54
Multitech . 028, 201,246, 250, 257,
113,114, 120, 128,131, 134,
136, 137, 144, 154, 158, 209,
250,256,262,272,306,338
266,280,309,339
Salora ..........................298, 306,307
Sambers .............239, 256, 257,322
Philips000,003,004, 006,008,009,
015,037,041,042,048,049,
050,12L 134, 203,205, 209,
233,242, 243,247,250, 251,
301,306, 312,320
Phoenix .......................209, 250,255
Sampo--,,004,006,091,092,118,
120,131
Kneissel.......................250, 275, 283
Kolster ..........................................
250
Konka ............................................
266
266, 272, 332
Murphy .................................
2[ [, 255
Korting ..........................................
209
Kosmos .........................................
250
KTV.028,091,094,115,116,120,
[31,146
NAD ..................006, 043,044, 109
National ........................................
265
NEC. 003,004, 005,006, 114, 120,
130, 131, 151,249,309,332
Neckermann .- 209, 214, 237, 242,
243,250, 272, 283,
Lenco ..................................
2[ I, 246
Lenoir ...................................
246, 332
LG .......................246, 250, 272, 282
Liesenkocter ................................250
Lloyds ...................................[51,246
Loewe ................037, 209, 250, 275
Loewe Opta .................................306
Logik ..............................................
339
Luma ...................246, 250, 283, 312
Lumatron ......................................
250
Luxman ................................004, 006
Luxor 285, 287, 298, 306, 307, 320,
323
LX[ ,,. 001,006, 033,037, 043, 044,
097, III, 113, [34, 148
M Electronic.
201,2[ [, 212, 233,
236, 246, 250, 258,
272, 279, 283, 285,
287
Magnadyne 209, 257, 272, 306, 332
Magnafon .............................256, 257
Magnasonic [13, 114, 136, [54, 262
Magnavox 004, 006, 008, 015, 037,
041,042, 045, 046, 070,
113, 114, 120, 128, 131,
133, 134, 136, 137, 142,
[44, 262
Marantz ,... 004, 006, 035, 037, 114,
120, 130, 13[, 134, 148,
243, 250
Matsui201, 204, 216, 2[9, 224, 228,
229, 232, 246, 248, 249, 250,
253, 255, 261,264, 276, 278,
280, 281,289, 309, 332, 339,
344
Medion ..........................................
250
Megatron ....................006, 035, 071
Memorex- 006, 113, 148,201,246
Metz. 209, 230, 240, 264, 270, 274,
306, 313,338
NEI .................................................
250
Nesco ................................... 262, 272
Neufunk ............................... 246, 250
Nikkai204, 217, 222, 246, 248, 249,
250, 255,266, 307
Nikko .......................... 006, 013, 154
NOBLEX ......................................
332
Nokia 236, 279, 285,287, 292, 294,
295
Nordmende .-, 264, 303, 3 [0, 319,
341
Novatronic ..........................250, 258
Oceanic ............................. 276, 298
Okano ......................... 250, 255, 338
Onwa .......................... 028, 115, 266
Optimus ........................................
109
Optonica .............................05 I, 093
Orbit .............................................
250
Orion 025, 100, 219, 224, 225, 229,
246, 250, 257, 261,276, 277,
281,300, 309, 313,317, 326,
330, 339
Osaki 217, 222, 234, 250, 255, 266,
330
Oso .......................................
2 [7, 266
Osume ...............249, 255,260, 266
Otto Versand - 202, 214, 219, 237,
240, 242, 243, 249,
250, 264, 268, 272,
276, 302, 303, 313,
324, 330, 332
Palladlum23L
250, 272,283,338
Panasonic. 003, 034,037,090, 106,
116,118,122,124,125,
135,142,143,154,156,
221,230,245,250,265,
Phonola-., 203,209,247,250,306,
320
Pioneer..... 004,006, 095,109, 112,
118, 119, 130, 131,250
Portland _, 004,006, 013,091, 113,
120, 131, 146, 147,152
Prandoni-Prince .................256,272
Price Club ......................................
58
Prima ...........................147,246, 332
Prinz ..............................................
255
Prism ...............................................
34
Profex ..........................201,246,332
Profi-Tronic ........................250,257
Proline225,247, 250, 255, 277,291
Proscan .......................001,097,111
Protech ................................201,222
Proton...... 004,006, 009,113, 114,
127, 131, 137, 146,148
Provision .......................................
250
Pye ...............................
203, 247, 250
Quasar-,
003,034, 118,124, 125,
128,135,142,143
Quelle ..--202, 208, 211,237, 240,
242,249,250,254,258,
260, 264, 272,306,309,
322,324,330,332
Radio Shack.. 111,115,116,118,
134,146
Radio Shack!Realistic 001,004,006,
009,028,033,
051,091,092
Radiola ............... 203, 247, 250,320
Radiomarelli ...............209, 250,272
RadioShack...................................
250
Radiotone ...................246, 250,289
RCA.001.003,004,005,006,007,
015. 052,053, 054,055,056,
095,097,098,099,102,
EEI,
112,115, EI8,119,122, E23,
124,130, 131, 141,143, 146,
153
Realistic ......................................... III
Recor ............................................. 250
Revox ............................................ 250
Rex ...................... 222, 272, 283,312
RFT .............................. 209, 255,275
332
Robotron ...................................... 306
Runco .............................................. 82
Samsung.,, 004,005,006,009,0E2,
015,057,058,059,09L
092,103,113,120,13L
134,14L 146, 151, 159,
201,222,223,231,239,
243,246,250,255,262,
305,322,323,332,338
Sansui ...................................100,250
Sanyo 004, 033,047, 060, 089, 096,
129,149,211,216,227.246,
249,253,255,260,275,298,
305,306,309,332
SBR .....................203,205,247,250
Schneider. 217,232, 247, 250,266,
272,288,332
Sco_ 004, 006,009, 016, 025,028,
032,115,116, E31,136,146
Sears 001,004,006, 010, 011,015,
032, 033,039,040, 043, 044,
061,071,096, 097, 111,113,
115,129,134,146,149
SEG ............222,246,249,250,272
SEE.-., 202, 209,224, 250, 257,276
SEl-Sinudyne .......................306,330
Seleco .................283,303, 312,319
Sentra .................204, 246, 248,266
Sharp 004, 006, 009, 017, 020, 05L
062, 063,064, 067, 091,093,
127,144,146,151,210,249,
260, 262,276, 302, 321,328,
329,340
Shorai ................. 224, 262, 276,330
Siarem209, 250,257, 260, 264,306
Siemens,,,, 214,2E5, 240,242,31L
313, 324. 325
Sierra ....................................
247,250
Signature 2000 ............................129
Singer ........209,257, 272, 306,332
Sinudyne ,, 202,209, 219, 250,257,
261,266,276,306,330
Solavox ................................255,307
Sonitron ........................................
216
Sonoko-.,,. 201,246, 250, 266,332
Sonolor .........................................
216
Sontec .........................250, 276,338
Sony. 002, 104,107, 108, 138,140,
145, 146,202, 237,249,257,
296,304,309,339,342
Soundesign004,006, 008, 028,032,
113,115,131,137
Star Lite ............................... 246,250
Starlite ..................................
028,332
107
Stern ..............................................
312
Sunkai219, 224, 225,229, 266, 276,
277, 281,330
Sunstar .................................
246,250
SuperTech ..................246, 250, 332
Supra ....................................
246, 332
Susumu .................................
217, 278
Sylvania..... 004, 006,008, 015, 037,
040, 041. 042,045, 046,
088, 113,114, 120, 128,
131,134,136,137,144,
154
Symphonic .........023,028, 116, 136
Tandberg ..........................283, 330
Tandy 093, 134,217,255, 266, 272
Tashiko ..............205,249, 251,333
Tatung.....003,118,220,250,255,
305,309,339
Teac ...............................................
250
Tec ............. 246, 272,278, 284, 332
Technics... 034, 135,142, 143, 221,
245
Techwood 004, 006,034, 114, 134
Teknika .... 004, 005,006, 008, 009,
rh
>
rh
i
i
o
_N
oo
108
010,011,013,028,032,
045,058,090+091,115,
116, 120,130, 131, 137,
146,154
Teleavia .........................................
319
Telecapt+on ....................................
65
Telecor ................................250, 266
Tel_unken 151,226,250,278, 284,
141, 148, 149,150, 204,
208, 238,241,248, 249,
254, 257, 271,314,318
Totev+sion ......................................
91
Towada .........................................
257
Tristar ...........................................
266
Vo_ec ...........................................
250
Voxson ...............209,250,256,306
Waltham ....................................
250
Wards...... 001,004, 005, 006,015,
016,023,032,037,04L
042,045,049, 051, ILL
Triumph ............. 250, 261,271,279
291,303,319
Telegazi ................................250, 266
Teleme+ster ..................................
250
Telesonic ......................................
250
Telestar .........................................
250
Teletech ............. 201,246,250, 272
Teleton ................................249, 274
Tensai211, 217, 224,246, 250, 258,
266,272,276,282,332
Uher ..................250, 256, 306, 312
Ultra ..............................................
154
Ultravox ............250, 257, 272, 306
Uniden ..........................................138
Universal .........................................
49
Universum 21 I, 212, 222, 23 I, 240,
249, 250, 254, 256, 258,
260, 261,264, 272, 276,
279, 283, 285,287, 292,
Texet ....................................
217, 246
Thomson.250,278,284,291,303,
310,319,341
Thorn204,211,213,237,240,241,
250,263,278,298,303,305,
313+324
Toshiba .-. 033,043,044,058, 061,
065,066,087,088,129,
309, 313, 324, 330, 332
Univox ..........................................
250
Vestel
..........................................
Video Concepts
..........................
250
115
V+deoSystem ................................ 250
Vidikron ........................................ 134
Vision
............................................
250
113,120,122,123,13L
134,136,137,141,144,
148,262
Watson ..............250, 266, 288,289
Watt Radio ..................................
257
Wega ...........................209,249,250
Weltblick ......................................
250
White Wesdnghousell3, 120,144,
146, 147,154,
157,250
Yamaha.
O04,005,006,015,120,
137,151,154
Yoko ..........222,246, 250, 266,332
Yorx .....................................
266,332
Zenith.....
004,082, 083, 084,105,
117,138,154
Record electronic pictures
and camcorder tapes on
DVD and play them on TV.
Best
00
OQ
Picture
• i.LINK
digital connection:
For perfect recording from digital camcorders
• Progressive Scan output: For razor-sharp picture output
• Component
Video Inputs: For the best analog recording input
Best Sound
• 2.channel Dolby Digital audio recording: For @gitd guality stereo sound
• 24-bit digital-to-analog conversion: For top quality sound
Great
Convenience
• Over 3600 pictures on DVD!
• PCMCIA media slot: Far your memory card
• Fast transfer from memory card to DVD: No cables, no software installa_,_on
• Lip to 6 hours video recording
• Index Picture Screen: For visual Table Of Contents
• Favorite Scene Selection:
• Multibrand
Remote
For easy editing of your home movies
• Fit to space
• Digital
Photo and music manager:
For simple user intet_ace
e_
DVDVideo
Standard
Picture
product
Recorder
information
Playback
Recording
SPDIF
Disc types
Recording functions
DVD+RW
• PCM
• Safe Record
DVD+R
• One-Touch Record (OTR)
Picture DVD
• Append
Picture CD
• Divide
Audio
Performance
DVD- P,/-RW,video mode
• Erase
DA Converter: 24 bit
DVD-Video
ii!i!i_J_!_!_i_ii_ziii_:ii!i_:i_ii:i_ii:_:i_ii:i_ii_i;_i_z_ii::::::i_i_ii_i_Xi_i_ii_i_ii_i_ii_
• Automatic/Manual
Chapter
Video CD, Super VCD
Audio CD
AD Converter:
16 bit
Signal/Noise (lkHz): 95 dB
MP3CD
CD-R/RW
Dynamic range (1 kHz): 85 dB
Crosstalk (1 kHz): 95 dB
Distortion/Noise
Video
(lkHz):
• Selectable Index
Mode
Rec,
DVD, SVCD:
VCD:
MPEG2
MPEG1
ResoIution
Bit rate (bit/s)
time
Video
Audio
Front
DVD/CD
Connections
Memory card slot: PCMCIA type II
i,LINK DV in: lEER1394 4-pin
S-video in: Hosiden 4-pin
Video in: Cinch (yellow)
Audio Left/Right in: Cinch (white/red)
Rear Connections
Component
video in Cinch
Progressive Scan/Component
Resolution
H xV (pixels)
Full D1 (DVD-Video)
Half DI
60Hz
SIE (VCD)
equivalent
equivalent
to 500 analogTV
to 250 analogTV
J
I
Int0rna
tuner
access
• Next/Previous
Tide/Track/Chapter
• Repeat (Chapter/Tide/All)
or (Track/All)
• A-B Repeat
• Shuffle
• IntroScan
• Time
Search
• Zoom (1.33x, 2x, 4x) with
• Auto Resume (20 discs)
S-video out: Hosiden 4-pin
Video in: Cinch (yellow)
Power Supply
Video out: Cinch (yellow)
Audio L/R in (2x): Cinch (white/red)
Mains:
Power supply:
Audio L/R out (2x): Cinch (white/red)
Digital audio out: Coaxial, Optical
Power
User
Recording
• Slow (3 speeds)
• Direct Title/Track
(3 speeds)
picture
enhancement
polarised (IEC)
90,.140 VAC (120 V nora)
50/60 Hz
consumption
(IEC type)
PAL/SECAM
Scan frequency
Number of lines
Playback
(green/blue/red)
playback
• Fast Forward/Backward
• Step Forward/Backward
RE antenna in: Coaxial 75 ohms (F type)
RETV out: Coaxial 75 ohms (E type)
lines
lines
NTSC
overview
Pictures
video out: Cinch (green/blue/red)
S-video in: Hosiden 4-pin
Mains: Standard
TV Standard
insertion
85 dB
Format
Digital compression
Marker
• Disc write protection
• Favorite Scene Selection
• Index Picture Screen for instant content
Interface
OSD languages:English,French, Spanish
Cabinet
Dimensions (W x H x D): 17.12 x 2.55 x 13.18 inches
Net Weight 8.81 LB
Electronic
Program
Guide
Timer programming:VCR Plus+/Manuat
Number of events: 6; 1 year; daily/weekly
Remote
Control
• 46-key remote control
Video Performance
DA Converter:
10 bit
AD Converter:
9 bit
Signal handling: Components
Video (CVBS) out: 1 Vpp into 75 ohm
S-video (Y/C) out: Y: 1 Vpp into 75 ohm
C: 0,286 1V_ into 75 ohm
Component/Progressive
video out (YPBP_):Y: 1 Vpp into 75 ohm
P_: 0,7 Vpp into 75 ohm
PR: 0.7Vpp into 75 ohm
Audio
Format
Compressed digital
• Dolby Digital
(AC-3)
• DTS, MPEG2
• MPEGI, MP3
Playback
•6.1-channel compatible
Recording
Digital
Photo
Manager
• PCMCIA slot compatible with Memory Stick,
Compact Flash,SD card, Smart Media, Micro Drive
• Recording on DVD+RW/+R
• Up to 3,600 pictures per DVD
• Two-way transfer between memory card and DVD
• Picture formats supported: EXIF-compliant JPEG
• Slide show
• Zoom (2 x, 4x, 6x)
• Rotate
General
• User Manual in English
• DVD+RW
disc
• AC power cable
• Stereo audio cable
• Video cable
• S-video cable
Functionality
PhUips Consumer
Screen Saver
• Backup Presets &Timer
Events: 1 year
• Backup Clock & Calendar:
• Time & Date Download
• Automatic
Contents
• DVD Video Recorder
• Remote Control + batteries
• Coax digital audio cable
• Coax RF antenna cable
• 3D Sound
• Automatic
Package
Audio
Recording
5 hrs
Level Control
Electronics
Data subiect to change without notice
600669
Printed in U,S,A.
2002© Koninklijke PhiIips Electronics N,M
All rights reserved
www.phillps,com
or AOL keyword:
Phillps
VCR Plus+ is trademarks of Gemstar Development Corp
Dolby
Digital and the double-D symbol are trademarks of Do[by Laboratories
Licenslng, lnc DTS is a trademark of DigitaITheater Systems, lnc
TruSurround, SRS and the symbol (D are _rademarks of SRS Labs, lnc
Quick install guide
Connecting
TV/Initial
Warning
! Until
will not function.
1
2
3
4
5
6
7
8
The initial
your
DVD
Recorder
to the
installation
the
initial
installation
has been
completed,
the buttons
on the
front
Remove the antenna cable jack from your TV. Insert it into the
ANTENNA IN jack at the back of the DVD recorder.
ANTENNA
Insert one end of the supplied antenna cable into the TV
OUT jack at the back of the DVD Recorder and the other end
into the antenna input jack at the back of the TV
Connect the S-VIDEO
OUT/AUDIO
L/R OUTjacks or
VIDEO
(CVBS)
OUT / AUDIO
L/R
OUT with
the
corresponding input jacks of the TV.
Switch on the TV
Connect
the
Recorder
with the power supply using the supplied power
mains
jack
_MAINSat
the
back
of the
DVD
cable.
The most important
features of the DVD Recorder will appear
on the display. After the initial installation
is completed,
this
function will be switched off.
Press STANDBY-ON
i
C
Tll
r3_y31
,
* :_ , _ L,_r wll
O on the recorder.
appear on the display.
t _
i _{
Tit
J_
£3_L-3
Ltt',l_
If necessary, select the channel number of the input jack at the
TV
initialSetup
The initial installation menu appears on the screen.
Menu Langua£e
Confirm
withpreferred
OK.
Select your
Espafiol
l English
Fran§ais
installation
is carried
setting using •
out automatically
or
•
.
Please wait until the procedure
is completed.
Press OKto continue
Making a recording
Press
MONITOR
to
display
the
selected
input
signal
on
the
screen
Select the program number from which the recording is to be
carried out using CHANNEL+
or CHANNEL-.
Recording
via the
Select either
at the back
external
the front
of the
recorder,
out, using
CHANNEL+
Selecting
the
You
hours),
hours)
using
SAFE
RECORD
Usually,
a recording
REC/OTR
Press
RECORD
(quality)
(camcorder
'M_
starts
recording
down
'EXTZ,')
is to be carried
recordingsll
(3 hours),
'M4'
hour),
(4 hours)
or
'M2'
(2
'M_
(6
MODE.
ended. This will delete
If a new
the recording
CHANNEL--.
'MI'
hours),
REC
which
mode
bet_veen
'M2x _ (2,5
from
or
recording
can select
jacks
jack ('[F_'¢ f, '[F_M_') or the jack ('EXTI',
is to
•
at the
point
all subsequent
where
the
previous
recording
recordings.
be placed
at the
end of all
recordings,
hold
until 'SF_PEfi_EC' appears on the display.
or
REC/OTR
5_SdRL'
•
to start the recording.
the
will
¢" If the recording is made from a video recorder, adjust the 'tracking
setting on the video recorder.
[x'Nu n
(no signal)
appear on
display
¢" In
Check
cable jacksvideo
fit correctly.
¢"
casewhether
of bad, the
non-standard
input signals, the DVD Recorder
may not be able to detect the signal.
Programming
Press
on the remote
Select line 'Timer
with •,
3
4
5
6
7
Programming'
field with
•
Enter the desired data with
0..9.
Confirm
control.
using
•
or
•
and confirm
data will be displayed,
Select the entry
with
or
•
•,
TIMER
Timer
Timer Programming
Date
01/22
Ch.
01
Rec
Start
End
Mode
O8:3fiAM 10:0OPM M1
,
•
or the number buttons
OK.
The data was stored
To end, press
Problem
recordings
TIMERQ
The current
Tip
in a TIMER block,
C).
Switch offthe DVD Recorder with STANDBY_.
A programmed recording will only function if the DVD Recorder
is switched off using STANDBYO.
Mo-Fr/Weekly
Press SELECT
To store
Press OK
The 'Digital
Using the 'Digital Photo Manager',
Photo
CD, DVD,
or a CD
Photo
you can view and modify JPEG pictures
ROM. You can store
them
and play them on a DVD
In addition,
pictures
can store
the
in a so-called
from a memory
on a DVD+RW/+R
card. You can create slide shows
you
Manager'
card,
or on the memory
player.
album
in a specific
order,
yet without
changing the order in which the pictures are stored on the memory card.
Moreover, you can view the pictures in a slide show at adjustable intervals.
Store the slide show on a DVD+RW/+R
so you can view them on a DVD
What is the difference between a 'Roll
player
and 'Albums'?
'Roll
A folder containing JPEG pictures. It is comparable with a conventional
35ram film for cameras. Rolls will be created automatically from the
digital cameras.
'Albums'
A file containing references to the pictures on the rolls. It is comparable
with a conventional photo album that may contain the pictures of
different films (rolls).
You can delete an album without deleting the pictures of the rolls.
The PC (PCMCIA)
In this DVD-Recorder
SD memory
pro, Micro
could
you can use the following
cards,
Multimedia
Drive, xD Picture
Warning
!
Insert/Remove
the
damage
If you were
Card,
PC Card
the
cards with an adapter:
SmartMedia,
Memory
Stick/Memory
only when
there
is no access to
the
memory
lights up on the top left corner
not sure, press in the
into the
'Media
Insert the medium
'Digital
Photo
menu'
Manager'
the
button
PHOTO.
screen.
you want to use (CD, DVD+RW/+R,
Press PHOTO on the remote control
memory
The 'Media menu' will
appear
Use • or • to select the medium you want to process (disc
or memory card). If you did not insert the corresponding medium
(disc or memory card), a warning sign will appear above the
symbol on the left hand side of the screen
with
Select 'Roll
_
.
using •
or
•
and confirm
with
You will see an overview with the first picture of each roll that
contains pictures. The display and the description
of the roll will
depend on the camera or the computer
this roll
6
This
of the screen
card)
Confirm
card.
card.
Showing JPEG pictures from a roll
3
4
5
Stick
access by:
disc symbol
take you directly
types of memory
CompactFlash,
Card
the memory
You can recognise
•) A moving
Card
Select the desired
roll using •
or
•
program
and confirm
used to create
with
OK
This will
The
data
pictures
8
will
be
read
and
then
an overview
of
the
stored
will be displayed.
You can select a picture for viewing or editing with
V,A.
•
, •
,
I Fast
the switch
pictures
With browsing
_
or _trough
you can
one page forward or backward,
You can also select a picture with the number buttons 0..9 on the
Tip
Ir_mote.
9
10
Press
OK to select the desired
The picture
picture.
will be displayed as a full picture
Making a 'DVD
compatible'
Using this function, you can record the pictures
from a roll or an album on a DVD player.
On a DVD+R
both pictures
you can only
slide show
in such a way, that you can view the slide show
The slide show will be stored on the DVD+RW/+R
photos in the JPEG format in addition to the video
that you can store
on the screen
as a video title. If you want to store
title, you must prepare the DVD+RW
the
so
and videos.
store
either
photos
or videos
A combination
of JPEG photos
and
video is not possible.
Making a slide show from a roll
Each roll will be stored
as one video title on the DVD+RWI+R
If you want to make a video title from different rolls, you have to create
you can store the album as a video title on the DVD+RW/+R,
In the 'Media
the middle)
menu'
Select the line 'Rolls'
Select with
video title.
Press
m
•
screen select the memory
and confirm
•
, •
the 'Roll
with
and confirm
with
•
.
, the roll from which you want to make a
Settings'
menu will appear.
Select the line 'Make video title' using • , • an confirm with
OK.
'SR_'I_'_' will appear in the display and the screen will show the
time left until completion.
The new roll will be stored on the DVD+RW/+R as a video title
(movie). It will appear in the index picture screen as a separate
title.
Ensure that there
_o
oo
in
•
This video title will be recorded
automatically
recording. No existing titles will be overwritten.
o
card (symbol
an album first. Then
is enough space on the disc.
To end, press DISC-MENU
after
the
last
/
_k
'DetroWToledo _"
Cleveland/
_
,:_
; San FranclscotMetto
Area
/,
• LOS Angeles
-
_
_
---
. Chadotle
K_oxville/ETennessee
• Philadelphia/S
New
Jersey
Atlanta/NGeorgia
" Dallas
* Indicates to-Home Service Only
Milwaukee: carl Ch_ago
Cincinnatiand Columbus:carl Cleveland
Nashvilleand Chattanooga: call Knoxville
Washington/Baltimore: call Philadelphia
Charlo_e: callAtlanta
San Antonio: call Houston
All Florida Ioca_ons;call Tampa
_
•
.
"
-_Odando
J
HOUStOn
_
.
TampalWFlorida
It, Myers/SW Florida
Y_Mlami/SE Florida
• Indicates In-Home/Carry-in Service
Tall-free numbersprovided on the nextpage
NOTE: If you reside in one of our Philips Factory Service Branch areas (see directory on back), you can contact the nearest Service
Branch to obtain efficient and expedient repair for your product. If your product is In-Warranty, you should have proof-of-purchase
to ensure No Charge Service. For Out-of-Warranty service, call the location nearest you.
NOTA:
Si vous r_sidez dans une des r_gions desservies par une succursale de service apr_s vente du fabricant Philips (voir liste
ci-dessous), vous pourrez contacter la branche de service apr_s vente la plus pros de chez vous pour obtenir un service apr_s vente
rapide et efficace. Si le produit est sous garantie, il suffira de presenter une preuve d achat pour b_n_ficier d'un service sans frais.
Pour les produits non couverts par la garantie, contactez le centre le plus pros de chez vous.
NOTA: Si Ud. reside en una de nuestras zonas para sucursales Philips de servicio al de f_brica (ver directorio m_s abajo), Ud. puede
comunicarse con la sucursal de servicio mgs cercana para obtener una reparaci6n oportuna y eficaz de su producto. Si su producto
est_ todavla bajo garantia, Ud. debe presentar comprobante de compra para no ocasionar ningunos cargos pot servicio. Para servicio
despu_s del vencimiento de la garantia, Ilame al lugar mgs cercano de los abajo indicados.
In Canada
To obtain efficient and expedient
carry-in, mail-in, or in-home service for your product, please contact
1-800-661-6162 (French speaking)
1-800-531-0039 (English or Spanish speaking)
Philips at:
Au Canada
Comment obtenir le service apr_s-vente pour les produits apport_s ou envoy_s par la poste _ notre centre de service ou le service
domicile. Veuillez contacter philips _:
1-800-66 I-6162 (Francophone)
1-800-531-0039 (Anglais ou Espagnol)
En el Canad_i
C6mo recibir servicio efficiente para su producto,
Rev. HH -I/9/2003
en persona, pot correo o a domicillo Favor de comunicarse
1-800-661-6162 (franc6fono)
1-800-531-0039 (Ingl_s o Espafiol)
con Philips al:
QUALITY
SERVICE IS AS CLOSE AS YOUR TELEPHONE!
SERVICE
CENTER
SERVICE,
NEAR YOU. YOUR
PRODUCT
SIMPLY
AND YOU WILL RECEIVE PEACE OF MIND,
KNOWING
PHILIPS'
COMMENT
DOMICILE,
PRODUITS
SAVOIR
OBTENIR
OU
EN
A REPARER A TRAVERS
L'EMPLACEMENT
COMO
OBTENER
SU PRODUCTO
RECEPCIOH
CERCANO
Rev.
NOTRE
SERVICE
SE PRESENTANT
UN
UN SERVICIO
A TRAVES
DE
DE
OPORTUNO
UN CENTRO
DENTRO
FOR THE NUMBER
OF A FACTORY
CARRY-IN,
OR IN-HOME
IS BEING GIVEN THE
MAIL-IN,
EXPERT ATTENTION
RAPIDE
ET
EFFICACE
PHILIPS.PLUS
SOIT
PAR
COURRIER,
DE 6O0 CENTRES
DE SERVICE AUX CONSOMMATEURS
DE 50 A 75 MILES (80 KM A 120 KM) DU CENTRE
DE SERVICE
DE REPARACIOHES:
DE UN RADIO
COMUNICARSE
CON EL CENTRO
DE 80 A 120 KM (50 A 75 MILLAS)
DE SERVICIO
DEL CENTRO
TAMPA
Philips Factory Service
1911 US Highway 301 North,
Suite 100
Tampa, FL 33619
800-442-2027
DETROIT
KNOXVILLE
Philips Factory Service
Philips Factory Service
25173 Dequindre
Madison Heights, MI 4807 I
800-438-1398
One Philips Drive
Building 2
Knoxville, TN 37914
800-821 - 1767
SAN FRANCISCO
DALLAS
PHILADELPHIA
Philips Factory Service
681 East Brokaw Rd.
SanJose, CA 95112
800-300-9013
Philips Factory Service
415 N. Main Street,#107
Euless,TX 76040
800-952-3254
Philips Factory Service
354 Dunks Ferry Rd.
Bensalem, PA 19020
800-847-9320
HOUSTON
LOS ANGELES
Philips Factory Service
I I I 0 N. Post Oak Rd.,
Suite 100
Houston, TX 77055
800-952-3254
Philips Factory Service
20930 Bonita, Ste. V
Carson, CA 90746
800-300-9013
,oo
DVDR
77/17
LOCAL.
DE FABRICA
DE SERVICIO
CHICAGO
m
DE
POUR
Y EFICIENTE
POR CORREO,
EN CASA
O EN PERSONA
PAPA
PHlUPS
DE SERVICIO.
MAS DE 600 SITIOS POR TODO EL PAlS PARA LA
CLEVELAND
Philips Factory Service
950 Keynote Circle
Brooklyn Heights, OH 44131
800-331-7037
- 1/9/2003
A
DE RECEPTION
LE PLUS PROCHE
ATLANTA
Philips Factory Service
550 Franklin Road.,Suite F
Marietta, GA 30067
800-273-1501
HH
OF
SERVICE.
SERVICE
LE CENTRE
DANS UN RAYON
NECESITADOS
PARA ESTOS LUGARES
VENTE
CENTRE
AND EXPEDIENT
YOUR PRODUCT
FACTORY
APRIES
LE PAYS: CONTACTER
DE CES DEPOTS
DE PRODUCTOS
A
LOOK OVER THE LIST BELOW
WILL RECEIVE EFFICIENT
Philips Factory Service
1279 W. Hamilton
Itasca, IL 60143
800-531-2922
Pkwy.
MAS
LOCAL.