1
DiasySoft Manual ABPM recorder Software NOVACOR S.A. 4 passage Saint-Antoine 92508 Rueil-Malmaison Cedex – France DiasySoft Manual 2000 NOVACOR S.A. – All rights reserved User manual - GB - 03/03 page 1 DIASYSOFT WINDOWS / MAC Contents CONTENTS 1. NOVACOR LICENCE AGREEMENT............................................................................................................5 1.1. 1.2. 1.3. 1.4. 1.5. 2. USING THE SOFTWARE, FLOPPY DISKS OR CDROM ........................................................................................6 COPIES ........................................................................................................................................................6 GUARANTEE.................................................................................................................................................6 MANUAL ......................................................................................................................................................7 COPYRIGHTS ................................................................................................................................................7 INSTALLING DIASYSOFT .............................................................................................................................8 2.1. ABOUT THIS MANUAL ...................................................................................................................................9 2.2. IF YOU HAVE NEVER USED A COMPUTER…......................................................................................................9 2.3. IF YOU HAVE NEVER USED A DIASYS UNIT …..................................................................................................9 2.4. DIASYS 200 AND DIASYS INTEGRA ...............................................................................................................9 2.5. SYSTEM REQUIREMENTS .............................................................................................................................10 2.5.1. Equipment ............................................................................................................................................10 2.5.2. WINDOWSTM Configuration..................................................................................................................10 2.5.2.1. 2.5.2.2. Minimum Configuration .............................................................................................................................. 10 Recommended Configuration....................................................................................................................... 10 2.5.3. MACINTOSH Configuration .................................................................................................................10 2.5.3.1. 2.5.3.2. Minimum Configuration .............................................................................................................................. 10 Recommended Configuration....................................................................................................................... 11 2.6. INSTALLING THE EQUIPMENT.......................................................................................................................11 2.6.1. Connecting the access key ....................................................................................................................11 2.6.2. Connecting the unit to a computer ........................................................................................................11 2.7. INSTALLING THE SOFTWARE ........................................................................................................................12 2.8. STARTING UP THE DIASYSOFT APPLICATION ................................................................................................13 2.9. UPGRADES AND OPTIONS ............................................................................................................................13 2.10. PASSWORD.................................................................................................................................................14 3. OPENING THE SOFTWARE ........................................................................................................................15 3.1. 3.2. 3.3. 3.4. 4. QUIT ICON .................................................................................................................................................15 MANAGEMENT OF PATIENT FILES ICON........................................................................................................15 COMMUNICATION ICON...............................................................................................................................15 CHAIN PRINTING ICON ................................................................................................................................15 MANAGEMENT OF PATIENT FILES.........................................................................................................16 4.1. PATIENT FILES ...........................................................................................................................................17 4.1.1. Choosing a File ....................................................................................................................................17 4.1.1.1. 4.1.1.2. 4.1.1.3. 4.1.1.4. The list of files ............................................................................................................................................ 17 Creating a New File .................................................................................................................................... 18 Opening a File............................................................................................................................................. 18 Deleting a File............................................................................................................................................. 18 4.1.2. The file window.....................................................................................................................................19 4.1.2.1. 4.1.2.2. 4.1.2.3. 4.1.2.4. Patient details.............................................................................................................................................. 19 Procedures................................................................................................................................................... 19 Medical history ........................................................................................................................................... 20 General information .................................................................................................................................... 20 4.2. PATIENT DATABASE OPERATIONS ................................................................................................................20 4.2.1. Deleting procedures..............................................................................................................................20 4.2.2. Transferring / Copying procedures .......................................................................................................21 4.2.3. Import / Restore ....................................................................................................................................21 4.2.4. Exportation / Backup ............................................................................................................................22 4.2.5. Multicriteria selection ..........................................................................................................................24 4.2.5.1. 4.2.5.2. 5. The Multicriteria Selection window............................................................................................................. 24 Making a multicriteria selection .................................................................................................................. 25 PROGRAMS ...................................................................................................................................................27 5.1. THE CONTENTS OF A PROGRAM ...................................................................................................................28 User manual - GB - 03/03 page 2 DIASYSOFT WINDOWS / MAC Contents 5.2. PROGRAMMING TABLE ...............................................................................................................................28 5.2.1. Opening a Programming Table .............................................................................................................28 5.2.1.1. 5.2.1.2. 5.2.1.3. 5.2.1.4. 5.2.1.5. Name of Program zone ................................................................................................................................ 29 The Icons zone............................................................................................................................................. 29 Measurement Intervals tab........................................................................................................................... 29 Options tab.................................................................................................................................................. 29 Additional measurements tab....................................................................................................................... 29 5.3. CREATING A NEW PROGRAM .......................................................................................................................30 5.3.1. Name of the program ............................................................................................................................30 5.3.2. Measurement intervals..........................................................................................................................30 5.3.2.1. 5.3.2.2. Programming measurement intervals ........................................................................................................... 31 Position Option ........................................................................................................................................... 31 5.3.3. Additional settings ................................................................................................................................32 5.3.4. Additional Measurements (Diasys Integra only)....................................................................................33 6. COMMUNICATION WITH THE DIASYS...................................................................................................35 6.1. DIASYS-COMPUTER COMMUNICATION..........................................................................................................36 6.1.1. Communication Options........................................................................................................................36 6.1.2. Communication window........................................................................................................................36 6.2. PROGRAMMING THE DIASYS .......................................................................................................................38 6.2.1. Choice of a Program and of a Patient...................................................................................................38 6.2.2. Transferring the program to the Diasys.................................................................................................39 6.3. READING THE DIASYS.................................................................................................................................40 6.3.1. Data Transmission ................................................................................................................................40 6.3.2. Allocating the Procedure to a Patient ...................................................................................................40 6.3.3. Creating a Procedure window...............................................................................................................41 6.4. RECEPTION OF PROCEDURES VIA MODEM (NOVAMODEM) .............................................................................42 6.4.1. Receiving a recording...........................................................................................................................42 6.4.1.1. 6.4.1.2. Configuration of equipment: ........................................................................................................................ 42 Setting the modem on standby ..................................................................................................................... 42 6.4.2. Saving procedures received via modem.................................................................................................43 6.5. RECEPTION OF PROCEDURES VIA E-MAIL (NOVAMAIL)..................................................................................43 6.5.1. Recovering a procedure from an e-mail ................................................................................................44 6.5.1.1. 6.5.1.2. NovaMail Settings....................................................................................................................................... 44 Recovering a procedure ............................................................................................................................... 44 6.5.2. Saving procedures recovered by NovaMail ...........................................................................................44 7. PROCEDURES ON THE SCREEN ...............................................................................................................45 7.1. THE PROCEDURE WINDOW .........................................................................................................................46 7.1.1. General points ......................................................................................................................................46 7.1.2. The technical conditions of the procedure.............................................................................................47 7.1.3. The medical conditions of the procedure...............................................................................................47 7.1.4. Measurement Validity ...........................................................................................................................48 7.2. DISPLAY OF RESULTS ..................................................................................................................................48 7.2.1. Icons for accessing results ....................................................................................................................48 7.2.2. Display Patient and Procedure files icons.............................................................................................49 7.2.3. Other icons ...........................................................................................................................................49 7.3. MEASUREMENT GRAPHS .............................................................................................................................49 7.3.1. Size of charts and tables .......................................................................................................................50 7.3.2. Selecting a measurement.......................................................................................................................50 7.3.3. Graph ...................................................................................................................................................51 7.3.3.1. 7.3.3.2. Settings displayed........................................................................................................................................ 51 Zoom........................................................................................................................................................... 51 7.3.4. Measurements table ..............................................................................................................................51 7.3.4.1. 7.3.4.2. 7.3.4.3. 7.3.4.4. 7.3.4.5. 7.3.4.6. 7.4. 7.5. Measurements displayed.............................................................................................................................. 51 The time column ......................................................................................................................................... 52 The status column ....................................................................................................................................... 52 The Incidents column .................................................................................................................................. 53 The Comments column ................................................................................................................................ 53 Removing measurements ............................................................................................................................. 54 HOURLY MEANS GRAPH ..............................................................................................................................54 THE STATISTICS TABLE ...............................................................................................................................54 User manual - GB - 03/03 page 3 DIASYSOFT WINDOWS / MAC Contents 7.5.1. Choice of hourly periods.......................................................................................................................55 7.5.2. Statistical thresholds.............................................................................................................................55 7.6. THE BAR CHARTS WINDOW.........................................................................................................................56 7.6.1. General points ......................................................................................................................................56 7.6.2. Display choices.....................................................................................................................................56 7.6.2.1. 7.6.2.2. 7.6.2.3. Type of chart ............................................................................................................................................... 56 Different settings......................................................................................................................................... 56 Time periods ............................................................................................................................................... 56 7.6.3. Bar Charts............................................................................................................................................57 7.6.4. Cumulative percentiles .........................................................................................................................58 7.7. THE COMPARISONS WINDOW.......................................................................................................................58 7.7.1. General points ......................................................................................................................................58 7.7.2. Display choices.....................................................................................................................................59 7.7.2.1. 7.7.2.2. 7.7.2.3. Type of graph .............................................................................................................................................. 59 Different settings......................................................................................................................................... 59 Procedures to be compared .......................................................................................................................... 59 7.7.3. Comparison in percentiles ....................................................................................................................60 7.7.4. Comparison of the hourly means...........................................................................................................60 7.7.4.1. 7.7.4.2. Comments ................................................................................................................................................... 61 Resynchronisation of procedures.................................................................................................................. 61 7.8. THE QKD ANALYSIS WINDOW .....................................................................................................................63 7.8.1. General points ......................................................................................................................................63 7.8.2. Display choices.....................................................................................................................................64 8. PRINTING REPORTS....................................................................................................................................65 8.1. ORGANISATION OF THE REPORTS .................................................................................................................66 8.1.1. Report items..........................................................................................................................................66 8.1.2. Configurations......................................................................................................................................66 8.2. CONFIGURATION OF REPORTS......................................................................................................................66 8.2.1. Name of report......................................................................................................................................67 8.2.2. Report heading .....................................................................................................................................67 8.2.3. New report ............................................................................................................................................67 8.2.4. Cover page ...........................................................................................................................................67 8.2.5. Y Scale..................................................................................................................................................68 8.2.6. QKd Analysis........................................................................................................................................68 8.3. PRINTING REPORTS .....................................................................................................................................69 8.3.1. The report printing window...................................................................................................................69 8.3.2. Printing ................................................................................................................................................69 8.4. CHAIN PRINTING ........................................................................................................................................70 8.4.1. List of procedures .................................................................................................................................70 8.4.2. Procedures to be printed.......................................................................................................................70 9. SETTINGS.......................................................................................................................................................72 9.1. REFERENCE LISTS .......................................................................................................................................73 9.1.1. The list itself .........................................................................................................................................73 9.1.2. Text zone ..............................................................................................................................................73 9.1.3. The Insert icon......................................................................................................................................73 9.1.4. The Delete icon.....................................................................................................................................74 9.1.5. Using reference lists in windows ...........................................................................................................74 9.2. STATISTICAL THRESHOLDS .........................................................................................................................74 9.2.1. General points ......................................................................................................................................74 9.2.2. Creation window...................................................................................................................................75 9.2.3. Threshold limits table ...........................................................................................................................76 9.2.4. Threshold values in the results window .................................................................................................76 9.3. DEFAULT VALUES ......................................................................................................................................77 9.4. PREFERENCES ............................................................................................................................................78 User manual - GB - 03/03 page 4 DIASYSOFT WINDOWS / MAC NOVACOR licence agreement 1. NOVACOR licence agreement DiasySoft software is sold under licence and can only be copied or used in accordance with this. By installing the DiasySoft software you agree to be bound by the terms and conditions of this licence agreement. Please read this text carefully before installing the software. If you do not agree to its conditions, you should not, under any circumstances, install the software. You may ask the retailer who sold it to you for a full refund. You should return it with the accompanying documents, items and packaging. User manual - GB - 03/03 page 5 DIASYSOFT WINDOWS / MAC NOVACOR licence agreement 1.1. Using the software, floppy disks or CDROM The software is licensed “as is” for use on a single terminal connected to one single computer at a time. The use of DiasySoft on a multi-user system is not covered by this licence, and is only allowed if a written contract with NOVACOR S.A. has been made. Renting or lending of the software is strictly prohibited, unless a prior written contract has been made with NOVACOR S.A. You may give up ownership of the disks, but this must be permanent, and they must be accompanied by all the original documents and packaging they were delivered with. Once you have given up the software you lose all rights to its use and the new owner becomes bound by the terms and conditions of this licence agreement. 1.2. Copies To use the software without any restrictions you will need an “Access key”. It may, however, be installed without this “Access key” as a “Demonstration Version”. In this instance a small database is available giving access to most functions, although it is not possible to communicate with a recorder. Copying an original software disk for demonstration purposes and for free distribution of these copies is, therefore authorised, as is making a backup copy. Any copy made with any other aim in mind, or any attempt to bypass the “Access key” could be considered as an offence punishable under the protection of royalties law. 1.3. Guarantee NOVACOR S.A. guarantees that the software will perform substantially in accordance with the documentation provided with the DiasySoft package on the computers which were used for the tests. NOVACOR S.A. cannot guarantee that the software will work properly on any specific computer. NOVACOR S.A. guarantees the DiasySoft items and documentation for 90 days following delivery. In particular, NOVACOR S.A. promises to replace the program disk or CD-Rom free of charge should it be found to be illegible. After this period of time a set fee will be charged for a replacement. The software and their accompanying manuals are sold as they are, without any guarantee as to their quality, their performance, their accuracy or their ability to reply to a specific need. In consequence, the use of the results and the diagnosis established according to these results, are the entire responsibility of the physician. No loss or alteration of the data, or any damages either direct or indirect, caused by the use of the software, may be attributed to NOVACOR S.A. or its distributors. User manual - GB - 03/03 page 6 DIASYSOFT WINDOWS / MAC NOVACOR licence agreement 1.4. Manual Information contained in this manual is given only as an indication, and does not engage the responsibility of NOVACOR S.A. NOVACOR S.A. accepts no responsibility for any errors or inaccuracies which may be found in its manuals. The examples, measurements and charts shown in this manual are fictitious and shown only for the purpose of illustrating the use of the DiasySoft software. They have no scientific or medical value and cannot be used for any purposes other than the teaching purposes of this manual. The functions of the software and the manual which explains them may be changed without prior notice by NOVACOR S.A. 1.5. Copyrights This agreement is governed by French law and the only jurisdiction which applies in the event of a dispute is the exclusive jurisdiction of the French courts. DiasySoft Manual ©2000 NOVACOR S.A. All rights reserved. Diasys and DiasySoft and their respective logos are registered trademarks of NOVACOR. Macintosh is a registered trademark of Apple Computer International. MS-DOS and Windows are registered trademarks of Microsoft Corporation. NOVACOR is an international trademark of NOVACOR S.A. User manual - GB - 03/03 page 7 DIASYSOFT WINDOWS / MAC Installing DiasySoft 2. Installing DiasySoft DiasySoft can be used with any Diasys unit (200 series and the Integra series). Its main functions are the following: • complete patient file management, • programming of the Diasys for the recording, then the retrieval and storage of clinical procedures, • consultation and optimisation of the test results, • presentation of the results in a printed report, for which full parameters can be set, • statistical analysis of all or part of the patient database (multicriteria selection), • exchanges with other software using import/export functions, as well as backup, archival and restoration of procedures, • customisation of screens according to the user’s needs: colours, size and presentation of the windows containing the results. User manual - GB - 03/03 page 8 DIASYSOFT WINDOWS / MAC Installing DiasySoft 2.1. About this manual The DiasySoft guide deals with everything you will need to know to use the software. DiasySoft exists in versions for Microsoft Windows (Version 4.5 onwards) and for Macintosh (Version 4.2 onwards). The functions of these two versions are identical, although the operations may sometimes vary slightly. Differences between Windows and Macintosh are indicated in the margin of the manual by the Macintosh and Windows logos shown here. 2.2. If you have never used a computer… DiasySoft is user-friendly and requires the same skills as for other Windows and Mac software, such as using the mouse, working with several windows at a time, modifying text on the screen, etc. This manual assumes that you have a working knowledge of Macintosh or Windows programs. If not, you should take the time to familiarise yourself with them by going through the guidebooks which came with your computer. 2.3. If you have never used a Diasys unit … This manual also assumes that you are familiar with the Diasys unit; if not, you should go through the Diasys user manual first. 2.4. Diasys 200 and Diasys Integra DiasySoft version 4.5 gives access to all the functions of the Diasys Integra and the Diasys Integra Access. If your Diasys belongs to the 200 series, you will, of course, benefit from the increased possibilities of this software in as far as analysis of results is concerned, but the Diasys 200 will function as usual. User manual - GB - 03/03 page 9 DIASYSOFT WINDOWS / MAC Installing DiasySoft 2.5. System requirements So that your software can work under the best possible conditions, you should first check that you have the appropriate equipment and configuration. 2.5.1. Equipment • • • • One or more Diasys units, A computer cable link, An access key, A PC compatible computer with Windows or a Macintosh with Mac OS system 7, complying with EN 60-950 standards. WINDOWSTM Configuration 2.5.2. 2.5.2.1. Minimum Configuration • • • • • • A 386DX computer with a mouse A DOS 4.0 system software or above, and Windows 3.1 or above. A VGA video card 4MB RAM. At least 10 Mo of free hard disk space. A PC Windows compatible printer with 1MB RAM 2.5.2.2. Recommended Configuration • • • • • • 2.5.3. A 486 DX-33 computer or above with mouse. A DOS 6.x system software or above with Windows 3.1 or above An SVGA accelerator video card (800 x 600). 8 MB of RAM At least 30 MB of free hard disk space. A PC Windows compatible printer, either laser or ink jet, black and white or colour. MACINTOSH Configuration 2.5.3.1. Minimum Configuration • • • • • User manual - GB - 03/03 A 68030 computer System 7.0 or above 4 MB RAM At least 3 MB of free hard disk space A QuickDrawTM or PostscriptTM printer page 10 DIASYSOFT WINDOWS / MAC Installing DiasySoft 2.5.3.2. Recommended Configuration • • • • • A 68040 or Power PC computer System 7.0 or above 8 MB RAM At least 10 MB of free hard disk space A QuickDraw™ or Postscript™ printer, either laser or ink jet, black and white or colour 2.6. Installing the equipment We recommend that connections are made before the computer is switched on.. 2.6.1. Connecting the access key To use the DiasySoft software, you will need to install the access key supplied with it. This is a special connector, which functions solely with DiasySoft software. If the software is installed without this access key, it will only work as a demonstration version. The access key is connected to the computer’s parallel port: unplug the printer, insert the access key (the arrows should be pointed towards the computer), fix it in place with the 2 screws, and plug the printer into the access key. PC access key The access key is connected to the keyboard ADB port: unplug the keyboard cable link, connect the access key (the arrow should be pointed towards the keyboard), and plug the keyboard cable link into the access key. If you are installing DiasySoft on an IMac or a Macintosh G4 without an ADB port, connect a USB/ADB adapter on the keyboard USB port, install the driver provided with the adapter and connect the access key to the ADB port on the adapter. MAC access key 2.6.2. Connecting the unit to a computer For Diasys Integra Series units, use the cable supplied with DiasySoft. For a 200 Series Diasys unit, use the same cable you used with the previous software. Different computers require different cables: User manual - GB - 03/03 page 11 DIASYSOFT WINDOWS / MAC Installing DiasySoft For PC computers, an RS232 cable with a DB9 connector is required. If your computer is equipped with a different connector, contact your distributor who will be able to tell you which cable you need to use. Plug the cable into the appropriate serial port (usually COM1 or COM2). To change the serial port, use the Communication Menu Options window (cf. § 6.1.1.1). For Macintosh computers, connect the mini-Din end of the cable to the computer’s port modem. MAC Modem Port This port is identified by a small telephone symbol. The printer port can also be used (if there is no modem port or it is busy). If doing so, do not forget to configure the application (Communication Options window in the Communication Menu). If you are installing DiasySoft on an IMac or a Macintosh G4 without a serial port, connect an USB/Serial adapter to one of the two USB ports, install the driver provided with the adapter and connect the mini-Din end of the cable to the modem port on the adapter... The cable link is usually left connected to the computer, so that it is always easy and quick to connect a Diasys to it, for programming or transferring data. 2.7. Installing the software The software is installed automatically with the installation disks or CD-Rom supplied: • Insert the installation disk n°1 into disk drive A: (or B:), or the installation CD-Rom into the CD drive, • Open the File Manager (Windows 3.1) or the desk top (Windows 95 or above, Windows NT), • Select disk drive, • Type SETUP.EXE to start installation, • Follow the instructions on the screen.. Installing DiasySoft uses about 3 Mb of hard disk space.. Insert the installation disk n°1 into the disk drive or the installation CD-Rom into the CD drive. Double-click on the Install DiasySoft icon: the installation program will guide you User manual - GB - 03/03 page 12 DIASYSOFT WINDOWS / MAC Installing DiasySoft 2.8. Starting up the DiasySoft application To start up the DiasySoft application, open the Windows 3.1 program manager and double click the DiasySoft icon, or select DiasySoft in the Start/Program/Novacor menu (Windows 95 or above, Windows NT). Open the DiasySoft file installed in your hard disk (Diasysoft by default) and doubleclick the DiasySoft application icon. WARNING ! Do not work directly in the files in the DiasySoft directory as this could damage your data. Moving files in the DiasySoft directory, renaming them or destroying them could seriously affect the data, and could even destroy it permanently or prevent the software from functioning properly. 2.9. Upgrades and Options Most of the DiasySoft functions are available as soon as the software is installed. However, four additional independent options are available: The Position option enables a DIASYS INTEGRA series unit to detect whether the patient is standing up or lying down and to control the intervals accordingly, and to trigger supplementary measurements if necessary according to his position. Option Position Option QKd The QKd option gives access to mathematical and graphical interpretations (regression curves) of the QKd - a true index in arterial distensibility Option Multicriteria The multicriteria Selection option enables you to work on just a part of the files in the patient database, chosen according to criteria for which parameters can be set. Option Modem Option Email The Modem Communication option allows reception of recordings transmitted by a Diasys Integra or a Diasys Integra Access to your PC. Your PC must be connected to a Modem dedicated to reception (cf. § 6.4). The e-mail communication option allows reception and manipulation of Diasys procedures sent via e-mail using NovaDrive These options are indicated in this manual by their logo. User manual - GB - 03/03 page 13 DIASYSOFT WINDOWS / MAC Installing DiasySoft Your software may therefore be updated or replaced (whilst retaining its existing database) when new options are installed or the level is upgraded. These new functions are added either with a supplementary disk used in the same way as the installation disk (see above) or by calling up an option in the software. In the latter case, use Add an option in the Utilities Menu and follow the instructions. 2.10. Password You can protect the confidentiality of your data by entering a password which you will then be asked to type in each time that you want to use the software. The window used for creating or changing passwords is accessed using the Password command in the Utilities Menu: • If no password exists yet, type the word chosen into each of the two zones at the bottom of the window and click OK. • To change your password, type it into the text zone at the top of the window then enter the new password twice in a row into the following zones (to remove use of the password, leave the two text zones at the bottom of the window empty). Then click OK. User manual - GB - 03/03 page 14 DIASYSOFT WINDOWS / MAC Opening the software 3. Opening the software Upon opening, the software has a menu bar and a tool bar at the top of the screen. Some of the icons are active. The procedure menu remains grey if no file is open. At the bottom of the screen, an information bar gives: • The date and time of your computer, all the time, • If applicable, information concerning current operations, for example, the patient’s name, date of birth, current procedure date. 3.1. Quit icon This enables you to quit the software, even if some of the windows are still open. 3.2. Management of Patient Files icon Management of patient files function, i.e. creating a new patient file, changing or deleting a file which already exists, consulting procedures carried out on a patient, updating or deleting tests, moving to other files or directories etc. 3.3. Communication icon The communication icon has to be clicked prior to any operation performed by the computer on the Diasys, i.e. checking the status of the unit, programming, or transferring data. 3.4. Chain printing icon Chain report printing function. This function enables several reports to be printed automatically in succession. User manual - GB - 03/03 page 15 DIASYSOFT WINDOWS / MAC Management of patient files 4. Management of Patient Files This enables you to: • create or modify patient files, • access the various procedures which have been carried out on these patients. The Patient Database contains all the data and procedures managed by DiasySoft. It is saved on your hard disk and kept updated by DiasySoft. Each patient in the database has his own File containing his details and any procedures which have been carried out on him. The only restriction to the size of the Patient Database is the space available on your hard disk. Each new file and each new procedure take up space on the hard disk. You should therefore check regularly that there is enough space left for future procedures. User manual - GB - 03/03 page 16 DIASYSOFT WINDOWS / MAC Management of patient files 4.1. Patient Files 4.1.1. Choosing a File 4.1.1.1. The list of files To access one of the files in the patient database, first of all select it in the List of files window which can be opened in any of the following ways: • • • by using the List of Files icon on the Tool Bar, by selecting “Open” from the Files Menu, by DiasySoft automatically after transmission of a recording. List of Files Window If your database contains more names than that (there is no restriction to the number of names), the first 200 names will appear. You can get to the chosen patient by typing the first letter(s) of his name. To select one of the files, you can • either click it directly having scrolled the list if necessary using the scroll box on the right, • or type the first letter(s) of the name: the first name corresponding to the letters entered is selected in the list. The name selected appears in the Selected patient zone. If no name begins with the letter entered, the list remains unchanged and the Selected Patient Zone is empty. User manual - GB - 03/03 page 17 DIASYSOFT WINDOWS / MAC Management of patient files 4.1.1.2. Creating a New File Click the New icon in the List of Files window to open the New File window. A window will appear with zones to be filled in: name, date of birth, sex . Fill in at least the Name of patient zone and click OK to create a new file. The new file is created. To complete the information zones, open the file (cf. § 4.1.1.3). 4.1.1.3. Opening a File To open one of the files, select it from the list and click the Open icon. Files can also be opened by double-clicking their name on the list. 4.1.1.4. Deleting a File To delete a Patient File, select the file on the list and click the Delete icon. DiasySoft always asks for confirmation before destroying a file: once a file has been deleted it cannot be retrieved. As a safety measure, files containing procedures cannot be deleted immediately: to delete the file, you must first delete its procedures (see § 4.2.1). A specific message will warn you if the file you want to delete contains procedures. User manual - GB - 03/03 page 18 DIASYSOFT WINDOWS / MAC 4.1.2. Management of patient files The file window The File window contains your patient’s details, and can be accessed from the Files Menu, Open or the Tool bar. File window This window enables you to: • enter or modify the patient’s details (name, address, phone number), • consult his list of procedures • add to or consult his medical history, • enter or modify general information, • open, delete, transfer, or copy one of the procedures. Click on the tab required in the window to enter the information in that tab. 4.1.2.1. Patient details Enter the patient details into the input zones. The dimensions of these zones are restricted (the software will not allow you to exceed these limits). 4.1.2.2. Procedures The various procedures which have been carried out on this patient are classified in inverse chronological order according to the start of procedure dates (date and time the Diasys was started up). The length, number of measurements and the serial number of the unit used for the procedure are also displayed. Click on the procedure to select it. User manual - GB - 03/03 page 19 DIASYSOFT WINDOWS / MAC Management of patient files 4.1.2.3. Medical history You can enter one of the items from the Medical history reference list explained in §9.1, or add specific information not contained in the reference list by clicking an empty line. You can add up to 8 items. To delete or replace one of the items already noted in this zone, just click it beforehand. 4.1.2.4. General information This is a practically unlimited free text zone in which you can note anything of general interest concerning the patient. Caution: the contents of this zone are only available on the screen and cannot be printed in the procedure report. The File window to which this zone belongs to does not concern one specific procedure but is valid for the patient file in general. 4.2. Patient Database operations In general, all the files in the patient database are available (Total Data Base ticked in the File menu). However, it is possible to select a section of the database following certain criteria which can be adjusted (cf. § 4.2.5). If you decide to carry out this selection (the multicriteria selection menu will now be selected), only those files corresponding to the selected criteria will be available. Transfers of files or procedures can be carried out on files available in the database: • the delete, transfer and copying operations: transfer procedures from one place to another within the database, • the import, export, backup, archival and restoration functions: transfer files or procedures from one database to another. These functions can be accessed from the Procedure (when at least one procedure has been selected) and from the Utilities Menus. 4.2.1. Deleting procedures If a procedure has been selected or is already open, it can be deleted by clicking the Delete line of the Procedure Menu.. Confirmation will be requested as deletion is irreversible. User manual - GB - 03/03 page 20 DIASYSOFT WINDOWS / MAC 4.2.2. Management of patient files Transferring / Copying procedures These operations enable one or more procedures to be transferred from one file to another within the patient database. When the Transfer operation is carried out, the original procedure is deleted. This enables a procedure to be transferred from one file to another, therefore enabling any mistakes in file allocation made during the data transmission phase to be corrected. When the Copy operation is carried out, the original procedure is kept. You can, for example, group together several typical recordings in the same file in order to publish them, or to use them for demonstrations, etc. In the File window, select one or more procedures and click the Transfer or the Copy icon. A window will open enabling you to choose the file into which you would like transfer the procedures selected. The destination file is selected in exactly the same way as a file (see § 4.1.2.1). Click the OK icon and the file will be transferred or copied. The New icon enables you to create a new destination file if necessary. 4.2.3. Import / Restore The import / restore function enables recordings from other databases to be added to your database, either in the DiasySoft (restore) format or another format (import). Files can also be imported using the ".ds1" (ASCII) exchange. Files with this format can be automatically generated with the Export function or manually constructed. This operation can be used to incorporate files and procedures carried out with other units (old or other models) or using different software e.g. previous versions of DiasySoft software, versions 1.9x or 2.xx under MS-DOS for example. Click the Import/Restore line of the Utilities menu to open the Import or restore from window which will enable you to define the directory and the original format of the data to be imported or restored. User manual - GB - 03/03 page 21 DIASYSOFT WINDOWS / MAC Management of patient files Import or restore from window After having selected the file from which the data is to be imported or restored, click on OK to open the patient file selection window and the procedures to import or restore. • Select one or more patient files. • If you have selected only one patient file, choose the procedures to be imported or restored from the procedures list. • If you have selected several patient files, choose between the following three possibilities: Import / Restore Window The imported or exported patient file is not copied if it already exists in the data base. It is only copied if it does not exist in the same base. 4.2.4. Exportation / Backup The Export/Back up function enables one or more recordings to be extracted from your DiasySoft patient database and transferred to: • Either to another software, in which case the specific exchange .ds1 format, should be chosen. The exported recording(s) will then be regrouped in 4 files (*.ds1 ; .exa ; .mes ; .pat) in ASCII, ready for use. • Or to another DiasySoft database, with the same .mdb format. User manual - GB - 03/03 page 22 DIASYSOFT WINDOWS / MAC Management of patient files The export/back up function is the inverse of the import/restore function, and works in the same way: • Click Export / back up in the Utilities menu to open the Export / back up window. • Click on one or more patient files, then select the procedures to export or back up. - If you have selected only one patient file, choose the procedures from the procedures list. - If you have selected several patient files, choose between the following three possibilities: Export / back up window • Then click Next. An options window opens: - Choose the format of the destination file, - Enter the file name, - If you wish to archive the file, i.e. delete it from the working data base, tick the option in the Base source section of the window: Export and back up options window The patient record of the exported, backed up or archived files is always copied to the destination data base. If the record already exists in this data base it will be replaced. User manual - GB - 03/03 page 23 DIASYSOFT WINDOWS / MAC 4.2.5. Option Multicriteria Management of patient files Multicriteria selection This enables part of the database to be extracted, by sorting out most of the items constituting the files and the statistical results of the procedures. It is then possible: - either to work on a reduced database, - or to make an export file entirely constituted of procedures with pre-defined characteristics. This function can only be accessed from the Files Menu on the menu bar. Click the Multicriteria Selection line to open the window of the same name, enabling you to choose a set of criteria which has already been memorised or to define a new set of criteria. 4.2.5.1. The Multicriteria Selection window Multicriteria selection window This window enables you to construct and memorise an unlimited number of sets of multicriteria search. If required, the result can be displayed, transferred to another software or applied to the contents of the DiasySoft patient database. User manual - GB - 03/03 page 24 DIASYSOFT WINDOWS / MAC Management of patient files 4.2.5.2. Making a multicriteria selection Criteria Validation User manual - GB - 03/03 • In the Multicriteria selection window, click New to open a blank window, and use the lower frame Definition of criteria to set out your request, by first pulling down the list of available fields: • Click the appropriate field and pull down the list of operators: • Click the appropriate operator then pull down the list of values: • Click the value required to complete the first criteria, then validate this first criteria by clicking the Criteria Validation icon. It is displayed on the criteria display zone and a new pull-down list Link is positioned to the left of the Field list. page 25 DIASYSOFT WINDOWS / MAC Management of patient files • You can carry out a search with this first criteria by clicking the Search icon: the result appears in a new window, whose presence on the screen will not impede other criteria from being established. To make a multicriteria search, other criteria can now be added to the first. Each supplementary criteria is introduced with and or or in the Link list on the left of the Definition of criteria frame. These are then established and validated as for the first. • To go back to the beginning of a multicriteria selection, press this icon and all the criteria already established will be cancelled. Cancel Criteria icon • The result of the complete search can be displayed by clicking Search. • Before this, click the items in the Display table that you want to see in the results window. If you want to retain your new request, type its name in the upper zone before saving it. Copy Search icon By clicking this icon, the list of criteria displayed (and the result of the corresponding search) will be copied into the clipboard enabling you to incorporate it into any document. You can also directly print the list of criteria displayed (and the results of the corresponding search). Print Search User manual - GB - 03/03 page 26 DIASYSOFT WINDOWS / MAC Programs 5. Programs Different programs can be used, depending on the aims of the procedure: routine, clinical protocols, particular pathologies, specific fields of application, etc. The multiple functions of the Diasys allow you to create many different programs. DiasySoft enables you to create and memorise as many as necessary. You can then consult the list, and choose the appropriate program for the procedure to be carried out. User manual - GB - 03/03 page 27 DIASYSOFT WINDOWS / MAC Programs 5.1. The contents of a Program A program defines the functioning mode to the unit. It contains the following precisions: • the duration of the procedure, • the measurement intervals, • display of measurements in real time, • measurement method, • oscillometric measurement alarms, etc. Programs are defined by 24 hour periods: if a procedure exceeds this duration, the program of the first 24 hour period will be repeated up to the end of the duration for the procedure (48 hours maximum). The 24 hour period can be divided into one or several cycles, a cycle being a period of time during which the interval between two measurements is the same. Usually 2 cycles are used: a daytime cycle and a night-time cycle. Over a 24 hour period, between 1 and 24 cycles can be programmed (i.e. from the same interval between two measurements to an interval which changes every hour). A cycle can start at any time, on the hour. Within a cycle: • the interval between 2 measurements can vary from 02 to 99 minutes, by steps of 1 minute, • if the interval is programmed at 0, then no measurements will be taken during this cycle, • each measurement is separated form the next by the interval pre-defined in the cycle (even if the next measurement corresponds to another cycle). Each program is presented in a Programming Table grouping together all its characteristics. 5.2. Programming Table 5.2.1. Opening a Programming Table To access the Programming Table either click on the Programs line of the Settings menu or the Settings icon on the Choose patient and program window (cf. § 6.2). User manual - GB - 03/03 page 28 DIASYSOFT WINDOWS / MAC Programs A programming Table Programming Table zones 5.2.1.1. Name of Program zone This is a pull-down list: click its arrow to see the full list. Display the program of your choice by clicking its name. The input zones of the table will automatically be filled in. 5.2.1.2. The Icons zone Option Position By clicking these icons you can: • close the Programming Table, saving it if necessary, • open a table for creating a new program, • delete the program displayed from the list, • set up control of the measurement intervals according to whether the patient is “standing” or “lying down”, determined by the position sensor (control icon). 5.2.1.3. Measurement Intervals tab This consists of two horizontal lines: • the first displays a 24 hour scale, by hourly sections, • the second displays the interval programmed between 2 measurements, hourly section by hourly section. The display of this 24 hour scale can be modified: position the mouse on the line, a double-arrow pointer appears. By keeping the left mouse click down and moving the pointer to the left or right, the hour bar moves. The tab also has a zone to adjust the recording length. 5.2.1.4. Options tab This enables the following additional parameters to be set: • display or non-display of the measurements and/or the time on the Diasys screen, • activation of an audible alarm warning the patient that an oscillometric measurement is about to begin. This alarm can be totally or partially inhibited, at night for example, • the approximate mean value of each deflation step in mmHg or in percentages of the momentary pressure, • for the Diasys Integra: the measurement mode to be used by the unit, • for the Diasys Integra Access: the maximum pressure of the cuff. 5.2.1.5. Additional measurements tab User manual - GB - 03/03 page 29 DIASYSOFT WINDOWS / MAC Programs This is only displayed for programs for the Diasys Integra which can, should you wish, carry out short bursts of additional measurements under certain adjustable conditions, for example when a systole or diastole measurement exceeds a fixed limit. 5.3. Creating a New Program 5.3.1. Name of the program Open the Programming Table (see § 5.2.1), and click the New icon. The New program window is displayed. Choose the type of program to be created. Click on the OK icon to open a table, ready for input of the new program. Initial table for a New program You can already type in the name of the new program, as the cursor will automatically be in the name zone. Then enter the other information either by clicking the zone or the corresponding area. These settings can be changed at a later stage, by selecting this program from the list and modifying it directly. 5.3.2. Measurement intervals As the interval in time separating two measurements can vary from one cycle to another, the beginning and end of each cycle and the corresponding interval must be defined. The timescale in the programming table enables parameters to be easily set for the cycles and intervals. User manual - GB - 03/03 page 30 DIASYSOFT WINDOWS / MAC Programs 5.3.2.1. Programming measurement intervals To set the first cycle: • select the interval of the first hourly section by clicking on it. • Type the interval (in minutes) that you have chosen for the cycle. Press <Enter>. This box changes colour. • To set the length of the cycle (take, for example, a daytime cycle from 7am to 10pm), position the cursor on the vertical bar marking the end of the cycle. A double arrow shape appears. Left click whilst sliding the mouse. Drag the vertical bar to the 10pm mark and release the mouse. Do the same with the vertical bar marking the beginning of the cycle, and put it at 7am. For the second cycle (take, for example, a night-time cycle from 10pm to 6am), proceed as above: • Select the interval for the 10pm hourly section by clicking on it. • Type the interval (in minutes) that you have chosen for the cycle. Press Enter. This box changes colour. To establish additional cycles (a third cycle between 2pm and 4pm for example) • Place the cursor (as a vertical bar) in the interval bar over the 2pm mark • Left click on the mouse and drag the cursor • A new cycle is created, it appears in white. Release the mouse once it reaches 4pm • Type the interval (in minutes) that you have chosen for the cycle. Press <Enter>. This box changes colour. • Select the length of the cycle using the vertical bar as before. 5.3.2.2. Position Option Option Position If installed, this option allows: • control of measurement intervals according to the activity of the patient (enhanced patient comfort), particularly during rest periods (the longest interval programmed will automatically be applied if the patient lies down, at no matter what time this occurs), • trigger additional measurements upon changing position when getting up (cf. § 5.3.4), Diasys Integra only. To activate / disable the Position option click the icon on the right. User manual - GB - 03/03 page 31 DIASYSOFT WINDOWS / MAC Programs Position option not active (icon up, default status): • • • The position icon is light grey (off), the background of the timescale is light grey, and the colours of the interval scale are light. Position option active (icon down): • • • The position icon is white (on), the background of the timescale is dark grey, and the colours of the interval scale are dark. When the Position option is activated, the different pre-programmed intervals will be applied to the pre-set times, except for the longest interval (but not 0) which will only be activated if the patient lies down. If an interval is programmed at 00, i.e. no measurement during the cycle, this will be respected, even if the patient lies down during this cycle: this program setting takes priority. Of course, if a Diasys Integra is programmed with the Position option activated, but the position sensor is not connected, it will function as usual according to the times set for each of the cycles. 5.3.3. Additional settings Display of measurements If you select this box, the Diasys will display the measurements, as soon as they have been carried out, for 30 seconds. Display of time If you select this box, the time will be displayed on the Diasys’ screen. Oscillometric measurement beeps Oscillometric measurements (Diasys Integra programmed in oscillometric mode or during a palliative measurement two minutes after a failed measurement, or Diasys Integra Access) require that the patient remains still. So that the patient knows he is not to move, three beeps can be emitted when the cuff starts to inflate. Select the corresponding box to activate this alarm. User manual - GB - 03/03 page 32 DIASYSOFT WINDOWS / MAC Programs These beeps are proposed by default in new programming tables for the Diasys Integra (active between 7am and 10pm and inhibited between 10pm and 7am). They are not activated in a new programming table for the Diasys Access, the patient must be warned each time a measurement is about to take place as he must always keep his arm immobile during the measurement. Deflation steps in the oscillometric mode You can adjust the mean value of the deflation steps in the oscillometric mode at 8 or 12 mmHg. Deflation steps in the auscultatory mode (Diasys Integra only) By clicking the pull-down list, you can adjust the mean value of the deflation steps in the auscultatory mode: - either a constant value in mmHg within a section between approximately 3 to 7 mmHg by steps of 1 mm, - or a relative value in % of the cuff pressure within a section of approximately 3% to 7% by steps of 1%. Measurement mode (Diasys Integra only) The measurement mode of the Diasys Integra can be chosen by clicking in the drop down menu: auscultatory, oscillometric or automatic (cf. Diasys Integra User Manual). Maximum Pressure (Diasys Integra Access only) The maximum pressure of the steps can be limited (fixed at 295 mmHg by default). 5.3.4. User manual - GB - 03/03 Additional Measurements (Diasys Integra only) page 33 DIASYSOFT WINDOWS / MAC Programs These additional measurements can be programmed under two precise circumstances: • Option Position The predefined minimum or maximum systolic or diastolic thresholds are exceeded. • The patient gets up during a rest period For each of these events, one measurement or a burst of several consecutive measurements can be programmed. Triggering based on arterial pressure This allows the adjustment of: • The number of measurements in the “burst” of measurements, • Triggering thresholds, • The interval between measurements (the first measurement will commence once the criteria are met), • And a latent period to avoid two bursts of measurements based on the same criteria taking place too close together. The bursts of measurements are stopped if two consecutive measurements are on the right side of the arterial pressure threshold criteria. Option Position Triggering due to getting up This allows the adjustment of: • The number of measurements in the “burst” of measurements, • The interval between measurements (the first measurement will commence less than 11 seconds after the criteria are met), • The minimum amount of time the patient must be lying down before taking into account his getting up. When the number of additional measurements upon getting up is set at more than 0, a window is displayed, asking which type of cable is to be used for the recording. Tick one of the boxes and validate (OK icon) If a position cable is used, the control of cycles according to position is automatically activated to allow the triggering of measurements upon getting up. However, if an orthostatism cable is used, the control of cycles according to position is not necessary to trigger measurements upon getting up. It will therefore not be activated. The bursts of measurements are stopped if the “upright” position of the patient is not confirmed by two consecutive measurements. Total number of additional measurements The total number of additional measurements can be limited (maximum 99). User manual - GB - 03/03 page 34 DIASYSOFT WINDOWS / MAC Communication with the Diasys 6. Communication with the Diasys Your DiasySoft software enables you to program and to receive data from any Diasys, 200 series or Integra series. This requires carrying out the following operations in order: • • • • establishing communication between the recorder and the computer, choosing to program or to read a Diasys choosing a patient from the Patient Database or creating his file if he is a new patient, transferring the patient details and the program to the Diasys or transmitting the recorded data from the Diasys to DiasySoft. Also, with the Modem Communication option, it is possible to receive, via modem, recorded data transmitted directly by a Diasys. User manual - GB - 03/03 page 35 DIASYSOFT WINDOWS / MAC Communication with the Diasys 6.1. Diasys-computer communication 6.1.1. Communication Options The Communication Options window is opened by selecting the Options line in the Communication menu. Serial Link tab • • • Choice of model of Diasys, to accelerate the communication with the Diasys. One, or the other, or both Diasys series can be selected. Choice of which serial port the Diasys cable is connected to (COM1 or COM2). Activation of the automatic connection (Diasys Integra series only). DiasySoft regularly checks the selected port, and once a connection is detected, the communication window is opened. Modem tab Settings to be transmitted to the Diasys (Integra series), for the transmission of a recording by modem (cf. Diasys User Manual). • • • 6.1.2. Choice of the telephone number to which the receiving modem is connected; the number can be entered directly into the field, or by selecting a name from the Call name scrolling list; the corresponding number is automatically inserted. Choice of the type of modem to be connected to the Diasys for the transmission. A modem in the scroll down list must be chosen. If you wish to use a different modem, contact your retailer. Select the initialisation chain of the calling modem: this is automatically updated upon selection of a modem from the scroll down list. This cannot be altered directly. The initialisation chain is transmitted to the Diasys in order to drive the modem. Communication window Connect your unit (having switched it on if it belongs to the 200 series) by plugging the connection cable already plugged into the computer into the corresponding Diasys connector. Wait for the Diasys Integra to display COMM (to confirm connection). If the Automatic Connection is activated, the Communication window opens automatically. User manual - GB - 03/03 page 36 DIASYSOFT WINDOWS / MAC Communication with the Diasys If not, this can be opened by: • Clicking the Communication icon on the Tool bar, • Clicking the Program / Read line in the Communication menu. This window centralises communications between the computer and the Diasys. It displays the status of the Diasys (Data to be read / Diasys ready), enabling the Diasys to be programmed for a new procedure, and enables either the data recorded during the procedure or the program contained in the unit to be read. Diasys communication window If DiasySoft cannot communicate with the Diasys, a warning window indicating possible causes of the problem is opened instead of the Communication window. If the Diasys displays Er 14 (battery low) at the same time, replace the battery by a charged one and restart the communication as described above. Please note that the Diasys Integra has a back up battery which allows the main battery to be removed temporarily without losing data stored in the unit. Display current program icon User manual - GB - 03/03 Clicking on this icon will display the current program stored in the Diasys that is communicating with the software. If this program is not already in the list of programs, it can be saved. page 37 DIASYSOFT WINDOWS / MAC Communication with the Diasys 6.2. Programming the Diasys 6.2.1. Choice of a Program and of a Patient Click the Program command in the Communication window to open the programming window: Choice of a patient and a program window In this window, indicate: • the patient (left hand zone) - either by choosing from the list of patients, - or by creating a new file by clicking the New icon (see § 4.1). • the program to be used for the procedure (right hand zone) - either by choosing from the list of programs, - or by creating a new program by clicking the New icon (see § 5.3). Your computer’s date and time, which will update your Diasys internal clock, are displayed at the bottom of the window: if this is not correct, it can be corrected by clicking the Update time icon. User manual - GB - 03/03 page 38 DIASYSOFT WINDOWS / MAC Communication with the Diasys This icon gives direct access to the Modem tab of the Communication Options window, allowing configuration of the Diasys Integra with a view to transmission of a recording by modem. It only appears if the connected Diasys (Integra series) has the Modem Communication option (see Diasys User Manual). 6.2.2. Transferring the program to the Diasys Click the Program icon in the Select Patient and Program window to transfer the required new program information to the Diasys. The Communication window will be displayed again, indicating the new status of the unit: Communication window after programming Check that the battery in the unit is properly charged, and connect your patient to the unit (see the Diasys User Manual). A program set with parameters for a Diasys Integra unit can also be used for a Diasys from the 200 series. The unit will simply memorise the functions which are available to it and will ignore the others. User manual - GB - 03/03 page 39 DIASYSOFT WINDOWS / MAC Communication with the Diasys 6.3. Reading the Diasys First of all, connect the Diasys and initiate communication as described in chap.6.1.1.2. Check that the date displayed in the Communication window is correct. If not, correct it at this stage in order to have the correct date and times of the measurements. 6.3.1. Data Transmission Click the Read the Diasys icon in the Diasys Communication window to start transferring the data to the computer. Read the Diasys icon in the Communication window 6.3.2. Allocating the Procedure to a Patient At the end of the transmission process, DiasySoft will ask you to allocate the procedure to a patient file. To do this, a Destination File window, similar to the Selection of a File window (see § 4.1.1.1.), opens. The name of the patient entered in the Diasys when it was programmed will be selected from the list presented. If not, DiasySoft opens a window to tell you that the patient does not exist in the database. Click OK to close this window. Destination File Window You can then: • validate the choice of the patient selected by clicking OK, or • choose another patient from the list, having typed the first few letters of his name, then click OK, or • create a new patient file by clicking New. Saving the procedure in the file may take a few seconds. User manual - GB - 03/03 page 40 DIASYSOFT WINDOWS / MAC 6.3.3. Communication with the Diasys Creating a Procedure window The data transmission phase is now over, and DiasySoft will automatically open the file concerned and the window for the procedure which has just been added to your patient database: Opening a File and creating a Procedure window This Procedure window can be filled in immediately or later on, in particular concerning the stethoscopic measurements taken before connecting the Diasys to the patient, procedures, clinical indications and the treatments followed by the patient during the procedure. You can now: • close the file or the procedure, which has been saved in your patient database, to go back to it later on, • look at the results on the screen, by clicking the relevant icons in the tool bar (cf. chap.7), • or print the report corresponding to this procedure (cf. chap.8). User manual - GB - 03/03 page 41 DIASYSOFT WINDOWS / MAC Communication with the Diasys 6.4. Reception of procedures via modem (NovaModem) Option The DiasySoft software can directly receive recordings transmitted by a Diasys Integra, given that the Diasys has been configured with the telephone number of the receiving modem. Modem reception of procedures requires: Modem 6.4.1. • Diasysoft software with modem option • NovaModem software Receiving a recording 6.4.1.1. Configuration of equipment: Any external modem, connected to the computer’s serial ports, or an internal modem, or even a PCMCIA drive for laptops, can be used. However, if the modem is waiting to receive a Diasys procedure, no other information can be received. It is therefore not recommended using the same modem for different types of reception (both fax and reception of Diasys procedures, for example). 6.4.1.2. Setting the modem on standby The DiasySoft software does not need to be open in order to receive a recording. However, the NovaModem reception module installed with the Modem Communication option must remain open, and the modem must be awaiting reception. This standby mode is driven by NovaModem. Click on the NovaModem icon in the Windows task bar to display the main window (NovaModem is always opened when starting up the computer). Select the Settings menu to open the settings window. Check that the selected serial port used by the modem is correct, and click OK. Click on Auto. The traffic light changes to orange whilst attempting to go to standby, and to green once successful. The NovaModem window is automatically reduced, and the modem is awaiting reception. Caution: when setting the modem in standby mode, the DiasySoft Automatic Connection Function (cf. § 6.1.1.1) must be disabled ! User manual - GB - 03/03 page 42 DIASYSOFT WINDOWS / MAC 6.4.2. Communication with the Diasys Saving procedures received via modem Upon receiving a procedure via NovaModem, the module displays a notification window. Click OK. Whilst DiasySoft is open, the Procedures received by modem/mail window is displayed. This window contains a list of the last procedures received by NovaModem or NovaMail that have not been treated. Each of these procedures can be saved (becoming a DiasySoft procedure, so the data base is updated), or deleted. After treatment it will disappear from the list. If you do not want to treat the procedures straight away, the window can be closed, and reopened later by clicking on the Procedures received by modem line in the DiasySoft Files menu. The procedures remain in the DiasySoft reception box until they are treated. 6.5. Reception of procedures via e-mail (NovaMail) Option E-mail The DiasySoft software can receive Diasys procedures sent via e-mail using NovaDrive. Reception of procedures requires: • Standard e-mail reception software • NovaMail software to recover procedures received • Diasysoft software with e-mail option for saving the procedures For more information on sending Diasys procedures via e-mail see the NovaDrive user manual User manual - GB - 03/03 page 43 DIASYSOFT WINDOWS / MAC 6.5.1. Communication with the Diasys Recovering a procedure from an e-mail A procedure can be recovered from an e-mail either automatically or manually. This is always done by NovaMail 6.5.1.1. NovaMail Settings 1. To access the settings window, right click on the NovaMail icon in the Windows task bar and select “Settings” from the menu 2. For automatic recovery: Select a value of between 1 and 60 (minutes) in the “connection interval” field and click OK For manual recovery: Select 0 in this field and click OK 6.5.1.2. Recovering a procedure In automatic mode the procedures received via e-mail are automatically recovered by NovaMail and displayed in the “procedures recied by Modem/mail” Diasysoft window. This mode deletes e-mails automatically after recovery. In manual mode, to recover a procedure: 1 open the e-mail in the in-box 2 double click on the attchment to open it. NovaMail then recovers the procedure. This mode does not automatically delete e-mails after recovery 6.5.2. Saving procedures recovered by NovaMail Treatment (saving or deleting) of procedures recovered by e-mail is the same as for those received via modem. For more information see paragraph 6.4.2- Saving procedures received via modem User manual - GB - 03/03 page 44 DIASYSOFT WINDOWS / MAC Procedures on the screen 7. Procedures on the screen The Procedure groups together all the measurements carried out by the Diasys from when it is started to the end of the period programmed, or up until a manual stop of the recording. Measurements concern systolic and diastolic pressure, the heart rate and sometimes the pulse wave transmission time (QKd). The Procedure also contains details concerning the patient, and the conditions under which it was carried out. DiasySoft offers a large range of possibilities for presenting the procedure results - tables, charts, statistical calculations, depending on the user’s needs. User manual - GB - 03/03 page 45 DIASYSOFT WINDOWS / MAC Procedures on the screen 7.1. The Procedure Window 7.1.1. General points The Procedure window enables the information concerning a procedure to be visualised, the result windows to be accessed, and the report to be printed. To open a Procedure window: • open the Patient window (cf. § 3.1.2) then select the required procedure, • click the Open Procedure icon (or double-click in the list on the selected procedure). • Or click on the Open icon in the procedure menu When you have finished transferring the recordings from the Diasys to the computer, the Procedure window is created and opened automatically (cf. § 6.3). Note that DiasySoft enables you to open up to four procedures at the same time. These four procedures always concern the same patient. All the views of the procedures are identified by the date of the procedure, indicated in the title of the window. A Procedure window The Procedure window is divided into 4 tabs: • The Procedure tab, with the technical conditions applied to the procedure, • the Indications/Treatments tab, with information concerning the medical nature of the procedure, • the Conclusions tab, • the Measurements validity tab giving access to the measurement validity criteria. The patient's name is displayed permanently in the information bar at the bottom of the screen whenever the file is open. Also, once a procedure is opened, the icons for the results windows are displayed in the tool bar. Tool bar User manual - GB - 03/03 page 46 DIASYSOFT WINDOWS / MAC 7.1.2. Procedures on the screen The technical conditions of the procedure The first three lines cannot be modified, they concern the start of procedure and data transmission dates, the procedure length, the number of measurements, the serial number of the Diasys Integra used, and the presence or absence of a position sensor. The following three lines can be filled in by the user, if appropriate, concerning: The referring and analysing physician references: Their names can be extracted from the corresponding reference list (cf. § 9.1): • pull down the list by clicking the arrow (to the right of the input frame), • then click the relevant name and it will be incorporated into the procedure window. If the relevant name is not listed, type it directly into the input frame, then press <Enter>: a message will ask you if you would like this name to be incorporated into the reference list. Getting up and going to bed times When a new procedure is created, the getting up times and bed times will use the times noted in the same patient's previous procedure. For the first procedure in a file, the times are those noted in the Default values of the Settings Menu (cf. § 9.1). They can be modified for the ongoing procedure by directly typing the required times into the Procedure window. The Stethoscopic Measurements The Stethoscopic Measurement frame enables up to 4 sets of reference measurements to be taken, for example with a stethoscope just before the Diasys is connected to the patient. 7.1.3. The medical conditions of the procedure Information of a medical nature relative to the ongoing procedure is noted in the Indications and Treatments frames, and in the Conclusion tab. The Indications and Treatments frames can be added to, in the same way as for the Analysing Physicians and Referring Physicians zones as described above, either directly or from the corresponding reference list (cf. § 9.1). They contain up to 8 lines. The Conclusion tab is a free text zone and should be filled in after the procedure results have been analysed. The contents are included on the first page of the final report, in the “Conclusions” frame. User manual - GB - 03/03 page 47 DIASYSOFT WINDOWS / MAC 7.1.4. Procedures on the screen Measurement Validity This tab enables modification of the minimum and maximum thresholds for measurements, outside of which the measurements will be classed as “out of criteria”. These measurements will not be taken into account for the statistics (cf. § 7.5). 7.2. Display of results The tool bar displays icons giving access to the different consultation and edition windows. Access is also possible from the Procedure menu. 7.2.1. Icons for accessing results Measurement graphs icon Opens the Measurements window which displays all the measurements taken as a graph and a table. This window is explained in § 7.3. Hourly means icon Opens the Hourly means window, displaying the hourly means of the measurements taken, as a graph and a table. This window is explained in § 7.4 . Table of statistics icon Opens the Measurements-statistics window, displaying graphs of the measurements and tables of different statistics. This window is explained in § 7.5 . Bar charts icon Opens the Bar charts window, which displays all the measurements carried out in bar charts or percentile curves. This window is explained in § 7.6. Comparison of procedures icon Opens the Comparisons window enabling the ongoing procedure to be simultaneously compared with up to three other procedures belonging to the same patient. This window is explained in § 7.7. QKd Analysis icon Option QKd Opens the QKd Analysis window which displays the pulse wave transmission time according to the other parameters measured. This window is explained in § 7.8. User manual - GB - 03/03 page 48 DIASYSOFT WINDOWS / MAC Procedures on the screen The first click on each icon opens the window. To go from one window to another click on the appropriate icon. To close the window, click on the cross in the right corner. 7.2.2. Display Patient and Procedure files icons Show procedure file icon The icon is only available when the procedure file is open. It brings the procedure file window to the fore-ground. Show patient file icon The icon is only available when the patient file is open. It brings the patient file window to the fore-ground. Once the results windows are open, these icons can be activated to visualise one or other of the files without closing the results windows. 7.2.3. Other icons Print icon Opens the Print Report window enabling you to choose the appropriate report model and to print it. These functions are explained in chap. 8. Close icon Closes all procedure windows that are open. 7.3. Measurement graphs This window is opened by clicking the Measurement graphs icon. This contains: - the complete, or partial, graph of measurements, value by value, - the complete table of measurements. In order to visualise the maximum amount of data, this window, like the results window, can be enlarged to “full screen” size by clicking the box to the right of its title bar. User manual - GB - 03/03 page 49 DIASYSOFT WINDOWS / MAC 7.3.1. Procedures on the screen Size of charts and tables The space occupied by the charts and the table can be divided between them, according to which one you wish to give the most space to. Place the mouse pointer on the bar separating the charts from the table, until it changes form. Drag the separation bar towards the top or the bottom and release where the separation is required. Double click anywhere within its frame for the chart (or the table) to take up the whole space: it will then be enlarged to its maximum size and the other one will disappear. Double click the enlarged zone again and the initial proportions will be reestablished. 7.3.2. Selecting a measurement Clicking on a measurement either in the table (anywhere on its line) or on the graph (anywhere on the pulse pressure or its vertical line) will select this measurement both in the table (horizontal band) and on the chart (vertical cursor). The mouse can be used to drag the selection cursor on the chart: the selection in the table will move at the same time whilst remaining on the first line as long as possible. The selection can be deleted by clicking the chart frame, on the left of the vertical axis. User manual - GB - 03/03 page 50 DIASYSOFT WINDOWS / MAC 7.3.3. Procedures on the screen Graph 7.3.3.1. Settings displayed The graph of all the measurements or hourly means, always displays at least the systolic and diastolic pressure, linked by a vertical bar showing the pulse pressure. By ticking the appropriate box, the following can also be displayed: • the shapes of curves (grouping together the systoles and the diastoles), • the heart rate (measured each time the blood pressure is taken), • QKd duration, if this option is installed, • the values of the statistical thresholds for the systole and the diastole. The set of threshold values to be applied to the procedure can be chosen at this point: clicking the thresholds box displays the set of thresholds, as well as a roll down list to choose from. 7.3.3.2. Zoom The zoom function enables you to select part of the measurement chart and enlarge it to the width of the screen: • hold down one of <Ctrl> keys, • click the top left of the zone to be enlarged, • hold the mouse icon down and drag it to the required place, in order to define the part to be zoomed, • release the mouse, then release the <Ctrl> key. The measurement table is not affected by this zoom on the chart: it will continue to display all the measurements. To return to the complete chart, press <Ctrl> and click anywhere in the chart frame. 7.3.4. Measurements table 7.3.4.1. Measurements displayed User manual - GB - 03/03 page 51 DIASYSOFT WINDOWS / MAC Procedures on the screen It contains the values of all the parameters measured, the time of the measurement, plus complementary information, concerning the categories specified in the Measurements bar: Measurements Frame Incorrect measurements The unit has not been able, for one reason or another, to take these measurements properly. These incorrect measurements are always accompanied by an error message which appears in the Incidents column of the table. Outside criteria measurements Although these measurements have been carried out successfully, they go beyond the threshold limits fixed in the Measurement Validity tab in the Procedure file. Manually removed measurements These measurements, although they are neither incorrect nor out of specification, have been taken out of the table by the user (Bin icon). Correct measurements Any measurements not entering into any of the above categories are deemed correct. The table and the charts will be clearer if these are the only ones displayed. However, all the measurements can be reinstated, if necessary, because they are kept in the database. 7.3.4.2. The time column This gives the time of the beginning of the measurement, as well as: Either the time period measurement taken during the daytime period measurement taken during the night-time period Or the patient’s position • Procedure carried out with position sensor measurement taken in sitting or standing position measurement taken in lying down position • Procedure carried out with orthostatism sensor measurement taken in standing position measurement taken in sitting or lying down position 7.3.4.3. The status column Gives the measurement mode used: K+ auscultatory measurement with ECG gating K auscultatory measurement without ECG gating User manual - GB - 03/03 page 52 DIASYSOFT WINDOWS / MAC Procedures on the screen O oscillometric measurement 7.3.4.4. The Incidents column This column groups together the messages automatically added by the Diasys to certain measurements or particular interventions, such as monitoring being stopped manually. When the unit has not been able to carry out a measurement the cause is also indicated in this column (error messages). Of course, these messages only concern measurements whose display has been requested (cf. 7.3.4.1): if you have indicated that only correct measurements should be displayed then no error messages will appear. Test Measurements: As the first two measurements are used by the Diasys Integra to help it choose its functioning mode (see the Diasys Integra User Manual), they are indicated as Test Measurement. These two test measurements are not displayed on the charts nor used in the statistical analysis. 7.3.4.5. The Comments column This last column enables you to add a personal comment relating to a measurement. These comments can be specific to this measurement and this procedure, or chosen from the Comments reference list (cf. 9.1). Clicking in the Comments column, on the line of the measurement will select this measurement in the table and on the chart and an input zone will open. Click the arrow to the right of the input zone, then pull down the Comments Reference list. If the comment is already listed, click it and it will automatically be incorporated. If the comment is not listed, type it directly into the input zone, then validate by <Enter> or by clicking elsewhere in the table. A message will ask you if you want this new comment to be incorporated into the reference list. If you type a comment into the input zone without using the pull-down list it will apply to this measurement but will not be incorporated into the reference list. User manual - GB - 03/03 page 53 DIASYSOFT WINDOWS / MAC Procedures on the screen 7.3.4.6. Removing measurements If certain measurements do not seem to be of significance, then they can be removed from the table of measurements. They will only be displayed and included in the statistical analysis by ticking the Removed manually box in the Measurements frame. Select the measurement(s) from the measurement table and click the Remove icon. Measurements removed in this way are still saved in your patient database. It is always possible to reinstate them at their initial place: first select, if this has not already been done, the Removed manually box in the Measurements frame, then select the measurement(s) to be reinstated. Click the Remove icon to reinstate the measurements selected 7.4. Hourly means graph This is opened by the “Hourly means graph” icon in the tool bar. This contains • Graph of all hourly means • Table of all hourly means And offers the same possibilities as the measurement graph, concerning: • Setting the screen (cf. § 7.3.1) • Selecting a mean value (cf. § 7.3.2) • Display parameters (cf. § 7.3.3.1) • the zoom (cf. § 7.3.3.2) The hourly means table summarises the complete table of measurements, giving the means of the all the measurements in each hourly section. It therefore contains the same parameter columns, except the Status, Incidents, and Comments columns. However, a supplementary Number column indicates how many measurements have been used in order to establish the mean for each hourly section. 7.5. The statistics table This table is opened with the Statistics Table icon in the tool bar. It groups together the correct values of the ongoing procedure in hourly sections and displays any interesting results. Statistics from three hourly periods are shown: • Those of the whole procedure, always shown, symbolised by the 24 hr icon • Those of two other periods to be chosen. User manual - GB - 03/03 page 54 DIASYSOFT WINDOWS / MAC 7.5.1. Procedures on the screen Choice of hourly periods This is done by scrolling the periods in the Statistics Table Five periods can be displayed: • Day/night: the table shows the statistical results of the day period and of the night period, • period1: the table shows the statistical results of the first period defined by the user and those of the complementary period, • period 2: the table shows the statistical results of the second period defined by the user and those of the complementary period, • period 1 and 2: : the table shows the statistical results of the first and the second period defined by the user • standing/lying: if the procedure was carried out with a position sensor, the table can show the statistical results of the standing period, and those of the lying period. By clicking periods 1 or 2, they can be defined: • either by zooming the relevant zone on the curve, • or by typing the beginning and end times in the frame. The periods are separated in the table by a double vertical bar. The title line indicates either the symbol which represents them, or the time limits and, between brackets, the number of measurements they contain. Corresponding curve: To display the measurement curve corresponding to one of the 3 periods presented, click the box on the title of the appropriate period: the segment is selected and the corresponding part of the chart is indicated on the graph and can be zoomed if required. 7.5.2. Statistical thresholds These are the sets of threshold values corresponding to standards, results of studies, etc. The sets are defined in the Thresholds window of the Settings menu (cf. § 9.2). For each setting concerned, the percentage of measurements which go beyond these thresholds is indicated on the last line of the table. The calculation of the percentage of measurements exceeding the thresholds for the 24 hour period uses percentages from the day and night periods. The calculation of the percentage of measurements exceeding the thresholds for the standing and lying periods uses values from the daytime thresholds and the night time thresholds respectively. These limits for the systole and diastole are displayed on the measurement chart if the Thresholds box in the Charts frame is selected. User manual - GB - 03/03 page 55 DIASYSOFT WINDOWS / MAC Procedures on the screen Whilst interpreting a new procedure, the default set of threshold values is used automatically (cf. § 9.2.4). However, another set of threshold values can be chosen from the Thresholds scroll down list. If the set of threshold values is not suitable, another one can be created in the Thresholds window of the Settings menu (cf. § 9.2). 7.6. The Bar Charts window 7.6.1. General points This window is opened by clicking the Bar Charts icon in the tool bar. It represents the distribution in percentages of the measurements for one or more of the following parameters: • Systole, • Diastole, • Heart rate, • QKd. This can be displayed as bar charts or in cumulative percentile charts. The windows always contains three charts: • One with the whole procedure, always displayed, • Two others, for those periods chosen from the scroll down Periods list. 7.6.2. Display choices 7.6.2.1. Type of chart Click this icon to go from bar charts to cumulative percentile charts. Click this icon to go from cumulative percentile charts to bar charts. 7.6.2.2. Different settings Choose the setting(s) whose charts you want to display from the bar at the bottom of the window. The colour of the chart is shown next to its box. 7.6.2.3. Time periods The time periods for which the charts will be calculated are chosen from a scroll down list, similar to that for the statistics window (cf. § 7.5.1). User manual - GB - 03/03 page 56 DIASYSOFT WINDOWS / MAC Procedures on the screen The three charts displayed are updated according to the period selected, in exactly the same way as the Statistics Table (cf. § 7.5.1). 7.6.3. Bar Charts Complete Bar Chart window These enable the peaks to be easily assessed visually: here for example, the majority of the systoles (about 35%) over the 24 hour period are between 110 and 120 mmHg. User manual - GB - 03/03 page 57 DIASYSOFT WINDOWS / MAC 7.6.4. Procedures on the screen Cumulative percentiles Complete Cumulated percentiles window These enable the overall distributions to be more clearly assessed: here for example about 85% of the systolic values over the 24 hour period are found at 120 mmHg. 7.7. The Comparisons window 7.7.1. General points This window is opened by clicking the Comparisons icon in the tool bar. It is used to superimpose, on the screen, several procedures belonging to the same patient (maximum 4). The ongoing procedure is always displayed: it can be compared to up to 3 other procedures. User manual - GB - 03/03 page 58 DIASYSOFT WINDOWS / MAC Procedures on the screen Comparisons can be made: • between the hourly means (bar chart) enabling the systole, diastole and differential to be assessed simultaneously, and/or the heart rate and/or the QKd, • or between charts in cumulative percentiles, using one or several of the following parameters: systole, diastole, heart rate, QKd. 7.7.2. Display choices 7.7.2.1. Type of graph This icon compares the cumulative percentile charts. This icon compares the hourly means for the entire procedure. The time scale starts from the earliest time period. The display is in chronological order. This icon compares the hourly means over 24 hours of the procedure. The time scale is limited to 24 hours from the first time period of the reference procedure. The chronological order of the procedures may be altered if necessary: • Either the procedure to be compared to the reference procedure started earlier, in which case the time periods from the beginning of the procedure to be compared are put towards the end, • Or the procedure to be compared to the reference procedure started later, in which case the time periods from the end of the procedure to be compared are put towards the beginning. 7.7.2.2. Different settings Choose the setting(s) to be included in the comparisons from the bar at the bottom of the window. The systole and diastole icons are joined together if comparisons are to be made with hourly means. 7.7.2.3. Procedures to be compared The patient’s procedures are selected from the scroll down list. A colour is allocated to these procedures once it is selected for comparison. The procedures are selected by clicking them. User manual - GB - 03/03 page 59 DIASYSOFT WINDOWS / MAC 7.7.3. Procedures on the screen Comparison in percentiles This function enables you to fully assess the evolution of a single setting during several procedures. In the example below, the difference in distribution of the systolic values of these procedures belonging to the same patient is evident. 7.7.4. Comparison of the hourly means This function enables you to fully assess the evolution of the heart rate over 24 hours for several procedures. The presentation in hourly periods enables the following supplementary operations: • display of the comments added to the table of measurements of the compared procedures, • standard comparison by superimposing the same hourly periods over different procedures, • comparison of procedures by synchronising them on a specific event, a comment for example. User manual - GB - 03/03 page 60 DIASYSOFT WINDOWS / MAC Procedures on the screen The comments frame to the left of the window allows the selection of comments to be displayed, for a resynchronisation of the procedures for example. Once a comment has been selected, the synchronisation by comment icon (bottom left of the window) is available (cf. chap.7). 7.7.4.1. Comments This frame displays all the comments noted in the measurement tables of the compared procedures. You can select one or more. Any comments selected in this frame will automatically appear on the chart, in a band the same colour as the procedure, with an arrow pointing to the centre of the corresponding hourly section: In the above example, two procedures are compared. The comments in one or both measurement tables are listed. Those selected (AAAA et BBBB) appear twice on the chart, in two colours, which means that they are noted in both procedures. If these had been noted in only one measurement table, they would have appeared only once on the chart, with the colour of the corresponding procedure. The current procedure took place between 4pm and 4pm, and the other between 7pm and 7pm, so the horizontal time axis is graded from 4pm to 8pm so that the comparisons can be made over the same hourly sections, which is often the aim, even if the procedures are far apart in time. 7.7.4.2. Resynchronisation of procedures It can sometimes be interesting to superimpose different hourly sections, in order to compare circumstances which did not happen at the same time. For example, if we know that drugs have been taken at different times during the two monitoring periods and we want to compare the repercussions on the pressure in each case, we can bring these two hourly sections into comparison with one another by dragging one of the procedures in relation to the other. If the events have been indicated in the tables of measurement with an appropriate comment, this shift operation can be carried out straightaway. It can also be done by dragging one of the procedures with the mouse. User manual - GB - 03/03 page 61 DIASYSOFT WINDOWS / MAC Align Comments icon Procedures on the screen 7.7.4.2.1. Automatic shift on comments If the hourly sections we want to compare have been identified by an identical comment, it is very easy to align them: • First click the common comments in the list. • Then click the Align Comments icon so that the hourly section of procedure(s) to be compared align themselves on the reference procedure with the same comment selected. The state of the 24 hour icon is not important: it will automatically be activated by this operation, if it is not already, as procedures can only be moved chronologically on a 24 hour scale. The example in § 7.7.4.1 above would be transformed as follows: Note that the grid of the hourly section moved is noted above the grid of the reference procedure, in the colour of procedure n° 2. The shift can be cancelled in two ways: By clicking the Synchronise the procedures icon which will enable the 24 hour scale to be retained, by clicking the hourly means icon, which will reinstate the original scale as it was when Comparisons window was opened. User manual - GB - 03/03 page 62 DIASYSOFT WINDOWS / MAC Procedures on the screen 7.7.4.2.2. Manual shift A manual shift can only be carried out when using the 24 hour comparison graph (horizontal scale limited to 24 hours). The reference procedure always stays where it is, and the procedure to be compared with it will be moved. All opened procedures (up to three) to be compared can be moved one after the other. Having decided which hourly period to superimpose, click the hourly section of the compared procedure or its vertical line, and hold the mouse icon down. The grid of this first hourly section will now be displayed on its vertical line, above the hour axis. It is, for this first move, identical to the fixed grid above the axe (figure 1: select). Move the cursor with the mouse towards the appropriate hourly section of the reference procedure: the cursor and the grid above the horizontal axis will move simultaneously (figure 2: move). 1 - select 2 – move and release When the cursor grid has reached the required position in the reference procedure, release the mouse: all of the compared procedure will now be moved over. The grid moved by the mouse will stay displayed, indicating that the procedures are no longer synchronised and by how much (figure 3: release). Several shifts can be carried out, one after another, if necessary. The Synchronise the procedures icon becomes accessible: if you click it, all the procedures will go back to their original places. 7.8. The QKd analysis window 7.8.1. Option QKd General points The QKd, transmission time of the pulse wave, measures just before the diastole, the duration in milliseconds separating the QRS of the corresponding Korotkoff sound captured by the microphone in the cuff. The Qkd is a reference value enabling this parameter to be easily estimated. It is established from the values measured and corresponds to the value of the Qkd for a systole of 100 mmHg and a heart rate of 60 min-1. User manual - GB - 03/03 page 63 DIASYSOFT WINDOWS / MAC Procedures on the screen Click the QKd icon in the tool bar to open the QKd window, or click the QKd line in the Procedure Menu. QKd variation against systolic pressure This window displays the best fit line of the QKd value according to parameters measured or calculated, as well as the following information: • in the upper left hand frame, concerning the chart itself: - the number of points of the scatter plot (number of measurements) - the equation of this best fit line • in the upper right hand frame, concerning the QKd reference value: - theoretical value of the Qkd (100:60) calculated according to the formula QKd (100:60) = 0,73 x height (cm) + 91 - value of the QKd (100:60) established according to the measurements taken - ratio of values established / theoretical values of the QKd (100:60) 7.8.2. Display choices Measurements taken into account are the correct values of the procedure. Click in the list of settings to select the one to be used for the regression calculation. User manual - GB - 03/03 page 64 DIASYSOFT WINDOWS / MAC Prining reports 8. Printing reports DiasySoft enables recordings to be visualised and analysed on the screen in a wide variety of ways. Parameters can then be set for printing the reports, so they can be fully adapted to your needs. User manual - GB - 03/03 page 65 DIASYSOFT WINDOWS / MAC Prining reports 8.1. Organisation of the reports 8.1.1. Report items Reports are made up of the following items: • a heading, which groups together the patient's identity details in a box at the top of each of the report pages, • a cover page: heading, results, conclusions, • charts and graphs of the results. 8.1.2. Configurations Full parameters can be set for the final report so that it can be adapted to the user's needs. The size of the report may therefore vary from one to about ten pages. Report models, corresponding to your personal needs, can be made and stored for future use. 8.2. Configuration of reports The report is configured in a specific window: User manual - GB - 03/03 page 66 DIASYSOFT WINDOWS / MAC Prining reports Configuration of reports window This Configuration of reports window is accessed: • by clicking the Reports line in the Settings Menu, • by clicking the Configure icon in the Reports frame of the Report printing window (cf. § 8.3), • by clicking the Configure icon in the Reports frame of the Chain printing window (cf. § 8.4). It contains all the items which may be printed. Fill in the input zones for the heading and report names and select the boxes required for the result items. 8.2.1. Name of report The names appear in a pull-down list, in the top part of the window. The model displayed when the window is opened, corresponds to the report selected in the previous window, or else the first in alphabetical order. All the characters on the keyboard can be used to enter names. To display one of the models, pull down the list and click its name. 8.2.2. Report heading The heading, which has its own frame, is the only item which is common to all the reports: you can indicate your name and address, which will be printed at the top of the cover page and on each of the report pages. If the heading is modified in one of the models, this modification will immediately be applied to all the other report models. 8.2.3. New report Click the New icon to open a blank window. Type the name under which you want to memorise, then select the boxes of all the items you want to incorporate in this new model. The items to be selected are described below, and concern results of windows with the same name, as described in chapter 7, “Procedures on the Screen”. 8.2.4. Cover page This displays: • a title zone with the address of the establishment or the surgery (heading), • a frame containing the patient's details, • a frame summarising the procedure, including on one hand the technical and medical information, and on the other hand a statistical table of the results, as parameterised by the user in the Measurements/Statistics window. This table includes the three periods: Whole procedure, Daytime and Night-time. Option Position User manual - GB - 03/03 The night and day period are replaced by “lying” and “not lying” if the procedure was carried out using the position sensor. page 67 DIASYSOFT WINDOWS / MAC • 8.2.5. Prining reports If the user has defined additional statistical periods, they will appear on the first page of the report. Finally, there is a frame reserved for conclusions, in which the contents of the Conclusion frame in the Procedure window are copied. Of course, if this has not been filled in the physician can put his conclusions directly on the cover page, either hand written or by typing them in. Y Scale The vertical scale of the pressure charts displayed on the screen can be graduated differently according to the user's needs. It is not always appropriate to use the same scale for printed reports as for on-screen observations. Consequently, the pull-down list enables you to adapt the scale for the printed report, without altering the scale on the screen: Click the line corresponding to the scale you require: • Automatic the scale will frame the maximum and minimum pressures of the procedure. • 0-300 mmHg fixed maximum scale. • Customised uses the customised scale defined in the Adjust the current procedure window (cf. chap.9), even if it is not applied. • As on the screen the scale applied for display. 8.2.6. Option QKd User manual - GB - 03/03 QKd Analysis If the corresponding box is selected, the best fit line of the QKd according to the systole, diastole, pulse pressure and the heart rate, will automatically be printed. page 68 DIASYSOFT WINDOWS / MAC Prining reports 8.3. Printing reports 8.3.1. The report printing window Click the Print procedure icon in the tool bar or on the Print line of the Procedure Menu to open this window: Report printing window The name of the patient and the start of procedure date appear in the top centre frame. This window enables: • a report model to be chosen, or a configuration of reports window to be opened, in order to display an existing model or to create a new one, • the printing configuration window to be accessed, with standard settings (consult your printer or system manual for more information), • printing to be started. 8.3.2. Printing Click the Print icon, having checked the data in the window, in particular, the report model. Depending on the complexity of the report, printing may only take a few seconds or may take several minutes. Printing can be stopped during this preparatory period: by clicking the Cancel icon in the temporary printing preparation window. by using the keyboard command Apple + Shift + Full Stop. User manual - GB - 03/03 page 69 DIASYSOFT WINDOWS / MAC Prining reports 8.4. Chain printing This command enables several reports to be printed in succession, thus enabling the user to gain precious time. Click the Chain printing icon on the tool bar or click the chain printing line in the Utilities Menu, to open the Chain printing window. 8.4.1. List of procedures When the window is opened, DiasySoft displays the current date. Click on Search to display the list of procedures from the last 24 hours. To select the procedures over a given period, use the Procedures read search zone at the top of the window. Use the Up / Down arrows to define the period to be taken into account, or type the day/month/year in place of the previous ones. Press the Search icon. This may take a few seconds, depending on the size of your database. 8.4.2. Procedures to be printed First select all the procedures to be printed with the same report model. You can make a multiple selection by clicking on each procedure whilst holding the Ctrl key down, or by dragging the mouse over consecutive procedures, or by combining the two methods. Then click the name of the model to be used for the procedures selected: User manual - GB - 03/03 page 70 DIASYSOFT WINDOWS / MAC Prining reports The name of the report will appear automatically in the Report column indicating thus that these procedures are ready to be printed using this model. Then select all the procedures to be printed using a second model, if there are any, and click the name of this model. Allocate models to all the procedures to be printed. If a model has been allocated by mistake, select the procedure then click None. Check the configuration of your printer and the reports, that the printer has enough paper, and click the Print icon to start the chain printing process. User manual - GB - 03/03 page 71 DIASYSOFT WINDOWS / MAC Settings 9. Settings This chapter explains the functions in the Settings menu. User manual - GB - 03/03 page 72 DIASYSOFT WINDOWS / MAC Settings 9.1. Reference lists DiasySoft manages several types of lists: interpreting physicians, referring physicians, treatments, indications, medical history and comments. As this information is repetitive, DiasySoft enables it to be listed permanently, so that you only have to enter the data once. A reference list These lists can be consulted or updated from the Reference lists line of the Settings menu or, in windows where they are displayed, by clicking their name. All the lists can contain an unlimited number of items and are based on the following model: 9.1.1. The list itself This contains items which have already been entered and is organised in alphabetical order. To select an item from the list, simply click it. 9.1.2. Text zone Five of the reference lists contain a single text zone, which: • displays the item selected from the list, or • enables you to use the cursor to add the name of a new item or to modify the one which has been selected in order to create a new one. The list of Referring Physicians also enables you to add supplementary information (address, phone number,…) to each item. 9.1.3. The Insert icon Inserts the contents of the text zone into the list by adding a line to it. User manual - GB - 03/03 page 73 DIASYSOFT WINDOWS / MAC 9.1.4. Settings The Delete icon Deletes the item selected from the list. Be careful, DiasySoft does not ask you to confirm this command. 9.1.5. Using reference lists in windows The Medical history reference list is used in the File windows. The Comments reference list is used in the Measurements windows. The Interpreting Physicians, Referring Physicians, Indications and Treatments reference lists are used in the Procedure windows. The same method is always used: 1 - Click the place where the item is to be inserted: a pull-down input zone appears. 2 - Pull down the list by clicking its arrow. If the item is not listed, type it in using your keyboard. It will automatically be inserted: press <Enter>. A message will ask you if you want to add the item to the reference list. 3 - Click the required item. It will automatically be inserted and the list will be closed.. If you know in advance that the item to be inserted is not listed, and you do not want to add it, type it in directly at stage 1 without using the pull-down list, and press <Enter>. 9.2. Statistical Thresholds 9.2.1. General points This window enables sets of statistical thresholds to be created. These can be used in the charts and in the statistical tables in the Measurements window. In the Settings Menu, click the Statistical thresholds line to open the window. User manual - GB - 03/03 page 74 DIASYSOFT WINDOWS / MAC Settings The set of thresholds window is different if simple threshold sets or complete thresholds sets have been selected in the Presentation window of the Preferences menu (cf. § 9.4) Simple threshold sets window Complete threshold sets window 9.2.2. Creation window Click the New icon to open a blank window. Type the name of this new set of thresholds in the upper input zone, where the cursor is placed when the window is opened. Then fill in one or several tables. Note that the limits of a given set of thresholds can be applied to different age groups, to one or other sex and to all or part of the nyctohemeral period (cf. § 9.4) Existing threshold sets can be modified by selecting it in the scroll list, except the predefined one. This is in fact a reference set of thresholds, and can be neither modified nor deleted. User manual - GB - 03/03 page 75 DIASYSOFT WINDOWS / MAC 9.2.3. Settings Threshold limits table These thresholds represent a maximum limit for each of the settings. If you have chosen to work with the complete sets of threshold values (cf. § 9.4) The table contains one or several lines, each corresponding to a different age group indicated in the first two columns. The first two columns, automatically filled in by the software, indicate the age of the beginning of the group, and the age of the end of the group respectively. They are automatically filled in by the software with “0” and “130”. These values can be left if you wish to use the same set of threshold values for each patient, whatever his age. If you wish different sets of threshold values depending on the age of the patient, click in the Max column of the first age group and enter the age required for the end limit of this group. After having entered a value press the <Enter> key to validate. A second line is automatically created. The hour groups can then be consulted. Then click on the settings threshold values boxes and enter the values required. It is not necessary to fill in all the cells; the software will only use the settings which have been entered. Click on Save when finished. The software opens a window asking if you want to use these threshold values as the default values. Click Yes if you want to use these values for every new procedure. Click No if not. 9.2.4. Threshold values in the results window The default threshold values are always used for interpreting a new procedure. Select which set of values is to be used in the Statistic thresholds window (cf. § 9.2.1), and click on Close. DiasySoft opens a confirmation window: Click Yes and the set of threshold values selected will automatically become the default set of values. Different threshold values for a particular procedure can be chosen and selected in one of the results windows (cf. chap. 7). User manual - GB - 03/03 page 76 DIASYSOFT WINDOWS / MAC Settings 9.3. Default Values The default values are those used for the interpretation of the first procedure for a new patient. They concern certain procedure criteria: • Getting up/going to bed times • Measurement validity limits Click on Default values in the Settings menu to open the corresponding window. The Predefined icon reinstates the original values fixed by the software. Times: State here the getting up and going to bed times used by the software, to determine the daytime and night-time intervals in the statistics table and in the graphs and charts. Measurement Validity: Define the ranges outside of which measurements will be rejected. For these criteria, the values used for the most recent procedure are re-used for the interpretation of a new procedure for the same patient. User manual - GB - 03/03 page 77 DIASYSOFT WINDOWS / MAC Settings 9.4. Preferences This menu allows modification of certain settings in the Diasysoft windows. The modifications carried out in the Preferences window are carried through from one procedure to another and from one DiasySoft session to another. The Preferences window has three tabs. Presentation tab: Several choices of display are offered. Default preferences window • • Simple sets of threshold values: upon selection of the Simple mode, DiasySoft uses a simplified set of threshold values (less complete) to calculate the statistics. Also, upon creation of a new set of threshold values in Simple mode, the creation window will also be simplified (cf. § 9.2.1). Caution, all sets of threshold values are available. If a complete set of threshold values is selected whilst in Simple mode, the software will only display and use those values applicable. Simple Statistics: selection of Simple mode displays a simplified statistics table (less complete). All statistical calculations are carried out, even in Simple mode. Re-select Complete in the Statistics frame of this tab to display all the calculations. Colours: The colours of the graphs can be modified. Click OK to validate, the colours will be immediately changed. Y Scale: The scale of the vertical axis of pressure measurements, in mmHg can either be adapted to the range of measurements carried out, or keep its fixed limits. User manual - GB - 03/03 page 78


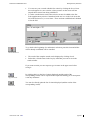

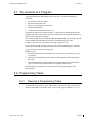

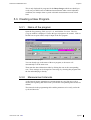

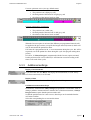
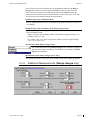


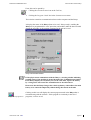
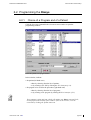
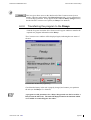
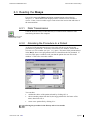

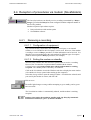
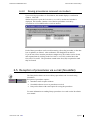
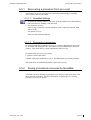


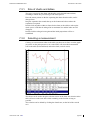


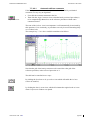
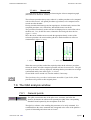
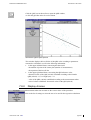

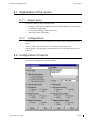


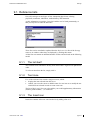

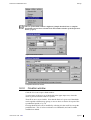

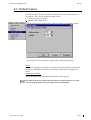
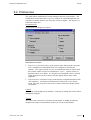


![DFare clic su [Avanti >]. - Firmware Center](http://vs1.manualzilla.com/store/data/006129751_1-43466461b7c26cc87297ea5728b4e30f-150x150.png)