1
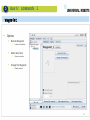
Basic Training 1 Company history Company history 2005 – 2008: Development of UR5 2008: First commercial sales of UR5 2009: Distribution network established in Europe 2011: Distribution network established in Asia 2012: Launch of UR10 Distribution network established in US 2013: Subsidiaries established in NY and Shanghai Distribution network established in Latin America 2014: Launch of UR5 (CB3) and UR10 (CB3) Subsidiary established in Barcelona 3 Company history Global distribution 2014 regions North Europe Central & Eastern Europe DACH + Benelux North America Mediteranean China Latin America Asia + Pacific 4 Welcome to Universal Robots Basic Training » A practical hands-on experience » Sample programs saved during training » Take notes » 30 min. examination at end of training 5 Hardware Advanced commands 3 Getting started Wizards Basic commands 1 Modbus TCP Basic commands 2 Service Advanced commands 1 Safety standards Advanced commands 2 Adjustable safety 6 1 Hardware Advanced commands 3 Getting started Wizards Basic commands 1 Modbus TCP Basic commands 2 Service Advanced commands 1 Safety standards Advanced commands 2 Adjustable safety 7 1 Hardware What’s in the box? Box 1 Robot arm Box 2 Control box Mains cable Mounting brackets Tool cable UR laserpen Manuals Production test certificate Robot arm and control box comes in ESD-approved bags 8 1 Hardware What’s in the box? Box 1 Robot arm Box 2 Control box Mains cable Mounting brackets Tool cable UR laserpen Manuals Production test certificate 9 1 Hardware Robot arm Manipulator design 6 axes Articulated robot (closely resembles human arm) Modular design +/- 360° freedom 3-phase AC servo motors Available types UR5 UR10 10 1 Hardware Robot arm Wrist 1 Joint designation and sizes UR5 UR10 Base Size 3 Size 4 Shoulder Size 3 Size 4 Elbow Size 3 Size 3 Wrist 1 Size 1 Size 2 Wrist 2 Size 1 Size 2 Wrist 3 Size 1 Size 2 Wrist 2 Elbow Wrist 3 Shoulder Base 11 1 Hardware Control box Contains Flashcard with software Power to robot arm Safety system Communication to peripheral devices Connectors Power 220/110 Vac Ethernet USB Robot arm 12 1 Hardware Teach pendant Touch sensitive monitor TP includes Power button Emergency button Teach button USB connector 13 1 Hardware Specifications UR5 UR10 Payload 5 kg. 10 kg. Reach 850 mm 1300 mm Joint ranges +/-360° +/-360° Repeatability +/-0.1 mm +/-0.1 mm Joint max. Speed 180°/sec 120°/sec and 180°/sec Tool max. speed 1000 mm/sec 1000 mm/sec Weight 18.4 kg 28.9 kg IP rating IP54 IP54 Temp. range 0-50°C 0-50°C Power supply 100-240V AC, 50-60 Hz 100-240V AC, 50-60Hz Additional specs can be found on www.universal-robots.com 14 1 Hardware Robot workspace UR5 workspace Approximate sphere of Ø170 cm Limitation Cylindrical area around center of Base Front view Tilted view 15 1 Hardware Mounting the base Requirements Solid surface Footprint 149 mm 4 pc. M8 bolts 16 1 Hardware Mounting the tool Mounting standard ISO 9409-1-50-4-M6 Tool connector 8 pin connector Lumberg RKMV-8-354 17 2 Hardware Advanced commands 3 Getting started Wizards Basic commands 1 Modbus TCP Basic commands 2 Service Advanced commands 1 Safety standards Advanced commands 2 Adjustable safety 18 2 Getting started Introduction to PolyScope PolyScope Developed by UR Free updates Operating system Debian Linux 19 2 Getting started About Information Serial number Software version IP-address 20 2 Getting started Online manual Features Displayed in selected language ”Light” version of software manual 21 2 Getting started Setup robot Setup robot Adjust software settings 22 2 Getting started Setup robot Software settings Initialize Robot Language and Units Update Robot Set Password Calibrate Screen Setup Network Set Time 23 2 Getting started Initialize robot Robot states State Brakes OFF Engaged ON Engaged ON Released Initialize robot Power Check payload setting Click ON: enables power Click ON: releases brakes Backdrive mode When close to collision, use Backdrive mode 24 2 Getting started Language and units Languages 20 languages English programming Keeps command names in English language Units Metric U.S. 25 2 Getting started Update robot Robot software Free updates Download from UR support site Procedure to update will be covered later in training session 26 2 Getting started Set password System password Limit access to parts of software Safety password Required for modifying safety settings 27 2 Getting started Calibrate screen Calibration of touch screen Mark four corners to calibrate 28 2 Getting started Setup network Network configuration IP-address of robot can be set in this menu Live demo will be covered later in training session 29 2 Getting started Set time Time Time format 24 hour 12 hour Date Date format 30 2 Getting started Program robot Program robot Overview of tabs 31 2 Getting started Program tab Program Load existing program Create new program 32 2 Getting started Installation tab Setup Environment settings Safety settings 33 2 Getting started Move tab Move Jog robot manually Actual position displayed 34 2 Getting started I/O tab I/O Monitoring signals Activate signal Setup analog signals 35 2 Getting started Log tab Status Control box Joints Log history Info messages Warnings Errors 36 2 Getting started Moving the robot Jogging One joint individually In linear space Tool orientation changes Min/max limits Angular value displayed Tool orientation is fixed when jogging in XYZ Relative to selected Feature View Base Tool By teach function Teach button on TP Teach button in UI 37 2 Software Initial setup Initial setup TCP configuration Mounting 38 2 Getting started TCP configuration Tool Center Point (TCP) Linear distance from center of tool flange to tip of tool Set XYZ coordinates according to illustration Payload Weight of tool 39 2 Getting started Payload calculation Example: Length = 200 mm how to calculate max. allowed payload 𝑃𝑎𝑦𝑙𝑜𝑎𝑑 = 4.5 4.5 = = 4.09 𝑘𝑔 (0.9 + 𝑙𝑒𝑛𝑔𝑡ℎ) (0.9 + 0.2) 40 2 Getting started Mounting Setup how robot base is mounted 41 2 Getting started Load/save Save Installation Load Installation All settings in Installation is saved in file Loads a saved Installation file Default name default.installation Loaded when booting robot 42 3 Hardware Advanced commands 3 Getting started Wizards Basic commands 1 Modbus TCP Basic commands 2 Service Advanced commands 1 Safety standards Advanced commands 2 Adjustable safety 43 3 Basic commands 1 Create new program Use template Empty Program 44 3 Basic commands 1 Command tab Program tree Structure of program Contains all commands Executed sequentally Command tab Edit of selected command Set general settings for program 45 3 Basic commands 1 Graphics tab Graphics tab Actual position Taught positions Trajectories 46 3 Basic commands 1 Structure tab Structure tab Contains all commands Split into Basic Advanced Wizards 47 3 Basic commands 1 Editing area / Dashboard Editing area Edit and organize program tree Editing tools Suppress function Dashboard Control program execution Simulation / Real Robot 48 3 Basic commands 1 Insert motion Waypoint specifies the target position Move specifies the trajectory robot will follow on it’s way to target position Trajectory Target position 49 3 Basic commands 1 Basic commands Basic commands Perform simple operations Insert Move command 50 3 Basic commands 1 Move command Movement types MoveJ (default) MoveL MoveP MoveC Shared parameters Joint speed Default: 60 °/s Joint acceleration Default: 80 °/s² Waypoint automatically added when inserting Move command 51 3 Basic commands 1 Waypoint Waypoint types Fixed (default) Relative Variable Teach Waypoint Press Set this Waypoint Teach position and press OK for saving 52 3 Basic commands 1 Waypoint Options Rename Waypoint Move robot here Improves readability Moves to position Change this Waypoint Modify position 53 3 Basic commands 1 MoveJ Joint movement No interpolation Waypoint_1 Fastest move type Useful in ”free” space movements Robot Program MoveJ Waypoint_1 Waypoint_2 Waypoint_3 Waypoint_4 Waypoint_4 Save sample program as movej.urp Waypoint_2 Waypoint_3 54 3 Basic commands 1 MoveL Linear movement Interpolation on Linear trajectory for TCP Robot Program MoveL Waypoint_1 Waypoint_2 Waypoint_3 Waypoint_4 Waypoint_1 Waypoint_2 Waypoint_4 Waypoint_3 Save sample program as movel.urp 55 3 Basic commands 1 MoveL with blend blend radius Blend radius Continuous movement No stop in Waypoint Robot Program MoveL Waypoint_1 Waypoint_2 (r=25) Waypoint_3 Waypoint_4 Waypoint_1 Waypoint_2 Waypoint_4 Waypoint_3 Save sample program as move_with_blend.urp 56 3 Basic commands 1 MoveP shared blend Process Movement Process applications Linear movement Constant TCP speed Shared blend radius Robot Program MoveP Waypoint_1 Waypoint_2 Waypoint_3 Waypoint_4 Waypoint_1 Waypoint_2 constant TCP speed Waypoint_4 Save sample program as movep.urp Waypoint_3 57 3 Basic commands 1 MoveC Waypoint_2 Circular movement Circular trajectory for TCP Three Waypoints required (Via point) Start point Via point End point Radius auto calculated Waypoint_1 Robot Program MoveP Waypoint_1 CircleMove Waypoint_2 Waypoint_3 Waypoint_4 Waypoint_5 Waypoint_5 Save sample program as movec.urp (Start point) (End point) Waypoint_3 Waypoint_4 58 3 Basic commands 1 Advanced options Advanced options Set individual Speed acceleration Waypoint position Joint angles Tool position 59 3 Basic commands 1 Pose editor Modify Joint positions Absolute value Add/subtract to value Angular value in degrees Tool position Cartesian value in mm. Define rotation unit 60 3 Basic commands 1 Relative waypoint Relative movement Linear movement Relative to prior position in program Distance and angle displayed 61 3 Basic commands 1 Relative waypoint Define Relative Waypoint Defined by two Waypoints Can be defined anywhere in robot workspace Robot Program MoveL Waypoint_1 Waypoint_2 rel. pos Waypoint_3 rel. pos Waypoint_4 rel. pos Waypoint_1 Waypoint_2 Waypoint_4 Waypoint_3 Save sample program as movel_with_relative_waypoint.urp 62 3 Basic commands 1 Variable waypoint Variable position Position that can be calculated / offset Definition of and how to use variable Waypoints is part of Advanced Training 63 3 Basic commands 1 Lab exercise part 1 Create a MoveL Create 6 waypoints in positions like those in the diagram. Use the move tab to move the robot tool into appropriate positions This shape can be defined anywhere in the robot workspace Waypoint_1 Waypoint_2 Waypoint_3 Waypoint_4 Waypoint_6 Waypoint_5 64 3 Basic commands 1 Lab exercise part 2 Adjust the waypoints Adjust the waypoints according to the dimensions on the diagram using the pose editor. Add a 50mm radius to waypoints 2, 3 and 4. Waypoint_1 Waypoint_2 200mm 100mm Waypoint_3 200mm Waypoint_6 Waypoint_4 300mm Waypoint_5 65 3 Basic commands 1 Lab exercise part 2 Convert to a MoveP Change from a MoveL to a moveP Set a 50mm radius at all points Waypoint_1 Waypoint_2 200mm 100mm Waypoint_3 200mm Waypoint_6 Waypoint_4 300mm Waypoint_5 66 4 Hardware Advanced commands 3 Getting started Wizards Basic commands 1 Modbus TCP Basic commands 2 Service Advanced commands 1 Safety standards Advanced commands 2 Adjustable safety 67 4 Basic commands 2 next Signal handling Interaction with external devices 68 4 Basic commands 2 User interface Safety Control Board (SCB) Safety Remote Emergency stop Safeguard stop Power on/off Power 2A internal PSU External PSU Config. signals Digital signals Analog signals 8 inputs 8 outputs 8 inputs 8 outputs 2 inputs 2 outputs 24V DC, PNP 24V DC, PNP 0-10V DC 4-20 mA Consult User Manual, chapter 4. Electrical Interface 69 4 Basic commands 2 User interface Power 24V DC and GND Tool connector pin 1 pin 2 pin 3 pin 4 pin 5 pin 6 pin 7 pin 8 AI[2] AI[3] TI[0] TI[1] 24V DC TO[0] TO[1] GND Max. load: 600mA Digital inputs Digital outputs 2 inputs 2 outputs 24V DC, PNP 24V DC, NPN Analog inputs 2 inputs 0-10V DC 4-20 mA 70 4 Basic commands 2 Signal handling Purpose Interaction with external devices Hardwired to Control box Tool connector Configuration Control box 16 DI 16 DO 2 AI 2 AO Tool connector 2 DI 2DO 2AI 71 4 Basic commands 2 Signal handling Digital signals Voltage State 24V DC GND OFF (Low) ON (High) Analog signals Range Current 4-20 mA Voltage 0-10 V 72 4 Basic commands 2 I/O setup Input Rename signal Output Rename signal I/O tab control Set signal state when stopped Program and I/O tab is affected when renaming 73 4 Basic commands 2 Wait command Wait for condition No action Wait an amount of time Wait for digital input Wait for analog input Wait for <expression> Robot Program MoveL Waypoint_1 Waypoint_2 Wait 1.0 Waypoint_3 Waypoint_4 Wait DI[0] = True Save sample program as wait.urp 74 4 Basic commands 2 Set command Perform action No action Set digital Output Set analog Output Set <expression> Increment variable Robot Program MoveL Waypoint_1 Set DO[0] = True Waypoint_2 Waypoint_3 Waypoint_4 Set DO[0] = False Save sample program as set.urp 75 4 Basic commands 2 Popup command Wait for operator Pauses program Define popup message Popup types Message Warning Error Robot Program MoveL Waypoint_1 Waypoint_2 Wait 1.0 Waypoint_3 Waypoint_4 Popup Save sample program as popup.urp 76 4 Basic commands 2 Stop command Halt Stops program execution 77 4 Basic commands 2 Comment command Comments Add text to program Program execution not affected 78 4 Basic commands 2 Folder command Folders Organizing program Label part of program Program execution not affected 79 4 Basic commands 2 Folder command Sample pick’n’place program Two folders Pick_part Place_part Robot Program Pick_part MoveL Waypoint_1 Waypoint_2 Set DO[0] = On Wait 0.5 Waypoint_1 Place_part MoveL Waypoint_3 Waypoint_4 Set DO[0] = Off Wait 0.5 Waypoint_3 Waypoint_1 Waypoint_3 Waypoint_2 Waypoint_4 Save sample program as pick_and_place.urp 80 4 Basic commands 2 Lab exercise part 1 Create a simple signal handling program Setup: Rename digital_out[4] to ”Lamp” and digital_in[5] to ”Button” Connect the provided Lamp to Digital Output 4 in the control box as shown below. Connect the provided button to Digital Input 5 in the control box as shown below. 81 4 Basic commands 2 Lab exercise part 2 Program – Button_Folder Create a folder called Button_Folder Wait for the button to be pushed before continuing Add a comment at the start of the folder explaining what this code does. Program – Lamp_Folder Create a folder called Lamp_Folder Turn on the lamp, wait for 5 seconds then turn it off again. Create a popup that informs the user the program has completed, and halt the program at this popup. Add a comment at the start of the folder explaining what this code does. 82 5 Hardware Advanced commands 3 Getting started Wizards Basic commands 1 Modbus TCP Basic commands 2 Service Advanced commands 1 Safety standards Advanced commands 2 Adjustable safety 83 5 Advanced commands 1 Advanced commands tab Advanced commands Perform advanced operations 84 5 Advanced commands 1 Loop command Definition Loop underlying commands no. of times Loop types Loop always Loop n times Loop <expression> Robot Program MoveJ Waypoint_5 Loop 3 times MoveL Waypoint_1 Waypoint_2 Waypoint_3 Waypoint_4 MoveJ Waypoint_5 Save sample program as loop.urp 85 5 Advanced commands 1 Loop command Interrupt Check expression continuously Robot Program MoveJ Waypoint_5 While DI[0] = True MoveL Waypoint_1 Waypoint_2 Waypoint_3 Waypoint_4 MoveJ Waypoint_5 Save sample program as loop_interrupt.urp 86 5 Advanced commands 1 SubProg command Subprograms Organize program Split program into subprograms Re-use subprogram in multiple programs 87 5 Advanced commands 1 SubProg command Calling a subprogram All commands in subprogram executed Then return to ”main” program Robot Program CALL Sub_1 Sub_1 CALL Sub_2 Sub_2 Note: Calling subprogram from subprogram is not supported 88 5 Advanced commands 1 SubProg command Call subprogram Load existing file Create program in empty program Save as file Part of main program Robot Program MoveJ Waypoint_5 Loop 3 times MoveL Waypoint_1 Waypoint_2 Waypoint_3 Waypoint_4 Call SubP_movec MoveJ Waypoint_5 Save sample program as call_sub.urp 89 5 Advanced commands 1 If ... else command If Examines a condition: State of sensor Value of variable Combination of various states If condition = True Execute underlying commands Robot Program MoveL Waypoint_1 IF DI[0] = True Waypoint_2 Waypoint_3 Save sample program as if.urp 90 5 Advanced commands 1 If ... else command … elseif Examines new condition … else Define what to do when no condition is not true Robot Program MoveL Waypoint_1 IF DI[0] = True Waypoint_2 Else Waypoint_3 Save sample program as if_else.urp 91 5 Advanced commands 1 Lab exercise part 1 Create a program using sub programs, loops and if statements This will use the installation from Basic Commands 2 Exercise First create a simple program to flash the lamp (This will be used as a sub program) Lamp_Flash: Create a program that flashes the lamp 5 times using a loop On for 0.5 seconds then off for 0.5 seconds (x5) Save this program as Lamp_Flash 92 5 Advanced commands 1 Lab exercise part 2 Create another empty program Create 3 waypoint in positions of your choice Move to waypoint_1 Wait for the button to be pushed When button pushed call Lamp_Flash sub program. Move to waypoint_2 Wait 1 second for potential button push If button pushed move to waypoint_1 Else move to waypoint_3 Move between point 1 and 2 repeatedly, stop immediately upon button push 93 6 Hardware Advanced commands 3 Getting started Wizards Basic commands 1 Modbus TCP Basic commands 2 Service Advanced commands 1 Safety standards Advanced commands 2 Adjustable safety 94 6 Advanced commands 2 What is a variable? Variable is a storage location (container) Content of container can change Variables are read and write Value can be overwritten Value can be read Variable can be compared with other variable or sensor state 95 6 Advanced commands 2 Variable types var type value boolean true/false integer 16 bit, whole number floating point real number (decimal) string ASCII characters (text) pose position variable p[x,y,z,rx,ry,rz] list array of variables 96 6 Advanced commands 2 Variable scope location local program global installation Local variables scope Declared in program Accessible from same program Value cleared at power down Global variables Declared in Installation Accessible from programs using same Installation Value stored in file on disk 97 6 Advanced commands 2 Assignment command Options Define variable name Declare variable type Assign value to variable Robot Program var_1 = True Wait 0.5 var_1 = False Wait 0.5 Save sample program as var_bool.urp 98 6 Advanced commands 2 Expression editor Options Numerical values Inputs Outputs Variables Poses Script codes Logic operators Keyboard 99 6 Advanced commands 2 Use variable as counter Counter Use integer variable Increment variable in loop Compare variable with number Robot Program var_1 = 0 While var_1 < 5 Pick_part Place_part var_1 = var_1 + 1 Save sample program as var_counter.urp 100 6 Advanced commands 2 Operator input Assignment by operator Select Source Define variable type Add message Robot Program var_1 = 0 var_2 = operator input While var_1 < var_2 Pick_part Place_part var_1 = var_1 + 1 Save sample program as var_operator_input.urp 101 6 Advanced commands 2 Init variables Inititialize variables Local variables listed Preset to fixed value 102 6 Advanced commands 2 Installation variables Features Listed in Installation tab Stored in separate file Keeps value after reboot Functionality Global variable Accessible from all programs Same functionality as local variable 103 6 Advanced commands 2 Use installation variable as counter Set command Increment installation variable by one Robot Program i_var_1 = 0 var_2 = operator input While i_var_1 < var_2 Pick_part Place_part Set i_var_1 = i_var_1 + 1 Save sample program as inst_var_operator_input.urp 104 6 Advanced commands 2 Lab exercise Create a program using installation variables to count program cycles Create Installation variable called count and set it to 0 Create a simple program that moves between waypoint_1 and waypoint_2 After each move increment count variable. When count reaches 10 clean tool (move to waypoint_3) When count variable reaches 20, show popup message ”Change Feeder Tray”. Only continue when the count variable has been manually reset. Start/stop program and confirm count variable persists Restart robot and confirm count is the same 105 Hardware 7 Advanced commands 3 Getting started Wizards Basic commands 1 Modbus TCP Basic commands 2 Service Advanced commands 1 Safety standards Advanced commands 2 Adjustable safety 106 7 Advanced commands 3 Threads/events Thread Parallel process Continuously running Robot prg Event Event Thread Start DO[0] = HI Trigger: DO[0] = HI Parallel process Triggered by a condition DO[0] = LO Stop Purpose Useful for controlling I/O communication with other machines, do complex calculations etc. 107 7 Advanced commands 3 Thread Settings Loops forever Track program execution Robot Program MoveJ Waypoint_1 Waypoint_2 IF DI[0] = True HALT Robot Program MoveJ Waypoint_1 Waypoint_2 Thread_1 IF DI[0] = True HALT WAIT 0.01 Save sample program as thread.urp 108 7 Advanced commands 3 Event Trigger Define condition to run Event Robot Program MoveJ Waypoint_1 Waypoint_2 Event DI[0] = True HALT Save sample program as event.urp 109 7 Advanced commands 3 What is script? This is an introduction to URScript Further scripting will be covered in Advanced Training URScript High level script language developed by UR Similarities to Python script language Script manual contains definitions of all available script codes 110 7 Advanced commands 3 How to use script Expression editor Most common script codes listed Sample program with force() Return value: TCP force Robot Program MoveL Waypoint_1 IF force() < 30 Waypoint_2 Save sample program as force_feedback.urp 111 7 Advanced commands 3 Script command Line Insert one script command File Call file containing multiple script codes Robot Program set_digital_out(0,True) WAIT 0.5 set_digital_out(0,False) WAIT 0.5 Save sample program as script_line.urp 112 7 Advanced commands 3 Force Control 113 7 Advanced commands 3 Force command Features Compliance with environment Adjusting of position to achieve defined force Specifications Force precision Torque precision Position precision Orientation precision ± 10 N ± 5 Nm ± 5 mm ± 0.5 ° 114 7 Advanced commands 3 How to use force Settings Force type Force level Direction of force Easy testing Teach test 115 7 Advanced commands 3 Force type: Simple Features One axis on compliant mode Force direction in Z-axis Test Add Force to new program Set Type: Simple Set Feature: BASE Set Force: 30 N Set Force: -30 N Teach test Teach test Set Feature: TOOL Teach test 116 7 Advanced commands 3 Force type: Simple Sample program Robot Program MoveL Waypoint_1 Waypoint_2 Force Waypoint_2 Waypoint_3 Waypoint__4 Waypoint_1 Waypoint_4 Waypoint_2 Waypoint_3 Save sample program as force_simple.urp FORCE 117 7 Advanced commands 3 Force type: Frame Features Multiple axes in compliant mode Force level individual for each axis Define speed for axes in compliant mode Base, Tool, user defined frames 118 7 Advanced commands 3 Force type: Point Features Specify Feature point Y-axis of task frame points towards Feature point Task frame changes during runtime 119 7 Advanced commands 3 Force type: Motion Features TCP motion in X-axis of task frame Task frame changes during runtime Y-axis perpendicular to TCP motion X-axis not compliant Teach mode not applicable 120 7 Advanced commands 3 Lab exercise Create a Program using Threads and URScript Main Program: Create a simple MoveL between waypoint_1 and waypoint_2 Thread1: Create a thread with an assignment that calls the force() URScript command and saves the result in a variable Insert a 0.01 second wait after the command Set the thread to loop forever Run the program and open the variables tab. You can now monitor how pushing on the tool plate affects the force value. 121 Hardware Getting started Advanced commands 3 8 Wizards Basic commands 1 Modbus TCP Basic commands 2 Service Advanced commands 1 Safety standards Advanced commands 2 Adjustable safety 122 8 Wizards Wizards Pallet Seek Palletizing/depalletizing Patterns Search function Euromap Injection molding Optional 123 8 Wizards Pallet wizard Pattern Determine palletizing pattern Patterns Line Square Box List PalletSequence What to do at each position in pattern 124 8 Wizards Pattern: Square Pattern Set pattern: Square Set objects between Point 1 to 2 Point 2 to 3 Teach the 4 corners Pattern a2nd a1st a3rd a4th 125 8 Wizards PalletSequence PalletSequence Teach points PatternPoint Approach Exit Define actions Rule of thumb: teach PatternPoint as some points as a1st_Corner Robot Program Pallet Pattern: Square a1st_Corner a2nd_Corner a3rd_Corner a4th_Corner PalletSequence Approach_1 PatternPoint_1 Set DO[0] =True Wait 0.5 Exit_1 Save sample program as pallet.urp PalletSequence Approach Exit PatternPoint = a1st 126 8 Wizards Seek wizard Stacking Add items to a stack Destacking Remove items from stack 127 8 Wizards Destacking Sample Add Seek to program Select Destack Destack Set StartPos Set Direction of stack Can be any linear direction FromPos ToPos Set item thickness From where to start seek operation Same thickness for all items Set sensor input To determine when item is found Use force() < 30 128 8 Wizards Destacking PickSequence StackPos Wayoint Defines how to exit after picking item Define actions Defines where to pick item when detected Set Wait rule of thumb is to teach StackPos as same point as StartPos 129 8 Wizards Destacking Sample program Add folder for placing destacked item Robot Program Destack StartPos Direction FromPos ToPos PickSequence StackPos Set DO[0] = True Wait 0.5 Waypoint_1 Folder Waypoint_2 Waypoint_3 Set DO[0] = False Wait 0.5 Waypoint_2 Save sample program as seek_destack.urp 130 8 Wizards Lab exercise Use the Palletizing wizard to create a program that simulates placing a part on each of the locations on the diagram below. You will be provided with an A3 print out of this diagram to use in the demo. Palletizing program Select the palletizing wizard template and create a new program Define the number of positions in each dimension X X X X X X X X X X X X X X X X X X X X X X X X Teach the 4 corner points of the Pallet Set approach and exit waypoints 100mm directly above the PatternPoint Set a feeder waypoint to collect a part from before moving to each position on the Pallet. 131 Hardware Advanced commands 3 Getting started Wizards Basic commands 1 9 Modbus TCP Basic commands 2 Service Advanced commands 1 Safety standards Advanced commands 2 Adjustable safety 132 9 Modbus TCP What is Modbus TCP? Modbus TCP Ethernet based communication protocol Communication protocol A protocol is a common language with which two devices can communicate Possible to transfer data between devices Device 1 Ethernet Device 2 data Client / Server relationship 133 9 Modbus TCP Client / Server Server One device acts as Server Listening on requests from Client Client Other device(s) acts as Client Sends requests to Server request Device 1 Device 2 reply Modbus client Modbus server Each device must have a unique IP-address 134 9 Modbus TCP Data types Available data types for Modbus TCP data type value Digital inputs On/Off Digital outputs On/Off Register inputs 16 bit Register outputs 16 bit address range Consult documentation provided by vendor of Server device Address range Each digital signal and register have a unique address Address is always specified in documentation provided by vendor 135 9 Modbus TCP Modbus TCP Sample Use robot as Client and connect to a Server Ethernet Modbus client Ext. device Modbus server 136 9 Modbus TCP Setup network Settings Select Static Address Set IP-address of robot Set Subnet mask Apply to save configuration Tip: Use UPDATE button for ”pinging” the other device 137 9 Modbus TCP Server Phoenix Contact ILB ETH 24 DI16 DIO16 2TX 16 digital outputs 16 digital inputs 2-port switch 138 9 Modbus TCP Setup server Device setup Add new device Set IP-address of device (Server) Signal setup Add new device Add signal Define data type Set signal address Define signal name 139 9 Modbus TCP Setup server Setup Monitoring Setup 2 digital inputs Setup 2 digital outputs Save Installation Signals can be monitored in I/O tab Connectivity status Status Connection ok Update frequency warning No connection E4 Exception code 140 9 Modbus TCP Use Modbus signal in program Use of signals Same functionality as normal digital signals Robot Program MoveL Waypoint_1 Set MODBUS_1 = True Waypoint_2 Waypoint_3 Waypoint_4 Set MODBUS_1 = False Save sample program as modbus.urp 141 9 Modbus TCP Default program Purpose Set robot to auto start with no operator action needed How to Select default program Set digital input to auto start Set digital input to auto initialize Save Installation Reboot Note: robot will always load default.installation at startup 142 9 Modbus TCP Lab exercise Set up a MODBUS connection and write a program to test it Connection Setup Connect the MODBUS device power terminals to 0V and 24V supply in the controller Connect pin 1.1 on block IO1 of your MODBUS device to DI0 in the controller Setup network and ensure your Controller and MODBUS device are in the same subnet Under the installation tab add the remote digital output Toggle the output and watch the indicator light on the MODBUS device to verify the setup is correct 143 2 Software Lab exercise 2 Write a program to test the connection Turn on remote output via MODBUS Verify local input has gone high Turn off remote output via MODBUS Verify local input has gone low Display a popup with the results of the test Set a Timeout Now Use a thread to create a 5 second timeout on the test. 144 Hardware Advanced commands 3 Getting started Wizards Basic commands 1 Modbus TCP Basic commands 2 10 Service Advanced commands 1 Safety standards Advanced commands 2 Adjustable safety 145 Service 10 Downloads and tips support.universal-robots.com Programming tips How to’s Safety guide Download Magic files Software firmware URSim Log reader CAD drawings Manuals 146 Service 10 Magic files Easy backup Others Backup programs Backup log history Backup configuration files Upload programs Screenshot of GUI How to Download Magic file from support site Copy file to USB-stick Insert USB-stick in TP » red USB warning appears Await green USB sign on GUI » copy completed 147 Service 10 Software update How to Download latest software from support site Copy file to USB-stick Insert USB-stick in TP Go to Setup\Update Press ”Search” and select the update Press ”Update” NOTE: Robot will power down after update IMPORTANT: ALWAYS MAKE FULL BACKUP BEFORE UPDATING SOFTWARE! 148 Service 10 Firmware update Firmware is software located in each joint Firmware controls the joint Can be updated if neccessary Software update is required prior to updating firmware During software update, the firmware is automatically copied to flash card No additional download required 149 Service 10 Firmware update Update procedure Drag finger across UNIVERSAL logo on Welcome screen 150 Service 10 Firmware update Update procedure Enter password lightbot Press OK to access Expert Mode lightbot 151 Service 10 Firmware update Update procedure Press ”Low Level Control” 152 Service 10 Firmware update Update procedure General tab Firmware tab Press ”Turn power on” Verify status on all joints: BOOTLOADER Select ”All joints” Press ”UPDATE Firmware” Await ”Firmware update complete” on STATUS line Press ”Back” and ”Return to Normal” 153 Service 10 Offline simulator URSim Offline programming software Only runs on Linux operating system Available for download from support site as: Installation file Virtual machine Virtual machine 154 10 Service next Maintenance 155 Service 10 Preventive maintenance Service manual content Preventive maintenance Robot arm Controller box Schematic drawings Service and replacement of parts Software Troubleshooting Spare parts Packing of robot Preventive maintenance Download Service Manual from support site Walk through Chapter 2. Preventive Maintenance 156 Service 10 Service manual Troubleshooting Log history Joint replacement Joint calibration Change joint ID Warranty claim UR5 Troubleshooting Flowchart Is UR5 the problem? NO YES No it isn’t. UR5 is working correctly. 157 Service 10 Log history Readings Joint load Control box health Joint status Log history Displays valuable information about robot health Show/hide Information Warnings Errors 158 Service 10 Log history Demonstrate error Remove blue lid from Wrist 3 Disconnect green comm. cable from prev. joint Verify that robot detects error and displays popup 159 Service 10 Log history Demonstrate error Check log history Show/hide Information entries Highlight line by tapping once on it Log history Saved in textfile named log_history.txt Use Magic file to backup Serial communication problem with one or more joints 160 Service 10 Support Log Reader Support Log reader Read log files Convert language Convert to csv-file Filter search Supports CB3 file format CB3 file format CB2 file format Language converted to English CB2 file format Language will be kept in original language 161 10 Service Joint replacement 162 Service 10 Joint replacement Replacing a joint Instructions available in Service Manual Replacing Wrist 3 Tools needed 5.5 mm open ended spanner Torx screwdriver T10 Allen key torx T10 Torque wrench 5.5 mm Regular small screwdriver Follow instructions in Service Manual for dismantling Wrist 3 from Wrist 2 Mount Wrist 3 back on 163 Service 10 Joint calibration Calibration 0˚ Each joint has a zero-position Zero position can be set in software Calibrating Wrist 3 Follow instructions in Service Manual for performing a calibration of a joint 164 10 Service Change joint ID 165 Service 10 Change joint ID Wrist 2 Each joint has a unique ID no. Wrist 1 ID joint J0 Base J1 Shoulder J2 Elbow J3 Wrist 1 J4 Wrist 2 J5 Wrist 3 Elbow Wrist 3 Shoulder Base It is not possible to have two joints with same ID no. on same robot » ID conflict will occur, causing malfunction of robot 166 Service 10 Change joint ID Wrist 3 Example Wrist 1 (J3) needs to be replaced Spare joint is a Wrist 3 (J5) » Conflict will occur as robot has two joints with ID J5 Wrist 2 Wrist 1 Elbow Wrist 3 How to solve Disconnect comm. connector for joint with correct ID no. » Wrist 3 is then not accessible Enter Low Level Control Shoulder » Change ID no. for replacement joint (J5) to J3 Base 167 Service 10 Change joint ID Joint ID Enter Low Level Control Go to General tab Click ”Power on” Click ”Go to Idle” Go to Joint ID tab Select J5 (the one to be changed) IMPORTANT: uncheck ”Exchange IDs” box In dropdown box, select ID no. 3 and press SET IT Full guide on how to change joint ID is found in Service Manual 168 Service 10 Warranty claim Email regional UR support office Required information to UR Robot s/n Software version Detailed error description Attach log file » Upon receiving information, regional support office will open RMA-file and ship sparepart 169 10 Service Regional support North Europe support.ne@universal-robots.com Central & Eastern Europe support.cee@universal-robots.com North America DACH + Benelux support.na@universal-robots.com support.dach@universal-robots.com Mediteranean China support.med@universal-robots.com support.china@universal-robots.com Latin America Asia + Pacific support.la@universal-robots.com support.apac@universal-robots.com 170 10 Service Lab exercise Log onto the support site – If you do not know your login details tell us now! Download the log history magic file and log file reader Copy the log file from the robot using the magic file View the log file using the log file reader 171 Hardware Advanced commands 3 Getting started Wizards Basic commands 1 Modbus TCP Basic commands 2 Service Advanced commands 1 Advanced commands 2 11 Safety standards Adjustable safety 172 11 Safety standards ...and now 173 11 Safety standards Complied international standards A collaborative robot system should comply with the requirements of the following international standards Standard Describes ISO 13849-1 Safety related parts of control system ISO 10218-1 Safety requirements for industrial robots ISO 10218-2 Safety requirements for integration of robots TS 15066 Collaborative robots technical specifications ISO 12100 Guidance for performing risk assessment Responsible Manufacturer Integrator 174 Safety standards 11 ISO 13849-1: 2008 Standard describes Purpose Safety related parts of control system Provide guidance of principles of design for the manufacturer of robot Contains Definitions of Safety Categories and Performance Levels (PL) UR5 and UR10 classifies as Performance Level d (PLd) PLd is the second highest reliability classification, meaning that the safety function is extremely reliable 175 Safety standards 11 ISO 10218-1: 2011 Standard describes Purpose Safety requirements for industrial robots Provide guidance of principles of design for the manufacturer of robot 10218-1 is designed for traditional industrial robots ISO 10218-1 Section 5.10 says: “Robots designed for collaborative operation shall provide a visual indication when the robot is in collaborative operation and shall comply with one or more of the requirements in 5.10.2 to 5.10.5 5.10.2 Safety rated monitored stop 5.10.3 Hand guiding 5.10.4 Speed and Separation mode 5.10.5 Power and force limiting by inherent design and control UR5 and UR10 comply with 5.10.5, as power and force limiting function is always active 176 Safety standards 11 Safety system certified by TÜV Tested in accordance with ISO 13849-1: 2008 ISO 10218-1: 2011 All safety functions rated as Performance Level d (PLd) 177 Safety standards 11 Your responsibility as integrator Risk assessment is mandatory Recommended to comply with the following standards Standard Describes ISO 13849-1 Safety related parts of control system ISO 10218-1 Safety requirements for industrial robots ISO 10218-2 Safety requirements for integration of robots TS 15066 Collaborative robots technical specifications ISO 12100 Guidance for performing risk assessment Responsible Manufacturer Integrator Identify risks and reduce them to appropriate level 178 Safety standards 11 ISO 10218-2: 2011 Standard describes Purpose Safety requirements for integration of robots Provide guidance for integrators of industrial robot Consider the design of the installation where the robot is used Considerations Definitions of workspace, restricted space, collaborativ space Location of controls and E-stops Design of end effector Movement and speeds of robot Position of operator 179 Safety standards 11 TS 15066 (draft) Standard describes Draft-guide only Collaborative robots technical specification Currently in development Scheduled for release 2015 Contains Detailed set of guidelines for integrators when deploying collaborative robots Force related limits for collaborative robots 180 Safety standards 11 Summary MANDATORY Integrator must perform risk assessment NOT MANDATORY Compliance with the standards It is recommended to comply with the standards! In case of failure: System complies with the standards System does not comply with the standards » burden of proof lies with the prosecutor » burden of proof lies with the integrator 181 Safety standards 11 Regional differences USA ANSI/RIA R15.06: 2012 Z434-03 R15.06 Canada CAN/CSA-Z434-03: 2013 Harmonized with international ISO standards ISO 10218-1 and ISO 10218-2 are combined into one document Harmonized with international ISO standards Consists of ISO 10218-1 and ISO 10218-2 with regional deviations Brazil NR 12 NR12 Standard is not harmonized with international ISO standards 182 Hardware Advanced commands 3 Getting started Wizards Basic commands 1 Modbus TCP Basic commands 2 Service Advanced commands 1 Safety standards Advanced commands 2 12 Adjustable safety 183 Adjustable safety 12 Features Configurable safety settings Purpose Advanced and patented safety system Redundant safety Password protected Safety can be adjusted to the individual application For ensuring no harm is made to personnel and peripheral equipment Risk assessment Always perform risk assessment when installing a robot in an application The configurable safety settings eases the risk assessment 184 Adjustable safety 12 Safety password Safety configuration is password protected Lock Unlock Protect safety configuration Enable modification of safety configuration Set safety password Go to Setup robot Select Set Password Enter Password Press Apply 185 Adjustable safety 12 Basic settings Safety setting Safety configuration Very restricted Restricted Default Least restricted Synchronized Altered Invalid configuration Save configuration Press ”Apply” Confirm settings 186 Adjustable safety 12 Basic settings Default settings Mode Very restricted Restricted Default Least restricted Force (N) 100 120 150 250 Power (W) 80 200 300 1000 Speed (mm/s) 250 750 1500 5000 5 10 25 100 Momentum (kg·m/s) Limits are theoretical maximum values, if exceed robot will security stop 187 Adjustable safety 12 Advanced settings Customize settings Force Power Speed Momentum Modes Normal Mode Reduced Mode requires setup of safety input 188 Adjustable safety 12 Safety modes Normal mode Reduced mode Safety mode active by default Active when robot TCP is positioned beyond Trigger Reduced Mode Plane Active when using configurable input to trigger Reduced Mode In case of violation: Recovery mode Active when robot arm is in violation of one of the other modes This mode allows robot arm to be manually adjusted until all violations has been solved Not possible to run program when this mode is active Joint position limits are disabled in Recovery Mode 189 Adjustable safety 12 Safety checksum Checksum Visual indication of safety configuration Indicated as colors and numbers Checksum will change when safety configuration is altered 190 Adjustable safety 12 Joint limits Maximum speed Set max. speed for each joint Modes Normal Mode Reduced Mode requires setup of safety input 191 Adjustable safety 12 Joint limits Position range Set min. and max. range for each joint Modes Normal Mode Reduced Mode requires setup of safety input 192 Adjustable safety 12 Boundaries Safety plane Restrict allowed workspace 8 planes can be defined Active in both Teach and Run mode Plane can trigger Reduced Mode when TCP is entering plane IMPORTANT: Safety boundary defines a limit only for robot TCP, not overall limit for robot arm 193 Adjustable safety 12 Boundaries Setup plane Set Feature plane Set Safety Mode Defines when safety plane is active Displacement Defines which plane to use Offsets the plane Apply Activates the configuration changes 194 12 Adjustable safety Safety Modes Safety Modes behaviour Safety Mode Behaviour Disabled inactive Normal acts as ”hard limit” when in normal mode Reduced acts as ”hard limit” only if robot is in reduced mode Both acts as ”hard limit” at all times Trigger Reduced Mode robot switches to reduced mode when TCP is entering plane 195 Adjustable safety 12 Behaviour of safety boundary Test Set Feature plane = Base Set Safety Mode = Normal Apply settings Test safety in teach mode Move robot from Normal area towards Safety area Normal area ”hard limit” Safety area Behaviour in Run mode Program execution will be aborted, safety violation will popup 196 Adjustable safety 12 Trigger reduced mode Test Change Safety Mode to: Trigger reduced mode Set max. speed for reduced mode to: 50 mm/s Apply settings Save as safety.installation Enter reduced mode p1 Robot Program MoveL Waypoint_1 Waypoint_2 Waypoint_3 Waypoint_4 p4 p2 p3 Exit reduced mode Save sample program as trigger_reduced_mode.urp Normal speed Reduced speed 197 Adjustable safety 12 User defined safety plane Features In PolyScope a Plane is defined as a Feature Multiple Features can be set Set Feature as Point Line Plane Add Feature Plane 198 Adjustable safety 12 User defined safety plane Options Rename Feature Delete Feature Parameters Show axes Joggable Variable 199 Adjustable safety 12 User defined safety plane Setup Plane Plane consists of three fixed waypoints Teach vertical plane Point_1 = origin Point_2 = Y-direction Point_3 = X-direction 200 Adjustable safety 12 User defined safety plane Graphical illustration of taught Plane Save Installation 201 Adjustable safety 12 User defined safety plane Setup new safety plane Set Feature plane to: Plane_1 Set Safety Mode to: Trigger Reduced Mode Apply settings Save as safety.installation 202 Adjustable safety 12 Behaviour of user defined safety plane Test Teach mode Move robot from Normal area towards Safety area Run mode Enter reduced mode Run sample program and verify TCP speed changes p2 p1 Robot Program MoveL Waypoint_1 Waypoint_2 Normal speed Reduced speed Save sample program as trigger_reduced_mode_feature.urp 203 Adjustable safety 12 Tool boundary Restrict angular deviation of TCP Set max. TCP deviation in respect to selected Feature Test Set Feature plane: Base Set Deviation: 25° Set Safety Mode to: Normal & Reduced Mode Apply Test in Teach mode 204 Adjustable safety 12 Safety I/O Safety functions Safety functions can be assigned to the Configurable I/O’s All functions are redundant Two signals for each function Category 3, PLd Configurable I/O’s Digital inputs Digital outputs 205 Adjustable safety 12 Safety inputs Safety inputs Emergency stop Reduced Mode For connecting external EMG-button or safety PLC Low signal: robot operates in normal mode High signal: robot operates in reduced mode Safeguard Reset If Safeguard is hardwired to Safety Control Board, the safeguard can be reset with this signal 206 Adjustable safety 12 Safety outputs Safety outputs System Emergency Stop Robot Moving HI: robot requested to stop signal is high until robot stops LO: no stop request Reduced Mode HI: robot not moving LO: robot moving Robot Not Stopping HI: normal mode LO: emergency stopped HI: normal mode LO: reduced mode Not Reduced Mode Inverse state of reduced mode 207 Adjustable safety 12 Lab exercise part 1 Create a program using safety zones and safety inputs Setup Safety Features: Select Restricted mode under the General Limits tab. Create a horizontal safety plane at the base (copy base feature) with a displacement of -50mm and use the Both restriction profile, so the robot will not crash into the table it is mounted on. Create a vertical safety plane at x=400mm and select the Trigger Reduced Mode profile, as if this part of the workspace is shared with a human. Apply the changes and move the robot around by hand in teach mode to feel the effect of the safety features 208 Adjustable safety 12 Lab exercise part 2 Setup a button to trigger reduced mode Connect the button we used previously to both CI0 and CI1 Select Reduced Mode for config_in[0] and [1] under the Safety I/O tab Write a simple program with 2+ waypoints and run it. Press the button to enter reduced mode and watch the robot slow down. 209 Basic Training Examination You have 30 minutes to answer the questions. Questions can have multiple answers, so please review all the choices carefully before answering. Indicate the right answer by ticking or circling the correct choices and filling in the blanks clearly where required. Feel free to use any material available to you and avoid discussing with other examinees. Good luck! 210 Basic Training Examination results 1. a. b. c. d. e. What settings on the “Installation” screen need to be verified before running any program on the robot? MODBUS client setup TCP, payload and Mounting settings Safety Settings for CB3 All of the above None of the above 2. a. b. c. d. e. What is the Set command used for? Set Digital or Analog Outputs Set MODBUS register output values Set and reset Payload during pick-up and drop-off All of the above None of the above 3. a. b. c. d. e. Which options below enable instantaneous response to a Digital Input State change? Use the "Event" function Enable "Check-expression continuously" check-box under If-Else Enable "Check-expression continuously" check-box under Loop All of the above None of the above 4. a. b. c. d. e. How would you call another program from within your current program? Use the “Folders” option to invoke the program Use the “Sub-Program” option to call the program Use the “Script code” button All of the above None of the above 211 Basic Training Examination results 5. a. b. c. d. e. What is an installation variable? Global variable available across all programs Variable that retains value even on Power Down Installation variable?? There's no such thing (a) and (b) (c) or (d) 6. a. b. c. d. e. What is the possible cause for a "Force limit protective stop" alarm? The robot ran into an obstruction The robot has incorrect TCP, payload and mounting settings Too high acceleration settings All of the above None of the above 7. a. b. c. d. e. Why do we need to "Set" and "Reset" TCP payload on a UR robot? The motor tuning parameters are dynamically calculated based on payload Incorrect payload affects stability of robot Don’t need to, Maxing out payload works fine (a) and (b) (c) and (d) 8. a. b. c. d. e. How would you create a variable that accepts and stores input from an operator? Use the "Assignment" button and change settings to "Operator" Use the initialize variables option Use the installation variables option All of the above None of the above 212 Basic Training Examination results 9. a. b. c. d. e. What is the possible cause for a "Torque limit violation" alarm? The robot has incorrect TCP, payload and mounting settings The robot ran into an obstruction Too high acceleration settings (a) or (c) This error does not exist 10. a. b. c. d. e. How do I create a variable that holds floating point values? Use assignments tab to create variable Rename variable name to “floating point” Create and Initialize variable with floating point value All variables are floating points by default None of the above 11. What is a pose variable and how is it represented? Solution :- It is a position saved as a variable containing six values, which can be adjusted programmatically. Represented like: p[x, y, z, rx, ry, rz] 12. a. b. c. d. e. What is the difference between a MOVL and a MOVP ? There is no difference You can set a blend radius in a MOVP but not on MOVL MOVP maintains joint speed throughout the tool path, MOVL does not MOVP maintains TCP speed throughout the tool path, MOVL does not None of the above 213 Basic Training Examination results 13. a. b. c. d. e. How do you trace a curved path ? Break the curve into smaller curves and use Circle Move under the MOVP command Use the “movec” function after a “movep” function in the UR script language Not possible on this robot (a) or (b) (b) or (c) 14. a. b. c. d. e. What safety standards do UR comply with? ISO 10218 Sections 1 and 2 ANSI/RIA R15.06-2012 CAN/CSA Z434-2003(R2013) All of the above None of the above 15. a. b. c. d. e. What makes the UR robot collaborative? It can’t smile so it's not collaborative It can be speed limited It is power and force limited Need Risk assessment to verify collaborative operation (b) (c) and (d) 16. a. b. c. d. e. How do you monitor a variable in parallel to the main program? Use an "Event" command Use a "Before Start Sequence" Use an "Assignment" command within a "Thread" function All of the above None of the above 214 Basic Training Examination results 17. a. b. A risk assessment is only required when a human will be working within the workspace of the robot. True False 18. a. b. c. d. e. The following features have been added in the CB3: Configurable safety settings New hubcaps True absolute encoders Mounting/Payload settings check monitor (a) (c) and (d) 19. a. b. c. d. e. In the CB3, safety boundaries can NOT be configured to which of the following? Using user-defined feature planes Using complex shapes such as ellipses and curved surfaces To offset a given plane To trigger reduced mode None of the above 20. a. b. c. d. e. You should zero calibrate your robot when: A joint is replaced An update to the joint firmware is made A new robot is shipped from the factory and installed When the robot reports “Force Limit Protective Stop” None of the above 215 Basic Training List of sample programs Sample programs movej.urp movel.urp movel_with_blend.urp movep.urp movec.urp movel_with_relative_waypoint.urp wait.urp set.urp popup.urp pick_and_place.urp loop.urp loop_interrupt.urp call_sub.urp if.urp if_else.urp var_bool.urp var_counter.urp var_operator_input.urp inst_var_operator_input.urp thread.urp event.urp force_feedback.urp script_line.urp force_simple.urp pallet.urp seek_destack.urp modbus.urp trigger_reduced_mode.urp trigger_reduced_mode_feature.urp default.installation safety.installation 216