Download Whirlpool GLA7900XM User's Manual
Transcript
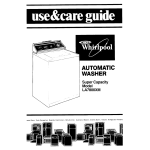
AUTOMATIC
WASHER
Regular
poye7ity
GLA7900XM
\
”
\
Iwave Owns. Trash Compactors. Room Air Condlllaners. Oehumldlfwrs. Aulomat~c Washers. Clothes Orvers, Freezers. Aelrleerator-F-0,
Parts and features
LAUNDRY
---‘dATION
INFORl
MAGIC
CYCLE
TEMPERATURE
CLEAN
SOFTENER DISPENSER
/
MODEL AND SERIAL
NUMBER PLATE
(not shown)
/AGITATOR
/
BASKET
-
TUB
Remove
the Consumer
Buy Guide label. It will be
easier to remove
before
the washer is used.
You should wipe out the
basket with o damp cloth
before
using to remove
dust
from
storing
or
shipping.
See the”Loundry
Guide”
for tips on detergents,
other laundry aids and instructions for washing special items.
\
Copy
your
Model
and ,Serial
Numbers
When you need service or call with a
question, have this InformatIon
ready
I. Complete
Model
and Serial Num
bers (from plate underthe
lid nearthe
hinge].
2. Purchase date from sales slip
Copy this information
in these spaces.
Keep this book in the Laundry Information Center with your”Laundry
Guide,”
sales slip and warranty
There IS no warranty
registration
to return
that is required
for In-warranty
service.
Model
Serlol
here
Number
Number
Purchase Date
Serwce
Phone
Company
Number
Proof-of-purchase
IS
all
Your responsibilities
Read this “Use and Care Guide”
and your “Laundry Guide” carefully for important
use and safety
information.
You are personally
responsible
for making sure that your
washer...
l IS installed
by a qualifiedinstaller.
l is properly
installed
and
leveled
on a floor that can
support the weight.*
l is connected
to the right kind
of outlet, electric
supply, water
supply and drain.* is properly
grounded..
l is used
only for jobs normally
expected
of home automatic
washers.
l is properly
maintained.
l is protected
from the weather
and kept where the temperature will not fall below freezing.
. is not run by children
or anyone
unable to operate
it properly.
*See the “Installation
Instructions”
for complete
information.
Contents
Page
PARTS AND FEATURES
YOUR RESPONSIBILITIES
SAFETY FIRST
STARTING YOUR WASHER
WHAT HAPPENS IN
EACH CYCLE
OTHER OPERATING
INSTRUCTIONS
For a Rinse and Spin
For a Drain and Spin
For a Soak or Pre-Wash
Liquid Bleach Dispenser
Liquid Fabric Softener
Dispenser
Magic Clean’
Filter
CARING FOR YOUR WASI%
IF YOU NEED SERVICE OR
ASSISTANCE
1. Before Calling for
Assistance
2. When You Return to the
United States
3. If You Need Assistance
4. If You Need Service
2
3
3
4
6
8
8
8
8
9
9
9
10
11
11
11
11
11
Starting
your washer
Before starting your washer, be sure you have measured
and added
detergent,
and have put in a properly
sorted load as recommended
in
your”Laundry
Guide:’
Select
LOAD
l
l
a
SIZE
2.
Turn the knob to point at a setting
that describes
the size of load you
want to wash.
Set the knob on or between
EX
SMALL [a few items) and LARGE [a
full load).
See your “Laundry
on load sizes.
LOAD
SIZES
Guide”
Match the wash water temperature
to the type of fabrics and soils being
washed.
All rinses are cold.
l
l
Recommended
wash temperatures
can be found in your “Laundry Guide”
and printed under the washer lid.
for details
AND
Select WATER
TEMPERATURES
WATER
Use less than a full tub of water
when you have less than a full load
to wash.
LEVELS
For best cleaning
results, the
load must be able to move freely
in the water. Too big a load or too
little water can tear items.
LARGE
(16.9 gals.164.0
(14.5 galsi54.9
(11.6 gals.143.9
EX SMALL (9.1 gals./34.5
‘Approximate
fill with load
L)’
L)’
L)’
L)’
3.
Start
the washer
A.
Push in the Control Knob and
turn it to the right. It must be
pushed In and turned only
clockwlse.
B.
C.
Start the washer by pulling out
the Control Knob. The washer
will fill to the level you set with
wash water of the selected
temperature.
After filling, the
washer will agitate for the
selected
number of minutes.
D. To stop the washer at any time
push in the Control Knob. To
restart the washer, pull out the
Control Knob.
To set the cotitrols for a rinse and
spin, a drain and spin, or a soak
or pre-wash, see page 8
Stop on a number in the cycle
you want. The numbers are
minutes of wash time. The
drawing
shows 8 minutes of
agitation
In the REGULAR HEAVY
Cycle.
What happens in each cycle
Each cycle was designed
for different kinds of fabrics. Numbers on the
dial in each cycle are the minutes of WASH agitation
time.
When the Cycle Control Knob is set to a number and pulled out,the washer
fills before agitation
and timing starts. After agitation
starts, the knob turns
REGULAR
HEAVY
Cycle
High agitation
and
spin speeds help remove
heavy soils and spin
water from heavy or
sturdy cotton fabrics.
PERMANENT
PRESS
AND
KNIT
Cycle
Cooling of the wash water
before the spin helps
keep wrinkles from setting
into permanent
press
fabrics.
SHORT
Cycle
1 Use for delicate
Items that
need a short wash and
spin time. Wash nylon hose
or panty hose in a net
laundry bag.
I
I
SOAK
J
.4ND PRE-WASH
Cycles
Periods of agitation
and
soaking time clean
stained, yellowed,
gray
or heavily soiled laundry.
Use recommended
amount of detergent.
1
Selected
Level
n
‘I
Time
I
clockwise
until it points to OFF and the cycle ends.
NOTE:You may hear the sound of water spraying
some cycles. In some cycles, cold water is sprayed
help with the rinsing.
HIGH
SPEED
SPtN
4 Spray
Rinses
DRAIN
No
Agitatior
during the spin parts of
on the spinning
load to
HIGH
SPEED
SPtN
4 Spray
Rinses
--
r
PARTIAL
DRAIN
DRAIN
No
Agitation
[Pause
a bout 1%
Minutes)
HIGH
SPEED
SPtN
WASH
High
Speed,
2
Minutes
REFILL
COOL
DOWN
DRAIN
No
Agitation
I
+Pre-wash
setting
begins
here (see page
Special care is needed when soaking or pre-washing
See your “Laundry
Guide” for proper use of this cycle.
8)
laundry.
I
7
Other operating
For a rinse
instructions
and spin
You may need an extra rinse and
spin for heavily soiled loads which
need more detergent.
(Extra detergent can require an extra rinse.)
l
Push Control Knob in.
l
Turn clockwise
to any l on the dial.
See above drawing.
l
Pull Control Knob out.
l
The washer will fill to selected
level
with cold water, agitate 2 minutes,
drain and spin.
For agitation
and spin speeds
For a drain
and spin
Your washer can be set to drain
and spin out water
l
Push Control Knob In
l
Turn clockwise
to the bar just before
OFF in any cycle. See above
drawing.
l
Pull Control Knob out
l
The washer will drain and spin.
in each
cycle,
see pages
6 and 7
For a soak or pre-wash
For best results, use warm water
for soaking or pre-washing
stained
laundry.
l
Use enough detergent
or pre-soak
product for a single load.
l
Push Control Knob in.
l
Turn clockwise
to point at a number
in the SOAK Cycle.
l
Pull Control Knob out.
l
When the cycle is over, add detergent for the next selected
wash
cycle. Important:
See additional
care information
on page 7 of your
“Laundry
Guide!’
l
Set the washer and start the next
selected
wash cycle.
To start the soak or pre-wash with agitation,
the Cycle Control
Knob must point to a number in the SOAK Cycle.
Liquid
bleach
dispenser
Always measure bleach. Do not
guess. Follow directions
on the bottle
for the amount to use. Never use
more than 1 cup (250 ml) for a full
:oad. Use less with lower water level
settings Use a cup wrth o pouring
spout to ovoid spilling.
1. Load the washer first.
2. Pour measured
bleach carefully
into dispenser. DO NOT let bleach
splash, drip or run down into the
washer basket. Undiluted bleach
will damage
any fabric if touches.
3. Start the washer. Bleach will be
diluted automatically
during the
wash port of the cycle
For more information
Liquid
fabric
on bleaching,
softener
see”Laundry
l
l
l
l
l
Lift the dispenser off the agitator.
Add detergent
and load to the basket.
Replace the dispenser on the agitator.
Add liquid fabric softener to the
dispenser using the amount recommended on the bottle.
MAGIC
CLEAN@
lint
page
11
dispenser
l
l
Guide”
Avoid dripping
or spilling any
fabric softener on the load.
IMPORTANT. Always odd water (‘2 to
1 cup] to dilute fabric softener to the
full mark on the dispenser.
Diluted softener will be added to the
load when the washer stops spinning
after the wash port of the cycle.
NOTE: Do not stop the washer during
this spin. If you do, the fa brie softener
will be added to the remaining,
soapy wash water.This con cause
stains.
l
Clean the dispenser after each use
with only warm wafer. Detergent con
make softeners sticky and lumpy.
filter
The lint filter in your washer cleans
itself. Collected
lint is drained away
with the wash and rinse water.
If your washer drains into a tub,
remove any lint collected
in the drain
or srrarner.
9
Caring for your washer
WHEN NOT WASHING, keep both
water faucets turned off. This takes
the pressure off the water inlet valve
and hoses.
AFTER WASHING, use a soft dry cloth
to wipe the outside and inside dry.
Leave the lid up until the basket is dry.
Wipe up spills right away. Spills can
dull or damage
the finish.
REMOVE SHARP OBJECTS such as pins,
buckles,
etc., from clothes
before
washing. Close metal zippers.
SHARP OR HEAVY OBJECTS should
never be put on or in the washer.
Check pockets for bolts, nuts,
tools, etc.
SOME PRETREATMENT PRODUCTS
can damage
washer and dryer dials,
consoles and finishes. Do not use
these products on or near your
washer or dryer.
If you need service or
assistance, we suggest
you follow these
four steps:
I. Before calling for
assistance. . .
Performance
problems
often resuit from little things you con find
and fix yourself without tools of any
kind.
IF YOUR WASHER DOES NOT FILL:
l Is the power
supply cord
plugged
In?
l Are both
water faucets open?
9 Are fuses blown or circuit-breaker
tripped?
l Are the water
supply hoses
kinked?
l Is the Cycle
Control Knob set and
pulled out?
2. When you return
to the L’nited States . . .
Migratory
Policy
We realize
that
you
re purchoslng
0
WhIrlpool
oppllance
for what
may
be a
temporary
stay
in 0 pari~culor
orea
If
you
are transferred
to the Umted
Slates
and
llnd that
your
Whirlpool
oppllance
requires
service
wtthln
the warranty
perlod
simply
contact
a WhIrlpool
outhorlred
dealerorservtceagent
All he II rep
quire
IS proof
of the purchase
date
of the
appllonce
Service
will
be supplled
Ot
no charge
NOTE:
The parts to convert this machine
to 120 volt, 60 Hz operation
are included
in the console
of the machine. These parts must be installed
by an authorized
Whirlpool
service
agent.
3. If you need assistance*.
..
IF YOUR WASHER DOES NOT SPIN:
. Is the IId closed7
l Is the power
supply cord
plugged
in?
l Is a fuse blown
or circuit-breaker
tripped?
Call Whirlpool
COOL-LINE”
service assistance
telephone
number.
Dial free from:
Continental
U.S. . (800) 253-1301
Michigan
. . . . . . . (800) 632-2243
Alaska & Hawaii
(800) 253-1121
IF YOUR WASHER STOPS DURING THE
PERMANENT PRESS/KNIT CYCLE:
l Remember,
the washer will stop
for about 112 minutes after the
partial drain during the cooldown period in this cycle.
and talk with one ofourtrained
Consultants. The Consultant
can instruct
You in how to obtain satisfactory
operation
from Your appliance
or, if
service is necessary,
recommend
a
qualified
service company
in your
area.
IF WASHER FILLS AND DRAINS
WITHOUT RUNNING:
l
Make sure that the Cycle Control
Knob is pointing to a number in
the cycle.
MAKE SURE THE DRAIN HOSE IS
HIGHER THAN THE WATER LEVEL IN
THE WASHER. IF IT ISN’T...
l The washer
may seem to be
draining
during wash and rinse
cycles.
l Water
can siphon out. [See “lnstallation
Instructions:‘)
-I. If you need service*.
..
Whirlpool
has
P
a nationwide
netT%+l
01 work of franchised
TECH-CARE” Servipd
ice Companies.
F$%%z%
TECH-CARE service technlcions
are trained to fulfill
the product
warranty
and provide
after-warranty
service, anywhere
in
the United States. To locate
TECHCARE service in your area, call our
COOL-LINE service assistance
telephone number (see Step3) or look in
your telephone
directory
Yellow
Pages
11
~qp&)l
Home
L Appliances
Maklng your world a llttle easier.
Port No. 305027
lmatlc Washers, Clothes Dryers. Freezers. Relrlgerator-Freezers.
Printed
in U.S.A.
Ice Makers. Dishwashers. Bu~ll-In Ovens and Surface Units. Ranges I


