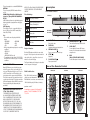
1
DVD-D360K DVD-D530 DVD-D530K DVD Player User Manual imagine the possibilities Thank you for purchasing this Samsung product. To receive more complete service, please register your product at www.samsung.com/global/register AK68-02046A ENGLISH Precautions Table of contens 1. Setting up - Refer to the identification label located on the rear of your player for its proper operating voltage. - Install your player in a cabinet with adequate ventilation holes. (7~10cm). Do not block ventilation holes on any of the components for air circulation. - Do not push the disc tray in by hand. - Do not stack components. - Be sure to turn all components off before moving the player. - Before connecting other components to this player, be sure to turn them off. - Be sure to remove the disc and turn off the player after use, especially if you are not going to use it for a long time. - The mains plug is used as a disconnect device and shall stay readily operable at any time. 2. For your safety - This product utilizes a laser. Use of controls or adjustments or performance of procedures other than those specified herein may result in hazardous radiation exposure. - Do not open covers and do not repair your self. Refer servicing to qualified personal. 3. Caution 2 - Your player is not intended for industrial use but for domestic purposes. Use of this product is for personal use only. - Apparatus shall not be exposed to dripping or splashing and no objects filled with liquids, such as vases, shall be placed on the apparatus. - Exterior influences such as lightning and static electricity can affect normal operation of this player. If this occurs, turn theplayer off and on again with the POWER button, or disconnect and then reconnect the AC power cord to the AC power outlet. The player will operate normally. - When condensation forms inside the player due to sharp changes in temperature, the player may not operate correctly. If this occurs, leave the player at room tempera- ture until the inside of the player becomes dry and operational. 4. Disc - Do not clean disc using record-cleaning sprays, benzene, thinner, or other volatile solvents that may cause damage to the disc surface. - Do not touch the disc’s bottom. Hold by the edges or by one edge and the hole in the center. - Wipe the dirt away gently; never wipe a cloth back and forth over the disc. 5. Environmental info - The battery used in this product contains chemicals that are harmful to the environment. - So, dispose the batteries in the proper- manner, according to federal, state, and local regulations. The product unit accomparied this user manual is licenced under certain intellectual property rights of certain third parties. This licence is limited to private non-commercial use by end-user consumers for licenced contents. No rights are granted for commercial use. The licence does not cover any product unit other than this product unit and the licence does not extend to any unlicenced product unit or pro-cess conforming to ISO/OUR 11172-3 or ISO/OUR 13818-3 used or sold in combination with this product unit. The licence only covers the use of this product unit to encode and/or decode audio files conforming to the ISO/ OUR 11172-3 or ISO/OUR 13818-3. No rights are granted under this licence for product features or functions that do not conform to the ISO/OUR 11172-3 or ISO/OUR 13818-3. CAUTION: USE OF ANY CONTROLS, ADJUSTMENTS, OR PROCEDURES OTHER THAN SPECIFIED HEREIN MAY RESULT IN HAZARDOUS RADIATION EXPOSURE Precautions. . . . . . . . . . . . . . . . . . . . . . . . . . . . . . Setup General Features . . . . . . . . . . . . . . . . . . . . . . . . . Description . . . . . . . . . . . . . . . . . . . . . . . . . . . . . . Tour of the Remote Control. . . . . . . . . . . . . . . . . . Connections Choosing a Connection . . . . . . . . . . . . . . . . . . . . Basic Functions Playing a Disc . . . . . . . . . . . . . . . . . . . . . . . . . . . Using the Search and Skip Functions . . . . . . . . . Using the Display Function . . . . . . . . . . . . . . . . . Using the Disc and Title Menu . . . . . . . . . . . . . . . Repeat Play . . . . . . . . . . . . . . . . . . . . . . . . . . . . . Slow Play . . . . . . . . . . . . . . . . . . . . . . . . . . . . . . . Advanced Functions Adjusting the Aspect Ratio (EZ View). . . . . . . . . . Selecting the Audio Language . . . . . . . . . . . . . . . Selecting the Subtitle Language. . . . . . . . . . . . . . Changing the Camera Angle. . . . . . . . . . . . . . . . . Using the Bookmark Function . . . . . . . . . . . . . . . Using the Zoom Function. . . . . . . . . . . . . . . . . . . Clips Menu for MP3/WMA/JPEG/MPEG4/ CD Audio. . . . . . . . . . . . . . . . . . . . . . . . . . . . . . . . Folder Selection . . . . . . . . . . . . . . . . . . . . . . . . . . 2 2 3 3 4 6 6 6 6 6 7 7 7 7 7 7 8 8 8 MP3/WMA/CD Audio Playback. . . . . . . . . . . . . . 8 MPEG4 Playback. . . . . . . . . . . . . . . . . . . . . . . . . . 8 Playing Media Files using the USB HOST feature . . . . . . . . . . . . . . . . . . . . . . . . . . . . . . . . . 9 CD Ripping . . . . . . . . . . . . . . . . . . . . . . . . . . . . . 10 Picture CD Playback. . . . . . . . . . . . . . . . . . . . . . 10 Picture CD Playback for HD-JPEG (Only DVD-D530K/DVD-D530) . . . . . . . . . . . . . . 10 Karaoke Functions (Only DVD-D530K/D360K) Karaoke Functions . . . . . . . . . . . . . . . . . . . . . . . 11 Changing Setup Menu Using the Setup Menu . . . . . . . . . . . . . . . . . . . . 11 Setting Up the Display Options. . . . . . . . . . . . . 11 Setting Up the Audio Options. . . . . . . . . . . . . . . 12 Setting Up the System Options . . . . . . . . . . . . . 12 Setting Up the Language Features. . . . . . . . . . . 12 Setting Up the Security Options. . . . . . . . . . . . . 13 Setting Up the General Options. . . . . . . . . . . . . 13 Setting Up the Support Options. . . . . . . . . . . . . 13 Reference Troubleshooting. . . . . . . . . . . . . . . . . . . . . . . . . . 13 Specifications. . . . . . . . . . . . . . . . . . . . . . . . . . . 14 Setup General Features Excellent Sound Dolby Digital, a technology developed by Dolby Laboratories, provides crystal clear sound reproduction. Screen Both regular and widescreen(16:9) pictures can be viewed. Slow Motion An important scene can be viewed in slow motion. 1080p Playback (Only DVD-D530K/ DVD-D530) This player upconverts regular DVDs for playback on 1080p TVs. Parental Control (DVD) The parental control allows users to set the neces-sary level to prohibit children from viewing harmful movies such as those with violence, adult subject matter, etc. Various On-Screen Menu Functions You can select various languages (Audio/ Subtitle) and screen angles while enjoying movies. Progressive Scan Progressive scanning creates an improved picture with double the scan lines of a conventional inter-laced picture EZ VIEW (DVD) Easy View enables picture adjustment to match your TV’s screen size (16:9 or 4:3). Digital Photo Viewer (JPEG) You can view Digital Photos on your TV. Repeat You can repeat a song or movie simply by press-ing the REPEAT button MP3/WMA This unit can play discs contain MP3/WMA files. MPEG4 This unit can play MPEG4 formats within an avi file. HDMI (High Definition Multimedia Interface) (Only DVD-D530K/DVDD530) HDMI reduces picture noise by allowing a puredigital video/audio signal path from the player to your TV. CD Ripping This feature lets you to copy audio files from disc to USB device into MP3 format. (Only Audio CD (CD DA)). Note - Discs which cannot be played with this player. • DVD-ROM • DVD-RAM • CD-ROM • CDV • CDI • CVD - Ability to play back may depend on recording conditions. • DVD-R, +R • CD-RW • DVD+RW, -RW (V mode) - The unit may not play certain CD-R, CD-RW and DVD-R due to the disc type or recording conditions. MODEL 576p, 720p, 1080p DVD PLAYER, PLEASE CONTACT SAMSUNG’S CUSTOMER SERVICE CENTER.” Disc Markings ~ PAL PAL broadcast system in U.K, France, Germany, etc. Dolby Digital disc STEREO STEREO Stereo disc DIGITAL SOUND Digital Audio disc MP3 disc Region Number Both the DVD player and the discs are coded by region. These regional codes must match in order for the disc to play. If the codes do not match, the disc will not play. The Region Number for this player is described on the rear panel of the player. Many DVD discs are encoded with copy protection. Because of this, you should only connect your DVD player directly to your TV, not to a VCR. Connecting to a VCR results in a distorted picture from copy-protected DVD discs. DivX Certification PROGRESSIVE SCAN OUTPUTS (576p,720p,1080p) “CONSUMERS SHOULD NOTE THAT NOT ALL HIGH DEFINITION TELEVISION SETS ARE FULLY COMPATIBLE WITH THIS PRODUCT AND MAY CAUSE ARTIFACTS TO BE DISPLAYED IN THE PICTURE, IN CASE OF 576, 720, 1080 PROGRESSIVE SCAN PICTURE PROBLEMS, IT IS RECOMMENDED THAT THE USER SWITCH THE CONNECTION TO THE ‘STANDARD DEFINITION’ OUTPUT. IF THERE ARE QUESTIONS REGARDING YOUR TV SET COMPATIBILITY WITH THIS 7 DVD-D530 Play Region Number COPY PROTECTION This item incorporates copy protection technology that is protected by U.S. patents and other intellectual property rights of ROVI Corporation. Reverse engineering and disassembly are prohibited. Description Front Panel Controls DivX, DivX Certified, and associated logos are trademarks of DivXNetworks, Inc and are used under license. “DivX Certified to play DivX video, including premium content.” Covered by one or more of the following U.S patents : 7,295,673; 7,460,668; 7,515,710; 7,519,274. 7 DVD-D530K DVD-D360K 1. DISC TRAY Place the disc here. 2. DISPLAY Operation indicators are displayed here. 3. OPEN/CLOSE ( ) Press to open and close the disc tray. 4. STOP ( ) Stops play. 5. PLAY/PAUSE ( ) Play or pause the disc. 6. 7. 8. POWER ON/OFF ( ) Turn on/off and the player is turned on/off. USB HOST Connect digital still camera, MP3 player, memory stick, Card reader other removable storage devices. MIC (Only DVD-D530K/D360K) Connect Microphone for karaoke functions. Tour of the Remote Control DVD-D360K 1 6 7 8 24 11 10 12 DVD-D530K DVD-D530 15 18 17 5 26 28 27 13 22 21 14 30 20 1 2 3 4 5 15 9 16 17 18 19 28 21 22 23 24 10 11 12 25 26 27 6 7 20 29 15 9 16 17 18 19 20 21 22 23 24 10 11 12 25 26 27 6 7 8 13 13 14 1 2 3 4 5 14 28 29 30 3 1. DVD POWER Button Turns the power on or off. 2. DVD Button (Only DVD-D530K/D530) Use to select the DVD player for operation. 3. TV Button (Only DVD-D530K/D530) Use to select a Samsung TV for operation. 4. EZ VIEW Button (Only DVD-D530K/D530) Lets you easily adjust the aspect ratio of a picture according to the screen size of your TV (16:9 or 4:3). 5. MARKER Button 6. REPEAT Button Allows you to repeat play a title, chapter, track, or disc. 7. DISC MENU Button Brings up the Disc menu. 8. RECORD Button (Only DVD-D530K/D360K) Use to Karaoke recording. 9. TV VOL (+, -) Buttons (Only DVD-D530K/D530) Controls volume. 10. SKIP Buttons ( / ) Use to skip the title, chapter or track. 11. STOP Button ( ) 12. MENU Button Brings up the DVD player’s menu. 13. ENTER/π/†,√/® Buttons This button functions as a toggle switch. 14. TOOLS Button Displays the current disc mode. It also lets you access the Display function. 15. OPEN/CLOSE ( ) Button To open and close the disc tray. 16. HDMI SEL. Button 17. 18. 19. 20. 21. 22. 23. 24. 25. 26. 27. 28. 29. 30. (Only DVD-D530K/D530) HDMI Output resolution setup. USB Button VIDEO SEL. Button Changes video output mode. REPEAT A-B Button (Only DVD-D530K/D530) Allows you to repeat play a chosen section (A-B) on a disc. INFO Button Used to displays playback info banner. TITLE MENU Button Brings up the Title menu. AUDIO/TV SOURCE Button Use this button to access various audio functions on a disc. Use this button to select an available TV source (mode TV). PAUSE Button ( ) (Only DVD-D530K/D530) Pauses disc play. SEARCH Buttons ( / ) Allows you to search forward/backward through a disc. TV CH ( , ) Buttons (Only DVD-D530K/D530) Channel selection. PLAY Button ( )/( ) Begins disc play. RETURN Button Returns to a previous menu. SUBTITLE/(π) Button EXIT Button (Only DVD-D530K/D530) Exits the on-screen menu. KARAOKE (†) Button (Only DVD-D530K/D360K) To access karaoke menu (Keycon, mic volume, Echo). Connections Choosing a Connection The following shows examples of connections commonly used to connect the DVD player with a TV and other components. Before Connecting the DVD Player - Always turn off the DVD player, TV, and other components before you connect or disconnect any cables. - Refer to the user’s manual of the additional components you are connecting for more information on those particular components. 4 A.Connecting to a TV (For Video) 1. Using video/audio cables, connect the VIDEO (yellow)/AUDIO (red and white) OUT terminals on the rear of the DVD player to the VIDEO (yellow)/AUDIO (red and white) IN terminals of TV. 2. Turn on the DVD player and TV. 3. Press the input selector on your TV remote control until the Video signal from the DVD player appears on the TV screen. Note - Noise may be generated if the audio cable is too close to the power cable. - If you want to connect to an Amplifier, please refer to the Amplifier connection page. - The number and position of terminals can vary depending on your TV set. Please refer to the user’s manual of the TV. - If there is one audio input terminal on the TV, connect it to the [AUDIO OUT][left] (white) terminal of the DVD player. - If you press the VIDEO SEL. button when DVD Player is in stop mode or no disc is inserted, the Video Output mode changes in the following sequence: (I-SCAN ➝ P-SCAN) B.Connection to a TV (Interlace/Progressive) 1. Using component video cables, connect the COMPONENT VIDEO OUT terminal on the rear of the DVD player to the COMPONENT IN terminal of TV. 2. Using the audio cables, connect the AUDIO (red and white) OUT terminals on the rear of the DVD player to the AUDIO (red and white) IN terminals of TV. Turn on the DVD player and TV. 3. Press the input selector on your TV remote control until the Component signal from the DVD player appears on the TV screen. 4. Set the Video Output to I-SCAN/P-SCAN in the Display Setup menu. You can use the VIDEO SEL. button to change the Video Output mode. Note - What is “Progressive Scan”? Progressive scan has twice as many scanning lines as the interlace output method has. Progressive scanning method can provide better and clearer picture quality. C.Connecting to a TV with DVI/HDMI Jack (ONLY DVD-D530K/D530) 1. Using the HDMI-DVI/HDMI-HDMI cable , connect the HDMI OUT terminal on the rear of the DVD player to the DVI/HDMI IN terminal of your TV. 2. Using the audio cables, connect the AUDIO (red and white) OUT terminals on the rear of the DVD player to the AUDIO (red and white) IN terminals of your TV. Turn on the DVD player and TV. 3. Press the input selector on your TV remote control until the DVI/HDMI signal from the DVD player appears on your TV screen. HDMI VIDEO Specifications (ONLY DVD-D530K/D530) When you press the HDMI SEL. button, 480p, 576p, 720p, 1080p, 1080i are selected in order. The first press of the HDMI SEL. button brings up the current resolution. The second press allows you to change the HDMI output resolution. - Depending on your TV, certain HDMI output resolutions may not work. - Please refer to the user’s manual of your TV. - If HDMI or HDMI-DVI cable is plugged into TV, the DVD player’s output is set to HDMI/DVI within 10 seconds. - If you set the HDMI output resolution 720p,1080p or 1080i, HDMI output provides better picture quality. - If you connect an HDMI cable between Samsung TV and this DVD player, you can operate this DVD player using your TV remote control. This is only available with Samsung TVs that support Anynet+(HDMI-CEC). - If your TV has an logo, then it will Supports the Anynet+ Function. • HDMI (High Definition Multimedia Interface) HDMI is an interface to enable the digital transmission of video and audio data with just a single connector.Using HDMI, the DVD player transmits a digital video and audio signal and displays a vivid picture on a TVhaving an HDMI input jack. • HDMI connection description HDMI connector - Both uncompressed video data and digital audio data (LPCM or Bit Stream data).- Though the player uses a HDMI cable, the player outputs only a pure digital signal to the TV. - If TV does not support HDCP (High-bandwidth Digital content protection), snow noise appears on the screen. • Why does Samsung use HDMI? Analog TVs require an analog video/audio signal. However, when playing a DVD, the data transmitted to a TV is digital. Therefore either a digital-to-analog converter (in the DVD player) or an analog-to-digital converter (in the TV) is required. During this conver-sion, the picture quality is degraded due to noise and signal loss. DVI technology is superior because it requires no D/A conversion and is a pure digital sig-nal from the player to your TV. • What is the HDCP? HDCP (High-bandwidth Digital Content Protection) is a system for protecting DVD content outputted via DVI from being copied. It provides a secure digital link between a video source (PC, DVD. etc) and a display device (TV, projector . etc). Content is encrypted at the source device to prevent unauthorized. DVD-D530K DVD-D530 2-Channel stereo amplifier or Dolby digital D Audio Cable Coaxial Cable WHITE WHITE BLUE GREEN RED RED RED YELLOW Audio Cable RED A Video Cable B WHITE YELLOW Component Cable C OR HDMI-DVI cable RED BLUE GREEN HDMI cable DVD-D360K D.Connection to an Audio System (2 Channel Amplifier, Dolby Digital, or MPEG2 ) 1. Using the audio cables, connect the AUDIO (red and white) OUT terminals on the rear of the DVD player to the AUDIO (red and white) IN terminals of the Amplifier. If using a coaxial cable, connect the DIGITAL AUDIO OUT (COAXIAL) terminal on the rear of the DVD player to the DIGITAL AUDIO IN (COAXIAL) terminal of the Amplifier. 2. Using the video signal cable(s), connect the VIDEO, COMPONENT or HDMI OUT terminals on the rear of the DVD player to the VIDEO, COMPONENT or DVI IN terminals of your TV 3. Turn on the DVD player, TV, and Amplifier. 4. Press the input select button of the Amplifier to select external input in order to hear sound from the DVD player. Refer to your Amplifier's user manual to set the Amplifier's audio input. WHITE RED D COAXIAL CABLE BLUE 2-Channel stereo ampilfier, Dolby digital RED WHITE GREEN WHITE WHITE RED RED RED YELLOW VIDEO CABLE AUDIO CABLE RED WHITE A B YELLOW COMPONENT CABLE RED BLUE GREEN 5 Basic functions Using the Display Function When Playing a DVD/VCD/MPEG4 Playing a Disc Before Play - Turn on your TV and set it to the correct Video Input by pressing TV/VIDEO button on the TV remote control. - If you connected an external Audio System, turn on your Audio System and set it to the correct Audio Input. After plugging in the player, the first time you press the DVD POWER button, this screen comes up: If you want to select a language, press the π/† button, and then press the ENTER button. (This screen will only appear when you plug in the player for the first time.)If the language for the startup screen is not set, the set-tings may change whenever you turn the power on or off. Therefore, make sure that you select the language you want to use.Once you select a menu language, you can change it by pressing the ®|| button on the front panel of the unit for more than 5 seconds with no disc in the unit. Then the SELECT MENU LANGUAGE window appears again where you can reset your preferred language. Using the Search and Skip Functions 1. 2. 3. 4. During play, press the TOOLS button on the remote control. Press the π/† buttons to select the desired item. Press the √/® buttons to make the desired setup. To make the screen disappear, press the TOOLS button again. The functions when using the Display function are listed in the table below. To access the desired title when there is more than one in the disc. For example, if there is more than one movie on a DVD, each movie will be identified. Most DVD discs are recorded in chapters so that you can quickly find a specific passage. Allows playback of the film from a desired time. You must enter the starting time as a reference.The time search function does not operate on some disc. Refers to the language of the film soundtrack. In the example, the soundtrack is played in English 5.1CH. A DVD disc can have up to eight different soundtracks. Refers to the subtitle languages available in the disc. You will be able to choose the subtitle languages or, if you prefer, turn them off from the screen. A DVD disc can have up to 32 different subtitles. During play, you can search quickly through a chapter or track, and use the skip function to jump to the next selection. Searching through a Chapter or Track During play, press the SEARCH (k or K) button on the remote control for more than 1 second. DVD CD VCD 2X, 4X, 8X, 16X, 32X 2X, 4X, 8X, 16X, 32X 4X, 8X Note - The speed marked in this function may be different from the actual playback speed. - No sound is hearing during search mode (Except CD). Skipping Tracks During play, press the SKIP (|k or K|) button. - When playing a DVD, if you press the SKIP (K|) button, it moves to the next chapter. If you press the SKIP (|k) button, it moves to the beginning of the chapter. One more press makes it move to the beginning of the previous chapter. - When playing a VCD, if you press the SKIP (K|) button, it moves to the next track. If you press the SKIP (|k) button, it moves to the beginning of the track. One more press makes it move to the beginning of the previous track. - If a track exceeds 15 minutes when playing a VCD and you press the K| button, it moves forward 5 minutes. If you press the |k button, it moves to the beginning of the track. One more press makes it move to the beginning of the previous track. 6 EZ User will be able to choose EZ-View type. Press enter to activate the Zoom function. To access the desired Angle function. Some DVD disc are have more than one recorded angle. Using the Disc and Title Menu During the playback of a DVD disc, press the DISC MENU/TITLE MENU button on the remote control. Note - Depending on a disc, the Disc Menu/Title Menu may not work. - You can also use the Disc Menu, using the DISC MENU button on the remote control. - Title Menu will only be displayed if there are at least two titles in the disc. Repeat Play Repeat the current track, chapter, title, a chosen section (A-B), or all of the disc. When playing a DVD/VCD 1. 2. Press the REPEAT button on the remote control. Repeat screen appears. Press the REPEAT or π/† button to change playback mode. DVD repeats play by chapter or title. - Off. - Title : repeats the title that is playing. - Chapter : repeats the chapter that is playing. - Repeat A-B (Only DVD-D360K) Using the A-B Repeat function (Only DVD-D360K) Note This function may behave differently depending on the type of disc. 1.Press the REPEAT button on the remote control. The repeat screen appears. 2.Press the π/† button to select the REPEAT A-B and then press ENTER. 3.Press the ENTER at the point where you want repeat play to start (A). 4.Press the ENTER at the point where you want repeat play to start (B). You can select a desired audio language quickly and easily with the AUDIO button. Using the A-B Repeat function (Only DVD-D530K/D530) Using the AUDIO/ √ button (DVD/VCD/MPEG4) 1.Press the REPEAT A-B button on the remote control. 2.Press the REPEAT A-B button at the point where you want repeat play to start (A). 3.Press the REPEAT A-B button at the point where you want the repeat play to stop (B). 3. To return to normal play, press the REPEAT A-B button until the display shows Repeat : Off. Note - A-B REPEAT allows you to set point (B) directly after point (A) has been set. - Depending on a disc, the Repeat function may not work. 1. During play, Press the AUDIO/ √ button. Change the audio language by pressing the AUDIO or π/† button. - The audio languages are represented by abbreviations. 2. To remove the AUDIO icon, press the EXIT/RETURN button. Note - This function depends on audio languages are encoded on the disc and may not work. - A DVD disc can contain up to 8 audio languages. Selecting the Subtitle Language Slow Play You can select a desired subtitle quickly and easily with the SUBTITLE/(π) button. This feature allows you slowly to repeat scenes con-taining sports, dancing, musical instruments being played etc., so you can study them more closely. When playing a DVD 1. During play, press the PAUSE ( )/PLAY ( ) button. 2. Press the SEARCH (k/K) button to choose the play speed between 1/2, 1/4, 1/8,1/16,1/2 and so on. If you want to go normal play press PLAY button. Advanced functions Adjusting the Aspect Ratio (EZ View) To play back using aspect ratio (DVD) 1. During play, press the EZ VIEW/TOOLS button on the remote control. 2. Press the EZ VIEW or π/† buttons to select the screen size. Each time you press the π/† or √/® buttons, the screen size changes. For graphics of the screen sizes and lists of the sequences in which the sizes change, see the next column. 3. Press the EXIT/RETURN button to exit EZ View. If you are using a 16:9 TV If you are using a 4:3 TV For 16:9 aspect ratio discs - WIDE SCREEN - SCREEN FIT - ZOOM FIT For 16:9 aspect ratio discs - 4:3 Letter Box - 4:3 Pan Scan - SCREEN FIT - ZOOM FIT For 4:3 aspect ratio discs - Normal Wide - SCREEN FIT - ZOOM FIT - Vertical Fit Selecting the Audio Language For 4:3 aspect ratio discs - Normal Screen - SCREEN FIT - ZOOM FIT Using the SUBTITLE/(π) button (DVD/MPEG4) 1. During play, Press the SUBTITLE/(π) button. 2. Press the SUBTITLE/(π) or π/† button to change the language. Each time you press the SUBTITLE/(π) or π/† button, the language changes. 3. To remove the SUBTITLE icon, press the EXIT/RETURN button. Note - The subtitle languages are represented by abbreviations. - You have to change the desired subtitle in the Disc Menu, according to discs. Press the DISC MENU button. - This function depends on what subtitles are encoded on the disc and may not work on all DVDs. - A DVD disc can contain up to 32 subtitle languages. Changing the Camera Angle When a DVD contains multiple angles of a particular scene, you can use the ANGLE function. Using the ANGLE function (DVD) If the disc contains multiple angles, the ANGLE appears on the screen. 1. During play, press the TOOLS button on the remote control. 2. Press the π/† buttons to select icon. When the angle screen is displayed, press the √/® buttons on the remote control to select the desired angle option. Using the Bookmark Function This feature lets you bookmark sections of a DVD or VCD (Menu Off mode) so you can quickly find them at a later time. Using the Bookmark Function (DVD/VCD) 1. During play, press the MARKER button on the remote control. 2. When you reach the scene you want to mark, press the √/® or π/† buttons, and then press MARKER button. Up to 12 scenes may be marked at a time. 7 Repeat/Random playback Note - Depending on a disc, the Bookmark function may not work. Press the REPEAT button to change the playback mode. There are four modes, such as Off, Track, Folder 1and Random. - Off ( ): Normal Playback 1 - Track ( 1 ): Repeats the current song file. - Folder ( ): Repeats the song files which have the same extension in the current folder. 1 - Random ( ): Song files which have the same extension will be played in random order. To resume normal play, press the REPEAT button until the Repeat : Off. Recalling a Marked Scene 1. During play, press the MARKER button on the remote control. 2. Press the √/® orπ/† buttons to select a marked scene. 3. Press the PLAY () button to skip to the marked scene. Clearing a Bookmark CD-R MP3/WMA file 1. During play, press the MARKER button on the remote control. 2. Press the √/® orπ/† buttons to select the bookmark number you want to delete. 3. Press the ENTER button to delete a bookmark number. Using the Zoom Function Using the Zoom Function (DVD/VCD) 1. During play or pause mode, press the TOOLS buttons on the remote control. 2. Press the π/† buttons to select icon, then press the ENTER button to zoom in X1,X2,X3,X4. Clips Menu for MP3/WMA/JPEG/MPEG4/CD Audio CD Audio or discs with MP3/WMA/JPEG/MPEG4 contain individual songs and/or pictures that can be organized into folders as shown below. They are similar to how you use your computer to put files into different folders. To go access these folders and the files in them, follow these steps : Videos \ 1. 2. 3. 1/2 Pages Open the disc tray. Place the disc on the tray. Close the tray. The tray closes and the Parent Folder Menu screen appears (top screen image.) Parent folders contain all the Peer folders that have the same kind of content: music, video, photos, etc. Press the √/® buttons to select the Parent folder of your choice, and then press the ENTER. A screen displaying the Peer folders appears. The Peer folders contain all the folders with the same kind of content (video, music, photos, etc.) that are in the Parent folder. CD Pages Move Return Folder Selection The folder can be selected both in Stop or Play mode. - To select the Parent Folder Press the RETURN button to go to parent folder, or press the π/† buttons to select “..” and press ENTER to go to the parent folder. - To select the Peer Folder Press the π/† buttons to select the desired folder, then press ENTER. - To select the Sub-Folder Press the π/† buttons to select the desired folder, then press ENTER. MP3/WMA/CD Audio Playback 1. Open the disc tray. Place the disc on the tray. Close the tray. 2. Press the √/® buttons to select a Music folder, and then press ENTER. Press the π/† buttons to select a song file, and then press the ENTER to begin playback of the song. 8 When you record MP3 or WMA files on CD-R, please refer to the following. - Your MP3 or WMA files should be ISO 9660 or JOLIET format. ISO 9660 format and Joliet MP3 or WMA files are compatible with Microsoft’s DOS and Windows, and with Apple’s Mac. This format is the most widely used. - When naming your MP3 or WMA files, do not exceed 8 characters, and enter “.mp3, .wma” as the file extension. General name format : Title.mp3. or Title.wma. When composing your title, make sure that you use 8 characters or less, have no spaces in the name, and avoid the use of special characters including: (.,/,\,=,+). - Use a decompression transfer rate of at least 128 Kbps when recording MP3 files. Sound quality with MP3 files basically depends on the rate of compression/decompression you choose. Getting CD audio sound requires an analog/digital sampling rate, that is conversion to MP3 format, of at least 128 Kbps and up to 160 Kbps. However, choosing higher rates, like 192 Kbps or more, only rarely give better sound quality. Conversely, files with decompression rates below 128 Kbps will not be played properly. - Use a decompression transfer rate of at least 64Kbps when recording WMA files. Sound quality with WMA files basically depends on the rate of compression/decompression you choose. Getting CD audio sound requires an analog/digital sampling rate, that is conversion to WMA format, of at least 64Kbps and up to 192Kbps. Conversely, files with decompression rates below 64Kbps or over 192Kbps will not be played properly. Sampling rate that can be supported for WMA files is > 30Khz. - Do not try recording copyright protected MP3 files. Certain “secured” files are encrypted and code protected to prevent illegal copying. These files are of the following types: Windows MediaTM (registered trade mark of Microsoft Inc) and SDMITM (registered trade mark of The SDMI Foundation). You cannot copy such files. - Important: The above recommendations cannot be taken as a guarantee that the DVD player will play MP3 recordings, or as an assurance of sound quality. You should note that certain technologies and methods for MP3 file recording on CD-Rs prevent optimal playback of these files on your DVD player (degraded sound quality and in some cases, inability of the player to read the files). - This unit can play a maximum of 500 files and 500 folders per disc. MPEG4 Playback MPEG4 Play Function AVI files are used to contain the audio and video data. Only AVI format files with the “.avi” extensions can be played. 1. Open the disc tray. Place the disc on the tray. Close the tray. 2. Press the √/® buttons to select a Videos Menu , then press the ENTER. Press the π/† to select an avi file (DivX/XviD) then press the ENTER. Press the π/† and then press the ENTER button. Repeat and Repeat A-B playback This unit supports all resolutions up to maximum below. 1. Press the REPEAT button , then press REPEAT or π/† buttons to change playback mode. There are 3 modes, such as Off, Folder and Title. - Off : No Repeat mode. - Title : repeats the title that is playing. - Folder : repeats the AVI files which have the same extension in the current folder. Repeat A-B playback (Only DVD-D360K) 1.Press the REPEAT button on the remote control. The repeat screen appears. 2.Press the π/† button to select the REPEAT A-B and then press ENTER. 3.Press the ENTER at the point where you want repeat play to start (A). 4.Press the ENTER at the point where you want repeat play to start (B). Repeat A-B playback (Only DVD-D530K/D530) 1.Press the REPEAT A-B button on the remote control. 2.Press the REPEAT A-B button at the point where you want repeat play to start (A). 3.Press the REPEAT A-B button at the point where you want the repeat play to stop (B) - To return to normal play, press the REPEAT A-B button until the display shows Repeat : Off. Note - A-B REPEAT allow you to set point (B) directly after point (A) has been set. Description Skip (|k or K|) During play, press the |k or K| button, it moves to next or previous track. Search (k or K) During play, press the SEARCH (k or K) button and press again to search at a faster speed. Allows you to search at a faster speed in an AVI file. (2X, 4X, 8X, 16X, 32X) Slow Motion Play ZOOM 720 x 480 @30fps 720 x 576 @25fps: Maximum bitrate : 4Mbps Note • The resolution that can be supported by DVD-D530/D530K model up to 720 x 480 @30 frames/ 720 x 576 @25 frames. • This unit supports CD-R/RW written in MPEG4 in accordance with the “ISO9660 format”. Playing Media Files Using the USB Host feature You can enjoy the media files such as pictures, movies andtunes saved in an MP3 player, USB memory or digital camera in high audio by connecting the storage device to the USB port of the DVD Player. Using the USB HOST feature 1. Connect the USB device to the USB port on the front of the unit. 2. The USB Menu screen appears. Press the √/® button to select Menu, then press ENTER. 3. Press the π/† buttons to select a file in the USB device. Press ENTER to Open the file. Note • Each time the USB button on the remote control is pressed, a frame of the USB device selection will appear. • “USB Loading” appears on the display screen. • Depends on the file size and clip duration, loading time on USB may take longer than using CD or DVD media. MPEG4 Function Description Function DivX5 • USB MENU screen appears on the TV screen and the saved file is played. • If there is a Disc in the unit, pressing the DVD button (DVD-D530K/DVD-D530) or USB button (DVDD360K) will make the player exit the USB menu and load the disc Safe USB Removal 1. Press the DVD button (DVD-D530K/DVD-D530) or USB button (DVD-D360K) to return to disc mode or the main screen. 2. Press the STOP (■) button 3. Remove the USB cable. Allows you to search at a slower speed in an AVI file. (1/2, 1/4, 1/8, 1/16) Skip Forward/Back X1/X2/X3/X4/Normal in order During playback, press the (|k/K|) button. • When there is more than one file, when you press the K| button, the next file is selected. • When there is more than one file, when you press the |k button, the previous file is selected. - These functions may not work depending on MPEG4 file. CD-R AVI fileThis unit can play the following video compression formats within the AVI file format: - DivX 3.11 contents - DivX 4 contents (Based on MPEG-4 Simple Profile) - DivX 5 contents (MPEG-4 simple profile plus additional features such as bi-directional frames. Qpel and GMC are also supported.) - XviD MPEG-4 compliant Contents. DVD-RW & DVD+R Format that support for DivX file : - Basic DivX format DivX3.11 / 4.12/ 5.x - Xvid (MPEG-4 compliant video codec) and DivX Pro - File format : *.avi, *.div, *.divx. Possible warning messages that may appear when trying to play DivX/AVI files are : 1. No Authorization - File with bad registration code. 2. Unsupported Codec - Files with certain Codec Types, Versions (ex. MP4, AFS and other proprietary codecs) are not suppoerted by this player. 3. Unsupported Resolution - Files containing resolutions higher than the player’s specification are not supported. Fast playback To play back the disc at a faster speed, press (k/K) during playback • Each time you press either button, the playback speed will change as follows : 2X ➞ 4X ➞ 8X ➞ 16X ➞ 32X. Compatible Devices 1. USB devices that support USB Mass Storage v1.0.(USB devices that operate as a removable disk in Windows (2000 or later) without additional driver installation.) 2. MP3 Player: Flash type MP3 player. 3. Digital camera: Cameras that support USB Mass Storage v1.0. • Cameras that operate as a removable disk in Windows (2000 or later) without additional driver installation. 4. USB Flash Drive: Devices that support USB2.0 or USB1.1. • You may experience a difference in playback quality when you connect a USB1.1 device. 5. USB card Reader: One slot USB card reader and Multi slot USB card reader 9 • Depending on the manufacturer. the USB card reader may not be supported. • If you install multiple memory devices into a multi card reader, you may experience problems. 6. If you use a USB extension cable, the USB device might not be recognized. • CBI (Control/Bulk/Interrupt) is not supported. • Digital Cameras that use PTP protocol or require additional program installation when connected to a PC are not supported. • A device using NTFS file system is not supported. (Only FAT 16/32 (File Allocation Table 16/32) file system is supported.) • Some MP3 players, when connected to this product,may not operate depending on the sector size of their file system. • The USB HOST function is not supported if a product that transfers media files by its manufacturerspecific program is connected. • Does not operate with Janus enabled MTP(Media Transfer Protocol) devices. • The USB host function of this product does not support all USB devices. • The USB Host does not support USB Hard Disc Drives (HDD). CD Ripping This feature allows you to copy audio files from a disc to a USB device in MP3 format. Open the dics tray. Place the Audio CD(CD DA) disc on the tray, and close the tray. Connect the USB device to the USB port on the front of the unit. Press the DVD button (DVD-D530K/DVD-D530) or USB button (DVD-D360K). 1. Press the TOOLS button to display the Ripping screen. 2. Press the π/† buttons, then press the ENTER button to select files for ripping. - To deselect files, press ENTER button again. 3. Press the √ and † button to select START, then press the ENTER button begin ripping. The Ripping menu contain the following buttons : - Mode (Fast/Normal) - Bitrate, press ENTER to change : 128kbps ➞ 192kbps ➞ 128kbps. • Standard : 128kbps • Better Quality : 192kbps - Device selection, press ENTER to change between partitions on the USB device (max 4). - Select - Unselect, press ENTER to change from Select all (files) or Select none. Note -To cancel copying in progress, press the ENTER button. -To return to the CDDA screen, press the TOOLS button again. -While the CD is being ripped, the player will automatically enter stop mode. -The ripping process is 2.6 times of normal speed. -The DVD player can only rip Audio CD (CD DA) discs. -The USB button does not work while you’re in the Ripping menu. -CD ripping function may not supported for some MP3 players device. Picture CD Playback 1. Select the desired folder. 2. Press the π/† buttons to select a Picture file in the clips menu and then press the ENTER button. Note - Press the STOP button to return to the clips menu. - When playing a Kodak Picture CD, the unit displays the Photo directly, not the clips menu. 10 Rotation Press the TOOLS button to select Rotate, and then press the ENTER button. Each time the √/® buttons are pressed, the picture rotates 90 degrees clockwise. Each time the π button is pressed, the picture will reverse to the upside down to show a mirror image. Each time the † button is pressed, the picture will reverse to the right side to show a mirror image. - - - - Zoom - Press the TOOLS button to select Zoom, and then press the ENTER button. - Each time ENTER button is pressed, the picture is enlarged. Zoom mode : X1-X2-X3-X4-X1. Slide Show - When youpress the PLAY at JPEG file, it will go to full screen mode and automatically slide show. Note - Depending on a file size, the amount of time between each picture may be different from the manual. - If you don’t press any button, the slide show will start automatically in about 10 seconds by default. Picture CD Playback for HD-JPEG (Only DVD-D530K/ D530) Must connect to HDMI. Resolution should be 720p/1080i/ 1080p, and HD-JPEG should be in HD mode. 1. 2. Select the desired folder. Press the π/† buttons to select a Picture file in the clip menu and then press the ENTER button. • Press the STOP (■) button to return to the clips menu. • When playing a Kodak Picture CD, the unit displays the Photo directly, not the clips menu. • Rotation Press the TOOLS button to select Rotate, and then press the ENTER button. Press the √/® button to rotate the screen 90 degrees to the left/right. • Zoom Press the TOOLS button to select Zoom, and then press ENTER. Each time ENTER button is pressed, the picture is enlarged. Zoom mode : X1-X2-X3-X4-X1. • Skip Picture Press the |k or K| button to select previous or next picture. • Slide Show Press the PLAY (®) button to start SLIDE function. Press the PAUSE (∏∏) button to stop SLIDE function. To continue slide show press PLAY button. Note - Depending on a file size, the amount of time between each picture may be different from the set interval time. - The image may be displayed at a smaller size depending on the picture size when displaying images in HD-JPEG mode. - It is recommended to set the “BD Wise” to “Off” In case of playback JPEG image file bigger than 720 X 480 pixel size. MP3-JPEG Playback You can play JPEG using music as a backgound. 1. Press the π/† buttons to select an MP3 file in the clips menu and then press the ENTER button. To return to the menu screen, Press the RETURN or MENU buttons. 2. 3. Press the √/® buttons to select Photos Menu, and then press the ENTER button. Press the π/† buttons to select a JPEG file in the clips menu and then press the ENTER button. - Music will play from the beginning Press Stop button when you want to stop the playback. Note MP3 and JPEG files have to be on the same disc. CD-R JPEG Disc - Only files with the “.jpg” and “.JPG” extensions can be played. - If the disc is not closed, it will take longer to start playing and not all of the recorded files may be played. - Only CD-R discs with JPEG files in ISO 9660 or Joliet format can be played. - The name of the JPEG file may not be longer than 8 characters and should contain no blank spaces or special characters (. / = +). - Only a consecutively written multi-session disc can be played. If there is a blank segment in the multisession disc, the disc can be played only up to the blank segment. - A maximum of 500 images can be stored on a single CD. - Kodak Picture CDs are recommended. - When playing a Kodak Picture CD, only the JPEG files in the pictures folder can be played. - Kodak Picture CD: The JPEG files in the pictures folder can be played automatically. - Konica Picture CD: If you want to see the Picture, select the JPEG files in the clips menu. - Fuji Picture CD: If you want to see the Picture, select the JPEG files in the clips menu. - QSS Picture CD: The unit may not play QSS Picture CD. - If the number of files in 1 Disc is over 500, only 500 JPEG files can be played. - If the number of folders in 1 Disc is over 500, only JPEG files in 500 folders can be played. Karaoke functions (Only DVD-D530K/D360K) Karaoke Functions Operation Sequence 1. Connect the terminals Mixed Audio Out to TV or Amplifier. 2. Connect the microphone plug to Mic (microphone) and set Karaoke score to On. When MIC is connected and Karaoke score is On, the karaoke functions can be used. Echo/Microphone Volume/Key Control (Tone control) 1. Play the karaoke disc containing the songs you want. ‑ Press the KARAOKE (†) button, and then press π/† to select ECHO, VOL or KEY. 2. Press the √/® buttons to change the desired item. Karaoke Scoring (Score) The scoring will appear as : 1. The microphone is connected and Karaoke score is On. 2. At the end of each chapter/title of karaoke disc. - If the DVD karaoke have any information on the scoring drive. - In case of VCD, the device can not differentiate between hard karaoke or movies, then the scoring will always appear. 3. Karaoke score will appear at the end of time for each chapter/title for about 6s. Karaoke Sound Recording 1. 2. 3. 4. Insert USB storage media into USB jack and then connected the microphone plug to Mic. To star karaoke recording, choose one of VCD/DVD/SVCD file, then press RECORD button. When recording, user can only press STOP button and PAUSE button to cancel the recording. If user do cancelation, then file result will be saved. Note - If you hear feedback(squealing or howling) while using the karaoke feature, move the microphone away from the speakers or turn down the microphone volume or the speaker volume. - When playing MP3, WMA and LPCM disc, the karaoke functions will not operate. - When the MIC is connected, Digital Out does not work. - The MIC sound outputs only from Analog Audio Out. - If MIC is connected to the MIC jack on the front panel, 5.1CH audio will be changed in to 2 CH audio automatically, this condition can’t be change unless the MIC is plugged out. Changing setup menu Using the Setup Menu The Setup menu lets you customize your DVD player by allowing you to select various language preferences, set up a parental level, even adjust the player to the type of television screen you have. 1. With the unit in Stop mode, press the MENU button on the remote control. Press the √/® buttons to select SETTINGS, then press the ENTER button. 2. Press the π/† buttons to select a Setup Menu, then press the ® or ENTER to bring up the submenu. 3. Press the π/† buttons to select a sub-menu option, then press the ® or ENTER. 4. To make the setup screen disappear after setting up, press the RETURN button. Setting Up the Display Options Display options enable you to set various video functions of the player. 1. With the unit in Stop mode, press the MENU button. Press the √/® buttons to select SETTINGS, then press the ENTER button. 2. Press the π/† buttons to select DISPLAY, then press the ® or ENTER button. 3. Press the π/† buttons to select the desired item, then press the ® or ENTER button. Setting Up the BD Wise (Only DVD-D530K/D530) When the player is connected to a SAMSUNG TV which supports “BD Wise”,you can enjoy optimized Picture Quality by setting the “BD Wise” function as “On”. 1. With the unit in Stop mode, press the MENU button. Press the √/® buttons to select SETTINGS, then press the ENTER button. 2. Press the π/† buttons to select DISPLAY, then press the ® or ENTER button. 3. Press the π/† buttons to select BD WISE, then press the ® or ENTER button. Press the π/† buttons to select ON/OFF, then press the ENTER button. 11 Note • This option can be changed only when TV support BD Wise. • Consult your TV User’s Manual to find out if your TV supports Progressive Scan. If Progressive Scan is supported, follow the TV User’s Manual regarding Progressive Scan settings in the TV’s menu system. • If Video Output is set incorrectly, the screen may be blocked. • The resolutions available for HDMI output depend on the connected TV or projector. For details, see the user’s manual of your TV or projector. • When the resolution is changed during playback, it may take a few seconds for a normal image to appear. • If you set the HDMI output resolution 720p,1080p or 1080i, HDMI output provides better picture quality. • It is recommended to set the "BD Wise" to "Off" In case of playback JPEG image file bigger than 720 X 480 pixel size. Setting Up the Audio Options Audio Options allows you to setup the audio device and sound status settings depending on the audio system in use. 1. With the unit in Stop mode, press the MENU button. Press the √/® buttons to select SETTING, then press the ENTER button. 2. Press the π/† buttons to select AUDIO, then press the ® or ENTER button. 3. Press the π/† buttons to select the desired item, then press the ® or ENTER button. Note : -When play a disc that has MPEG Audio and you have Bitstream selected in the Audio Options menu, the Digital Audio jack may not output audio -There is no analogue audio output when you play a sound disc. -Even when PCM Down sampling is Off •Some discs will only output down sampled audio through the digital outputs. HDMI (Only DVD-D530K/D530) - If your TV is not compatible with compressed multi-channel formats (Dolby Digital, MPEG), you should set Digital Audio to PCM. - If your TV is not compatible with LPCM sampling rates over 48kHz, you should set PCM Down sam-pling to On. Manufactured under license from Dolby Laboratories. “Dolby” and the double-D symbol are trademarks of Dolby Laboratories. 12 Setting Up the System Options 1. With the unit in Stop mode, press the MENU button. Press the √/® buttons to select SETTINGS, then press the ENTER button. 2. Press the π/† buttons to select SYSTEM, then press the ® or ENTER button. 3. Press the π/† buttons to select the desired item, then press the ® or ENTER button. Setting Up the Anynet+(HDMI-CEC) (Only DVD-D530K/D530) Anynet+ is a function that can be used to operate the unit using a Samsung TV remote control, by connecting the DVD D530/D530K to a SAMSUNG TV using a HDMI Cable. (This is only available with SAMSUNG TVs that support Anynet+. Select On when you connect the DVD D530/D530K with Samsung TV that support Anynet+. 1. With the unit in Stop mode, press the MENU button. Press the √/® buttons to select SETTINGS, then press the ENTER button. 2. Press the π/† buttons to select SYSTEM, then press the ® or ENTER button. 3. Press the π/† buttons to select ANYNET+ (HDMI-CEC), then press the ® or ENTER button. 4. Set the Anynet+(HDMI-CEC) to “On” on your DVD Player, then press the ENTER button. 5. Set the Anynet+ function at your TV. (See the TV instruction manual for more information.). Note • By pressing the PLAY button of the unit while watching TV, the TV screen will change to the play screen. • If you play a DVD when the TV power is off, the TV will power On. • If you turn the TV off , the DVD Player will power off automatically. • If you change the HDMI to other sources (Composite,Component,... etc) in TV while playing the DVD disc, the DVD Player will stop playing. Setting Up the Language Features If you set the player menu, disc menu, audio and subtitle language in advance, they will come up automatically every time you watch a movie. 1. With the unit in Stop mode, press the MENU button. Press the √/® buttons to select SETTINGS, then press the ENTER button. 2. Press the π/† buttons to select LANGUAGE, then press the ® or ENTER button. 3. Press the π/† buttons to select the desired language, then press the ® or ENTER button. Note -The language is selected and the screen returns to Language Setup menu. -To make the setup menu disappear, press the MENU button. -If the selected language is not recorded on the disc, the original pre-recorded language is selected. -Select “Original” if you want the defaultsoundtrack language to be the original language the disc is recorded in. -Select “Automatic” if you want the subtitle language to be the same as the language selected as the audio language. -Some discs may not contain the language you select as your initial language; in that case the disc will use its original language setting. Setting Up the Security Options The Parental Control function works in conjunction with DVDs that have been assigned a rating, which helps you control the types of DVDs that your family watches. There are up to 8 rating levels on a disc. Setting Up the Rating Level and Changing the Password 1. With the unit in Stop mode, press the MENU button. Press the √/® buttons to select SETTINGS, then press the ENTER button. 2. Press the π/† buttons to select SECURITY, and then press the ® or ENTER button. Enter your password. 3. Press the π/† buttons to select PARENTAL/CHANGE PASSWORD, and then press the ® or ENTER button. 4. Press the π/† buttons to select the rating level you want, and then press the ENTER button. e.g) Setting up in KID SAFE - For example, if you select the Kids Safe level, discs that contain level 2 or higher will not play. 5. Enter your password. If this is the first time, enter 0000. Then, enter a new password. The new password must be a number other than 0000 to activate the parental control function. Then, re-enter the new password. Security Levels : ❶ KID SAFE ❷ G (General Audiences) : All Ages Admitted ❸ PG (Parental Guidance suggested) : Some material may not be suitable for young children. ❹ PG 13 (PG-13 Parents strongly cautioned) : Some material may be inapproriate for children under 13. ❺ PGR (Parental Guidance Recommended) : These are not necessarily unsuitable for children, but viewer discretion is advised, and parents and guardians are encouraged to supervise younger viewers. ❻ R (Restricted) : Under 17 requires accompanying adult ❼ NC17 (NC-17) : No one 17 and under admitted. ❽ ADULT Note: - If you have forgotten your password, see “Forgot Password” in the Troubleshooting Guide. Reference Troubleshooting Before requesting service (troubleshooting), please check the following. Problem Action The screen is blocked. • Press the ®|| button (in front panel) for more than 5 seconds under no disc inside. All setting will revert to factory settings. Forgot password. • Press the ®|| button (in front panel) for more than 5 seconds under no disc inside. All setings including the password will revert to the factory settings. Don't use this unless absolutely necessary. No HDMI output • Check the Video output is HDMI enabled. • Check the connection between the TV and the HDMI jack of DVD player. • See if the TV supports this 480p/ 576p/720p/1080i/1080p DVD player. Abnormal HDMI output screen. • If snow noise appears on the screen, it means that TV does not support HDCP (High-bandwidth Digital Content Protection). HDMI output Jitter • Check your TV system setup correctly. • The screen Jitter phenomenon may occur when frame rate is converted from 50Hz to 60 Hz for 720p/1080i/ 1080p HDMI (High Definition Multimedia Interface) Output. • Please refer to the user's manual of your TV. Setting Up the General Options 1. With the unit in Stop mode, press the MENU button. Press the √/® buttons to select SETTINGS, then press the ENTER button. 2. Press the π/† buttons to select GENERAL, then press the ® or ENTER button. 3. Press the π/† buttons to select the desired item, then press the ® or ENTER button. Setting Up the Support Options Support option enable you to check your DVD player information such as the model code, Software Version, The serial and version numbers can be found on the back side of your DVD-Player. 1. With the unit in Stop mode, press the MENU button. Press the √/® buttons to select SETTINGS, then press the ENTER button. 2. Press the π/† buttons to select SUPPORT, then press the ® or ENTER button. 3. Select PRODUCT INFORMATION, then press the ® or ENTER button. 13 Memo Spesifications General Power Requirements AC110~240V, 50/60Hz Power Comsumption For the power supply and power consumption, refer to the label attached to the product Weight Dimensions Video Output +5ºC to +35ºC Operating Humidity Range 10 % to 75 % Composite Video 1 channel : 1.0 Vp-p (75 Ω load) Component Video Y : 1.0 Vp-p (75 Ω load) Pr : 0.70 Vp-p (75 Ω load) Pb : 0.70 Vp-p (75 Ω load) Output terminal Maximum Output Level Frequency Response Digital Audio Out 14 360mm(W) X 207mm(D) X 42mm(H) Operating Temperature Range HDMI (Only DVD-D530K/DVD-D530) Audio Output 1.2 Kg 480p, 576p, 720p, 1080p, 1080i RCA 2Vrms 20 Hz to 20 kHz Coaxial terminal (S/PDIF) Memo Contact SAMSUNG WORLD WIDE If you have any questions or comments relating to Samsung products, please contact the SAMSUNG customer care center. Region North America Latin America Europe CIS Asia Pacific Area Canada Mexico U.S.A Argentine Brazil Chile Nicaragua Honduras Costa Rica Ecuador El Salvador Guatemala Jamaica Panama Puerto Rico Rep. Dominica Trinidad & Tobago Venezuela Colombia Contact Center 1-800-SAMSUNG (726-7864) 01-800-SAMSUNG (726-7864) 1-800-SAMSUNG (726-7864) 0800-333-3733 0800-124-421, 4004-0000 800-SAMSUNG (726-7864) 00-1800-5077267 800-7919267 0-800-507-7267 1-800-10-7267 800-6225 1-800-299-0013 1-800-234-7267 800-7267 1-800-682-3180 1-800-751-2676 1-800-SAMSUNG (726-7864) 0-800-100-5303 01-8000112112 Belgium 02 201 2418 Czech Republic Denmark Finland France Germany Hungary Italia Luxemburg Netherlands Norway Poland Portugal Slovakia Spain Sweden U.K Eire Austria 800-SAMSUNG (800-726786) 8-SAMSUNG (7267864) 30-6227 515 01 4863 0000 01805-SAMSUNG (726-7864 € 0,14/Min) 06-80-SAMSUNG (726-7864) 800-SAMSUNG (726-7864) 02 261 03 710 0900-SAMSUNG (0900-7267864) (€ 0,10/Min) 3-SAMSUNG (7267864) 0 801 1SAMSUNG (172678), 022-607-93-33 80820-SAMSUNG (726-7864) 0800-SAMSUNG (726-7864) 902-1-SAMSUNG (902 172 678) 0771 726 7864 (SAMSUNG) 0845 SAMSUNG (7267864) 0818 717 100 0810-SAMSUNG (7267864, € 0.07/min) Switzerland 0848-SAMSUNG (7267864, CHF 0.08/min) Russia Kazakhstan Uzbekistan Kyrgyzstan Tadjikistan 8-800-555-55-55 8-10-800-500-55-500 8-10-800-500-55-500 00-800-500-55-500 8-10-800-500-55-500 Ukraine 8-800-502-0000 Belarus Moldova Lithuania Latvia Estonia Australia New Zealand China 810-800-500-55-500 00-800-500-55-500 8-800-77777 8000-7267 800-7267 1300 362 603 0800 SAMSUNG (0800 726 786) 400-810-5858, 010-6475 1880 Hong Kong 3698-4698 India Indonesia Japan Malaysia 3030 8282, 1800 110011, 1800 3000 8282 0800-112-8888 0120-327-527 1800-88-9999 1-800-10-SAMSUNG (726-7864), 1-800-3-SAMSUNG (726-7864), 1-800-8-SAMSUNG (726-7864), 02-5805777 1800-SAMSUNG (726-7864) 1800-29-3232, 02-689-3232 0800-329-999 1 800 588 889 444 77 11 0860-SAMSUNG (726-7864 ) 800-SAMSUNG (726-7864), 8000-4726 Philippines Middle East & Africa Singapore Thailand Taiwan Vietnam Turkey South Africa U.A.E Web Site www.samsung.com/ca www.samsung.com/mx www.samsung.com/us www.samsung.com/ar www.samsung.com/br www.samsung.com/cl www.samsung.com/latin www.samsung.com/latin www.samsung.com/latin www.samsung.com/latin www.samsung.com/latin www.samsung.com/latin www.samsung.com/latin www.samsung.com/latin www.samsung.com/latin www.samsung.com/latin www.samsung.com/latin www.samsung.com/latin www.samsung.com.co www.samsung.com/be (Dutch) www.samsung.com/be_fr (French) www.samsung.com/cz www.samsung.com/dk www.samsung.com/fi www.samsung.com/fr www.samsung.de www.samsung.com/hu www.samsung.com/it www.samsung.com/lu www.samsung.com/nl www.samsung.com/no www.samsung.com/pl www.samsung.com/pt www.samsung.com/sk www.samsung.com/es www.samsung.com/se www.samsung.com/uk www.samsung.com/ie www.samsung.com/at www.samsung.com/ch www.samsung.com/ch_fr/ (French) www.samsung.ru www.samsung.com/kz_ru www.samsung.com/kz_ru www.samsung.ua www.samsung.com/ua_ru www.samsung.com/lt www.samsung.com/lv www.samsung.com/ee www.samsung.com/au www.samsung.com/nz www.samsung.com/cn www.samsung.com/hk www.samsung.com/hk_en/ www.samsung.com/in www.samsung.com/id www.samsung.com/jp www.samsung.com/my www.samsung.com/ph www.samsung.com/sg www.samsung.com/th www.samsung.com/tw www.samsung.com/vn www.samsung.com/tr www.samsung.com/za www.samsung.com/ae DVD-D360K DVD-D530 DVD-D530K ﺠﻬﺎﺰﺸﻐﻳﻝ ﺪﻱﻓﻲﺩﻱ ﺩﻠﻳﻝ ﺍﻠﻤﺴﺘﺧﺩﻡ ﺻﻭّﺭ ﺍﻹﻣﻛﺎﻨﻴﺎﺕ ﺸﻛﺮﺍ ﻟﻛﻢ ﻋﻟﻰ ﺸﺮﺍﺀ ﻣﻨﺗﺞ ﺳﺎﻤﺴﻭﻨﺞ. ﻻﺴﺗﻼﻡ ﺃﻔﺿﻝ ﺍﻟﺧﺪﻣﺔ، ﺍﻟﺭ ﺠﺎﺀ ﺘﺳﺟﻳﻞ ﻤﻧﺗﺧﻛﻡ ﻔﻲ www.samsung.com/global/register AK68-02046A ﺍﻠﻌﺭﺑﻴﺔ ﺍﻻﺤﺗﻳﺎﻄﺎﺕ .١ﺍﻹﻋﺩﺍﺩ - - ﻴُﺭﺠﻰ ﺍﻠﺭﺠﻮﻉ ﺇﻠﻰ ﻤﻠﺼﻕ ﺍﻠﺘﻌﺭﻴﻑ ﺍﻠﻤﻭﺠﻭﺩ ﺒﺎﻠﺠﺰﺀ ﺍﻠﺨﻠﻔﻲ ﻤﻦ ﺍﻠﻤﺸﻐﻝ ﻠﻤﻌﺭﻔﺔ ﺩﺭﺠﺔ ﺍﻠﻔﻮﻠﺘﻳﺔ ﺍﻠﺼﺤﻳﺤﺔ ﻠﻟﺘﺸﻐﻳﻝ. ﻘﻢ ﺒﺘﺭﻜﻴﺏ ﺍﻠﻤﺸﻐﻝ ﻔﻲ ﺼﻨﺩﻮﻕ ﻤﺰﻭﺩ ﺒﻔﺘﺤﺎﺕﺘﻬﻮﻴﺔﻜﺎﻔﻴﺔ. ) ٧ﺇﻠﻰ ١٠ﺴﻢ( ﺘﺠﺏ ﻋﺩﻢ ﺴﺩ ﻔﺘﺤﺎﺕ ﺍﻠﺘﻬﻭﻴﺔ ﺍﻠﺨﺎﺼﺔ ﺒﺄﻱ ﻤﻦ ﺍﻠﻤﻜﻮﻨﺎﺕ ﻠﻟﺴﻤﺎﺡ ﺒﺩﻭﺭﺍﻦ ﺍﻠﻬﻭﺍﺀ. ﺘﺠﺐ ﻋﺩﻢ ﺩﻔﻊ ﺩﺭﺝ ﺍﻷﻘﺭﺍﺹ ﺇﻠﻰ ﺍﻠﺩﺍﺧﻞ ﻴﺩﻮﻳﹰﺎ. ﻴﺠﺏ ﻋﺩﻢ ﺘﻜﺩﺱ ﺍﻠﻤﻜﻮﻨﺎﺕ. ﺘﺄﻜﺩ ﻤﻦ ﺇﻴﻘﺎﻑ ﺘﺸﻐﻴﻝ ﺠﻤﻴﻊ ﺍﻠﻤﻜﻮﻨﺎﺕ ﻘﺒﻞ ﺘﺤﺭﻴﻚ ﺍﻠﻤﺸﻐﻝ. ﺘﺄﻜﺩ ﻤﻦ ﺇﻴﻘﺎﻑ ﺘﺸﻐﻴﻝ ﺍﻠﻤﻜﻮﻨﺎﺕ ﺍﻷﺨﺭﻯ ﻘﺒﻞ ﺘﻭﺼﻴﻠﻬﺎ ﺒﻬﺫﺍ ﺍﻠﻤﺸﻐﻝ. ﺘﺄﻜﺩ ﻤﻦ ﺇﺨﺭﺍﺝ ﺍﻠﻘﺭﺹ ﻮﺇﻴﻘﺎﻑ ﺘﺸﻐﻴﻝ ﺍﻠﻤﺸﻐﻝ ﺒﻌﺩ ﺍﻻﻨﺘﻬﺎﺀ ﻤﻦ ﺍﻻﺴﺘﺧﺩﺍﻢ ،ﻮﻻ ﺴﻴﻤﺎ ﺇﺫﺍ ﻜﻨﺕ ﺘﻌﺘﺰﻢ ﻋﺩﻡ ﺍﺴﺘﺨﺩﺍﻤﻪ ﻠﻔﺘﺭﺓ ﻄﻮﻴﻠﺔ. ﻴﺘﻢ ﺍﺴﺘﺨﺩﺍﻢ ﻤﻘﺒﺱ ﺍﻠﻄﺎﻘﺔ ﺍﻠﺭﺌﻴﺳﻲ ﻜﺠﻬﺎﺰ ﻔﺼﻝ ﻮﻴﺠﺏ ﺃﻦ ﻴﻅﺎﻫﺯًﺍﻔﻲ ﺃﻱ ﻮﻘﺕ. .٢ﻠﺴﻼﻤﺘﻚ ﻴﺴﺘﺧﺩﻢ ﻫﺫﺍ ﺍﻠﻤﻨﺘﺞ ﺸﻌﺎﻉ ﺍﻠﻟﻴﺰﺭ .ﻮﻘﺩ ﻴﺆﺩﻱ ﺍﺴﺘﺧﺩﺍﻢ ﻋﻨﺎﺼﺭﺍﻠﺘﺤﻜﻢ ﺃﻭ ﺍﻠﺘﻌﺩﻼﺕ ﺃﻭ ﺃﺩﺍﺀ ﺍﻹﺠﺭﺍﺀﺍﺕ ﻏﻳﺭ ﺘﻠﻙ ﺍﻠﻤﺒﻳﻧﺔ ﻫﻧﺎ ﺇﻠﻰ ﺍﻠﺘﻌﺭﺾ ﻠﻺﺸﻌﺎﻉ ﺒﺴﻛﻞ ﺧﻄﻴﺭ. ﺘﺠﺏ ﻋﺩﻢ ﻔﺘﺢ ﺍﻷﻏﻄﻴﺔ ﻮﺇﺠﺭﺍﺀ ﻋﻤﻠﻴﺎﺕ ﺍﻹﺼﻼﺡ ﺒﻨﻔﺴﻙ.ﺍﺘﺭﻚ ﺃﻋﻤﺎﻝ ﺍﻠﺼﻳﺎﻨﺔ ﻠﻔﻧﻴﻳﻦ ﻤﺆﻫﻠﻳﻦ ﻔﻘﻄ. .٣ﺘﻨﺒﻳﺔ - - ٢ ﻠﻢ ﻴﺘﻢ ﺘﺼﻤﻴﻢ ﺍﻠﻤﺸﻐﻝ ﻠﻴﺘﻢ ﺍﺴﺘﺧﺩﺍﻤﻪ ﻔﻲ ﺃﻏﻲ ﺃﻏﺭ ﺍﺾ ﺼﻨﺎﻋﻳﺔ ﻮﻠﻛﻦ ﻷﻏﺭﺍﺽ ﻤﻨﺰﻠﻴﺔ .ﻫﺫﺍ ﺍﻠﻤﻨﺘﺞ ﻠﻼﺴﺘﺧﺩﺍﻢ ﺍﻠﺸﺧﺼﻲ ﻔﻘﻄ. ﻴﺠﺏ ﻋﺩﻢ ﺘﻌﺭﺽ ﺍﻠﺠﻬﺎﺰ ﻠﻘﻄﺭﺍﺕ ﺍﻠﻤﺎﺀ ﺃﻮ ﺭﺬﺍﺫ ﺍﻠﻤﺎﺀ ﻜﻤﺎ ﻻ ﻴﺟﺏ ﺃﻦ ﻴﻮﻀﻊ ﻋﻠﻴﻪ ﺃﺸﻴﺎﺀ ﺘﺤﺘﻮﻱ ﻋﻠﻰ ﺴﻮﺍﺌﻞ ﻤﺛﻝ ﺁﻨﻴﺔ ﺍﻠﺰﻫﻭﺭ. ﻴﻤﻜﻦ ﺍﻦ ﺘﺆﺛﺭ ﺍﻠﻌﻮﺍﻤﻞ ﺍﻠﺨﺎﺭﺠﻴﺔ ﻜﺈﻠﺒﺭﻖ ﻭﺍﻠﻛﻬﺭﺒﺎﺀ ﺍﻠﺴﺎﻜﻨﺔ ﻋﻠﻰ ﺍﻠﺘﺸﻐﻳﻝ ﺍﻠﻄﺒﻳﻌﻲ ﻠﻬﺫﺍ ﺍﻠﻤﺸﻐﻝ .ﺇﺫﺍ ﻮﺍﺠﻬﺕ ﻫﺫﻩ ﺍﻠﻤﺸﻜﻠﺔ، ﻔﻘﻢ ﺒﺈﻴﻘﺎﻑ ﺘﺸﻐﻴﻝ ﺍﻠﻤﺸﻐﻝ ﺛﻢ ﺃﻋﺩ ﺘﺸﻐﻳﻠﻪ ﺒﺎﻠﺿﻐﻄ ﻋﻠﻰ ﺍﻠﺰﺭ ،POWERﺃﻮ ﺍﻔﺼﻝ ﺴﻠﻙ ﺍﻠﺘﻳﺎﺭ ﺍﻠﻛﻬﺭﺒﻲ ﺍﻠﻤﺘﺭﺪﺩ ﺜﻢ ﺃﻋﺩ ﺘﻮﺼﻴﻠﻪ ﺒﻤﻨﻔﺫ ﺍﻠﺘﻴﺎﺭ ﺍﻠﻜﻬﺭﺒﻲ ﺍﻟﻤﺘﺮﺪﺩ .ﺴﻴﻌﻤﻝ ﺍﻠﻤﻐﻞ ﻋﻠﻰ ﻨﺤﻮ ﻄﺒﻳﻌﻲ. ﻔﻲ ﺤﺎﻠﺔ ﺤﺩﻭﺙ ﺘﻜﺎﺜﻑ ﺩﺍﺨﻝ ﺍﻠﻤﺸﻐﻞ ﻨﺘﻴﺠﺔ ﺤﺩﻮﺙ ﺘﻐﻴﻳﺭﺍﺕ ﺸﺩﻴﺩﺓ ﻔﻲ ﺩﺭﺠﺎﺕﺍﻠﺤﺭﺍﺭﺓ ،ﺭﺒﻣﺎ ﻻ ﻴﻌﻤﻝ ﺍﻠﻤﺸﻐﻝ ﻔﻲ ﺩﺭﻨﺤﻮ ﺴﻠﻴﻢ .ﻔﻲ ﺤﺎﻠﺔ ﺤﺩﻭﺚ ﻫﺫﻩ ﺍﻠﻤﺸﻜﻠﺔ ،ﺍﺘﺭﻚ ﺍﻠﻤﺸﻐﻝ ﻔﻲ ﺩﺭﺠﺔ ﺤﺭﺍﺭﺓ ﺍﻠﻐﺭﻔﺔ ﺤﺘﻰ ﻴﺼﺒﺢ ﺍﻠﺠﺯﺀ ﺍﻠﺩﺍﺨﻠﻲ ﻤﻦ ﺍﻠﻤﺸﻐﻝ ﺠﺎﻔًﺎ ﻮﻤﺴﺘﻌﺩًﺍ ﻠﻠﻌﻤﻝ. ﺠﺩﻭﻝ ﺍﻠﻣﺣﺗﻭﻴﺎﺕ .٤ﺍﻠﻘﺭﺹ ﻴﺠﺏ ﻋﺩﻢ ﺘﻨﻅﻴﻑ ﺍﻠﻘﺭﺹ ﺒﺎﺴﺘﺧﺩﺍﻢ ﻤﻮﺍﺪ ﺍﻠﺭﺵ ﺍﻠﺧﺎﺼﺔﺒﻤﺴﺢ ﺍﻠﺘﺴﺠﻴﻼﺕ ﺃﻭ ﺍﻠﺒﻨﺰﻴﻦ ﺃﻮ ﺴﺎﺌﻝ ﺘﺧﻔﻴﻑ ﺍﻠﺩﻫﺎﻦ ﺃﻮ ﻏﻳﺭﻫﺎ ﻤﻦ ﺍﻠﻤﺫﻴﺒﺎﺕ ﺍﻠﻤﺘﻃﺎﻴﺭﺓ ﺍﻷﺧﺭﻯ ﻮﺍﻠﺘﻲ ﻘﺩ ﺘﺗﺴﺒﺏ ﻔﻲ ﺤﺩﻮﺚ ﺘﻠﻑ ﺒﺴﻄﺢ ﺍﻠﻘﺭﺹ. ﻴﺠﺏ ﻋﺩﻢ ﻠﻤﺱ ﺴﻄﺢ ﺇﺸﺎﺭﺎﺕ ﺍﻠﻘﺭﺹ .ﺍﻤﺴﻚ ﺍﻠﻘﺭﺹ ﻤﻦﺇﺣﺩﻯ ﺍﻠﺤﻮﺍﻑ ﻮﺍﻠﻔﺘﺤﺔ ﺍﻠﻣﻮﺟﻮﺩﺓ ﺒﺎﻠﻤﻧﺘﺼﻒ. ﺍﻤﺴﺢ ﺍﻷﺘﺭﺒﺔ ﺒﺭﻔﻖ ﻮﻻ ﺘﻘﻢ ﻪﻄﻠﻘﹰﺎ ﺍﻠﻤﺴﺢ ﻤﺴﺘﺧﺩﻤﹰﺎ ﻘﻄﻌﺔﻘﻤﺎﺶ ﺫﻫﺎﺒًﺎ ﻮﺇﻴﺎﺒًﺎ ﻔﻮﻕ ﺍﻠﻘﺮﺹ. ە .ﺍﻠﻤﻠﻮﻤﺎﺕ ﺍﻠﺒﻳﺌﻴﺔ ﺘﺤﺘﻮﻱ ﺍﻠﺒﻃﺎﺭﻴﺔ ﺍﻠﻤﺴﺘﺧﺩﻤﺔ ﻔﻲ ﻫﺫﺍ ﺍﻠﻤﻨﺘﺞ ﻋﻠﻰ ﻤﻮﺍﺩ ﻜﻴﻤﺎﻮﻴﺔﻀﺎﺭﺓ ﺒﺎﻠﺒﻳﺌﺔ. ﻠﺫﺍ ،ﻴُﺭﺠﻰ ﺍﻠﺘﺧﻠﺹ ﻤﻦ ﺍﻠﺒﻄﺎﺭﺘﺎﺕ ﺒﺎﻠﻄﺭﻴﻘﺔ ﺍﻠﺼﺤﻴﺤﺔ ،ﻮﻔﻘًﺎﻟﻠﻘﻮﺍﻨﻴﻦ ﺍﻠﻔﻳﺩﺭﺍﻠﻳﺔ ﻮﺍﻠﺩﻮﻠﻳﺔ ﻭﺍﻠﻤﺤﻠﻳﺔ. ﻮﺤﺩﺓ ﺍﻠﻤﻨﺘﺞ ﺍﻠﻤﺭﻔﻘﺔ ﺒﻬﺫﺍ ﺍﻠﺩﻠﻳﻝﻤﺭﺨﺼﺔ ﻭﻔﻘًﺎ ﻠﺤﻘﻮﻖ ﻤﻠﻜﻴﺔ ﻔﻛﺭﻴﺔ ﻤﺤﺪﺩﺓ ﻠﺸﺭﻜﺎﺕ ﺃﻄﺭﺍﻑ ﺃﺨﺭﻯ .ﻴﻘﺘﺼﺭ ﻫﺬﺍ ﺍﻠﺘﺭﺨﻳﺹ ﻋﻠﻰ ﺍﻻﺴﺘﺨﺩﺍﻡ ﺍﻠﺨﺎﺹ ﻏﻳﺭ ﺍﻠﺘﺠﺎﺭﻱ ﺒﻭﺍﺴﻄﺔ ﺍﻠﻌﻤﻴﻞ ﺍﻠﻨﻬﺎﺌﻲ ﺍﻠﻤﻨﺘﻔﻊ ﻤﻦ ﺍﻠﻤﺤﺘﻭﻴﺎﺕ ﺍﻠﻤُﺭﺨﺼﺔ .ﻮﻻ ﺘﻮﺠﺩ ﺤﻘﻭﻖ ﻤﻣﻨﻭﺤﺔ ﻻﺴﺘﺧﺩﺍﻢ ﻫﺫﺍ ﺍﻠﺠﻬﺎﺰ ﻷﻏﺭﺍﺾ ﺘﺠﺎﺭﻴﺔ .ﻻ ﻴﻐﻄﻲ ﻫﺫﺍ ﺍﻠﺘﺭﺨﻳﺹ ﺃﻱ ﻭﺣﺩﺓ ﻤﻨﺘﺞ ﺃﺨﺭﻯ ﺒﺧﻼﻑ ﻫﺫﻩ ﺍﻠﻮﺣﺩﺓ ،ﻭﻜﻨﻟﻚ ﻻ ﻴﺸﻤﻝ ﺍﻠﺘﺭﺨﻳﺹ ﺃﻱ ﻭﺣﺩﺓ ﻤﻨﺘﺞ ﺃﻭ ﻋﻤﻠﻳﺔ ﻏﻴﺭ ﻤﺭﺨﺼﺔ ﺘﻃﺎﺒﻕ ISO/OUR 11172-3ﺃﻮ ISO/OUR 13818-3 ﺍﻠﺘﺭﺨﻳﺹ ﻔﻘﻄ ﺍﺴﺘﺨﺩﻢ ﺃﻢ ﺘﺒﺎﻉ ﻤﺭﻓﻘﺔ ﺒﻮﺤﺩﺓ ﺍﻠﻤﻨﺘﺞ ﺍﻠﺤﺎﻠﻳﺔ .ﻜﺫﻠﻚ ﻴﻐﻄﻲ ﺍﻠﺘﺭﺨﻳﺹ ﻔﻘﻃ ﺍﺴﺘﺧﺩﺍﻢ ﻭﺣﺩﺓ ﺍﻠﻤﻨﺘﺞ ﺍﻠﺤﺎﻠﻴﻪ ﻠﺘﺷﻔﻴﺭ ﻮ/ﺃﻮ ﻔﻚ ﺘﺸﻔﻴﺭ ﻤﻠﻔﺎﺕ ﺍﻠﺼﻭﺕ ﺍﻠﺘﻲ ﺘﺗﻄﺎﺒﻖ ﻤﻊ ISO/OUR 11172-3ﺃﻮ .ISO/OUR 13818-3ﻠﻢ ﻴﻨﻢ ﻤﻨﺢ ﺤﻘﻮﻖ ﺒﻤﻮﺠﺏ ﻫﺫﺍ ﺍﻠﺘﺭﺨﻴﺹ ﻔﻴﻤﺎ ﻴﺘﻌﻠﻕ ﺒﻤﻳﺯﺍﺕ ﺍﻠﻤﻨﺘﺞ ﺃﻮ ﻮﻅﺎﺌﻔﻪ ﺍﻠﺘﻲ ﻻ ﺘﻃﺎﺒﻖ ISO/OUR 11172-3 ﺃﻮ .ISO/OUR 13818-3 ﺘﻧﺒﻴﻪ :ﻘﺩ ﻴﺆﺩﻱ ﺍﺴﺘﺧﺩﺍﻢ ﺃﺰﺭﺍﺭ ﺍﻠﺘﺤﻜﻢ ﺃﻮ ﺇﻋﺩﺍﺩﺍﺕ ﺍﻠﺿﺒﻄ ﺃﻮ ﺘﻨﻔﻴﺫ ﺇﺠﺭﺍﺀﺍﺕ ﺒﺧﻼﻑ ﺍﻠﻮﺍﺭﺪﺓ ﺒﻬﺫﺍ ﺍﻠﺪﻠﻴﻝ ﺇﻠﻰ ﺍﻠﺘﻌﺭﺽ ﻠﻺﺸﻌﺎﻉ ﺍﻠﺧﻄﻴﺭ. ﺍﻻﺤﺘﻳﺎﻃﺎﺖ ٢................................................................... ﺍﻹﻋﺪﺍﺪ ﻤﻳﺯﺍﺖ ﻋﺎﻤﺔ ٢.................................................................. ﺍﻠﻭﺼﻒ ٣....................................................................... ﺍﺴﺗﻜﺷﺎﻒ ﻭﺤﺩﺓﺍﻠﺗﺤﻜﻢ ﻋﻦ ﺑﹸﻌﺩ ٣.............................................. ﺍﻠﺘﻭﺻﻳﻼﺖ ﺍﺨﺘﻴﺎﺮ ﺇﺤﺪﻯ ﺍﻠﺘﻭﺼﻴﻼﺖ ٤.................................................... ﺍﻠﻭﻈﺎﺋﻒ ﺍﻷﺴﺎﺴﻴﺔ ﺘﺷﻐﻳﻞ ﺍﻠﻘﺭﺺ٥................................................................ ﺍﺴﺘﺨﺪﺍﻢ ﻭﻅﻴﻓﺘﻲ ﺍﻠﺑﺤﺕ ﻭﺍﻠﺛﺧﻄﻲ٥........................................... ﺍﺴﺘﺧﺪﺍﻡ ﻭﻇﻳﻔﺔ ﺍﻠﻌﺭﺾ٦...................................................... ﺍﺴﺘﺨﺪﺍﻢ ﻘﺎﺌﻤﺘﻲ ﺍﻠﻌﻧﺎﻭﻳﻦ ﻭﺍﻷﻘﺭﺍﺺ ٦........................................ ﺘﻛﺭﺍﺮ ﺍﻠﺘﺷﻐﻴﻞ٦................................................................ ﺍﻠﺗﺷﻐﻴﻞ ﺍﻠﺑﻄﻲﺀ ٦.............................................................. ﺍﻠﻭﻈﺎﺋﻒ ﺍﻠﺗﻗﺪﻤﺔ ﺿﺑﻄ ﻨﺴﺒﺔ ﺍﻻﺭﺗﻓﺎﻉ ﺇﻠﻰ ﺍﻠﻌﺭﺽ )٦.........................(EZ VIEW ﺘﺤﺪﻳﺪ ﻠﻐﺔ ﺍﻠﺻﻭﺖ٧............................................................ ﺗﺤﺪﻴﺪ ﻠﻐﺔ ﺍﻠﺗﺮﺟﻤﺔ ﺍﻠﺼﺎﺤﺑﺔ٧................................................. ﺗﻐﻳﻳﺭ ﺰﺍﻭﻴﺔ ﺍﻠﻛﺎﻤﻴﺭﺍ ٧......................................................... ﺍﺴﺘﺨﺪﺍﻡ ﻭﻅﻳﻔﺔ ﺍﻠﻌﻼﻤﺎﺖ ٧.................................................... ﺍﺴﺗﺧﺪﺍﻡ ﻭﻆﻴﻔﺔ ﺍﻠﺗﻛﺑﻴﺭ/ﺍﻠﺘﺼﻐﻳﺭ٧............................................. ﻘﺎﺌﻤﺔ ﻤﻘﺎﻄﻊ ﻤﻠﻔﺎﺖ /MPEG4/JPEG/WMA/MP3ﻗﺭﺺ ﺍﻠﺿﻐﻭﻄ٧... ﺗﺤﺪﻴﺩ ﺍﻨﺟﻠﺪ ٧................................................................... ﺘﺸﻐﻴﻞ ﺼﻭﺕ /WMA/MP3ﺍﻠﻗﺭﺺ ﺍﻠﻣﻁﻐﻮﻃ ٧.......................... ﺘﺸﻐﻴﻞ ٨........................................................... MPEG4 ﺗﺷﻐﻳﻞ ﻣﻠﻔﺎﺖ ﺍﻠﻭﺳﺎﺋﻄ ﺒﺎﺴﺘﺧﺪﺍﻢ ﻤﻳﺯﺓ ﻤﺿﻴﻒ ٩..................... USB ﺍﻠﻧﺴﺦ ﻤﻦ ﺍﻟﻘﺭﺹ ﺍﻟﻤﹸﺪﻣﹶﺞ ٩................................................. ﺘﺷﻐﻴﻞ ﺍﻠﻘﺭﺺ ﺍﻠﺫﻱ ﻴﺗﺿﻤﻦ ﺻﻭﺭ ٩......................................... ﺘﺷﻐﻴﻞ ﺍﻠﻘﺭﺺ ﺍﻠﺫﻱ ﻴﺗﺿﻤﻦ ﺻﻭ JPEG-HD )١٠..................................... (DVD-D530K/DVD-D530 ﻭﻃﺎﺌﻑ ﻜﺎﺭﻭﻜﻲ )(DVD-D530K/DVD-D360K ﻭﻃﺎﺌﻑ ﻜﺎﺭﻭﻜﻲ١٠............................................................ ﺗﻐﻴﻳﻄ Setup Menu ﺍﺴﺘﺨﺪﺍﻡ ١١.................................................Setup Menu ﻀﺑﻄ ﺨﻴﺎﺭﺍﺖ ﺍﻠﻌﺭﺽ ١١.................................................... ﻀﺑﻄ ﺧﻳﺎﺭﺍﺖ ﺍﻠﺻﻭﺖ ١١.................................................... ﻀﺑﻄ ﺧﻳﺎﺭﺍﺖ ﺍﻠﻨﻅﺎﻢ١١....................................................... ﻀﺑﻄ ﻤﻴﺯﺍﺖ ﺍﻠﻟﻐﺔ ١٢......................................................... ﻀﺑﻄ ﺧﻳﺎﺭﺍﺖ اﻟﺤﻤﺎﻳﺔ ١٢..................................................... ﻀﺑﻄ ﺧﻳﺎﺭﺍﺖ اﻟﻌﺎﻣﺔ١٢....................................................... ﻀﺑﻄ ﺧﻳﺎﺭﺍﺖ ﺍﻠﺩﻋﻢ ١٢....................................................... ﺍﻠﻣﺭﺟﻊ ﺍﺴﺘﻛﺷﺎﻒ ﺍﻷﺧﻃﺎﺀ ﻭﺇﺻﻼﺤﻬﺎ١٣............................................. ﺍﻠﻤﻭﺍﺼﻔﺎﺖ ١٣................................................................. ﺍﻹﻋﺩﺍﺪ ﻣﻳﺯﺍﺕ ﻋﺎﻣﺔ ﺺﻭﺕ ﻤﻣﺗﺎﺯ ﺘﻣﻧﺢ ﺘﻗﻧﻳﺔ Dolby Digitalﻮﻫﻲ ﺘﻗﻧﻳﺔ ﺘﻡ ﺘﻃﻭﻴﺭﻫﺎ ﻤﻥ ﻗﺑﻝ ﺸﺭﻜﺔ Dolby Laboratoriesﺺﻭﺘﺎ ﻔﺎﺒﻕ ﺍﻠﻭﻀﻭﺡ. ﺍﻠﺷﺎﺸﺔ ﻴﻣﻛﻥ ﻋﺭﺽ ﺼﻭﺭ ﺍﻠﺸﺎﺸﺔ ﺍﻠﻌﺭﻴﺿﺔ ) (٩:١٦ﻮﺍﻠﻌﺎﺩﻴﺔ ﻋﺎﻰ ﺤﺩ ﺴﻭﺍﺀ. ﺍﻟﺣﺭﻜﺔ ﺍﻠﺑﻃﻳﺋﺔ ﻴﻣﻛﻥ ﻋﺭﺽ ﺃﺤﺩ ﺍﻠﻣﺷﺎﻫﺩ ﺍﻠﻬﺎﻤﺔ ﺒﺎﻠﺤﺭﻛﺔ ﺍﻠﺑﻃﺋﺔ. ﺘﺷﻐﻳﻝ (DVD-D530K/DVD-D530) 1080p ﻴﺣﻭﻝ ﻫﺫﺍ ﺍﻠﻣﺷﻐﻝ ﺃﻗﺭﺍﺹ DVDﺍﻠﻌﺎﺪﻴﺔ ﻋﻠﻰ ﺃﺠﻬﺯﺓ ﺘﻠﻳﻓﺯﻴﻭﻥ ﺘﻌﻣﻝ ﺒﺩﻗﺔ .1080p ﺘﺣﻛﻡ ﺍﻵﺒﺎﺀ )(DVD ﺘﺗﻳﺢﻭﻆﻳﻔﺔ ﺘﺤﻛﻡ ﺍﻵﺒﺎﺀ ﻠﻠﻣﺳﺗﺧﺩﻤﻳﻥ ﻀﺑﻁ ﺍﻠﻤﺳﺗﻭﻯ ﺍﻠﻼﺯﻡ ﻠﻣﻧﻊ ﺍﻷﻃﻔﻝ ﻤﻥ ﻤﺷﺎﻫﺩﺓ ﺍﻷﻔﻼﻢ ﺍﻠﺿﺎﺭﺓ ﻜﺘﻠﻙ ﺍﻠﺗﻲ ﺒﻬﺎ ﻤﺷﺎﻫﺩ ﻋﻧﻑ ﺃﻭ ﺍﻠﺗﻲ ﺘﺗﻧﺎﻭﻝ ﺃﺤﺩ ﺍﻠﻣﻭﻀﻭ ﻋﺎﺕ ﺍﻠﺧﺎﺼﺔ ﺒﺎﻠﻛﺒﺎﺭ ﻮﻤﺎ ﺇﻠﻰ ﺫﻠﻙ. ﻭﻅﺎﺌﻑ ﻘﺎﺌﻣﺔ ﺍﻠﺸﺎﺸﺔ ﺍﻠﻣﺗﻌﺪﺪﺓ ﻴﻣﻛﻦ ﺍﺨﺘﻴﺎﺭ ﺍﻠﻌﺩﻴﺩ ﻤﻦ ﺒﻳﻦ ﺍﻠﻟﻐﺎﺕ )ﺍﻠﺗﺭﺠﻣﺔ ﺍﻠﻣﺼﺎﺤﺒﺔ/ﺍﻠﺼﻭﺕ( ﻭﺯﻭﺍﻳﺎ ﺍﻠﺷﺎﺸﺔ ﺃﺜﻧﺎﺀ ﺍﻻﺴﺘﺎﻉ ﺒﻣﺷﺎﻫﺩﺓ ﺍﻷﻔﻼﻡ. ﺍﻻﺴﺗﻌﺭﺍﺽ ﺍﻠﻣﺗﻗﺩﻡ ﺘﻌﻣﻝ ﻤﻳﺯﺓ ﺍﻻﺴﺗﻌﺭ ﺍﺾ ﺍﻠﻣﺘﻗﺪﻢ ﻋﻠﻰ ﺇﻨﺷﺎﺀ ﺼﻭﺭﺓ ﻤﺤﺳﻧﺔ ﺬﺍﺕ ﺨﻃﻮﻄ ﺍﺴﺘﻌﺭ ﺍﺾ ﻀﻌﻑ ﺨﻄﻭﻄ ﺍﻻﺴﺘﻌﺭﺍﺽ ﺍﻠﺧﺎﺼﺔ ﺒﺻﻭﺭﺓ ﻤﺘﺩﺍﺧﻟﺔ ﺘﻗﻠﻳﺪﻴﺔ. )EZ VIEW (DVD ﻴﺗﻳﺢ ﺍﻠﻌﺭﺾ ﺍﻠﺳﻬﻝ ﻀﺒﻄ ﺍﻠﺼﻭﺭﺓ ﺒﺧﻳﺚ ﺘﺗﻨﺎﺴﺏ ﻤﻊ ﺤﺟﻢ ﺸﺎﺸﺔ ٩:١٦ﺃﻭ .(٣:٤ ﻋﺎﺍﺭﺾ ﺍﻠﺻﻭﺭ ﺍﻠﻔﻮﺘﻮﻏﺭﺍﻔﻴﺔ ﺍﻠﺭﻘﻤﻴﺔ )(JPEG ﺘﺳﺗﻃﻳﻊ ﻋﺭﺽ ﺼﻭﺭ ﻔﻭﺘﻭﻏﺭ ﺍﻔﻳﺔ ﺭﻘﻣﻳﺔ ﻋﻟﻰ ﺠﻬﺎﺯ ﺍﻠﺗﻟﻳﻔﺯﻴﻭﻦ. Repeat ﻴﻣﻛﻧﻙ ﺘﻛﺭﺍﺭ ﺃﻏﻧﻳﺔ ﺃﻭ ﻔﻳﻠﻢ ﺒﻣﺠﺭﺩ ﺍﻠﺿﻐﻃ ﻋﻠﻰ ﺍﻠﺯﺭ .REPEAT MP3/WMA ﻴﻣﻛﻦ ﻠﻬﺫﻩ ﺍﻠﻭﺤﺩﺓ ﺘﺷﻐﻳﻝ ﺃﻘﺭ ﺍﺹ ﺘﻢ ﺇﻧﺷﺎﺅ ﻫﺎ ﻤﻥ ﻤﻟﻔﺎﺕ .MP3/WMA MPEG4 ﻴﺳﺘﻄﻳﻊ ﻫﺫﺍ ﺍﻠﺠﻬﺎﺯ ﺘﺷﻐﻳﻝ ﺍﻠﻣﻠﻔﺎﺕ ﺫﺍﺕ ﺘﻧﺳﻴﻕ MPEG4ﺩﺍﺧﻝ ﻤﻟﻑ .AVI ) HDMIﻮﺍﺠﻬﺔ ﺍﻠﻭﺴﺎﺌﻄ ﺍﻠﻣﺘﻌﺪﺩﺓ ﻋﺎﻠﻳﺔ ﺍﻠﻭﻀﻭﺡ( )(DVD-D530K/DVD-D530 ﺘﻌﻣﻝ ﻮﺍﺠﻬﺔ ﺍﻠﻭﺴﺎﺌﻄ ﺍﻠﻣﺘﻌﺪﺩﺓ ﻋﺎﻠﻳﺔ ﺍﻠﻭﻀﻭﺡ HDMIﻋﺎﻰ ﺘﻗﻟﻳﻝ ﺘﺷﻭﻴﺶ ﺍﻠﺼﻮﺭ ﻤﻦ ﺨﻼﻝ ﺍﻠﺳﻣﺎﺡ ﺒﻭﺠﻭﺩ ﻤﺳﺎﺭﺓ ﻔﻴﺩﻴﻭ/ﺼﻭﺕ ﺭﻗﻤﻳﺔ ﺃﻜﺛﺭ ﻨﻗﺎﺀً ﻤﻥ ﺍﻠﻣﺷﻐﻝ ﺇﻠﻰ ﺍﻠﺘﻟﻴﻔﺯﻴﻭﻦ. ﺍﻟﻨﺴﺢ ﻣﻦ ﺍﻟﻘﮟﺹ ﺍﻟﻤُﺪﻣَﺞ ﺘﺗﻳﺢ ﻠﻙ ﻫﺫﻩ ﺍﻠﻣﻳﺯﺓ ﻨﺳﺦ ﻤﻟﻓﺎﺕ ﺍﻟﺻﻭﺕ ﻤﻥ ﺍﻠﻗﺮﺹ ﺇﻠﻰ ﺠﻬﺎﺯ USB ﺒﺗﻧﺳﻳﻕ ) .MP3ﺍﻷﻘﺭﺍﺹ ﺍﻠﻣﺩﻤﺟﺔ ﺍﻠﺻﻭ ﺘﻳﺔ ﻔﻗﻁ ).((CD DA ﻤﻼﺤﻆﺔ ﺍﻷﻘﺭﺍﺹ ﺍﻠﺘﻲ ﻻ ﻴﻤﻜﻦ ﺘﺷﻐﻳﻠﻬﺎ ﻤﻊ ﻫﺬﺍ ﺍﻠﻤﺴﻐﻝ.• DVD-RAM • DVD-ROM • CDV • CD-ROM • CVD • CDI ﺭﺒﻤﺎ ﺘﺗﻭﻘﻑ ﺍﻠﻘﺩﺭﺓ ﻋﻠﻰ ﺍﻠﺘﺴﻐﻴﻝ ﻋﻠﻰ ﻅﺭﻮﻑ ﺍﻠﺘﺴﺠﻴﻝ.• DVD-Rﺃﻭ DVD+R • CD-RW • ﺃﻘﺭﺍﺹ DVD+RWﺃﻮ ) DVD-RWﻮﺿﻊ (V ﻘﺩ ﺘﺗﻣﻛﻦ ﺍﻠﻮﺣﺩﺓ ﻤﻦ ﺸﻐﻴﻞ ﺒﻌﺽ ﺃﻘﺭﺇﺹ CD-Rﻮ CD-RWﻮ DVD-Rﺘﺴﺒﺏ ﻨﻮﻉ ﺍﻠﻘﺭﺹ ﺃﻭ ﻅﺭﻮﻑ ﺍﻠﺘﺴﺠﻳﻞ. ﻋﻼﻤﺎﺕ ﺍﻠﻘﺭﺹ ~ PAL ﻳﺘﻀﻤﻦ ﻫﺬا اﻟﺒﻨﺪ ﺗﻘﻨﻴﺔ ﺣﻤﺎﻳﺔ ﺿﺪ اﻟﻨﺴﺦ وﻫﻲ ﻣﺤﻤﻴﺔ ﺑﻤﻮﺟﺐ ﺣﻘﻮق اﻟﺒﺮ اءات وﺣﻘﻮق اﻟﻤﻠﻜﻴﺔ اﻟﻔﻜﺮﻳﺔ اﻷﺧﺮى ﺑﺎﻟﻮﻻﻳﺎت اﻟﻤﺘﺤﺪة اﻷﻣﺮﻳﻜﻴﺔ وﻜﺬﻟﻚ ﺣﻘﻮق ﺷﺮﻜﺔ .ROVIﻳُﻤﻨﻊ ﻣﻨﻌﺎً ﺑﺎﺗﺎً اﻟﻘﻴﺎم ﺑﻬﻨﺪﺳﺔ ﻋﻜﺴﻴﺔ أو اﻟﺘﻔﻜﻴﻚ ﻤﺨﺭﺠﺎﺕ ﺍﻻﺴﺘﻌﺭﺍﺾ ﺍﻠﻤﺘﻘﺩﻢ )(576p "ﻴﺘﻌﻴﻦ ﻋﻠﻰ ﺍﻠﻤﺴﺘﻠﻜﻴﻦ ﺍﻻﻨﺘﺒﺎﻩ ﺇﻠﻰ ﺃﻨﻪ ﺍﻴﺴﺖ ﻜﻞ ﺃﺠﻬﺰﺓ ﺍﻠﺘﻠﻔﺎﺰﺫﺍﺕ ﺩﺭ ﺠﺔ ﺍﻠﻮﻀﻮﺡ ﺍﻠﻌﺎﻠﻴﺔ ﻤﺘﻮﺍﻓﻘﺔ ﺘﻤﺎﻤًﺎ ﻤﻊ ﻫﺬﺍ ﺍﻠﻤﻨﺘﺞ ﻭﻘﺩ ﺘﺗﺴﺒﺏ ﻔﻲ ﻅﻬﻮﺭ ﻋﻴﻮﺏ ﻤﺭﺌﻴﺔ ﻔﻲ ﺍﻠﺼﻮﺭﺓ .ﻔﻲ ﺤﺎﻠﺔ ﻅﻬﻭﺭ ﻤﺸﻜﻼﺕ ﻔﻲ ﺼﻭﺭ ﺍﻻﺴﺘﻌﺭﺍﺽ ﺍﻠﻤﺘﻘﺩﻢ ﻔﻲ ﺍﻠﻮﺿﻌﻳﻦ 576ﻴُﻮﺼﻰ ﺃﻦ ﻴﻘﻮﻢ ﺍﻠﻤﺴﺘﺨﺩﻢ ﺒﺘﺒﺩﻴﻞ ﺍﻠﻮﺼﻠﺔ ﺇﻠﻰ ﺨﺭﺝ "ﺇﻠﺘﻌﺭﻴﻑ ﺍﻠﻘﻴﺎﺴﻲ" .ﺇﺫﺍ ﻜﺎﻨﺕ ﻠﺩﻴﻚ ﺃﻴﺔ ﺍﺴﺌﻠﺔ ﺘﺗﻌﻠﻕ ﺒﺘﻮﺍﻔﻕ ﺠﻬﺎﺰ ﺍﻠﺘﻠﻔﺎﺰ ﻤﻊ ﻫﺩﺍ ﺍﻠﻄﺭﺍﺰ ﻤﻦ ﻤﺸﻐﻞ ﺃﻘﺭﺍﺹ ،DVD 576pﻴُﺭﺠﻰ ﺍﻻﺘﺼﺎﻞ ﺒﻤﺮﻜﺰ ﺨﺩﻤﺔ ﺍﻠﻌﻤﻼﺀ ﺍﻠﺨﺎﺹ ﺒ ".SAMSUNG ﺃﺯﺭﺍﺭ ﺘﺤﻛﻡ ﺍﻠﻟﻭﺤﺔ ﺍﻷﻤﺎﻤﻳﺔ DVD-D530 ٧ ٥ ٦ ٣٤ ١ ٢ ﻘﺭﺹ ﺩﻮﻠﺒﻲ ﺍﻠﺭﻘﻤﻲ STEREO STEREO ﻘﺭﺹ ﺍﺴﺘﺭﻴﻮ DIGITAL SOUND ﻘﺭﺹ ﺍﻠﺼﻮﺕ ﺍﻠﺭﻘﻤﻲ ﺍﻠﺤﻤﺎﻴﺔ ﻤﻦ ﺍﻠﻨﺴﺦ ﻴﻭﺠﺩ ﺍﻠﻌﺩﻴﺩ ﻤﻦ ﺃﻘﺭﺍﺹ DVDﺍﻠﻤﺰﻮﺩﺓ ﺒﺸﻔﺭﺓ ﻠﻟﺤﻤﺎﻴﺔ ﻩﻦ ﺍﻠﻨﺴﺦ. ﻮﻠﻬﺬﺍ ﺍﻠﺴﺒﺏ ،ﻴﺟﺏ ﻋﻠﻴﻚ ﻔﻘﻄ ﺘﻮﺼﻴﻞ ﻤﺸﻐﻞ ﺃﻘﺭﺍﺹ DVDﻤﺒﺎﺸﺭﺓ ﺒﺟﻬﺎﺰ ﺍﻠﺘﻠﻔﺎﺰ ﻮﻠﻴﺲ ﺒﺄﺣﺩ ﺃﺠﻬﺰﺓ ﺍﻠﻔﻴﺩﻴﻭ .ﺤﻳﺚ ﻴﻨﺘﺞ ﻋﻦ ﺘﻭﺼﻴﻝ ﻫﺫﻩ ﺍﻠﻮﺤﺪﺓ ﺒﺠﻬﺎﺰ ﻔﻴﺩﻴﻮ ﻅﻬﻮﺭ ﺼﻮﺭﺓ ﻤﺸﻭﻫﺔ ﻤﻦ ﺃﻘﺭﺍﺹ DVDﺍﻠﻤﺤﻤﻴﺔ ﻀﺩ ﺍﻠﻨﺴﺦ. ﺭﻤﺰ ﻤﻨﻄﻘﺔ ﺍﻠﺘﺸﻐﻴﻞ ﻨﻅﺎﻢ ﺒﺚ PALﻔﻲ ﺍﻠﻤﻣﻛﺔ ﺍﻟﻤﺘﺤﺩﺓ ﻮﻔﺭﻨﺴﺎ ﻮﺃﻠﻤﺎﻨﻴﺎ ﻮﻤﺎ ﺇﻠﻰ ﺫﻠﻚ. ﺍﻠﻮﺼﻑ DVD-D360K DVD-D530K ٧ ٣٤ ٥ ٦ ٢ ١ ٨ ﻘﺭﺹ MP3 ﺮﻘﻢ ﺍﻠﻤﻨﻄﻘﺭ ﻴﺘﻢ ﺘﺭﻤﻳﺰ ﻜﻞ ﻤﻦ ﺃﻘﺭﺍﺹ ﻮﻤﺸﻐﻞ ﺃﻘﺭﺍﺹ DVDﺤﺴﺏ ﺍﻠﻤﻨﻄﻘﺔ .ﻮﻻﺒﺩ ﺃﻦ ﺘﺗﻮﺍﻔﻕ ﺭﻤﻮﺰ ﺍﻠﻤﻨﺎﻄﻕ ﺤﺘﻰ ﻴﻤﻜﻥ ﺘﺸﻐﻴﻝ ﺍﻠﻘﺭﺹ .ﻔﻲ ﺤﺎﻠﺔ ﻋﺩﻢ ﺘﻮﺍﻔﻕ ﺍﻠﺭﻤﻮﺰ ،ﻠﻦ ﻴﺘﻢ ﺘﺸﻐﻳﻞ ﺍﻠﻘﺭﺹ. ﻮﻴﻤﻜﻦ ﺍﻠﻌﺛﺭ ﻋﻠﻰ ﺭﻤﺯ ﺍﻠﻤﻨﻄﻘﺔ ﻠﻬﺫﺍ ﺍﻠﻤﺸﻐﻞ ﻋﻠﻰ ﺍﻠﻟﻭﺤﺔ ﺍﻠﺨﻠﻔﻴﺔ. ﻋﺘﻤﺎﺩ DivX ﺘﻌﺩ DivXﻮ DiVX Certified ﺍ .ﺪﺭﺝ ﺍﻷﻘﺭﺍﺹ ﻀﻊ ﺍﻠﻗﺭﺹ ﻫﻨﺎ. DISPLAY .٢ ﺍﺿﻌﻁ ﻋﻟﻰ ﻫﺫﺍ ﺍﻠﺯﺭ ﻠﻓﺗﺢﺪﺭﺝ ﺍﻷﻘﺭﺍﺹ ﻭﺇﻏﻼﻘﻪ. OPEN/CLOSE ( ) .٣ ﺍﺿﻌﻁ ﻋﻟﻰ ﻫﺫﺍ ﺍﻠﺯﺭ ﻠﻓﺗﺢﺪﺭﺝ ﺍﻷﻘﺭﺍﺹ ﻭﺇﻏﻼﻘﻪ. STOP( ) .٤ ﻹﻴﺎﻑ ﺘﺷﻐﻳﻝ ﺍﻠﻗﺭﺹ. ﺑﻤﺎ ﻓﻲ ﻟﻚ اﻟﻤﺤﺘﻮى اﻟﻤﺘﻤﻴﺰ“. ﻤﻐﻂﻲ ﺒﻭﺍﺣﺩﺓ ﺃﻭﺃﻜﺛﺭ ﻤﻥ ﺒﺭﺍﺀﺍﺕ ﺍﻻﺨﺗﺭﺍﻉ ﺍﻷﻤﺭﻴﻛﻳﺔ ﺍﻟﺗﺎﻟﻳﺔ : 7,519,274 ،7,515,710 ،7,460,668 ، : 7295673 .٧ .٨ DVD-D530 DVD-D360K ،DivXNetwork, Incﻮﻴﺘﻢ ﺍﺴﺘﺧﺩﺍﻤﻬﺎ ﺒﻤﻮﺠﺏ ﺘﺭﺨﻴﺹ. .٦ ﺍﺴﺗﻛﺷﺎﻑ ﻭﺤﺩﺓﺍﻠﺗﺣﻛﻢ ﻋﻥ ﺑُﻌﺪ ﻮﺍﻠﺸﻌﺎﺭﺍﺕ ﺍﻠﻤﺭﺘﺒﻄﺔ ﺒﻬﺎ ﻋﻼﻤﺎﺕ ﺘﺠﺎﺭﻴﺔ ﻠﺸﺭﻜﺔ “ ﺑﺮﻧﺎﻣﺞ DivXﻣﺮﺧﺺ ﻟﻪ ﺗﺸﻐﻴﻞ ﻟﻘﻄﺎت اﻟﻔﻴﺪﻳﻮ ﻣﻦ ،DivX .٥ ) ( PLAY/PAUSE ﻟﺑﺩﺀ ﺘﺷﻐﻳﻝ ﺍﻠﻗﺭﺹ ﺃﻭ ﺇﻴﻗﺎﻑ ﺘﺷﻐﻳﻟﻪ ﻤﺆﻗﺗًﺎ. ( POWER ON/OFF ) ﻘﻡ ﺒﺎﻠﺗﺷﻐﻝ/ﺇﻴﻗﺎﻑ ﺍﻠﺗﺷﻐﻳﻝ ﻭﺴﻳﺗﻡ ﺘﺷﻐﻳﻝ/ﺇﻴﻗﺎﻑ ﺘﺷﻐﻳﻝ ﺍﻠﻣﺷﻐﻝ. ﻤﺿﻳﻑ USB ﺘﻭﺼﻳﻝ ﻜﺎﻤﻳﺭﺍ ﺍﻠﺻﻭﺭ ﺍﻠ�ﺎﺒﺗﺔ ﺍﻠﺭﻘﻣﻳﺔ ﺃﻭ ﻤﺷﻐﻝ MP3ﺃﻭ ﺒﻃﺎﻘﺔ ﺍﻠﺫﺍﻜﺭﺓ ﺃﻭ ﻘﺎﺭﺊ ﺍﻠﺑﻃﺎﻘﺔ ﺃﻮ ﻭﺤﺩﺍﺕ ﺍﻠﺗﺧﺯﻴﻥ ﺍﻷﺨﺭﻯ ﺍﻠﻗﺎﺒﻟﺔ ﻠﻺﺯﺍﻠﺔ. (DVD-D530K/DVD-D360K) MIC ﻠﺗﻭﺼﻳﻝ ﺍﻠﻳﻛﺭﻭﻔﻭﻥ ﻠﺗﺛﻐﻳﻝ ﻭﻅﺎﺌﻑ ﻜﺎﺭﻭﻜﻲ. ١٥ ١٥ ١٦ ١٧ ٥ ٢٦ ٢٨ ٢٧ ٢١ ٣٠ ٢٠ ١ ٦ ٧ ٨ ٢٤ ١١ ١٠ ١٢ ١٣ ٢٢ ١٦ ١٧ ١٨ ١٩ ٢٨ ٢١ ٢٢ ٢٣ ٢٤ ٢٥ ٢٦ ٢٧ DVD-D530K ١ ٢ ٣ ٤ ٥ ٦ ٧ ٢٠ ٩ ١٠ ١١ ١٢ ١٣ ١٤ ٢٨ ١٤ ١٥ ١٦ ١٧ ١٨ ١٩ ٢٠ ٢١ ٢٢ ٢٣ ٢٤ ٢٥ ٢٦ ٢٧ ٢٨ ٢٩ ٣٠ ١ ٢ ٣ ٤ ٥ ٦ ٧ ٨ ٩ ١٠ ١١ ١٢ ١٣ ١٤ ٣ .١ﺍﻠﺯﺭ POWERﻠﻣﺷﻐﻝ ﺃﻘﺭﺍﺹ DVD ﻠﺗﺷﻐﻳﻝ ﺍﻠﻭﺤﺩﺓ ﺃﻭ ﺇﻴﻗﺎﻑ ﺘﺷﻐﻳﻟﻬﺎ. .٢ﺯﺭ (DVD-D530K/DVD-D530) DVD ﺍﻀﻐﻃ ﻋﻟﻰ ﻫﺫﺍ ﺍﻠﺯﺭ ﻋﻧﺩ ﺍﺴﺗﺧﺩﺍﻡ ﻤﺷﻐﻝ .DVD .٣ﺯﺭ (DVD-D530K/DVD-D530) TV ﺍﻀﻐﻃ ﻋﻟﻰ ﻫﺫﺍ ﺍﻠﺯﺭ ﻠﺗﺷﻐﻳﻝ ﺍﻠﺗﻟﻓﺎﺯ. .٤ﺯﺭ EZ VIEW )(DVD-D530K/DVD-D530 ﻴﻣﻛﻥ ﻀﺑﻁ ﻨﺳﺑﺔ ﺍﻻﺭﺘﻓﺎﻉ ﺇﻠﻰ ﺍﻠﻌﺭﺽ ﺒﺳﻬﻭﻠﺔ ﻮﻔﻗًﺎ ﻠﺤﺟﻡ ﺸﺎﺸﺔ ﺍﻠﺗﻟﻳﻓﺯﻴﻭﻥ ) ٩:١٦ﺃﻭ .(٣:٤ .٥ﺯﺭ ﺍﻠﻌﻼﻤﺔ )(MARKER .٦ﺯﺭ REPEAT ﻴﺘﻳﺢ ﻫﺫﺍ ﺍﻠﺯﺭ ﺘﻛﺭﺍﺭ ﺘﺷﻐﻳﻝ ﻋﻧﻭﺍﻥ ﺃﻭ ﻔﺻﻝ ﺃﻭ ﻤﺎﺩﺓ ﻤﺳﺟﻟﺔ ﺃﻭ ﻘﺭﺹ. .٧ﺯﺭ DISC MENU ﻻﻈﻬﺎﺭ ﻘﺎﺌﻣﺔ ﺍﻻﻗﺭﺍﺹ .٨ﺯﺭ (DVD-D530K/DVD-D360K) RECORD ﺘﺳﺗﺧﺩﻢ ﻟﻟﺳﺟﻳﻝ ﺒﻂﺭ ﻴﻗﺔ ﻜﺎﺭﻴﻭ ﻜﻲ .٩ﺯﺭ )) TV VOL (+, -ﺍﻠﺯﻴﺎﺩﺓ ،ﺍﻠﺗﺧﻓﻳﺽ( )(DVD-D530K/DVD-D530 ﺍﻠﺗﺣﻛﻡ ﻔﻲ ﻤﺳﺗﻭﻯ ﺍﻠﺻﻭﺕ .١٠ﺯﺭﺍ (|k/K|) SKIP ﻴﺳﺗﺧﺩﻤﺎﻥ ﻠﺗﺧﻃﻲ ﺍﻠﻌﻧﻭﺍﻥ ﺍﻠﻓﺻﻝ ﺃﻭ ﺍﻠﻣﻟﺩﺓ ﺍﻠﻤﺳﺟﻟﺔ. .١١ﺯﺭ (˚) STOP .١٢ﺯﺭ MENU ﻹﻈﻬﺎﺭ ﻘﺎﺌﻣﺔ ﻤﺷﻐﻝ ﺃﻘﺭﺍﺹ .DVD .١٣ﺃﺯﺭﺍﺭENTER √/® π/†/ ﻴﻌﻣﻝ ﻫﺫﺍ ﺍﻠﺯﺭ ﻜﻣﻓﺗﺎﺡ ﺘﺑﺩﻳﻝ. .١٤ﺯﺭ TOOLS ﻠﻌﺭﺽ ﻭﻀﻊ ﺍﻠﻗﺭﺹ ﺍﻠﺣﺎﻠﻲ ﻳﺴﺘﺨﺪم ﻟﻌﺮض ﺷﺮﻳﻂ ﻣﻌﻠﻮﻣﺎت اﻟﺘﺸﻐﻴﻞ .١٥ﺯﺭ ) ( OPEN/CLOSE ﻠﻓﺗﺢ ﺪﺭﺝ ﺍﻷﻘﺭﺍﺹ ﻭﺇﻏﻼﻘﻪ. .١٦ﺯﺭ HDMI SEL. )(DVD-D530K/DVD-D530 ﻠﺿﺑﻃ ﺪﻘﺔ ﺨﺭﺝ .HDMI .١٧ﺯﺭ USB ﻠﺗﻛﺑﻳﺭ ﺼﻭﺭﺓ .DVD .١٨ﺍﻠﺯﺭ VIDEO SEL. ﻟﺗﻐﻳﻳﺭ ﻭﻀﻊ ﺨﺭﺝ ﺍﻠﻓﻳﺩﻴﻭ. .١٩ﺯﺭ REPEAT A-B )(DVD-D530K/DVD-D530 .٢٠ﺯﺭ INFO .ﻜﻤﺎ ﻳﺴﻤﺢ ﻟﻚ أﻳﻀﺎ ﺑﺎﺳﺘﺨﺪام وﻇﻴﻔﺔ اﻟﻌﺮض ).(Display .٢١ﺯﺭ TITLE MENU ﻻﻈﻬﺎﺭ ﻘﺎﺌﻣﺔ ﺍﻠﻌﻧﺎﻭﻴﻥ. .٢٢ﺯﺭ TV SOURCE/AUDIO ﺍﺴﺗﺧﺩﻡ ﻫﺫﺍ ﺍﻠﻟﻭﺼﻭﻝ ﺇﻠﻰ ﻭﻆﺎﺌﻑ ﺍﻠﺻﻭﺕ ﺍﻠﻣﺗﻌﺩﺪﺓ ﺍﻠﻣﻭﺠﻭﺪﺓ ﻋﻟﻰ ﺍﻠﻗﺭﺹ.ﺍﻨﻗﺭ ﻋﻟﻰ ﻫﺫﺍ ﺍﻠﺯﺭ ﻻﺨﺗﻳﺎﺭ ﻤﺻﺩﺭ ﺍﻠﺗﻟﻓﺎﺫ ﺍﻠﻣﺗﺎﺡ )ﻭﻀﻊ ﺍﻠﺗﻟﻓﺎﺯ(. .٢٣ﺯﺭ (∏∏)PAUSE )(DVD-D530K/DVD-D530 ﺇﻴﻗﺎﻑ ﺍﻠﺗﺷﻐﻳﻝ ﺍﻠﻣﺅﻘﺕ ﻠﻟﻗﺭﺹ. .٢٤ﺯﺭﺍ (k/K) SEARCH ﻴﺗﻳﺣﺎﻥ ﻠﻙ ﺍﻠﺑﺣﺙ ﺇﻠﻰ ﺌﻷﻤﺎﻡ/ﺍﻠﺧﻟﻑ ﺨﻼﻝ ﺍﻠﻗﺭﺹ. .٢٥ﺃﺯﺭﺍﺭ )) TV CH (P, Qﻘﻧﺎﺓ ﺍﻠﺗﻟﻓﺎﺯ( )(DVD-D530K/DVD-D530 ﺘﺣﺩﻴﺩ ﺍﻠﻗﻧﺎﺓ. .٢٦ﺯﺭ )®(PLAY ( )/ ﻠﺑﺩﺀ ﺍﻠﺗﺷﻐﻳﻝ. .٢٧ﺯﺭ RETURN ﻠﻟﺭﺠﻭﻉ ﺇﻠﻰ ﻘﺎﺌﻣﺔ ﺴﺎﺒﻗﺔ. .٢٨ﺯﺭ )SUBTITLE (π .٢٩ﺯﺭ ) EXITﺨﺭﻭﺝ( )(DVD-D530K/DVD-D530 ﻠﻟﺧﺭﻭﺝ ﻣﻥ ﺍﻠﻗﺎﺌﻤﺔ ﺍﻠﺗﻲ ﺘﻆﻬﺭ ﺍﻠﻰ ﻠﺷﺎﺸﺔ. .٣٠ﺯﺭ (†) KARAOKE )(DVD-D530K/DVD-D360K ﻟﻟﻭﺼﻭﻝ ﺇﻟﻰ ﻘﺎﺌﻣﺔ ﻜﺎﺭﻴﻭﻜﻲ(echo، mic vol ،keycon). ﺍﻠﺗﻭﺼﻳﻼﺕ ﺍﺨﺗﻳﺎﺭ ﺇﺤﺩﻯ ﺍﻠﺗﻭﺼﻴﻼﺕ ﺘﻌﺭﺾ ﺍﻠﺗﺎﻟﻳﺔ ﺘﻭﺼﻳﻼﺕ ﺸﺎﺌﻌﺔ ﺍﻻﺴﺗﺧﺩﺍﻡ ﻠﺘﻭﺼﻳﻝ ﻤﺷﻐﻝ ﺍﻘﺭﺍﺹ DVDﺒﺠﻬﺎﺯ ﺍﻠﺗﻟﻓﺎﺯ ﻭ ﺍﻠﻣﻛﻭﻧﺎﺖ ﺍﻷﺨﺭﻯ. ﻘﺒﻝ ﺘﻭﺼﻳﻝ ﻤﺷﻐﻝ DVD ﺘﺄﻜﺩ ﺩﺍﺌﻣًﺎ ﻤﻦ ﺇﻴﻗﺎﻑ ﺘﺷﻐﻝ ﺃﻘﺭﺍﺹ DVDﻭﺍﻠﺘﻟﻓﺎﺯ ﻭﺍﻠﻣﻛﻭﻨﺎﺕ ﺍﻷﺨﺭﻯ ﻘﺑﻝ ﺘﻭﺼﻳﻝ ﺃﻱ ﻜﺎﺒﻼﺕ ﺃﻭ ﻔﺻﻟﻬﺎ. ﻴﺭﺠﻰ ﺍﻠﺭﺠﻭﻉ ﺇﻠﻰ ﺩﻠﻝ ﺍﻠﻣﺳﺘﺨﺩﻡ ﻠﻟﻣﻛﻭﻨﺎﺕ ﺍﻹﺿﺎ ﻔﻳﺔ ﺍﻠﺘﻲ ﺘﻗﻭﻢ ﺒﺗﻭﺼﻳﻟﻬﺎ ﻠﻟﺤﺼﻭﻝ ﻋﻟﻰ ﻤﺯﻴٍﺩ ﻤﻥ ﺍﻠﻣﻌﻟﻭﻣﺎﺕ ﺤﻭﻝ ﺘﻟﻙ ﺍﻠﻣﻛﻭﻨﺎﺕ ﺍﻠﺧﺎﺼﺔ. .Aﺍﻠﺗﻭﺼﻳﻝ ﺒﺠﻬﺯ ﺘﺈﻔﺎﺯ )ﻠﻟﻔﻴﺩﻴﻭ( .١ﺒﺎﺴﺗﺧﺩﺍﻢ ﻜﺎﺒﻼﺕ ﺍﻠﺼﻭﺖ/ﺍﻠﻔﻳﺩﻳﻭ،ﻘﻢ ﺑﺘﻭﺼﻳﻝ ﻄﺭ ﻔﻲ ﺍﻠﺗﻭﺼﻳﻝ ) VIDEOﺍﻷﺼﻔﺭ() AUDIO OUT/ﺍﻷﺒﻳﺾ ﻭﺍﻷﺤﻤﺭ( ﺒﺎﻠﺠﺯ ﺀ ﺍﻠﺧﻟﻔﻲ ﻤﻦ ﻤﺷﻐﻝ ﺃﻭﺃﻘﺭﺍﺹ ) 5.1ﺍﻠﻗﻧﺎﺓ 5.1CHﻭ ﺍﻷﺒﻳﺾ( ﺍﻠﺧﺎﺹ ﺃﻘﺭﺍﺹ DVDﺒﻃﺭﻔﻲ ﺘﻭﺼﻳﻝ ) VIDEOﺍﻷﺼﻔﺭ() AUDIO IN/ﺍﻷﺒﻳﺾ ﻭﺍﻷﺤﻤﺭ( ﺒﺟﻬﺎﺯ ﺍﻠﺗﻟﻔﺎﺯ. .٢ﻘﻢ ﺒﺗﺷﻐﻳﻝ ﻤﺷﻐﻝ ﺃﻘﺭﺍﺹ DVDﻭ ﺍﻠﺘﻟﻔﺎﺯ. .٣ﺍﺿﻐﻄ ﻋﻟﻰ ﻤﺤﺩﺩ ﺍﻠﺩﺧﻝ ﺒﻭﺤﺩﺓ ﺍﻠﺗﺤﻛﻡ ﻋﻥ ﺒﻌﺩ ﺍﻠﺧﺎﺼﺔ ﺒﺎﻠﺗﻟﻳﻔﺯﻴﻭﻦ ﺤﺗﻰ ﺘﻇﻬﺭ ﺇﺸﺎﺭﺓ ﺍﻠﻔﻴﺩﻴﻭ ﺍﻠﺼﺎﺩﺭﺓ ﻤﻥ ﻤﺷﻐﻝ DVDﻋﻟﻰ ﺸﺎﺸﺔ ﺍﻠﺗﻟﻳﻔﺯﻳﻭﻥ. ٤ ﻤﻼﺤﻅﺔ ﻘﺩ ﻴﺣﺩﺚ ﺘﺷﻭﻴﺶ ﺇﺫﺍ ﻜﺎﻦ ﻜﺎﺒﻝ ﺍﻠﺼﻭﺕ ﺸﺩﻴﺩ ﺍﻠﻗﺭﺏ ﻤﻥ ﻜﺎﺒﻝ ﺍﻠﺘﻳﺎﺭ ﺍﻠﻛﻬﺭﺒﻲ. ﺇﺫﺍ ﺃﺭﺩﺕ ﺍﻠﺗﻮﺼﻳﻝ ﺒﻣﺿﺧﻡ ﺼﻭﺕ ،ﻔﻳُﺭ ﺠﻰ ﺇﻠﺭ ﺠﻭﻉ ﺇﻠﻰ ﺼﻔﺤﺔ ﺘﻭﺼﻳﻝ ﻤﺿﺧﻢ ﺍﻠﺼﻭﺕ. ﻴﺧﺗﺎﻑ ﻋﺫﺩ ﺃﻄﺭﺍﻒ ﺍﻠﺘﻭﺼﻳﻝ ﻭﺼﻳﻝ ﻭﻤﻭﻀﻌﻬﺎ ﺤﺳﺏ ﺠﻬﺎﺯ ﺍﻠﺗﻠﻔﺎﺯ .ﻴﹸﺭﺠﻰ ﺍﻠﺭﺟﻭﻉ ﺇﻠﻰ ﺩﻠﻳﻝ ﺍﻠﻣﺳﺗﺧﺩﻡ ﺍﻠﺧﺎﺹ ﺒﺎﻠﺗﻟﻔﺎﺯ. ﻔﻲ ﺤﺎﻠﺔ ﻮﺠﻮﺩ ﻄﺭﻒ ﺘﻭﺼﻳﻝ ﺩﺨﻝ ﺼﻭﺕ ﻭﺍﺣﺩ ﺒﺠﻬﺎﺯ ﺍﻠﺘﻟﻔﺎﺯ ،ﻘﻢ ﺒﺗﻭﺼﻳﻟﻪ ﺒﻁﺭﻒ ﺘﻭﺼﻳﻝ ]] [AUDIO OUTﺍﻷﻴﺳﺭ[ )ﺍﻷﺒﻳﺽ( ﺍﻠﻣﻮﺠﻭﺩ ﺒﻤﺷﻐﻝ ﺃﻘﺭﺍﺹ .DVD ﻔﻲ ﺤﺎﻠﺔ ﺍﻠﺿﻐﻂ ﻋﻟﻰﺯﺭ VIDEO SEL.ﻋﻧﺩﻤﺎ ﻴﻛﻭﻦ ﻤﺷﻐﻝ DVDﻔﻲ ﻮﻀﻊ ﺍﻠﺗﻭﻘﻑ ﺃﻭ ﻔﻲ ﺤﺎﻠﺔ ﻋﺩﻢ ﺇﺩﺨﺎﻝ ﺃﻱ ﻘﺭﺹ ،ﻴﺗﻐﻳﺭ ﺍﻠﻭﻀﻊ ﺨﺭﺝ ﺍﻠﻔﻳﺩﻴﻭ ﺒﺎﻠﺗﺳﻠﺳﻝﺍﻠﺘﺎﻠﻱ .(P-SCAN o I-SCAN) : .Bﺍﻠﺗﻭﺼﻳﻝ ﺒﺠﻬﺎﺯ ﺘﻟﻓﺎﺯ )ﺘﺩﺍﺧﻝ/ﻤﺘﻗﺩﻢ( .١ﺒﺎﺴﺘﺧﺩﺍﻢ ﻜﺎﺒﻼﺕ ﻔﻳﺩﻳﻭ ﺍﻠﻣﻛﻭﻥ ،ﻘﻢ ﺒﺗﻭﺼﻳﻝ ﻃﺭﻒ ﺘﻭﺼﻳﻝ COMPONENT VIDEO OUTﺍﻠﻣﻭﺠﻭﺩ ﺒﺎﻠﺠﺯ ﺀ ﺍﻠﺨﻟﻓﻲ ﻠﻣﺷﻐﻞ ﺃﻘﺭﺍﺹ DVDﺒﻃﺭﻑ ﺘﻮﺼﻳﻝ COMPONENT INﺒﺠﻬﺎﺯ ﺍﻠﺘﻟﻓﺎﺯ. .٢ﺒﺎﺴﺗﺧﺩﺍﻢ ﻜﺎﺒﻼﺕ ﺍﻠﺼﻭﺖ ،ﻘﻢ ﺑﺘﻭﺼﻳﻝ ﻄﺭ ﻔﻲ ﺍﻠﺗﻭﺼﻳﻝ ) AUDIO OUTﺍﻷﺒﻳﺾ ﻭﺍﻷﺤﻤﺭ( ﺒﺎﻠﺠﺯ ﺀ ﺍﻠﺧﻟﻔﻲ ﻤﻦ ﻤﺷﻐﻝ ﺃﻭﺃﻘﺭﺍﺹ ) 5.1ﺍﻠﻗﻧﺎﺓ 5.1CH ﻭ ﺍﻷﺒﻳﺾ( ﺍﻠﺧﺎﺹ ﺃﻘﺭﺍﺹ DVDﺒﻃﺭﻔﻲ ﺘﻭﺼﻳﻝ ) AUDIO INﺍﻷﺒﻳﺾ ﻭﺍﻷﺤﻤﺭ( ﺒﺟﻬﺎﺯ ﺍﻠﺗﻟﻔﺎﺯ .ﻘﻢ ﺒﺗﺷﻐﻳﻝ ﻤﺷﻐﻝ ﺃﻘﺭﺍﺹ DVDﻭ ﺍﻠﺘﻟﻔﺎﺯ. .٣ﺍﻀﺑﻄ ﺨﺭﺝ ﺍﻠﻔﻴﺩﻳﻭ ﻋﻠﻰ P-SCAN/I-SCANﻔﻲ ﻘﺎﺌﻣﺔ Display Setupﻴﻣﻛﻥﺍﺴﺘﺧﺪﺍﻢﺍﻠﺯﺭ VIDEO SEL.ﻔﻲ ﺘﻐﻳﻳﺭ ﻭﺿﻊ ﺨﺭﺝ ﺍﻠﻔﻳﺩﻴﻭ. ﻤﻼﺤﻅﺔ ﻤﺎ ﻫﻮ ”ﺍﻻﺴﺗﻌﺭﺍﺽ ﺍﻠﻩﺘﻗﺩﻢ“ .ﻴﺘﻣﻳﺯ ﺍﻻﺴﺗﻌﺭﺍﺾ ﺍﻠﻤﺗﻗﺩﻢ ﺒﺄﻨﻪ ﻴﺗﺿﻣﻥ ﺨﻄﻭﻄ ﺍﺴﺘﻌﺭﺍﺽ ﻀﻌﻒ ﺨﻃﻭﻃ ﺍﻻﺴﺗﻌﺭﺍﺾﺍﻠﺨﺎﺼﺔ ﺒﻄﺭﻴﻘﺔ ﺨﺭﺝ ﺍﻠﺗﺩﺍﺨﻝ .ﻴﻣﻛﻥ ﺃﻦ ﺘﻤﻧﺤﻙ ﻄﺭﻴﻘﺔ ﺍﻻﺴﺗﻌﺭﺍﺽ ﺍﻠﻣﺗﻘﺩﻡ ﺠﻭﺩﺓ ﺼﻭﺭﺓ ﺃﻭﻀﺢ ﻭﺃﻔﺿﻝ. .Cﺍﻠﺗﻭﺼﻳﻝ ﺒﺎﻠﺗﻠﻳﻔﺯﻴﻭﻥ ﺒﺎﺴﺗﺨﺩﺍﻡ ﻤﻗﺒﺱ (DVD-D530K/DVD-D530) HDMI/DVI .١ﺒﺎﺴﺗﺧﺩﺍﻡ ﻜﺎﺒﻝ ، HDMI-HDMI/HDMI-DVIﻘﻡ ﺒﺗﻭﺼﻳﻝ ﻃﺭﻑ ﺘﻭﺼﻳﻝ HDMI OUTﺍﻠﻣﻭﺠﻭﺩ ﺒﺎﻠﺠﺯ ﺀ ﺍﻠﺧﻟﻔﻲ ﻠﻣﺷﻐﻝ ﺃﻘﺭﺍﺹ DVDﺒﻄﺭﻒ ﺘﻮﺼﻳﻝ HDMI/DVI INﺒﺠﻬﺎﺯ ﺍﻠﺘﻟﻓﺎﺯﻴﻭﻥ. .٢ﺒﺎﺴﺗﺧﺩﺍﻢ ﻜﺎﺒﻼﺕ ﺍﻠﺼﻭﺖ ،ﻘﻢ ﺑﺘﻭﺼﻳﻝ ﻄﺭ ﻔﻲ ﺍﻠﺗﻭﺼﻳﻝ ) AUDIO OUTﺍﻷﺒﻳﺾ ﻭﺍﻷﺤﻤﺭ( ﺒﺎﻠﺠﺯ ﺀ ﺍﻠﺧﻟﻔﻲ ﻤﻦ ﻤﺷﻐﻝ ﺃﻭﺃﻘﺭﺍﺹ ) 5.1ﺍﻠﻗﻧﺎﺓ 5.1CH ﻭ ﺍﻷﺒﻳﺾ( ﺍﻠﺧﺎﺹ ﺃﻘﺭﺍﺹ DVDﺒﻃﺭﻔﻲ ﺘﻭﺼﻳﻝ ) AUDIO INﺍﻷﺒﻳﺾ ﻭﺍﻷﺤﻤﺭ( ﺒﺟﻬﺎﺯ ﺍﻠﺗﻟﻔﺎﺯﻴﻭﻦ .ﻘﻢ ﺒﺗﺷﻐﻳﻝ ﻤﺷﻐﻝ ﺃﻘﺭﺍﺹ DVDﻭ ﺍﻠﺘﻟﻔﺎﺯ. .٣ﺍﺿﻐﻄ ﻋﻠﻰ ﻤﺤﺪﺩ ﺍﻠﺩﺨﻝ ﺒﻭﺤﺩﺓ ﺍﻠﺗﻛﻢ ﻋﻦ ﺒﻌﺩ ﺍﻠﺧﺎﺼﺔ ﺒﺎﻠﺘﻠﻴﻔﺯﻴﻭﻦ ﺤﺗﻰ ﺘﻅﻬﺭ ﺇﺸﺎﺭﺓ HDMI/DVIﺍﻠﺼﺎﺩﺭﺓ ﻤﻦ ﻤﺷﻐﻝ DVDﻋﻠﻰ ﺸﺎﺸﺔ ﺍﻠﺗﻠﻴﻔﺰﻴﻭﻥ. ﻤﻭﺍﺼﻔﺎﺕ (DVD-D530K/DVD-D530) HDMI VIDEO ﻋﻧﺩ ﺍﻠﺿﻐﻄ ﻋﻠﻰ ﺍﻠﺯﺭ HDMI SEL.ﻴﺗﻢ ﺘﺤﺩﻳﺩ 1080i ، 720p ، 576p ، 480pﻭ 1080pﺒﺎﻠﺗﺭﺘﻳﺏ. ﻴﺆﺩﻱ ﺍﻠﺿﻐﻄ ﻋﻠﻰ ﺍﻠﺯﺭ HDMI SEL.ﻷﻮﻝ ﻤﺭﺓ ﺈﻠﻰ ﻆﻬﻭﺭ ﺍﻠﺩﻘﺔ ﺍﻠﺤﺎﻠﻳﺔ ﺃﻣﺎ ﻤﻦ ﺨﻼﻝ ﺍﻠﺿﻐﻄ ﻋﻠﻳﻪ ﻠﻟﻣﺭﺓ ﺍﻠﺛﺎﻨﻳﺔ ،ﻴﻣﻛﻦ ﺘﻐﻴﻳﺭ ﺩﻘﺔ ﺨﺭﺝ .HDMI ﻘﺩ ﻻ ﺘﻌﻣﻝ ﺩﻗﺎﺕ ﺨﺭﺝ HDMIﻤُﻌﻳﻨﺔ ،ﻮﺫﻠﻚ ﺤﺳﺏ ﺍﻠﺗﻠﻳﻔﺯﻴﻭﻦ ﺍﻠﻤﺘﻭﻔﺭ ﻠﺩﻴﻚ. ﻴُﺭﺠﻰ ﺍﻠﺭﺠﻭﻉ ﺇﻠﻰ ﺩﻠﻳﻝ ﺍﻠﻤﺳﺗﺧﺩﻢ ﺍﻠﺧﺎﺹ ﺒﺎﻠﺘﻠﻳﻔﺰﻴﻭﻦ. ﻔﻲ ﺤﺎﻠﺔ ﺘﻭﺼﻳﻝ ﻜﺎﺒﻝ HDMIﺃﻭ HDMI-DVIﺒﺎﻠﺗﻠﻴﻭﻦ ،ﻴﺗﻢ ﻀﺒﻄ ﺨﺭﺝ ﻤﺷﻐﻝ DVDﻋﻠﻰ HDMI/DVIﻔﻲ ﻏﺿﻭﻦ ١٠ﺜﻭﺎﻥ. ﻔﻲ ﺤﺎﻠﺔ ﻀﺑﻂ ﺩﻘﺔ ﺨﺭﺝ HDMIﻋﻠﻰ 1080i ، 720pﺃﻭ ، 1080pﻴﻭﻔﺭ ﺧﺭﺝ HDMIﺠﻭﺩﺓ ﺃﻔﺿﻝ ﻠﻟﺼﻭﺭﺓ. ﻔﻲ ﺤﺎﻠﺔ ﺘﻭﺼﻳﻝ ﻜﺎﺒﻝ HDMIﺒﻳﻥ ﺘﻟﻓﺎﺯ ﺴﺎﻤﺳﻭﻨﺞ ،ﺘﺳﺗﻃﻳﻊ ﺬﺷﻐﻳﻝ ﻤﺷﻐﻝ DVDﺒﺳﻬﻭﻠﺔ ﺒﺎﺴﺗﺧﺩﺍﻡ ﻭ ﺤﺩﺓ ﺍﻠﺗﺣﻛﻡ ﻋﻥ ﺒﻌﺪ ﺍﻠﺧﺎﺼﺔ ﺒﺎﻠﺗﻟﻓﺎﺯ)ﻴﺗﻭﺍﻔﺭ ﻫﺫﺍ ﻔﻗﻁ ﻤﻊ ﺘﻟﻓﺎﺯ ﺴﺎﻤﺳﻭﻨﺞ ﺍﻠﺩﻱ ﻴﺩﻋﻡ ﻭﻈﻳﻓﺔ ).Anynet+(HDMI-CEC ،ﻔﻬﺫﺍ ﻴﻌﻧﻲ ﻥﺃ ﺍﻠﺟﻬﺎﺯ ﻴﺩﻋﻡ ﻭﻈﻳﻓﺔ.(Anynet+ )ﻔﻲ ﺤﺎﻠﺔ ﻭﺠﻭﺩ ﺸﻌﺎﺭ ﻴﺭﺠﻰ ﺍﻠﺗﺣﻗﻕ ﻤﻥ ﻭﺠﻭﺩﺸﻌﺎﺭ▪ ) HDMIﻮﺍﺠﻬﺔ ﺍﻠﻭﺴﺎﺌﻃ ﺍﻠﻣﺘﻌﺩﺩﺓ ﻋﺎﻠﻳﺔ ﺍﻠﻭﻀﻭﺡ( )(DVD-D530K/DVD-D530 HDMIﻋﺒﺎﺭﺓ ﻋﻦ ﻭﺍﺠﻬﺔ ﺘﺳﻣﺢ ﺒﺎﻠﻧﻗﻝ ﺍﻠﺭﻘﻤﻲ ﻠﺒﻳﺎﻨﺎﺕ ﺍﻠﻔﻳﺩﻴﻭ ﻭ ﺍﻠﺼﻭﺕ ﺒﺎﺴﺘﺧﺩﺍﻢ ﻤﻮﺼﻝ ﻭﺍﺤﺩ ﻔﻘﻄ . ﻤﻦ ﺨﻼﻝ ﺍﺴﺗﺧﺩﺍﻡ HDMIﻴﻧﻗﻝ ﻤﺷﻐﻝ DVDﺇﺸﺎﺭﺓ ﺽﻮﺕ ﻮﻔﻴﺩﻴﻭ ﺭﻘﻣﻳﺔ ﻭﻴﻌﺭﺽ ﺼﻭﺭﺓ ﺯﺍﻫﻴﺔ ﻋﻠﻰ ﺍﻠﺗﻠﻳﻔﺯﻴﻭﻦ ﺍﻠﻣﺰﻭﺩ ﺒﻤﻗﺒﺲ ﺩﺧﻝ .HDMI ▪ ﻮﺼﻑ ﻭﺼﻠﺔ HDMI ﻤﻭﺼﻝ - HDMIﻜﻼﻫﻣﺎ ﻋﺑﺭﺓ ﻋﻦ ﺒﻳﺎﻨﺎﺕ ﺼﻭﺕ ﺭﻘﻣﻳﺔ ﻭﺒﻳﺎﻨﺎﺕ ﻔﻴﺩﻴﻭﻏﻧﺭ ﻤﺿﻐﻭﻄﺔ ) LPCMﺃﻭ ﺒﻴﺎﻨﺎﺕ ﺘﺩﻔﻕ ﻭﺤﺩﺍﺕ ﺍﻠﺑﺕ(. ﺇﺸﺎﺭﺓ ﺭﻘﻣﻳﺔ ﻨﻗﻳﺔ ﻔﻗﻃ ﺇﻠﻰ ﺍﻠﺘﻠﻴﻔﺰﻴﻭﻦ ﻋﻠﻰ ﺍﻠﺭﻏﻡ ﻤﻦ ﺃﻦ ﺍﻠﻣﺸﻐﻝ ﻴﺳﺗﺧﺩﻢ ﻜﺎﺒﻝ ، HDMIﻴُﺧﺭﺝ ﺍﻠﻣﺷﻐﻞ. ﻭﺇﺫﺍ ﻜﺎﻦ ﺍﻠﺗﻠﻳﻔﺯﻴﻭﻦ ﻻ ﻴﺩﻋﻢ ) HDCPﺤﻣﺎﻴﺔ ﺍﻠﻣﺤﺘﻭﻯ ﺍﻠﺭﻘﻣﻲ ﻋﺎﻠﻲ ﺍﻠﻨﻄﺎﻖ( ،ﻴﻅﻬﺭ ﺗﺷﻮﻴﺶ ﺃﺒﻳﺾ ﻠﻟﻮﻦ ﻋﻠﻰ ﺍﻠﺸﺎﺸﺔ.▪ ﻟﻣﺎﺫﺍ ﺘﺳﺘﺧﺩﻢ ﺸﺭﻜﺔ Samsungﺘﻘﻧﻳﺔ HDMI ﺍﻠﺭ ﻏﻡ ﻤﻦ ﺫﻠﻚ ،ﻔﻌﻧﺩ ﺘﺷﻐﻳﻝ ﺃﺤﺩ ﺃﻘﺭﺍﺹ ، DVDﻔﺈﻦ ﺍﻠﺒﻴﺎﻨﺎﺕ ﺍﻠﺗﻲ ﻴﺗﻡ ﺘﺗﻄﻠﺏ ﺃﺠﻬﺯﺓ ﺍﻠﺗﻠﻴﻔﺯﻴﻭﻦ ﺍﻠﺘﻧﺎﻅﺭﻴﺔ ﺇﺸﺎﺭﺓ ﻔﻴﺩﻴﻭ/ﺼﻮﺕ ﺘﻧﺎﻅﺭﻴﺔ .ﻮﻋﻠﻰ ﻨﻗﺎﻬﺎ ﺇﻠﻶ ﺍﻠﺗﻠﻳﻔﺯﻴﻭﻦ ﺘﻛﻭﻦ ﺒﻳﺎﻧﺎﺕ ﺭﻘﻣﻳﺔ .ﻮﻤﻦ ﺜﻡ ﻴﺗﻌﻳﻦ ﺍﺳﺘﺧﺩﺍﻡ ﻤﺤﻭﻝ ﺭﻘﻣﻲ ﺇﻠﻰ ﺘﻧﺎﻅﺭﻱ )ﻔﻲ ﻤﺷﻐﻝ (DVDﺃﻭ ﻤﺤﻭﻝ ﺘﻧﺎﻅﺭﻱ ﺇﻠﻰ ﺭﻘﻣﻲ )ﻔﻲ ﺍﻠﺗﻠﻳﻔﺯﻴﻮﻦ( .ﺃﺜﻧﺎ ﺀ ﻋﻣﻠﻳﺔ ﺍﻠﺗﺤﻮﻴﻝ ﺘﺗﺭﺪﻯ ﺠﻭﺩﺓ ﺍﻠﺼﻭﺭﺓ ﺒﺳﺘﺏ ﺍﻠﺗﺷﻮﻴﺶ ﻮﻔﻘﺩﺍﻦ ﺍﻹﺷﺎﺭﺓ .ﺗﻌﺩ ﺘﻗﻨﻳﺔ DVIﻫﻲ ﺍﻷﻔﺿﻝ ﺤﻳﺚ ﺇﻨﻬﺎ ﻻ ﺘﺗﻄﻟﺏ ﺘﺤﻮﻳﻝ ﺭﻘﻤﻲ/ﺘﻨﺎﻆﺭﻱ ﻭﺘﻨﻗﻝ ﺇﺸﺎﺓ ﺭﻘﻣﻳﺔ ﻣﻦ ﺍﻠﻣﺷﻐﻝ ﺇﻠﻰ ﺍﻠﺗﻠﻳﻔﺰﻴﻭﻦ. ▪ ﻤﺎ ﺍﻠﻣﻘﺼﻮﺩ ﺒ HDMI ﺇﻥ ) HDCPﺤﻣﺎﻴﺔ ﺍﻠﻣﺤﺗﻮﻯ ﺍﻠﺭﻘﻣﻲ ﻋﺎﻠﻲ ﺍﻠﻨﻄﺎﻖ( ﻋﺑﺎﺭﺓ ﻋﻦ ﻨﻄﺎﻢ ﻴﺳﺗﺧﺩﻢ ﻠﺤﻣﺎﻴﺔ ﻤﺤﺗﻮﻴﺎﺕ DVDﺍﻠﺗﻲ ﻴﺘﻢ ﺇﺧﺭ ﺍﺠﻬﺎ ﻋﺑﺭ DVIﺒﺤﻳﺙ ﻻ ﻴﺗﻢ ﻨﺳﺧﻬﺎ .ﻮﻴﻭﻔﺭ ﻫﺫﺍ ﺍﻠﻧﻅﺎﻢ ﺍﺗﺼﺎﻻ ﺭﻘﻤﻳﹰﺎ ﺁﻤﻧًﺎ ﺒﻴﻦ ﻤﺼﺭ ﻔﻴﺩﻴﻭ)ﺍﻠﻜﻣﺒﻴﻮﺗﺭ ﺃﻭ DVDﻭﻤﺎ ﺇﻠﻰ ﺫﻠﻚ( ﻮﺠﻬﺎﺯ ﺍﻠﻌﺭﺾ )ﺍﻠﺗﻠﻳﻔﺯﻴﻭﻦ ﻮﺁﻠﺔ ﺍﻠﻌﺭﺽ ﻮﻤﺎ ﺇﻠﻰ ﺫﻠﻚ( .ﻮﻴﺘﻡ ﺘﺷﻔﻳﺭ ﺍﻠﻣﺤﺗﻮﻯ ﻔﻲ ﺍﻠﺠﻬﺎﺯ ﺍﻠﻣﺼﺭ ﻠﻤﻨﻊ ﺇﻨﺷﺎﺀ ﻨﺳﺦ ﻏﻴﺭ ﻤﺭﺨﺼﺔ. .Dﺍﻠﺗﻭﺼﻳﻝ ﺒﻨﻅﻡ ﺼﻭﺕ )ﻤﺾﺧﻡ ﺼﻮﺕ ﺜﻨﺎﺌﻲ ﺍﻠﻓﺘﻭﺍﺕ/ﻤﺿﺧﻢ ﺍﻠﻓﺘﻭﺍﺕ Dolby Digitalﺃﻮ (MPEG2 .١ﺒﺎﺴﺗﺧﺩﺍﻢ ﻜﺎﺒﻼﺕ ﺍﻠﺼﻭﺖ ،ﻘﻢ ﺑﺘﻭﺼﻳﻝ ﻄﺭ ﻔﻲ ﺍﻠﺗﻭﺼﻳﻝ ) AUDIO OUTﺍﻷﺒﻳﺾ ﻭﺍﻷﺤﻤﺭ( ﺒﺎﻠﺠﺯﺀ ﺍﻠﺧﻟﻔﻲ ﻤﻦ ﻤﺷﻐﻝ ﺃﻭﺃﻘﺭﺍﺹ ) 5.1ﺍﻠﻗﻧﺎﺓ 5.1CH ﻭ ﺍﻷﺒﻳﺾ( ﺍﻠﺧﺎﺹ ﺃﻘﺭﺍﺹ DVDﺒﻃﺭﻔﻲ ﺘﻭﺼﻳﻝ ) AUDIO INﺍﻷﺒﻳﺾ ﻭﺍﻷﺤﻤﺭ( ﺒﻣﺿﺧﻢ ﺍﻠﺼﻭﺕ .ﻘﻢ ﺒﺗﺷﻐﻳﻝ ﻤﺷﻐﻝ ﺃﻘﺭﺍﺹ DVDﻭ ﺍﻠﺘﻟﻔﺎﺯ. ﺇﺫﺍ ﻜﻨﺕ ﺘﺳﺗﺧﺩﻢ ﻜﺎﺒﻸﺫﺍ ﻤﺤﻮﺭﻴﻦ ،ﻔﻗﻡ ﺒﺗﻮﺼﻴﻝ ﻄﺭﻒ ﺘﻮﺼﻴﻝ ) DIGITAL AUDIO OUT (COAXIALﺍﻠﻤﻭﺠﻮﺩ ﺒﺎﻠﺠﺯﺀ ﺍﻠﺧﺎﻔﻲ ﻠﻣﺷﻐﻝ ﺃﻘﺭﺍﺹ DVDﺒﻄﺭﻒ ﺘﻮﺼﻴﻝ ) DIGITAL AUDIO IN (COAXIALﻠﻤﻀﺧﻢ ﺍﻠﺼﻮﺕ. .٢ﺒﺎﺴﺘﺧﺩﺍﻢ ﻜﺎﺒﻝ )ﻜﺎﺒﻼﺕ( ﺇﺸﺎﺭﺍﺕ ﺍﻠﻔﻳﺩﻳﻭ ،ﻘﻢ ﺒﺗﻭﺼﻳﻝ ﺃﻃﺭﺍﻒ ﺍﻠﺘﻭﺼﻳﻝ VIDEOﺃﻭ COMPONENT OUTﺒﺎﻠﺠﺯ ﺀ ﺍﻠﺨﻟﻓﻲ ﻤﻦ ﻠﻣﺷﻐﻞ ﺃﻘﺭﺍﺹ DVDﺒﻃﺭﻑ ﺘﻮﺼﻳﻝ VIDEOﺃﻭ COMPONENT INﺒﺠﻬﺎﺯ ﺍﻠﺘﻟﻓﺎﺯ. .٣ﻘﻢ ﺒﺗﺷﻐﻳﻝ ﻤﺷﻐﻝ ﺃﻘﺭﺍﺹ DVDﻭ ﺍﻠﺘﻟﻔﺎﺯ ﻭﻤﻀﺧﻡ ﺍﻠﺼﻭﺕ. .٤ﺍﺿﻐﻄ ﻋﻟﻰ ﺯﺭﺘﺤﺩﻳﺩ ﺍﻠﺩﺧﻝ ﺍﻠﺩﺧﺎﺹ ﺒﻣﺿﺧﻢ ﺍﻠﺼﻮﺕ ﻠﺗﺤﺩﻳﺩ ﺍﻠﺩﺧﻝ ﺍﻠﺧﺎﺭﺠﻲ ﻠﺳﻣﺎ ﻉ ﺍﻠﺼﻮﺕ ﻤﻥ ﻤﺷﻐﻝ .DVD ﺍﻠﻭﻈﺎﺌﻑ ﺍﻷﺴﺎﺴﻳﺔ ﺘﺷﻐﻳﻝ ﺍﻠﻘﺮﺺ ﻗﺒﻝ ﺍﻠﺗﺷﻐﻴﻝ ﺑﺘﺸﻐﻴﻝ ﺠﻬﺎﺯ ﺍﻠﺘﻠﻔﺎﺯ ﻭ ﺍﺿﺑﻃﻪ ﻋﻠﻰ ﺪﺧﻝ ﺍﻠﻔﻴﺪﻴﻭ ﺍﻠﺼﺣﻴﺢ ﺒﺎﻠﺿﻐﻂﻋﻠﻰ ﺍﻠﺯﺮ TV/VIDEOﺑﻭ ﺣﺪﺓ ﺍﻠﺘﺣﻛﻢ ﻋﻦ ﺒُﻌﺪ ﺍﻠﺧﺎﺼﺔ ﺒﺎﻠﺘﻠﻔﺎﺯ. ﻓﻲ ﺣﺎﻠﺔ ﺗﻭ ﺼﻴﻝ ﻨﻆﺎﻢ ﺽﻮﺕ ﺧﺎﺭﺠﻲ ،ﻗﻢ ﺑﺘﺷﻐﻴﻝ ﻧﻅﺎﻢ ﺍﻠﺼﻭﺕ ﻭ ﺍﻀﺒﻂﻪ ﻋﻠﻰﺪﺧﻝ ﺍﻠﺼﻭﺕ ﺍﻠﺼﺣﻴﺢ.ﺑﻌﺪ ﺘﻭ ﺼﻴﻝ ﺍﻠﻣﺷﻐﻝ ،ﺘﻅﻬﺮ ﻫﺬﻩ ﺍﻠﺷﺎﺷﺔ ﻓﻲ ﺍﻠﻤﺮﺓ ﺍﻷﻭ ﻠﻰ ﺍﻠﺘﻲ ﺘﺿﻐﻄ ﻓﻴﻬﺎ ﻋﻠﻰ ﺍﻠﺯﺮ POWERﺍﻠﺣﺎﺹ ﺒﻤﺷﻐﻝ ﺃﻗﺮ ﺍﺹ .DVDﺇﺫﺍ ﺃﺭﺪﺕ ﺍﺧﺘﻴﺎﺮ ﻋﻠﻰﺯﺮ † ،π/ﺛﻢ ﺍﻀﻐﻄ ﻋﻠﻰ ﺍﻠﺰﺮ ) .ENTERﺘﻅﻬﺮ ﻫﺫﻩ ﺍﻠﺷﺎ ﺷﺔ ﻔﻘﻃ ﻋﻨﺪ ﺇﺣﺪﻯ ﺎﻠﻠﻐﺎﺕ ،ﻓﺎﺿﻐﻄ ﺘﻭﺼﻴﻝ ﺍﻠﻤﺷﻐﻝﻠﻠﻣﺮ ﺓ ﺍﻷﻭﻠﻰ (.ﺇﺬﺍ ﻠﻢ ﻳﺘﻢ ﻀﺑﻄ ﺷﺎﺸﺔ ﺑﺪﺀ ﺍﻠﺘﺷﻐﻴﻝ ،ﻓﻘﺪ ﺘﺘﻐﻴﺮ ﺍﻹﻋﺪﺍﺪﺍﺕ ﺣﻴﻨﻤﺎ ﺘﻘﻭ ﻢ ﺑﺎﻠﺘﺷﻐﻴﻝ ﺇﺫﺍ ﻠﻢ ﻳﺘﻢ ﻀﺑﻄ ﺷﺎﺷﺔ ﺒﺪﺀ ﺍﻠﺴﺑﺐ ،ﺘﺄﻜﺪ ﻣﻦ ﺍﺧﺘﻴﺎﺮ ﺍﻠﻐﺔ ﺍﻠﻤﺮ ﺍﺪ ﺍﺳﺘﺧﺪ ﺍﻣﻬﺎ ﺑﻣﺠﺭﺪ ﺍﺧﺘﻴﺎﺮﺇﺣﺪﻯ ﻠﻐﺎﺕ ﺍﻠﻘﺎﺌﻤﺔ، ﻴﻤﻛﻨﻚﺘﻐﻳﻳﺮﻫﺎﺒﺎﻠﺿﻐﻄﻋﻠﻰﺍﻠﺰﺮ ||® ﺒﺎﻠﻠﻭ ﺣﺔ ﺍﻷﻣﺎﻣﻴﺔ ﻠﻠﻭﺣﺪﺓ ﻠﻤﺪﺓ ﺘﺯﻴﺪ ﻋﻦ ﻩ ﺛﻭﺍﻦﻤﻊﻮ ﺟﻭﺪ ﺍﻠﻘﺮﺹ ﻓﻲ ﺍﻠﻭﺣﺪﺓ .ﺛﻢ ،ﻴﻅﻬﺮﺇﻂﺎﺮ SELECT MENU LANGUAGEﻤﺭﺓ ﺃﺧﺭﻯ ﺣﻴﺚ ﻴﻤﻜﻨﻙ ﺇﻋﺎﺪﺓ ﺘﻌﻴﻦ ﺍﻠﻠﻐﺔ ﺍﻠﻤﻔﻀﻠﺔ ﺇﻠﻴﻚ. DVD-D360K ﺍﺳﺘﺣﺩﺍﻡ ﻮﻅﻳﻔﺘﻲ ﺍﻠﺒﺤﺖ ﻮﺍﻠﺛﺨﻂﻲ ﻷﺒﻴﺾ ﺍﻷﺣﻣﺭ ﻤﺿﺧﻡ ﺍﺴﺘﺮﻴﻭ ﺜﻧﺎﺌﻲ ﺍﻠﻘﻧﻮﺍﺕ, ﻤﺿﺨﻢ ﺻﻭﺖ ﺪﻭﻠﺑﻲ ﺮﻗﻣﻲ ﻜﺎﺒﻞ ﺍﻠﺼﻭﺖ ﻜﺎﺑﻞ ﺫﻭ ﻣﺤﻭﺮﻴﻥ D ﺍﻷﺧﺿﺮ ﻷﺒﻴﺾ ﺃﺛﻨﺎﺀﺍﻠﺗﺸﻐﻳﻞﻋﻛﻧﻚ ﺍﻟﺒﺤﺙ ﺒﺳﺭ ﻋﺓ ﺧﻼ ﻞ ﻔﺼﻞ ﺃﻭ ﻣﺎ ﺪ ﺓ ﻤﺳﺠﻟﺔ ﻭ ﺍ ﺴﺘﺧﺮ ﺍ ﻡ ﻮ ﻈﻳﻔﺔ ﺍ ﻟﺗﺧﻁﻲ ﻟﻼ ﺒﺘﻘﺎ ﻞ ﺇ ﻟﻰ ﺍ ﻟﺘﺣﺪ ﻴﺪ ﺍﻠﺘﺎ ﻠﻲ ﺍ ﻟﺒﺣﺙ ﺠﻼﻝﺃﻮ ﻤﺎﺪﺓ ﻣﺴﺟﻟﺔ ﺍﻷﺯﺮﻖ ﻷﺒﻴﺾ ﺍ ﻟﺒﺣﺙ ﺠﻼﻝﺃﻮ ﻤﺎﺪﺓ ﻣﺴﺟﻟﺔ K) SEARCHﺃﻮ (kﺒﻮﺤﺮﺓﺍﻠﺘﺤﻜﻡﻋﻥ ﺑﻌﺪ ﺍﻷﺣﻣﺭ ﺍﻷﺣﻣﺭ ﺍﻷﺻﻔﺭ ﺍﻷﺣﻣﺭ ﻛﺎﺒﻞ ﺍﻟﻓﻴﺪﻴﻭ A ﻜﺎﺑﻝ ﺍﻟﻤﻜﻮﻥ ﻜﺎﺒﻞ ﺍﻠﺼﻭﺖ B ﺍﻷﺧﺿﺮ ﺍﻷﺯﺮﻖ ﺍﻷﺣﻣﺭ ﺍﻷﺻﻔﺭ ﻷﺒﻴﺾ ﺍﻷﺣﻣﺭ DVD-D530K DVD-D530 ﻷﺒﻴﺾ ﺍﻷﺣﻣﺭ ﻤﺿﺧﻡ ﺍﺴﺘﺮﻴﻭ ﺜﻧﺎﺌﻲ ﺍﻠﻘﻧﻮﺍﺕ, ﻤﺿﺨﻢ ﺻﻭﺖ ﺪﻭﻠﺑﻲ ﺮﻗﻣﻲ ﻜﺎﺒﻞ ﺍﻠﺼﻭﺖ D ﺍﻷﺧﺿﺮ ﻜﺎﺑﻞ ﺫﻭ ﻣﺤﻭﺮﻴﻥ ﺘﺧﻁﻲﺍﻟﻮﺍﺪﺍﻟﺴﺠﻟﺔ ﺃﺛﻨﺎﺀﺪ ﺘﺛﻔﻳﻞ،ﺍﻀﻐﻁﻋﻠﻰ ﻟﺯﺮ K|) SKIPﺃﻮ (|k ﺍﻷﺯﺮﻖ ﻷﺒﻴﺾ ﺍﻷﺣﻣﺭ ﺍﻷﺻﻔﺭ ﺍﻷﺣﻣﺭ C HDMIﻜﺎﺒﻝ 4X, 8X VCD ﻳﻨﺘﻗﻞ ﺈﻠﻰ ﺍﻟﻐﺼﻞ.ﺘﺆﺪﻲ ﻀﻐﻂﺔ ﺃﺧﺮ ﻯﻋﻠﻴﻪ ﺇﻠﻰﺍﻨﺘﻘﺎ ﻠﻪﺇﻟﻰ ﺒﺪﺍﻴﺔ ﻓﺼﻞ ﺳﺎ ﺑﻖ. ﺍﻷﺣﻣﺭ ﺃﻭ 2X, 4X, 8X, 16X, 32X CD -ﻋﻧﺪ ﺘﺸﻐﻳﻝ ﻗﺭ ﺼﻦ ، DVDﺈﺬﺍﻘﻣﺖ ﻧﺎ ﻟﻀﻐﻂ ﻋﺎﻰ ﻟﺯﺮ (K|) SKIPﻔﺴﻴﻨﺘﻘﻞﺇﻟﻰﺍﻠﻔﺼﻞﺇﻟﻰﺍﻠﻔﺼﻞ ﻟﺘﺎ ﻟﻲ.ﻓﻲ ﺤﺎﻟﺔ ﻧﺎﻟﻀﻐﻂﻋﺎﻰ ﻟﺯﺮ(|k) SKIP ﻷﺒﻴﺾ ﻜﺎﺑﻝ ﺍﻟﻤﻜﻮﻥ HDMI-DVIﻜﺎﺒﻝ 2X, 4X, 8X, 16X, 32X DVD ﻤﻼﺤﻅﺔ ﻗﺪ ﺜﺧﻳﻟﻒ ﺍﻟﺳﺮﻋﺔﺍﻜﺑﻳﺑﺔ ﻔﻲﻫﺬﻩﺍﻟﻮ ﻅﻴﻔﺔﻋﻦ ﺴﺮﻋﺔ ﺍﻠﺘﺸﻐﻳﻞ ﺍﻠﻔﻌﻠﻴﺔ.-ﻻﻴﺼﺪﺮﺃﻱ ﺻﻮﺖﺃﺛﻧﺎﺀﻮﻀﻊﺍﻟﺑﺣﺚ).ﺑﺎﺴﺘﺛﻧﺎﺀ ﺍﻷﻗﺮﺍﻟﻐﻌﻠﻳﺔ. B ﺍﻷﺧﺿﺮ ﻛﺎﺒﻞ ﺍﻟﻓﻴﺪﻴﻭ ﺍﻷﺯﺮﻖ ﺍﻷﺣﻣﺭ A ﻷﺒﻴﺾ ﻜﺎﺒﻞ ﺍﻠﺼﻭﺖ ﺍﻷﺣﻣﺭ ﻋﻨﺪ ﺘﺷﻐﻴﻝ ﻘﺭﺹ VCDﻂ،ﺇﺫﺍ ﻀﻐﻃﺕ ﻋﺎﻰ ﻟﺯﺮ ، (K|) SKIPﻔﺴﻳﻧﺘﻘﻞ ﺇﻟﻰ ﺍﻠﺎﺪﺓ ﺍﻠﺴﺟﻟﺔ ﺍﻠﻳﺔ.ﻘﻲﺣﺎﻟﺔﺍﻟﻀﻐﻂﻋﻠﻰ ﻟﺯﺮ (|k) SKIP،ﻴﻧﺘﻘﻞﺇﻟﻰﺑﺪﺇﻳﺔ ﺍﻠﺎﺪﺓﺍﻠﺴﺠﻠﺔ.ﺘﻮﺪﻱ ﻀﻐﻃﺔﺃﺧﺭﻯﻋﻠﻴﻪﺇﻟﻰﺍﻧﺘﻘﺎ ﻠﻪ ﺇﻟﻰ ﺒﺪﺍﻳﺔ ﻣﺎﺪ ﺓ ﻤﺴﺟﻟﺔ ﺴﺎﺒﻘﺔ. ﺇﺬﺍﺤﺘﺎﻮﺯﺕ ﻣﺩﺓﺍﻠﺎﺪﺓﺍﻟﺎﺪﻩﺍﺪﻘﻴﻘﺔﻋﻨﺪ ﺘﺸﻐﻴﻞﻘﺭﺹ VCDﻮﻘﻤﺕ ﻧﺎﻟﻀﻐﻃﻋﻟﻰﺍﻟﺰﺭ )| ، (Kﻔﺴﻳﻨﺘﻘﻞﺈﻠﻰﺍﻷﻤﺎﻡ.ﻋﻘﺩﺍﺭﻩ ﺩﻘﺎﺋﻕ .ﺇﺬﺍﺿﻐﻃﺕﻋﻟﻰﺍﻟﺰﺭ )(|kﻔﺳﻳﻨﺘﻘﻞ ﺇﻞ ﺇﻟﻰ ﺍﻠﺧﻠﻒ.ﻋﻘﺩﺍﺭﻩﺩﻘﺎﺋﻕ. ﺍﻷﺻﻔﺭ ٥ ﺍﺳﺘﺨﺩﺍﻡ ﻮﻅﻳﻔﺔ ﺍﻟﻌﺮﺽ ﻋﻧﺪ ﺘﺛﻐﻴﻞ ﻗﺭﺺ DVD/VCD/MPEG4 .١ﺃﺜﻧﺎﺀ ﻟﺘﻐﻴﻞ ،ﻀﻐﻂ ﻋﻟﻰ ﺍﻟﺯﺭ TOOLSﺑﻮﺣﺪﺓ ﺍﻟﺘﺣﻜﻢ ﻋﻥ ﺑﻌﺩ. .٢ﺍﺿﻐﻂﻋﻟﻰﺯﺮ† π/ﻟﺘﺣﺪ ﻳﺪﺍﻠﻌﻨﺼﺭﺍﻟﻁﻟﻮﺐ. .٣ﺍﻀﻐﻃ ﻋﻠﺯﺭ® √/ﻹﺣﺮﺇﻹﻋﺪ .٤ﻹﺨﻔﺎﺀ ﺍﻠﺸﺎﺸﺔ ،ﺍﻀﻐﻄ ﻋﻠﻰ ﺍﻠﺯ TOOLSﻣﺭﺓ ﺃﺨﺭﻯ. ﺗﻈﻬﺮ اﻟﻮﻇﺎﺋﻒ ﻋﻨﺪ اﺳﺘﺨﺪام وﻇﻴﻔﺔ اﻟﻌﺮض ) (Displayﻓﻲ اﻟﺠﺪول أدﻧﺎﻩ ﻠﻠﻮﺼﻮﻝ ﺇﻠﻰﺍﻠﻌﻧﻮﺍﻥ ﺍﻠﻣﻄﻠﻮﺐ ﻔﻲ ﺤﺎﻠﺔ ﻮﺟﻭﺪ ﺃﻜﺛﺭ ﻤﻥ ﻋﻨﻭﺍﻦ .ﻋﻠﻰ ﺍﻠﻘﺭﺹ .ﻋﻠﻰ ﺴﺑﻴﻝ ﺍﻠﻣﺛﺎﻝ ،ﻔﻲﺤﺎﻠﺔ ﻮﺤﻮﺩ ﺃﻜﺗﺮﻣﻥ ﻔﻴﻠﻢ ﻋﻠﻰ ﻗﺯﺺ ،DVDﻳﺘﻢ ﺍﻠﺘﻌﺭﻒ ﻋﻠﻰ ﻛﻝ ﻔﻴﻠﻢ. ﻴﺘﻢ ﺗﺴﺟﻳﻝ ﻣﻌﻇﻢ ﺃﻘﺭﺍﺹ DVDﻔﻲ ﻔﺼﻮﻝ ﺤﺗﻰ ﻴﻤﻜﻨﻚ ﺍﻠﻌﺛﻮﺭ ﻋﻠﻰ ﻣﻘﻄﻊ ﻤﺤﺩﺩ )ﺗﺜﺑﻪ ﺍﻠﻣﻮﺍﺪ ﺍﻠﻣﺴﺟﻠﺔ ﻋﻠﻰ ﻗﺭﺹ ﺻﻮﺖ ﻤﻀﻐﻮﻄ(. ﻹﺘﺎﺧﺔ ﺘﺸﻐﻴﻝ ﺍﻠﻔﻳﻠﻡ ﻤﻥ ﺍﻠﻮﻗﺖ ﺍﻠﻣﻄﻠﻮﺐ .ﻳﺟﺏ ﺇﺪﺨﺎﻝ ﻮﻗﺕ ﺍﻠﺑﺩﺀ ﻜﻤﺮﺠﻊ .ﻻﺗﻌﻣﻝ ﻮﻇﻴﻔﺔ ﺍﻟﺑﺤﺚ ﻋﻥ ﺍﻠﻮﻗﺖ ﻣﻊ ﺑﻌﺽ ﺍﻷﻗﺮﺍﺹ. ﻠﻺﺸﺎﺮﺓ ﺇﻠﻰ ﻠﻐﺔ ﺍﻠﻤﺎﺩﺓ ﺍﻠﺻﻮﺗﻳﺔ ﺍﻠﻣﺳﺠﻠﺔ ﻠﻠﻔﻳﻠﻢ .ﻓﻲ ﺍﻠﻣﺛﺎﻝ ،ﻳﺗﻢ ﺗﺸﻐﻴﻝ ﺍﻟﻤﺎﺩﺓ ﺍﻟﺼﻮﺗﻴﺔ ﺍﻟﻣﺴﺟﻠﺔ ﻔﻰ ﺻﻮﺕ .English 5.1CH ﻋﻳﻣﻜﻥ ﺃﻥ ﻴﺤﺘﻮﻱ ﺍﻗﺭﺹ DVDﻋﻠﻰ ﻣﺎ ﻳﺻﻝ ﺇﻠﻰ ﺘﻣﺎﻥ ﻣﻮﺍﺩ ﺼﻮﺗﻳﺔ ﻣﺴﺟﻠﺔ ﻣﺤﺗﻠﻔﺔ. ﻠﻺﺸﺎﺮﺓ ﺇﻠﻰ ﻠﻐﺎﺖ ﺍﻟﺗﺭﺠﻤﺔ ﺍﻠﻣﺼﺎﺤﺑﺔ ﺍﻠﻣﺗﻮ ﻔﺭﺓ ﻋﻠﻰ ﺍﻠﻘﺭﺺ .ﺴﺗﺗﻣﻛﻦ ﻣﻦ ﺍﺨﺗﻳﺎﺭ ﻠﻐﺎﺖ ﺍﻠﺘﺭﺟﻣﺔ ﺍﺍﻠﻣﺻﺎﺤﺑﺔ ﺃﻮ ﺇﻴﻗﺎﻒ ﺗﺸﻐﻳﻠﻬﺎ ﻤﻥ ﺍﻠﺸﺎﺸﺔ ،ﺇﺫﺍ ﻛﻧﺕ ﺗﻓﺿﻝ ﺫﻠﻚ.ﻳﻣﻜﻥ ﺃﻥ ﻳﺤﺗﻮﻱ ﻘﺭﺺ DVDﻋﻠﻰ ﻤﺎ ﻳﺻﻝ ﺇﻠﻰ ٣٢ﺗﺭﺣﻣﺔ ﻣﺼﺎ ﺤﺑﺔ ﻤﺧﺗﻠﻔﺔ. EZ ﺘﺴﺘﺨﺩﻡﺍﻠﻮﻈﻴﻔﺔ﴿EZ Viewﻋﺭﺽ﴾EZﻟﻐﻳﻳﺭﻨﺴﺑﺔﺍﻠﻌﺭ ﺾﺇﻠﻰﺍﻻﺭﻉﺑﺎﻠﻗﺭﺺDVD ﻤﻼﺤﻅﺔ ﻻ ﺘﺳﻤﺢ ﻮﻅﻳﻔﺔ AB REPEATﻠﻙ ﺒﺿﺒﻄ ﺍﻠﻧﻗﻃﺔ ) (Bﺤﺘﻰ ﺍﻨﻗﺿﺎﺀ ﻩ ﺜﻮﺍٍﻦ ﻋﻠﻰ ﺍﻷﻘﻝ ﻤﻦ ﺍﻠﺘﺸﻐﻴﻝ ﺒﻌﺩ ﺼﺒﻄ ﺍﻠﻨﻘﻄﺔ ).(A -ﺤﺳﺏ ﺍﻠﻘﺭﺿ ،ﺭﺒﻤﺎ ﻻ ﺘﻌﻤﻝ ﻭﻅﻳﻔﺔ .Repeat ﺍﻠﺘﺷﻐﻴﻝ ﺍﻠﺑﻃﻲﺀ ﻰ ﻠﻠﻤﺷﺎﻫﺪ ﺍﻠﻤﺤﺘﻭﻴﺔ ﻋﻠﻰ ﻠﻘﻃﺎﺕ ﺭ ﻳﺎﻀﻴﺔ ﻭﺍﻠﺣﺮﻛﺔ ﻮﺍﻷﺩﻮﺍﺕﺍﻠﻣﻭ ﺴﻴﻗﻴﺔ ﺍﻠﺘﻲ ﺘﻌﻤﻝ ﻭﻏﻳﺮﻫﺎ ﺑﺣﻴﺕ ﻴﻤﻛﻧﻚ ﺪﺭﺍﺳﺘﻬﺎﻋﻦ ﻗﺮﺏ. ﺘﺘﻴﺢ ﻠﻙ ﻫﺯﻩ ﺍﻠﻤﻴﺯﺓ ﺍﻠﺘﻜﺭﺍﺭ ﺍﻠﺑﻄﻴ ٔ ﻋﻧﺩ ﺘﺷﻐﻳﻝ ﻗﺭﺹ DVD .١ﺃﺛﻧﺎﺀ ﺍﻠﺘﺸﻐﻳﻝ ،ﺍﻀﻐﻄ ﻋﻠﻰ ﺍﻠﺯﺭ ) (. (∏∏) PAUSE/PLAY . .٢ﺍﻀﻔﻄ ﻋﻠﻰ ﺍﻠﺯﺭ (k/K) SEARCHﻻﺧﺘﻴﺎﺭ ﺳﺮﻋﺔ ﺍﻠﺘﺷﻐﻳﻝ ﺑﻳﻦ ٢/١ﻭ ٤/١ﻭ ٨/١ﻮ١٦/١ﻭ ٢/١ﻠﻟﺳﺭﻋﺎﺕ ﺍﻠﻌﺎﺩﻴﺔ ﺃﺜﻧﺎﺀ ﺍﻠﻭﻀﻊ .PAUSE ﺇﺫﺍ ﺃﺭﺩﺕ ﺍﻟﺗﺷﻐﻳﻝ ﺍﻟﻌﺎﺩﻱ ،ﺍﺿﻐﻁ ﻋﻟﻰ ﺰﺭ ) PLAYﺘﺷﻐﻳﻝ(. ﺍﻠﻭﻈﺎﺌﻑ ﺍﻠﻣﺗﻗﺩﻤﺔ ﺍﻀﻐﻃ ﻋﻠﻰ ﺍﻠﺯﺮ ENTERﻠﺘﻨﺷﻴﻄ ﻮ ﻅﻴﻔﺔ ) Zoomﺍﻠﺘﻛﺑﻴﺮ(. ﻠﻠﻮﺻﻮﻝﺇﻠﻰﻮﻇﻴﻓﺔ Angleﺍﻠﻣﻄﻠﻮﺑﺔ .ﺑﻌﺽﺃﻗﺭﺍﺹ DVDﻬﺎﻮﻆﺎﺋﻒﺯﺍﻮﻳﺔﺃﻜﺛﺭﺑﻛﺛﻳﺭﻣﻣﺎﻔﻲ ﺃﻳﺔﺼﻮﺮﺓ. ﻀﺒﻃ ﻨﺴﺒﺔ ﺍﻻﺮﺘﻔﺎﻉ ٳﻠﻰ ﺍﻠﻌﺮﺾ )(EZ View ﻠﻠﺘﺷﻐﻴﻞ ﺒﺎﺴﺘﺨﺪﺍﻢ ﻨﺴﺒﺔ ﺍﻻﺮﺘﻔﺎﻉ ٳﻠﻰ ﺍﻠﻌﺮﺾ )(DVD ﺍﺳﺘﺣﺩﺍﻢ ﻗﺎﺌﻣﺗﻲ ﺍﻠﻌﻨﺎﻮﻳﻥ ﻮﺍﻷﻘﺭﺍﺺ .١ﺃﺛﻧﺎﺀ ﺘﺸﻐﻳﻝ ﻘﺭﺹ ،DVDﺍﺿﻐﻄ ﻋﻠﻰ ﻟﺯﺭ Title Menu/Disc Menuﺒﻮﺤﺩﺓ ﺍﻠﺗﺤﻜﻢ ﻋﻥ ﺑُﻌﺪ. ﻤﻼﺤﻅﺔ ﻗﺩ ﻻ ﺘﻌﻤﻝ ﻭﻅﻳﻓﺔ Title Menu/Disc menuﻭﻓﻘًﺎ ﻠﻟﻘﺮﺺ. ﻜﺬﻟﻙ ،ﻴﻤﻛﻧﻚ ﺍﺳﺗﺨﺩﺍﻡ ﻘﺎﺋﻤﺔ ﺍﻷﻘﺮﺍﺺ ،ﺒﺎﺴﺗﺨﺩﻡ ﺍﻟﺯﺮ MENU DISCﺒﻭﺤﺩﺓ ﺍﻟﺗﺣﻜﻡ ﻋﻦ ﺒُﻌﺩ. -ﺴﻳﺘﻢ ﻋﺭﺽ ﻭﻅﻳﻔﺔ Title Menuﻓﻘﻈ ﻔﻲ ﺤﺎﻠﺔ ﻭﺧﻭﺪ ﻋﻧﻭﺍﻧﻳﻥ ﻋﻠﻰ ﺍﻷﻗﻝ ﻋﻠﻰ ﺍﻠﻗﺭﺹ. ) Chapterﺒﺎﺏ( :ﻠﺗﻜﺭﺍﺭ ﺍﻠﻓﺻﻝ ﺍﻠﺤﺎﺮﻱ ﺘﺸﻐﻳﻠﺔ. ) REPEAT A-Bﺘﻛﺭﺍﺭ (DVD-D360K) (A-Bﺍﺳﺘﺧﺪﺍﻡ ﻭﻆﻳﻔﺔ (DVD-D360K) A-B Repeat .١ﺃﺜﻧﺎﺀ ﻟﺘﻐﻴﻞ ،ﻀﻐﻂ ﻋﻟﻰ ﺍﻟﺯﺭ REPEATﺑﻮﺣﺪﺓ ﺍﻟﺘﺣﻜﻢ ﻋﻥ ﺑﻌﺩ. .٢ﺍﺴﺧﺪﻢ ﺍﻠﺯﺭﻴﻦ † π/ﻠﺘﺣﺪﻳﺪ ، REPEAT A-Bﺛﻢ ﺍﻀﻐﻄ ﻋﻠﻰ ® ﺃﻭ ﺍﻠﺯﺭ ENTER .٣ﺍﺿﻐﻄ ﻋﻠﻰ ﻟﺯﺭ ENTERﻋﻧﺪ ﺍﻠﻣﻭﻀﻊ ﺍﻠﻤﻄﻠﻮﺏ ﺑﺪﺀ ﺘﻛﺮﺍﺭ ﺍﻠﺘﺸﻐﻳﻝ ﻋﻨﺪﻩ ﴿.﴾A .٤ﺍﺿﻐﻄ ﻋﻠﻰ ﻟﺯﺭ ENTERﻋﻧﺪ ﺍﻠﻣﻭﻀﻊ ﺍﻠﻤﻄﻠﻮﺏ ﺇﻴﻘﺎﻑ ﺘﻛﺮﺍﺭ ﺍﻠﺘﺸﻐﻳﻝ ﻋﻨﺪﻩ ﴿.﴾B ﺍﺳﺘﺧﺪﺍﻡ ﻭﻆﻳﻔﺔ (DVD-D530K/DVD-D530) A-B Repeat .١ﺃﺜﻧﺎﺀ ﻟﺘﻐﻴﻞ ،ﻀﻐﻂ ﻋﻟﻰ ﺍﻟﺯﺭ REPEAT A-Bﺑﻮﺣﺪﺓ ﺍﻟﺘﺣﻜﻢ ﻋﻥ ﺑﻌﺩ. .٢ﺍﺿﻐﻄ ﻋﻠﻰ ﻟﺯﺭ REPEAT A-Bﻋﻧﺪ ﺍﻠﻣﻭﻀﻊ ﺍﻠﻤﻄﻠﻮﺏ ﺑﺪﺀ ﺘﻛﺮﺍﺭ ﺍﻠﺘﺸﻐﻳﻝ ﻋﻨﺪﻩ ﴿.﴾A .٣ﺍﺿﻐﻄ ﻋﻠﻰ ﻟﺯﺭ REPEAT A-Bﻋﻧﺪ ﺍﻠﻣﻭﻀﻊ ﺍﻠﻤﻄﻠﻮﺏ ﺇﻴﻘﺎﻑ ﺘﻛﺮﺍﺭ ﺍﻠﺘﺸﻐﻳﻝ ﻋﻨﺪﻩ ﴿.﴾B .٣ﻠﻠﺮﺟﻭﻉ ﺇﻠﻰ ﺍﻠﺘﺷﻌﻳﻝ ﺍﻠﻌﺎﺪﻱ ،ﺍﻀﻐﻂ ﻋﻠﻰ ﺍﻠﺯﺮ REPEAT A-Bاﻟﺸﺎﺷﺔ ر :ﺳﺎﻟﺔ ﺗﻜﺮار إﻳﻘﺎف ﺗﺸﻐﻴﻞ ).(Repeat: Off .١ﺍﺿﻐﻄ ﻋﻠﻰ ﺍﻠﺯﺮ EZ VIEW/TOOLSﺒﻮﺤﺩﺓ ﺍﻠﺘﺤﻜﻢ ﻋﻦ ﺑُﻌﺪ .ﻓﺗﻇﻬﺭ ﺸﺎﺸﺔ ﺍﻠﺗﻛﻠﺭﺍﺭ .٢اﺿﻐﻂ زر ﻋﺮض هـ ت EZ VIEWأو † π/ﻻﺧﺘﻴﺎر ﺣﺠﻢ اﻟﺸﺎﺷﺔ .ﻓﻲ ﻜﻞ ﻣﺮة ﺗﻀﻐﻂ ﻓﻴﻬﺎ زر ﻫـت ® √/أو † π/ﻳﺘﻐﻴﺮ ﺣﺠﻢ اﻟﺸﺎﺷﺔ. ﻟﻠﺘﻌﺮف ﻋﻠﻰ أﺷﻜﺎل ﺣﺠﻢ اﻟﺸﺎﺷﺔ وﻗﻮاﺋﻢ اﻟﺘﺴﻠﺴﻼت اﻟﺘﻲ ﺗﺘﻐﻴﺮ ﺑﻬﺎ اﻟﺸﺎﺷﺔ ،اﻧﻈﺮ اﻟﻌﻤﻮد أدﻧﺎﻩ .٣اﺿﻐﻂ زر ﺧﺮوج EXIT/RETURNﻟﻠﺨﺮوج ﻣﻦ ﻋﺮض ﻫت )(EZ VIEW ﺇﺫﺍ ﻛﻨﺖ ﺘﺴﺘﺨﺩﻢ ﺘﻠﻔﺎﺯ ﺑﻨﺴﺑﺔ ﺍﻻﺭﺘﻓﺎﻉ ﺇﻠﻰ ﺍﻠﻌﺮﺾ ٩�١٦ ﺇﺫﺍ ﻛﻨﺖ ﺘﺴﺘﺨﺩﻢ ﺠﻬﺎﺯ ﺘﻴﻔﺰﻴﻭﻦ ﺑﻨﺴﺑﺔ ﺍﻻﺭﺘﻓﺎﻉ ﺇﻠﻰ ﺍﻠﻌﺮﺾ ٣�٤ ﺗﺴﺗﻳﻊ ﺘﻛﺭﺍﺭ ﺘﺸﻐﻳﻝ ﺍﻠﻤﺎﺪﺓ ﺍﻠﻤﺴﺠﻠﺔ ﺃﻭ ﺍﻠﻔﺼﻝ ﺃﻮﺍﻠﻌﻧﻭ ﺍﻥ ﺍﻠﺤﺎﻠﻲ ﺃﻮ ﻘﺴﻡ ﻣﺨﺗﺎﺭ ﴿﴾A-Bﺃﻭ ﺍﻠﻘﺭﺹ ﺑﺂﻛﻣﻟﻪ. ﻠﻸﻗﺭﺍﺺ ﺍﻠﺘﻲ ﺘﻌﻤﻝ ﺑﻨﺴﺑﺔ ﺍﻻﺭﺘﻔﺎﻉ ﺇﻠﻰ ﺍﻠﻌﺮﺾ ٩�١٦ WIDE SCREEN SCREEN FITZOOM FIT - ﻋﻧﺩ ﺗﺸﻐﻳﻝ ﻗﺭﺹ DVD/VCD .١ﺍﺿﻐﻄ ﻋﻠﻰ ﺍﻠﺯﺮ REPEATﺒﻮﺤﺩﺓ ﺍﻠﺘﺤﻜﻢ ﻋﻦ ﺑُﻌﺪ .ﻓﺗﻇﻬﺭ ﺸﺎﺸﺔ ﺍﻠﺗﻛﻠﺭﺍﺭ .٢ﺍﻀﺒﻆ ﻋﻠﻰ ﺍﻠﺯﺭﻴﻦ REPEATﺃﻭ † π/ﻠﺘﻐﻴﻴﺮ ﻭﻀﻊ ﺍﻠﺘﺷﻐﻴﻝ .ﻳﻜﺮﺭ ﻗﺭﺺ DVDﺍﻟﺘﺸﻐﻳﻝ ﺤﺳﺏ ﺍﻠﻓﺻﻝ ﺃﻮ ﺍﻟﻌﻧﻭﺍﻥ. ﺇﻴﻗﺎﻑ ﺍﻟﺗﺷﻐﻳﻝ) Title -ﺍﻠﻌﻨﻮﺍﻦ( :ﻟﺘﻛﺭﺍﺭ ﺍﻟﻌﻧﻭﺍﻥ ﺍﻠﺤﺎﺮﻱ ﺘﺸﻐﻳﻠﺔ. ﻠﻸﻗﺮﺍﺹ ﺍﻠﺗﻲ ﺘﻌﻣﻞ ﺑﻧﺴﺑﺔ ﺍﻻﺭﺘﻓﺎﻉ ﺇﻠﻰ ﺍﻠﻌﺭﺾ ٣�٤ Normal Wide SCREEN FIT ZOOM FITVertical Fit - ﻠﻸﻗﺭﺍﺺ ﺬﺍﺕ ﻨﺳﺒﺔ ﺍﻻﺭﺘﻔﺎﻉ ﺇﻠﻰ ﺍﻠﻌﺮﺾ ٩�١٦ 4:3 Letter Box 4:3 Pan Scan SCREEN FITZOOM FIT - ﺘﻜﺭﺍﺭ ﺍﻠﺘﺷﻐﻴﻝ ٦ ﻠﻸﻗﺭﺍﺺ ﺍﻠﺗﻲ ﺘﻌﻣﻞ ﻨﺳﺒﺔ ﺍﻻﺭﺘﻔﺎﻉ ﺇﻠﻰ ﺍﻠﻌﺮﺾ ٣�٤ Normal Screen SCREEN FITZOOM FIT - ﻤﻼﺤﻅﺔ ﻘﺪ ﺗﺆﺪﻱ ﻫﺫﻩ ﺍﻠﻭﻅﻳﻔﺔ ﺇﻠﻰ ﻧﺗﺎﺌﺞ ﻣﺨﺘﻠﻔﺔ ﺤﺴﺏ ﻧﻭﻉ ﺍﻠﻘﺭﺹ� ﺘﺣﺪﻴﺪ ﻠﻐﺔ ﺍﻠﺼﻭﺕ ﻴﻤﻛﻨﻙ ﺘﺣﺪﻴﺪ ﻠﻐﺔ ﺍﻠﺼﻭﺕ ﺍﻠﻤﻃﺎﻭﺒﺔ ﻋﻠﻰ ﻧﺣﻭ ﺴﺮﻴﻊ ﻭﺴﻬﻝ ﺑﺎﺴﺘﺧﺪﺍﻢ ﺍﻠﺯﺭ .AUDIO ﺍﺴﺘﺧﺪﺍﻢ ﺍﻠﺯﺮ (DVD/VCD/MPEG4) AUDIO .١ﺍﻀﻐﻄ ﻋﻠﻰ ﺍﻠﺯﺮ √ .AUDIO /ﻳﺘﻐﻴﺭ ﺍﻠﺼﻭﺕ ﻋﻧﺪ ﺍﻠﻀﻐﻄ ﻋﻠﻰ ﺍﻠﺯﺮ ﺑﺷﻛﻝ ﻤﺘﻜﺮﺮ. .ﻳﻤﻜﻨﻚ ﺗﻐﻴﻴﺮ ﻟﻐﺔ اﻟﺼﻮت ﺑﺎﻟﻀﻐﻂ ﻋﻠﻰ زر ﺻﻮﺗﻲ AUDIO أو †.π/ ﻴﺘﻢ ﻋﺮﺾ ﻠﻐﺎﺕ ﺍﻠﺼﻭﺕ ﺑﺎﺴﺘﺧﺪﺍﻢ ﺍﻻﺧﺘﺼﺎﺮﺍﺕ. .٢ﻹﺰﺍﻠﺔ ﺍﻠﺭﻤﺰ ، AUDIOﺍﻀﻐﻄ ﻋﻠﻰ ﺍﻠﺯ .EXIT/RETURN ﻣﻼﺣﻇﺔ ﺘﻌﺘﻤﺪ ﻫﺬﻩ ﺍﻠﻭﻆﻴﻔﺔ ﻋﻠﻰ ﻠﻐﺎﺕ ﺍﻠﺼﻭﺕ ﺍﻠﺘﻲ ﺘﻢ ﺘﺸﻔﻴﺮﻫﺎ ﻋﻠﻰ ﺍﻠﻘﺮﺹ ﻭﻗﺪ ﻻ ﺘﻌﻤﻝ. -ﻴﻤﻜﻦ ﺃﻦ ﻳﺣﺘﻭﻯ ﻗﺮ ﺹ DVDﻋﻠﻰ ﻤﺎ ﻴﺼﻝ ﺇﻠﻰ ٨ﻠﻐﺎﺕ ﺻﻭﺕ. ﺘﺤﺪﻳﺪ ﻠﻐﺔ ﺍﻠﺘﺮﺠﻤﺔ ﺍﻠﻣﺼﺎﺣﺑﺔ ﺍﺴﺗﺪﻋﺎﺀ ﻣﺸﻬﺪ ﻤﻤﻴﺯ ﺑﻌﻼﻣﺔ .١ﺃﺜﻧﺎﺀ ﻭ ﻀﻊ ﺍﻠﺘﺷﻐﻳﻝ ﺃﻭ ﺍﻹﻴﻘﺎﻒ ﺍﻠﻤﺆﻘﺕ ،ﺍﻀﻐﻄ ﻋﻠﻰ ﺍﻠﺯﺮ MARKERﺑﻭﺣﺪﺓ ﺍﻠﺘﺣﻜﻢﻋﻦ ﺑُﻌﺪ. .٢ﺍﺻﻐﻄ ﻋﻠﻰ ﺍﻠﺯﺭﻳﻥ ® √/ﺃﻭ ﺍﻠﺯﺭ † π/ﻠﺗﺤﺪﻳﺪ ﻣﺸﻬﺪ ﻣﻤﻳﺯ ﺑﻌﻼﻣﺔ. .٣ﺍﺿﻐﻃ ﻋﻠﻰ ﺍﻠﺯﺮ ) PLAY (ﻟﺗﺨﻄﻲ ﺍﻠﺷﻬﺪ ﺍﻟﻣﹸﻤﻳﺯ ﺑﻌﻼﻣﺔ ﻤﺴﺢ ﻋﻼﻤﺔ .١ﺃﺜﻧﺎﺀ ﻭ ﻀﻊ ﺍﻠﺘﺷﻐﻳﻝ ﺃﻭ ﺍﻹﻴﻘﺎﻒ ﺍﻠﻤﺆﻘﺕ ،ﺍﻀﻐﻄ ﻋﻠﻰ ﺍﻠﺯﺮ MARKERﺑﻭﺣﺪﺓ ﺍﻠﺘﺣﻜﻢﻋﻦ ﺑُﻌﺪ. .٢ﺍﺿﻐﻄ ﻋﻠﻰ ﺍﻠﺯﺭﻳﻦ ® √/ﺃﻭ ﺍﻠﺯﺭ † π/ﻠﺗﺤﺩﻴﺪ ﺮﻗﻢ ﺍﻠﻌﻼﻤﺔ ﺍﻠﻄﻠﻭﺐ ﺤﺫﻔﻬﺎ. .٣ﺍﻀﻐﻄ ﻋﻠﻰ ﺍﻠﺯ ENTERﻠﺤﺬﻒ ﺭﻘﻡ ﺍﻠﻌﻼﻤﺔ. ﺍﺴﺘﺧﺪﺍﻢ ﻭﻆﻳﻔﺔ ﺍﻠﺘﻜﺑﻳﺮ/ﺍﻠﺘﺼﻐﻳﺮ ﺍﺴﺘﺧﺪﺍﻢ ﻭﻅﻳﻔﺔ ) Zoomﺃﻗﺮﺍﺹ (DVD/VCD .١ﺃﺜﻧﺎﺀ ﻭ ﻀﻊ ﺍﻠﺘﺷﻐﻳﻝ ﺃﻭ ﺍﻹﻴﻘﺎﻒ ﺍﻠﻤﺆﻘﺕ ،ﺍﻀﻐﻄ ﻋﻠﻰ ﺍﻠﺯﺮ ﺍﻠﺯﺭ TOOLSﺑﻭﺣﺪﺓ ﺍﻠﺘﺣﻜﻢﻋﻦ ﺑُﻌﺪ. ،ﺛﻢ ﺍﻀﻐﻄ ﻋﻠﻰ ﺍﻠﺯﺭ .ENTERﻠﺘﻜﺑﻴﺮ ﺒﻨﺴﺑﺔ X٤,X٣,X٢,X١.ﺑﺎﻠﺘﺮ ﺘﻴﺐ. .٢ﺍﻀﺒﻆ ﻋﻠﻰ ﺍﻠﺯﺭﻴﻦ † π/ﻠﺘﺣﺪﻳﺪ ﻗﺎﺌﻤﺔ ﻤﻘﺎﻃﻊ ﻣﻠﻔﺎﺕ /MPEG4/JPEG/WMA/MP3ﻗﺮﺺ ﺍﻠﻣﻀﻐﻭﻄ ﻴﻤﻛﻨﻙ ﺘﺣﺪﻴﺪ ﺍﻠﺘﺭﺠﻤﺔ ﺍﻠﻤﺼﺎﺠﺒﺔ ﺍﻠﻤﻃﺎﻭﺒﺔ ﻋﻠﻰ ﻧﺣﻭ ﺴﺮﻴﻊ ﺑﺎﺴﺘﺧﺪﺍﻢ ﺍﻠﺯﺭ .SUBTITLE ﺘﺣﺘﻭﻱ ﺃﻗﺮﺍﺹ ﺍﻠﺼﻭﺕ ﺍﻠﻣﻀﻐﻭﻃﺔ ﺃﻮ ﺍﻷ ﻗﺮﺍﺹ ﺍﻠﺘﻲ ﺘﺘﻀﻤﻦ ﻤﻠﻔﺎﺕ MP3/WMA/JPEG/MPEG4ﻋﻠﻰ ﺃﻏﺎٍﻦ ﺧﺎﺼﺔ ﻮ/ﺃﻭ ﺍﻠﺼﻭﺮ ﺍﻠﺘﻲ ﻳﻤﻜﻦ ﺘﻧﻅﻴﻤﻬﺎ ﻓﻲ ﻤﺟﻠﺪﺍﺕ ﻋﻟﻰ ﺍﻠﻨﺣﻭ ﺍﻠﻤﻭﻀﺢ ﺃﺪﻨﺎﻩ .ﻭﻫﻲ ﺘﺘﺸﺎﺑﻪ ﻣﻊ ﻂﺭﻳﻘﺔ ﺍﺴﺘﺧﺪﺍﻢ ﺍﻠﻛﻤﺑﻳﻭﺘﺮ ﻠﻮﻀﻊ ﺍﻠﻤﻠﻔﺎﺕ ﻓﻲ ﻤﺣﻠﺪﺍﺕ ﻣﺧﺘﻠﻔﺔ. .١ﺍﻀﻐﻄ ﻋﻠﻰ ﺍﻠﺯﺮ ) .SUBTITLE (πﻴﺘﻢ ﻋﺮﺾ ﻠﻐﺎﺕ ﺍﻠﺘﺮﺠﻣﺔ ﺍﻠﻣﺼﺎﺣﺑﺔ ﺍﻠﻤﺘﻭ ﺍﻓﺮﺓ ﺑﺎﺴﺘﺧﺪﺍﻢ ﺍﻻﺧﺘﺼﺎﺮﺍﺕ. .٢اﺿﻐﻂ زر ) SUBTITLE (πأو † π/ﻟﺘﻐﻴﻴﺮ اﻟﻠﻐﺔ .ﻓﻲ ﻜﻞ ﻣﺮة ﺗﻀﻐﻂ ﻓﻴﻬﺎ ﻋﻠﻰ زر اﻟﺘﺮﺟﻤﺔ ) SUBTITLE (πأو † π/ﺗﺘﻐﻴﺮ اﻟﻠﻐﺔ. .٣ﻹﺰﺍﻠﺔ ﺍﻠﺭﻤﺰ ، SUBTITLEﺍﻀﻐﻄ ﻋﻠﻰ ﺍﻠﺯ .EXIT/RETURN ﻠﺪﺧﻮل إﻟﻰ هﺬﻩ اﻟﻤﺠﻠﺪات واﻟﻤﻠﻔﺎت اﻟﺘﻲ ﺗﺸﺘﻤﻞ ﻋﻠﻴﻬﺎ ،اﺗﺒﻊ اﻟﺨﻄﻮات اﻟﺘﺎﻟﻴﺔ : ﺍﺴﺘﺧﺪﺍﻢ ﺍﻠﺯﺮ (DVD/MPEG4) SUBTITLE ﻣﻼﺣﻇﺔ ﻴﺘﻢ ﺘﻐﻴﻴﺮ ﺍﻠﺘﺮﺠﻤﺔ ﺍﻠﻣﺼﺎﺣﺑﺔ ﻋﻨﺪ ﺍﻠﻀﻐﻄ ﻘﺩ ﺘﺤﺗﺎﺝ ﺇﻠﻰ ﺘﻐﻴﻳﺭ ﺍﻠﺘﺭﺟﻤﺔ ﺍﻠﻪﺻﺎﺤﺑﺔ ﺍﻠﻤﻄﻟﻮﺒﺔ ﻔﻲ ﻘﺎﺌﻤﺔ Disc Menuﺤﺳﺏ ﻧﻭﻉ ﺍﻠﻘﺭﺹ .ﺍﻀﻐﻄ ﻋﻠﻰ ﺍﻠﺰﺭ .DISC MENU ﺘﻌﺘﻤﺪ ﻫﺬﻩ ﺍﻠﻭﻆﻴﻔﺔ ﻋﻠﻰ ﻠﻐﺎﺕ ﺍﻠﺗﺭﺠﻤﺔ ﺍﻠﻤﺼﺎﺤﺒﺔ ﺍﻠﺘﻲ ﺘﻢ ﺘﺸﻔﻴﺮﻫﺎ ﻋﻠﻰ ﺍﻠﻘﺮﺹ ﻭﻗﺪ ﻻ ﺘﻌﻤﻝ ﻭﻘﺩ ﻻ ﺘﻌﻤﻝ ﻋﻠﻰ ﻜﺎﻔﺔ ﺃﻘﺭﺍﺹ .DVD -ﻣﻛﻥ ﺃﻦ ﻴﺣﺗﻭ ﻯ ﻗﺭﺹ DVDﻋﻟﻰ ﻤﺎ ﻴﺻﻝ ﺇﻟﻰ ٣٢ﻠﻐﺔ ﻠﻟﺘﺭﺠﻤﺔ ﺍﻠﻤﺼﺎﺤﺒﺔ. ﺘﻐﻴﻴﺮ ﺯﺍﻭﻴﺔ ﺍﻠﻜﺎﻣﻴﺮﺍ ﺇﺬﺍ ﻜﺎﻦ ﻗﺭﺹ DVDﻴﺣﺘﻭﻱ ﻋﻠﻰ ﺯﻭﺍﻴﺎ ﻤﺘﻌﺪﺪﺓ ﻠﻤﺷﻬﺪ ﻤﻌﻴﻦ ،ﻴﻤﻛﻨﻚ ﺍﺴﺘﺧﺪﺍﻢ ﻭﻅﻴﻔﺔ .ANGLE ﺍﺴﺘﺧﺪﺍﻢ ﻭﻇﻴﻔﺔ ) ANGLEﺃﻗﺮﺍﺺ (DVD ﺇﺬﺍ ﻜﺎﻦ ﺍﻠﻘﺮﺹ ﻳﺤﺘﻮﻱ ﻋﻠﻰ ﺯﻮﺍﻴﺎ ﻤﺘﻌﺪﺪﺓ ،ﻓﺴﺘﻅﻬﺮ ﺍﻠﻭﻅﻴﻔﺔ ANGLEﻋﻠﻰ ﺍﻠﺸﺎﺷﺔ. .١ﺃﺜﻧﺎﺀ ﻭ ﻀﻊ ﺍﻠﺘﺷﻐﻳﻝ ﺃﻭ ﺍﻹﻴﻘﺎﻒ ﺍﻠﻤﺆﻘﺕ ،ﺍﻀﻐﻄ ﻋﻠﻰ ﺍﻠﺯﺮ TOOLSﺑﻭﺣﺪﺓ ﺍﻠﺘﺣﻜﻢﻋﻦ ﺑُﻌﺪ. .ﺍﻀﺒﻆ ﻋﻠﻰ ﺍﻠﺯﺭﻴﻦ ® √/ﺃﻮ ﻴﻤﻜﻦ ﺍﺴﺘﺧﺩﺍﻢ ﺃﺯﺭﺍﺭ ﺍﻷﺭﻘﺎﻢ ﻋﻠﻰ ﻮﺣﺪﺓ ﺍﻠﺘﺣﻛﻢ ﻋﻦ ﺑُﻌﺪ ﻠﺘﺣﺪﻴﺪ ﺍﻠﺯﺍﻭﻴﺔ ﺍﻠﻣﻄﻠﻭ ﺑﺔ. .٢ﺍﻀﺒﻆ ﻋﻠﻰ ﺍﻠﺯﺭﻴﻦ † π/ﻠﺘﺣﺪﻳﺪ ﺍﺴﺘﺧﺪﺍﻢ ﻭﻆﻳﻔﺔ ﺍﻠﻌﻼﻤﺎﺖ ﺗﺗﻳﺢ ﻠﻚ ﻫﺫﻩ ﺍﻠﻴﺯﺓ ﻭﺿﻊ ﻋﻼﻤﺔ ﻋﻠﻰ ﺃﺟﺯﺍﺀ ﻗﺭﺺ DVDﺃﻭﻗﺭﺺ ) VCDﻭﺿﻊ (Menu Offﺑﺤﻳﺙ ﻴﻤﻜﻨﻚ ﺍﻠﻭﺻﻭﻞ ﺇﻠﻴﻬﺎ ﺑﺴﺭﻋﺔ ﻓﻲ ﻭﻗﺖ ﻻﺤﻖ. ﺍﺴﺘﺧﺪﺍﻢ ﻭﻆﻳﻔﺔ )ﺃﻗﺮﺍﺺ (DVD/VCD .١ﺃﺜﻧﺎﺀ ﻭ ﻀﻊ ﺍﻠﺘﺷﻐﻳﻝ ﺃﻭ ﺍﻹﻴﻘﺎﻒ ﺍﻠﻤﺆﻘﺕ ،ﺍﻀﻐﻄ ﻋﻠﻰ ﺍﻠﺯﺮ MARKERﺑﻭﺣﺪﺓ ﺍﻠﺘﺣﻜﻢﻋﻦ ﺑُﻌﺪ. .٢ﻋﻧﺩ ﺍﻠﻭﺼﻭﻝ ﺇﻠﻰ ﻤﺸﻬﺩ ﺍﻠﻣﻃﺎﻭﺏ ﺘﻤﻴﻳﺰﻩ،ﺍﺻﻐﻄ ﻋﻠﻰ ﺍﻠﺯﺭﻳﻥ ® √/ﺍﻠﺯﺭ † π/ﺛﻢ ﺍﻀﻐﻄ ﻋﻠﻰ .MARKERﻴﻣﻛﻦ ﺘﻣﻴﻳﺰ ﺤﺘﻰ ١٢ﻤﺸﺎﻫﺩ ﻔﻰ ﺍﻠﻤﺮﺓ ﺍﻠﻮﺍﺤﺩﺓ. ﻣﻼﺣﻇﺔ -ﻗﺪﻻ ﺘﻌﻣﻞ ﻭﻅﻳﻔﺔ Bookmarkﺤﺳﺏ ﻧﻭﻉ ﺍﻠﻘﺭﺹ .١ﺍﻓﺘﺢ ﺪﺮﺝ ﺍﻷﻗﺮﺍﺹ .ﻀﻊ ﺍﻠﻘﺭﺹ ﻓﻲ ﺍﻠﺪﺭﺝ. .٢ﺃﻏﻠﻖ ﺍﻠﺪﺮﺝ .ﺗﻐﻠﻖ اﻟﻌﻠﺒﺔ وﺗﻈﻬﺮ ﻧﺎﻓﺬة ﻗﺎﺋﻤﺔ اﻟﻤﺠﻠﺪ اﻟﺮﺋﻴﺴﻲ )) (Parent Folder Menuاﻟﺼﻮرة اﻟﺘﻲ ﺗﻈﻬﺮ أﻋﻠﻰ اﻟﺼﻔﺤﺔ( .ﺗﺤﺘﻮي اﻟﻤﺠﻠﺪات اﻟﺮﺋﻴﺴﻴﺔ ﻋﻠﻰ ﺟﻤﻴﻊ اﻟﻤﺠﻠﺪات اﻟﺸﺒﻴﻬﺔ ) (Peerاﻟﺘﻲ ﺗﻀﻢ ﻧﻔﺲ ﻧﻮع اﻟﻤﺤﺘﻮى اﻟﻤﻮﺳﻴﻘﻰ ،ﻣﻠﻔﺎت اﻟﻔﻴﺪﻳﻮ ،اﻟﺼﻮر ،اﻟﺦ. .٣اﺿﻐﻂ أزرار ® √/ﻻﺧﺘﻴﺎر اﻟﻤﺠﻠﺪ اﻟﺮﺋﻴﺴﻲ ﺛﻢ اﺿﻐﻂ زر إدﺧﺎل)(ENTER ﺗﻈﻬﺮ ﺷﺎﺷﺔ اﻟﻤﺠﻠﺪات اﻟﺸﺒﻴﻬﺔ .ﺗﻀﻢ اﻟﻤﺠﻠﺪات اﻟﺸﺒﻴﻬﺔ ﺟﻤﻴﻊ اﻟﻤﺠﻠﺪات اﻟﺘﻲ ﺗﺤﺘﻮي ﻋﻠﻰ ﻧﻔﺲ ﻧﻮع اﻟﻤﺤﺘﻮى )ﻣﻠﻔﺎت ﻓﻴﺪﻳﻮ ،ﻣﻮﺳﻴﻘﻰ ،ﺻﻮر ،اﻟﺦ( اﻟﻤﻮ ﺟﻮد ﺑﺎﻟﻤﺠﻠﺪات اﻟﺮﺋﻴﺴﻴﺔ. ﺼﻔﺤﺔ ﻋﻮﺪﺓ \ ﺍﻠﻔﻴﺩﻴﻮ 1/2 ﺘﻘﻞ ﺼﻔﺤﺔ CD ﺘﺣﺪﻴﺪ ﺍﻨﺠﻠﺪ ﻴﻤﻛﻦ ﺘﺤﺪﻴﺩ ﺍﻠﻤﺠﻠﺪ ﻓﻲ ﻜﻝ ﻤﻦ ﺍﻠﻭﻀﻊ Stopﺃﻮ .Play ﻠﺘﺤﺪﻳﺪ ﺍﻠﻣﺠﻠﺪ ﺍﻠﺮﺌﻳﺴﻲﺍﺿﻐﻃ ﻋﻠﻰ ﺍﻠﺯﺮ RETURNﻠﻼﻨﺘﻘﺎﻝ ﺇﻠﻰ ﺍﻠﻣﺟﻟﺩ ﺍﻠﺭﺌﻴﺴﻲ ،ﺃﻮ ﺍﻀﻐﻄ ﻋﻠﻰ ﺍﻠﺯﺮﻴﻦ † π/ﻠﺘﺣﺪﻳﺪ " "..ﺛﻢ ﺍﻀﻐﻄ ﻋﻟﻰ ENTERﻜﻲ ﺗﻨﺘﻘﻝ ﺇﻠﻰ ﺍﻠﻤﺠﻠﺪ ﺍﻠﺭ ﺌﻳﺴﻲ. ﻠﺘﺤﺩﻴﺩ ﺍﻠﻣﺠﻠﺪ ﺍﻠﻨﻅﻴﺭﺍﺿﻐﻃ ﻋﻠﻰ ﺍﻠﺯﺮﻴﻦ † π/ﻠﺘﺣﺪﻳﺪ ﺍﻠﻤﺠﻠﺩ ﺍﻠﻤﻃﻠﻭﺏ ﺜﻢ ﺍﻀﻐﻄ ﻋﻠﻰ ﺍﻠﺯﺮ .ENTER ﻠﺘﺤﺩﻴﺩ ﺍﻠﻣﺠﻠﺪ ﺍﻠﻔﺭﻋﻲﺍﺿﻐﻃ ﻋﻠﻰ ﺍﻠﺯﺮﻴﻦ † π/ﻠﺘﺣﺪﻳﺪ ﺍﻠﻤﺠﻠﺩ ﺍﻠﻤﻃﻠﻭﺏ ﺜﻢ ﺍﻀﻐﻄ ﻋﻠﻰ .ENTER ﺘﺸﻐﻴﻝ ﺼﻭﺕ /WMA/MP3ﺍﻠﻘﺮﺹ ﺍﻠﻣﺿﻐﻮﻄ .١ﺍﻓﺗﺢ ﺪﺭﺝ ﺍﻷﻗﺮﺍﺹ .ﺿﻊ ﺍﻠﻘﺭ ﺺ ﻓﻲ ﺍﻠﺩﺭﺝ .ﺃﻏﻟﻖ ﺍﻠﺪﺮﺝ. .٢ﺍﻀﻐﻄﻋﻠﻰ ﺍﻠﺯﺭﻴﻦ ® √/ﻠﺘﺣﺪﻴﺩ ﻗﺎﺋﻤﺔ اﻟﻤﻮﺳﻴﻘﻰ ﺛﻢ ﺍﻀﻐﻄ ﻋﻠﻰ ﺍﻠﺯﺭ .ENTERﺍﻀﻐﻄﻋﻠﻰ ﺍﻠﺯﺭﻴﻦ † π/ﺃﻭ ﺍﻠﺯﺭﻴﻦ ﻠﺘﺣﺪﻴﺩ ﻤﻠﻒ ﺃﻏﻨﻴﺔ ﺛﻢ ﺍﻀﻐﻄ ﻋﻠﻰ ) ENTERﺇﺩﺨﺎﻞ( ﻠﺑﺪﺀ ﺘﺷﻐﻴﻝ ﻤﻠﻒ ﺍﻷﻏﻨﻴﺔ. ٧ ﺍﻠﺘﻜﺭﺍﺭ ﻭﺍﻠﺘﺷﻐﻴﻝ ﺍﻠﻌﺷﻭﺍﺌﻲ 1 REPEATﻠﺘﻐﻴﻴﺮ ﻭﺿﻊ ﺍﻠﺘﺸﻐﻴﻝ .ﺘﻭﺠﺪ ﺃﺮﺑﻌﺔ ﺃﻭﺿﺎ ﻉ ﺘﺸﻐﻴﻝ Offﻮ Trackﻮ Folderﻮ .Random ﺍﻀﻐﻄ ﻋﻠﻰ ﺍﻠﺯﺭ ) Offﺇﻴﻗﺎﻑ ﺍﻟﺗﺷﻐﻳﻝ( ) ( :ﺗﺷﻐﻴﻝ ﻋﺎﺪﻱ1 )ﻤﻘﻄﻊ ﻤﻮﺴﻳﻘﻰ( ) :( 1ﻠﺘﻜﺮﺍﺮ ﻤﻟﻒ ﺍﻷﻏﻨﻳﺔ ﺍﻠﺣﺎﻠﻲ. Track ) Folderﻤﺟﻠﺪ( ) ( :ﻠﺘﻜﺮﺍﺮ ﻤﻠﻔﺎﺕ ﺍﻷﻏﺎﻨﻲ ﺍﻠﻣﺘﺷﺎﺑﻬﺔ ﻓﻲ ﺍﻻﻤﺘﺪﺍﺪ ﺑﺘﺮ ﺘﻴﺐ ﻋﺸﻭﺍﻠﺌﻲ.1 )ﻋﺸﻮﺍﺌﻲ( ) ( :ﺴﻴﺘﻢ ﺘﺷﻐﻴﻝ ﻤﻠﻔﺎﺖ ﺍﻷﻏﺎﻨﻲ ﺍﻠﻣﺘﻄﺎﺒﻘﺔ ﻓﻲ ﺍﻻﻤﺗﺪ ﺍﺪ ﺑﺘﺮﺘﻴﺐ ﻋﺷﻭﺍﺌﻲ. Randomﻻ ﺴﺘﺌﻨﺎﻒ ﺍﻠﺘﺸﻐﻴﻝ ﺍﻠﻌﺎﺪﻱ ،ﺍﻀﻐﻃ ﻋﻠﻰ ﺍﻠﺯﺭ REPEATﺣﺘﻰ ﺗﻜﺮار :ﺇﻴﻗﺎﻑ ).(Repeat: Off ﻤﻠﻑ MP3/WMAﺒﻘﺭﺹ CD-R ﻋﻧﺩ ﺘﺳﺠﻴﻝ ﻤﻠﻔﺎﺕ MP3ﺃﻭ WMAﻋﻠﻰ ﻘﺭﺹ CDRﻴﺭﺟﻰ ﺍﻠﺭﺠﻭﻏ ﺇﻠﻰ ﻣﺎ ﻴﻠﻲ. ﻴﺠﺏ ﺃﻦ ﺘﻜﻮﻦ ﻤﻠﻔﺎﺕ MP3ﺃﻭ WMAﺒﺘﻨﺳﻴﻖ ISO 9660ﺃﻭ .JOLIETﻴﺘﻭﺍﻔﻕ ﺘﻧﺳﻳﻖ ISO 9660ﻭ Jolietﻠﻤﻠﻔﺎﺕ MP3ﺃﻭ WMAﻤﻊ ﻨﻅﺎﻢ ﺍﺘﺸﻐﻳﻝ Microsoft DOSﻭ Microsoft Windowsﻭﻨﻅﺎﻢ ﺍﻠﺘﺸﻐﻳﻝ Apple Macﻭﻫﻭ ﺍﻠﺘﻧﺳﻴﻖ ﺍﻷﻜﺛﺭ ﺍﺴﺘﺨﺩﺍﻤﹰﺎ . ﻋﻨﺩ ﺘﺳﻤﻴﺔ ﻤﻠﻔﺎﺕ MP3ﺃﻭ ،WMAﻴﺠﺏ ﺉﻻﻴﺘﺟﺎﻭﺯ ﺍﻻﺳﻢ ٨ﺤﺭﻭﻑ ﻭﻴﺠﺏ ﺇﺩﺧﺎﻝ ” mp3.ﻮ “wma.ﻜﺎﻤﺘﺩﺍﺩ ﺍﻠﻤﻠﻑ.ﺍﻠﺘﻨﺳﻴﻖ ﺍﻠﻌﺎﻢ ﻠﻼﺴﻢ Title.mp3 :ﺃﻭ .Title.wmaﻋﻧﺩ ﺘﻛﻭﻴﻦ ﺍﻠﻌﻧﻮﺍﻦ ،ﺘﺄﻜﺪ ﻤﻦ ﺍﺴﺘﺧﺩﺍﻢ ٨ﺤﺭﻭﻑ ﺃﻭ ﺃﻘﻝ ﻮﻋﺪﻢ ﻭﺠﻭﺪ ﻤﺳﺎﻔﺎﺕ ﻔﻲ ﺍﻻﺳﻢ ﻮﺘﺠﻨﺏ ﺍﺴﺘﺧﺪﺍﻢ ﺍﻠﺤﺭﻭﻑ ﺍﻠﺧﺎﺼﺔ ﺒﻤﺎ ﻔﻲ ﺫﻠﻚ .(+=،\،/،.) : ﺍﺴﺘﺧﺩﻢ ﻤﻌﺪﻝ ﻨﻗﻝ ﻔﻚ ﺿﻐﻄ ﻻ ﻴﻗﻝ ﻋﻦ ١٢٨ﻜﻴﻠﻮ ﺒﺎﻴﺕ ﻔﻲ ﺍﻠﺛﺎﻨﻳﺔ ﻋﻧﺩ ﺘﺳﺠﻴﻞ ﻤﻠﻔﺎﺕ MP3ﺘﻌﺘﻤﺩ ﺠﻮﺩﺓ ﺼﻮﺕ ﻤﻠﻔﺎﺕ MP3ﺒﺸﻜﻝ ﺃﺴﺎﺴﻲ ﻋﻠﻰ ﻤﻌﺪﻝ ﺍﻠﺿﻐﻃ/ﻔﻚ ﺍﻠﺿﻐﻄ ﺍﻠﻤﺤﺩﺩ .ﻴﺘﻄﻠﺏ ﺍﻠﺤﺼﻮﻝ ﻋﻠﻰ ﺼﻭﺕ ﻘﺭﺹ ﺍﻠﺼﻭﺕ ﺍﻠﻤﺿﻐﻭﻄ ﺘﻭﻔﺭ ﻤﻌﺩﻝ ﻋﻴﻧﺔ ﺘﻨﺎﻅﺭﻱ/ﻘﻤﻲ ،ﺒﻤﺎ ﻴﻌﻧﻲ ﺍﻠﺘﺤﻮﻴﻝ ﺇﻠﻰ ﺘﻧﺳﻴﻖ ،MP3ﺒﻣﺎ ﻻ ﻴﻗﻝ ﻋﻦ ١٢٨ﻜﻴﻠﻮ ﺒﺎﻴﺕ ﻔﻲ ﺍﻠﺛﺎﻨﻳﺔ ﻭﺤﺘﻰ ١٦٠ﻜﻴﻠﻭ ﺒﺎﻴﺕ ﻔﻲ ﺍﻠﺛﺎﻨﻳﺔ .ﺒﻴﻨﻤﺎ ﻻ ﻴﺆﺩﻱ ﺍﺧﺘﻴﺎﺭ ﺍﻠﻤﻌﺩﻻﺕ ﺍﻷﻋﻠﻰ ،ﻤﺛﻝ ١٩٢ﻜﻳﻠﻮ ﺒﺎﻴﺕ ﻔﻲ ﺍﻠﺛﺎﻨﻳﺔ ﺃﻭ ﻤﺎﻴﺰﻴﺩ ،ﺍﻠﻰ ﺍﻠﺤﺼﻭﻝ ﻋﻠﻰ ﺠﻭﺩﺓ ﺼﻮﺕ ﺃﻔﺿﻝ ﺇﻻ ﻔﻲ ﺍﻠﺤﺎﻻﺕ ﺍﻠﻧﺎﺩﺭﺓ .ﻭﺒﺎﻠﻌﻜﺲ ،ﻠﻦ ﻴﺗﻢ ﺘﺸﻐﻴﻝ ﺍﻠﻤﻟﻔﺎﺕ ﺫﺍﺕ ﻤﻌﺩﻝ ﻔﻚ ﺍﻠﺿﻐﻄ ﺍﻠﺫﻱ ﻴﻗﻝ ﻋﻦ ١٢٨ﻜﻳﻠﻭ ﺒﺎﻴﺕ ﻔﻲ ﺍﻠﺛﺎﻧﻳﺔ ﺒﺸﻜﻝ ﺼﺤﻳﺢ. ﺍﺴﺘﺧﻢ ﻤﻌﺩﻝ ﻨﻘﻝ ﻔﻚ ﺿﻐﻄ ﻻ ﻴﻘﻞ ﻋﻦ ٦٤ﻜﻴﻠﻭﺒﺎﻴﺕ ﻔﻲ ﺍﻠﺛﺎﻨﻳﺔ ﻋﻧﺩ ﺘﺳﺠﻴﻝ ﻤﻠﻔﺎﺕ WMAﺘﻌﺘﻤﺩ ﺟﻭﺩﺓ ﺼﻮﺕ ﻤﻠﻔﺎﺕ WMAﺒﺸﻜﻞ ﺃﺳﺎﺳﻲ ﻋﻠﻰ ﻤﻌﺩﻞ ﺍﻠﺿﻐﻄ/ﻔﻚ ﺍﺿﻐﻄ ﺍﻠﻤﺤﺪ .ﻴﺘﻄﻠﺏ ﺍﻠﺤﺼﻮﻞ ﻋﻠﻰ ﺼﻭﺕ ﻘﺭﺹ ﺍﻠﺼﻭﺕ ﺍﻠﻤﺿﻐﻭﻄ ﺘﻮﻔﺮ ﻤﻌﺪﻞ ﻋﻴﻨﺔ ﺘﻨﺎﻅﺭﻱ/ﺭﻘﻤﻲ ،ﺒﻤﺎ ﻴﻌﻧﻲ ﺍﻠﺘﺤﻮﻴﻞ ﺇﻠﻲ ﺘﺳﻴﻖ ،WMAﺒﻤﺎ ﻻ ﻴﻘﻞ ﻋﻦ ٦٤ﻜﻴﻠﻮ ﺒﺎﻴﺕ ﻔﻲﺍﻠﺜﺎﻨﻳﺔ ﻮﺤﺘﻰ ١٩٢ﻜﻴﻠﻭ ﺒﺎﻴﺕ ﻔﻲ ﺍﻠﺛﺎﻨﻴﺔ .ﻮﻋﻠﻰ ﺍﻠﻌﻜﺱ ،ﻠﻦ ﻴﺘﻢ ﺘﺷﻐﻴﻝ ﻠﻤﻠﻔﺎﺕ WMAﺃﻜﺒﺭ ﻤﻦ ٣٠ﻜﻠﻭ ﻫﺭﺘﺰ ١٩٢ .ﻜﻳﻠﻭ ﺒﺎﻴﺕ ﻔﻲ ﺍﻠﺜﺎﻨﻳﺔ ﺒﺸﻜﻝ ﺼﺤﻴﺢ .ﻤﻌﺩﻝ ﺍﻠﻌﻴﻧﺎﺕ ﺍﻠﺫﻱ ﻴﻤﻜﻦ ﺩﻋﻤﻪ ﻻ ﺘﺳﺟﻴﻝ ﻤﻠﻔﺎﺕ MP3ﺍﻠﻤﺤﻤﻴﺔ ﺒﻤﻭﺠﺏ ﺤﻘﻭﻖ ﺍﻠﻄﺒﻊ ﻮﺍﻠﻧﺸﺭ.ﺘﻢ ﺘﺸﻔﻴﺭ ﺒﻌﺾ ﺍﻠﻤﻠﻔﺎﺕ ”ﺍﻠﻤﺤﻤﻴﺔ“ ﻮﺤﻤﺎﻴﺘﻬﺎ ﺒﺎﻠﺭﻤﻭﺰ ﻠﻤﻨﻊ ﺍﻠﻨﺳﺦ ﻏﻴﺭ ﺍﻠﻘﺎﻨﻮﻨﻲ .ﺘﺗﻤﻲ ﻫﺬﻩ ﺍﻠﻤﻠﻔﺎﺕ ﺇﻠﻰ ﺍﻷﻨﻭﺍﻏ ﺍﻵﺘﻴﺔ Windows MediaTM : )ﻋﻼﻤﺔ ﺘﺠﺎﺭﻴﺔ ﻤﺳﺠﻠﺔ ﻠﺸﺭﻜﺔ (Microsoft Incﻭ ) SDMITMﻋﻼﻤﺔ ﺘﺟﺎﺭﻴﺔ ﻤﺳﺠﻠﺔ ﻠﻠﺸﺭﻜﺔ .(SDMI Foundationﻻ ﻴﻤﻜﻧﻚ ﻨﺳﺦ ﻤﺜﻝ ﻫﺫﻩ ﺍﻠﻤﻠﻔﺎﺕ. ﻫﺎﻢ :ﻻ ﻴﻤﻜﻦ ﺍﻋﺘﺒﺎﺭ ﺍﻠﺘﻭﺼﻴﺎﺕ ﺍﻠﻣﺫﻜﻭﺭﺓ ﺃﻋﻼﻩ ﻀﻤﺎﻨﹰﺎ ﺒﺄﻦ ﻤﺸﻐﻞ ﺃﻘﺭﺍﺹ DVDﺴﻴﻗﻮﻢ ﺒﺘﺸﻐﻴﻝ ﺘﺳﺠﻴﻼﺕ MP3ﺃﻭ ﺘﺄﻜﻴﺩًﺍ ﻋﻠﻰ ﺠﻭﺩﺓ ﺍﻠﺼﻮﺖ .ﻴﺟﺏ ﻤﻼﺤﻅﺔ ﺃﻦ ﺒﻌﺾ ﺘﻘﻨﻴﺎﺕ ﻭﺃﺴﺎﻠﻴﺏ ﺘﺳﺠﻴﻝ ﻤﻠﻔﺎﺕ MP3ﻋﻠﻰ ﺃﻘﺭﺍﺹ CD-Rsﺘﻤﻧﻊ ﺍﻠﺘﺷﻐﻴﻝ ﺍﻷﻤﺛﻝ ﻠﻬﺫﻩ ﺍﻠﻤﻠﻔﺎﺕ ﺒﺎﺴﺘﺧﺩﺍﻢ ﻤﺸﻌﻝ ﺃﻘﺭﺍﺹ ) DVDﻜﺎﻨﺧﻔﺎﺾ ﺠﻮﺩﺓ ﺍﻠﺼﻭﺕ ﻭﻋﺟﺯ ﺍﻠﻤﺸﻐﻞ ﻔﻲ ﺒﻌﺾ ﺍﻠﺤﺎﻻﺕ ﻋﻦ ﻘﺭﺍﺀﺓ ﺍﻠﻤﺎﻔﺎﺕ(. -ﺘﺳﺘﻄﻳﻊ ﻫﺫﻩ ﺍﻠﻭﺣﺩﺓ ﺘﺸﻐﻴﻝ ﺤﺘﻰ ٥٠٠ﻤﻠﻑ ﻮ ٥٠٠ﻤﺠﻠﺩ ﻜﺤﺩ ﺃﻘﺼﻰ ﻔﻲ ﺍﻠﻗﺭﺹ ﺍﻠﻭﺍﺤﺩ. ﺘﺸﻐﻴﻝ MPEG4 ﻭﻆﻴﻔﺔ ﺘﺸﻐﻴﻝ MPEG4 ﻴﺘﻢ ﺍﺴﺘﺧﺩ ﺍﻢ ﻣﻠﻔﺎﺕ AVIﺑﻐﺮﺾ ﺍﺤﺘﻭﺍﺀ ﺑﻴﺎﻧﺎﺕ ﻓﻴﺪﻴﻭ ﻭﺼﻭﺕ .ﻓﻼ ﻴﻤﻜﻦ ﺘﺷﻐﻴﻝ ﺴﻭﻯ ﺍﻠﻤﻠﻔﺎﺕ ﺒﺘﻨﺴﻴﻖ AVIﻓﻘﻄ ﺬﺍﺕ ﺍﻻﻤﺘﺪﺍﺪ ".."avi. .١ﺍﻓﺗﺢ ﺪﺭﺝ ﺍﻷﻗﺮﺍﺹ .ﺿﻊ ﺍﻠﻘﺭﺺ ﻓﻲ ﺍﻠﺩ ﺝ .ﺃﻏﻟﻖ ﺍﻠﺪﺮﺝ. .٢ﺍﻀﻐﻄﻋﻠﻰ ﺍﻠﺯﺭﻴﻦ ® √/ﻟﺘﺣﺪﻴﺪ ﻗﺎﺋﻤﺔ ﻣﻠﻔﺎت اﻟﻔﻴﺪﻳﻮ ،ﺛﻢ ﺍﻀﻐﻄ ﻋﻠﻰ ﺍﻠﺯﺭ .ENTERﺍﻀﻐﻄﻋﻠﻰ ﺍﻠﺯﺭﻴﻦ † π/ﻟﺘﺣﺪﻴﺪ ﻤﻠﻒ ، (DivX/XviD) avi ﺛﻢ ﺍﺿﻐﻄ ﻋﻠﻰ ﺍﻠﺯﺮ .ENTERﺍﻀﻐﻄﻋﻠﻰ ﺍﻠﺯﺭﻴﻦ † ،π/ﺛﻢ ﺍﻀﻐﻄ ﻋﻠﻰ ﺍﻠﺯﺭ .ENTER ٨ ﺘﻜﺮﺍﺮ ﺘﺸﻐﻴﻝ ﻮ ﺍﺴﺘﺧﺪﺍﻢ ﻮﻅﻴﻔﺔ REPEAT A-B .١ﺍﻀﻐﻄ ﻋﻠﻰ ﺍﻠﺯﺮ REPEATﻠﺘﻐﻴﻴﺮ ﻭﻀﻊ ﺍﻠﺘﺷﻐﻴﻝ .ﻫﻨﺎﻚ ﺛﻼﺛﺔ ﺃﻭﻀﺎﻉ ،ﻣﺛﻝ )ﺇﻴﻗﺎﻑ ﺍﻟﺗﺷﻐﻳﻝ( Offﻭ )ﺍﻠﻌﻨﻮﺍﻦ( Titleﻭ )ﻤﺟﻠﺪ( .Folder ﺇﻴﻗﺎﻑ ﺍﻟﺗﺷﻐﻳﻝ ) TItleﺍﻠﻌﻨﻮﺍﻦ( :ﻟﺘﻛﺭﺍﺭ ﺍﻟﻌﻧﻭﺍﻥ ﺍﻠﺤﺎﺮﻱ ﺘﺸﻐﻳﻠﺔ. ) Folderﻤﺟﻠﺪ( :ﻠﺘﻜﺭﺍﺮﻣﻠﻔﺎﺕ AVIﺫﺍﺕ ﺍﻻﻤﺘﺪﺍﺪ ﺍﻠﻤﺘﻣﺎﺜﻝ ﻓﻲ ﺍﻠﻣﺠﻠﺪ ﺍﻠﺣﺎﻠﻲ.ﺍﺳﺘﺧﺪﺍﻡ ﻭﻆﻳﻔﺔ (DVD-D360K) A-B Repeat .١ﺃﺜﻧﺎﺀ ﻟﺘﻐﻴﻞ ،ﻀﻐﻂ ﻋﻟﻰ ﺍﻟﺯﺭ REPEATﺑﻮﺣﺪﺓ ﺍﻟﺘﺣﻜﻢ ﻋﻥ ﺑﻌﺩ. .٢ﺍﺴﺧﺪﻢ ﺍﻠﺯﺭﻴﻦ † π/ﻠﺘﺣﺪﻳﺪ ، REPEAT A-Bﺛﻢ ﺍﻀﻐﻄ ﻋﻠﻰ ® ﺃﻭ ﺍﻠﺯﺭ ENTER .٣ﺍﺿﻐﻄ ﻋﻠﻰ ﻟﺯﺭ ENTERﻋﻧﺪ ﺍﻠﻣﻭﻀﻊ ﺍﻠﻤﻄﻠﻮﺏ ﺑﺪﺀ ﺘﻛﺮﺍﺭ ﺍﻠﺘﺸﻐﻳﻝ ﻋﻨﺪﻩ ﴿.﴾A .٤ﺍﺿﻐﻄ ﻋﻠﻰ ﻟﺯﺭ ENTERﻋﻧﺪ ﺍﻠﻣﻭﻀﻊ ﺍﻠﻤﻄﻠﻮﺏ ﺇﻴﻘﺎﻑ ﺘﻛﺮﺍﺭ ﺍﻠﺘﺸﻐﻳﻝ ﻋﻨﺪﻩ ﴿.﴾B ﺍﺳﺘﺧﺪﺍﻡ ﻭﻆﻳﻔﺔ (DVD-D530K/DVD-D530) A-B Repeat .١ﺃﺜﻧﺎﺀ ﻟﺘﻐﻴﻞ ،ﻀﻐﻂ ﻋﻟﻰ ﺍﻟﺯﺭ REPEAT A-Bﺑﻮﺣﺪﺓ ﺍﻟﺘﺣﻜﻢ ﻋﻥ ﺑﻌﺩ. .٢ﺍﺿﻐﻄ ﻋﻠﻰ ﻟﺯﺭ REPEAT A-Bﻋﻧﺪ ﺍﻠﻣﻭﻀﻊ ﺍﻠﻤﻄﻠﻮﺏ ﺑﺪﺀ ﺘﻛﺮﺍﺭ ﺍﻠﺘﺸﻐﻳﻝ ﻋﻨﺪﻩ ﴿.﴾A .٣ﺍﺿﻐﻄ ﻋﻠﻰ ﻟﺯﺭ REPEAT A-Bﻋﻧﺪ ﺍﻠﻣﻭﻀﻊ ﺍﻠﻤﻄﻠﻮﺏ ﺇﻴﻘﺎﻑ ﺘﻛﺮﺍﺭ ﺍﻠﺘﺸﻐﻳﻝ ﻋﻨﺪﻩ ﴿.﴾B ﻠﻠﺮﺟﻭﻉ ﺇﻠﻰ ﺍﻠﺘﺷﻌﻳﻝ ﺍﻠﻌﺎﺪﻱ ،ﺍﻀﻐﻂ ﻋﻠﻰ ﺍﻠﺯﺮ REPEAT A-Bاﻟﺸﺎﺷﺔ ر :ﺳﺎﻟﺔ ﺗﻜﺮار إﻳﻘﺎف ﺗﺸﻐﻴﻞ ).(Repeat: Offﻭﺼﻒﻮﻅﻴﻔﺔ MPEG4 ﺍﻠﻭﺼﻒ ﺍﻠﻭﻆﻴﻔﺔ Skip )| Kﺃﻮ (|k ﺃﺛﻨﺎﺀ ﺍﻠﺘﺷﻐﻴﻝ ,ﺍﻀﻐﻄ ﻋﻠﻰ ﺍﻠﺯﺮ |kﺃﻮ| Kﺗﻨﺘﻘﻞ إﻟﻰ اﻟﻤﺴﺎر اﻟﺘﺎﻟﻲ أو اﻟﺴﺎﺑﻖ. Search ) Kﺃﻮ (k ﺃﺜﻨﺎﺀ ﺍﻠﺘﺸﻐﻴﻝ ،ﺍﻀﻐﻄ ﻋﻠﻰ ﺍﻠﺰﺮ k) SEARCHﺃﻮ (Kﻭﺍﻀﻐﻃ ﻤﺮﺓً ﺃﺧﺮﻯ ﻠﻠﺒﺣﺚ ﺑﺴﺮﻋﺔ ﺃﻜﺑﺮ. ﻴﺘﻴﺢ ﺍﻠﺒﺣﺚ ﺑﺴﺮﻋﺔ ﺃﻜﺑﺮ ﻓﻲ ﻤﻠﻒ .(٣٢X, ١٦X, ٨X, ٤X, ٢X) .AVI ﺗﺸﻐﻴﻝ ﺑﺎﻠﺣﺮﻜﺔ ﻠﺑﻃﻴﺌﺔ ZOOM ﻴﺘﻴﺢ ﺍﻠﺒﺣﺚ ﺑﺴﺮﻋﺔ ﺃﻗﻝ ﻓﻲ ﻤﻠﻒ ( ١/١٦, ١/٨, ١/٤, ١/٢) .AVI X٤/X٣/X٢/X١/Normalﺑﺎﻠﺘﺮ ﺘﻴﺐ ﻗﺪ ﻻ ﺘﻌﻤﻝ ﻫﺬﻩ ﺍﻠﻭﻅﺎﺌﻒ ﻭﺫﻠﻚ ﺣﺴﺏ ﻤﻠﻒ .MPEG4ﻤﻠﻑ AVIﻋﻠﻰ ﻗﺮﺹ CD-R ﺑﺈﻤﻜﺎﻦ ﻫﺬﺍ ﺍﻠﺠﻬﺎﺯ ﺘﺷﻐﻴﻝ ﺘﻨﺴﻴﻘﺎﺕ ﻀﻐﻄ ﺍﻠﻔﻳﺪﻴﻮ ﺍﻠﺘﺎﻠﻴﺔ ﺪﺍﺧﻝ ﺘﻨﺴﻴﻖ ﺍﻠﻤﺎﻒ : AVI ﻤﺣﺘﻭﻴﺎﺕ DivX 3.11 ﻤﺣﺘﻭﻴﺎﺕ ) DivX 4ﺣﺴﺐ (MPEG-4 Simple Profile ﻤﺣﺘﻭﻴﺎﺕ ) DivX 5ﺍﻠﻭﻀﻊ ﺍﻠﺒﺴﻴﻄ ﺍﻠﺧﺎﺹ ﺒ MPEG-4ﻋﻼﻭﺓ ﻋﻠﻰﺍﻠﻣﻴﺰﺍﺕ ﺍﻹﺿﺎﻓﻴﺔ ﻤﺜﻝ ﺍﻹﻃﺎﺮﺍﺕ ﺛﻨﺎﺌﻴﺔ ﺍﻻﺘﺠﺎﻫﺎﺕ .ﻜﻣﺎ ﻳﺘﻢ ﺪﻋﻢ Qpel ﻮ GMCﺃﻴﻀًﺎ(. ﻤﺣﺘﻭﻴﺎﺕ Xvidﻤﺘﻭ ﺍﻓﻗﺔ ﻤﻊ .MPEG-4ﺃﻗﺮﺍﺹ DVD-RW & DVD+R ﺍﻠﺘﻨﺴﻴﻖ ﺍﻠﺬﻱ ﻴﺪﻋﻢ :DivX ﺘﻨﺴﻴﻖ DivXﺍﻷﺴﺎﺴﻲ DivX3.11/4.12/5.x) Xvidﺑﺮﻨﺎﻤﺞ ﻓﻚ ﺍﻠﺘﺷﻔﻴﺮ ﺍﻠﻤﺘﻭﺍﻓﻖ ﻣﻊ (MPEG-4ﻮ DivX Pro ﺘﻨﺴﻴﻖ ﺍﻠﻣﻠﻒ *.avi, *.div, *.divx. :ﻴﺪﻋﻢ ﻫﺬﺍ ﺍﻠﺟﻬﺎﺰ ﻜﺎﻓﺔ ﺪﺮﺟﺎﺕ ﺍﻠﺪﻗﺔ ﺣﺘﻰ ﺃﻗﺼﻰ ﺪﻗﺔ ﻣﻌﺭﻭﻀﺔ ﺃﺪﻧﺎﻩ. ﻴﺪﻋﻢ ﻫﺬﺍ ﺍﻠﺟﻬﺎﺰ ﻜﺎﻓﺔ ﺪﺮﺟﺎﺕ ﺍﻠﺪﻗﺔ ﺣﺘﻰ ﺃﻗﺼﻰ ﺪﻗﺔ ﻣﻌﺭﻭﻀﺔ ﺃﺪﻧﺎﻩ. DivX5 ٤٨٠ x ٧٢٠ﺑﻤﻌﺪﻝ ٣٠ﺇﻃﺎﺭًﺍ ﻓﻲ ﺍﻠﺛﺎﻨﻴﺔ ٥٧٦ x ٧٢٠ﺑﻤﻌﺪﻝ ٣٥ﺇﻃﺎﺭًﺍ ﻓﻲ ﺍﻠﺛﺎﻨﻴﺔ :ﺃﺼﻰ ﻤﻌﺪﻝ ﻧﻘﻝ ﺒﻴﺎﻨﺎﺕ ٤ :ﻤﻴﺠﺎﺑﺎﻴﺕ ﻓﻲ ﺍﻠﺛﺎﻨﻴﺔ ﺘﻅﻬﺮﺭﺴﺎﺌﻝ ﺘﺣﺫﻴﺮ ﻤﺣﺘﻤﻠﺔ ﺧﻼﻝ ﻤﺣﺎﻮﻠﺔ ﺘﺷﻐﻴﻝ ﻤﻠﻒ : DivX .١ﻻ ﻴﻭﺠﺪ ﺘﺼﺮﻴﺢ ﺍﻠﻣﻠﻒ ﺍﻠﻣﻨﺷﺄ ﺑﺮﻤﺰ ﺘﺴﺟﻴﻝ ﺧﻄﺄ. .٢ﺑﺮ ﻨﺎﻤﺞ ﻓﻚ ﺘﺷﻔﻴﺭ ﻏﻴﺮ ﻤﺪﻋﻭﻢ ﻤﻠﻒ ﺒﺈﺼﺪﺮﺍﺕ ﻭﺃﻧﻮﺍﻉ ﻓﻚ ﺘﺷﻔﻴﺮ ﻤﻌﻴﻨﺔ )ﻤﺛﻝ MP4 :ﻭ AFSﻭ ﺑﺮﺍﻤﺞ ﻓﻚ ﺘﺷﻔﻴﺮ ﻤﻠﻜﻴﺔ ﺃﺧﺮﻯ( ﻻ ﻴﺪﻋﻤﻬﺎ ﻫﺬﺍ ﺍﻠﻤﺷﻐﻝ. .٣ﺪﻗﺔ ﻏﻴﺮ ﻤﺪﻋﻮﻤﺔ ﺍﻠﻣﻠﻑ ﺍﻠﺬﻱ ﻳﺣﺘﻭﻱ ﻋﻠﻰ ﺪﺮﺠﺎﺕ ﺪﻗﺔ ﺃﻋﻠﻰ ﻤﻦ ﻤﻭﺍﺼﻔﺎﺕ ﺍﻠﻣﺷﻐﻝﻏﻴﺮ ﻤﺪﻋﻭﻢ. ﻤﻼﺤﻅﺔ ﺍﻠﺪﻗﺔ ﺍﻠﺘﻲ ﻴﻤﻜﻦ ﺪﻋﻤﻬﺎ ﺑﻭﺍﺴﻂﺔ ﺍﻠﻃﺭﺍﺯ DVD D530K/D530ﺘﺼﻝ ﺇﻠﻰ 480 x 720ﻋﻠﻰ 30ﺇﻄﺎ ﺮًﺍ 576 x 720 ،ﻋﻠﻰ 25ﺇﻄﺎﺮًﺍ. ﻗﺪ ﻳﺘﻌﺬﺮ ﺘﺷﻐﻴﻝ ﺑﻌﺾ ﻤﻠﻔﺎﺕ MPEG-4ﺍﻠﺘﻲ ﺘﻢ ﺇﻧﺷﺎﺆﻫﺎ ﻋﻠﻰ ﻛﻤﺑﻴﻭ ﺘﺮﺸﺧﺼﻲ.ﻭﻫﺬﺍ ﻴﻔﺴﺮﺳﺑﺐﻋﺪﻢ ﺪﻋﻢ ﻧﻭﻉ ﺑﺮﻧﺎﻣﺞ ﻓﻚ ﺍﻠﺘﺷﻔﻴﺮ ﻮﺍﻹﺼﺪﺍﺭﻭﺍﻠﺪﻗﺔ ﺍﻷﻋﻠﻰ ﺍﻠﻣﺘﺠﺎﻭﺯﺓ ﻠﻠﻤﻮ ﺍﺼﻔﺎﺕ. -ﻴﺪﻋﻢ ﻫﺬﺍ ﻠﻠﺠﻬﺎﺯ ﺃﻗﺮﺍﺹ CD-R/RWﺍﻠﻤﻜﺘﻭ ﺑﺔ ﺑﺘﻨﺴﻴﻖ MPEG4ﻮﺍﻠﻣﺘﻭ ﺍﻓﻘﺔ ﻤﻊ ﺍﻠﺘﻨﺴﻴﻖ "."ISO9660 اﻟﻨﺴﺦ ﻣﻦ اﻟﻘﺮص اﻟﻤُﺪﻣَﺞ ﺘﺷﻐﻳﻝ ﻤﻟﻓﺎﺕ ﺍﻠﻭﺴﺎﺌﻃ ﺒﺎﺴﺗﺧﺩﺍﻡ ﻤﻳﺯﺓ ﻤﺿﻳﻑ USB ﻴﻣﻛﻧﻙ ﺍﻻﺴﺗﻣﺗﺎﻉ ﻤﻟﻓﺎﺕ ﺍﻠﻭﺴﺎﺌﻁ ﻤﺛﻝ ﺍﻠﺻﻭﺭ ﻮ ﺍﻷﻓﻼﻡ ﻭ ﺍﻠﻧﻐﻣﺎﺕ ﺍﻠﻣﺣﻓﻭﻈﺔ ﺒﻣﺷﻐﻝ MP3ﺃﻭ ﺬﺍﻜﺭﺓ USBﺃﻭ ﺍﻠﻛﺍﻤﻳﺭ ﺍﻠﺭﻘﻣﻳﺔ ﺒﺻﻭﺕ ﻤﺭﺘﻓﻊ ﻋﻥ ﻁﺭﻴﻕ ﺘﻭﺼﻳﻝ ﻮﺤﺩﺓ ﺍﻠﺗﺧﺯﻴﻥ ﺒﻣﻧﻓﺫ USBﺍﻠﻣﻭﺠﻭﺩ ﺒﻣﺷﻝ ﺃﻗﺭﺍﺹ .DVD ﺍﺴﺗﺧﺩﺍﻡ ﻤﻳﺯﺓ) USB HOSTﻤﺿﻳﻑ (USB .١ﻘﻡ ﺒﺗﻭﺼﻳﻝ ﻭﺤﺩﺓ USBﺒﻣﻧﻓﺫ USBﺍﻠﻣﻭﺠﻭﺩ ﺒﺎﻠﺟﺯﺀ ﺍﻷﻤﺎﻤﻲ ﻤﻥ ﺍﻟﻭﺤﺩﺓ. .٢ﺗﻈﻬﺮ ﻗﺎﺋﻤﺔ ﻳﻮ إس ﺑﻲ ) ،(USBاﺿﻐﻂ ﻋﻠﻰ اﻟﺰر ® √/ﻟﺘﺤﺪﻳﺪ ﻗﺎﺋﻤﺔ ،ﺛﻢ اﺿﻐﻂ ﻋﻠﻰ ) ENTERﻣﻮاﻓﻖ(. .٣ﻓاﺿﻐﻂ ﻋﻠﻰ اﻟﺰرﻳﻦ † π/ﻟﺘﺤﺪﻳﺪ ﻣﻠﻒ ﻓﻲ .USBاﺿﻐﻂ ﻋﻠﻰ ) ENTERﻣﻮاﻓﻖ( ﻟﻔﺘﺢ اﻟﻤﻠﻒ. ﻤﻼﺤﻅﺔ • وﻓﻲ آﻞ ﻣﺮة ﻳﺘﻢ اﻟﻀﻐﻂ ﻋﻠﻰ زر USBﻓﻲ ﺟﻬﺎز اﻟﺘﺤﻜﻢ ،ﺳﻮف ﻳﻈﻬﺮ إﻃﺎر اﺧﺘﻴﺎر ﺟﻬﺎز .USB • ﻳﻈﻬﺮ اﻻﺧﺘﺼﺎر ” “USBﻋﻠﻰ ﺷﺎﺷﺔ اﻟﻌﺮض. • اﻋﺘﻤﺎدا ﻋﻠﻰ ﺣﺠﻢ اﻟﻤﻠﻒ وﻣﺪﺗﻪ ،ﻓﺈن اﻟﺘﺤﻤﻴﻞ ﻋﻠﻰ ) (USBﻗﺪ ﻳﺴﺘﻐﺮق وﻗﺘﺎ أآﺒﺮ ﻣﻦ اﺳﺘﺨﺪام اﻟﻮﺳﺎﺋﻂ اﻟﻤﻮﺟﻮدة ﻋﻠﻰ ﺳﻲ دي أو دي ﻓﻲ دي . • ﺗﻈﻬﺮ اﻟﺸﺎﺷﺔ ) USB MENUﻗﺎﺋﻤﺔ (USBﻋﻠﻰ ﺷﺎﺷﺔ اﻟﺘﻠﻔﺎز ،ﺛﻢ ﻳﺘﻢ ﺗﺸﻐﻴﻞ اﻟﻤﻠﻒ اﻟﻤﺤﻔﻮظ. • إذا آﺎﻧﺖ هﻨﺎك اﺳﻄﻮاﻧﺔ ﻓﻲ اﻟﻮﺣﺪة ،ﻓﺈن اﻟﻀﻐﻂ ﻋﻠﻰ زر دي ﻓﻲ دي ) (DVD-D530K/DVD-D530ﺃﻭ ﺰﺭ (DVD-D360K) USB ﻳﺆدي إﻟﻰ اﻟﺨﺮوج ﻣﻦ ﻗﺎﺋﻤﺔ ) (USBوﻳﺘﻢ ﺗﺤﻤﻴﻞ اﻻﺳﻄﻮاﻧﺔ . إزاﻟﺔ USBﻋﻠﻰ ﻧﺤﻮ ﺁﻣﻦ . .١اﺿﻐﻂ ﻋﻠﻰ زر ) (DVD-D530K/DVD-D530ﺃﻭ ﺰﺭ (DVD-D360K) USBﻟﻠﻌﻮدة إﻟﻰ وﺿﻊ اﻟﻘﺮص أو اﻟﺸﺎﺷﺔ اﻟﺮﺋﻴﺴﻴﺔ .٢اﺿﻐﻂ ﻋﻠﻰ اﻟﺰر)■( ) STOPإﻳﻘﺎف(. .٣أزل ﻜﺎﺑﻞ .USB اﻟﺘﺨﻄﻲ ﻟﻸﻣﺎم/ﻟﻠﺨﻠﻒ أﺛﻨﺎء اﻟﺘﺸﻐﻴﻞ ،اﺿﻐﻂ ﻋﻠﻰ اﻟﺰر )|.(|k/K • ﻓﻲ ﺣﺎﻟﺔ وﺟﻮد أﻜﺛﺮ ﻣﻦ ﻣﻠﻒ ،ﻳﺘﻢ ﺗﺤﺪﻳﺪ اﻟﻤﻠﻒ اﻟﺘﺎﻟﻲ ﻋﻨﺪ اﻟﻀﻐﻂ ﻋﻠﻰ اﻟﺰر )|.(K • ﻓﻲ ﺣﺎﻟﺔ وﺟﻮد أﻜﺛﺮ ﻣﻦﻣﻠﻒ ،ﻳﺘﻢ ﺗﺤﺪﻳﺪ اﻟﻤﻠﻒ اﻟﺴﺎﺑﻖ ﻋﻨﺪ اﻟﻀﻐﻂ ﻋﻠﻰ اﻟﺰر ).(|k ▪ ▪ ▪ ▪ ▪ ▪ وﻻ ﻳﺘﻢ دﻋﻢ اﻟﺠﻬﺎز اﻟﺬي ﻳﺴﺘﺨﺪم ﻧﻈﺎم ﻣﻠﻒ ) .NTFSﻳﺘﻢ ﻓﻘﻂ دﻋﻢ ﻧﻈﺎم ﻣﻠﻒ ) 32/16 FATﺟﺪول ﺗﻮزﻳﻊ اﻟﻤﻠﻒ .(32/16 وﻗﺪ ﻻ ﻳﺘﻢ ﺗﺸﻐﻴﻞ ﺑﻌﺾ ﻣﺸﻐﻼت MP3ﻋﻨﺩ ﺗﻮﺻﻴﻠﻬﺎ ﺑﻬﺬا اﻟﻤﻨﺘﺞ وهﺬا ﻳﻌﺘﻤﺪ ﻋﻠﻰ ﺣﺠﻢ ﻗﻄﺎع ﻧﻈﺎم اﻟﻤﻠﻔﺎت. ﺗﻜﻮن وﻇﻴﻔﺔ USB HOSTﻏﻴﺮ ﻣﺪﻋﻮﻣﺔ ﻓﻲ ﺣﺎﻟﺔ ﺗﻮﺻﻴﻞ اﻟﻤﻨﺘﺞ اﻟﺬي ﻳﻘﻮم ﺑﻨﻘﻞ ﻣﻠﻔﺎت اﻟﻮﺳﺎﺋﻂ ﺑﺎﺳﺘﺨﺪام اﻟﺒﺮﻧﺎﻣﺞ اﻟﻤﺨﺼﺺ ﻣﻦ اﻟﻤُﺼﻨﻊ. ﻻ ﻳﻤﻜﻦ اﻟﺘﺸﻐﻴﻞ ﻣﻊ أﺟﻬﺰة ) MTPﺑﺮوﺗﻮﻜﻮل ﻧﻘﻞ اﻟﻮﺳﺎﺋﻂ( اﻟﺘﻲ ﺗُﻤﻜﻦ .Janus وﻇﻴﻔﺔ ﻣﻀﻴﻒ USBﻟﻬﺬا اﻟﻤﻨﺘﺞ ﻻ ﺗﺪﻋﻢ آﺎﻓﺔ أﺟﻬﺰة .USB ﻣﻀﻴﻒ ﻳﻮ إس ﺑﻲ هﺬا ﻻ ﻳﺪﻋﻢ ﻣﺸﻐﻼت اﻟﻘﺮص اﻟﺼﻠﺐ ).(HDD اﻟﺘﺸﻐﻴﻞ اﻟﺴﺮﻳﻊ ﻟﺘﺸﻐﻴﻞ اﻟﻘﺮص ﺑﺴﺮﻋﺔ أﻋﻠﻰ ،اﺿﻐﻂ ﻋﻠﻰ اﻟﺰر أﺛﻨﺎء اﻟﺘﺸﻐﻴﻞ ).(k/K • ﻓﻲ ﻜﻝ ﻣﺮة ﻳﺘﻢ ﻓﻴﻬﺎ اﻟﻀﻐﻂ أي ﻣﻦ اﻟﺰرﻳﻦ ،ﺗﺘﻐﻴﺮ ﺳﺮﻋﺔ اﻟﺘﺸﻐﻴﻞ ﻜﻤﺎ .٣٢X o ١٦X o ٨X o ٤X o ٢X : اﻷﺟﻬﺰة اﻟﻤﺘﻮاﻓﻘﺔ .١وﺣﺪات USBاﻟﺘﻲ ﺗﺪﻋﻢ ) USB Mass Storage v1.0.وﺣﺪات USBاﻟﺘﻲ ﺗﻌﻤﻞ ﻜﻘﺮص ﻗﺎﺑﻞ ﻟﻺزاﻟﺔ ﻓﻲ ﻧﻈﺎم اﻟﺘﺸﻐﻴﻞ Windows )اﻹﺻﺪار 2000أو اﻹﺻﺪار اﻷﺣﺪث( ﺑﺪون ﺗﺜﺒﻴﺖ ﺑﺮﻧﺎﻣﺞ ﺗﺸﻐﻴﻞ )إﺿﺎﻓﻲ(. .٢ﻣﺸﻐﻞ : MP3ﻣﺸﻐﻞ MP3ﻣﻦ ﻧﻮع اﻟﻔﻼش وﻣﺤﺮك اﻷﻗﺮاص اﻟﺼﻠﺒﺔ. .٣اﻟﻜﺎﻣﻴﺮا اﻟﺮﻗﻤﻴﺔ :اﻟﻜﺎﻣﻴﺮات اﻟﺘﻲ ﺗﺪﻋﻢ وﺣﺪات .USB Mass Storagev1.0. • اﻟﻜﺎﻣﻴﺮات اﻟﺘﻲ ﺗﻌﻤﻞ آﻘﺮص ﻗﺎﺑﻞ ﻟﻺزاﻟﺔ ﻓﻲ ﻧﻈﺎم اﻟﺘﺸﻐﻴﻞ ) Windowsاﻹﺻﺪار 2000أو اﻹﺻﺪار اﻷﺣﺪث( ﺑﺪون ﺗﺜﺒﻴﺖ ﺑﺮﻧﺎﻣﺞ ﺗﺸﻐﻴﻞ إﺿﺎﻓﻲ. .٤ﻣﺤﺮك أﻗﺮاص ﻓﻼش : USBاﻷﺟﻬﺰة اﻟﺘﻲ ﺗﺪﻋﻢ USB2.0أو .USB1.1 • ﻗﺪ ﺗﺠﺪ اﺧﺘﻼﻓًﺎ ﻓﻲ ﺟﻮدة اﻟﺘﺸﻐﻴﻞ ﻋﻨﺪ ﺗﻮﺻﻴﻞ وﺣﺪة .USB1.1 .٥ﻗﺎرئ ﺑﻄﺎﻗﺔ : USBﻗﺎرئ ﺑﻄﺎﻗﺔ USBذو ﻓﺘﺤﺔ واﺣﺪة وﻗﺎرئ .USB • وﻓﻘًﺎ ﻟﺠﻬﺔ اﻟﺘﺼﻨﻴﻊ ،ﻗﺪ ﻻ ﻳﺘﻢ ﺗﺪﻋﻴﻢ ﻗﺎرئ ﺑﻄﺎﻗﺔ .USB • ﻗﺪ ﺗﻮاﺟﻬﻚ ﻣﺸﻜﻼت ،ﻓﻲ ﺤﺎﻠﺔ ﺗﺮﻜﻴﺐ وﺣﺪات ذاﻜﺮة ﻣﺘﻌﺪدة ﻓﻲ ﻗﺎرئ ﺑﻄﺎﻗﺎت ﻣﺘﻌﺪدة. .٦ﻓﻲ ﺣﺎﻟﺔ اﺳﺘﺨﺪام ﻜﺎﺑﻞ ﺗﻮﺻﻴﻞ ،USBﻗﺪ ﻻ ﻳﺘﻢ اﻟﺘﻌﺮف ﻋﻠﻰ ﺟﻬﺎز .USB ▪ CBIﻏﻴﺮ ﻣﺪﻋﻮم )ﺗﺤﻜﻢ/ﺗﻀﺨﻴﻢ/ﻗﻄﻊ( ▪ وأﻳﻀًﺎ اﻟﻜﺎﻣﻴﺮات اﻟﺮﻗﻤﻴﺔ اﻟﺘﻲ ﺗﺴﺘﺨﺪم ﺑﺮوﺗﻮآﻮل PTPاﻟﺘﻲ ﺗﺘﻄﻠﺐ ﺗﺜﺒﻴﺖ ﺑﺮﻧﺎﻣﺞ إﺿﺎﻓﻲ ﻋﻨﺪ ﺗﻮﺻﻴﻠﻬﺎ ﺑﺎﻟﻜﻤﺒﻴﻮﺗﺮ ﻏﻴﺮ ﻣﺪﻋﻮﻣﺔ. ﺗﺘﻴﺢ ﻟﻚ ﻫﺬﻩ اﻟﻤﻴﺰة ﻧﺴﺦ ﻣﻠﻔﺎت اﻟﺼﻮت ﻣﻦ اﻟﻘﺮص إﻟﻰ ﺟﻬﺎز USBﺑﺘﻨﺴﻴﻖ MP3 اﻓﺘﺢ درج اﻟﻘﺮص .ﺿﻊ اﻟﻘﺮص اﻟﻤﺪﻣﺞ اﻟﺼﻮﺗﻲ ) (CD DAﻋﻠﻰ اﻟﺪرج ﺛﻢ ﻗﻢ ﺑﺈﻏﻼﻗﻪ .ﻗﻢ ﺑﺘﻮﺻﻴﻞ ﺟﻬﺎز USBإﻟﻰ ﻣﻀﻴﻒ USBﻓﻲ ﻣﻘﺪﻣﺔ اﻟﻤﺸﻐﻞ .ﺍﻀﻐﻄ ﻋﻠﻰ ﺍﻠﺯﺮ ENTERﻠﺘﺤﺪﻳﺪ ﺍﻠﻘﺮﺹ .اﺿﻐﻂ ﻋﻠﻰ زر ) (DVD-D530K/DVD-D530ﺃﻭ ﺰﺭ (DVD-D360K) USB .١ﻋﻨﺪﻤﺎ ﺘﻛﻭﻦ ﺍﻠﻭ ﺣﺪﺓ ﻓﻲ ﻭ ﻀﻊ ﺍﻹﻴﻘﺎﻒ ،ﺍﻀﻐﻄ ﻋﻠﻰ ﺍﻠﺯﺮ TOOLSﻠﻌﺮﺾ ﺸﺎﺷﺔ ) Rippingﺍﻨﺳﺦ ﻣﻦ ﺍﻷﻗﺭ ﺍﺹ(. .٢اﻧﻘﺮ ﻋﻠﻰ اﻷزرار † ،π/ﺛﻢ ﺿﻐﻂ ﻋﻠﻰاﻟﺰر ENTERﻟﺘﺤﺪﻳﺪ ﺟﻤﻴﻊ اﻟﻤﻠﻔﺎت ﻟﻠﻨﺴﺦ. ﻹﻟﻐﺎء ﺗﺤﺪﻳﺪ ﻧﺴﺦ ﺟﻤﻴﻊ اﻟﻤﻠﻔﺎت ،اﺿﻐﻂ ﻋﻠﻰ اﻟﺰر ENTERﻣﺮة أﺧﺮى )ﻗﺎﺋﻤﺔ إﻟﻐﺎء اﻟﺘﺤﺪﻳﺪ(. .٣ﻀﻐﻄ ﻋﻠﻰ ﺍﻠﺯﺮ √ ﻭ † ﻠﺘﺣﺪﻴﺪ ) STARTﺒﺪﺀ( ﻗﺎﺌﻤﺔ ﺍﻠﻧﺳﺦ ﻤﻦ ﺍﻷﻗﺮﺍﺹ ،ﺛﻢ ﺍﻀﻐﻄ ﻋﻠﻰ ﺍﻠﺯﺭ .ENTER ﺗﺤﺘﻮي ﻗﺎﺋﻤﺔ اﻟﻘﺺ ) (Rippingﻋﻠﻰ اﻷز رار اﻟﺘﺎﻟﻴﺔ ﺍﻠﻭﻀﻊ )ﺴﺭﻴﻌﺔ(Normal/ ﻤﻌﺪﻻﺕ ﺍﻠﺒﺕ ،ﺍﻀﻐﻄ ﻋﻠﻰ ﺍﻠﺯﺭ ENTERﻠﺘﻐﻴﻴﺭ 128ﻜﻴﻠﻭ ﺑﺕ/ﺍﻠﺜﺎﻨﻴﺔ ﺇﻠﻰ 192ﻜﻴﻠﻭ ﺑﺕ/ﺍﻠﺜﺎﻨﻴﺔ ﻮ 128ﻜﻴﻠﻭ ﺑﺕ/ﺍﻠﺜﺎﻨﻴﺔ... ﺘﺣﺪﻴﺪ ﺍﻠﺠﻬﺎﺰ ،ﺍﻀﻐﻄ ﻋﻠﻰ ﺍﻠﺯﺭ ENTERﻠﻠﺘﻐﻴﺮ ﺑﻳﻦ ﺍﻷ ﺠﻬﺯ ﺓ )ﺒﺣﺪ ﺃﻗﺼﻰ (4 ﺘﺤﺪﻳﺪ ﺇﻠﻐﺎﺀ ﺘﺣﺪﻴﺪ ،ﺍﻀﻐﻃ ﻋﻠﻰ ﺍﻠﺯﺮ ENTERﻠﻠﺘﻐﺘﻐﻳﻳﺮ ﻤﻦ ﺘﺣﺪﻳﺪ ﺍﻠﻜﻝ ﺇﻠﻰ ﺘﺣﺪﻳﺪ ﺒﻼ. ﺒﺪﺀ ﺍﻠﻨﺳﺦ ،ﺍﻀﻐﻃ ﻋﻠﻰ ﺍﻠﺯﺮ ENTERﻠﺑﺪ ﺀ ﻋﻤﻠﻴﺔ ﺍﻠﻨﺴﺦ.ﻤﻼﺤﻅﺔ • ﻹﻟﻐﺎء اﻟﻨﺴﺦ ﻓﻴﺪ اﻟﺘﻨﻔﻴﺬ ،اﺿﻐﻂ زر إدﺧﺎل )(ENTER • ﻠﻠﻌﻮﺪﺓ ﺇﻠﻰﺷﺎﺷﺔ ،CDDAﺍﻀﻐﻂ ﻋﻠﻰ ﺍﻠﺯﺮ TOOLSﻣﺮ ﺓ ﺃﺧﺮﻯ. • ﻋﻨﺪﻣﺎ ﺗﺘﻢ ﻣﻌﺎﻟﺠﺔ اﻟﻨﺴﺦ ﻣﻦ اﻟﻘﺮص اﻟﻤﺪﻣﺞ ﺳﻮف ﻳﺼﺒﺢ اﻟﻤﺸﻐﻞ ﻓﻲ ﺣﺎﻟﺔ اﻟﺘﺸﻐﻴﻞ ﺗﻠﻘﺎﺋﻴًﺎ. • اﻷﻗﺮاص اﻟﻤﺪﻣﺠﺔ اﻟﺼﻮﺗﻴﺔ ) (CD DAاﻟﺘﻲ ﻳﻤﻜﻦ اﻟﻨﺴﺦ ﻣﻨﻬﺎ. • ﻷﻦ ﺍﻠﺴﺮ ﻋﺔ ﺘﻌﺎﺪﻝ 2.6ﻀﻌﻒ ﻤﻦ ﺍﻠﺴﺮ ﻋﺔ ﺍﻠﻌﺎﺪﻴﺔ .ﻻ ﻳﺴﺘﻃﻴﻊ ﺍﻠﻣﺴﺘﺧﺪﻢ ﺘﺸﻐﻴﻝ CDDAﻤﻦ ﺧﻼﻝ ﻋﻣﻠﻴﺔ ﻨﺴﺦ ﺍﻷﻗﺮ ﺍﺹ. • ﻻ ﻳﻌﻤﻞ زر ﻳﻮ إس ﺑﻲ ) (USBﻋﻨﺪﻣﺎ ﺗﻜﻮن ﻓﻲ ﻗﺎﺋﻤﺔ اﻟﻘﺺ ).(Ripping • ﻗﺪ ﻻ ﺗﻌﻤﻞ وﻇﻴﻔﺔ اﻗﺘﺼﺎص اﻟﺴﻲ دي ) (Rippingﻣﻊ ﺑﻌﺾ ﻣﺸﻐﻼت ﻣﻠﻔﺎت .MP3 ﺘﺷﻐﻴﻝ ﺍﻠﻘﺭﺺ ﺍﻠﺫﻱ ﻴﺘﻀﻤﻦ ﺼﻭﺮ .١ﺣﺪﺪ ﺍﻠﻤﺠﺎﺪ ﺍﻠﻤﻃﻠﻭ ﺐ .٢ﺍﻀﻐﻄ ﻋﻠﻰ ﺍﻠﺯﺭﻴﻦ† π/ﻠﺘﺤﺩﻳﺩ ﻤﻟﻒ ﺍﻠﺼﻭﺳﺓ ﻔﻲ ﻘﺎﺌﻤﺔ ﺍﻠﻤﻘﺎﻄﻊ ﺜﻢ ﺍﺿﻐﻄ ﻋﻠﻰ ﺍﻠﺯﺭ .ENTER ﻤﻼﺤﻅﺔ ﺍﺿﻐﻃ ﻋﻠﻰ ﺍﻠﺯﺳ STOPﻠﻟﻌﻭﺩﺓ ﺇﻠﻰ ﻘﺎﺌﻤﺔ ﺍﻠﻤﻘﺎﻄﻊ. -ﻋﻨﺩ ﺘﺸﻐﻴﻝ ﻘﺭﺹ ،Kodak Picture CDﺘﻌﺭﺽ ﺍﻠﻭﺤﺩﺓﺍﻠﺼﻮﺭ ﻤﺒﺎﺸﺭﺓﹰ ﻮﻠﻴﺲ ﻘﺎﺌﻤﺔ ﺍﻠﻤﻘﺎﻄﻊ. ﺍﻠﺘﺩﻮﻴﺭ -ﺍﻀﻐﻄ ﻋﻠﻰ ﺍﻠﺯﺮﻴﻦ TOOLSﻠﺘﺣﺪﻴﺩ ﺍﻠﻭﺠﻪ ،ﺛﻢ ﺍﻀﻐﻄ ﻋﻠﻰ ﺍﻠﺯﺭ .ENTER ﻓﻲ ﻜﻝ ﻣﺭﺓ ﻴﺘﻢ ﺍﻠﻨﻘﺮ ﻓﻴﻬﺎ ﻋﻠﻰ ﺯﺭ® √/ﺘﺪﻭﺭ ﺍﻠﺼﻭﺭﺓ 90ﺪﺭﺠﺔ ﻓﻲ ﺍﺘﺠﺎﻩ ﻋﻗﺎﺮ ﺐ ﺍﻠﺴﺎ ﻋﺔ. ﻓﻲ ﻜﻝ ﻣﺮ ﺓ ﻴﺘﻢ ﺍﻠﻀﻐﻂ ﻋﻠﻰ ﺯﺮ ، πﺴﻭ ﻑ ﺘﻨﻌﻛﺲ ﺍﻠﺼﻭﺮﺓ ﺮﺃﺴًﺎﻋﻠﻰ ﻋﻘﺐ ﻠﻌﺮ ﺽ ﺼﻭ ﺭ ﺓ ﻤﻌﻜﻭ ﺴﺔ. ﻓﻲ ﻜﻝ ﻣﺮ ﺓ ﻴﺘﻢ ﺍﻠﻀﻐﻂ ﻋﻠﻰ ﺯﺮ † ،ﺴﻭ ﻑ ﺘﻨﻌﻛﺲ ﺍﻠﺼﻭﺮﺓﺇﻠﻰ ﺍﻠﺠﺎ ﻨﺐ ﺍﻠﺼﺣﻴﺢ ﻠﻌﺮ ﺽ ﺼﻭ ﺭ ﺓ ﻤﻌﻜﻭ ﺴﺔ.Zoom ﺍﻀﻐﻄ ﻋﻠﻰ ﺍﻠﺯﺮﻴﻦ TOOLSﻠﺘﺣﺪﻴﺩ ﺘﻜﺒﻳﺭ ،ﺛﻢ ﺍﻀﻐﻄ ﻋﻠﻰ ﺍﻠﺯﺭ ..ENTER ﻓﻲ آﻞ ﻣﺮة ﻳﺘﻢ اﻟﻨﻘﺮ ﻓﻴﻬﺎ ﻋﻠﻰ زر ENTERﻳﺘﻢ ﺗﻜﺒﻴﺮ اﻟﺼﻮرة .وﺿﻊ اﻟﺘﻜﺒﻴﺮ. X١-X٤-X٣-X٢-X١ :Slide Show -ﻋﻨﺪﻤﺎ ﻨﻘﻭﻢ ﺒﺎﻠﻨﻘﺮ ﻋﻠﻰﺯﺮ )ﺍﻠﺪﺧﻭﻝ/ﺍﻠﺘﺷﻐﻴﻝ( ﻓﻲ ﻣﻠﻒ Jpegﺴﻮﻒ ﺘﻨﺘﻘﻝ ﻤﺒﺎﺷﺮ ﺓ ﺇﻠﻰ ﻭ ﺿﻊ ﺍﻠﺷﺎﺸﺔ ﺍﻠﻜﺎﻣﻠﺔﻭﻳﺘﻢ ﻋﺭ ﺾ ﺍﻠﺷﺮ ﺍﺌﺢ ﺗﻠﻘﺎﺌﻴًﺎ. ٩ ﻤﻼﺤﻅﺔ ﺣﺴﺐ ﺤﺠﻢ ﺍﻠﻠﻒ ،ﻗﺪ ﻴﻜﻭﻥ ﻤﻘﺪﺍﺮ ﺍﻠﻔﺎ ﺼﻝ ﺒﻳﻦ ﻜﻝ ﺼﻭ ﺮﺓ ﻤﺨﺘﻠﻔًﺎ ﻋﻦ ﻫﺫﺍ ﺍﻠﺪ ﻠﻴﻝ. -ﺇﺫﺍ ﻠﻢ ﻴﺗﻢ ﺍﻠﻀﻐﻄ ﻋﻠﻰ ﺃﻱ ﺯﺮ ،ﻔﺴﻴﺑﺪﺃ ﻋﺭ ﺾ ﺍﻠﺷﺮﺍﺌﺢ ﺘﻠﻘﺎ ﺌﻳًﺎ ﺧﻼﻝ ١٠ﺛﻭ ﺍٍﻦ ﺑﺷﻜﻝ ﺍﻔﺘﺭ ﺍﻀﻲ. ﺘﺷﻐﻴﻝ ﺍﻠﻘﺭﺺ ﺍﻠﺫﻱ ﻴﺘﻀﻤﻦ ﺼﻭﺮ (DVD-D530K/DVD-D530) JPEG-HD ﻳﺠﺏ ﺍﻠﺘﻭ ﺼﻳﻝ ﺑ . HDMIﺘﺠﺐ ﺃﻦ ﺘﺑﻠﻎ ﺍﻠﺪﻗﺔ 720p/1080i/1080pﺘﻜﻭﻥ HD-JPEGﻔﻲ ﺍﻠﻭ ﻀﻊ .HD .١ﺤﺪﺪ ﺍﻠﻤﺟﻠﺪ ﺍﻠﻤﻄﻠﻭﺐ .٢ﺍﺿﻐﻃرﻋﻟﻰ ﺍﻠﺯﺭﻴﻥ † π/ﻟﺘﺤﺪﻳﺪ ﻤﻟﻑ ﺼﻭﺭﺓ ﻔﻲ ﻔﺎﺌﻣﺔ ﺍﻠﻣﻗﺎﻄﻊ ﺜﻡ ﺍﻀﻐﻃ ﻋﻟﻰ ﺍﻠﺯﺮ .ENTER ﺍﻀﻐﻂ ﻋﻟﻰ ﺍﻠﺯﺭ (■) STOPﻠﻟﻌﻭﺪﺓ ﺇﻠﻰ ﺌﻣﺔ ﺍﻠﻣﻗﺎﻄﻊ. ﻋﻧﺩ ﺘﺷﻐﻳﻝ ﻘﺭﺹ ،Kodak Picture CDﻴﻌﺭﺽ ﺠﻬﺎﺯ ﺍﻠﺻﻭﺭ ﻤﺑﺎﺸﺭﺓً ﻭﻠﻳﺱ ﻘﺎﺌﻣﺔ ﺍﻠﻣﻗﺎﻄﻊ. ﺍﻠﺗﺩﻭﻴﺭ ﺍﻀﻐﻄ ﻋﻠﻰ ﺍﻠﺯﺮﻴﻦ TOOLSﻠﺘﺣﺪﻴﺩ ﺍﻠﻭﺠﻪ ،ﺛﻢ ﺍﻀﻐﻄ ﻋﻠﻰ ﺍﻠﺯﺭ .ENTERﺍﻀﻐﻃ ﻋﻠﻰ ﺍﻠﺯﺭ ® √/ﻠﺗﺩﻭﻴﺭﺍﻠﺷﺎﺸﺔ ﺒﻣﻗﺩﺍﺭ ٩٠ﺪﺭﺠﺔﺠﻬﺔ ﺍﻠﻳﺳﺎﺭ /ﺍﻠﻳﻣﻳﻥ. ﺘﺧﻃﻲ ﺍﻠﺻﻭﺭﺓﺍﻀﻐﻁ ﻋﻟﻰ ﺍﻠﺯﺭ | Kﺃﻭ |kﻠﺗﺣﺩﻳﺩ ﺍﻠﺻﻭﺭﺓ ﺍﻠﺳﺎﺒﻗﺔ ﺃﻭ ﺍﻠﺗﺎﻠﻳﺔ. Zoomﺍﻀﻐﻄ ﻋﻠﻰ ﺍﻠﺯﺮﻴﻦ TOOLSﻠﺘﺣﺪﻴﺩ ﺘﻜﺒﻳﺭ ،ﺛﻢ ﺍﻀﻐﻄ ﻋﻠﻰ ﺍﻠﺯﺭ ..ENTER ﻓﻲ آﻞ ﻣﺮة ﻳﺘﻢ اﻟﻨﻘﺮ ﻓﻴﻬﺎ ﻋﻠﻰ زر ENTERﻳﺘﻢ ﺗﻜﺒﻴﺮ اﻟﺼﻮرة .وﺿﻊ اﻟﺘﻜﺒﻴﺮ. X١-X٤-X٣-X٢-X١ : ﻋﺭﺽ ﺍﻠﺷﺭﺍﺌﺢﺍﻀﻐﻁ ﻋﻟﻰ ﺍﻠﺯﺭ (®) PLAYﻠﺑﺩﺀ ﺍﻟﻭﻈﻳﻓﺔ .SLIDE ﺍﻀﻐﻁ ﻋﻟﻰ ﺍﻠﺯﺭ (∏∏) PAUSEﻹﻴﻗﺎﻑ ﺍﻟﻭﻈﻳﻓﺔ .SLIDEﺍﻀﻐﻁ ﻋﻟﻰ ﺰﺭ ) PLAYﺘﺷﻐﻳﻝ( ﻠﻣﻭ ﺍﺼﻟﺔ ﻋﺭﺽ ﺍﻠﺷﺭﺍﺌﺢ. ﻤﻼﺤﻅﺔ ﺤﺲ ﺏ ﺤﺟﻡ ﺍﻠﻣﻟﻑ ،ﻘﺩ ﻴﻛﻭﻥ ﻤﻗﺩﺍﺭ ﺍﻠﺯﻤﻥ ﺍﻠﻓﺎﺼﻝ ﺒﻳﻥ ﻜﻝ ﺼﻭﺭﺓ ﻣﺧﺗﻟﻓًﺎ ﻋﻥ ﺍﻠﺯﻤﻥ ﺍﻠﻓﺎﺼﻝ ﺍﻠﻣﺿﺑﻭﻃ ﻘﺩ ﺘﻅﻬﺭ ﺍﻠﺻﻭﺭﺓ ﺒﺣﺟﻡ ﺃﺼﻐﺭ ﺤﺳﺏ ﺤﺟﻡ ﺍﻠﺻﻭﺭﺓ ﻋﻧﺩ ﻋﺭﺽ ﺍﻠﺻﻭﺭ ﻔﻲ ﺍﻠﻭﻀﻊ HD-JPEG ﻳﻮﺻﻰ ﺑﻀﺒﻂ وﻇﻴﻔﺔ BD Wiseﻋﻠﻰ اﻟﻮﺿﻊ ) Offإﻳﻘﺎف اﻟﺘﺸﻐﻴﻞ( ﻓﻲ ﺣﺎﻟﺔ ﻋﺮض ﻣﻠﻒ ﺻﻮر JPEGﺑﺤﺠﻢ أﻛﺒﺮ ﻣﻦ 720 480 xﺑﻜﺴﻞ ﺘﺷﻐﻴﻝ MP3-JPEG ﻴﻤﻜﻨﻚ ﺘﺸﻐﻴﻝ ﻣﻟﻔﺎﺕ JPEGﻤﻊ ﺍﺴﺗﺧﺩﺍﻡ ﺍﻠﻤﻮﺴﻘﻰ. .١ﺍﻀﻐﻃ ﻋﻠﻰ ﺍﻠﺯﺭﻴﻦ † π/ﻠﺗﺤﺩﻳﺩ ﻤﻟﻑ MP3ﻔﻲ ﻘﺎﺌﻤﺔ ﺍﻠﻤﻗﺎﻃﻊ ﺜﻡ ﺍﻀﻐﻃ ﻋﻠﻰ ﺍﻠﺯﺭ .ENTER ﻟﻠﻌﻮدة ﻟﺸﺎﺷﺔ اﻟﻘﺎﺋﻤﺔ ،اﺿﻐﻂ زر رﺟﻮع RETURNأو اﻟﻘﺎﺋﻤﺔ MENU .٢ﺍﻀﻐﻃ ﻋﻠﻰ ﺍﻠﺯﺭﻴﻦ ® √/ﻠﺗﺤﺩﻳﺩ ﻤﻟﻑ ﻗﺎﺋﻤﺔ ﺻﻮر ،ﺛﻢ ﺍﻀﻐﻄ ﻋﻠﻰ ﺍﻠﺯﺭ ENTER ﺍﻀﻐﻃ ﻋﻠﻰ ﺍﻠﺯﺭﻴﻦ † π/ﻠﺗﺤﺩﻳﺩ ﻤﻟﻑ JPEGﻔﻲ ﻘﺎﺌﻤﺔ ﺍﻠﻤﻗﺎﻃﻊ ﺜﻡ ﺍﻀﻐﻃ ﻋﻠﻰ ﺍﻠﺯﺭ .ENTER ﺴﻴﺘﻢ ﺘﺷﻐﻳﻝ ﺍﻠﻣﻭﺴﻳﻗﻰ ﻤﻦ ﺍﻠﺑﺩﺍﻳﺔ .٣ﺍﻀﻐﻄ ﻋﻠﻰ ﺍﻠﺯﺭ Stopﻋﻧﺩﻤﺎ ﺘﺭﻴﺩ ﺇﻗﺎﻒ ﺍﻠﺘﺷﻐﻴﻝ. ﻤﻼﺤﻅﺔ ﻴﺟﺏ ﺃﻦ ﺘﻜﻭﻦ ﻤﻠﻔﺎﺕ MP3ﻭ JPEGﻤﻭﺠﻭﺩﺓ ﻋﻠﻰ ﻨﻔﺲ ﺍﻠﻗﺭﺹ. ﻘﺭﺹ CD-Rﻨﻭ ﻤﻠﻔﺎﺕ ﺒﺎﻤﺘﺩﺍﺪ JPEG ﻴﻛﻦ ﺘﺷﻐﻳﻝ ﺍﻠﻤﻟﻔﺎﺕ ﺫﺍﺕ ﺍﻻﻤﺘﺩﺍﺩ ” “.jpgﻭ ” “.JPGﻔﻘﻄ. ﺇﺫﺍ ﻜﺎﻦ ﺍﻠﻗﺭﺹ ﻏﻴﺭ ﻤﻐﻠﻕ ،ﻔﺳﻴﺳﺘﻐﺭﻖ ﻭﻘﺗًﺎ ﺃﻄﻮﻝ ﻠﺑﺩﺀ ﺍﻠﺘﺷﻐﻴﻝ ﻮﻗﺩ ﻴﺗﻌﺫﺭ ﺘﺷﻐﻴﻝ ﻜﺎﻔﺔ ﺍﻠﻣﻟﻔﺎﺕ ﺍﻠﻤﺳﺠﻟﺔ. ﻴﻤﻛﻦ ﺘﺸﻐﻴﻝ ﺃﻘﺭﺍﺹ CD-Rﺍﻠﺗﻲ ﺘﺸﺘﻤﻝ ﻋﻠﻰ ﻤﻠﻔﺎﺕ JPEGﺒﺘﻧﺳﻴﻖ ISO 9660ﺃﻭ Jolietﻔﻗﻄ. ﻻ ﻴﺠﻭﺯ ﺃﻦ ﻴﻛﻭﻦ ﺍﺳﻢ ﻤﻟﻒ JPEGﺃﻃﻮﻝ ﻤﻦ ٨ﺤﺭﻭﻒ ﻭﻴﺟﺏ ﺃﻻﻴﺷﺘﻣﻝ ﻋﻠﻰ ﻤﺳﺎﻔﺎﺕ ﻔﺎﺭ ﻏﺔ ﺃﻮ ﺤﺭﻭﻑ ﺨﺎﺼﺔ ).(+ = / . ﻴﻤﻜﻦ ﺘﺸﻐﻳﻝ ﻘﺭﺹ ﺘﻤﺕ ﻜﺘﺎﺒﺘﻪﻋﻠﻰ ﺠﻠﺳﺎﺕ ﻤﺘﺗﺎﺒﻌﺔ ﻔﻗﻄ .ﺇﺫﺍ ﺍﺪﺘﻮﻯ ﻘﺭﺹ ﺍﻠﺟﺳﻠﺳﺎﺕ ﺍﻠﻤﻌﺪﺩﺓ ﻑﻠﻰ ﻤﻗﻃﻊ ﻔﺎﺭﻍ ،ﻔﻴﻤﻜﻦ ﺘﺸﻐﻴﻝ ﺍﻠﻌﺭﺾ ﺤﺘﻰ ﺍﻠﻤﻗﻃﻊ ﺍﻠﻔﺎﺭﻍ ﻓﻘﻄ. ﻴﻤﻛﻦ ﺘﺳﺠﻴﻝ ٥٠٠ﺼﻮﺭﺓ ﻜﺣﺩ ﺃﻘﺼﻰ ﻋﻠﻰ ﻘﺭﺹ ﻤﺿﻐﻮﻂ ﻮﺍﺤﺩ. -ﻴُﻨﺼﺢ ﺒﺎﺴﺘﺧﺩﺍﻢ ﺃﻘﺭﺍﺹ .Kodak Picture CD ١٠ ﻋﻧﺩ ﺘﺷﻐﻳﻝ ﺃﻘﺭﺹ ، Kodak Picture CDﻴﻤﻜﻬ ﺘﺸﻐﻴﻝ ﻤﻠﻔﺎﺕ JPEGﻔﻘﻄ ﻔﻲ ﻤﺟﻠﺩ ﺍﻠﺼﻮﺭ. ﻘﺭﺹ : Kodak Picture CDﻴﻤﻜﻦ ﺘﺷﻐﻴﻝ ﻤﻠﻔﺎﺕ JPEGﺍﻠﻤﻮﺟﻭﺪﺓ ﻔﻲ ﻤﺠﻠﺩ ﺍﻠﺼﻭﺭ ﺒﺷﻛﻝ ﺗﻠﻗﺎﺌﻲ. ﻘﺭﺾ : Konica Picture CDﺇﺫﺍ ﻜﻧﺕ ﺘﺭﻴﺩ ﻋﺭﺾ ﺍﻠﺼﻮﺭﺓ ،ﻔﺤﺪﺩ ﻤﻠﻔﺎﺕ JPEGﻔﻲ ﻘﺎﺌﻤﺔ ﺍﻠﻤﻔﺎﻂﻊ ﻘﺭﺾ : Fuji Picture CDﺇﺫﺍ ﻜﻧﺕ ﺘﺭﻴﺩ ﻋﺭﺾ ﺍﻠﺼﻮﺭﺓ ،ﻔﺤﺪﺩ ﻤﻠﻔﺎﺕ JPEGﻔﻲ ﻘﺎﺌﻤﺔ ﺍﻠﻤﻔﺎﻂﻊ ﻘﺭﺾ : QSS Picture CDﻘﺩ ﻻ ﺘﺳﺗﻄﻴﻐ ﺍﻠﻭﺣﺩﺓ ﺘﺸﻐﻴﻝ ﻘﺭﺹ QSS Picture CD ﺇﺫﺍ ﻜﺎﻦ ﻋﺩﺩ ﺍﻠﻣﻠﻔﺎﺕ ﺍﻠﻤﻭﺠﻮﺩﺓ ﻔﻲ ﻘﺭﺹ ﻮﺍﺤﺩ ﻔﻗﻃ ﻴﺰﻴﺩ ﻋﻦ ٥٠٠ﻤﻠﻑ ،ﻔﻴﻣﻜﻦ ﺘﺸﻐﻳﻝ ٥٠٠ﻤﻠﻒ ﺒﺘﻧﺳﻴﻖ JPEGﻔﻘﻃ. -ﺇﺫﺍ ﻜﺎﻦ ﻋﺩﺩ ﺍﻠﻣﺠﻠﺩﺍﺕ ﺍﻠﻤﻭﺠﻮﺩﺓ ﻔﻲ ﻘﺭﺹ ﻮﺍﺤﺩ ﻔﻗﻃ ﻴﺰﻴﺩ ﻋﻦ ٥٠٠ﻤﺠﻠﺪ ،ﻔﻴﻣﻜﻦ ﺘﺸﻐﻳﻝ ﻤﻠﻔﺎﺕ JPEGﻔﻘﻃ ٥٠٠ﻤﺠﻠﺪ. ﻭﻈﺎﺌﻑ ﻜﺎﺭﻭﻜﻲ )(DVD-D530K/DVD-D360K ﻭﻇﺎﺋﻒ ﻛﺎﺭﻮﻜﻲ ﻳﺴﻠﺴﻞ ﻋﻤﻠﻴﺎت اﻟﺘﺸﻐﻴﻞ .١ﻗﻢ ﺑﺘﻮﺻﻴﻞ ﻃﺮﻓﻲ ﺧﺮج اﻟﺼﻮت اﻟﻤﺸﺘﺮك ﺑﺘﻠﻔﺰﻳﻮن أو ﻣﻜﺒﺮ. .٢ﻗﻢ ﺑﺘﻮﺻﻴﻞ ﻗﺎﺑﺲ اﻟﻤﻴﻜﺮوﻓﻮ ) Micاﻟﻤﻴﻜﺮوﻓﻮن( ن ﺑـ وﺿﺒﻂ ﻧﺘﻴﺠﺔ اﻟﻜﺎرﻳﻮﻛﻲ ﻋﻠﻰ ﺗﺸﻐﻴﻞ .ﻋﻨﺪ ﺗﻮﺻﻴﻞ اﻟﻤﻴﻜﺮوﻓﻮن وﺿﺒﻂ ﻧﺘﻴﺠﺔ اﻟﻜﺎرﻳﻮﻛﻲ ﻋﻠﻰ ﺗﺸﻐﻴﻞ، ﻳﻤﻜﻨﻚ اﺳﺘﺨﺪام وﻇﺎﺋﻒ اﻟﻜﺎرﻳﻮﻛﻲ. ﻧﺘﻴﺠﺔ اﻟﻜﺎرﻳﻮكي/ﻣﺴﺘﻮى ﺻﻮت اﻟﻤﻴﻜﺮوﻓﻮن/اﻟﺘﺤﻜﻢ ﻓﻲ اﻟﻤﻔﺘﺎح )اﻟﺘﺤﻜﻢ ﻓﻲ اﻟﻨﻐﻤﺔ( .١ﻗﻢ ﺑﺘﺸﻐﻴﻞ ﻗﺮص اﻟﻜﺎرﻳﻮﻛﻲ اﻟﺬي ﻳﻀﻢ اﻷﻏﺎﻧﻲ اﻟﺘﻲ ﺗﺮﻳﺪﻫﺎ ﺍﻀﻐﻄﻋﻠﻰ ﺍﻠﺯﺭﻴﻦ (†) KARAOKEﻟﺘﺣﺪﻴﺪ ﻤﻠﻒ اﻟﻨﺘﻴﺠﺔ ﻤﺴﺘﻮﻯ ﺍﻠﺼﻮﺕ ﺃﻭ ﻤﻔﺘﺎﺡ. .٢اﺿﻐﻂ ﻋﻠﻰ اﻟﺰر ﻳﻦ ® √/ﻠﺗﺤﺩﻳﺩ ﺍﻠﻌﻨﺼﺭ ﺍﻠﻣﻄﻠﻭﺏ. ﻧﺘﻴﺠﺔ اﻟﻜﺎرﻳﻮﻛﻲ )اﻟﻨﺘﻴﺠﺔ( ﺳﺘﻈﻬﺮ ﻟﻨﺘﻴﺠﺔ ﻛـ : .١اﻟﻤﻴﻜﺮوﻓﻮ ،ن ﻣﺘﺼﻞ وﻧﺘﻴﺠﺔ اﻟﻜﺎرﻳﻮﻛﻲ ﻗﻴﺪ اﻟﺘﺸﻐﻴﻞ. .٢ﻓﻲ ﻧﻬﺎﻳﺔ ﻛﻞ ﻓﺼﻞ/ﻋﻨﻮان ﻟﻘﺮص اﻟﻜﺎرﻳﻮﻛﻲ. إذا ﻛﺎن ﻛﺎرﻳﻮﻛﻲ DVDﻳﺤﺘﻮي ﻋﻠﻰ أي ﻣﻌﻠﻮﻣﺎت ﺣﻮل ﻣﺤﺮك اﻟﻨﺘﻴﺠﺔ. ﻓﻲ ﺣﺎﻟﺔ ،VCDﻻ ﻳﺴﺘﻄﻴﻊ اﻟﺠﻬﺎز اﻟﺘﻤﻴﻴﺰ ﺑﻴﻦ اﻟﻜﺎرﻳﻮﻛﻲ اﻟﺼﻠﺐ أو اﻷﻓﻼم ،وﻋﻨﺪﺋﺬ ﺳﺘﻈﻬﺮ اﻟﻨﺘﻴﺠﺔ دوﻣًﺎ. .٣ﺳﺘﻈﻬﺮ ﻧﺘﻴﺠﺔ اﻟﻜﺎرﻳﻮﻛﻲ ﻋﻨﺪ اﻧﺘﻬﺎء وﻗﺖ ﻛﻞ ﻓﺼﻞ/ﻋﻨﻮان ﻟﻤﺪة 6ﺛﻮانٍ ﺗﻘﺮﻳﺒًﺎ ﺑر ﻧﺎﻣﺞ ﺗﺴﺠﻳﻞ اﻟﺼو ت ﺑﻄر ﻳﻘﺔ ﻛﺎر ﻳوﻛۑ )(KARAOKE .١ﺃﺪﺨﻝ ﻮﺴﺎﺌﻁ ﺘﺧﺯﻴﻥ USBﻔﻲ ﻤﻗﺑﺱ USBﺜﻡ ﻮﺼﻝ ﻘﺎﺒﺱ ﺒﺎﻟﻣﻳﻛﺭﻮﻔﻮﻥ ﺒﺎﻟﻣﻳﻛﺭﻮﻔﻮﻥ. .٢ﻟﺑﺩﺀ ﺘﺷﻐﻳﻝ ﺒﺭ ﻨﺎﻤﺞ ﺍﻟﺗﺳﺟﻳﻝ ﻜﺎﺭﻴﻮﻜﻲ ،ﺍﺨﺗﺭ ﺃﺤﺩ ﻤﻟﻓﺎﺕ ، VCD/DVD/SCVDﺜﻡ ﺍﻀﻐﻁ ﺰﺭ ) RECORDﺘﺳﺟﻳﻝ(. .٣ﻋﻧﺩ ﺍﻟﺗﺳﺟﻳﻝ ،ﻻ ﻴﺳﺗﻂﻳﺢ ﺍﻟﻣﺳﺗﺧﺩﻡ ﺴﻭﻱ ﺍﻟﺿﻐﻁ ﻋﻟﻰ ﺰﺭ ) STOPﺇﻴﻗﺎﻑ( ﻮﺯﺭ ) PAUSEﺇﻴﻗﺎﻑ ﻤﺅﻘﺕ( ﻹﻟﻐﺎﺀ ﺍﻟﺘﺳﺟﻳﻝ. .٤ﻋﻧﺩ ﻘﻳﺎﻡ ﺍﻟﻣﺳﺗﺧﺩﻡ ﺒﻌﻣﻟﻳﺔ ﺍﻹﻠﻐﺎﺀ ،ﻔﺈﻨﻪ ﺴﻳﺗﻡ ﺤﻓﻁ ﻨﺗﻳﺟﺔ ﺍﻠﻣﻟﻑ. ﻤﻼﺤﻅﺔ إذاﻛﻨﺖﺗﺴﻤﻊﺻﻮﺗًﺎ ﻣﻌﯿﻨًﺎ )ﺻﺮاخ أو ﻧﺒﺎح( ﻋﻨﺪ اﺳﺘﺨﺪام ﻣﯿﺰﺓ ﻛﺎﺭﻭ ﻛﻲ ،ﻓﺎﻧﻘﻞ اﳌﻴﻜﺮوﻓﻮ ن ﺑﻌﯿﺪًا ﻋﻦ اﳌﻜﺒﺮات أو ﻗﻢ ﺑﺨﻔﺾ ﻣﺴﺘﻮى ﺻﻮت اﳌﻴﻜﺮوﻓﻮنأو ﻣﺴﺘﻮ ى ﺻﻮت ﳌﻜﺒﺮ. ﻋﻨﺪ ﺗﺸﻐﻴﻞ ﻗﺮ ص ﻳﺸﺘﻤﻞ ﻋﻠﻰ ﻣﻠﻔﺎت MP3ﻭ WMAﻭ ،LPCMﻓﻠﻦ ﺗﻌﻤﻞ ﻣﻴﺰة ﻛﺎروﻛﻲ. ﻋﻧﺩ ﺘﻭﺼﻳﻝ ،MICﻻ ﻴﻌﻤﻝ ﻃﺭﻒ ﺍﻠﺘﻭﺼﻴﻝ .DIGITAL OUT ﻳﺼﺪر ﺼﻭﺕ MICﺻﻮت ﻣﻦ ﺧﻼل ﺧﺮ ج اﻟﺘﻨﺎﻇﺮ ي ﻓﻘﻂ. ﻓﻲ ﺣﺎﻟﺔ ﺗﻮﺻﻴﻞ ﻣﺎﻳﻜﺮوﻓﻮن ﺑﻤﻘﺒﺲ اﻟﻤﺎﻳﻜﺮوﻓﻮن ) (MICاﻟﻤﻮﺟﻮد ﺑﺎﻟﻠﻮﺣﺔ اﻷﻣﺎﻣﻴﺔ ،ﻳﺘﻢ ﺗﻐﻴﻴﺮ ﻧﻈﺎم اﻟﺼﻮت 5.1CHإﻟﻰ ﻧﻈﺎم اﻟﺼﻮت 2CHﺗﻠﻘﺎﺋﻴًﺎ ،وﻻ ﻳﻤﻜﻦ ﺗﻐﻴﻴﺮ هﺬﻩ اﻟﺤﺎﻟﺔ ﻣﺎ ﻟﻢ ﻳﺘﻢ ﻓﺼﻞ اﻟﻤﺎﻳﻜﺮوﻓﻮن. ﺘﻐﻳﻳﻁ Setup Menu ﺍﺴﺘﺧﺩﺍﻢ Setup Menu ﺘﺘﻴﺢ ﻠﻚ ﺍﻠﻘﺎﺌﻤﺔ Setupﺘﺧﺼﻴﺹ ﻤﺷﻐﻝ DVDﻋﻦ ﻄﺭﻴﻖ ﺍﻠﺴﻤﺎﺡ ﺒﺘﺣﻳﺪ ﺘﻔﺿﻳﻼﺕ ﺍﻠﻠﻐﺔ ﺍﻠﻤﺧﺘﻠﻔﺔﻭﺇﻋﺪﺍﺪ ﻣﺴﺘﻭﻯ ﺮ ﺌﻴﺴﻲ ،ﺑﻝ ﻭﻀﺑﻄ ﺍﻠﻤﺷﻐﻝ ﻋﻠﻰ ﻧﻭ ﻉ ﺷﺎﺷﺔ ﺍﻠﺘﻠﻴﻔﺯ ﻴﻭﻦ ﺍﻠﻣﺘﻭ ﻔﺮﺓ ﻠﺪﻳﻚ. .١ﺃﺜﻧﺎﺀ ﻀﺒﻄ ﺍﻠﻮﺤﺩﺓ ﻋﻠﻰ ﺍﻠﻮﺿﻊ ، Stopﺍﻀﻌﻄ ﻋﻠﻰ ﺍﻠﺯﺭ MENUﺒﻭ ﺤﻜﻢ ﻋﻦ ﺑُﻌﺪ .ﺍﺴﺧﺪﻢ ﺍﻠﺯﺭﻴﻦ ® √/ﻠﺘﺣﺪﻳﺪ ﺍﻹﻋﺪﺍﺪﺍﺕ ،ﺛﻢ ﺍﻀﻐﻄ ﻋﻠﻰ ﺍﻠﺯﺭ .ENTER .٢ﺍﺴﺧﺪﻢ ﺍﻠﺯﺭﻴﻦ † π/ﻠﺘﺣﺪﻳﺪ ، Setupﺛﻢ ﺍﻀﻐﻄ ﻋﻠﻰ ® ﺃﻭ ﺍﻠﺯﺭ .ENTER .٣ﺍﺿﻐﻄ ﻋﻠﻰ ﺍﻠﺯﺭﻴﻦ † π/ﻠﻠﻮﻝ ﺇﻠﻰ ﺍﻠﻣﻴﺯ ﺍﺕ ﺍﻠﻤﺨﺘﻠﻔﺔ .ﺍﺿﻐﻄ ﻋﻠﻰ ® ﺃﻭ ﺍﻠﺯﺮ ENTERﻠﻠﻭ ﺼﻭﻝ ﺇﻠﻰ ﺍﻠﻣﻳﺯ ﺍﺕ ﺍﻠﻔﺮ ﻋﻴﺔ. .٤ﻹﺨﻔﺎ ﺀ ﻋﺮ ﺾ ﺷﺎﺷﺔ ﺍﻹ ﻋﺪﺍﺪ ﺑﻌﺪ ﺇﺠﺮ ﺍﺀ ﺍﻹ ﻋﺪﺍﺪ ،ﺍﺿﻐﻄ ﻋﻠﻰ ﺍﻠﺯﺭ RETURNﻣﺮﺓً. ﻀﺑﻄ ﺧﻳﺎﺮﺍﺕ ﺍﻠﻌﺮﺾ ﺘﺘﻴﺢ ﻠﻠﻚ ﺧﻴﺎﺭ ﺍﺕ ﺍﻠﺼﻭﺕ ﺇﻋﺪﺍﺪ ﺠﻬﺎﺯ ﺍﻠﺼﻭﺕﻭﺇﻋﺪﺍﺪﺍﺕ ﺤﺎﻠﺔ ﺍﻠﺼﻭﺕﺤﺴﺐ ﻨﻅﺎﻢ ﺍﻠﺼﻭ ﺕ ﺍﻠﻤﺴﺘﺧﺪﻢ. .١ﺃﺜﻧﺎﺀ ﻀﺒﻄ ﺍﻠﻮﺤﺩﺓ ﻋﻠﻰ ﺍﻠﻮﺿﻊ ، Stopﺍﻀﻌﻄ ﻋﻠﻰ ﺍﻠﺯﺭ MENUﺒﻭ ﺤﻜﻢ ﻋﻦ ﺑُﻌﺪ .ﺍﺴﺧﺪﻢ ﺍﻠﺯﺭﻴﻦ ® √/ﻠﺘﺣﺪﻳﺪ ﺍﻹﻋﺪﺍﺪﺍﺕ ،ﺛﻢ ﺍﻀﻐﻄ ﻋﻠﻰ ﺍﻠﺯﺭ .ENTER .٢ﺍﻀﺒﻆ ﻋﻠﻰ ﺍﻠﺯﺭﻴﻦ † π/ﻠﺘﺣﺪﻳﺪ ﻋﺭﺾ ،ﺛﻢ ﺍﻀﻐﻄ ﻋﻠﻰ ® ﺃﻭ ﺍﻠﺯﺭ .ENTER .٣ﺍﻀﺒﻆ ﻋﻠﻰ ﺍﻠﺯﺭﻴﻦ † π/ﻠﺘﺣﺪﻳﺪ ﺍﻠﻣﺼﺮ ﺍﻠﻤﻄﻠﻮﺐ ،ﺛﻢ ﺍﻀﻐﻄ ﻋﻠﻰ ﺃﻭ ﺍﻠﺯﺭ ،ﺛﻢ ﺍﻀﻐﻄ ﻋﻠﻰ ® ﺃﻭ ﺍﻠﺯﺭ .ENTER ﻭﻈﻳﻓﺔ (DVD-D530K/DVD-D530) BD-Wise ﻋﻨﺪﻣﺎ ﻳﻜﻮن اﻟﻤﺸﻐّﻞ ﻣﺘﺼﻼً ﺑﺄﺣﺪ أﺟﻬﺰة ﺗﻠﻴﻔﺰﻳﻮن SAMSUNGاﻟﺘﻲ ﺗﺪﻋﻢ و ﻇﻴﻔﺔ ، BD Wiseﻳﻤﻜﻦ اﻟﺘﻤﺘﻊ ﺑﺠﻮدة ﺻﻮرة ﻣﺤﺴّﻨﺔ وذﻟﻚ ﻣﻦ ﺧﻼل ﺿﺒﻂ وﻇﻴﻔﺔ BD Wiseﻋﻠﻰ اﻟﻮﺿﻊ ) Onﺗﺸﻐﻴﻞ(. .١ﺃﺜﻧﺎﺀ ﻀﺒﻄ ﺍﻠﻮﺤﺩﺓ ﻋﻠﻰ ﺍﻠﻮﺿﻊ ، Stopﺍﻀﻌﻄ ﻋﻠﻰ ﺍﻠﺯﺭ MENUﺒﻭ ﺤﻜﻢ ﻋﻦ ﺑُﻌﺪ .ﺍﺴﺧﺪﻢ ﺍﻠﺯﺭﻴﻦ ® √/ﻠﺘﺣﺪﻳﺪ ﺍﻹﻋﺪﺍﺪﺍﺕ ،ﺛﻢ ﺍﻀﻐﻄ ﻋﻠﻰ ﺍﻠﺯﺭ .ENTER .٢ﺍﻀﺒﻆ ﻋﻠﻰ ﺍﻠﺯﺭﻴﻦ † π/ﻠﺘﺣﺪﻳﺪ ﻋﺭﺾ ،ﺛﻢ ﺍﻀﻐﻄ ﻋﻠﻰ ® ﺃﻭ ﺍﻠﺯﺭ .ENTER .٣ﺍﻀﺒﻆ ﻋﻠﻰ ﺍﻠﺯﺭﻴﻦ † π/ﻠﺘﺣﺪﻳﺪ ، BD-Wiseﺛﻢ ﺍﻀﻐﻄ ﻋﻠﻰ ® ﺃﻭ ﺍﻠﺯﺭ .ENTER ﺍﻀﺒﻆ ﻋﻠﻰ ﺍﻠﺯﺭﻴﻦ † π/ﻠﺘﺣﺪﻳﺪ ﺘﺷﻐﻳﻝ/ﺇﻴﻗﺎﻑ ،ﺛﻢ ﺍﻀﻐﻄ ﻋﻠﻰ ﺍﻠﺯﺭ .ENTER ﻤﻼﺤﻅﺔ ﻳﻤﻜﻦ ﺗﻐﻴﻴﺮ هﺬا اﻟﺨﻴﺎر إﻻ إذا ﻜﻟن اﻟﺘﻠﻴﻔﺰﻳﻮن ﻳﺪﻋﻢ وﻇﻴﻔﺔ BD Wise ﺍﺮﺠﻊ ﺇﻠﻰ ﺪﻠﻳﻝ ﻤﺴﺘﺧﺪﻢ ﺍﻠﺘﻠﻴﻔﺯﻴﻭﻦ ﻠﻠﺘﻌﺮ ﻒ ﻋﻰ ﻤﺎ ﺇﺫﺍ ﻜﺎﻦ ﺍﻠﺘﻠﻴﻔﺯ ﻴﻭﻦ ﻴﺪ ﻋﻢ ﺍﻠﻤﺴﺢ ﺍﻠﻣﺘﻘﺪﻢ ﺃﻢ ﻻ .ﻭﺇﺫﺍ ﻜﺎﻦ ﺍﻠﺘﻠﻴﻔﺯ ﻴﻭﻦ ﻴﺪ ﻋﻢ ﺍﻻﺴﺘﻌﺮ ﺍﺾ ﺍﻠﻣﺘﻗﺪﻢ،ﻔﺎﺘﺑﻊ ﺍﻠﺘﻌﻠﻴﻤﺎﺕ ﺍﻠﻭﺍﺭﺪﺓ ﻔﻲ ﺪﻠﻴﻝ ﻤﺴﺘﺠﺪﻢ ﺍﻠﺘﻠﻴﻔﺯ ﻴﻭﻦ ﻔﻤﺎ ﻴﺘﻠﻖﻴﺎﻋﺪﺍﺪﺍﺕ ﺍﻻﺴﺘﻌﺭ ﺍﺾ ﺍﻠﻣﺘﻗﺪﻢ ﻔﻲ ﻘﺎﺌﻤﺔ ﻨﻅﺎﻢ ﺍﻠﺘﻠﻴﻔﺯﻴﻮﻦ. ﻔﻲ ﺤﺎﻠﺔ ﻀﺑﻃ Video Outputﺑﻃﺮﻴﻘﺔ ﻏﻳﺮ ﺼﺣﻴﺤﺔ ،ﻘﺪ ﻻ ﺘﻆﻬﺭ ﺍﻠﺸﺎﺷﺔ. ﺘﻌﺗﻣﺩ ﺩﺭﺠﺎﺕ ﺍﻠﺩﻘﺔ ﺍﻠﻣﺗﻭﻔﺭﺓ ﻠﺧﺭﺝ HDMIﻋﻠﻰ ﺍﻠﺗﻠﻳﻔﺯﻴﻭﻦ ﺃﻭ ﺁﻠﺔ ﺍﻠﻌﺭﺾ ﺍﻠﻤﺳﺘﺧﺩﻤﺔ .ﻟﻼﻄﻼﻉ ﻋﻠﻯ ﺍﻠﺘﻔﺎﺼﻳﻝ ،ﻴﺭﺠﻰ ﺍﻠﺭﺠﻭﻉ ﺇﻠﻰ ﺩﻠﻴﻝ ﺍﻠﻣﺳﺗﺧﺩﻢﺍﻠﺧﺎﺹ ﺒﺠﻬﺎﺯ ﺍﻠﺗﻠﻳﻔﺰﻴﻭﻦ ﺃﻭ ﺁﻠﺔ ﺍﻠﻌﺭﺾ ﻠﺩﻴﻚ. ﻋﻧﺪ ﺘﻐﻴﻴﺭ ﻤﺳﺘﻮﻯ ﺍﻠﺪﻘﺔ ﺃﺛﻧﺎﺀ ﺍﻠﺘﺸﻐﻴﻝ ،ﻘﺪ ﻴﺘﻄﻠﺏ ﺍﻷﻤﺭ ﺜﻭﺍﻦ ﻘﻠﻴﻠﺔ ﻠﻅﻬﻮﺭﺓ ﺍﻠﻌﻼﻴﺔ ﻔﻲ ﺤﺎﻠﺔ ﻀﺑﻄﺩﻗﺔ ﺨﺭﺝ HDMIﻋﻠﻰ 720pﺃﻭ 1080i ، 1080pﻴﻭﻔﺭ ﺨﺭﺝ HDMIﺠﻭﺩﺓ ﺃﻔﺿﻝ ﻠﻟﺼﻭﺭﺓ. -ﻳﻮﺻﻰ ﺑﻀﺒﻂ وﻇﻴﻔﺔ BD Wiseﻋﻠﻰ اﻟﻮﺿﻊ ) Offإﻳﻘﺎف اﻟﺘﺸﻐﻴﻞ( ﻓﻲ ﺣﺎﻟﺔ ﻋﺮض ﻣﻠﻒ ﺻﻮر JPEGﺑﺤﺠﻢ أﻛﺒﺮ ﻣﻦ 480 x 720ﺑﻜﺴﻞ ﻀﺑﻄ ﺧﻴﺎﺭﺍﺕ ﺍﻠﺼﻭﺕ ﺘﺘﻴﺢ ﻠﻠﻚ ﺧﻴﺎﺭ ﺍﺕ ﺍﻠﺼﻭﺕ ﺇﻋﺪﺍﺪ ﺠﻬﺎﺯ ﺍﻠﺼﻭﺕﻭﺇﻋﺪﺍﺪﺍﺕ ﺤﺎﻠﺔ ﺍﻠﺼﻭﺕ ﺤﺴﺐ ﻨﻅﺎﻢ ﺍﻠﺼﻭ ﺕ ﺍﻠﻤﺴﺘﺧﺪﻢ. .١ﺃﺜﻧﺎﺀ ﻀﺒﻄ ﺍﻠﻮﺤﺩﺓ ﻋﻠﻰ ﺍﻠﻮﺿﻊ ، Stopﺍﻀﻌﻄ ﻋﻠﻰ ﺍﻠﺯﺭ MENUﺒﻭ ﺤﻜﻢ ﻋﻦ ﺑُﻌﺪ .ﺍﺴﺧﺪﻢ ﺍﻠﺯﺭﻴﻦ ® √/ﻠﺘﺣﺪﻳﺪ ﺍﻹﻋﺪﺍﺪﺍﺕ ،ﺛﻢ ﺍﻀﻐﻄ ﻋﻠﻰ ﺍﻠﺯﺭ .ENTER .٢ﺍﻀﺒﻆ ﻋﻠﻰ ﺍﻠﺯﺭﻴﻦ † π/ﻠﺘﺣﺪﻳﺪ ﺍﻠﺼﻮﺕ ،ﺛﻢ ﺍﻀﻐﻄ ﻋﻠﻰ ® ﺃﻭ ﺍﻠﺯﺭ .ENTER .٣ﺍﻀﺒﻆ ﻋﻠﻰ ﺍﻠﺯﺭﻴﻦ † π/ﻠﺘﺣﺪﻳﺪ ﺍﻠﻣﺼﺮ ﺍﻠﻤﻄﻠﻮﺐ ،ﺛﻢ ﺍﻀﻐﻄ ﻋﻠﻰ ﺃﻭ ﺍﻠﺯﺭ ،ﺛﻢ ﺍﻀﻐﻄ ﻋﻠﻰ ® ﺃﻭ ﺍﻠﺯﺭ .ENTER ﻤﻼﺤﻅﺔ ﻋﻧﺪ ﺘﺸﻐﻴﻝ ﻗﺮ ﺹ ﻳﺷﺘﻤﻝ ﻋﻠﻰ ﺼﻭﺕ MPEGﻓﻲ ﺘﺣﺪﻴﺪ ، bitsreamﻗﺪ ﻻ ﻴﺜﺘﻤﻝ ﺍﻡﻤﺣﻭﺮ ﻋﻠﻰ ﺧﺮﺝ ﺼﻭﺕﻭﻫﻭ ﻳﺴﺘﻨﺩﺇﻠﻰﻣﺴﺘﻘﺑﻝ ﺍﻠﺼﻭﺕ ﻻ ﻴﻭﺠﺩ ﺨﺭﺝ ﺼﻭﺕﺘﻧﺎﻅﺭﻱ ﻋﻧﺩ ﺘﺷﻐﻳﻝ ﻘﺭﺹ ﺼﻭﺕ . ﺤﺘﻰ ﺃﺛﻧﺎ ﺀ ﻀﺒﻄ PCM Down Samplingﻋﻠﻰ .off• ﺴﺘﻗﻭﻢ ﺒﻌﺾ ﺍﻷﻗﺮ ﺍﺺ ﺑﺈﺧﺮﺍﺝ ﺍﻠﺼﻭ ﺖ ﺬﻱ ﺍﻠﻣﻌﺎﻴﻧﺔ ﺍﻠﻤﻨﺧﻓﺿﺔ ﻓﻘﻄ ﻣﻦﺧﻼﻝ ﻋﻣﻠﻳﺎﺕ ﺍﻠﺧﺭ ﺝ ﺍﻠﺮ ﻗﻤﻲ. (DVD-D530K/DVD-D530) HDMI ﺫﺍ ﻠﻢ ﻴﻜﻦ ﺍﻠﺘﻠﻴﻔﺯ ﻳﻭﻦ ﺍﻠﻤﺘﻭ ﻓﺭ ﻠﺪﻴﻙ ﻤﺘﻭ ﺍﻔﻘًﺎ ﻤﻊ ﺘﻨﺴﻴﻘﺎﺕ ﺍﻠﺿﻐﻃ ﻤﺘﻌﺪﺪﺓ ﺍﻠﻘﻭ ﺍﺕ )ﺪﻭ ﻠﺒﻲ ﺭ ﻗﻤﻲ ﺃﻭ ،(MPEGﻔﻴﺠﺐ ﻀﺒﻄ Digital Audioﻋﻠﻰ .PCM ﺇﺫﺍﻠﻢ ﻴﻜﻦ ﺍﻠﺘﻠﻴﻔﺯ ﻴﻭﻦ ﺍﻠﻤﺘﻭ ﻔﺭ ﻠﺪﻳﻙ ﻤﺘﻭ ﺍﻓﻘًﺎ ﻤﻊ ﻣﻌﺪ ﻻﺕ ﺍﻠﻌﻴﺬﺔ LPCMﺍﻠﺘﻲ ﺘﺘﺟﺎﻭﺯ ٤٨ﻛﻴﻠﻭ ﻫﺮ ﺘﺯ ،ﻓﻴﺟﺐ ﻀﺑﻄ PCM Down samplingﻋﻠﻰ .On ﺘﻢ ﺍﻠﺘﺼﻨﻴﻊ ﺑﻤﻭ ﺟﺐ ﺘﺮ ﺧﻴﺹ ﻣﻦ "Dolby" .Dolby Laboratoriesﻭﺭﻤﺯ ﺣﺮ ﻒ Dﺍﻠﻣﺯ ﻭﺪ ﺝ ﻳﻤﺛﻼﻦ ﻋﻼﻣﺘﻴﻦ ﻠ .Dolby Laboratories ﻀﺑﻄ ﺧﻳﺎﺭﺍﺖ ﺍﻠﻨﻅﺎﻢ .١ﺃﺜﻧﺎﺀ ﻀﺒﻄ ﺍﻠﻮﺤﺩﺓ ﻋﻠﻰ ﺍﻠﻮﺿﻊ ، Stopﺍﻀﻌﻄ ﻋﻠﻰ ﺍﻠﺯﺭ MENUﺒﻭ ﺤﻜﻢ ﻋﻦ ﺑُﻌﺪ .ﺍﺴﺧﺪﻢ ﺍﻠﺯﺭﻴﻦ ® √/ﻠﺘﺣﺪﻳﺪ ﺍﻹﻋﺪﺍﺪﺍﺕ ،ﺛﻢ ﺍﻀﻐﻄ ﻋﻠﻰ ﺍﻠﺯﺭ .ENTER .٢ﺍﻀﺒﻆ ﻋﻠﻰ ﺍﻠﺯﺭﻴﻦ † π/ﻠﺘﺣﺪﻳﺪ ﻨﻅﺎﻢ ،ﺛﻢ ﺍﻀﻐﻄ ﻋﻠﻰ ® ﺃﻭ ﺍﻠﺯﺭ .ENTER .٣ﺍﻀﺒﻆ ﻋﻠﻰ ﺍﻠﺯﺭﻴﻦ † π/ﻠﺘﺣﺪﻳﺪ ﺍﻠﻣﺼﺮ ﺍﻠﻤﻄﻠﻮﺐ ،ﺛﻢ ﺍﻀﻐﻄ ﻋﻠﻰ ﺃﻭ ﺍﻠﺯﺭ ،ﺛﻢ ﺍﻀﻐﻄ ﻋﻠﻰ ® ﺃﻭ ﺍﻠﺯﺭ .ENTER ﻭﻅﻴﻔﺔ )(DVD-D530K/DVD-D530) Anynet+(HDMI-CEC ﻴﻣﻜﻦ ﺍﺴﺘﺧﺪﺍﻢﻭ ﻆﻴﻔﺔ Anynet+ﻠﺘﺷﻐﻳﻝ ﺍﻠﻭﺣﺪﺓ ﺑﺎﺴﺘﺧﺪﺍﻢﻭﺤﺪﺓﺍﻠﺘﺣﻛﻢ ﻋﻦ ﺑﻌﺪ ﺍﻠﺠﺎﺼﺔ ﺑﺘﻠﻔﺎﺯﺴﺎﻤﺴﻮ ﻨﺞ ،ﻭ ﺫﻠﻚ ﺑﺘﻭ ﺼﻳﻝ DVD-D530K/D530ﺇﻠﻰ ﺘﻠﻔﺎﺯ ﺴﺎﻤﺴﻭ ﻨﺞﺒﺎﺴﺘﺧﺪﺍﻢﻜﺍﺑﻝ ) .HDMIﻭﻳﺘﻭ ﻔﺭ ﻫﺫﺍ ﻓﻗﻄ ﻣﻊ ﺃﺠﻬﺯﺓ ﺘﺎﻔﺎﺯ ﺴﺎﻤﺴﻭﻨﺞ ﺍﻠﺘﻲ ﺘﺪ ﻋﻢ ﻭ ﻅﻴﻔﺔ (.Anynet+ ﺣﺪﺪ "ﺘﺷﻐﻳﻝ "ﻋﻨﺪ ﺘﻭ ﺼﻴﻝ DVD-D530K/D530ﺑﺎﺴﺘﺧﺪﺍﻢ ﺘﻠﻔﺎﺯ ﺴﺎﻤﺴﻭ ﻨﺞ ﻴﺪ ﻋﻢ ﻭ ﻅﻴﻔﺔ .Anynet+ .١ﺃﺜﻧﺎﺀ ﻀﺒﻄ ﺍﻠﻮﺤﺩﺓ ﻋﻠﻰ ﺍﻠﻮﺿﻊ ، Stopﺍﻀﻌﻄ ﻋﻠﻰ ﺍﻠﺯﺭ MENUﺒﻭ ﺤﻜﻢ ﻋﻦ ﺑُﻌﺪ .ﺍﺴﺧﺪﻢ ﺍﻠﺯﺭﻴﻦ ® √/ﻠﺘﺣﺪﻳﺪ ﺍﻹﻋﺪﺍﺪﺍﺕ ،ﺛﻢ ﺍﻀﻐﻄ ﻋﻠﻰ ﺍﻠﺯﺭ .ENTER .٢ﺍﻀﺒﻆ ﻋﻠﻰ ﺍﻠﺯﺭﻴﻦ † π/ﻠﺘﺣﺪﻳﺪ ﻨﻅﺎﻢ ،ﺛﻢ ﺍﻀﻐﻄ ﻋﻠﻰ ® ﺃﻭ ﺍﻠﺯﺭ .ENTER .٣ﺍﻀﺒﻆ ﻋﻠﻰ ﺍﻠﺯﺭﻴﻦ † π/ﻠﺘﺣﺪﻳﺪ ) ، Anynet+(HDMI-CECﺛﻢ ﺍﻀﻐﻄ ﻋﻠﻰ ® ﺃﻭ ﺍﻠﺯﺭ .ENTER .٤ﺣﺪﺪ ) Anynet+(HDMI-CECﻋﻠﻰ "ﺘﺷﻐﻴﻝ" ﺑﻤﺸﻐﻝ ،DVDﺛﻢ ﺍﺿﻐﻄ ﻋﻠﻰ ﺍﻠﺯﺭ .ENTER .٥ﺍﻀﺒﻃﻭﻅﻴﻔﺔ Anynet+ﻔﻲ ﺍﻠﺘﻠﻔﺎﺯ).ﺭ ﺍﺠﻊ ﺪﻠﻴﻝ ﺘﻌﻠﻴﻤﺎﺖ ﺍﻠﺘﻠﻔﺎﺯ ﻠﻣﺯ ﻴﺪ ﻤﻦ ﺍﻠﻣﻠﻭ ﻤﺎﺖ(. ﻤﻼﺤﻅﺔ ﺒﺎﻠﺿﻐﻃ ﻋﻠﻰﺯﺭ ) Playﺘﺷﻐﻳﻝ( ﺒﺎﻠﻭﺤﺩﺓ ﺃﺜﻧﺎﺀ ﻤﺷﺎﻫﺩﺓ ﺍﻠﺘﻠﻔﺎﺰ ،ﺴﻳﺗﻢ ﺘﻐﻳﻳﺭ ﺸﺎﺸﺔ ﺍﻠﺘﻠﻔﺎﺯ ﺇﻠﻰ ﺸﺎﺸﺔ ﺍﻠﺘﺷﻐﻳﻝ. ﻔﻲ ﺤﺎﻠﺔ ﺘﺷﻐﻳﻝ DVDﺃﺜﻧﺎﺀ ﺇﻴﻘﺎﻑ ﻄﺎﻘﺔ ﺍﻠﺗﻠﻔﺎﺯ ،ﻴﺗﻢ ﺘﺷﻐﻳﻝ ﻄﺎﻘﺔ ﺍﻠﺘﻠﻔﺎﺯ. ﻋﻧﺩ ﺇﻴﻗﺎﻒ ﺘﺷﻐﻳﻝ ﺍﻠﺗﻠﻔﺎﺯ ،ﻴﺗﻡ ﺇﻴﻘﺎﻒ ﻤﺷﻐﻝ DVDﺘﻟﻗﺎﺌﻳًﺎ. ﻔﻲ ﺤﺎﻠﺔ ﺘﻐﻴﻳﺭ HDMIﺇﻠﻰ ﻤﺼﺎﺩﺭ ﺃﺨﺭﻯ )ﺍﻠﻤﺭﻜﺏ ﺃﻭ ﺍﻠﻤﻜﻭﻦ ﺃﻭ ﻤﺎ ﺇﻠﻰ ﺫﻠﻚ( ﻔﻲ ﺍﻠﺗﻠﻔﺎﺯ ﺃﺜﻧﺎﺀ ﺘﺷﻐﻳﻝ ﻘﺭﺹ ، DVDﻴﺗﻭﻘﻒ ﻤﺷﻐﻝ ، DVDﻠﻜﻦ ﻴﺳﻣﺭ ﺘﺷﻐﻴﻝ ﻘﺭﺹ DVDﻔﻲ ﻤﺷﻐﻝ DVDﺤﺳﺏ ﺍﻠﺗﻧﻘﻝ ﺍﻠﺫﻱ ﻴﺩﻋﻤﻪ ﻘﺭﺹ .DVD ١١ ﺿﺒﻄ ﻤﻳﺯﺍﺕ ﺍﻠﻠﻐﺔ ﺇﺬﺍ ﺘﻢ ﺿﺑﻄ ﻗﺎﺌﻤﺔ ﺍﻠﻤﺷﻐﻝﻭ ﻗﺎﺌﻤﺔ ﺍﻷﻗﺮﺺﻭﻠﻐﺔ ﺍﻠﺼﻮ ﺕ ﻭ ﻠﻐﺔ ﺍﻠﺘﺭ ﺠﻤﺔ ﺍﻠﻣﺼﺎ ﺣﺒﺔ ﺒﺷﻜﻝ ﻤﺴﺑﻖ ،ﻓﺳﺘﻆﻬﺭ ﺠﻣﻴﻌًﺎ ﺑﺷﻜﻝ ﺘﻠﻗﺎﺌﻲ ﻔﻲ ﻜﻝ ﻤﺮ ﺓ ﻳﺘﻢ ﻓﻴﻬﺎ ﻋﺮ ﺽ ﻔﻴﺎﻢ. .١ﺃﺜﻧﺎﺀ ﻀﺒﻄ ﺍﻠﻮﺤﺩﺓ ﻋﻠﻰ ﺍﻠﻮﺿﻊ ، Stopﺍﻀﻌﻄ ﻋﻠﻰ ﺍﻠﺯﺭ MENUﺒﻭ ﺤﻜﻢ ﻋﻦ ﺑُﻌﺪ .ﺍﺴﺧﺪﻢ ﺍﻠﺯﺭﻴﻦ ® √/ﻠﺘﺣﺪﻳﺪ ﺍﻹﻋﺪﺍﺪﺍﺕ ،ﺛﻢ ﺍﻀﻐﻄ ﻋﻠﻰ ﺍﻠﺯﺭ .ENTER .٢ﺍﻀﺒﻆ ﻋﻠﻰ ﺍﻠﺯﺭﻴﻦ † π/ﻠﺘﺣﺪﻳﺪ ﺍﻠﻠﻐﺔ ،ﺛﻢ ﺍﻀﻐﻄ ﻋﻠﻰ ® ﺃﻭ ﺍﻠﺯﺭ .ENTER .٣ﺍﻀﺒﻆ ﻋﻠﻰ ﺍﻠﺯﺭﻴﻦ † π/ﻠﺘﺣﺪﻳﺪ ﺍﻠﻠﻐﺔ ﺍﻠﻣﻄﻠﻭﺑﺔ ،ﺛﻢ ﺍﻀﻐﻄ ﻋﻠﻰ ﺃﻭ ﺍﻠﺯﺭ ® ﺃﻭ ﺍﻠﺯﺭ .ENTER ﻤﻼﺤﻅﺔ ﻴﺘﻢ ﺘﺪﻳﺪ ﺍﻠﻠﻐﺔ ﻭ ﺘﻌﻭ ﺪ ﺍﻠﺷﺎﺷﺔ ﺇﻠﻰ ﻗﺎﺌﻣﺔ .Language Setup ﻹﺧﻔﺎﺀ ﻋﺭﺾﻗﺎﺌﻤﺔ ﺍﻹﻋﺪﺍﺪ ،ﺍﺿﻐﻄ ﻋﻠﻰ ﺍﻠﺯﺭ .Menu ﺇﺬﺍ ﻜﺎﻨﺕ ﺍﻠﻟﻐﺔ ﺍﻠﻤﺤﺪﺩﺓ ﻏﻴﺭ ﻤﺳﺠﻠﺔ ﻋﻠﻰ ﺍﻠﻗﺭﺹ ﻔﺳﻴﺘﻢ ﺘﺤﺩﻴﺩ ﺍﻠﻟﻐﺔ ﺍﻷﺼﻠﻴﺔ ﻤﺳﺑﻗﺔ ﺍﻠﺘﺳﺟﻳﻝ. ﺤﺪﺪ " "Originalﺇﺫﺍ ﻜﻨﺖ ﺘﺭﻴﺪ ﻀﺑﻂ ﺍﻠﻐﺔ ﺍﻻﻓﺘﺮ ﺍﻀﻴﺔ ﻠﻣﺎﺪﺓ ﺍﻠﻣﺴﺠﻠﺔ ﺑﺣﻴﺚ ﺘﻜﻭﻥ ﺍﻠﻠﻐﺔ ﺍﻷ ﺼﺎﻴﺔ ﻠﺘﺴﺟﻴﻝ ﺍﻠﻗﺭ ﺹ. ﺤﺪﺪ " "Automaticﺇﺫﺍ ﻜﻨﺖ ﺘﺭﻴﺪ ﻀﺑﻂ ﺍﻠﻐﺔ ﺍﻠﻣﺼﺎﺣﺑﺔ ﻋﻠﻰ ﻨﻔﺲ -ﻗﺪ ﻻ ﺘﺷﻤﻝ ﺑﻌﺾ ﺍﻷﻗﺭ ﺍﺺ ﺍﻠﻠﻐﺔ ﺍﻠﺘﻲ ﺘﻢ ﺘﺣﺪ ﻳﺪ ﻫﺎ ﻜﻠﻐﺔ ﺃﻭﻠﻰ ،ﻭﻓﻲ ﺘﻠﻚ ﺍﻠﺤﺎﻠﺔ ﻳﺴﺘﺧﺪﻢ ﺍﻠﻗﺭﺹ ﺇﻋﺪﺍﺪ ﺍﻠﻠﻐﺔ ﺍﻷﺼﻠﻴﺔ ﻀﺑﻄ ﺧﻳﺎﺭﺍﺖ اﻟﺤﻤﺎﻳﺔ ﺘﻤﻝ ﻭﻆﻴﻔﺔ Parental Controlﺒﺎﻻﺷﺘﺮ ﺍﻚ ﻤﻊ ﺃﻗﺮﺍﺺ DVDﺍﻠﺙﻲ ﺘﻢﺘﻌﻳﻳﻦ ﺘﺼﻨﻳﻒ ﻠﻬﺎ ﺒﺤﻳﺚ ﺘﺴﺎ ﻋﻠﻰ ﺍﻠﺘﺤﻜﻢ ﻔﻲ ﺃﻗﺮ ﺍﺺ DVDﺍﻠﺘﻲ ﺘﺷﺎ ﻫﺪ ﻫﺎ ﺍﻷ ﺴﺭ ﺓ .ﻴﻭ ﺠﺪ ﻣﺎ ﻴﺼﻝ ﺇﻠﻰ ٨ﻣﺴﺘﻭ ﻴﺎﺕ ﺘﺼﻨﻳﻑ ﻋﻠﻰ ﺍﻠﻘﺮ ﺺ. ﺇﻋﺪﺍﺪ ﻣﺴﺘﻭﻯ ﺍﻠﺘﺼﻨﻳﻑ ﻭ ﺘﻐﻳﻴﺭ ﻜﻠﻣﺔ ﺍﻠﻣﺭﻭﺭ .١ﺃﺜﻧﺎﺀ ﻀﺒﻄ ﺍﻠﻮﺤﺩﺓ ﻋﻠﻰ ﺍﻠﻮﺿﻊ ، Stopﺍﻀﻌﻄ ﻋﻠﻰ ﺍﻠﺯﺭ MENUﺒﻭ ﺤﻜﻢ ﻋﻦ ﺑُﻌﺪ .ﺍﺴﺧﺪﻢ ﺍﻠﺯﺭﻴﻦ ® √/ﻠﺘﺣﺪﻳﺪ ﺍﻹﻋﺪﺍﺪﺍﺕ ،ﺛﻢ ﺍﻀﻐﻄ ﻋﻠﻰ ﺍﻠﺯﺭ .ENTER .٢ﺍﻀﺒﻆ ﻋﻠﻰ ﺍﻠﺯﺭﻴﻦ † π/ﻠﺘﺣﺪﻳﺪ ﺍﻷﻤﺎﻦ ،ﺛﻢ ﺍﻀﻐﻄ ﻋﻠﻰ ® ﺃﻭ ﺍﻠﺯﺭ .ENTERﺃﺩﺧﻝ ﻜﻠﻣﺔ ﺍﻠﻣﺭﻭﺭ. .٣ﺍﻀﺒﻆ ﻋﻠﻰ ﺍﻠﺯﺭﻴﻦ † π/ﻠﺘﺣﺪﻳﺪ ﺍﻠﻮﺍﻠﺪﻴﻦ/ﺘﻐﻴﻳﺭ ﻜﻠﻤﺔ ﺍﻠﻤﺭﻮﺭ ،ﺛﻢ ﺍﻀﻐﻄ ﻋﻠﻰ ® ﺃﻭ ﺍﻠﺯﺭ .ENTER .٤ﺍﻀﻐﻃ ﻋﻠﻰ ﺍﻠﺯﺭ† π/ﻠﺘﺤﺪﻴﺪ Rating Levelﺍﻠﻣﻃﻠﻭﺐ ،ﺛﻢ ﺍﻀﻐﻂ ﻋﻠﻰ ﺍﻠﺯﺭ .ENTER ﻤﺛﺎﻝ( ﺍﻹﻋﺪﺍﺪ ﻔﻲ ﺍﻠﻭﻀﻊ ﺃﻤﻥﺍﻟﻃﻔﻞ ﻔﻣﺛﻼً ﺇﺫﺍﺘﻢ ﺘﺤﺩﻴﺩ ﺤﺗﻰ ﺃﻤﻥﺍﻟﻃﻔﻞ ،ﻔﻠﻦ ﻴﺗﻢ ﺘﺷﻐﻳﻝ ﺍﻷﻘﺭﺍﺹ ﺍﻠﺗﻲ ﺘﺷﺘﻣﻝ ﻋﻠﻰ اﻟﻤﺴﺘﻮى 2ﺃﻭ ﺃﻋﻠﻰ ﻻ ﻳﻤﻜﻦ ﺗﺸﻐﻴﻠﻬﺎ. .٥ﺃﺩﺧﻝ ﻜﻠﻣﺔ ﺍﻠﻣﺭﻭﺭ .إذا آﺎﻧﺖ هﺬﻩ هﻲ اﻟﻤﺮة اﻷوﻟﻰ ،أدﺧﻞ .0000ﺛﻢ أدﺧﻞ آﻠﻤﺔ اﻟﻤﺮور اﻟﺠﺪﻳﺪة .ﻳﺠﺐ أن ﺗﻜﻮن آﻠﻤﺔ اﻟﻤﺮور ﻋﺪدا ﻏﻴﺮ 0000 ﻟﺘﻔﻌﻴﻞ وﻇﻴﻔﺔ اﻟﺘﺤﻜﻢ اﻷﺑﻮي .ﺃﻋﺪ ﺇﺪﺨﺎﻝ ﻜﻠﻣﺔ ﺍﻠﻣﺭﻭﺭ ﺍﻠﺠﺪﻴﺪﺓ ﻤﺠﺪﺌﺍ. ﻣﺴﺘﻮﻳﺎت اﻟﺤﻤﺎﻳﺔ : ﺃﻤﻥﺍﻟﻃﻔﻞ ) Gﺍﻠﺠﻤﻬﻮﺮ ﺍﻠﻌﺎﻢ( :ﺠﻣﻴﻊ ﺍﻷﻋﻤﺎﺮ ﺍﻠﻤﺳﻣﻭﺡﻠﻬﺎ ) PGﺍﻠﺘﻭ ﺠﻴﻪ ﺍﻷ ﺒﻭ ﻱ ﺍﻠﻤﻘﺘﺮﺡ( :ﺍﻠﻤﻤﻜﻦ ﻭﺟﻭﺪ ﺒﻌﺾ ﺍﻠﻣﻭ ﺍﺪ ﻏﻴﺮ ﺍﻠﻣﻼﺌﻤﺔ ﻠﻸﻄﻔﺎﻝ. ) 13-PGﺘﺣﺬﻴﺮ ﺍﻵ ﺒﺎ ﺀ ﺒﺸﺪﺓ( :ﻣﻥ ﺍﻠﻤﺣﺘﻤﻝ ﻭﺠﻭﺪ ﺑﻌﺾ ﺍﻠﻣﻭ ﺍﺪ ﻏﻴﺮ ﺍﻠﻤﻼﺌﻣﺔ ﻠﻸ ﻄﻔﺎﻝ ﺘﺣﺕ ﺴﻥ .13 ) PGRﺍﻠﺘﻭ ﺠﻴﻪ ﺍﻷﺑﻮ ﻱ ﺍﻠﻤﻘﺘﺮ ﺡ( :ﻠﻴﺲ ﻣﻦ ﺍﻠﺿﺮﻭﺮ ﺓ ﻋﺪﻢ ﻤﻼﺀﻣﺘﻬﺎ ﻠﻸﻃﻔﺎﻝﻭﻡﻛ ﻤﻥ ﺍﻠﻭ ﺍﺟﺐ ﺘﺣﻔُﻅ ﺍﻠﻤﺸﺎ ﻫﺪﻭﻤﺮ ﺍﻗﺒﺔ ﺍﻵﺑﺎﺀﻭﺍﻷﻮﺼﻴﺎﺀ ﻠﻠﻤﺷﺎﻫﺪﻴﻦﺍﻠﺼﻐﺎﺮ. ) Rﻤﺣﻆﻭﺮ( :ﻤﻦ ﺍﻠﻤﻔﺘﺮ ﺾ ﻭﺟﻭﺪ ﺼﺤﺑﺔ ﻠﻠﻤﺷﺎﻫﺪﻴﻦ ﺘﺣﺕ ﺴﻦ 17 ) : NC 17 (NC 17ﻻ ﻴﺘﻢ ﺍﻠﺳﻣﺎ ﺡ ﻷﺣﺪ ﻓﻲ ﺳﻦ 17ﻓﺄﻗﻝ -ﺒﺎﻠﻎ ١٢ ﻤﻼﺤﻅﺔ -ﺇﺫﺍ ﻨﺴﻴﺕ ﻜﻠﻤﺔ ﺍﻠﻤﺮﻭﺭ ﺍﻠﺨﺎﺼﺔ ﺑﻚ ،ﻔﺎﻨﻆﺮ"ﻨﺴﻴﺎﻦ ﻜﻠﻤﺔ ﺍﻠﻣﺮﻭﺭ" ﻓﻲ ﺪﻠﻴﻝ ﺍﺴﺘﻜﺸﺎﻒ ﺍﻷﺨﻃﺎﺀ ﻭﺇﺼﻼﺤﻬﺎ ﻀﺑﻄ ﺧﻳﺎﺭﺍﺖ اﻟﻌﺎﻣﺔ .١ﺃﺜﻧﺎﺀ ﻀﺒﻄ ﺍﻠﻮﺤﺩﺓ ﻋﻠﻰ ﺍﻠﻮﺿﻊ ، Stopﺍﻀﻌﻄ ﻋﻠﻰ ﺍﻠﺯﺭ MENUﺒﻭ ﺤﻜﻢ ﻋﻦ ﺑُﻌﺪ .ﺍﺴﺧﺪﻢ ﺍﻠﺯﺭﻴﻦ ® √/ﻠﺘﺣﺪﻳﺪ ﺍﻹﻋﺪﺍﺪﺍﺕ ،ﺛﻢ ﺍﻀﻐﻄ ﻋﻠﻰ ﺍﻠﺯﺭ .ENTER .٢ﺍﻀﺒﻆ ﻋﻠﻰ ﺍﻠﺯﺭﻴﻦ † π/ﻠﺘﺣﺪﻳﺪ ﻋﺎﻢ ،ﺛﻢ ﺍﻀﻐﻄ ﻋﻠﻰ ® ﺃﻭ ﺍﻠﺯﺭ .ENTER .٣ﺍﻀﺒﻆ ﻋﻠﻰ ﺍﻠﺯﺭﻴﻦ † π/ﻠﺘﺣﺪﻳﺪ ﺍﻠﻣﺼﺮ ﺍﻠﻤﻄﻠﻮﺐ ،ﺛﻢ ﺍﻀﻐﻄ ﻋﻠﻰ ﺃﻭ ﺍﻠﺯﺭ ،ﺛﻢ ﺍﻀﻐﻄ ﻋﻠﻰ ® ﺃﻭ ﺍﻠﺯﺭ .ENTER ﻀﺑﻄ ﺧﻳﺎﺭﺍﺖ ﺍﻠﺩﻋﻢ ﻳﺘﻴﺢ ﻟﻚ ﺧﻴﺎر اﻟﺪﻋﻢ ) (Supportاﻟﺘﻌﺮف ﻋﻠﻰ ﻣﻌﻠﻮﻣﺎت ﻣﺸﻐﻞ اﻟﺪي ﻓﻲ دي ) (DVDﻣﺜﻞ رﻣﺰ اﻟﻮﺿﻊ ،ﻧﺴﺨﺔ اﻟﺒﺮﻧﺎﻣﺞ ،اﻟﺮﻗﻢ اﻟﻤﺴﻠﺴﻞ ورﻗﻢ اﻹﺻﺪار ﺣﻴﺚ ﻳﻤﻜﻦ اﻻﻃﻼع ﻋﻠﻰ ﻫﺬﻩ اﻟﻤﻌﻠﻮﻣﺎت ﻋﻠﻰ ﻇﻬﺮ ﻣﺸﻐﻞ اﻟﺪي ﻓﻲ دي ).(DVD .١ﺃﺜﻧﺎﺀ ﻀﺒﻄ ﺍﻠﻮﺤﺩﺓ ﻋﻠﻰ ﺍﻠﻮﺿﻊ ، Stopﺍﻀﻌﻄ ﻋﻠﻰ ﺍﻠﺯﺭ MENUﺒﻭ ﺤﻜﻢ ﻋﻦ ﺑُﻌﺪ .ﺍﺴﺧﺪﻢ ﺍﻠﺯﺭﻴﻦ ® √/ﻠﺘﺣﺪﻳﺪ ﺍﻹﻋﺪﺍﺪﺍﺕ ،ﺛﻢ ﺍﻀﻐﻄ ﻋﻠﻰ ﺍﻠﺯﺭ .ENTER .٢ﺍﻀﺒﻆ ﻋﻠﻰ ﺍﻠﺯﺭﻴﻦ † π/ﻠﺘﺣﺪﻳﺪ ﺍﻠﺪﻋﻢ ،ﺛﻢ ﺍﻀﻐﻄ ﻋﻠﻰ ® ﺃﻭ ﺍﻠﺯﺭ .ENTER .٣ﺣﺪﺪ ﻤﻌﻠﻮﻤﺎﺕ ﺍﻠﻤﻧﺘﺞ ،ﺛﻢ ﺍﻀﻐﻄ ﻋﻠﻰ ® ﺃﻭ ﺍﻠﺯﺭ .ENTER ﺍﻠﻣﺭﺠﻊ ﺍﻠﻤﻭﺍﺼﻓﺎﺕ ﺍﺴﺘﻜﺷﺎﻑ ﺍﻷﺨﻄﺎﺀ ﻭﺇﺼﻼﺤﻬﺎ ﻤﺘﻃﺎﺑﺎﺖ ﺍﻠﺘﻴﺎﺭ ﺍﻠﻜﻬﺭ ﺑﻲ ﻘﺒﻝ ﻄﺎﺏ ﺍﻠﺻﻳﺎﻧﺔ )ﺍﺴﺗﻛﺷﺎﻒ ﺍﻷﺨﻅﺎ ﺀ ﻭﺇﺼﻼﺤﻬﺎ( ،ﻴﺭﺠﻰ ﺍﻠﺭﺠﻭﻉ ﺇﻠﻰ ﻤﺎ ﻴﻠﻲ. ﺍﻠﻣﺸﻜﻠﺔ ﺍﻠﺸﺎﺸﺔ ﻻ ﺘﻅﻬﺭ ﺍﻹﺟﺭﺍﺀ ▪ ﺍﻀﻐﻄ ﻋﻠﻰ ﺍﻠﺯﺭ ||® )ﻋﻠﻰ ﺍﻠﻟﻭﺤﺔ ﺍﻷﻣﺎﻣﻳﺔ( ﻠﻣﺩﺓ ﺃﻜﺛﺭ ﻤﻦ ٥ﺛﻭﺍٍﻦ ﺃﺜﻧﺎﺀ ﻋﺩﻢ ﻭﺠﻭﺩ ﺃﻱ ﻗﺭﺹ ﺒﺎﻠﺩﺍﺧﻝ .ﺴﺘﻌﻭﺩ ﻜﺈﻔﺔ ﺍﻹﻋﺩﺍﺩﺍﺕ ﺇﻠﻰ ﺇﻋﺩﺍﺩﺍﺕ ﺍﻠﻣﺼﻨﻊ ﻤﺭﺓﹰ ﺃﺧﺭﻯ ﻋﺎﻤﺔ ▪ ﺍﻀﻐﻄ ﻋﻠﻰ ﺍﻠﺯﺭ ||® )ﻋﻠﻰ ﺍﻠﻟﻭﺤﺔ ﺍﻷﻣﺎﻣﻳﺔ( ﻠﻣﺩﺓ ﺃﻜﺛﺭ ﻤﻦ ٥ﺛﻭﺍٍﻦ ﺃﺜﻧﺎﺀ ﻋﺩﻢ ﻭﺠﻭﺩ ﺃﻱ ﻗﺭﺹ. ﺒﺎﻠﺩﺍﺧﻝ .ﺴﺘﻌﻭﺩ ﻜﺈﻔﺔ ﺍﻹﻋﺩﺍﺩﺍﺕ ﺇﻠﻰ ﻘﻳﻡ ﺇﻋﺩﺍﺩﺍﺕ ﺍﻠﻣﺼﻨﻊ ﺒﻣﺎ ﻔﻲ ﺫﻟﹰﻚ ﻜﻠﻣﺔ ﺍﻠﻣﺭﻭﺭ .ﻻﺘﻟﺠﺄ ﺇﻠﻰ ﺍﺴﺗﺧﺩﺎﻡ ﺫﻠﻙ ﺍﻹ ﻔﻲ ﺤﺎﻠﺔ ﺍﻠﺿﺭﻭﺭﺓ ﺍﻠﻘﺼﻭﻯ. ﻻ ﻴﻣﻛﻦ ﺘﺬﻜﺭ ﻜﻠﻣﺔ ﺍﻠﻣﺭﻳﺭ ﻻ ﻴﻭﺠﺩ ﺨﺭﺝ HDMI ﺍﺴﺘﻬﻼﻚ ﺍﻠﺘﻴﺎﺭ ﺍﻠﻜﻬﺭ ﺑﻲ ﺍﻫﺘﺯﺍﺯ ﺨﺭﺝ HDMIﺘﺒﺩﻮ ▪ ﻔﻲ ﺤﺈﻠﺔ ﻈﻬﻭﺭ ﺘﺷﻭﻴﺶ ﺃﺒﻴﺾ ﻠﻟﻭﻦ ﻋﻠﻰ ﺍﻠﺸﺎﺸﺔ ،ﻔﻬﺫﺍ ﻴﻌﻧﻲ ﺃﻦ ﺍﻠﺗﻠﻳﻔﺯﻴﻭﻦ ﻻ ﻴﺩﻋﻢ HDCP )ﺤﻣﺎﻴﺔ ﺍﻠﻤﺤﺘﻮﻯ ﻋﺎﻠﻲ ﺍﻠﻨﻄﺎﻖ(. ﺍﻫﺗﺯﺍﺯ ﺨﺭﺝ HDMI ▪ ﺘﺄﻜﺩ ﺃﻦ ﺇﻋﺩﺍﺩ ﻨﻅﺎﻢ ﺍﻠﺘﻠﻳﻔﺯﻴﻭﻦ ﻴﻌﻤﻝ ﺒﻄﺭﻴﻘﺔ ﺼﺤﻳﺤﺔ. ▪ ﻘﺩﺘﻬﺘﺯ ﺍﻠﺷﺎﺸﺔ ﻋﻧﺩﺘﺤﻭﻴﻝ ﻤﻌﺩﻝ ﺍﻹﻄﺎﺭ ﻤﻦ ٥٠ﻫﺭﺘﺯ ﺇﻠﻰ ٦٠ﻫﺭﺘﺯ ﺒﺎﻠﺳﺒﺔ ﻠﺧﺭﺝ ) HDMIﻭﺠﻬﺔ ﺍﻠﻭﺴﺎﺌﻄ ﺍﻠﻣﺘﻌﺪﺩﺓ ﻋﺎﻠﻴﺔ ﺍﻠﻭﻀﻭﺡ( ﺍﻠﺘﻲ ﺘﻌﻣﻝ ﺒﻤﺳﺘﻭﻯ ﺩﻘﺔ .720p/1080i/1080p ▪ ﻴﺭﺠﻰ ﻤﺭﺍﺠﻌﺔ ﺩﻠﻳﻝ ﺍﻠﻤﺳﺗﺧﺩﻣ ﺍﻠﺧﺎﺹ ﺒﺎﻠﺗﻠﻳﻔﺯﻴﻭﻦ. ﺍﻠﻭﺯﻦ ﺍﻷﺑﻌﺎﺪ ٣٦٠ﻤﻠﻢ )ﻋﺭﺾ( ٢٠٧ Xﻤﻠﻢ )ﻋﻤﻖ( ٤٢ Xﻤﻠﻢ )ﺍﺭﺘﻓﺎﻉ( ﻨﻄﺎﻕ ﺭﻄﻭ ﺑﺔ ﺍﻠﺘﺛﻐﻴﻝ ﺨﺮ ﺝ ﺍﻠﻔﻴﺪﻳﻭ +5°Cﺇﻠﻰ +35°C ٪١٠ ﺇﻠﻰ ٪٧٥ ﻔﻴﺪﻴﻮ ﻤﺭﻜﺏ ﻘﻧﺎﺓ ) 1.0 Vp-p : ١ﺤﻤﻞ ٧٥ﺃﻭﻢ( ﻤﻜﻮ ﻦ ﺍﻠﻔﻴﺪ ﻴﻭ ) Y : 1.0 Vp-pﺤﻤﻞ ٧٥ﺃﻭﻢ( ) Pr : 0.70 Vp-pﺤﻤﻞ ٧٥ﺃﻭﻢ( ) Pb : 0.70 Vp-pﺤﻤﻞ ٧٥ﺃﻭﻢ( )HDMI (DVD-D530K/DVD-D530 ﻃﺮف اﻹﺧﺮاج ﺠﺭ ﺝ ﺍﻠﺼﻭ ﺕ ﻠﻌﺮﻓﺔ ﻣﻮاﺻﻔﺎت ﻣﺰود اﻟﻄﺎﻗﺔ وﻣﻌﺪﻻت اﺳﺘﻬﻼﻜﻬﺎ، ا ﻟﺮﺟﺎء اﻟﺮﺟﻮع إﻠﻰ اﻟﻠﺼﻖ اﻟﻮﺟﻮد ﻋﻠﻰ اﻟﻨﺘﺞ ١,٢ﻜﺨﻡ ﻧﻄﺎﻖ ﺪﺮ ﺠﺔ ﺣﺭ ﺍﺭ ﺓ ﺍﻠﺘﺛﻐﻳﻝ ▪ ﺘﺄﻜﺩ ﻤﻦ ﺃﻦ ﺨﺭﺝ ﺍﻠﻔﻴﺩﻴﻭ ﻴﻌﻣﻝ ﺒﺩﻋﻢ .HDMI ▪ ﺇﻔﺤﺹ ﺍﻠﻭﺼﻟﺔ ﺒﻳﻦﺍﻠﺗﻠﻴﻔﺯﻴﻮﻦ ﻮﻤﻘﺒﺱ HDMIﺒﻣﺷﻐﻝ .DVD ▪ ﺘﺄﻜﺩ ﺃﻦ ﺠﻬﺎﺯ ﺍﻠﺘﻠﻳﻔﺯﻴﻭﻦ ﻴﺩﻋﻢ ﻤﺷﻌﻝ DVDﺍﻠﺬﻱ ﻴﻌﻣﻝ ﺒﺩﻋﻢ .480p/720p/1080i/1080p ١١٠ـ ٢٤٠ﻔﻭ ﻠﺕ ﻤﻦ ﺍﻠﺘﻴﺎﺭ ﺍﻠﻤﺘﺮﺪﺪ ،ﺒﺘﺭﺪﺪ ٦٠/٥٠ﻫﺭ ﺗﺯ ﺃﻘﺼﻰ ﻤﺴﺘﻭ ﻯ ﻠﻺ ﺠﺭ ﺍﺝ ﺧﺮ ﺝ ﺼﻭ ﺕ ﺮ ﻗﻣﻲ ﺍﺴﺘﺠﺎ ﺑﺔ ﺍﻠﺘﺪﺪ 480p/576p. 720p. 1080i. 1080p RCA Vrms ٢ ٢٠ﻫﺭﺘﺯ ﺇﻠﻰ ٢٠ﻜﺘﻠﻭ ﻫﺭﺘﺯ ﻄﺮ ﻒ ﺛﻨﺎﺌﻲ ﺍﻠﻤﺤﻭﺭ )(S/PDIF ١٣ ﻣﺫﻛﺮﺓ ١٤ ﻣﺫﻛﺮﺓ ﻓﻲ ﻛﺎﻓﺔ ﺃﻧﺤﺎﺀ ﺍﻟﻌﺎﻟﻢSAMSUNG ﺑﺸﺮﻛﺔ .SAMSUNG ﻓﻴﺠﺮﻯ ﺍﻻﺗﺼﺎﻝ ﲟﺮﻛﺰ ﺧﺪﻣﺔ ﺍﻟﻌﻤﻼﺀ ﺍﳋﺎﺹ ﺑﺸﺮﻛﺔ،Samsung ﺇﺫﺍ ﻛﺎﻥ ﻟﺪﻳﻚ ﺃﻱ ﺍﺳﺘﻔﺴﺎﺭ ﺃﻭ ﺗﻌﻠﻴﻖ ﻋﻠﻰ ﻣﻨﺘﺠﺎﺕ Web Site www.samsung.com/ca www.samsung.com/mx www.samsung.com/us www.samsung.com/ar www.samsung.com/br www.samsung.com/cl www.samsung.com/latin www.samsung.com/latin www.samsung.com/latin www.samsung.com/latin www.samsung.com/latin www.samsung.com/latin www.samsung.com/latin www.samsung.com/latin www.samsung.com/latin www.samsung.com/latin www.samsung.com/latin www.samsung.com/latin www.samsung.com.co www.samsung.com/be (Dutch) www.samsung.com/be_fr (French) www.samsung.com/cz www.samsung.com/dk www.samsung.com/fi www.samsung.com/fr www.samsung.de www.samsung.com/hu www.samsung.com/it www.samsung.com/lu www.samsung.com/nl www.samsung.com/no www.samsung.com/pl www.samsung.com/pt www.samsung.com/sk www.samsung.com/es www.samsung.com/se www.samsung.com/uk www.samsung.com/ie www.samsung.com/at www.samsung.com/ch www.samsung.com/ch_fr/ (French) www.samsung.ru www.samsung.com/kz_ru www.samsung.com/kz_ru www.samsung.ua www.samsung.com/ua_ru www.samsung.com/lt www.samsung.com/lv www.samsung.com/ee www.samsung.com/au www.samsung.com/nz www.samsung.com/cn www.samsung.com/hk www.samsung.com/hk_en/ www.samsung.com/in www.samsung.com/id www.samsung.com/jp www.samsung.com/my www.samsung.com/ph www.samsung.com/sg www.samsung.com/th www.samsung.com/tw www.samsung.com/vn www.samsung.com/tr www.samsung.com/za www.samsung.com/ae Contact Center 1-800-SAMSUNG (726-7864) 01-800-SAMSUNG (726-7864) 1-800-SAMSUNG (726-7864) 0800-333-3733 0800-124-421, 4004-0000 800-SAMSUNG (726-7864) 00-1800-5077267 800-7919267 0-800-507-7267 1-800-10-7267 800-6225 1-800-299-0013 1-800-234-7267 800-7267 1-800-682-3180 1-800-751-2676 1-800-SAMSUNG (726-7864) 0-800-100-5303 01-8000112112 Area Canada Mexico U.S.A Argentine Brazil Chile Nicaragua Honduras Costa Rica Ecuador El Salvador Guatemala Jamaica Panama Puerto Rico Rep. Dominica Trinidad & Tobago Venezuela Colombia 02 201 2418 Belgium 800-SAMSUNG (800-726786) 8-SAMSUNG (7267864) 30-6227 515 01 4863 0000 01805-SAMSUNG (726-7864 € 0,14/Min) 06-80-SAMSUNG (726-7864) 800-SAMSUNG (726-7864) 02 261 03 710 0900-SAMSUNG (0900-7267864) (€ 0,10/Min) 3-SAMSUNG (7267864) 0 801 1SAMSUNG (172678), 022-607-93-33 80820-SAMSUNG (726-7864) 0800-SAMSUNG (726-7864) 902-1-SAMSUNG (902 172 678) 0771 726 7864 (SAMSUNG) 0845 SAMSUNG (7267864) 0818 717 100 0810-SAMSUNG (7267864, € 0.07/min) Czech Republic Denmark Finland France Germany Hungary Italia Luxemburg Netherlands Norway Poland Portugal Slovakia Spain Sweden U.K Eire Austria 0848-SAMSUNG (7267864, CHF 0.08/min) Switzerland 8-800-555-55-55 8-10-800-500-55-500 8-10-800-500-55-500 00-800-500-55-500 8-10-800-500-55-500 Russia Kazakhstan Uzbekistan Kyrgyzstan Tadjikistan 8-800-502-0000 Ukraine 810-800-500-55-500 00-800-500-55-500 8-800-77777 8000-7267 800-7267 1300 362 603 0800 SAMSUNG (0800 726 786) 400-810-5858, 010-6475 1880 Belarus Moldova Lithuania Latvia Estonia Australia New Zealand China 3698-4698 Hong Kong 3030 8282, 1800 110011, 1800 3000 8282 0800-112-8888 0120-327-527 1800-88-9999 1-800-10-SAMSUNG (726-7864), 1-800-3-SAMSUNG (726-7864), 1-800-8-SAMSUNG (726-7864), 02-5805777 1800-SAMSUNG (726-7864) 1800-29-3232, 02-689-3232 0800-329-999 1 800 588 889 444 77 11 0860-SAMSUNG (726-7864 ) 800-SAMSUNG (726-7864), 8000-4726 India Indonesia Japan Malaysia Region North America Latin America Europe CIS Asia Pacific Philippines Singapore Thailand Taiwan Vietnam Turkey South Africa U.A.E Middle East & Africa