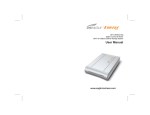
Download Eagle ET-CSWSIU2-BK storage enclosure
Transcript
[ ET-CSWSIU2-BK ] Eagle | Consus W-Series SATA / IDE to USB2.0 External Storage System User Manual www.eagle-techusa.com Index 1 Getting Started Package Contents …………………………………………...……. System Requirements ………………………………………….. Updating Your Operating System ……………………………... Handling Precautions 2 Setting Up External Storage Components …………………..………………. IDE Hard Drive Installation ….……………………………………… SATA Hard Drive Installation ….……………………………….. 3 24 25 Appendix Regulatory Compliance …………………………………………… Warranty Information …………………………………………… EAGLE | CONSUS Service and Support ……...………………… Understand EAGLE TECH Sub-Brand ……...………………… 1 22 23 Troubleshooting FAQ – USB, Firewire & RAID Information ………………………. FAQ – Installation ………………………………………….…….. 7 16 19 Disconnecting the Hard Drive Windows …………………………………………………………….. Mac …………………………………………………………….. 6 14 15 Partition & Format the Hard Drive Windows …………………………………………………………….. Mac OS v.10.2 + ………………………………………………… 5 04 05 09 Connecting the External Hard Drive Connecting the Cables …………………………………………. Powering Up the Hard Drive ……..……………………………. 4 02 03 03 03 30 31 34 35 1 Getting Started Thank you for purchasing EAGLE | CONSUS W-SERIES product. Eagle | Consus W-Series SATA / IDE to USB2.0 External Storage System. It will not only save you money, but also space and time. This user manual provides step-by-step installation instructions and other important information regarding your EAGLE | CONSUS product. For the latest EAGLE | CONSUS product information and news, visit our Web Site at www.eagle-techusa.com Package Contents * Eagle | Consus W-Series SATA / IDE to USB2.0 External Storage System USB 2.0 certified cable Installation CD AC power adapter User Manual USB 2.0 host required for Hi-Speed USB 2.0 performance. USB 2.0 is highly recommended because of the significant reduction in file transfer time compared to USB 1.1. To determine if your system supports USB 2.0, refer to your USB controller card documentation or contact your USB card manufacturer. 2 System Requirements Hardware Pentium® II, 200 MHz equivalent or newer for IBM compatible PC PowerPC G4, 350 MHz or newer for PowerPC-based Apple Computer Core® or newer for Intel-based Apple Computer Available High Speed USB 2.0 port SATA Hard Drive(s) Software Windows® Windows 2000 Pro / Server 2000 / Server 2003 / XP / Vista Macintosh® Mac® OS X v.10.2+ Note: For highest performance and reliability, EAGLE | CONSUS recommends that you install the latest service pack (SP) and updates. Updating Your Operating System Windows Go to the Start menu and select Windows updates. For more information regarding updating your system, visit windowsupdate.microsoft.com. Macintosh Go to the Apple menu and select Software Update. For more information regarding updating your system, visit apple.com/macosx. Handling Precautions EAGLE | CONSUS products are precision instruments and must be handled with care during unpacking and installation. Drives may be damaged by rough handling, shock, or vibration. Be aware of the following precautions when unpacking your Eagle | Consus external storage kit: Do not unpack the product until you are ready to install it. Do not drop or jolt the product. Do not move the external storage when it is powered up. 3 2 Setting Up You will need a 3.5 inch SATA / IDE Hard Drive. Carefully follow the procedure to install the hard drive into the enclosure. Note: For pre-installed Hard Drive EAGLE | CONSUS enclosure, please skip this chapter and proceed to Chapter 3: Connecting the Drive. EAGLE | CONSUS W-SERIES Front and Rear View Power Switch – Turns the W-SERIES on / off Hard Drive access light – Indicates hard drive activity Power light – Indicates device is on USB 2.0 port – Connects to a computer USB port or USB hub Power Input – Connects to the AC/DC power adapter 4 IDE Hard Drive Installation NOTE: For SATA hard drive installation, go to page 9 1. Remove 2 screws from the rear. 2. Unplug (D1A, Red-Black Cable) HDD Access LED Connector and unplug (D2A, Blue-Black Cable) Power LED Connector from controller board. 5 3. Pull out the Disk Mounting Tray and connect Power and IDE cable to the hard drive. 4. Tighten up Hard Drives with 4 screws. 6 5. Plug in the (Red-Black Cable) “HDD Access LED” connector to D1A and (Blue-Black Cable) “Power LED” Connector to D2A on the controller board. 6. Slide the Disk Mounting Tray into the Enclosure 7 7. Put the bezel and tighten up with 2 screws at the rear. 8. External Hard Drive Installation Process Completed! 8 SATA Hard Drive Installation 1. Remove 2 screws from the rear. 2. Unplug (D1A, Red-Black Cable) HDD Access LED Connector and unplug (D2A, Blue-Black Cable) Power LED Connector from Disk Mounting Tray. 9 3. Pull out the hard drive tray from the case and unplug the IDE cable and HDD power cable. 4. Connect the SATA data & power cable to the controller board. 10 5. Connect the SATA connector to the SATA Hard Drive. 6. Tighten up hard drive with 4 screws. 11 7. Plug in the (Red-Black Cable) “HDD Access LED” connector to D1A and (Blue-Black Cable) “Power LED” Connector to D2A on the controller board. 9. Slide the Disk Mounting Tray into the enclosure 12 10. Put the bezel and tighten up with 2 screws at the rear. 11. External Hard Drive Installation Process Completed! 13 3 Connecting the External Hard Drive Attention: ¾ Make sure power switch is OFF when attempt to connect DC power supply socket to the external hard drive. ¾ Connect the USB cable from the desktop / laptop to the external hard drive properly before turn on the power switch. Connecting the Cables 1. Connect the AC adapter cord to the DC power supply socket at the rear of the external hard drive. 2. Connect one end of the power cord to the AC adapter. 3. Connect the other end of the power cord to an electric outlet. 4. Connect one end of the USB 2.0 cable to the USB 2.0 port at the rear of the external hard drive. 5. Connect the other end of the USB 2.0 cable to an available USB port on your computer. 14 Powering Up the Drive Press the power switch to turn on the unit. Wait 3 seconds after blue light illuminates. Windows 2000/XP/2003/Vista Your operating system will automatically detect the external drive after a “Found New Hardware” message pop up. Windows 98SE/ME Note: Eagle | Consus does not provide any tech supports for Windows98 platform since Microsoft has discontinued Windows 98SE. 1. Connect Eagle | Consus External Storage to your Computer. Turn on the power. 2. Windows 98SE will detect a new device and activate Hardware Wizard, then Click Next. 3. Select Search for the Best Driver for your Device. Click “Next” to continue 4. Insert the CD Driver in your CD ROM, then Browse the CD Driver Contain and chose Win Folder. Click Next. 5. After installation Click Finish to restart your computer. 6. Once installation completes, you‘ll find USB Safe Remove icon in icon tray. If the new hard drive doesn't appear in My Computer, it means the USB hard drive is a brand new hard disk, which does not contain any partition, please format your Hard disk before using this device. Mac OS X Your operating system will automatically detect the external drive. Once formatted the Hard Drive, the Hard Drive icon will appear on the desktop. 15 4 Partition & Format the Hard Drive Windows XP/2000/2003 Note: For formatted Hard Drive, proceed to step 2. 1. Click the Start button and click on Control Panel, double-click the Administrative Tools, and then double-click the Computer Management. 2. Click the Disk Management under Storage. Your new Hard Drive should have the right capacity shown. (E.g. figure above Disk 1 is showing approximately 160GB). Right click the Disk 1, and choose Initialize Disk. Note: If your Disk 1 is shown as Basic and Online, skip this step. 3. After New Partition Wizard launched, then click Next. 16 4. On the next page, choose your partition size then click Next. 5. After that, please assign a drive letter for the new Hard Drive, and go to Next. 6. To format a Hard Drive. Choose the NTFS as File System. Leave the 17 Allocation unit size as default. Assign a name in Volume label. Check the Perform a quick format to reduce format time. Click Next. 7. Confirm your setting and click Finish. 8. It would show the status as Formatting. 9. When the status change to Healthy, your new Hard Drive is ready to use. 18 10. Go to My Computer, your new drive should be listed there and ready to use. Mac OS X Note: If the warning does not show up, start at step 2. 1. A warning window will pop up for new and unformatted hard drive. Click Initialize. Skip Step 2 and continue at Step 3. 2. Click Go on the desk bar and choose Utilities, click Disk Utility. 19 3. Under the Disk Utilities, choose the new hard drive (1) and click Partition (2). Click Options to choose format other than Mac Extended (3) refer to Figure 1 at page 16. Choose the number of partition you want by clicking on the scroll bar (4). Name the new hard drive (5). Choose the Format (6) refer to Figure 2 at page 16. Define the Size if you want more than one partition or else, leave it as default (7). Make sure the configuration is right and click Partition (8). 20 Figure 1: 3 Options… Choose the partition for you hard drive. Click OK. Figure 2: 6 Format: Choose the format for your hard drive. 4. After the partitioning is done, an icon with the Name you assigned should appear on your Desktop. Just double click the icon to access the hard drive. 21 5 Disconnecting the Hard Drive CAUTION: To prevent data loss, be sure to close all active applications before shutting down the drive. Windows XP/2000/2003/Vista 1. Double-click the Safely Remove Hardware icon in your system tray (typically located on the bottom right corner of your desktop). 2. Select USB Mass Storage Device from the list and click Stop. 3. The following window is displayed. Select the drive to be disconnected and click OK. Important: If other USB devices (such as a portable flash drive) are connected to your computer, there may be multiple for USB Mass Storage Device. Be sure to select the Eagle | Consus device! 4. Click Close and turn the Power switch to OFF the devices. 5. Now you can safely disconnect the USB cable from your computer and the power cord from the electric outlet. 22 Windows 98SE 1. Close all the application on Windows. 2. Be sure the drive isn’t running, press Power switch to shutdown the devices. 3. Disconnect the USB cable from your computer. Mac 1. Find the Removable Disk icon associated with drive you to disconnect, and drag it to the Trash icon on your desktop (it would turn to Eject icon). 2. After the disk icon disappears from the desktop, press the Power button to turn off your drive. Now you can safely disconnect the USB or FireWire cable from your computer and the power cord from the electric outlet. 23 6 Troubleshooting To search the EAGLE | CONSUS technical support knowledge base and to view a complete list of FAQs for your operating system, visit our support Web site at www.eagle-techusa.com. Frequently Asked Questions – USB, FireWire, JBOD, and RAID Information Q: What is High-Speed USB? A: Hi-Speed USB is another name for USB 2.0, which provides transfer rates up to 40 times faster than USB 1.1. Upgrading to USB 2.0 is highly recommended because of the significant reduction in file transfer time versus USB 1.1. Q: How do I determine whether or not my system supports USB 2.0? A: Refer to your USB card documentation or contact your USB card manufacturer. Note: If your USB 2.0 controller is built in the motherboard, be sure to install the appropriate chipset support for your motherboard. Refer to your motherboard or system manual for more information. Q: What happens when a USB 2.0 device is plugged into a USB 1.1 port or hub? A: USB 2.0 is backward-compatible with USB 1.1. When connected to a USB 1.1 port or hub, a USB 2.0 device operates at the USB 1.1 full speed of up to 12Mbps. Q: Can USB 1.1 cables be used with USB 2.0 devices? A: Although USB 1.1 cables work with USB 2.0 devices, it is recommended that USB 2.0 certified cables be used with USB 2.0 peripherals and USB 2.0 PCI adapter cards. Q: What is FireWire400? A: FireWire400 is also called as 1394A. “FireWire” is registered by Apple Computer Inc. FireWire800 is also known as 1394B. It has the double transfer rate of FireWire400. Note: FireWire800 is NOT backward-compatible with FireWire400, be sure you get the right one. 24 Q: What is JBOD, RAID? A: Redundant Array of Independent Disks (RAID); a collection of storage disks with a controller (or controllers) to manage the storage of data on the disks. Just a Bunch of Disks (JBOD) is a disk array that without a controller, it can combines different sizes of Hard Drive together. Q: Why need USB and FireWire? A: USB is for PC user while FireWire is for Mac user. Most of the PC supports USB and most of the Mac supports FireWire. Frequently Asked Questions – Installation Q: Why does the drive not power up? A: After connecting the power cord, be sure to switch the Power switch to ON. The USB cable has to be connected to the computer and the computer is turned ON. Q: Why is the drive not recognized under My Computer or on the computer desktop? First of all, make sure the external hard drive is turn ON. A: This is a common issue for a new unformatted hard drive. The same problem might occur if the hard drive is not formatted to the recognizable format of the operating system. Reformatting the hard drive will normally fix this issue. See “Formatting the Drive” A: If your system has USB 2.0 or FireWire PCI adapter card, be sure that the appropriate drivers are installed before connecting your EAGLE | CONSUS external storage product. The drive is not recognized correctly unless USB 2.0 or FireWire root hub and host controller drivers are installed. Contact the controller card manufacturer or motherboard manufacturer. Q: Why is the data transfer rate slow? A: Your system may be operating at USB 1.1 speeds due to an incorrect driver installation of the USB 2.0 adapter card or the system that does not support USB 2.0. Be sure to download the latest Service Pack. If your system includes a PCI slot, you can achieve Hi-Speed USB transfer rates by installing a USB 2.0 PCI adapter card. Contact the card manufacturer for installation procedures and more information. Q: Why Windows will not allow me to safely remove my drive? It keeps 25 reporting the drive is busy or in use. A: This is usually caused by a program that is trying to read from the drive. Be sure to close all application before removing the drive. Q: Why there is delayed write failure on my Windows XP? A: Delayed write failure errors have many causes, most of which are specific to individual computers. However, one of the most common causes is that some of the communication going between the computer and the external drive is blocked by a firewall. Windows XP SP2 has an added feature called a firewall which helps protect your system from being accessed from the outside. This firewall feature is enabled by default when you install Service Pack 2 and it can block transfers from/to the external drive. This normally happens on the 1394 port, but has also been seen on the USB port. As a troubleshooting step, TEMPORARILY disable the firewall and transfer data to and from the drive. This will confirm if the firewall is the cause of the delayed write error you are seeing. To disable the Firewall in Windows XP SP2: Go to Start > Control Panel > Double-click the Windows Firewall > Select the Off option and Click OK. If this fixes the issue, then go to Advanced tab and uncheck the 1394 connection and/or USB connections to disable firewall on those connections. Be sure it is the connection for your external hard drive. 26 If there is a pop-up when trying to transfer data, then click on allow option for requests from the USB or 1394 port. That will open the USB / 1394 ports. Be sure to pay close attention to what you are allowing through your firewall, you may not want to allow some programs access to your computer or the internet. Important: Be sure to enable the firewall after troubleshooting is complete. 27 Q: Why my Hard Drive isn’t showing the same space as it listed according to hard drive manufacturer? A: This is very common question by everybody. The answer is because there are two different definition of capacity of hard drive between hard drive manufacturer and Operating System company. For example, hard drive manufacturer define 1GB = 1000MB but operating system company define 1GB=1024MB. Therefore, if you have a 250GB hard drive, but it shows only about 237GB on Windows XP. It is an interesting coincidence that every tenth power of two is approximately equal to every third power of ten. This has resulted in two different definitions of these numbering systems. The terms Kilobyte, Megabyte, Gigabyte, etcetera can mean either of two different things depending on the context in which it is used. Obviously this can, and often does, result in confusion, especially in respect to hard disk size measurements, where both measurements are often used. Name Abbr. Kilobyte Megabyte Gigabyte TeraByte KB MB GB TB Binary Power 210 220 230 240 Binary Value 1,024 1,048,576 1,073,741,824 1,099,511,627,776 Decimal Power 103 106 109 1012 Decimal Value 1,000 1,000,000 1,000,000,000 1,000,000,000,000 This is the industry standard, and all major disk drive manufacturers employ this definition. Capacity Calculations Different applications like FDISK, CHKDSK, Windows, BIOS, etc., use different methods and numbering systems to calculate hard drive capacities. The two most common numeric representations of the hard drive capacity are presented in the base 10 (decimal) and base 2 (binary) numbering systems. The basic formula to calculate the capacity of a drive is: Cylinders * Heads * Sectors * 512 (bytes per sector) 28 This formula calculates a number representing the total number of bytes (characters) that can be stored on the hard drive. This is a decimal number, to convert this number to the decimal equivalent of the binary Megabytes (MB) or Gigabytes (GB), this value must be divided by the decimal value of a binary MB or GB. The decimal equivalent of 1 MB (220) is 1,048,576 and 1 GB (230) is 1,073,741,824. Example for a 3.5 GB hard drive: 6,800 * 16 * 63 * 512 = 3,509,452,800 bytes or 3.5 GB using 106 or decimal values The equivalent in binary MB is 3,509,452,800 / 1,048,576 = 3,346 MB The equivalent in binary GB is 3,509,452,800 / 1,073,741,824 = 3.268 GB 160GB shows roughly ~150GB 200GB shows roughly ~186GB 250GB shows roughly ~237GB Note: Disk size may differ for different products. The above space shown is for reference purpose only. Please check with hard drive manufacturer for more details on drive space. Q: My Hard Drive is showing 2 drives which are 191GB one is 45GB respectively but I ordered a single 250GB hard drive A: This is common because the hard drive is formatted to FAT32 files system which only supports the maximum capacity of 200GB per partition. Therefore a 250GB hard drive formatted to FAT32 can only be done by formatting to 200GB and 50GB respectively. Q: My Hard Drive is showing only 137GB but I ordered a larger hard drive This is very common if you did not update your Windows 2000/XP to the latest service pack. For Windows 98SE/ME there is a driver for supporting large hard drives for the designated brand of hard drive used, like Maxtor, Seagate, Western Digital. If this does not help, the only easy way is to format your hard drive in Windows 2000/XP in FAT32 but in at least 2 evenly divided partitions for full detection. 29 7 Appendix Regulatory Compliance FCC Class B Information This equipment has been tested and found to comply with the limits for a Class B digital device, pursuant to Part 15 of FCC Rules. These limits are designed to provide reasonable protection against harmful interference in a residential installation. This equipment generates ‘uses’ and can radiate radio frequency energy and, if not installed and used in accordance with the instruction, may cause harmful interference to radio communications. However, there is no guarantee that interference will not occur in a particular installation. If this equipment does cause harmful interference to radio or television reception, which can be determined by turning the equipment off and on, the user is encouraged to try to correct the interference by one or more of the following measures: 1. Reorient or relocate the receiving antenna. 2. Increase the separation between the equipment and receiver. 3. Connect the equipment into an outlet on a circuit different from that to which the receiver is connected. 4. Consult the dealer or an experienced radio/television technician for help. Notice 1: The changes or modifications not expressly approved by the party responsible for compliance could void the user’s authority to operate the Equipment. Notice 2: Shielded interface cables, if any, must be used in order to comply with the emission limit. CE Compliance for Europe This equipment has been tested and found to comply with the limits for European Council Directive on the approximation of the law of the member states relating to electromagnetic compatibility (89/336/EEC) according to EN55022 Class B. 30 Copyright Notice All title, copyright and other intellectual property rights in and to any Eagle Tech Products, the “Products” or “Product” (including but not limited to product design and appearance, firmware, and any relevant media, images, photographs, animations, video, audio, music, text, and applets incorporated into the Products), the accompanying manuals and other documents, and on-line or electronic documents, if any, are owned by Eagle Tech Computer, Inc. Unless otherwise expressly licensed by Eagle Tech Computers, Inc. in writing, any provision of the Product does not represent any license of any of the above rights. Copyright © 2006-2007 Eagle Tech Computers, Inc; All rights reserved. Trademark Notice Eagle Tech Computers, Inc. and other names of Eagle Tech Products are proprietary marks or registered trademarks of Eagle Tech Computers, Inc. Microsoft, Windows, Windows 2000, and Windows XP are trademarks of Microsoft Corporation. Mac, MacOS, and Mac OS X are trademarks of Apple Computer, Inc., registered in the U.S. and other countries. Other products and company names mentioned herein are trademarks of their respective holders. Warranty Information Attention: Eagle Tech Computers, Inc. is not responsible for consequential damages, including loss or recovery of data. This product contains no user-serviceable parts. Refer servicing only to Eagle Tech personnel. Obtaining Service Eagle Tech values your business and always attempts to provide you the very best of service. If the Product requires maintenance, either contact the 31 detailer from whom you originally purchased the Product or visit our product support Web site at www.eagle-techusa.com for information on how to obtain a service or, a Return Material Authorization (RMA). If it is determined that the Product may be defective, you will be given an RMA number and instructions for Product return. An unauthorized return (i.e. one for which an RMA number has not been issued) will be returned to you at your expense. Authorized returns must be shipped in appropriate shipping container prepaid and insured, to the address provided on your return paperwork. Your original box and packaging materials should be kept for storing or shipping Eagle Tech product. Your warranty will be void if your returned product is shipped in anything other than the original packaging or Eagle Tech approved materials. To conclusively establish the period of warranty, check the warranty expiration (serial number required) via www.eagle-techusa.com. Eagle Tech is not liable lost data, regardless of the cause, recovery of lost data, or data contained in any Product placed in its possession. One Year Limited Warranty Eagle Tech warrants that the Product, in the course of its normal use, will be free from defects in material and workmanship for a period of one (1) year and will conform to Eagle Tech specification therefore. This limited warranty period shall commence on the purchase date appearing on your purchase receipt. Eagle Tech shall have no liability for any Product returned if Eagle Tech determines that the Product was stolen from Eagle Tech or that the asserted defect a) is not present, b) cannot reasonably be rectified because of damage occurring before Eagle Tech receives the Product, or c) is attributable to misuse, improper installation, alteration (including removing or obliterating labels and opening or removing external enclosures, unless authorized to do so by Eagle Tech), accident or mishandling while in the possession of someone other than Eagle Tech. Subject to the limitations specified above, your sole and exclusive warranty shall be, during the period of warranty specified above and at Eagle Tech’s option, the repair or replacement of the Product. The foregoing warranty shall extend to repaired or replaced Products for the balance of the applicable period of the original warranty or ninety (90) days from the date of shipment of a repaired or replaced Product, whichever is longer. The foregoing limited warranty is Eagle Tech’s sole warranty and is applicable only to products sold as new. The remedies provided herein are in lieu of a) any and all other remedies and warranties, whether expressed, implied or statutory, including but not limited to, any implied warranty of merchantability or fitness for a particular purpose, and b) any and all obligations and liabilities 32 of Eagle Tech for damages including, but not limited to accidental, consequential, or special damages, or any financial loss, lost profits or expenses, or lost data arising out of or in connection with the purchase, use or performance of the Product, even if EAGLE | CONSUS has been advised of the possibility of such damages. This warranty gives you specific legal rights, and you may also have other rights which vary from state to state. EAGLE TECH COMPUTERS, INC. SHALL HAVE NO LIABILITY TO YOU UNDER THIS LIITED WARRANTY IF THE PRODUCT IS INSTALLED AND USED IN A MANNER NOT SPECIFIED OR DESCRIBED IN THE PRODUCT SPECIFICATIONS OR DESCRIPTION. THE PRODUCT HAS BEEN MODIFIED OR ALTERED IN ANY WAY BY ANY PARTY OTHER THAN EAGLE TECH, OTHER THE FAILURE OF THE PRODUCT TO CONFORM TO ITS SPECIFICATIONS CAN BE ATTRIBUTED TO CAUSES THAT NOT THE RESPONSIBILITY OF EAGLE TECH. EAGLE TECH MAKES NO WARRANTY OR REPRESENTATION, EXPRESSED, IMPLIED, OR STATUTORY, WITH RESPECT TO ITS PRODUCTS OR THE CONTENTS OR USE OF THIS DOCUMENTATION AND ALL ACCOMPANYING SOFTWARE, AND PARTICULARLY DISCLAIMS ITS QUALITY OR PERFORMANCE FOR ANY PARTICULAR PURPOSE. EAGLE TECH MAKES NO GUARANTEE THAT ALL DATA STORED ON EAGLE TECH PRODUCTS IS ALWAYS SECURE WIHOUT ANY RISKS OF DATA LOSS. EAGLE TECH REMINDS YOU TO BACK UP THE DATA PERIODICALLY. UNDER NO CIRCUMSTANCES SHALL EAGLE TECH BE LIABLE IN ANYWAY TO THE USER FOR DAMABES, INCLUDING ANY SAVINGS, LOST PROFITS OR OTHER INCIDENTAL OR CONSEQUENTIAL DAMAGES ARISPING OUT OF THE USE OF, OR INABILITY TO USE EAGLE TECH PRODUCTS OR RESULTING LOSS OF DATA FROM SUCH USE. 33 EAGLE | CONSUS Service and Support If you need additional information or help during installation or normal use of this product, visit out product support Web site at www.eagle-techusa.com and choose from these topics: Support- Obtain warranty information, warranty status, RMA status access product specifications and technical tips. Downloads - Download installation software and drivers. Contact- Contact a support representative by email or phone. When contacting Eagle Tech for support, have your Eagle Tech product serial number, model number, system hardware, and system software version available. www.eagle-techusa.com phone 626.956.4040 fax 626.810.4820 Eagle Tech Computers, Inc. 18539 East Gale Avenue City of Industry, CA 91748 United States Thank you for choosing Eagle Tech products! 34 8 Understand Eagle Tech Brand 35


