1
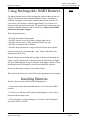
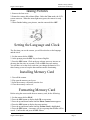
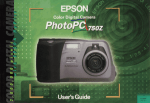
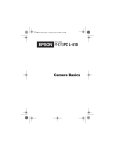
Pinellas County Schools
Instructional Technology
Digital Camera/Epson
Digital
Camera
Epson PhotoPC 750Z
Training Guide
DRAFT
Pinellas County Schools
Instructional Technology
Digital Camera/Epson
Page 1
Pinellas County Schools
Instructional Technology 7/99
Digital Camera/Epson
Table of Contents
Objectives .......................................................................................... Page 3
Course Description and Organization ................................................ Page 4
Technology Requirements ................................................................. Page 4
Adjusting Memory ............................................................................. Page 4
On-line Help ...................................................................................... Page 5
To Draw...or To Paint What’s the Difference? ................................... Page 5
What to Use and When ...................................................................... Page 5
To Paint .............................................................................................. Page 5
Drawing Drawbacks .......................................................................... Page 6
To Paint .............................................................................................. Page 6
Painting Drawbacks ........................................................................... Page 6
Combining Two Programs ................................................................. Page 6
Tools and Palettes .............................................................................. Page 7
Pen Palette ......................................................................................... Page 8
Creating Shapes with the Tools ......................................................... Page 9
Working With the Draw Program .................................................... Page 10
Working With the Paint Program ..................................................... Page 12
Graphics...Computer Basics Assessment ...................................... Page 14
Pre/Post test......................................................................................Page 15
Digital Camera/Epson
Page 2
Pinellas County Schools
Instructional Technology
Digital Camera/Epson
Objectives
Digital cameras help teachers to enhance and/or illustrate incorporate digital photography in
their presentations and word processing or other programs and The following objectives are
based on recommendations by the International Society for Technology in Education (ISTE) in
establishing technology standards for all teachers.
1.2 Personal and Professional Use of Technology.
Candidates will apply tools for enhancing their own professional growth and productivity.
They will use technology in communicating, collaborating, conducting research, and solving
problems. In addition, they plan and participate in activities that encourage lifelong learning
and will promote equitable, ethical, and legal use of computer/technology resources.
1.2.1 Use productivity tools for word processing, database management, and
spreadsheet applications.
1.2.2 Apply productivity tools for creating multimedia presentations.
1.2.3 Use computer-based technologies including telecommunications to
access information and enhance personal and professional productivity.
1.2.4 Use computers to support problem solving, data collection, information
management, communications, presentations, and decision making.
1.2.6 Demonstrate knowledge of equity, ethics, legal, and human issues
concerning use of computers and technology.
1.2.7 Identify computer and related technology resources for facilitating
lifelong learning and emerging roles of the learner and the educator.
Digital Camera/Epson
Page 3
Pinellas County Schools
Instructional Technology 7/99
Digital Camera/Epson
Course Description
and Organization
Notes
Digital Camera is designed to be taught as a 2-4 hour course. Through this
course the participant will learn the basic functions and operation skills for
using a digital camera. Upon completion of this course and the submission of all required activities, the learner will receive credit in the form of
component points and a Certificate of Completion. The Certificate is the
record of completion for the Pinellas County Technology Invitation.
Please keep all materials and Certificates earned through Technology
Invitation in a notebook for future reference.
Digital camera is organized so that activities may be completed in a
variety of ways. Time for the completion of activities may or may not be
provided during the course of the training. Some work may need to be
completed and returned to the instructor after the component has finished.
The instructor will provide the time frame for completion and address to
send finished work.
Technology Requirements
Hardware
• Power PC or G3
• System 7.X or later
• CD-ROM drive
• Minimum 16MB RAM
• 30MB of available hard disk space
• Serial communications port
• VGA monitor, minimum resolution of 640x480 with 16 colors
• Mouse or pointing device
Digital Camera/Epson
Page 4
Digital Camera/Epson
Identifying Camera Parts
Digital Camera/Epson
Pinellas County Schools
Instructional Technology
Notes
Page 5
Pinellas County Schools
Instructional Technology 7/99
Digital Camera/Epson
Using Rechargeable NiMH Batteries
Notes
The digital camera comes with 4 rechargeable batteries and a pocket-size
charger. The batteries can be charged hundreds of times. The batteries
should be recharged 3 times before installing them for the first time in
your camera. New batteries will take approximately 5 or 6 hours to recharge, but this for the first time only. The next time the batteries are to be
charged, it will take about two and one half hours. (Only use the NiMH
batteries in the Epson charger)
When charging batteries...
• Do NOT insert batteries backwards
• Do NOT open the cover while battery charger lights are on.
• Do NOT use near water or with wet hands. Indoor use only.
• Do NOT use within reach of children.
• Do NOT charge the batteries using an electrical outlet on an airplane.
Insert the batteries by positioning the + and - ends as indicated by the
markings inside the case.
Plug the charger into an outlet and two lights will turn red indicating the
battery is in the charge mode. In about two and one half hours, the lights
will go off indicating the charge is complete. If the lights continue to flash,
then batteries may be damaged or worn out and should be replaced.
Do not use the battery charger for more than 4 hours.
Wait one hour for batteries to cool before removing them from the charger.
Installing Batteries
Be sure camera is turned off before installing batteries.
1. Turn camera upside down and slide battery cover lock to the OPEN
position.
2. Lift the cover and insert all 4 batteries positioning the + and - ends as
shown inside the camera case.
3. Close the battery cover by holding the cover down while sliding the
lock from OPEN to CLOSE
Digital Camera/Epson
Page 6
Pinellas County Schools
Instructional Technology
Digital Camera/Epson
Taking Pictures
Notes
1. Remove the lens cover.
2. Rotate the camera dial to On or View . Under the View mode, the LCD
screen comes on. When the status light turns green, the camera is ready
for use.
3. When finished taking your pictures, turn the camera dial to OFF.
Setting the Language and Clock
The first time you use the camera, you will be asked to set the language
and the clock.
1. Set the camera dial to VIEW.
2. At the prompt press the ESC key to choose English.
3. Press the SEL button. Click on the up or down arrows to increase or
decrease the date, time or seconds. Click on SEL after each setting.
You will have to set the clock each time you change the batteries as it
takes battery power to keep the date and time modes functioning.
Installing Memory Card
1. Turn off the camera.
2. Flip open the memory card cover.
3. Insert the memory card totally into the slot.
4. Close the memory card cover.
Formatting Memory Card
Before using the camera with the new memory card, do the following:
1. Set the camera dial to PLAY.
2. Press the SEL button to display the LCD screen menu.
3. Press the up and down button until the Photo Control menu appears.
4. Press the SEL button to display the menu options.
5. Press the up and down button until the Format Card is highlighted.
6. Press the SEL button. A message will give a prompt that all data will be
erased . Confirm this and press the SEL button.
Digital Camera/Epson
Page 7
Digital Camera/Epson
7. Press the SEL button again to format the card and then return to the
Photo Control menu.
Pinellas County Schools
Instructional Technology 7/99
Notes
Removing the Memory Card
1. Turn camera OFF.
2. With LCD screen facing up, flip the Memory Card cover open.
3. Press the Eject button, take hold of the exposed card and pull it out
from the camera.
Using the Display Panel
The Display Panel shows the camera’s current settings and the number of
pictures remaining.
Checking on Low Battery
A low battery icon will appear on the screen when batteries are low. The
icon changes to a flashing icon when the battery power is depleted.
Taking Pictures with the Viewfinder
To take Point -and -Shoot pictures, look through the optical viewfinder
and snap the 2-step shutter.
1. Be sure you are at least 32 inches from the subject.
2. Slide the camera dial lock down and turn the Camera Dial ON and wait
until the status light turns green.
3. Look through the Viewfinder and center the subject within the crosshairs.
4. Move the Zoom control up to get closer or down to get farther from
your subject.
5. Hold the shutter halfway down to lock the autofocus. This will change
the status light from green to orange.
6. Press the shutter button all the way to take the picture.
7. Hold the camera still until it beeps and the status light starts flashing
red. This indicates that the camera has captured the image and is processing it.
8. When the light turns green, the image has been saved and you are ready
for the next picture. Saved images can remain in memory for at least a
year even if the camera is turned off and the batteries removed.
Digital Camera/Epson
Page 8
Digital Camera/Epson
Pinellas County Schools
Instructional Technology
Taking Pictures with the LCD Screen
Notes
The LCD screen lets you see a live preview of what the camera’s lens
sees.
1. Remove the lens cap and turn the camera dial to the View position.
2. If outside, flip to the Solar Assist panel to save battery power by
lighting the screen with direct sunlight.
3. Center your subject on the screen and move the Zoom control up to get
closer and down to get further away.
4. Hold the shutter button halfway down to lock the autofocus.
5. The status light changes from green to orange and a small green circle
appears in the upper right hand corner of the screen. While holding the
shutter down, you can reframe your picture or move things off center.
6. Press the shutter button the rest of the way down to take the picture.
7. Hold the camera still until it beeps and the status light starts flashing
red.
NOTE: The LCD screen uses up battery power quickly. If idle for more
than 30 seconds, the camera shuts off automatically. To turn back on, press
the shutter button down and turn camera dial to OFF and then back to
VIEW.
Checking the Picture Counter
The large number on the center of the display panel (on top of camera)
shows how many pictures you can take. This number depends on the
image quality and special format settings.
When the camera’s memory is full, the number of pictures remaining is 0.
The status light on the back of the camera turns red. Press the shutter
button again and if it says the memory is full, do the following:
1. Play back the pictures on the LCD screen and erase the ones you do not
want.
2. By changing from a higher standard to a standard resolution will save
memory.
3. If you want to save the pictures and then erase them, you need to connect the camera to your computer and transfer the images.
Digital Camera/Epson
Page 9
Digital Camera/Epson
Setting up the Software (MAC)
Pinellas County Schools
Instructional Technology 7/99
Notes
1. Insert the CD in the CD-ROM DRIVE.
2. Double click on the CD ROM icon.
3. Double click the Install PhotoPC 750Z icon. Click Continue and follow
the instructions on the screen.
Connecting to a Macintosh
If you have an AC adapter use it! Make sure you have the MAC Direct
Print cable that came with your camera. Before you start, turn the camera
OFF.
1. Locate the MODEM port or the PRINTER port on the back of your
computer.
2. Line up the arrow on the cable connector with the port icon on your
Macintosh. Then insert the connector.
4. Open the connector cover on the side of the camera.
_
5. Line up the arrow/flat side of the cable connector with the mark on the
camera’s serial port. Then insert the connector.
6. Turn the camera on as well as your Macin osh system.
On a Mac G3, the transfer rate can be up to 230.4 KB per second!
Digital Camera/Epson
Page 10
Digital Camera/Epson
Pinellas County Schools
Instructional Technology
Transferring Photos with
Image Expert
Notes
1. On the Macintosh, find the PhotoPC 750Z folder and double click on
the Image Expert icon.
2. Click on any of the topics that appears on your screen for an animated
demo of what you can do with image Expert.
3. To skip the tour and transfer the pictures, click CLOSE.
4. Click View Pictures in the Camera. You see a window displaying
“filmstrips” of your images.
5. Click GET ALL to transfer all images. You can also click on individual
images to select it. The GET ALL button changes to GET SELECTED.
6. An album for your pictures will be created.
7. Click OPEN or OK to begin transferring the pictures.
8. When finished, close the filmstrip window.
9. If you want to make more room for more pictures on your camera, click
YES. Your pictures are now displayed in an album.
10. Double click on an image to open Image Expert software.
As with any hardware item, always consult the directions that came with
your digital camera.
Digital Camera/Epson
Page 11
Pinellas County Schools
Instructional Technology 7/99
Digital Camera/Epson
Digital Camera
Assessment
Notes
Hand in the following items to your instructor:
1. Take at least 3 pictures with the digital camera.
2. Transfer images to the hard drive.
3. Bring image to a word processor and add text to it. Print image out.
3. Write a paragraph describing ways you could integrate this technology
into your curriculum. Send this to your instructor via PLACES.
Digital Camera/Epson
Page 12
Pinellas County Schools
Instructional Technology
Digital Camera/Epson
Digital Camera
Pretest and Posttest
Name________________________________________________________
School/Dept_________________________________________________
Date_________________________________________________________
Directions:
Participants should take the pretest at the beginning of the course. In
order to receive component points, the participant must show an eighty
percent improvement in the learning objectives covered below. After
completing the posttest, participants need to return it to the instructor.
Pre
Yes No
Post
Yes No
___ ___
___ ___
1. Participant can identify parts of the
digital camera.
___ ___
___ ___
2. Participant can insert batteries correctly
into the charger.
___ ___
___ ___
3. Participant can correctly insert batteries
into the camera.
___ ___
___ ___
4. Participant can take a picture using the
Viewfinder.
___ ___
___ ___
5. Participant can take a picture using the
LCD Screen.
___ ___
___ ___
6. Participant can view a series of pictures
on the LCD screen.
___ ___
___ ___
7. Participant can connect the camera to the
computer.
___ ___
___ ___
8. Participant can transfer images to the
computer.
___ ___
___ ___
9. Participant can erase images from the
camera.
Digital Camera/Epson
Page 13