1
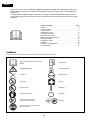
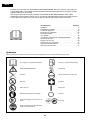
English / French / German Italian / Dutch / Spanish / Português Power Sprayer Super pulvérisateur Sprühgerät Spruzzatore a motore Motorsproeier ISTRUZIONI D’USO Motorizados Pulverizadores MANUAL DE INSTRUCCIONES Pulverizador Motorizado EVH2000 INSTRUCTION MANUAL Important: Read this instruction manual carefully before putting the into operation and strictly observe the safety regulations! Preserve instruction manual carefully! MANUEL D’INSTRUCTIONS Recommandation importante: Lire soigneusement ce manuel d’instructions avant de mettre la en service et observer rigoureusement les consignes de sécurité! Conserver soigneusement ce manuel d’instructions. BETRIEBSANLEITUNG Wichtlg: Bitte lesen Sie dieses Anweisungshandbuch sorgfältig durch, bevor Sie die in Betrieb nehmen, und beachten Sie die Sicherheitsvorschriften strikt! Bewahren Sie das Anweisungshandbuch sorgfältig auf. ISTRUZIONI D’USO Importante: Prima di mettere in funzione il , leggere attentamente il presente manuale; rispettare rigorosamente le norme di sicurezza! Conservare il manuale delle istruzioni per l’uso! GEBRUIKSAANWIJZING Belangrijk: Lees voor het in gebruik nemen van de deze gebruiksaarwijzing zorgvuldig door en neem alle veiligheidsvoorschriften in acht. Bewaar de gebruiksaanwijzing voor eventuele naslag. MANUAL DE INSTRUCCIONES Importante: Leer cuidadosamente este manual de instrucciones antes de poner en marcha la máquina y observar estrictamente las normas de seguridad. Conservar este manual de instrucciones con cuidado. MANUAL DE INSTRUÇÕES English Thank you very much for purchasing a MAKITA POWER SPRAYER. We are pleased to offer you a product that is the result of an extensive development program and many years of knowledge and experience. To safely obtain the best possible results from your MAKITA POWER SPRAYER, please read this manual thoroughly before using the machine, and follow all instructions given herein to ensure proper operation. Table of Contents Page Symbols 㨯㨯㨯㨯㨯㨯㨯㨯㨯㨯㨯㨯㨯㨯㨯㨯㨯㨯㨯㨯㨯㨯㨯㨯㨯㨯㨯㨯㨯㨯㨯㨯㨯㨯㨯㨯㨯㨯㨯㨯㨯㨯㨯㨯㨯㨯 2 Safety instructions 㨯㨯㨯㨯㨯㨯㨯㨯㨯㨯㨯㨯㨯㨯㨯㨯㨯㨯㨯㨯㨯㨯㨯㨯㨯㨯㨯㨯㨯㨯㨯㨯㨯㨯㨯㨯㨯 3 Technical data㨯㨯㨯㨯㨯㨯㨯㨯㨯㨯㨯㨯㨯㨯㨯㨯㨯㨯㨯㨯㨯㨯㨯㨯㨯㨯㨯㨯㨯㨯㨯㨯㨯㨯㨯㨯㨯㨯㨯㨯㨯 7 Designetion of parts 㨯㨯㨯㨯㨯㨯㨯㨯㨯㨯㨯㨯㨯㨯㨯㨯㨯㨯㨯㨯㨯㨯㨯㨯㨯㨯㨯㨯㨯㨯㨯㨯㨯㨯㨯㨯 8 Assembly instructions 㨯㨯㨯㨯㨯㨯㨯㨯㨯㨯㨯㨯㨯㨯㨯㨯㨯㨯㨯㨯㨯㨯㨯㨯㨯㨯㨯㨯㨯㨯㨯㨯㨯㨯 9 Before start of operation 㨯㨯㨯㨯㨯㨯㨯㨯㨯㨯㨯㨯㨯㨯㨯㨯㨯㨯㨯㨯㨯㨯㨯㨯㨯㨯㨯㨯㨯㨯㨯 10 Mixing aguricultual chemicals㨯㨯㨯㨯㨯㨯㨯㨯㨯㨯㨯㨯㨯㨯㨯㨯㨯㨯㨯㨯㨯㨯㨯㨯㨯㨯㨯 12 Starting the engine 㨯㨯㨯㨯㨯㨯㨯㨯㨯㨯㨯㨯㨯㨯㨯㨯㨯㨯㨯㨯㨯㨯㨯㨯㨯㨯㨯㨯㨯㨯㨯㨯㨯㨯㨯㨯 12 Stopping the engine 㨯㨯㨯㨯㨯㨯㨯㨯㨯㨯㨯㨯㨯㨯㨯㨯㨯㨯㨯㨯㨯㨯㨯㨯㨯㨯㨯㨯㨯㨯㨯㨯㨯㨯㨯 14 Operation 㨯㨯㨯㨯㨯㨯㨯㨯㨯㨯㨯㨯㨯㨯㨯㨯㨯㨯㨯㨯㨯㨯㨯㨯㨯㨯㨯㨯㨯㨯㨯㨯㨯㨯㨯㨯㨯㨯㨯㨯㨯㨯㨯㨯 15 Inspection and maintenance㨯㨯㨯㨯㨯㨯㨯㨯㨯㨯㨯㨯㨯㨯㨯㨯㨯㨯㨯㨯㨯㨯㨯㨯㨯㨯㨯㨯 16 Troubleshooting 㨯㨯㨯㨯㨯㨯㨯㨯㨯㨯㨯㨯㨯㨯㨯㨯㨯㨯㨯㨯㨯㨯㨯㨯㨯㨯㨯㨯㨯㨯㨯㨯㨯㨯㨯㨯㨯㨯 19 SYMBOLS It is very important to understand the following symbols when reading this instruction manual. Read, Understand and Follow Instruction Manual Fuel(Gasoline) WARNING/DANGER Engine-manual Start Forbidden Emergency Stop No smoking First Aid No Open Flame ON/START Wear protective gloves OFF/STOP Keep the area of Operation clear of all persons and pets Recycling Wear eye protection, protective mask and ear protection 2 SAFETY INSTRUCTIONS General Instructions – To ensure correct and safe operation, the user must read, understand and follow this instruction manual to assure familiarity with the handling of the power sprayer. Users insufficiently informed will risk danger to themselves as well as others due to improper handling. – It is recommended only to loan the power sprayer to people who have proven to be experienced with power sprayers. – Always hand over the instruction manual. – First-time users should ask the dealer for basic instructions to familiarize oneself with the handling of a power sprayer. – Children and young persons aged under 18 years must not be allowed to operate the power sprayer. Persons over the age of 16 years may however use the tool for the purpose of being trained only while under the direct supervision of a qualified trainer. – Use power sprayer with the utmost care and attention. – Operate the power sprayer only if you are in good physical condition. – Perform all work conscientiously and carefully. The user has to accept responsibility for others. – Never use the power sprayer while under the influence of alcohol or drugs. – Do not use the unit when you are tired. – Save these instructions for future referral. Personal protective equipment – The clothing worn should be functional and appropriate, i. e. It should be tight-fitting but not cause a hindrance. Do not wear jewelry, clothing or long hair which could be drawn into the air intake. – In order to avoid head-, eye-, hand- or foot injuries as well as to protect you hearing the following protective equipment and protective clothing must be used during operation of the power sprayer. Waterproof cap Ear protection Pay particular attention to the following regulations – Please wear clothing that is functional and tight-fitting, without restricting movement when operating the power sprayer. Do not wear clothing or jewelry that could get tangled with foliage or the machine. – For adequate protection against head, eye, feet, hand, and hearing injuries, the following protective equipment and clothing must be used when working with the power sprayer. 1. Always wear adequate face protection (mask, protective goggles, etc.) to protect the face, eyes and lungs from dust and chemicals. 2. To avoid hearing damage, wear adequate hearing protection at all times. 3. To protect skin from dust and chemicals, wear work clothes with long sleeves and long pants at all times. 4. Always wear rubber gloves when operating or servicing the power sprayer. 5. When using the power sprayer, always wear sturdy shoes with non-slip soles. Special work shoes are available to ensure good footing and protect against injury. – Always secure loose clothing, hair, and accessories such as towels etc. Loose objects may become tangled in moving parts of the machine and cause serious injury. Starting up the Power Sprayer – Please make sure that there are no children or other people within a working range of 15 meters, also pay attention to any animals in the working vicinity. Never use the power sprayer in urban areas. – Before operating, always check that the power sprayer is safe for operation: Check the security of the throttle lever. The throttle lever should be checked for smooth and easy action. Check for clean and dry throttle lever and test the function of the I - O switch. 3 Protective goggles Long sleeves Protective mask Rubber gloves Long pants Work shoes – Before starting the power sprayer, always make sure that the machine is in safe operational condition and check whether the throttle lever is functioning properly. – Always check for and remove tools used during assembly of the machine. Attached tools may be flung from the engine when it is started, causing serious injury. – Make sure that the power sprayer is clean and dry and test the STOP switch to ensure that it is functioning properly. – Stop the engine immediately if experiencing engine problems. – When operating the power sprayer, take extra care not to inhale exhaust fumes. – Exhaust fumes are poisonous. Never operate the machine in an enclosed room or an area with insufficient ventilation (risk of suffocation and gas poisoning). – Do not operate the power sprayer continuously for longer than one hour, and observe a rest time of at least 30 minutes between each working hour. – Stop the engine when resting or when the power sprayer is left unattended. To protect other people and the power sprayer from damage, place the machine in a safe location and make sure that no combustible material is nearby. Never place a hot power sprayer onto dry grass or combustible material. Placing the machine on dry grass or near combustible material is extremely dangerous and may result in a fire. – Never operate the engine if the muffler is malfunctioning. – Always turn off the engine before moving the power sprayer to a new location. – Wait until the engine has cooled down, empty the fuel tank, and securely attach the power sprayer before transporting the machine in a vehicle. – Make sure that the fuel tank is completely empty and dry before shipping the power sprayer. Resting Transport Refuelling Maintenance Tool replacement Refueling – Shut off the engine during refuelling, keep well away from open flame and do not smoke. – Avoid skin contact with petroleum products. Do not inhale fuel vapor. Always wear protective gloves during refuelling. Change and clean protective clothing at regular intervals. – Take care not to spill either fuel or oil in order to prevent soil contamination (environmental protection). Clean the power sprayer immediately after fuel has been spilt. Allow wet cloths to dry before disposing in proper, covered container to prevent spontaneous combustion. – Avoid any fuel contact with your clothing. Change your clothing immediately if fuel has been spilled on it (danger hazard). – Inspect the fuel cap at regular intervals making sure that it stays securely fastened. – Carefully tighten the locking screw of the fuel tank. Change locations to start the engine (at least 3 meters away from the place of refuelling). – Never refuels in closed rooms. Fuel vapors accumulate at ground level (risk of explosions). – Only transport and store fuel in approved containers. Make sure stored fuel is not accessible to children. – Do not attempt to refuel a hot or a running engine. Method of operation – Only use the power sprayer in good light and visibility conditions. Never use the power sprayer at night. Do not use the power sprayer during rainfall or immediately after rain (danger of injury through slipping and falling in wet conditions). – Beware of slippery and wet areas (ice and snow) as there is a danger of slipping, and always ensure secure footing. – Never use the power sprayer while standing on a ladder. – Never climb a tree to use the power sprayer from the tree. – Never use the power sprayer while standing on an unstable surface. – Do not point the nozzle of the power sprayer towards people or animals. Flying debris may cause serious injury. – Do not touch the spark plug connector while the engine is running. – Do not touch moving parts of the power sprayer while the engine is running. – Do not touch the muffler or other engine parts during operation or for a period after the engine has stopped. These engine parts are extremely hot and may cause serious burns. 4 3 meters – Ensure that the toxicity of the pesticides or herbicides to be used is known before use, and carefully read related use instructions to familiarize yourself with the proper procedures for using the chemicals in question. If pesticides/herbicides come in contact with your skin, immediately rinse the affected area and thoroughly wash with soap. Firmly tighten the cap of the sprayer tank in order to avoid chemical leaks. Maintenance instructions – Be kind to the environment. Operate the power sprayer with as little noise and pollution as possible. In particular check the correct adjustment of the carburetor. – Clean the power sprayer at regular intervals and check that all screws and nuts are securely tightened. – Never service or store the power sprayer in the vicinity of open flames, sparks, etc. – Always store the power sprayer in a well-ventilated locked room and with an emptied fuel tank. Observe and follow all relevant accident prevention instructions issued by the trade associations and by insurance companies. Do not perform any modifications to the power sprayer as this will risk your safety. The performance of maintenance or repair work by the user is limited to those activities as described in this instruction manual. All other work is to be done by Authorized Service Agents. Use only genuine spare parts and accessories supplied by MAKITA. Use of non-approved accessories and tools means increased risk of accidents and injuries. MAKITA will not accept any liability for accidents or damage caused by the use of any non-approved attachment or accessories. First aid In case of accident make sure that a well-stocked first-aid kit, is available in the vicinity of the operations. Immediately replace any item taken from the first aid kit. When asking for help, please give the following information: – Place of accident – What happened – Number of injured persons – Extent of injuries – Your name Packaging – The MAKITA power sprayer is delivered in a protective cardboard box to prevent shipping damage. Cardboard is a basic raw material and is therefore consequently reusable or suitable for recycling (waste paper recycling). 5 EC-DECLARATION OF CONFORMITY Model; EVH2000 We declare under our sole responsibility that this product is in compliance with the following standards of standardized documents, EN292, EN55012 in accordance with Council Directives, 89/392/EEC, amended 98/37/EEC, 93/68/EEC, 89/336/EEC, amended 92/31/EEC. Measured Sound Power: 98 dB Guarantee Sound Power: 102 dB These sound power levels wear measured in accordance with Council Directive, 2000/14/EC. Conformity assessment procedure: Annex V. CE2007 Tomoyasu Kato Director Responsible Manufacturer: Makita Corporation. 3-11-8,Sumiyoshi-cho, Anjo, Aichi, JAPAN Authorized Representative in Europe: Makita International Europe Ltd. Michigan Drive, Tongwell, Milton kyenes, Bucks MK15 8JD, ENGLAND 6 TECHNICAL DATA Model Dimensions: (length x width x height) EVH2000 mm Dry weight Chemical tank capacity 380 x 420 x 635 kg 9.1 L 20 Pump Type Max. Pressure Horizontal opposed twin pistons MPa 2.5 L 7.1 Suction Engine Model Displacement EH025A cm3 Fuel 24.5 Automobile gasoline Fuel tank capacity L 0.5 SAE 10-W-30 oil API SF or later (4-stroke automobile engine oil) Engine oil Engine oil capacity L 0.08 Caburetor type WALBRO WYL Ignition system type Solid state ignition Spark plag type NGK CMR6A (C type) Electrode gap mm 0.7 - 0.8 Sound pressure level (Lpa) to 98/37/EC dB 84.0 Guaranteed sound power level (Lwa) to 2000/14/EC dB 102.0 Sound pressure levels Note: 1. Use the oil and spark plug specified by MAKITA. 2. This specification is subject to change without prior notice. 7 DESIGNATION OF PARTS No 1 DESIGNATION OF PARTS No DESIGNATION OF PARTS No DESIGNATION OF PARTS I-O Switch 9 Muffler 17 Quick connector 2 Throttle lever 10 Oil gauge 18 Handgrip 3 Choke lever 11 Primer Pump 19 Nozzle lever 4 Air cleaner cover 12 Chemical tank drain cap 20 Nozzle pipe 5 Plug cover 13 Chemical tank cap 21 Nozzle pipe holder 6 Starter knob 14 Chemical tank 22 Nozzle (wide angle twin head) 7 Fuel tank 15 Pressure dial 23 8 Fuel tank cap 16 Sprayer hose 24 8 ASSEMBLY INSTRUCTIONS CAUTION: Before performing any work on the power sprayer, always switch off the motor and pull the spark plug connectors off the spark plug. Always wear protective gloves! CAUTION: Start the power sprayer only after having assembled it completely. 1. ASSEMBLY OF NOZZLE Refer to the figure on the previous page (DESIGNATION OF PARTS) to assemble handgrip, nozzle lever, nozzle pipe and nozzle. Be careful to put parts together properly to prevent leaks. 2. SETTING OF SHOULDER HARNESS Set the two shoulder harnesses on a chemical tank in a way shown below without any twists of the shoulder harnesses. Instructions are given about the ones for one of the shoulder harnesses. Setting upper part of shoulder harness 㽲 Chemical tank 㽳 㽴 Pull the harness in the direction of the arrow and put its folded end at the lower end of the buckle. Upper buckle Setting lower part of shoulder harness 㽳 Put the part 'A', of the harness 㽲 through this gap of the metallic hook. Upper buckle Then raise the harness to the degree of 90, in the direction of the arrow. Lower buckle Metallic hook Chemical tank 㽴 Repeat the same instructions for the other shoulder harness to finish the setting. Put the back harnesses 'A'. one of the twooverlapped harnesses, at the metallic hook in a way shown below at ԙ and Ԛ. Metallic hook 9 BEFORE START OF OPERATION Inspection and Refill of Engine Oil – Perform the following procedure, with the engine cooled down. – While keeping the engine level, remove the oil gauge, and confirm that the oil is filled within the upper and lower limit marks. When the oil is in short in such a way that the oil gauge touches the oil only by its tip, in particular with the oil gauge remaining inserted in the crankcase without screwing-in (Fig. 1), refill new oil near the port (Fig. 2). – For reference, the oil refill time is about 10h (10 times or 10 tanks of oil refill). – If the oil changes in color or mixes with dirt, replace it with new one. (For the interval and method of replacement, refer to P 16) Recommended oil: SAE 10W-30 oil of API Classification, Class SF or higher (4-stroke engine for automobile) Oil volume: Approx. 0.08 L Note: If the engine is not kept upright, oil may go into around the engine, and may be refilled excessively. If the oil is filled above the limit, the oil may be contaminated or may catch fire with white. Point 1 in Replacement of Oil “Oil Gauge” – Remove dust or dirt near the oil refill port, and detach the oil gauge. – Keep the detached oil gauge free of sand or dust. Otherwise, any sand or dust adhering to the oil gauge may cause irregular oil circulation or wear on the engine parts, which will result in troubles. – As an example to keep the oil gauge clean, it is recommended to insert the oil gauge on its knob side into the engine cover, as shown in Fig.3. Upper limit (Edge of oil refill port) If oil adheres around this tip, refill new oil. Fig.1 Fig.2 Oil gauge Fig.3 10 1) Keep the engine level, and detach the oil gauge. 2) Fill oil up to the edge of the oil refill port. (Refer to Fig.2 of the preceding page). Feed oil with the lubricant refill container. 3) Securely tighten the oil gauge. Insufficient tightening may cause oil leakage. Point 2 in Replacement of Oil: “If oil spills out” – If oil spills out between the fuel tank and engine main unit, the oil is sucked into through the cooling air intake port, which will contaminate the engine. Be sure to wipe out spilt oil before start of operation. REFUELING Handling of Fuel It is necessary to handle fuel with utmost care. Fuel may contain substances similar to solvents. Refueling must be performed in a sufficiently ventilated room or in the open air. Never inhale fuel vapor, and keep fuel away from you. If you touch fuel repeatedly or for a long time, the skin becomes dry, which may cause skin disease or allergy. If fuel enters into the eye, clean the eye with fresh water. If your eye remains still irritated, consult your doctor. Storage Period of Fuel Fuel should be used up within a period of 4 weeks, even if it is kept in a special container in a well-ventilated shade. If a special container is not used or if the container is not covered, fuel may deteriorate in one day. STORAGE OF MACHINE AND REFILL TANK – Keep the machine and tank at a cool place free from direct sunshine. – Never keep the fuel in the cabin or trunk. Fuel The engine is a four-stroke engine. Be sure to use an automobile gasoline (regular gasoline or premium gasoline). Points for Fuel – Never use a gasoline mixture which contains engine oil. Otherwise, it will cause excessive carbon accumulation or mechanical troubles. – Use of deteriorated oil will cause irregular startup. Refueling WARNING: INFLAMMABLES STRICTLY PROHIBITED Gasoline used: Automobile gasoline (unleaded gasoline) – Loosen the tank cap a little so that there will be no difference in atmospheric pressure. – Detach the tank cap, and refuel, discharging air by tilting the fuel tank so that the refuel port will be oriented upward. (Never refill fuel full to the oil refill port.) Fuel tank cap Fuel upper limit – Wipe well the periphery of the tank cap to prevent foreign matter from entering into the fuel tank. – After refueling, securely tighten the tank cap. • If there is any flaw or damage on the tank cap, replace it. Fuel tank • The tank cap is consumable, and therefore should be renewed every two to three years. 11 MIXING AGURICULTUAL CHEMICALS 1) Mixing aguricultual chemicals 1. Aguricultual chemicals are toxic. When working with aguricultual chemicals, strictly follow the instructions provided by the manufacturer at all times. 2. Always use the provided strainer when pouring aguricultual chemicals into the chemical tank. 3. Firmly tighten the chemical tank cap to prevent leaks. 4. If chemicals are to be mixed inside the chemical tank, alwys add water before other sguricultual chemicals. CAUTION: • Always handle agricultural chemicals with the utmost care. Should your skin come into contact with agricultural chemicals by accident, immediately rinse the affected area with large amounts of water. 2) Using a different type of chemical agent 1. Take extra care to thoroughly rinse the sprayer tank, pump and nozzle before adding different chemical agents to the sprayer tank. Mixing the residues of previously used agricultural chemicals with other chemical agents may cause toxin-induced diseases. STARTING THE ENGINE WARNING • Never attempt engine start in a place where the fuel has been supplied. When starting the engine, keep a distance of at least 3m. - Otherwise, it will may cause ignition or fire. • Exhaust gas from the engine has toxic consequences. Do not operate the engine in a poorly-ventilated place. Such as in a tunnel, building, etc. -Operating the engine in the poorly-ventilated place may cause poisoning by exhaust gas. • In case of derection of any abnormality sound, odor, vibration after start, stop the engine immediately and carry out inspection. - If the engine is operated without attending such abnomality, an accident may occur. • Confirm that the engine stops when the stop switch is set to “O” position. 1) Before starting the engine, always confirm that the chemical tank contains fluid. NOZZLE LEVER CLOSED 2) Turn the nozzle lever to the CLOSED position. 12 3) Rotate the pressure dial and align the STARTING tab with the mark. “STARTING” TAB PRESSURE DIAL 1) When the engine is cold, or when the fuel it refueled (1) (2) (3) (4) Set this machine on a flat space. Set the I-O switch to “ I “ position. Make sure that the throttle lever is the SLOW position. Continue to push the primer pump untill fuel enters into the primer pump. • In general, fuel enters into the carburetor by 7 to 10 Pushes. • If the primer pump is pushed excessively, an excess of gasoline returns to the fuel tank. (5) Lifting the choke lever of the air cleaner right side, close the choke lever. SLOW Throttle lever Primer pump switch Close (6) Hold the element cover with a left hand to prevent the engine from moving, settle down to take the stable position. (7) Pull out slowly the starter handle till a certain resistance is felt. Return the starter handle backward once from this position, then pull it out with force. • Never pull the rope to the full. • Once the start knob is pulled, never release your hand immediately. Hold the start knob until it returns to its original point. (8) When the engine starts, open the choke lever. • Open the choke lever progressively while checking the engine operation. Be sure to open the choke lever to the full in the end. • In cold or when the engine is cooled down, never open the choke lever suddenly. Otherwise, the engine may stop. (9) Continue warm-up operation for 2 to 3 minutes. (10) Rotation of the engine speed stabilizes and when from low speed making at high speed rotation, if reaches the point where it accelerates smoothly, it is completion of warming-up. Open 13 2) When the engine is warm (1) Place the engine on a flat ground. (2) Press the primary pump several times. (3) Confirm that the choke lever is open. (4) Hold the element cover with a left hand to prevent the engine from moving, settle down to take the stable position. (5) Pull out slowly the starter handle till a certain resistance is felt. Return the starter handle backward once from this position, then pullit out with force. (6) When the engine is difficult to start, open the throttle valve by about 1/3. STOPPING THE ENGINE 1) Turn the nozzle lever to the CLOSE position. NOZZLE LEVER CLOSED 2) Turn the I-O switch to “O” Position. 3) Move the throttle lever to the SLOW position. SLOW I-O switch Throttle lever 14 OPERATION 1. Start the engine (see page 12) 2. After starting the engine, mount the power sprayer on your back and adjust the shoulder straps so as to keep the unit as close to your body as possible. Put the engine in idle and take care not to tilt the power sprayer unit too much. Adjust straps as follows. 1) Loosening straps: 2) Tightening straps: Note: Ԙ Raise buckle ԙPull on the end of the strap attached to the power sprayer. Ԛ Pull on the free end of the strap. Buckle Ԙ If straps do not carry any weight, they can be tightened with relative ease. ԙ Tighten Ԛ Loosen 3. Serect the desired opereting position the pressure dial. HIGH PRESSURE LOW PRESSURE PRESSURE DIAL 4. Move the throttle lever at the desired position with the nozzle lever moved while observing the spray. FAST SLOW Throttle lever NOZZLE LEVER CLOSED OPEN CAUTION When using the power sprayer always spray downwind. Take special care to avoid situations where sprayed chemicals are blown back towards you. 15 INSPECTION AND MAINTENANCE! ! ! DANGER • Before inspection and maintenance, stop the engine and allow it to cool. Remove also the spark plug and plug cap. - If inspention or maintenance is attempted immediately after engine stop or with the plug cap left attached, the operator may suffer buun or an accident due to careless startup. • After inspection and maintenance, be sure to confirm that all parts are assembled. Then, proceed to operation. 㩷 1. Replacement of engine oil Deteriorated engine oil will shorten the life of the sliding and rotating parts to a great extent. Be sure to check the period and quantity of replacement. 㩷 DANGER • In general, the engine main unit and engine oil still remain hot just after the engine is stopped. In replacement of oil, confirm that the engine main unit and engine oil are sufficiently cooled down. Otherwise, there may remain a risk of scald. In addition just after of the engine stopping because oil does not finish to return in the oil case, becomes cause of the oil inserting too much • If the oil filled above the limit, it may be contaminated or may catch fire with white smoke. Interval of replacement: Initially, every 20 operating hours, and subsequently every 50 operating hours Recommended oil: SAE10W-30 oil of API Classification SF Class or higher (4-stroke engine oil for automobile) In replacement, perform the following procedure.㩷 Fuel tank cap 1) Confirm that the tank cap is tightened securely. 2) Detach the oil gauge. - Keep the oil gauge free from dust or dirt. Oil gauge 3) Use the provided oil extraction bottle to remove the old oil from the oil reservoir. • Squeeze the body of the bottle to and insert the nozzle into the oil. Release pressure on the bottle to draw the old oil from the oil reservoir. • When the oil reservoir is almost empty, tilt the power sprayer unit slightly in order to facilitate removal of the remaining engine oil. 4) Return the engine to level. Using the lubricant refill bottle, fill with new oil up to the top of the oil reservoir. 5) Replace and securely tighten the dip stick. Insufficient tightening will lead to oil leaks. • Use the provided oil extraction bottle and lubricant refill bottle for their intended purposes. Oil extraction bottle Lubricant refill bottle 16 Points in replacement of engine oil㩷㩷 㩷 㩷 • Never discard replaced engine oil in garbage, earth or sewage ditch. Disposal of oil is regulated by law. In disposal, always follow the relevant laws and regulations. For any points remaining unknown, contact Authorized Service Agent. • Oil will deteriorate even when it is kept unused. Perform inspection and replacement at regular intervals (replace with new oil every 6 months). 2. Cleaning of air cleaner WARNING: INFLAMMABLES STRICTLY PROHIBITED Interval of Cleaning and Inspection: Daily (every 10 operating hours) – Remove the air cleaner cover-fixing bolts. Place cut part in this position (top left) Element Air cleaner cover – Pull the lower side of the cover and detach the air cleaner cover. – Fully close the choke, and ensure that the carburetor is free from dust or dirt. – Remove the air cleaner element, wash element with neutral detergent diluted with tepid water, and let element dry. Replace the element in the position indicated by the dotted line in fig. 1. – Use a piece of paper to wipe off any oil adhering to the air cleaner cover and plate breather. – Immediately after cleaning, attach the cleaner cover and use the attachment bolt for fixing. (When remounting, position the upper part of the cover first and then the lower.). Plate Attachment bolt Breather section Line (slashed line) Element (dotted lines) Fig.1 3. Checking the spark plug – Only use the supplied universal wrench to remove or to install the spark plug. – The gap between the two electrodes of the spark plug should be 0.7-0.8mm (0.028”-0.032”). If the gap is too wide or too narrow, adjust it. If the spark plug is clogged with carton or fouled, clean it thoroubhly or replace it. CAUTION: Never touch the spark plug connector while the engine is running (danger of high voltage electric shock). 4. Cleaning of fuel filter 0.7~0.8 mm (0.028”-0.032”) Fuel pipe WARNING: INFLAMMABLES STRICTLY PROHIBITED Interval of Cleaning and Inspection: Monthly (every 50 operating hours) Hose clamp Suction head in the fuel tank – The fuel filler (1) of the suction head is used to filler the fuel required by the carburetor. – A periodical visual inspection of the fuel filter is to be conducted. For that purpose open the tank cap, use a wire hook and pull out the suction head through the tank opening. Filters found to have hardened, been polluted or clogged up are to be replaced. – Insufficient fuel supply can result in the admissible maximum speed being exceeded. It is therefore important to replace the fuel filter at least quarterly to ensure satisfactory fuel supply to the carburetor. 17 Fuel filter (1) Fault location Fault System Observation Cause Engine not starting or with difficulty Ignition system Ignition spark O.K. Fault in fuel supply or compression system, mechanical defect STOP-switch operated, wiring fault or short circuit, spark plug or connector defective, ignition module faulty Incorrect choke position, carburetor defective, fuel supply line bent or blocked, fuel dirty. Cylinder bottom gasket defective, crankshaft seals damaged, cylinder or piston rings defective or improper sealing of spark plug Broken starter spring, broken parts inside of the engine Carburetor contaminated, have it cleaned No ignition spark Fuel supply Fuel tank filled Compression No compression when pulled over Mechanical fault Starter not engaging Tank filled ignition spark existing Tank filled Warm start problems Engine starts but dies Fuel supply Insufficient performance Several systems may simultaneously be affected Operating time Engine idling poor Before operation Item Inspect/clean After lubrication Incorrect idling adjustment, carburetor contaminated Fuel tank vent defective, fuel supply line interrupted, cable or STOP-switch faulty Air filter contaminated, carburetor contaminated, muffler clogged, exhaust duct in the cylinder clogged Daily (10h) 30h 200h ٤*1 Replace Inspect ٤ Clean/inspect ٤ Fuel tank ٤*3 Drain fuel Throttle lever Check function ٤ Stop switch Check function ٤ Low-speed rotation Inspect/adjust ٤ Air cleaner Clean ٤ Ignition plug Inspect ٤ Cooling air duct Clean/inspect ٤ Inspect ٤ Fuel pipe ٧*2 Replace ٤ Fuel filter Clean/replace Clearance between air intake valve and air discharge valve Adjust ٧*2 Oil tube Inspect ٧*2 ٧*2 Engine overhaul Carburetor *1 *2 *3 Shutdown/r est ٤ Engine oil Tightening parts (bolt, nut) 50h ٤*3 Drain fuel Perform initial replacement after 20h operation. For the 200 operating hour inspection, request Authorized Service Agent or a machine shop. After emptying the fuel tank, continue to run the engine and drain fuel in the carburetor. 18 TROUBLESHOOTING – Before making a request for repairs, check a trouble for yourself. If any abnormality is found, control your machine according to the description of this manual. Never tamper or dismount any part contrary to the description. For repairs, contact Authorized Service Agent or local dealership. State of abnormality Probable cause (malfunction) Failure to operate primer pump Remedy Push 7 to 10 times. Low pulling speed of starter rope Pull strongly. Lack of fuel Feed fuel. Clogged fuel filter Clean Broken fuel tube Straighten fuel tube Deteriorated fuel Deteriorated fuel makes starting more difficult. Replace with new one. (Recommended replacement: 1 month) Excessive suction of fuel Set throttle lever from medium speed to high speed, and pull starter handle until engine starts. Engine does not start If engine will not start still, remove spark plug, make electrode dry, and reassemble them as they originally are. Then, start as specified. Engine stops soon Engine speed does not increase Engine does not stop. Detached plug cap Attach securely Contaminated spark plug Clean Abnormal clearance of spark plug Adjust clearance Other abnormality of spark plug Replace Abnormal carburetor Make request for inspection and maintenance. Starter rope cannot be pulled Make request for inspection and maintenance Abnormal drive system Make request for inspection and maintenance Insufficient warm-up Perform warm-up operation Choke lever is set to “CLOSE” although engine is warmed up Set to “OPEN” Clogged fuel filter Clean Contaminated or clogged air cleaner Clean Abnormal carburetor Make request for inspection and maintenance Abnormal drive system Make request for inspection and maintenance Detached throttle wire Attach securely Detached connector Attach securely Abnormal electric system Make request for inspection and maintenance. Run engine at idling, and set choke lever to CLOSE. When the engine does not start after warm-up operation: If there is no abnormality found for the check items, open the throttle by about 1/3 and start the engine. 19 Dutch Hartelijk voor het kiezen van onze MAKITA MOTORSPROEIER. We zijn er trots op u dit product te kunnen aanbieden, het resultaat van een uitgebreid ontwikkelingsprogramma en onze door de jaren opgebouwde kennis en ervaring. Om veilig en optimaal te kunnen profiteren van uw MAKITA MOTORSPROEIER, dient u deze handleiding zorgvuldig door te lezen voor u de machine gaat gebruiken en dient u alle instructies erin op te volgen om er zeker van te kunnen zijn dat de machine naar behoren zal functioneren. Inhoudsopgave Bladzijde Symbolen㨯㨯㨯㨯㨯㨯㨯㨯㨯㨯㨯㨯㨯㨯㨯㨯㨯㨯㨯㨯㨯㨯㨯㨯㨯㨯㨯㨯㨯㨯㨯㨯㨯㨯㨯㨯㨯㨯㨯㨯㨯㨯㨯㨯 74 veiligheidsvoorschriften 㨯㨯㨯㨯㨯㨯㨯㨯㨯㨯㨯㨯㨯㨯㨯㨯㨯㨯㨯㨯㨯㨯㨯㨯㨯㨯㨯㨯㨯㨯㨯㨯 75 Technische gegevens 㨯㨯㨯㨯㨯㨯㨯㨯㨯㨯㨯㨯㨯㨯㨯㨯㨯㨯㨯㨯㨯㨯㨯㨯㨯㨯㨯㨯㨯㨯㨯㨯㨯 79 Benaming van onderdelen 㨯㨯㨯㨯㨯㨯㨯㨯㨯㨯㨯㨯㨯㨯㨯㨯㨯㨯㨯㨯㨯㨯㨯㨯㨯㨯㨯㨯㨯 80 Montage instrukties 㨯㨯㨯㨯㨯㨯㨯㨯㨯㨯㨯㨯㨯㨯㨯㨯㨯㨯㨯㨯㨯㨯㨯㨯㨯㨯㨯㨯㨯㨯㨯㨯㨯㨯㨯 81 Voor gebruik 㨯㨯㨯㨯㨯㨯㨯㨯㨯㨯㨯㨯㨯㨯㨯㨯㨯㨯㨯㨯㨯㨯㨯㨯㨯㨯㨯㨯㨯㨯㨯㨯㨯㨯㨯㨯㨯㨯㨯㨯㨯 82 Het mengen van chemische bestrijdingsmiddelen 㨯㨯㨯㨯㨯㨯㨯㨯㨯 84 Starten van de motor 㨯㨯㨯㨯㨯㨯㨯㨯㨯㨯㨯㨯㨯㨯㨯㨯㨯㨯㨯㨯㨯㨯㨯㨯㨯㨯㨯㨯㨯㨯㨯㨯㨯㨯 84 Stoppen van de motor 㨯㨯㨯㨯㨯㨯㨯㨯㨯㨯㨯㨯㨯㨯㨯㨯㨯㨯㨯㨯㨯㨯㨯㨯㨯㨯㨯㨯㨯㨯㨯㨯㨯 86 Werken met de motorsproeier 㨯㨯㨯㨯㨯㨯㨯㨯㨯㨯㨯㨯㨯㨯㨯㨯㨯㨯㨯㨯㨯㨯㨯㨯㨯㨯 87 Inspection and maintenance㨯㨯㨯㨯㨯㨯㨯㨯㨯㨯㨯㨯㨯㨯㨯㨯㨯㨯㨯㨯㨯㨯㨯㨯㨯㨯㨯㨯 88 Oplossen van problemen 㨯㨯㨯㨯㨯㨯㨯㨯㨯㨯㨯㨯㨯㨯㨯㨯㨯㨯㨯㨯㨯㨯㨯㨯㨯㨯㨯㨯㨯㨯 91 Symbolen Het is erg belangrijk de volgende symbolen te herkennen en begrijpen wanneer u deze gebruiksaanwijzing doorleest. Lees, begrijp en volg gebruiksaanwijzing Draag oog- en gehoorsbescherming WAARSCHUWING/GEVAAR Autobenzine Verboden Met de hand starten van de motor Niet roken Noodstop Geen open vuur Eerste hulp Beschermende handschoenen dragen Aan/start Houd werkomgeving vrij van personen en dieren Recycling Draag ogenbescherming, beschermende masker en oorbescherming 74 VEILIGHEIDSVOORSCHRIFTEN Algemene instructies – Om verzekerd te zijn van een correcte en veilige bediening moet de gebruiker de gebruiksaanwijzing lezen, begrijpen en opvolgen om vertrouwd te geraken met de motorsproeier. Niet volledig geïnstrueerde gebruikers riskeren ongelukken voor zichzelf en voor anderen door niet correct gebruik. – Het is aan te bevelen de machine enkel uit te lenen aan mensen die vertrouwd zijn met de werking hiervan. Reik altijd de gebruiksaanwijzing over. – Onervaren gebruikers moeten zich door de dealer op de hoogte laten stellen van het correcte gebruik van de motorsproeier. – Kinderen en personen onder de 18 jaar mogen niet werken met de machine. Personen boven de 16 jaar mogen enkel onder begeleiding van deskundigen met de machine werken. – Gebruik de motorsproeier met de meeste zorg en waakzaamheid. – Gebruik de motorsproeier enkel wanneer u in een goede, lichamelijke conditie verkeert. Werk met de grootste waakzaamheid. De gebruiker is verantwoordelijk voor derden. – Gebruik de motorsproeier nooit indien de gebruiker onder invloed van alcohol of medicijnen is. – Werk niet met de machine indien u zich moe voelt. – Bewaar deze instructies zodat u er later nog iets in kunt naslaan. Persoonlijke beschermingsmiddelen – De te dragen kleding moet functioneel zijn en afdoende bescherming bieden. De kleding mag de werkzaamheden niet hinderen. Draag nooit kettingen, loszittende kledingstukken of lang haar wat door de aanzuigtrechter kan worden ingezogen. – Om hoofd-, oog-, of voetverwondingen te voorkomen en uw gehoor te beschermen moet u tijdens de werkzaamhen de volgende beschermende maatregelen nemen: Oorbeschermers Waterdichte hoofdbescherming Veiligheidsbril Lange mouwen Geef de volgende voorschriften extra aandacht: – Uw kleding moet functioneel zijn en goed passen zonder u te hinderen in uw bewegingen bij het werken met de motorsproeier. Draag geen kleding of sieraden die verstrikt kan raken in het gewas of in de machine zelf. – U moet de volgende beschermingsmiddelen en kledingstukken gebruiken wanneer u met de motorsproeier werkt om letsel aan uw hoofd of uw ogen, uw voeten of handen alsmede schade aan uw gehoor te voorkomen. Gezichtsmasker Rubberlaarzen Lange broek Werkschoenen 1. Om letsel aan uw gezicht of ogen te voorkomen en uw luchtwegen te beschermen tegen stof en chemische middelen, moet u daartoe geschikte gezichtsbescherming (masker, veiligheidsbril enz.) dragen. 2. Om schade aan het gehoor te voorkomen moet u te allen tijde oorbeschermers dragen. 3. Om uw huid te beschermen tegen stof en chemische middelen, moet u te allen tijde kleding met lange mouwen en pijpen dragen. 4. Draag altijd stevige, rubberen werkhandschoenen wanneer u met de motorsproeier werkt of er onderhoud aan uitvoert. 5. U moet stevige schoenen met een anti-slip zool dragen wanneer u met de motorsproeier werkt. Speciale werkschoenen zorgen ervoor dat u stevig kunt blijven staan en beschermen tegen eventueel letsel. – U moet eventueel loshangende kleding, haren en andere uitrustingsstukken, bijvoorbeeld een handdoek enz. goed vastmaken. Losse voorwerpen kunnen verstrikt raken in de bewegende onderdelen van de machine, hetgeen kan leiden tot ernstig persoonlijk letsel. Het starten van de motorsproeier – Verzeker u ervan dat er zich geen kinderen of andere personen bevinden binnen een straal van 15 meter, sla ook acht op eventuele aanwezigheid van dieren. Gebruik de motorsproeier niet in druk bevolkte gebieden. – Voor u de motorsproeier gaat starten, moet u controleren of de machine in een goede, bedrijfswaardige en veilige staat verkeert. Controleer of het veiligheidsmechanisme van de gashendel goed werkt. De gashendel moet soepel en gemakkelijk te bedienen zijn. De gashendel moet schoon en droog zijn. Test de werking van de I-O schakelaar. 75 15meter – Voor u de motorsproeier gaat starten, moet u controleren of de machine in goede, bedrijfswaardige eb veilige staat verkeert en moet u controleren of de gashendel naar behoren functioneert. – Bij het monteren van de machine moet u controleren of alle gebruikte gereedschappen inderdaad verwijderd zijn. Nog aanwezig gereedschap kan ernstig letsel veroorzaken wanneer dit bij het starten van de machine wordt weggeslingerd. – Controleer of de motorsproeier schoon en droog is en test of de STOP schakelaar naar behoren functioneert. – Controleer of het veiligheidsmechanisme van de gashendel goed werkt. De vergrendeling moet soepel en gemakkelijk te bedienen zijn. Controleer of de vergrendeling goed werkt. Kijk of de handgrepen schoon en droog zijn en test de STOP schakelaar om te controleren of deze goed werkt. – Stop de motor onmiddellijk als deze problemen vertoont. – Bij het gebruik van de motorsproeier moet u extra voorzichtig zijn dat u geen uitlaatgassen inademt. – Uitlaatgas is giftig. U mag daarom in geen geval de machine gebruiken in een afgesloten of onvoldoende geventileerde ruimte (vergiftigings- en verstikkingsgevaar). – Vergeet niet dat koolmonoxide een geurloos gas is. Zorg er altijd voor dat het werkterrein waar de motor gebruikt gaat worden goed geventileerd is. – Werk niet meer dan een uur achter elkaar met de motorsproeier en neem tenminste 30 minuten rust na elk uur werk. – Stop de motor wanneer u een rustpauze inlast of wanneer u de motorsproeier onbeheerd achter laat. Ter bescherming van derden en om de motorsproeier te vrijwaren van beschadiging, dient u de machine alleen achter te laten op een veilige plek en dient u ervoor te zorgen dat er zich geen brandbare materialen in de buurt van de machine bevinden. Leg een heet geworden motorsproeier in geen geval op droog gras of ander brandbaar materiaal. Het is zeer gevaarlijk om een hete motorsproeier op droog gras of ander brandbaar materiaal te leggen, daar dit kan leiden tot brand. – Werk niet met de motorsproeier als de uitlaat kapot is. – Zet de motor uit voor u de machine gaat vervoeren. – Wacht eerst tot de motor is afgekoeld, maak de brandstoftank leeg en maak de motorsproeier goed vast wanneer u deze met een voertuig gaat vervoeren. – Controleer of de brandstoftank helemaal leeg en droog is voor u de motorsproeier opstuurt. ٨ ٨ ٨ ٨ ٨ Pauze Transport Bijtanken Onderhoud Delen Vervangen Tanken – Schakel de motor uit bij tanken (7), houdt de machine weg bij open vuur en rook beslist niet. – Voorkom huidcontact met benzine. Inhaleer geen benzinedampen. Draag altijd beschermende handschoenen bij het tanken. Wissel en reinig regelmatig beschermende kleding. – Voorkom het spillen van benzine en olie uit veiligheids-en milieu overwegingen. Veeg gemorste benzine direct af en reinig de machine. wissel direct kledingstukken indien u hierover qemorst hebt met benzine. – Voorkom ieder contact van benzine op uw kleding. Trek direct kleding uit indien deze in contact is geweest met de brandstof om brandgevaar en huidcontact te voorkomen. – Controleer met regelmaat de benzinetankdop op lekkage en of deze goed afdicht. – Draai de benzinetankdop altijd goed aan en start de machine op een andere plaats (min.3 meter verder) dan waar u heeft bijgetankt (9). – Tank nooit bij in afgesloten ruimten. Benzinedampen vormen zeer brandbare gassen op grondniveau (gevaar voor explosies). – Transporteer en sla de benzine enkel op in goedgekeurde cans. Verzeker u dat de benzine volgens voorschriften is opgeslagen en geen toegang heeft voor derden. – Tank nooit een hete of nog draaiende motor bij. Bediening – Gebruik de motorsproeier alleen bij goed licht en zicht. Gebruik de motorsproeier in geen geval 's nachts. Gebruik de motorsproeier niet als het regent of net geregend heeft (gevaar van letsel door uitglijden en vallen als het nat is). – Wees zeer voorzichtig op gladde of natte oppervlakken (ijs en sneeuw) in de winter waar er gevaar voor uitglijden bestaat en zorg er te allen tijde voor dat u stevig op de grond kunt blijven staan. – Gebruik de motorsproeier in geen geval wanneer u op een ladder staat. – Klim niet in een boom om uit de hoogte de motorsproeier te kunnen gebruiken. – Gebruik de motorsproeier in geen geval wanneer u op een onstabiele ondergrond staat. – Richt het mondstuk van de motorsproeier niet op mensen of dieren. Uitgeworpen materiaal kan ernstig letsel veroorzaken. – Raak de bougie-aansluiting niet aan terwijl de motor loopt. – Raak geen bewegende onderdelen van de motorsproeier aan terwijl de motor loopt. – Raak de uitlaat of andere motoronderdelen niet aan terwijl u de machine gebruikt of kort geleden gebruikt heeft. Deze motoronderdelen kunnen zeer heet worden en ernstige brandwonden veroorzaken. 76 3 meter – Verzeker u ervan dat de giftigheid van de te gebruiken pesticiden of herbiciden bekend is voor gebruik en lees de bijbehorende gebruiksaanwijzingen zorgvuldig door zodat u vertrouwd bent met de juiste procedures voor het gebruik van de chemische middelen in kwestie. Als de pesticiden/herbiciden in aanraking komen met uw huid, dient u de betreffende plek onmiddellijk af te spoelen en goed met zeep te wassen. Doe de dop van de sproeitank goed dicht om te voorkomen dat er chemische middelen uit kunnen lekken. Onderhoudsinstructies – Wees milieubewust. Werk met zo min mogelijk lawaai en belasting van het milieu als mogelijk. Laat de afstelling van de carburateur checken. – Reinig de motorsproeier met regelmaat en controleer alle bouten, moeren en schroeven op hun bevestiging. – Onderhoud of plaats de motorsproeier nooit in nabijheid van open vuur, vonken, etc. – Sla de motorsproeier altijd op met een lege tank in een goed geventileerde ruimte. Sla acht en volg alle relevante veiligheidsinstrukties, uitgegeven door overheidsinstellingen en verzekeraars. Voer geen enkele modifikatie uit aan uw motorsproeier, omdat dit uw veiligheid in gevaar brengt. Het uitvoeren van onderhoud of reparaties door de gebruiker is beperkt tot de in deze gebruiksaanwijzing omschreven punten. Alle andere werkzaamheden dienen door de erkende vakman/dealer uitgevoerd te worden. Gebruik enkel originele MAKITA-onderdelen. Gebruik van niet originele onderdelen of toebehoren verhoogt de kans op verwondingen en ongelukken. MAKITA accepteert geen enkele claim die voortvloeit uit het gebruik van niet-originele onderdelen of toebehoren. Eerste Hulp In geval van ongelukken dient een goed gevulde Eerste hulp-koffer volgens DIN 13164 aanwezig te zijn. Vul direct na gebruik van de inhoud de koffer weer volledig aan. Wanneer u hulp inroept, geef altijd de volgende informatie: – Plaats van ongeluk – Wat er gebeurt is – Aantal verwonde mensen – Aard van verwondingen – Uw naam Verpakking – De motorsproeier wordt geleverd in een beschermende kartonnen doos om transportschade te voorkomen. Karton is een grondstof die kan worden hergebruikt (papier kringloop). 77 EU-CONFORMITEITSVERKLARING Model; EVH2000 Wij verklaren onder ons exclusieve aansprakelijkheid dat dit product voldoet aan de volgende normen van de standaard documenten, EN292, EN55012 in overeenstemming met EU richtlijnen, 89/392/EEC, zoals gewijzigd bij 98/37/EEC, 93/68/EEC, 89/336/EEC, zoals gewijzigd bij 92/31/EEC. Gemeten geluidsdrukniveau: 98 dB Gegarandeerd geluidsdrukniveau:102 dB Deze geluidsdruk waarden waren gemeten in overeenstemming met EU richtlijnen 2000/14/EC. Conformiteits beoordelingsmethode: Annex V. CE2007 Tomoyasu Kato Director De verantwoordelijke fabrikant: Makita Corporation. 3-11-8,Sumiyoshi-cho, Anjo, Aichi, JAPAN Gevolmachtigd Vertegenwoordiger in Europa: Makita International Europe Ltd. Michigan Drive, Tongwell, Milton Keynes, Bucks MK15 8JD, ENGELAND 78 TECHNISCHE GEGEVENS Model Afmetingen: (lengte x breedte x hoogte) Leeg gewicht Inhoud sproeiertank EVH2000 mm 380 x 420 x 635 kg 9.1 L 20 Pomp Type Maximale druk Flux Horizontal opposed twin pistons MPa 2.5 L 7.1 Motor Model Cilinderinhoud EH025A cm3 24.5 Brandstof Inhoud brandstoftank Autobenzine L SAE 10W-30 olie API SF of later (4-takt automotorolie) Motorolie Inhoud olietank 0.5 L 0.08 Carburateur type WALBRO WYL Ontstekingssysteem type Elektronische ontsteking Bougie type NGK CMR6A (C type) Elektrodenafstand mm 0.7 - 0.8 Geluidsdruk volgens Geluidsdruk (Lpa) volgens 98/37/EC dB 84.0 Maximale geluidsdruk (Lwa) volgens 2000/14/EC dB 102.0 Opmerkingen: 1. Gebruik uitsluitend de door MAKITA gespecificeerde olie en bougie. 2. Deze technische gegevens kunnen zonder kennisgeving vooraf gewijzigd worden. 79 BENAMING VAN ONDERDELEN No Benaming van onderdelen No Benaming van onderdelen No Benaming van onderdelen 1 I-O-schakelaar 9 Uitlaat 17 Snelkoppeling 2 Gashendel 10 Oliepeilstok 18 Handgreep 3 Chokehendel 11 Opvoerpomp 19 Afsluiter 4 Luchtfilter deksel 12 Sproeiertank dop aflaatopening 20 NozSproeipijp 5 Bougie afdekking 13 Sproeiertank dop vulopening 21 Sproeipijphouder 6 Trekstarter 14 Sproeiertank 22 Mondstuk (groothoek, dubbele kop) 7 Brandstoftank 15 Instelling sproeidruk 23 8 Brandstoftankdop 16 Spuitslang 24 80 MONTAGE INSTRUKTIES WAARSCHUWING: Voor aanvang van werkzaamheden aan de motorsproeier, ALTIJD de motor UITSCHAKELEN en de bougiekapjes van de bougies aftrekken. ALTIJD werkhandschoenen dragen. WAARSCHUWING: De motorsproeier alleen weer starten nadat deze VOLLEDIG is samengesteld. 1. MONTAGE VAN DE SPROEIER Raadpleeg de afbeelding op de vorige bladzijde (Lijst van onderdelen) voor de montage van de handgreep, kraan, sproeipijp en het mondstuk. Let op dat u de onderdelen op de juiste wijze monteert om lekkage te voorkomen. 2. INSTELLEN VAN HET SCHOUDERHARNAS Maak de twee schouderriemen vast zoals aangegeven op de afbeeldingen hieronder en controleer of de riemen niet verdraaid zijn. Deze instructie beschrijft de procedure voor 1 riem. Monteer de 2de riem op dezelfde manier. Instellen van het bovenste deel van de schouderriemen 㽲 Sproeiertank 㽳 㽴 Trek de schouderriem in de richting van de pijl, en steek het omgeslagen uiteinde weer terug in de sluiting. Onderste sluiting Instellen onderste deel van de schouderriemen 㽳 Haal het deel, gemarkeerd met 'A', 㽲 door de spleet in de metalen haak. Onderste sluiting Draai daarna de schouderriem 90 graden, in de richting van de pijl. Bovenste sluiting Sproeiertank Metalen haak 㽴 Herhaal deze bewerking voor de andere schouderriem. De instelling is daarmee afgesloten. Steek het deel van de schouderriem, gemarkeerd met 'A', een van de beide overlappende schouderriemen, in de metalen haak, zoals te zien in ԙ en Ԛ. 81 Metalen haak VOOR GEBRUIK Inspectie en bijvullen van motorolie – Voer de volgende procedure uit wanneer de motor is afgekoeld. – Houd de motor horizontaal, verwijder de oliepeilstok en kijk of het oliepeil zich tussen de markeringen voor het maximale en het minimale oliepeil bevindt. Wanneer er zo weinig olie in de motor zit dat alleen de tip van de oliepeilstok de olie raakt wanneer de oliepeilstok in het carter steekt zonder vastgedraaid te zijn (Afb. 1), dient u motorolie toe te voegen (Afb. 2). – Voor uw informatie, het duurt ongeveer 10 uur voor er olie bijgevuld moet worden (10 keer, of 10 tanks). – Als de olie verkleurd blijkt, of wanneer u vuil in de olie aantreft, dient u de olie te verversen. (Zie bladzijde 88 voor de intervallen en manier van verversen.) Aanbevolen olie: SAE10W-30 olie van API Classificatie SF Klasse of hoger (4-takt olie voor auto's) Hoeveelheid olie: Ongeveer 0,08 L. NOOT: Als de motor niet recht wordt gehouden, kan er olie in de motor terecht komen en kunt u teveel olie in het blok doen. Als er teveel olie in het carter gedaan is, kan de olie verontreinigd raken, of verbranden met een witte rook als resultaat. Opmerking 1 bij het verversen van de olie; de "oliepeilstok" – Verwijder stof en vuil rond de olievul-opening en haal de oliepeilstok los. – Houd de losgemaakte oliepeilstok vrij van zand en stof. Doet u dat niet, dan kunnen vuil dat aan de oliepeilstok blijven hangen de circulatie van de olie door de motor belemmeren of het binnenwerk beschadigen, wat kan leiden tot problemen. – Om de oliepeilstok schoon te houden kunt u deze bijvoorbeeld met zijn knop in de motor-afdekking steken, zoals in Afb. 3 te zien is. Maximale oliepeil (Rand van de olievul-opening) Vul motorolie bij als er alleen aan de tip olie zit. Afb.1 Afb.2 Oliepeilstok Afb.3 82 1) Houd de motor horizontaal en haal de oliepeilstok los. 2) Vul bij met motorolie tot aan de rand van de olievul-opening. (Zie Afb. 2 op de vorige bladzijde). Gebruik bijvoorbeeld een spuitfles om de olie makkelijker in de opening te krijgen. 3) Zet de oliepeilstok weer goed vast. Doet u dat niet, dan kan er olielekkage optreden. Opmerking 2 bij het verversen van olie: "Als er olie gemorst wordt" – Als er olie gemorst wordt tussen de brandstoftank en de motor zelf, kan de olie in de inlaat van de luchtkoeling gezogen worden, waardoor de motor verontreinigd kan raken. Vergeet niet om gemorste olie op te nemen voor u de motor weer in gebruik neemt. TANKEN Omgaan met brandstof U moet brandstof met de grootst mogelijke voorzichtigheid behandelen. Brandstof kan aan oplosmiddelen verwante stoffen bevatten. U moet tanken in een voldoende geventileerde ruimte of in de open lucht. Adem de brandstofdampen niet in en houd de brandstof zo veel mogelijk bij u vandaan. Als u herhaaldelijk en voor langere tijd in aanraking bent met brandstoffen, zal de huid uitdrogen en kan zich een huidziekte of allergie ontwikkelen. Als er brandstof in uw oog komt, dient u het oog te spoelen met water. Als u oog dan nog pijn blijft doen, dient u een arts te raadplegen. Opslagtermijn van brandstof Brandstof hoort binnen 4 weken opgebruikt te worden, zelfs al wordt het bewaard in een speciale container in een goed geventileerde, donkere ruimte. Als u geen speciale container gebruikt, of als de container open is, kan brandstof binnen een dag onbruikbaar worden. Opslag van de machine en de tank – Bewaar de machine en de tank op een koele plek, uit de zon. – Bewaar in geen geval brandstof in de passagiersruimte of de bagageruimte van uw auto. Brandstof De gebruikte motor is een 4-takt motor. Let er op dat u benzine voor auto's gebruikt (normaal of super). Opmerkingen over brandstof – Gebruik nooit een benzine-olie mengsel. Doet u dit toch, dan kan er zich een koolstof afzetting vormen en kunnen er mechanische problemen op gaan treden. – Gebruik van slechte brandstof zal de motor onregelmatig doen starten. Tanken WAARSCHUWING: ONTVLAMBARE MATERIALEN TEN STRENGSTE VERBODEN Gebruikte benzine: benzine voor auto's – Maak de tankdop een beetje los om eventuele gassen te laten ontsnappen. – Haal de tankdop los en doe brandstof in de tank terwijl u er voor zorgt dat de gassen in de tank kan ontsnappen door de vulopening naar boven te houden. (Doe nooit brandstof in de vulopening voor de motorolie.) Brandstoftankdop Maximale brandstofpeil – Veeg de omgeving van de tankdop goed schoon om te voorkomen dat vreemde voorwerpen in de brandstoftank terecht komen. – Doe de tankdop weer goed vast als u klaar bent met tanken. • Als er een beschadiging of onvolkomenheid is aan de tankdop, dient u deze te vervangen. • De tankdop is aan slijtage onderhevig en dient elke twee a drie jaar vervangen te worden. 83 Brandstoftank HET MENGEN VAN CHEMISCHE BESTRIJDINGSMIDDELEN 1) Mengen van chemische bestrijdingsmiddelen 1. Chemische bestrijdingsmiddelen zijn giftig. Wanneer u met chemische bestrijdingsmiddelen werkt, dient u te allen tijde de door de fabrikant verstrekte instructies strikt op te volgen. 2. Gebruik te allen tijde de meegeleverde zeef wanneer u chemische bestrijdingsmiddelen in de sproeiertank giet. 3. Doe de dop van de sproeiertank stevig dicht om lekkage te voorkomen. 4. Als u de chemische bestrijdingsmiddelen in de sproeiertank zelf wilt mengen, moet u het water als eerste in de tank doen, voor de te gebruiken chemische bestrijdingsmiddelen. Let op: • Wees te allen tijde uiterst voorzichtig met chemische bestrijdingsmiddelen gebruik. Mocht uw huid onverhoopt in aanraking komen met chemische bestrijdingsmiddelen gebruik, dan dient u de betreffende plek onmiddellijk af te spelen met grote hoeveelheden water. 2) Gebruiken van een ander chemisch middel 1. U moet de sproeiertank, de pomp en het mondstuk extra goed uitspoelen voor u een ander chemisch middel in de sproeiertank gaat doen. Mengen van restjes van eerder gebruikte chemische middelen met andere middelen kan leiden tot ziektes en andere aandoeningen. STARTEN VAN DE MOTOR WAARSCHUWING • Start de motor in geen geval op dezelfde plek als waar u getankt heeft. Ga minstens 3m bij de tankplek vandaan voor u de motor start. − Doet u dit niet, dan kan er brand ontstaan. • De uitlaatgassen van de motor zijn giftig. Gebruik de motor niet op een slecht geventileerde plek, bijvoorbeeld in een tunnel, in een gebouw enz.. − Gebruik van de motor op een slecht geventileerde plek ka leiden tot vergiftiging door uitlaatgassen. • Stop en inspecteer de motor onmiddellijk wanneer u na het starten iets abnormaals bespeurt, zoals een vreemd geluid, geur, of trilling. − Als u de motor blijft gebruiken terwijl zich een dergelijk abnormaal verschijnsel voordoet, kan dat leiden tot een ongeval. • Controleer of de motor inderdaad stopt wanneer de stopschakelaar op de “O” stand wordt gezet. 1) Vóór het starten van de motor, ALTIJD controleren dat er vloeistof in de sproeiertank zit. Afsluitkraan sproeier DICHT 2) Zet de afsluitkraan in de stand DICHT. 84 3) Draai de instelling van de sproeidruk tot de aanduiding “STARTING” op de markeerstreep staat. Markering “STARTING“ Instelling sproeidruk 1) Wanneer de motor koud is of als er is bijgetankt. (1) Laat het gas los en zet de omwentelingssnelheid van de motor op het minimum. (2) Zet de stopschakelaar op "I". (3) Controleer of de gashendel op de lage-snelheid stand staat. (4) Blijf op de opvoerpomp drukken tot er brandstof in de opvoerpomp komt. In het algemeen zal er na 7 tot 10 keer drukken brandstof in de opvoerpomp komen. Als u de opvoerpomp te intensief gebruikt, zal het teveel aan benzine teruggevoerd worden naar de brandstoftank. (5) Doe de chokehendel aan de rechterkant naar boven en doe de choke dicht. Lage-snelheid Gashendel Opvoerpomp I-O schakelaar DICHT (6) Houd de afdekking van het element met uw linkerhand vast om te voorkomen dat de motor van zijn plaats komt en zet uzelf schrap. (7) Trek rustig aan de trekstarter tot u weerstand voelt (compressiepunt). Laat de trekstarter vervolgens terugkeren en trek er dan krachtig aan. Trek de trekstarter nooit volledig uit. Laat nooit direct los nadat u de trekstarter heeft uitgetrokken. Houd de trekstarter vast totdat deze terugkeert naar zijn oorspronkelijke positie. (8) Zet de chokehendel open wanneer de motor start. Zet de chokehendel steeds verder open terwijl u controleert hoe de motor loopt. Vergeet niet dat de chokehendel uiteindelijk helemaal open moet staan. Als het koud is of wanneer de motor is afgekoeld, mag u nooit de chokehendel ineens helemaal open zetten. Doet u dit toch, dan kan de motor stilvallen. (9) Laat de motor 2 a 3 minuten opwarmen. (10) Het toerental van de motor zal zich stabiliseren en de overgang van laag naar hoog toerental zal soepeler gaan. De motor is nu opgewarmd. OPEN 85 2) Wanneer de motor warm is. (1) (2) (3) (4) (5) Plaats de motor op een vlakke ondergrond. Druk een paar keer op de opvoerpomp. Controleer of de chokehendel open staat. Houd de afdekking van het element met uw linkerhand vast om te voorkomen dat de motor van zijn plaats komt en zet uzelf schrap. Trek de hendel van de trekstarter voorzichtig uit tot u weerstand voelt. Laat de trekstarter terugkeren naar de uitgangspositie en trek er vervolgens stevig aan. STOPPEN VAN DE MOTOR 1) Draai de afsluitklep op de sproeier in de stand DICHT. Afsluitkraan sproeier DICHT 2) Draai de I-O schakelaar in de stand “O“. 3) Zet de gashendel in de stand lage-snelheid. Lage-snelheid I-O schakelaar Gashendel 86 WERKEN MET DE MOTORSPROEIER 1. Start de motor (zie pagina 84) 2. Doe de motorsproeier op uw rug nadat u de motor gestart heeft en stel de schouderriemen zo af dat de machine zo dicht mogelijk bij uw lichaam blijft. Laat de motor stationair lopen en zorg ervoor dat u de motorsproeier niet te veel kantelt. Stel de riempjes als volgt af. 1) Losmaken van de riempjes: Ԙ Til de sluiting op. ԙ Trek aan het uiteinde van het riempje dat aan de motorsproeier vast zit. Ԛ Trek aan het losse uiteinde van het riempje. 2) Strakker trekken van de riempjes. Sluiting Ԙ Opmerking: Als de riempjes niet belast zijn, zijn ze relatief gemakkelijk te verstellen. Losser Ԛ ԙ Vaster 3. Selecteer de gewenste werkdruk met de instelling werkdruk. HOGE DRUK LAGE DRUK INSTELLING WERKDRUK 4. Stel de gashendel in op de gewenste positie, open de afsluitkraan op de sproeier, tot de gewenste straal bereikt is. Hoge snelheid Lage snelheid Gashendel Afsluitkraan sproeier DICHT OPEN Let op Sproei altijd met de wind mee. Wees extra waakzaam om situaties te vermijden waarin de gesproeide chemische middelen terug naar uzelf toe worden geblazen. 87 INSPECTIE EN ONDERHOUD! ! ! GEVAAR • Stop de motor en laat deze afkoelen voor u inspectie en onderhoud gaat uitvoeren. Verwijder ook de bougie en de bougiekap. − Als u inspectie of onderhoud uitvoert direct nadat de motor gestopt is of wanneer de bougiekap nog op zijn plaats zit, kunt u zich branden of een ongeval oplopen omdat de motor onverwacht opstart. • Controleer of alle onderdelen goed op hun plek zitten na inspectie of onderhoud. Ga pas daarna de machine opnieuw gebruiken. 㩷 1. Verversen van de motorolie Te lang gebruikte motorolie zal de levensduur van de heen en weer bewegende en roterende onderdelen flink bekorten. Vergeet niet te controleren wanneer en hoeveel olie ververst moet worden. 㩷 GEVAAR • In het algemeen zullen de motor zelf en de motorolie nog enige tijd heet blijven ook al is de motor gestopt. Als u de olie wilt gaan verversen, moet u eerst controleren of de motor zelf en de motorolie daarin voldoende zijn afgekoeld. Doet u dat niet, dan bestaat het gevaar dat u zich zult branden. Net nadat de motor gestopt is, circuleert er nog olie in de motor en is niet alle olie teruggekeerd in de oliepan. Bijvullen kan nu zorgen voor teveel olie. • Als er teveel olie in het carter gedaan is, kan de olie verontreinigd raken, of verbranden met een witte rook als resultaat. Verversingsinterval: Aanbevolen olie: In het begin na elke 20 bedrijfsuren, daarna na elke 50 bedrijfsuren. SAE10W-30 olie van API Classificatie SF Klasse of hoger (4-takt olie voor auto's) Voer de volgende procedure uit bij het verversen van de olie.㩷 Brandstoftankdop 1) Controleer of de tankdop goed dicht zit. 2) Maak de oliepeilstok los. – Houd de oliepeilstok vrij van stof of vuil. Peilstok 3) Gebruik de meegeleverde afgewerkte oliefles om de oude olie uit het carter te halen. • Knijp de onderkant van de fles in en steek de tuit in de olie. Laat de onderkant van de fles los om de oude olie uit het carter op te zuigen. • Wanneer het carter bijna leeg is, kunt u de motorsproeier een beetje proberen te kantelen zodat u de resterende olie gemakkelijker kunt verwijderen. 4) Zet de machine weer recht. Gebruik de olievulfles om het carter tot boven aan met olie te vullen. 5) Doe de peilstok weer terug en doe deze stevig vast. Als u de peilstok niet goed vast doet, kan er olielekkage optreden. • Gebruik de meegeleverde afgewerkte oliefles en de olievulfles alleen voor de bestemde doeleinden. Afgewerkte oliefles Olievulfles 88 㩷 㩷 Opmerkingen bij het verversen van de motorolie㩷 • Gooi afgewerkte motorolie niet weg met het normale vuilnis en loos het niet in de natuur of in een sloot. Het afvoeren van olie is wettelijk geregeld. Volg altijd de geldende wetten en regelgeving wanneer u zich van afgewerkte motorolie wilt ontdoen. Neem contact op met een erkende onderhoudsmonteur als u hieromtrent vragen hebt. • Ook wanneer u olie gewoon bewaart zal de olie op den duur bederven. Controleer regelmatig of de olie die u wilt gebruiken nog goed is (vervang de olie minstens elke 6 maanden). 2. Schoonmaken van het luchtfilter !WAARSCHUWING: BRANDBARE MATERIALEN STRIKT VERBODEN Interval voor reiniging en controle: dagelijks (elke 10 bedrijfsuren) – Verwijder de bouten die het deksel van het luchtfilter vastzetten. Plaats uitsnede hier (links boven) Element Deksel luchtfilter – Trek aan de onderkant van het deksel en maak het deksel van het luchtfilter los. – Doe de choke helemaal dicht en zorg ervoor dat de carburateur vrij blijft van stof en vuil. – Verwijder het element van het luchtfilter, was het element met een neutraal wasmiddel opgelost in lauw water en laat het element goed drogen. Doe het element weer terug op zijn plaats zoals aangegeven door de stippellijn in Afb. 1. – Gebruik een stuk papier om eventuele olie van het deksel van het luchtfilter en van de plaat waarop de inlaat is gemonteerd te verwijderen. Plaat Bevestigings bout nlaat-gedeelte – Onmiddellijk na het reinigen dient u het deksel van het luchtfilter terug te zetten en vast te maken met de bevestigingsbout. (Bij het in elkaar zetten dient u eerst de bovenkant aan te brengen en dan pas de onderkant.) Lijn (gearceerd) Line (slashed line) Element (stippellijn) Afb.1 3. Controlen van de bougie – Gebruik enkel de originele bougiesleutel om een bougie te vervangen of te controleren. – De afstand tussen de 2 elektroden moet 0,7-0,8mm bedragen. Is de afstand te groot of the nauw, stel deze bij. Als de bougie aangekoekt is, vervang deze of maak deze schoon. WAARSCHUWING: Raak nooit de bougiekabel aan met draaiende motor (gevaar voor elektrische schok met hoog voltage). 4. Schoonmaken van het brandstoffilter 0.7~0.8 mm (0.028”-0.032”) Brandstofleiding GEVAAR: ONTVLAMBARE MATERIALEN TEN STRENGSTE VERBODEN Interval voor reiniging en inspectie: Maandelijks (om de 50 bedrijfsuren) Slangenklem Zuigkop in de benzinetank – Het brandstoffilter (1) van de zuigkop filtert de benzine voordat deze in de carburateur komt. – Regelmatige controle van dit brandstoffilter is aanbevolen. Verwijder de tankdop en haak de zuigkop naar buiten. Vervuilde of uitgeharde brandstoffilters uitwisselen. – Onvoldoende benzinetoevoer door vervuilde zuigkoppen kunnen allerlei storingen veroorzaken, wissel daarom regelmatig het brandstoffilter uit, op zijn minst om de paar maanden. 89 Brandstoffilter (1) Storing lokaliseren Storing Onderdeel Observatie Oorzaak Motor start niet of nauwelijks Ontsteking Bougie vonkt Oorzaak in benzinetoevoer of compressiesysteem, of mechanische oorzaak Vonkt niet Stopschakelaar, kabelbreuk, kortsluiting, bougie of aansluiting defect ontstekingsspoel defect Benzinetoevoer Tank gevuld Onjuiste chokepositie, carburateur defect, vervuilde zuigkop, breuk, knik of vuil in benzineleiding Compressie Geen compressie bij start Voetpakking stuk, krukaskeerringen defect, zuigerveren gebroken of lekke bougiepakking Mechanische storing Starter functioneert niet Gebroken startveer, defecte startpallen Tank gevuld bougie vonkt Carburateur vervuild, laten reinigen Warm start problemen Motor start maar valt stil Benzinetoevoer Tank gevuld Onjuiste afstelling, vervuilde zuigkop of carburateur Defecte ontluchting, breuk benzineleiding, kabelbreuk, ontsteking defect Onvoldoende vermogen Diverse oorzaken Onderdeel Voor gebruik Bedrijfsuren Motorolie Stationairloop onregelmatig Inspecteren/ reinigen Na smering Luchtfilter vervuild, carburateur vervuild, uitlaat verstopt uitlaatpoort vervuild Dagelijks (10 u.) 50 u 200 u Motor uit/ rustpauze ٤ ٤*1 Verversen Onderdelen vastzetten (bouten, moeren) 30 u Inspecteren ٤ Reinigen/ inspecteren ٤ Brandstoftank Brandstof aftappen ٤*3 Gashendel Werking controleren ٤ Stopschakelaar Werking controleren ٤ Stationaire draaisnelheid Inspecteren/ bijstellen ٤ Luchtfilter Reinigen ٤ Bougie Inspecteren ٤ Kanaal luchtkoeling Reinigen/ inspecteren ٤ Inspecteren ٤ Brandstofleiding ٧*2 Vervangen ٤ Brandstoffilter Reinigen/ vervangen Speling tussen luchtinlaatklep en uitlaatklep Bijstellen ٧*2 Olieleiding Inspectie ٧*2 ٧*2 Reviseren motor Carburateur *1 *2 *3 ٤*3 Brandstof aftappen Voer de eerste verversing uit na 20 bedrijfsuren. Laat de inspectie na 200 bedrijfsuren uitvoeren door een erkende onderhoudsmonteur of motor-werkplaats Laat de motor gewoon even doorlopen nadat u de brandstoftank heeft leeg gemaakt om alle brandstof uit de carburateur te verwijderen. 90 OPLOSSEN VAN PROBLEMEN Ga eerst zelf na wat er aan de hand zou kunnen zijn voor u om een reparatie gaat verzoeken. Als u iets abnormaals vindt, voer dan de handelingen beschreven in deze handleiding uit. Knoei niet met onderdelen en demonteer geen onderdelen als dat niet in de handleiding beschreven wordt. Neem contact op met een erkende onderhoudsmonteur of uw dealer voor eventuele reparaties. Probleem De motor start niet Motor valt stil. Motorsnelheid neemt niet toe. De motor stopt niet. Waarschijnlijke oorzaak (storing) Oplossing U heeft de opvoerpomp niet gebruikt. Druk 7 tot 10 keer op de opvoerpomp. Er wordt niet snel genoeg aan de trekstarter getrokken. Trek harder. Niet genoeg brandstof. Ga tanken. Brandstoffilter verstopt. Reinig het brandstoffilter. Brandstofleiding geknakt of kapot. Haal de knik eruit of vervang de brandstofleiding. Slechte brandstof. Als de brandstof oud of slecht is, is de motor moeilijker te starten, Gebruik verse brandstof. (Ververs de brandstof in de tank minstens een keer per maand.) Te grote toevoer van brandstof (verzuipen). Zet de gashendel op halve of hoge snelheid en trek aan de trekstarter totdat de motor start. Als de motor nog steeds niet wil starten, dient u de bougie eruit te draaien, af te drogen en weer in te draaien. Start de motor vervolgens zoals beschreven. Losse bougiedop. Zet de bougiedop weer vast. Vuile bougie. Maak de bougie schoon. Abnormale elektrodenafstand. Stel de afstand tussen de elektroden van de bougie bij. Andere problemen met de bougie. Vervang de bougie. Problemen met de carburateur. Verzoek om inspectie en onderhoud. De trekstarter werkt niet. Verzoek om inspectie en onderhoud. Problemen met de overbrenging. Verzoek om inspectie en onderhoud. Niet genoeg opgewarmd. Laat de motor eerst opwarmen. De chokehendel staat op "CLOSE" (dicht), alhoewel de motor al opgewarmd is. Zet de chokehendel open. Brandstoffilter verstopt. Reinig het brandstoffilter. Luchtfilter verstopt of verontreinigd. Reinig het luchtfilter. Problemen met de carburateur. Verzoek om inspectie en onderhoud. Problemen met de overbrenging. Verzoek om inspectie en onderhoud. De gaskabel zit niet goed vast. Maak de gaskabel op de juiste wijze vast. Stekkertje los. Maak het stekkertje vast. Problemen met het elektrische systeem. Verzoek om inspectie en onderhoud. Laat de motor stationair lopen en zet de chokehendel op CLOSE (dicht). Wanneer de motor niet start na het opwarmen: Als u geen problemen vindt via de bovenstaande controles, dient u het gas ongeveer 1/3 open te zetten en vervolgens de motor te starten. 91