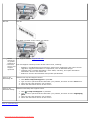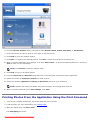
1
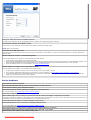
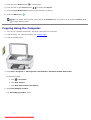
Dell™ Photo P703w All-In-One Printer User's Guide
To order ink or supplies from Dell:
1. Double-click the following icon on your desktop.
2. Visit Dell's website, or order Dell printer supplies by phone.
www.dell.com/supplies
For the best service, ensure you have the Dell printer Service Tag available.
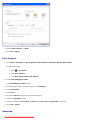
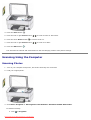
Finding Information
Understanding the Software
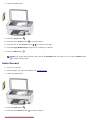
About Your Printer
Configuring Wireless
Understanding the Operator Panel Menus Maintenance
Loading Paper and Originals
Troubleshooting
Printing
Specifications
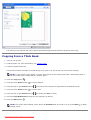
Printing From a Memory Card or USB Key Ordering Printer Supplies
Copying
Appendix
Scanning
Licensing Notice
Notes, Notices, and Cautions
NOTE: A NOTE indicates important information that helps you make better use of your computer.
NOTICE: A NOTICE indicates either potential damage to hardware or loss of data and tells you how to avoid the
problem.
CAUTION: A CAUTION indicates a potential for property damage, personal injury, or death.
Information in this document is subject to change without notice.
© 2008 Dell Inc. All rights reserved.
Reproduction of these materials in any manner whatsoever without the written permission of Dell Inc. is strictly forbidden.
Trademarks used in this text: Dell, the DELL, and Dell Ink Management System are trademarks of Dell Inc.; Intel, Pentium, and Xeon are
registered trademarks of Intel Corporation in the United States and/or other countries; Microsoft, Windows, and Windows Vista are either
trademarks or registered trademarks of Microsoft Corporation in the United States and/or other countries; AMD, Athlon, and Opteron are
trademarks of Advanced Micro Devices, Inc.; Bonjour, the Bonjour logo, and the Bonjour symbol are trademarks of Apple Computer, Inc.;
Bluetooth is a registered trademark owned by Bluetooth SIG, Inc. and used by Dell Inc. under license.
Other trademarks and trade names may be used in this document to refer to either the entities claiming the marks and names or their
products. Dell Inc. disclaims any proprietary interest in trademarks and trade names other than its own.
UNITED STATES GOVERNMENT RESTRICTED RIGHT
This software and documentation are provided with RESTRICTED RIGHTS. Use, duplication or disclosure by the Government is subject to
restrictions as set forth in subparagraph (c)(1)(ii) of the Rights in Technical Data and Computer Software clause at DFARS 252.227-7013 and
in applicable FAR provisions: Dell Inc., One Dell Way, Round Rock, Texas, 78682, USA.
August 2008 Rev. A00
Model P703w
Downloaded from ManualsPrinter.com Manuals
Back to Contents Page
Finding Information
Dell™ Photo P703w All-In-One Printer User's Guide
What are you
looking for?
Find it here
Drivers for Drivers and Utilities CD
my printer
My User's
Guide
Warranty
information
If you purchased your Dell™ computer and printer at the same time, documentation and drivers for
your printer are already installed on your computer. You can use the CD to uninstall/reinstall drivers
or access your documentation. Readme files may be included on your CD to provide last-minute
updates about technical changes to your printer or advanced technical reference material for
experienced users or technicians.
How to set up my Setting Up Your Printer poster
printer
Safety
information
Product Information Guide
Express Service
Code and Service
Tag number
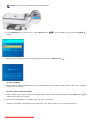
Express Service Code and Service Tag number
This label is located on the printer (see below).
Downloaded from ManualsPrinter.com Manuals
Mac No.
Mac No.
This label is located on the printer (see below).
Latest
Dell Support Website: support.dell.com
drivers for
my printer Answers to
The Dell Support website provides several online tools, including:
technical
service and
Solutions—Troubleshooting hints and tips, articles from technicians, and online courses
support
Upgrades—Upgrade information for components, such as Bluetooth dongle
questions
Customer Care—Contact information, order status, warranty, and repair information
Downloads—Drivers and Utilities CD
Reference—Printer documentation and product specifications
How to use
Windows® XP
Windows XP Help and Support Center
How to use
Windows Vista®
Windows Vista Help and Support Center
1.
2.
3.
4.
Click Start® Help and Support or press F1.
Type a word or phrase that best describes your problem, and then click the arrow icon.
Click the topic that describes your problem.
Follow the instructions shown on the screen.
® Help and Support or press F1.
1. Click
2. Type a word or phrase that best describes your problem, and then click the magnifying
glass.
3. Click the topic that describes your problem.
4. Follow the instructions shown on the screen.
Back to Contents Page
Downloaded from ManualsPrinter.com Manuals
Back to Contents Page
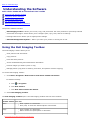
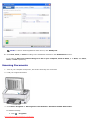
Understanding the Software
Dell™ Photo P703w All-In-One Printer User's Guide
Using the Dell Imaging Toolbox
Configuring Printer Settings
Using Printing Preferences
Dell Ink Management System
Removing and Reinstalling Software
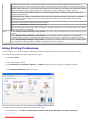
The printer software includes:
Dell Imaging Toolbox- Allows you to scan, copy, and print either the newly scanned or previously scanned
documents and images. It also allows you to configure print, copy, scan, and Wi-Fi settings.
Printing Preferences- Allows you to adjust printer settings.
Dell Ink Management System™- Warns you when your printer is running low on ink.
Using the Dell Imaging Toolbox
The Dell Imaging Toolbox allows you to:
Scan pictures and documents
Copy pictures
Print and share pictures
Access troubleshooting and maintenance information
Preview images you want to print or copy
Manage photos (copy them to folders, print them, and perform creative copying)
To access Dell Imaging Toolbox:
1. Click Start® Programs® Dell Printers® Dell Photo P703w AIO Printer.
In Windows Vista®:
a. Click
® Programs.
b. Click Dell Printers.
c. Click Dell Photo P703w AIO Printer.
2. Select Dell Imaging Toolbox.
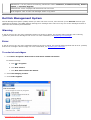
The Dell Imaging Toolbox opens. The Dell Imaging Toolbox has four main sections:
In this section You can
Scan
Scan a photo or a document.
Save, edit, or share the scanned photo or document.
Copy
Copy a photo or a document.
Edit or resize the copied photo or document.
Downloaded from ManualsPrinter.com Manuals
Print
Print one or multiple files.
Settings
Configure print and copy settings for standalone use of your printer.
Configure scan settings for standalone use of your printer.
Configure Wi-Fi settings for standalone use of your printer.
For more information, click Help in the Dell Imaging Toolbox.
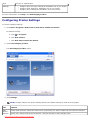
Configuring Printer Settings
To access Configure Settings:
1. Click Start® Programs® Dell Printers® Dell Photo P703w AIO Printer.
In Windows Vista®:
a. Click
® Programs.
b. Click Dell Printers.
c. Click Dell Photo P703w AIO Printer.
2. Select Dell Imaging Toolbox.
The Dell Imaging Toolbox opens.
3. Click Settings.
NOTE: Changes made to the printer settings become the default settings for most of the programs.
Tab
Options
AIO
PrinterGeneral
Printer date and time- Select the check box to synchronize your printer's date and time with the computer.
Power save- Select timeout values between 1 and 60 minutes to enter standby mode.
Downloaded from ManualsPrinter.com Manuals
Printer- Select the check box to hear a beep when you press a button on the Operator Panel.
Name- Your printer has a serial number that is used to construct name for Bluetooth printing. The default
name is DellP703w+XXXX, where XXXX represents the last four digits of the printer's serial number. You can
change this to a more personalized name by entering a new name.
AIO
PrinterPrint
Print quality- Select Draft, Normal, or Best for non-photo paper. Draft produces the fastest print speed,
but the lowest quality. Normal delivers high-quality output and is the default setting. Best produces the
highest quality for all paper.
Print options- Select Borderless, Bordered, 2 to 9 per page, 2 X 2, 3 X 3, and 4 X 4 Poster Layout.
The photo layouts on your printer "snap" to the nearest standard print size based on the combination of
layout and paper size loaded whenever possible. Otherwise the layouts are based on a standard 2x3 aspect
ratio.
Print date on front- Select to print today's date on the front of the picture.
Quantity- Select the number to print.
Print colors as grayscale- Select the check box to print a color photo in black and white. The grayscale
palette contains white, black, and 254 shades of gray. Each color in the image is replaced with a gray that
matches its lightness value.
Automatically apply screen balance to digital camera pictures- Select the check box to adjust the color and
density of digital images for brighter color and truer flesh tones.
Enable printing of tagged pictures- Select the check box to enable the printer to detect tagged photo files
(DPOF) and prompt you for the options.
AIO
PrinterCopy
Output quality- Select Draft, Normal, or Best for non-photo paper output quality.
Copy options- Select Same Size, Fit to Page, Scale Percent, or Photo Layouts.
Size- Set the percentage you want to scale your copies. It is enabled when you select Scale Percent in the
Output.
Layout- Select your preferred layout to print one of more photos on the size paper loaded (see Layouts). It
is enabled when you select Photo Layouts from the Output.
Brightness- Use the slide-bar to increase or decrease the brightness of copies.
Quantity- Sets the default number of copies to the value you select.
Print colors as grayscale- Select the check box to print a color photo in black-and-white. The grayscale
palette contains white, black, and 254 shades of gray. Each color in the image is replaced with a gray that
matches its lightness value.
ScanGeneral
Default item type- Select Documents or Pictures.
Default scan destination- Select Memory card, File, or Application that list by default.
Application List- You can add and remove applications from the destination list for scanned items.
ScanScan as- Select a color. Color sets the printer to scan a color photo in color. Grayscale sets the printer to
Document scan a black and white photo and convert it to gray. Black & White sets the printer to scan in black and
white.
Resolution- You can choose a resolution you want to use for scanning: 75, 150, 300, 600, and 1200 dpi.
File format- Select to save the scanned image as PDF, RTF, JPEG, or TIFF file.
Prompt for filename and location- Select to have Dell Imaging Toolbox prompt you for the filename and
location to save the file.
Automatically save- Select to automatically save scans to the name and location you specify. The default
filename base is Scan appended with a three digit integer that increments sequentially as photos are
scanned and saved.
Base name- Edit field for entering your base filename.
Location- Click Browse for choosing a new location.
Save into new folder with current date as file name- Select the check box to save scanned files to the base
name and location you specified.
ScanPicture
Scan as- Select a color. Color sets the printer to scan a color photo in color. Grayscale sets the printer to
scan a black and white photo and convert it to gray. Black & White sets the printer to scan in black and
white.
Resolution- You can choose a resolution you want to use for scanning: 75, 150, 300, 600, and 1200 dpi.
File format- Select to save the scanned image as PDF, RTF, JPEG, or TIFF file.
Downloaded from ManualsPrinter.com Manuals
Automatically detect picture- Select the check box so that your printer automatically detects how you
arrange the pictures on the scanner glass. When it is unchecked, the entire glass is scanned as one picture.
Quality- When scanning to a file and the selected file format is JPEG, you can select the compression quality
of the saved file. A higher quality means the compression is lower, resulting in a larger file size.
Prompt for filename and location- Select to have Dell Imaging Toolbox prompt you for the filename and
location to save the file.
Automatically save- Select to automatically save scans to the name and location you specify. The default
filename base is Scan appended with a three digit integer that increments sequentially as photos are
scanned and saved.
Base name- Edit field for entering your base filename.
Location- Click Browse for choosing a new location.
Save into new folder with current date as file name- Select the check box to save scanned files to the base
name and location you specified.
Wi-Fi
Select Create wireless settings of my printer if you have not yet configured the wireless settings of your
printer.
Select Modify wireless settings of my printer if your printer's wireless settings have already been
configured but would like to change the wireless settings. For example, connecting to a different network.
Select Keep wireless settings of my printer if your printer's wireless settings are already configured and
you would like to add the printer to another computer in the same network.
Using Printing Preferences
You can change your printer settings in Printing Preferences depending on the type of project you want to create.
To access Printing Preferences when a document is open:
1. Click File® Print.
The Print dialog box opens.
2. Click Preferences, Properties, Options, or Setup (depending on the program or operating system).
The Printing Preferences dialog box opens.
To access Printing Preferences when a document is not open:
1. In Windows XP, click Start® Control Panel® Printers and Other Hardware® Printers and Faxes.
Downloaded from ManualsPrinter.com Manuals
In Windows Vista®:
a. Click
® Control Panel.
b. Click Hardware and Sound.
c. Click Printers.
2. Right-click the printer icon, and then select Printing Preferences.
NOTE: Changes made to the printer settings from the Printers folder become the default settings for most
programs.
Tab
Options
General
Display preview before printing- Select the check box if you want to see a preview.
Print quality- Select Draft, Normal, or Best depending on your desired output quality. Draft is the fastest
option, but the lowest quality. Normal delivers high-quality output and is the default setting. Best produces
the highest quality for all paper eliminates the banding (striping) effect that sometimes occurs in solid areas.
Note: Dell picture quality is automatically selected when photo paper is selected.
Paper size- Select the paper size of your paper. If you want to customize the paper, click Custom....
Borderless- Select the check box if you want to print borderless photos.
Orientation- Select how the document is arranged on the printed page. You can print using portrait or
landscape orientation.
Copies- Customize how the printer prints several copies of a single print job
Print Last Page First- Select the check box if you want to print the last page first and end with the first page.
Collate pages- Select the check box if you want to collate the pages.
The checkbox is enabled when the value in the spin box is greater than one.
My preferences- Select a set option to load the saved settings for the selected option into each of the
printing preference fields.
Save Current Preferences- Click to save the current settings.
Delete Current Preferences- Deletes the selected preference.
Estimated Ink Levels- Click black and color icons to display the ink levels box. The level shown for the color
ink cartridge is the current lowest level for the five colors within the cartridge.
Note: A warning icon is displayed over the ink level icon when a low ink condition exists. A critical icon is
displayed over the low level icon when an ink cartridge needs to be replaced.
Order Supplies- Click to buy supplies from Dell online.
Layout
Layout- Select Normal, Multi-page, Poster, or Booklet. Normal is the default layout where each
document page is printed on a sheet of paper. If multi-page is selected, multiple pages are printed on a
sheet of paper. When you select Poster, a picture is divided into segments and printed on individual pages.
Booklet allows you to print a document as a small booklet by printing two pages per sheet.
Scale- Select By to enable the spin box to choose a value between 10 and 500 percent. Select To fit to
enable drop-down list that contains all supported paper sizes.
Print mirror image- Select the check box to flip the image for iron-on printing.
Two-sides printing- Select No to print on one side of the paper only. Select Manual (Instructions provided) to
perform manual duplexing where you print on one side, rotate the printed pages 180 degrees, and place
them back in the main input tray to print on the other side.
Advanced Color- Select how the document is to be printed. You can print in color or black and white.
Watermark- Select the watermark from the drop-down list. Custom... enables you to select predefined
watermarks or create and edit your own watermarks. The option Print only on first page places the
watermark only on the first page of the document.
Paper Type- Select the paper type from the drop-down list.
Color Space- Select to determine a color range: sRGB or Adobe RGB. sRGB is a default color space for the
internet. Adobe RGB encompasses most of the colors achievable on your printer by using RGB primary colors.
Downloaded from ManualsPrinter.com Manuals
Maintenance- You can perform the following maintenance tasks: Calibration, Printhead Cleaning, Disable
Update, or Firmware Upgrade.
Estimated Ink Levels- Displays both black and color ink levels.
Order Supplies- Click to order ink cartridges online or by phone.
Dell Ink Management System
Dell Ink Management System (DIMS) notifies you when ink levels run low, and connects you to Dell.com and the right
replacement cartridge. The DIMS displays warning/error messages if the ink level in any one of the cartridges touches or
falls below the minimum prescribed limit.
Warning
If the ink level in any one of the cartridges touches 15 percent or below, the printing status expands with a warning
(yellow bar) that the ink cartridge is low on ink. For more information, see Replacing Ink Cartridges.
Error
If the ink level in any one of the cartridges touches 5 percent or below, the printing status expands with an error (red bar)
that the ink cartridge is almost empty. For more information, see Replacing Ink Cartridges.
To order ink cartridges:
1. Click Start® Programs® Dell Printers® Dell Photo P703w AIO Printer.
In Windows Vista®:
a. Click
® Programs.
b. Click Dell Printers.
c. Click Dell Photo P703w AIO Printer.
2. Select Dell Imaging Toolbox.
3. Click Order Supplies.
Downloaded from ManualsPrinter.com Manuals
4. If you want to order online, click Order Online. Follow the instructions in the Dell website.
or
If you want to order by phone, select language to display the phone number you can contact to place an order.
Alternatively, you can order ink cartridges through the Status Monitor or in the Printing Status window by clicking Order
Supplies and following the instructions in step 4.
Removing and Reinstalling Software
If your printer does not function properly, or communication error messages appear when using your printer, you can
remove and reinstall the printer software.
1. Click Start® Programs® Dell Printers® Dell Photo P703w AIO Printer.
In Windows Vista®:
a. Click
® Programs.
b. Click Dell Printers.
c. Click Dell Photo P703w AIO Printer.
2. Click Uninstall Dell Photo P703w AIO Printer.
3. Follow the instructions on the screen.
4. Restart your computer.
5. Insert the Drivers and Utilities CD, and then follow the instructions on the screen.
If the installation screen does not appear:
a. In Windows XP, click Start® My Computer.
In Windows Vista®, click
® Computer.
b. Double-click the CD/DVD drive icon, and then double-click setup.exe.
c. When the printer software installation screen appears, click Personal Installation or Network
Installation.
d. Follow the instructions on your screen to complete the installation.
Back to Contents Page
Downloaded from ManualsPrinter.com Manuals
Back to Contents Page
About Your Printer
Dell™ Photo P703w All-In-One Printer User's Guide
Understanding the Printer Parts
Understanding the Operator Panel
You can use your printer to perform a variety of tasks. Your printer can perform tasks with or without a connection to a
computer.
If the printer is connected to a computer, you can use either the printer operator panel or the printer software to
produce quality documents.
You do not need to connect your printer to a computer to print, copy, and scan. Printing without computer is
through card slot or PictBridge port only.
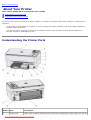
Understanding the Printer Parts
Number Part
Description
1
Upper cover of printer that holds your document or photograph in place while you scan it.
Scanner lid
Downloaded from ManualsPrinter.com Manuals
2
LCD display
Displays photos, messages, status, and menus.
3
Operator panel
Panel on the printer you use to control copying, scanning, and printing.
4
Wi-Fi LED
Indicates Wi-Fi setup status. Lights up blue once Wi-Fi setup is successful.
5
Scanner base unit
Unit you lift to gain access to the ink cartridges.
6
Memory card
indicator
Indicates whether a memory card is inserted in the memory card slot.
7
Memory card slots
Slots into which you insert a memory card containing digital pictures.
8
PictBridge
connector
The connector you use to connect your PictBridge-enabled digital camera or a USB key to
your printer.
9
Photo tray light
Lights up when the photo tray is engaged.
10
Photo tray
Tray that holds the photo paper.
11
Paper-length
guide
Guide that helps the paper feed into the printer properly.
12
Output tray
extender
Extender that extends the paper output tray.
13
Paper-width guide
Guide that helps the paper feed into the printer properly.
14
Paper output tray
Tray that holds the paper output by the printer.
15
Rear access door
Part that you have to open to clear paper jams.
16
Power connector
Connector into which you plug the power cable.
17
USB connector
Connector into which you plug in the USB cable. The other end of the USB cable plugs
into your computer.
Understanding the Operator Panel
Number Use
the
To
1
LCD display
Display photos, messages, status, and menus.
2
Error
LED
Flashes amber when printer is in error state.
Downloaded from ManualsPrinter.com Manuals
3
Zoom
in
button
When in Photo Preview mode, magnifies the photo to 1.25X. Subsequent presses
zoom in 0.25X increments to a maximum of 5X. When in thumbnail view, displays
the current photo in preview mode.
4
Copy
button
Press to enter Copy mode. Lights up when in Copy mode.
5
Scan
button
Press to enter Scan mode. Lights up when in Scan mode.
6
Start
button
Start copy, print, or scan operation.
7
Power
button
Turn your printer on or off.
8
Power
light
Power light flashes white when starting up.
9
Menu
button
Display the main menu screen.
10
Cancel
button
Cancel the current operation.
11
Select
button
Used for selection in conjunction with the arrow button.
12
Arrow
buttons
Used to navigate Up
, Down
, Left
, and Right
.
13
Photo
button
Press to enter Photo mode. Lights up when in Photo mode.
14
Rotate
button
Rotate picture on the display, clockwise, 90 degrees.
15
Zoom
out
button
When the printer is in Photo Preview mode, pressing enters thumbnail view.
When a photo has been magnified with the Zoom in button, pressing the Zoom out
button decreases the magnification in 0.25X increments.
Back to Contents Page
Downloaded from ManualsPrinter.com Manuals
Back to Contents Page
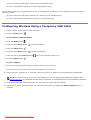
Configuring Wireless
Dell™ Photo P703w All-In-One Printer User's Guide
Minimum Requirements for Setup
Wireless Network Settings
Wireless Encryption
Configuring Wireless Using a Temporary USB Cable
Configuring Wireless Using Wi-Fi Config Utility
Configuring Wireless using Wi-Fi Protected Setup (WPS) – Advanced Users Only
Minimum Requirements for Setup
Dell™ Photo P703w AIO Printer
An existing wireless network
Drivers and Utilities CD that shipped with your printer
A computer running one of the following operating systems:
Windows Vista®
Windows® XP
NOTE: Install the wireless access point or router in a central location. If you have only one wireless client, installing
the base station near the client is recommended for the best Wi-Fi performance.
Wireless Network Settings
Some wireless network settings may be needed to configure the adapter that has been installed in the printer. Here are
some of the settings that you may need:
Network Name, also known as SSID (Service Set ID)
BSS (Basic Service Set) Type (the type of wireless network you use - Ad-Hoc or Infrastructure)
Wireless Channel Number
Network Authentication and encryption type
Security Key(s)
Wireless Encryption
The following security types are supported:
No security
WEP with either 64-bit or 128-bit key
WPA with either 128-bit TKIP encryption engine, or 128-bit AES-CCMP encryption engine
A WPA (Wi-Fi Protected Access) pre-shared key is like a password and must meet the following criteria:
Downloaded from ManualsPrinter.com Manuals
If you are using Hex characters, valid keys are 64 characters long.
If you are using ASCII, valid keys are at least 8 characters long.
The wireless network may use anywhere from one to four WEP keys. A WEP key is like a password and must meet the
following criteria:
If you are using Hex characters, valid keys are either 10 or 26 characters long.
If you are using ASCII, valid keys are either 5 or 13 characters long.
Configuring Wireless Using a Temporary USB Cable
1. Plug the printer power cable into the wall outlet.
2. Press the Power button
.
At your printer's Operator Panel:
3. Press the Menu button
.
4. Press the down Arrow button
5. Press the Select button
to scroll to Network.
.
6. Press the down Arrow button
to scroll to WiFi Radio.
7. Press the left or right Arrow button
8. Press the Select button
to set the parameter value to on.
.
At your computer:
9. If you are using your printer with an existing computer: Go to step 10.
If you are using your printer with a new Dell computer: Go to step 11.
10. Ensure that your computer is on, and then insert the Drivers and Utilities CD. The CD launches automatically.
NOTE: If you do not have your Drivers and Utilities CD, you can download the appropriate software from
support.dell.com. The Windows firewall settings might have to be disabled before you download the software.
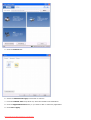
11. Connect the USB cable between the port on the back of the printer and the computer.
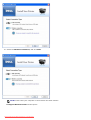
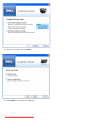
12. Follow the on-screen instructions until you reach the below screen. By default the USB connection option is
selected.
Downloaded from ManualsPrinter.com Manuals
13. Select the Wireless connection, and click Next.
NOTE: Ensure that your computer is connected to the same network.
Configure Wireless Printer window opens.
Downloaded from ManualsPrinter.com Manuals
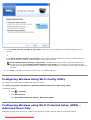
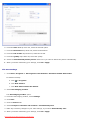
14. Select Create wireless settings of my printer if you have not yet configured the wireless settings of your
printer.
or
Select Keep wireless settings of my printer if your printer's wireless settings are already configured and you
would like to add the printer to another computer in the same network.
NOTE: Modify wireless settings of my printer is enabled only if your printer is already connected to a
wireless network. Select Modify wireless settings of my printer if your printer's wireless settings have
already been configured but would like to change the wireless settings. For example, connecting to a different
network.
15. Click Next, and follow instructions on the screen to complete the setup.
Configuring Wireless Using Wi-Fi Config Utility
For configuring wireless after installing Dell Imaging Toolbox:
Click Start® Programs® Dell Printers® Dell Photo P703w AIO Printer® WiFi Config Utility.
In Windows Vista®:
a. Click
® Programs.
b. Click Dell Printers.
c. Click Dell Photo P703w AIO Printer® WiFi Config Utility.
Configuring Wireless using Wi-Fi Protected Setup (WPS) –
Advanced Users Only
Follow these instructions carefully to configure your printer's wireless settings using Wi-Fi Protected Setup.
Downloaded from ManualsPrinter.com Manuals
WPS is available only if you are using a WPS-enabled router. If you are not sure if your router is WPS enabled, check the
router for the WPS logo.
NOTE: Wireless configuration using WPS is only recommended for advanced users.
Before configuring your printer using WPS, you must know the router's IP address. If you are not sure of the router's IP
address, you can configure wireless using a temporary USB cable. For more information, see Configuring Wireless Using a
Temporary USB Cable.
NOTE: Ensure that your computer is connected to the wireless network.
At your computer:
1. Using an Internet browser type your router's IP address and press the Enter key. Your router's web page opens.
NOTE: You may be prompted to enter your username and password. If you are not sure of the username and
password, contact your router manufacturer's helpline or your Internet service provider.
2. On your router's web page, navigate to the WPS section.
NOTE: The location of this page may change depending on the manufacturer of the router you are using.
At your printer's Operator Panel:
3. Press the Menu button
.
4. Press the down Arrow button
to scroll to Network, then press the Select button
5. Press the down Arrow button
to scroll to WiFi Radio and ensure that it is turned On.
Downloaded from ManualsPrinter.com Manuals
.
NOTE: The blue Wi-Fi indicator LED starts flashing blue.
6. In the Network menu, press the up or down Arrow button
button.
to scroll to WPS Pin, then press the Select
7. Note down the PIN shown on the LCD display. Do NOT press the Select button
.
At your computer:
8. Enter the PIN into the PIN textbox on your router's WPS page and initiate the WPS search on the router. Complete
step 9 within 2 minutes.
At your printer's Operator Panel:
9. Return to the printer within 2 minutes of initiating WPS search on the web page and press the Select button
initiate the process at the printer.
10. Wait for the configuration to complete. This may take few minutes.
If setup is successful, the following screen appears on your printer's LCD screen. Proceed with step 11.
Downloaded from ManualsPrinter.com Manuals
to
If setup is unsuccessful or times out, wait for a few minutes and repeat steps 5-10.
NOTE: Your printer's internal wireless antenna is located on the right side of the printer close to the operator
panel. Move the printer closer to the router with the printer's operator panel closer to the router for a better
wireless signal.
11. Wait for the Wi-Fi LED on the printer to stop flashing and turn solid blue. This may take few minutes.
12. Press the up or down Arrow button
to scroll to Status, then press the Select button
.
NOTE: Ensure that the printer shows the correct SSID and that it has been assigned an IP address (i.e. NOT
0.0.0.0). If the printer IP address has not been assigned restart the printer and re-check. If the IP address
still is not assigned, repeat from step 5.
At your computer:
13. Return to your computer and close the router's web page. Proceed from step 14 to install the printer drivers on
your computer.
14. Insert the Drivers and Utilities CD if you have not already done so.
NOTE: If you have already installed your printer on your computer, launch the installed Wi-Fi Config Utility
program. Skip to step 16.
NOTE: If you do not have your Drivers and Utilities CD, you can download the appropriate software from
support.dell.com.
15. Follow the on-screen instructions until you reach the below screen. By default the USB connection option is
selected.
Downloaded from ManualsPrinter.com Manuals
16. Select the Wireless connection, and click Next.
NOTE: Ensure that your computer is connected to the same network.
17. Configure Wireless Printer window opens. Select Keep wireless settings of my printer, and click Next.
Downloaded from ManualsPrinter.com Manuals
18. Select your printer, and click Next.
19. Click Finish to complete the installation.
Downloaded from ManualsPrinter.com Manuals
Back to Contents Page
Downloaded from ManualsPrinter.com Manuals
Back to Contents Page
Understanding the Operator Panel Menus
Dell™ Photo P703w All-In-One Printer User's Guide
Copy Mode
Photo Mode
Scan Mode
Copy Mode
To view or change the Copy Mode menu:
1. Press the Copy button
Copy Menu
item
Quantity
on the printer's operator panel.
Settings
to scroll to Quantity.
1. From the Copy Menu, press the down Arrow button
to change the number of copies (1-99).
2. Press the left or right Arrow button
3. Press the Select button
to set and continue setting options, or Start button
.
The default is one copy.
Color
to scroll to Color.
1. From the Copy Menu, press the down Arrow button
2. Press the left or right Arrow button
to change the copy color (Black and White/Color).
3. Press the Select button
Quality
to set and continue setting options, or Start button
1. From the Copy Menu, press the down Arrow button
2. Press the left or right Arrow button
3. Press the Select button
Output
to scroll to Quality.
to change the copy quality (Draft/Normal/Best).
to set and continue setting options, or Start button
.
1. From the Copy Menu, press the down Arrow button
2. Press the left or right Arrow button
3. Press the Select button
Size
.
to scroll to Output.
to change the copy output (Scale Percent/Photo layouts/Same size/ Fit to Page).
to set and continue setting options, or Start button
.
NOTE: You can change the Size if you have selected Scale percent or Photo layouts as an Output.
Scale Percent:
to scroll to Size.
1. From the Copy Menu, press the down Arrow button
2. Press the left or right Arrow button
to scroll to Scale Percent.
3. Press the left or right Arrow button
to change the Scale percent (10-500).
4. Press the Select button
to set and continue setting options, or Start button
.
Photo layouts:
to scroll to Size.
1. From the Copy Menu, press the down Arrow button
to scroll to Photo layouts.
2. Press the left or right Arrow button
3. Press the left or right Arrow button
to change the Photo layout (Borderless/Bordered/2 per page/3 per page/4 per page/9
per page/2x2 poster/3x3 poster/4x4 poster).
4. Press the Select button
Brightness
to set and continue setting options, or Start button
1. From the Copy Menu, press the down Arrow button
2. Press the left or right Arrow button
3. Press the Select button
Preview
to scroll to Brightness.
to select darken or lighten.
to set and continue setting options, or Start button
.
1. From the Copy Menu, press the down Arrow button
2. Press the left or right Arrow button
3. Press the Select button
Save Copy
Settings
.
to scroll to Preview.
to enable or disable Preview.
to set and continue setting options, or Start button
.
to scroll to Save Settings.
1. From the Copy Menu, press the down Arrow button
2. Press the left or right Arrow button
to save copy settings to Yes or No.
Photo Mode
To view or change the Photo Mode menu settings:
1. Insert a memory card. The printer automatically switches to Photo mode after the card is read.
NOTICE: Do not attempt to remove a memory card while it is being accessed. Doing so can damage files on the card. You can safely remove a card only
when the status light next to the slots is not blinking.
Photo Menu
Item
Settings
Downloaded from ManualsPrinter.com Manuals
Layout
1. From the Layout, press the left or right Arrow button
Index
2x2 Poster
3x3 Poster
4x4 Poster
Borderless (default)
Bordered
2 per Page
3 per Page
4 per Page
9 per Page
2. Press the Select button
Quantity
to scroll to Photo layout:
to set and continue setting options, or Start button
.
1. From the Photo Menu, press the down Arrow button
2. Press the left or right Arrow button
3. Press the Select button
Color
to scroll to Quantity.
to change the number (1-99).
to set and continue setting options, or Start button
1. From the Photo Menu, press the down Arrow button
2. Press the left or right Arrow button
3. Press the Select button
Quality
1. From the Photo Menu, press the down Arrow button
3. Press the Select button
Save settings
to scroll to Color.
to change the color (Black and White/Color).
to set and continue setting options, or Start button
2. Press the left or right Arrow button
.
.
to scroll to Quality.
to change the photo quality (Draft/Normal/Best).
to set and continue setting options, or Start button
.
1. From the Photo Menu, press the down Arrow button
2. Press the left or right Arrow button
to scroll to Save Settings.
to set save photo settings to Yes or No.
Scan Mode
To view or change the Scan Mode menu settings:
1. Press the Scan button
Scan Menu
Item
Scan what
on the printer's operator panel.
Settings
to scroll to Scan what.
1. From the Scan Menu, press the down Arrow button
2. Press the left or right Arrow button
to select Document/Photo.
3. Press the Select button
Scan to
to set and continue setting options, or Start button
1. From the Scan Menu, press the down Arrow button
2. Press the left or right Arrow button
3. Press the Select button
Scan destination
to scroll to Scan to.
to select PC-USB/Memory Card/Wifi-host.
to set and continue setting options, or Start button
.
1. From the Scan Menu, press the down Arrow button
2. Press the left or right Arrow button
3. Press the Select button
Save settings
.
to scroll to Scan destination.
to select the File.
to set and continue setting options, or Start button
1. From the Scan Menu, press the down Arrow button
2. Press the left or right Arrow button
Back to Contents Page
Downloaded from ManualsPrinter.com Manuals
to scroll to Save Settings.
to set save scan settings to Yes or No.
.
Back to Contents Page
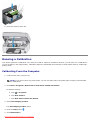
Maintenance
Dell™ Photo P703w All-In-One Printer User's Guide
Cleaning the Scanner Glass
Cleaning the Scanner Lid
Formatting a Memory Card
Printing a Diagnostic Sheet
Checking Ink Levels
Replacing Ink Cartridges
Running a Calibration
Cleaning the Printhead
Replacing the Printhead
Disabling the Upgrade
Upgrading the Firmware
Dell™ ink cartridges are available through Dell. You can order more ink online at www.dell.com/supplies or by phone.
It is recommended that you use Dell ink cartridges for your printer. Dell does not provide warranty coverage for problems
caused by using accessories, parts, or components not supplied by Dell.
Cleaning the Scanner Glass
1. Turn off the printer and unplug it from the wall outlet.
2. Lift the scanner lid.
3. Clean the glass with a soft cloth or sponge slightly moistened with a nonabrasive glass cleaner.
NOTICE: Do not use abrasives, acetone, benzene, or carbon tetrachloride on the glass, since they can damage it.
Do not place or spray liquid directly on the glass. The liquid might seep under the glass and damage the device.
4. Dry the glass with a lint free cloth.
Cleaning the Scanner Lid
1. Turn off the printer and unplug it from the wall outlet.
2. Lift the scanner lid.
3. Clean the lid underside with a soft cloth or sponge slightly moistened with a mild soap and warm water.
4. Wipe the underside gently to loosen the debris.
5. Dry the underside with a chamois or soft cloth.
NOTICE: Do not use paper-based wipes, as these might scratch the underside.
6. If further cleaning is needed, repeat the previous steps using isopropyl (rubbing) alcohol and wipe the underside
thoroughly with a damp cloth to remove any residual alcohol.
Downloaded from ManualsPrinter.com Manuals
Formatting a Memory Card
Formatting erases all the data on a memory card.
1. Insert a memory card into the appropriate slot.
2. Press the Menu button
.
3. Press the down Arrow button
4. Press the Select button
5. Press the Start button
to scroll to Format Memory Card.
.
.
The formatting of the memory card begins.
Printing a Diagnostic Sheet
The Diagnostic Page contains information about your printer that can be useful when contacting Dell support.
1. Press the Menu button
.
2. Press the down Arrow button
3. Press the Select button
4. Press the Start button
to scroll to Print Diagnostic Sheet.
.
.
Printing of the diagnostic sheet begins.
Checking Ink Levels
Your printer uses separate black and color ink cartridges. You can check the ink levels to determine how soon you might
need to replace an ink cartridge. The ink level supply screen shows the amount of ink remaining in the ink tanks.
1. Press the Menu button
.
2. Press the down Arrow button
3. Press the Select button
to scroll to Ink Levels.
.
The Ink Levels screen shows ink levels in a vertical gauge format with one gauge for the Black Ink cartridge and another
for the Color Ink cartridge.
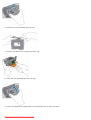
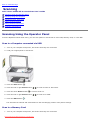
Replacing Ink Cartridges
A Low ink warning message is displayed when one of the ink levels drops below 15 percent.
NOTE: For the best quality prints, store ink cartridges in a location where the temperature does not exceed 85° F
(30° C).
Downloaded from ManualsPrinter.com Manuals
NOTICE: Use genuine Dell ink cartridges to ensure the best results and avoid printhead damage.
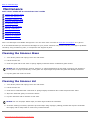
1. Turn on your printer.
2. Lift the scanner base unit from the front.
The printhead moves to a center position. The ink tanks are located in the printhead.
Number Part
1
Printhead
2
Color ink cartridge
3
Black ink cartridge
3. Wait until the printhead is idle and silent, then pinch the pinch latch on the old ink cartridge with your thumb and
forefinger.
4. Lift it out of the printhead.
Downloaded from ManualsPrinter.com Manuals
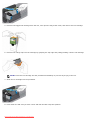
5. Remove the bagged ink cartridge from the box, tear open the bag at the notch, and remove the ink cartridge.
6. Remove the orange cap from the cartridge by grasping the top edge and pulling/rotating it off the ink cartridge.
NOTE: Insert the ink cartridge into the printhead immediately to prevent any drying of the ink.
7. Slide the ink cartridge into the printhead.
8. Press down the tab until you hear a click and feel the latch snap into position.
Downloaded from ManualsPrinter.com Manuals
9. Close the scanner base unit.
Running a Calibration
Your printer performs a calibration every time you install or replace a printhead. However, you can also run a calibration if
you see changes in the image quality. Calibration aligns the printheads and performs a nozzle health check to enable highquality prints.
Calibrating From the Computer
1. Load the main tray or photo tray.
NOTE: If you do not have any photo paper, you can use plain paper, but photo paper is highly recommended
for calibrations.
2. Click Start® Programs® Dell Printers® Dell Photo P703w AIO Printer.
In Windows Vista®:
a. Click
® Programs.
b. Click Dell Printers.
c. Click Dell Photo P703w AIO Printer.
3. Select Dell Imaging Toolbox.
The Dell Imaging Toolbox opens.
4. Click the Help button
.
5. Click Maintenance.
Downloaded from ManualsPrinter.com Manuals
6. Click Calibration.
7. Follow the instructions on the computer for calibration print to calibrate the printer.
Calibrating From the Operator Panel
1. Load the main tray or photo tray.
NOTE: If you do not have any photo paper, you can use plain paper, but photo paper is highly recommended
for calibrations.
2. Press the Menu button
.
3. Press the down Arrow button
to scroll to Calibrate Printer, and then press the Select button
A new screen appears with Print Calibration Page selected.
4. Press the Start button
.
5. Follow the instructions on the LCD display to complete the calibration.
Cleaning the Printhead
If you notice a degradation in the quality of prints, the printhead may need cleaning.
Cleaning the Printhead From the Computer
1. Click Start® Programs® Dell Printers® Dell Photo P703w AIO Printer.
In Windows Vista®:
a. Click
® Programs.
b. Click Dell Printers.
c. Click Dell Photo P703w AIO Printer.
2. Select Dell Imaging Toolbox.
The Dell Imaging Toolbox opens.
3. Click the Help button
.
4. Click Maintenance.
5. Click Printhead Cleaning.
Cleaning the Printhead From the Operator Panel
1. Press the Menu button
.
2. Press the down Arrow button
to scroll to Clean Printhead.
Downloaded from ManualsPrinter.com Manuals
.
3. Press the Select button
to go to Clean Printhead menu.
4. Press the Select button
to perform a Basic Clean.
or
Press the down Arrow button
to select Deep Clean and press the Select button
to perform a Deep Clean.
Replacing the Printhead
NOTE: The printhead need not be changed normally, during the lifespan of the printer.
1. Turn on your printer.
2. Lift the scanner base unit from the front.
The printhead moves to a center position. Wait until the printhead is idle and silent.
3. Remove the ink cartridges. For more information, see the steps 3 and 4 under the section Replacing Ink Cartridges.
4. Lift the printhead latch to release the printhead from the carriage.
5. Remove the old printhead from the carriage.
Downloaded from ManualsPrinter.com Manuals
6. Remove the new printhead from its bag.
7. Remove and discard the orange protective cap.
8. Place the new printhead into the carriage.
9. Push firmly against the target label on the printhead until it clicks into place.
Downloaded from ManualsPrinter.com Manuals
10. Reinstall the ink cartridges into the printhead. For more information, see the steps 7 and 8 under the section
Replacing Ink Cartridges.
11. Close the scanner base unit.
Disabling the Upgrade
To enable or disable the Dell Imaging Toolbox from automatically checking for software updates each time it starts:
1. Click Start® Programs® Dell Printers® Dell Photo P703w AIO Printer.
In Windows Vista®:
a. Click
® Programs.
b. Click Dell Printers.
c. Click Dell Photo P703w AIO Printer.
2. Select Dell Imaging Toolbox.
The Dell Imaging Toolbox opens.
3. Click the Help button
.
4. Click Maintenance.
5. Click Disable update.
Upgrading the Firmware
Downloaded from ManualsPrinter.com Manuals
You can update the firmware in the printer with the most recent available updates from the Dell Imaging Toolbox
software. This requires an internet connection.
1. Click Start®Programs® Dell Printers® Dell Photo P703w AIO Printer.
In Windows Vista®:
a. Click
® Programs.
b. Click Dell Printers.
c. Click Dell Photo P703w AIO Printer.
2. Select Dell Imaging Toolbox.
The Dell Imaging Toolbox opens.
3. Click the Help button
.
4. Click Maintenance.
5. Click Firmware Upgrade.
NOTE: Do not turn off printer during the firmware upgrade as it damages the printer.
Back to Contents Page
Downloaded from ManualsPrinter.com Manuals
Back to Contents Page
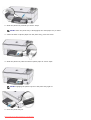
Loading Paper and Originals
Dell™ Photo P703w All-In-One Printer User's Guide
Loading Paper
Loading Photo Paper
Loading Envelopes
Loading Labels
Loading Original Documents
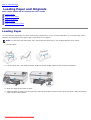
Loading Paper
You can load the main paper tray with various types of paper from 3 to 8.5 inches wide and 5 to 14 inches long, with a
capacity of 100 sheets of 20 lb plain paper (clean stack of new paper).
NOTE: To print from the main paper tray, ensure that the photo tray is not engaged and the lid is closed.
1. Fan the paper.
2. Lift the output tray, and slide the paper-width and paper-length guides to their outermost positions.
3. Align the edges of the stack of paper.
4. Insert the stack of paper into the input tray with the short edge forward and the print side down. Slide the stack of
paper forward until it stops.
Downloaded from ManualsPrinter.com Manuals
5. Slide the paper-width and paper-length guides inward until they stop at the edges of the paper.
6. Lower the output tray.
7. Pull the output tray extender out.
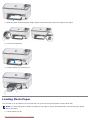
Loading Photo Paper
You can load up to 20 sheets of 10 mil thick 4x6 inch (101x150 mm) photo paper into the photo tray.
NOTE: To avoid fingerprints, handle the paper by the edges or by the perforated tabs. Avoid touching the glossy
side of the paper.
1. Lift the photo tray lid.
Downloaded from ManualsPrinter.com Manuals
2. Slide the photo tray towards you until it stops.
NOTE: When the photo tray is disengaged, the main paper tray is active.
3. Insert the stack of photo paper into the photo tray, print side down.
4. Slide the photo tray with the stack of photo paper in until it stops.
NOTE: Engaging the photo tray turns the photo tray light on.
5. Close the photo tray lid.
Downloaded from ManualsPrinter.com Manuals
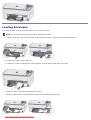
Loading Envelopes
You can load plain envelopes into the main input tray of your printer.
NOTE: Do not use envelopes with cutouts or cellophane windows.
1. Lift the output tray, and slide the paper-width and paper-length guides to their outermost positions.
2. Remove any paper in the input tray.
3. Insert one or more envelopes face down with the envelope flaps closed and to the right.
4. Slide the stack of envelopes forward until it stops.
5. Slide the paper guides inward against the stack of envelopes until they stop.
Downloaded from ManualsPrinter.com Manuals
6. Close the output tray.
Loading Labels
Use letter or A4 (designed for use with ink jet printers) label sheets.
1. Ensure that none of the pages are sticking together.
2. Place a stack of label sheets on top of standard paper in the input tray, label side down.
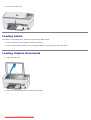
Loading Original Documents
1. Open the top cover.
2. Place the document face down on the scanner glass.
Downloaded from ManualsPrinter.com Manuals
3. Close the top cover.
Back to Contents Page
Downloaded from ManualsPrinter.com Manuals
Back to Contents Page
Troubleshooting
Dell™ Photo P703w All-In-One Printer User's Guide
Setup Problems
General Problems
Improving Print Quality
General Guidelines for Selecting or Loading Print Media
Avoiding Jams and Misfeeds
Error Messages
Setup Problems
Computer Problems
Correct communication problems between the printer and the computer.
Remove the USB cable from your printer and your computer. Reconnect the USB cable.
Turn off the printer. Unplug the printer power cable from the electrical outlet. Reconnect the printer power cable into the electrical outlet, and turn on
the printer.
Restart your computer.
Verify your printer is compatible with the computer.
The printer supports Windows XP Professional x32, Windows XP Professional x64, Windows Vista® x32, and Windows Vista® 64.
Ensure that your printer and computer are turned on.
If the software installation screen does not appear automatically, install the software manually.
1. Insert the Drivers and Utilities CD.
2. In Windows XP, click Start® My Computer.
In Windows Vista®, click
® Computer.
3. Double-click the CD/DVD drive icon, and then double-click setup.exe.
4. When the printer software installation screen appears, click Personal Installation or Network Installation.
5. Follow the instructions on your screen to complete the installation.
Determine if the printer software is installed.
In Windows XP, click Start® Programs or All Programs® Dell Printers.
In Windows Vista®:
® Programs.
1. Click
2. Click Dell Printers.
If the printer does not appear in the list of printers, the printer software is not installed. Install the printer software. For more information, see Removing and
Reinstalling Software.
Set your printer as the default printer.
1. In Windows XP, click Start® Control Panel® Printers and Other Hardware® Printers and Faxes.
In Windows Vista®:
a. Click
® Control Panel.
b. Click Hardware and Sound.
c. Click Printers.
2. Right-click Dell Photo P703w AIO.
3. Select Set as Default Printer.
Downloaded from ManualsPrinter.com Manuals
Printer does not print and print jobs are in the print queue.
Check for multiple instances of the printer installed on your computer.
1. In Windows XP, click Start® Control Panel® Printers and Other Hardware® Printers and Faxes.
In Windows Vista®:
a. Click
® Control Panel.
b. Click Hardware and Sound.
c. Click Printers.
2.
3.
4.
5.
Check for multiple instances for your printer.
Print a job to each of these print objects to see which printer is active.
Set that print object as the default printer by right-clicking the printer icon and selecting Set as Default Printer.
Delete the other copies of the print object by right-clicking the printer name and selecting Delete.
To prevent multiple instances of the printer in your Printers folder, ensure that you always plug the USB cable back into the same USB connector that was
originally used for the printer. Also, do not install printer drivers multiple times from the Drivers and Utilities CD.
Printer Problems
Ensure that the printer power cable is firmly connected to the printer and the electrical outlet.
Determine if the printer has been held or paused.
1. In Windows XP, click Start® Control Panel® Printers and Other Hardware® Printers and Faxes.
In Windows Vista®:
a. Click
® Control Panel.
b. Click Hardware and Sound.
c. Click Printers.
2. Right-click the printer icon.
3. Ensure that Pause Printing is not selected. If Pause Printing is selected, click Resume Printing.
Ensure that you installed the ink cartridges correctly and removed the orange caps from each cartridge.
For more information, see Replacing Ink Cartridges.
Ensure that you loaded the paper correctly.
For more information, see Loading Paper.
Ensure that the printer is not connected to a PictBridge-enabled camera.
For more information, see Printing Photos From a PictBridge-Enabled Camera.
General Problems
Printing Problems
Check the ink levels, and install new ink cartridges if necessary.
For more information, see:
Dell Ink Management System.
Replacing Ink Cartridges.
Ensure that you removed individual sheets from the paper exit tray.
To avoid ink smudging when you are using the following media, remove each sheet as it exits, and allow it to dry:
Photo paper
Glossy paper
Transparency
Labels
Envelopes
Iron-on transfers
Free up memory resources on your computer when print speed is slow.
Close all the applications not in use.
Try minimizing the number and size of graphics and images in your document.
Consider purchasing more Random Access Memory (RAM) for your computer.
Remove as many unused fonts as possible from your system.
Uninstall the printer software, and then reinstall it. For more information, see Removing and Reinstalling Software.
Select a lower print quality. For more information, see Configuring Printer Settings.
Ensure that you loaded the paper correctly.
For more information, see Loading Paper.
Envelope printing incorrect.
The envelopes are not loaded correctly.
Downloaded from ManualsPrinter.com Manuals
1. Remove the envelopes from the main paper tray.
2. Straighten the stack of envelopes against a flat surface, and reload it into the main paper tray.
3. Slide the paper-width and paper-length guides inward until they stop at the edges of the envelopes.
Multiple-page document in reverse order.
The printing settings are set to print the first page of your document first.
Print the document in reverse order so the pages will be in the correct order when printing finishes.
1. Click the Properties button on the Print dialog.
2. Select Print last page first on the General tab.
Photo print appears smudged.
To avoid photo print smudging, Fingerprints may be on glossy side of paper.
Handle paper by the edges.
PictBridge camera not detected.
1.
2.
3.
4.
Check the USB connections from the PictBridge compatible camera or device to the printer.
If disconnected, reconnect the USB cable from the PictBridge compatible camera or device to the printer.
Ensure that there is at least one picture in the PictBridge compatible camera or device's internal memory or memory card.
Ensurethat the connected camera or device is PictBridge compatible. See your camera or device user's guide for details.
Picture does not print.
A selected picture does not print.
The image file may be corrupt. Review the picture on the camera or computer and delete if necessary.
The image file may not be JPEG format. The printer can only print JPEG files in standalone mode. Connect to a computer and use Adobe Photoshop
Album SE software to print BMP and TIFF formats.
Pictures cropped.
Change the picture quality setting (or resolution) on your digital camera to 3:2. See your camera user's guide for details.
Adjust cropped pictures using Adobe Photoshop Album SE software on your computer.
If you are printing from an application on your computer, select the proper paper size in print options.
NOTE: Cropping may vary depending on the selected picture size.
Poor print quality.
1. Clean the printhead.
2. Run a calibration.
If the problem persists, repeat as often as necessary.
Print skewed or slanted.
Probable Cause 1
The paper is not properly loaded in the tray.
1.
2.
3.
4.
Remove the stack of paper from the main paper tray, and slide the paper guides to the outermost position.
Remove the paper and check for wrinkles and tears.
Straighten the stack of paper against a flat surface, and reload it into the main paper tray.
Slide the paper-width and paper-length guides inward until they stop at the edges of the paper.
For more information, see Loading Paper.
Probable Cause 2
More than one type of paper is loaded.
Load only one type of paper.
Print spotted.
Paper may be dirty.
Use a dry, lint-free cloth to wipe clean. For excessive dirt or debris, thoroughly clean the paper tray, and load new paper.
NOTE: Keep paper tray covers closed to keep dust and debris from collecting on the paper or inside the printer.
Print too dark.
NOTE: For best results, use only Dell Ink cartridges and paper for your printer.
Try re-taking the picture with the flash on, or move within the flash range of the camera. See your camera user's guide for details.
Adjust the exposure compensation on your camera, and try re-taking the picture. See your camera user's guide for details.
Edit the picture using Adobe Photoshop Album SE software on your computer. See the Adobe Photoshop Album SE Help for details.
Ensure that the printer is not placed in direct sunlight or is not operating in a high-temperature environment.
Print too light.
NOTE: For best results, use only Dell Ink cartridges and paper for your printer.
Ensure that the paper is loaded with the Dell logo facing up. Reload if necessary.
Try re-taking the picture with the flash off. See your camera user's guide for details.
Adjust the exposure compensation on your camera, and try re-taking the picture. See your camera user's guide for details.
Edit the picture using Adobe Photoshop Album SE software on your computer. See the Adobe Photoshop Album SE software Help for details.
Downloaded from ManualsPrinter.com Manuals
Printing Stops.
Printing stops during mid-print. Paper stops feeding, and Status light may blink.
NOTE: For best results, use only Dell Ink cartridges and paper for your printer.
Check the paper
1.
2.
3.
4.
5.
6.
7.
Disengage the photo tray if engaged.
Check the paper access on the back of the printer.
Remove any loose paper from the printer.
Inspect the paper supplies and reload with new paper if necessary.
Carefully "fan" the paper to keep the sheets from sticking together.
Reload the paper trays. Do not overload.
Re-engage the photo tray, if desired, and then press Start to resume printing.
Slow Printing.
NOTE: When printing a large number of prints, printing may slow down to prevent the print head from overheating.
Ensure that the printer is not placed in direct sunlight or is not operating in a high-temperature environment (higher than 95° F, or 35° C).
Close unnecessary software applications.
Ensure that your computer meets the minimum system requirements. Upgrade your system if necessary.
White Edges on Borderless Prints.
Probable Cause
White edges can appear when there are slight misalignments between the printer and paper. Some software applications are able to "hide" these small
misalignments so that the prints look borderless like they are supposed to.
Use the application's Fit to Page/Fill Page option, or resize the picture so it is slightly larger than the paper size.
Copying Problems
Check for blinking lights or error messages on the printer.
For more information, see Error Messages.
Ensure that the scanner glass is clean.
If the scanner glass is dirty, gently wipe it with a clean, lint-free cloth dampened with water.
Check paper sizes.
Ensure that the paper size being used matches the size you selected on the operator panel or the Dell Imaging Toolbox.
Copies faded or dull colors.
Probable Cause 1
The copy quality is set to Draft.
Set the copy quality to Normal or Best.
For more information, see Changing Copy Settings.
Probable Cause 2
The brightness setting for copies is set too light.
Adjust the brightness setting to darker.
For more information, see Changing Copy Settings.
Copies too Light or Dark.
The brightness setting for copies is set too light or dark.
Adjust the brightness setting for copies
For more information, see Changing Copy Settings.
Copy Cut Off.
The original is larger than the paper loaded.
When the original is larger than the paper loaded, use the Fit to Page option to reduce your original to the size of the paper loaded.
Scanning Problems
Check for blinking lights and error messages on the printer.
Check the USB cable.
Ensure that the USB cable is firmly connected to your printer and your computer.
Shut down the computer, reconnect the USB cable as shown on the Setting Up Your Printer poster, and then restart the computer.
Determine if the printer software is installed.
Click Start® Programs or All Programs® Dell Printers.
Downloaded from ManualsPrinter.com Manuals
In Windows Vista®:
1. Click
® Programs.
2. Click Dell Printers.
If the printer does not appear in the list of printers, the printer software is not installed. Install the printer software. For more information, see Removing and
Reinstalling Software.
Correct communication problems between the printer and the computer.
Remove the USB cable from your printer and your computer. Reconnect the USB cable to your printer and your computer.
Turn off the printer. Unplug the printer power cable from the electrical outlet. Reconnect the printer power cable into the electrical outlet, and turn on
the printer.
Restart your computer.
Scan Fails.
Probable Cause 1
Your computer is not turned on.
Turn on your computer.
Probable Cause 2
Your printer is not connected to your computer.
Connect your printer to your computer with a standard USB cable.
Probable Cause 3
The Dell Imaging Toolbox software is not installed.
Insert the Dell Imaging Toolbox installation CD and install the software.
Probable Cause 4
Your computer system resources may be low.
1. Turn off your computer and printer and then turn them back on.
2. If the problem still persists, try scanning at a lower resolution.
Scanned image blank.
Your original is not placed correctly on the scanner glass.
Place your original face down on the right front corner of the scanner glass.
Proofsheet scan unsuccessful.
Probable Cause 1
The scanner glass is dirty.
Ensure that the scanner glass is completely clean or the proofsheet might not scan properly . For more information, see Cleaning the Scanner Glass.
Probable Cause 2
Memory Card or Camera Changed
Ensure that the same memory card inserted or camera connected you used to print the proofsheet.
Probable Cause 3
Proofsheet not placed correctly on scanner glass.
Place the proofsheet on the front right of the scanner glass.
Transferring Pictures Problems
If you are trying to transfer pictures from a memory card and a PictBridge camera is connected, remove it.
Close unnecessary software applications, and minimize remaining application windows. Follow any messages on the screen that may have been hidden
by other windows.
Disconnect and then reconnect the USB cable from the printer to the computer.
Ensure that you are using the USB cable included with your printer.
Ensure that Adobe Photoshop Album SE software is installed. If you choose Custom installation, ensure to install the printer driver.
Un-install, and then reinstall Adobe Photoshop Album SE software.
Ensure that your computer meets the minimum requirements.
NOTE: The printer is compatible with the Dell 8-in-1-card reader (sold separately). Other Dell USB card readers may work with the printer; however, other
manufacturers' card readers are not supported.
Wireless Network Problem
Cannot print using Wi-Fi from my computer.
Ensure that there are at least three bars (green color) in your printer to indicate a minimum Wi-Fi signal strength. Poor signal strength affects the print
performance and also the print reliability.
Downloaded from ManualsPrinter.com Manuals
Check the placement of the printer and router.
Ensure the correct placement of the printer and router to optimize the Wi-Fi signal strength.
Ensure that your computer is connected to a wireless network.
1. Click Start® Control Panel.
2. Double-click
Network Connections.
The Wireless Network Connection icon should state that is connected with a valid IP address.
If the Wireless Network Connection icon states that it is connected with an invalid IP address or not connected, go to Dell Wireless Support Center for
assistance or troubleshooting your wireless network.
Check that you are connected to correct network.
Ensure that the SSID of the printer and the computer are same. To verify, print a Network Configuration Settings page from the printer with the following
steps and verify that the SSID is the same as in the computer.
Check the Network Status
.
1. Press the Menu button
2. Press the down Arrow button
3. Press the Select button
to scroll to Network.
.
4. Scroll to Status and then press the Select button
to view the network details.
Ensure that the Firewall is turned off.
Ensure that the firewall is disabled for printing through wireless. This is because the firewall might interfere when printing through wireless. See your
Windows® help for disabling the firewall.
Wi-Fi LED is blinking.
This indicates that the printer is searching for Wi-Fi network.
Ensure that the Access Point is on.
Ensure that the network devices, such as the wireless router, are turned on for an infrastructure network. For more information on the wireless router, see
the documentation that came with your wireless router.
Check the distance between the printer and the Access Point.
To establish a good signal between the printer and the Access Point, ensure that:
The Access Point and the printer are not too far away.
There is no large metal object, for example metal cabinet or refrigerator, in the transmission path.
There is no other equipment, for example microwave or cordless phone, which emits radio signals (2.4 GHz).
Ensure that only three computers are connected to Printer.
You can configure a maximum of three wireless connections to your printer. If a fourth connection is attempted, then a computer gets disconnected.
Ensure that the WiFi Radio is turned on.
If the Wi-Fi radio is turned off, then follow the below steps to turn it on.
.
1. Press the Menu button
2. Press the down Arrow button
to scroll to Network.
3. Press the Select button
.
4. Press the down Arrow button
5. Press the right Arrow button
to scroll to WiFi Radio.
to turn on the Wi-Fi network.
Check the Access Point setting.
If the wireless SSID broadcast is not enabled, see the user guide that was shipped with your Wireless Router. Also, check the Wireless Router settings.
Alternatively, you can manually configure in the Wireless Setup wizard. Type the network name (SSID) in the Add Network Manually dialog box.
Downloaded from ManualsPrinter.com Manuals
SSID is not visible from the list of available networks.
The SSID is not visible from the list of available network. It could be out of sight at the bottom of the list.
Ensure that the network name (SSID) is correct.
Ensure that you have entered the correct network name (SSID) in the Wireless Setup wizard.
NOTE: SSID is case-sensitive.
Ensure the correct WEP key is used.
When connected to a WEP security mode, ensure that you have entered the correct WEP key. If you do not know the WEP key, see the user guide for the
wireless router.
Wireless adapter in computer is not broadcasting SSID.
If the wireless adapter in the computer is not broadcasting the SSID (ad hoc):
1. Verify that the wireless adapter is broadcasting the SSID.
2. Print a Network Configuration Settings page from the printer using the following steps and verify that the SSID for the wireless adapter appears on the
Network Configuration Settings. If the wireless adapter is not broadcasting the SSID, verify Wireless Network set-up on the computer.
3. Check the Network Status. For more information, see Check the Network Status.
Wireless adapter on computer is not broadcasting the SSID.
Wireless adapter in the computer is not broadcasting the SSID (ad hoc).
1. Verify that the computer is setup for ad hoc mode and the network name (SSID) is correct.
2. Print a network configuration setting page from the printer. For more information, see Check that you are connected to correct network.
3. Verify that the SSID for the wireless adapter appears on the Network Configuration Settings page. If the wireless adapter is not broadcasting the
SSID, verify wireless network set up on the computer.
Device Problems
Ensure that the camera is turned on.
Ensure that the USB cable from the camera is fully inserted in the USB connector.
Ensure that the memory card is completely inserted.
Ensure that the type of memory card you are using can be used in the printer.
For more information, see Printing From a Memory Card or USB Key.
Insert only one memory card at a time.
When printing images from a memory card, ensure that the file format of the images is supported by the printer.
Only images in JPG and a limited set of TIFF formats can be printed directly from the memory card. If you want to print photos stored on the memory card in
a different file format, the photos must be transferred to your computer before printing.
If the memory card file system is corrupt, reformat it in your camera.
Ensure that the printer is not connected to a PictBridge-enabled camera.
For more information, see Printing Photos From a PictBridge-Enabled Camera.
Ensure that the device is within range of the Bluetooth radio signal (30 feet or 10 meters).
Ensure that the Bluetooth technology enabled device uses a BIP, OPP, or FTP profile.
Ensure that you enter a PIN of 1111 into the sending device.
Downloaded from ManualsPrinter.com Manuals
Ink Cartridge Problems
Ensure that you install a genuine Dell ink cartridge.
Ensure to replace the expired ink cartridge.
Paper Problems
Ensure that you loaded the paper correctly.
For more information, see Loading Paper.
Use Dell recommended paper for your printer.
Use a smaller amount of paper when printing multiple pages.
Ensure that the paper is not wrinkled, torn, or damaged.
Check for a paper jam.
If the paper jam is near the paper input tray:
1. Lift the output tray.
2. Firmly pull the jammed papers to remove it.
NOTE: If the paper tears while removing it, check inside the printer for torn pieces of paper and remove them. More jams are likely to occur if all the torn
pieces are not removed.
3. Close the output tray.
4. Press the Select button
.
5. Resend your print job to print any missing pages.
If the paper jam is not visible:
1. Turn off the printer.
2. Lift the scanner unit.
3. Firmly grasp the paper, and gently pull it from the printer.
4. Close the scanner unit.
5. Turn on your printer, and print the document again.
If the jam is located near the rear access door:
1. Open the rear access door by pressing the tabs on either ends of the door.
Downloaded from ManualsPrinter.com Manuals
2. Firmly grasp the paper, and gently pull it from the printer.
3. Close the rear access door.
4. Press the Select button
to continue printing.
Improving Print Quality
If you are not satisfied with the print quality of your documents, there are different ways to improve the print quality.
Use the appropriate paper. For example, use Dell™ Ultra Premium Photo Paper or Dell™ Premium Photo Paper if you are printing photos.
Use paper which is a heavier weight, bright white, or coated.
Select a higher print quality.
To select a higher print quality:
1. With your document open, click File Print.
The Print dialog box opens.
2. Click Preferences, Properties, Options, or Setup (depending on the program or operating system).
The Printing Preferences dialog box opens.
3. On the Print Setup tab, select a higher quality setting.
4. Print your document again.
5. If the print quality does not improve, try aligning or cleaning the ink cartridges.
For more information on aligning the printhead, see Running a Calibration.
For more information on cleaning the printhead, see Cleaning the Printhead.
For additional solutions, go to support.dell.com.
General Guidelines for Selecting or Loading Print Media
Attempting to print on damp, curled, wrinkled, or torn paper can cause paper jams and poor print quality.
Use only high-quality, copier-grade paper for the best print quality.
Avoid paper with embossed lettering, perforations, or a texture that is too smooth or rough. Paper jam may occur.
Store paper in its packaging until you are ready to use it. Place cartons on pallets or shelves, not on the floor.
Do not place heavy objects on top of the media.
Keep paper away from moisture or other conditions that can cause it to wrinkle or curl.
Store unused paper at temperatures ranging between 15°C and 30°C (59°F and 86°F). The relative humidity should be between 10% and 70%.
During storage, you should use moisture-proof wrap, such as a plastic container or bag, to prevent dust and moisture from contaminating the paper.
Avoiding Jams and Misfeeds
You can avoid most jams and misfeeds by following these guidelines:
Ensure that the media is properly loaded in the input tray.
Do not overload the input tray.
Do not remove media from the input tray while printing.
Flex, fan, and straighten the paper before loading.
Do not use creased, damp, or curled paper.
Orient the media according to the instructions for the printer.
Downloaded from ManualsPrinter.com Manuals
Error Messages
Color Ink Messages
Message
Cause
Action/Solution
Color ink cartridge is low.
Ink remaining in color tank is less than 15 percent.
Color ink cartridge needs to be replaced soon.
Order for the color ink cartridge.
Color ink cartridge needs
replacing.
The color ink cartridge has reached its end of life and needs to be
replaced.
Install a new Dell approved color ink cartridge
for best results.
Color ink cartridge not recognized.
Color ink cartridge has an Invalid Manufacturer Code.
Install a new Dell approved color ink cartridge
for best results.
New updates are available to
optimize your print quality.
Better performance can be achieved with the currently installed ink
cartridges, if a firmware upgrade is performed.
Upgrade your printer's firmware for best results.
NOTE: Use the Dell Imaging Toolbox to
upgrade.
Color ink cartridge is not inserted
properly.
An improper electrical connection to the ink cartridge was detected.
Reinstall the color ink cartridge.
Color ink cartridge is not installed.
Color ink cartridge is not installed or an incorrect or damaged ink
cartridge is installed.
Install a new Dell approved color ink cartridge
for best results.
Black Ink Messages
Message
Cause
Action/Solution
Black ink cartridge is low.
Ink remaining in black tank is less than 15 percent.
Black ink cartridge needs to be replaced soon.
Order for the Ink cartridge.
Black ink cartridge needs replacing. The black ink cartridge has reached its end of life and needs to be
replaced.
Install a new Dell approved black ink cartridge
for best results.
Black ink cartridge not recognized.
Black ink cartridge has an Invalid Manufacturer Code.
Install a new Dell approved black ink cartridge
for best results.
New updates are available to
optimize your print quality.
Better performance can be achieved with the currently installed ink
cartridges, if a firmware upgrade is performed.
Upgrade your printer's firmware for best
results.
NOTE: Use the Dell Imaging Toolbox to
upgrade.
Black ink cartridge is not inserted
properly.
An improper electrical connection to the ink cartridge was detected.
Reinstall the black ink cartridge.
Black ink cartridge is not installed.
Black ink cartridge is not installed or an incorrect or damaged ink
cartridge is installed.
Install a new Dell approved black ink cartridge
for best results.
Paper Messages
Message
Cause
Paper jam
The printer has detected an error condition that indicates the paper
may be jammed in the printer or failed to feed from the input tray.
1. Clear the paper jam.
2. Press the Select button
the printer.
on
Action/Solution
NOTE: For best result, use only Dell ink
cartridges & paper for your printer.
1. Disengage the photo paper tray, if
engaged.
2. Turn off your printer for 5 seconds, and
then turn it back on.
3. Any paper stuck in the printer should
automatically eject.
4. If the paper does not automatically eject,
disconnect the power from the printer and
carefully remove any paper stuck in the
printer including paper pieces.
NOTE: Remove the jammed papers from the
Rear access door.
5. Remove the paper supply from the paper
tray. Carefully fan the paper to keep the
sheets from sticking together.
6. Reload the paper tray. Do not overfill.
7. Reconnect the power to the printer.
8. Re-engage the photo paper tray, if
desired, then press the Start button
to resume printing for a computer print
job. You have to start a local print job
over.
9. If the problem persists, call Dell service
for assistance.
Paper is loaded incorrectly.
Photo paper was loaded upside down.
Load photo paper print-side down.
Print carriage jam.
For some reason, most likely a paper jam, the carriage cannot travel
Clear the jammed paper and press Select
Downloaded from ManualsPrinter.com Manuals
freely.
button
Dell paper not recognized.
The Dell paper loaded needs a later version of firmware.
Upgrade your printer's firmware.
Proofsheet no longer valid.
The device used to print the proofsheet was removed. A new session
number is assigned each time a Proofsheet is printed. When the
printer scans the Proofsheet it must match the current session
number.
Message
Cause
Action/Solution
Printhead missing or not installed
correctly.
The printer has detected that a Printhead is not installed.
Install the printhead.
Printer requires calibration.
The printer has detected that you have installed a new Printhead and
now it must be calibrated.
Press the Start button
Calibration unsuccessful
Calibration sheet not inserted correctly.
Check calibration sheet placement and press the
to continue.
Print a new proofsheet.
Print Messages
Select
to continue.
button to continue.
Cannot read calibration sheet.
The printer detected a calibration sheet, but can not read it.
Press the Select
Some photos may not be visible.
Maximum number of photos
exceeded.
A device was attached that contained more than the supported
maximum of 1000 images. Memory Card or Digital Camera, USB
Thumbdrive.
None.
Ink overflow container is full.
Press the Select
button to continue.
Printer error. Print job unsuccessful.
The printer failed to finish printing a swath successfully.
Press the Select
button.
There was an error reading the
tagged pictures on your input
device.
There is a DPOF file on the card which user has requested to be used
but the file is unusable. Cannot read the file, formatting of the data is
not readable, or file could be corrupt.
None.
button.
Rear Access Door Message
Message
Cause
Action/Solution
Replace the rear access door.
The Rear Access Door on the back of the printer is off or not properly
installed.
Install the Rear Access door.
Print job stopped.
During printing the printer detected that the Rear Access Door is
latched.
Unlatch the Rear Access door.
Message
Cause
Action/Solution
Scanner base unit is open.
The scanner base unit on the top of the printer is open while printing.
Close the scanner base unit.
Message
Cause
Action/Solution
Scan operation failed. Please try
again.
Scan operation initiated from the printer fails to communicate with
the computer within a timeout period. The computer was supposed to
start the scan operation.
Retry the scan operation.
Scanner Base Unit Message
Scanner Message
Bluetooth Message
Message
Cause
Action/Solution
Bluetooth connection lost.
Bluetooth communication/connection dropped while downloading a file
to the printer.
Check the connection and resend.
Back to Contents Page
Downloaded from ManualsPrinter.com Manuals
Back to Contents Page
Printing
Dell™ Photo P703w All-In-One Printer User's Guide
Printing Photos From the Computer
Printing Photos From the Application Using the Print Command
Printing Photos From the Operator Panel Menu
Printing a Proofsheet
Printing a Demo Sheet
Printing More Than One Page on a Sheet of Paper
Printing a Poster
Printing a Booklet
Printing Photos From a PictBridge-Enabled Camera
Printing From a Bluetooth®-Enabled Device
Changing Print Settings
Printing Photos From the Computer
1. Turn on your computer and printer, and ensure that they are connected.
2. Load the paper. For more information, see Loading Paper.
NOTE: To print from the photo tray, ensure that the photo tray is engaged.
3. Click Start® Programs or All Programs® Dell Printers® Dell Photo P703w AIO Printer.
In Windows Vista®:
a. Click
® Programs.
b. Click Dell Printers.
c. Click Dell Photo P703w AIO Printer.
4. Select Dell Imaging Toolbox.
The Dell Imaging Toolbox opens.
5. From the Dell Imaging Toolbox, click Print.
Downloaded from ManualsPrinter.com Manuals
6. From the Browse Pictures dialog, load pictures from Recent Folders, Printer Card Slots, or Get Pictures.
7. Click the pictures you want to print to move them to the picture tray.
8. Click Next to go to the enhance window.
9. Click Edit... to enhance the selected photo or click Add... to add more photos to the picture tray.
10. When you finish customizing your settings, click either Save to File... to save the enhanced picture to a new file or
Save to save it to the selected file.
NOTE: Click Cancel to undo the changes made.
11. Click Next > to go to the Finish window.
12. From the Paper size and Print size drop-down lists, select the paper size and print size respectively.
13. Select the number of Copies per pictures you want to print.
14. Select the checkbox Optimize for cutting and Borderless, based on your preference.
NOTE: Optimize for cutting is available only when the paper size is bigger than print size.
15. When you finish customizing your Print settings, click Print.
Printing Photos From the Application Using the Print Command
1. Turn on your computer and printer, and ensure that they are connected.
2. Load the paper. For more information, see Loading Paper.
3. With your photo open, click File® Print.
The Print dialog box opens.
Downloaded from ManualsPrinter.com Manuals
4. Click Preferences, Properties, Options, or Setup (depending on the program or operating system).
The Printing Preferences dialog box opens.
5. On the General, Layout, and Advanced tabs, make any necessary changes for your photo.
6. When you finish customizing your settings, click OK.
The Printing Preferences dialog box closes.
7. Click Print.
Printing Photos From the Operator Panel Menu
1. Turn on your printer.
2. Insert a memory card into the appropriate slot, USB Memory key into the PictBridge connector, or connect a digital
camera to the PictBridge/USB connector.
The last photo is displayed.
NOTE: USB HDD is not supported by PictBridge connector.
NOTICE: Do not attempt to remove a memory card while it is being accessed. Doing so can damage files on the
card. You can safely remove a card only when the status light next to the slots is not blinking.
3. Load the paper. For more information, see Loading Paper.
4. Press the up Arrow button
5. Press the right Arrow button
6. Press Photo Menu button
to select the number of prints for this photo.
to preview the next photo.
to change the print settings.
7. When you finish customizing your settings, press the Start button
.
Printing a Proofsheet
1. Turn on your printer.
2. Insert a memory card into the appropriate slot, USB Memory key into the PictBridge connector, or connect a digital
camera to the PictBridge/USB connector.
The last photo is displayed.
NOTE: USB HDD is not supported by PictBridge connector.
NOTICE: Do not attempt to remove a memory card while it is being accessed. Doing so can damage files on the
card. You can safely remove a card only when the status light next to the slots is not blinking.
3. Load the paper. For more information, see Loading Paper.
4. Press the Menu button
to display all the menu items.
5. Press the down Arrow button
6. Press the Start button
to scroll to Proofsheet.
.
Proofsheet is printed.
Downloaded from ManualsPrinter.com Manuals
7. Complete the four steps on the proofsheet with the memory card, storage device, or camera connected.
Printing a Demo Sheet
1. Turn on your printer.
2. Load the paper. For more information, see Loading Paper.
3. Press the Menu button
to display all the menu items.
4. Press the down Arrow button
5. Press the Start button
to scroll to Print Demo Sheet.
.
Printing More Than One Page on a Sheet of Paper
1. Turn on your computer and printer, and ensure that they are connected.
2. Load the paper. For more information, see Loading Paper.
3. With your document open, click File® Print.
The Print dialog box opens.
4. Click Preferences, Properties, Options, or Setup (depending on the program or operating system).
The Printing Preferences dialog box opens.
5. From the layout tab, select Multi-page.
6. From the Pages per sheet drop-down list, select the number of pages you want to print on one sheet.
7. Select the Print with frame check box, if you want to print borders around each page.
8. From the Pages order drop-down list, select the order of the pages in which you want the pages to be printed.
9. When you finish customizing your settings, click OK.
The Printing Preferences dialog box closes.
10. Click Print.
Printing a Poster
1. Turn on your computer and printer, and ensure that they are connected.
2. Load the paper. For more information, see Loading Paper.
3. With your document open, click File® Print.
The Print dialog box opens.
4. Click Preferences, Properties, Options, or Setup (depending on the program or operating system).
The Printing Preferences dialog box opens.
5. From the layout tab, select Poster.
Downloaded from ManualsPrinter.com Manuals
6. From the Poster size drop-down list, select the size of the poster.
7. When you finish customizing your settings, click OK.
The Printing Preferences dialog box closes.
8. Click Print.
NOTE: Two sided printing is not available for the Poster layout.
Printing a Booklet
1. Turn on your computer and printer, and ensure that they are connected.
2. Load the paper. For more information, see Loading Paper.
3. With your document open, click File® Print.
The Print dialog box opens.
4. Click Preferences, Properties, Options, or Setup (depending on the program or operating system).
The Printing Preferences dialog box opens.
5. From the layout tab, select Booklet.
6. Select the Print with frame check box, if you want to print borders around each page.
7. When you finish customizing your settings, click OK.
The Printing Preferences dialog box closes.
8. Click Print.
Printing Photos From a PictBridge-Enabled Camera
Your printer supports PictBridge-enabled cameras.
1. Insert one end of the USB cable into the camera.
2. Insert the other end of the USB cable into the PictBridge connector on the front of the printer.
See the instructions included with your camera for selection of the appropriate camera USB settings and PictBridge
connection and usage information.
Downloaded from ManualsPrinter.com Manuals
NOTE: When you connect a PictBridge camera to your printer, then all the functions from operator panel
buttons become unavailable. The printer gets into PictBridge mode and waits for the camera to send pictures
that should be printed. Operator panel buttons become available after you disconnect the PictBridge camera
from your printer.
3. Turn on your digital camera.
The printer automatically enters PictBridge mode.
4. See the instructions included with your camera to begin printing photos.
NOTE: For many digital cameras, there are two USB mode selections, computer and printer (or PTP). For
PictBridge printing, the printer (or PTP) USB selection should be used. For more information, see the
documentation that shipped with your camera.
NOTICE: Do not remove the PictBridge-enabled device or touch the printer near the area of the memory card or
PictBridge-enabled device while actively printing from PictBridge. Data corruption can occur.
Printing From a Bluetooth®-Enabled Device
Bluetooth is a short-range radio technology that enables wireless connectivity between electronic devices.
Range
The recommended maximum distance between Bluetooth devices for the highest transfer speed is 10 meters or 32.81
feet.
Printing
1. Insert your Kodak Bluetooth Adapter into the Pictbridge connector.
Wait until the LED in the Bluetooth Adapter turns on.
2. Discover your printer on your Bluetooth®-enabled device.
Your printer supports the following types of Bluetooth enabled devices:
Mobile camera phones
PDAs
Digital still cameras
3. Select your printer.
4. After Bluetooth connection is established, send a file to your printer using Bluetooth.
Downloaded from ManualsPrinter.com Manuals
NOTE: When a Bluetooth connection is made no other functions are available, and the LCD display indicates
printing from Bluetooth.
Use your Bluetooth device to control printing.
Changing Print Settings
Using the Operator Panel
If you are using your printer as a standalone copier, you can change the print settings from the Photo Mode menu on
the Operator Panel. For more information about settings, see Photo Mode.
Using the Computer
Print Quality
Photo quality is automatically selected when photo paper is detected in the main or photo input trays.
To set print quality for non-photo paper
1. Click Start® Programs or All Programs® Dell Printers® Dell Photo P703w AIO Printer.
In Windows Vista®:
a. Click
® Programs.
b. Click Dell Printers.
c. Click Dell Photo P703w AIO Printer.
2. Select Dell Imaging Toolbox.
The Dell Imaging Toolbox opens.
3. From the Dell Imaging Toolbox window, select Settings.
4. Click AIO Printer.
5. Click Print.
Downloaded from ManualsPrinter.com Manuals
6. Select Draft, Normal, or Best.
7. Click OK or Apply.
Print Options
1. Click Start® Programs or All Programs® Dell Printers® Dell Photo P703w AIO Printer.
In Windows Vista®:
a. Click
® Programs.
b. Click Dell Printers.
c. Click Dell Photo P703w AIO Printer.
2. Select Dell Imaging Toolbox.
The Dell Imaging Toolbox opens.
3. From the Dell Imaging Toolbox window, select Settings.
4. Click AIO Printer.
5. Click Print.
6. From the Layout drop-down list, select the layout.
7. Select the Quantity (1-99).
8. Select the check box Print date on front and Print colors as grayscale, if desired.
9. Click OK or Apply.
Advanced
Downloaded from ManualsPrinter.com Manuals
1. Click Start® Programs or All Programs® Dell Printers® Dell Photo P703w AIO Printer.
In Windows Vista®:
a. Click
® Programs.
b. Click Dell Printers.
c. Click Dell Photo P703w AIO Printer.
2. Select Dell Imaging Toolbox.
The Dell Imaging Toolbox opens.
3. From the Dell Imaging Toolbox window, select Settings.
4. Click AIO Printer.
5. Click Print.
6. Select the check box Automatically apply scene balance to digital pictures, if desired.
7. Select the check box Enable printing of tagged pictures, if desired.
8. Click OK or Apply.
Back to Contents Page
Downloaded from ManualsPrinter.com Manuals
Back to Contents Page
Specifications
Dell™ Photo P703w All-In-One Printer User's Guide
Overview
Environmental Specifications
Power Consumption and Requirements
Print and Scan Mode Capabilities
Operating System Support
Memory Specifications and Requirements
Media Types and Sizes
Cables
Overview
Memory
64 MB SDRAM
8 MB FLASH
Connectivity
HS USB2.0
Wireless
Wireless specifications
Compliant standards - 802.11b/802.11g
Bandwidth - 2.4 GHz
Data Transfer Rate 802.11g: 54, 48, 36, 24, 18, 12, 9, 6 Mbps
802.11b: 11, 5.5, 2, 1 Mbps
Security - 64 (40-bit key)/128 (104-bit key) WEP, WPA-PSK (TKIP, AES), WPA2-PSK (AES)
(IEEE802.1x attestation function of WPA 1x non-corresponds)
Printer life
10,000 print events (including Scanner)
Environmental Specifications
Condition Temperature
Relative humidity (non-condensing)
Operation
41° to 95° F
15 to 85%
Storage
-40° to 140° F 5 to 90%
Shipping
-40° to 140° F 5 to 90%
Power Consumption and Requirements
Power Requirements
Rated AC input
100-240 V
Rated frequency
50-60 Hz
Downloaded from ManualsPrinter.com Manuals
Maximum input current 1.3 A
Average Power Consumption
Draft mode document printing 62W max
Idle mode
13W
Standby mode
6.8W
Print and Scan Mode Capabilities
You can print from 72 to 19,200 dpi. Although your printer has this capability, Dell recommends using the preset
resolutions.
Mode
Print resolution
Scan resolution
Photo/glossy paper All other media
Draft
300 x 300 dpi
NA
300 x1200 dpi
Normal 300 x 300 dpi
NA
600 x 1200 dpi
Best
1200 x 1200 dpi
1200 x 1200 dpi
300 x 300 dpi
Operating System Support
The printer supports:
Windows Vista x32
Windows Vista x64
Windows XP Professional x32
Windows XP Professional x64
Memory Specifications and Requirements
Your operating system must meet the minimum system requirements.
Operating System
Processor speed RAM
Hard disk
Windows Vista x32
2 GHz
1024 MB 40 GB capacity with 15GB free
Windows Vista x64
2 GHz
1024 MB 40 GB capacity with 15GB free
Windows XP Professional x32 1.2 GHz
512 MB
1.8 GB
Windows XP Professional x64 1.2 GHz
512 MB
1.8 GB
Media Types and Sizes
Media type
Plain paper
Downloaded from ManualsPrinter.com Manuals
Sizes supported
A4 (210x297
A5 (148x210
A6 (105x148
US Executive
Load up to
mm)
mm)
mm)
(7.25x10.5 in.) (184x266 mm)
100 sheets
US Legal (8.5x14 in.) (216x356 mm)
US Letter (8.5x11 in.) (216x280 mm)
Envelopes
B5 (6.92x9.84 in.) (176x250 mm)
C5 (6.38x9 in.) (162x299 mm)
C6 (4.49x6.38 in.) (114x162 mm)
A2 (4.37x5.75 in.) (111x146 mm)
DL (designated long) (4.33x8.66 in.) (110x220
mm)
US #7 (7x9 in.) (178x127 mm)
US #9 (9x12 in.) (127x305 mm)
US #10 (4.12x9.5 in) (105x241 mm)
10 mm
stack
3.5x5.25 in. (89x133 mm)
3.5x7.25 in. (89x184 mm)
4x5.5 in. (101x140 mm)
4x8 in. (101x203 mm)
Hagaki (100x148 mm)
10 mm
stack
Iron-on transfers
A4 (210x297 mm)
US Letter (8.5x11 in.) (216x280 mm)
10 mm
stack
Photo/glossy or matte paper
3.5x5 in. (89x127 mm)
100x150 mm
4x6 in. (101x152 mm)
4x8 in. (101x203 mm)
4x12 in. (101x305 mm)
5x7 in. (127x178 mm)
6x9 in. (152x229 mm)
8x10 in. (203x254 mm)
8.5x11 in. (216x280 mm)
A4 210x297 mm
10 mm
stack
A4 (210x297 mm)
US Letter (8.5x11 in.) (216x280 mm)
10 mm
stack
Greeting cards, index cards, postcards, or photo
cards
Transparencies
Custom size paper
The paper must fit the following dimensions:
Width: 3.0 – 8.5 inches (76 – 216 mm)
Cables
Your printer uses a Universal Serial Bus (USB) cable.
Back to Contents Page
Downloaded from ManualsPrinter.com Manuals
100 sheets
Back to Contents Page
Printing From a Memory Card or USB Key
Dell™ Photo P703w All-In-One Printer User's Guide
Printing Photos From a Memory Card or USB Key Using the Computer
Printing Photos From a Memory Card or USB Key Using the Operator Panel
Printing Tagged Photos (DPOF)
Most digital cameras use a memory card to store photos. The printer supports the following digital media:
Compact Flash Type I and II
Memory Stick
Memory Stick PRO
Memory Stick Duo (with adapter)
Mini SD (with adapter)
Secure Digital
MultiMedia Card
xD-Picture Card
Secure Digital High Capacity (SDHC)
NOTE: Your printer supports up to 8 GB for SDHC.
Memory cards should be inserted with the label facing up. The card reader has two memory card slots and a USB
connector to accommodate these media and an LED that lights up indicating that the card is being read or is transmitting
data.
NOTE: Do not insert more than one memory card at a time.
NOTE: Do not insert a USB key if there is already a memory card inserted in the printer.
NOTICE: Do not attempt to remove a memory card while it is being accessed. Doing so can damage files on the
card. You can safely remove a card only when the status light next to the slots is not blinking.
When you insert a memory card or USB key, the printer automatically switches to Photo mode.
Printing Photos From a Memory Card or USB Key Using the
Computer
1. Turn on your computer and printer, and ensure that they are connected.
2. Load the paper. For more information, see Loading Paper.
3. Click Start® Programs or All Programs® Dell Printers® Dell Photo P703w AIO Printer.
In Windows Vista®:
a. Click
® Programs.
b. Click Dell Printers.
c. Click Dell Photo P703w AIO Printer.
4. Select Dell Imaging Toolbox.
Downloaded from ManualsPrinter.com Manuals
The Dell Imaging Toolbox opens.
5. From Dell Imaging Toolbox, click Print.
6. From the Browse Pictures dialog, select Printer Card Slots and select the pictures from Memory Card.
7. Click the pictures you want to print to move them to the picture pane.
8. Click Next to go to the enhance window.
9. Click Edit... to enhance the selected photo or click Add... to add more photos to the picture pane.
10. When you finish customizing your settings, click Save to File... to save the enhanced picture to at new file, or
Save to save it to the original file.
11. Click Next > to go to the Finish window.
12. From the Paper size and Print size drop-down list, select the paper size and print size respectively.
13. Select the number of Copies per pictures you want to print.
14. Select the checkbox Optimize for cutting and Borderless, based on your preference.
NOTE: Optimize for cutting is available only when the paper size is bigger than the print size.
15. When you finish customizing your Print settings, click Print.
Printing Photos From a Memory Card or USB Key Using the
Operator Panel
1. Turn on your printer.
2. Insert a memory card into the appropriate slot, USB Memory key into the PictBridge connector, or connect a digital
camera to the PictBridge/USB connector.
3. Load the paper. For more information, see Loading Paper.
NOTE: To print from the photo tray, ensure that the photo tray is engaged.
4. Press the up Arrow button
5. Press the right Arrow button
to select the number of prints for the photo.
to preview the next photo.
6. Press the Photo Mode menu button
to change the print settings.
7. When you finish customizing your settings, press the Start button
Downloaded from ManualsPrinter.com Manuals
.
Saving Photos to Your Computer
1. Turn on your computer and printer, and ensure that they are connected.
2. Insert a memory card into the appropriate slot, USB Memory key into the PictBridge connector, or connect a digital
camera to the PictBridge/USB connector.
3. Press the Menu button
.
Transfer to PC is selected.
4. Press the Start button
.
Connecting to the imaging service message box appears.
5. Follow the instructions on how to transfer the photos to your computer.
Printing Tagged Photos (DPOF)
If your camera supports Digital Print Order Format (DPOF), you can specify which photos to print, and how many of each,
while the memory card is still in the camera. The printer recognizes these settings when you insert the memory card into
the printer.
If a DPOF file is detected when you insert a memory card, printer displays the Print Order screen. This screen indicates
to begin printing.
that tagged photos are found, the number of photos and total prints, and press the Start button
Back to Contents Page
Downloaded from ManualsPrinter.com Manuals
Back to Contents Page
Ordering Printer Supplies
Dell™ Photo P703w All-In-One Printer User's Guide
Your printer includes software installed to detect the ink levels in the printer. During a print job, a screen appears on your
computer to warn you of low ink levels. You can order ink online at www.dell.com/supplies or by phone.
US
877–INK-2-YOU
Korea
Australia
1300 303 290
Luxembourg 02.713 1590
Austria
8 20 - 24 05 30 35 Malaysia
1800 88 0553
Belgium
02.713 1590
Mexico
001 866 851 1754
Canada
877-501-4803
Netherlands
020 - 674 4881
Chile
1230-020-3947
Norway
231622 64
800-202874
Portugal
21 4220710
Columbia 01800-9-155676
PRC
800-858-2425
Czech
Poland
022 579 59 65
Denmark 3287 5215
Puerto Rico
866-851-1760
Finland
09 2533 1411
Singapore
1800 394 7245
France
825387247
South Africa 0860 102 591
+420 225 372 711
080-999-0240
Germany 0800 2873355
Spain
902120385
Ireland
1850 707 407
Sweden
08 587 705 81
Italy
800602705
Switzerland
0848 335 599
Japan
044-556-3551
UK
0870 907 4574
NOTE: If your country is not listed, contact your Dell™ distributor to order supplies.
Your printer has been designed to print using the following ink cartridges.
Supply item
Part number Series number
Standard Capacity black ink cartridge DW905
Series 20
Standard Capacity color ink cartridge
Series 20
DW906
Back to Contents Page
Downloaded from ManualsPrinter.com Manuals
Back to Contents Page
Copying
Dell™ Photo P703w All-In-One Printer User's Guide
Copying Using the Operator Panel
Copying Using the Computer
Copying From a Thick Book
Changing Copy Settings
Copying Using the Operator Panel
Same Size
1. Turn on your printer.
2. Load the paper. For more information, see Loading Paper.
3. Load the original photo.
4. Press the Copy button
.
5. Press the down Arrow button
to scroll to Output.
6. Press the left or right Arrow button
to scroll to Same Size.
7. From the Copy Mode menu change the copy settings, as desired.
8. Press the Start button
.
NOTE: The printer starts making copies unless the Preview Mode is turned on. If so, press the Start button
to begin making copies.
Fit to Page
1. Turn on your printer.
2. Load the paper. For more information, see Loading Paper.
Downloaded from ManualsPrinter.com Manuals
3. Load the original photo.
4. Press the Copy button
.
5. Press the down Arrow button
to scroll to Output.
6. Press the left or right Arrow button
to scroll to Fit to Page.
7. From the Copy Mode menu change the copy settings, as desired.
8. Press the Start button
.
NOTE: The printer starts making copies unless the Preview Mode is turned on. If so, press the Start button
to begin making copies.
Scale Percent
1. Turn on your printer.
2. Load the paper. For more information, see Loading Paper.
3. Load the original photo.
4. Press the Copy button
.
5. Press the down Arrow button
to scroll to Output.
Downloaded from ManualsPrinter.com Manuals
6. Press the left or right Arrow button
7. Press the down Arrow button
to scroll to Scale Percent.
to scroll to Size.
8. Press the left or right Arrow button
to change the size (10-500).
9. From the Copy Mode menu change the copy settings, as desired.
10. Press the Start button
.
NOTE: The printer starts making copies unless the Preview Mode is turned on. If so, press the Start button
to begin making copies.
Photo Layout
You can set the layout for making copies of photos on your printer. The following layouts are supported:
Borderless (default)
Bordered
2 per Page
3 per Page
4 per Page
9 per Page
2x2 Poster
3x3 Poster
4x4 Poster
1. Turn on your printer.
2. Load the paper. For more information, see Loading Paper.
3. Load the original photo.
4. Press the Copy button
.
5. Press the down Arrow button
to scroll to Output.
6. Press the left or right Arrow button
Downloaded from ManualsPrinter.com Manuals
to scroll to Photo Layouts.
7. Press the down Arrow button
to scroll to Size.
8. Press the left or right Arrow button
to change the layout.
9. From the Copy Mode menu change the copy settings, as desired.
10. Press the Start button
.
NOTE: The printer starts making copies unless the Preview Mode is turned on. If so, press the Start button
to begin making copies.
Copying Using the Computer
1. Turn on your computer and printer, and ensure that they are connected.
2. Load the paper. For more information, see Loading Paper.
3. Load the original photo.
4. Click Start® Programs or All Programs® Dell Printers® Dell Photo P703w AIO Printer.
In Windows Vista®:
a. Click
® Programs.
b. Click Dell Printers.
c. Click Dell Photo P703w AIO Printer.
5. Select Dell Imaging Toolbox.
The Dell Imaging Toolbox opens.
Downloaded from ManualsPrinter.com Manuals
6. From Dell Imaging Toolbox, click Copy to open the Copy Pictures window.
The Basic Copy window opens.
7. Click Go to Advanced from the Copy Pictures window.
The Advanced Copy window opens.
Downloaded from ManualsPrinter.com Manuals
8. From the Select photo output drop-down list, select an output type.
9. Select Color or Black and White.
10. From the Resolution, Paper size, and Print size drop-down list, select the resolution, paper size, and print size
respectively.
11. Select the checkbox Copy as individual pictures, Color restoration, Borderless, Kodak Perfect Touch
technology, and Paper saver, as desired.
12. Select the number of Copies per picture (1-99) you want.
13. Click
to save the options you selected as a Shortcut, if desired.
14. Click Copy or click Preview > button to preview the scanned photos, if desired.
15. Adjust the dotted box to fit around the portion of the image you want to copy and click Next>.
16. Click Edit... to enhance the selected photo.
NOTE: Click Next > to go directly to the Finish window.
17. When you finish customizing your settings, click either Save to File... to save the enhanced picture at new file or
Save to save it to the scanned file.
NOTE: Click Cancel to undo the changes made.
18. Click Next > to go to the Finish window.
19. When you finish customizing your settings, click Copy or Finish.
Downloaded from ManualsPrinter.com Manuals
The picture(s) are scanned and copy progress information appears that shows the progress of the copy.
Copying From a Thick Book
1. Turn on your printer.
2. Load the paper. For more information, see Loading Paper.
3. Load the original thick book.
Your printer functions normally even with the top cover open. You can lift the top cover from the hinges.
NOTE: To get a better Copy quality, cover the extra space on the scanner glass with a white blank paper, if
the size of the book is lesser than the scanner glass.
4. Press the Copy button
.
5. Press the down Arrow button
to scroll to Output.
6. Press the left or right Arrow button
7. Press the down Arrow button
to scroll to Same Size/Fit to Page/Scale Percent/Photo Layout.
to scroll to Size.
8. Press the left or right Arrow button
to change the size (10-500).
9. From the Copy Mode menu change the copy settings, as desired.
10. Press the Start button
.
NOTE: The printer starts making copies unless the Preview Mode is turned on. If so, press Start
making copies.
Downloaded from ManualsPrinter.com Manuals
to begin
Changing Copy Settings
Using the Operator Panel
If you are using your printer as a standalone copier, you can change the copy settings from the Copy Mode menus on
the operator panel. For more information about settings, see Copy Mode.
Using the Computer
Output Quality
Photo quality is automatically selected when photo paper is detected in the photo input trays.
To set output quality for non-photo paper
1. Click Start® Programs or All Programs® Dell Printers® Dell Photo P703w AIO Printer.
In Windows Vista®:
a. Click
® Programs.
b. Click Dell Printers.
c. Click Dell Photo P703w AIO Printer.
2. Select Dell Imaging Toolbox.
The Dell Imaging Toolbox opens.
3. From the Dell Imaging Toolbox window, select Settings.
4. Click AIO Printer.
Downloaded from ManualsPrinter.com Manuals
5. Click Copy tab.
6. Select Draft, Normal, or Best.
7. Click OK or Apply.
Copy Options
Downloaded from ManualsPrinter.com Manuals
1. Click Start® Programs or All Programs® Dell Printers® Dell Photo P703w AIO Printer.
In Windows Vista®:
a. Click
® Programs.
b. Click Dell Printers.
c. Click Dell Photo P703w AIO Printer.
2. Select Dell Imaging Toolbox.
The Dell Imaging Toolbox opens.
3. From the Dell Imaging Toolbox window, select Settings.
4. Click AIO Printer.
5. Click Copy tab.
6. From the Output and Size drop-down lists, select the output and size respectively.
NOTE: The Size option gets disabled or enabled depending on the type of Output selected.
7. Adjust the brightness by sliding the slider with the mouse.
8. Select the Quantity (1-99).
9. Select the check box Print colors as grayscale, if desired.
10. Click OK or Apply.
Back to Contents Page
Downloaded from ManualsPrinter.com Manuals
Back to Contents Page
Appendix
Dell™ Photo P703w All-In-One Printer User's Guide
Dell Technical Support Policy
Technical Assistance
Obtaining Assistance
Product Information
Before You Call
Contacting Dell
Warranty and Return Policy
Dell Technical Support Policy
Technician-assisted technical support requires the cooperation and participation of the customer in the troubleshooting
process and provides for restoration of the Operating System, application software and hardware drivers to the original
default configuration as shipped from Dell, as well as the verification of appropriate functionality of the printer and all Dellinstalled hardware. In addition to this technician assisted technical support, online technical support is available at Dell
Support. Additional technical support options may be available for purchase.
Dell provides limited technical support for the printer and any Dell-installed software and peripherals. Support for thirdparty software and peripherals is provided by the original manufacturer, including those purchased and/or installed
through Software & Peripherals (DellWare), ReadyWare, and Custom Factory Integration (CFI/DellPlus).
Technical Assistance
If you need help with a technical problem, Dell™ is ready to assist you.
1. Call technical support from a telephone near or at the printer so that technical support can assist you with any
necessary procedures. When calling Dell, use your Express Service Code to help expedite the routing of your call to
the proper support personnel.
NOTE: Dell's Express Service Code may not be available in all countries.
2. In the U.S., small business customers should call 1-800-456-3355, medium and large business customers should
call 1-877-671-3355, and consumer (home and home office) customers should call 1-800-624-9896.
3. Follow the menu prompts in the automated telephone system to speak with a technical support representative.
Obtaining Assistance
NOTE: Call the support service from a telephone near or at the computer so that the support staff can assist you
with any necessary procedures.
NOTE: Dell's Express Service Code system may not be available in all countries.
When prompted by Dell's automated telephone system, enter your Express Service Code to route the call directly to the
proper support personnel. If you do not have an Express Service Code, open the Dell Accessories folder, double-click the
Express Service Code icon, and follow the directions. For instructions on using the Dell Support, see Before You Call.
NOTE: Some of the following services are not always available in all locations outside the continental U.S. Call your
local Dell representative for information on availability.
Downloaded from ManualsPrinter.com Manuals
AutoTech Service
Dell's automated support service—AutoTech—provides recorded answers to the questions most frequently asked by Dell
customers about their portable and desktop computers.
When you call AutoTech, use your touch-tone telephone to select the subjects that correspond to your questions. For the
telephone number to call for your region, see Contacting Dell.
Product Information
If you need information about additional products available from Dell, or if you would like to place an order, visit the Dell
website at www.dell.com. For the telephone number to call for your region or to speak to a sales specialist, see
Contacting Dell.
Before You Call
NOTE: Have your Express Service Code ready when you call. The code helps Dell's automated-support telephone
system direct your call more efficiently. You may also be asked for your Service Tag.
Remember to fill out the Diagnostics Checklist. If possible, turn on your printer before you call Dell for assistance and call
from a telephone at or near the printer. You may be asked to relay detailed information during operations, or try other
troubleshooting steps possible only at the printer itself. Ensure that the printer documentation is available.
CAUTION: Before working inside your printer, follow the safety instructions in your Product Information
Guide.
Diagnostics Checklist
Name:
Date:
Address:
Phone number:
Service Tag:
Express Service Code:
Return Material Authorization Number (if provided by Dell support technician):
Operating system and version:
Is your printer connected to a network? Yes No
Network, version, and network adapter:
Error message:
Description of problem and troubleshooting procedures you performed:
Contacting Dell
NOTE: If you do not have an active Internet connection, you can find contact information on your purchase invoice,
packing slip, bill, or Dell product catalog.
Dell provides several online and telephone-based support and service options. Availability varies by country and product,
and some services may not be available in your area. To contact Dell for sales, technical support, or customer service
issues:
1. Visit support.dell.com.
2. Verify your country or region in the Choose A Country/Region drop-down menu at the bottom of the page.
Downloaded from ManualsPrinter.com Manuals
3. Click Contact Us on the left side of the page.
4. Select the appropriate service or support link based on your need.
Choose the method of contacting Dell that is convenient for you.You can contact Dell electronically using the following
addresses:
World Wide Web
www.dell.com/
www.dell.com/ap/ (Asian/Pacific countries only)
www.dell.com/jp/ (Japan only)
www.euro.dell.com/ (Europe only)
www.dell.com/la/ (Latin American and Caribbean countries)
www.dell.ca (Canada only)
Anonymous file transfer protocol (FTP)
ftp.dell.com/
Log in as user: anonymous, and use your email address as your password.
Dell Support e-mail addresses
mobile_support@us.dell.com
support@us.dell.com
la-techsupport@dell.com (Latin America and Caribbean countries only)
apsupport@dell.com (Asian/Pacific countries only)
Electronic Support Service
mobile_support@us.dell.com
support@us.dell.com
la-techsupport@dell.com (Latin America and Caribbean countries only)
apsupport@dell.com (Asian/Pacific countries only)
support.jp.dell.com (Japan only)
support.euro.dell.com (Europe only)
Electronic Quote Service
apmarketing@dell.com (Asian/Pacific countries only)
sales_canada@dell.com (Canada only)
Warranty and Return Policy
Dell Inc. ("Dell") manufactures its hardware products from parts and components that are new or equivalent to new in
accordance with industry-standard practices.
Prepare all items being returned, whether for repair or credit, as follows:
1. Call Dell to obtain a Return Material Authorization Number, and write it clearly and prominently on the outside of
the box.
For the telephone number to call for your region, see Contacting Dell.
Downloaded from ManualsPrinter.com Manuals
2. Include a copy of the invoice and a letter describing the reason for the return.
3. Include a copy of the Diagnostics Checklist (see Diagnostics Checklist), indicating the tests that you have run and
any error messages reported by the Dell Diagnostics.
4. Include any accessories that belong with the item(s) being returned (power cables, software floppy disks, guides,
and so on) if the return is for credit.
5. Pack the equipment to be returned in the original (or equivalent) packing materials.
You are responsible for paying shipping expenses. You are also responsible for insuring any product returned, and you
assume the risk of loss during shipment to Dell. Collect On Delivery (C.O.D.) packages are not accepted.
Returns that are missing any of the preceding requirements will be refused at Dell's receiving dock and returned to you.
Back to Contents Page
Downloaded from ManualsPrinter.com Manuals
Back to Contents Page
Scanning
Dell™ Photo P703w All-In-One Printer User's Guide
Scanning Using the Operator Panel
Scanning Using the Computer
Scanning From a Thick Book
Editing Scanned Images
Editing Scanned Documents
Changing Scan Settings
Scanning Using the Operator Panel
From the Operator Panel's Scan menu, you can scan photos or documents to a PC-USB, Memory Card, or a PC-WiFi.
Scan to a Computer connected via USB
1. Turn on your computer and printer, and ensure that they are connected.
2. Load your original photo or document.
3. Press the Scan button
.
4. Press the left or right Arrow button
5. Press the down Arrow button
to scroll to Scan To.
6. Press the left or right Arrow button
7. Press the Start button
to scroll to Photo or Document.
to scroll to PC-USB.
.
The document is scanned and saved based on the Dell Imaging Toolbox scan picture settings.
Scan to a Memory Card
1. Turn on your computer and printer, and ensure that they are connected.
Downloaded from ManualsPrinter.com Manuals
2. Insert a Memory Card into the appropriate card slot.
NOTICE: Do not attempt to remove a memory card while it is being accessed. Doing so can damage files on the
card. You can safely remove a card only when the status light next to the slots is not blinking.
3. Load your original photo or document.
4. Press the Scan button
.
5. Press the left or right Arrow button
6. Press the down Arrow button
to scroll to Scan To.
7. Press the left or right Arrow button
8. Press the Start button
to scroll to Photo or Document.
to scroll to Memory Card.
.
The document is scanned and saved to the destination File.
Scan to a Computer connected via Wi-Fi
Scanning to PC-WiFi option is automatically enabled when the wireless connection is established between your printer
and the computer.
1. Turn on your printer and the computer.
2. Establish a wireless connection between your printer and the computer. For more information, see Configuring
Wireless.
3. Load your original photo or document.
Downloaded from ManualsPrinter.com Manuals
4. Press the Scan button
.
5. Press the left or right Arrow button
6. Press the down Arrow button
to scroll to Scan To.
7. Press the left or right Arrow button
8. Press the Start button
to scroll to Photo or Document.
to scroll to PC-WiFi.
.
The document is scanned and saved based on the Dell Imaging Toolbox scan picture settings.
Scanning Using the Computer
Scanning Photos
1. Turn on your computer and printer, and ensure that they are connected.
2. Load your original photo.
3. Click Start® Programs or All Programs® Dell Printers® Dell Photo P703w AIO Printer.
In Windows Vista®:
a. Click
® Programs.
Downloaded from ManualsPrinter.com Manuals
b. Click Dell Printers.
c. Click Dell Photo P703w AIO Printer.
4. Select Dell Imaging Toolbox.
The Dell Imaging Toolbox opens.
5. From the Dell Imaging Toolbox, click Scan to open the Scan Pictures and Document window.
The Basic Scan window opens.
Downloaded from ManualsPrinter.com Manuals
6. Click Go to Advanced from the Scan Pictures and Document window.
The Advanced Scan window opens.
7. Select Picture.
8. Select Color or Black & White.
Downloaded from ManualsPrinter.com Manuals
9. From the Resolution and Sharpening drop-down lists, select the resolution and sharpening.
10. Select the Color restoration, Red eye reduction, and Kodak Perfect Touch technology check box, if you want
to scan with enhancements.
11. Click
to save the options you selected as a Scan Shortcut, if desired.
12. Click Scan or click Preview > button to view the scanned image.
13. Adjust the dotted box to fit around the portion of the image you want to scan and click Next>.
14. Click Edit... to enhance the selected photo (for more information, see Editing Scanned Images) or click Scan More
to add more photos to the picture tray.
NOTE: Click Next > to go directly to the Finish window.
15. When you finish customizing your settings, click Save to File... to save the enhanced picture at new file, or Save
to save it to the scanned file.
NOTE: Click Cancel to undo the changes made.
16. Click Next > to go to the Finish window.
17. Select the destination from the Destinations list box.
Downloaded from ManualsPrinter.com Manuals
NOTE: To add or delete applications from the list, click Modify List.
18. Click Save, Send, or Print according to the destination selected in the Destinations list box.
If you want to Save your scanned image to a file on your computer, Send to Email, or to Print, click Save,
Send, or Print respectively.
Scanning Documents
1. Turn on your computer and printer, and ensure that they are connected.
2. Load your original document.
3. Click Start® Programs or All Programs® Dell Printers® Dell Photo P703w AIO Printer.
In Windows Vista®:
a. Click
Programs.
Downloaded from ManualsPrinter.com Manuals
®
b. Click Dell Printers.
c. Click Dell Photo P703w AIO Printer.
4. Select Dell Imaging Toolbox.
The Dell Imaging Toolbox opens.
5. From the Dell Imaging Toolbox, click Scan to open the Scan Pictures and Document window.
The Basic Scan window opens.
6. Click Go to Advanced from the Scan Pictures and Document window.
The Advanced Scan window opens.
7. Select Document.
8. Select Color, Grayscale, or Black & White.
9. From the Resolution and Sharpening drop-down lists, select the resolution and sharpening respectively.
NOTE: If you change the Resolution, you can save it as a Scan Shortcut.
NOTE: You can change the Sharpening, if you have selected a Color output.
10. Click
to save the options you selected as a Scan Shortcut, if desired.
11. Click Scan or click Preview > button to view the scanned document.
12. Adjust the dotted box to fit around the portion of the document you want to scan and click Next>.
13. Click Edit... to enhance the selected document (for more information, see Editing Scanned Documents) or click
Scan More to add more documents.
Downloaded from ManualsPrinter.com Manuals
NOTE: Click Next > to go directly to the Finish window.
14. When you finish customizing your settings, click Save.
NOTE: Click Cancel to undo the changes made.
15. Click Next > to go to the Finish window.
16. Select the destination from the Destinations list box.
NOTE: To add or delete applications from the list, click Modify List.
17. Click Save, Send, or Print according to the destination selected in the Destinations list box.
If you want to Save your scanned document to a file on your computer, Send to Email, or to Print, click
Save, Send, or Print respectively.
Scanning From a Thick Book
1. Turn on your printer.
2. Load the original thick book.
Your printer functions normally even with the top cover open. You can lift the top cover from the hinges.
NOTE: To get a better Scan quality, cover the extra space on the scanner glass with the white blank paper, if
the size of the book is lesser than the scanner glass.
3. Press the Scan button
.
4. Press the left or right Arrow button
5. Press the down Arrow button
to scroll to Scan To.
6. Press the left or right Arrow button
7. Press the Start button
to scroll to Photo or Document.
to scroll to PC-USB/Memory Card/PC-WiFi.
.
The document is scanned and saved based on the Dell Imaging Toolbox scan picture settings.
Editing Scanned Images
Editing Colored Scanned Images
1. Turn on your computer and printer, and ensure that they are connected.
2. Load your original photo.
Downloaded from ManualsPrinter.com Manuals
3. Click Start® Programs or All Programs® Dell Printers® Dell Photo P703w AIO Printer.
In Windows Vista®:
a. Click
® Programs.
b. Click Dell Printers.
c. Click Dell Photo P703w AIO Printer.
4. Select Dell Imaging Toolbox.
The Dell Imaging Toolbox opens.
5. From the Dell Imaging Toolbox, click Scan to open the Scan Pictures and Document window.
The Basic Scan window opens.
6. Click Go to Advanced from the Scan Pictures and Document window.
The Advanced Scan window opens.
7. Select Picture® Color.
8. Click Scan.
The picture is scanned and scan progress information appears.
9. Click Edit... to edit the selected photo.
10. Edit the image using the tools available in your program. You may be able to:
Enhance your image (Sharpening, Color restoration, Red eye reduction, Facial Retouch, Kodak Perfect Touch
technology)
Adjust the brightness, contrast, saturation, shadows, midtones, and highlights of your image
Custom Facial Retouch of your image
Crop your image
Downloaded from ManualsPrinter.com Manuals
Editing Black and White Scanned Images
1. Turn on your computer and printer, and ensure that they are connected.
2. Load your original photo.
3. Click Start® Programs or All Programs® Dell Printers® Dell Photo P703w AIO Printer.
In Windows Vista®:
a. Click
® Programs.
b. Click Dell Printers.
c. Click Dell Photo P703w AIO Printer.
4. Select Dell Imaging Toolbox.
The Dell Imaging Toolbox opens.
5. From the Dell Imaging Toolbox, click Scan to open the Scan Pictures and Document window.
The Basic Scan window opens.
Downloaded from ManualsPrinter.com Manuals
6. Click Go to Advanced from the Scan Pictures and Document window.
The Advanced Scan window opens.
7. Select Picture® Black and White.
8. Click Scan.
The picture is scanned and scan progress information appears.
9. Click Edit... to edit the selected photo.
10. Edit the image using the tools available in your program. You may be able to:
Enhance your image (Sharpening)
Adjust the brightness, contrast, shadows, midtones, and highlights of your image
Crop your image
Editing Scanned Documents
NOTE: Your printer supports Optical Character Recognition (OCR) capability.
Editing Colored Scanned Documents
1. Turn on your computer and printer, and ensure that they are connected.
2. Load your original document.
Downloaded from ManualsPrinter.com Manuals
3. Click Start® Programs or All Programs® Dell Printers® Dell Photo P703w AIO Printer.
In Windows Vista®:
a. Click
® Programs.
b. Click Dell Printers.
c. Click Dell Photo P703w AIO Printer.
4. Select Dell Imaging Toolbox.
The Dell Imaging Toolbox opens.
5. From Dell Imaging Toolbox, click Scan to open the Scan Pictures and Document window.
The Basic Scan window opens.
6. Click Go to Advanced from the Scan Pictures and Document window.
The Advanced Scan window opens.
7. Select Document® Color.
8. Click Scan.
The document is scanned and scan progress information appears.
9. Click Edit... to edit the selected document.
10. Edit the document using the tools available in your program. You may be able to:
Enhance your document (Sharpening)
Adjust the brightness, contrast, saturation, shadows, midtones, highlights, and invert your document
Crop your document
Downloaded from ManualsPrinter.com Manuals
Editing Grayscale Scanned Documents
1. Turn on your computer and printer, and ensure that they are connected.
2. Load your original document.
3. Click Start® Programs or All Programs® Dell Printers® Dell Photo P703w AIO Printer.
InWindows Vista®:
a. Click
® Programs.
b. Click Dell Printers.
c. Click Dell Photo P703w AIO Printer.
4. Select Dell Imaging Toolbox.
The Dell Imaging Toolbox opens.
5. From the Dell Imaging Toolbox, click Scan to open the Scan Pictures and Document window.
Downloaded from ManualsPrinter.com Manuals
The Basic Scan window opens.
6. Click Go to Advanced from the Scan Pictures and Document window.
The Advanced Scan window opens.
7. Select Document® Grayscale.
8. Click Scan.
The document is scanned and scan progress information appears.
9. Click Edit... to edit the selected document.
10. Edit the document using the tools available in your program. You may be able to:
Enhance your document
Convert gray scale to black and white, adjust the brightness, contrast, and invert your document
Crop your document
Editing Black and White Scanned Documents
1. Turn on your computer and printer, and ensure that they are connected.
2. Load your original document.
Downloaded from ManualsPrinter.com Manuals
3. Click Start® Programs or All Programs® Dell Printers® Dell Photo P703w AIO Printer.
In Windows Vista®:
a. Click
® Programs.
b. Click Dell Printers.
c. Click Dell Photo P703w AIO Printer.
4. Select Dell Imaging Toolbox.
The Dell Imaging Toolbox opens.
5. From the Dell Imaging Toolbox, click Scan to open the Scan Pictures and Document window.
The Basic Scan window opens.
6. Click Go to Advanced from the Scan Pictures and Document window.
The Advanced Scan window opens.
7. Select Document® Black and White.
8. Click Scan.
The document is scanned and scan progress information appears.
9. Click Edit... to edit the selected document.
10. Edit the document using the tools available in your program. You may be able to:
Adjust the brightness, contrast, and invert your document
Crop your document
Downloaded from ManualsPrinter.com Manuals
Changing Scan Settings
Using the Operator Panel Menu
You can change the scan settings from the Scan Mode menu on the operator panel. For more information about settings,
see Scan Mode.
Using the Computer
Scan General Settings
1. Click Start® Programs or All Programs® Dell Printers® Dell Photo P703w AIO Printer.
In Windows Vista®:
a. Click
® Programs.
b. Click Dell Printers.
c. Click Dell Photo P703w AIO Printer.
2. Select Dell Imaging Toolbox.
The Dell Imaging Toolbox opens.
3. From the Dell Imaging Toolbox, select Settings.
4. Click Scan.
Downloaded from ManualsPrinter.com Manuals
5. Click the General tab.
6. Select the Default item type, Documents or Pictures.
7. From the Default scan drop-down list, select the Default scan destination.
8. Click the Applications list button, if you want to add or delete any application.
9. Click OK or Apply.
Downloaded from ManualsPrinter.com Manuals
Scan Document Settings
Basic Settings
1. Click Start® Programs or All Programs® Dell Printers® Dell Photo P703w AIO Printer.
In Windows Vista®:
a. Click
® Programs.
b. Click Dell Printers.
c. Click Dell Photo P703w AIO Printer.
2. Select Dell Imaging Toolbox.
The Dell Imaging Toolbox opens.
3. From the Dell Imaging Toolbox, select Settings.
4. Click Scan.
5. Click the Document tab.
6. From the Scan as drop-down list, select the desired option.
7. From the Resolution drop-down list, select the Resolution.
8. From the File format drop-down list, select the format.
9. Click OK or Apply.
File Save Settings
Downloaded from ManualsPrinter.com Manuals
1. Click Start® Programs or All Programs® Dell Printers® Dell Photo P703w AIO Printer.
In Windows Vista®:
a. Click
® Programs.
b. Click Dell Printers.
c. Click Dell Photo P703w AIO Printer.
2. Select Dell Imaging Toolbox.
The Dell Imaging Toolbox opens.
3. From the Dell Imaging, Toolbox select Settings.
4. Click Scan.
5. Click the Document tab.
6. Select Prompt for filename and location or Automatically save.
7. Make any necessary changes to your scan settings, if you select Automatically save.
8. When you finish customizing your settings, click OK or Apply.
Scan Picture Settings
Basic Settings
1. Click Start® Programs or All Programs® Dell Printers® Dell Photo P703w AIO Printer.
In Windows Vista®:
a. Click
® Programs.
b. Click Dell Printers.
c. Click Dell Photo P703w AIO Printer.
2. Select Dell Imaging Toolbox.
The Dell Imaging Toolbox opens.
3. From the Dell Imaging Toolbox, select Settings.
4. Click Scan.
5. Click the Picture tab.
Downloaded from ManualsPrinter.com Manuals
6. From the Scan as drop-down list, select the desired option.
7. From the Resolution drop-down list, select the Resolution.
8. From the File format drop-down list, select the format.
9. From the Quality drop-down list, select the quality.
10. Select the Automatically detect picture check box if you want to detect the picture automatically.
11. When you finish customizing your settings, click OK or Apply.
File Save Settings
1. Click Start® Programs or All Programs® Dell Printers® Dell Photo P703w AIO Printer.
In Windows Vista®:
a. Click
® Programs.
b. Click Dell Printers.
c. Click Dell Photo P703w AIO Printer.
2. Select Dell Imaging Toolbox.
The Dell Imaging Toolbox opens.
3. From the Dell Imaging Toolbox, select Settings.
4. Click Scan.
5. Click the Picture tab.
6. Select Prompt for filename and location or Automatically save.
7. Make any necessary changes to your scan settings, if you select Automatically save.
8. When you finish customizing your settings, click OK or Apply.
Downloaded from ManualsPrinter.com Manuals
Back to Contents Page
Downloaded from ManualsPrinter.com Manuals
Back to Contents Page
Licensing Notice
Dell™ Photo P703w All-In-One Printer User's Guide
BSD License and Warranty statements
The printer resident software contains:
Software licensed under the BSD license and warranty statements
BSD License and Warranty statements
Copyright (c) 1991 The Regents of the University of California. All rights reserved.
Redistribution and use in source and binary forms, with or without modification, are permitted provided that the following
conditions are met:
1. Redistributions of source code must retain the above copyright notice, this list of conditions and the following
disclaimer.
2. Redistributions in binary form must reproduce the above copyright notice, this list of conditions and the following
disclaimer in the documentation and/or other materials provided with the distribution.
3. The name of the author may not be used to endorse or promote products derived from this software without
specific prior written permission.
THIS SOFTWARE IS PROVIDED BY THE AUTHOR ``AS IS'' AND ANY EXPRESS OR IMPLIED WARRANTIES, INCLUDING, BUT
NOT LIMITED TO, THE IMPLIED WARRANTIES OF MERCHANTABILITY AND FITNESS FOR A PARTICULAR PURPOSE ARE
DISCLAIMED. IN NO EVENT SHALL THE AUTHOR BE LIABLE FOR ANY DIRECT, INDIRECT, INCIDENTAL, SPECIAL,
EXEMPLARY, OR CONSEQUENTIAL DAMAGES (INCLUDING, BUT NOT LIMITED TO, PROCUREMENT OF SUBSTITUTE GOODS
OR SERVICES; LOSS OF USE, DATA, OR PROFITS; OR BUSINESS INTERRUPTION) HOWEVER CAUSED AND ON ANY
THEORY OF LIABILITY, WHETHER IN CONTRACT, STRICT LIABILITY, OR TORT (INCLUDING NEGLIGENCE OR OTHERWISE)
ARISING IN ANY WAY OUT OF THE USE OF THIS SOFTWARE, EVEN IF ADVISED OF THE POSSIBILITY OF SUCH DAMAGE.
Back to Contents Page
Downloaded from ManualsPrinter.com Manuals