1
You'll be entered into a quarterly drawing for free Cisco Press books by returning this survey! Cisco is dedicated to customer
satisfaction and would like to hear your thoughts on these printed manuals. Please visit the Cisco Product Comments on-line
survey at www.cisco.com/go/crc to submit your comments about accessing Cisco technical manuals. Thank you for your time
General Information
1
Years of networking experience:
2
I have these network types:
Years of experience with Cisco products:
LAN
Backbone
Switches
Routers
WAN
Other:
3
I have these Cisco products:
Other (specify models):
4
I perform these types of tasks:
Network management
5
I use these types of documentation:
Command reference
H/W installation and/or maintenance
S/W configuration
Other:
H/W installation
H/W configuration
S/W configuration
Quick reference
Release notes
Online help
% Cisco.com
% CD-ROM
% Printed manuals
Cisco.com
CD-ROM
Printed manuals
Other:
6
I access this information through:
7
I prefer this access method:
8
I use the following three product features the most:
% Other:
Other:
Document Information
Document Title:
Cisco SN 5428-2 Storage Router Software Configuration Guide
Part Number:
78-15471-01
S/W Release (if applicable): 3.3
On a scale of 1–5 (5 being the best), please let us know how we rate in the following areas:
The document is complete.
The information is accurate.
The information is well organized.
The information I wanted was easy to find.
The document is written at my
technical level of understanding.
The information I found was useful to my job.
Please comment on our lowest scores:
Mailing Information
Organization
Date
Contact Name
Mailing Address
City
State/Province
Zip/Postal Code
Country
Phone (
)
Extension
E-mail
Fax
)
May we contact you further concerning our documentation?
(
Yes
No
You can also send us your comments by e-mail to bug-doc@cisco.com, or by fax to 408-527-8089.
When mailing this card from outside of the United States, please enclose in an envelope addressed to the location on the back of this card with
the required postage or fax to 1-408-527-8089.
FIRST-CLASS MAIL
PERMIT NO. 4631
SAN JOSE CA
BUSINESS REPLY MAIL
POSTAGE WILL BE PAID BY ADDRESSEE
DOCUMENT RESOURCE CONNECTION
CISCO SYSTEMS INC
170 WEST TASMAN DR
SAN JOSE CA 95134-9916
NO POSTAGE
NECESSARY
IF MAILED
IN THE
UNITED STATES
Cisco SN 5428-2 Storage Router
Software Configuration Guide
Release 3.3
Corporate Headquarters
Cisco Systems, Inc.
170 West Tasman Drive
San Jose, CA 95134-1706
USA
http://www.cisco.com
Tel: 408 526-4000
800 553-NETS (6387)
Fax: 408 526-4100
Customer Order Number: DOC-7815471=
Text Part Number: 78-15471-01
THE SPECIFICATIONS AND INFORMATION REGARDING THE PRODUCTS IN THIS MANUAL ARE SUBJECT TO CHANGE WITHOUT NOTICE. ALL
STATEMENTS, INFORMATION, AND RECOMMENDATIONS IN THIS MANUAL ARE BELIEVED TO BE ACCURATE BUT ARE PRESENTED WITHOUT
WARRANTY OF ANY KIND, EXPRESS OR IMPLIED. USERS MUST TAKE FULL RESPONSIBILITY FOR THEIR APPLICATION OF ANY PRODUCTS.
THE SOFTWARE LICENSE AND LIMITED WARRANTY FOR THE ACCOMPANYING PRODUCT ARE SET FORTH IN THE INFORMATION PACKET THAT
SHIPPED WITH THE PRODUCT AND ARE INCORPORATED HEREIN BY THIS REFERENCE. IF YOU ARE UNABLE TO LOCATE THE SOFTWARE LICENSE
OR LIMITED WARRANTY, CONTACT YOUR CISCO REPRESENTATIVE FOR A COPY.
The Cisco implementation of TCP header compression is an adaptation of a program developed by the University of California, Berkeley (UCB) as part of UCB’s public
domain version of the UNIX operating system. All rights reserved. Copyright © 1981, Regents of the University of California.
NOTWITHSTANDING ANY OTHER WARRANTY HEREIN, ALL DOCUMENT FILES AND SOFTWARE OF THESE SUPPLIERS ARE PROVIDED “AS IS” WITH
ALL FAULTS. CISCO AND THE ABOVE-NAMED SUPPLIERS DISCLAIM ALL WARRANTIES, EXPRESSED OR IMPLIED, INCLUDING, WITHOUT
LIMITATION, THOSE OF MERCHANTABILITY, FITNESS FOR A PARTICULAR PURPOSE AND NONINFRINGEMENT OR ARISING FROM A COURSE OF
DEALING, USAGE, OR TRADE PRACTICE.
IN NO EVENT SHALL CISCO OR ITS SUPPLIERS BE LIABLE FOR ANY INDIRECT, SPECIAL, CONSEQUENTIAL, OR INCIDENTAL DAMAGES, INCLUDING,
WITHOUT LIMITATION, LOST PROFITS OR LOSS OR DAMAGE TO DATA ARISING OUT OF THE USE OR INABILITY TO USE THIS MANUAL, EVEN IF CISCO
OR ITS SUPPLIERS HAVE BEEN ADVISED OF THE POSSIBILITY OF SUCH DAMAGES.
CCIP, CCSP, the Cisco Arrow logo, the Cisco Powered Network mark, the Cisco Systems Verified logo, Cisco Unity, Follow Me Browsing, FormShare, iQ Net Readiness
Scorecard, Networking Academy, and ScriptShare are trademarks of Cisco Systems, Inc.; Changing the Way We Work, Live, Play, and Learn, The Fastest Way to Increase Your
Internet Quotient, and iQuick Study are service marks of Cisco Systems, Inc.; and Aironet, ASIST, BPX, Catalyst, CCDA, CCDP, CCIE, CCNA, CCNP, Cisco, the Cisco Certified
Internetwork Expert logo, Cisco IOS, the Cisco IOS logo, Cisco Press, Cisco Systems, Cisco Systems Capital, the Cisco Systems logo, Empowering the Internet Generation,
Enterprise/Solver, EtherChannel, EtherSwitch, Fast Step, GigaStack, Internet Quotient, IOS, IP/TV, iQ Expertise, the iQ logo, LightStream, MGX, MICA, the Networkers logo,
Network Registrar, Packet, PIX, Post-Routing, Pre-Routing, RateMUX, Registrar, SlideCast, SMARTnet, StrataView Plus, Stratm, SwitchProbe, TeleRouter, TransPath, and VCO
are registered trademarks of Cisco Systems, Inc. and/or its affiliates in the U.S. and certain other countries.
All other trademarks mentioned in this document or Web site are the property of their respective owners. The use of the word partner does not imply a partnership relationship
between Cisco and any other company. (0303R)
Cisco SN 5428-2 Storage Router Software Configuration Guide
Copyright © 2003 Cisco Systems, Inc. All rights reserved.
C O N T E N T S
About This Guide
Objectives
Audience
ix
ix
ix
Organization
x
Command Syntax Conventions
Related Documentation
xi
xii
Obtaining Documentation xii
Cisco.com xii
Documentation CD-ROM xii
Ordering Documentation xiii
Documentation Feedback xiii
Obtaining Technical Assistance xiii
Cisco.com xiii
Technical Assistance Center xiv
Cisco TAC Website xiv
Cisco TAC Escalation Center xv
Obtaining Additional Publications and Information
CHAPTER
1
xv
Before Configuring SN 5428-2 Storage Router Software
SN 5428-2 Storage Router Software Overview
1-1
1-2
SCSI Routing Overview 1-4
Using iSCSI Protocol to Route SCSI Requests and Responses
Basic Network Structure 1-6
SCSI Routing Mapping and Access Control 1-6
Available Instances of SCSI Routing 1-9
1-5
Transparent SCSI Routing Overview 1-10
Using iSCSI Protocol to Route SCSI Requests and Responses 1-11
Basic Network Structure 1-12
Transparent SCSI Routing Mapping and Access Control 1-12
Available Instances of Transparent SCSI Routing 1-15
FCIP Overview 1-15
Using FCIP to Route Fibre Channel Packets
FCIP Network Structures 1-16
VLAN Access Overview
1-15
1-18
Cisco SN 5428-2 Storage Router Software Configuration Guide
78-15471-01
iii
Contents
Zoning Overview
1-19
Fibre Channel Interface Overview
1-21
Gigabit Ethernet Interface Overview
Authentication Overview
1-21
1-22
SN 5428-2 Cluster Management Overview
Interface Naming
Where to Go Next
CHAPTER
2
1-23
1-24
First-Time Configuration
Prerequisite Tasks
1-22
2-1
2-1
Collecting Configuration Information
Connecting a Console
2-2
2-6
Initial System Configuration Script
2-7
Running the Setup Configuration Wizard
2-8
Introducing the CLI 2-10
Character Case Sensitivity in the CLI
Command Modes 2-10
Command Prompt 2-10
Reserved Words 2-11
Show CLI Command 2-11
Special Keys 2-11
Starting a CLI Management Session
2-10
2-12
Introducing the Web-Based GUI 2-12
Logging In 2-12
Monitor Mode 2-13
Administrator Mode 2-13
Menu Items and Links 2-13
Where to Go Next
CHAPTER
3
2-14
Configuring System Parameters
Prerequisite Tasks
3-1
3-1
Configuration Tasks
3-2
Configuring the Management Interface
Configuring Time and Date
Configuring IP Routes
3-3
3-4
3-5
Configuring Network Management Access
Configuring Passwords
3-7
3-8
Cisco SN 5428-2 Storage Router Software Configuration Guide
iv
78-15471-01
Contents
Configuring Administrator Contact Information
Configuring the High-Availability Interface
3-9
Configuring for Secure Shell (SSH) Access
3-9
Verifying and Saving Configuration
CHAPTER
4
Configuring for VLAN
Prerequisite Tasks
3-10
4-1
4-1
VLAN Encapsulation
4-1
Configuration Tasks
4-2
Configuring for VLAN with VTP
4-4
Configuring for VLAN without VTP
Configuring an IP Route
4-4
4-5
Verifying and Saving Configuration
4-5
Assigning a VLAN to a SCSI Routing Instance
CHAPTER
5
Configuring Fibre Channel Interfaces
Prerequisite Tasks
Configuration Tasks
3-8
4-6
5-1
5-1
5-1
Configuring FC Interfaces 5-2
Configuring an FC Port Type 5-3
Configuring a Donor Port to Extend Buffer Credits
5-3
Configuring the Domain ID 5-4
Internal FC Ports 5-5
Configuring Zoning
5-6
Verifying Configuration
CHAPTER
6
Configuring SCSI Routing
Prerequisite Tasks
Configuration Tasks
5-9
6-1
6-1
6-2
Creating a SCSI Routing Instance
Configuring a Server Interface
Configuring iSCSI Targets
6-6
6-6
6-7
Creating and Configuring an Access List
Configuring Access to iSCSI Targets
Verifying and Saving Configuration
6-10
6-11
6-14
Cisco SN 5428-2 Storage Router Software Configuration Guide
78-15471-01
v
Contents
CHAPTER
7
Configuring Transparent SCSI Routing
Prerequisite Tasks
7-1
Summary of Configuration Process
Verifying Configuration
CHAPTER
8
Configuring FCIP
7-1
7-1
7-3
8-1
Prerequisite Tasks
8-1
Configuration Tasks
8-2
Setting the Domain ID
8-2
Creating an FCIP Instance
Assigning an IP Address
8-3
8-3
Assigning a Protocol, Peer Name, and Peer IP Address
Assigning Protocol: tcpserver 8-4
Assigning Protocol: tcpclient 8-4
Assigning Protocol: raw 8-5
CHAPTER
9
Configuring Operational Parameters
8-5
Verifying and Saving Configuration
8-6
Configuring Authentication
Prerequisite Tasks
9-1
9-2
Using Authentication 9-2
iSCSI Authentication 9-2
Enable Authentication 9-3
Login Authentication 9-3
AAA Authentication Services
Configuration Tasks
8-3
9-3
9-4
Configuring AAA Authentication Services
Creating Named Server Groups
9-11
9-14
Creating AAA Authentication Lists
9-15
Testing Authentication 9-17
iSCSI Authentication 9-17
Enable Authentication 9-17
Login Authentication 9-18
Configuring Two-Way Authentication
Enabling iSCSI Authentication
9-18
9-19
Verifying and Saving Configuration
9-19
Cisco SN 5428-2 Storage Router Software Configuration Guide
vi
78-15471-01
Contents
CHAPTER
10
Configuring a High Availability Cluster
10-1
Prerequisite Tasks 10-1
Guidelines for Configuring SCSI Routing Instances
10-2
Creating a Cluster 10-2
Adding an Unconfigured SN 5428-2 Storage Router 10-4
Adding a Minimally Configured SN 5428-2 Storage Router
Joining Stand-alone Storage Routers in a Cluster
Changing Clusters
CHAPTER
11
10-5
10-6
10-7
Maintaining and Managing the SN 5428-2 Storage Router
Prerequisite Tasks
11-1
11-2
Installing Updated Software 11-2
Specifying the Location to Retrieve Updated Software
Downloading Updated Software 11-5
Downloading from a Special Location 11-6
Setting Updated Software as Boot Version 11-6
Precautions for Cluster Environments 11-7
Backing Up System Configuration
Restoring from Backups
11-7
11-8
Powering Down the SN 5428-2 Storage Router
Resetting the System
Recovering Passwords
11-3
11-16
11-17
11-19
Controlling SCSI Routing Instances in a Cluster 11-20
Making Changes to Instance Configurations 11-20
Enabling and Disabling Connections 11-21
Stopping & Starting Instances 11-23
Viewing Operational Statistics 11-23
Handling Failover 11-23
Manual Failover 11-25
Managing CDP on the SN 5428-2 Storage Router
11-27
Using Scripts to Automate Tasks 11-28
Running Command Scripts 11-29
Using the SN 5428-2 Logging Facilities 11-29
Filtering and Routing Event Messages 11-31
Enabling and Disabling Logging 11-32
Managing the Log File 11-32
Gathering Troubleshooting Information
11-33
Cisco SN 5428-2 Storage Router Software Configuration Guide
78-15471-01
vii
Contents
Using the Crash Log 11-33
Using FTP with the SN 5428-2 Storage Router 11-35
Understanding Diagnostics 11-36
Capturing System Messages at Bootup 11-36
Capturing the Storage Router Configuration 11-37
Using Debug Facilities 11-37
CHAPTER
12
Command Line Interface Reference
About CLI Commands
CLI Usage Tips
12-1
CLI Commands
12-2
12-1
12-1
INDEX
Cisco SN 5428-2 Storage Router Software Configuration Guide
viii
78-15471-01
About This Guide
This preface describes the objectives, audience, organization and command syntax conventions of the
Cisco SN 5428-2 Storage Router Software Configuration Guide. It also provides information on how to
obtain related documentation and technical assistance.
Note
The model number of the SN 5428-2 Storage Router may appear on your terminal as 5428-2-K9 during
console sessions with the storage router and in command line interface (CLI) output.
Objectives
This software configuration guide describes how to configure software in a Cisco SN 5428-2 Storage
Router. It does not describe every possible configuration but does describe those tasks commonly
required to configure the software.
Note
This guide does not describe how to configure the iSCSI driver to be installed in each host requiring IP
access to storage. Download the Cisco iSCSI drivers from Cisco.com and install and configure the
drivers according to the accompanying readme files, release notes, and example configuration files.
Audience
This guide is intended primarily for the following audiences:
•
System administrators who are familiar with the fundamentals of router-based internetworking and
network storage devices, but who might not be familiar with the specifics of Cisco products or the
routing protocols supported by Cisco products.
•
System administrators who are responsible for configuring network storage equipment.
Cisco SN 5428-2 Storage Router Software Configuration Guide
78-15471-01
ix
About This Guide
Organization
Organization
This guide contains the following chapters (Table 1):
Table 1
Document Organization
Chapter
Title
Description
Chapter 1
Before Configuring SN 5428-2
Storage Router Software
Describes what you should understand prior to
configuring storage router software.
Chapter 2
First-Time Configuration
Describes what configuration information to
gather and explains the initial system
configuration script and setup configuration
wizard. This chapter also introduces the CLI and
web-based GUI.
Chapter 3
Configuring System Parameters
Provides procedures for configuring system
parameters.
Chapter 4
Configuring for VLAN
Provides procedures for configuring VLAN.
Chapter 5
Configuring Fibre Channel Interfaces Provides procedures for configuring Fibre
Channel (FC) interfaces and FC fabric zoning.
Chapter 6
Configuring SCSI Routing
Provides procedures for configuring SCSI
routing.
Chapter 7
Configuring Transparent SCSI
Routing
Provides procedures for configuring transparent
SCSI routing.
Chapter 8
Configuring FCIP
Provides procedures for configuring FCIP.
Chapter 9
Configuring Authentication
Provides procedures for configuring AAA
authentication and enabling iSCSI, Enable and
Login authentication.
Chapter 10
Configuring a High Availability
Cluster
Provides procedures for configuring a storage
router cluster.
Chapter 11
Maintaining and Managing the
SN 5428-2 Storage Router
Describes how to perform normal maintenance
and management tasks associated with the
storage router.
Chapter 12
Command Line Interface Reference
Provides information on the command line
interface (CLI) and on all CLI commands.
Cisco SN 5428-2 Storage Router Software Configuration Guide
x
78-15471-01
About This Guide
Command Syntax Conventions
Command Syntax Conventions
Table 2 describes the syntax used with the commands in this document.
Table 2
Syntax Conventions
Convention
Description
boldface font
Indicates commands and keywords that you enter
literally as shown.
italic font
Indicates arguments for which you supply values.
[x]
Square brackets indicate an optional element
(keyword or argument).
{x}
Braces indicate a required element (keyword or
argument).
{s | y | z}
Braces and vertical bars indicate a required choice
of keywords or arguments, separated by the
vertical bars within the braces.
[ x {y | z}]
Braces and vertical bars within square brackets
indicate a required choice within an optional
element.
/bits
The value entered for /bits specifies a network
mask in classless interdomain routing (CIDR)
style. That is, the value equals the number of bits
in a network mask counting from the most
significant side (left) of an IP address. For
example, a /bits value of 24 is the equivalent of a
network mask of 255.255.255.0. Similarly, a /bits
value of 32 specifies using the entire IP address.
“user text”
Indicates that user text (a user-defined text string)
that contains a space or spaces must be enclosed
using double or single quotes. If single quotes or
an apostrophe is used as part of the text string,
enclose the string using double quotes. If double
quotes are used as part of the text string, enclose
the string using single quotes.
For example, both “Pat’s storage router” and
‘number “2”’ are valid text string entries.
Note
The question mark (?) character cannot be
used as part of a text string.
screen font
Examples of information displayed on the screen.
boldface screen font
Examples of information you must enter.
<>
Nonprinting characters, for example, passwords
appear in angle brackets.
[
Default responses to system prompts appear in
square brackets.
]
Cisco SN 5428-2 Storage Router Software Configuration Guide
78-15471-01
xi
About This Guide
Related Documentation
Note
Caution
Timesaver
Means reader take note. Notes contain helpful suggestions or references to additional information and
material.
Means reader be careful. In this situation, you might do something that could result in equipment
damage or loss of data.
Means the described action saves time. You can save time by performing the action described in the
paragraph.
Related Documentation
Refer to the following documents for additional information:
•
Cisco SN 5428-2 Storage Router Hardware Installation Guide
•
Release Notes for the Cisco SN 5428-2 Storage Router
Obtaining Documentation
Cisco provides several ways to obtain documentation, technical assistance, and other technical
resources. These sections explain how to obtain technical information from Cisco Systems.
Cisco.com
You can access the most current Cisco documentation on the World Wide Web at this URL:
http://www.cisco.com/univercd/home/home.htm
You can access the Cisco website at this URL:
http://www.cisco.com
International Cisco websites can be accessed from this URL:
http://www.cisco.com/public/countries_languages.shtml
Documentation CD-ROM
Cisco documentation and additional literature are available in a Cisco Documentation CD-ROM
package, which may have shipped with your product. The Documentation CD-ROM is updated regularly
and may be more current than printed documentation. The CD-ROM package is available as a single unit
or through an annual or quarterly subscription.
Registered Cisco.com users can order a single Documentation CD-ROM (product number
DOC-CONDOCCD=) through the Cisco Ordering tool:
http://www.cisco.com/en/US/partner/ordering/ordering_place_order_ordering_tool_launch.html
Cisco SN 5428-2 Storage Router Software Configuration Guide
xii
78-15471-01
About This Guide
Obtaining Technical Assistance
All users can order monthly or quarterly subscriptions through the online Subscription Store:
http://www.cisco.com/go/subscription
Ordering Documentation
You can find instructions for ordering documentation at this URL:
http://www.cisco.com/univercd/cc/td/doc/es_inpck/pdi.htm
You can order Cisco documentation in these ways:
•
Registered Cisco.com users (Cisco direct customers) can order Cisco product documentation from
the Networking Products MarketPlace:
http://www.cisco.com/en/US/partner/ordering/index.shtml
•
Nonregistered Cisco.com users can order documentation through a local account representative by
calling Cisco Systems Corporate Headquarters (California, U.S.A.) at 408 526-7208 or, elsewhere
in North America, by calling 800 553-NETS (6387).
Documentation Feedback
You can submit comments electronically on Cisco.com. On the Cisco Documentation home page, click
Feedback at the top of the page.
You can e-mail your comments to bug-doc@cisco.com.
You can submit comments by using the response card (if present) behind the front cover of your
document or by writing to the following address:
Cisco Systems
Attn: Customer Document Ordering
170 West Tasman Drive
San Jose, CA 95134-9883
We appreciate your comments.
Obtaining Technical Assistance
Cisco provides Cisco.com, which includes the Cisco Technical Assistance Center (TAC) website, as a
starting point for all technical assistance. Customers and partners can obtain online documentation,
troubleshooting tips, and sample configurations from the Cisco TAC website. Cisco.com registered users
have complete access to the technical support resources on the Cisco TAC website, including TAC tools
and utilities.
Cisco.com
Cisco.com offers a suite of interactive, networked services that let you access Cisco information,
networking solutions, services, programs, and resources at any time, from anywhere in the world.
Cisco.com provides a broad range of features and services to help you with these tasks:
•
Streamline business processes and improve productivity
Cisco SN 5428-2 Storage Router Software Configuration Guide
78-15471-01
xiii
About This Guide
Obtaining Technical Assistance
•
Resolve technical issues with online support
•
Download and test software packages
•
Order Cisco learning materials and merchandise
•
Register for online skill assessment, training, and certification programs
To obtain customized information and service, you can self-register on Cisco.com at this URL:
http://tools.cisco.com/RPF/register/register.do
Technical Assistance Center
The Cisco TAC is available to all customers who need technical assistance with a Cisco product,
technology, or solution. Two types of support are available: the Cisco TAC website and the Cisco TAC
Escalation Center. The type of support that you choose depends on the priority of the problem and the
conditions stated in service contracts, when applicable.
We categorize Cisco TAC inquiries according to urgency:
•
Priority level 4 (P4)—You need information or assistance concerning Cisco product capabilities,
product installation, or basic product configuration. There is little or no impact to your business
operations.
•
Priority level 3 (P3)—Operational performance of the network is impaired, but most business
operations remain functional. You and Cisco are willing to commit resources during normal business
hours to restore service to satisfactory levels.
•
Priority level 2 (P2)—Operation of an existing network is severely degraded, or significant aspects
of your business operations are negatively impacted by inadequate performance of Cisco products.
You and Cisco will commit full-time resources during normal business hours to resolve the situation.
•
Priority level 1 (P1)—An existing network is “down,” or there is a critical impact to your business
operations. You and Cisco will commit all necessary resources around the clock to resolve the
situation.
Cisco TAC Website
The Cisco TAC website provides online documents and tools to help troubleshoot and resolve technical
issues with Cisco products and technologies. To access the Cisco TAC website, go to this URL:
http://www.cisco.com/tac
All customers, partners, and resellers who have a valid Cisco service contract have complete access to
the technical support resources on the Cisco TAC website. Some services on the Cisco TAC website
require a Cisco.com login ID and password. If you have a valid service contract but do not have a login
ID or password, go to this URL to register:
http://tools.cisco.com/RPF/register/register.do
If you are a Cisco.com registered user, and you cannot resolve your technical issues by using the Cisco
TAC website, you can open a case online at this URL:
http://www.cisco.com/tac/caseopen
If you have Internet access, we recommend that you open P3 and P4 cases online so that you can fully
describe the situation and attach any necessary files.
Cisco SN 5428-2 Storage Router Software Configuration Guide
xiv
78-15471-01
About This Guide
Obtaining Additional Publications and Information
Cisco TAC Escalation Center
The Cisco TAC Escalation Center addresses priority level 1 or priority level 2 issues. These
classifications are assigned when severe network degradation significantly impacts business operations.
When you contact the TAC Escalation Center with a P1 or P2 problem, a Cisco TAC engineer
automatically opens a case.
To obtain a directory of toll-free Cisco TAC telephone numbers for your country, go to this URL:
http://www.cisco.com/warp/public/687/Directory/DirTAC.shtml
Before calling, please check with your network operations center to determine the Cisco support services
to which your company is entitled: for example, SMARTnet, SMARTnet Onsite, or Network Supported
Accounts (NSA). When you call the center, please have available your service agreement number and
your product serial number.
Obtaining Additional Publications and Information
Information about Cisco products, technologies, and network solutions is available from various online
and printed sources.
•
The Cisco Product Catalog describes the networking products offered by Cisco Systems, as well as
ordering and customer support services. Access the Cisco Product Catalog at this URL:
http://www.cisco.com/en/US/products/products_catalog_links_launch.html
•
Cisco Press publishes a wide range of networking publications. Cisco suggests these titles for new
and experienced users: Internetworking Terms and Acronyms Dictionary, Internetworking
Technology Handbook, Internetworking Troubleshooting Guide, and the Internetworking Design
Guide. For current Cisco Press titles and other information, go to Cisco Press online at this URL:
http://www.ciscopress.com
•
Packet magazine is the Cisco quarterly publication that provides the latest networking trends,
technology breakthroughs, and Cisco products and solutions to help industry professionals get the
most from their networking investment. Included are networking deployment and troubleshooting
tips, configuration examples, customer case studies, tutorials and training, certification information,
and links to numerous in-depth online resources. You can access Packet magazine at this URL:
http://www.cisco.com/go/packet
•
iQ Magazine is the Cisco bimonthly publication that delivers the latest information about Internet
business strategies for executives. You can access iQ Magazine at this URL:
http://www.cisco.com/go/iqmagazine
•
Internet Protocol Journal is a quarterly journal published by Cisco Systems for engineering
professionals involved in designing, developing, and operating public and private internets and
intranets. You can access the Internet Protocol Journal at this URL:
http://www.cisco.com/en/US/about/ac123/ac147/about_cisco_the_internet_protocol_journal.html
•
Training—Cisco offers world-class networking training. Current offerings in network training are
listed at this URL:
http://www.cisco.com/en/US/learning/le31/learning_recommended_training_list.html
Cisco SN 5428-2 Storage Router Software Configuration Guide
78-15471-01
xv
About This Guide
Obtaining Additional Publications and Information
Cisco SN 5428-2 Storage Router Software Configuration Guide
xvi
78-15471-01
C H A P T E R
1
Before Configuring SN 5428-2 Storage Router
Software
The Cisco SN 5428-2 Storage Router installation and configuration tasks consist of the following:
•
Install the SN 5428-2 Storage Router according to the Cisco SN 5428-2 Storage Router Hardware
Installation Guide.
•
Select how the SN 5428-2 will be deployed: SCSI routing, transparent SCSI routing, or FCIP.
•
Configure the SN 5428-2 Storage Router software according to the Cisco SN 5428-2 Storage Router
Software Configuration Guide (this manual).
•
Install and configure iSCSI drivers in IP hosts connected to the storage router.
The iSCSI driver is not required for FCIP deployment, or in IP hosts that have a TCP/IP Offload
Engine (TOE) with embedded iSCSI protocol installed.
This chapter is the starting point for SN 5428-2 Storage Router software configuration. It provides some
very basic, abbreviated information as background to help you understand the SN 5428-2 Storage Router
features and the software configuration process. It contains the following topics:
•
SN 5428-2 Storage Router Software Overview, page 1-2
•
SCSI Routing Overview, page 1-4
•
Transparent SCSI Routing Overview, page 1-10
•
FCIP Overview, page 1-15
•
VLAN Access Overview, page 1-18
•
Zoning Overview, page 1-19
•
Fibre Channel Interface Overview, page 1-21
•
Gigabit Ethernet Interface Overview, page 1-21
•
Authentication Overview, page 1-22
•
SN 5428-2 Cluster Management Overview, page 1-22
•
Interface Naming, page 1-23
•
Where to Go Next, page 1-24
Cisco SN 5428-2 Storage Router Software Configuration Guide
78-15471-01
1-1
Chapter 1
Before Configuring SN 5428-2 Storage Router Software
SN 5428-2 Storage Router Software Overview
SN 5428-2 Storage Router Software Overview
The Cisco SN 5428-2 Storage Router provides universal access to storage over IP networks. The storage
router software controls the operation of the Cisco SN 5428-2 Storage Router. You can configure the
software to provide the following types of access to storage over IP networks: SCSI routing, transparent
SCSI routing, or FCIP.
SCSI routing provides IP hosts with access to Fibre Channel (FC) storage devices, using iSCSI protocol.
The iSCSI protocol is an IETF-defined protocol for IP storage (ips).
Note
For more information about the iSCSI protocol, refer to the IETF standards for IP storage at
http://www.ietf.org.
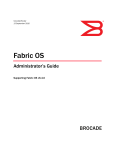
With SCSI routing, storage device access is managed primarily in the SN 5428-2. (See Figure 1-1.)
Figure 1-1
SCSI Routing
FC storage devices
IP hosts
Cisco SN 5428-2
IP
85720
Storage access is managed
in the SN 5428-2.
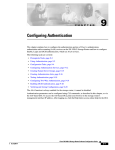
Transparent SCSI routing provides IP hosts with transparent access to intelligent storage arrays using
iSCSI protocol; that is, each IP host is presented as an FC host to an intelligent storage array. With
transparent SCSI routing, availability of storage devices is managed primarily in the intelligent storage
array. (See Figure 1-2.)
Transparent SCSI Routing
IP hosts
Intelligent storage
array
Cisco SN 5428-2
FC
IP
The SN 5428-2
presents each IP host
as an FC host to the
storage array.
Storage access is
managed in the
storage array.
85721
Figure 1-2
Cisco SN 5428-2 Storage Router Software Configuration Guide
1-2
78-15471-01
Chapter 1
Before Configuring SN 5428-2 Storage Router Software
SN 5428-2 Storage Router Software Overview
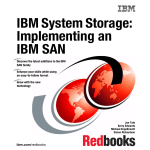
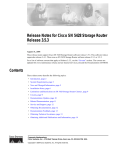
Fibre Channel over IP (FCIP) enables SN 5428-2 Storage Routers to provide connectivity by tunneling
through an IP network between storage area networks (SANs). (See Figure 1-3.)
FCIP
FC hosts and
storage devices
SAN
SN 5428-2
SN 5428-2
IP
FC hosts and
storage devices
SAN
The SN 5428-2s connect
SANs by tunneling though
the IP network
91658
Figure 1-3
In addition to providing services for accessing storage over IP networks, the SN 5428-2 Storage Router
software provides the following services:
•
VLAN Access Control—provides IP access control to storage based on a VLAN identifier (VID)
number (in addition to access control through access lists)
•
Authentication—provides iSCSI, Enable and Login authentication using AAA authentication
methods
•
High Availability (HA)—provides the ability to group storage routers in a cluster for intelligent
failover and other cluster-related functions (for SCSI routing only)
•
E_Port with FC Fabric Zoning—provides the ability to connect FC ports to FC switches and
participate in fabric zoning, manage zoning, and support zone mergers
•
SNMP/MIB support—provides network management of the SN 5428-2 through SNMP using
selected MIBs
•
Gigabit Ethernet Interface features—provides the ability to assign a management IP address per
Gigabit Ethernet interface, multiple IP addresses per SCSI routing instance, and an optional
secondary Gigabit Ethernet interface per IP address used for SCSI routing or SN 5428-2
management. When the SN 5428-2 is deployed for FCIP, provides primary and optional secondary
Gigabit Ethernet interfaces to the FCIP peer.
•
Buffer credit extension—enables the SN 5428-2 to donate buffer credits from a donor port to
selected FC ports
•
Secure Sockets Layer support—provides HTTPS connection for secure access through the
web-based GUI
•
Secure Shell (SSH) protocol version 2 support—provides high encryption and authentication for
interactive management sessions, and is a common replacement for Telnet
•
Routing Information Protocol (RIP) listening support—allows the SN 5428-2 to learn dynamic
routing using RIP (version 1 or version 2) listening
•
Service Location Protocol (SLP) Support—provides the ability to advertise targets of specified
SCSI routing instances
•
TCP Window Tuning—provides the ability to maximize bandwidth across the network by
automatically setting the local TCP receive window size to the remote TCP receive window size
without user intervention
•
A command-line interface (CLI) and a web-based GUI—provides user interfaces for configuration
and maintenance of an SN 5428-2
Cisco SN 5428-2 Storage Router Software Configuration Guide
78-15471-01
1-3
Chapter 1
Before Configuring SN 5428-2 Storage Router Software
SCSI Routing Overview
Note
The web-based GUI is not available in SN 5428-2s deployed for transparent SCSI routing.
SCSI Routing Overview
SCSI routing provides IP hosts with access to FC storage devices as if the storage devices were directly
attached to the hosts, with access to devices being managed primarily in the SN 5428-2 Storage Router.
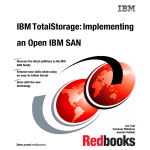
An iSCSI target is an arbitrary name for a group of physical storage devices. The iSCSI targets are
created and mapped to physical storage devices attached to the SN 5428-2. The storage router presents
the iSCSI targets to IP hosts as if the physical storage devices were directly attached to the hosts. (See
Figure 1-4.) With SCSI routing, storage devices are not aware of each IP host; the storage devices are
aware of the SN 5428-2 and respond to it as if it were one FC host.
Figure 1-4
SCSI Routing Overview
FC storage
IP hosts
Cisco SN 5428-2
An IP host accesses a storage
device as if it were directly
attached to the storage device.
85722
IP
To configure an SN 5428-2 Storage Router for SCSI routing, you should have a basic understanding of
the following concepts:
Note
•
Using iSCSI Protocol to Route SCSI Requests and Responses, page 1-5
•
Basic Network Structure, page 1-6
•
SCSI Routing Mapping and Access Control, page 1-6
•
Available Instances of SCSI Routing, page 1-9
Along with FC storage, FC host connections and FC switch connections are allowed; however, most of
the illustrations in this manual show only storage connections for the purpose of describing the
SN 5428-2 Storage Router features.
Cisco SN 5428-2 Storage Router Software Configuration Guide
1-4
78-15471-01
Chapter 1
Before Configuring SN 5428-2 Storage Router Software
SCSI Routing Overview
Using iSCSI Protocol to Route SCSI Requests and Responses
SCSI routing consists of routing SCSI requests and responses between hosts in an IP network and FC
storage. (See Figure 1-5.)
Figure 1-5
Routing SCSI Requests and Responses for SCSI Routing
FC storage
IP hosts
Cisco SN 5428-2
85723
IP
SCSI requests and responses
Each host that requires IP access to storage via an SN 5428-2 Storage Router needs to have a compatible
iSCSI driver installed. Using the iSCSI protocol, the iSCSI driver allows an IP host to transport SCSI
requests and responses over an IP network. From the perspective of a host operating system, the iSCSI
driver appears to be a SCSI or Fibre Channel driver for a peripheral channel in the host.
SCSI routing consists of the following main actions (See Figure 1-6):
•
Transporting SCSI requests and responses over an IP network between the hosts and the SN 5428-2
Storage Router
•
Routing SCSI requests and responses between hosts on an IP network and FC storage
•
Transporting SCSI requests and responses between the SN 5428-2 Storage Router and FC storage
Figure 1-6
SCSI Routing Actions
FC storage
IP hosts
Cisco SN 5428-2
IP
Transporting SCSI
requests and responses
over an IP network
Transporting SCSI
requests and responses
between an SN 5428-2
and storage
85724
Routing SCSI requests
and responses
Cisco SN 5428-2 Storage Router Software Configuration Guide
78-15471-01
1-5
Chapter 1
Before Configuring SN 5428-2 Storage Router Software
SCSI Routing Overview
Basic Network Structure
Figure 1-7 shows the basic structure of a SCSI routing network. IP hosts with iSCSI drivers access the
storage routers through an IP network connected to the Gigabit Ethernet interface of each storage router.
The storage routers access storage devices connected to the Fibre Channel interfaces of each storage
router. A management station manages the storage routers through an IP network connected to the
management interface of each storage router. For high availability (HA) operation, the storage routers
communicate with each other over two networks: the HA network connected to the HA interface of each
storage router and the management network connected to the management interface of each storage
router.
Figure 1-7
SCSI Routing Basic Network Structure
Cisco SN 5428-2
Contains SN 5428-2
software
FC storage
IP host
Contains iSCSI
driver
IP
HA
Management
Management
station
Contains iSCSI
driver
Cisco SN 5428-2
85725
IP host
SCSI Routing Mapping and Access Control
SCSI routing occurs in the SN 5428-2 Storage Router through the mapping of physical storage devices
to iSCSI targets. An iSCSI target is an arbitrary name for a group of physical storage devices. You can
map an iSCSI target to multiple physical devices. An iSCSI target always contains at least one Logical
Unit Number (LUN). Each LUN on an iSCSI target is mapped to a single LUN on a physical storage
target.
You can choose either of two types of storage mapping: target-and-LUN mapping or target-only
mapping. Target-and-LUN mapping maps an iSCSI target and LUN combination to a physical storage
target and LUN combination. Target-only mapping maps an iSCSI target to a physical storage target and
its LUNs.
With target-and-LUN mapping, an iSCSI target name and iSCSI LUN number are specified and mapped
to the physical storage address of one LUN; either a WWPN + LUN (World Wide Port Name + LUN)
combination, a LUN ID (unique LUN identifier), or a LUN serial number.
Cisco SN 5428-2 Storage Router Software Configuration Guide
1-6
78-15471-01
Chapter 1
Before Configuring SN 5428-2 Storage Router Software
SCSI Routing Overview
If the LUN is available, it is made available as an iSCSI LUN and numbered with the iSCSI LUN number
specified. For example, if an iSCSI target and iSCSI LUN specified as Database, LUN 9 were mapped
to the physical storage address, WWPN 3100112233445566, LUN 12, then LUN 12 would be available
as one iSCSI LUN. An iSCSI driver would see the iSCSI target named Database, with one iSCSI LUN
identified as LUN 9. The iSCSI LUN would appear as one storage device to a host. (See Table 1-1.)
Table 1-1
Target-and-LUN Mapping Example
Apparent to Host as
Local Disk
iSCSI Target
Name
iSCSI LUN
Available
Physical Storage
Address
Physical LUN
Available
Local Disk (D:)
Database
LUN 9
WWPN
3100112233445566
LUN 12
Apparent as one
locally attached
storage device.
Database
appears as one
controller with
one LUN
available.
iSCSI LUN is Specifies the storage
address of a storage
numbered as
controller.
specified and
can be different
than the
physical LUN
number.
The LUN number
is specified as the
only LUN to be
mapped.
With target-only mapping, an iSCSI target name is specified and mapped to the physical storage address
of a storage controller only; a WWPN. Any LUNs that are available in the storage controller are made
available as iSCSI LUNs and are numbered the same as the LUNs in the storage controller. For example,
if an iSCSI target specified as Webserver2000 were mapped to the physical storage address WWPN
3100112233445577, and LUNs 0 through 2 were available in that controller, those LUNs would become
available as three iSCSI LUNs. An iSCSI driver would see the iSCSI target named Webserver2000 as a
controller with three iSCSI LUNs identified as LUN 0, LUN 1, and LUN 2. Each iSCSI LUN would
appear as a separate storage device to a host. (See Table 1-2.)
Table 1-2
Target-only Mapping Example
Apparent to Host as
Local Disk
iSCSI Target
Name
iSCSI LUNs
Available
Physical Storage
Address
Physical LUNs
Available
Local Disk (D:)
Webserver2000
LUN 0
WWPN
3100112233445577
LUN 0
Local Disk (E:)
Webserver2000
LUN 1
WWPN
3100112233445577
LUN 1
Local Disk (F:)
Webserver2000
LUN 2
WWPN
3100112233445577
LUN 2
Apparent as three
locally attached
storage devices.
Webserver2000
appears as one
controller with
LUNs 0, 1, and
2 available.
Specifies the storage LUNs 0, 1, and 2
iSCSI LUNs
address of a storage are available for
are numbered
controller.
mapping.
the same as
physical LUNs.
Cisco SN 5428-2 Storage Router Software Configuration Guide
78-15471-01
1-7
Chapter 1
Before Configuring SN 5428-2 Storage Router Software
SCSI Routing Overview
Access for SCSI routing is controlled in the IP hosts and the storage router. In an IP host, the iSCSI driver
is configured with the Gigabit Ethernet IP address of the SCSI routing instance in the storage router with
which the host is to transport SCSI requests and responses. In a storage router, access is controlled
through an access list and a VLAN identifier (VID) number of the hosts. Additionally, access can be
further controlled in the SN 5428-2 through authentication. See the “Authentication Overview” section
on page 1-22 for more information about authentication.
An access list enables access to storage devices attached to the SN 5428-2 according to any combination
of host IP address(es), CHAP user name(s), or iSCSI name(s). An access list contains these combinations
of hosts allowed to access the storage devices. Host VID enables access to storage devices according to
the VID of each host. See the “VLAN Access Overview” section on page 1-18 for more information
about VLAN access.
For each iSCSI target, you can associate one access list allowing read/write access, and one access list
allowing read-only access. See Chapter 6, “Configuring SCSI Routing,” for more information about
read/write and read-only access.
You can use a combination of access lists and VIDs to configure access in the SN 5428-2; that is, you
can specify that certain hosts according to IP address in a VLAN can access storage devices attached to
the SN 5428-2.
Once the access is configured in the hosts and the SN 5428-2, and once the storage mapping is
configured in the SN 5428-2, the SN 5428-2 routes SCSI requests and responses between hosts and the
mapped storage devices.
Figure 1-8 represents the concept of storage mapping and access control for SCSI routing. In the figure,
the SN 5428-2 Storage Router provides three IP hosts with IP access to disk drives across four disk
controllers. The SN 5428-2 contains two SCSI routing instances: one configured with IP address
10.1.2.3 for the Gigabit Ethernet interface and the other with IP address 10.1.2.4. The iSCSI drivers in
each IP host are configured to access those SCSI routing instances by their IP addresses through the
Gigabit Ethernet interface. An access list in the storage router or VID (or both) specifies that hosts A,
B, and C are allowed to access the mapped storage devices. From the perspective of a host, each disk
drive mapped to it appears as a locally attached disk drive. Table 1-3 shows the correlation between an
access list and/or VID, the Gigabit Ethernet IP addresses of the SCSI routing instances, and the storage
device mapping.
Note
The purpose of Figure 1-8 and Table 1-3 is only to illustrate the concept of storage mapping and access
control. The IP addresses will vary according to each site. Similarly, the type of storage addressing (for
example, LUN ID, WWPN + LUN or LUN serial number) will vary according to the types of storage
and the types of storage addressing preferred at each site. In addition, the figure and the table exclude
any additional SN 5428-2 Storage Routers that could be configured for high availability.
Cisco SN 5428-2 Storage Router Software Configuration Guide
1-8
78-15471-01
Chapter 1
Before Configuring SN 5428-2 Storage Router Software
SCSI Routing Overview
Figure 1-8
SCSI Routing Storage Mapping and Access Control Concept
Storage
Cisco SN 5428-2
with IP addresses accessible by
10.1.2.3 and 10.1.2.4 IP host C
IP host A
IP host B
IP
Controller 4
1
2
3
Controller 1
IP host C
1
3
1
3
Controller 3
1
2
3
Controller 2
Table 1-3
2
Storage
accessible by
IP host B
85726
Storage
accessible by
IP host A
2
SCSI Routing Storage Mapping and Access Control Concept
Hosts Allowed
Access via SN 5428-2 Storage Devices Apparent Via GbE IP
Access List and/or
to Host as Locally
Addresses of SCSI Mapped To
VID
Attached Devices
Routing Instances Controller
Mapped To
Drive
Host A
Host B
Host C
Local Disk (D:)
10.1.2.3
1
1
Local Disk (E:)
10.1.2.3
1
2
Local Disk (F:)
10.1.2.3
1
3
Local Disk (G:)
10.1.2.3
2
1
Local Disk (H:)
10.1.2.3
2
2
Local Disk (I:)
10.1.2.3
2
3
Local Disk (D:)
10.1.2.3
3
1
Local Disk (E:)
10.1.2.3
3
2
Local Disk (D:)
10.1.2.4
4
1
Local Disk (E:)
10.1.2.4
4
2
Local Disk (F:)
10.1.2.4
4
3
Local Disk (G:)
10.1.2.4
3
3
Available Instances of SCSI Routing
You can configure an SN 5428-2 Storage Router with up to 12 instances of SCSI routing services. Each
instance needs to be configured with the following:
•
One or more unique IP addresses assigned to either one or both Gigabit Ethernet interfaces
•
Mapping between iSCSI target names and physical storage addresses
•
Access control
When an SN 5428-2 is part of a cluster, an instance of SCSI routing can run on only one storage router
in a cluster at any given time. See the “SN 5428-2 Cluster Management Overview” section on page 1-22
for more information about storage router clusters.
Cisco SN 5428-2 Storage Router Software Configuration Guide
78-15471-01
1-9
Chapter 1
Before Configuring SN 5428-2 Storage Router Software
Transparent SCSI Routing Overview
Transparent SCSI Routing Overview
Transparent SCSI routing provides IP hosts with access to intelligent storage arrays as if each storage
array were directly attached to the hosts, with access to the storage devices managed primarily in each
storage array. The SN 5428-2 transparently presents each IP host to the storage array as if each host were
an FC host.
Typically, transparent SCSI routing is used with an intelligent storage array that is directly connected to
the SN 5428-2 Fibre Channel interface. Managing access to storage devices consists of using
configuration tools available with an intelligent storage array (to configure, for example, which hosts are
granted access and to configure multiple paths between hosts and storage devices). With transparent
SCSI routing, an intelligent storage array can manage each IP host as if it were directly attached to the
array as an FC host.
Transparent SCSI routing automatically creates iSCSI targets and maps them to physical targets
available in the intelligent storage array. The storage router presents the iSCSI targets to IP hosts as if
the physical targets were directly attached to the hosts. In conjunction with presenting iSCSI targets to
hosts, transparent SCSI routing presents each IP host as an FC host to the intelligent storage array. The
intelligent storage array is aware of each IP host and responds to each IP host as if it were an FC host
connected to the storage array. (See Figure 1-9.) Transparent SCSI routing can present no more than 62
IP hosts as FC hosts to an intelligent storage array.
Transparent SCSI Routing Overview
IP hosts
Intelligent storage
array
Cisco SN 5428-2
FC
IP
An IP host accesses
a target made available
by a storage array as if
the IP host were an FC
host directly attached
to the storage array.
85727
Figure 1-9
To configure an SN 5428-2 Storage Router that is deployed for transparent SCSI routing, you should
have a basic understanding of the following concepts:
•
Using iSCSI Protocol to Route SCSI Requests and Responses, page 1-11
•
Basic Network Structure, page 1-12
•
Transparent SCSI Routing Mapping and Access Control, page 1-12
•
Available Instances of Transparent SCSI Routing, page 1-15
Cisco SN 5428-2 Storage Router Software Configuration Guide
1-10
78-15471-01
Chapter 1
Before Configuring SN 5428-2 Storage Router Software
Transparent SCSI Routing Overview
Using iSCSI Protocol to Route SCSI Requests and Responses
Transparent SCSI routing consists of routing SCSI requests and responses between hosts in an IP
network and an intelligent storage array that is directly connected to an SN 5428-2 Fibre Channel
interface. (See Figure 1-10.)
Figure 1-10 Routing SCSI Requests and Responses for Transparent SCSI Routing
IP hosts
Cisco SN 5428-2
Intelligent storage
array
85728
FC
IP
SCSI requests and responses
Each host that requires IP access to storage via an SN 5428-2 Storage Router needs to have a compatible
iSCSI driver installed. Using the iSCSI protocol, the iSCSI driver allows an IP host to transport SCSI
requests and responses over an IP network. From the perspective of a host operating system, the iSCSI
driver appears to be a SCSI or Fibre Channel driver for a peripheral channel in the host. From the
perspective of the storage array, each IP host appears as an FC host (with one Fibre Channel address for
each host).
Transparent SCSI routing consists of the following main actions (Figure 1-11):
•
Transporting SCSI requests and responses over an IP network between the hosts and the SN 5428-2
Storage Router.
•
Routing SCSI requests and responses between hosts on an IP network and an intelligent storage
array.
•
Transporting SCSI requests and responses between the SN 5428-2 Storage Router and an intelligent
storage array.
Figure 1-11 Transparent SCSI Routing Actions
IP hosts
Intelligent storage
array
Cisco SN 5428-2
FC
IP
Transporting SCSI
requests and responses
between an SN 5428-2
and a storage array
Routing SCSI requests
and responses
85729
Transporting SCSI
requests and responses
over an IP network
Cisco SN 5428-2 Storage Router Software Configuration Guide
78-15471-01
1-11
Chapter 1
Before Configuring SN 5428-2 Storage Router Software
Transparent SCSI Routing Overview
Basic Network Structure
Figure 1-12 shows the basic structure of a transparent SCSI routing network. IP hosts with iSCSI drivers
access the storage routers through an IP network connected to one of the Gigabit Ethernet interfaces of
each storage router. The storage routers access the intelligent storage array through a Fibre Channel
interface of each storage router. A management station manages the storage routers through an IP
network connected to the management interface of each storage router. High availability operation for
transparent SCSI routing is controlled in the intelligent storage array; therefore, an SN 5428-2 HA
network is not necessary, and the HA interface on the SN 5428-2 is disabled.
Figure 1-12 Transparent SCSI Routing Basic Network Structure
Cisco SN 5428-2
IP
IP host
FC
Contains iSCSI
driver
Management
station
Intelligent storage
array
Management
Contains iSCSI
driver
FC
Cisco SN 5428-2
85730
IP host
Transparent SCSI Routing Mapping and Access Control
Transparent SCSI routing occurs in an SN 5428-2 Storage Router through two types of mapping:
•
Mapping iSCSI targets to physical targets
•
Mapping each IP host to a Fibre Channel (FC) address
Mapping iSCSI targets to physical targets makes the physical targets accessible to IP hosts. Mapping
each IP host to an FC address—which maps the iSCSI client in the IP host to the internal FC initiator
WWPN—allows the host to be presented to a storage array as an FC host with its own FC WWPN.
Mapping iSCSI targets to physical targets consists of creating iSCSI targets that represent physical
targets in an intelligent storage array. An iSCSI target is an arbitrary name for a group of physical storage
devices; one iSCSI target is automatically created for each target made available by the intelligent
storage array.
The iSCSI target name is created automatically using the iSCSI extended unique identifier (EUI) format.
The EUI format combines the prefix “eui” with each WWPN made available by the intelligent storage
array. For example, if the WWPN of a target in a storage array were 3100112233445566, then an iSCSI
target would be created in the SN 5428-2 with the iSCSI target name of eui.3100112233445566.
Transparent SCSI routing maps iSCSI targets to physical targets using target-only mapping. Target-only
mapping maps an iSCSI target to a physical storage target and its LUNs. Any LUNs that are available
with a physical WWPN in the storage array are available with the corresponding iSCSI target and are
numbered the same as the LUNs in the storage array.
Cisco SN 5428-2 Storage Router Software Configuration Guide
1-12
78-15471-01
Chapter 1
Before Configuring SN 5428-2 Storage Router Software
Transparent SCSI Routing Overview
For example, if an iSCSI target were created for WWPN 3100112233445566 in a storage array, and that
WWPN contained LUNs 0 through 2, those LUNs would become available to an IP host as LUNs 0
through 2. An iSCSI driver would see the iSCSI target named eui.3100112233445566 as a controller
with three iSCSI LUNs identified as LUN 0, LUN 1, and LUN 2. Each iSCSI LUN would appear as a
separate storage device to an IP host.
Mapping each IP host to a Fibre Channel address consists of assigning a WWPN to an IP host that is
requesting access to storage; the WWPN is used for presenting the IP host as an FC host to a storage
array. The SN 5428-2 maintains a pool of 62 WWPNs that are assigned to IP hosts requesting access to
storage. When an IP host is granted access, a WWPN is assigned to the IP host and the SN 5428-2
presents the host as an FC host to the storage array. That host continues using that WWPN until it is
finished using the storage. When transparent SCSI routing is deployed in dynamic mode, once the host
is finished using the storage (logged out), the WWPN becomes available for assignment to other IP hosts
requiring access to storage. In static mode, the IP host/WWPN mapping is retained throughout IP host
logins and logouts and throughout storage router reboots.
See Table 1-4 for an example of transparent SCSI routing mapping. In this mapping example, the
WWPN, 200100023D000100, is assigned to the IP host. Using that WWPN, the SN 5428-2 presents the
IP host as an FC host to the storage array. Three devices are made available as local storage devices:
Local Disk (E:), Local Disk (F:), and Local Disk (G:). (Microsoft Windows devices are used as
examples.) The iSCSI target, eui.3100112233445566, has been automatically created and mapped to a
WWPN, 3100112233445566, that was made available by the storage array. To the IP host, the iSCSI
target appears as a controller with LUNs 0, 1, and 2 available. The LUNs are apparent as they are with
the WWPN in the storage array.
Table 1-4
Transparent SCSI Routing Mapping Example
LUNs
Apparent
with iSCSI WWPN of Storage Array
Target
Target
Physical
LUNs
Available
WWPN assigned to IP
Host
Apparent to IP
Host
200100023D000100
Local Disk (E:) eui.3100112233445566
LUN 0
3100112233445566
LUN 0
Local Disk (G:) eui.3100112233445566
LUN 1
3100112233445566
LUN 1
Local Disk (H:) eui.3100112233445566
LUN 2
3100112233445566
LUN 2
iSCSI Target Name
Access for transparent SCSI routing is controlled in the IP hosts and the intelligent storage array. In an
IP host, the iSCSI driver is configured with the Gigabit Ethernet IP address of the SCSI routing instance
in the storage router with which the host is to transport SCSI requests and responses. In the intelligent
storage array, access is controlled through its storage management tools. Additionally, access can be
further controlled in the SN 5428-2 through authentication. See the “Authentication Overview” section
on page 1-22 for more information about authentication.
Once the access is configured in the hosts and the intelligent storage array, the SN 5428-2 transparently
routes SCSI requests and responses between hosts and the mapped storage devices.
Figure 1-13 represents the concept of storage mapping and access control for transparent SCSI routing.
In the figure, the SN 5428-2 Storage Router provides three IP hosts with access to disk drives made
available by the intelligent storage array. A single SCSI routing instance in the storage router is
configured with IP address 10.1.2.3 for the Gigabit Ethernet interface. The iSCSI driver in each IP host
is configured to access that SCSI routing instance by its IP address 10.1.2.3 through the Gigabit Ethernet
interface on the storage router. From the perspective of an IP host, each disk drive mapped to it appears
as a locally attached disk drive. From the perspective of the storage array, each host is connected directly
Cisco SN 5428-2 Storage Router Software Configuration Guide
78-15471-01
1-13
Chapter 1
Before Configuring SN 5428-2 Storage Router Software
Transparent SCSI Routing Overview
to it, with each host having a WWPN. Table 1-5 shows the correlation between the IP hosts, the Gigabit
Ethernet IP address of the SCSI routing instance, storage device mapping, and IP-host-to-FC-address
(WWPN) mapping.
Note
The purpose of Figure 1-13 and Table 1-5 is only to illustrate the concept of storage mapping, FC
address mapping, and access control. The IP addresses and WWPNs will vary according to each site. In
addition, the figure and the table exclude any additional SN 5428-2 Storage Routers that could be
configured for multiple paths between hosts and storage devices.
Figure 1-13 Transparent SCSI Routing Storage Mapping and Access Control Concept
WWPN 3100112233445566
and its LUNs accessible by IP host A
Cisco SN 5428-2
with IP address
10.1.2.3
IP host B
Table 1-5
WWPN 3100112233445577
and its LUNs accessible by IP host B
FC
IP
IP host C
Storage
array
SN 5428-2 presents IP hosts as
FC hosts with WWPNs:
IP host A = WWPN 201000023D000100
IP host B = WWPN 201000023D000101
IP host C = WWPN 201000023D000102
WWPN 3100112233445588
and its LUNs accessible by IP host C
85731
IP host A
Transparent SCSI Routing Storage Mapping and Access Control Concept
Storage Devices
Apparent to Host as
Hosts Allowed Access by
Intelligent Storage Array and Locally Attached
Devices
SN 5428-2 Authentication
Mapped To Storage
Via GbE IP
Address of
SCSI Routing
Instance
WWPN
Drive (LUN)
Host A: apparent to storage Local Disk (D:)
array as FC host with WWPN Local Disk (E:)
201000023D000100
Local Disk (F:)
10.1.2.3
3100112233445566
0
10.1.2.3
3100112233445566
1
10.1.2.3
3100112233445566
2
10.1.2.3
3100112233445577
0
10.1.2.3
3100112233445577
1
Host B: apparent to storage
Local Disk (D:)
array as FC host with WWPN Local Disk (E:)
201000023D000101
Host C: apparent to storage
Local Disk (D:)
array as FC host with WWPN Local Disk (E:)
201000023D000102
Local Disk (F:)
10.1.2.3
3100112233445588
0
10.1.2.3
3100112233445588
1
10.1.2.3
3100112233445588
2
Local Disk (G:)
10.1.2.3
3100112233445588
3
Cisco SN 5428-2 Storage Router Software Configuration Guide
1-14
78-15471-01
Chapter 1
Before Configuring SN 5428-2 Storage Router Software
FCIP Overview
Available Instances of Transparent SCSI Routing
When an SN 5428-2 Storage Router is deployed for transparent SCSI routing, it is automatically
configured for one instance of transparent SCSI routing service; only that one instance can exist in that
SN 5428-2.
While the instance of transparent SCSI routing needs to be configured with a Gigabit Ethernet IP
address, mapping between iSCSI target names and physical storage addresses is automatic and cannot
be configured.
When an SN 5428-2 is deployed for transparent SCSI routing, it cannot participate in a storage router
cluster. However, multiple SN 5428-2s can be connected to an intelligent storage array, where it is
possible to manage failover and multiple paths. In networks where multiple SN 5428-2 Storage Routers
are connected to an intelligent storage array, each SN 5428-2 has one (and only one) instance of
transparent SCSI routing; the instance is unique to that storage router and cannot fail over to another
storage router.
FCIP Overview
Fibre Channel over IP (FCIP) enables two or more peer SN 5428-2 Storage Routers to provide
connectivity between FC hosts and FC storage devices over an IP network.
To deploy FCIP, at least two SN 5428-2 Storage Routers are required, each configured for FCIP and
connected to a SAN (or to any FC host or FC device). The peer storage routers are connected to each
other through an IP network. (See Figure 1-14.)
Figure 1-14 FCIP Overview
SAN 1
SN 5428-2
SN 5428-2
IP
FC hosts and
storage devices
SAN 2
Peer SN 5428-2s deployed for FCIP
provide connectivity between SANs
over an IP network
91007
FC hosts and
storage devices
An FC host or FC device needs no additional hardware or software to access storage devices via an
SN 5428-2 Storage Router deployed for FCIP.
To configure an SN 5428-2 Storage Router deployed for FCIP, you need a basic understanding of the
following concepts:
•
Using FCIP to Route Fibre Channel Packets, page 1-15
•
FCIP Network Structures, page 1-16
Using FCIP to Route Fibre Channel Packets
With FCIP, peer SN 5428-2 Storage Routers transport FC frames over an IP network. From the
perspective of the SANs, the storage devices accessed through the SN 5428-2s appear to be part of one
unified SAN.
Cisco SN 5428-2 Storage Router Software Configuration Guide
78-15471-01
1-15
Chapter 1
Before Configuring SN 5428-2 Storage Router Software
FCIP Overview
Once configured, FCIP instances on each storage router become active and establish their connectivity
via the IP network. The storage devices in one SAN access the storage devices in the connected SAN
using FC frames, which are encapsulated in IP packets by the FCIP instance running in the SN 5428-2,
and transmitted to the peer SN 5428-2. The peer FCIP instance strips the IP packet data and passes only
the FC frames over the FC interfaces to the storage devices.
The peer SN 5428-2 Storage Routers deployed for FCIP must be configured to use the same protocol:
TCP or raw. TCP protocol uses standard TCP flow control and error recovery algorithms. Raw protocol
uses a proprietary connection protocol, but provides more operational control over flow control and error
recovery than standard TCP/IP.
If the selected protocol is TCP, one FCIP instance must be configured as the TCP client; the other FCIP
instance must be configured as the TCP server. The only difference between FCIP instances configured
as TCP client and TCP server is which FCIP instance initiates the connection: the TCP client initiates
the connection.
FCIP transports FC frames between SANs by performing the following actions (Figure 1-15):
•
Transporting FC frames between a SAN and an SN 5428-2 that is deployed for FCIP
•
Encapsulating FC frames in IP packets and transporting the IP packets to a peer SN 5428-2 that is
deployed for FCIP
•
Receiving IP packets and transporting as FC frames between the peer SN 5428-2 and a connected
SAN
Note that FC traffic is carried over the IP network in such a way that the FC fabric and all FC devices on
the fabric are unaware of the presence of the IP Network.
Figure 1-15 FCIP Actions
SN 5428-2
SAN
Transporting FC frames
between SAN and an
SN 5428-2 deployed
for FCIP.
SN 5428-2
IP
Encapsulating FC frames
in IP packets and
transporting IP packets
to peer SN 5428-2.
FC hosts and
storage devices
SAN
Transporting FC
frames between
an SN 5428-2
deployed for FCIP
and SAN.
91008
FC hosts and
storage devices
FCIP Network Structures
This section describes typical FCIP network structures. In all of these examples, a management station
(not shown) manages the storage routers through an IP network connected to the management interface
and/or HA interface of each storage router.
Figure 1-14 represents a basic, non-redundant structure of an FCIP network configuration. An FC host
or FC device connects to one or more Fibre Channel interfaces of each peer SN 5428-2 Storage Router
deployed for FCIP. Each SN 5428-2 connects to the IP network through one of its Gigabit Ethernet
interfaces. Through the IP network, each FCIP instance accesses its peer, thereby connecting the SANs.
Cisco SN 5428-2 Storage Router Software Configuration Guide
1-16
78-15471-01
Chapter 1
Before Configuring SN 5428-2 Storage Router Software
FCIP Overview
Figure 1-16 shows a slightly more complex FCIP network: a redundant WAN FCIP configuration. In this
configuration, an FC host or FC device connects to one or more Fibre Channel interfaces of each peer
SN 5428-2 Storage Router deployed for FCIP, and each SN 5428-2 connects to two separate IP networks
through each of its Gigabit Ethernet interfaces. Through the IP network, each FCIP instance accesses the
peer storage router deployed for FCIP, connecting the SANs. In this configuration, IP A and IP B are
redundant paths, so that the loss of connectivity via either path does not cause a loss of connectivity
between the SANs.
Figure 1-16 FCIP Redundant WAN Configuration
IP
A
SN 5428-2
SN 5428-2
SAN 2
SAN 1
91533
IP
B
Figure 1-17 shows an even more reliable FCIP configuration, in which pairs of SN 5428-2s provide full
redundancy. In this configuration, loss of an SN 5428-2 or loss of connectivity through one of the IP
networks can be tolerated with no loss of connectivity between the SANs.
Figure 1-17 FCIP Fully Redundant Configuration
SN 5428-2
deployed for FCIP
FC hosts and
storage devices
SN 5428-2
deployed for FCIP
IP
A
FC hosts and
storage devices
SAN 2
SAN 1
SN 5428-2
deployed for FCIP
Note
SN 5428-2
deployed for FCIP
91009
IP
B
For multiple paths between SANs, multiple pairs of SN 5428-2s deployed for FCIP need to be connected
to the FC hosts or FC devices. However, multiple SN 5428-2 Storage Routers deployed for FCIP cannot
be configured in an HA cluster. It is assumed that the multipath management is being done by an entity
outside the SN 5428-2s (for example, by management applications on the FC host or storage devices).
Figure 1-18 shows an alternative network structure for FCIP, in which FCIP tunnels are established from
two SANs aggregated to a central site. The SN 5428-2 at the central site has one FCIP instance set up
for SAN 1, and the other FCIP instance set up for SAN 2.
Cisco SN 5428-2 Storage Router Software Configuration Guide
78-15471-01
1-17
Chapter 1
Before Configuring SN 5428-2 Storage Router Software
VLAN Access Overview
Figure 1-18 Multisite FCIP Configuration
SN 5428-2
SAN 1
FC hosts and
storage devices
SN 5428-2
FC hosts and
storage devices
IP
SAN 3
91357
SN 5428-2
SAN 2
VLAN Access Overview
SN 5428-2 VLAN access provides IP hosts with access to storage devices according to the VLAN to
which each host belongs.
Figure 1-19 shows a sample network that employs SN 5428-2 VLAN access. In the figure, an SN 5428-2
Gigabit Ethernet interface is connected to an IP network through an IEEE 802.1Q trunk; the SN 5428-2
Fibre Channel interfaces are connected to storage devices 1, 2, and 3. The SN 5428-2 is configured with
two SCSI routing instances named SR100 and SR200. The IP network contains two VLANs: VLAN 100
and VLAN 200. The SCSI routing instance, SR100, is configured to allow the hosts in VLAN 100 to
access storage devices 1 and 2. The SCSI routing instance, SR200, is configured to allow the hosts in
VLAN 200 to access storage device 3.
Figure 1-19 VLAN Access Overview
VLAN 200
Storage devices accessible by
VLAN 100 via SCSI routing
instance SR100
Cisco SN 5428-2
IP
802.1Q trunk
1
2
Configured with two SCSI
3
routing instances named
SR100 and SR200
Storage device accessible by
VLAN 100
85732
VLAN 200 via SCSI routing
instance SR200
Cisco SN 5428-2 Storage Router Software Configuration Guide
1-18
78-15471-01
Chapter 1
Before Configuring SN 5428-2 Storage Router Software
Zoning Overview
If the SN 5428-2 is used in a Cisco switched network environment, configure the SN 5428-2 to use the
Cisco proprietary VLAN Trunking Protocol (VTP). With VTP, the SN 5428-2 will exchange VTP
packets with an externally attached switch to dynamically learn about the VLANs that are accessible in
the IP network. The SN 5428-2 then uses VTP to propagate VLAN information around the switched
network using layer 2 multicast packets.
If the SN 5428-2 is used in a non-Cisco switched network environment, configure the SN 5428-2 for
VLAN without using VTP. The SN 5428-2 does not exchange VTP packets to learn about the VLANs in
the network. Instead, you must manually assign VLANs in the network with a VLAN identifier (VID)
number. You can optionally assign each VLAN with a unique name and manually set the MTU size.
If the SN 5428-2 participates in a cluster, the VLAN information configured for the SN 5428-2 is
propagated to all storage routers in the cluster.
The SN 5428-2 uses IEEE 802.1Q standard for VLAN encapsulation. With 802.1Q encapsulation,
VLAN information is carried in packets sent and received through the SN 5428-2 Gigabit Ethernet
interface. These packets contain the VID and other VLAN information needed for VLAN members to
participate in a VLAN.
A VLAN is granted access to storage devices via a SCSI routing instance configured in the SN 5428-2.
The iSCSI targets assigned to the SCSI routing instance determine which storage devices the VLAN can
access.
Zoning Overview
The SN 5428-2 supports FC fabric zoning. Zoning enables you to divide the devices of the fabric into
zones for more efficient and secure communication among functionally grouped nodes.
Note
FC fabric zoning participation is not supported in SN 5428-2s deployed for transparent SCSI routing.
Once initiator WWPN1 and initiator WWPN2 are configured, the SN 5428-2 will support fabric zoning
using the WWPNs of each FC storage device attached, either directly or on a fabric. The IP hosts
participate in zoning via the access list. See the “SCSI Routing Mapping and Access Control” section
on page 1-6 for more information about access lists.
Figure 1-20 shows an example network that employs SN 5428-2 FC fabric zoning. In the figure, the
SN 5428-2 is connected to IP hosts A and B through the Gigabit Ethernet interface; the SN 5428-2 Fibre
Channel interfaces are connected to FC storage and a zoned FC switched fabric. The IP hosts are allowed
access to storage devices in both zones (Y and Z) and storage devices attached to the SN 5428-2. Zone
Y has access to all the SN 5428-2 storage devices and zone Z has access to one storage device on the
SN 5428-2.
Cisco SN 5428-2 Storage Router Software Configuration Guide
78-15471-01
1-19
Chapter 1
Before Configuring SN 5428-2 Storage Router Software
Zoning Overview
Figure 1-20 FC Fabric Zoning Overview
Zone Y
Zone Z
Host A
Host B
IP Host A
FC
switch
IP Host B
IP
Cisco SN 5428-2
FC storage
85733
FC storage
Zoning comprises zones, zone sets, aliases, and zone databases.
A zone is a named group of devices that can communicate with each other. Membership in a zone is
defined by the device WWPN. Zone members can communicate only with members of the same zone.
The SN 5428-2 supports the soft zone type. Soft zones can overlap; that is, a device can be a member of
more than one soft zone.
To make it easier to add devices to one or more zones, you can create an alias. An alias is a named set
of devices that are grouped together for convenience. You can add an alias to one or more zones.
However, you cannot add a zone to an alias, nor can an alias be a member of another alias.
You can also use an alias to name a single device. This allows you to refer to the device by the alias name
rather than the WWPN of the device.
A zone set is a named group of zones. A zone can be a member of more than one zone set.
To apply zoning to a fabric, enable the appropriate zone set. When you enable (or “activate”) a zone set,
the system compiles zone sets of the same name from all SN 5428-2s and switches in the fabric, and then
redistributes this merged active zone set back to every SN 5428-2 and switch in the fabric. Therefore,
every SN 5428-2 and switch in the fabric will have identical active zone sets.
The SN 5428-2 supports multiple zone sets, but only one zone set can be active in the fabric at any given
time.
Each SN 5428-2, like other switches in the zoned FC switched fabric, has its own zoning database. The
zoning database is made up of all aliases, zones, and zone sets that have been created on the SN 5428-2
or received from other switches in the fabric. When you modify aliases, zone or zone sets, the changes
are immediately saved to the SN 5428-2 bootable configuration.
The Auto Save zoning configuration parameter controls whether zoning changes received from other
SN 5428-2s or switches in the fabric are automatically saved to the SN 5428-2s zoning database.
Cisco SN 5428-2 Storage Router Software Configuration Guide
1-20
78-15471-01
Chapter 1
Before Configuring SN 5428-2 Storage Router Software
Fibre Channel Interface Overview
See Chapter 5, “Configuring Fibre Channel Interfaces,” for more information about configuring the
SN 5428-2 for FC fabric zoning.
Fibre Channel Interface Overview
The SN 5428-2 has an integrated switch component with Fibre Channel interfaces that support the
following port types: E_Port, F_Port, FL_Port, G_Port, GL_Port, TL_Port, and donor port.
The SN 5428-2 FC interfaces support GS-3 management server commands. This allows management of
the SN 5428-2 integrated switch component through the Fibre Channel interfaces (in-band
management). See the interface fc? ms-enable command in Chapter 12, “Command Line Interface
Reference,” for more information about enabling the FC interfaces for GS-3 commands.
See Chapter 5, “Configuring Fibre Channel Interfaces,” for more information about configuring FC
ports.
Gigabit Ethernet Interface Overview
Each of the two 1-Gigabit Ethernet interfaces on the SN 5428-2 (GE 1 and GE 2) provide the following
capabilities:
•
Multiple IP addresses per SCSI routing instance—allows IP hosts to connect to SCSI routing
instances via one or more IP addresses. Each Gigabit Ethernet interface can be configured with up
to 12 unique IP addresses, which provides a maximum of 24 unique IP addresses per SN 5428-2
Storage Router. If VLAN access is used, the maximum number of unique IP addresses per Gigabit
Ethernet interface increases to 16. This provides a maximum of 32 unique IP addresses per
SN 5428-2 Storage Router when configured with VLAN.
•
Assignment of a secondary interface per SCSI routing instance—allows the same IP address to be
assigned to each Gigabit Ethernet interface; one interface is assigned as primary and one interface
is assigned as secondary. If the primary Gigabit Ethernet interface loses connection to the host and
if the secondary connection is assigned and still connected, the IP address moves to the secondary
Gigabit Ethernet interface, which then becomes active.
•
Assignment as an interface to an FCIP peer—allows assignment of an IP address as a primary
Gigabit Ethernet interface between an FCIP instance and an FCIP peer. Each SN 5428-2 can be
configured with up to two FCIP instances, and each FCIP instance can be configured with one peer,
for a maximum of two FCIP peers per SN 5428-2 Storage Router when configured for FCIP.
•
Assignment of a secondary interface per FCIP instance—allows the same IP address to be assigned
to each Gigabit Ethernet interface configured for an FCIP instance; one interface is assigned as
primary and one interface is assigned as secondary. If the primary interface loses connection to the
network and remains down for two seconds, the IP address moves to the secondary Gigabit Ethernet
interface, which then becomes active.
•
Assignment as a management IP address—allows each Gigabit Ethernet interface to have one IP
address assigned per logical interface, as a management interface. This IP address is in addition to
any multiple IP address(es) per SCSI routing instance or FCIP instance assigned.
•
Assignment of a secondary management IP address—allows the same IP address to be assigned to
each Gigabit Ethernet interface configured as a management interface; one interface is assigned as
primary and one interface is assigned as secondary. If connection to the primary Gigabit Ethernet
Cisco SN 5428-2 Storage Router Software Configuration Guide
78-15471-01
1-21
Chapter 1
Before Configuring SN 5428-2 Storage Router Software
Authentication Overview
maintenance interface is lost and if the secondary maintenance interface connection is assigned and
connected, the IP address moves to the secondary Gigabit Ethernet interface, which then allows
management access.
Authentication Overview
Authentication is a software service that is available in each SN 5428-2. It provides a method of
identifying users (including login and password dialog, challenge and response, and messaging support)
prior to receiving access to the requested object, function, or network service. The SN 5428-2 supports
three types of authentication:
•
iSCSI authentication—provides an authentication mechanism to authenticate IP hosts that request
access to storage. An IP host, acting as an iSCSI initiator, can also verify the identity of an iSCSI
target assigned to a SCSI routing instance, which responds to the request, resulting in a two-way
authentication.
•
Enable authentication—provides a mechanism to authenticate users requesting Administrator mode
access to an SN 5428-2 management session via the CLI enable command or an FTP session.
•
Login authentication—provides a mechanism to authenticate users requesting access to the
SN 5428-2 in Monitor mode via the login process from a Telnet session, SSH session or the
SN 5428-2 console.
Authentication is provided by an AAA (authentication, authorization, and accounting) subsystem
configured in each SN 5428-2. AAA is Cisco’s architectural framework for configuring a set of three
independent security functions in a consistent and modular manner: authentication, authorization, and
accounting. The SN 5428-2 Storage Router software implements the authentication function.
AAA authentication is configured by defining a list of authentication services. iSCSI authentication,
which uses a AAA authentication services list, can be enabled for specific SCSI routing instances in an
SN 5428-2.
When iSCSI authentication is enabled, IP hosts (with iSCSI drivers) must provide user name and
password information each time an iSCSI TCP connection is established. With two-way authentication,
the SCSI routing instance to which an iSCSI target has been assigned responds to the authentication
request with an assigned username and password. iSCSI authentication uses the iSCSI CHAP (Challenge
Handshake Authentication Protocol) authentication method.
See Chapter 9, “Configuring Authentication,” for more information about configuring authentication
services.
SN 5428-2 Cluster Management Overview
You can configure Cisco SN 5428-2 Storage Routers in a cluster to allow the storage routers to back each
other up in case of failure.
Note
A storage router can participate in a cluster only if it is deployed for SCSI routing.
An SN 5428-2 Storage Router can be configured in a cluster with one other SN 5428-2, or with an
SN 5428, connected as follows:
•
Connected to the same hosts
•
Connected to the same storage systems
Cisco SN 5428-2 Storage Router Software Configuration Guide
1-22
78-15471-01
Chapter 1
Before Configuring SN 5428-2 Storage Router Software
Interface Naming
•
Connected to each other through their management and high availability (HA) interfaces
In a cluster, storage routers continually exchange HA information to propagate configuration data to
each other and to detect failures in the cluster. The storage routers exchange HA information through
two separate networks: one connected to the management interface of each storage router and the other
connected to the HA interface of each storage router. To make sure that HA information is exchanged
reliably between storage routers, the storage routers balance the transmission of HA information
between the management and the HA interfaces.
A storage router cluster supports up to 12 active instances of SCSI routing. For example, if one storage
router is already running two instances, it is eligible to run up to ten additional instances. At any given
time, an instance of SCSI routing can run on only one storage router in a cluster. The instance continues
running on the storage router where it was started until one of the following actions occurs:
•
The instance is explicitly stopped or failed over to the other storage router in the cluster.
•
The instance automatically fails over to another storage router because an interface is unavailable or
another software or hardware problem occurs. This automatic fail over uses intelligent eligibility
guidelines to determine fail over.
See Chapter 10, “Configuring a High Availability Cluster,” for more information about configuring a
high availability cluster.
Interface Naming
Configuring the SN 5428-2 Storage Router software requires that you understand hardware interface
naming. This section describes the interface naming system used with the SN 5428-2 Storage Router
hardware.
Each storage router interface is assigned a three-character name consisting of two lower-case letters
followed by a number. The letters designate the interface type; the number designates the chassis slot
occupied by the interface (See Figure 1-21).
Figure 1-21 SN 5428-2 Interface Naming System
Interface type
Chassis slot
48421
a a n
Table 1-6 shows valid interface type designators for the SN 5428-2; Figure 1-22 shows each interface
location and interface name on the SN 5428-2.
Table 1-6
Interface Type Designators
Interface Type
Description
fc
Fibre Channel
ge
Gigabit Ethernet
Cisco SN 5428-2 Storage Router Software Configuration Guide
78-15471-01
1-23
Chapter 1
Before Configuring SN 5428-2 Storage Router Software
Where to Go Next
85739
Figure 1-22 SN 5428-2 Chassis-Slot Numbering
ge1
ge2
fc1
fc2
fc3
fc4
fc5
fc6
fc7
fc8
Where to Go Next
When you are ready to configure the SN 5428-2 software, proceed to one of the following chapters in
this configuration guide according to your needs:
Note
•
Chapter 2, “First-Time Configuration”—For initial setup or after configuration has been reset to
factory default configuration
•
Chapter 3, “Configuring System Parameters”—Using the CLI for setting up and modifying system
parameters
•
Chapter 4, “Configuring for VLAN”—Using the CLI for setting up and modifying VLAN
configurations
•
Chapter 5, “Configuring Fibre Channel Interfaces”—Using the CLI for setting up and modifying FC
interface and zoning configurations
•
Chapter 6, “Configuring SCSI Routing” —Using the CLI for setting up and modifying SCSI routing
configurations
•
Chapter 7, “Configuring Transparent SCSI Routing” —Using the CLI for setting up and modifying
transparent SCSI routing configurations
•
Chapter 8, “Configuring FCIP” —Using the CLI for setting up and modifying FCIP configurations
•
Chapter 9, “Configuring Authentication”—Using the CLI for setting up and modifying
authentication configurations
•
Chapter 10, “Configuring a High Availability Cluster”—Using the CLI for setting up and modifying
cluster configurations
•
Chapter 11, “Maintaining and Managing the SN 5428-2 Storage Router”—Downloading software,
backing up and restoring configurations, and other related maintenance and management tasks
•
Chapter 12, “Command Line Interface Reference”—For a basic understanding of the command line
interface and information on all CLI commands.
This guide does not describe how to configure iSCSI drivers. Install and configure iSCSI drivers
according to readme and example configuration files for each driver.
Cisco SN 5428-2 Storage Router Software Configuration Guide
1-24
78-15471-01
C H A P T E R
2
First-Time Configuration
This chapter describes what configuration information to gather and explains the initial system
configuration script and setup configuration wizard for the first-time configuration of the Cisco
SN 5428-2 Storage Router. This chapter also introduces the command line interface (CLI) and
web-based GUI, which can be used for subsequent configuration tasks.
Note
The web-based GUI is not available in SN 5428-2s deployed for transparent SCSI routing.
This chapter contains the following sections:
•
Prerequisite Tasks, page 2-1
•
Collecting Configuration Information, page 2-2
•
Connecting a Console, page 2-6
•
Initial System Configuration Script, page 2-7
•
Running the Setup Configuration Wizard, page 2-8
•
Introducing the CLI, page 2-10
•
Introducing the Web-Based GUI, page 2-12
•
Where to Go Next, page 2-14
Prerequisite Tasks
Before configuring the SN 5428-2 Storage Router for the first time, make sure you have completed the
hardware installation according to the Cisco SN 5428-2 Storage Router Hardware Installation Guide.
Cisco SN 5428-2 Storage Router Software Configuration Guide
78-15471-01
2-1
Chapter 2
First-Time Configuration
Collecting Configuration Information
Collecting Configuration Information
Use the Cisco SN 5428-2 Storage Router First-Time Configuration Checklist (Table 2-1) to help you
gather the system and network information that is needed for the first-time configuration of your
SN 5428-2 Storage Router. The items in the checklist are based on the information requested by the
initial system configuration script and the setup configuration wizard.
Table 2-1
First-Time Configuration Checklist
Configuration Item
Description
Required or Optional
Your Configuration
Value
Configuration
deployment option
The SN 5428-2 can be configured for one of two
kinds of deployments:
Required
1, 2, or 3
1.
SCSI routing (SN 5428-2 enables iSCSI hosts
to access Fibre Channel storage. SN 5428-2
manages access to the Fibre Channel devices.)
2.
Transparent SCSI routing (SN 5428-2 enables
iSCSI hosts to access Fibre Channel storage.
SN 5428-2 does not manage access to the
Fibre Channel devices.)
3.
FCIP (SN 5428-2 enables connectivity
between SANs. SN 5428-2 does not manage
access to the Fibre Channel devices.)
Required for
transparent SCSI
Static mode saves the iSCSI client-to-FC WWPN routing only
bindings, making them persistent across iSCSI
client logouts and system reboots. This is the
preferred choice for most operations.
Static or dynamic mode Static or dynamic deployment for transparent
SCSI routing:
Dynamic mode resets iSCSI client-to-FC WWPN
bindings upon reboots or iSCSI logouts. To deploy
dynamic mode, the intelligent storage array
connected to the SN 5428 must support an
extended iSCSI FC PLOGI frame that contains the
iSCSI client’s IP address and initiator name, and
only recognizes storage devices that support this.
Management interface
IP address and subnet
mask
The IP address and subnet mask of the storage
router management interface.
Note
Required
The management interface for each
storage router in a cluster must be on the
same IP subnet.
Cisco SN 5428-2 Storage Router Software Configuration Guide
2-2
78-15471-01
Chapter 2
First-Time Configuration
Collecting Configuration Information
Table 2-1
First-Time Configuration Checklist (continued)
Configuration Item
Description
Required or Optional
Static route for
management interface
The destination IP address with subnet mask and
then the gateway IP address.
Required if
SN 5428-2 is
managed from a
subnet other than the
one to which it is
physically attached,
unless the SN 5428-2
will be configured to
use RIP listening. See
Chapter 3,
“Configuring System
Parameters.”
System name
The name you want to use for the storage router. If Required
you use the services of a domain name server
(DNS), the system name is the same name you will
enter and associate with the management
interface. Maximum length is 19 characters.
High availability (HA)
configuration
The SN 5428-2 can run in either standalone or
clustered mode. The default is clustered.
Standalone mode is recommended if the storage
router is not intended to provide high availability
along with other storage routers.
Required for SCSI
routing only
High availability (HA)
cluster name
The name of the cluster in which the storage router
is to participate. Clusters are multiple storage
routers that back each other up in case of hardware
or software failure. All storage routers that
participate in a cluster must have the same cluster
name.
Required only if
clustered was
specified for the HA
configuration
High availability (HA)
IP address and subnet
mask
The IP address and subnet mask of the storage
router HA interface. The HA interface and
management interface must be on unique IP
networks. If the SN 5428-2 is to participate in a
cluster, the HA IP address is required; if the
SN 5428-2 is a stand-alone machine, it is optional.
Required only if
clustered was
specified for the HA
configuration
Note
Your Configuration
Value
Standalone or
clustered
The HA interface for each storage router
in a cluster must be on the same IP subnet.
Primary DNS IP address The IP address of the primary domain name server Optional
to be accessed by the storage router. Required if
you refer to any other server via name rather than
IP address.
Secondary DNS IP
address
A backup domain name server from which the
storage router can request services when the
primary DNS is unavailable.
Optional
Cisco SN 5428-2 Storage Router Software Configuration Guide
78-15471-01
2-3
Chapter 2
First-Time Configuration
Collecting Configuration Information
Table 2-1
First-Time Configuration Checklist (continued)
Configuration Item
Description
NTP server IP address
The IP address of the NTP server available to the Optional
storage router. This allows the storage router to
keep the date and time synchronized with the rest
of the network.
Time zone, current date The format for the date is mm/dd/yyyy, and the
and time
time is hh:mm:ss.
Enable Telnet on all
interfaces
Required or Optional
Your Configuration
Value
Optional
Enable Telnet access on all interfaces. By default, Optional
Telnet access is enabled on only the management
interface.
Yes or no
Optional
SNMP read community The name of the community having read-only
name
access to the storage router network. The
SN 5428-2 will respond to this community’s GET
commands. The default is public.
SNMP write community The name of the community having write access to Optional
name
the storage router network. The SN 5428-2 will
respond to this community’s SET commands. The
default is private.
First SNMP trap
manager IP address
The IP address of the first destination host used for Optional
SNMP notifications (traps). Required if you wish
to use SNMP traps.
Trap version for first
SNMP IP address
The version number of the traps that are to be sent Optional
to the first SNMP trap manager IP address. The
default is 1.
Second SNMP trap
manager IP address
An optional IP address of the second destination
host used for SNMP notifications (traps).
Optional
Trap version for second The version number of the traps that are to be sent Optional
SNMP IP address
to the second SNMP trap manager IP address. The
default is 1.
Send authentication
failure option
Enable an authentication failure trap to be sent
when a user specifies an incorrect community.
Optional
Yes or no
Send link up/down traps Enable link up/down traps to be sent for the
option
Management interface when the link goes up and
when it goes down.
Optional
Yes or no
Enable link up/down traps to be sent for the HA
interface when the link goes up and when it goes
down.
Optional
Yes or no
Enable link up/down traps to be sent for the
Optional
Gigabit interface when the link goes up and when
it goes down.
Yes or no
Enable link up/down traps to be sent for the Fibre Optional
Channel interface when the link goes up and when
it goes down.
Yes or no
Cisco SN 5428-2 Storage Router Software Configuration Guide
2-4
78-15471-01
Chapter 2
First-Time Configuration
Collecting Configuration Information
Table 2-1
First-Time Configuration Checklist (continued)
Configuration Item
Description
Required or Optional
Your Configuration
Value
Monitor-level password A password for users who will only monitor
Optional
storage router operations. The default password is
cisco.
Administrator-level
password
A password for users who will configure and
administer the storage router. The default
password is cisco.
Password applied to
EIA/TIA-232 console
interface
Choose whether or not the user is required to enter Optional
the monitor and administrator password when
accessing the storage router via the EIA/TIA-232
console interface. The default is no.
Site-specific contact
information for the
SN 5428-2.system
administrator
Name
Optional
E-mail Address
Optional
Phone number
Optional
Pager Number
Optional
A unique name for a SCSI routing instance.
Names of instances can be up to 32 characters in
length. A maximum of 12 unique SCSI routing
instances are allowed. Only one instance can be
named in the setup configuration wizard.
Required for SCSI
routing only
Name of SCSI routing
instance
Note
Optional
Yes or no
Do not name the SCSI routing instance
with the setup configuration wizard if you
are using the VLAN service with your
SN 5428-2. See Chapter 4, “Configuring
for VLAN,” before naming and
configuring SCSI routing instances.
Gigabit Ethernet
Associate the Gigabit Ethernet interface (ge1 or
interface and IP address ge2) and IP address to the SCSI routing instance.
and subnet mask
IP hosts access FC storage using this address.
Required for SCSI
routing only
Configure multiple or redundant Gigabit Ethernet Required for
Multiple or redundant
interfaces for the SCSI routing instance. IP hosts transparent SCSI
Gigabit Ethernet
routing only
interfaces, IP addresses access FC storage using these addresses.
and subnet masks
For transparent SCSI routing, configure a
maximum of one IP address per Gigabit Ethernet
interface (multiple interfaces) or configure one IP
address that can be presented on either interface
(redundant interfaces).
If you configure the Gigabit Ethernet interfaces
(ge1 and ge2) as redundant, they must be
connected to the same network segment.
FCIP instance name
The name of the FCIP instance. Valid names are
fcip1 and fcip2.
Required for FCIP
only
fcip2 or fcip2
Cisco SN 5428-2 Storage Router Software Configuration Guide
78-15471-01
2-5
Chapter 2
First-Time Configuration
Connecting a Console
Table 2-1
First-Time Configuration Checklist (continued)
Configuration Item
Description
IP address
A Gigabit Ethernet interface and IP address for the Required for FCIP
named FCIP instance, to provide IP connectivity only
between the FCIP instance and its peer
destination.
Peer address
The IP address of the FCIP peer destination.
Required for FCIP
only
Protocol type
Protocol to assign to the FCIP peer destination,
determined as follows:
Required for FCIP
only
Domain ID
Required or Optional
•
If the peer is configured as a TCP client,
assign protocol tcpserver
•
If the peer FCIP instance is configured as a
TCP server, assign protocol tcpclient.
•
If the peer FCIP instance is configured to use
raw IP, assign protocol raw
Your Configuration
Value
Set the domain IDs of the FCIP peers to different Required for FCIP
values, to avoid conflict.
only
Once you have completed the first-time configuration checklist, you are ready to continue with the
first-time configuration of the SN 5428-2 Storage Router using the initial system configuration script
and the setup configuration wizard.
Connecting a Console
To begin configuration of your SN 5428-2 Storage Router, use the CLI by connecting a PC with a
terminal emulation program to the EIA/TIA-232 console interface according to the Cisco SN 5428-2
Storage Router Hardware Installation Guide. Then make sure that the terminal emulation program is
configured for a CLI session with the values provided in Table 2-2.
Table 2-2
Terminal Emulation Configuration
Setting
Value
Bits Per Second
9600
Data Bits
8
Parity
None
Stop Bits
1
Flow Control
None
Cisco SN 5428-2 Storage Router Software Configuration Guide
2-6
78-15471-01
Chapter 2
First-Time Configuration
Initial System Configuration Script
Initial System Configuration Script
The initial system configuration script runs on the CLI and ensures that a few required values are entered
to make the SN 5428-2 Storage Router operational. When you first power up the storage router and after
the initial boot process, the script will run automatically on the CLI session running on the terminal
emulation program via an EIA/TIA-232 console connection.
After the first running of the script, the script will run automatically whenever the storage router is not
configured with an IP address for the management interface, due most likely to a clear conf command,
which requires the system to be configured again.
The initial system configuration script provides explanatory text before prompting you to enter
configuration values. There are two versions of the script. The values asked for by the script are
determined by the configuration deployment option entered for the first prompt.
Table 2-3 lists the configuration items in the order they will appear in the script.
Table 2-3
Configuration Items in Initial System Configuration Script
Configuration Item
Configuration Deployment
Configuration deployment option: 1 for SCSI routing, 2 for
transparent SCSI routing, 3 for FCIP
All
Static or dynamic deployment for transparent SCSI routing
Transparent SCSI routing
Management interface IP address and subnet mask in CIDR style (for All
example: 10.1.10.244/24)
(Optional) The destination IP address with subnet mask and then the All
gateway IP address. (for example 1.0.1.0/24 10.0.1.2)
SN 5428-2 system name (maximum length allowed is 19 characters) All
HA configuration (standalone or clustered)
SCSI routing
Cluster name (asked for only when HA configuration is set to
clustered)
SCSI routing
HA interface IP address and subnet mask in CIDR style (for example: SCSI routing
10.1.20.56/24; asked for only when HA configuration is set to
clustered)
Multiple or Redundant interfaces (configure a unique Gigabit
Ethernet IP address for each interface, or configure a single Gigabit
Ethernet interface that can be presented on either interface)
Transparent SCSI routing
Transparent SCSI routing
Gigabit Ethernet IP address and subnet mask in CIDR style (for
example: 10.1.0.45/24; for multiple interfaces, configure a maximum
of one IP address per interface, or for redundant interfaces, configure
one IP address that can be presented on either interface)
When the script completes, the system will automatically reboot. When the command prompt returns,
continue configuration with the setup configuration wizard.
Cisco SN 5428-2 Storage Router Software Configuration Guide
78-15471-01
2-7
Chapter 2
First-Time Configuration
Running the Setup Configuration Wizard
Running the Setup Configuration Wizard
The setup configuration wizard is available from the CLI and is a script that consists of a series of
prompts asking you to enter values to provide a basic system configuration for your SN 5428-2. You will
be asked to enter values to configure the following:
•
Management interfaces (including primary and secondary DNS servers)
•
Date and time (including time zone and NTP server)
•
Network management access (including SNMP)
•
Management access (including passwords and system administrator contact information)
•
SCSI routing (this section of the wizard only appears if SCSI routing was the configuration
deployment selected in the initial system configuration script; if you are using the VLAN service,
do not configure SCSI routing with the setup configuration wizard)
•
FCIP (this section of the wizard only appears if FCIP was the configuration deployment selected in
the initial system configuration script)
You can run the setup configuration wizard through an EIA/TIA-232 console interface connection, or
through a Telnet session using the management interface.
The values entered for the setup configuration wizard are saved at the end of the wizard’s script. To quit
the configuration wizard at any time without saving changes, press Ctrl-C, and reboot the storage router
to restore previous values.
Note
The factory default listening port used for iSCSI traffic is 3260. This is a port number assigned by IANA.
You can change this value for your network configuration if needed. See the CLI setup iscsi-port
command in Chapter 12, “Command Line Interface Reference,” for details.
Cisco SN 5428-2 Storage Router Software Configuration Guide
2-8
78-15471-01
Chapter 2
First-Time Configuration
Running the Setup Configuration Wizard
Use the following procedure to start the setup configuration wizard.
Step 1
Command
Description
enable
Enter Administrator mode. If prompted for an Administrator
password, use the default password, cisco.
Note
Step 2
setup
Passwords are cluster-wide configuration elements and
apply to all storage routers in a cluster. If the SN 5428-2
joined an existing cluster during initial configuration,
enter the Administrator mode password already configured
for the cluster.
Start the setup configuration wizard.
The wizard will ask you to choose one of the two levels:
•
The novice level provides information before the prompt
explaining what is being requested.
•
The expert level does not provide the explanatory text.
Respond to the prompts using your First-Time Configuration
Checklist.
•
For multiple choice questions, the choices are shown in square
brackets.
•
For values requiring a specific format, the required format is
shown in square brackets.
•
If values have already been entered (for instance, via the
initial system configuration script), the current value saved in
the system are shown in square brackets.
•
Default values are shown in parentheses within the square
brackets.
•
If you want to accept the current or default value, press Enter.
•
If there is no default and you want to bypass the question (that
is, you do not want to change or provide a value), press Enter.
If you configured any interfaces or identified any servers to the SN 5428-2 that are outside the storage
router management subnet, you must update the SN 5428-2 route table with the appropriate gateways
that will provide access to these interfaces or servers, or configure the SN 5428-2 for RIP listening to
dynamically learn IP routes. See Chapter 3, “Configuring System Parameters,” for details on adding
static IP routes or configuring the SN 5428-2 for RIP listening.
You can use the setup command again to change these basic configuration parameters. You can also use
the CLI or, if the storage router is deployed for SCSI routing, the web-based GUI to make changes to the
basic storage router configuration or to configure the storage router more extensively. To access the
web-based GUI, point your browser to the SN 5428-2 management interface IP address.
Cisco SN 5428-2 Storage Router Software Configuration Guide
78-15471-01
2-9
Chapter 2
First-Time Configuration
Introducing the CLI
Introducing the CLI
The CLI is available via a Telnet or Secure Shell (SSH) session to the management interface. It is also
available via a direct EIA/TIA-232 connection on the console interface. The CLI provides commands to
perform all necessary SN 5428-2 management functions, including software upgrades and maintenance.
All CLI commands are capable of prompting for further information as the user types.
•
Pressing the Tab key completes the current command word at any point after it is unique.
•
Pressing the question mark (?) key lists all of the options available at that point in the command
syntax.
•
Each command or keyword can be truncated at any point after it is unique.
Character Case Sensitivity in the CLI
CLI commands, keywords, and reserved words are not case-sensitive. Commands and keywords can be
entered in upper and lower case.
User-defined text strings are case-sensitive and can be defined in both upper and lower case (including
mixed cases). Case for user-defined text strings is preserved in the configuration.
Command Modes
The SN 5428-2 management interface is password protected. You must enter passwords when accessing
the SN 5428-2 via Telnet or SSH (for the CLI) or web-based GUI.
There are two levels of authority:
•
Monitor mode—Allows view-only access to the SN 5428-2 status and system configuration
information.
•
Administrator mode—Allows the user to configure and actively manage the SN 5428-2, its access
lists and SCSI routing instances, and the storage router cluster.
The factory default password for both modes is cisco.
Passwords for Monitor and Administrator mode can be initially configured through the setup
configuration wizard. See the “Running the Setup Configuration Wizard” section on page 2-8 for details.
Note
Passwords are shared cluster-wide, and when configured on the first storage router in the cluster, will be
shared with any other storage router that joins the cluster.
Command Prompt
The CLI command prompt includes the SN 5428-2 system name. An asterisk ( * ) appears at the
beginning of the prompt if the system configuration has been modified but not saved.
Cisco SN 5428-2 Storage Router Software Configuration Guide
2-10
78-15471-01
Chapter 2
First-Time Configuration
Introducing the CLI
Reserved Words
Reserved words cannot be used as user-defined values or names in CLI commands. Words that are used
as commands or as keywords in commands are reserved words.
The following are additional reserved words in the CLI.
•
acl
•
canonical
•
iprouter
•
iptan
•
loglevel
Show CLI Command
Use the show cli command to display the complete CLI command syntax tree, along with helpful
information about command parameters and arguments. Only valid commands will display for the
current command mode of your SN 5428-2 management session.
You can limit the display to specific command families by specifying the desired command words as
parameters to the show cli command. For example, show cli aaa debug scsirouter displays the syntax
tree for all aaa commands, all debug commands, and all scsirouter commands.
Special Keys
The CLI supports the use of special keyboard keys. Table 2-4 lists the special keys and describes their
function.
Table 2-4
Special Keys
Key
Function
?
List choices
Backspace
Delete character backwards
Tab
Command word completion
Ctrl-A
Go to the beginning of the line
Ctrl-B or Left Arrow
Go backwards one character
Ctrl-D
Delete current character
Ctrl-E
Go to the end of the line
Ctrl-F or Right Arrow
Go forward one character
Ctrl-K
Delete from current position to the end of the line
Ctrl-N or Down Arrow
Go to the next line in the history buffer
Ctrl-P or Up Arrow
Go to the previous line in the history buffer
Ctrl-T
Transpose the current and previous character
Ctrl-U
Delete the line
Ctrl-W
Delete the previous word
Cisco SN 5428-2 Storage Router Software Configuration Guide
78-15471-01
2-11
Chapter 2
First-Time Configuration
Introducing the Web-Based GUI
Starting a CLI Management Session
Follow these steps to start a CLI management session via a Telnet connection to the storage router.
Step 1
Establish a Telnet session to the SN 5428-2.
Step 2
Enter the appropriate password at the logon prompt.
Step 3
(Optional) Enter enable to change to Administrator mode.
Note
If you need to make changes to the configuration of the storage router, you need to enable the
Administrator mode.
Step 4
(Optional) Enter the Administrator password at the prompt.
Step 5
Issue the appropriate CLI commands to complete the desired task.
Introducing the Web-Based GUI
If the SN 5428-2 is deployed for SCSI routing, you can also configure the SN 5428-2 Storage Router
using the web-based GUI. You can use the GUI for configuration after completing the initial system
configuration script, which assures that the SN 5428-2 management interface is configured with an IP
address.
To access the GUI, enter the URL for the SN 5428-2 by pointing your browser to the SN 5428-2
management interface IP address using the HTTP protocol (for example, type http://10.1.10.244).
Logging In
After entering the URL for the SN 5428-2, a login page appears. You can log in as monitor or as admin,
entering the appropriate user name and password in the dialog box that appears. See Table 2-5 for the
user name and factory default password to use for the two login options.
Table 2-5
Note
Logging into Web-Based GUI
Login Options
User Name
Factory Default Password
Monitor
monitor
cisco
Admin
admin
cisco
If you configured new passwords using the setup wizard, or if the SN 5428-2 joined an existing cluster
with different passwords, use them when logging in.
Cisco SN 5428-2 Storage Router Software Configuration Guide
2-12
78-15471-01
Chapter 2
First-Time Configuration
Introducing the Web-Based GUI
Monitor Mode
Monitor mode in the web-based GUI will only allow you to monitor the storage router. You cannot
configure, maintain, or troubleshoot the storage router in monitor mode. If you click on the
Configuration, Maintenance, and Troubleshooting menu items in the GUI, a login dialog box will appear
asking for a user name and password for administrator mode.
Administrator Mode
In administrator mode, you can configure, maintain, and troubleshoot the storage router. If you click the
Monitor menu item, a login dialog box will appear asking for a user name and password for monitor
mode.
Menu Items and Links
The GUI menu links appear horizontally at the top of each browser page. Click the desired menu item
to display a list of available action links in the left frame. Table 2-6 lists the menu links, available
actions, and the login modes from which they are available.
Table 2-6
Menu Items and Links in the GUI
Menu Links
Actions
Login Mode
Monitor
Display configuration information and operational
statistics for the SN 5428-2 system, all interfaces,
services (including cluster and SCSI routing
instances, or FCIP instances), and the IP network.
Monitor only
Configuration
Admin only
Configure system parameters (including interface
IP addresses and operational parameters, FC
zoning, and authentication), static routes, and SCSI
routing instances or FCIP instances.
Maintenance
Perform software upgrades, backup and restore
SN 5428-2 configuration elements, and reset the
system.
Troubleshooting
Admin only
Perform reset actions on log files and counters,
display configuration information and system data,
perform trace and debug functions, display debug
files, and gather information when requested by
Cisco Technical Support professionals.
Support
Opens the Cisco.com “Service & Support” page in a Monitor and Admin
new browser window.
Home
Returns to the GUI login page where you choose to Monitor and Admin
log in as either Monitor or Admin.
Help
Opens the GUI online help in a new browser
window.
Admin only
Monitor and Admin
Cisco SN 5428-2 Storage Router Software Configuration Guide
78-15471-01
2-13
Chapter 2
First-Time Configuration
Where to Go Next
Where to Go Next
Note
If you want to configure a high availability cluster, or add the storage router to an existing cluster, review
the information and procedures in Chapter 10, “Configuring a High Availability Cluster,” before
configuring additional system parameters or SCSI routing.
If you did not run the complete SN 5428-2 setup configuration wizard, or if you want to make system
configuration additions, changes, or corrections, continue with the procedures described in Chapter 3,
“Configuring System Parameters.”
If you are using the VLAN service with the storage router and you entered all desired
parameters—except for SCSI routing—with the setup configuration wizard (see “Running the Setup
Configuration Wizard” section on page 2-8 for details), configure for VLAN using the procedures
described in Chapter 4, “Configuring for VLAN.”
If you are participating in Fibre Channel switched fabric zoning with the storage router, configure for
zoning using the procedures described in Chapter 5, “Configuring Fibre Channel Interfaces.”
If you do not need to configure for VLAN or zoning, go directly to Chapter 6, “Configuring SCSI
Routing,” to configure SCSI routing more extensively or Chapter 7, “Configuring Transparent SCSI
Routing,” to verify the configuration of an SN 5428-2 deployed for transparent SCSI routing.
If you need to configure FCIP, go to Chapter 8, “Configuring FCIP.”
Cisco SN 5428-2 Storage Router Software Configuration Guide
2-14
78-15471-01
C H A P T E R
3
Configuring System Parameters
This chapter explains how to configure system parameters on your SN 5428-2 Storage Router and
contains the following sections:
•
Prerequisite Tasks, page 3-1
•
Configuration Tasks, page 3-2
•
Configuring the Management Interface, page 3-3
•
Configuring Time and Date, page 3-4
•
Configuring IP Routes, page 3-5
•
Configuring Network Management Access, page 3-7
•
Configuring Passwords, page 3-8
•
Configuring Administrator Contact Information, page 3-8
•
Configuring the High-Availability Interface, page 3-9
•
Configuring for Secure Shell (SSH) Access, page 3-9
•
Verifying and Saving Configuration, page 3-10
System parameters can be configured or changed using CLI commands, as described in this chapter, or
via the web-based GUI. To access the web-based GUI, point your browser to the storage router’s
management interface IP address. After logging on, click the Help link to access online help for the GUI.
Prerequisite Tasks
Before configuring system parameters, make sure you have finished the following tasks:
Note
•
Completed the hardware installation according to the Cisco SN 5428-2 Storage Router Hardware
Installation Guide.
•
Entered values as requested by the initial system configuration script. See the “Initial System
Configuration Script” section on page 2-7 for more information.
You do not need to perform the configuration tasks in this chapter if you ran the complete SN 5428-2
setup configuration wizard (using the setup CLI command with no keyword), or if you ran the wizards
separately using all the setup CLI commands except setup scsi. However, you may wish to perform
some of the optional configuration procedures described in this chapter, such as configuring IP routes or
SSH access.
Cisco SN 5428-2 Storage Router Software Configuration Guide
78-15471-01
3-1
Chapter 3
Configuring System Parameters
Configuration Tasks
Configuration Tasks
To configure system parameters on your SN 5428-2 Storage Router, perform the following steps:
Step 1
Configure the management interface.
Step 2
Configure the time and date.
Step 3
(Optional) Configure IP routes.
Step 4
(Optional) Configure network management access.
Step 5
Configure passwords.
Step 6
(Optional) Configure administrator contact information.
Step 7
(Optional) Configure the high-availability (HA) interface.
Step 8
(Optional) Configure for Secure Shell (SSH) access.
Step 9
Verify and save configuration.
Note
You can verify and save the configuration (by using the save system bootconfig or save all
bootconfig command) at any point in the process of performing the configuration tasks.
Figure 3-1 illustrates the example configuration used in this chapter.
Cisco SN 5428-2 Storage Router Software Configuration Guide
3-2
78-15471-01
Chapter 3
Configuring System Parameters
Configuring the Management Interface
Figure 3-1
System Parameters Example Configuration
Cisco SN 5428-2
HA interface
Cluster Name: Mt_Olympus
IP: 10.1.20.56
Mask: 255.255.255.0
GEx interface
GE1 primary management interface
GE2 secondary management interface
IP: 10.1.70.85
Mask: 255.255.255.0
Management interface
System Name: SN_5428-MG1
Domain Name: mystoragenet.com
IP: 10.1.10.244
Mask: 255.255.255.0
GEx
HA
Management Station
IP: 10.1.30.17
Gateway
IP: 10.1.10.201
Management
Primary DNS server
IP: 10.1.40.243
NTP server
IP: 10.1.60.86
85735
Secondary DNS server
IP: 10.1.50.249
Cisco SN 5428
Configuring the Management Interface
Configuring the management interface consists of tasks for setting the system name, IP address and
mask, gateway, and DNS servers. Use the following procedure to configure the management interface.
If you want external servers, such as RADIUS, TACACS+ or SMTP servers, to communicate with the
SN 5428-2 Storage Router via a specific IP address on a Gigabit Ethernet interface (for in-band
management), configure the IP address on the desired Gigabit Ethernet interface, as described in Step 4.
Save the changes to the bootable configuration (save all bootconfig), and then reboot the storage router.
Note
The purpose of Figure 3-1 is an example system configuration only. The IP addresses and all names
given below are examples only.
Command
Description
Step 1
enable
Enter Administrator mode.
Step 2
hostname SN_5428-2-MG1
Specify or change the system name. The system name identifies
the SN 5428-2 through the management interface and appears
immediately in the prompt.
Cisco SN 5428-2 Storage Router Software Configuration Guide
78-15471-01
3-3
Chapter 3
Configuring System Parameters
Configuring Time and Date
Step 3
Command
Description
interface mgmt ip-address
10.1.10.244/24
Specify or change the IP address and subnet mask for the
management interface.
Note
Step 4
interface ge1 ip-address
10.1.70.85/24 secondary ge2
(Optional) Configure an IP address and subnet mask on ge1 to be
used for SN 5428-2 management and maintenance. Specify ge2 as
the secondary interface for this IP address. If the Gigabit Ethernet
interface ge1 becomes unavailable and ge2 is available, the IP
address will become active on ge2.
Note
Step 5
no restrict ge1 ssh
no restrict ge2 ssh
If this storage router is to participate in a cluster, the
management interface for all storage routers in the cluster
must be on the same IP subnet.
If you configure a Gigabit Ethernet IP address with a
secondary interface, all Gigabit Ethernet IP addresses on
the same subnet must also be configured with the same
secondary interface.
(Optional) Configure the Gigabit Ethernet interfaces to be used for
management and maintenance for access via the desired
protocol(s). In this configuration example, management access to
the SN 5428-2 through the configured Gigabit Ethernet IP address
is allowed for both ge1 and ge2 via Secure Shell (SSH) protocols.
Step 6
ip name-server 10.1.40.243
10.1.50.249
(Optional) Set the primary and secondary DNS IP addresses.
Specifies the IP address of the primary DNS server if the
management interface IP address is to be correlated with a DNS
host name. If there is a secondary DNS, the second IP address
specifies the IP address of the secondary DNS server.
Step 7
ip domain-name
mystoragenet.com
(Optional) Specify the domain name of the storage router. Use this
command in conjunction with the ip name-server command.
Configuring Time and Date
Configuring time and date parameters consists of specifying the time zone, time, date and time server.
Use the following procedure to configure the time and date parameters.
Command
Description
Step 1
enable
Enter Administrator mode.
Step 2
clock timezone US/Pacific
Identify the time zone where the storage router is located. If a time
zone is not identified, time is assumed to be GMT.
Note
To use the clock timezone command, you must use a valid
time-zone string. For a list of valid time-zone strings, use
the clock timezone ? command. See Chapter 12,
“Command Line Interface Reference,” for details.
Cisco SN 5428-2 Storage Router Software Configuration Guide
3-4
78-15471-01
Chapter 3
Configuring System Parameters
Configuring IP Routes
Command
Description
Step 3
clock set 08:20:00 04 15 2002
Set time and date (for example: time, 8:20 A.M.;
date, April 15, 2002).
Step 4
ntp peer 10.1.60.86
(Optional) Specify the name or IP address of the network time
protocol (NTP) server with which the storage router will
synchronize the date and time.
Configuring IP Routes
If the storage router requires access to any IP address outside the management subnet, you must
configure the appropriate routes in the SN 5428-2 routing table. You can configure static routes, or if
you are using RIP in your network, you can enable the storage router to dynamically learn routes using
the routing information protocol (RIP).
When there are multiple routes to the same destination, use administrative distance to determine which
route to install in the routing table. The default administrative distance for static routes is 1; the
administrative distance for dynamic routes created by RIP is 120. The route with the lower
administrative distance is installed in the routing table (as long as the interface used by the route is up).
Note
The SN 5428-2 can learn a maximum of 200 routes. Additional routes that are received are silently
ignored. In the SN 5428-2 routing table, a static route will always override a learned route. To modify
this behavior, change the administrative distance of a static route to a value greater than 120.
Static Routes
Use the following procedure to manually configure the SN 5428-2 routing table using static IP routes.
Command
Description
Step 1
enable
Enter Administrator mode.
Step 2
ip route 10.1.30.0/24 10.1.10.201 (Optional) Configure a gateway IP address if the storage router is
to be managed from a management station outside the storage
router management subnet. The second IP address specifies a
gateway on the storage router management network that will
provide access to a management station.
Note
Step 3
ip route 10.1.40.243/32
10.1.10.201 130
In this configuration example, the mask is set to 24
(255.255.255.0) to allow any host on subnet 10.1.30.0 to
be a management station.
Configure a gateway IP address if the primary DNS server is
outside the storage router management subnet. The second IP
address specifies a gateway on the storage router management
network that will provide access to a primary DNS server.
The administrative distance is set at 130, so if RIP is enabled, the
route can be overridden by a dynamically learned route.
Note
In this configuration example, the mask is set to 32
(255.255.255.255) to specify the host with IP address
10.1.40.243 (the primary DNS server).
Cisco SN 5428-2 Storage Router Software Configuration Guide
78-15471-01
3-5
Chapter 3
Configuring System Parameters
Configuring IP Routes
Step 4
Command
Description
ip route 10.1.50.249/32
10.1.10.201
Configure a gateway IP address if the secondary DNS server is
outside the storage router management subnet. The second IP
address specifies a gateway on the storage router management
network that will provide access to a secondary DNS server.
Note
Step 5
ip route 10.1.60.86/32
10.1.10.201
In this configuration example, the mask is set to 32
(255.255.255.255) to specify the host with IP address
10.1.50.249 (the secondary DNS server).
Specify the gateway IP address if the time server is outside the
storage router management subnet. The second IP address
specifies the gateway on the storage router management network
that provides access to the time server.
Note
In this configuration example, the mask is set to 32
(255.255.255.255) to specify the host with IP address
10.1.60.86.
Dynamic Routes via RIP Listening
Use the following procedure to configure the storage router to learn routes from RIP advertisements, and
dynamically populate the routing table. The storage router supports both RIP version 1 (v1) and RIP
version 2 (v2).
The SN 5428-2 RIP implementation runs RIP v2 in broadcast mode. This allows the storage router to
learn from either RIP v1 or RIP v2 hosts that are operating in broadcast mode. The storage router will
not learn routes from RIP v2 hosts operating in multicast mode.
Note
The storage router is a passive, or silent, RIP device; it updates routes based on RIP advertisements but
it does not advertise.
Command
Description
Step 1
enable
Enter Administrator mode.
Step 2
ip rip enable
Enable RIP listening. The storage router listens for advertised
routes, learning routing information dynamically as it is
exchanged in the network.
Cisco SN 5428-2 Storage Router Software Configuration Guide
3-6
78-15471-01
Chapter 3
Configuring System Parameters
Configuring Network Management Access
Configuring Network Management Access
Configuring network management access consists of tasks for configuring SNMP. Use the following
procedure to configure SNMP for network management access.
Command
Description
Step 1
enable
Enter Administrator mode.
Step 2
no restrict all telnet
(Optional) Enable Telnet access on all interfaces. By default,
Telnet access is enabled on only the management interface.
Step 3
snmp-server community world
ro
(Optional) Specify the name of the community having read-only
access of the storage router network (that is, to which community’s
GET commands the storage router will respond). The default read
community is public.
Step 4
snmp-server community
mynetmanagers rw
(Optional) Specify the name of the community having write access
to the storage router network (that is, to which community’s SET
commands the storage router will respond). The default write
community is private.
Step 5
snmp-server host 10.1.30.17
version 2 traps
Specify the IP address for the first destination host used for a
specified version of notifications (traps). Version 1 traps is the
default version.
Note
In this configuration example, the trap hosts have IP
addresses that are outside the storage router management
subnet. In an earlier step in the Configuring the
Management Interface section, a gateway was already
specified providing access to hosts on the 10.1.30.0
subnet.
Step 6
snmp-server host 10.1.30.18
traps
(Optional) Specify the IP address for the second destination host
used for notifications (traps). Version 1 traps is the default version.
Step 7
snmp-server sendauthtraps
(Optional) Enable sending of authentication failure traps.
Step 8
no snmp-server linkupdown all
(Optional) By default, the SNMP agent is enabled to generate link
up/down traps for all interfaces. In this configuration example, the
command disables this setting for all interfaces. See Chapter 12,
“Command Line Interface Reference,” to disable this setting for
individual interfaces.
Cisco SN 5428-2 Storage Router Software Configuration Guide
78-15471-01
3-7
Chapter 3
Configuring System Parameters
Configuring Passwords
Configuring Passwords
Configuring passwords consists of setting the Monitor mode and Administrator mode passwords for
access to the 10/100 Ethernet management interface (used for the CLI via Telnet or SSH, and the
web-based GUI via HTTP). You can also enable these passwords to restrict access to the EIA/TIA-232
console interface. The factory default password for both Monitor and Administrator modes is cisco.
In a cluster environment, passwords are cluster-wide configuration elements and apply to all storage
routers in a cluster. All password management functions are handled by a single storage router. If you
issue try to set the Administrator or Monitor mode passwords from a storage router that is not performing
password management functions, the CLI displays an informational message with the name of the
storage router that is currently handling those functions.
Use the following procedure to configure passwords
Command
Description
Step 1
enable
Enter Administrator mode.
Step 2
monitor password janu$01
Set the monitor password (for users who only monitor storage
router operation).
Step 3
admin password electr@50
Set the administrator password (for system administrators,
allowing configuration changes).
Step 4
restrict console
(Optional) Enable the Monitor-mode and Administrator-mode
passwords to be required when accessing the SN 5428-2 via a
console connected to the EIA/TIA-232 console interface.
Configuring Administrator Contact Information
Configuring administrator contact information consists of tasks for specifying the name, e-mail address,
phone number, and pager number of the system administrator for the storage router. Use the following
procedure to configure administrator contact information.
Command
Description
Step 1
enable
Enter Administrator mode.
Step 2
admin contactinfo name “Pat J.
Smith” email
pjsmith@mystoragenet.com
phone “763 555-1117” pager
“763 555-7766”
Provide contact name, e-mail address, phone number, and pager
number. Enclose each string that contain spaces in single or double
quotes.
Note
The admin contactinfo command requires that you
specify either one parameter or all four parameters.
Cisco SN 5428-2 Storage Router Software Configuration Guide
3-8
78-15471-01
Chapter 3
Configuring System Parameters
Configuring the High-Availability Interface
Configuring the High-Availability Interface
If you configured the SN 5428-2 for high availability during the initial system configuration, you were
prompted to enter an IP address for the high availability (HA) interface. The HA interface is a 10/100
Ethernet interface, and is used along with the management interface to exchange information as
heartbeats to detect changes or failures in the cluster.
If you configured the SN 5428-2 as a stand-alone system, or if you need to change the HA IP address
without changing clusters, use the following procedure to configure the HA interface IP address.
Command
Description
Step 1
enable
Enter Administrator mode.
Step 2
interface ha ip-address
10.1.20.56/24
Specify or change the IP address and subnet mask for the HA
interface.
See Chapter 10, “Configuring a High Availability Cluster,” for more information about configuring
SN 5428-2s in a high availability cluster.
Configuring for Secure Shell (SSH) Access
The SN 5428-2 Storage Router supports Secure Shell (SSH) as an alternative to Telnet protocol for
SN 5428-2 management. SSH provides encryption and strong authentication for interactive SN 5428-2
management sessions. The SN 5428-2 supports SSH protocol version 2 and allows port forwarding.
The SN 5428-2 SSH implementation supports execution of interactive commands only; non-interactive
commands cannot be executed. Secure FTP (sftp) and Secure Copy (scp) are not supported.
SSH is enabled for the SN 5428-2 and the SSH service is started, by default. However, you must generate
a public/private key pair for the SN 5428-2 before you can use SSH to establish a management session.
By default, SSH is restricted on all interfaces except the management interface.
Use the following procedure to configure the SN 5428-2 to use SSH.
Command
Description
Step 1
enable
Enter Administrator mode.
Step 2
show ssh
Display the status of the SSH service for the SN 5428-2. The SSH
service is running and is enabled by default (Example 3-1).
Step 3
ssh enable
(Optional) If SSH is not enabled, start the SSH service.
Step 4
ssh keygen
Generate the SSH public/private key pair, using the specified
number of bits. For example, generate a 1024-bit key pair (the
default setting).
Step 5
show restrict
Display the current protocol restrictions for the SN 5428-2. Verify
that SSH is enabled for the required interface.
Step 6
no restrict mgmt ssh
(Optional) Enable SSH for the required interfaces. For example,
enable SSH for the SN 5428-2 the management interface.
Cisco SN 5428-2 Storage Router Software Configuration Guide
78-15471-01
3-9
Chapter 3
Configuring System Parameters
Verifying and Saving Configuration
Command
Description
Step 7
restrict mgmt telnet
(Optional) If SSH is being used as a replacement for Telnet, you
can disable Telnet access through the specified SN 5428-2
interface (or all interfaces). For example, disable Telnet access via
the management interface.
Step 8
no telnet enable
(Optional) You can also disable Telnet for the entire SN 5428-2 by
stopping the Telnet service.
Step 9
save system bootconfig
Save changes to the SN 5428-2 bootable configuration.
Example 3-1
Results of “show ssh” Command
[SN5428-2A]# show ssh
SSH Server Configuration
Status: enabled
Verifying and Saving Configuration
Verify the system parameters using the following procedure. You can save the configuration at any time
using either the save all bootconfig commands. You must save the running configuration to the bootable
configuration for it to be retained in the storage router when it is rebooted.
Use the following procedure to verify configuration information.
Command
Description
Step 1
enable
Enter Administrator mode.
Step 2
show system
Display system information, such as system name, software
version, date and time (including time zone), NTP server, DNS
(name server), and management and HA interface IP addresses.
Step 3
show ip route
(Optional) Display the system route table, if you added any routing
information or if you enabled the storage router for RIP listening.
Step 4
show ip rip
(Optional) Display RIP configuration and operational information,
if set.
Step 5
show snmp
(Optional) Display SNMP management configuration information
for the storage router, if set.
Step 6
show admin
(Optional) Display contact information for the system
administrator of the storage router, if set.
Step 7
show ssh
(Optional) Display SSH operational status, if configured.
Step 8
show ssh fingerprint
(Optional) Display public key information for the SSH, if set.
Step 9
show restrict
(Optional) Display the restrict settings, if you made changes to the
protocols allowed for the various SN 5428-2 interfaces.
Step 10
show bootconfig
(Optional) Display the current boot configuration of the
SN 5428-2.
Step 11
show runningconfig
(Optional) Display the current running configuration of the
SN 5428-2.
Cisco SN 5428-2 Storage Router Software Configuration Guide
3-10
78-15471-01
C H A P T E R
4
Configuring for VLAN
This chapter explains how to configure your SN 5428-2 Storage Router for a virtual local area network
(VLAN) and contains the following sections:
•
Prerequisite Tasks, page 4-1
•
VLAN Encapsulation, page 4-1
•
Configuration Tasks, page 4-2
•
Configuring for VLAN with VTP, page 4-4
•
Configuring for VLAN without VTP, page 4-4
•
Configuring an IP Route, page 4-5
•
Verifying and Saving Configuration, page 4-5
•
Assigning a VLAN to a SCSI Routing Instance, page 4-6
You can configure for VLAN using CLI commands, as described in this chapter, or via the web-based
GUI. To access the web-based GUI, point your browser to the storage router’s management interface IP
address. After logging on, click the Help link to access online help for the GUI.
Note
The VLAN function is not available for SN 5428-2 Storage Routers deployed for FCIP.
Prerequisite Tasks
Before configuring for VLAN, make sure you have configured all system parameters as described in
Chapter 2, “First-Time Configuration,” or Chapter 3, “Configuring System Parameters.”
VLAN Encapsulation
The SN 5428-2 Storage Router uses the IEEE 802.1Q standard for VLAN encapsulation.
Note
If the storage router is connected to a Cisco switch, the switch port must be configured as a trunk port
and the encapsulation set to 802.1Q, not Inter-Switch Link (ISL), which is the default setting for trunk
ports. The switch port must also be set to VLAN 1.
Cisco SN 5428-2 Storage Router Software Configuration Guide
78-15471-01
4-1
Chapter 4
Configuring for VLAN
Configuration Tasks
Configuration Tasks
VLAN and VTP configuration information applies to all storage routers participating in a cluster. When
the configuration information is saved, the settings become active on all storage routers in the cluster.
Note
Changes to cluster-wide configuration elements are handled by a single storage router in the cluster. In
a cluster environment, use the show cluster command to verify that the SN 5428-2 that you are
configuring is managing cluster-wide configuration elements.
To configure for VLAN on the SN 5428-2 Storage Router, perform the following steps:
Step 1
Configure for VLAN using the VLAN Trunking Protocol (VTP).
or
Configure for VLAN without using VTP.
Step 2
Configure an IP route.
Step 3
Verify and save configuration.
Note
Step 4
You can verify and save the configuration at any point in the process of performing the
configuration tasks. Save your configuration by using the save all bootconfig CLI command.
This command saves all configuration data to the bootable configuration, which is then used
when the storage router is rebooted.
Proceed to Chapter 6, “Configuring SCSI Routing,” to configure SCSI routing and to assign a VLAN to
a SCSI routing instance.
Figure 4-1 contrasts configuring the SN 5428-2 Storage Router for VLAN with VTP and without VTP.
Cisco SN 5428-2 Storage Router Software Configuration Guide
4-2
78-15471-01
Chapter 4
Configuring for VLAN
Configuration Tasks
Figure 4-1
Contrast of Configuring for VLAN with VTP and without VTP
Configuring for VLAN with VTP
Network environment:
VTP mode:
VID:
Optional parameter:
Cisco only
Client
Automatically assigned
Domain name
Manually assigned VIDs
and VLAN names
VLAN 100
VID: 100
Name: Engineering
SN 5428-2 learns about VLANs by exchanging VTP
packets with externally attached switch and
automatically assigns a VID to each VLAN.
Cisco SN 5428-2
802.1Q trunk
IP
Configuring for VLAN without VTP
Network environment:
VTP mode:
VID:
Optional parameter:
Multiple vendor
Transparent
Manually assigned
VLAN name and MTU size
SN 5428-2 does not exchange VTP packets, and
VLANs must be manually configured with a VID.
VLAN 300
VID: 300
Name: Finance
85736
Switch
VLAN 200
VID: 200
Name: Manufacturing
Cisco SN 5428-2 Storage Router Software Configuration Guide
78-15471-01
4-3
Chapter 4
Configuring for VLAN
Configuring for VLAN with VTP
Configuring for VLAN with VTP
Configuring for VLAN using the VLAN Trunking Protocol (VTP) consists of assigning the VTP domain
name and setting the VTP mode to client. VTP, a proprietary protocol of Cisco Systems, is used to
propagate VLAN information around a switched network.
Use the following procedure to configure VLAN using VTP.
Note
VTP can only be used in a Cisco network environment.
Command
Description
Step 1
enable
Enter Administrator mode.
Step 2
vtp domain opus
(Optional) Assign a VTP domain name (opus) to which the
SN 5428-2 Storage Router belongs. If a domain name is not
specified, the SN 5428-2 will assign itself to the first domain from
which it receives a VTP message. The default setting is none.
Step 3
vtp mode client
The default setting for the VTP mode is client. Set the VTP mode
to client if the current setting is transparent.
In client mode, the SN 5428-2 will exchange VTP packets with an
externally attached switch to learn about the VLANs that are
accessible in the network.
Configuring for VLAN without VTP
Configuring for VLAN without using VTP consists of setting the VTP mode to transparent, assigning a
VID, and optionally assigning a name and maximum transmission unit (MTU) size to the VLAN.
Use the following procedure to configure VLAN without using VTP.
Command
Description
Step 1
enable
Enter Administrator mode.
Step 2
vtp mode transparent
Set the VTP mode for the storage router to transparent. In
transparent mode, the SN 5428-2 does not exchange VTP packets,
and VLANs must be manually configured. The default setting is
client.
Step 3
vlan 100
Assign a VLAN identifier (VID) number that uniquely identifies
the VLAN. The VID can be any integer from 1 to 4095.
or
vlan 100 name Engineering
mtusize 9000
Optionally, a VLAN can be assigned a unique name (Engineering)
up to 32 characters in length. If a name is not specified, a default
name is automatically assigned. The default name has VLAN as the
prefix followed by the VID, left padded to four bytes (for example,
VLAN0100).
Optionally, an MTU size can be specified using a value from 1500
to 9000. The default value is 1500.
Cisco SN 5428-2 Storage Router Software Configuration Guide
4-4
78-15471-01
Chapter 4
Configuring for VLAN
Configuring an IP Route
Configuring an IP Route
Note
If the SN 5428-2 is configured to dynamically learn routes via RIP listening, you do not need to
configure a static IP route.
Configuring an IP route to access the VLAN consists of specifying a static route that uses a gateway
attached to the desired VLAN. Use the following procedure to configure an IP route.
Command
Description
Step 1
enable
Enter Administrator mode.
Step 2
ip route 10.2.90.285/32
10.2.10.233
Specify the IP address and subnet mask (10.2.90.285/32) of the
destination. Set the subnet mask to 255.255.255.255. In this
example, the subnet mask was set using CIDR style (/32).
Verifying and Saving Configuration
Verify VTP and VLAN operational and configuration information using the procedures that follow. You
can save the configuration at any time by using the save all bootconfig command. You must save the
running configuration to the bootable configuration for it to be retained in the storage router when it is
rebooted. Once you have saved the configuration, you can verify that the configuration to be used when
the storage router is rebooted matches the currently running configuration.
Use the following procedure to verify VTP operational information and configured settings.
Command
Description
Step 1
enable
Enter Administrator mode.
Step 2
show vtp
Display VTP operational information (Example 4-1).
Step 3
show vtp from runningconfig
Display current VTP configuration from the currently running
configuration (runningconfig) or from the persistent saved
configuration, used when the storage router is restarted
(bootconfig). (See Example 4-2.)
or
show vtp from bootconfig
Example 4-1
Verifying VTP Operational Information
[SN5428-2A]# show vtp
Configuration Revision
Number of existing VLANs
VTP Operating Mode
VTP Domain Name
Example 4-2
:
:
:
:
8
4
Client
opus
Verifying VTP Configured Settings
[SN5428-2A]# show vtp from runningconfig
vtp mode client
vtp domain opus
Cisco SN 5428-2 Storage Router Software Configuration Guide
78-15471-01
4-5
Chapter 4
Configuring for VLAN
Assigning a VLAN to a SCSI Routing Instance
Use the following procedure to verify current operational information for all VLANs either learned from
the network using VTP in client mode or configured locally while in transparent mode.
Command
Description
Step 1
enable
Enter Administrator mode.
Step 2
show vlan
Display current VLAN operational information (Example 4-3).
Example 4-3
Verifying VLAN Operational Information
[SN5428-2A]# show vlan
VLAN Name
---- ------------------------------100
Engineering
200
Manufacturing
VLAN
---100
200
Type
----enet
enet
MTU
----1500
1500
Status
--------active
active
Ports
------------------------------ge2
ge2
Interfaces
------------------------------ge2VLAN100
ge2VLAN200
Use the following procedure to verify configured VLAN information.
Command
Description
Step 1
enable
Enter Administrator mode.
Step 2
show vlan from runningconfig
Display current VLAN configuration from the currently running
configuration (runningconfig) or from the persistent saved
configuration, used when the storage router is restarted
(bootconfig). (See Example 4-4.)
or
show vlan from bootconfig
Example 4-4
Verifying VLAN Configuration Information
[SN5428-2A]# show vlan from runningconfig
vlan 100 name Engineering mtu 1500
vlan 200 name Manufacturing mtu 1500
Assigning a VLAN to a SCSI Routing Instance
Assigning a VLAN to a SCSI routing instance is achieved with the scsirouter serverif vlan command.
This procedure is provided in the “Configuring a Server Interface” section of Chapter 6, “Configuring
SCSI Routing.” We recommend that you follow the configuration tasks to configure SCSI routing in the
order given in that chapter at the time you are ready to configure SCSI routing.
Cisco SN 5428-2 Storage Router Software Configuration Guide
4-6
78-15471-01
C H A P T E R
5
Configuring Fibre Channel Interfaces
This chapter explains how to configure your SN 5428-2 Storage Router Fibre Channel (FC) interfaces.
This includes configuring zoning, and contains the following sections:
•
Prerequisite Tasks, page 5-1
•
Configuration Tasks, page 5-1
•
Configuring FC Interfaces, page 5-2
•
Configuring the Domain ID, page 5-4
•
Configuring Zoning, page 5-6
•
Verifying Configuration, page 5-9
You can configure FC interfaces and zoning using CLI commands, as described in this chapter, or via
the web-based GUI. To access the web-based GUI, point your browser to the storage router’s
management interface IP address. After logging on, click the Help link to access online help for the GUI.
Prerequisite Tasks
Before configuring FC interfaces or zoning, make sure you have configured all system parameters as
described in Chapter 2, “First-Time Configuration,” or Chapter 3, “Configuring System Parameters.”
Configuration Tasks
To configure the SN 5428-2 for zoning, perform the following steps:
Step 1
Configure the FC interfaces.
Step 2
Configure the domain ID.
Step 3
Create a zone set and zone, and an optional alias.
Step 4
Add the zone to the zone set.
Step 5
Add members to the zone, and optionally, members to the alias.
Step 6
Activate the zone set.
Step 7
Verify configuration.
Cisco SN 5428-2 Storage Router Software Configuration Guide
78-15471-01
5-1
Chapter 5
Configuring Fibre Channel Interfaces
Configuring FC Interfaces
Configuring FC Interfaces
The SN 5428-2 has an integrated switch component with Fibre Channel interfaces (fc1 through fc8) that
support the port types described in Table 5-1. The SN 5428-2 FC interfaces are auto configuring; for
public devices and other switches, the SN 5428-2 can automatically set the port mode as each interface
discovers the type of device to which it is connected.
Table 5-1
FC Port Types
Type
Description
Configuration
E_Port
Operates as an expansion port when connected to another SN 5428-2 or an
FC-SW-2 compliant switch. Links multiple FC switches together into a
fabric.
Self-discovered by configuring a
G_Port or GL_Port.
F_Port
Port type is fabric. Supports connection to a single public device (N_Port).
Configured with the
interface fc? type command, or
self-discovered by configuring a
G_Port or GL_Port.
FL_Port
Port type is fabric loop (also known as “public loop”). Supports connection Configured with the
to a loop of up to 126 public devices (NL_Port).
interface fc? type command, or
self-discovered by configuring a
GL_Port.
G_Port
Configured with the
Port type is generic and can function as either an F_Port or an E_Port.
Self-discovers as an F_Port when connected to a single public device, or as interface fc? type command.
an E_Port when connected to another SN 5428-2 or an FC-SW-2 compliant
switch. May also self-discover as an E_Port when connected to a switch
running non-FC-SW-2 compliant firmware.
GL_Port
Port type is generic loop; this is the default port type. Self-discovers as an
FL_Port when connected to a loop of public devices, an F_Port when
connected to a single device, or an E_Port when connected to another
SN 5428-2 or an FC-SW-2 compliant switch. May also self-discover as an
E_Port when connected to a switch running non-FC-SW-2 compliant
firmware.
TL_Port
Configured with the
Port type is translated loop. Supports connection to a loop of up to 126
interface fc? type tl-port mode
private devices with the ability to communicate with “off-loop” devices,
command.
such as public fabric devices and private devices on other TL_Ports.
TL_Ports connect to devices that confirm to the Fibre Channel-Private Loop
SCSI Direct Attach (FC-PLDA) standard. A TL_Port acts as a proxy for the
off-loop device, translating private frames to and from public frames. Each
TL_Port can proxy up to 64 off-loop devices.
Donor
Enables the SN 5428-2 to extend buffer credits from the donor port to
selected FC ports.
Configured with the
interface fc? type command.
Configured with the
interface fc? type donor
command.
The following are the default operational characteristics for the FC interfaces:
•
Fairness disabled (switch has priority)
•
Fabric Address Notification (FAN) enabled
•
Automatically negotiated transfer rate (linkspeed auto)
•
Multi-Frame sequence bundling enabled (with a timeout value of 10)
Cisco SN 5428-2 Storage Router Software Configuration Guide
5-2
78-15471-01
Chapter 5
Configuring Fibre Channel Interfaces
Configuring FC Interfaces
•
GS-3 management server commands enabled
•
Port type of generic loop, which enables automatic selection of port type as Fabric (F_Port), Fabric
Loop (FL_Port or public loop) or Expansion (E_Port or switch to switch)
•
Credit extension is not enabled (ext-credit is 0)
Configuring an FC Port Type
To configure an FC port type, select the appropriate port type based on the connected equipment, as
described in Table 5-1 on page 5-2.
Note
If you are going to attach to a Fibre Channel fabric through an inter-switch link or by connecting to
another SN 5428-2, verify that the named interface port type is set to generic loop (GL_Port), using the
show interface command. If it is not, you must change the FC interface port type to GL_Port and reset
the interface, as shown in the following procedure.
Use the following procedure to configure and reset a port type for an FC interface. Resetting the port
type ensures that the port is configured correctly with the connected equipment. In this example, fc3 is
the interface that is connected to your Fibre Channel switched fabric, and it is being set to port type
gl-port.
Command
Description
Step 1
enable
Enter Administrator mode.
Step 2
interface fc3 type gl-port
Specify the port type to be used for the specified port.
See the interface fc? type command in Chapter 12, “Command
Line Interface Reference,” for additional port types and details.
Step 3
interface fc3 reset
Note
Removing the cable to the FC interface port and re-attaching the cable also resets the interface.
Resets the FC interface.
Configuring a Donor Port to Extend Buffer Credits
You can configure one or more FC ports as donor ports to extend buffer credits to other FC ports. This
feature is useful for counteracting performance degradation caused by transmission delay to distant
devices.
The sole purpose of a donor port is to extend buffer credits to selected FC ports in the SN 5428-2 Storage
Router; a donor port cannot provide connectivity to an FC device.
To donate credits, the donor port type must be donor. To receive credits, a selected FC port must be
configured to receive extended credits and must be one of the following types: E_Port, F_Port or G_Port.
A port with a running loop port type (FL_Port, GL_Port, or TL_Port) cannot receive donated credits.
Each donor port donates 11 buffer credits, all of which must go to a single recipient port configured for
credit extension.
Use the following procedure to configure a port to receive extended credits and to configure the donor
port.
Cisco SN 5428-2 Storage Router Software Configuration Guide
78-15471-01
5-3
Chapter 5
Configuring Fibre Channel Interfaces
Configuring the Domain ID
Command
Description
Step 1
enable
Enter Administrator mode.
Step 2
interface fc8 type donor
Set the FC interface port type to donor.
Step 3
interface fc1 type f-port
Set the FC interface port type to F_Port.
Step 4
interface fc1 ext-credit 11
Set a recipient interface port to receive credit extension. Buffer
credits can be made available only in increments of 11, with a
maximum of 77 credits.
See the interface fc? type and the interface fc? ext-credit commands in Chapter 12, “Command Line
Interface Reference,” for additional details about extended credits.
Configuring the Domain ID
Each switch in the FC switched fabric zone has a domain ID. The SN 5428-2 must be configured with a
domain ID that is unique and compatible with the FC switched fabric zone.
Use the following procedure to configure the unique domain ID.
Note
Changing the domain ID in an operational fabric will cause traffic disruption. To avoid this problem,
remove the SN 5428-2 from the fabric before making the configuration change. For example, disable all
FC interfaces operating as E_Ports before making the configuration change. The domain ID change will
be propagated to the fabric when the SN 5428-2 rejoins the fabric (when the FC interfaces are enabled).
Command
Description
Step 1
enable
Enter Administrator mode.
Step 2
fcswitch domainid 99
Assign a unique domain ID. The default setting for the SN 5428-2
is 1.
Note
The domain ID must be within the operable range; see your
Fibre Channel switched fabric administrator for the
appropriate value.
At the prompt, enter yes to continue and change the domain ID
(Example 5-1).
Example 5-1
“fcswitch domainid” Command Warning
[SN5428-2A] fcswitch domainid 99
*** Warning: changing domain ID in an operational fabric will cause traffic disruption.
Do you want to continue? [yes/no (no)] yes
Cisco SN 5428-2 Storage Router Software Configuration Guide
5-4
78-15471-01
Chapter 5
Configuring Fibre Channel Interfaces
Configuring the Domain ID
Internal FC Ports
There are two internal FC ports in the SN 5428-2, initiator WWPN1 and initiator WWPN2. These two
initiator ports identify the SN 5428-2 to the switched fabric. Both initiator WWPN1 and WWPN2 are
required by your zone administrator to allow participation in zoning.
To include the SN 5428-2 in FC zoning, both ports (WWPN1 and WWPN2) must be included in the zone
set. A default alias of iscsi is provided that contains both initiators WWPN1 and WWPN2.
Use the following procedure to display initiator WWPN1 and initiator WWPN2 and the iscsi alias.
Command
Description
Step 1
enable
Enter Administrator mode.
Step 2
show fcswitch
Display FC operational information (Example 5-2).
Step 3
show fcalias all
Display iscsi alias information (Example 5-3)
Example 5-2
Display Initiator WWPN1 and WWPN2
[SN5428-2A]# show fcswitch
Global attributes
-----------------------------------Domain ID
Domain ID lock
Active Zoneset
Zoning Merge
Zoning Default
Zoning Autosave
Distributed Services timeout (dstov)
Fabric Services timeout (fstov)
Error Detect timeout (edtov)
Resource Allocation timeout (ratov)
Buffer to Buffer Credit (interop)
Initiator WWPN1
Initiator WWPN2
Example 5-3
Value
----99
disabled
None
SW2
All
enabled
5000
1000
2000
10000
12
280000048aa58710
290000048aa58710
Display “iscsi” Alias
[SN5428-2A]# show fcalias all
Alias Name
Member type
-------------------- ----------iscsi
wwpn
wwpn
Member value
-----------280000048aa58710
290000048aa58710
Cisco SN 5428-2 Storage Router Software Configuration Guide
78-15471-01
5-5
Chapter 5
Configuring Fibre Channel Interfaces
Configuring Zoning
Configuring Zoning
The SN 5428-2 zoning feature provides the ability to actively participate in FC switched fabric zones
and to manage zones. Managing a zone includes creating a zone set, creating zones as zone set members,
then adding devices (using WWPN) as zone members.
After the zone members are added to the zone set, you must activate the zone set. The SN 5428-2 allows
you to configure multiple zone sets to satisfy the different security and access needs of your storage area
network; however, only one zone set can be active at one time.
Managing zoning include the following tasks:
•
Creating and deleting zone sets, zones, and aliases
•
Adding a zone to a zone set and removing a zone from a zone set
•
Adding a member to a zone or an alias using WWPN
•
Adding an alias to a zone
•
Activating and deactivating zone sets
•
Clearing zones on the local SN 5428-2
•
Clearing the fabric wide zoning database
To make changes to a new or an existing configuration, add, delete, or remove individual elements to
create the desired configuration.
Note
All zoning changes are automatically saved to the SN 5428-2 bootable configuration and, if the
SN 5428-2 is connected to the FC switched fabric, the configuration changes are replicated
throughout the fabric.
The configuration you create using the command line interface (or GUI) can be uploaded to a host for
archiving. To restore the configuration to the zoning data base, use the restore fcswitch zones
command. If the SN 5428-2 is connected to the FC switched fabric, the restored zoning database will be
pushed into the fabric.
See Chapter 12, “Command Line Interface Reference,” for a complete list of all zoning and other
commands.
The following are SN 5428-2 zoning limits:
•
Maximum of 256 zone sets
•
Maximum of 256 zones
•
Maximum of 256 aliases
•
Maximum of 2000 members per zone
•
Maximum of 2000 members per aliases
•
Maximum of 2000 total members
Cisco SN 5428-2 Storage Router Software Configuration Guide
5-6
78-15471-01
Chapter 5
Configuring Fibre Channel Interfaces
Configuring Zoning
Creating a zone set, a zone, and an alias
To operate within a zone, the zone set, zone, and alias names must be unique. Before creating a zone set,
zone, or alias, ensure that the SN 5428-2 is attached to the switched fabric. When the SN 5428-2 is
attached to the switched fabric, you will not be allowed to use a name that is already in use.
Use the following procedure to create a zone set, a zone, and an alias. In this example, the zone set is
named helen, the zone is named agamemnon, and the alias is named leto.
Note
A zone set, zone, or alias name cannot exceed 31 characters in length and must begin with an alpha
character.
Command
Description
Step 1
enable
Enter Administrator mode.
Step 2
zoneset helen
Specify a unique zone set name.
Step 3
zone agamemnon
Specify a unique zone name.
Step 4
fcalias leto
(Optional) Specify a unique alias name.
Adding a zone to a zone set
Use the following procedure to add a zone to a zone set. In this example, the zone set is named helen and
the zone is named agamemnon.
Command
Description
Step 1
enable
Enter Administrator mode.
Step 2
zoneset helen zone agamemnon
Assign the zone to the zone set.
Adding a member to an alias using WWPN
Use the following procedure to add a member to an alias using the device WWPN. In this example, the
alias is called leto and the WWPN is 201b00491585c219.
Command
Description
Step 1
enable
Enter Administrator mode.
Step 2
fcalias leto member wwpn
201b00491585c219
Assign a WWPN member to the alias.
Adding a zone member to a zone using WWPN
Use the following procedure to add a zone member to a zone using the device WWPN. In this example,
the zone is named agamemnon and the WWPN is 211b00491585c219.
Command
Description
Step 1
enable
Enter Administrator mode.
Step 2
zone agamemnon member wwpn Assign a WWPN member to the zone.
211b00491585c219
Cisco SN 5428-2 Storage Router Software Configuration Guide
78-15471-01
5-7
Chapter 5
Configuring Fibre Channel Interfaces
Configuring Zoning
Adding an alias to a zone
Use the following procedure to add an alias to a zone. In this example, the zone is named agamemnon
and the alias is named leto. The default alias named iscsi is also added to the zone.
Command
Description
Step 1
enable
Enter Administrator mode.
Step 2
zone agamemnon member
fcalias leto
Assign the alias to the zone.
Note
zone agamemnon member
fcalias iscsi
If the SN 5428-2 is going to participate in the zone, be sure
to add the default alias named iscsi to the zone.
Activating a zone set
Activation of a zone set does not require rebooting or resetting the SN 5428-2. When you activate a zone
set, the system compiles the zone sets of the same name from all switches in the fabric, then distributes
this merged active zone set to each switch in the fabric.
Only one zone set can be active at one time; an active zone set must be deactivated to allow the activation
of another zone set.
Use the following procedure to activate a zone set. In this example, the zone set helen (which includes
the zone member agamemnon) is activated.
Command
Description
Step 1
enable
Enter Administrator mode.
Step 2
zoneset helen enable
Enable the zone set.
Note
To activate a zone set, it must have at least one alias or one
zone member assigned. You cannot activate an empty zone
set.
Clearing zone configuration from the local SN 5428-2
When moving the SN 5428-2 from one FC zoned fabric to another, you must clear the SN 5428-2 zone
configuration after you disconnect from the fabric and prior to connecting to the new fabric.
Note
All ports operating as E_Ports must be inactive. If you try to clear the local zone configuration when
there is an active E_Port on the SN 5428-2 Storage Router, the command fails and issues a warning
message indicating the FC interfaces that are currently enabled.
Use the following procedure to clear the local zone configuration.
Command
Description
Step 1
enable
Enter Administrator mode.
Step 2
clear fcswitch zones local
Clear the zone configuration from the SN 5428-2.
Cisco SN 5428-2 Storage Router Software Configuration Guide
5-8
78-15471-01
Chapter 5
Configuring Fibre Channel Interfaces
Verifying Configuration
Clearing the fabric wide zoning database
When reconfiguring the zones in the FC zoned fabric you must clear the zoning database and deactivate
the active zone set for the entire switched fabric.
Use the following procedure to clear the local zoning database and deactivate the active zone set on the
fabric.
Command
Description
Step 1
enable
Enter Administrator mode.
Step 2
clear fcswitch zones fabric
Clear the local zoning database and deactivate the active zone set
for the entire switched fabric.
Verifying Configuration
Verify zoning is operational using the following procedure.
Command
Description
Step 1
enable
Enter Administrator mode.
Step 2
show devices
Display all attached devices to the SN 5428-2 (Example 5-4).
Note
Example 5-4
The show devices command displays an interface number
for each device directly attached to that FC interface. If an
interface number is not displayed, the associated device is
not directly connected to an FC interface; the device is
connected in the FC fabric.
Verifying Zone Operation
[SN5428-2A]# show devices
Fabric Attached Devices detected
Interface WWPN
PortId
--------- ---------------- -------fc1
22000003be3203bc 0x101e2
fc1
2200001026448a0d 0x101e1
Lun Description Table
Interface WWPN
--------- ---------------fc1
22000003be3203bc
fc1
2200001026448a0d
Lun
----0
0
Device Type
-----------DASD
DASD
Capacity
-------17GB
17GB
Lun
---0
0
Vendor
-----------SEAGATE
SEAGATE
Lunid Type
------------IEEE Extended
IEEE Extended
Product
-----------T207341EB
ST207340EB
Lund
----200f
200b
Serial
-----3EVON6B3000M
3EVON4CW0002
Cisco SN 5428-2 Storage Router Software Configuration Guide
78-15471-01
5-9
Chapter 5
Configuring Fibre Channel Interfaces
Verifying Configuration
Cisco SN 5428-2 Storage Router Software Configuration Guide
5-10
78-15471-01
C H A P T E R
6
Configuring SCSI Routing
This chapter explains how to configure your SN 5428-2 Storage Router for SCSI routing and contains
the following sections:
•
Prerequisite Tasks, page 6-1
•
Configuration Tasks, page 6-2
•
Creating a SCSI Routing Instance, page 6-6
•
Configuring a Server Interface, page 6-6
•
Configuring iSCSI Targets, page 6-7
•
Creating and Configuring an Access List, page 6-10
•
Configuring Access to iSCSI Targets, page 6-11
•
Verifying and Saving Configuration, page 6-14
SCSI routing can be configured using CLI commands, as described in this chapter, or via the web-based
GUI. To access the web-based GUI, point your browser to the storage router’s management interface IP
address. After logging on, click the Help link to access online help for the GUI.
Prerequisite Tasks
Before configuring SCSI routing, make sure you have configured all system parameters as described in
Chapter 2, “First-Time Configuration,” or Chapter 3, “Configuring System Parameters.”
If the VLAN service is to be used with the SN 5428-2 Storage Router, configure VLANs as described in
Chapter 4, “Configuring for VLAN,” before proceeding.
Cisco SN 5428-2 Storage Router Software Configuration Guide
78-15471-01
6-1
Chapter 6
Configuring SCSI Routing
Configuration Tasks
Configuration Tasks
To configure SCSI routing on your SN 5428-2 Storage Router, perform the following steps:
Step 1
Create a SCSI routing instance. Once an instance is created, you will configure that instance with
parameters for a server interface, iSCSI targets, and access by IP hosts.
Step 2
Configure a server interface with or without VLAN.
Step 3
Configure iSCSI targets.
Step 4
(Optional) Create and configure a named access list. A named access list contains IP host identification
information and is necessary if you want to control access to iSCSI targets on a per-IP host basis.
Step 5
Configure access to iSCSI targets. Associate named access lists to iSCSI targets to control target access
on a per-IP host basis, or allow any IP host access to iSCSI targets.
Step 6
Verify and save configuration.
Note
Caution
Although this is shown as the last step, you can verify and save the configuration at any point in
the process of performing the configuration tasks. Save your configuration by using the
save all bootconfig CLI command. This command saves all configuration data to the bootable
configuration, which is then used when the storage router is rebooted.
When making changes to a SCSI routing instance (such as adding or deleting targets or changing access)
be sure to make the complementary changes to the iSCSI driver configuration of IP hosts that use that
SCSI routing instance to access the storage resources. See the readme files for the appropriate iSCSI
drivers for additional details. (You can access the latest iSCSI drivers and readme and example
configuration files from Cisco.com.)
Figure 6-1 illustrates SCSI routing configuration elements, and Figure 6-2 illustrates the example
configuration used in this chapter. Figure 6-3 illustrates how the configuration of SCSI routing instances
determines VLAN access to storage devices.
Note
Configuring the SCSI routing instance does not include configuring the Fibre Channel (FC) interfaces.
Once the SCSI routing instance is configured, all the FC interfaces are available. See Chapter 5,
“Configuring Fibre Channel Interfaces,” for more information on the FC interfaces and default
characteristics.
Cisco SN 5428-2 Storage Router Software Configuration Guide
6-2
78-15471-01
Chapter 6
Configuring SCSI Routing
Configuration Tasks
Figure 6-1
Configuration Elements for SCSI Routing
SN 5428-2 Storage Router configured for SCSI routing
SCSI routing instance
Access list
Control of access between
IP hosts and targets
Identifier(s) IP Addresses,
CHAP user name,
or
iSCSI name
Access
Server
interface(s)
Specifies (a) the primary SN 5428-2
Gigabit Ethernet interface that the SCSI
routing instance will use to
communicate with IP hosts (b) The IP
address of the server interface for the
SCSI routing instance and (c) an
optional secondary Gigabit Ethernet
interface that can be used for the IP
address if the primary is not available
Specifies IP host(s) allowed
to access a common set of
storage resources via the
SN 5428-2 Storage Router
GbE interface
iSCSI
targets
Specifies iSCSI target
names and LUNs, and
mapping to the physical
storage addresses
(controllers and LUNs)
Fibre Channel interfaces
IP address of
SCSI routing
instance
FC storage
iSCSI driver
IP host
IP host
IP host
85737
IP
Cisco SN 5428-2 Storage Router Software Configuration Guide
78-15471-01
6-3
Chapter 6
Configuring SCSI Routing
Configuration Tasks
Figure 6-2
SCSI Routing Parameters Example Configuration
SCSI routing instance
Name: zeus
Access list:aegis
CHAP User Name 12h7b.lab2.webservices
CHAP User Name 52a3c.lab2.webservices
CHAP User Name 36a8g.lab1.webservices
IP / Mask: 10.2.0.23 / 255.255.255.255
IP / Mask: 10.3.0.36 / 255.255.255.255
IP / Mask: 10.4.0.49 / 255.255.255.255
Read-write access
iSCSI targets
For SCSI routing instance: zeus
iSCSI chimaera_apps, LUN 24 mapped to WWPN 22:00:00:20:37:19:15:05, LUN 0
iSCSI chimaera_eng, LUN 17 mapped to LUN ID 20:00:00:20:37:19:12:9d
iSCSI pegasus_web, LUN 3 mapped to Serial No. LS093221000019451JM5
iSCSI pegasus_email mapped to WWPN 22:00:00:20:37:19:12:da
Access list: media
CHAP User name 44n2n.lab1.webwervices
IP / Mask: 10.5.0.52 / 255.255.255.255
Read-only access
Cisco SN 5428-2 configured for SCSI routing
with authorization enabled
Server interface
For SCSI routing instance: zeus
Name: ge2
IP / Mask: 10.1.0.45 / 255.255.255.0
FC interfaces
Contains a device addressable as:
LUN ID 20:00:00:20:37:19:15:05
WWPN 2200002037191505, LUN 0
Serial No. LS092288000019512N3V
IP: 10.2.0.23
CHAP Name 12h7b.lab2.webservices
Contains a device addressable as:
LUN ID 20:00:00:20:37:19:12:9d
WWPN 220000203719129d, LUN 0
Serial No. LS101990000019411NGQ
IP: 10.5.0.52
CHAP User Name 44n2n.lab1.webservices
IP
Contains a device addressable as:
LUN ID 20:00:00:20:37:19:15:2e
WWPN 220000203719152e, LUN 0
Serial No. LS093221000019451JM5
IP: 10.3.0.36
CHAP User Name 36a8g.lab1.webservices
IP: 10.4.0.49
CHAP User Name 52a3c.lab2.webservices
85742
Contains a device addressable as:
LUN ID 20:00:00:20:37:19:12:da
WWPN 22000020371912da, LUN 0
Serial No. LS097776000019511C3B
Cisco SN 5428-2 Storage Router Software Configuration Guide
6-4
78-15471-01
Chapter 6
Configuring SCSI Routing
Configuration Tasks
Figure 6-3
Configuration of SCSI Routing Instance Determines VLAN Access to Storage Devices
SN 5428-2 Storage Router configured for SCSI routing
SCSI routing instance A
VLAN 200
VID: 200
With the scsirouter serverif vlan
command, assign a VLAN
(identified by its VID) to the
desired SCSI routing instance
iSCSI
targets
iSCSI targets assigned to the SCSI
routing instance determine which
storage devices the VLAN can access
SCSI routing instance B
GbE interface
iSCSI
targets
Fibre Channel interfaces
85738
VLAN 100
VID: 100
802.1Q encapsulation is used to carry
theVLAN information on packets sent
and received on the GbE interface
1 2 3
IP Network
VLAN 200
Storage devices accessible by
VLAN 100 via SCSI routing
instance B
1 2 3
1 2 3
Storage devices accessible
by VLAN 200 via SCSI
routing instance A
VLAN 100
Cisco SN 5428-2 Storage Router Software Configuration Guide
78-15471-01
6-5
Chapter 6
Configuring SCSI Routing
Creating a SCSI Routing Instance
Creating a SCSI Routing Instance
Creating a SCSI routing instance consists of naming the new instance. Use the following procedure to
create a SCSI routing instance.
Command
Description
Step 1
enable
Enter Administrator mode.
Step 2
scsirouter zeus
Create a SCSI routing instance by naming the new instance (zeus).
Note
You can define up to 12 instances on a single SN 5428-2 or
across a cluster. See Chapter 10, “Configuring a High
Availability Cluster,” for additional details about
configuring clusters for high availability.
Configuring a Server Interface
Configuring a server interface consists of assigning a primary Gigabit Ethernet interface along with an
IP address and subnet mask to the desired SCSI routing instance. If the SN 5428-2 is to be used with
VLAN, specify the VLAN by its VID.
You can also choose one of the following configuration options:
•
Each SCSI routing instance can be configured with multiple server interfaces. This allows IP hosts
to connect to the instance and access iSCSI targets using any of the assigned server interface IP
addresses.
•
Each server interface can be assigned a secondary Gigabit Ethernet interface. The server interface
IP address automatically moves to the secondary Gigabit Ethernet interface if the connection to the
IP host from the primary Gigabit Ethernet interface is lost. To use this feature, both Gigabit Ethernet
interfaces must be connected to the same network.
Note
If you configure a Gigabit Ethernet IP address with a secondary interface, all Gigabit Ethernet IP
addresses on the same subnet must also be configured with the same secondary interface.
Note
The IP address assigned to the server interface for the SCSI routing instance cannot be on the same
subnet as any other network interface.
Without VLAN
Use the following procedure to configure a server interface for a SCSI routing instance.
Command
Description
Step 1
enable
Enter Administrator mode.
Step 2
scsirouter zeus serverif ge2
10.1.0.45/24
Assign a server interface (ge2) to the desired SCSI routing
instance (zeus). Specify the IP address and subnet mask
(10.1.0.45/24) that IP hosts will use to access the SCSI routing
instance. In this example, the subnet mask of 255.255.255.0 was
set using CIDR style (/24).
Cisco SN 5428-2 Storage Router Software Configuration Guide
6-6
78-15471-01
Chapter 6
Configuring SCSI Routing
Configuring iSCSI Targets
With VLAN
Use the following procedure to assign a server interface and VLAN to a SCSI routing instance.
Command
Description
Step 1
enable
Enter Administrator mode.
Step 2
scsirouter zeus serverif ge2 vlan Assign a VLAN, identified by its VID (100), to the desired SCSI
100 10.1.0.45/24
routing instance (zeus). Specify the server interface (ge2) and the
IP address and subnet mask (10.1.0.45/24) that the VLAN will use
to access the SCSI routing instance. In this example, the subnet
mask of 255.255.255.0 was set using CIDR style (/24).
Note
To look up the VID, use the show vlan command. VIDs
are listed in the VLAN column.
Configuring iSCSI Targets
Configuring iSCSI targets consists of specifying the SCSI routing instance to which an iSCSI target is
to be assigned, specifying the iSCSI target name, and mapping the iSCSI target to a physical storage
device. When assigning an iSCSI target, you can specify the physical storage device either by physical
storage address, LUN serial number, or by an index number assigned to the device.
Note
When a new iSCSI target is configured, IP hosts do not have access to it. You need to configure access
to newly created iSCSI targets according to the “Configuring Access to iSCSI Targets” section later in
this chapter.
Use the procedures that follow according to mapping type and storage addressing type:
•
Target-and-LUN mapping using WWPN addressing
•
Target-and-LUN mapping using LUN ID addressing
•
Target-and-LUN mapping using LUN Serial Number addressing
•
Target-only mapping using WWPN addressing
Example 6-1
Id
--1
2
3
4
I/F
----fc4
fc4
fc4
fc4
Lunid
-----------------2000002037191505
200000203719129d
200000203719152e
20000020371912da
Example 6-2
Id
--1
2
3
4
I/F
----fc4
fc4
fc4
fc4
Indexed List of Storage Devices by LUN ID
Lun
----0
0
0
0
Device
Type
-----Disk
Disk
Disk
Disk
Vendor
-------SEAGATE
SEAGATE
SEAGATE
SEAGATE
Product
---------ST318452FC
ST319452FC
ST319453FC
ST319452FC
Indexed List of Storage Devices by WWPN
WWPN
-----------------2200002037191505
220000203719129d
220000203719152e
22000020371912da
Lun
----0
0
0
0
Device
Type
-----Disk
Disk
Disk
Disk
Vendor
-------SEAGATE
SEAGATE
SEAGATE
SEAGATE
Product
---------ST319451FC
ST319452FC
ST319453FC
ST319452FC
Cisco SN 5428-2 Storage Router Software Configuration Guide
78-15471-01
6-7
Chapter 6
Configuring SCSI Routing
Configuring iSCSI Targets
Example 6-3
Id
--1
2
3
4
I/F
----fc4
fc4
fc4
fc4
Indexed List of Storage Devices by Serial Number
Serial
-----------------LS092288000019512N3V
LS101990000019411NGQ
LS093221000019451JM5
LS097776000019511C3B
Lun
----0
0
0
0
Device
Type
-----Disk
Disk
Disk
Disk
Vendor
-------SEAGATE
SEAGATE
SEAGATE
SEAGATE
Product
---------ST319451FC
ST319452FC
ST319453FC
ST319452FC
Target-and-LUN mapping using WWPN addressing
Use the following procedure to map iSCSI targets to storage devices by physical storage address.
Command
Description
Step 1
enable
Enter Administrator mode.
Step 2
scsirouter zeus target
chimaera_apps lun 24 wwpn
2200002037191505 lun 0
Specify desired SCSI routing instance (zeus). Specify iSCSI target
(chimaera_apps) and LUN (24), and map it to the desired physical
address (WWPN 2200002037191505 LUN 0).
Use the following procedure to map iSCSI targets to storage devices by an index number.
Command
Description
Step 1
enable
Enter Administrator mode.
Step 2
scsirouter zeus target
chimaera_apps lun 31 wwpn #?
Specify desired SCSI routing instance (zeus). Specify iSCSI target
(chimaera_apps) and LUN (31), and prompt for an indexed list of
available storage addresses using the number sign and a question
mark (#?).
Step 3
scsirouter zeus target
chimaera_apps lun 31 wwpn #1
Choose a physical address designated by an index number (see
index number 1 in Example 6-2) to map the iSCSI target
(chimaera_apps) and LUN (31) combination to the desired
physical address (WWPN 2200002037191505, LUN 0).
Target-and-LUN mapping using LUN ID addressing
Use the following procedure to map iSCSI targets to storage devices by physical storage address.
Command
Description
Step 1
enable
Enter Administrator mode.
Step 2
scsirouter zeus target
chimaera_eng lun 17 lunid
200000203719129d
Specify desired SCSI routing instance (zeus). Specify iSCSI target
(chimaera_eng) and LUN (17), and map it to the desired physical
address (LUN ID 200000203719129d).
Cisco SN 5428-2 Storage Router Software Configuration Guide
6-8
78-15471-01
Chapter 6
Configuring SCSI Routing
Configuring iSCSI Targets
Use the following procedure to map iSCSI targets to storage devices by an index number.
Command
Description
Step 1
enable
Enter Administrator mode.
Step 2
scsirouter zeus target
chimaera_eng lun 17 lunid #?
Specify desired SCSI routing instance (zeus). Specify iSCSI target
(chimaera_eng) and LUN (17), and prompt for an indexed list of
available storage addresses using the number sign and a question
mark (#?).
Step 3
scsirouter zeus target
chimaera_eng lun 17 lunid #2
Choose a physical address designated by an index number (see
index number 2 in Example 6-1) to map the iSCSI target
(chimaera_eng) and LUN (17) combination to the desired physical
address (LUN ID 200000203719129d)
Target-and-LUN mapping using LUN Serial Number addressing
Use the following procedure to map iSCSI targets to storage devices by serial number.
Note
The storage resource must support unique serial numbers for each LUN.
Command
Description
Step 1
enable
Enter Administrator mode.
Step 2
scsirouter zeus target
pegasus_web lun 3 serial
LS093221000019451JM5
Specify desired SCSI routing instance (zeus). Specify iSCSI target
(pegasus_web) and LUN (3), and map it to the desired physical
address (serial number LS093221000019451JM5).
Use the following procedure to map iSCSI targets to storage devices by an index number.
Command
Description
Step 1
enable
Enter Administrator mode.
Step 2
scsirouter zeus target
pegasus_web lun 3 serial #?
Specify desired SCSI routing instance (zeus). Specify iSCSI target
(pegasus_web) and LUN (3), and prompt for an indexed list of
available storage addresses using the number sign and a question
mark (#?).
Step 3
scsirouter zeus target
pegasus_web lun 3 serial #3
Choose a physical address designated by an index number (see
index number 3 in Example 6-3) to map the iSCSI target
(pegasus_web) and LUN (3) combination to the desired physical
address (serial number LS093221000019451JM5)
Cisco SN 5428-2 Storage Router Software Configuration Guide
78-15471-01
6-9
Chapter 6
Configuring SCSI Routing
Creating and Configuring an Access List
Target-only mapping using WWPN addressing
Use the following procedure to map iSCSI targets to storage devices by physical storage address.
Command
Description
Step 1
enable
Enter Administrator mode.
Step 2
scsirouter zeus target
pegasus_email wwpn
22000020371912da
Specify desired SCSI routing instance (zeus). Specify iSCSI target
(pegasus_email), and map it to the desired physical address
(WWPN 22000020371912da) and any LUNs available as part of
that WWPN.
Use the following procedure to map iSCSI targets to storage devices by index numbers.
Command
Description
Step 1
enable
Enter Administrator mode.
Step 2
scsirouter zeus target
pegasus_email wwpn #?
Specify desired SCSI routing instance (zeus). Specify iSCSI target
(pegasus_email), and prompt for an indexed list of available
storage addresses using the number sign and a question mark (#?).
Step 3
scsirouter zeus target
pegasus_email wwpn #4
Choose a physical address designated by an index number (see
index number 4 in Example 6-2) to map the iSCSI target
(pegasus_email) to desired physical address (WWPN
22000020371912da).
Creating and Configuring an Access List
Creating an access list consists of naming the new list. Configuring an access list consists of identifying
the IP hosts that have permission to access storage devices via iSCSI target names.
IP hosts can be identified by:
•
IP address
•
CHAP user name (used for iSCSI authentication)
•
iSCSI Name of the IP host - The iSCSI Name is a UTF-8 character string based on iSCSI functional
requirements. It is a location-independent permanent identifier for an iSCSI node. An iSCSI node
can be an initiator, a target, or both.
An access list can contain one or more types of identification entries. If an identification entry type exists
in the access list, an IP host attempting to access the associated storage target must have a matching entry
defined in the access list. For example, if an access list contains both IP address and iSCSI Name
identification entry types, then every IP host that requires access to the associated set of storage
resources must have a matching IP address and iSCSI Name entry in the access list.
An access list is necessary if you want to specify access to iSCSI targets on a per-IP host basis. An access
list is not necessary if you want to specify that any IP host can have access to the iSCSI targets
configured in a SCSI routing instance; however, in this case you must still configure access as described
in Configuring Access to iSCSI Targets, page 6-11.
Note
For each SN 5428-2 Storage Router, you can create a maximum of 100 access lists and configure up to
200 identification entries across all access lists.
Cisco SN 5428-2 Storage Router Software Configuration Guide
6-10
78-15471-01
Chapter 6
Configuring SCSI Routing
Configuring Access to iSCSI Targets
Note
If there is a CHAP user name entry in the access list, the SCSI routing instance used to access the storage
target must also have iSCSI authentication enabled. See Chapter 9, “Configuring Authentication,” for
additional information about AAA and iSCSI authentication.
Use the following procedure to create an access list. In this procedure, the access list is called aegis and
the IP host identifiers include three IP addresses (10.2.0.23, 10.3.0.36, and 10.4.0.49) and three CHAP
user names (12h7b.lab2.webservices, 36a8g.lab1.webservices, and 52a3c.lab2.webservices).
Command
Description
Step 1
enable
Enter Administrator mode.
Step 2
accesslist aegis
Create an access list by naming it (aegis). There is a 31 character
limit.
Step 3
accesslist aegis description
“Access to zeus SCSI routing
service”
(Optional) Add a string as a description for the access list. Enclose
the string using single or double quotes.
Step 4
accesslist aegis 10.2.0.23/32
10.3.0.36/32 10.4.0.49/32
Add IP addresses of IP hosts to the access list. Separate multiple
IP addresses with a space. To limit the access to each specific IP
address, set the subnet mask to 255.255.255.255. In this example,
the subnet mask was set using CIDR style (/32).
Step 5
accesslist aegis chap-username
12h7b.lab2.webservices
Add CHAP user names to the access list. In this example, each IP
host has a unique CHAP user name.
accesslist aegis chap-username
36a8g.lab1.webservices
Note
accesslist aegis chap-username
52a3c.lab2.webservices
Note
When using CHAP user names in an access list, iSCSI
authentication must be enabled for the SCSI routing
instance, and the IP host must be successfully
authenticated using the configured AAA methods.
Access lists are cluster elements and, in a cluster environment, all access list management functions are
handled by a single storage router. If you issue accesslist commands from another storage router in the
cluster, the CLI displays an informational message with the name of the storage router that is currently
handling those functions. See Chapter 11, “Maintaining and Managing the SN 5428-2 Storage Router,”
for more information on operating the SN 5428-2 in a cluster.
Configuring Access to iSCSI Targets
Configuring access to iSCSI targets consists of associating a named access list to an iSCSI target to
control target access on a per-IP host basis. The default for access to newly configured iSCSI targets is
none. You must configure access to iSCSI targets according to the information provided in this section.
When configuring access, you can specify one iSCSI target at a time or all iSCSI targets associated with
a SCSI routing instance, and you can specify a named access list or allow access by any IP host using a
SCSI routing instance. In addition, you can deny access to iSCSI targets one at a time or all at once.
Cisco SN 5428-2 Storage Router Software Configuration Guide
78-15471-01
6-11
Chapter 6
Configuring SCSI Routing
Configuring Access to iSCSI Targets
You can also associate up to two access lists with an iSCSI target: one allowing read/write access, and
one allowing read-only access. The default access is read/write. Access lists are evaluated read/write
first, and then read-only, so if an IP host is associated with both types of lists, it will be allowed
read/write access.
Note
Some host operating systems impose restrictions on the use of read-only access lists. For details, see the
readme files and release notes for your IP host operating system.
Use the procedures that follow according to the type of access:
•
Configuring access to one iSCSI target at a time
•
Configuring access to all iSCSI targets at once
•
Denying access to one or more iSCSI targets
•
Configuring read/write and read-only access
Configuring access to one iSCSI target at a time
This section provides two procedures: one for configuring access to an iSCSI target by specific IP hosts,
and one for configuring access to an iSCSI target by any iSCSI host.
Use the following procedure to configure access to one iSCSI target on a per-IP host basis by associating
the iSCSI target with a named access list.
Command
Description
Step 1
enable
Enter Administrator mode.
Step 2
scsirouter zeus target
chimaera_apps accesslist aegis
Specify that an iSCSI target (chimaera_apps), configured as part
of a SCSI routing instance (zeus), can only be accessed by IP hosts
listed in an access list (aegis). Because access is read/write by
default, it does not need to be specified.
Use the following procedure to configure access to one iSCSI target by any iSCSI host.
Command
Description
Step 1
enable
Enter Administrator mode.
Step 2
scsirouter zeus target
pegasus_email accesslist any
Specify that an iSCSI target (pegasus_email), configured as part of
a SCSI routing instance (zeus), can be accessed by any IP host.
Because access is read/write by default, it does not need to be
specified.
Configuring access to all iSCSI targets at once
This section provides two procedures: one for configuring access to all iSCSI targets by specific IP hosts,
and one for configuring access to all iSCSI targets by any IP host.
Use the following procedure to configure access to all iSCSI targets associated with a SCSI routing
instance. Access is controlled on a per-IP host basis by associating the iSCSI targets with a named access
list.
Cisco SN 5428-2 Storage Router Software Configuration Guide
6-12
78-15471-01
Chapter 6
Configuring SCSI Routing
Configuring Access to iSCSI Targets
Command
Description
Step 1
enable
Enter Administrator mode.
Step 2
scsirouter zeus target all
accesslist aegis
Specify that all iSCSI targets that were configured as part of the
specified SCSI routing instance (zeus) can be accessed by IP hosts
listed in an access list (aegis). Because access is read/write by
default, it does not need to be specified.
Use the following procedure to configure access to all iSCSI targets associated with a SCSI routing
instance. Access is open; the iSCSI targets are made available to any IP host.
Command
Description
Step 1
enable
Enter Administrator mode.
Step 2
scsirouter zeus target all
accesslist any
Specify that all iSCSI targets that were configured as part of the
specified SCSI routing instance (zeus) can be accessed by any IP
host. Because access is read/write by default, it does not need to be
specified.
Denying access to one or more iSCSI targets
This section provides two procedures: one for denying access to one iSCSI target at a time, and one for
denying access to all iSCSI targets configured as party of a specified SCSI routing instance.
Use the following procedure to deny access to one iSCSI target by any IP host.
Command
Description
Step 1
enable
Enter Administrator mode.
Step 2
scsirouter zeus target
chimaera_eng accesslist none
Specify that no IP host can access the iSCSI target
(chimaera_eng), configured as part of the specified SCSI routing
instance (zeus).
Use the following procedure to deny access to all iSCSI targets associated with a SCSI routing instance
by any IP host.
Command
Description
Step 1
enable
Enter Administrator mode.
Step 2
scsirouter zeus target all
accesslist none
Specify that no IP hosts can access any iSCSI targets that were
configured as part of the specified SCSI routing instance (zeus).
Configuring read/write and read-only access
This section provides two procedures for applying read/write and read-only access to iSCSI targets, but
there are many other combinations you can use.
Use the following procedure to assign read/write access to an iSCSI target by IP hosts listed in a named
access list, and to assign read-only access to the same target by any other IP hosts.
Cisco SN 5428-2 Storage Router Software Configuration Guide
78-15471-01
6-13
Chapter 6
Configuring SCSI Routing
Verifying and Saving Configuration
Command
Description
Step 1
enable
Enter Administrator mode.
Step 2
scsirouter zeus target
Assign read/write access to the iSCSI target (chimaera_eng) by IP
chimaera_eng accesslist aegis rw hosts listed in the access list (aegis).
Step 3
scsirouter zeus target
chimaera_eng accesslist any ro
Assign read-only access to the iSCSI target (chimaera_eng) by any
other IP hosts with access to that target.
Use the following procedure to specify that the IP hosts listed in one named access list have read/write
access to an iSCSI target, and the IP host listed in another named access list has read-only access to the
same target.
Command
Description
Step 1
enable
Enter Administrator mode.
Step 2
scsirouter zeus target
Assign read/write access to the iSCSI target (chimaera_eng) by the
chimaera_eng accesslist aegis rw IP hosts listed in the access list (aegis).
Step 3
scsirouter zeus target
Assign read-only access to the iSCSI target (chimaera_eng) by the
chimaera_eng accesslist medea ro IP host listed in the access list (medea).
Verifying and Saving Configuration
Verify the access list configuration and the SCSI routing configuration using the procedures that follow.
You can save the configuration at any time by using the save all bootconfig command. You must save
the running configuration to the bootable configuration for it to be retained in the storage router when it
is rebooted. Once you have saved the configuration, you can verify that the configuration to be used
when the storage router is rebooted matches the currently running configuration.
In a cluster environment, saving the configuration makes the SCSI routing instance and access list
information available to other storage routers in the cluster.
Use the following procedure to verify access list configuration.
Command
Description
Step 1
enable
Enter Administrator mode.
Step 2
show accesslist
Display a list of all existing access lists (Example 6-4).
Step 3
show accesslist aegis
Display the IP hosts identified in an access list (Example 6-5).
Example 6-4
Verifying Existence of an Access List
[SN5428-2A]# show accesslist
aegis
mars
medea
Cisco SN 5428-2 Storage Router Software Configuration Guide
6-14
78-15471-01
Chapter 6
Configuring SCSI Routing
Verifying and Saving Configuration
Example 6-5
Verifying IP Hosts in an Access List Named aegis
[SN5428-2A]# show accesslist aegis
accesslist aegis description "Access to zeus SCSI routing service"
accesslist aegis 10.2.0.23/255.255.255.255
accesslist aegis 10.3.0.36/255.255.255.255
accesslist aegis 10.4.0.49/255.255.255.255
accesslist aegis chap-username 12h7b.lab2.webservices
accesslist aegis chap-username 36a8g.lab1.webservices
accesslist aegis chap-username 52a3c.lab2.webservices
Use the following procedure to verify the configuration of a SCSI routing instance.
Example 6-6
Command
Description
Step 1
enable
Enter Administrator mode.
Step 2
show scsirouter zeus
Display the parameters configured for the specified SCSI routing
instance (Example 6-6).
Verifying Configuration for a SCSI Routing Instance
[SN5428-2A]# show scsirouter zeus
SCSI Router Information
Status Codes: A=active, I=inactive, C=create failed, D=not enabled, S=slave
CDB
Reserve Pass Lun
Router
Stat Retry Proxy
Thru Reset Description
-------------------- ---- ----- -------- ---- ----- ----------zeus
A
30
disabled no
no
(not set)
SCSI Router Authentication Information
Router
Authentication Username
Password
-------------------- --------------- --------------- -------zeus
none
none
none
Router
ServerIf
Vlan Vid IP/Netmask
Secondary TCP P
---------- ---------- -------- -------------------------------- ---------- ----zeus
ge2
10.1.50.51/24
none
3260N
Target Attribute Information
Router
---------zeus
zeus
zeus
zeus
Target
---------------chimaera_apps
chimaera_eng
pegasus_web
pegasus_email
Target Mapping Information
Router
Target
---------- ---------------zeus
chimaera_apps
zeus
chimaera_apps
zeus
chimaera_eng
zeus
pegasus_web
zeus
pegasus_email
Status
-------enabled
enabled
enabled
enabled
Accesslist
Read-Write
---------aegis
aegis
none
none
Mapping
---------Lun-wwpn
Lun-wwpn
Lun-lunid
Lun-serial
Tgt
Accesslist
Read-Only
---------none
medea
none
none
Profile
------High
High
High
High
CRC
---------prefer-off
prefer-off
prefer-off
prefer-off
Description
----------(not set)
(not set)
(not set)
(not set)
iSCSI Name
----------iqn.1987-05.com.cisco:00.e732a9ff858f.chimaera_apps
iqn.1987-05.com.cisco:00.1579a736f6ea.chimaera_apps
iqn.1987-05.com.cisco:00.0857b0b9cacf.chimaera_apps
iqn.1987-05.com.cisco:00.2d3a2d118fe1.chimaera_apps
iqn.1987-05.com.cisco:00.4131e05d05a8.chimaera_apps
Targets - Lun Mapped via WWPN
Router
Target
Lun
WWPN Primary
Lun
WWPN Secondary
Lun
---------- ---------------- ----- ---------------- ----- ---------------- ----zeus
chimaera_apps
24
2200002037559b0e 0
Cisco SN 5428-2 Storage Router Software Configuration Guide
78-15471-01
6-15
Chapter 6
Configuring SCSI Routing
Verifying and Saving Configuration
Targets - Lun Mapped via Lunid
Router
Target
Lun
Lunid
---------- ---------------- ----- ---------------zeus
chimaera_eng
17
200000203719129d
Targets - Lun Mapped via Serial
Router
Target
Lun
Serial
---------- ---------------- ----- ---------------zeus
pegasus_web
3
LS093221000019451JM5
Cisco SN 5428-2 Storage Router Software Configuration Guide
6-16
78-15471-01
C H A P T E R
7
Configuring Transparent SCSI Routing
This chapter explains the configuration process for a transparent SCSI routing deployment of the
SN 5428-2 Storage Router and provides procedures to verify the configuration. It contains the following
sections:
•
Prerequisite Tasks, page 7-1
•
Summary of Configuration Process, page 7-1
•
Verifying Configuration, page 7-3
Transparent SCSI routing is configured with the values entered with the initial system configuration
script. To verify the configuration, use the CLI commands as described in this chapter.
The web-based GUI is not available for transparent SCSI routing, since this deployment option requires
minimal configuration of the SN 5428-2.
Prerequisite Tasks
Before verifying the transparent SCSI routing configuration, make sure you have configured all system
parameters as described in Chapter 2, “First-Time Configuration,” or Chapter 3, “Configuring System
Parameters.”
Summary of Configuration Process
The configuration parameters needed to create an instance of SCSI routing in an SN 5428-2 deployed
for transparent SCSI routing are entered with the initial system configuration script. Option number 2
(transparent SCSI routing) must be chosen as the configuration deployment for the SN 5428-2 for the
first question in the script.
When you select transparent SCSI routing, the script requests the mode of deployment: static or
dynamic:
•
Static mode
For most operations, static mode is the preferred selection. It saves the mappings of IP hosts (iSCSI
clients) to FC addresses (FC initiator WWPNs), making them persistent across iSCSI client
logouts/logins and storage router reboots. These mappings can be removed individually or cleared
entirely using the clear static iscsibindings command. See Chapter 12, “Command Line Interface
Reference,” for more information.
Cisco SN 5428-2 Storage Router Software Configuration Guide
78-15471-01
7-1
Chapter 7
Configuring Transparent SCSI Routing
Summary of Configuration Process
•
Dynamic mode
When transparent SCSI routing is deployed in dynamic mode, the iSCSI client-to-internal FC
WWPN mappings are not persistent across reboots; they are reset each time any of the following
occurs:
– Whenever the storage router is rebooted
– Whenever an IP host (iSCSI client) logs in and out, then logs back in
For both static mode and dynamic mode, the maximum number of FC WWPNs available on the storage
router is 62; a maximum of 62 iSCSI clients can be logged in at any one time. As each new iSCSI client
connects and logs in to the storage router, it is assigned (mapped) to the next available internal FC
WWPN. After the maximum number of iSCSI clients have logged in, each additional iSCSI client
connection will be rejected until one of the following occurs, depending on whether the storage router
is deployed in dynamic or static mode:
Note
•
In dynamic mode, each additional iSCSI connect is rejected until an iSCSI client logs out, making
an FC WWPN available.
•
In static mode, each additional iSCSI connect is rejected until a binding is manually cleared to make
an FC WWPN available. Bindings can be manually cleared only in static mode. To view all saved
mappings, use the show static iscsibindings CLI command. To see which mappings are currently
being used, issue the show interface fci1 iscsibindings and show interface fci2 iscsibindings
commands. To clear bindings that are not being used, issue the clear static iscsibinding command.
To deploy dynamic mode with transparent SCSI routing, the intelligent storage array connected to the
SN 5428-2 must support an FC extended port login, which contains the IP Host (iSCSI initiator name)
and the associated IP address embedded in the FC login frame. The iSCSI FC PLOGI frame is not used.
The final parameter needed to create an instance of SCSI routing in an SN 5428-2 deployed for
transparent SCSI routing is at least one IP address assigned to a Gigabit Ethernet interface. IP hosts
access FC storage using this address.
The initial configuration script allows you to associate each Gigabit Ethernet interface with a unique IP
address, or specify a single IP address that can be presented on either interface. If you configure a single
IP address that can be presented on either interface, both Gigabit Ethernet interfaces must be connected
to the same network segment.
Once all requested values have been entered and the script completes, a single SCSI routing instance
named, transparent, is automatically created. The SN 5428-2 then initiates the target discovery process
and creates an iSCSI logical target for each Fibre Channel target discovered.
Afterwards, the SN 5428-2 will discover new targets whenever any of the following occurs:
•
A new target or Fibre Channel switch or hub is added to the SN 5428-2.
•
cable is plugged in causing a loop initialization primitive LIP.
•
The SN 5428-2 is rebooted.
Cisco SN 5428-2 Storage Router Software Configuration Guide
7-2
78-15471-01
Chapter 7
Configuring Transparent SCSI Routing
Verifying Configuration
Verifying Configuration
Use the following procedure to verify the configuration of the SCSI routing instance.
Command
Description
Step 1
enable
Enter Administrator mode.
Step 2
show scsirouter transparent
Display configuration for SCSI routing instance (Example 7-1).
or
Note
As shown in the second command, you can type the
keyword, all, as a shortcut, instead of the SCSI routing
instance name, transparent.
show scsirouter all
Example 7-1
Verifying Configuration of Transparent SCSI Routing Instance
[SN5428-2]# show scsirouter transparent
SCSI Router Information
Status Codes: A=active, I=inactive, C=create failed, D=not enabled, S=slave
CDB
Lun
Router
Stat Auth Retry Reset Description
-------------------- ---- ---- ----- ----- ----------transparent
A
none 30
no
(not set)
SCSI Router Authentication Information
Router
Authentication Username
Password
-------------------- --------------- --------------- -------transparent
none
none
none
Router
---------transparen
transparen
ServerIf
Vlan Vid
---------- -------ge1
ge2
IP/Netmask
-------------------------------10.1.31.243/24
10.1.26.243/24
Secondary
---------none
none
TCP Port
-------3260
3260
SLP
--OFF
OFF
Target Attribute Information
Router
---------transparen
transparen
transparen
Target
---------------2200002037a761c7
2200002037a7618f
2200002037a7518d
Status
-------enabled
enabled
enabled
Accesslist
Read-Write
---------any
any
any
Accesslist
Read-Only
---------none
none
none
Profile
------High
High
High
Target Mapping Information
Router
Target
---------- ---------------transparen 21000020371912ee
transparen 21000020371912a2
transparen 21000020371912a3
transparen 21000020371912d1
transparen 2100002037c59e27
Mapping
---------Tgt
Tgt
Tgt
Tgt
Tgt
Targets - Target Mapped
Router
Target
---------- ---------------transparen 21000020371912ee
transparen 21000020371912a2
transparen 21000020371912a3
transparen 21000020371912d1
transparen 2100002037c59e27
WWPN Primary
WWPN Secondary
---------------- ---------------21000020371912ee
21000020371912a2
21000020371912a3
21000020371912d1
2100002037c59e27
CRC
---------prefer-off
prefer-off
prefer-off
Description
----------(not set)
(not set)
(not set)
iSCSI Name
----------eui.21000020371912ee
eui.21000020371912a2
eui.21000020371912a3
eui.21000020371912d1
eui.2100002037c59e27
Cisco SN 5428-2 Storage Router Software Configuration Guide
78-15471-01
7-3
Chapter 7
Configuring Transparent SCSI Routing
Verifying Configuration
Use the following procedure to verify logged-in IP hosts and bound Fibre Channel targets.
Example 7-2
Command
Description
Step 1
enable
Enter Administrator mode.
Step 2
show interface fci1 iscsilogins
Display logged-in IP hosts and bound Fibre Channel targets on
internal FC interface fci1 (Example 7-2).
Step 3
show interface fci2 iscsilogins
Display logged-in IP hosts and bound Fibre Channel targets on
internal FC interface fci2 (Example 7-3).
Verifying Logged-in IP Hosts and Bound Fibre Channel Targets on fci1
[SN5428-2]# show interface fci1 iscsilogins
Initiator
Target
ALPA portID State
WWPN
0
ef
200000023d070740
e0
6
2100005028b64d1a
dc
6
2100005028b6431c
b6
6
2100005028b64d0a
1
e8
200100023d070740
e0
6
2100005028b64d1a
dc
6
2100005028b6431c
b6
6
2100005028b64d0a
2
e4
200200023d070740
e0
6
2100005028b64d1a
dc
6
2100005028b6431c
b6
6
2100005028b64d0a
3
e2
200300023d070740
e0
6
2100005028b64d1a
dc
6
2100005028b6431c
b6
6
2100005028b64d0a
Example 7-3
IP Host
IP address
10.1.10.244
IP Host Name
iqn.1987-05.com.cisco.00.sn5428-4
10.0.5.159
iqn.1987-05.com.cisco.02.9FD38900B2FAC8E036D3D3.NT10
10.0.5.226
iqn.1987-05.com.cisco.02.B826B52E725BAFA5CAB913.NT9
10.0.5.112
iqn.1987-05.com.cisco.02.16E9C60D686BC79113C401.WIN1
Verifying Logged-in IP Hosts and Bound Fibre Channel Targets on fci2
[SN5428-2]# show interface fci2 iscsilogins
Initiator
Target
ALPA portID State
WWPN
0
ef
290000023d0712c0
203e1
6
2200002037a7c100
203ef
6
2200002037a7c3f9
1
e8
290100023d0712c0
20101
6
210000d0b20036a0
202e4
6
21000080e5118ab2
2
e4
290200023d0712b0
20101
6
210000d0b20036c0
203d9
6
2200002037a7a0c5
203da
6
2200002037b99fzf
3
e2
290300023d0712c0
20101
6
210000d0b20036d0
202e4
6
21000080e5118ag2
4
e1
290400023d0712g0
20101
6
210000d0b20036g0
5
e0
290500023d0712n0
20101
6
210000d0b20036v0
6
dc
290600023d0712e0
20101
6
210000d0b20036a0
7
da
290700023d0712c0
20101
6
210000d0b20036d0
IP Host
IP address
10.0.5.208
IP Host Name
iqn.1987-05.com.cisco.00.sn5428-4
10.0.5.10
iscsi.cisco.snow110
10.0.5.12
iscsi.cisco.snow112
10.0.5.15
iscsi.cisco.snow115
10.0.5.17
iscsi.cisco.snow117
10.0.5.18
iscsi.cisco.snow118
10.0.5.27
iscsi.cisco.snow127
10.0.5.28
iscsi.cisco.snow128
Cisco SN 5428-2 Storage Router Software Configuration Guide
7-4
78-15471-01
Chapter 7
Configuring Transparent SCSI Routing
Verifying Configuration
The following explains the Initiator and State fields:
Initiator
Initiator 0 is reserved for the primary initiator port. This port performs the
discovery of the target devices—the same devices that appear in the
show devices command. This port is not available to IP hosts. The port’s
IP address is the one assigned to the SN 5428-2 management interface,
and its IP host name is the system name of the SN 5428-2 with
“iqn.1987-05.com.cisco.00.” preceding it.
Initiators 1 to 62 (1 to 31 on each port) are used for IP hosts that are
logged in. For instance in Example 7-2, IP host, NT10, is bound to
initiator port 1 with WWPN 200100023d070740.
State
Login state:
0 and 1—(not used)
2—PLOGI request has queued to request queue
3—PLOGI response has been received
4—PLOGI response received and PRLI request queued to request queue
5—PRLI response received
6—PRLI ACC received (login successful)
7—Initial port state (not logged in)
8—LOGO is queued to request queue
9—LOGO has been transmitted
Use the following procedure to verify discovered targets.
Command
Description
Step 1
enable
Enter Administrator mode.
Step 2
show devices
Display discovered targets (Fibre Channel devices).
(Example 7-4.)
Example 7-4
Verifying Discovered Targets
[SN5428-2]# show devices
Fabric Attached Devices detected
Interface WWPN
PortId
--------- ---------------- -------fc1
22000004cf4304cd 0x101e2
fc1
2200002037559b0e 0x101e1
Lun Description Table
Interface WWPN
--------- ---------------fc1
22000004cf4304cd
fc1
2200002037559b0e
Lun
----0
0
Device Type
--------------DASD
DASD
Capacity
-------17GB
17GB
Lun
----0
0
Vendor
-----------SEAGATE
SEAGATE
Lunid Type
----------------IEEE Extended
IEEE Extended
Product
-----------ST318452FC
ST318451FC
Lunid
----200f
200b
Serial
-----3EV0N8B4000M
3EV0N7CW0002
Cisco SN 5428-2 Storage Router Software Configuration Guide
78-15471-01
7-5
Chapter 7
Configuring Transparent SCSI Routing
Verifying Configuration
Cisco SN 5428-2 Storage Router Software Configuration Guide
7-6
78-15471-01
C H A P T E R
8
Configuring FCIP
This chapter explains how to configure your SN 5428-2 Storage Router for FCIP and contains the
following sections:
•
Prerequisite Tasks, page 8-1
•
Configuration Tasks, page 8-2
•
Setting the Domain ID, page 8-2
•
Creating an FCIP Instance, page 8-3
•
Assigning an IP Address, page 8-3
•
Assigning a Protocol, Peer Name, and Peer IP Address, page 8-3
•
Configuring Operational Parameters, page 8-5
•
Verifying and Saving Configuration, page 8-6
FCIP is configured in the setup wizard. To configure the FCIP deployment option further and to verify
the configuration, you can use the procedure in this chapter, or you can use the web-based GUI. To access
the web-based GUI, point your browser to the storage router’s management interface IP address. After
logging on, click the Help link to access online help for the GUI.
Prerequisite Tasks
Before performing FCIP configuration tasks on the SN 5428-2, make sure you have configured all
system parameters as described in Chapter 2, “First-Time Configuration,” or Chapter 3, “Configuring
System Parameters.”
To configure an FCIP instance, you will need the IP address and communication protocol of the FCIP
instance on the peer storage router (another SN5428-2 configured for FCIP).
Cisco SN 5428-2 Storage Router Software Configuration Guide
78-15471-01
8-1
Chapter 8
Configuring FCIP
Configuration Tasks
Configuration Tasks
To configure FCIP on an SN 5428-2 Storage Router, perform the following steps:
Step 1
If not already done, set the domain ID to a different value on one of the peer SN5428-2s.
Step 2
Create an FCIP instance.
Step 3
Assign an interface and IP address to the FCIP instance for use by the peer storage router (another
SN 5428-2 configured for FCIP).
Step 4
Assign protocol and FCIP peer IP address.
Step 5
(Optional) Configure operational parameters as needed.
Step 6
Verify and save configuration.
Note
Although this is shown as the last step, you can verify and save the configuration at any point in
the process of performing the configuration tasks. Save your configuration by using the
save all bootconfig CLI command. This command saves all configuration data to the bootable
configuration, which is then used when the storage router is rebooted.
Setting the Domain ID
Domain IDs must be unique between FCIP peers to avoid conflict. If the domain IDs are the same for
both peer SN 5428s, use the following procedure to set one of the peers to a different value.
Command
Description
Step 1
enable
Enter Administrator mode.
Step 2
fcswitch domainid 42
Set the domain ID for the SN 5428-2. For example, set the
switched zoned fabric domain ID to 42.
Cisco SN 5428-2 Storage Router Software Configuration Guide
8-2
78-15471-01
Chapter 8
Configuring FCIP
Creating an FCIP Instance
Creating an FCIP Instance
Creating an FCIP instance consists of naming the new instance. Use the following procedure to create
an FCIP instance.
Command
Description
Step 1
enable
Enter Administrator mode.
Step 2
fcip fcip1
Create an FCIP instance by naming the new instance. For example,
name the instance fcip1.
The FCIP instance named fcip1 uses the Gigabit Ethernet
interface, ge1; the instance named fcip2 uses ge2. See Chapter 12,
“Command Line Interface Reference,” for more information about
the fcip command.
Step 3
fcip fcip1 description “Access to (Optional) Add a description of what the FCIP instance is for. For
SAN island 5”
example, add the description “Access to SAN island 5” to the FCIP
instance fcip1.
Assigning an IP Address
Use the following procedure to assign an IP address to the FCIP instance.
Command
Description
Step 1
enable
Enter Administrator mode.
Step 2
fcip fcip1 networkif 10.1.0.16/24 Assign an IP address to the FCIP instance. For example, assign IP
address 10.1.0.16 to the FCIP instance fcip1.
See Chapter 12, “Command Line Interface Reference,” for more
information about the fcip networkif command.
Assigning a Protocol, Peer Name, and Peer IP Address
An FCIP instance runs with a point-to-point connection to an FCIP instance on a peer SN 5428-2. Each
FCIP instance can be configured with one peer.
To configure the peer of an FCIP instance, you assign a protocol and an arbitrary peer name, and specify
the IP address of the peer. The peer name will be required for operational configuration changes, if any.
Assigning protocol consists of selecting a protocol type according to one of the following scenarios:
•
If the peer FCIP instance is configured as a TCP client, assign protocol tcpserver as described in this
section.
•
If the peer FCIP instance is configured as a TCP server, assign protocol tcpclient as described in this
section.
•
If the peer FCIP instance is configured to use raw IP, assign protocol raw as described in this section.
Cisco SN 5428-2 Storage Router Software Configuration Guide
78-15471-01
8-3
Chapter 8
Configuring FCIP
Assigning a Protocol, Peer Name, and Peer IP Address
Assigning Protocol: tcpserver
If the peer FCIP instance is configured as a TCP client, use the following procedure to assign an arbitrary
peer name and configure the peer’s IP address.
Command
Description
Step 1
enable
Enter Administrator mode.
Step 2
fcip fcip2 destination fcip1san5
tcpserver 10.1.0.47
Assign an arbitrary name to the peer FCIP instance, and enter its
IP address.
For example, assign the name fcip1san5 to the peer of FCIP
instance fcip2. The IP address of the peer is in dotted quad notation
10.1.0.47, and connection is made using TCP protocol, with fcip2
acting as a TCP server. The TCP server will listen for a TCP
connection attempt from its peer, which must be configured as a
TCP client.
Note
If you are configuring two FCIP instances on the
SN 5428-2, do not configure both instances as TCP
servers. Instead, configure both instances as TCP clients,
or one as a TCP server and the other as a TCP client. If
both instances have to be TCP servers then they should use
different TCP ports.
See Chapter 12, “Command Line Interface Reference,” for more
information about the fcip destination command.
Assigning Protocol: tcpclient
If the peer FCIP instance is configured as a TCP server, use the following procedure to assign an
arbitrary name to the peer and configure the peer’s IP address.
Command
Description
Step 1
enable
Enter Administrator mode.
Step 2
fcip fcip2 destination fcip2san5
tcpclient 10.1.0.46
Assign an arbitrary name to the peer FCIP instance, and enter its
IP address.
For example, assign the name fcip2san5 to the peer of FCIP
instance fcip2. The IP address of the peer is in dotted quad notation
10.1.0.46, and connection is made using TCP protocol, with fcip2
acting as a TCP client. The TCP client will try to initialize the TCP
connection with its peer, which must be configured as a TCP
server.
See Chapter 12, “Command Line Interface Reference,” for more
information about the fcip destination command.
Cisco SN 5428-2 Storage Router Software Configuration Guide
8-4
78-15471-01
Chapter 8
Configuring FCIP
Configuring Operational Parameters
Assigning Protocol: raw
If the peer FCIP instance is configured to use raw IP, use the following procedure to assign an arbitrary
name to the FCIP peer and configure the peer’s IP address.
Command
Description
Step 1
enable
Enter Administrator mode.
Step 2
fcip fcip1 destination fcip1san5
raw 10.1.0.48
Assign an arbitrary name to the peer FCIP instance, and enter its
IP address.
For example, assign the name fcip1san5 to the peer of FCIP
instance fcip1. The IP address of the peer is in dotted quad notation
10.1.0.48, and connection is made using raw protocol.
See Chapter 12, “Command Line Interface Reference,” for more
information about the fcip destination command.
Configuring Operational Parameters
For FCIP deployment, a large maximum transfer unit (MTU) size is desirable. To set the size of the
MTU, use the interface ge? mtusize command to set MTU to its highest level, 9000, if possible.
To configure FCIP operational parameters, use the fcip destination command. The default settings for
operational command parameters are listed in this section. If modifications to these settings are
necessary, see Chapter 12, “Command Line Interface Reference,” for details about the fcip destination
command.
Table 8-1 describes the optional operational parameters available for TCP protocol.
Table 8-1
Optional Operational Parameters: TCP Protocol
Description
Default
Keyword
Maximum number of frames given to the Fibre Channel interface 688
frinhiwater
Number of seconds before a keep-alive packet is sent across an
idle connection
60
idlepingdelay
Value of the packet trace mask. Packets are traced for debugging
problems. Range is from 0x0000 to 0xffff. A value of zero will
disable packet tracing.
0xffff
pkttracemask
Maximum number of outstanding bytes that can be received on a 262144
TCP connection
rxtcpwinsize
TCP port number where the server is listening to and where the
client is connecting to
tcpport
3225
Maximum number of outstanding bytes that can be transmitted on 2097152
a TCP connection
txtcpwinsize
Cisco SN 5428-2 Storage Router Software Configuration Guide
78-15471-01
8-5
Chapter 8
Configuring FCIP
Verifying and Saving Configuration
Table 8-2 describes the optional operational parameters available for raw protocol.
Table 8-2
Operational Parameters: Raw Protocol
Description
Default
Keyword
Maximum number of bytes outstanding on a raw IP connection
16777216 bcouthiwater
Maximum number of frames given to the Fibre Channel interface 688
frinhiwater
Maximum number of frames outstanding on a raw IP connection
1024
frouthiwater
Number of seconds before a keep-alive packet is sent across an
idle connection
60
idlepingdelay
Initial timeout of a transmitted frame on a raw IP connection
0 ticks1
initialtimeout
IP protocol used in the IP header on a raw IP connection
0x04
ipprotocol
Maximum time for any one retransmission on a raw IP connection 48 ticks
maxtimeout
Maximum number of frames not acknowledged on a raw IP
connection
16
peerneedsackhiwater
Value of the packet trace mask
0xffff
pkttracemask
Maximum number of times a packet is retransmitted on a raw IP
connection
4
rexmitcount
Number of ticks to add to a packet’s timeout value before
retransmitting the packet on a raw IP connection
0 ticks
timeoutincrement
Maximum time a packet is kept alive on a raw IP connection
0 ticks
totaltimeout
1. 60 ticks is approximately one second.
Verifying and Saving Configuration
Verify the FCIP configuration using the procedures that follow. You can save the configuration at any
time by using the save all bootconfig command. You must save the running configuration to the bootable
configuration for it to be retained in the storage router when it is rebooted. Once you have saved the
configuration, you can verify that the configuration to be used when the storage router is rebooted
matches the currently running configuration.
Use the following procedure to verify FCIP configuration.
Command
Description
Step 1
enable
Enter Administrator mode.
Step 2
show fcip fcip1
Displays the operational and connection information for FCIP
instance fcip1. (Example 8-1).
Cisco SN 5428-2 Storage Router Software Configuration Guide
8-6
78-15471-01
Chapter 8
Configuring FCIP
Verifying and Saving Configuration
Example 8-1
Verifying Existence of an FCIP instance
[SN5428-2A]# show fcip fcip1
Instance Device I/F Network I/F
-------- ---------- ----------fcip1
fci1
ge1 10.1.0.16
Description
----------Access to SAN island 5
Destination
----------fcip1san5
LocalMode
--------raw
IpAddress
--------------10.1.0.48
IsConnected
----------TRUE
LinkState
--------UP
fcip1 Trace Status
-----------------pktTracing
mboxTracing
mboxCmdCount
On, mask 0xffff
On
0
fcip1 Connection Information
---------------------------idlePingDelay
60
txAck
0x4d
txSeq
0x4f
rxAck
0x4d
rxSeq
0x4d
peerNeedsAck
0x0
WackQ
0x0, 0xce05230
WackQCnt
0x0F
WackQExtra
0x0
frOut
0x0
frOutHiWater
0x400
bcOut
0x0
bcOutHiWater
0x200000
burstOut
0x0
burstOutHiWater
0x200000
outFlowCtrlQ
0x0, 0x0
frIn
0x0
frInHiWater
0x2b0
inFlowCtrlQ
0x0, 0x0
blockMaxSize
0x0
oosPktQ
0x0, 0x0
ipProtocol
0x4
reXmitCnt
0x4
reXmitMaxTO
0x30
reXmitTimeOutIncr
0x0
reXmitInitialTimeOut
0x0
reXmitTotalTimeOut
0x0
192ms 256ms 384ms 768ms
Cisco SN 5428-2 Storage Router Software Configuration Guide
78-15471-01
8-7
Chapter 8
Configuring FCIP
Verifying and Saving Configuration
Cisco SN 5428-2 Storage Router Software Configuration Guide
8-8
78-15471-01
C H A P T E R
9
Configuring Authentication
This chapter explains how to configure the authentication portion of Cisco’s authentication,
authorization and accounting (AAA) services on the SN 5428-2 Storage Router and how to configure
Enable, Login and iSCSI authentication, which use AAA authentication services.
The following tasks are covered:
•
Prerequisite Tasks, page 9-2
•
Using Authentication, page 9-2
•
Configuration Tasks, page 9-4
•
Configuring AAA Authentication Services, page 9-11
•
Creating Named Server Groups, page 9-14
•
Creating AAA Authentication Lists, page 9-15
•
Testing Authentication, page 9-17
•
Configuring Two-Way Authentication, page 9-18
•
Enabling iSCSI Authentication, page 9-19
•
Verifying and Saving Configuration, page 9-19
The AAA authentication function is always enabled for the storage router; it cannot be disabled.
Authentication parameters can be configured using CLI commands, as described in this chapter, or via
the web-based GUI. To access the web-based GUI, point your browser to the storage router’s
management interface IP address. After logging on, click the Help link to access online help for the GUI.
Note
The web-based GUI is not available for storage routers deployed for transparent SCSI routing.
Cisco SN 5428-2 Storage Router Software Configuration Guide
78-15471-01
9-1
Chapter 9
Configuring Authentication
Prerequisite Tasks
Prerequisite Tasks
Before performing AAA authentication configuration tasks on the storage router, make sure you have
configured system parameters as described in Chapter 2, “First-Time Configuration,” or Chapter 3,
“Configuring System Parameters.” If the storage router is deployed for SCSI routing, you should also
configure SCSI routing instances as described in Chapter 6, “Configuring SCSI Routing,” before
proceeding. See the iSCSI driver readme file for details on configuring IP hosts for iSCSI authentication.
Note
AAA authentication configuration settings are cluster-wide elements and are shared across a cluster. All
AAA configuration and management functions are performed from a single storage router in a cluster.
Issue the show cluster command to identify the storage router that is currently performing AAA
configuration and management functions.
Using Authentication
AAA is Cisco’s architectural framework for configuring a set of three independent security functions in
a consistent, modular manner. Authentication provides a method of identifying users (including login
and password dialog, challenge and response, and messaging support) prior to receiving access to the
requested object, function, or network service.
The SN 5428-2 Storage Router implements the authentication function for three types of authentication:
•
iSCSI authentication—provides a mechanism to authenticate all IP hosts that request access to
storage via a SCSI routing instance. IP hosts can also verify the identity of a SCSI routing instance
that responds to requests, resulting in two-way authentication.
•
Enable authentication—provides a mechanism to authenticate users requesting access to the
SN 5428-2 in Administrator mode via the CLI enable command or an FTP session.
•
Login authentication—provides a mechanism to authenticate users requesting access to the
SN 5428-2 in Monitor mode via the login process from a Telnet session, SSH session or the
management console.
iSCSI Authentication
When enabled, iSCSI drivers provide user name and password information each time an iSCSI TCP
connection is established. iSCSI authentication uses the iSCSI Challenge Handshake Authentication
Protocol (CHAP) authentication method.
iSCSI authentication can be enabled for specific SCSI routing instances. Each SCSI routing instance
enabled for authentication can be configured to use a specific list of authentication services, or it can be
configured to use the default list of authentication services.
For IP hosts that support two-way authentication, the SCSI routing instance can also be configured to
provide user name and password information during the iSCSI TCP connection process.
Note
iSCSI authentication is available for SN 5428-2 storage routers deployed for SCSI routing or transparent
SCSI routing only; it is not available for storage routers deployed for FCIP.
Cisco SN 5428-2 Storage Router Software Configuration Guide
9-2
78-15471-01
Chapter 9
Configuring Authentication
Using Authentication
Enable Authentication
When configured, a user enters password information each time the CLI enable command is entered
from the management console, or from a Telnet or SSH management session.
Because the enable command does not require you to enter a user name, configured authentication
services that require a user name (such as RADIUS or TACACS+ servers) are passed the default user
name, $enab15$, along with the entered password for authentication. If no authentication services are
configured, the entered password is checked against the Administrator mode password configured for
the storage router.
If the storage router is configured to allow FTP access, Enable authentication also authenticates users
attempting to login and establish an FTP session with the storage router.
Login Authentication
When configured, you are prompted to enter a user name and password each time access to the storage
router is attempted from the management console, or from a Telnet or SSH management session.
AAA Authentication Services
AAA authentication is configured by defining the authentication services available to the storage router.
iSCSI, Enable and Login authentication types use AAA authentication services to administer security
functions. If you are using remote security servers, AAA is the means through which you establish
communications between the SN 5428-2 and the remote RADIUS or TACACS+ security server.
Table 9-1 lists the AAA authentication services and indicates which authentication types can be
performed by each service.
Table 9-1
AAA Authentication Services
Authentication
Service
Description
Authentication Types
RADIUS
All
A distributed client/server system that secures
networks against unauthorized access. The SN 5428-2
sends authentication requests to a central RADIUS
server that contains all user authentication and network
service access information.
TACACS+
All
A security application that provides centralized
validation of users. TACACS+ services are maintained
in a database on a TACACS+ daemon running,
typically, on a UNIX or Windows NT workstation.
Local or
Local-case
Uses a local username database on the storage router
for authentication. Local-case indicates that the user
name authentication is case-sensitive. Passwords
authentication is always case-sensitive.
Enable
Uses the Administrator mode password configured for Enable and Login
the storage router.
authentication only
Monitor
Uses the Monitor mode password configured for the
storage router.
Login and iSCSI
authentication only
Enable and Login
authentication only
Cisco SN 5428-2 Storage Router Software Configuration Guide
78-15471-01
9-3
Chapter 9
Configuring Authentication
Configuration Tasks
Configuration Tasks
To configure iSCSI, Enable or Login authentication and the associated AAA authentication services on
the storage router, perform the following steps:
Step 1
Configure the desired authentication services, such as RADIUS, TACACS+ and the local username
database.
Step 2
(Optional) Create named groups of RADIUS and TACACS+ servers.
Step 3
Create AAA authentication lists.
Step 4
(Optional) Test authentication using configured AAA authentication services.
Step 5
(Optional) Configure the user name and password for SCSI routing instances that will participate in
two-way authentication.
Step 6
Enable authentication for individual SCSI routing instances.
Step 7
Verify and save AAA and iSCSI authentication configuration.
Figure 9-1 illustrates AAA authentication configuration elements used for iSCSI authentication and
Figure 9-2 illustrates the example configuration of iSCSI authentication and AAA authentication
services used in this chapter.
Cisco SN 5428-2 Storage Router Software Configuration Guide
9-4
78-15471-01
Chapter 9
Configuring Authentication
Configuration Tasks
Figure 9-1
iSCSI Authentication Configuration Elements
Remote RADIUS servers
Remote TACACS+ servers
Username database
user
user
user
user
user
user
...
...
When iSCSI authentication is
enabled, the SCSI routing
instance passes the user name
and password from the iSCSI
driver to AAA for authentication.
AAA uses the specified
authentication list to determine
which services to use for the
authentication attempt.
RADIUS
TACACS+
password
password
password
password
password
password
.....
.....
local or
local-case
Authentication services lists
If authentication fails, the
connection is refused and the
host cannot obtain access to
storage resources.
AAA authentication services
SCSI routing instance
SN 5428-2 Storage Router
iSCSI drivers
IP host (and optionally SCSI routing instance)
user name and password via
CHAP when iSCSI TCP
connection established
Disk
controller
Tape
controller
85749
IP
Disk
controller
Cisco SN 5428-2 Storage Router Software Configuration Guide
78-15471-01
9-5
Chapter 9
Configuring Authentication
Configuration Tasks
Figure 9-2
iSCSI Authentication Example Configuration
Remote TACACS+ servers
IP 10.7.0.22
IP 10.7.0 41
IP 10.7.0.45
Global Key: tacacs123SN
group janus
Username database
Remote RADIUS servers
IP 10.5.0.61
IP 10.6.0.53
Global Key: rad123SN
labserver foo
labserver2 foo2
RADIUS
TACACS+
local or
local-case
Authentication services list: webservices2
local
group janus
group tacacs+
AAA authentication services
SCSI routing instance: zeus
user name = zeusabc password=zeus123
IP hosts with
iSCSI drivers
SN 5428-2 Storage Router
user name = labserver
password = foo
Disk
controller
IP
Disk
controller
Tape
controller
user name = labserver2
password = foo2
85750
Storage
Cisco SN 5428-2 Storage Router Software Configuration Guide
9-6
78-15471-01
Chapter 9
Configuring Authentication
Configuration Tasks
Figure 9-3 illustrates AAA authentication configuration elements used for Enable authentication and
Figure 9-4 illustrates the example configuration of Enable authentication and AAA authentication
services used in this chapter.
Figure 9-3
Enable Authentication Configuration Elements
Remote RADIUS servers
Remote TACACS+ servers
When Enable authentication is
enabled, authentication is
required when the use
rattempts Administrator mode
access via the CLI "enable"
command.
Administrator
password
The user is prompted for a
password, which is sent along
with the default user name
RADIUS TACACS+
Enable
Monitor
password
Monitor
$enab15$ to AAA for
authentication.
AAA uses the default
authentication list to determine
which services to use for the
authentication attempt.
If authentication fails, the
request is refused and the user
cannot obtain Administrator
mode access to the SN 5428-2.
the entered password is sent with
default user name $enab15$
Authentication services list
AAA authentication services
CLI command session processor
SN 5428-2 Storage Router
Telnet, SSH or console management session
85751
"enable" command prompts
for password
Cisco SN 5428-2 Storage Router Software Configuration Guide
78-15471-01
9-7
Chapter 9
Configuring Authentication
Configuration Tasks
Figure 9-4
Enable Authentication Example Configuration
group sysadmin
Remote TACACS+ servers
IP 10.7.0.22
IP 10.7.0.41
Global key: tacacs123SN
Administrator password:
ciscoadmin
RADIUS TACACS+
user name = $enab15$
password = ciscoadmin
Enable
Monitor
Authentication services list:
group sysadmin
enable
AAA authentication services
CLI command session processor
SN 5428-2 Storage Router
85752
password = ciscoadmin
Telnet, SSH or console management session
Cisco SN 5428-2 Storage Router Software Configuration Guide
9-8
78-15471-01
Chapter 9
Configuring Authentication
Configuration Tasks
Figure 9-5 illustrates AAA authentication configuration elements used for Login authentication and
Figure 9-6 illustrates the example configuration of Login authentication and AAA authentication
services used in this chapter.
Figure 9-5
Login Authentication Configuration Elements
Remote RADIUS servers
Remote TACACS+ servers
Username database
Administrator
password
When Login authentication is
enabled, authentication is
required when the user
attempts Monitor mode access
to the SN 5428-2 by attempting
to establish a CLI command
session.
...
RADIUS TACACS+ Enable Monitor
The login process prompts the
user for a user name andpass
word, which are passed to
AAA for authentication.
local or
local-case
Authentication services list
AAA uses the default
authentication list to determine
which services to use for the
authentication attempt.
If authentication fails, the login
request is refused and the user
cannot obtain Monitor mode
access to the SN 5428-2.
user password
user password
user password
Monitor
password
AAA authentication services
CLI command session processor
SN 5428-2 Storage Router
85753
Login requires user name
and password
Telnet, SSH or console management session
Cisco SN 5428-2 Storage Router Software Configuration Guide
78-15471-01
9-9
Chapter 9
Configuring Authentication
Configuration Tasks
Figure 9-6
Login Authentication Example Configuration
group sysadmin
Remote TACACS+ servers
IP 10.7.0.22
IP 10.7.0.41
Global Key: tacacs123SN
Monitor password:
ciscomonitor
RADIUS TACACS+ Enable Monitor
local or
local-case
Authentication services list:
group sysadmin
monitor
AAA authentication services
CLI command session processor
SN 5428-2 Storage Router
Telnet, SSH or console management session
85754
user name: sysmonitor
password: ciscomonitor
Cisco SN 5428-2 Storage Router Software Configuration Guide
9-10
78-15471-01
Chapter 9
Configuring Authentication
Configuring AAA Authentication Services
Configuring AAA Authentication Services
Configuring AAA authentication services consists of setting the appropriate parameters for the various
service options that can be used by the storage router. The storage router can use any or all of the
supported services:
•
RADIUS
•
TACACS+
•
Local username database
•
Enable
•
Monitor
Use the procedures that follow to configure the storage router to use each of these services.
Note
See the iSCSI driver readme file for details on configuring CHAP user names and passwords for iSCSI
authentication.
RADIUS Servers
Use the commands in the following procedure to configure RADIUS authentication services.
Command
Description
Step 1
enable
Enter Administrator mode.
Step 2
radius-server host 10.6.0.53
Specify the RADIUS server to be used for AAA authentication.
For example, specify the RADIUS server at 10.6.0.53 for use by
the storage router.
Because no port is specified, the authentication requests use the
default UDP port 1645. Global timeout and retransmit values are
also used.
See Chapter 12, “Command Line Interface Reference,” for more
information about the radius-server host command.
Step 3
radius-server host 10.6.0.73
radius-server host 10.5.0.61
Specify additional RADIUS servers. For example, specify the
RADIUS servers at 10.6.0.73 and 10.5.0.61 as the second and third
RADIUS server to be used for AAA authentication.
RADIUS servers are accessed in the order in which they are
defined (or for a specified server group, in the order they are
defined in the group).
Step 4
radius-server key rad123SN
Configure the global authentication and encryption key to be used
for all RADIUS communications between the SN 5428-2 and the
RADIUS daemon. For example, set the key to rad123SN.
This key must match the key used on the RADIUS daemon.
Cisco SN 5428-2 Storage Router Software Configuration Guide
78-15471-01
9-11
Chapter 9
Configuring Authentication
Configuring AAA Authentication Services
TACACS+ Hosts
Use the commands in the following procedure to configure TACACS+ authentication services.
Command
Description
Step 1
enable
Enter Administrator mode.
Step 2
tacacs-server host 10.7.0.22
Specify the TACACS+ servers to be used for AAA authentication.
For example, specify the TACACS+ servers at 10.7.0.22,
10.7.0.41, and 10.7.0.45 for use by the storage router. Because no
port is specified, the authentication requests use the default port
49. The global timeout value is also used.
tacacs-server host 10.7.0.41
tacacs-server host 10.7.0.45
Like RADIUS servers, TACACS+ servers are accessed in the order
in which they are defined (or for a specified server group, in the
order they are defined in the group).
See Chapter 12, “Command Line Interface Reference,” for more
information about the tacacs-server host command.
Step 3
tacacs-server key tacacs123SN
Configure the global authentication and encryption key to be used
for all TACACS+ communications between the SN 5428-2 and the
TACACS+ servers. For example, set the key to tacacs123SN.
This key must match the key used by the TACACS+ daemon.
Local Username Database
Use the commands in the following procedure to configure a local username database.
Command
Description
Step 1
enable
Enter Administrator mode.
Step 2
username labserver password
foo
Enter a user name and password for each host requiring
authentication prior to access to storage and for each user
requiring Monitor mode access to the SN 5428-2 via console,
Telnet or SSH management sessions. For example, add the
following user name and password combinations:
username labserver2 password
foo2
•
labserver and foo
•
labserver2 and foo2
For iSCSI authentication, user name and password pairs must
match the CHAP user name and password pairs configured for the
iSCSI drivers that require access to storage via the SCSI routing
instances that have iSCSI authentication enabled.
If other services are also used (such as RADIUS or TACACS+),
these user name and password pairs must also be configured within
the databases those services use for authentication purposes.
Note
If you use RADIUS or TACACS+ servers for Enable
authentication, configure the user name $enab15$ with the
desired password. Because the enable command does not
require you to enter a user name, the default user name
$enab15$ is passed to the AAA authentication service.
Cisco SN 5428-2 Storage Router Software Configuration Guide
9-12
78-15471-01
Chapter 9
Configuring Authentication
Configuring AAA Authentication Services
The following rules apply to passwords:
•
Passwords are entered in clear text. However, they are changed to “XXXXX” in the CLI command
history cache, and are stored in the local username database in an encrypted format.
•
If the password contains embedded spaces, enclose it with single or double quotes.
•
After initial entry, passwords display in their encrypted format. Use the show aaa command to
display the local username database entries. The following is an example display:
username "foo" password "9 ea9bb0c57ca4806d3555f3f78a4204177a"
The initial “9” in the example display indicates that the password is encrypted.
•
You can re-enter an encrypted password using the normal username password command. Enter the
encrypted password in single or double quotes, starting with 9 and a single space. For example,
copying and pasting password "9 ea9bb0c57ca4806d3555f3f78a4204177a" from the example above
into the username pat command would create an entry for pat in the username database. The user
named pat would have the same password as the user named foo. This functionality allows user
names and passwords to be restored from saved configuration files.
•
When entering a password, a zero followed by a single space indicates that the following string is
not encrypted; 9 followed by a single space indicates that the following string is encrypted. To enter
a password that starts with 9 or zero, followed by one or more spaces, enter a zero and a space and
then enter the password string. For example, to enter the password “0 123” for the user named pat,
enter this command:
username pat password “0 0 123”
To enter the password “9 73Zjm 5” for user name lab1, use this command:
username lab1 password ‘0 9 73Zjm 5’
Enable
Enable is a special AAA authentication service; it is available for Enable and Login authentication only.
The Enable service compares the password you entered with the Administrator mode password
configured for the storage router. The requested access is granted only if the passwords match.
See Chapter 3, “Configuring System Parameters,” for more information about changing the
Administrator mode password.
Monitor
Monitor is a special AAA authentication service; it is available for Enable and Login authentication only.
The Monitor service compares the password you entered with the Monitor mode password configured
for the storage router. The requested access is granted only if the passwords match.
See Chapter 3, “Configuring System Parameters,” for more information about changing the Monitor
mode password.
Cisco SN 5428-2 Storage Router Software Configuration Guide
78-15471-01
9-13
Chapter 9
Configuring Authentication
Creating Named Server Groups
Creating Named Server Groups
By default, you can use all configured RADIUS or TACACS+ servers for authentication. All configured
RADIUS servers belong to the default group named radius. All configured TACACS+ servers belong to
the default group named tacacs+.
You can also create named groups of RADIUS or TACACS+ servers, to be used for specific
authentication purposes. For example, you can use a subset of all configured RADIUS servers for iSCSI
authentication of IP hosts requesting access to storage via a specific SCSI routing instance.
In the example configuration shown in Figure 9-2, the group of RADIUS servers named janus and the
default group of all TACACS+ servers will be used for iSCSI authentication of IP hosts accessing storage
via the SCSI routing instance named zeus. In the example configurations shown in Figure 9-4 and
Figure 9-6, the group of TACACS+ servers named sysadmin will be used for Enable and Login
authentication.
Radius Server Groups
Use the commands in the following procedure to create a named group of RADIUS servers.
Command
Description
Step 1
enable
Enter Administrator mode.
Step 2
aaa group server radius janus
Create a group of RADIUS servers. For example create a group
named janus.
All authentication server groups must have unique names; you
cannot have a group of RADIUS servers named janus and a group
of TACACS+ servers named janus.
Step 3
aaa group server radius janus
server 10.5.0.61
Add a RADIUS server to the named group. For example, add the
RADIUS server at IP address 10.5.0.61 to the group named janus.
Because no port is specified, authentication requests to this server
use the default UDP port 1645. Servers are accessed in the order
in which they are defined within the named group.
Step 4
aaa group server radius janus
server 10.6.0.53
Add another RADIUS server to the named group. For example,
add the RADIUS server at IP address 10.6.0.53 to the group named
janus.
TACACS+ Server Groups
Use the commands in the following procedure to create a named group of TACACS+ servers.
Command
Description
Step 1
enable
Enter Administrator mode.
Step 2
aaa group server tacacs+
sysadmin
Create a group of TACACS+ servers. For example create a group
named sysadmin.
All authentication server groups must have unique names; you
cannot have a group of TACACS+ servers named sysadmin and a
group of RADIUS servers named sysadmin.
Cisco SN 5428-2 Storage Router Software Configuration Guide
9-14
78-15471-01
Chapter 9
Configuring Authentication
Creating AAA Authentication Lists
Step 3
Command
Description
aaa group server tacacs+
sysadmin server 10.7.0.22
Add a TACACS+ server to the named group. For example, add the
TACACS+ server at IP address 10.7.0.22 to the group named
sysadmin.
Because no port is specified, authentication requests to this server
use the default port 49. Servers are accessed in the order in which
they are defined within the named group.
Step 4
aaa group server tacacs+
sysadmin server 10.7.0.41
Add another TACACS+ server to the named group. For example,
add the TACACS+ server at IP address 10.7.0.41 to the group
named sysadmin.
Creating AAA Authentication Lists
iSCSI, Enable and Login authentication use lists of defined AAA authentication services to administer
security functions. The list that is created for Enable and Login authentication must be named default.
iSCSI authentication supports a variety of AAA authentication lists.
Use the procedures that follow according to the type of authentication required:
•
iSCSI authentication
•
Enable authentication
•
Login authentication
iSCSI authentication
Use the commands in the following procedure to build a unique list of AAA authentication services to
be used for iSCSI authentication.
Command
Description
Step 1
enable
Enter Administrator mode.
Step 2
aaa authentication iscsi
webservices2 local group janus
group tacacs+
Create a unique list of authentication services for iSCSI
authentication.
Note
For example, create the list called webservices2 so that AAA first
tries to perform authentication using the local username database.
If AAA fails to find a user name match, an attempt is made to
contact a RADIUS server in the server group named janus. If no
RADIUS server in group janus is found, RADIUS returns an error
and AAA tries to use perform authentication using all configured
TACACS+ servers. If no TACACS+ server is found, TACACS+
returns an error and AAA authentication fails. If a RADIUS or
TACACS+ server does not find a user name and password match,
authentication fails and no other methods are attempted.
If local or local-case is the first service in the authentication list and a user name match is not found, the
next service in the list will be tried. If local or local-case is not the first service, authentication fails if a
user name match is not found. Authentication always fails if a RADIUS or TACACS+ server fails to find
a user name match.
Cisco SN 5428-2 Storage Router Software Configuration Guide
78-15471-01
9-15
Chapter 9
Configuring Authentication
Creating AAA Authentication Lists
Enable authentication
Use the commands in the following procedure to build a default list of AAA authentication services to
be used for Enable authentication. Building the default list completes the configuration of Enable
authentication and makes it immediately effective.
Command
Description
Step 1
enable
Enter Administrator mode.
Step 2
aaa authentication enable
default group sysadmin enable
Create a default list of authentication services for Enable
authentication.
For example, create a list so that AAA first tries to perform
authentication using the TACACS+ servers in the group named
sysadmin. If no TACACS+ server is found, TACACS+ returns an
error and AAA attempts authentication using the configured
Administrator mode password. If the password you entered does
not match the configured Administrator mode password,
authentication fails and no other methods are attempted.
Because the enable command requires you to enter a password but does not allow you to enter a user
name, Enable authentication passes a fixed user name of $enab15$, along with the password you entered,
to a RADIUS or TACACS+ server for authentication purposes.
Note
Local and local-case services cannot be used for Enable authentication.
Login authentication
Use the commands in the following procedure to build a default list of AAA authentication services to
be used for Login authentication. Building the default list completes the configuration of Login
authentication and makes it immediately effective.
Command
Description
Step 1
enable
Enter Administrator mode.
Step 2
aaa authentication login default Create a default list of authentication services for Login
group sysadmin monitor
authentication.
For example, create a list so that AAA first tries to perform
authentication using the TACACS+ servers in the group named
sysadmin. If no TACACS+ server is found, TACACS+ returns an
error and AAA attempts authentication using the configured
Monitor mode password (eliminating authentication of the user
name). If the password you entered does not match the configured
Monitor mode password, authentication fails and no other methods
are attempted.
Cisco SN 5428-2 Storage Router Software Configuration Guide
9-16
78-15471-01
Chapter 9
Configuring Authentication
Testing Authentication
Testing Authentication
You can perform authentication testing at any time. For example, before enabling iSCSI authentication
for a SCSI routing instance, you can test iSCSI authentication. The user name and password are passed
to AAA authentication, which performs authentication using the specified iSCSI authentication list.
The command response indicates a pass or fail status.
iSCSI Authentication
Use the commands in the following procedure to test iSCSI authentication.
Command
Description
Step 1
enable
Enter Administrator mode.
Step 2
aaa test authentication iscsi
webservices2 labserver foo
Test the user names and passwords listed in the username database.
AAA authentication uses the services in the list named
webservices2 for authentication (Example 9-1).
aaa test authentication iscsi
webservices2 labserver2 foo2
Example 9-1
Testing iSCSI Authentication
*[SN5428-2-MG1]# aaa test authentication iscsi webservices2 labserver foo
Sep 02 14:37:00:aaa:AS_NOTICE :Auth test request being queued
Sep 02 14:37:00:aaa:AS_NOTICE :Auth test request complete, status = pass
Enable Authentication
Use the commands in the following procedure to test Enable authentication.
Command
Description
Step 1
enable
Enter Administrator mode.
Step 2
aaa test authentication enable
default $enab15$ ciscoadmin
Test the password configured for Administrator mode access to the
storage router, using the default user name. AAA authentication
uses the services in the default list (Example 9-2).
Example 9-2
Testing Enable Authentication
*[SN5428-2-MG1]# aaa test authentication enable default $enab15$ ciscoadmin
Sep 02 14:37:00:aaa:AS_NOTICE :Auth test request being queued
Sep 02 14:37:00:aaa:AS_NOTICE :Auth test request complete, status = pass
Cisco SN 5428-2 Storage Router Software Configuration Guide
78-15471-01
9-17
Chapter 9
Configuring Authentication
Configuring Two-Way Authentication
Login Authentication
Use the commands in the following procedure to test Login authentication.
Command
Description
Step 1
enable
Enter Administrator mode.
Step 2
aaa test authentication login
default sysmonitor ciscomonitor
Test the user name and password configured for Monitor mode
access to the storage router. AAA authentication uses the services
in the default list (Example 9-3).
Example 9-3
Testing Login Authentication
*[SN5428-2-MG1]# aaa test authentication login default sysmonitor ciscomonitor
Sep 02 14:37:00:aaa:AS_NOTICE :Auth test request being queued
Sep 02 14:37:00:aaa:AS_NOTICE :Auth test request complete, status = pass
Configuring Two-Way Authentication
When iSCSI authentication is enabled, the SCSI routing instance must authenticate the IP host during
the iSCSI TCP connection process. IP hosts that cannot be authenticated are not allowed access to the
storage resources. IP hosts may also require authentication of the SCSI routing instance during the iSCSI
TCP connection process. If the SCSI routing instance cannot be authenticated, the IP host terminates the
connection.
Use the commands in the following procedure to configure a user name and password for a SCSI routing
instance that must be authenticated by IP hosts.
Command
Description
Step 1
enable
Enter Administrator mode.
Step 2
scsirouter zeus username
zeusabc
Assign a user name to the SCSI routing instance. For example,
configure the user name zeusabc for the SCSI routing instance
named zeus.
Step 3
scsirouter zeus password
zeus123
Assign a password to the SCSI routing instance. For example,
configure the password zeus123 for the SCSI routing instance
named zeus.
Note
The SCSI routing instance user name and password pair must also be configured within the
authentication database services used by the IP hosts for authentication purposes.
Cisco SN 5428-2 Storage Router Software Configuration Guide
9-18
78-15471-01
Chapter 9
Configuring Authentication
Enabling iSCSI Authentication
Enabling iSCSI Authentication
iSCSI authentication is enabled for specific SCSI routing instances. By default, iSCSI authentication is
not enabled.
Use the commands in the following procedure to enable iSCSI authentication using the AAA
authentication methods configured in the specified AAA authentication list.
Command
Description
Step 1
enable
Enter Administrator mode.
Step 2
scsirouter zeus authentication
webservices2
Enable authentication for the named SCSI routing instance, using
the named authentication list.
For example, enable authentication for the SCSI routing instances
named zeus, using the authentication list named webservices2.
Verifying and Saving Configuration
You can save the configuration at any time using either the save aaa bootconfig or save all bootconfig
commands. Although AAA configuration changes are effective immediately, you must save the
authentication configuration for it to be retained in the SN 5428-2 when it is rebooted.
Use the following procedure to verify and save authentication settings.
Command
Description
Step 1
enable
Enter Administrator mode.
Step 2
show aaa
Display AAA authentication configuration (Example 9-4).
Step 3
show scsirouter zeus brief
Verify that iSCSI authentication is enabled and (optionally) that
the appropriate user name and password are configured for the
specified SCSI routing instance.
For example, verify that the SCSI routing instance named zeus is
enabled for authentication using the authentication list named
webservices2 and is configured with the user name zeusabc and
password zeus123 (Example 9-5).
Step 4
save aaa bootconfig
Save authentication settings.
Step 5
save scsirouter zeus bootconfig
Save the SCSI routing instances.
Step 6
save all bootconfig
(Optional) Save all configuration settings.
This command may be used in place of individual
save aaa bootconfig and save scsirouter bootconfig commands
described in Steps 4 and 5.
Cisco SN 5428-2 Storage Router Software Configuration Guide
78-15471-01
9-19
Chapter 9
Configuring Authentication
Verifying and Saving Configuration
Example 9-4
Display AAA Authentication Configuration
[SN5428-2-MG1]# show aaa
aaa new-model
username "labserver" password "9 491c083a73d7f89bc0205927d086cdd0d8"
username "labserver2" password "9 5ccd52d543e0d3a5558afe8cbe2867dd41"
radius-server key "9 64ced29a261a8ca554a6f4ea8d494669c1"
radius-server host 10.6.0.53 auth-port 1645
radius-server host 10.6.0.73 auth-port 1645
radius-server host 10.5.0.61 auth-port 1645
tacacs-server key "9 c5fc960c37b1a3ad4d76e2495b169e4b08"
tacacs-server host 10.7.0.22 auth-port 49
tacacs-server host 10.7.0.41 auth-port 49
tacacs-server host 10.7.0.45 auth-port 49
aaa group server radius "janus"
aaa group server radius "janus" server 10.5.0.61 auth-port 1645
aaa group server radius "janus" server 10.6.0.53 auth-port 1645
aaa group server tacacs+ "sysadmin"
aaa group server tacacs+ "sysadmin" server 10.7.0.22 auth-port 49
aaa group server tacacs+ "sysadmin" server 10.7.0.41 auth-port 49
aaa authentication enable default group sysadmin enable
aaa authentication iscsi webservices2 local group janus group tacacs+
aaa authentication login default group sysadmin monitor
Example 9-5
Verify iSCSI Authentication for SCSI Routing Instance
[SN5428-2-MG1]# show scsirouter zeus brief
SCSI Router Information
...
SCSI Router Authentication Information
Router
Authentication Username
Password
-------------------- --------------- --------------- -------zeus
webservices2
zeusabc
9 5eaee29546ed37f31d5812ea60eaac1568
...
Cisco SN 5428-2 Storage Router Software Configuration Guide
9-20
78-15471-01
C H A P T E R
10
Configuring a High Availability Cluster
This chapter explains how to configure SN 5428-2 Storage Routers in a cluster to allow the storage
routers to back each other up in case of failure. The following tasks are covered:
•
Prerequisite Tasks, page 10-1
•
Creating a Cluster, page 10-2
•
Joining Stand-alone Storage Routers in a Cluster, page 10-6
•
Changing Clusters, page 10-7
High availability clusters can be configured using CLI commands, as described in this chapter, or via the
web-based GUI. To access the web-based GUI, point your browser to the storage router’s management
interface IP address. After logging on, click the Help link to access online help for the GUI.
Note
SN 5428-2 Storage Routers that are deployed for transparent SCSI routing or FCIP cannot participate in
a high availability cluster.
Prerequisite Tasks
All storage routers that will participate in a cluster must have connectivity to the same hosts and the same
storage systems, and must be connected to each other through their management and HA interfaces.
Note
At least one of the interface connections must be live; you cannot connect storage routers in a cluster
using cross-over cables.
Cisco SN 5428-2 Storage Router Software Configuration Guide
78-15471-01
10-1
Chapter 10
Configuring a High Availability Cluster
Creating a Cluster
Guidelines for Configuring SCSI Routing Instances
When you configure SCSI routing instances to run in a high availability cluster, the following
operational guidelines apply:
•
A cluster supports up to 12 active SCSI routing instances.
•
If you map targets using WWPN, be sure to specify both the primary WWPN (the WWPN associated
with the storage resource as known to the primary node in the cluster) and the secondary WWPN
(the WWPN associated with the storage resource as known to the second node in the cluster).
•
Each storage router in a cluster maintains and exchanges information about available resources.
Failover by eligibility is enabled by default; HA bases the decision to automatically fail over a SCSI
routing instance to another storage router in a cluster based on the Fibre Channel and other resources
available to that SCSI routing instance.
Failover occurs when:
– All mapped targets are unavailable or a critical resource for the SCSI routing instance is
unavailable, and some or all mapped targets would be available from another storage router in
the cluster. A critical resource can be a configured Gigabit Ethernet interface, a required Fibre
Channel interface, or an internal resource needed to run the SCSI routing instance.
– Some mapped targets are unavailable and all mapped targets are available on another storage
router in the cluster.
– All mapped targets are available, but another storage router in the cluster also has all targets
available and is designated at the primary for the SCSI routing instance.
– The storage router stops receiving heartbeats from another node within the cluster.
Note
If you need more manual control over where a SCSI routing instance runs, you can turn off failover by
eligibility on a storage router. If a SCSI routing instance fails over to a storage router that is configured
with failover by eligibility turned off, it will continue running on that storage router unless there are no
mapped targets available or a critical resource is unavailable. Normal failover resumes when failover by
eligibility is turned back on for the storage router where the SCSI routing instance is running.
Creating a Cluster
A high availability cluster is composed of two SN 5428-2 Storage Routers (or one SN 5428-2 and one
SN 5428) that back each other up in case of failure. Storage routers in a cluster have connectivity to the
same hosts and storage systems, and are connected to each other through their management and HA
interfaces. Storage routers in a cluster must be running the same version of software.
The following configuration settings are shared cluster-wide, and when configured on the first storage
router in the cluster, will be shared with the other storage router that joins the cluster.
•
AAA authentication
•
Access lists
•
Administrator mode and Monitor mode passwords
•
Cluster name
•
SCSI routing instances
•
VLAN information (VID, VTP mode, domain name, etc.)
Cisco SN 5428-2 Storage Router Software Configuration Guide
10-2
78-15471-01
Chapter 10
Configuring a High Availability Cluster
Creating a Cluster
To create a cluster, you typically configure a principal storage router (including all cluster-wide
settings), and then add a new, unconfigured node or a minimally configured node to the cluster.
Note
A minimally configured storage router is one in which the management IP address, system name, and
optional network management interfaces have been configured. Other system information, such as HA
IP address, DNS, and NTP server may also have been configured. A minimally configured storage router
does not have any cluster-wide settings configured.
To create a cluster, perform the following steps:
Step 1
Respond to the prompts from the initial system configuration script, as described in Chapter 2,
“First-Time Configuration.” This script configures the following settings:
•
Management IP address
•
System name
•
HA configuration mode
•
Cluster name
•
HA IP address
When prompted to select HA configuration mode, choose clustered. When prompted for cluster name,
enter the name of the new cluster. At the end of the initial configuration script, the storage router
automatically reboots.
Step 2
When the storage router restarts, complete the system configuration using the setup wizard or other CLI
commands, as described in Chapter 2, “First-Time Configuration,” or Chapter 3, “Configuring System
Parameters,” or the web-based GUI.
Step 3
(Optional) If you are participating in Fibre Channel switched fabric zoning with the storage router,
complete the configuration for zoning using the procedures described in Chapter 5, “Configuring Fibre
Channel Interfaces.”
Step 4
Configure all desired SCSI routing instances and access lists, as described in Chapter 6, “Configuring
SCSI Routing.”
Step 5
Add another storage router to the cluster. To add a new, unconfigured SN 5428-2 to the cluster, follow
the additional steps in the “Adding an Unconfigured SN 5428-2 Storage Router” section.
To add a minimally configured SN 5428-2 to the cluster, follow the additional steps in the “Adding a
Minimally Configured SN 5428-2 Storage Router” section.
Cisco SN 5428-2 Storage Router Software Configuration Guide
78-15471-01
10-3
Chapter 10
Configuring a High Availability Cluster
Creating a Cluster
Adding an Unconfigured SN 5428-2 Storage Router
To add a new, unconfigured SN 5428-2 to the existing cluster, perform the following steps:
Step 1
Respond to the prompts from the SN 5428-2 initial system configuration script. When prompted to select
HA configuration mode, choose clustered. When prompted for cluster name, enter the name of the
existing cluster. At the end of the initial system configuration script, the storage router automatically
reboots.
Step 2
When the storage router restarts, it communicates with the other member of the cluster to obtain current
cluster configuration information. Once the storage router is completely restarted, verify the new cluster
configuration. Issue the show cluster command to verify the cluster name and confirm that the
SN 5428-2 is exchanging heartbeats with the other member of the cluster.
Step 3
To verify that both storage routers in the cluster include the same cluster configuration elements, issue
the following commands from the principal storage router in the cluster:
•
show aaa
•
show accesslist all
•
show scsirouter all from bootconfig
•
show vlan
•
show vtp
Issue the same commands from the SN 5428-2 just added to the cluster. The displays should be the same.
Step 4
Use the setup configuration wizard, other CLI commands, or the GUI to complete SN 5428-2
configuration. If you are participating in Fibre Channel switched fabric zoning with the storage router,
configure for zoning using the procedures described in Chapter 5, “Configuring Fibre Channel
Interfaces.”
Step 5
(Optional) Save any changes made to the configuration by issuing the appropriate save command with
the bootconfig keyword, which updates the bootable configuration for the SN 5428-2 and notifies all
storage routers in the cluster of the configuration changes.
Step 6
(Optional) To divide the workload between the storage routers in the cluster, you can manually fail over
selected SCSI routing instances using the failover scsirouter command. See Chapter 11, “Maintaining
and Managing the SN 5428-2 Storage Router,” for more information about failing over SCSI routing
instances.
Cisco SN 5428-2 Storage Router Software Configuration Guide
10-4
78-15471-01
Chapter 10
Configuring a High Availability Cluster
Creating a Cluster
Adding a Minimally Configured SN 5428-2 Storage Router
To add a minimally configured SN 5428-2 to an existing cluster, perform the following steps:
Step 1
Run the setup cluster configuration wizard.
•
When prompted to select HA configuration mode, choose clustered.
•
When prompted for cluster name, enter the name of the existing cluster.
•
When prompted, enter the HA IP address for the SN 5428-2. The HA interface for each storage
router in a cluster must be on the same IP subnet.
•
When prompted to retain or delete “scsirouter” instances, enter delete. Deleting means that any
existing SCSI routing instances will be deleted from this SN 5428-2. (Since this is a minimally
configured SN 5428-2, there should be no SCSI routing instances to delete.)
•
Enter yes to confirm your changes. The storage router automatically reboots.
Step 2
When the storage router restarts, it communicates with other member of the cluster to obtain current
cluster configuration information. Once the storage router is completely restarted, verify the new cluster
configuration. Issue the show cluster command to verify the cluster name and confirm that the
SN 5428-2 is exchanging heartbeats with the other member of the cluster.
Step 3
To verify that both storage routers in the cluster include the same cluster configuration elements, issue
the following commands from the principal storage router in the cluster:
•
show aaa
•
show accesslist all
•
show scsirouter all from bootconfig
•
show vlan
•
show vtp
Issue the same commands from the SN 5428-2 just added to the cluster. The displays should be the same.
Step 4
Complete additional system configuration of the SN 5428-2 just added to the cluster, as needed. For
example:
•
Use the setup netmgmt configuration wizard to configure the storage router for network
management via SNMP.
•
Use the setup time configuration wizard to configure the storage router date and time, and optional
NTP server information.
•
Use the CLI or GUI to configure CDP and logging.
•
If you are participating in Fibre Channel switched fabric zoning with the storage router, configure
for zoning using the procedures described in Chapter 5, “Configuring Fibre Channel Interfaces.”
Step 5
Save any changes to the configuration by issuing the appropriate save command with the bootconfig
keyword, which updates the bootable configuration for the SN 5428-2 and notifies all storage routers in
the cluster of the configuration changes.
Step 6
(Optional) To divide the workload between the storage routers in the cluster, you can manually fail over
selected SCSI routing instances using the failover scsirouter command. See Chapter 11, “Maintaining
and Managing the SN 5428-2 Storage Router,” for more information about failing over SCSI routing
instances.
Cisco SN 5428-2 Storage Router Software Configuration Guide
78-15471-01
10-5
Chapter 10
Configuring a High Availability Cluster
Joining Stand-alone Storage Routers in a Cluster
Joining Stand-alone Storage Routers in a Cluster
In some cases you may prefer to completely configure both storage routers (including SCSI routing
instances and access lists) as stand-alone systems before joining them into a cluster.
The following example explains the steps required to create a cluster named Cluster1, composed of two
SN 5428-2s named Sys1 and Sys2. This example assumes that both SN 5428-2s are fully configured with
SCSI routing instances and access lists. Use the scsirouter primary command to assign a preferred
storage router to any or all of the SCSI routing instances, if desired. See Chapter 6, “Configuring SCSI
Routing,” for more information about configuring SCSI routing instances.
To create a cluster from fully configured SN 5428-2s, perform the following steps:
Step 1
Use the setup cluster configuration wizard to define Sys1 as a member of the cluster Cluster1. When
prompted, enter retain to keep the access list and SCSI routing instance information already defined.
Step 2
Use the show cluster command to verify the cluster name after Sys1 reboots. Verify that all instances
and access lists are still available, using show scsirouter and show accesslist commands.
Step 3
(Optional) When Sys2 joins Cluster1, all cluster elements (access lists, VLANs, passwords and AAA
settings) currently configured on Sys2 will be deleted. If you want to make any of the cluster elements
currently configured on Sys2 available to the cluster, use the appropriate save command to save the
elements to a file. For example, to make any of the access lists currently configured on Sys2 available to
the cluster, use the save accesslist command to save the access lists to a file. The following command
saves all access lists to a file named Sys2_AccessLists:
[Sys2] save accesslist all Sys2_AccessLists
Step 4
(Optional) Because cluster elements can only be manipulated from the first storage router in a cluster,
the saved configuration file(s) from Sys2 must be made available to Sys1. See Chapter 11, “Maintaining
and Managing the SN 5428-2 Storage Router,” for more information about managing saved
configuration files using either the copy savedconfig command or FTP.
Step 5
Join Sys2 to the new cluster named Cluster1, using the setup cluster configuration wizard. When
prompted, enter retain to share the existing SCSI routing instances across the cluster.
Step 6
Use the show cluster command to verify the cluster name after Sys2 reboots. Verify that the defined
SCSI routing instances were retained, using show scsirouter command.
Step 7
(Optional) Restore the cluster elements (such as access lists) saved in Step 3 using the appropriate
restore from command. Cluster elements can only be manipulated from the first storage router in a
cluster, so these commands must be issued from the system Sys1. For example, to restore all access lists
from the configuration file named Sys2_AccessLists saved in Step 3:
[Sys1] restore accesslist all from Sys2_AccessLists
Note
Restoring AAA or VLAN information overwrites any existing information. You may prefer to make the
configuration modifications to the storage router currently in the cluster before adding the new member.
Step 8
(Optional) Save all configuration information on system Sys1 by issuing a save all bootconfig
command, which updates the bootable configuration of all storage routers in the cluster with the saved
cluster configuration elements.
Step 9
Verify that all SCSI routing instances are active using the show scsirouter stats command on both
storage routers.
Cisco SN 5428-2 Storage Router Software Configuration Guide
10-6
78-15471-01
Chapter 10
Configuring a High Availability Cluster
Changing Clusters
Changing Clusters
In some situations, you may need to move a storage router from one cluster to another cluster. Moving
a fully configured storage router from one cluster to another is more complex than simply adding it to a
cluster. Advanced planning is required.
To successfully move a storage router from one cluster to another, perform the following steps:
Step 1
Verify that the storage router to be moved has the same hardware configuration as the other storage router
in the cluster you are planning to join. Each node in the cluster must have connectivity to the same IP
hosts and Fibre Channel storage. All management interfaces and all HA interfaces for the storage routers
within a cluster must be on the same IP subnet; however, the management interfaces must be on a
different IP network than the HA interfaces.
Step 2
Decide if you need to retain any of the SCSI routing instances that are configured on the storage router
joining the cluster. Retaining data means all SCSI routing instances existing on the storage router joining
the cluster will be added to those already configured for the cluster. If the existing instances are not
retained, they are deleted.
Step 3
If you are going to retain data, determine if you have any duplicate SCSI routing instance names. When
a storage router is added to the cluster, the data in the cluster will overwrite the existing data. You may
prefer to change the configuration in the storage router before it joins the cluster to prevent this situation.
Step 4
If you are going to retain data, determine if you need to save existing access list information, or other
cluster elements (such as VLANs or AAA configuration). Cluster elements are not retained. Any access
lists, VLANs or AAA configuration on the storage router will be discarded when it joins the new cluster.
The storage router will also learn Administrator mode and Monitor mode passwords from the cluster.
You can save cluster elements, such as access list information, and then restore them to the cluster.
Cluster element information can be restored before or after the storage router joins the cluster by
transferring the saved configuration file to the first storage router in the cluster and performing the
appropriate restore functions.
Note
Restoring AAA or VLAN information overwrites any existing information. You may prefer to simply
make the appropriate configuration modifications to the storage router currently in the cluster before
adding the new member.
Step 5
Use the setup cluster configuration wizard to join the new cluster. Respond to the prompts to retain or
delete configuration as required. The storage router automatically reboots at the end of the configuration
wizard.
Step 6
Perform any additional configuration that may be needed. For example, you can fail over SCSI routing
instances to this new cluster member to balance traffic load between all storage routers in the cluster.
Step 7
After making configuration changes, use the save all command with the bootconfig keyword to copy
and save the storage router configuration, thereby updating the cluster.
Cisco SN 5428-2 Storage Router Software Configuration Guide
78-15471-01
10-7
Chapter 10
Configuring a High Availability Cluster
Changing Clusters
Cisco SN 5428-2 Storage Router Software Configuration Guide
10-8
78-15471-01
C H A P T E R
11
Maintaining and Managing the SN 5428-2
Storage Router
This chapter explains how to perform normal maintenance and management tasks associated with the
Cisco SN 5428-2 Storage Router. The following tasks are covered:
•
Prerequisite Tasks, page 11-2
•
Installing Updated Software, page 11-2
•
Backing Up System Configuration, page 11-7
•
Restoring from Backups, page 11-8
•
Powering Down the SN 5428-2 Storage Router, page 11-16
•
Resetting the System, page 11-17
•
Recovering Passwords, page 11-19
•
Controlling SCSI Routing Instances in a Cluster, page 11-20
•
Managing CDP on the SN 5428-2 Storage Router, page 11-27
•
Using Scripts to Automate Tasks, page 11-28
•
Using the SN 5428-2 Logging Facilities, page 11-29
•
Gathering Troubleshooting Information, page 11-33
SN 5428-2 Storage Router maintenance and management tasks can be performed using CLI commands,
as described in this chapter, or via the web-based GUI. To access the web-based GUI, point your browser
to the storage router’s management interface IP address. After logging on, click the Help link to access
online help for the GUI.
Note
Not all maintenance and management tasks are appropriate for all storage routers. For example, tasks
related to high availability clusters (such as failover of SCSI routing instances) are not necessary for
storage routers configured as standalone systems, or deployed for transparent SCSI routing or FCIP.
Cisco SN 5428-2 Storage Router Software Configuration Guide
78-15471-01
11-1
Chapter 11
Maintaining and Managing the SN 5428-2 Storage Router
Prerequisite Tasks
Prerequisite Tasks
Before performing any of the storage router maintenance tasks, make sure you have configured system
parameters as described in Chapter 2, “First-Time Configuration,” or Chapter 3, “Configuring System
Parameters.”
Note
Certain configuration tasks, such as identifying a location from which to download software, are optional
and may not have been performed during initial configuration. You may perform these tasks at any time,
via the CLI or the GUI. Where necessary, this chapter will identify the relevant tasks and commands.
Installing Updated Software
The SN 5428-2 Storage Router is designed to run on a continual basis without significant maintenance.
However, from time to time, you may need to install updated software.
The SN 5428-2 stores software images (along with configuration files, log files, and other information)
on a local file system. This file system is stored on an internal, non-volatile Flash disk. The
show software version all command displays a list of all software versions stored on the SN 5428-2 and
the amount of disk space available for additional software.
Cisco.com provides registered users access to SN 5428-2 Storage Router software updates. You can
download updated software directly to the SN 5428-2 from Cisco.com via standard HTTP, or via HTTP
using a proxy server. See the “Obtaining Technical Assistance” section on page xiii for details on using
Cisco.com.
You can also use a standard browser to download software updates and associated readme files from
Cisco.com to a location of your choosing. Using the CLI or the web-based GUI, you can then make the
software available from this location (known as the “download location”) to the storage router via HTTP,
HTTP using a proxy server, or Trivial File Transport Protocol (TFTP).
If you plan to use the CLI download software http or download software proxy commands to make
the updated software available to the storage router, the machine hosting the download location must be
running a web server.
If you plan to use the CLI download software tftp command, the machine must be accessible using the
Trivial File Transport Protocol.
If the machine is not running a web server or accessible via TFTP, use the web-based GUI to make the
updated software available to the storage router. (See the online Help for details.)
The download location used for retrieving updated SN 5428-2 software is set using the
software http url, software proxy url, or the software tftp commands. To view the download location
currently specified, use the show software version all command. The resulting display (Example 11-1)
identifies the HTTP URL, Proxy URL, and TFTP host name and other information used to identify the
download location, the current version of software running on the storage router, and the version that
will be used at system restart. In the example, all default locations and related user names and passwords
are set.
Cisco SN 5428-2 Storage Router Software Configuration Guide
11-2
78-15471-01
Chapter 11
Maintaining and Managing the SN 5428-2 Storage Router
Installing Updated Software
Example 11-1 Results of “show software version all” Command
[SN5428-2_A01]# show software version all
Version
-------------------3.3.0.23-K9
3.3.1-K9
Boot
---OK
OK
Hash
---OK
OK
Sign
---N/A
N/A
Crash
----0
0
Size
---------10101.0 KB
11102.0 KB
Date
--------------------Feb 25 11:38 CDT 2003
Feb 29 15:44 CDT 2003
Http Url: http://www.cisco.com
Http Username: SWAdmin01
Http Password: *********
Proxy Address:
Proxy Port:
Proxy Url:
Proxy Username:
Proxy Password:
10.1.12.32
3122
http://www.cisco.com
SWAdmin01
*********
Tftp Hostname: 10.1.1.122
Tftp Directory:
Software Space Available: 33264.0 KB
Current Version: 3.3.1-K9
Boot Version: 3.3.1-K9
To install updated SN 5428-2 software, perform the following steps:
Step 1
(Optional) Identify the location from which to retrieve the updated SN 5428-2 software. (This is either
Cisco.com or another download location of your choosing, as previously described.)
Step 2
Make the selected version of software available on the SN 5428-2 local file system.
Step 3
(Optional) Set the new version as the version to be booted during the next system restart, and reboot the
SN 5428-2.
Note
Always review the README file before making updated software available to the SN 5428-2.
Specifying the Location to Retrieve Updated Software
You must specify the location from which to retrieve updated software. If the current download location
is not appropriate, you can reset it.
Use the following procedures to specify the desired download location:
•
Using HTTP, page 11-4
•
Using Proxy Services, page 11-4
•
Using TFTP, page 11-4
When you are finished, verify the new settings using the show software version all command, then save
them using the save system bootconfig or save all bootconfig command.
Cisco SN 5428-2 Storage Router Software Configuration Guide
78-15471-01
11-3
Chapter 11
Maintaining and Managing the SN 5428-2 Storage Router
Installing Updated Software
Note
If you use the URL, http://www.cisco.com, as the default download location, the username and password
must be the same as your Cisco.com login ID and password.
Using HTTP
Use the following procedure to specify the HTTP download location.
Command
Description
Step 1
enable
Enter Administrator mode.
Step 2
software http url
http://10.1.11.32/software/sn5428-2
Configure the default download location. For example, set the
download location to http://10.1.11.32/software/sn5428-2.
Step 3
software http username webadmin
password webword
(Optional) Define the user name and password needed to access
the selected location. For example, specify user name
webadmin and password webword. If no user name and
password are required, use the keyword none (for example,
software http username none).
Using Proxy Services
Use the following procedure to specify a download location via proxy services.
Command
Description
Step 1
enable
Enter Administrator mode.
Step 2
software proxy url
http://www.mystoragenet.com
Configure the default download location. For example, set the
download location to http://www.mystoragenet.com.
Step 3
software proxy address
http://10.1.10.126 port 32
(Optional) Identify the address and port number of the proxy
server that will be used to access the URL specified in Step 3
(for example, http://10.1.10.126, port 32).
Step 4
software proxy username Ciscouser (Optional) Define the user name and password needed to access
password Ciscopswd
the selected download location. For example, specify user name
Ciscouser and password Ciscopswd. If no user name and
password are required, use the keyword none (for example,
software proxy username none).
Using TFTP
Use the following procedure to specify the TFTP download location.
Command
Description
Step 1
enable
Enter Administrator mode.
Step 2
software tftp hostname TFTPHost1 Configure the default download host and optional base
directory /myTFTP
directory. For example, set the host name to TFTPHost1 and the
base directory to /myTFTP.
Note
If the storage router is not configured to use the services
of a DNS, enter the IP address of the TFTP host. If the
base directory is tftpboot, omit the directory keyword.
Cisco SN 5428-2 Storage Router Software Configuration Guide
11-4
78-15471-01
Chapter 11
Maintaining and Managing the SN 5428-2 Storage Router
Installing Updated Software
Downloading Updated Software
The download software command makes a new version of software available to the storage router for
boot purposes. You can store two versions of software on the SN 5428-2. Before attempting to download
updated software, verify that only a single version of software exists on the storage router. If two
versions exist, use the delete software version command to delete the old version of software to make
room for the new version.
Use the following procedures to make a new version of software available to the storage router:
Note
•
Using HTTP, page 11-5
•
Using Proxy Services, page 11-5
•
Using TFTP, page 11-5
Before downloading software, issue the show system command and verify that there is sufficient free
space available. The software space available is shown in kilobytes; the size of the typical download is
between 25 and 30 MB.
Using HTTP
Use the following procedure to make a new version of software available to the SN 5428-2 via HTTP.
Command
Description
Step 1
enable
Enter Administrator mode.
Step 2
download software http version
3.3.1-K9
Download a new software version to the storage router (for
example, 3.3.1-K9).
Using Proxy Services
Use the following procedure to make a new version of software available to the SN 5428-2 via proxy
services.
Command
Description
Step 1
enable
Enter Administrator mode.
Step 2
download software proxy
version 3.3.1-K9
Make a new software version available to the storage router (for
example, 3.3.1-K9).
Using TFTP
Use the following procedure to make a new version of software available to the SN 5428-2 via TFTP.
Note
While the size of the software file may vary, it will exceed 16MB. Some older TFTP implementations
have a 16MB download limitation.
Cisco SN 5428-2 Storage Router Software Configuration Guide
78-15471-01
11-5
Chapter 11
Maintaining and Managing the SN 5428-2 Storage Router
Installing Updated Software
Command
Description
Step 1
enable
Enter Administrator mode.
Step 2
download software tftp version
3.3.1-K9
Make a new software version available to the storage router (for
example, 3.3.1-K9).
Downloading from a Special Location
There may be times when you need to make special software available to the storage router, for example,
under the guidance of a Cisco Technical Support professional.
If you isolate this software from standard updates by placing it in another location (not the default
download location), you could change the default download location, download the software, and then
reset the default download location.
An easier way, however, is to specify the download location as a parameter on the appropriate
download software command.
•
To download a file named 331-K9.tar from http://your.website.com/sn5428-2 via HTTP, issue this
command:
download software http url http://your.website.com/sn5428-2/331-K9.tar
•
To download a file named 331-K9.tar from http://your.website.com/sn5428-2 using the services of
a proxy server, issue this command:
download software proxy url http://your.website.com/sn5428-2/331-K9.tar
•
To download a file named 331-K9.tar from my_tftpHost using TFTP, issue this command. The
321-K9.tar file must reside in the default base directory defined for the TFTP host.
download software tftp hostname my_tftpHost filename 331-K9.tar
Setting Updated Software as Boot Version
Downloading updated software to the storage router does not change the currently running version of the
software, nor does it automatically set the new version to be booted at next system restart. You must take
specific action to make the new software version bootable.
Setting software as the bootable version consists of verifying the software integrity and performing
internal checks to ensure that the storage router can boot the specified version of software.
Use the following procedure to set the new software as the version to be booted.
Command
Description
Step 1
enable
Enter Administrator mode.
Step 2
software version 3.3.1-K9
Select the software to be booted when the system next starts (for
example, boot 3.3.1-K9 when the system restarts). The system
checks the integrity of the specified software version to be sure
that it is bootable.
Cisco SN 5428-2 Storage Router Software Configuration Guide
11-6
78-15471-01
Chapter 11
Maintaining and Managing the SN 5428-2 Storage Router
Backing Up System Configuration
Command
Description
Step 3
show software version boot
Verify that the correct version is shown as the bootable version
(identified as Boot Version).
Step 4
reboot
When you are ready to run the new software version, restart the
storage router.
Precautions for Cluster Environments
In a cluster environment, the software version command may temporarily suspend normal HA
communications, while internal checks are made to ensure that the new software can be run. A
suspension will cause a failover of any SCSI routing instances active on the storage router.
Any instances with the primary attribute set to the name of the SN 5428-2 will resume running on the
storage router after it is rebooted or after normal HA communications are restored.
If the storage router is running in a cluster environment, issuing the reboot command will attempt
failover for all SCSI routing instances to another storage router in the cluster. The iSCSI drivers handle
reconnection of users to the appropriate storage resources, minimizing the effects of the reboot sequence
on those users.
Backing Up System Configuration
Backing up the system configuration consists of saving selected storage router configuration information
to XML files that can be stored both locally and remotely. Should problems occur, AAA authentication
information, access lists, Fibre Channel (FC) interface and switch configuration, SCSI routing instances,
FCIP instances, VLANs and other storage router system configuration information can be restored from
these files. See Chapter 12, “Command Line Interface Reference,” for more information about what
configuration data is saved.
While you can issue a save command at any time during a CLI command session, best practices suggest
that you should back up the storage router system configuration to a file on a regular basis.
Configuration files are maintained in the savedconfig directory on the SN 5428-2. You can use the copy
command to copy the configuration file to a server running TFTP, allowing you to integrate the storage
router backups with other software archives.
By accessing the web-based GUI from a remote server, you can create storage router backup files
directly on that server. See the GUI online help for details.
Note
See Chapter 12, “Command Line Interface Reference,” for more information about using the save and
copy commands.
Creating Local Backups
Local backups allow you to store the resulting XML configuration file in the savedconfig directory on
the SN 5428-2.
Use the following procedure to perform a local backup that saves the storage router system configuration
to a file named mybackup in the savedconfig directory.
Cisco SN 5428-2 Storage Router Software Configuration Guide
78-15471-01
11-7
Chapter 11
Maintaining and Managing the SN 5428-2 Storage Router
Restoring from Backups
Command
Description
Step 1
enable
Enter Administrator mode.
Step 2
save system mybackup
Save the storage router system configuration information to a file
named mybackup.
Storing Backups to a Remote TFTP Server
Use the following procedure to create a backup configuration file named backup1 and to copy that
backup file to another file named back1.temp, located on the TFTP host, tftpserver1, in the default
directory, /tftpboot.
Command
Description
Step 1
enable
Enter Administrator mode.
Step 2
save all backup1
Save the current running configuration to a file called backup1 in
the savedconfig directory.
Step 3
copy savedconfig:backup1
tftp://tserver1/back1.temp
Copy the saved configuration file, backup1, to a file called
back1.temp, located on the TFTP server, tserver1, in the default
directory.
Note
The back1.temp file must already exist in the default
directory with the appropriate permissions that allow it to
be overwritten. You cannot create a new file using TFTP.
Restoring from Backups
AAA authentication information, access lists, FC interface and switch configuration, SCSI routing
instances, FCIP instances, VLANs, and selected system configuration data can be restored from
previously saved configuration files. You may choose to restore selected data such as a specific SCSI
routing or FCIP instance, or all available configuration data, using the restore command with the from
keyword.
The file from which configuration is restored must reside in the savedconfig directory
(/ata3/savedconfig). If you need to restore configuration data from a backup file existing elsewhere in
the network, use the copy command to make the desired file available in the savedconfig directory.
Restoring configuration data copies all or part of the contents of the specified file into persistent
memory; it does not always change the storage router's running configuration. For example, the
configuration of a restored SCSI routing instance may only be completely visible via the
show scsirouter command using the from bootconfig keywords until the instance has been restarted. A
restored FCIP instance, however, is automatically enabled and the storage router running configuration
is updated.
Note
The configuration information available for restoration depends on the deployment of the SN 5428-2
Storage Router.
Restoring a Deleted SCSI Routing Instance
For example, suppose the SCSI routing instance, scsi1, was inadvertently deleted. Use the following
procedure to restore scsi1 from a configuration file that was saved to a URL.
Cisco SN 5428-2 Storage Router Software Configuration Guide
11-8
78-15471-01
Chapter 11
Maintaining and Managing the SN 5428-2 Storage Router
Restoring from Backups
Command
Description
Step 1
enable
Enter Administrator mode.
Step 2
copy http://10.1.1.44/~s1/back1
savedconfig:scsi1_restore
Copy the specified configuration file from the designated URL
and place it in the savedconfig directory, using the file name,
scsi1_restore.
Step 3
show savedconfig
Verify that the imported file now exists in the savedconfig
directory.
Step 4
show scsirouter all from
scsi1_restore
Verify that the SCSI routing instance exists in this
configuration file.
Step 5
restore scsirouter scsi1 from
scsi1_restore
Restore the SCSI routing instance from the specified file.
Step 6
show scsirouter scsi1 from
bootconfig
Display the restored SCSI routing instance to verify that the
configuration is as expected.
Step 7
scsirouter scsi1 enable
Start the restored SCSI routing instance, updating the running
configuration of the storage router. Once the instance has been
restored and restarted, modifications to its configuration can
also be made.
Step 8
save scsirouter scsi1 bootconfig
(Optional) If changes are made to the SCSI routing instance
configuration, save the SCSI routing instance to the storage
router bootable configuration.
Restoring an Existing SCSI Routing Instance
If you need to restore the configuration of a SCSI routing instance that is still active in the storage router,
you must stop the instance, restore the configuration from the selected file, and then restart the instance.
For example, use the following procedure to restore the SCSI routing instance, scsi2, from the file,
scsi2_backup.
Command
Description
Step 1
enable
Enter Administrator mode.
Step 2
show scsirouter scsi2 brief
Display current status of the SCSCI routing instance. If the
status is active, proceed with Step 3 to stop the instance.
Otherwise, continue with Step 4.
Step 3
no scsirouter scsi2 enable
(Optional) Disable an active SCSI routing instance. You
cannot restore an active instance.
Step 4
show scsirouter all from
scsi2_backup
(Optional) Verify that the instance saved in the configuration
file is the one you want to restore. The named configuration
file must exist in the savedconfig directory.
Step 5
restore scsirouter scsi2 from
scsi2_backup
Restore the SCSI routing instance.
Step 6
show scsirouter scsi2 from
bootconfig
Confirm that the configuration of the SCSI routing instance is
now correct.
Step 7
scsirouter scsi2 enable
Restart the SCSI routing instance.
Cisco SN 5428-2 Storage Router Software Configuration Guide
78-15471-01
11-9
Chapter 11
Maintaining and Managing the SN 5428-2 Storage Router
Restoring from Backups
Command
Description
Step 8
show scsirouter scsi2
(Optional) Verify the configuration of the restored and
restarted SCSI routing instance. The running configuration
should now match the restored permanent configuration. Once
the instance has been restored and restarted, modifications to
its configuration can also be made.
Step 9
save scsirouter scsi2 bootconfig
(Optional) If changes are made to the SCSI routing instance
configuration, save the restored SCSI routing instance to the
storage router bootable configuration.
Restoring a Deleted FCIP Instance
For example, suppose the FCIP instance, fcip1, was inadvertently deleted. Use the following procedure
to restore fcip1 from a configuration file named fcip1_backup.
Command
Description
Step 1
enable
Enter Administrator mode.
Step 2
show fcip all from fcip1_backup
(Optional) Verify that the FCIP instance exists in this
configuration file. The configuration file must exist in the
savedconfig directory.
Step 3
restore fcip all from fcip1_backup
Restore the FCIP instance from the specified file.
Step 4
show fcip fcip1
(Optional) Display the restored FCIP instance to verify that the
configuration is as expected.
Restoring an Existing FCIP Instance
If you need to restore the configuration of an FCIP instance that is still active in the storage router, you
must stop the instance and then restore the configuration from the selected file. The restore process starts
the instance. For example, use the following procedure to restore the FCIP instance, fcip2, from the file
fcip2_backup.
Command
Description
Step 1
enable
Enter Administrator mode.
Step 2
no fcip fcip2 enable
Disable the active FCIP instance. You cannot restore an active
instance.
Step 3
show fcip fcip2 from fcip2_backup (Optional) Verify that the FCIP instance exists in this
configuration file. The configuration file must exist in the
savedconfig directory.
Step 4
restore fcip fcip2 from
fcip2_backup
Restore the FCIP instance from the specified file.
Step 5
show fcip fcip2
(Optional) Display the restored FCIP instance to verify that the
configuration is as expected.
Cisco SN 5428-2 Storage Router Software Configuration Guide
11-10
78-15471-01
Chapter 11
Maintaining and Managing the SN 5428-2 Storage Router
Restoring from Backups
Restoring AAA Authentication Information
When you restore AAA authentication information, the following configuration settings are updated:
•
AAA authentication lists
•
The user names and passwords in the local username database
•
Radius servers, server groups, and associated server, group and global authentication port,
retransmit, time-out, deadtime and key values
•
TACACS+ servers, server groups, and associated server and global authentication port, time-out,
and key values.
Use the following procedure to restore the AAA authentication configuration that exists in the saved
configuration file aaa_backup.
Note
In a cluster environment, AAA configuration functions are handled by a single node in the cluster. If you
issue an AAA command from a storage router that is not performing AAA configuration functions, the
CLI displays an informational message with the name of the storage router that is currently handling
those functions.
Command
Description
Step 1
enable
Enter Administrator mode.
Step 2
show savedconfig aaa_backup
Display the contents of the backup file, and verify that this is the
AAA authentication configuration that you want to restore. The
file must exist in the savedconfig directory.
Step 3
restore aaa from aaa_backup
Restore the AAA authentication from the saved configuration file.
Step 4
show aaa
Display the AAA authentication information and verify that it is
now correct.
Step 5
save aaa bootconfig
(Optional) If you make any changes to the restored AAA
authentication configuration, save the changed configuration to
the storage router bootable configuration.
Restoring an Access List
When you restore an access list, existing entries are never deleted. The restore will add missing entries
and overwrite entries of the same name, but will never purge or delete existing entries. If necessary, you
can delete an entire access list and then restore if from a saved configuration file.
Use the following procedure to restore the access list named mylist from the file named
accesslist_backup.
In this example, the access list named mylist in the running configuration contains the following entries:
•
10.1.1.30/32
•
172.16.255.220/32
•
chap-username 12h7b.lab2.webservices
•
chap-username 12784.lab1.webservices
Cisco SN 5428-2 Storage Router Software Configuration Guide
78-15471-01
11-11
Chapter 11
Maintaining and Managing the SN 5428-2 Storage Router
Restoring from Backups
The saved access list in the configuration file named accesslist_backup, contains these entries:
Note
•
209.165.200.225/32
•
10.1.1.30/32
•
chap-username 12h7b.lab2.webservices
•
chap-username test2.sys3
In a cluster environment, access lists management functions are handled by a single node in the cluster.
If you issue an access list command from a storage router that is not performing access list management
functions, the CLI displays an informational message with the name of the storage router that is currently
handling those functions.
Command
Description
Step 1
enable
Enter Administrator mode.
Step 2
show accesslist mylist
Display the current entries associated with the access list.
Step 3
show accesslist mylist from
accesslist_backup
Display the entries associated with the access list saved in the
configuration file. The configuration file must exist in the
savedconfig directory.
Step 4
restore accesslist mylist from
accesslist backup
Restore the access list entries from the saved configuration file.
Step 5
show accesslist mylist
Display the entries for the restored access list. The entries are:
Step 6
save accesslist mylist
bootconfig
•
10.1.1.30/32
•
172.16.255.220/32
•
209.165.200.225/32
•
chap-username 12h7b.lab2.webservices
•
chap-username 12784.lab1.webservices
•
chap-username test2.sys3
(Optional) If any entries prior to the restore were not saved, issue
the save command to save the current access list configuration to
the storage router bootable configuration.
Restoring Fibre Channel Interface and Switch Configuration
You can restore zoning information and both global and interface-specific FC configuration information.
You can restore the following settings:
•
Global FC settings, including time out values and domain ID
•
FC interface configuration, including link speed and port type settings, for all FC interfaces
•
All alias, zone and zone set configuration
Use the following procedure to restore all saved global and FC interface configuration information. In
this example, the global and interface-specific FC configuration information will be restored from the
saved configuration file named fcswitch_backup.
Cisco SN 5428-2 Storage Router Software Configuration Guide
11-12
78-15471-01
Chapter 11
Maintaining and Managing the SN 5428-2 Storage Router
Restoring from Backups
Note
Restoring global FC settings, such as the domain ID, in an operational fabric may cause traffic
disruptions.
Command
Description
Step 1
enable
Enter Administrator mode.
Step 2
no interface fc1 enable
(Optional) Remove the storage router from the switched fabric by
disabling all FC interfaces operating as E_Ports. For example,
disable the FC interfaces fc1 and fc4.
no interface fc4 enable
Step 3
show savedconfig
fcswitch_backup
Display the contents of the saved configuration file and verify that
this is the FC configuration information that you want to restore
(Example 11-2). The file must exist in the savedconfig directory.
Step 4
restore fcswitch all from
fcswitch_backup
Restore all FC configuration information from the saved
configuration file.
Note
Step 5
show fcswitch
show interface all
Step 6
interface fc1 enable
interface fc4 enable
Step 7
save fcswitch bootconfig
Zoning information is not restored with a
restore fcswitch all command. You must explicitly enter a
restore fcswitch zones command to restore the zoning
database. See Chapter 12, “Command Line Interface
Reference,” for more information about restoring zones.
Display all FC configuration information and verify that it is
correct.
(Optional) Rejoin the switched fabric by enabling the FC
interfaces operating as E_Ports. Any relevant changes to the FC
configuration, such as the domain ID, will be propagated to the
fabric. For example, enable the FC interfaces fc1 and fc4.
(Optional) If you make any changes to the restored FC
configuration, save the changed configuration to the storage router
bootable configuration.
Example 11-2 Show FC Configuration from Saved Configuration File
!
! FC SWITCH
!
fcswitch ratov 10000
fcswitch edtov 2000
fcswitch dstov 5000
fcswitch fstov 1000
fcswitch zoning default all
fcswitch zoning autosave enable
fcswitch zoning merge SW2
fcswitch domainid 1 force
no fcswitch domainid lock enable
fcswitch interop-credit 12
!
...
Cisco SN 5428-2 Storage Router Software Configuration Guide
78-15471-01
11-13
Chapter 11
Maintaining and Managing the SN 5428-2 Storage Router
Restoring from Backups
! FC PORTS
!
interface fc1 enable
interface fc1 ms-enable enable
no interface fc1 al-fairness enable
interface fc1 fan-enable enable
interface fc1 ext-credit 0
interface fc1 mfs-bundle enable timeout 10
interface fc1 linkspeed auto
interface fc1 type gl-port
!
...
!
interface fc8 enable
interface fc8 ms-enable enable
no interface fc8 al-fairness enable
interface fc8 fan-enable enable
interface fc8 ext-credit 0
interface fc8 mfs-bundle enable timeout 10
interface fc8 linkspeed auto
interface fc8 type gl-port
Restoring VLANs
You can restore specific VLANs or all VLANs. When you restore a VLAN, the VTP mode is also
restored.
Use the following procedure to restore a VLAN. In this example, VLAN 10 (named TestLab) will be
restored from the saved configuration file named VLAN_backup.
Note
In a cluster environment, VLAN management functions are handled by a single node in the cluster. If
you issue a VLAN command from another storage router in the cluster, the CLI displays an informational
message with the name of the storage router that is currently handling those functions.
Command
Description
Step 1
enable
Enter Administrator mode.
Step 2
show vlan 10 from VLAN_backup Verify that the saved configuration file contains the VLAN
configuration information that you want to restore.
Step 3
restore vlan 10 from
VLAN_backup
Restore VLAN 10 from the saved configuration file.
Step 4
show vlan
Verify that the VLAN is restored and the configuration is correct.
Step 5
show vtp
Verify that the VTP configuration is correct.
Step 6
save vlan 10 bootconfig
(Optional) If you make any configuration changes to the VLAN
after restoration, save the changes to the storage router bootable
configuration.
Cisco SN 5428-2 Storage Router Software Configuration Guide
11-14
78-15471-01
Chapter 11
Maintaining and Managing the SN 5428-2 Storage Router
Restoring from Backups
Restoring System Configuration
You can restore selected system information using the restore system command. You can restore the
following information:
•
Administrator contact settings
•
CDP configuration
•
DNS configuration
•
IP address of remote syslog host
•
NTP server and date, time, and time zone settings
•
Restrict service setting for all interfaces
•
Session timeout value for management sessions
•
Event message logging table
•
Routing table and RIP settings
•
SNMP network management configuration
•
Software default download locations and associated user names and passwords
•
Secure Shell (SSH) configuration settings and session timeout value
Use the following procedure to restore system configuration information. In this example, SNMP
network management configuration and administrator contact settings will be restored from the saved
configuration file named system_backup.
Command
Description
Step 1
enable
Enter Administrator mode.
Step 2
show savedconfig system_backup Display the contents of the saved configuration file and verify that
the file contains the information that you want to restore.
Step 3
restore system snmp from
system_backup
Restore SNMP network management configuration.
Step 4
show snmp
Verify that the SNMP network management information is
restored and that the configuration is correct (Example 11-3).
Step 5
restore system contactinfo from
system_backup
Restore administrator contact settings.
Step 6
show admin
Verify that the administrator contact information is restored and
that the configuration is correct (Example 11-4).
Step 7
save system bootconfig
(Optional) If you make any changes to the SNMP configuration or
administrator contact information after the restoration, save the
changes to the storage router bootable configuration.
Cisco SN 5428-2 Storage Router Software Configuration Guide
78-15471-01
11-15
Chapter 11
Maintaining and Managing the SN 5428-2 Storage Router
Powering Down the SN 5428-2 Storage Router
Example 11-3 Verify SNMP Configuration
[SN5428-2_PR1]# show snmp
First Trap Host: 10.1.32.200
Second Trap Host: 10.2.12.242
Get Community String: public
Set Community String: private
Send Authentication Traps: enabled
Send Entity FRU Traps: enabled
Link Up/Down Enable for mgmt: enabled
Link Up/Down Enable for ha: enable
Link Up/Down Enable for fc1: enabled
Link Up/Down Enable for fc2: enabled
Link Up/Down Enable for fc3: enabled
Link Up/Down Enable for fc4: enabled
Link Up/Down Enable for fc5: enabled
Link Up/Down Enable for fc6: enabled
Link Up/Down Enable for fc7: enabled
Link Up/Down Enable for fc8: enabled
Link Up/Down Enable for ge1: enabled
Link Up/Down Enable for ge2: enabled
System location is: Test lab
Example 11-4 Verify Administrator Contact Information
[SN5428-2_PR1]# show admin
Administrator Contact Information
Name: Pat Hurley
Email: phurley@abc123z.com
Phone: 123.456.7890
Pager: 123.456.3444 pin 2234
Powering Down the SN 5428-2 Storage Router
If you need to make changes to the physical location or cabling of the storage router, you may need to
schedule a time to power down the unit.
Use the following procedure to properly power down a storage router. These steps assure that the file
system is in the appropriate state prior to shutdown.
Command
Description
Step 1
enable
Enter Administrator mode.
Step 2
halt
Respond to any prompts to save information as desired. The
SN 5428-2 can be safely powered down when the [HALTED]#
command prompt appears.
Cisco SN 5428-2 Storage Router Software Configuration Guide
11-16
78-15471-01
Chapter 11
Maintaining and Managing the SN 5428-2 Storage Router
Resetting the System
Resetting the System
There may be times when you need to return some or all of the storage router configuration to factory
defaults, for example, when moving a system between environments (such as test and production) or for
troubleshooting purposes.
To reset the SN 5428-2 Storage Router, perform the following steps:
Step 1
(Optional) Save existing configuration information to a file.
Step 2
Clear the current configuration and restore some or all factory defaults, using the clear conf command.
Note
If the SN 5428-2 is operating in a cluster environment, any SCSI routing instances running on
this storage router fail over to another storage router in the cluster. If you are operating in a
cluster environment but do not want SCSI routing instances to fail over, issue the
no scsirouter enable command for all instances (or selected instances that should not fail over)
before you issue the clear conf command. (This will permanently delete the SCSI routing
instances from the cluster.) See “Controlling SCSI Routing Instances in a Cluster” for more
information about operating the SN 5428-2 in a cluster environment.
Step 3
(Optional) Run the initial configuration script to configure the management interface and other required
parameters via an EIA/TIA-232 console connection.
Step 4
Restore specific configuration information or reconfigure the storage router using CLI commands or the
web-based GUI.
Reset All to Factory Defaults
The following procedure clears the storage router and returns most settings to factory defaults. For
example, use this procedure if an existing storage router is to be physically moved to another
environment, and it is not necessary to retain any current configuration information, because the system
setup will be completely different.
Command
Description
Step 1
enable
Enter Administrator mode.
Step 2
clear conf
Clear the current system configuration, including network
management information.
or
clear conf all cisco
If the storage router is deployed for SCSI routing, you can use the
clear conf wizard. At the prompt, enter the Administrator
password. Enter all to erase system configuration and management
port settings, and all saved configurations and SCSI routing
instances (Example 11-5).
If the storage router is deployed for transparent SCSI routing or
FCIP, enter the clear conf all command, followed by the
Administrator password (for example, cisco). This command is
also available in storage routers deployed for SCSI routing.
After either command completes, the storage router automatically
reboots.
Cisco SN 5428-2 Storage Router Software Configuration Guide
78-15471-01
11-17
Chapter 11
Maintaining and Managing the SN 5428-2 Storage Router
Resetting the System
After the move, use the EIA/TIA-232 console connection to configure the management interface IP
address and other required system information. Then continue configuration of the storage router via the
setup configuration wizards or other CLI commands, or via the web-based GUI.
See Chapter 2, “First-Time Configuration,” for more information about initial system configuration.
Example 11-5 Reset SN 5428-2 Storage Router Configuration
Enter admin password: *****
This process can restore factory default settings for the SN5428-2.
* Select "apps" to remove active applications and retain system
configuration settings.
* Select "system" to remove active applications and system
configuration settings.
* Select "saved" to remove all backup configurations from disk.
* Select "all" to remove active applications, system configuration,
and saved configurations.
The system configuration includes the management port, dns, admin and
monitor login, ntp, and snmp. You will need to use the console
to reconfigure the management port if you erase the system configuration.
The system will reboot if you select "apps", "system", or "all".
Erase what? [apps/system/saved/all/cancel (cancel)]
Reset and Retain System Settings
If the storage router is deployed for SCSI routing, you can clear the current configuration but retain the
existing system configuration. The following procedure retains the system configuration and saved
configuration files over the system reset. For example, use this procedure if you need to use an existing
storage router for testing purposes and then restore its current configuration.
Command
Description
Step 1
enable
Enter Administrator mode.
Step 2
save all myfile
Save all configuration information in a file called myfile. This file
is stored in the savedconfig directory.
Step 3
clear conf
Clear the current configuration but retain system information
(such as management and HA interfaces, logging table, DNS,
Administrator and Monitor passwords, NTP server, and SNMP
information) and saved configuration files.
At the prompt, enter the Administrator password. Enter apps to
retain system configuration settings. After the command
completes, the storage router automatically reboots.
Perform the required user testing. When finished, continue with
Step 4 to restore the original configuration.
Step 4
restore all from myfile
Restore original configuration, which was retained over the
clear conf command.
Step 5
reboot
Reboot to restore the original application configuration into
running memory.
Cisco SN 5428-2 Storage Router Software Configuration Guide
11-18
78-15471-01
Chapter 11
Maintaining and Managing the SN 5428-2 Storage Router
Recovering Passwords
Reset to Remove Saved Configuration Files
The following procedure removes previously saved configuration files from the storage router. The
system configuration, management information, and SCSI routing instances remain unchanged. For
example, use this procedure if a stand-alone storage router has joined a cluster and adopted the new
cluster’s configuration.
Command
Description
Step 1
enable
Enter Administrator mode.
Step 2
clear conf
Remove all saved configuration files from the savedconfig
directory.
At the prompt, enter the Administrator password. Enter saved to
retain system configuration settings.
All files are removed from the savedconfig directory. After the
command completes, the system prompt displays. (The storage
router does not reboot.)
Step 3
show savedconfig
Note
You can also use the delete savedconfig command to delete selected saved configuration files from the
savedconfig directory. The delete savedconfig command is available regardless of deployment option.
Verify that all files have been removed from the savedconfig
directory.
Recovering Passwords
The storage router management interface is password protected. You must enter passwords when
accessing the storage router for management purposes via Telnet, SSH or the web-based GUI. Password
protection can also be enabled for the console interface, thereby requiring that the same Administrator
and Monitor mode passwords that are configured for the management interface be applied to the console
interface.
If the passwords have been enabled for the console interface and are lost, you can recover management
access to the storage router using the password recovery procedure. The password recovery procedure
requires physical access to the storage router console and can be found at the following URL:
http://www.cisco.com/warp/public/474/
Cisco SN 5428-2 Storage Router Software Configuration Guide
78-15471-01
11-19
Chapter 11
Maintaining and Managing the SN 5428-2 Storage Router
Controlling SCSI Routing Instances in a Cluster
Controlling SCSI Routing Instances in a Cluster
It is important to know where SCSI routing instances are running. While automatic failover capabilities
keep the high availability cluster operational in times of system difficulties, manual HA controls provide
the ability to distribute SCSI routing instances between the storage routers in a cluster to meet your
specific network requirements.
The following are typical activities involved with controlling SCSI routing instances in a cluster
environment. While most of these activities are performed infrequently, some (such as viewing
operational statistics) may be performed on a regular basis.
•
Making Changes to Instance Configurations, page 11-20
•
Enabling and Disabling Connections, page 11-21
•
Stopping & Starting Instances, page 11-23
•
Viewing Operational Statistics, page 11-23
•
Handling Failover, page 11-23
Making Changes to Instance Configurations
Note
To assure that changes are correctly propagated to all storage routers within a cluster, always modify the
configuration of a SCSI routing instance from the node where the instance is currently active.
From time to time, you will make changes to the SCSI routing instance configurations. Changes include
such actions as adding or deleting a target, adding or deleting a LUN, remapping a target, or modifying
access. It is important to understand the ramifications of these changes on the IP hosts accessing the
associated storage resources.
For example, changing the instance configuration may change the device presentation to the IP host,
effectively changing the name or number assigned to the device by the host operating system. Certain
instance configuration changes, such as adding or deleting targets, adding or deleting LUNs within a
particular target, or adding or deleting entire instances may change the order of the devices presented to
the host. Even if the host is only associated with one SCSI routing instance, the device order could make
a difference.
Typically, the IP host operating system assigns drive identifications in the order they are received based
on certain criteria. For example, a Linux system assigns drive identifications in the order they are
received based on host, bus, target, and LUN information. Changing the order of the storage discovery
may result in a changed drive identification. Applications running on the host may require modification
to appropriately access the current drives.
Other actions, such as deleting a named target and subsequently remapping that target using the same
target name, result in a change to the iSCSI Name associated with the device. This also causes device
presentation difficulties for the IP host.
If an entire SCSI routing instance is removed, or there are no targets available for the host, the host’s
iSCSI driver configuration file must be updated to remove the appropriate reference before restarting the
iSCSI driver. If a host’s iSCSI configuration file contains a reference to an instance which does not exist
or has no targets available for the host, the iSCSI driver will not complete a login and will not discover
targets associated with any SCSI routing instance.
Cisco SN 5428-2 Storage Router Software Configuration Guide
11-20
78-15471-01
Chapter 11
Maintaining and Managing the SN 5428-2 Storage Router
Controlling SCSI Routing Instances in a Cluster
For additional information and recommended procedures for changing iSCSI driver configuration, see
the iSCSI driver readme and example configuration files. You can access the latest iSCSI drivers and
readme and example configuration files from Cisco.com.
Enabling and Disabling Connections
A SCSI routing instance becomes active, by default, once it is associated with a Gigabit Ethernet
interface to IP hosts. Each target that is added to an instance is also, by default, enabled. However, no IP
hosts can connect or log in to that target because the target has no access list associations. Once you
associate an access list with a target, it is automatically enabled; the IP hosts specified by access list
entries are allowed to connect or log in to the target.
Use the no scsirouter target enable command to control access to the target without changing the
access list associations or stopping the entire SCSI routing instance. Existing connections and logins are
not affected, but future connections and logins are prohibited. Use the scsirouter target enable
command when you are ready to allow connections and logins again.
For example, suppose you have a problem with an entry in the access list, webserver2. This access list
is associated with the target, webstorage2, which is, in turn, associated with the SCSI routing instance
foo.
Use the following procedure to temporarily disable access to the target associated with a problem access
list.
Command
Description
Step 1
enable
Enter Administrator mode.
Step 2
show scsirouter foo stats
Display status to confirm the SCSI routing instance, foo, is active
on this storage router.
Step 3
show scsirouter foo
Verify the name and current status of the target and access list. The
target, webstorage2, should be associated with the webserver2
access list and the target should be enabled. (Example 11-6.)
Step 4
no scsirouter foo
target webstorage2 enable
Disable access to the target, webstorage2. (Example 11-7.)
Cisco SN 5428-2 Storage Router Software Configuration Guide
78-15471-01
11-21
Chapter 11
Maintaining and Managing the SN 5428-2 Storage Router
Controlling SCSI Routing Instances in a Cluster
Example 11-6 Verify Target, Access List, and Target Status
[SN5428-2_PR1]# show scsirouter foo
SCSI Router Information
Status Codes: A=active, I=inactive, C=create failed, D=not enabled, S=slave
CDB
Reserve Pass Lun
Router
Stat Retry Proxy
Thru Reset Description
-------------------- ---- ----- -------- ---- ----- ----------foo
A
6
disabled no
no
test iSCSI
SCSI Router Authentication Information
Router
Authentication Username
Password
-------------------- --------------- --------------- -------foo
none
none
none
Router
ServerIf
Vlan Vid IP/Netmask
Secondary TCP Port SLP
---------- ---------- -------- -------------------------------- ---------- -------- --foo
ge2
10.1.0.45/24
none
3260
ON
Target Attribute Information
Accesslist Accesslist
Router
Target
Status
Read-Write Read-Only Profile CRC
Description
---------- ---------------- -------- ---------- ---------- ------- ---------- ----------foo
webstorage2
enabled webserver2 none
High
prefer-off Web Storage
Target Attribute Information
Example 11-7 Verify New Target Status
[SN5428-2_PR1]# show scsirouter foo
SCSI Router Information
Status Codes: A=active, I=inactive, C=create failed, D=not enabled, S=slave
CDB
Reserve Pass Lun
Router
Stat Retry Proxy
Thru Reset Description
-------------------- ---- ----- -------- ---- ----- ----------foo
A
6
disabled no
no
test iSCSI
SCSI Router Authentication Information
Router
Authentication Username
Password
-------------------- --------------- --------------- -------foo
none
none
none
Router
ServerIf
Vlan Vid IP/Netmask
Secondary TCP Port SLP
---------- ---------- -------- -------------------------------- ---------- -------- --foo
ge2
10.1.0.45/24
none
3260
ON
Target Attribute Information
Accesslist Accesslist
Router
Target
Status
Read-Write Read-Only Profile CRC
Description
---------- ---------------- -------- ---------- ---------- ------- ---------- ----------foo
webstorage2
disabled webserver2 none
High
prefer-off Web Storage
Cisco SN 5428-2 Storage Router Software Configuration Guide
11-22
78-15471-01
Chapter 11
Maintaining and Managing the SN 5428-2 Storage Router
Controlling SCSI Routing Instances in a Cluster
Stopping & Starting Instances
If the storage router is experiencing a problem with a specific set of IP hosts or storage resources, you
may wish to stop the associated SCSI routing instance from running anywhere in the cluster. The
no scsirouter enable command causes the specified SCSI routing instance to cease running on the
SN 5428-2, but does not cause a failover to another storage router in the cluster. This command
effectively stops an instance from running anywhere in the cluster.
Once a SCSI routing instance has been stopped, it can be re-activated by issuing the scsirouter enable
command. The scsirouter enable command must be issued from the same storage router as the
no scsirouter enable command.
When a SCSI routing instance is stopped, its configuration information is removed from the bootable
configuration of all cluster nodes, except for the storage router from which the command was issued. See
Chapter 12, “Command Line Interface Reference,” for more information about the no scsirouter enable
command.
Viewing Operational Statistics
Use the show scsirouter stats command to see access and connection information, such as the number
of active connections and the number of logins that have occurred since the storage router was last
restarted (or since statistics were last cleared).
For example, the show scsirouter stats command in Example 11-8 shows that SCSI routing instance,
foo, is currently active.
Example 11-8 Results of “show scsirouter stats” Command
[SN5428-2_PR1]# show scsirouter foo
Logins
Router
Started
Accepted
---------- --------------- -------foo
Aug 01 16:01:49 10
stats
Logins
Active
-----7
Target Access
Failures
-------------0
Authentication
Failures
-------------0
Handling Failover
In a cluster, storage routers continually exchange information as heartbeats to detect changes or failures
in the cluster. HA messages are sent using UDP over IP and, depending on the message type or situation,
may be sent as unicast or multicast messages. To make sure that HA information is exchanged reliably
between cluster nodes, the storage routers alternate transmission of heartbeats between the management
and the HA interfaces.
Each storage router in the cluster maintains and exchanges information about available resources.
Failover by eligibility is enabled by default; HA bases the decision to automatically fail over a SCSI
routing instance to another storage router in a cluster based on the Fibre Channel and other resources
available to that SCSI routing instance.
Failover occurs when:
•
All mapped targets are unavailable or a critical resource for the SCSI routing instance is unavailable,
and some or all mapped targets would be available from another storage router in the cluster. A
critical resource can be a configured Gigabit Ethernet interface, a required Fibre Channel interface,
or an internal resource needed to run the SCSI routing instance.
Cisco SN 5428-2 Storage Router Software Configuration Guide
78-15471-01
11-23
Chapter 11
Maintaining and Managing the SN 5428-2 Storage Router
Controlling SCSI Routing Instances in a Cluster
Note
•
Some mapped targets are unavailable and all mapped targets are available on another storage router
in the cluster.
•
All mapped targets are available, but another storage router in the cluster also has all targets
available and is designated at the primary for the SCSI routing instance.
•
The storage router stops receiving heartbeats from another storage router within the cluster.
If you need more manual control over where a SCSI routing instance runs, you can turn off failover by
eligibility on a storage router. If a SCSI routing instance fails over to a storage router that is configured
with failover by eligibility turned off, it will continue running on that storage router unless there are no
mapped targets available or a critical resource is unavailable. Normal failover resumes when failover by
eligibility is turned back on for the storage router where the SCSI routing instance is running.
The show scsirouter all failover command (Example 11-9) displays target and resource availability
associated with each storage router in the cluster. The show ha all command (Example 11-10) displays
the status of the failover by eligibility feature.
Each cluster supports up to 12 active SCSI routing instances. Since each storage router can also support
up to 12 SCSI routing instances, high availability is ensured for each instance in the cluster (regardless
of the division of those instances between storage routers).
Example 11-9 Results of “show scsirouter all failover” Command
[SN5428-2A]# show scsirouter all failover
Each [
] contains node operating characteristics for a scsirouter.
[Instance status, Failover Priority, Eligibility]
Instance Status('M' = Master, ' ' = Slave)
Failover Priority(' ' = none, 'fp' = primary, 'fs' = secondary)
Eligiblity(U = Eligibility has not been initialized
N = None of the configured devices are available or
a configured interface is unavailable
S = Some of the configured devices are available
A = All of the configured devices are available
P = Primary and all of the configured devices are available)
Configured
Configured Failover
Scsirouter Primary
Primary
---------- ---------- ---------jb1
SN5428-2B
none
jb2
none
none
pad1a
none
none
pad1b
SN5428-2A
none
pad2a
SN5428-2B
none
pad2d
SN5428-2B
none
pad3a
SN5428-2A
none
Configured
Failover
Secondary
---------none
none
none
none
none
none
none
This
Failover
Node
Node List
-------- ---------------[
N] [M A]SN5428-2B
[
A] [M A]SN5428-2B
[M A] [
S]SN5428-2B
[M A] [
S]SN5428-2B
[
S] [M A]SN5428-2B
[
S] [M A]SN5428-2B
[M A] [
N]SN5428-2B
Example 11-10 Results of “show ha all” Command
[SN5428-2A]# show ha all
System Name
Configuration
SN5428-2A
CLUSTERED
Status
up
MGMT
up
HA
up
Failover By Eligibility
on
Cisco SN 5428-2 Storage Router Software Configuration Guide
11-24
78-15471-01
Chapter 11
Maintaining and Managing the SN 5428-2 Storage Router
Controlling SCSI Routing Instances in a Cluster
Manual Failover
While failover of SCSI routing instances is automatic, there may be times when you wish to manually
move a SCSI routing instance from one storage router to another. The move may be temporary, after
which the instance will be moved back to its original location. At other times, you may want to move a
SCSI routing instance permanently to another storage router, ensuring that the instance will continue
running on the specified node whenever possible. The primary attribute allows you to specify a
“preferred” storage router for the specified SCSI routing instance.
As an example cluster scenario, a cluster is composed of two storage routers, Sys1 and Sys2. Sys1 is
currently running instances, scsi1 and scsi2, and is the primary storage router for both instances. Sys2 is
currently running instances, scsi3 and scsi4. The primary attribute for scsi3 and scsi4 is set to the default
setting of none, indicating no preferred storage router for failover for either instance. Both storage
routers have the same resources available for the configured SCSI routing instances and both storage
routers have failover by eligibility enabled (the default configuration).
Failover as Temporary Move
Referring to the example cluster scenario just described, the following procedure moves the SCSI
routing instances, scsi1 and scsi2, from their primary, or preferred, storage router, Sys1, to the other
storage router on a temporary basis. The first two commands in this procedure are issued from a CLI
session from Sys2; the remaining commands are issued from Sys1.
Command
Description
Step 1
enable
Enter Administrator mode on Sys2.
Step 2
no failover eligibility on
Disable failover by eligibility for Sys2.
Note
This will prevent the SCSI routing instances from
automatically failing back over to Sys1 due to their
primary attribute setting.
Step 3
enable
Enter Administrator mode on Sys1.
Step 4
failover scsirouter all
Failover all SCSI routing instances running on Sys1.
Note
Step 5
show cluster
or
Because there are only two storage routers in the cluster,
you do not need to specify the failover destination.
Verify that the SCSI routing instances are no longer running on the
storage router, Sys1.
show scsirouter all brief
Once the failover is complete, return to your management session with Sys2 and verify—using CLI
commands described in Step 5 above—that the SCSI routing instances, scsi1 and scsi2, are now running
on that storage router.
This is considered a temporary move because Sys1 is still designated as the primary storage router for
the SCSI routing instances. If, for example, failover eligibility is manually re-enabled on Sys2 or if Sys2
is rebooted, scsi1 and scsi2 will stop running on Sys2 and will start up and run on Sys1.
Cisco SN 5428-2 Storage Router Software Configuration Guide
78-15471-01
11-25
Chapter 11
Maintaining and Managing the SN 5428-2 Storage Router
Controlling SCSI Routing Instances in a Cluster
Note
Use caution if you change the configuration of a SCSI routing instance while it is running on the storage
router that is not the instance’s configured primary. If the instance’s configuration changes while the
designated primary for that instance is down (or otherwise removed from the cluster), the changes will
not be propagated to that node. When the primary reboots (or otherwise returns to the cluster), it will
reassert itself as the primary and will start to run the instance using the last configuration it had before
leaving the cluster.
Failover as Permanent Move
Referring to the example cluster scenario previously described, the following procedure moves the SCSI
routing instance, scsi2, from its primary, or preferred, storage router, Sys1, to the other storage router on
a permanent basis. The commands in this procedure are issued from a CLI session from Sys1.
Command
Description
Step 1
enable
Enter Administrator mode.
Step 2
show cluster
Verify that the instance to be moved, scsi2, is indeed running on
Sys1.
or
show scsirouter scsi2 brief
Step 3
scsirouter scsi2 primary Sys2
Set Sys2 as the primary for the desired SCSI routing instance,
scsi2.
Step 4
save scsirouter scsi2 bootconfig
Save the current SCSI routing instance configuration, including
the primary setting, and circulate the changed configuration
around the cluster.
Step 5
failover scsirouter scsi2
(Optional) Manually failover the desired SCSI routing instance,
scsi2.
Note
Because the storage routers are both enabled for failover
by eligibility and have access to the same resources for the
SCSI routing instances, scsi2 will automatically failover to
Sys2 because it is now configured as the primary for that
instance.
Once the failover is complete, establish a management session to Sys2 and verify—using the
show scsirouter scsi2 command—that the SCSI routing instance, scsi2, is now running on Sys2 and that
Sys2 is designated as the primary for that instance.
Failover for Distribution Purposes
In the example cluster scenario previously described, there is a significant increase in traffic for SCSI
routing instance, scsi4, and as a result, you decide to distribute all of the other instances (scsi1, scsi2,
and scsi3) to Sys1. Sys1 is already running scsi1 and scsi2.
The following procedure moves the SCSI routing instance, scsi3, to Sys1. The commands in this
procedure are issued from a CLI session from Sys2.
Cisco SN 5428-2 Storage Router Software Configuration Guide
11-26
78-15471-01
Chapter 11
Maintaining and Managing the SN 5428-2 Storage Router
Managing CDP on the SN 5428-2 Storage Router
Command
Description
Step 1
enable
Enter Administrator mode.
Step 2
show cluster
Verify that the SCSI routing instance to be moved is indeed
running on Sys2.
or
show scsirouter scsi3 brief
Step 3
failover scsirouter scsi3 to Sys1
Failover the desired SCSI routing instance, scsi3, to Sys1.
Once the failover is complete, establish a management session to Sys1 and verify—using the
show scsirouter command—that instances, scsi1, scsi2, and scsi3, are now running there.
Note
Because scsi3 has no primary setting, it will remain running on Sys1 until it is explicitly stopped or failed
over, or until it is automatically failed over by HA because of an interface failure or an unfavorable target
resource comparison.
Managing CDP on the SN 5428-2 Storage Router
Cisco Discovery Protocol (CDP) is primarily used to obtain protocol addresses of neighboring devices
and to discover the platform of those devices. CDP is media- and protocol-independent and runs on all
Cisco-manufactured equipment including routers, bridges, access servers, and switches.
Each device configured for CDP sends periodic messages, known as advertisements, to a multicast
address. Each device advertises at least one address at which it can receive SNMP messages. The
advertisements contain time-to-live, or holdtime, information, which indicates the length of time a
receiving device should hold CDP information before discarding it. Each device also listens to the
periodic CDP messages sent by others in order to learn about neighboring devices and determine when
their interfaces to the media go up or down.
The storage router is enabled, by default, to exchange CDP information with other CDP-enabled devices
in the network. CDP can be enabled or disabled for individual interfaces on the storage router, and the
holdtime for receiving devices and the frequency of CDP transmissions from the storage router can be
modified.
Disable CDP for Selected Interfaces
CDP can be enabled or disabled for the storage router management, HA, and Gigabit Ethernet interfaces.
By default, all interfaces are enabled for CDP. Use the following procedure to disable CDP for an
interface.
Command
Description
Step 1
enable
Enter Administrator mode.
Step 2
no cdp interface ge2 enable
Disable CDP on the desired interface (ge2).
Step 3
show cdp interface
Confirm that CDP is disabled for the interface.
Step 4
save system bootconfig
(Optional) Save the CDP change to the storage router bootable
configuration.
Cisco SN 5428-2 Storage Router Software Configuration Guide
78-15471-01
11-27
Chapter 11
Maintaining and Managing the SN 5428-2 Storage Router
Using Scripts to Automate Tasks
Modify the CDP Holdtime and Timeout Values
Holdtime is the amount of time the receiving device should hold a CDP packet from the storage router
before discarding it. The CDP holdtime value must be set to a higher number of seconds than the CDP
timer value (the time between CDP transmissions from the storage router). For example, the default CDP
holdtime value is 180 seconds. The default CDP timer value is 60 seconds.
Use the following procedure to change the CDP holdtime value and the CDP timer value.
Command
Description
Step 1
enable
Enter Administrator mode.
Step 2
show cdp
Verify the current CDP configuration.
Step 3
cdp holdtime 300
Set the number of seconds (300) that a receiving device should
hold the storage router CDP packet.
Step 4
cdp timer 120
Set the number of seconds (120) between transmissions of CDP
packets from the storage router.
Step 5
show cdp
(Optional) Verify the new CDP configuration.
Step 6
save system bootconfig
(Optional) Save the CDP changes to the storage router bootable
configuration.
Using Scripts to Automate Tasks
If you frequently issue a series of CLI commands, you can save time by entering those commands into
a script for execution purposes. Command scripts are stored in the script directory and are simply ASCII
text files containing CLI commands.
When scripts run, the commands and any responses are echoed on the storage router console.
Scripts can be created on any system using any text editor and placed in the script directory (/ata3/script)
of the target SN 5428-2 using the copy command to copy the script file to the storage router using HTTP
or TFTP. You can also use FTP to make the file available to the storage router. See “Using FTP with the
SN 5428-2 Storage Router” for more information about using FTP to transfer files.
Follow these rules when creating a command script:
•
Commands can start anywhere on a line. The first word on any line that is not preceded by a
comment character is considered to be the start of a command string.
•
Comments can be added by placing an exclamation point (!) or number sign (#) character at the
beginning of the line or as the first character at any position in the line. Comments are useful for
documenting the contents of the file and the expected results. Comments can also be used to prevent
a command from executing without removing it from the file by inserting a comment character
before the command string.
•
You can extend commands across line boundaries by ending a line with a backslash ( \ ) as the
continuation character. Use the continuation character to make long commands more readable. The
line sequence is continued until a command line without a continuation character is encountered. If
a comment line is used to end a line continuation sequence, you must add a blank line after the
comment.
Cisco SN 5428-2 Storage Router Software Configuration Guide
11-28
78-15471-01
Chapter 11
Maintaining and Managing the SN 5428-2 Storage Router
Using the SN 5428-2 Logging Facilities
For example:
radius-server host 10.5.0.53 \
auth-port 1644 \
timeout 60 \
retransmit 5
! Configure 1st RADIUS server
radius-server host 10.6.0.61
. . .
•
Scripts can be invoked from other scripts.
•
You can pass parameters to scripts. Within the script, the key character is the “@” which instructs
the script execution function to substitute the value of the specified parameter. Whenever the
execution function encounters @1, it substitutes the value of the first passed parameter. The value
of the second parameter is substituted for @2, and so forth. You must use the force keyword to pass
parameters to the script.
Running Command Scripts
Use the following procedure to execute the CLI commands stored in a script file. In this example, the
script file is named CreateSc and must exist in the script directory.
Command
Description
Step 1
enable
Enter Administrator mode.
Step 2
show script CreateSc
Verify that the script, CreateSc, exists in the script directory and
that it contains the configuration that you want to recreate.
Step 3
read script CreateSc
Read and execute the CLI commands in the script file. When
prompted, confirm that you want to continue and execute the script
commands.
or
read script CreateSc force
(Optional) Use the force keyword to execute the script
immediately without asking for confirmation. The force keyword
is also required if you are passing parameters to the script.
After the script completes, issue the appropriate show commands to verify that the script executed as
expected.
Using the SN 5428-2 Logging Facilities
The SN 5428-2 Storage Router generates a variety of system event messages. All storage router event
and debug messages are issued in the following format:
Example 11-11 Event Message
Mar 18 11:48:05: %SNMP-5-SASAS: SnmpApp starting...
<timestamp>: %<facility>-<level_number>-<mnemonic>: <message text>
Cisco SN 5428-2 Storage Router Software Configuration Guide
78-15471-01
11-29
Chapter 11
Maintaining and Managing the SN 5428-2 Storage Router
Using the SN 5428-2 Logging Facilities
All messages are assigned a notification level, which reflects the priority of the message in the system.
Messages with the highest priority are assigned a notification level of emergency. Messages at this level
indicate that the system is unusable. Messages with the lowest priority are assigned a notification level
of debug. Messages at this level are for troubleshooting purposes. In Example 11-11, the message level
number is 5, indicating a notification level of notice.
Table 11-1 lists the notification levels, their level number, and their description.
Table 11-1
Event Message Notification Levels
Notification Level
Level Number
Description
emergency
0
System unusable
alert
1
Immediate action needed
critical
2
Critical conditions
error
3
Error conditions
warning
4
Non-fatal warning conditions
notice
5
Normal but significant conditions
info
6
Informational messages only
debug
7
Information for troubleshooting purposes
Event, trace and debug messages can be routed to various destinations, based on the notification level of
the message and the application area (facility) that generated the message. Table 11-2 lists the logging
destinations and their descriptions; Table 11-3 lists the logging facilities and their descriptions.
Table 11-2
Event Message Logging Destinations
Destination
Description
all
Logs the message to all destinations.
none
The message is not logged; it is discarded.
console
The message is logged to a serial console CLI session.
logfile
The message is logged to the storage router logfile.
rslog
The message is logged to a remote syslog server. Use the logging syslog
command to specify the IP address of the remote syslog server.
vty
The message is logged to all Telnet, SSH, or other virtual terminal CLI sessions.
Table 11-3
Event Message Facilities
Facility
Description
ALL
All facilities.
AUTH
AAA authentication.
CDP
Cisco Discovery Protocol.
CONF
Configuration functions.
FC
Fibre Channel interfaces.
FCIP
FCIP functions.
Cisco SN 5428-2 Storage Router Software Configuration Guide
11-30
78-15471-01
Chapter 11
Maintaining and Managing the SN 5428-2 Storage Router
Using the SN 5428-2 Logging Facilities
Table 11-3
Event Message Facilities (continued)
Facility
Description
GE
Gigabit Ethernet interfaces.
HA
High availability cluster functions.
IF
Interface manager.
INVALID
Generic functions.
IP
IP functions.
ISCSI
iSCSI functions.
MON
Hardware monitor.
SLP
Service Location Protocol service functions.
SNMP
Simple Network Management Protocol.
SYSLOG
Syslog functions.
UI
User interface functions.
VTP
VTP and VLAN functions.
Messages are routed by creating a list of routing rules that is searched for a facility and notification level
match whenever an event or debug message is received. This list of routing rules is known as the storage
router logging table.
By default, the logging table includes rules to log all messages at notification level notice (or numerically
lower levels) to all destinations, and to log all messages at notification level info to the storage router
log file. Any message that does not find a matching rule is not logged to any destination.
Use the show logging command to display the current logging table routing rules and other logging
information.
Filtering and Routing Event Messages
The logging table allows messages to be filtered by their facility and notification level and routed to the
specified destination(s). When an event message arrives, the logging table rules are searched by facility
name and by level until the first match is found. The message is sent to all the destinations specified by
the matching rule. If no match is found, the event message is discarded.
When a new routing rule is added, it is appended to the existing table. Use the logging level command
to add a new routing rule to the logging table; use the logging #? command to insert a routing rule into
the logging table before the specified entry.
Each facility can have eight notification levels. Each facility and notification level pair can have up to
seven destinations.
In Example 11-11, the facility is SNMP, and the notification level is 5 (notice). If the logging table
included the entries in Example 11-12, the event message in Example 11-11 would match on the first
routing rule, and would be sent to all valid destinations. Any message from the SNMP facility at
notification level info, and any message from another facility at notification level info (or lower) would
match on the second rule and be sent to the storage router console and log file. All messages from any
facility at notification level debug would be discarded.
Cisco SN 5428-2 Storage Router Software Configuration Guide
78-15471-01
11-31
Chapter 11
Maintaining and Managing the SN 5428-2 Storage Router
Using the SN 5428-2 Logging Facilities
Example 11-12 Example Log Route Entries List
Index Level
1
notice
2
info
Priority Facility
5
SNMP
6
all
Route
all
console logfile
Syslog host is enabled, ipaddress is 10.1.70.6
The logging table can be saved and retained across a storage router restart. The order of the rules in the
logging table is preserved when entries are deleted.
Enabling and Disabling Logging
Logging is enabled by default. By default, the SN 5428-2 Storage Router includes the following routing
rules in the logging table:
•
All messages at notification level notice or lower are logged to all valid destinations.
•
All messages at notification level info are logged to the storage router log file.
•
All debug messages are discarded.
Use the no logging on command to quickly disable logging for all destinations without modifying the
logging table. No logging will take place until logging is re-enabled by the logging on command.
If you clear the logging table without returning to the factory defaults, all rules are removed from the
logging table. This causes all messages to be discarded because there are no matching rules in the
logging table. To resume logging, you can add new routing rules, restore a previously saved logging
table, or clear the logging table back to the factory defaults.
Managing the Log File
You can view the entire storage router log file or selected portions of the log file using the show logging
command. You can also view the log file using the web-based GUI. If you want to analyze or search the
log file in more detail, you can use FTP to retrieve a copy of the log file. See “Using FTP with the
SN 5428-2 Storage Router” for more information about using FTP to transfer files.
Log files are created in the SN 5428-2 log directory (/ata4/log). They can occupy up to 4 MB of memory.
Once this limit has been reached, the oldest file is removed and a new one is created. The
show logging size command can be used to display the size of the existing log files. The show system
command can be used to display the amount of space allocated to log files, and the amount of log file
space currently available.
The name of the log file is messages, followed by a number (for example, messages3 or messages12).
The first log file is named messages0, the next log file is named messages1, etc.
Depending on the needs of your enterprise, you can archive log files to a remote server, or you can clear
log files on a periodic basis. You can use FTP to transfer files from the storage router to a remote server,
or you can use the web-based GUI to display the contents of the log file and use cut-and-paste techniques
to save the information to a local file. You can also issue the show logging all command and redirect the
output of your console using the logging facilities for your specific console interface.
Cisco SN 5428-2 Storage Router Software Configuration Guide
11-32
78-15471-01
Chapter 11
Maintaining and Managing the SN 5428-2 Storage Router
Gathering Troubleshooting Information
Clearing the Log Files
Use the following procedure to periodically clear the log files.
Command
Description
Step 1
enable
Enter Administrator mode.
Step 2
show logging size
(Optional) Check the current size of the log files (Example 11-13).
Step 3
show logging all
(Optional) Display all the current log file entries (first command),
or display a selected number of entries, such as 50, from the end
of the file (second command).
or
show logging last 50
Step 4
clear log
Clear the existing log file. The system clears the existing log file
and starts a new log file.
Example 11-13 Results of “show logging size” Command
[SN5428-2_PRA]# show logging size
5120 messages (342797 bytes) logged
Gathering Troubleshooting Information
If you experience problems with the storage router, you may need to obtain troubleshooting information
for Cisco technical support personnel. The SN 5428-2 Storage Router provides several features that can
help you assemble the necessary information.
The following are typical activities involved with troubleshooting the SN 5428-2:
•
Using the Crash Log, page 11-33
•
Using FTP with the SN 5428-2 Storage Router, page 11-35
•
Understanding Diagnostics, page 11-36
•
Capturing System Messages at Bootup, page 11-36
•
Capturing the Storage Router Configuration, page 11-37
•
Using Debug Facilities, page 11-37
Using the Crash Log
If the storage router experiences an unexpected problem that forces it to automatically reboot, a special
log file is generated. The file is named crash-cpp.txt and it is stored in the log directory (/ata4/log). You
can display the contents of this file to the console using the show crash command.
To save the show crash command output, redirect the output of your console using the logging facilities
for your specific console interface. Depending on your console interface and scroll buffer size, you may
also be able to copy and paste the contents from your console into an ASCII text file.
Cisco SN 5428-2 Storage Router Software Configuration Guide
78-15471-01
11-33
Chapter 11
Maintaining and Managing the SN 5428-2 Storage Router
Gathering Troubleshooting Information
The crash log provides the following information:
•
System information, including software version
•
Exception information
•
Boot information, including the kernel version and creation date
•
A list of all tasks, including entry point, task ID and priority for each task
•
Task registers and stack trace for each task in the task list
•
Net job ring
•
A list of all modules, including module ID, data start addresses, etc.
•
A list of all devices
•
A list of all drivers, including the number of create, delete, open, close, read, write, and I/O control
actions performed
•
A list of free memory addresses and a summary of memory usage information
•
A list of open file descriptors
•
Network interface information, including flags, interface type, addresses, and MTU information for
all storage router interfaces
•
The route table
•
The ARP table
•
The host table
•
Active Internet connection information, including PCB, connection type (TCP or UDP), receive and
send queues, local and foreign addresses, and state for each connection
•
Routing statistics
•
IP statistics
•
ICMP statistics
•
TCP statistics
•
UDP statistics
•
Network stack data pool (MBufs) and cluster pool table information
•
NFS authorization
•
Mounted NFS filesystem information
•
Boot filesystem information
•
Registered crash dump functions
•
CPC710 registers at time of exception
Information used to create the crash-cpp.txt file is periodically written to the tmpcrash.txt file in the log
directory. If a crash occurred at the current time, use the show crash current command to display the
information as it would be written to the crash log.
Cisco SN 5428-2 Storage Router Software Configuration Guide
11-34
78-15471-01
Chapter 11
Maintaining and Managing the SN 5428-2 Storage Router
Gathering Troubleshooting Information
Using FTP with the SN 5428-2 Storage Router
In certain cases, you may want to copy log files from the storage router to another server in your network
for analysis purposes, or you may want to copy configuration or script files to another server prior to
making them available to another SN 5428-2. The storage router includes an FTP daemon; however, the
FTP port (port 21) is, by default, restricted.
Use the following procedure to enable FTP and to copy the current message log file from the storage
router to another server in the network.
Command
Description
Step 1
enable
Enter Administrator mode.
Step 2
show restrict
Display interface restrictions. If port 21 on the management
interface (mgmt) is closed, use the command in Step 3 to open it.
Step 3
no restrict mgmt ftp
(Optional) Allow FTP functions on the management interface.
Once the function is enabled, open the FTP session to the storage router from the server. You will be
prompted for a user name and password. The user name is admin and the password is the storage router
Administrator password (or, if you are using Enable authentication, the password that you would enter
in response to the CLI enable command). The default Administrator password is cisco.
Note
The user name and the password are both case sensitive.
The log files and crash trace files are stored in the /ata4/log directory. Saved configuration files are
stored in the /ata3/savedconfig directory. Script files are stored in the /ata3/script directory.
To use FTP to retrieve the log file, change to the /ata4/log directory using the FTP cd command. List the
files to determine what log file you want to retrieve. (In our example, the log file is messages0.) If
necessary, specify the binary flag using the FTP binary command. Issue the FTP get command to retrieve
the log file and to copy it to the specified file on your server. When the process completes, close the FTP
connection using the FTP bye command.
Example 11-14 illustrates the FTP session just described. In this example, the storage router
management interface IP address is 10.1.11.210.
Example 11-14 FTP Session
Server1> ftp 10.1.11.210
Connected to 10.1.11.210.
220 VxWorks (5.4.1) FTP server ready
Name: admin
331 Password required
Password:********
230 User logged in
ftp> cd /ata4/log
250 Changed directory to "/ata4/log"
ftp> dir
200 Port set okay
150 Opening ASCII mode data connection
size
date
time
name
------------------------512
Apr-09-2002 20:46:18
.
512
Apr-09-2002 20:46:18
..
13803
May-16-2002 15:13:56
messages0
<DIR>
<DIR>
Cisco SN 5428-2 Storage Router Software Configuration Guide
78-15471-01
11-35
Chapter 11
Maintaining and Managing the SN 5428-2 Storage Router
Gathering Troubleshooting Information
92167
Apr-10-2002
19:14:06
tmpcrash.txt
226 Transfer complete
ftp: 374 bytes received in 0.02Seconds 23.38Kbytes/sec.
ftp> binary
200 Type set to I, binary mode
ftp> get
(remote-file) messages0
(local-file) SN5428-2Sys1_Messages
200 Port set okay
150 Opening BINARY mode data connection
226 Transfer complete
40863 bytes received in 0.049 seconds (8.1e+02 Kbytes/s)
ftp> bye
221 Bye...see you later
If you had to remove the restriction on the management interface before proceeding with the FTP
session, return to the CLI session and re-enable the restriction, using the following procedure.
Command
Description
Step 1
show restrict
Verify that port 21 on the management interface is currently open.
Step 2
restrict mgmt ftp
Close the management interface to FTP functions. No FTP
functions will be allowed.
Understanding Diagnostics
The SN 5428-2 Storage Router normally performs hardware diagnostics when the unit is powered up. A
message displays during the power up process, indicating that hardware diagnostics can be skipped if
the Escape key is pressed within five seconds. If the Escape key is pressed, all hardware diagnostics are
bypassed for this reboot only. If no key is pressed, diagnostics will begin after the five second wait period
expired.
If a hardware diagnostic fails, the storage router halts. The boot process cannot be reinitiated. If you
experience a hardware diagnostic failure, contact Cisco technical support personnel as described in the
“Obtaining Technical Assistance” section on page xiii for further instructions.
The SN 5428-2 performs additional “soft” diagnostics after the hardware diagnostics complete on power
up and after every system reboot. If necessary, the soft diagnostics can be bypassed, using the reboot
command with the fast keyword.
If you experience problems with soft diagnostics, contact Cisco technical support personnel for
assistance.
Capturing System Messages at Bootup
The SN 5428-2 Storage Router logs a variety of messages to the console during the system boot process.
If you are experiencing problems with the storage router, it may be helpful to capture these messages.
Use the console interface to perform the boot process and capture the console log using typical external
methods.
Cisco SN 5428-2 Storage Router Software Configuration Guide
11-36
78-15471-01
Chapter 11
Maintaining and Managing the SN 5428-2 Storage Router
Gathering Troubleshooting Information
Capturing the Storage Router Configuration
You can use the show runningconfig or show bootconfig command to display the storage router current
running configuration or the bootable configuration. You can then redirect this display to create a script
file in the SN 5428-2 script directory. The resulting file can be used as a basis to create command scripts
to automate common tasks. See “Using Scripts to Automate Tasks” for more information about using
scripts on the storage router.
Using Debug Facilities
The storage router includes debug facilities for SCSI routing instances, RIP, and packet tracing for
Gigabit Ethernet interfaces. Running debug traces can impact the operation of the storage router. If you
experience problems with a SCSI routing instance that cannot be resolved, Cisco technical support
personnel may ask you to capture some debug traces. They will assist you to properly configure the
storage router to accomplish this task.
See Chapter 12, “Command Line Interface Reference,” for more information about the debug
commands and using the storage router debug facilities.
Cisco SN 5428-2 Storage Router Software Configuration Guide
78-15471-01
11-37
Chapter 11
Maintaining and Managing the SN 5428-2 Storage Router
Gathering Troubleshooting Information
Cisco SN 5428-2 Storage Router Software Configuration Guide
11-38
78-15471-01
C H A P T E R
12
Command Line Interface Reference
The Cisco SN 5428-2 Storage Router provides three interfaces for operation, configuration,
administration, maintenance, and support tasks: command line interface (CLI), web-based GUI, and
SNMP.
This chapter documents the storage router CLI. For help on the web-based GUI, point your browser to
the storage router’s management interface IP address. After logging on, click the Help link to access the
online help system.
This chapter provides information about the following CLI topics:
•
About CLI Commands, page 12-1
•
CLI Usage Tips, page 12-1
•
CLI Commands, page 12-2
About CLI Commands
This chapter lists all possible CLI commands. However, the set of CLI commands and keywords that are
available to you depends on the level of authority associated with your CLI management session and the
deployment option selected for the SN 5428-2 Storage Router during initial configuration.
Use the show cli command to view all CLI commands and keywords that are valid for your current CLI
management session.
CLI Usage Tips
•
Commands and keywords can be truncated at any point after they are unique.
•
Use the Tab key to complete the current word.
•
Use the question mark ( ? ) key to list all of the options available at that point in the command line.
•
CLI commands and keywords are not case-sensitive. Commands and keywords can be entered in any
case (including mixed case).
•
User-defined strings are case-sensitive. User-defined strings must be entered in the appropriate case
(including mixed case). Case for user-defined strings is preserved in the configuration.
•
An asterisk ( * ) at the beginning of the CLI command prompt indicates that the system
configuration has been changed but not saved.
Cisco SN 5428-2 Storage Router Software Configuration Guide
78-15471-01
12-1
Chapter 12
Command Line Interface Reference
CLI Commands
CLI Commands
This section lists all CLI commands in alphabetical order. The no form of any command is shown with
the primary command entry. Command information includes syntax, defaults, mode, history, usage
guidelines, examples, and related commands.
Cisco SN 5428-2 Storage Router Software Configuration Guide
12-2
78-15471-01
Chapter 12
Command Line Interface Reference
aaa authentication enable
aaa authentication enable
To configure authentication, authorization and accounting (AAA) authentication services for
Administrator mode access to the CLI (via the CLI enable command), use the
aaa authentication enable command. To disable this authentication, use the no form of this command.
aaa authentication enable default services1 [services2...]
no aaa authentication enable default
Syntax Description
Defaults
default
The name of the authentication list. The list name must be default.
services1 [services2...]
At least one of the services described in Table 12-1.
If the default list is not configured, only the Administrator mode password is checked. This has the same
effect as the following command:
aaa authentication enable default enable
Command Modes
Administrator.
Command History
Release
Modification
3.2.1
This command was introduced.
Usage Guidelines
Administrator mode access (“Enable”) authentication uses AAA authentication services to provide
authentication of users that request Administrator mode access to the storage router via the CLI enable
command. Because the enable command does not require you to enter a user name, the special user name
$enab15$ is used if RADIUS or TACACS+ servers are used for authentication.
AAA attempts to use each service in the order listed in the default authentication list, until authentication
succeeds or fails. If the service fails to find a user name and password match, authentication fails and
access is denied. If AAA returns an error (because the RADIUS or TACACS+ server is not available, for
example), AAA attempts to use the next service in the list for authentication. To specify that the
authentication should succeed even if all methods return an error (not if they return an authentication
failure), specify none as the final method in the command line. Use the show aaa command to display
the current authentication lists.
In a cluster environment, AAA management functions are handled by a single storage router. To
determine which storage router is performing AAA management functions, issue the show cluster
command. If you issue the aaa authentication enable command from a storage router that is not
performing AAA management functions, the CLI displays an informational message with the name of
the node that is currently handling those functions.
Note
Enable authentication extends to users accessing the storage router via an FTP session. An FTP session
requires the user name admin and the password that would be entered for the CLI enable command.
Cisco SN 5428-2 Storage Router Software Configuration Guide
78-15471-01
12-3
Chapter 12
Command Line Interface Reference
aaa authentication enable
In Table 12-1, the group radius and group tacacs+ methods refer to all previously defined RADIUS or
TACACS+ servers; the group name method refers to a previously defined group of one or more RADIUS
or TACACS+ servers. Use the radius-server host and tacacs-server host commands to configure the
servers, and the aaa group server radius and aaa group server tacacs+ commands to create server
groups.
Table 12-1 aaa authentication enable default services
Examples
Keyword
Description
enable
Uses the configured Administrator mode password for authentication.
group name
Uses a named group of defined RADIUS or TACACS+ servers for
authentication, using the user name $enab15$.
group radius
Uses the list of all RADIUS servers for authentication, using the user
name $enab15$.
group tacacs+
Uses the list of all TACACS+ servers for authentication, using the user
name $enab15$.
monitor
Uses the configured Monitor mode password for authentication.
none
Uses no authentication.
The following example creates a default AAA authentication list to be used to perform Enable
authentication. When Administrator access of the storage router is requested via the CLI enable
command, AAA first attempts to contact a RADIUS server, using the $enab15$ username and the
entered password. If no server is found, AAA returns an error and authentication is performed by
checking the entered password against the configured Administrator mode password. If there is no
match, authentication fails and you are denied Administrator access.
[SN5428-2A]# aaa authentication enable default group radius enable
Related Commands
Command
Description
aaa group server
radius
Create a named group of RADIUS servers for AAA authentication services.
aaa group server
tacacs+
Create a named group of TACACS+ servers for AAA authentication
services.
aaa authentication
login
Configure AAA authentication services for Monitor mode access to the
SN 5428-2 Storage Router via the CLI.
aaa test authentication Enable testing of the specified AAA authentication list.
debug aaa
Enable debugging for the AAA authentication services.
radius-server host
Configure remote RADIUS servers for AAA authentication services.
restore aaa
Restore AAA authentication services from the named configuration file.
save aaa
Save the current AAA configuration information.
show aaa
Display AAA configuration information.
tacacs-server host
Configure remote TACACS+ servers for AAA authentication services.
Cisco SN 5428-2 Storage Router Software Configuration Guide
12-4
78-15471-01
Chapter 12
Command Line Interface Reference
aaa authentication iscsi
aaa authentication iscsi
To configure authentication, authorization and accounting (AAA) authentication services for iSCSI
authentication of IP hosts requesting access to storage via SCSI routing instances, use the
aaa authentication iscsi command. To disable this authentication, use the no form of this command.
aaa authentication iscsi {listname | default} services1 [services2...]
no aaa authentication iscsi {listname | default}
Syntax Description
Defaults
listname
The name of the authentication list. Enter a maximum of 31 characters.
default
The name of the default authentication list.
services1 [services2...]
At least one of the services described in Table 12-2.
If iSCSI authentication is enabled and the named authentication list is not configured, authentication
fails.
If iSCSI authentication is enabled using the default list but the default list is not configured, only the
local user database is selected. This has the same effect as the following command:
aaa authentication iscsi default local
Command Modes
Administrator.
Command History
Release
Modification
3.2.1
This command was introduced.
Usage Guidelines
iSCSI authentication uses AAA authentication services to provide authentication of IP hosts that request
access to storage from SCSI routing instances that have authentication enabled.
AAA attempts to use each service in the order listed in the specified iSCSI authentication list, until
authentication succeeds or fails. If the service fails to find a user name match, authentication fails. If
AAA returns an error (because the RADIUS or TACACS+ server is not available, for example), AAA
attempts to use the next service in the list for authentication.
If either local or local-case is the first service on the iSCSI authentication list and AAA fails to find a
user name match, AAA attempts to use the next method on the list for authentication. If the local or
local-case service is in any other position on the list and AAA fails to find a user name match,
authentication fails and access is denied. If a RADIUS or TACACS+ server fails to find a user name
match (regardless of position on the iSCSI authentication list), authentication fails and access is denied.
Use the show aaa command to display the current authentication lists.
Cisco SN 5428-2 Storage Router Software Configuration Guide
78-15471-01
12-5
Chapter 12
Command Line Interface Reference
aaa authentication iscsi
In a cluster environment, AAA management functions are handled by a single storage router. To
determine which storage router is performing AAA management functions, issue the show cluster
command. If you issue the aaa authentication iscsi command from a storage router that is not
performing AAA management functions, the CLI displays an informational message with the name of
the node that is currently handling those functions.
In Table 12-2, the group radius and group tacacs+ methods refer to all previously defined RADIUS or
TACACS+ servers; the group name method refers to a group of one or more RADIUS or TACACS+
servers. Use the radius-server host and tacacs-server host commands to configure the servers, and the
aaa group server radius and aaa group server tacacs+ commands to create server groups.
Note
A named server group must be defined to be used as an authentication method. However, verification of
server groups occurs only at runtime. If a server group is not defined, the authentication process
generates error messages and the server group is skipped. This could cause unexpected authentication
failures.
Table 12-2 aaa authentication iscsi services
Keyword
Description
group name
Uses a named group of defined RADIUS or TACACS+ servers for
authentication.
group radius
Uses the list of all RADIUS servers for authentication.
group tacacs+
Uses the list of all TACACS+ servers for authentication.
local
Uses the local username database for authentication.
local-case
Uses case-sensitive local username authentication.
none
Uses no authentication.
If the local authentication service is selected, the user name validation is not case-sensitive. If local-case
authentication service is selected, the user name validation is case-sensitive. The password validation for
both the local service and the local-case service is case-sensitive.
Examples
The following example creates a new AAA authentication list named webtest and enables iSCSI
authentication for the SCSI routing instance named myCompanyWebserver2, using the webtest
authentication list. When iSCSI authentication is required, AAA first tries to use the local username
database for authentication. If no match is found, AAA attempts to contact a TACACS+ server. If no
server is found, AAA returns an error and the IP host is allowed access with no authentication.
[SN5428-2A]# aaa authentication iscsi webtest local group tacacs+ none
[SN5428-2A]# scsirouter myCompanyWebserver2 authentication webtest
Cisco SN 5428-2 Storage Router Software Configuration Guide
12-6
78-15471-01
Chapter 12
Command Line Interface Reference
aaa authentication iscsi
Related Commands
Command
Description
aaa group server
radius
Create a named group of RADIUS servers for AAA authentication services.
aaa group server
tacacs+
Create a named group of TACACS+ servers for AAA authentication
services.
aaa test authentication Enable testing of the specified AAA authentication list.
debug aaa
Enable debugging for the AAA authentication services.
radius-server host
Configure remote RADIUS servers for AAA authentication services.
restore aaa
Restore AAA authentication services from the named configuration file.
save aaa
Save the current AAA configuration information.
scsirouter
authentication
Enable iSCSI authentication for the named SCSI routing instance.
show aaa
Display AAA configuration information.
tacacs-server host
Configure remote TACACS+ servers for AAA authentication services.
Cisco SN 5428-2 Storage Router Software Configuration Guide
78-15471-01
12-7
Chapter 12
Command Line Interface Reference
aaa authentication login
aaa authentication login
To configure authentication, authorization and accounting (AAA) authentication services for Monitor
mode access to the storage router via the CLI, use the aaa authentication login command. To disable
this authentication, use the no form of this command.
aaa authentication login default services1 [services2...]
no aaa authentication login default
Syntax Description
Defaults
default
The name of the authentication list. The list name must be default.
services1 [services2...]
At least one of the services described in Table 12-3.
If the default list is not configured, only the Monitor mode password is checked. This has the same effect
as the following command:
aaa authentication login default monitor
Note
If the default list is not configured, you are only prompted to enter a password; you are not prompted to
enter a user name.
Command Modes
Administrator.
Command History
Release
Modification
3.2.1
This command was introduced.
Usage Guidelines
Monitor mode access (“Login”) authentication uses AAA authentication services to provide
authentication of users that request Monitor mode access to the SN 5428-2 Storage Router via the CLI.
A user attempting Monitor mode access of the storage router via the CLI will be prompted for a user
name and password.
AAA attempts to use each service in the order listed in the default authentication list, until authentication
succeeds or fails. If the service fails to find a user name match, authentication fails. If AAA returns an
error (because the RADIUS or TACACS+ server is not available, for example), AAA attempts to use the
next service in the list for authentication. To specify that the authentication should succeed even if all
methods return an error (not if they return an authentication failure), specify none as the final method in
the command line.
If either local or local-case is the first service on the default authentication list and AAA fails to find a
user name match, AAA attempts to use the next method on the list for authentication. If the local or
local-case service is in any other position on the list and AAA fails to find a user name match,
authentication fails and access is denied. If a RADIUS or TACACS+ server fails to find a user name
match (regardless of position on the default authentication list), authentication fails and access is denied.
Cisco SN 5428-2 Storage Router Software Configuration Guide
12-8
78-15471-01
Chapter 12
Command Line Interface Reference
aaa authentication login
If the Enable service is used, the user name is ignored and the password is authenticated against the
configured Administrator mode password. If the Monitor service is used, the user name is ignored and
the password is authenticated against the configured Monitor mode password.
Note
AAA does not provide authentication for access via the GUI (using HTTP or HTTPS).
Use the show aaa command to display the current authentication lists.
In a cluster environment, AAA management functions are handled by a single storage router. To
determine which storage router is performing AAA management functions, issue the show cluster
command. If you issue the aaa authentication login command from a storage router that is not
performing AAA management functions, the CLI displays an informational message with the name of
the node that is currently handling those functions.
In Table 12-3, the group radius and group tacacs+ methods refer to all previously defined RADIUS or
TACACS+ servers; the group name method refers to a previously defined group of one or more RADIUS
or TACACS+ servers. Use the radius-server host and tacacs-server host commands to configure the
servers, and the aaa group server radius and aaa group server tacacs+ commands to create server
groups.
Table 12-3 aaa authentication login default services
Keyword
Description
enable
Uses the configured Administrator mode password for authentication.
The user name is ignored.
group name
Uses a named group of defined RADIUS or TACACS+ servers for
authentication.
group radius
Uses the list of all RADIUS servers for authentication.
group tacacs+
Uses the list of all TACACS+ servers for authentication.
local
Uses the local username database for authentication.
local-case
Uses case-sensitive local username authentication.
monitor
Uses the configured Monitor mode password for authentication. The user
name is ignored.
none
Uses no authentication.
If the local authentication service is selected, the user name validation is not case-sensitive. If local-case
authentication service is selected, the user name validation is case-sensitive. The password validation for
both the local service and the local-case service is case-sensitive.
Examples
The following example creates a default AAA authentication list to be used to perform Login
authentication. AAA first attempts to contact a RADIUS server. If no server is found, AAA returns an
error and authentication is performed by checking the local username database. If no match is found,
AAA performs authentication by checking the entered password against the configured Monitor mode
password.
[SN5428-2A]# aaa authentication login default group radius local monitor
Cisco SN 5428-2 Storage Router Software Configuration Guide
78-15471-01
12-9
Chapter 12
Command Line Interface Reference
aaa authentication login
Related Commands
Command
Description
aaa authentication
enable
Configure AAA authentication services for Administrator mode access to
the SN 5428-2 Storage Router via the CLI enable command.
aaa group server
radius
Create a named group of RADIUS servers for AAA authentication services.
aaa group server
tacacs+
Create a named group of RADIUS servers for AAA authentication services.
aaa test authentication Enable testing of the specified AAA authentication list.
debug aaa
Enable debugging for the AAA authentication services.
radius-server host
Configure remote RADIUS servers for AAA authentication services.
restore aaa
Restore AAA authentication services from the named configuration file.
save aaa
Save the current AAA configuration information.
scsirouter
authentication
Enable iSCSI authentication for the named SCSI routing instance.
show aaa
Display AAA configuration information.
tacacs-server host
Configure remote TACACS+ servers for AAA authentication services.
Cisco SN 5428-2 Storage Router Software Configuration Guide
12-10
78-15471-01
Chapter 12
Command Line Interface Reference
aaa generate password
aaa generate password
To generate a long random password, use the aaa generate password command.
aaa generate password
Syntax Description
This command has no arguments or keywords.
Defaults
None.
Command Modes
Administrator.
Command History
Release
Modification
3.2.1
This command was introduced.
Usage Guidelines
Use this command to generate a long random password. From a CLI management session, you can cut
and paste this password into other commands or applications, using the conventions appropriate to your
specific Telnet or SSH client, or operating system.
Examples
The following example generates a long random password:
[SN5428-2A]# aaa generate password
Password: 28b79da19608342a99642ce92fbdd3114
Related Commands
Command
Description
aaa test authentication Enable testing of the specified AAA authentication list.
admin password
Set the login password for administrative access to the storage router
management interface.
monitor password
Set the login password for view-only access to the storage router
management interface.
username password
Add a user name and optional password to the local username database.
Cisco SN 5428-2 Storage Router Software Configuration Guide
78-15471-01
12-11
Chapter 12
Command Line Interface Reference
aaa group server radius
aaa group server radius
To create a named group of RADIUS servers to be used for AAA authentication, use the
aaa group server radius command. To disable an existing group of RADIUS servers, use the no form
of this command.
aaa group server radius name
no aaa group server radius name
Syntax Description
name
Defaults
None. All configured RADIUS servers belong to the group named radius.
Command Modes
Administrator.
Command History
Release
Modification
3.2.1
This command was introduced.
Usage Guidelines
The name of the group of RADIUS servers to be used for AAA
authentication. Enter a maximum of 31 characters.
Use this command to create a subset of RADIUS servers to be used for AAA authentication. The named
group can then be added to a AAA authentication methods list, allowing the specified set of RADIUS
servers to be used for authentication. After creating the named group, use the
aaa group server radius server command to add a RADIUS server to the group.
Use the radius-server host command to configure a RADIUS server to be used by the storage router for
AAA authentication.
Group names must be unique across the storage router; you cannot have a group of RADIUS servers
named labauth and a group of TACACS+ servers named labauth. The default group name of radius
includes all configured RADIUS servers.
In a cluster environment, AAA management functions are handled by a single storage router. To
determine which storage router is performing AAA management functions, issue the show cluster
command. If you issue the aaa group server radius command from a storage router that is not
performing AAA management functions, the CLI displays an informational message with the name of
the node that is currently handling those functions.
Examples
The following example creates a RADIUS server group named region2:
[SN5428-2A]# aaa group server radius region2
Cisco SN 5428-2 Storage Router Software Configuration Guide
12-12
78-15471-01
Chapter 12
Command Line Interface Reference
aaa group server radius
Related Commands
Command
Description
aaa authentication
enable
Configure AAA authentication services for Administrator mode access to
the SN 5428-2 Storage Router via the CLI enable command.
aaa group server
radius deadtime
Specify the length of time the storage router can skip a RADIUS server in
the named group that is marked as unavailable.
aaa group server
radius server
Add the specified RADIUS server to the named RADIUS server group.
aaa authentication
iscsi
Configure the AAA authentication services to be used for iSCSI
authentication.
aaa authentication
login
Configure AAA authentication services for Monitor mode access to the
SN 5428-2 Storage Router via the CLI.
aaa test authentication Enable testing of the specified AAA authentication list.
radius-server
deadtime
Specify the length of time the storage router can skip a RADIUS server that
is marked as unavailable.
radius-server host
Configure remote RADIUS servers for AAA authentication services.
radius-server key
Sets the global authentication and encryption key for all RADIUS
communications between the storage router and the RADIUS daemon.
radius-server
retransmit
Specifies how many times the storage router resends the RADIUS request
to a server before giving up.
radius-server timeout
Sets the interval the storage router waits for a RADIUS server to reply
before retransmitting.
restore aaa
Restore AAA authentication services from the named configuration file.
save aaa
Save the current AAA configuration information.
scsirouter
authentication
Enable iSCSI authentication for the named SCSI routing instance.
show aaa
Display AAA configuration information.
Cisco SN 5428-2 Storage Router Software Configuration Guide
78-15471-01
12-13
Chapter 12
Command Line Interface Reference
aaa group server radius deadtime
aaa group server radius deadtime
To improve RADIUS response time when some servers might be unavailable, use the
aaa group server radius deadtime command to cause the storage router to skip the unavailable servers
in the specified group immediately. To set the dead time to 0, effectively preventing the storage router
from skipping any RADIUS server in the specified group, use the no form of this command.
aaa group server radius name deadtime minutes
no aaa group server radius name deadtime
Syntax Description
name
The name of the group of RADIUS servers. Enter a maximum of 31
characters.
minutes
The length of time, in minutes, for which a RADIUS server in the specified
group is skipped over by the storage router when requesting AAA
authentication services, up to a maximum of 1440 minutes (24 hours).
Defaults
The dead time is set to zero (0) by default.
Command Modes
Administrator.
Command History
Release
Modification
3.2.1
This command was introduced.
Usage Guidelines
Use this command to cause the storage router to mark as “dead” any RADIUS servers in the specified
group that fail to respond to authentication requests, thus avoiding the wait for the authentication request
to time out before trying the next configured server. A RADIUS server marked as dead is skipped by
additional requests for the specified number of minutes, unless all RADIUS servers in the specified list
are marked as dead. If all RADIUS servers in a group are marked as dead, the deadtime setting is ignored.
This command overrides the global setting that applies to all configured RADIUS servers. If the
deadtime is not set for a RADIUS server group, the global dead time setting applies.
In a cluster environment, AAA management functions are handled by a single storage router. To
determine which storage router is performing AAA management functions, issue the show cluster
command. If you issue the aaa group server radius deadtime command from a storage router that is
not performing AAA management functions, the CLI displays an informational message with the name
of the node that is currently handling those functions.
Examples
The following example specifies a dead time of five minutes for all RADIUS servers in the group named
region2 that fail to respond to AAA authentication requests:
[SN5428-2A]# aaa group server radius region6 deadtime 5
Cisco SN 5428-2 Storage Router Software Configuration Guide
12-14
78-15471-01
Chapter 12
Command Line Interface Reference
aaa group server radius deadtime
The following example effectively sets a dead time of zero minutes for all RADIUS servers in the group
named region6. The global dead time value, if set, will apply to all RADIUS server in the group.
[SN5428-2A]# no aaa group server radius region6 deadtime
Related Commands
Command
Description
radius-server
deadtime
Specify the length of time the storage router can skip a RADIUS server that
is marked as unavailable.
show aaa
Display AAA configuration information.
Cisco SN 5428-2 Storage Router Software Configuration Guide
78-15471-01
12-15
Chapter 12
Command Line Interface Reference
aaa group server radius server
aaa group server radius server
To add a RADIUS server to a named group of RADIUS servers to be used for AAA authentication, use
the aaa group server radius server command. To remove a RADIUS server from an existing group of
RADIUS servers, use the no form of this command.
aaa group server radius name server ip-address [auth-port port-number]
no aaa group server radius name server ip-address [auth-port port-number]
Syntax Description
name
The name of the group of RADIUS servers. Enter a maximum of 31
characters.
ip-address
The IP address of the RADIUS server.
auth-port port-number (Optional) The UDP destination port for authentication requests. If
unspecified, the port number defaults to 1645.
Defaults
None.
Command Modes
Administrator.
Command History
Release
Modification
3.2.1
This command was introduced.
Usage Guidelines
Use this command to add a RADIUS server to a group of RADIUS servers to be used for AAA
authentication. Use the radius-server host command to define a RADIUS server for use by the storage
router.
During authentication, the servers are accessed in the order in which they are added to the group.
Note
Verification of IP addresses in a server group occurs only at runtime. If a RADIUS server group contains
an IP address that is not defined as a RADIUS server, the authentication process generates error
messages and the IP address is skipped. This could cause unexpected authentication failures.
In a cluster environment, AAA management functions are handled by a single storage router. To
determine which storage router is performing AAA management functions, issue the show cluster
command. If you issue the aaa group server radius server command from a storage router that is not
performing AAA management functions, the CLI displays an informational message with the name of
the node that is currently handling those functions.
Cisco SN 5428-2 Storage Router Software Configuration Guide
12-16
78-15471-01
Chapter 12
Command Line Interface Reference
aaa group server radius server
Examples
The following example identifies the servers with IP address 10.5.0.53 and 10.6.0.61 as RADIUS
servers, using the default port for authentication. It creates a RADIUS server group named region2 and
adds the previously configured RADIUS servers to the region2 group.
[SN5428-2A]#
[SN5428-2A]#
[SN5428-2A]#
[SN5428-2A]#
[SN5428-2A]#
radius-server host 10.5.0.53
radius-server host 10.6.0.61
aaa group server radius region2
aaa group server radius region2 server 10.5.0.53
aaa group server radius region2 server 10.6.0.61
The following example removes the RADIUS server with IP address 10.5.0.53 from the RADIUS server
group named region2:
[SN5428-2A]# no aaa group server radius region2 server 10.5.0.53
Related Commands
Command
Description
aaa authentication
enable
Configure AAA authentication services for Administrator mode access to
the SN 5428-2 Storage Router via the CLI enable command.
aaa authentication
iscsi
Configure the AAA authentication services to be used for iSCSI
authentication.
aaa authentication
login
Configure AAA authentication services for Monitor mode access to the
SN 5428-2 Storage Router via the CLI.
aaa group server
radius
Create a named group of RADIUS servers for AAA authentication services.
aaa group server
radius deadtime
Specify the length of time the storage router can skip a RADIUS server in
the named group that is marked as unavailable.
aaa test authentication Enable testing of the specified AAA authentication list.
radius-server
deadtime
Specify the length of time the storage router can skip a RADIUS server that
is marked as unavailable.
radius-server host
Configure remote RADIUS servers for AAA authentication services.
radius-server key
Sets the global authentication and encryption key for all RADIUS
communications between the storage router and the RADIUS daemon.
radius-server
retransmit
Specifies how many times the storage router resends the RADIUS request
to a server before giving up.
radius-server timeout
Sets the interval the storage router waits for a RADIUS server to reply
before retransmitting.
restore aaa
Restore AAA authentication services from the named configuration file.
save aaa
Save the current AAA configuration information.
scsirouter
authentication
Enable iSCSI authentication for the named SCSI routing instance.
show aaa
Display AAA configuration information.
Cisco SN 5428-2 Storage Router Software Configuration Guide
78-15471-01
12-17
Chapter 12
Command Line Interface Reference
aaa group server tacacs+
aaa group server tacacs+
To create a named group of TACACS+ servers to be used for AAA authentication, use the
aaa group server tacacs+ command. To disable an existing group of TACACS+ servers, use the no form
of this command.
aaa group server tacacs+ name
no aaa group server tacacs+ name
Syntax Description
name
Defaults
None. All configured TACACS+ servers belong to the group named tacacs+.
Command Modes
Administrator.
Command History
Release
Modification
3.2.1
This command was introduced.
Usage Guidelines
The name of the group of TACACS+ servers to be used for AAA
authentication. Enter a maximum of 31 characters.
Use this command to create a subset of TACACS+ servers to be used for AAA authentication. The named
group can then be added to a AAA authentication methods list, allowing the specified set of TACACS+
servers to be used for authentication. After creating the named group, use the
aaa group server tacacs+ server command to add a TACACS+ server to the group.
Use the tacacs-server host command to configure a TACACS+ server to be used by the storage router
for AAA authentication.
Group names must be unique across the storage router; you cannot have a group of TACACS+ servers
named labauth and a group of RADIUS servers named labauth. The default group name of tacacs+
includes all configured TACACS+ servers.
In a cluster environment, AAA management functions are handled by a single storage router. To
determine which storage router is performing AAA management functions, issue the show cluster
command. If you issue the aaa group server tacacs+ command from a storage router that is not
performing AAA management functions, the CLI displays an informational message with the name of
the node that is currently handling those functions.
Examples
The following example creates a TACACS+ server group named region3:
[SN5428-2A]# aaa group server tacacs+ region3
Cisco SN 5428-2 Storage Router Software Configuration Guide
12-18
78-15471-01
Chapter 12
Command Line Interface Reference
aaa group server tacacs+
Related Commands
Command
Description
aaa authentication
enable
Configure AAA authentication services for Administrator mode access to
the SN 5428-2 Storage Router via the CLI enable command.
aaa authentication
iscsi
Configure the AAA authentication services to be used for iSCSI
authentication.
aaa authentication
login
Configure AAA authentication services for Monitor mode access to the
SN 5428-2 Storage Router via the CLI.
aaa group server
tacacs+ server
Add the specified TACACS+ server to the named TACACS+ server group.
aaa test authentication Enable testing of the specified AAA authentication list.
tacacs-server host
Configure remote TACACS+ servers for AAA authentication services.
tacacs-server key
Sets the global authentication and encryption key for all TACACS+
communications between the storage router and the TACACS+ daemon.
tacacs-server timeout
Sets the interval the storage router waits for a TACACS+ server to reply.
restore aaa
Restore AAA authentication services from the named configuration file.
save aaa
Save the current AAA configuration information.
scsirouter
authentication
Enable iSCSI authentication for the named SCSI routing instance.
show aaa
Display AAA configuration information.
Cisco SN 5428-2 Storage Router Software Configuration Guide
78-15471-01
12-19
Chapter 12
Command Line Interface Reference
aaa group server tacacs+ server
aaa group server tacacs+ server
To add a TACACS+ server to a named group of TACACS+ servers to be used for AAA authentication,
use the aaa group server tacacs+ server command. To remove a RADIUS server from an existing
group of TACACS+ servers, use the no form of this command.
aaa group server tacacs+ name server ip-address [auth-port port-number]
no aaa group server tacacs+ name server ip-address [auth-port port-number]
Syntax Description
name
The name of the group of TACACS+ servers. Enter a maximum of 31
characters.
ip-address
The IP address of the TACACS+ server.
auth-port port-number (Optional) The server port number. Valid port numbers range from 1 to
65535. If unspecified, the port number defaults to 49.
Defaults
None.
Command Modes
Administrator.
Command History
Release
Modification
3.2.1
This command was introduced.
Usage Guidelines
Use this command to add a TACACS+ server to a group of TACACS+ servers to be used for AAA
authentication. Use the tacacs-server host command to define a TACACS+ server for use by the storage
router.
During authentication, the servers are accessed in the order in which they are added to the group.
Note
Verification of IP addresses in a server group occurs only at runtime. If a TACACS+ server group
contains an IP address that is not defined as a TACACS+ server, the authentication process generates
error messages and the IP address is skipped. This could cause unexpected authentication failures.
In a cluster environment, AAA management functions are handled by a single storage router. To
determine which storage router is performing AAA management functions, issue the show cluster
command. If you issue the aaa group server tacacs+ server command from a storage router that is not
performing AAA management functions, the CLI displays an informational message with the name of
the node that is currently handling those functions.
Cisco SN 5428-2 Storage Router Software Configuration Guide
12-20
78-15471-01
Chapter 12
Command Line Interface Reference
aaa group server tacacs+ server
Examples
The following example identifies the servers with IP address 172.29.39.46 and 10.7.0.72 as TACACS+
servers, using the default port for authentication. It creates a TACACS+ server group named region3 and
adds the previously configured TACACS+ servers to the region3 group.
[SN5428-2A]#
[SN5428-2A]#
[SN5428-2A]#
[SN5428-2A]#
[SN5428-2A]#
tacacs-server host 172.29.39.46
tacacs-server host 10.7.0.72
aaa group server tacacs+ region3
aaa group server tacacs+ region3 server 172.29.39.46
aaa group server tacacs+ region3 server 10.7.0.72
The following example removes the TACACS+ server with IP address 10.7.0.72 from the TACACS+
server group named region3:
[SN5428-2A]# no aaa group server tacacs+ region3 server 10.7.0.72
Related Commands
Command
Description
aaa authentication
enable
Configure AAA authentication services for Administrator mode access to
the SN 5428-2 Storage Router via the CLI enable command.
aaa authentication
iscsi
Configure the AAA authentication services to be used for iSCSI
authentication.
aaa authentication
login
Configure AAA authentication services for Monitor mode access to the
SN 5428-2 Storage Router via the CLI.
aaa group server
tacacs+
Create a named group of TACACS+ servers for AAA authentication
services.
aaa test authentication Enable testing of the specified AAA authentication list.
tacacs-server host
Configure remote TACACS+ servers for AAA authentication services.
tacacs-server key
Sets the global authentication and encryption key for all TACACS+
communications between the storage router and the TACACS+ daemon.
tacacs-server timeout
Sets the interval the storage router waits for a TACACS+ server to reply.
restore aaa
Restore AAA authentication services from the named configuration file.
save aaa
Save the current AAA configuration information.
scsirouter
authentication
Enable iSCSI authentication for the named SCSI routing instance.
show aaa
Display AAA configuration information.
Cisco SN 5428-2 Storage Router Software Configuration Guide
78-15471-01
12-21
Chapter 12
Command Line Interface Reference
aaa new-model
aaa new-model
To enable the AAA access control model, issue the aaa new-model command.
aaa new-model
no aaa new-model
Syntax Description
This command has no arguments or keywords.
Defaults
AAA is enabled. AAA cannot be disabled on the SN 5428-2 Storage Router.
Command Modes
Administrator.
Command History
Release
Modification
3.2.1
This command was introduced.
Usage Guidelines
This command enables the AAA access control model. The no aaa new-model command is available
for completeness only; AAA cannot be disabled for the storage router.
AAA authentication services are used to provide the following authentication types:
•
iSCSI authentication—provides authentication of IP hosts requiring access to storage via SCSI
routing instances
•
Login authentication—provides authentication of users requiring Monitor mode access to the
storage router via the CLI
•
Enable authentication—provides authentication of users requiring Administrator mode access to the
storage router via the CLI enable command
In a cluster environment, AAA management functions are handled by a single storage router. To
determine which storage router is performing AAA management functions, issue the show cluster
command. If you issue the aaa new-model command from a storage router that is not performing AAA
management functions, the CLI displays an informational message with the name of the node that is
currently handling those functions.
Examples
The following example initializes AAA:
[SN5428-2A]# aaa new-model
Cisco SN 5428-2 Storage Router Software Configuration Guide
12-22
78-15471-01
Chapter 12
Command Line Interface Reference
aaa new-model
Related Commands
Command
Description
aaa authentication
enable
Configure AAA authentication services for Administrator mode access to
the SN 5428-2 Storage Router via the CLI enable command.
aaa authentication
iscsi
Configure the AAA authentication services to be used for iSCSI
authentication.
aaa authentication
login
Configure AAA authentication services for Monitor mode access to the
SN 5428-2 Storage Router via the CLI.
aaa group server
radius
Create a named group of RADIUS servers for AAA authentication services.
aaa group server
tacacs+
Create a named group of TACACS+ servers for AAA authentication
services.
aaa test authentication Enable testing of the specified AAA authentication list.
debug aaa
Enable debugging for the AAA authentication services.
radius-server host
Configure remote RADIUS servers for AAA authentication services.
restore aaa
Restore AAA authentication services from the named configuration file.
save aaa
Save the current AAA configuration information.
scsirouter
authentication
Enable iSCSI authentication for the named SCSI routing instance.
show aaa
Display AAA configuration information.
tacacs-server host
Configure remote TACACS+ servers for AAA authentication services.
Cisco SN 5428-2 Storage Router Software Configuration Guide
78-15471-01
12-23
Chapter 12
Command Line Interface Reference
aaa test authentication
aaa test authentication
To test authentication using the specified authentication list, use the aaa test authentication command.
aaa test authentication {enable | login} default username password
aaa test authentication iscsi {listname | default} username password
aaa test authentication cancel
Syntax Description
enable default
Use the services in the Enable authentication list for testing. The name of
the list must be default.
login default
Use the services in the Login authentication list for testing. The name of the
list must be default.
iscsi listname
Use the services in the named iSCSI authentication list for testing.
iscsi default
Use the services in the iSCSI authentication list for testing. The name of the
list must be default.
username
The user name to be tested.
password
The password associated with the specified user name.
cancel
Cancel any outstanding test authentication requests.
Defaults
None.
Command Modes
Administrator.
Command History
Release
Modification
3.2.1
This command was introduced.
Usage Guidelines
AAA uses the services in the specified authentication list to perform Enable, Login or iSCSI
authentication. Use this command to test iSCSI authentication prior to enabling authentication for SCSI
routing instances or for troubleshooting purposes.
Use the cancel keyword to terminate any outstanding test authentication requests. For example, if a
RADIUS or TACACS+ server is configured with a very long timeout value, you can cancel the request
rather than waiting for the timeout to occur.
In a cluster environment, AAA management functions are handled by a single storage router. To
determine which storage router is performing AAA management functions, issue the show cluster
command. If you issue the aaa test authentication command from a storage router that is not
performing AAA management functions, the CLI displays an informational message with the name of
the node that is currently handling those functions.
Cisco SN 5428-2 Storage Router Software Configuration Guide
12-24
78-15471-01
Chapter 12
Command Line Interface Reference
aaa test authentication
Examples
The following example tests iSCSI authentication using the default authentication list for the user named
user1, with a password of password1:
[SN5428-2A]# aaa test authentication iscsi default user1 password1
The following example tests iSCSI authentication using the authentication list named webtest1, for the
user named user2, with a password of password2:
[SN5428-2A]# aaa test authentication iscsi webtest1 user2 password2
The following example tests Enable authentication for the user named $enab15$, with a password of
admin:
[SN5428-2A]# aaa test authentication enable default $enab15$ admin
The following example tests Login authentication for the user named monitor, with a password of cisco:
[SN5428-2A]# aaa test authentication login default monitor cisco
Related Commands
Command
Description
aaa authentication
enable
Configure AAA authentication services for Administrator mode access to
the SN 5428-2 Storage Router via the CLI enable command.
aaa authentication
iscsi
Configure the AAA authentication services to be used for iSCSI
authentication.
aaa authentication
login
Configure AAA authentication services for Monitor mode access to the
SN 5428-2 Storage Router via the CLI.
aaa group server
radius
Create a named group of RADIUS servers for AAA authentication services.
aaa group server
tacacs+
Create a named group of TACACS+ servers for AAA authentication
services.
debug aaa
Enable debugging for the AAA authentication services.
radius-server host
Configure remote RADIUS servers for AAA authentication services.
restore aaa
Restore AAA authentication services from the named configuration file.
save aaa
Save current AAA configuration information.
scsirouter
authentication
Enable iSCSI authentication for the named SCSI routing instance.
show aaa
Display AAA configuration information.
tacacs-server host
Configure remote TACACS+ servers for AAA authentication services.
Cisco SN 5428-2 Storage Router Software Configuration Guide
78-15471-01
12-25
Chapter 12
Command Line Interface Reference
accesslist
accesslist
To create an access list entity, use the accesslist command.
accesslist name
Syntax Description
name
Defaults
None.
Command Modes
Administrator.
Command History
Release
Modification
3.2.1
This command was introduced.
Usage Guidelines
The name of the access list entity created by this command. Enter a
maximum of 31 characters.
Access lists identify the IP hosts allowed to access a common set of storage resources and are associated
with specific storage targets. IP hosts can be identified by:
•
IP address
•
CHAP user name (used for iSCSI authentication)
•
iSCSI Name
An access list can contain one or more types of identification entries. If an identification entry type exists
in the access list, the IP host attempting to access the associated storage target must have a matching
entry defined in the access list. For example, if an access list contains both IP address and iSCSI Name
identification entry types, then every IP host that requires access to the associated set of storage
resources must have a matching IP address and iSCSI Name entry in the access list.
There is a maximum of 100 access lists per storage router or per storage router cluster. There is a
maximum of 200 access list identification entries across all access lists in the storage router or storage
router cluster.
Note
If there is a CHAP user name entry in the access list, the SCSI routing instance used to access the storage
target must also have iSCSI authentication enabled. See Chapter 9, “Configuring Authentication” for
more information about AAA and iSCSI authentication.
In a cluster environment, access list management functions are handled by a single storage router. To
determine which storage router is performing access list management functions, issue the show cluster
command. If you issue an accesslist command from a storage router that is not performing access list
management functions, the CLI displays an informational message with the name of the node that is
currently handling those functions.
See Chapter 11, “Maintaining and Managing the SN 5428-2 Storage Router,” for more information
about operating the storage router in a cluster.
Cisco SN 5428-2 Storage Router Software Configuration Guide
12-26
78-15471-01
Chapter 12
Command Line Interface Reference
accesslist
Examples
The following command creates an access list named webserver2:
[SN5428-2A]# accesslist webserver2
Related Commands
Command
Description
accesslist A.B.C.D/bits Add IP addresses to an access list.
accesslist
chap-username
Add CHAP user name entries to an access list.
accesslist description
Add a description to an access list.
accesslist iscsi-name
Add iSCSI Name entries to an access list.
delete accesslist
Delete a specific access list entry or an entire access list.
restore accesslist
Restore the named access list or all access lists from the named
configuration file.
save accesslist
Save configuration data for the named access list or all access lists.
scsirouter target
accesslist
Associate an access list with a specific SCSI routing instance target or all
targets.
show accesslist
Display the contents of the named access list or all access lists.
show scsirouter
Display configuration and operational information for the named SCSI
routing instance.
Cisco SN 5428-2 Storage Router Software Configuration Guide
78-15471-01
12-27
Chapter 12
Command Line Interface Reference
accesslist A.B.C.D/bits
accesslist A.B.C.D/bits
To add the IP address and subnet mask of IP hosts to the named access list, use the
accesslist A.B.C.D/bits command.
accesslist name A.B.C.D/bits | A.B.C.D/1.2.3.4 [A.B.C.D/bits | A.B.C.D/1.2.3.4] . . .
[A.B.D.F/bits | A.B.C.D/1.2.3.4]
Syntax Description
name
The name of an access list to which you are adding information.
A.B.C.D/bits
IP address and subnet mask of the IP host being added to the access list.
A.B.C.D is the dotted quad notation of the IP address. The /bits specifies the
subnet mask in CIDR style.
A.B.C.D/1.2.3.4
The IP address and subnet mask of the IP host being added to the access list.
A.B.C.D is the dotted quad notation of the IP address. 1.2.3.4 is the dotted
quad notation of the subnet mask.
Defaults
None.
Command Modes
Administrator.
Command History
Release
Modification
3.2.1
This command was introduced.
Usage Guidelines
Use the accesslist A.B.C.D/bits command after creating an access list to populate the list with IP
address entries. Enter multiple addresses and masks, separating each by a space.
Access lists identify the IP hosts allowed to access a common set of storage resources and are associated
with specific storage targets. IP hosts can be identified by:
•
IP address
•
CHAP user name (used for iSCSI authentication)
•
iSCSI Name
An access list can contain one or more types of identification entries. If an identification entry type exists
in the access list, the IP host attempting to access the associated storage target must have a matching
entry defined in the access list. For example, if an access list contains both IP address and iSCSI Name
identification entry types, then every IP host that requires access to the associated set of storage
resources must have a matching IP address and iSCSI Name entry in the access list.
There is a maximum of 100 access lists per storage router or per storage router cluster. There is a
maximum of 200 access list identification entries across all access lists in the storage router or storage
router cluster.
Cisco SN 5428-2 Storage Router Software Configuration Guide
12-28
78-15471-01
Chapter 12
Command Line Interface Reference
accesslist A.B.C.D/bits
In a cluster environment, access list management functions are handled by a single storage router. To
determine which storage router is performing access list management functions, issue the show cluster
command. If you issue an accesslist A.B.C.D/bits command from a storage router that is not performing
access list management functions, the CLI displays an informational message with the name of the node
that is currently handling those functions.
See Chapter 11, “Maintaining and Managing the SN 5428-2 Storage Router,” for more information
about operating the storage router in a cluster.
Examples
The following commands add the specified entries to the named access lists:
[SN5428-2A]# accesslist myAccessList 192.168.54.12/32 192.168.54.15/32
*[SN5428-2A]# accesslist Webserver5 209.165.201.1/255.255.255.0
209.165.201.5/255.255.255.0
Related Commands
Command
Description
accesslist
Create an access list entity.
accesslist
chap-username
Add CHAP user name entries to an access list.
accesslist description
Add a description to an access list.
accesslist iscsi-name
Add iSCSI Name entries to an access list.
delete accesslist
Delete a specific access list entry or an entire access list.
restore accesslist
Restore the named access list or all access lists from the named
configuration file.
save accesslist
Save configuration data for the named access list or all access lists.
scsirouter target
accesslist
Associate an access list with a specific SCSI routing instance target or all
targets.
show accesslist
Display the contents of the named access list or all access lists.
show scsirouter
Display configuration and operational information for the named SCSI
routing instance.
Cisco SN 5428-2 Storage Router Software Configuration Guide
78-15471-01
12-29
Chapter 12
Command Line Interface Reference
accesslist chap-username
accesslist chap-username
To add the CHAP user name of IP hosts to the named access list, use the accesslist chap-username
command.
accesslist name chap-username username
Syntax Description
name
The name of an access list to which you are adding information.
username
The CHAP user name (used for iSCSI authentication purposes) configured
for the IP host that requires access to storage.
Defaults
None.
Command Modes
Administrator.
Command History
Release
Modification
3.2.1
This command was introduced.
Usage Guidelines
Use the accesslist chap-username command after creating an access list to populate the list with CHAP
user name entries. A CHAP user name is required for iSCSI authentication.
Access lists identify the IP hosts allowed to access a common set of storage resources and are associated
with specific storage targets. IP hosts can be identified by:
•
IP address
•
CHAP user name (used for iSCSI authentication)
•
iSCSI Name
An access list can contain one or more types of identification entries. If an identification entry type exists
in the access list, the IP host attempting to access the associated storage target must have a matching
entry defined in the access list. For example, if an access list contains both IP address and iSCSI Name
identification entry types, then every IP host that requires access to the associated set of storage
resources must have a matching IP address and iSCSI Name entry in the access list.
There is a maximum of 100 access lists per storage router or per storage router cluster. There is a
maximum of 200 access list identification entries across all access lists in the storage router or storage
router cluster.
The iSCSI driver is configured with a CHAP user name and password when SCSI routing instances have
iSCSI authentication enabled. AAA authentication services authenticate the IP host using the CHAP user
name and password. An access list can also use the CHAP user name to identify IP hosts allowed access
to a common set of storage resources.
Cisco SN 5428-2 Storage Router Software Configuration Guide
12-30
78-15471-01
Chapter 12
Command Line Interface Reference
accesslist chap-username
Note
If there is a CHAP user name entry in the access list, the SCSI routing instance used to access the storage
target must also have iSCSI authentication enabled. See Chapter 9, “Configuring Authentication” for
more information about AAA and iSCSI authentication.
In a cluster environment, access list management functions are handled by a single storage router. To
determine which storage router is performing access list management functions, issue the show cluster
command. If you issue an accesslist chap-username command from a storage router that is not
performing access list management functions, the CLI displays an informational message with the name
of the node that is currently handling those functions.
See Chapter 11, “Maintaining and Managing the SN 5428-2 Storage Router,” for more information
about operating the storage router in a cluster.
Examples
The following commands add the specified entries to the named access lists:
[SN5428-2A]# accesslist myAccessList chap-username foo
*[SN5428-2A]# accesslist Webserver5 chap-username server1
Related Commands
Command
Description
accesslist
Create an access list entity.
accesslist A.B.C.D/bits Add IP addresses to an access list.
accesslist description
Add a description to an access list.
accesslist iscsi-name
Add iSCSI Names to an access list.
delete accesslist
Delete a specific access list entry or an entire access list.
restore accesslist
Restore the named access list or all access lists from the named
configuration file.
save accesslist
Save configuration data for the named access list or all access lists.
scsirouter target
accesslist
Associate an access list with a specific SCSI routing instance target or all
targets.
show accesslist
Display the contents of the named access list or all access lists.
show scsirouter
Display configuration and operational information for the named SCSI
routing instance.
Cisco SN 5428-2 Storage Router Software Configuration Guide
78-15471-01
12-31
Chapter 12
Command Line Interface Reference
accesslist description
accesslist description
To add a description to an existing access list entity, use the accesslist description command.
accesslist name description “text”
Syntax Description
name
The name of an existing access list entity.
text
User-defined identification information associated with this access list.
Enclose the description string in quotes. Enter a maximum of 64 characters.
Defaults
None.
Command Modes
Administrator.
Command History
Release
Modification
3.2.1
This command was introduced.
Usage Guidelines
Access lists identify the IP hosts allowed to access a common set of storage resources and are associated
with specific storage targets. IP hosts can be identified by:
•
IP address
•
CHAP user name (used for iSCSI authentication)
•
iSCSI Name
An access list can contain one or more types of identification entries. If an identification entry type exists
in the access list, the IP host attempting to access the associated storage target must have a matching
entry defined in the access list. For example, if an access list contains both IP address and iSCSI Name
identification entry types, then every IP host that requires access to the associated set of storage
resources must have a matching IP address and iSCSI Name entry in the access list.
There is a maximum of 100 access lists per storage router or per storage router cluster. There is a
maximum of 200 access list identification entries across all access lists in the storage router or storage
router cluster.
In a cluster environment, access list management functions are handled by a single storage router. To
determine which storage router is performing access list management functions, issue the show cluster
command. If you issue an accesslist description command from a storage router that is not performing
access list management functions, the CLI displays an informational message with the name of the node
that is currently handling those functions.
See Chapter 11, “Maintaining and Managing the SN 5428-2 Storage Router,” for more information
about operating the storage router in a cluster.
Cisco SN 5428-2 Storage Router Software Configuration Guide
12-32
78-15471-01
Chapter 12
Command Line Interface Reference
accesslist description
Examples
The following command adds a description to the access list named webserver2:
[SN5428-2A]# accesslist webserver2 description “Access list for company web servers”
Related Commands
Command
Description
accesslist
Create an access list entity.
accesslist A.B.C.D/bits Add IP addresses to an access list.
accesslist
chap-username
Add CHAP user name entries to an access list.
accesslist iscsi-name
Add iSCSI Name entries to an access list.
delete accesslist
Delete a specific access list entry, or an entire access list.
restore accesslist
Restore the named access list or all access lists from the named
configuration file.
save accesslist
Save configuration data for the named access list or all access lists.
scsirouter target
accesslist
Associate an access list with a specific SCSI routing instance target or all
targets.
show accesslist
Display the contents of the named access list or all access lists.
show scsirouter
Display configuration and operational information for the named SCSI
routing instance.
Cisco SN 5428-2 Storage Router Software Configuration Guide
78-15471-01
12-33
Chapter 12
Command Line Interface Reference
accesslist iscsi-name
accesslist iscsi-name
To add the iSCSI Name of IP hosts to the named access list, use the accesslist iscsi-name command.
accesslist name iscsi-name string
Syntax Description
name
The name of an access list to which you are adding information.
string
The iSCSI Name of IP host that requires access to storage. The iSCSI Name
is a UTF-8 character string based on iSCSI functional requirements. It is a
location-independent permanent identifier for an iSCSI node. An iSCSI
node can be either an initiator, a target, or both.
Defaults
None.
Command Modes
Administrator.
Command History
Release
Modification
3.2.1
This command was introduced.
Usage Guidelines
Use the accesslist iscsi-name command after creating an access list to populate the list with iSCSI Name
entries.
If you do not know the iSCSI Name of the IP host, configure the IP host and attempt to access the desired
storage targets. Use the show scsirouter command with the host table keywords to then display the
iSCSI Name (along with the initiator alias, IP address and CHAP user name) of all IP hosts that have
attempted to access storage resources.
Access lists identify the IP hosts allowed to access a common set of storage resources and are associated
with specific storage targets. IP hosts can be identified by:
•
IP address
•
CHAP user name (used for iSCSI authentication)
•
iSCSI Name
An access list can contain one or more types of identification entries. If an identification entry type exists
in the access list, the IP host attempting to access the associated storage target must have a matching
entry defined in the access list. For example, if an access list contains both IP address and iSCSI Name
identification entry types, then every IP host that requires access to the associated set of storage
resources must have a matching IP address and iSCSI Name entry in the access list.
There is a maximum of 100 access lists per storage router or per storage router cluster. There is a
maximum of 200 access list identification entries across all access lists in the storage router or storage
router cluster.
Cisco SN 5428-2 Storage Router Software Configuration Guide
12-34
78-15471-01
Chapter 12
Command Line Interface Reference
accesslist iscsi-name
In a cluster environment, access list management functions are handled by a single storage router. To
determine which storage router is performing access list management functions, issue the show cluster
command. If you issue an accesslist iscsi-name command from a storage router that is not performing
access list management functions, the CLI displays an informational message with the name of the node
that is currently handling those functions.
See Chapter 11, “Maintaining and Managing the SN 5428-2 Storage Router,” for more information
about operating the storage router in a cluster.
Examples
The following command add the specified iSCSI Name to the access list named foo:
[SN5428-2A]# accesslist foo iscsi-name ign.1987-05.com.cisco.01.88e8b25a6bf3372a34567123f
Related Commands
Command
Description
accesslist
Create an access list entity.
accesslist A.B.C.D/bits Add IP addresses to an access list.
accesslist
chap-username
Add CHAP user name entries to an access list.
accesslist description
Add a description to an access list.
delete accesslist
Delete a specific access list entry or an entire access list.
restore accesslist
Restore the named access list or all access lists from the named
configuration file.
save accesslist
Save configuration data for the named access list or all access lists.
scsirouter target
accesslist
Associate an access list with a specific SCSI routing instance target or all
targets.
show accesslist
Display the contents of the named access list or all access lists.
show scsirouter
Display configuration and operational information for the named SCSI
routing instance.
Cisco SN 5428-2 Storage Router Software Configuration Guide
78-15471-01
12-35
Chapter 12
Command Line Interface Reference
admin contactinfo
admin contactinfo
To provide basic contact information for the system administrator of this SN 5428-2 Storage Router, use
the admin contactinfo command.
admin contactinfo [name “string” | email “string” | phone “string” | pager “string”]
admin contact info name “string” email “string” phone “string” pager “string”
Syntax Description
name string
(Optional) The name of the storage router administrator.
email string
(Optional) The e-mail address of the storage router administrator. This is an
address to which alerts may be sent.
phone string
(Optional) The phone number of the storage router administrator.
pager string
(Optional) The pager number of the storage router administrator.
Defaults
None.
Command Modes
Administrator.
Command History
Release
Modification
3.2.1
This command was introduced.
Usage Guidelines
Use the admin contactinfo command to provide site-specific information for the system administrator
of the SN 5428-2 Storage Router. The command accepts each parameter separately, or all parameters
together. If all parameters are specified, they must be in the sequence shown. Usage is completely
site-specific.
Enclose each string containing spaces in single or double quotes. If a string contains a single quote,
enclose it is double quotes; if it contains a double quote, enclose it in single quotes. A string cannot
contain both single and double quotes.
Examples
The following commands set the system administrator name and e-mail address:
[SN5428-2A]# admin contactinfo name “Pat Hurley”
[SN5428-2A]# admin contactinfo email “hurley@abc123z.com”
The following command sets all system administrator contact information:
[SN5428-2A]# admin contactinfo name “Chris Smith” email “chris.smith@zxy478x.com” phone
“123.555.5555 ext 97” pager “555.3444 pin 2234”
Cisco SN 5428-2 Storage Router Software Configuration Guide
12-36
78-15471-01
Chapter 12
Command Line Interface Reference
admin contactinfo
Related Commands
Command
Description
admin password
Set the login password for administrative access to the storage router
management interface.
restore system
Restore selected system information from the named configuration file.
save all
Save all configuration information, including the system administrator
contact information.
save system
Save selected system configuration information, including the system
administrator contact information.
show admin
Display system administrator contact information.
Cisco SN 5428-2 Storage Router Software Configuration Guide
78-15471-01
12-37
Chapter 12
Command Line Interface Reference
admin password
admin password
To set the password used for administrative access to the SN 5428-2 Storage Router management
interface, use the admin password command. Access may be via Telnet or SSH (for CLI), or web-based
GUI.
admin password string
Syntax Description
string
Defaults
The default password is cisco.
Command Modes
Administrator.
Command History
Release
Modification
3.2.1
This command was introduced.
Usage Guidelines
The password associated with administrative access to the storage router
management interface. The string can be enclosed in quotes, and must be
enclosed in quotes if the password includes one or more spaces. A string
value of “” clears the password. The default password is cisco.
The management interface is password protected. You must enter passwords when accessing the storage
router via Telnet or SSH (for CLI) or web-based GUI. The Monitor mode password provides view-only
access to the management interface, while the Administrator mode password allows you to create entities
and make changes to the configuration of the storage router. Password protection can also be extended
to the storage router console, using the restrict console command.
The password can contain one or more spaces, if the password string is enclosed in quotes. A string value
of “” clears the password, effectively setting it to nothing.
In a cluster environment, the Administrator mode and Monitor mode passwords are cluster-wide
configuration elements and apply to all storage routers in a cluster. The password management functions
are handled by a single storage router. To determine which storage router is performing password
management functions, issue the show cluster command. If you issue the admin password command
from a storage router that is not performing password management functions, the CLI displays an
informational message with the name of the node that is currently handling those functions.
Note
Examples
The password is displayed in clear text as the command is entered, but it is changed to a series of number
signs (#####) when the change is acknowledged.
The following example sets the Administrator mode password to foo73G. All passwords are case
sensitive.
[SN5428-2A]# admin password foo73G
Cisco SN 5428-2 Storage Router Software Configuration Guide
12-38
78-15471-01
Chapter 12
Command Line Interface Reference
admin password
The following example sets the Administrator mode password to “xZm! 673”:
[SN5428-2A]# admin password “xZm! 673”
Related Commands
Command
Description
aaa generate password Generate a long random password.
enable
Enter Administrator mode.
exit
Leave Administrator mode and enter Monitor mode.
monitor password
Set the login password for view-only access to the storage router
management interface.
restrict console
Enable or disable password checking on the storage router console
interface.
save all
Save all configuration information, including the administrator password.
save system
Save selected system configuration information, including the
Administrator mode passwords.
setup access
Run the wizard to configure Monitor mode and Administrator mode
passwords.
Cisco SN 5428-2 Storage Router Software Configuration Guide
78-15471-01
12-39
Chapter 12
Command Line Interface Reference
cdp enable
cdp enable
To enable Cisco Discovery Protocol (CDP) on the SN 5428-2 Storage Router, use the cdp enable
command. To disable CDP on the storage router, use the no form of this command.
cdp enable
no cdp enable
Syntax Description
This command has no arguments or keywords.
Defaults
CDP is enabled.
Command Modes
Administrator.
Command History
Release
Modification
3.2.1
This command was introduced.
Usage Guidelines
Examples
CDP is enabled by default in order to send or receive CDP information. CDP can be switched on or off
for each specific interface via the cdp interface command.
The following example enables CDP on the storage router:
[SN5428-2A]# cdp enable
Related Commands
Command
Description
cdp holdtime
Specify the amount of time the receiving device should hold a CDP packet
from the SN 5428-2 Storage Router before discarding it.
cdp interface
Switch CDP on or off for the specified interface.
cdp timer
Specify the amount of time between transmissions of CDP packets from the
SN 5428-2 Storage Router.
Cisco SN 5428-2 Storage Router Software Configuration Guide
12-40
78-15471-01
Chapter 12
Command Line Interface Reference
cdp holdtime
cdp holdtime
To specify the amount of time the receiving device should hold a CDP packet from the SN 5428-2
Storage Router before discarding it, use the cdp holdtime command. To revert to the default setting, use
the no form of this command.
cdp holdtime nn
no cdp holdtime
Syntax Description
nn
Defaults
The default holdtime is 180 seconds.
Command Modes
Administrator.
Command History
Release
Modification
3.2.1
This command was introduced.
The holdtime to be sent in the CDP update packets, in seconds.
Usage Guidelines
The CDP holdtime must be set to a higher number of seconds than the time between CDP transmissions,
which is set using the cdp timer command.
Examples
The following example sets the CDP holdtime to 60, meaning that the CDP packet being sent from the
storage router should be held by the receiving device for 60 seconds before being discarded. You may
want to set the holdtime lower than the default setting of 180 seconds if information about the storage
router changes frequently.
[SN5428-2A]# cdp holdtime 60
Related Commands
Command
Description
cdp enable
Enable or disable CDP on the SN 5428-2 Storage Router.
cdp interface
Switch CDP on or off for the specified interface.
cdp timer
Specify the amount of time between transmissions of CDP packets from the
SN 5428-2 Storage Router.
Cisco SN 5428-2 Storage Router Software Configuration Guide
78-15471-01
12-41
Chapter 12
Command Line Interface Reference
cdp interface
cdp interface
To enable CDP for a specific interface, use the cdp interface command. To disable CDP for a specific
interface, use the no form of this command.
cdp interface if-name enable
no cdp interface if-name enable
Syntax Description
if-name
The name of the interface for which you are enabling or disabling CDP.
CDP can be enabled on the management (mgmt), HA, and Gigabit Ethernet
(ge2) interfaces. When you type the cdp interface ? command, the CLI lists
the interfaces available. You cannot specify a nonexistent interface.
enable
Keyword used to enable CDP for the specified interface.
Defaults
CDP is enabled for all interfaces.
Command Modes
Administrator.
Command History
Release
Modification
3.2.1
This command was introduced.
Usage Guidelines
CDP must be enabled for the SN 5428-2 Storage Router, using the cdp enable command, before it can
be enabled for a specific interface.
Examples
The following example enables CDP for the Gigabit Ethernet interface, ge2:
[SN5428-2A]# cdp interface ge2 enable
The following example disables CDP for the management interface:
[SN5428-2A]# no cdp interface mgmt enable
Related Commands
Command
Description
cdp enable
Enable or disable CDP on the SN 5428-2 Storage Router.
cdp holdtime
Specify the amount of time the receiving device should hold a CDP packet
from the SN 5428-2 Storage Router before discarding it.
cdp timer
Specify the amount of time between transmissions of CDP packets from the
SN 5428-2 Storage Router.
Cisco SN 5428-2 Storage Router Software Configuration Guide
12-42
78-15471-01
Chapter 12
Command Line Interface Reference
cdp timer
cdp timer
To specify the amount of time between transmissions of CDP packets from the SN 5428-2 Storage
Router, use the cdp timer command. To revert to the default setting, use the no form of this command.
cdp timer nn
no cdp timer
Syntax Description
nn
Defaults
The default is 60 seconds.
Command Modes
Administrator.
Command History
Release
Modification
3.2.1
This command was introduced.
The number of seconds between transmissions of CDP packets from the
SN 5428-2 Storage Router.
Usage Guidelines
The time between CDP transmissions must be set to a lower number than the CDP holdtime, which is
set using the cdp holdtime command. There is a trade-off between sending more frequent CDP updates
and bandwidth utilization.
Examples
The following example sets the CDP timer to 90, meaning that CDP updates are sent every 90 seconds,
which is less frequently than the default of 60 seconds. You may want to make this change if you are
concerned about preserving bandwidth.
[SN5428-2A]# cdp timer 90
Related Commands
Command
Description
cdp enable
Enable or disable CDP on the SN 5428-2 Storage Router.
cdp holdtime
Specify the amount of time the receiving device should hold a CDP packet
from the SN 5428-2 Storage Router before discarding it.
cdp interface
Switch CDP on or off for the specified interface.
Cisco SN 5428-2 Storage Router Software Configuration Guide
78-15471-01
12-43
Chapter 12
Command Line Interface Reference
clear conf
clear conf
To return certain configuration settings to factory defaults, use the clear conf wizard. The clear conf
wizard prompts you to enter the Administrator mode password and then to indicate which settings to
restore to factory defaults.
clear conf
Syntax Description
This command has no arguments or keywords.
Defaults
None.
Command Modes
Administrator.
Command History
Release
Modification
3.2.1
This command was introduced.
Usage Guidelines
The clear conf wizard is only available when the storage router is deployed for SCSI routing. If the
storage router is deployed for transparent SCSI routing, use the clear conf {all | system} command to
return the storage router configuration to factory default settings.
Follow these guidelines when using the clear conf wizard:
•
Select apps to remove all SCSI routing instances but retain system configuration settings.
•
Select system to remove all SCSI routing instances and system configuration settings.
•
Select saved to delete all backup configuration files from disk.
•
Select all to remove all SCSI routing instances, system configuration settings, and saved
configuration files.
The system will reboot if you select apps, system, or all.
System configuration settings include:
•
The management and HA interface IP addresses
•
Configuration information for Fibre Channel interfaces
•
Saved zone configuration information
•
Domain name servers
•
NTP server and time zone information
•
SNMP information
•
Administrator and Monitor passwords, and administrator contact information
•
AAA authentication configuration information
•
VLAN and VTP information
Cisco SN 5428-2 Storage Router Software Configuration Guide
12-44
78-15471-01
Chapter 12
Command Line Interface Reference
clear conf
Deleting system configuration makes the storage router unavailable to Telnet, SSH or web-based GUI
sessions until the management interface is reconfigured with an IP address via a console connection. See
Chapter 2, “First-Time Configuration,” for more information about initial system configuration.
Note
Examples
The clear conf wizard will not reset any Secure Shell (SSH) public and private key pairs generated for
the storage router. Use the ssh keygen command to generate new SSH keys after the storage router is
restored to the selected factory default settings.
The following example removes all SCSI routing instances from the storage router. The system
configuration settings are retained.
[SN5428-2_A1]# clear conf
Enter admin password: *****
This process can restore factory default settings for the SN5428-2.
* Select "apps" to remove active applications and retain system
configuration settings.
* Select "system" to remove active applications and system
configuration settings.
* Select "saved" to remove all backup configurations from disk.
* Select "all" to remove active applications, system configuration,
and saved configurations.
The system configuration includes the management port, dns, admin and
monitor login, ntp, and snmp. You will need to use the console
to reconfigure the management port if you erase the system configuration.
The system will reboot if you select "apps", "system", or "all".
Erase what? [apps/system/saved/all/cancel (cancel)]apps
Configuration cleared. System configuration settings retained.
System halting.............!
System has been halted
Related Commands
Command
Description
setup access
Run the wizard to configure Monitor mode and Administrator mode
passwords.
setup cluster
Change the configuration of the high availability environment.
setup fcip
Run the wizard to manually configure FCIP instances.
setup iscsi-port
Run the wizard to manually configure the port used for iSCSI traffic.
setup mgmt
Run the wizard to configure the management interface.
setup netmgmt
Run the wizard to configure network management.
setup scsi
Run the wizard to configure a SCSI routing instance.
setup time
Run the wizard to configure the system date and time.
Cisco SN 5428-2 Storage Router Software Configuration Guide
78-15471-01
12-45
Chapter 12
Command Line Interface Reference
clear conf {all | system}
clear conf {all | system}
To return certain configuration settings to factory defaults, use the clear conf {all | system} command.
clear conf {all | system} password
Syntax Description
all
Remove all storage router configuration information, including system
configuration settings, saved configuration files, SCSI routing and FCIP
instances, access lists, and cluster configuration settings.
system
Remove all system configuration settings, SCSI routing instances, access
lists and cluster configuration settings. Saved configuration files will be
retained.
password
The Administrator mode password.
Defaults
None.
Command Modes
Administrator.
Command History
Release
Modification
3.2.1
This command was introduced.
Usage Guidelines
System configuration settings include:
•
The management and HA interface IP addresses
•
Configuration information for Fibre Channel interfaces
•
Saved zone configuration information
•
Domain name servers
•
NTP server and time zone information
•
SNMP information
•
Administrator and Monitor passwords, and administrator contact information
•
AAA authentication information
•
VLAN and VTP information
Issuing the clear conf command with either the system or all keyword causes the storage router to
reboot.
Deleting system configuration makes the storage router unavailable to Telnet or web-based GUI sessions
until the management interface is reconfigured with an IP address via a console connection. See
Chapter 2, “First-Time Configuration,” for more information about initial system configuration.
Cisco SN 5428-2 Storage Router Software Configuration Guide
12-46
78-15471-01
Chapter 12
Command Line Interface Reference
clear conf {all | system}
Note
Examples
The clear conf command will not reset any Secure Shell (SSH) public and private key pairs generated
for the storage router. Use the ssh keygen command to generate new SSH keys after the storage router
is restored to the selected factory default settings.
The following example removes all storage router configuration information, returning the storage router
to its initial default configuration. The example uses the default Administrator mode password, cisco.
[SN5428-2_A1]# clear conf all cisco
Clearing configuration...
Current configuration and named configurations cleared.
System halting.........
Related Commands
Command
Description
clear conf
Run the wizard to reset the storage router to factory defaults.
setup access
Run the wizard to configure Monitor mode and Administrator mode
passwords.
setup cluster
Change the configuration of the storage router’s high availability
environment.
setup fcip
Run the wizard to manually configure FCIP instances.
setup iscsi-port
Run the wizard to manually configure the port used for iSCSI traffic.
setup mgmt
Run the wizard to configure the management interface.
setup netmgmt
Run the wizard to configure network management.
setup scsi
Run the wizard to configure a SCSI routing instance.
setup time
Run the wizard to configure the system date and time.
Cisco SN 5428-2 Storage Router Software Configuration Guide
78-15471-01
12-47
Chapter 12
Command Line Interface Reference
clear counters fcip
clear counters fcip
To clear all counters associated with the specified FCIP instance, or all instances, use the
clear counters fcip command.
clear counters fcip {name | all}
Syntax Description
name
The name of the FCIP instance for which counters will be cleared.
all
Clear counters for all FCIP instances.
Defaults
None.
Command Modes
Administrator.
Command History
Release
Modification
3.3.1
This command was introduced.
Usage Guidelines
This command resets the specified operational statistics. It does not display the accumulated statistics
before resetting the counters.
Clear counters before beginning a troubleshooting session, so you can quickly identify the counters that
are changing.
Examples
The following example clears the operational counters for the FCIP instance named fcip1:
[SN5428-2A]# clear counters fcip fcip1
The following example clears the operational counters for all FCIP instances:
[SN5428-2A]# clear counters fcip all
Related Commands
Command
Description
fcip
Create an FCIP instance.
show fcip
Display configuration and operational information for the named FCIP
instance.
Cisco SN 5428-2 Storage Router Software Configuration Guide
12-48
78-15471-01
Chapter 12
Command Line Interface Reference
clear counters interface
clear counters interface
To clear all counters associated with the specified interface, or all interfaces, use the
clear counters interface command.
clear counters interface {if-name | all}
Syntax Description
if-name
The name of the interface. Counters can be cleared for the management
(mgmt), Fibre Channel (fc?), FC initiator interfaces (fci?), Gigabit Ethernet
(ge?) interfaces, and the high availability (ha) interface (if available). When
you type the clear counters interface ? command, the CLI lists the
interfaces available. You cannot specify a nonexistent interface.
all
Clear counters for all interfaces.
Defaults
None.
Command Modes
Administrator or Monitor.
Command History
Release
Modification
3.2.1
This command was introduced.
Usage Guidelines
This command resets all accumulated operational statistics for the specified interface. Operational
statistics can include counters for packets received and transmitted, collisions, octets, multicast packets,
dropped and unsupported protocol, exception status IOCBs (such as LIP reset aborts, port unavailable
or logged out, DMA errors, port configuration changed, command timeout, data overrun, write or read
data underrun, and queue full), Fibre Channel errors, and other general events.
Clear counters before beginning a troubleshooting session, so you can quickly identify the counters that
are changing.
Examples
The following example clears all accumulated operational statistics counters for the Fibre Channel
interface fc1.
[SN5428-2A]# clear counters interface fc1
Related Commands
Command
Description
show interface
Display operational and configuration information for the specified
interface or all interfaces.
Cisco SN 5428-2 Storage Router Software Configuration Guide
78-15471-01
12-49
Chapter 12
Command Line Interface Reference
clear counters scsirouter
clear counters scsirouter
To reset accumulated operational statistics for the specified SCSI routing instance, use the
clear counters scsirouter command.
clear counters scsirouter {name | all} {connection | host | target {name | all}}
Syntax Description
name
The name of the SCSI routing instance for which counters will be cleared.
all
Clear counters for all SCSI routing instances.
connection
Clear operational statistics related to connections only.
host
Clear operational statistics related to currently connected hosts only.
target name
Clear operational statistics related to the specified target.
target all
Clear operational statistics related to all targets.
Defaults
None.
Command Modes
Administrator or Monitor.
Command History
Release
Modification
3.2.1
This command was introduced.
Usage Guidelines
This command resets the specified operational statistics. It does not display the accumulated statistics
before resetting the counters.
Clear counters before beginning a troubleshooting session, so you can quickly identify the counters that
are changing.
Examples
The following example clears the connection counters for the SCSI routing instance myScsi1.
[SN5428-2A]# clear counters scsirouter myScsi1 connection
Related Commands
Command
Description
show scsirouter
Display configuration and operational information for the named SCSI
routing instance.
Cisco SN 5428-2 Storage Router Software Configuration Guide
12-50
78-15471-01
Chapter 12
Command Line Interface Reference
clear fcswitch
clear fcswitch
To clear the switch log files of all entries or to clear stored zoning configuration information, issue the
clear fcswitch command.
clear fcswitch {devlog | syslog | zones {fabric | local}}
Syntax Description
devlog
The switch development log file.
syslog
The switch system log file.
zones
Zoning changes received from switches in the fabric and stored by the
SN 5428-2 Storage Router.
fabric
Keyword used to clear the local zoning database and deactivate the active
zone set for the entire fabric.
local
Keyword used to clear the local zoning database for the storage router only.
All ports operating as E_Ports must be inactive before the local zoning
configuration is cleared.
Defaults
None.
Command Modes
Administrator.
Command History
Release
Modification
3.2.1
This command was introduced.
Usage Guidelines
Clear the switch development or system log file if it is large, or if you are going to perform testing and
want to be sure the switch log files only reflects information from the testing session.
Clear local zoning configuration if you are moving the storage router from one FC switched zoned fabric
to another or removing a switch from the fabric, or when other network changes have been made that
render the saved zoning information inaccurate. All ports operating as E_Ports must be inactive. If the
clear fcswitch zones local command is issued when there is an active E_Port on the SN 5428-2 Storage
Router, the command fails and issues a warning message indicating the FC interfaces that are currently
enabled.
Use the fabric keyword to clear the local zoning database and deactivate the active zoneset for the entire
fabric.
Examples
The following example clears the switch development log files:
[SN5428-2A]# clear fcswitch devlog
The following example clears the switch system log files:
[SN5428-2A]# clear fcswitch syslog
Cisco SN 5428-2 Storage Router Software Configuration Guide
78-15471-01
12-51
Chapter 12
Command Line Interface Reference
clear fcswitch
The following example clears all saved zoning information from the storage router local zoning
database:
[SN5428-2A]# clear fcswitch zones local
The following example clears the local zoning database and deactivates the active zone set for the entire
fabric:
[SN5428-2A]# clear fcswitch zones fabric
Related Commands
Command
Description
fcswitch devlog
Specify logging parameters for the switch development log file.
fcswitch domainid
Set the domain ID for the storage router, to be used for FC switched fabric
zoning.
fcswitch syslog
Specify logging parameters for the switch system log file.
fcswitch zoning
autosave
Configure the storage router to participate in FC switched fabric zones.
show debug fcswitch
Display internal FC interface parameters, including switch log entries.
show fcswitch
Display global configuration information for storage router FC interfaces.
show fcswitch fabric
Display information about the Fibre Channel fabric.
show fcswitch
linkstate
Display information about the storage router link state database.
zone
Create a Fibre Channel fabric zone.
zoneset
Create a Fibre Channel fabric zone set.
Cisco SN 5428-2 Storage Router Software Configuration Guide
12-52
78-15471-01
Chapter 12
Command Line Interface Reference
clear log
clear log
To clear the SN 5428-2 Storage Router log file of all entries, issue the clear log command.
clear log
Syntax Description
This command has no arguments or keywords.
Defaults
None.
Command Modes
Administrator.
Command History
Release
Modification
3.2.1.
This command was introduced.
Usage Guidelines
Clear the storage router log file if it is large, or if you are going to perform testing and want to be sure
the log file only reflects information from the testing session.
Examples
The following example clears all entries from the storage router log file:
[SN5428-2A]# clear log
Related Commands
Command
Description
logging level
Add rule entries to route storage router event, debug and trace messages to
various destinations based on facility and notification level.
show logging
Display the routing rules in the logging table and the contents of the storage
router log file.
Cisco SN 5428-2 Storage Router Software Configuration Guide
78-15471-01
12-53
Chapter 12
Command Line Interface Reference
clear logging table
clear logging table
To clear the SN 5428-2 Storage Router logging table of all entries, or to reset the table to factory
defaults, issue the clear logging table command.
clear logging table [to factory_defaults]
Syntax Description
to factory_defaults
Defaults
None.
Command Modes
Administrator.
Command History
Release
Modification
3.2.1.
This command was introduced.
Usage Guidelines
Return the storage router logging table to the factory default logging rule
entries.
Use this command to remove all rules for routing storage router event messages. If the logging table is
cleared, logging is still enabled but all messages will be discarded.
To return the logging table to the factory default logging rules, use the to factory_defaults keywords.
The factory default logging rules are as follows:
Examples
•
All messages from all facilities at notice level or lower levels are logged to all destinations.
•
All messages from all facilities at info level of lower levels are logged to the storage router log file.
The following example clears all entries from the storage router logging table and returns the table to
the default logging rules:
[SN5428-2A]# clear logging table to factory_defaults
Related Commands
Command
Description
delete logging
Delete a rule from the logging table.
logging #?
Insert a routing rule entry into the storage router logging table.
logging level
Add rule entries to route storage router event, debug and trace messages to
various destinations based on facility and notification level.
logging on
Enable or temporarily disable logging of storage router event message.
show logging
Display the routing rules in the logging table and the contents of the storage
router log file.
Cisco SN 5428-2 Storage Router Software Configuration Guide
12-54
78-15471-01
Chapter 12
Command Line Interface Reference
clear scsirouter failover
clear scsirouter failover
To clear the primary or secondary storage router from the HA failover list for the specified SCSI routing
instance, use the clear scsirouter command.
clear scsirouter name failover {primary | secondary}
Syntax Description
name
The name of the SCSI routing instance.
primary
Delete the current primary storage router from the HA failover list.
secondary
Delete the secondary storage router from the HA failover list.
Defaults
None.
Command Modes
Administrator.
Command History
Release
Modification
3.2.1
This command was introduced.
Usage Guidelines
Use the clear scsirouter failover command to reset the primary or secondary storage router on the HA
failover list for the specified SCSI routing instance. If there is no primary or secondary storage router
configured on the HA failover list when the SCSI routing instance fails over, the cluster attempts to run
the instance on the first node that is available based on HA failover eligibility information.
Use the scsirouter failover command to add a storage router to the HA failover list.
Note
Examples
This command causes the SCSI routing instance configuration information to be saved and all nodes in
the cluster to be updated.
The following example removes the current primary storage router from the HA failover list for SCSI
routing instance foo:
[SN5428-2A]# clear scsirouter foo failover primary
Cisco SN 5428-2 Storage Router Software Configuration Guide
78-15471-01
12-55
Chapter 12
Command Line Interface Reference
clear scsirouter failover
Related Commands
Command
Description
failover scsirouter
Cause the named SCSI routing instance to cease running on the storage
router.
scsirouter failover
Add the storage router to the HA failover list for the specified SCSI routing
instance.
Cisco SN 5428-2 Storage Router Software Configuration Guide
12-56
78-15471-01
Chapter 12
Command Line Interface Reference
clear scsirouter primary
clear scsirouter primary
To remove the storage router configured as the primary for the named SCSI routing instance, use the
clear scsirouter primary command.
clear scsirouter name primary
Syntax Description
name
Defaults
None.
Command Modes
Administrator.
Command History
Release
Modification
3.2.1
This command was introduced.
Usage Guidelines
The name of the SCSI routing instance.
At any given time, a SCSI routing instance can run on only one storage router in a cluster. If a SCSI
routing instance has the primary attribute set, the specified storage router will take over running that
instance upon system restart or whenever target and critical resources are available.
If the primary attribute is not set, the SCSI routing instance continues running on the node where it was
started until it is explicitly stopped (via a no scsirouter enable command), it automatically fails over to
another storage router in the cluster because targets or critical resources are unavailable, or an explicit
failover scsirouter command is issued. This is the default behavior.
Examples
The following command removes the storage router configured as the primary for the SCSI routing
instance named lab2:
[SN5428-2A]# clear scsirouter lab2 primary
Related Commands
Command
Description
clear scsirouter
failover
Remove the designated primary or secondary storage router from the HA
failover list for the specified SCSI routing instance.
scsirouter primary
Identify the storage router as the preferred storage router to run the named
SCSI routing instance.
scsirouter failover
Add the storage router to the HA failover list for the specified SCSI routing
instance.
Cisco SN 5428-2 Storage Router Software Configuration Guide
78-15471-01
12-57
Chapter 12
Command Line Interface Reference
clear static
clear static
To clear the mapping of the IP host to Fibre Channel (FC) address for the specified World Wide Port
Name (WWPN), use the clear static command. This command is only available when the storage router
is deployed for static transparent SCSI routing.
clear static iscsibindings {all | xxxxxxxxxxxxxxxx}
Syntax Description
iscsibindings all
Clear all IP host to FC address mappings.
iscsibindings
xxxxxxxxxxxxxxxx
Clear the mapping represented by this WWPN.
Note
WWPN address notation is represented by 16 hex digits. The digits
may be separated by colons. When using WWPN addresses in this
command, colons can be omitted or placed anywhere in the address
notation as long as they do not leave one character without a partner
character.
Defaults
None.
Command Modes
Administrator.
Command History
Release
Modification
3.3.1
This command was introduced.
Usage Guidelines
When the storage router is deployed for static transparent SCSI routing, the IP host to FC address
mappings are saved and retained in the storage router when it is restarted. If an IP host will no longer be
accessing storage via the SN 5428-2, or if you want the SN 5428-2 to create a new mapping when the IP
host logs in again, you can clear an existing mapping. Mappings can only be cleared if they are not
currently in use.
To display the mappings that are currently configured in the storage router, use the
show static iscsibindings command.
Examples
The following example displays the currently configured mappings, and then deletes the mapping for the
IP host at IP address 10.1.20.2 (WWPN 280100065338d6c0):
[SN5428-2A]# show static iscsibindings
Interface WWPN
Host IP Address
--------- ---------------- ---------------fci1
280100065338d6c0 10.1.20.2
fci1
280200065338d6c0 10.1.4.213
fci2
290100065338d6c0 10.1.30.100
Host Name
------------------------------iscsi.cisco.testlab
iqn.1987-05.com.cisco.02.0AB08....B6E5CCE.WIN1
iqn.1987-05.com.cisco.02.9FD389....36D3D3.NT10
[SN5428-2A]# clear static iscsibindings 280100065338d6c0
Binding cleared for WWPN 280100065338d6c0
Cisco SN 5428-2 Storage Router Software Configuration Guide
12-58
78-15471-01
Chapter 12
Command Line Interface Reference
clear static
The following example clears all IP host to FC mappings saved in the storage router. If a mapping is in
use by an IP host, the mapping will not be cleared.
[SN5428-2A]# clear static iscsibindings all
Related Commands
Command
Description
show static
Display the currently configured IP host to FC address mappings saved in
the storage router.
Cisco SN 5428-2 Storage Router Software Configuration Guide
78-15471-01
12-59
Chapter 12
Command Line Interface Reference
clock set
clock set
To set the storage router system clock to the given date and time, use the clock set command. Date and
time information is used for log files and the user interface.
clock set hh:mm:ss mm dd yyyy
Syntax Description
hh:mm:ss mm dd yyyy
Defaults
None.
Command Modes
Administrator.
Command History
Release
Modification
3.2.1
This command was introduced.
The current time in hours, minutes, and seconds, followed by the current
month, day, and year. For example, 13:55:22 06 22 2001.
Usage Guidelines
If the storage router should synchronize its date and time with a network time protocol (NTP) server, see
the ntp peer command.
Examples
The following example sets the storage router date and time to June 22, 2001 at 14:39:00.
[SN5428-2A]# clock set 14:39:00 06 22 2001
Related Commands
Command
Description
clock timezone
Specify the time zone for the storage router.
ntp peer
Specify the name or IP address of the NTP server with which the storage
router will synchronize date and time.
setup time
Run the wizard to configure the system date and time.
show clock
Display the current system date and time, including the system timezone.
Cisco SN 5428-2 Storage Router Software Configuration Guide
12-60
78-15471-01
Chapter 12
Command Line Interface Reference
clock timezone
clock timezone
To specify the time zone for the storage router, use the clock timezone command.
clock timezone {string | ?}
Syntax Description
string
A character string representing the time zone of the storage router. For
example, America/Chicago or Europe/Amsterdam.
?
Display a list of all valid time zones. Use any time zone in this list for the
string parameter to set the storage router to that time zone.
Defaults
None.
Command Modes
Administrator.
Command History
Release
Modification
3.2.1
This command was introduced.
Usage Guidelines
Unless you specify the time zone, the clock setting is assumed to be in Universal time, also known as
Greenwich Mean Time (GMT).
You can use the setup time wizard to select a time zone, set the clock and date, and identify an NTP
server for the storage router.
To use the clock timezone command, you must know the appropriate time zone string. Use the “?” to
display a list of valid time zone strings.
Examples
The following example sets the storage router time zone to US/Mountain:
[SN5428-2A]# clock timezone US/Mountain
Related Commands
Command
Description
clock set
Set the storage router system clock.
ntp peer
Specify the name or IP address of the NTP server with which the storage
router will synchronize date and time.
setup time
Run the wizard to configure the system date and time.
show clock
Display the current system date and time, including the system time zone.
Cisco SN 5428-2 Storage Router Software Configuration Guide
78-15471-01
12-61
Chapter 12
Command Line Interface Reference
copy
copy
To copy the named configuration file or script file from the specified location to the savedconfig or script
directory, or from the storage router to the specified location, use the copy command. The exchange is
via HTTP or TFTP. When copying files to the storage router, any file of the same name in the savedconfig
or script directory is overwritten.
copy http://FileUrl {savedconfig:configfilename | script:scriptfilename}
copy tftp://Location/Directory/Filename {savedconfig:configfilename | script:scriptfilename}
copy {savedconfig:configfilename | script:scriptfilename} tftp://Location/Directory/Filename
Syntax Description
FileUrl
The URL (including the file name) of the configuration or script file to be
copied to the storage router, such as http://acme/~myhome/allconf.xml. (In
this example, the host name acme can be used if the ip name-server
command was previously issued.) Configuration files are transferred to the
savedconfig directory; script files are transferred to the script directory.
configfilename
The name of the saved configuration file. If the file is being copied from the
storage router to a TFTP server, it must exist in the storage router
savedconfig directory.
scriptfilename
The name of the saved script file. If the file is being copied from the storage
router to a TFTP server, it must exist in the storage router script directory.
Location/Directory/File The name of the TFTP server and default directory, followed by the file
name
name. The file must currently exist in the directory. It will be overwritten
by the file copied from the storage router.
Note
If the default directory is tftpboot, specify only the name of the
TFTP server and the file name.
Defaults
None.
Command Modes
Administrator.
Command History
Release
Modification
3.2.1
This command was introduced.
Usage Guidelines
The copy command does not affect the running or persistent configuration of the storage router or high
availability cluster. However, the restore command can be used to copy the contents of a saved
configuration file into persistent memory, while the read script command can be used to execute the
commands in a script file to modify a storage router configuration.
Because TFTP does not require a user name and password, directories and files cannot be created. When
you copy a file to a TFTP server, you must have read/write permissions for the complete file path, and
the file copied from the storage router must already exist.
Cisco SN 5428-2 Storage Router Software Configuration Guide
12-62
78-15471-01
Chapter 12
Command Line Interface Reference
copy
Examples
The following example copies the saved configuration file myFoo.xml from a server with an IP address
of 10.1.40.10 to the storage router. The file name is changed to myFoo_restore.xml when it is written to
the storage router savedconfig directory.
[SN5428-2A]# copy http://10.1.40.10/usr/SN5428-2/savedconfig/myFoo.xml
savedconfig:myFoo_restore.xml
The following example copies the script file SN5428-2_Lab from a server named acme. The file name is
unchanged when it is written to the storage router script directory.
[SN5428-2A]# copy http://acme/~myhome/SN5428-2_Lab script:SN5428-2_Lab
The following example copies the saved configuration file, backup_23, to the daily_backup file in the
tftpboot directory of the tftp_primary server. The file, daily_backup, must already exist in the tftpboot
directory of the tftp_primary server. This command will overwrite the existing daily_backup file.
Note
Because the default directory is tftpboot, the command does not specify directory information.
[SN5428-2A]# copy savedconfig:backup_23 tftp://tftp_primary/daily_backup
Related Commands
Commands
Description
read script
Read and execute the CLI commands in the named script file.
restore aaa
Restore AAA authentication services from the named configuration file.
restore accesslist
Restore the named access list or all access lists from the named
configuration file.
restore all
Restore the contents of the named configuration file into memory.
restore scsirouter
Restore the named SCSI routing instance from the named configuration file.
restore system
Restore selected system information from the named configuration file.
restore vlan
Restore VLAN configuration information from the named configuration
file.
save aaa
Save the current AAA configuration information.
save accesslist
Save configuration data for the named access list or all access lists.
save all
Save all configuration information.
save scsirouter
Save configuration information for the named SCSI routing instance.
save system
Save selected system configuration information.
save vlan
Save configuration information for the named VLAN or for all VLANs.
show savedconfig
Display the contents of the savedconfig directory or the contents of the
named configuration file.
show script
Display the contents of the script directory or the contents of the named
command file.
Cisco SN 5428-2 Storage Router Software Configuration Guide
78-15471-01
12-63
Chapter 12
Command Line Interface Reference
debug aaa
debug aaa
To enable debugging for authentication, authorization, and accounting (AAA) services, use the
debug aaa command. To disable debugging for AAA authentication services, use the no form of this
command.
debug aaa
no debug aaa
Syntax Description
This command has no arguments or keywords.
Defaults
Debugging is not enabled.
Command Modes
Administrator.
Command History
Release
Modifications
3.2.1
This command was introduced.
Usage Guidelines
Use this command to debug problems with iSCSI, Enable and Login authentication or general AAA
authentication services. Create log route entries for notification level debugging to send the trace and
debug messages to the desired destination, using the logging level command.
Examples
The following example enables AAA debugging:
[SN5428-2A]# debug aaa
Cisco SN 5428-2 Storage Router Software Configuration Guide
12-64
78-15471-01
Chapter 12
Command Line Interface Reference
debug aaa
Related Commands
Command
Description
aaa authentication
enable
Configure AAA authentication services for Administrator mode access to
the SN 5428-2 Storage Router via the CLI enable command.
aaa authentication
iscsi
Configure the AAA authentication services to be used for iSCSI
authentication.
aaa authentication
login
Configure AAA authentication services for Monitor mode access to the
SN 5428-2 Storage Router via the CLI.
aaa group server
radius
Create a named group of RADIUS servers for AAA authentication services.
aaa group server
tacacs+
Create a named group of TACACS+ servers for AAA authentication
services.
aaa test authentication Enable testing of AAA authentication services.
debug scsirouter
Enable debugging for the named SCSI routing instance.
logging level
Add rule entries to route storage router event, debug and trace messages to
various destinations based on facility and notification level.
restore aaa
Restore AAA configuration services from a saved configuration file.
save aaa
Save the current AAA configuration information.
scsirouter
authentication
Enable iSCSI authentication for the named SCSI routing instance.
show aaa
Display AAA configuration information.
Cisco SN 5428-2 Storage Router Software Configuration Guide
78-15471-01
12-65
Chapter 12
Command Line Interface Reference
debug cmd
debug cmd
To run any operating system command with up to five arguments from the CLI, use the debug cmd
command.
debug cmd os-command [parameters]
Syntax Description
os-command
Any valid operating system command. Do not invoke interactive functions.
parameters
Up to five command parameters.
Defaults
None.
Command Modes
Administrator.
Command History
Release
Modifications
3.2.1
This command was introduced.
Usage Guidelines
The debug cmd command is designed for debug purposes, and should be used under the guidance of a
Cisco Technical Support professional.
Examples
The following example displays usage information for the debug cmd:
[SN5428-2A]# debug cmd dbgRunOSCmdHelp 0
[SN5428-2A]# debug cmd dbgRunOSCmdHelp 0c 1a c4 3c
Running command dbgRunOSCmdHelp(0xc1ac43c) with args 0 0 0 0 0
CLI usage: debug cmd symbol arg1 .. arg5
symbol -- any named OS function
arg1 .. arg5 -- numbers (interpreted as hex) or
strings if escaped with an initial '$', such as $fc1
Anything that doesn't convert to a number is a string
Return value is 0 = 0x0 (OK)
Related Commands
Command
Description
debug aaa
Enable debugging for AAA authentication services.
debug scsirouter
Enable debugging for the named SCSI routing instance.
Cisco SN 5428-2 Storage Router Software Configuration Guide
12-66
78-15471-01
Chapter 12
Command Line Interface Reference
debug fcip
debug fcip
To enable trace facilities for debugging FCIP instances, use the debug fcip command. To disable
debugging, use the no form of this command.
debug fcip name {mailboxtrace | packettrace mask}
no debug fcip name mailboxtrace
Syntax Description
name
The name of the FCIP instance to be debugged.
mailboxtrace
Keyword, indicating that mail box tracing services will be enabled.
packettrace mask
Keyword, indicating that packet tracing services will be enabled. The mask
value indicates the traces to capture, in hex. The default value, 0xFFFF,
captures all traces. A value of 0x0000 turns off packet tracing.
Defaults
All trace facilities are enabled, by default. The packet trace mask value defaults to 0xFFFF, capturing all
traces.
Command Modes
Administrator.
Command History
Release
Modification
3.3.1
This command was introduced.
Usage Guidelines
The debug fcip command is designed for debug purposes, and should be used under the guidance of a
Cisco Technical Support professional.
Use this command to trace traffic associated with the named FCIP instance. Use the show debug fcip
command to view the trace buffer output. The mask value defaults to 0xFFF, all packets are traced. A
mask value of 0x0000 will turn off packet tracing.
Debug settings are not persistent and will return to default value when the storage router is rebooted. To
retain a mask value for packet tracing services, use the fcip destination config command with the
pkttracemask keyword to change the FCIP instance configuration and then save the changes to the
storage router bootable configuration.
Examples
The following example enables the debug mail box tracing services for the FCIP instance named fcip1:
[SN5428-2A]# debug fcip fcip1 mailboxtrace
The following example enables the debug packet tracing services for the FCIP instance named fcip2. All
packets will be traced.
[SN5428-2A]# debug fcip fcip2 packettrace 0xffff
Cisco SN 5428-2 Storage Router Software Configuration Guide
78-15471-01
12-67
Chapter 12
Command Line Interface Reference
debug fcip
The following example disables debug mail box tracing services for the FCIP instance named fcip1:
[SN5428-2A]# no debug fcip fcip1 mailboxtrace
The following example turns off all packet tracing services for the FCIP instance named fcip2:
[SN5428-2A]# debug fcip fcip2 packettrace 0x0000
Related Commands
Command
Description
fcip
Create an FCIP instance.
fcip destination config Configure operational parameters for the named FCIP instance.
show debug fcip
Display debugging information for the named FCIP instance.
Cisco SN 5428-2 Storage Router Software Configuration Guide
12-68
78-15471-01
Chapter 12
Command Line Interface Reference
debug interface
debug interface
To specify the maximum number of firmware dump files that can exist on the storage router for a
specified initiator interface, or to remove all existing firmware dump files, use the debug interface
command.
debug interface if-name {forcefcfwdump | lldrestartfcfw}
debug interface if-name fwdumpcount nn
debug interface if-name removefwdumps
Syntax Description
if-name
Enable IP trace for the FC initiator interfaces. When you type the
debug interface ? command, the CLI lists the interfaces available. You
cannot specify a nonexistent interface.
forcefcfwdump
Force a dump of FC firmware. A file named qlclifwdump01.txt is created in
the /ata4 partition.
lldrestartfcfw
Restart the FC firmware. Any existing connections may be dropped.
fwdumpcount nn
Specify the maximum number of times the firmware dump files for the
specified interface can be overwritten. If a firmware dump is requested and
the dump files cannot be overwritten, the firmware will be restarted but a
dump file will not be created. The default is 1.
removefwdumps
Keyword used to clear all existing firmware dump files for the specified
interface from the storage router.
Defaults
The maximum number of times firmware dump files can be overwritten for each FC initiator interface
is 1.
Command Modes
Administrator.
Command History
Release
Modification
3.2.1
This command was introduced.
Usage Guidelines
Caution
Best practices suggest clearing all existing firmware dump files for the specified interface before
requesting a new firmware dump.
Some debug interface commands may perform actions that drop existing connections or otherwise
impact normal storage router performance. The debug interface command is designed for debug
purposes and should be used under the guidance of a Cisco Technical Support professional.
Cisco SN 5428-2 Storage Router Software Configuration Guide
78-15471-01
12-69
Chapter 12
Command Line Interface Reference
debug interface
Examples
The following example sets the maximum number of times the firmware dump files for fci1 can be
overwritten to 2:
[SN5428-2A]# debug interface fci1 fwdumpcount 2
The following example clears all firmware dump files for fci2:
[SN5428-2A]# debug interface fci2 removefwdumps
Related Commands
Command
Description
show debug
Display a variety of debug information or perform specific troubleshooting
activities.
show interface
Display operational and configuration information for the specified
interface or all interfaces.
Cisco SN 5428-2 Storage Router Software Configuration Guide
12-70
78-15471-01
Chapter 12
Command Line Interface Reference
debug interface fc?
debug interface fc?
To configure a variety of operational parameters for the internal FC interface switch ports, use the
debug interface fc? command. To disable various parameters, use the no form of this command.
debug interface fc? {al-fairness | fan-enable |ms-enable} enable
debug interface fc? default
debug interface fc? diag
debug interface fc? enable
debug interface fc? ext-credit nn
debug interface fc? linkspeed {auto | 1gb | 2gb}
debug interface fc? loopback {external | internal | online}
debug interface fc? mfs-bundle enable [timeout nn]
debug interface fc? type {auto | donor | f-port | fl-port | g-port | gl-port}
debug interface fc? type tl-port mode {autobridge | autolearn}
no debug interface fc? {al-fairness | fan-enable | ms-enable} enable
no debug interface fc? enable
no debug interface fc? mfs-bundle enable [timeout nn]
Syntax Description
fc?
The name of the internal FC interface switch port for which you are setting
this parameter. Valid values are fc0 and fc15. When you type the
debug interface fc? command, the CLI lists the interfaces available. You
cannot specify a nonexistent interface.
al-fairness enable
Keywords, used to enable the fairness algorithm (loop priority) on the
named internal switch port.
default
Keyword used to reset the port to default operational parameters.
diag
Keyword used to places the switch port into diagnostic mode for testing
purposes.
enable
Keyword used to enable the specified switch port.
ext-credit nn
Keywords used to enable the port to use additional data buffer credits. Valid
values are 0, 11, 22, 33, 44, 55, 66 and 77. The default is 0, indicating that
the port is not enabled for credit extension.
fan-enable enable
Keywords, used to enable Fabric Address Notification (FAN) on the
specified switch port.
linkspeed auto
Keywords, indicating that the transfer rate is negotiated.
linkspeed 1gb
Keywords, indicating the transfer rate is fixed at 1 Gbps.
linkspeed 2gb
Keywords, indicating the transfer rate is fixed at 2 Gbps.
Cisco SN 5428-2 Storage Router Software Configuration Guide
78-15471-01
12-71
Chapter 12
Command Line Interface Reference
debug interface fc?
Defaults
loopback external
Keywords, indicating an external test will be performed. The specified port
must be in a diagnostic state.
loopback internal
Keywords, indicating an internal test will be performed. The specified port
must be in a diagnostic state.
loopback online
Keywords, indicating an online loopback test will be performed. The
specified port must be enabled.
mfs-bundle enable
Keywords, used to enable Multi-Frame sequence (MFS) bundling for the
named switch port.
timeout nn
The timeout value associated with MFS bundling, in milliseconds. Valid
values are 10 through 20480. The default timeout value is 10 msecs.
ms-enable enable
Keywords, used to enable GS-3 management server commands for the
specified switch port.
type auto
Keywords, indicating the port type is automatically negotiated and
functions as a generic loop (GL_Port).
type donor
Keywords, indicating the port type is donor. A donor port places its data
buffer credits in a pool that ports configured for credit extension draw on.
A donor port is essentially disabled; it cannot be used for FC
communication.
type f-port
Keywords, indicating that the port type is fabric. F_Ports are fabric ports.
type fl-port
Keywords, indicating that the port type is fabric loop (also known as “public
loop”).
type g-port
Keywords, indicating that the port type is generic and can function as either
an F_Port or an E_Port. An E_Port is also known as an “expansion port.”
type gl-port
Keywords, indicating that the port type is generic loop and can function as
either an F_Port, FL_Port, or E_Port.
type tl-port
Keywords, indicating that the port type is translated loop.
mode autobridge
Keywords, indicating public targets are made visible to the initiator in a
private loop.
mode autolearn
Keywords, indicating targets in a private loop are made visible.
The internal FC switch ports have the following default operational characteristics:
Command Modes
•
fairness algorithm is disabled (switch has priority)
•
Fabric Address Notification (FAN) is enabled
•
transfer rate is fixed at 2 Gbps
•
Multi-Frame sequence bundling is enabled
•
GS-3 management server commands are enabled
•
port type is fabric (F_Port)
•
credit extension is disabled (ext-credit is set to 0)
Administrator.
Cisco SN 5428-2 Storage Router Software Configuration Guide
12-72
78-15471-01
Chapter 12
Command Line Interface Reference
debug interface fc?
Command History
Usage Guidelines
Caution
Examples
Release
Modification
3.2.1
This command was introduced.
The debug interface fc? command is designed for debug purposes, and should be used under the
guidance of a Cisco Technical Support professional.
Changing operational characteristic for the interface FC switch ports can cause unexpected behavior in
the storage router.
The following example places the internal FC switch port fc0 into diagnostic mode for testing purposes:
[SN5428-2A]# debug interface fc0 diag
Related Commands
Command
Description
show debug interface
fc?
Display debug information for internal FC interface switch ports.
Cisco SN 5428-2 Storage Router Software Configuration Guide
78-15471-01
12-73
Chapter 12
Command Line Interface Reference
debug interface ge?
debug interface ge?
To enable packet tracing on a Gigabit Ethernet interface, use the debug interface ge? command. To
disable packet tracing, use the no form of this command.
debug interface ge? trace [pktcnt nn] [pktsize nn] enable
no debug interface ge? trace enable
Syntax Description
ge?
Enable IP trace for the specified Gigabit Ethernet interface. When you type
the debug interface ge? command, the CLI lists the interfaces available.
You cannot specify a nonexistent interface.
trace
Keyword indicating IP packet tracing will be enabled.
pktcnt nn
(Optional) Specify the maximum number of packets to be traced. nn must
be a value greater then zero (0). If not specified, a circular trace buffer is
used. This is the default.
pktsize nn
(Optional) Specify the maximum number of bytes to trace per packet. Valid
values are 14 to 1024, inclusive. The default is 128.
enable
Keyword used to enable IP packet tracing.
Defaults
IP packet tracing for all Gigabit Ethernet interfaces is disabled by default. The maximum trace size is
128, and all packets use a circular trace buffer.
Command Modes
Administrator.
Command History
Release
Modification
3.2.1
This command was introduced.
Usage Guidelines
Note
The debug interface ge? command is designed for debug purposes, and should be used under the
guidance of a Cisco Technical Support professional.
•
Use the pktcnt keyword to specify the maximum number of packets to be traced. IP packet tracing
will automatically be disabled when the specified number of packets is traced, or the trace buffer
fills up. If a packet count is not specified, a circular trace buffer is used. The default trace buffer size
is 131072 bytes.
•
Use the pktsize keyword to specify the maximum number of bytes to trace per packet. This value
must be in the range of 14 to 1024. The default number of bytes to trace per packet is 128.
•
Use the show debug interface command to display statistics about the packet trace and to display
the contents of the trace buffer in hex.
IP packet tracing must be disabled on the interface before the trace buffer can be displayed.
Cisco SN 5428-2 Storage Router Software Configuration Guide
12-74
78-15471-01
Chapter 12
Command Line Interface Reference
debug interface ge?
Examples
The following example enables IP packet tracing on the ge2 interface:
[SN5428-2A]# debug interface ge2 trace enable
The following example enables IP packet tracing on ge1, for a maximum of 100 packets. A maximum
of 200 bytes will be traced per packet.
[SN5428-2A]# debug interface ge1 trace pktcnt 100 pktsize 200 enable
Related Commands
Command
Description
show debug
Display a variety of debug information or perform specific troubleshooting
activities.
show debug interface
ge?
Display IP packet trace statistics or the contents of the trace buffer.
Cisco SN 5428-2 Storage Router Software Configuration Guide
78-15471-01
12-75
Chapter 12
Command Line Interface Reference
debug ip rip
debug ip rip
To enable routing information protocol (RIP) debug log message, use the debug ip rip command. To
disable RIP debug log message, use the no form of this command.
debug ip rip
no debug ip rip
Syntax Description
This command has no arguments or keywords.
Defaults
RIP debug log messages are disabled.
Command Modes
Administrator.
Command History
Release
Modification
3.2.1
This command was introduced.
Usage Guidelines
The debug ip rip command is designed for debug purposes, and should be used under the guidance of a
Cisco Technical Support professional.
Examples
The following example enables RIP, configures logging to send debug message to all virtual terminal
sessions, and then enables RIP debug log messages. The show ip rip command is used to verify the
running RIP configuration.
[SN5428-2A]# ip rip enable
Dec 09 16:12:50: %IP-5-IRMRSAR: RIP Services are running
*[SN5428-2A]# logging level debug from ip to vty
*[SN5428-2A]# debug ip rip
Dec 31 12:52:14: %IP-7-IRRPRL00: RIP Packet received from 10.1.30.1 length 124
Dec 31 12:52:14: %IP-7-IRRPRL01:
command 2 version 1
Dec 31 12:52:14: %IP-7-IRRPRL02:
route af 2, dest 10.1.40.0 mask 0.0.0.0 nextHop
0.0.0.0 metric 2
Dec 31 12:52:14: %IP-7-IRRPRL02:
route af 2, dest 10.1.51.0 mask 0.0.0.0 nextHop
0.0.0.0 metric 1
*[SN5428-2A]# show ip rip
Routing Information Protocol (RIP) Information:
Invalid Timer: 180
Enabled Flag: true
Debug Flag:
true
Running Flag: true
Cisco SN 5428-2 Storage Router Software Configuration Guide
12-76
78-15471-01
Chapter 12
Command Line Interface Reference
debug ip rip
Related Commands
Command
Description
ip rip enable
Enable the storage router to learn dynamic routing using the routing
information protocol (RIP).
show ip
Display entries from the SN 5428-2 Storage Router routing table, and
statistics about the protocols used in the storage router network. Use the rip
keyword to display RIP configuration information.
Cisco SN 5428-2 Storage Router Software Configuration Guide
78-15471-01
12-77
Chapter 12
Command Line Interface Reference
debug scsirouter
debug scsirouter
To enable trace facilities for debugging SCSI routing instances, use the debug scsirouter command. To
disable debugging, use the no form of this command.
debug scsirouter name scsitrace
no debug scsirouter name scsitrace
Syntax Description
name
The name of the SCSI routing instance to be debugged.
scsitrace
Keyword indicating tracing services will be enabled.
Defaults
All trace facilities are enabled by default.
Command Modes
Administrator.
Command History
Release
Modification
3.2.1
This command was introduced.
Usage Guidelines
When enabled at this level, debug tracing will trace traffic to and from all targets associated with the
named SCSI routing instance. Use the show debug scsirouter command to view the trace buffer output.
Examples
The following example enables debug tracing facilities for a SCSI routing instance named foo:
[SN5428-2A]# debug scsirouter foo scsitrace
Related Commands
Command
Description
debug aaa
Enable debugging for AAA authentication services.
debug scsirouter
iscsitrace
Enable iSCSI trace facilities for debugging connections to and from the
specified SCSI routing instance.
debug scsirouter
target
Enable debugging for a specific SCSI routing instance target and LUN
combination.
show debug scsirouter Display trace buffer output.
Cisco SN 5428-2 Storage Router Software Configuration Guide
12-78
78-15471-01
Chapter 12
Command Line Interface Reference
debug scsirouter iscsitrace
debug scsirouter iscsitrace
To enable trace facilities for debugging iSCSI connections to and from SCSI routing instances, use the
debug scsirouter iscsitrace command. To disable iSCSI trace facilities, use the no form of this
command.
debug scsirouter name iscsitrace [fromto {A.B.C.D/bits | A.B.C.D/1.2.3.4}] [pducnt nn]
[pdusize nn] enable
no debug scsirouter name iscsitrace enable
Syntax Description
name
The name of the SCSI routing instance to be debugged.
fromto A.B.C.D/bits
(Optional) Trace iSCSI Protocol Data Units (PDUs) from and to the
specified host or network. A.B.C.D is the dotted quad notation of the IP
address. The /bits specifies the subnet mask in CIDR style.
fromto A.B.C.D/1.2.3.4 (Optional) Trace iSCSI PDUs from and to the specified host or network.
A.B.C.D is the dotted quad notation of the IP address. 1.2.3.4 is the dotted
quad notation of the subnet mask.
Defaults
pducnt nn
(Optional) Specify the maximum number of PDUs to trace.
pdusize nn
(Optional) Specify the maximum trace size per PDU, in bytes.
enable
Enable iSCSI trace facilities.
The following are the default iSCSI trace options:
•
All client connections to and from the specified SCSI routing instance are traced.
•
The maximum trace size per PDU is 48 bytes.
•
All PDUs are traced (circular).
•
The trace buffer size is 131072 bytes. This value cannot be changed.
Command Modes
Administrator.
Command History
Release
Modification
3.3.1
This command was introduced.
Usage Guidelines
The debug scsirouter iscsitrace command is designed for debug purposes, and should be used under the
guidance of a Cisco Technical Support professional.
Use the show debug scsirouter command with the iscsitrace keyword to display iSCSI trace
information.
Cisco SN 5428-2 Storage Router Software Configuration Guide
78-15471-01
12-79
Chapter 12
Command Line Interface Reference
debug scsirouter iscsitrace
Examples
The following example enables iSCSI trace facilities for the SCSI routing instance named zeus, using
the default iSCSI trace options:
[SN5428-2A]# debug scsirouter zeus iscsitrace enable
Related Commands
Command
Description
debug scsirouter
Enable debugging for the named SCSI routing instance.
debug scsirouter
target
Enable debugging for a specific SCSI routing instance target and LUN
combination.
show debug scsirouter Display trace buffer output.
Cisco SN 5428-2 Storage Router Software Configuration Guide
12-80
78-15471-01
Chapter 12
Command Line Interface Reference
debug scsirouter target
debug scsirouter target
To enable trace facilities for debugging a specific SCSI routing instance target and LUN combination,
use the debug scsirouter target command. To disable debugging, use the no debug scsirouter target
form of this command.
debug scsirouter name target name lun nn scsitrace
no debug scsirouter name target name lun nn scsitrace
Syntax Description
name
The name of the SCSI routing instance to be debugged.
target name
The name of the target to be included in the trace.
lun nn
The specific LUN associated with the target.
scsitrace
Keyword indicating tracing services will be enabled.
Defaults
All trace facilities are enabled by default.
Command Modes
Administrator.
Command History
Release
Modification
3.2.1
This command was introduced.
Usage Guidelines
When enabled at this level, SCSI tracing will trace traffic to and from the specified target and LUN
combination associated with the named SCSI routing instance. Use the show debug scsirouter
command to view the trace buffer output.
Examples
The following example enables SCSI tracing facilities for the target and LUN combination myTarget,
LUN 0, associated with the SCSI routing instance named foo:
[SN5428-2A]# debug scsirouter foo target myTarget lun 0 scsitrace
Related Commands
Command
Description
debug aaa
Enable debugging for AAA authentication services.
debug scsirouter
Enable debugging for the named SCSI routing instance.
debug scsirouter
iscsitrace
Enable iSCSI trace facilities for debugging connections to and from the
specified SCSI routing instance.
show debug scsirouter Display trace buffer output.
Cisco SN 5428-2 Storage Router Software Configuration Guide
78-15471-01
12-81
Chapter 12
Command Line Interface Reference
delete accesslist
delete accesslist
To delete an entire access list, all access lists, or a specified entry from the named access list, use the
delete accesslist command. This command does not change the persistent storage router configuration
until the relevant configuration information has been saved using the appropriate save command with
the bootconfig keyword.
delete accesslist all
delete accesslist name [A.B.C.D/bits | A.B.C.D/1.2.3.4]
delete accesslist name [chap-username username | iscsi-name string]
delete accesslist name all
Syntax Description
name
The name of the access list.
A.B.C.D/bits
(Optional) IP address and subnet mask of the IP host being deleted from the
access list. A.B.C.D is the dotted quad notation of the IP address. The /bits
specifies the subnet mask in CIDR style.
A.B.C.D/1.2.3.4
(Optional) IP address and subnet mask of the IP host being deleted from the
access list. A.B.C.D is the dotted quad notation of the IP address. 1.2.3.4 is
the dotted quad notation of the subnet mask.
chap-username
username
(Optional) The CHAP user name configured for the IP host being deleted
from the access list. The CHAP user name is used for iSCSI authentication
purposes.
iscsi-name string
(Optional) The iSCSI Name of the IP host being deleted from the access list.
name all
Delete all entries from the named access list.
all
Delete all access lists.
Defaults
None.
Command Modes
Administrator.
Command History
Release
Modification
3.2.1
This command was introduced.
Cisco SN 5428-2 Storage Router Software Configuration Guide
12-82
78-15471-01
Chapter 12
Command Line Interface Reference
delete accesslist
Usage Guidelines
Because access lists are cluster entities, this operation affects all targets associated with this access list,
regardless of where the associated SCSI routing instance is running within the high availability cluster.
•
Use the delete accesslist name all to clear all entries from the access list, but retain the access list
entity.
•
Use the delete accesslist name command with no additional parameters to completely delete the
named access list. Before completely deleting an access list, verify that it is no longer associated
with any SCSI routing instance target.
Changes to access lists do not impact currently connected IP hosts; changes are effective for all
subsequent connections.
Note
If you delete an access list that is still associated with a SCSI routing instance target, the target remains
bound to the access list, but subsequent connection requests by IP hosts will be rejected (as if the
scsirouter target accesslist none command had been issued). Use the show scsirouter command with
the target keyword to view access lists associated with SCSI routing instance targets.
In a cluster environment, access list management functions are handled by a single storage router. To
determine which storage router is performing access list management functions, issue the show cluster
command. If you issue a delete accesslist command from a storage router that is not performing access
list management functions, the CLI displays an informational message with the name of the node that is
currently handling those functions.
See Chapter 11, “Maintaining and Managing the SN 5428-2 Storage Router,” for more information on
operating the storage router in a cluster.
Examples
The following example completely deletes the access list named fooList from the currently running
configuration:
[SN5428-2A]# delete accesslist fooList
The following example deletes all entries from the access list named fooList1. The access list entity itself
is not deleted from the currently running configuration:
[SN5428-2A]# delete accesslist fooList1 all
The following example deletes all access lists from the currently running configuration:
[SN5428-2A]# delete accesslist all
The following example deletes the specified IP address from the named access list, fooList2. This
command does not update the bootable configuration of the storage router until a
save accesslist bootconfig or save all bootconfig command is issued.
[SN5428-2A]# delete fooList2 192.168.54.12/32
The following example deletes the specified CHAP user name from the named accesslist, fooList3. This
command does not update the bootable configuration of the storage router until a
save accesslist bootconfig or save all bootconfig command is issued.
[SN5428-2A]# delete fooList3 chap-username webserver15
Cisco SN 5428-2 Storage Router Software Configuration Guide
78-15471-01
12-83
Chapter 12
Command Line Interface Reference
delete accesslist
The following example deletes the specified iSCSI Name from the named accesslist, fooList4. This
command does not update the bootable configuration of the storage router until a
save accesslist bootconfig or save all bootconfig command is issued.
[SN5428-2A]# delete fooList4 iscsi-name ign.1987-05.com.cisco.01.8838a325b4017f
Related Commands
Command
Description
accesslist
Create an access list entity.
accesslist A.B.C.D/bits Add IP addresses to an access list.
accesslist
chap-username
Add CHAP user name entries to an access list.
accesslist iscsi-name
Add iSCSI Name entries to an access list.
restore accesslist
Restore the named access list or all access lists from the named
configuration file.
save accesslist
Save configuration data for the named access list or for all access lists.
scsirouter target
accesslist
Associate an access list with a specific SCSI routing target or all targets.
show accesslist
Display the contents of the named access list or all access lists.
Cisco SN 5428-2 Storage Router Software Configuration Guide
12-84
78-15471-01
Chapter 12
Command Line Interface Reference
delete fcalias
delete fcalias
To delete the named alias, or the specified member WWPN from the named alias, use the delete fcalias
command.
delete fcalias alias-name [member wwpn xxxxxxxxxxxxxxxx]
Syntax Description
alias-name
The name of the alias.
member wwpn
xxxxxxxxxxxxxxxx
The WWPN of the alias member.
Note
WWPN address notation is represented by 16 hex digits. The digits
may be separated by colons. When entering WWPN addresses,
colons can be omitted or placed anywhere in the address notation as
long as they do not leave one character without a partner character.
Defaults
None.
Command Modes
Administrator.
Command History
Release
Modification
3.2.1
This command was introduced.
Usage Guidelines
An alias is a collection of Fibre Channel devices, such as switches, initiators, storage and other
SN 5428-2 Storage Routers, that can be zoned together. An alias is not a zone and cannot include a zone
or another alias as a member.
Use this command to delete an entire alias and all its members from the zoning database, or to delete a
specified member WWPN from an alias.
If the alias is a member of the active zone set, the alias will not be removed from the active zone set until
the active zone set is deactivated. Use the no zoneset command with the enable keyword to deactivate
the active zone set.
Caution
If the storage router is connected to the FC switched fabric, all zoning changes (including the deletion
of an alias) are immediately propagated to other SN 5428-2 Storage Routers and switches in the fabric.
See Chapter 5, “Configuring Fibre Channel Interfaces,” for more information about FC fabric zoning.
Examples
The following example deletes the alias named AliasFoo and all its members. The alias will be removed
from all zone sets in which it is used.
[SN5428-2A]# delete fcalias AliasFoo
Cisco SN 5428-2 Storage Router Software Configuration Guide
78-15471-01
12-85
Chapter 12
Command Line Interface Reference
delete fcalias
The following example deletes the member WWPN 21000004ed4105ab from the alias AliasFoo:
[SN5428-2A]# delete fcalias AliasFoo member wwpn 21000004ed4105ab
Related Commands
Command
Description
fcalias
Create an alias entity for use in Fibre Channel zoning.
fcalias member
Add the specified member to the named alias.
show fcalias
Display information about aliases and their members.
Cisco SN 5428-2 Storage Router Software Configuration Guide
12-86
78-15471-01
Chapter 12
Command Line Interface Reference
delete fcip
delete fcip
To delete the named elements from the FCIP instance, or to delete the named instance or all FCIP
instances, use the delete fcip command. This command does not change the persistent storage router
configuration until the relevant configuration information has been saved using the appropriate save
command with the bootconfig keyword.
delete fcip {name | all}
delete fcip name destination name
Syntax Description
name
The name of the FCIP instance.
all
Keyword, used to delete all FCIP instances from the storage router.
Note
destination name
You are not prompted to confirm your actions.
The name of the specific destination to delete.
Defaults
None.
Command Modes
Administrator.
Command History
Release
Modification
3.3.1
This command was introduced.
Usage Guidelines
Use this command if you want to reconfigure the FCIP instance. You can delete the peer destination or
the entire FCIP instance, or all FCIP instances. You must save the configuration changes to update the
storage router bootable configuration.
Examples
The following examples deletes a destination named dest2 from the FCIP instance, fcip2:
[SN5428-2A]# delete fcip fcip2 destination dest2
The following example deletes all FCIP instances:
[SN5428-2A]# delete fcip all
The following example deletes the FCIP instance named fcip1:
[SN5428-2A]# delete fcip fcip1
Cisco SN 5428-2 Storage Router Software Configuration Guide
78-15471-01
12-87
Chapter 12
Command Line Interface Reference
delete fcip
Related Commands
Command
Description
fcip
Create an FCIP instance.
show fcip
Display configuration and operational information for the named FCIP
instance.
Cisco SN 5428-2 Storage Router Software Configuration Guide
12-88
78-15471-01
Chapter 12
Command Line Interface Reference
delete logging
delete logging
To delete a rule from the logging table, use the delete logging command.
delete logging level notification-level from facility-name
delete logging #?
delete logging #nn
Syntax Description
level notification-level
The notification level of the routing rules entry to be deleted. See Table 12-4
in the Usage Guidelines section for a list of valid names that can be used for
the notification-level argument.
from facility-name
The name of the facility. A facility is the feature area from which the
message is received. See Table 12-5 in the Usage Guidelines section for a
list of valid facility names.
#?
Request an indexed list of entries in the logging table.
#nn
The index number from the displayed list of entries. The specified routing
rule will be deleted.
Defaults
None.
Command Modes
Administrator.
Command History
Release
Modification
3.2.1
This command was introduced.
Usage Guidelines
Event, trace and debug messages can be routed to various destinations, based on the notification level of
the message and the application area (facility) that generated the message. When a log message is
received by the storage router, the logging table rules are searched by facility name and by message level
until a match is found. The log message is sent to all the destinations specified by the matching rule.
Use this command to delete logging rules based on notification level and facility name, or by index
number.
To display an indexed lists of entries in the logging table, use the number sign (#) character followed by
a question mark (?). That action will cause the routing rules in the logging table to be displayed as a
numbered (indexed) set of lines. The command is displayed at the prompt below the list to the point of
the # keyword. Complete the command by entering the appropriate index number. The specified routing
rule will be deleted.
The level limits logging to messages of the specified level or lower levels, based on level number.
Table 12-4 describes the available logging levels.
Cisco SN 5428-2 Storage Router Software Configuration Guide
78-15471-01
12-89
Chapter 12
Command Line Interface Reference
delete logging
Table 12-4 Logging Level Notification Levels and Corresponding Numbers
Note
Notification Level
Level Number
Description
emergency
0
System unusable
alert
1
Immediate action needed
critical
2
Critical conditions
error
3
Error conditions
warning
4
Non-fatal warning conditions
notice
5
Normal but significant conditions
info
6
Informational messages only
debug
7
Information for troubleshooting purposes
The debug notification level should be used for specific troubleshooting purposes only. System
performance and HA behavior may be adversely affected by logging at the debug notification level.
Each facility can have up to eight notification levels. Each facility and notification level pair can have
up to seven destinations. Table 12-5 describes the available facility names.
Table 12-5 Logging Level Facilities
Facility Name
Description
all
All facilities.
AUTH
AAA authentication.
CDP
Cisco Discovery Protocol.
CONF
Configuration functions.
FC
Fibre Channel interfaces.
FCIP
FCIP functions.
GE
Gigabit Ethernet interfaces.
HA
High availability cluster functions.
IF
Interface manager.
INVALID
Generic functions.
IP
IP functions.
ISCSI
iSCSI functions.
MON
Hardware monitor.
SLP
Service Location Protocol service functions.
SNMP
Simple Network Management Protocol.
SYSLOG
Syslog functions.
UI
User interface functions.
VTP
VTP and VLAN functions.
Cisco SN 5428-2 Storage Router Software Configuration Guide
12-90
78-15471-01
Chapter 12
Command Line Interface Reference
delete logging
Use the save system bootconfig or save all bootconfig commands to save the updated logging table.
Examples
The following example displays the logging table and then deletes the routing rule entry for messages at
level info from facility all:
[SN5428-2A]# show logging
Logging is enabled
Index Level
1
info
2
debug
Priority Facility
6
all
7
HA
Route
console logfile
logfile rslog
Syslog host is enabled, ip-address is 10.1.1.144
[SN5428-2A]# delete logging level info from all
The following example displays an indexed list of the routing rules in the logging table and then deletes
the third entry:
[SN5428-2A]# delete logging #?
Logging is enabled
Index
1
2
3
4
Level
critical
debug
notice
warning
Priority
2
7
5
4
Facility
all
SNMP
HA
CDP
Route
console logfile
rslog
all
rslog
Syslog host is enabled, ip-address is 10.1.1.144
[SN5428-2A]# delete logging #3
Related Commands
Command
Description
clear logging table
Clear the SN 5428-2 Storage Router logging table of all entries, or to reset
the table to factory defaults.
logging #?
Insert a routing rule entry into the storage router logging table.
logging level
Add rule entries to route storage router event, debug and trace messages to
various destinations based on facility and notification level.
logging on
Enable or temporarily disable logging of storage router event message.
show logging
Display the routing rules in the logging table and the contents of the storage
router log file.
Cisco SN 5428-2 Storage Router Software Configuration Guide
78-15471-01
12-91
Chapter 12
Command Line Interface Reference
delete savedconfig
delete savedconfig
To remove the named file from the savedconfig directory, use the delete savedconfig command.
delete savedconfig {filename | all}
Syntax Description
filename
The name of the configuration file to be deleted. This file must exist in the
savedconfig directory.
all
Keyword, indicating that all configuration files in the savedconfig directory
are to be deleted.
Defaults
None.
Command Modes
Administrator.
Command History
Release
Modification
3.2.1
This command was introduced.
Usage Guidelines
Use the show savedconfig command to display the contents of the savedconfig directory.
Examples
The following example removes the configuration file named foo_config from the storage router:
[SN5428-2A]# delete savedconfig foo_config
Related Commands
Command
Description
copy
Copy the named configuration or script file from a remote location to the
storage router, or from the storage router to a remote location.
restore all
Restore the contents of the named configuration file into memory.
save all
Save all configuration information.
save system
Save selected system configuration information
show savedconfig
Display the contents of the savedconfig directory or the contents of the
named configuration file.
show script
Display the contents of the script directory or the contents of the named
command file.
Cisco SN 5428-2 Storage Router Software Configuration Guide
12-92
78-15471-01
Chapter 12
Command Line Interface Reference
delete script
delete script
To remove the named command file from the script directory, use the delete script command.
delete script {filename | all}
Syntax Description
filename
The name of the command file to be deleted. This file must exist in the
script directory.
all
Keyword, indicating that all command files in the script directory are to be
deleted.
Defaults
None.
Command Modes
Administrator.
Command History
Release
Modification
3.2.1
This command was introduced.
Usage Guidelines
Use the show script command to display the contents of the script directory or the specified command
file.
Examples
The following example removes the command file named foo_script from the storage router:
[SN5428-2A]# delete script foo_script
Cisco SN 5428-2 Storage Router Software Configuration Guide
78-15471-01
12-93
Chapter 12
Command Line Interface Reference
delete script
Related Commands
Command
Description
copy
Copy the named configuration or script file from a remote location to the
storage router, or from the storage router to a remote location.
read script
Read and execute the CLI commands in the named script file.
restore all
Restore the contents of the named configuration file into memory.
save all
Save all configuration information.
save system
Save selected system configuration information.
show bootconfig
Display the bootable configuration, or create a command file based on the
bootable configuration.
show runningconfig
Display the running configuration, or create a command file based on the
running configuration.
show savedconfig
List the contents of the savedconfig directory or the contents of the named
configuration file.
show script
Display the contents of the script directory or the contents of the named
command file.
Cisco SN 5428-2 Storage Router Software Configuration Guide
12-94
78-15471-01
Chapter 12
Command Line Interface Reference
delete scsirouter
delete scsirouter
To delete the named elements from the SCSI routing instance, use the delete scsirouter command. This
command does not change the persistent storage router configuration until the relevant configuration
information has been saved using the appropriate save command with the bootconfig keyword.
delete scsirouter {name | all} [connection nn | serverif ge? [vlan vid]]
delete scsirouter {name | all} serverif ge? force
delete scsirouter {name | all} target {name | all} [lun nn]
delete scsirouter {name | all} target {name | all} [lun nn] force
delete scsirouter {name | all} force
delete scsirouter name all
Syntax Description
name
The name of the SCSI routing instance.
all
Delete all SCSI routing instances from the storage router, or delete all
attributes for the named SCSI routing instance.
Note
You are not prompted to confirm your actions.
connection nn
(Optional) Delete the specified connection from the named instance or all
instances. Use the show scsirouter command with the connection keyword
to display connection IDs.
serverif ge?
(Optional) Delete the server interface for the named SCSI routing instance
or all instances.
vlan vid
(Optional) Delete the specified VLAN from the named SCSI routing
instance or all instances.
target name
The name of the specific target to delete.
target all
Delete all targets from the named instance.
lun nn
(Optional) Delete the specified iSCSI LUN from the named target or all
targets.
force
(Optional) Keyword that overrides normal protections, allowing the action
to be performed.
Defaults
None.
Command Modes
Administrator.
Command History
Release
Modification
3.2.1
This command was introduced.
Cisco SN 5428-2 Storage Router Software Configuration Guide
78-15471-01
12-95
Chapter 12
Command Line Interface Reference
delete scsirouter
Usage Guidelines
In a cluster environment, changes to the SCSI routing instance can only be made on the storage router
that is the currently running that instance. The SCSI routing instance may be in a stopped state at the
time it is deleted.
The force option allows the SCSI routing instance to be deleted from a storage router that is not currently
running the instance. The force option should only be used when the storage router, or a specific SCSI
routing instance, is in an abnormal state and cannot be recovered without rebooting.
When used with the target or LUN keywords, the force option allows the specified object to be deleted,
even if in use by an iSCSI driver. Under normal circumstances, a target or LUN cannot be deleted if an
iSCSI driver is logged in.
Use the all keyword to delete all attributes of a named SCSI routing instance. The named SCSI routing
instance, however, is not deleted.
Note
Examples
When making changes to SCSI routing instances (such as adding or deleting targets or changing access)
be sure to make the complimentary changes to the iSCSI configuration of IP hosts using these services
to access the storage resources. See the readme files for the appropriate iSCSI drivers for additional
details. You can access the latest iSCSI drivers and readme and example configuration files from
Cisco.com.
The following example deletes all targets associated with the SCSI routing instance named foo:
[SN5428-2A]# delete scsirouter foo target all
The following example deletes the specified VLAN from the Gigabit Ethernet interface, ge2, used by the
SCSI routing instance named foo2:
[SN5428-2A]# delete scsirouter foo2 serverif ge2 vlan 101
The following example deletes all attributes of the SCSI routing instance named foo3. The SCSI routing
instance named foo3 remains available for configuration on the storage router.
[SN5428-2A]# delete scsirouter foo3 all
The following example deletes the entire SCSI routing instance named foo4:
[SN5428-2A]# delete scsirouter foo4
Note
All examples update the currently running configuration only. To make a deletion permanent, issue the
appropriate save all bootconfig or save scsirouter bootconfig command.
Cisco SN 5428-2 Storage Router Software Configuration Guide
12-96
78-15471-01
Chapter 12
Command Line Interface Reference
delete scsirouter
Related Commands
Command
Description
restore scsirouter
Restore the named SCSI routing instance from the named configuration file.
save scsirouter
Save configuration information for the named SCSI routing instance.
scsirouter
Create a SCSI routing instance.
scsirouter enable
Start and stop the named SCSI routing instance.
scsirouter serverif
Assign a Gigabit Ethernet interface, IP address, and optionally a VLAN to
the named SCSI routing instance.
scsirouter target
maxcmdqueuedepth
Specify the maximum number of commands allowed at any given time from
each iSCSI session to the specified target.
setup scsi
Run the wizard to configure a SCSI routing instance.
show accesslist
Display the contents of the named access list or all access lists.
show scsirouter
Display configuration and operational information for the named SCSI
routing instance.
Cisco SN 5428-2 Storage Router Software Configuration Guide
78-15471-01
12-97
Chapter 12
Command Line Interface Reference
delete software version
delete software version
To delete a version of software from the storage router, use the delete software version command.
Note
The version of software currently running and the version that will be booted when the system is
restarted may not be deleted.
delete software version {v.x.y | all}
Syntax Description
v.x.y
The version of storage router software to be deleted.
all
Delete all non-bootable and non-current software versions.
Defaults
None.
Command Modes
Administrator.
Command History
Release
Modification
3.2.1
This command was introduced.
Usage Guidelines
Use this command to remove old versions of software from the storage router.
Examples
The following example removes version 2.0.1 from the storage router:
[SN5428-2A]# delete software version 2.0.1
Related Commands
Command
Description
download software
Download the list of available software versions or the specified version of
software from the named location.
software http url
Specify the default location from which to download updated storage router
software via HTTP.
software proxy url
Specify the default location from which to download updated storage router
software via HTTP, using a proxy server.
software tftp
Specify the default location from which to download updated storage router
software via TFTP.
verify software version Check the specified software version for problems.
Cisco SN 5428-2 Storage Router Software Configuration Guide
12-98
78-15471-01
Chapter 12
Command Line Interface Reference
delete zone
delete zone
To delete the specified Fibre Channel (FC) zone or the specified member of the zone from the zoning
database, use the delete zone command.
delete zone name [member {fcalias alias-name | fcid port-id | wwpn xxxxxxxxxxxxxxxx}]
Syntax Description
name
The name of the zone.
member
(Optional) Keyword, indicating the specified zone member will be deleted.
fcalias alias-name
Deletes the named alias member from the named zone.
fcid port-id
Deletes the specified Port ID member from the named zone.
wwpn
xxxxxxxxxxxxxxxx
Deletes the specified WWPN member from the named zone.
Note
WWPN address notation is represented by 16 hex digits. The digits
may be separated by colons. When entering WWPN addresses,
colons can be omitted or placed anywhere in the address notation as
long as they do not leave one character without a partner character.
Defaults
None.
Command Modes
Administrator.
Command History
Release
Modification
3.2.1
This command was introduced.
Usage Guidelines
A zone is a group of FC ports or devices, such as switches, storage or SN 5428-2 Storage Routers,
grouped together to control the exchange of information.
Use this command to delete the specified zone from the zoning database. If the zone is a member of the
active zone set, the zone will not be removed from the active zone set until the active zone set is
deactivated. Use the no zoneset command with the enable keyword to disable the active zone set.
Use the member keyword to delete the specified alias, Port ID or WWPN member from the named zone.
Caution
If the storage router is connected to the FC switched fabric, all zoning changes (including the deletion
of a zone or zone member) are immediately propagated to other SN 5428-2 Storage Routers and switches
in the fabric.
See Chapter 5, “Configuring Fibre Channel Interfaces,” for more information about FC fabric zoning.
Cisco SN 5428-2 Storage Router Software Configuration Guide
78-15471-01
12-99
Chapter 12
Command Line Interface Reference
delete zone
Examples
The following example deletes the zone named testlab from the zoning database:
[SN5428-2A]# delete zone testlab
The following example deletes the alias member myfoo from the zone webservices:
[SN5428-2A]# delete zone webservices member fcalias myfoo
Related Commands
Command
Description
show zone
Display configuration and operational information for Fibre Channel fabric
zones from the local zoning database.
show zoneset
Display configuration and operational information for Fibre Channel fabric
zone sets.
zone
Create a Fibre Channel fabric zone.
zone member
Add a device or an alias to a zone.
zoneset
Create a Fibre Channel fabric zone set.
zoneset zone
Add a member zone to a zone set.
Cisco SN 5428-2 Storage Router Software Configuration Guide
12-100
78-15471-01
Chapter 12
Command Line Interface Reference
delete zoneset
delete zoneset
To delete the specified zone from the zone set or to delete the entire named zone set from the zoning
database, use the delete zoneset command.
delete zoneset name [zone name]
Syntax Description
name
The name of the zone set.
zone name
(Optional) Deletes the named zone from the specified zone set.
Defaults
None.
Command Modes
Administrator.
Command History
Release
Modification
3.2.1
This command was introduced.
Usage Guidelines
A zone set is a group of zones. Zoning enables you to divide the ports and devices of the Fibre Channel
fabric into zones for more efficient and secure communication among functionally grouped nodes. Only
one zone set can be active at a time. The active zone set defines the zoning for the Fibre Channel fabric.
Use this command to delete an entire zone set from the zoning database or only the named zone from
the zone set. If the zone set is active, the command does not take effect until the zone set is deactivated.
Use the no zoneset command with the enable keyword to disable the active zone set.
Caution
If the storage router is connected to the FC switched fabric, all zoning changes (including the deletion
of a zone set) are immediately propagated to other SN 5428-2 Storage Routers and switches in the fabric.
See Chapter 5, “Configuring Fibre Channel Interfaces,” for more information about FC fabric zoning.
Examples
The following example deletes the zone set named testgroup:
[SN5428-2A]# delete zoneset testgroup
The following example deletes the zone named zoneA from the zoneset named testgroupA:
[SN5428-2A]# delete zoneset testgroupA zone zoneA
Cisco SN 5428-2 Storage Router Software Configuration Guide
78-15471-01
12-101
Chapter 12
Command Line Interface Reference
delete zoneset
Related Commands
Command
Description
show zone
Display configuration and operational information for Fibre Channel fabric
zones from the local zoning database.
show zoneset
Display configuration and operational information for Fibre Channel fabric
zone sets.
zone
Create a Fibre Channel fabric zone.
zone member
Add a device or an alias to a zone.
zoneset
Create a Fibre Channel fabric zone set.
zoneset zone
Add a member zone to a zone set.
Cisco SN 5428-2 Storage Router Software Configuration Guide
12-102
78-15471-01
Chapter 12
Command Line Interface Reference
download software
download software
To fetch the specified object from the named location or the default download location, use the
download software list command.
download software {http | proxy} {list | url full_url | version v.x.y}
download software tftp {hostname host filename file | list | version v.x.y}
Syntax Description
http
Download using the HTTP protocol.
proxy
Download using a proxy server.
list
(Optional) Download a list of available versions.
url
(Optional) Keyword indicating that the download is from the specified
URL.
full_url
The fully qualified URL from which to download this version of storage
router software. For example, http://anywebserver.com/3.3.1-K9.tar.
version v.x.y
(Optional) Download the specified version of storage router software from
the default location.
tftp
Download using the TFTP protocol
hostname host
The name of the TFTP host.
filename file
The name of the file to be downloaded, such as 3.3.1-K9.tar. This file
contains the storage router software.
Defaults
None.
Command Modes
Administrator.
Command History
Release
Modification
3.2.1
This command was introduced.
Usage Guidelines
The list of available software versions is stored in the file named sw-sn5428-2-versions.txt. This text file
must contain one line for each version of software that is available from the download location. If you
store and download software from a site other than the system default (http://www.cisco.com), create
this file and update it whenever a new version of software is available.
Software is either downloaded from the default locations set for the specified protocol or from the
location specified as part of the command. Always verify software after it has downloaded to assure no
errors were encountered. See “Installing Updated Software” for details on verification and making
updated software available to the storage router.
A maximum of two versions of software can be stored on the SN 5428-2 Storage Router.
Cisco SN 5428-2 Storage Router Software Configuration Guide
78-15471-01
12-103
Chapter 12
Command Line Interface Reference
download software
Note
Examples
While the size of the software file may vary, it will exceed 16 MB. Some older TFTP implementations
have a 16 MB download limitation.
The following example downloads storage router software version 3.3.1-K9 from the default location via
standard Hypertext Transfer Protocol (HTTP):
[SN5428-2A]# download software http version 3.3.1-K9
The following example downloads a file named sn5428-2v331.tar from the TFTP host named
my_tftpHost. The file must exist in the default TFTP directory.
[SN5428-2A]# download software tftp hostname my_tftpHost filename sn5428-2v331.tar
The following file downloads the list of available software from the default location using the proxy
configuration:
[SN5428-2A]# download software proxy list
Related Commands
Command
Description
delete software version Remove the specified version of software from the storage router.
software http url
Specify the default location from which to download updated storage router
software via HTTP.
software http
username
Configure the user name and optional password required to access the
default download location.
software proxy
Configure HTTP proxy information.
software proxy url
Specify the default location from which to download updated storage router
software via HTTP, using a proxy server.
software proxy
username
Configure the user name and optional password required to access the proxy
URL.
software tftp
Specify the default location from which to download updated storage router
software via TFTP.
verify software version Check the specified software version for problems.
Cisco SN 5428-2 Storage Router Software Configuration Guide
12-104
78-15471-01
Chapter 12
Command Line Interface Reference
enable
enable
To change the management session from Monitor mode to Administrator mode, use the enable
command. Monitor mode, which is the default mode, provides view-only access to the storage router
management interface. Administrator mode allows you to create entities and make changes to the
configuration of the storage router.
enable
Syntax Description
This command has no arguments or keywords.
Defaults
None.
Command Modes
Monitor.
Command History
Release
Modification
3.2.1
This command was introduced.
Usage Guidelines
Issue the enable command after a successful CLI login to change to Administrator mode. You are
prompted to enter the Administrator mode password, if required. Use the exit command to return to
Monitor mode.
Examples
The following example changes the session from Monitor mode to Administrator mode.
[SN5428-2A]# enable
Enter admin password: *****
[Entering Administrator mode]
Related Commands
Command
Description
aaa authentication
enable
Configure AAA authentication services for Administrator mode access to
the SN 5428-2 Storage Router via the CLI enable command.
exit
Leave Administrator mode and enter Monitor mode.
logout
Terminate the management session.
show aaa
Display AAA configuration information.
Cisco SN 5428-2 Storage Router Software Configuration Guide
78-15471-01
12-105
Chapter 12
Command Line Interface Reference
exit
exit
To return the management session to Monitor mode from Administrator mode, use the exit command.
exit
Syntax Description
This command has no arguments or keywords.
Defaults
None.
Command Modes
Administrator.
Command History
Release
Modification
3.2.1
This command was introduced.
Usage Guidelines
Issue the exit command to return to Monitor mode after previously issuing the enable command.
Examples
The following example returns the CLI session to Monitor mode:
[SN5428-2A]# exit
[Leaving Administrator mode]
Related Commands
Command
Description
enable
Enter Administrator mode.
logout
Terminate the management session.
Cisco SN 5428-2 Storage Router Software Configuration Guide
12-106
78-15471-01
Chapter 12
Command Line Interface Reference
failover eligibility
failover eligibility
To enable failover by eligibility for all SCSI routing instances running on the storage router, use the
failover eligibility command. To disable failover by eligibility, use the no form of this command.
failover eligibility on
no failover eligibility on
Syntax Description
on
Defaults
Failover by eligibility is enabled.
Command Modes
Administrator mode.
Command History
Release
Modification
3.2.1
This command was introduced.
Usage Guidelines
Keyword used to enable failover by eligibility for all SCSI routing instances
running on the storage router.
Each storage router in a cluster maintains and exchanges information about available resources. Failover
by eligibility is enabled by default; HA bases the decision to automatically fail over a SCSI routing
instance to another node in a cluster based on the Fibre Channel and other resources available to that
SCSI routing instance.
Failover occurs when:
•
All mapped targets are unavailable or a critical resource for the SCSI routing instance is unavailable,
and some or all mapped targets would be available from another node in the cluster. A critical
resource can be a configured Gigabit Ethernet interface, a required Fibre Channel interface, or an
internal resource needed to run the SCSI routing instance.
•
Some mapped targets are unavailable and all mapped targets are available on another node in the
cluster.
•
All mapped targets are available, but another node in the cluster also has all targets available and is
designated at the primary for the SCSI routing instance.
•
The storage router stops receiving heartbeats from another node within the cluster.
For more manual control over where a SCSI routing instance runs, use the no failover eligibility on
command to prevent failover by eligibility on a storage router. If a SCSI routing instance is running on
(or fails over to) a storage router that is configured with failover by eligibility turned off, it will continue
running on that storage router unless there are no mapped targets available or a critical resource is
unavailable.
Use the failover eligibility on command to restore normal failover functions.
The failover eligibility setting is not retained across a reboot; restarting the storage router restores the
default setting (failover by eligibility is enabled).
Cisco SN 5428-2 Storage Router Software Configuration Guide
78-15471-01
12-107
Chapter 12
Command Line Interface Reference
failover eligibility
Examples
The following example disables failover by eligibility for all SCSI routing instances running on the
storage router named SN 5428-2A:
[SN5428-2A] no failover eligibility on
Related Commands
Command
Description
failover scsirouter
Cause the named SCSI routing instance to cease running on the storage
router.
show ha
Display HA operational statistics for the storage router or for a specific
application.
show scsirouter
Display configuration and operational information for the named SCSI
routing instance.
Cisco SN 5428-2 Storage Router Software Configuration Guide
12-108
78-15471-01
Chapter 12
Command Line Interface Reference
failover scsirouter
failover scsirouter
To cause the named SCSI routing instance to cease running on this storage router and start running on
another storage router in the cluster, use the failover scsirouter command.
Note
If no eligible storage router is found, the SCSI routing instance will start running again on the same node.
If the storage router is configured as a standalone system, failover is not allowed.
failover scsirouter name [pri | sec | to systemname]
failover scsirouter all [to systemname]
Syntax Description
name
The name of the SCSI routing instance to be failed over.
all
Failover all instances currently running on this storage router.
pri
(Optional) Force failover to the designated primary storage router on the
failover list.
sec
(Optional) Force failover to the designated secondary storage router on the
failover list.
to systemname
(Optional) Perform the failover to the specified storage router. This node
must be active in the cluster.
Defaults
None.
Command Modes
Administrator.
Command History
Release
Modification
3.2.1
This command was introduced.
Usage Guidelines
Use the all keyword to failover all SCSI routing instances currently running on this storage router. Each
storage router can run a maximum of 12 SCSI routing instances; there is a maximum of 12 SCSI routing
instances per cluster.
Examples
The following example causes the SCSI routing instance named foo to failover to another storage router
in the cluster:
[SN5428-2A]# failover scsirouter foo
The following example causes all SCSI routing instances to failover to the storage router named
TestLab1:
[SN5428-2A]# failover scsirouter all to TestLab1
Cisco SN 5428-2 Storage Router Software Configuration Guide
78-15471-01
12-109
Chapter 12
Command Line Interface Reference
failover scsirouter
Related Commands
Command
Description
scsirouter enable
Stop or start the named SCSI routing instance.
scsirouter failover
Add the storage router to the HA failover list for the specified SCSI routing
instance.
setup cluster
Change the configuration of the high availability environment.
Cisco SN 5428-2 Storage Router Software Configuration Guide
12-110
78-15471-01
Chapter 12
Command Line Interface Reference
fcalias
fcalias
To create an alias entity for use in Fibre Channel zoning, use the fcalias command. An alias is a group
of FC ports or devices (such as switches, storage or SN 5428-2 Storage Routers) that are grouped
together for convenience.
fcalias alias-name
Syntax Description
alias-name
Defaults
None.
Command Modes
Administrator.
Command History
Release
Modification
3.2.1
This command was introduced.
Usage Guidelines
The name of the alias entity created by this command. Enter a maximum of
31 characters. The name must begin with an alpha character.
An alias allows you to group FC ports and devices together for zoning purposes. Unlike zones, however,
aliases do not impose any communication restrictions on its members. An alias can belong to one or
more zones, but a zone cannot be a member of an alias, nor can an alias be a member of another alias.
You must create a named alias entity before you can add members to the alias.
A default alias of iscsi is provided that contains both initiators WWPN1 and WWPN2.
Caution
If the storage router is connected to the FC switched fabric, all zoning changes (including the creation
of an alias) are immediately propagated to other SN 5428-2 Storage Routers and switches in the fabric.
See Chapter 5, “Configuring Fibre Channel Interfaces,” for more information about FC fabric zoning.
Examples
The following example creates an alias entity named LabGroupA:
[SN5428-2A]# fcalias LabGroupA
Related Commands
Command
Description
delete fcalias
Delete the named alias or the specified alias member.
fcalias member
Add the specified member to the named alias.
show fcalias
Display information about aliases and their members.
zone member
Add a device or an alias to a zone.
Cisco SN 5428-2 Storage Router Software Configuration Guide
78-15471-01
12-111
Chapter 12
Command Line Interface Reference
fcalias member
fcalias member
To add the specified member to the named alias, use the fcalias member command. An alias is a group
of FC ports or devices (such as switches, storage or SN 5428-2 Storage Routers) that are grouped
together for convenience.
fcalias alias-name member wwpn xxxxxxxxxxxxxxxx
Syntax Description
alias-name
The name of the alias entity.
wwpn
xxxxxxxxxxxxxxxx
The World Wide Port Name (WWPN) of the port or device to be added to
the alias.
Note
WWPN address notation is represented by 16 hex digits. The digits
may be separated by colons. When entering WWPN addresses,
colons can be omitted or placed anywhere in the address notation as
long as they do not leave one character without a partner character.
Defaults
None.
Command Modes
Administrator.
Command History
Release
Modification
3.2.1
This command was introduced.
Usage Guidelines
An alias allows you to group FC ports and devices together for zoning purposes. Unlike zones, however,
aliases do not impose any communication restrictions on its members. An alias can belong to one or
more zones, but a zone cannot be a member of an alias, nor can an alias be a member of another alias.
The command verifies the format of the WWPN, but does not verify that the specified device exists. A
default alias of iscsi is provided that contains both initiators WWPN1 and WWPN2.
Caution
If the storage router is connected to the FC switched fabric, all zoning changes (including adding a
member to an alias) are immediately propagated to other SN 5428-2 Storage Routers and switches in the
fabric.
See Chapter 5, “Configuring Fibre Channel Interfaces,” for more information about FC fabric zoning.
Examples
The following example creates the alias named LabGroupA, and then adds the devices with the WWPN
2200001026558a0f and 220000201744ab3c to the named alias:
[SN5428-2A]# fcalias LabGroupA
[SN5428-2A]# fcalias LabGroupA member wwpn 2200001026558a0f
[SN5428-2A]# fcalias LabGroupA member wwpn 220000201744ab3c
Cisco SN 5428-2 Storage Router Software Configuration Guide
12-112
78-15471-01
Chapter 12
Command Line Interface Reference
fcalias member
Related Commands
Command
Description
delete fcalias
Delete the named alias or the specified alias member.
fcalias
Create an alias entity for use in Fibre Channel zoning.
show fcalias
Display information about aliases and their members.
zone member
Add a device or an alias to a zone.
Cisco SN 5428-2 Storage Router Software Configuration Guide
78-15471-01
12-113
Chapter 12
Command Line Interface Reference
fcip
fcip
To create an FCIP instance, use the fcip command.
fcip name
Syntax Description
name
Defaults
None.
Command Modes
Administrator.
Command History
Release
Modification
3.3.1
This command was introduced.
Usage Guidelines
The name of the FCIP instance. Valid named are fcip1 and fcip2.
FCIP provides connectivity between SANs. Technically, it employs Fibre Channel over TCP/IP (FCIP)
to provide block oriented FC devices connectivity over an IP network. FCIP allows the interconnection
of islands of FC storage area networks (SANs) over IP-based networks to form a unified SAN in a single
FC fabric. The FCIP instance becomes a binding point for the association of other configuration
parameters.
An FCIP instance runs with a point-to-point connection to an FCIP instance on a peer SN 5428-2 Storage
Router. Each FCIP instance requires one and only one peer.
There can be a maximum of 2 FCIP instances defined per storage router. Each FCIP instance is
associated with:
•
An internal FC interface fci1 or fci2 (fci1 is initiator WWPN1 and fci2 is initiator WWPN2). The
FCIP instance named fcip1 is associated with fci1; the instance named fcip2 is associated with fci2.
This association is made automatically.
•
A network interface, which provides IP connectivity to the peer destination. The FCIP instance
named fcip1 uses the Gigabit Ethernet interface, ge1; the instance named fcip2 uses ge2. If both
Gigabit Ethernet interfaces are cabled to the same network, you can configure the FCIP instance to
failover to the secondary interface in case of a failure on the primary interface.
•
A destination, which is the IP address of the FCIP instance on the peer SN 5428-2 Storage Router.
The destination configuration includes the connection protocol (TCP/IP or raw IP) used between the
FCIP instances.
This command updates the running configuration of the storage router. You must save the FCIP instance
configuration to the bootable configuration for it to be retained in the storage router when it is restarted.
Issue the save fcip command with the bootconfig keyword to save the FCIP instance to the storage router
bootable configuration.
Cisco SN 5428-2 Storage Router Software Configuration Guide
12-114
78-15471-01
Chapter 12
Command Line Interface Reference
fcip
Examples
The following example creates an FCIP instance named fcip1:
[SN5428-2A]# fcip fcip1
Related Commands
Command
Description
clear counters fcip
Reset accumulated operational statistics for the specified SCSI routing
instance.
delete fcip
Delete the named FCIP instance or the specified element of the FCIP
instance.
delete fcip
Enable debugging for the named FCIP instance.
fcip description
Add user-defined identification information to the named FCIP instance.
fcip destination config Configure operational parameters for the named FCIP instance.
fcip destination raw
Add a peer destination to the named FCIP instance, with a connection type
of raw IP.
fcip destination
tcpclient
Add a peer destination to the named FCIP instance, with a connection type
of TCP/IP. The named FCIP instance initiates the TCP connection.
fcip destination
tcpserver
Add a peer destination to the named FCIP instance, with a connection type
of TCP/IP. The named FCIP instance listens for the TCP connection from
the named destination.
fcip enable
Stop or start the named FCIP instance.
fcip networkif
Assign a Gigabit Ethernet interface and IP address to the named FCIP
instance.
restore fcip
Restore the named SCSI routing instance from the named configuration file.
save fcip
Save configuration information for the named FCIP instance.
show debug fcip
Display debugging information for the named FCIP instance.
show fcip
Display configuration and operational information for the named FCIP
instance.
Cisco SN 5428-2 Storage Router Software Configuration Guide
78-15471-01
12-115
Chapter 12
Command Line Interface Reference
fcip description
fcip description
To add user-defined identification information to the named FCIP instance, use the fcip description
command.
fcip name description “user text”
Syntax Description
name
The name of this FCIP instance. Valid named are fcip1 and fcip2.
“user text”
User-defined identification information associated with this FCIP instance.
If the string contains spaces, enclose it in quotes. Enter a maximum of 64
characters.
Defaults
None.
Command Modes
Administrator.
Command History
Release
Modification
3.3.1
This command was introduced.
Usage Guidelines
This command allows you to add a new description or change an existing description. Descriptions are
site-specific.
Examples
The following example adds the description “Access to lab SAN island 7” to the FCIP instance fcip1:
[SN5428-2A]# fcip fcip2 description “Access to lab SAN island 7”
Related Commands
Command
Description
fcip
Create an FCIP instance.
save fcip
Display configuration and operational information for the named FCIP
instance.
Cisco SN 5428-2 Storage Router Software Configuration Guide
12-116
78-15471-01
Chapter 12
Command Line Interface Reference
fcip destination config
fcip destination config
To configure operational parameters for the selected FCIP connection protocol type, use the
fcip destination config command.
fcip name destination name config {rxtcpwinsize | txtcpwinsize} nn
fcip name destination name config tcpport port-number
fcip name destination name config {bcouthiwater | burstouthiwater} nn
fcip name destination name config frouthiwater nn
fcip name destination name config peerneedsackhiwater nn
fcip name destination name config {initialtimeout | maxtimeout | totaltimeout} nn
fcip name destination name config ipprotocol nn
fcip name destination name config rexmitcount nn
fcip name destination name config timeoutincrement nn
fcip name destination name config frinhiwater nn
fcip name destination name config idlepingdelay nn
fcip name destination name config pkttracemask mask
fcip name destination name config usebport {yes | no}
Syntax Description
name
The name of this FCIP instance. Valid named are fcip1 and fcip2.
destination name
The name of the peer destination.
rxtcpwinsize nn
The maximum number of outstanding bytes that can be received on a TCP
connection. Valid values are 8192 to 2097152, inclusive. The default value
is 262144. This configuration option applies to TCP client or TCP server
connections only.
txtcpwinsize nn
The maximum number of outstanding bytes that can be transmitted on a
TCP connection. Valid values are 8192 to 2097152, inclusive. The default
value is 2097152. This configuration option applies to TCP client or TCP
server connections only.
tcpport port-number
The TCP port number. The TCP server listens to this port; the TCP client
connects to this port. Valid values are 0 to 65535, inclusive. The default port
is 3225. This configuration option applies to TCP client or TCP server
connections only.
bcouthiwater nn
The maximum number of bytes that can be outstanding on a raw IP
connection. Valid values are from 1 to 4294967294, inclusive. The default
value is 2097152. This configuration option applies to raw IP connections
only.
Cisco SN 5428-2 Storage Router Software Configuration Guide
78-15471-01
12-117
Chapter 12
Command Line Interface Reference
fcip destination config
burstouthiwater nn
The maximum number of bytes that can be transmitted on a raw IP
connection. Valid values are from 1 to 4294967294, inclusive. The default
value is 2097152. This configuration option applies to raw IP connections
only.
frouthiwater nn
The maximum number of frames that can be outstanding on a raw IP
connection. Valid values are from 1 to 4294967294, inclusive. The default
value is 1024. This configuration option applies to raw IP connections only.
peerneedsackhiwater
nn
The maximum number of unacknowledged frames that can exist at any
given time on a raw IP connection. Valid values are from 0 to 4294967294.
The default value is 16. This configuration option applies to raw IP
connections only.
initialtimeout nn
The initial amount of time, in ticks, to delay before retransmitting a packet.
This value is used in error recovery algorithms. Valid values are from 0 to
2147483647. The default value is 0. This configuration option applies to
raw IP connections only.
maxtimeout nn
The maximum amount of time, in ticks, that can be used for any one
retransmission, before the packet is discarded. This value is used in error
recovery algorithms. Valid values are from 0 to 2147483647. The default
value is 48 ticks. This configuration option applies to raw IP connections
only.
Note
The default value is set to 48 ticks only if timeoutincrement,
initialtimeout and totaltimeout keywords have no associated
value.
totaltimeout nn
The maximum amount of time, in ticks, that a packet is kept alive, before it
is discarded. This value is used in error recovery algorithms. Valid values
are from 0 to 2147483647. The default value is 0. This configuration option
applies to raw IP connections only.
ipprotocol nn
The value of the IP protocol used in the IP header. Valid values are from 0
to 255. The default value is 4. This configuration option applies to raw IP
connections only.
Note
This should be a unique IP protocol value. Do not change this value
to an IP protocol that is currently in use on the storage router. For
example, do not change the value to the TCP protocol (6) or UDP
protocol (17).
rexmitcount nn
The maximum number of times a packet can be retransmitted, before it is
discarded. This value is used in error recovery algorithms. Valid values are
from 1 to 2147483647. The default value is 4. This configuration option
applies to raw IP connections only.
timeoutincrement nn
The amount of time, in ticks, to add to a packet's time out value before
retransmitting the packet. This value increases the delay before the next
retransmission, and is used in error recovery algorithms. Valid values are
from 0 to 2147483647. The default value is 0. This configuration option
applies to raw IP connections only.
frinhiwater nn
The maximum number of frames, received from a raw IP connection, that
can be sent to the Fibre Channel (FC) interface. Valid values are from 1 to
4294967294. The default value is 688. This configuration option applies to
all FCIP connection types.
Cisco SN 5428-2 Storage Router Software Configuration Guide
12-118
78-15471-01
Chapter 12
Command Line Interface Reference
fcip destination config
Defaults
idlepingdelay nn
The number of seconds before a keep-alive packet is sent across an idle
connection. Valid values are 1 to 65535, inclusive. The default value is 60.
This configuration option applies to all FCIP connection types.
pkttracemask mask
The value of the packet trace mask, in hex. Packets are traced for debugging
problems. Valid values are 0 (0x0000) to 0xffff. A value of zero disables
packet tracing. The default value is 0xffff, which enables all packet tracing.
This configuration option applies to all FCIP connection types.
usebport yes
Use Fibre Channel (FC) B_Port connectivity. This configuration option
applies to all FCIP connection types. This is the default.
usebport no
Do not use FC B_Port connectivity. This value should only be set if the
SN 5428-2 is connected to another FCIP device that does not support
B_Port connectivity.
The following are the default settings for all FCIP connection configuration options:
•
TCP receive window size—262144 bytes
•
TCP transmit window size—2097152 bytes
•
TCP port number—3225
•
Maximum number of bytes outstanding on raw IP connection—2097152 bytes
•
Maximum number of bytes transmitted on raw IP connection—2097152 bytes
•
Maximum number of frames sent to FC interface—688 frames
•
Maximum number of frames outstanding—1024 frames
•
Maximum number of unacknowledged frames—16 frames
•
Initial amount of delay before retransmission—0 ticks
•
Maximum amount of time for retransmission—48 ticks
•
Maximum amount of time a packet can be kept alive—0 ticks
•
Value of IP protocol in IP header—4
•
Maximum number of retransmissions—4
•
The amount of time to increase the delay prior to retransmission—0 ticks
•
The amount of time before a keep-alive ping is sent across an idle connection—60 seconds
•
Packet trace mask—0xffff (packet tracing is enabled for all packets)
•
The FCIP instance uses FC B_Port connectivity.
The default error recovery algorithm for raw connection protocol uses maxtimeout and rexmitcount
values (timeout = maxtimeout / rexmitcount--).
Note
Command Modes
One second is approximately 60 ticks.
Administrator.
Cisco SN 5428-2 Storage Router Software Configuration Guide
78-15471-01
12-119
Chapter 12
Command Line Interface Reference
fcip destination config
Command History
Usage Guidelines
Release
Modification
3.3.1
This command was introduced.
Each FCIP instance requires three active elements:
•
The networkif element assigns an interface and IP address for use by the FCIP peer.
•
The destination element assigns the peer’s protocol and IP address.
•
The device interface element associates the FCIP instance with an internal Fibre Channel interface
and is automatically assigned and enabled.
An FCIP instance runs with a point-to-point connection to an FCIP instance on a peer SN 5428-2 Storage
Router. Each FCIP instance requires one and only one peer. Both FCIP instances must be configured to
use the same connection protocol, TCP/IP or raw IP.
TCP/IP connection protocol uses the FCIP standard and TCP flow control and error recovery algorithms.
FCIP, using TCP connections, allows you to configure TCP receive and transmit window sizes. Raw IP
uses a proprietary protocol, but allows you to configure a wider variety of operational settings, providing
more granular control over flow control and error recovery. All changes to raw IP operational parameters
are applied immediately. Changes to TCP operational parameters are not applied until the FCIP instance
is stopped and restarted, or the storage router is rebooted.
Raw IP connections have unique flow control settings for network transmissions and FC transmissions.
The FC transmission counter (the frinhiwater keyword) limits the number of frames given to the FC
interface for transmission. The FC frames are only acknowledged once they have been transmitted out
of the SN 5428-2. The network transmissions are controlled by both a byte counter (the burstouthiwater
keyword) and a frame counter (the frouthiwater keyword). FCIP will not transmit data when either
counter has reached its high water mark. The data is queued until the counters have receded from their
high water mark.
Raw IP uses four error recovery algorithms. These algorithms use five different operational settings,
which control which error recovery algorithm is used.
•
rexmitcount—The maximum number of times a packet can be retransmitted, before it is discarded.
•
maxtimeout—The maximum amount of time, in ticks, that can be used for any one retransmission,
before the packet is discarded.
•
timeoutincrement—The amount of time, in ticks, to add to a packet's time out value before
retransmitting the packet.
•
initialtimeout—The initial amount of time, in ticks, to delay before retransmitting a packet.
•
totaltimeout—The maximum amount of time, in ticks, that a packet is kept alive, before it is
discarded.
The following are the available error recovery algorithms:
1.
For error recovery using maxtimeout and rexmitcount:
– timeout = maxtimeout / rexmitcount--
For example, using a maxtimeout value of 48 and rexmitcount value of 4 would result in
retransmissions at 12, 16, 24 and 48 ticks. This is the default error recovery algorithm.
2.
For error recovery using timeoutincrement and rexmitcount:
– timeout += timeoutincrement
For example, using a timeoutincrement value of 8 and a rexmitcount value of 4 would result in
retransmissions at 8, 16, 24 and 32 ticks.
Cisco SN 5428-2 Storage Router Software Configuration Guide
12-120
78-15471-01
Chapter 12
Command Line Interface Reference
fcip destination config
3.
For error recovery using timeoutincrement, initialtimeout and rexmitcount:
– timeout = initialtimeout
/* initial calculation */
– timeout = timeout * timeoutincrement
/* subsequent calculations */
For example, using a timeoutincrement value of 2, an initialtimeout value of 8, and a rexmitcount
of 4 would result in retransmissions at 8, 16, 32 and 64 ticks.
4.
For error recovery using totaltimeout and rexmitcount:
– if (rexmitcount & 0x01) timeout = ((rexmitcount-remainingrexmitcount+1)*totaltimeout) /
(rexmitcount*((rexmitcount/2)+(rexmitcount/2))
– else timeout = ((rexmitcount-remaining rexmitcount+1)*totaltimeout) /
(rexmitcount*((rexmitcount*((rexmitcount/2)+(rexmitcount/2))
For example, using a totaltimeout value of 48 and a rexmitcount value of 4 would result in
retransmissions at 4, 9, 14 and 17 ticks.
By default, a raw IP connection uses the first error recovery algorithm. To use another error recovery
algorithm, set the desired values for the appropriate operational settings. For example, to use the second
error recovery algorithm, set the timeoutincrement and, optionally, the rexmitcount. To use the fourth
error recovery algorithm, set the totaltimeout and, optionally, the rexmitcount.
Examples
The following example add the destination dest1 to the FCIP instance named fcip1. The destination IP
address is 10.1.40.27. The FCIP instance is configured to use TCP/IP connection protocol and will
initiate the connection (TCP client). The destinations TCP receive window size is set to 1 MB.
[SN5428-2A]# fcip fcip1 destination dest1 tcpclient 10.1.40.27
*[SN5428-2A]# fcip fcip1 destination dest1 config rxtcpwinsize 1048576
Related Commands
Command
Description
fcip
Create an FCIP instance.
fcip destination raw
Add a peer destination to the named FCIP instance, with a connection type
of raw IP.
fcip destination
tcpclient
Add a peer destination to the named FCIP instance, with a connection type
of TCP/IP. The named FCIP instance initiates the TCP connection.
fcip destination
tcpserver
Add a peer destination to the named FCIP instance, with a connection type
of TCP/IP. The named FCIP instance listens for the TCP connection from
the named destination.
fcip networkif
Assign a Gigabit Ethernet interface and IP address to the named FCIP
instance.
show fcip
Display configuration and operational information for the named FCIP
instance.
Cisco SN 5428-2 Storage Router Software Configuration Guide
78-15471-01
12-121
Chapter 12
Command Line Interface Reference
fcip destination raw
fcip destination raw
To add a peer destination to the named FCIP instance, with a connection type of raw IP, use the
fcip destination raw command.
fcip name destination name raw A.B.C.D
Syntax Description
name
The name of the FCIP instance. Valid names are fcip1 and fcip2.
destination name
The name of the peer destination. Enter a maximum of 31 characters.
A.B.C.D
The IP address of the peer destination. A.B.C.D is the dotted quad notation
of the IP address. The peer destination is the FCIP instance running in the
partner SN 5428-2 Storage Router.
Defaults
None.
Command Modes
Administrator.
Command History
Release
Modification
3.3.1
This command was introduced.
Usage Guidelines
Each FCIP instance requires three active elements:
•
The networkif element assigns an interface and IP address for use by the FCIP peer.
•
The destination element assigns the peer’s protocol and IP address.
•
The device interface element associates the FCIP instance with an internal Fibre Channel interface
and is automatically assigned and enabled.
An FCIP instance runs with a point-to-point connection to an FCIP instance on a peer SN 5428-2 Storage
Router. Each FCIP instance requires one and only one peer. Use this command to configure a peer
destination name and IP address, using raw IP as the protocol type.
The destination IP address is the Gigabit Ethernet IP address of the FCIP instance running in the peer
SN 5428-2 Storage Router. Both FCIP instances must be configured to use the same connection protocol.
Raw IP uses a proprietary connection protocol, but provides more operational control over flow control
and error recovery than standard TCP/IP.
Note
When configuring an FCIP instance, you must configure the network interface before you configure the
peer destination and protocol.
Cisco SN 5428-2 Storage Router Software Configuration Guide
12-122
78-15471-01
Chapter 12
Command Line Interface Reference
fcip destination raw
Examples
The following example configures the FCIP instance named fcip1 with a destination named lucky at IP
address 10.1.3.47, using raw IP connection protocol:
[SN5428-2A]# fcip fcip1 destination lucky raw 10.1.3.47
Related Commands
Command
Description
fcip
Create an FCIP instance.
fcip destination config Configure operational parameters for the named FCIP instance.
fcip networkif
Assign a Gigabit Ethernet interface and IP address to the named FCIP
instance.
show fcip
Display configuration and operational information for the named FCIP
instance.
Cisco SN 5428-2 Storage Router Software Configuration Guide
78-15471-01
12-123
Chapter 12
Command Line Interface Reference
fcip destination tcpclient
fcip destination tcpclient
To add a peer destination to the named FCIP instance, with a connection type of TCP/IP, use the
fcip destination tcpclient command. The named FCIP instance will initiate the TCP connection.
fcip name destination name tcpclient A.B.C.D
Syntax Description
name
The name of the FCIP instance. Valid names are fcip1 and fcip2.
destination name
The name of the peer destination. Enter a maximum of 31 characters.
A.B.C.D
The IP address of the peer destination. A.B.C.D is the dotted quad notation
of the IP address. The peer destination is the FCIP instance running in the
partner SN 5428-2 Storage Router.
Defaults
None.
Command Modes
Administrator.
Command History
Release
Modification
3.3.1
This command was introduced.
Usage Guidelines
Each FCIP instance requires three active elements:
•
The networkif element assigns an interface and IP address for use by the FCIP peer.
•
The destination element assigns the peer’s protocol and IP address.
•
The device interface element associates the FCIP instance with an internal Fibre Channel interface
and is automatically assigned and enabled.
An FCIP instance runs with a point-to-point connection to an FCIP instance on a peer SN 5428-2 Storage
Router. Each FCIP instance requires one and only one peer.
Use this command to configure a peer destination name and IP address, using TCP/IP as the protocol
type. When configured as a TCP client, the FCIP instance initiates the connection to the peer destination.
The peer destination must be configured as a TCP server. The TCP server listens for the initial
connection.
Note
The only functional difference between an FCIP instance configured as a TCP client and an FCIP
instance configured as a TCP server is during the initial connection, which is initiated by the TCP client.
The destination IP address is the Gigabit Ethernet IP address of the FCIP instance running in the peer
SN 5428-2 Storage Router.
TCP/IP connection protocol uses the FCIP standard and TCP flow control and error recovery algorithms.
FCIP, using TCP connections, allows you to configure TCP receive and transmit window sizes.
Cisco SN 5428-2 Storage Router Software Configuration Guide
12-124
78-15471-01
Chapter 12
Command Line Interface Reference
fcip destination tcpclient
Note
Examples
When configuring an FCIP instance, you must configure the network interface before you configure the
peer destination and protocol.
The following example configures the FCIP instance named fcip2 with a destination named lucky2 at IP
address 10.1.4.32, using TCP/IP connection protocol. The FCIP instance is configured as a TCP client,
and will initiate the TCP connection to the destination.
[SN5428-2A]# fcip fcip2 destination lucky2 tcpclient 10.1.4.32
Related Commands
Command
Description
fcip
Create an FCIP instance.
fcip destination config Configure operational parameters for the named FCIP instance.
fcip networkif
Assign a Gigabit Ethernet interface and IP address to the named FCIP
instance.
show fcip
Display configuration and operational information for the named FCIP
instance.
Cisco SN 5428-2 Storage Router Software Configuration Guide
78-15471-01
12-125
Chapter 12
Command Line Interface Reference
fcip destination tcpserver
fcip destination tcpserver
To add a peer destination to the named FCIP instance, with a connection type of TCP/IP, use the
fcip destination tcpserver command. The named FCIP instance will listen for the TCP connection from
the named destination.
fcip name destination name tcpserver A.B.C.D
Syntax Description
name
The name of the FCIP instance. Valid names are fcip1 and fcip2.
destination name
The name of the peer destination. Enter a maximum of 31 characters.
A.B.C.D
The IP address of the peer destination. A.B.C.D is the dotted quad notation
of the IP address. The peer destination is the FCIP instance running in the
partner SN 5428-2 Storage Router.
Defaults
None.
Command Modes
Administrator.
Command History
Release
Modification
3.3.1
This command was introduced.
Usage Guidelines
Each FCIP instance requires three active elements:
•
The networkif element assigns an interface and IP address for use by the FCIP peer.
•
The destination element assigns the peer’s protocol and IP address.
•
The device interface element associates the FCIP instance with an internal Fibre Channel interface
and is automatically assigned and enabled.
An FCIP instance runs with a point-to-point connection to an FCIP instance on a peer SN 5428-2 Storage
Router. Each FCIP instance requires one and only one peer.
Use this command to configure a peer destination name and IP address, using TCP/IP as the protocol
type. When configured as a TCP server, the FCIP instance listens for the connection from the peer
destination. The peer destination must be configured as a TCP client. The TCP client initiates the TCP
initial TCP connection.
Note
The only functional difference between an FCIP instance configured as a TCP client and an FCIP
instance configured as a TCP server is during the initial connection, which is initiated by the TCP client.
The destination IP address is the Gigabit Ethernet IP address of the FCIP instance running in the peer
SN 5428-2 Storage Router.
TCP/IP connection protocol uses the FCIP standard and TCP flow control and error recovery algorithms.
FCIP, using TCP connections, allows you to configure TCP receive and transmit window sizes.
Cisco SN 5428-2 Storage Router Software Configuration Guide
12-126
78-15471-01
Chapter 12
Command Line Interface Reference
fcip destination tcpserver
Note
Examples
When configuring an FCIP instance, you must configure the network interface before you configure the
peer destination and protocol.
The following example configures the FCIP instance named fcip1 with a destination named dest1 at IP
address 10.1.5.222, using TCP/IP connection protocol. The FCIP instance is configured as a TCP server,
and will listen for the TCP connection from the destination.
[SN5428-2A]# fcip fcip1 destination dest1 tcpserver 10.1.5.222
Related Commands
Command
Description
fcip
Create an FCIP instance.
fcip destination config Configure operational parameters for the named FCIP instance.
fcip networkif
Assign a Gigabit Ethernet interface and IP address to the named FCIP
instance.
show fcip
Display configuration and operational information for the named FCIP
instance.
Cisco SN 5428-2 Storage Router Software Configuration Guide
78-15471-01
12-127
Chapter 12
Command Line Interface Reference
fcip enable
fcip enable
To start the named FCIP instance on this SN 5428-2 Storage Router, use the fcip enable command. To
stop the named FCIP instance, use the no form of this command.
fcip {name | all} enable
no fcip {name | all} enable
Syntax Description
name
The name of the FCIP instance to be started. Valid names are fcip1 and
fcip2.
all
Start all FCIP instances on this storage router.
Defaults
None.
Command Modes
Administrator.
Command History
Release
Modification
3.3.1
This command was introduced.
Usage Guidelines
FCIP instances are automatically started by the storage router during the creation process and when the
storage router is restarted. Use this command to manually control the running state of FCIP instances.
Use the all keyword to start all FCIP instances on the SN 5428-2. All instances previously stopped on
this storage router will be restarted. This form of the command is always available; the only time the
command is available for a named FCIP instance is when that FCIP instance has been previously
stopped.
Examples
The following example starts the FCIP instance named fcip2. This instance must have been previously
stopped.
[SN5428-2A]# fcip fcip2 enable
The following example stops all FCIP instances running on the storage router:
[SN5428-2A]# no fcip all enable
Cisco SN 5428-2 Storage Router Software Configuration Guide
12-128
78-15471-01
Chapter 12
Command Line Interface Reference
fcip enable
Related Commands
Command
Description
delete fcip
Delete the named FCIP instance or the specified element of the FCIP
instance.
fcip
Create an FCIP instance.
show fcip
Display configuration and operational information for the named FCIP
instance.
Cisco SN 5428-2 Storage Router Software Configuration Guide
78-15471-01
12-129
Chapter 12
Command Line Interface Reference
fcip networkif
fcip networkif
To assign a Gigabit Ethernet interface and IP address to the named FCIP instance, use the fcip networkif
command. The specified interface provides IP connectivity between the FCIP instance and its peer
destination.
fcip name networkif {A.B.C.D/bits | A.B.C.D/1.2.3.4} [secondary]
Syntax Description
name
Name of the FCIP instance to which you are adding the Gigabit Ethernet
interface. Valid names are fcip1 and fcip2.
A.B.C.D/bits
The IP address of the named interface. A.B.C.D is the dotted quad notation
of the IP address. The /bits specifies the subnet mask in CIDR style.
Note
For the FCIP instance named fcip1, the IP address must be
accessible from the Gigabit Ethernet interface, ge1. For the instance
named fcip2, the IP address must be accessible from the interface
ge2.
A.B.C.D/1.2.3.4
The IP address of the named interface. A.B.C.D is the dotted quad notation
of the IP address. 1.2.3.4 is the dotted quad notation of the subnet mask.
secondary
(Optional) Indicates the specified IP address is available from both Gigabit
Ethernet interfaces. If the primary interface goes down and remains down
for two seconds, the specified IP address will be moved to the secondary
interface.
Defaults
None.
Command Modes
Administrator.
Command History
Release
Modification
3.3.1
This command was introduced.
Usage Guidelines
The specified interface IP address is configured as the destination IP address for the FCIP instance
running in the peer SN 5428-2 Storage Router.
Each FCIP instance requires three active elements:
•
The networkif element assigns an interface and IP address for use by the FCIP peer.
•
The destination element assigns the peer’s protocol and IP address.
•
The device interface element associates the FCIP instance with an internal Fibre Channel interface
and is automatically assigned and enabled.
An FCIP instance runs with a point-to-point connection to an FCIP instance on a peer SN 5428-2 Storage
Router. Each FCIP instance requires one and only one peer.
Cisco SN 5428-2 Storage Router Software Configuration Guide
12-130
78-15471-01
Chapter 12
Command Line Interface Reference
fcip networkif
Note
Each FCIP instance must connect to a unique peer SN 5428-2 Storage Router. If you have two FCIP
instances running in a single storage router, you cannot connect both instances to the same peer
SN 5428-2 Storage Router.
Use this command to configure an IP address for the FCIP instance, to be used by the FCIP peer for IP
connectivity. For the FCIP instance named fcip1, the IP address is automatically associated with the
Gigabit Ethernet interface, ge1. For the FCIP instance named fcip2, the IP address is automatically
associated with the Gigabit Ethernet interface, ge2.
When configuring an FCIP instance, you must configure the network interface before you configure the
peer destination and protocol.
If the secondary keyword is used, both Gigabit Ethernet interfaces must be connected to the same
network segment. If the primary interface goes down and remains down for two seconds, the IP address
will be moved to the secondary interface.
Note
If you configure a Gigabit Ethernet IP address with a secondary interface, all Gigabit Ethernet IP
addresses on the same subnet must also be configured with the same secondary interface.
You can configure two FCIP instances on a single storage router to use the same network interface. You
must fully configure one FCIP instance, and then configure a second FCIP instance without configuring
a network interface. The second FCIP instance will use the same network interface as configured for the
first instance. The two FCIP instances should use different connection protocols, or if both are
configured as TCP servers, each FCIP instance must use a unique TCP port number.
Examples
The following command adds the IP address 10.1.10.128/24, to the FCIP instance named fcip2. This IP
address will automatically be associated with the Gigabit Ethernet interface, ge2.
[SN5428-2A]# fcip fcip2 networkif 10.1.10.128/24
The following command adds the IP address 10.1.30.128, with a netmask of 255.255.255.0, to the FCIP
instance fcip1. This IP address is automatically associated with the Gigabit Ethernet interface, ge1. If
the primary interface is not available, the IP address will be moved to the secondary Gigabit Ethernet
interface, ge2. The Gigabit Ethernet interfaces must be connected to the same network.
[SN5428-2A]# fcip fcip1 networkif 10.1.30.128/255.255.255.0 secondary
The following set of commands configures the FCIP instance named fcip1, adds the network IP address
10.1.40.42/24, and configures the destination, dest1, with a TCP client connection type. The second
FCIP instance, fcip2, is configured with a destination named dest2 and a TCP server connection type.
Both FCIP instances will use the 10.1.40.42/24 network interface.
[SN5428-2A]#fcip fcip1
*[SN5428-2A] fcip fcip1 networkif 10.1.40.42/24
*[SN5428-2A] fcip fcip1 destination dest1 tcpclient 10.1.1.144
*[SN5428-2A] fcip fcip2
*[SN5428-2A] fcip fcip2 destination dest2 tcpserver 10.1.5.73
Cisco SN 5428-2 Storage Router Software Configuration Guide
78-15471-01
12-131
Chapter 12
Command Line Interface Reference
fcip networkif
Related Commands
Command
Description
fcip
Create an FCIP instance.
fcip destination config Configure operational parameters for the named FCIP instance.
fcip destination raw
Add a peer destination to the named FCIP instance, with a connection type
of raw IP.
fcip destination
tcpclient
Add a peer destination to the named FCIP instance, with a connection type
of TCP/IP. The named FCIP instance initiates the TCP connection.
fcip destination
tcpserver
Add a peer destination to the named FCIP instance, with a connection type
of TCP/IP. The named FCIP instance listens for the TCP connection from
the named destination.
show fcip
Display configuration and operational information for the named FCIP
instance.
Cisco SN 5428-2 Storage Router Software Configuration Guide
12-132
78-15471-01
Chapter 12
Command Line Interface Reference
fcswitch beacon enable
fcswitch beacon enable
To enable all Fibre Channel port Logged-In (LOG) LEDs to flash, use the fcswitch beacon enable
command. To disable LOG LED flashing, use the no form of this command.
fcswitch beacon enable
no fcswitch beacon enable
Syntax Description
This command has no arguments or keywords.
Defaults
Beacon flashing is disabled, by default. See the SN 5428-2 Storage Router Hardware Installation Guide
for default LOG LED indication descriptions.
Command Modes
Administrator.
Command History
Release
Modification
3.2.1
This command was introduced.
Usage Guidelines
Examples
Use this command to assist in locating a physical unit. This command is primarily used for
troubleshooting purposes.
The following example causes all Fibre Channel port LOG LEDs on the storage router to flash:
[SN5428-2A]# fcswitch beacon enable
Related Commands
Command
Description
show debug fcswitch
Display internal Fibre Channel interface parameters.
show fcswitch
Display global configuration information for storage router FC interfaces.
Cisco SN 5428-2 Storage Router Software Configuration Guide
78-15471-01
12-133
Chapter 12
Command Line Interface Reference
fcswitch devlog
fcswitch devlog
To specify the logging parameters for the SN 5428-2 Storage Router integrated Fibre Channel (FC)
switch component development log file, use the fcswitch devlog command.
fcswitch devlog components component1 [component2...]
fcswitch devlog level notification-level
Syntax Description
components
component1
[component2...]
At least one of the components described in Table 12-6.
level notification-level
Limit logging to messages of a specified level or lower. See Table 12-7 in
the Usage Guidelines section for a list of valid names that can be used for
the notification-level argument.
Defaults
No components or notification level are configured. Development logging for the SN 5428-2 Storage
Router integrated FC switch component is disabled.
Command Modes
Administrator.
Command History
Release
Modification
3.2.1
This command was introduced.
Usage Guidelines
The fcswitch devlog command is designed for debug purposes, and should be used under the guidance
of a Cisco Technical Support professional.
After logging is enabled, use this command to limit the amount of information recorded in the switch
development log by component and by notification level. To stop all logging for all components, set the
notification level to none. Use the fcswitch devlog enable command to enable development logging.
Table 12-6 fcswitch devlog components
Component
Description
Cmon
Monitors internal chassis components and
applications.
Diag
Handles online testing and other diagnostic tasks.
Ds
Data services repository for all switch data.
Fc2
Class 2 frame handler.
MgmtApp
Manages the user interface and internal
configuration for the switch.
PortApp
Manages the switch ports.
Cisco SN 5428-2 Storage Router Software Configuration Guide
12-134
78-15471-01
Chapter 12
Command Line Interface Reference
fcswitch devlog
Table 12-6 fcswitch devlog components (continued)
Component
Description
Swb
Software bus internal process communications
mechanism.
Util
Utility message interpreter for handling legacy
user interfaces.
Table 12-7 fcswitch devlog notification-level
Examples
Notification Level
Description
Critical
Log all messages from the selected components
(critical, warning and informational).
Warn
Log all warning and informational messages for
the selected components.
Info
Log informational messages only for the selected
components.
None
Log no messages. This setting stops switch
development logging.
The following example limits the switch development log file to informational messages only from the
management application and the class 2 frame handler:
[SN5428-2A]# fcswitch devlog components MgmtApp Fc2
[SN5428-2A]# fcswitch devlog level info
The following example stops all switch devlog logging:
[SN5428-2A]# fcswitch devlog level none
Related Commands
Command
Description
clear fcswitch
Clear the switch log files of all entries or clear stored zoning configuration
information.
fcswitch devlog enable Enable development logging for the integrated FC switch component.
fcswitch log interface
Restrict the integrated FC switch logging to information related to a specific
FC interface.
show debug fcswitch
Display internal FC interface parameters, including switch log entries.
Cisco SN 5428-2 Storage Router Software Configuration Guide
78-15471-01
12-135
Chapter 12
Command Line Interface Reference
fcswitch devlog enable
fcswitch devlog enable
To start development logging for the SN 5428-2 Storage Router integrated Fibre Channel (FC) switch
component, use the fcswitch devlog enable command. To stop development logging, use the no form of
this command.
fcswitch devlog enable
no fcswitch devlog enable
Syntax Description
This command has no arguments or keywords.
Defaults
Development logging is stopped.
Command Modes
Administrator.
Command History
Release
Modification
3.2.1
This command was introduced.
Usage Guidelines
The fcswitch devlog enable command is designed for debug purposes, and should be used under the
guidance of a Cisco Technical Support professional.
Examples
The following example starts development logging for the FC switch component and limits the switch
development log file to informational messages only from the management application and the class 2
frame handler:
[SN5428-2A]# fcswitch devlog components MgmtApp Fc2
[SN5428-2A]# fcswitch devlog level info
[SN5428-2A]# fcswitch devlog enable
Related Commands
Command
Description
clear fcswitch
Clear the switch log files of all entries or clear stored zoning configuration
information.
fcswitch devlog
Specify logging parameters for the switch development log file.
fcswitch log interface
Restrict the integrated FC switch logging to information related to a specific
FC interface.
show debug fcswitch
Display internal FC interface parameters, including switch log entries.
Cisco SN 5428-2 Storage Router Software Configuration Guide
12-136
78-15471-01
Chapter 12
Command Line Interface Reference
fcswitch diag
fcswitch diag
To set all Fibre Channel (FC) interfaces into diagnostic mode for testing purposes, use the fcswitch diag
command.
fcswitch diag
Syntax Description
This command has no arguments or keywords.
Defaults
None.
Command Modes
Administrator.
Command History
Release
Modification
3.2.1
This command was introduced.
Usage Guidelines
Examples
Use this command to change all FC interfaces to diagnostic mode prior to performing internal or external
loopback testing on individual FC interfaces.
•
Use the fcswitch enable command to reenable all FC interfaces. An FC interface must be enabled
to run online loopback tests or to allow access to storage targets.
•
Use the no fcswitch enable command to disable all FC interfaces. When you are ready to allow
access to the storage targets, you can enable all FC interfaces at once via the fcswitch enable
command, or enable individual interfaces via the interface fc? enable command.
The following example sets all FC interfaces into a diagnostic state and then performs an internal
loopback test on the FC interface named fc6:
[SN5428-2A]# fcswitch diag
[SN5428-2A]# interface fc6 loopback internal
Related Commands
Command
Description
fcswitch enable
Enable all FC interfaces.
interface fc? diag
Set the named FC interface into diagnostic mode for testing purposes.
interface fc? enable
Enable the named FC interface.
interface fc? loopback Initiate a loopback test on the named FC interface.
show fcswitch
Display global configuration information for storage router FC interfaces.
Cisco SN 5428-2 Storage Router Software Configuration Guide
78-15471-01
12-137
Chapter 12
Command Line Interface Reference
fcswitch domainid
fcswitch domainid
To set the SN 5428-2 Storage Router’s domain ID for switched zoned fabric to a unique value, and to
prevent the FC fabric from changing that domain ID, use the fcswitch domainid command. To disable
the lock and allow the domain ID to be changed by the switched zoned fabric, use the no form of this
command.
fcswitch domainid {domain-id} [force]
fcswitch domainid lock enable
no fcswitch domainid lock enable
Syntax Description
domain-id
The domain identification number associated with the storage router.
force
(Optional) Suppress warning prompts and messages.
lock enable
Keywords used to disallow changes to the domain ID from the switched
zoned fabric.
Defaults
The default domain ID for fabric zoning is 1. The domain ID can be changed by the switched zoned
fabric, by default.
Command Modes
Administrator.
Command History
Release
Modification
3.2.1
This command was introduced.
Usage Guidelines
Use this command to set the SN 5428-2 Storage Router’s domain identification number for switched
zoned fabric to a unique value or to prevent changes to that value by the zoned fabric. Domain IDs allow
fabrics to be segmented into different areas.
Domain IDs must be unique among all switch elements within a fabric. If there is a domain ID conflict,
the expansion ports (ports operating as E_Ports) on the two conflicting elements are disabled, isolating
the Interswitch Link (ISL).
If you are planning to connect to a switched zoned fabric via one or more FC interfaces, complete the
appropriate zoning configuration for the storage router, as described in Chapter 5, “Configuring Fibre
Channel Interfaces.”
Note
Changing the domain ID in an operational fabric may cause traffic disruption. All ports operating as
E_Ports should be inactive or disabled prior to changing the domain ID.
Cisco SN 5428-2 Storage Router Software Configuration Guide
12-138
78-15471-01
Chapter 12
Command Line Interface Reference
fcswitch domainid
Examples
The following example sets the switched zoned fabric domain ID for the storage router to 42:
[SN5428-2A]# fcswitch domainid 42
*** Warning: Changing domain ID in an operational fabric will cause traffic disruption
Do you want to continue? [(yes/no (no)] yes
The following example sets the switched zoned fabric domain ID for the storage router to 5 and enables
the lock, which prevents the domain ID from being changed by the zoned fabric.
[SN5428-2A]# fcswitch domainid 5
*** Warning: Changing domain ID in an operational fabric will cause traffic disruption
Do you want to continue? [(yes/no (no)] yes
[SN5428-2A]# fcswitch domainid lock enable
Related Commands
Command
Description
fcswitch enable
Enable all FC interfaces.
fcswitch interop-credit Set the data buffer credit capacity for all FC ports.
fcswitch zoning
autosave
Configure the storage router to participate in FC switched zones.
fcswitch zoning
default
Select the level of communication between the storage router and devices in
the fabric where there is no active zone set.
fcswitch zoning merge Set zoning merge compliance.
interface fc? diag
Set the named FC interface into diagnostic mode for testing purposes.
interface fc? enable
Enable the named FC interface.
interface fc? loopback Initiate a loopback test on the named FC interface.
show fcswitch
Display global configuration information for storage router FC interfaces.
show fcswitch eport
Display FSPF protocol information.
Cisco SN 5428-2 Storage Router Software Configuration Guide
78-15471-01
12-139
Chapter 12
Command Line Interface Reference
fcswitch dstov
fcswitch dstov
To specify the amount of time the storage router is to wait for Fibre Channel (FC) Distributed Services,
use the fcswitch dstov command.
fcswitch dstov {nn | default}
Syntax Description
nn
The Distributed Services timeout value, in milliseconds.
default
Keyword, indicating the storage router is to wait 5000 milliseconds for
Fibre Channel Distributed Services.
Defaults
The default Distributed Services timeout value is 5000 milliseconds.
Command Modes
Administrator.
Command History
Release
Modification
3.2.1
This command was introduced.
Usage Guidelines
Use this command to specify the length of time the storage router should wait for FC Distributed
Services, such as the Management Server or Name Server, before returning an error.
Use the default keyword to return the Distributed Services timeout value to 5000 milliseconds.
Examples
The following example sets the Distributed Services timeout value to 7500 milliseconds:
[SN5428-2A]# fcswitch dstov 7500
The following example resets the Distributed Services timeout value to the default of 5000 milliseconds:
[SN5428-2A]# fcswitch dstov default
Related Commands
Command
Description
fcswitch edtov
Specify an error detect timeout value for all Fibre Channel interfaces.
fcswitch enable
Enable all FC interfaces.
fcswitch fstov
Specify the fabric stability timeout value.
fcswitch ratov
Specify a Fibre Channel resource allocation timeout value for the storage
router.
show fcswitch
Display global configuration information for storage router FC interfaces.
Cisco SN 5428-2 Storage Router Software Configuration Guide
12-140
78-15471-01
Chapter 12
Command Line Interface Reference
fcswitch edtov
fcswitch edtov
To specify an error detect timeout value for all Fibre Channel (FC) interfaces, use the fcswitch edtov
command.
fcswitch edtov {nn | default}
Syntax Description
nn
The amount of time a port is to wait for errors to clear, in milliseconds.
default
Keyword, indicating the port is to wait 2000 milliseconds for errors to clear.
Defaults
The default error detect timeout value is 2000 milliseconds.
Command Modes
Administrator.
Command History
Release
Modification
3.2.1
This command was introduced.
Usage Guidelines
The error detect timeout value is the amount of time the FC port is to wait for all errors to clear. This
value applies to all FC interfaces in the storage router.
Error detect timeout values should be the same for all SN 5428-2 Storage Routers or switches in the
fabric.
Examples
The following example sets the error detect timeout value to 4000 milliseconds:
[SN5428-2A]# fcswitch edtov 4000
The following example resets the error detect timeout value to the default of 2000 milliseconds:
[SN5428-2A]# fcswitch edtov default
Related Commands
Command
Description
fcswitch dstov
Specify the amount of time the storage router is to wait for Fibre Channel
Distributed Services.
fcswitch enable
Enable all FC interfaces.
fcswitch fstov
Specify the fabric stability timeout value.
fcswitch ratov
Specify a Fibre Channel resource allocation timeout value for the storage
router.
show fcswitch
Display global configuration information for storage router FC interfaces.
Cisco SN 5428-2 Storage Router Software Configuration Guide
78-15471-01
12-141
Chapter 12
Command Line Interface Reference
fcswitch enable
fcswitch enable
To enable all Fibre Channel (FC) interfaces, use the fcswitch enable command. To disable all FC
interfaces, use the no form of this command.
fcswitch enable
no fcswitch enable
Syntax Description
This command has no arguments or keywords.
Defaults
All FC interfaces are enabled, by default.
Command Modes
Administrator.
Command History
Release
Modification
3.2.1
This command was introduced.
Usage Guidelines
An FC interface must be enabled to allow access to storage targets or perform online loopback testing.
Use this command to enable all FC interfaces at one time.
If you experience problems with FC storage, use the no form of this command to quickly disable all FC
interfaces at once.
Examples
The following example enables all FC interfaces and then performs an online loopback test for the FC
interface named fc6:
[SN5428-2A]# fcswitch enable
[SN5428-2A]# interface fc6 loopback online
The following example disables all FC interfaces.
[SN5428-2A]# no fcswitch enable
Cisco SN 5428-2 Storage Router Software Configuration Guide
12-142
78-15471-01
Chapter 12
Command Line Interface Reference
fcswitch enable
Related Commands
Command
Description
fcswitch diag
Set all FC interfaces into diagnostic mode for testing purposes.
interface fc? diag
Set the named FC interface into diagnostic mode for testing purposes.
interface fc? enable
Enable the named FC interface.
interface fc? loopback Initiate a loopback test on the named FC interface.
show fcswitch
Display global configuration information for storage router FC interfaces.
show fcswitch eport
Display FSPF protocol information.
Cisco SN 5428-2 Storage Router Software Configuration Guide
78-15471-01
12-143
Chapter 12
Command Line Interface Reference
fcswitch fstov
fcswitch fstov
To specify the fabric services timeout value, use the fcswitch fstov command.
fcswitch fstov {nn | default}
Syntax Description
nn
The amount of time the storage router is to wait for fabric services, in
milliseconds.
default
Keyword, indicating the storage router will wait for 1000 milliseconds for
fabric services.
Defaults
The default fabric stability timeout value is 1000 milliseconds.
Command Modes
Administrator.
Command History
Release
Modification
3.2.1
This command was introduced.
Usage Guidelines
Use this command to specify the number of milliseconds the storage router will wait for fabric services.
Examples
The following example sets the fabric services timeout value to 5000 milliseconds:
[SN5428-2A]# fcswitch fstov 5000
The following example resets the fabric services timeout value to the default of 1000 milliseconds:
[SN5428-2A]# fcswitch fstov default
Related Commands
Command
Description
fcswitch dstov
Specify the amount of time the storage router is to wait for Fibre Channel
Distributed Services.
fcswitch edtov
Specify an error detect timeout value for all Fibre Channel interfaces.
fcswitch enable
Enable all FC interfaces.
fcswitch ratov
Specify a Fibre Channel resource allocation timeout value for the storage
router.
show fcswitch
Display global configuration information for storage router FC interfaces.
Cisco SN 5428-2 Storage Router Software Configuration Guide
12-144
78-15471-01
Chapter 12
Command Line Interface Reference
fcswitch interop-credit
fcswitch interop-credit
To set the buffer-to-buffer credit value for all Fibre Channel (FC) ports, use the fcswitch interop-credit
command.
fcswitch interop-credit credit
Syntax Description
credit
Defaults
The data buffer credit capacity is 12, by default.
Command Modes
Administrator.
Command History
Release
Modification
3.2.1
This command was introduced.
Usage Guidelines
The data buffer credit capacity, also known as the buffer-to-buffer credit
value. The credit variable is an integer between 0 and 255 inclusive. The
default value is 12.
Use this command to set the data buffer credit capacity for all the storage router FC ports. The port buffer
credit is used to determine how many maximum sized frames can be sent to a recipient before the sending
port must wait for an acknowledgement. When the acknowledgement is received, the sending port can
continue by sending the next frame. Port buffer credits are required when buffer-to-buffer flow control
is in use. Buffer-to-buffer flow control occurs between directly connected FC ports.
The data buffer credit capacity must be the same for all switches across the fabric, and should be set to
the lowest system-wide setting.
Examples
The following example sets the data buffer credit capacity to 15:
[SN5428-2A]# fcswitch interop-credit 15
Cisco SN 5428-2 Storage Router Software Configuration Guide
78-15471-01
12-145
Chapter 12
Command Line Interface Reference
fcswitch interop-credit
Related Commands
Command
Description
fcswitch domainid
Set the domain ID for the storage router, to be used for FC switched fabric
zoning.
fcswitch enable
Enable all FC interfaces.
fcswitch zoning
autosave
Configure the storage router to participate in FC switched zones.
fcswitch zoning
default
Select the level of communication between the storage router and devices in
the fabric where there is no active zone set.
fcswitch zoning merge Set zoning merge compliance.
interface fc? diag
Set the named FC interface into diagnostic mode for testing purposes.
interface fc? enable
Enable the named FC interface.
interface fc? loopback Initiate a loopback test on the named FC interface.
show fcswitch
Display global configuration information for storage router FC interfaces.
Cisco SN 5428-2 Storage Router Software Configuration Guide
12-146
78-15471-01
Chapter 12
Command Line Interface Reference
fcswitch log interface
fcswitch log interface
To restrict the SN 5428-2 Storage Router integrated Fibre Channel (FC) switch logging to information
related to a specific FC interface, use the fcswitch log interface command.
fcswitch log interface {if-name | default}
Syntax Description
if-name
The name of the FC interface for which you are setting this parameter. Valid
values are fc1 through fc8. When you type the interface fc? command, the
CLI lists the interfaces available. You cannot specify a nonexistent
interface.
default
Enable logging for all FC interfaces.
Defaults
None.
Command Modes
Administrator.
Command History
Release
Modification
3.2.1
This command was introduced.
Usage Guidelines
The fcswitch log interface command is designed for debug purposes, and should be used under the
guidance of a Cisco Technical Support professional.
Examples
The following example restricts logging for the integrated FC switch to information associated with fc3:
[SN5428-2A]# fcswitch log interface fc3
Related Commands
Command
Description
clear fcswitch
Clear the switch log files of all entries or clear stored zoning configuration
information.
fcswitch devlog
Specify logging parameters for the switch development log file.
fcswitch devlog enable Enable development logging for the integrated FC switch component
fcswitch syslog
Specify logging parameters for the switch system log file.
fcswitch syslog enable
Enable system logging for the integrated FC switch component.
show debug fcswitch
Display internal FC interface parameters, including switch log entries.
Cisco SN 5428-2 Storage Router Software Configuration Guide
78-15471-01
12-147
Chapter 12
Command Line Interface Reference
fcswitch ratov
fcswitch ratov
To specify a Fibre Channel (FC) resource allocation timeout value for the storage router, use the
fcswitch ratov command.
fcswitch ratov {nn | default}
Syntax Description
nn
The amount of time the storage router is to wait to allow two FC ports to
allocate enough resources to establish a link.
default
Keyword, indicating the storage router is to wait up to 10000 milliseconds
to allow two FC ports to allocate enough resources to establish a link.
Defaults
The default resource allocation timeout value is 10000 milliseconds.
Command Modes
Administrator.
Command History
Release
Modification
3.2.1
This command was introduced.
Usage Guidelines
The resource allocation timeout value is the amount of time the storage router is to wait to allow two FC
ports to allocate sufficient resources to establish a link.
Resource allocation timeout values should be the same for all SN 5428-2 Storage Routers or switches in
the fabric.
Examples
The following example sets the resource allocation timeout value to 9000 milliseconds:
[SN5428-2A]# fcswitch ratov 9000
The following example resets the resource allocation timeout value to the default of 10000 milliseconds:
[SN5428-2A]# fcswitch ratov default
Related Commands
Command
Description
fcswitch dstov
Specify the amount of time the storage router is to wait for Fibre Channel
Distributed Services.
fcswitch edtov
Specify an error detect timeout value for all Fibre Channel interfaces.
fcswitch enable
Enable all FC interfaces.
fcswitch fstov
Specify the fabric stability timeout value.
show fcswitch
Display global configuration information for storage router FC interfaces.
Cisco SN 5428-2 Storage Router Software Configuration Guide
12-148
78-15471-01
Chapter 12
Command Line Interface Reference
fcswitch syslog
fcswitch syslog
To specify the logging parameters for the SN 5428-2 Storage Router integrated Fibre Channel (FC)
switch component system log file, use the fcswitch syslog command.
fcswitch syslog components component1 [component2...]
fcswitch syslog level notification-level
Syntax Description
components
component1
[component2...]
At least one of the components described in Table 12-8.
level notification-level
Limit logging to messages of a specified level or lower. See Table 12-9 in
the Usage Guidelines section for a list of valid names that can be used for
the notification-level argument.
Defaults
All components log information into the SN 5428-2 Storage Router integrated FC switch component
system log, by default. The default notification level is critical.
Command Modes
Administrator.
Command History
Release
Modification
3.2.1
This command was introduced.
Usage Guidelines
Use this command to limit the amount of information recorded in the switch system log by component
and by notification level. To stop all logging for all components, set the notification level to none.
Table 12-8 fcswitch syslog components
Component
Description
Blade
Monitors modular circuit boards.
Chassis
Monitors chassis hardware components.
Eport
Monitors all Fibre Channel interfaces where the
port is operating as an expansion port (E_Port).
NameServer
Monitors name server events.
MgmtServer
Monitors management server status.
Other
Monitors miscellaneous events.
Port
Monitors all port events.
Switch
Monitors switch management events.
Zoning
Monitors zoning conflict events.
Cisco SN 5428-2 Storage Router Software Configuration Guide
78-15471-01
12-149
Chapter 12
Command Line Interface Reference
fcswitch syslog
Table 12-9 fcswitch syslog notification level
Examples
Notification Level
Description
Critical
Log all messages from the selected components
(critical, warning and informational).
Warn
Log all warning and informational messages for
the selected components.
Info
Log informational messages only for the selected
components.
None
Log no messages. This setting stops switch
system logging.
The following example limits the switch system log file to informational messages only for name server,
management server, port and switch management events:
[SN5428-2A]# fcswitch syslog components NameServer MgmtServer Port Switch
[SN5428-2A]# fcswitch syslog level info
The following example stops all switch syslog logging:
[SN5428-2A]# fcswitch syslog level none
Related Commands
Command
Description
clear fcswitch
Clear the switch log files of all entries or clear stored zoning configuration
information.
fcswitch log interface
Restrict the integrated FC switch logging to information related to a specific
FC interface.
fcswitch syslog enable
Enable system logging for the integrated FC switch component.
show debug fcswitch
Display internal FC interface parameters, including switch log entries.
Cisco SN 5428-2 Storage Router Software Configuration Guide
12-150
78-15471-01
Chapter 12
Command Line Interface Reference
fcswitch syslog enable
fcswitch syslog enable
To start system logging for the SN 5428-2 Storage Router integrated Fibre Channel (FC) switch
component, use the fcswitch syslog enable command. To stop system logging, use the no form of this
command.
fcswitch syslog enable
no fcswitch syslog enable
Syntax Description
This command has no arguments or keywords.
Defaults
System logging for the integrated FC switch component is started, by default.
Command Modes
Administrator.
Command History
Release
Modification
3.2.1
This command was introduced.
Usage Guidelines
The fcswitch syslog enable command is designed for debug purposes, and should be used under the
guidance of a Cisco Technical Support professional.
Examples
The following example stops system logging for the integrated FC switch component. When system
logging is started, logging will continue based on the existing component and notification level settings.
[SN5428-2A]# no fcswitch syslog enable
Related Commands
Command
Description
clear fcswitch
Clear the switch log files of all entries or clear stored zoning configuration
information.
fcswitch log interface
Restrict the integrated FC switch logging to information related to a specific
FC interface.
fcswitch syslog
Specify logging parameters for the switch system log file.
show debug fcswitch
Display internal FC interface parameters, including switch log entries.
Cisco SN 5428-2 Storage Router Software Configuration Guide
78-15471-01
12-151
Chapter 12
Command Line Interface Reference
fcswitch zoning autosave
fcswitch zoning autosave
To enable the SN 5428-2 Storage Router to automatically save zoning changes received from switches
in the fabric, use the fcswitch zoning autosave command. To prevent the storage router from saving
zoning changes, use the no form of this command.
fcswitch zoning autosave enable
no fcswitch zoning autosave enable
Syntax Description
autosave enable
Defaults
The storage router saves zoning changes by default.
Command Modes
Administrator.
Command History
Release
Modification
3.2.1
This command was introduced.
Enables the storage router to save zoning changes received from switches in
the fabric to non-volatile memory. This is the default.
Usage Guidelines
By default, the SN 5428-2 Storage Router can merge into existing FC switched fabric zones and
participate in the zoning. Use the no form of this command, in conjunction with the fcswitch domainid
command with the lock keyword to prevent the storage router from participating in FC switched fabric
zones.
Examples
The following example prevents the storage router from participating in FC switched fabric zones. The
first command prevents the storage router from saving zoning changes received from switches in the
fabric, and the second command locks the domain ID, preventing the FC switched fabric from making
changes to that value.
[SN5428-2A]# no fcswitch zoning autosave enable
[SN5428-2A]# fcswitch domainid lock enable
Cisco SN 5428-2 Storage Router Software Configuration Guide
12-152
78-15471-01
Chapter 12
Command Line Interface Reference
fcswitch zoning autosave
Related Commands
Command
Description
clear fcswitch
Clear the switch log files of all entries or clear stored zoning configuration
information.
fcswitch domainid
Set the domain ID for the storage router, to be used for FC switched fabric
zoning.
fcswitch enable
Enable all FC interfaces.
fcswitch interop-credit Set the data buffer credit capacity for all FC ports.
fcswitch zoning
default
Select the level of communication between the storage router and devices in
the fabric where there is no active zone set.
fcswitch zoning merge Set zoning merge compliance.
interface fc? diag
Set the named FC interface into diagnostic mode for testing purposes.
interface fc? enable
Enable the named FC interface.
interface fc? loopback Initiate a loopback test on the named FC interface.
show fcswitch
Display global configuration information for storage router FC interfaces.
zone
Create a Fibre Channel fabric zone.
zoneset
Create a Fibre Channel fabric zone set.
zoneset enable
Activate a zone set.
Cisco SN 5428-2 Storage Router Software Configuration Guide
78-15471-01
12-153
Chapter 12
Command Line Interface Reference
fcswitch zoning default
fcswitch zoning default
To select the level of communication between the storage router and devices in the fabric when there is
no active zone set, use the fcswitch zoning default command.
fcswitch zoning default {all | none}
Syntax Description
default all
Enables the storage router to communicate with all switches and other
devices in the fabric when there is no active zone set. This is the default.
default none
When there is no active zone set, the storage router cannot communicate
with any other switch or device in the fabric.
Defaults
If there is no active zone set, the storage router can communicate with all switches and other devices in
the fabric, by default.
Command Modes
Administrator.
Command History
Release
Modification
3.2.1
This command was introduced.
Usage Guidelines
By default, the SN 5428-2 Storage Router can merge into existing FC switched fabric zones and
participate in the zoning. Use this command to isolate the storage router and prevent communication
with any switch or other device in the fabric, if there is no active zone set.
Before changing the default behavior, disconnect any ISL links to other fabric entities to prevent
unintended disruption of fabric traffic.
Examples
The following example prevents the storage router from communicating with switches and all other
devices in the fabric, if there is no active zone set:
[SN5428-2A]# fcswitch zoning default none
Cisco SN 5428-2 Storage Router Software Configuration Guide
12-154
78-15471-01
Chapter 12
Command Line Interface Reference
fcswitch zoning default
Related Commands
Command
Description
clear fcswitch
Clear the switch log files of all entries or clear stored zoning configuration
information.
fcswitch domainid
Set the domain ID for the storage router, to be used for FC switched fabric
zoning.
fcswitch enable
Enable all FC interfaces.
fcswitch interop-credit Set the data buffer credit capacity for all FC ports.
fcswitch zoning
autosave
Enable the SN 5428-2 Storage Router to save zoning changes received from
switches in the fabric.
fcswitch zoning merge Set zoning merge compliance.
interface fc? diag
Set the named FC interface into diagnostic mode for testing purposes.
interface fc? enable
Enable the named FC interface.
interface fc? loopback Initiate a loopback test on the named FC interface.
show fcswitch
Display global configuration information for storage router FC interfaces.
zone
Create a Fibre Channel fabric zone.
zoneset
Create a Fibre Channel fabric zone set.
zoneset enable
Activate a zone set.
Cisco SN 5428-2 Storage Router Software Configuration Guide
78-15471-01
12-155
Chapter 12
Command Line Interface Reference
fcswitch zoning merge
fcswitch zoning merge
To set zoning merge compliance, use the fcswitch zoning merge command.
fcswitch zoning merge sw2
Syntax Description
sw2
Defaults
The SN 5428-2 Storage Router is FC-SW-2 compliant, and is configured to participate in a fabric with
only FC-SW-2 compliant switches by default.
Command Modes
Administrator.
Command History
Release
Modification
3.2.1
This command was introduced.
Indicates the fabric includes only FC-SW-2 compliant switches. A merge
may only occur of active zoning information, ensuring all switches have
identical active zone sets. This is the default.
Usage Guidelines
By default, the SN 5428-2 Storage Router can merge into existing FC switched fabric zones and
participate in the zoning. All switches in a fabric should be set to the same merge mode to prevent
switches from becoming isolated from each other. By default, the storage router supports the FC-SW-2
compliant merge mode.
Examples
The following example sets the merge mode for participation in a fabric with FC-SW-2 compliant
switches:
[SN5428-2A]# fcswitch zoning merge sw2
Cisco SN 5428-2 Storage Router Software Configuration Guide
12-156
78-15471-01
Chapter 12
Command Line Interface Reference
fcswitch zoning merge
Related Commands
Command
Description
clear fcswitch
Clear the switch log files of all entries or clear stored zoning configuration
information.
fcswitch domainid
Set the domain ID for the storage router, to be used for FC switched fabric
zoning.
fcswitch enable
Enable all FC interfaces.
fcswitch interop-credit Set the data buffer credit capacity for all FC ports.
fcswitch zoning
autosave
Enable the SN 5428-2 Storage Router to save zoning changes received from
switches in the fabric.
fcswitch zoning
default
Select the level of communication between the storage router and devices in
the fabric where there is no active zone set.
interface fc? diag
Set the named FC interface into diagnostic mode for testing purposes.
interface fc? enable
Enable the named FC interface.
interface fc? loopback Initiate a loopback test on the named FC interface.
show fcswitch
Display global configuration information for storage router FC interfaces.
zone
Create a Fibre Channel fabric zone.
zoneset
Create a Fibre Channel fabric zone set.
zoneset enable
Activate a zone set.
Cisco SN 5428-2 Storage Router Software Configuration Guide
78-15471-01
12-157
Chapter 12
Command Line Interface Reference
halt
halt
To prepare the storage router to be powered down, issue the halt command.
halt [force] [fast]
Syntax Description
force
(Optional) Force an immediate halt of the SN 5428-2 Storage Router.
fast
(Optional) Bypass hardware diagnostics when the storage router is next
restarted.
Defaults
If there are unsaved configuration changes when the command is issued, the default is to save all changes
before halting. If the command is issued with the optional force keyword, any unsaved configuration
changes are discarded.
Command Modes
Administrator.
Command History
Release
Modification
3.2.1
This command was introduced.
Usage Guidelines
The halt command prepares the SN 5428-2 Storage Router file system to be powered down. If the
storage router is participating in a cluster, the halt command will cause any SCSI routing instances
running on this SN 5428-2 to failover to another storage router in the cluster.
If the halt command is issued with no keywords and there are unsaved changes to the current
configuration, you are prompted to save or discard the changes.
Use the force keyword to cause an immediate halt of the storage router, discarding any unsaved
configuration changes. Append the optional fast keyword to bypass diagnostics when the storage router
is restarted.
When the halt command completes, the storage router displays the following system prompt:
[HALTED]#
The storage router can be safely powered down when the HALTED system prompt appears. The only
CLI command that can be issued from the storage router at the HALTED system prompt is the reboot
command.
Note
When the storage router is restarted, the cluster determines any SCSI routing instances that should start
on the SN 5428-2. If the storage router is identified as the preferred storage router for any SCSI routing
instance (via the scsirouter primary command), that instance will start running on the SN 5428-2
(assuming targets and critical resources are available).
Cisco SN 5428-2 Storage Router Software Configuration Guide
12-158
78-15471-01
Chapter 12
Command Line Interface Reference
halt
Examples
The following prompt is received if you issue a halt command (without the force keyword) when the
storage router has unsaved configuration changes.
[SN5428-2A]# halt
*** Warning: This will halt the system.
Do you want to continue? [yes/no (no)] yes
Changes have been made to the current configuration of the system which
have not been saved.
yes
- all of the configuration data will be saved,
no
- modifications to the configuration data will not be saved.
Save ALL configuration data? [yes/no (yes)] no
Halting system............!
[HALTED]#
The following example halts the SN 5428-2 Storage Router (after prompting you to save any unsaved
configuration changes). Diagnostics will be bypassed when the storage router is restarted.
[SN5428-2A]# halt fast
Related Commands
Command
Description
reboot
Cause the SN 5428-2 Storage Router to shut down and then restart.
Cisco SN 5428-2 Storage Router Software Configuration Guide
78-15471-01
12-159
Chapter 12
Command Line Interface Reference
help
help
To display information on how to use the CLI, issue the help command.
help
Syntax Description
This command has no arguments or keywords.
Defaults
None.
Command Modes
Administrator or Monitor.
Command History
Release
Modification
3.2.1
This command was introduced.
Usage Guidelines
The help command displays information about the various CLI commands that can be issued, based on
the mode currently in use. The help command also displays information about the special keys that can
be used in the CLI.
Examples
The following example shows the special key information returned as a result of the help command:
[SN5428-2A]# help
Special keys:
?
Backspace
Tab
Ctrl-A
Ctrl-B or Arrow
Ctrl-D
Ctrl-E
Ctrl-F or Arrow
Ctrl-K
Ctrl-N or Arrow
Ctrl-P or Arrow
Ctrl-T
Ctrl-U
Ctrl-W
Related Commands
list choices
delete character backward
complete current word
go to beginning of line
Left go backward one character
delete character
go to end of line
Right go forward one character
delete from current position to end of line
Down go to next line in history buffer
Up
go to previous line in history buffer
transpose current character and previous character
delete line
delete previous word
Command
Description
enable
Enter Administrator mode.
exit
Leave Administrator mode and enter Monitor mode.
Cisco SN 5428-2 Storage Router Software Configuration Guide
12-160
78-15471-01
Chapter 12
Command Line Interface Reference
hostname
hostname
To specify a new system name for the SN 5428-2 Storage Router, use the hostname command. The
storage router is recognized by this name through the management interface.
This command takes effect immediately, and the new system name is automatically integrated into the
prompt string.
hostname sysname
Syntax Description
sysname
Defaults
None.
Command Modes
Administrator.
Command History
Release
Modification
3.2.1
This command was introduced.
Usage Guidelines
The name of the storage router. This may be the fully qualified domain
name. Maximum length is 19 characters. The name cannot contain blanks,
white space, or control characters.
The SN 5428-2 Storage Router must have a system name, which is assigned to the storage router during
initial configuration. Use this command to change the system name.
If you wish to enable network management on the storage router using the facilities of a Domain Name
Server (DNS), you must make the storage router system name and IP address known to the DNS. Use
the system name specified in this command.
Examples
The following example changes the storage router name to sn5428-2lab1.
[SN5428-2A]# hostname sn5428-2lab1
Related Commands
Command
Description
save all
Save all configuration information.
save system
Save selected system configuration information.
show system
Display selected system information, including system name.
Cisco SN 5428-2 Storage Router Software Configuration Guide
78-15471-01
12-161
Chapter 12
Command Line Interface Reference
interface fc? al-fairness
interface fc? al-fairness
To enable the fairness algorithm (loop priority) on the named Fibre Channel (FC) interface, use the
interface fc? al-fairness command. To disable the fairness algorithm on the named FC interface, use the
no form of this command.
interface fc? al-fairness enable
no interface fc? al-fairness enable
Syntax Description
fc?
The name of the FC interface for which you are setting this parameter. Valid
values are fc1 through fc8. When you type the interface fc? command, the
CLI lists the interfaces available. You cannot specify a nonexistent
interface.
enable
Keyword, required to enable the fairness algorithm on the named FC
interface.
Defaults
The fairness algorithm is disabled on all FC interfaces by default, allowing the switch to have priority.
Command Modes
Administrator.
Command History
Release
Modification
3.2.1
This command was introduced.
Usage Guidelines
Note
Examples
When the fairness algorithm is not enabled for a specific FC interface, the switch receives priority. Use
this command to enable the fairness algorithm for the named interface, removing the switch priority for
that interface.
All storage routers in a cluster should be configured with the same interface-specific parameters,
allowing failover of SCSI routing instances to provide consistent performance characteristics.
The following example enables the fairness algorithm on the FC interface named fc6:
[SN5428-2A]# interface fc6 al-fairness enable
The following example disables the fairness algorithm on the FC interface named fc3. The switch
receives priority for traffic on this interface.
[SN5428-2A]# no interface fc3 al-fairness enable
Cisco SN 5428-2 Storage Router Software Configuration Guide
12-162
78-15471-01
Chapter 12
Command Line Interface Reference
interface fc? al-fairness
Related Commands
Command
Description
interface fc? default
Return the named FC interface to its default operational characteristics.
interface fc?
fan-enable
Enable Fabric Address Notification (FAN) on the named FC interface.
interface fc? linkspeed Set the transfer rate for the named FC interface.
interface fc?
mfs-bundle
Enable Multi-Frame Sequence bundling for the named FC interface.
interface fc?
ms-enable
Enable GS-3 management server commands for the specified FC interface.
interface fc? type
Set the port type for the named FC interface.
show interface
Display operational and configuration information for the specified
interface or all interfaces.
Cisco SN 5428-2 Storage Router Software Configuration Guide
78-15471-01
12-163
Chapter 12
Command Line Interface Reference
interface fc? default
interface fc? default
To return the named Fibre Channel (FC) interface to its default operational characteristics, use the
interface fc? default command.
interface fc? default
Syntax Description
fc?
Defaults
The following are the default operational characteristics for the Fibre Channel interface:
The name of the FC interface to be returned to its default operational
characteristics. Valid values are fc1 through fc8. When you type the
interface fc? command, the CLI lists the interfaces available. You cannot
specify a nonexistent interface.
•
fairness algorithm is disabled (switch has priority)
•
Fabric Address Notification (FAN) is enabled
•
transfer rate is automatically negotiated (linkspeed auto)
•
Multi-Frame sequence bundling is enabled
•
GS-3 management server commands are enabled
•
port type is generic loop, indicating the port can function as either a fabric loop port (FL_Port), an
expansion port (E_Port) or a fabric port (F_Port)
•
credit extension is not enabled (ext-credit is 0)
Command Modes
Administrator.
Command History
Release
Modification
3.2.1
This command was introduced.
Usage Guidelines
Use this command to quickly reset the named FC interface to its default operational characteristics. The
results of this command are the same as if each of the following commands were issued for the same
named FC interface:
•
no interface fc? al-fairness enable
•
interface fc? ext-credit 0
•
interface fc? fan-enable enable
•
interface fc? linkspeed auto
•
interface fc? mfs-bundle enable timeout 10
•
interface fc? ms-enable enable
•
interface fc? type gl-port
Cisco SN 5428-2 Storage Router Software Configuration Guide
12-164
78-15471-01
Chapter 12
Command Line Interface Reference
interface fc? default
Note
Examples
All storage routers in a cluster should be configured with the same interface-specific parameters,
allowing failover of SCSI routing instances to provide consistent performance characteristics.
The following example returns the operational characteristics to their default settings for the FC
interface named fc6:
[SN5428-2A]# interface fc6 default
Related Commands
Command
Description
interface fc?
al-fairness
Enable the fairness algorithm on the named FC interface.
interface fc?
fan-enable
Enable Fabric Address Notification (FAN) on the named FC interface.
interface fc? linkspeed Set the transfer rate for the named FC interface.
interface fc?
mfs-bundle
Enable Multi-Frame Sequence bundling for the named FC interface.
interface fc?
ms-enable
Enable GS-3 management server commands for the specified FC interface.
interface fc? type
Set the port type for the named FC interface.
show interface
Display operational and configuration information for the specified
interface or all interfaces.
Cisco SN 5428-2 Storage Router Software Configuration Guide
78-15471-01
12-165
Chapter 12
Command Line Interface Reference
interface fc? diag
interface fc? diag
To set the named Fibre Channel (FC) interface into diagnostic mode for testing purposes, use the
interface fc? diag command.
interface fc? diag
Syntax Description
fc?
Defaults
None.
Command Modes
Administrator.
Command History
Release
Modification
3.2.1
This command was introduced.
Usage Guidelines
Examples
The name of the FC interface to be placed into diagnostic mode. Valid
values are fc1 through fc8. When you type the interface fc? command, the
CLI lists the interfaces available. You cannot specify a nonexistent
interface.
Use this command to change the named FC interface to diagnostic mode prior to performing an internal
or external loopback test.
•
Use the interface fc? enable command to reenable the FC interface. An FC interface must be
enabled to run an online loopback test, or to allow access to storage targets.
•
Use the no interface fc? enable command to disable the FC interface. When you are ready to allow
access to the storage targets, you can enable all FC interfaces at once via the interface fc enable
command, or enable individual interfaces via the interface fc? enable command.
The following example sets the FC interface fc6 into a diagnostic state and then performs an internal
loopback test:
[SN5428-2A]# interface fc6 diag
[SN5428-2A]# interface fc6 loopback internal
Cisco SN 5428-2 Storage Router Software Configuration Guide
12-166
78-15471-01
Chapter 12
Command Line Interface Reference
interface fc? diag
Related Commands
Command
Description
fcswitch diag
Set all FC interfaces into diagnostic mode for testing purposes.
fcswitch enable
Enable all FC interfaces.
interface fc? enable
Enable the named FC interface.
interface fc? loopback Initiate a loopback test on the named FC interface.
interface fc? reset
Disable and then enable the specified FC interface.
show fcswitch
Display global configuration information for storage router FC interfaces.
Cisco SN 5428-2 Storage Router Software Configuration Guide
78-15471-01
12-167
Chapter 12
Command Line Interface Reference
interface fc? enable
interface fc? enable
To enable the named Fibre Channel (FC) interface, use the interface fc? enable command. To disable
the named FC interface, use the no form of this command.
interface fc? enable
no interface fc? enable
Syntax Description
fc?
Defaults
None.
Command Modes
Administrator.
Command History
Release
Modification
3.2.1
This command was introduced.
Usage Guidelines
The name of the FC interface to be enabled. Valid values are fc1 through
fc8. When you type the interface fc? command, the CLI lists the interfaces
available. You cannot specify a nonexistent interface.
An FC interface must be enabled to allow access to storage targets or perform online loopback testing.
Use this command to enable an individual FC interface.
If you experience a problem with the FC interface or a specific storage resource, use the no form of this
command to disable the named FC interface.
Examples
The following example enables the FC interface fc6 and then performs an online loopback test:
[SN5428-2A]# interface fc6 enable
[SN5428-2A]# interface fc6 loopback online
The following example disables the FC interface fc3:
[SN5428-2A]# no interface fc3 enable
Cisco SN 5428-2 Storage Router Software Configuration Guide
12-168
78-15471-01
Chapter 12
Command Line Interface Reference
interface fc? enable
Related Commands
Command
Description
fcswitch diag
Set all FC interfaces into diagnostic mode for testing purposes.
fcswitch enable
Enable all FC interfaces.
interface fc? diag
Set the named FC interface into diagnostic mode for testing purposes.
interface fc? loopback Initiate a loopback test on the named FC interface.
interface fc? reset
Disable and then enable the specified FC interface.
show fcswitch
Display global configuration information for storage router FC interfaces.
Cisco SN 5428-2 Storage Router Software Configuration Guide
78-15471-01
12-169
Chapter 12
Command Line Interface Reference
interface fc? ext-credit
interface fc? ext-credit
To configure the specified interface for credit extension, use the interface fc? ext-credit command.
interface fc? ext-credit nn
Syntax Description
fc?
The name of the interface to receive the additional buffer credits. Valid
values are fc1 through fc8. When you type the interface fc? command, the
CLI lists the interfaces available. You cannot specify a nonexistent
interface.
nn
The maximum number of additional buffer credits available to this
interface. Valid values are 0, 11, 22, 33, 44, 55, 66 or 77.
Defaults
No extended credits are available. By default, each FC interface has 12 data buffer credits available.
Command Modes
Administrator.
Command History
Release
Modification
3.2.1
This command was introduced.
Usage Guidelines
By default, each SN 5428-2 Storage Router Fibre Channel (FC) interface has a data buffer capacity of
12 maximum sized FC frames or “credits.” This enables full bandwidth class 2 service over a distance
of 20 kilometers at 1 Gbps, or 10 kilometers at 2 Gbps, for fibre optic cables. Longer distances can be
spanned at full bandwidth by extending the credits available to an interface. An interface configured for
credit extension draws on a pool of credits donated by designated donor interfaces. Each donor interface
contributes 11 credits to the pool from which the recipient interfaces can draw.
In order to receive donated credits, the interface must have a running port type of E_Port, F_Port or
G_Port. An interface with a running loop mode port type (FL_Port, GL_Port or translated loop) cannot
receive donated credits. In order to donate credits, the interface port type must be donor.
Each interface with a port type of donor donates 11 buffer credits; all 11 buffer credits must go to a single
recipient interface.
Use the show interface command to display the maximum data buffer credits available to an interface,
and to display the ports receiving donated credits.
To make the interface unavailable for donated data buffer credits, use this command with a maximum
number of additional buffer credits of 0 (zero).
Cisco SN 5428-2 Storage Router Software Configuration Guide
12-170
78-15471-01
Chapter 12
Command Line Interface Reference
interface fc? ext-credit
Examples
The following example sets the port type for interface fc1 to F_Port, sets the port type for interface fc8
as donor (making 11 extended credits available to the interface fc1), and configures interface fc1 for
credit extension:
[SN5428-2A]# interface fc8 type donor
*[SN5428-2A]# interface fc1 type f-port
*[SN5428-2A]# interface fc1 ext-credit 11
The following example makes the interface fc1 unavailable for credit extension:
[SN5428-2A]# interface fc1 ext-credit 0
Related Commands
Command
Description
fcswitch interop-credit Set the data buffer credit capacity for all FC ports.
interface fc? type
Set the port type for the named FC interface.
show fcswitch
Display global configuration information for storage router FC interfaces.
show interface
Display operational and configuration information for the specified
interface or all interfaces.
Cisco SN 5428-2 Storage Router Software Configuration Guide
78-15471-01
12-171
Chapter 12
Command Line Interface Reference
interface fc? fan-enable
interface fc? fan-enable
To enable Fabric Address Notification (FAN) on the named Fibre Channel (FC) interface, use the
interface fc? fan-enable command. To disable FAN on the named FC interface, use the no form of this
command.
interface fc? fan-enable enable
no interface fc? fan-enable enable
Syntax Description
fc?
The name of the FC interface for which you are setting this parameter. Valid
values are fc1 through fc8. When you type the interface fc? command, the
CLI lists the interfaces available. You cannot specify a nonexistent
interface.
enable
Keyword, required to enable FAN on the named FC interface.
Defaults
FAN is enabled on all FC interfaces by default
Command Modes
Administrator.
Command History
Release
Modification
3.2.1
This command was introduced.
Usage Guidelines
Note
Examples
Use this command to enable or disable FAN loop login behavior on the named FC interface.
All storage routers in a cluster should be configured with the same interface-specific parameters,
allowing failover of SCSI routing instances to provide consistent performance characteristics.
The following example disables FAN on the FC interface named fc6:
[SN5428-2A]# no interface fc6 fan-enable enable
The following example enables FAN on the FC interface named fc3.
[SN5428-2A]# interface fc3 fan-enable enable
Cisco SN 5428-2 Storage Router Software Configuration Guide
12-172
78-15471-01
Chapter 12
Command Line Interface Reference
interface fc? fan-enable
Related Commands
Command
Description
interface fc?
al-fairness
Enable the fairness algorithm on the named FC interface.
interface fc? default
Return the named FC interface to its default operational characteristics.
interface fc? linkspeed Set the transfer rate for the named FC interface.
interface fc?
mfs-bundle
Enable Multi-Frame Sequence bundling for the named FC interface.
interface fc?
ms-enable
Enable GS-3 management server commands for the specified FC interface.
interface fc? type
Set the port type for the named FC interface.
show interface
Display operational and configuration information for the specified
interface or all interfaces.
Cisco SN 5428-2 Storage Router Software Configuration Guide
78-15471-01
12-173
Chapter 12
Command Line Interface Reference
interface fc? linkspeed
interface fc? linkspeed
To set the transfer rate for the named Fibre Channel (FC) interface, use the interface fc? linkspeed
command.
interface fc? linkspeed {auto | 1gb | 2gb}
Syntax Description
fc?
The name of the FC interface for which you are setting this parameter. Valid
values are fc1 through fc8. When you type the interface fc? command, the
CLI lists the interfaces available. You cannot specify a nonexistent
interface.
auto
Keyword, indicating the transfer rate will be negotiated.
1gb
Keyword, indicating the transfer rate will be fixed at 1 Gbps.
2gb
Keyword, indicating the transfer rate will be fixed at 2 Gbps.
Defaults
The transfer rate is automatically negotiated to either 1 Gbps or 2 Gbps, by default.
Command Modes
Administrator.
Command History
Release
Modification
3.2.1
This command was introduced.
Usage Guidelines
Note
Examples
Use this command to change the transfer rate for the named FC interface.
All storage routers in a cluster should be configured with the same interface-specific parameters,
allowing failover of SCSI routing instances to provide consistent performance characteristics.
The following example sets the transfer rate for to 2 Gbps for the FC interface named fc6:
[SN5428-2A]# interface fc6 linkspeed 2gb
Cisco SN 5428-2 Storage Router Software Configuration Guide
12-174
78-15471-01
Chapter 12
Command Line Interface Reference
interface fc? linkspeed
Related Commands
Command
Description
interface fc?
al-fairness
Enable the fairness algorithm on the named FC interface.
interface fc? default
Return the named FC interface to its default operational characteristics.
interface fc?
fan-enable
Enable Fabric Address Notification (FAN) on the named FC interface.
interface fc?
mfs-bundle
Enable Multi-Frame Sequence bundling for the named FC interface.
interface fc?
ms-enable
Enable GS-3 management server commands for the specified FC interface.
interface fc? type
Set the port type for the named FC interface.
show interface
Display operational and configuration information for the specified
interface or all interfaces.
Cisco SN 5428-2 Storage Router Software Configuration Guide
78-15471-01
12-175
Chapter 12
Command Line Interface Reference
interface fc? loopback
interface fc? loopback
To initiate a loopback test on the named Fibre Channel (FC) interface, use the interface fc? loopback
command.
interface fc? loopback {external | internal | online}
Syntax Description
fc?
The name of the FC interface to be tested. Valid values are fc1 through fc8.
When you type the interface fc? command, the CLI lists the interfaces
available. You cannot specify a nonexistent interface.
external
Keyword, indicating an external loopback test will be performed. The FC
interface must be in a diagnostic state.
internal
Keyword, indicating an internal loopback test will be performed. The FC
interface must be in a diagnostic state.
online
Keyword, indicating an online loopback test will be performed. The FC
interface must be enabled.
Defaults
None.
Command Modes
Administrator.
Command History
Release
Modification
3.2.1
This command was introduced.
Usage Guidelines
Loopback tests are part of standard diagnostic procedures. To display the results or status of a loopback
test, use the show interface fc? command.
Before performing a loopback test, the named FC interface must be in the correct state.
Examples
•
For online loopback testing, the FC interface must be enabled. Use the interface fc? enable
command to enable the FC interface before performing online loopback testing.
•
For external or internal loopback testing, the FC interface must be in a diagnostic state. Use the
interface fc? diag command to set the FC interface into a diagnostic state before performing
external or internal loopback testing.
The following example sets the FC interface fc6 into a diagnostic state and then performs an internal
loopback test:
[SN5428-2A]# interface fc6 diag
[SN5428-2A]# interface fc6 loopback internal
Cisco SN 5428-2 Storage Router Software Configuration Guide
12-176
78-15471-01
Chapter 12
Command Line Interface Reference
interface fc? loopback
The following example enables the FC interface fc3 and then performs an online loopback test:
[SN5428-2A]# interface fc3 enable
[SN5428-2A]# interface fc3 loopback online
Related Commands
Command
Description
fcswitch diag
Set all FC interfaces into diagnostic mode for testing purposes.
fcswitch enable
Enable all FC interfaces.
interface fc? diag
Set the named FC interface into diagnostic mode for testing purposes.
interface fc? enable
Enable the named FC interface.
interface fc? reset
Disable and then enable the specified FC interface.
show interface
Display operational and configuration information for the specified
interface or all interfaces.
Cisco SN 5428-2 Storage Router Software Configuration Guide
78-15471-01
12-177
Chapter 12
Command Line Interface Reference
interface fc? mfs-bundle
interface fc? mfs-bundle
To enable Multi-Frame Sequence (MFS) bundling for the named Fibre Channel (FC) interface, use the
interface fc? mfs-bundle command. To disable MFS bundling for the named FC interface, use the no
form of this command.
interface fc? mfs-bundle enable timeout nn
no interface fc? mfs-bundle enable
Syntax Description
fc?
The name of the FC interface for which you are setting this parameter. Valid
values are fc1 through fc8. When you type the interface fc? command, the
CLI lists the interfaces available. You cannot specify a nonexistent
interface.
enable
Keyword, required to enable MFS bundling on the named FC interface.
timeout nn
The timeout threshold, in milliseconds. Valid values are 10 through 20480.
The default timeout value is 10 msecs.
Defaults
MFS bundling is enabled on all FC interfaces, by default. The default timeout value is 10 msec.
Command Modes
Administrator.
Command History
Release
Modification
3.2.1
This command was introduced.
Usage Guidelines
Note
Examples
MFS bundling is used to support systems that require frames to be sequenced in a particular order.
All storage routers in a cluster should be configured with the same interface-specific parameters,
allowing failover of SCSI routing instances to provide consistent performance characteristics.
The following example enables MFS bundling for the FC interface named fc6, and sets the timeout value
to 640 msecs:
[SN5428-2A]# interface fc6 mfs-bundle enable timeout 640
The following example disables MFS bundling for the FC interface named fc3:
[SN5428-2A]# no interface fc3 mfs-bundle enable
Cisco SN 5428-2 Storage Router Software Configuration Guide
12-178
78-15471-01
Chapter 12
Command Line Interface Reference
interface fc? mfs-bundle
Related Commands
Command
Description
interface fc?
al-fairness
Enable the fairness algorithm on the named FC interface.
interface fc? default
Return the named FC interface to its default operational characteristics.
interface fc?
fan-enable
Enable Fabric Address Notification (FAN) on the named FC interface.
interface fc? linkspeed Set the transfer rate for the named FC interface.
interface fc?
ms-enable
Enable GS-3 management server commands for the specified FC interface.
interface fc? type
Set the port type for the named FC interface.
show interface
Display operational and configuration information for the specified
interface or all interfaces.
Cisco SN 5428-2 Storage Router Software Configuration Guide
78-15471-01
12-179
Chapter 12
Command Line Interface Reference
interface fc? ms-enable
interface fc? ms-enable
To enable GS-3 management server commands for the specified Fibre Channel (FC) interface, use the
interface fc? ms-enable command. To disable GS-3 management server commands, use the no form of
this command.
interface fc? ms-enable enable
no interface fc? ms-enable enable
Syntax Description
fc?
The name of the FC interface for which you are setting this parameter. Valid
values are fc1 through fc8. When you type the interface fc? command, the
CLI lists the interfaces available. You cannot specify a nonexistent
interface.
enable
Keyword, required to enable GS-3 management server commands for the
named FC interface.
Defaults
GS-3 management server commands are enabled on all FC interfaces.
Command Modes
Administrator.
Command History
Release
Modification
3.2.1
This command was introduced.
Usage Guidelines
Enabling GS-3 management server commands for the FC interface allows in-band management of the
SN 5428-2 Storage Router integrated FC switch component. GS-3 management server commands must
be enabled if you want to use storage management tools to provide in-band management of the integrated
FC switch component along with other switches in the fabric.
Use the no form of this command to disable in-band management on the specified FC interface.
Examples
The following example disables GS-3 management server commands for fc8:
[SN5428-2A]# no interface fc8 ms-enable enable
Related Commands
Command
Description
interface fc? default
Return the named FC interface to its default operational characteristics.
show fcswitch
Display global configuration information for storage router 2 FC interfaces.
show interface
Display operational and configuration information for the specified
interface or all interfaces.
Cisco SN 5428-2 Storage Router Software Configuration Guide
12-180
78-15471-01
Chapter 12
Command Line Interface Reference
interface fc? reset
interface fc? reset
To disable and then enable the specified Fibre Channel (FC) interface, use the interface fc? reset
command.
interface fc? reset
Syntax Description
fc?
Defaults
None.
Command Modes
Administrator.
Command History
Release
Modification
3.2.1
This command was introduced.
Usage Guidelines
The name of the FC interface for which you are setting this parameter. Valid
values are fc1 through fc8. When you type the interface fc? command, the
CLI lists the interfaces available. You cannot specify a nonexistent
interface.
This command is functionally equivalent to issuing a no interface fc? enable command, followed by an
interface fc? enable command.
After placing the FC interface into diagnostic mode and performing internal loopback testing, use this
command to return the interface to an operational state.
Examples
The following example resets the FC interface named fc3:
[SN5428-2A]# interface fc3 reset
Related Commands
Command
Description
interface fc? diag
Set the named FC interface into diagnostic mode for testing purposes.
interface fc? enable
Enable the named FC interface.
interface fc? loopback Initiate a loopback test on the named FC interface.
Cisco SN 5428-2 Storage Router Software Configuration Guide
78-15471-01
12-181
Chapter 12
Command Line Interface Reference
interface fc? rscn
interface fc? rscn
To enable the generation of Registered State Control Notification (RSCN) messages on the specified
Fibre Channel (FC) interface, use the interface fc? rscn command. To disable RSCN messages, use the
no form of this command.
interface fc? rscn enable
no interface fc? rscn enable
Syntax Description
fc?
The name of the FC interface for which you are setting this parameter. Valid
values are fc1 through fc8. When you type the interface fc? command, the
CLI lists the interfaces available. You cannot specify a nonexistent
interface.
enable
Keyword, required to enable generation of RSCN messages on the specified
interface.
Defaults
RSCN messages are generated on all FC interfaces.
Command Modes
Administrator.
Command History
Release
Modification
3.2.1
This command was introduced.
Usage Guidelines
Each SN 5428-2 Storage Router and FC switch contains its own local Name Server, called a distributed
Name Server (dNS). By default, all SN 5428-2 Storage Routers and FC switches in the fabric distribute
RSCN messages whenever a change takes place in their local dNS database. RSCN notification is used
to maintain the integrity of the local dNS database.
Examples
The following example disables generation of RSCN messages on interface fc5:
[SN5428-2A]# no interface fc5 rscn enable
Related Commands
Command
Description
show fcswitch
nameserver
Display the local Fibre Channel nameserver database.
Cisco SN 5428-2 Storage Router Software Configuration Guide
12-182
78-15471-01
Chapter 12
Command Line Interface Reference
interface fc? type
interface fc? type
To set the port type for the named Fibre Channel interface, use the interface fc? type command.
interface fc? type {auto | f-port | fl-port | g-port | gl-port}
interface fc? type tl-port mode {autobridge | autolearn}
interface fc? type donor
Syntax Description
fc?
The name of the FC interface for which you are setting this parameter. Valid
values are fc1 through fc8. When you type the interface fc? command, the
CLI lists the interfaces available. You cannot specify a nonexistent
interface.
auto
Keyword, indicating the port type is automatically negotiated and functions
as a generic loop (GL_Port).
f-port
Keyword, indicating the port type is fabric. F_Ports are fabric ports.
fl-port
Keyword, indicating the port type is fabric loop (also known as “public
loop”).
g-port
Keyword, indicating the port type is generic and can function as either an
F_Port or an E_Port. An E_Port (also known as an “expansion port”) is used
to link multiple FC switches together into a fabric.
gl-port
Keyword, indicating the port type is generic loop and can function as either
an F_Port, an FL_Port or an E_Port.
tl-port
Keyword, indicating the port type is translated loop.
mode autobridge
Keywords, indicating public targets are made visible to the initiator in a
private loop.
mode autolearn
Keywords, indicating targets in a private loop are made visible.
donor
Keyword, indicating the interface is functioning as a donor port, making 11
buffer credits available to a recipient port, configured for credit extension.
Defaults
The port type is generic loop (GL_Port), by default.
Command Modes
Administrator.
Command History
Release
Modification
3.2.1
This command was introduced.
Usage Guidelines
Select the appropriate port type based on the connected equipment. By default, all of the storage router
FC ports are defined as self configuring GL_Ports.
Cisco SN 5428-2 Storage Router Software Configuration Guide
78-15471-01
12-183
Chapter 12
Command Line Interface Reference
interface fc? type
•
A GL_Port configures as an FL_Port when connected to a loop of public devices, an F_Port when
connected to a single device, or an E_Port when connected to another SN 5428-2 or an FC-SW-2
compliant switch. A GL_Port may also configure as an E_Port when connected to a switch running
non-FC-SW-2 compliant firmware.
•
A G_Port configures as an F_Port when connected to a single public device or an E_Port when
connected to another SN 5428-2 or an FC-SW-2 compliant switch. A G_Port may also configure as
an E_Port when connected to a switch running non-FC-SW-2 compliant firmware.
•
An F_Port supports connection to a single public device (N_Port).
•
An FL_Port supports connection to a loop of up to 126 public devices (NL_Port).
•
A TL_Port supports connection to a loop of up to 126 private devices with the ability to
communicate with “off-loop” devices, such as public fabric devices and private devices on other
TL_Ports. TL_Ports connect to devices that confirm to the Fibre Channel-Private Loop SCSI Direct
Attach (FC-PLDA) standard. A TL_Port acts as a proxy for the off-loop device, translating private
frames to and from public frames. Each TL_Port can proxy up to 64 off-loop devices.
•
A donor port type indicates that the interface is donating its buffer credits and is not used for FC
devices. Each donor ports donates 11 buffer credits to the pool. All of the 11 credits must go to a
single recipient interface, configured for credit extension.
Public devices have full Fibre Channel addressing capability and can communicate with any other public
device on the fabric; private devices do not have full FC addressing capability. Private devices have only
the Arbitrated Loop Physical Address (ALPA) portion.
Note
Examples
All storage routers in a cluster should be configured with the same interface-specific parameters,
allowing failover of SCSI routing instances to provide consistent performance characteristics.
The following example sets the port type to fabric for the FC interface named fc6:
[SN5428-2A]# interface fc6 type f-port
The following example set the port type to translated loop for the FC interface named fc3. The mode is
autolearn, so targets in private loop are made visible.
[SN5428-2A]# interface fc3 type tl-port mode autolearn
The following example sets the port type for interface fc1 to F_Port, sets the port type for interface fc8
as donor (making 11 buffer credits available to the interface fc1), and configures interface fc1 for credit
extension:
[SN5428-2A]# interface fc1 type f-port
*[SN5428-2A]# interface fc8 type donor
*[SN5428-2A]# interface fc1 ext-credit 11
Cisco SN 5428-2 Storage Router Software Configuration Guide
12-184
78-15471-01
Chapter 12
Command Line Interface Reference
interface fc? type
Related Commands
Command
Description
interface fc?
al-fairness
Enable the fairness algorithm on the named FC interface.
interface fc? default
Return the named FC interface to its default operational characteristics.
interface fc? ext-credit Configure the specified interface as a potential recipient of donated data
buffer credits.
interface fc?
fan-enable
Enable Fabric Address Notification (FAN) on the named FC interface.
interface fc? linkspeed Set the transfer rate for the named FC interface.
interface fc?
mfs-bundle
Enable Multi-Frame Sequence bundling for the named FC interface.
interface fc?
ms-enable
Enable GS-3 management server commands for the specified FC interface.
show interface
Display operational and configuration information for the specified
interface or all interfaces.
Cisco SN 5428-2 Storage Router Software Configuration Guide
78-15471-01
12-185
Chapter 12
Command Line Interface Reference
interface fci? devicediscoverytimer
interface fci? devicediscoverytimer
To enable the SN 5428-2 Storage Router internal Fibre Channel (FC) interfaces to perform background
device rediscovery for all attached FC targets at specific time intervals, use the
interface fci? devicediscoverytimer command.
interface fci? devicediscoverytimer nn
Syntax Description
fci?
The name of the internal FC interface. Valid values are fci1 or fci2. When
you type the interface fci? command, the CLI lists the interfaces available.
You cannot specify a nonexistent interface.
nn
The amount of time, in minutes between automatic background device
rediscovery.
Defaults
The device discovery timer value is 0, indicating that automatic background device rediscovery is
disabled.
Command Modes
Administrator.
Command History
Release
Modifications
3.2.1
This command was introduced.
Usage Guidelines
Use this command to enable automatic device rediscovery on a periodic basis in environments where
LUNs can be created on FC targets, but no event occurs to cause devices to be rediscovered. This
situation may occur with certain RAID controllers or virtualization type devices.
You do not need to issue the interface fci? devicediscoverytimer command for both internal FC
interfaces. When you enable automatic background device rediscovery for one internal FC interface (for
example, fci1), the same setting is enabled for the other internal FC interface (for example, fci2).
When automatic background device rediscovery is enabled, use the show interface command with the
stats keyword to display the current device rediscovery timer configuration.
Examples
The following example enables automatic device rediscovery every 20 minutes:
[SN5428-2A]# interface fci2 devicediscoverytimer 20
device discovery timer changed to 20 minutes on interface fci1
device discovery timer changed to 20 minutes on interface fci2
The following example disables automatic background device rediscovery by setting the device
discovery timer interval to 0. (This is the default setting.)
[SN5428-2A]# interface fci2 devicediscoverytimer 0
device discovery timer changed to 0 minutes on interface fci1
device discovery timer changed to 0 minutes on interface fci2
Cisco SN 5428-2 Storage Router Software Configuration Guide
12-186
78-15471-01
Chapter 12
Command Line Interface Reference
interface fci? devicediscoverytimer
Use the show interface command with the stats keyword to display the current device rediscovery timer
configuration. In the following example, the storage router will perform background device rediscovery
every 10 minutes.
[SN5428-2B]# show interface fci1 stats
loop:
LOOP READY
connection: F Port
Data Rate: 2 Gb/s
port id:
0x20f00
ALPA:
0x0
firmware:
READY
device rediscovery timer:
10 minutes
. . .
Note
Related Commands
The device rediscovery timer information does not display if automatic background device rediscovery
is not enabled.
Command
Description
show interface
Display operational and configuration information for the specified
interface or all interfaces.
Cisco SN 5428-2 Storage Router Software Configuration Guide
78-15471-01
12-187
Chapter 12
Command Line Interface Reference
interface ge?
interface ge?
To set various operational parameters associated with the Gigabit Ethernet interface, such as the size of
the maximum transfer unit (MTU) or the use of VLANs, use the interface ge? command. To disable the
use of VLANs, use the no form of this command. To specify that auto negotiation will never be used on
this interface, use the interface ge? no autonegotiation command.
interface ge? {autonegotiation [autodetect] | mtusize {nn | default}
interface ge? no autonegotiation
interface ge? vlan enable
no interface ge? vlan enable
Syntax Description
ge?
The name of the interface for which you are setting this parameter. When
you type the interface ge? command, the CLI lists the interfaces available.
You cannot specify a nonexistent interface.
autonegotiation
Auto negotiation will always be used on this interface.
autonegotiation
autodetect
Automatically detect if auto negotiation should be used for this interface.
This is the default setting.
mtusize nn
The size of the MTU, in bytes. nn is an integer between 1500 and 9000
inclusive.
mtusize default
Reset the value to the factory default of 1500 bytes.
vlan enable
Enable VLANs for this interface. This is the default.
Defaults
MTU size defaults to 1500 bytes. Auto negotiation defaults to autodetect. For storage routers deployed
for SCSI routing, the use of VLANs is enabled by default.
Command Modes
Administrator.
Command History
Release
Modification
3.2.1
This command was introduced.
Usage Guidelines
All storage routers in a cluster should be configured with the same MTU size and other interface-specific
parameters, allowing failover of applications to provide consistent performance characteristics.
If the SN 5428-2 is deployed for FCIP, a larger MTU size is desirable. Set the MTU size to 9000 bytes,
if possible.
Use the no interface ge? vlan enable command to quickly restrict VLAN functionality on the Gigabit
Ethernet interface for troubleshooting purposes.
Cisco SN 5428-2 Storage Router Software Configuration Guide
12-188
78-15471-01
Chapter 12
Command Line Interface Reference
interface ge?
Examples
The following example enables auto negotiation on the Gigabit Ethernet interface, ge1. The ge1 interface
will not come up until auto negotiation is successfully completed.
[SN5428-2A]# interface ge1 autonegotiation
The following example disables VLANs for the Gigabit Ethernet interface, ge2:
[SN5428-2A]# no interface ge2 vlan enable
The following examples changes the MTU size for the Gigabit Ethernet interface, ge1, to 9000 bytes.
This is the recommended setting when the storage router is deployed for FCIP.
[SN5428-2A]# no interface ge2 vlan enable
Related Commands
Command
Description
show interface
Display operational and configuration information for the specified
interface or all interfaces.
Cisco SN 5428-2 Storage Router Software Configuration Guide
78-15471-01
12-189
Chapter 12
Command Line Interface Reference
interface ge? ip-address
interface ge? ip-address
To enable an IP address on a Gigabit Ethernet interface for management of the SN 5428-2 Storage
Router, use the interface ge? ip-address command. To disable an IP address configured for storage
router management, use the no form of this command.
interface ge? [vlan vid] ip-address {A.B.C.D/bits | A.B.C.D/1.2.3.4} [secondary ge?]
no interface ge? [vlan vid] ip-address
Syntax Description
ge?
The name of the Gigabit Ethernet interface associated with this IP address.
When you type the interface ge? command, the CLI lists the interfaces
available. You cannot specify a nonexistent interface.
vlan vid
The keyword and the VLAN identifier.
A.B.C.D/bits
The IP address of the specified Gigabit Ethernet interface to be used for
management of the SN 5428-2 Storage Router. If the keyword vlan is used,
the IP address is part of the specified VLAN. The /bits specifies the network
mask in CIDR style.
A.B.C.D/1.2.3.4
The IP address of the specified Gigabit Ethernet interface to be used for
management of the SN 5428-2 Storage Router. If the keyword vlan is used,
the IP address is part of the specified VLAN. A.B.C.D is the dotted quad
notation of the IP address. 1.2.3.4 is the dotted quad notation of the subnet
mask.
secondary ge?
(Optional) The name of the Gigabit Ethernet interface to be used as a
secondary interface for the specified IP address. If the primary interface
goes down and remains down for two seconds, the specified IP address will
be moved to the secondary interface.
Defaults
None.
Command Modes
Administrator.
Command History
Release
Modification
3.2.1
This command was introduced.
Usage Guidelines
Use this command to designate an IP address on a Gigabit Ethernet interface to be used for management
of the SN 5428-2 Storage Router (in-band management). The Gigabit Ethernet IP address specified for
storage router management can perform all the normal management tasks, but unlike the management
interface, it cannot perform HA functions in a cluster environment if the HA interface is unavailable.
Cisco SN 5428-2 Storage Router Software Configuration Guide
12-190
78-15471-01
Chapter 12
Command Line Interface Reference
interface ge? ip-address
In-band management is performed via a Telnet or Secure Shell (SSH) session, or via the web-based GUI.
Only one IP address per logical interface can be configured for in-band management. Telnet, SSH, HTTP
and SSL access is restricted, by default, on all Gigabit Ethernet interfaces. Use the no restrict CLI
command to allow access to the storage router using the desired protocol via the specified Gigabit
Ethernet interface.
If the secondary keyword is used, both Gigabit Ethernet interfaces must be connected to the same
network segment. If you configure a Gigabit Ethernet IP address with a secondary interface, all Gigabit
Ethernet IP addresses on the same subnet must also be configured with the same secondary interface.
If you are using the Gigabit Ethernet interface IP address in configuration of external servers, such as
RADIUS, TACACS+ or SNMP, that will access the storage router via this interface, reboot the storage
router after configuring the Gigabit Ethernet IP address and saving the change to the system bootable
configuration. This assures that the IP address is the first address associated with the specified interface.
Note
Examples
The IP address used for management of the SN 5428-2 Storage Router cannot be used as a Gigabit
Ethernet IP address associated with a SCSI routing instance (serverif); the IP address must not already
be in use on the storage router.
The following example configures the IP address 10.1.0.244/24 on ge1 for management of the storage
router, and enables the ge1 interface for Telnet access.
[SN5428-2B]# interface ge1 ip-address 10.1.0.244/24
[SN5428-2B]# no restrict ge1 telnet
The following example configures two IP addresses on unique logical interfaces for storage router
management. The IP address 10.1.0.160/255.255.255.128 is specified as part of VLAN 100 on ge2; the
IP address 10.1.0.168/255.255.255.128 is also on ge2 but is not part of a VLAN. The interface ge2 is
enabled for SSH access.
[SN5428-2B]# interface ge2 vlan 100 ip-address 10.1.0.160/255.255.255.128
[SN5428-2B]# interface ge2 ip-address 10.1.0.168/255.255.255.128
[SN5428-2B]# no restrict ge2 ssh
The following example configures the IP address 10.1.0.230/24 on ge2 for storage router management.
If the ge2 interface is unavailable, the ge1 interface will be used. Both ge1 and ge2 are enabled for HTTP
access.
[SN5428-2B]# interface ge2 ip-address 10.1.0.230/24 secondary ge1
[SN5428-2B]# no restrict ge2 http
[SN5428-2B]# no restrict ge1 http
The following example removes the IP address configured for storage router management from ge1, and
restricts SSL access to the interface:
[SN5428-2B]# no interface ge1 ip-address
[SN5428-2B]# restrict ge1 ssl
The following example configures the IP address 10.1.0.212/24 on ge2 for management of the storage
router, saves the changes to the bootable configuration, and then performs a fast reboot. This assures that
the IP address will be the first address associated with the ge2 interface, and allows the IP address to be
used by external servers (such as RADIUS or TACACS+) to communicate with the storage router.
[SN5428-2B]# interface ge2 ip-address 10.1.0.212/24
*[SN5428-2B]# save all bootconfig
[SN5428-2B]# reboot fast
Cisco SN 5428-2 Storage Router Software Configuration Guide
78-15471-01
12-191
Chapter 12
Command Line Interface Reference
interface ge? ip-address
Related Commands
Command
Description
restrict
Secure access to storage router interfaces by communications protocols and
services.
show interface
Display operational and configuration information for the specified
interface or all interfaces.
show ip
Display entries from the SN 5428-2 Storage Router routing table and
statistics about the protocols used in the SN 5428-2 network.
show restrict
Display configurable security settings for the storage router interfaces.
Cisco SN 5428-2 Storage Router Software Configuration Guide
12-192
78-15471-01
Chapter 12
Command Line Interface Reference
interface ha
interface ha
To set various operational parameters associated with the high availability (HA) interface, such as the
speed and duplex mode, use the interface ha command.
interface ha autonegotiation
interface ha no autonegotiation [speed {10 | 100}] [duplex {full | half}]
Syntax Description
autonegotiation
Auto negotiation will always be used on this interface. Operational
characteristics will automatically be negotiated with the partner.
speed 10
(Optional) The interface speed is fixed at 10 Mbps. Auto negotiation is not
used.
speed 100
(Optional) The interface speed is fixed at 100 Mbps. Auto negotiation is not
used. If speed is not specified, the default is 100 Mbps.
duplex full
(Optional) The duplex setting is fixed at full. Auto negotiation is not used.
If the duplex setting is not specified, the default is full duplex.
duplex half
(Optional) The duplex setting is fixed at half. Auto negotiation is not used.
Defaults
Auto negotiation is enabled.
Command Modes
Administrator.
Command History
Release
Modification
3.2.1
This command was introduced.
Usage Guidelines
Use this command to manually set a specific interface speed and duplex setting, if the partner is unable
to auto negotiate these settings.
All storage routers in a cluster should be configured with the same interface-specific parameters,
allowing failover to provide consistent performance characteristics. Use the show interface ha
command to display current operating characteristics for the HA interface.
Examples
The following example disables auto negotiation, and sets the interface speed to 10 Mbps, duplex full:
[SN5428-2A] interface ha no autonegotiation speed 10 duplex full
Cisco SN 5428-2 Storage Router Software Configuration Guide
78-15471-01
12-193
Chapter 12
Command Line Interface Reference
interface ha
Related Commands
Command
Description
interface ha ip-address Specify the HA interface IP address and subnet mask.
show interface
Display operational and configuration information for the specified
interface or all interfaces.
Cisco SN 5428-2 Storage Router Software Configuration Guide
12-194
78-15471-01
Chapter 12
Command Line Interface Reference
interface ha ip-address
interface ha ip-address
To specify the IP address and subnet mask for this system’s high availability interface, use the
interface ha ip-address command.
interface ha ip-address {A.B.C.D/bits | A.B.C.D/1.2.3.4}
Syntax Description
A.B.C.D/nn
The IP address of the HA interface. A.B.C.D is the dotted quad notation of
the IP address. The /bits specifies the subnet mask in CIDR style.
A.B.C.D/1.2.3.4
The IP address of the HA interface. A.B.C.D is the dotted quad notation of
the IP address. 1.2.3.4 is the dotted quad notation of the subnet mask.
Defaults
None.
Command Modes
Administrator.
Command History
Release
Modification
3.2.1
This command was introduced.
Usage Guidelines
The HA features are used within a cluster of storage routers. Each member of the cluster communicates
over the HA and management interfaces, exchanging heartbeats and other configuration information,
allowing for failover in case of system problems.
The HA interface and the management interface must be on unique IP subnets. In a cluster, the HA
interfaces for all nodes should be on the same IP subnet.
After initial system configuration, use the setup cluster command to change the configuration of the
high availability environment.
For SN 5428-2 Storage Routers deployed for transparent SCSI routing, or standalone storage routers
deployed for SCSI routing, the HA interface is optional.
Examples
The following example assigns the IP address of 10.1.20.56/24 to the HA interface:
[SN5428-2B]# interface ha ip-address 10.1.20.56/24
Cisco SN 5428-2 Storage Router Software Configuration Guide
78-15471-01
12-195
Chapter 12
Command Line Interface Reference
interface ha ip-address
Related Commands
Command
Description
interface mgmt
ip-address
Specify the management interface IP address and subnet mask.
save all
Save all configuration information.
save system
Save selected system configuration information, including HA IP address.
setup cluster
Change the configuration of the high availability environment.
show cluster
Display cluster-related operational statistics, including heartbeat
information.
show ha
Display HA operational statistics for the storage router or for a specific
application.
Cisco SN 5428-2 Storage Router Software Configuration Guide
12-196
78-15471-01
Chapter 12
Command Line Interface Reference
interface mgmt
interface mgmt
To set various operational parameters associated with the management interface, such as the speed and
duplex mode, use the interface mgmt command.
interface mgmt autonegotiation
interface mgmt no autonegotiation [speed {10 | 100}] [duplex {full | half}]
Syntax Description
autonegotiation
Auto negotiation will always be used on this interface. Operational
characteristics will automatically be negotiated with the partner.
speed 10
(Optional) The interface speed is fixed at 10 Mbps. Auto negotiation is not
used.
speed 100
(Optional) The interface speed is fixed at 100 Mbps. Auto negotiation is not
used. If speed is not specified, the default is 100 Mbps.
duplex full
(Optional) The duplex setting is fixed at full. Auto negotiation is not used.
If the duplex setting is not specified, the default is full duplex.
duplex half
(Optional) The duplex setting is fixed at half. Auto negotiation is not used.
Defaults
Auto negotiation is enabled.
Command Modes
Administrator.
Command History
Release
Modification
3.2.1
This command was introduced.
Usage Guidelines
Use this command to manually set a specific interface speed and duplex setting, if the partner is unable
to auto negotiate these settings.
All storage routers in a cluster should be configured with the same interface-specific parameters,
allowing failover to provide consistent performance characteristics. Use the show interface mgmt
command to display current operating characteristics for the management interface.
Examples
The following example disables auto negotiation, and sets the interface speed to 10 Mbps, duplex full:
[SN5428-2A] interface mgmt no autonegotiation speed 10 duplex full
Cisco SN 5428-2 Storage Router Software Configuration Guide
78-15471-01
12-197
Chapter 12
Command Line Interface Reference
interface mgmt
Related Commands
Command
Description
interface mgmt
ip-address
Specify the management interface IP address and subnet mask.
show interface
Display operational and configuration information for the specified
interface or all interfaces.
Cisco SN 5428-2 Storage Router Software Configuration Guide
12-198
78-15471-01
Chapter 12
Command Line Interface Reference
interface mgmt ip-address
interface mgmt ip-address
To specify the IP address and subnet mask of the interface labeled MGMT on the front panel of the
SN 5428-2 Storage Router, use the interface mgmt ip-address command. This address is used to
manage the storage router via Telnet, Secure Shell (SSH), the web-based GUI, or SNMP.
interface mgmt ip-address {A.B.C.D/bits | A.B.C.D/1.2.3.4}
Syntax Description
A.B.C.D/bits
The IP address of the management interface. A.B.C.D is the dotted quad
notation of the IP address. The /bits specifies the subnet mask in CIDR
style.
A.B.C.D/1.2.3.4
The IP address of the management interface. A.B.C.D is the dotted quad
notation of the IP address. 1.2.3.4 is the dotted quad notation of the subnet
mask.
Defaults
None.
Command Modes
Administrator.
Command History
Release
Modification
3.2.1
This command was introduced.
Usage Guidelines
The management and HA interfaces must be on unique IP subnets. In a cluster, the management
interfaces for all nodes should be on the same IP subnet.
Examples
The following example assigns the IP address of 10.1.10.244/24 to the management interface:
[SN5428-2A]# interface mgmt ip-address 10.1.10.244/24
Cisco SN 5428-2 Storage Router Software Configuration Guide
78-15471-01
12-199
Chapter 12
Command Line Interface Reference
interface mgmt ip-address
Related Commands
Command
Description
interface ha ip-address Specify the HA interface IP address and subnet mask.
ip route
Add a static route to the SN 5428-2 Storage Router routing table.
save all
Save all configuration information.
save system
Save selected system configuration information, including management and
HA interface information.
setup mgmt
Run the wizard to configure the management interface.
show cluster
Display cluster-related operational statistics, including heartbeat
information.
show interface
Display operational and configuration information for the specified
interface or all interfaces.
Cisco SN 5428-2 Storage Router Software Configuration Guide
12-200
78-15471-01
Chapter 12
Command Line Interface Reference
ip default-gateway
ip default-gateway
To add a gateway to the default route in the SN 5428-2 Storage Router routing table, use the
ip default-gateway command. To delete the gateway, use the no form of this command.
ip default-gateway E.F.G.H [administrative-distance]
no ip default-gateway [A.B.C.D]
Syntax Description
E.F.G.H
The default gateway IP address.
administrative-distance (Optional) The administrative distance for the route. Valid values are 0 to
255 inclusive. The default administrative distance is 1.
A.B.C.D
(Optional) The IP address of the default route. The gateway to this route will
be removed.
Defaults
The default administrative distance for a static route is 1.
Command Modes
Administrator.
Command History
Release
Modification
3.2.1
This command was introduced.
Usage Guidelines
All IP interfaces in the SN 5428-2 use the routing table to reach services and networks outside their local
network. Other facilities, such as SNMP and connections to an NTP server or DNS servers, may also use
the routing table. Use the ip default-gateway command to add a gateway to the default route in this
table.
Only one default route is allowed in the routing table.
Note
This command is functionally equivalent to issuing the ip route command for IP address 0.0.0.0/00.
The administrative distance is used to determine which route to install in the routing table when there
are multiple routes to the same destination. The default administrative distance for static routes is 1; the
administrative distance for dynamic routes created by RIP is 120. The route with the lower
administrative distance is installed in the routing table (as long as the interface used by the route is up).
By default, a static route will always override a dynamic route learned by RIP. To modify this behavior,
change the administrative distance of a static route to a value greater than 120.
Examples
The following example adds a default route to gateway 10.3.40.1 in the routing table. The administrative
distance is 1, by default.
[SN5428-2A]# ip default-gateway 10.3.40.1
Cisco SN 5428-2 Storage Router Software Configuration Guide
78-15471-01
12-201
Chapter 12
Command Line Interface Reference
ip default-gateway
The following example adds a default route to gateway 10.3.30.1, with an administrative distance of 130,
in the routing table. If RIP is enabled for the storage router, the default route can be overridden by a
dynamically learned route.
[SN5428-2A]# ip default-gateway 10.3.30.1 130
Related Commands
Command
Description
ip route
Add a static route to the SN 5428-2 Storage Router routing table.
show ip
Display entries from the SN 5428-2 Storage Router routing table and
statistics about the protocols used in the storage router network.
show route
Display the default routes.
Cisco SN 5428-2 Storage Router Software Configuration Guide
12-202
78-15471-01
Chapter 12
Command Line Interface Reference
ip domain-name
ip domain-name
To specify the name of the SN 5428-2 Storage Router domain, use the ip domain-name command. To
remove a domain name, use the no form of this command.
ip domain-name name
no ip domain-name
Syntax Description
name
Defaults
None.
Command Modes
Administrator.
Command History
Release
Modification
3.2.1
This command was introduced.
Usage Guidelines
Note
Examples
The name of the SN 5428-2 Storage Router domain.
Use the ip domain-name command in conjunction with the ip name-server command. The storage
router requires access to a DNS if any IP addresses are entered as host names via any of the storage router
management interfaces, or if the management interface IP address is to be correlated with a DNS host
name.
If the DNS is outside the storage router management subnet, use the ip route command to add an
appropriate gateway IP address to the routing table.
The following example assigns the domain name abc123z.com to the storage router.
[SN5428-2A]# ip domain-name abc123z.com
Related Commands
Command
Description
ip default-gateway
Configure a gateway for the default route.
ip name-server
Specify the IP addresses of a primary (and optional secondary) DNS.
ip route
Add a static route to the SN 5428-2 Storage Router routing table.
setup mgmt
Run the wizard to configure the management interface.
Cisco SN 5428-2 Storage Router Software Configuration Guide
78-15471-01
12-203
Chapter 12
Command Line Interface Reference
ip name-server
ip name-server
To specify the IP address of the primary and optional secondary Domain Name Server (DNS), use the
ip name-server command. To remove the settings for current domain name servers, use the no form of
this command.
ip name-server A.B.C.D [E.F.G.H]
no ip name-server
Syntax Description
A.B.C.D
The IP address of a primary Domain Name Server, accessible by the storage
router. A.B.C.D is the dotted quad notation of the IP address.
E.F.G.H
(Optional) The IP address of a secondary DNS, accessible by the storage
router. E.F.G.H is the dotted quad notation of the IP address.
Defaults
None.
Command Modes
Administrator.
Command History
Release
Configuration
3.2.1
This command was introduced.
Usage Guidelines
The storage router requires access to a DNS if any IP addresses are entered as host names via any of the
storage router management interfaces, or if the management interface IP address is to be correlated with
a DNS host name. To use the services of a DNS, you must also assign a domain name to the storage router
via the ip domain-name command.
If the DNS is outside the storage router management subnet, use the ip route command to add an
appropriate gateway IP address to the routing table.
Examples
The following example assigns the domain name abc123z.com to the storage router, and assigns the IP
address of the primary DNS to 10.1.40.243 and the secondary DNS to 10.1.50.249:
[SN5428-2A]# ip domain-name abc123z.com
[SN5428-2A]# ip name-server 10.1.40.243 10.1.50.249
Related Commands
Command
Description
ip default-gateway
Configure a gateway for the default route.
ip domain-name
Assign a domain name to the SN 5428-2 Storage Router.
ip route
Add a static route to the SN 5428-2 Storage Router routing table.
setup mgmt
Run the wizard to configure the management interface.
Cisco SN 5428-2 Storage Router Software Configuration Guide
12-204
78-15471-01
Chapter 12
Command Line Interface Reference
ip radius sourceinterface
ip radius sourceinterface
To specify a single network interface to be used as the source IP address for all outgoing AAA
authentication requests to RADIUS servers, use the ip radius sourceinterface command. To disable this
restriction, use the no form of this command.
ip radius sourceinterface if-name
no ip radius sourceinterface
Syntax Description
if-name
Defaults
None.
Command Modes
Administrator.
Command History
Release
Modification
3.2.1
This command was introduced.
The name of the interface to which you are restricting all outgoing AAA
authentication requests to RADIUS servers. When you type the
IP radius sourceinterface ? command, the CLI lists the interfaces
available. You cannot specify a nonexistent interface.
Usage Guidelines
Use this command to restrict all outgoing AAA authentication requests to RADIUS servers to a single
interface.
Examples
The following example restricts all outgoing AAA authentication requests to RADIUS servers to the
Gigabit Ethernet interface ge1:
[SN5428-2A]# ip radius sourceinterface ge1
Cisco SN 5428-2 Storage Router Software Configuration Guide
78-15471-01
12-205
Chapter 12
Command Line Interface Reference
ip radius sourceinterface
Related Commands
Command
Description
aaa authentication
enable
Configure AAA authentication services for Administrator mode access to
the SN 5428-2 Storage Router via the CLI enable command.
aaa authentication
iscsi
Configure the AAA authentication services to be used for iSCSI
authentication.
aaa authentication
login
Configure AAA authentication services for Monitor mode access to the
SN 5428-2 Storage Router via the CLI.
radius-server host
Configure remote RADIUS servers for AAA authentication services.
restore aaa
Restore AAA authentication services from the named configuration file.
save aaa
Save the current AAA configuration information.
show aaa
Display AAA configuration information.
Cisco SN 5428-2 Storage Router Software Configuration Guide
12-206
78-15471-01
Chapter 12
Command Line Interface Reference
ip rip enable
ip rip enable
To enable the SN 5428-2 Storage Router to learn dynamic routing using the routing information protocol
(RIP), use the ip rip enable command. To disable dynamic routing via RIP, use the no form of this
command.
ip rip enable
no ip rip enable
Syntax Description
This command has no arguments or keywords.
Defaults
RIP is disabled by default.
Command Modes
Administrator.
Command History
Release
Modification
3.2.1
This command was introduced.
Usage Guidelines
Routing Information Protocol (RIP) is an Interior Gateway Protocol (IGP) for dynamic routing and uses
a distance vector algorithm to determine the best route between nodes in an Autonomous System (AS).
The SN 5428-2 Storage Router is a passive, or silent, RIP device; it updates routes based on RIP
advertisements but it does not advertise. The storage router listens for advertised routes, learning routing
information dynamically as it is exchanged in the network. The storage router supports both RIP
version 1 (v1) and RIP version 2 (v2).
The SN 5428-2 RIP implementation runs RIP v2 in broadcast mode. This allows the storage router to
learn from either RIP v1 or RIP v2 hosts that are operating in broadcast mode. The storage router will
not learn routes from RIP v2 hosts operating in multicast mode.
If you are using RIP in your network, you can enable RIP support on the storage router. RIP eliminates
or reduces the need to configure static routes for the storage router, because the storage router updates
the route table based on the RIP advertisements.
The storage router can learn a maximum of 200 routes. Additional routes that are received are silently
ignored. In the routing table, a static route will always override a dynamic route by default. To modify
this behavior, change the administrative distance of a static route to a value greater than 120.
Examples
The following example enables RIP for the SN 5428-2 Storage Router:
[SN5428-2A]# ip rip enable
[SN5428-2A] Dec 09 17:54:16: %IP-5-IRMRSAR: RIP Services are running
The following command disables RIP:
[SN5428-2A]# no ip rip enable
Cisco SN 5428-2 Storage Router Software Configuration Guide
78-15471-01
12-207
Chapter 12
Command Line Interface Reference
ip rip enable
Related Commands
Command
Description
ip rip timers
Configure various RIP timers.
show ip
Display entries from the SN 5428-2 Storage Router routing table, and
statistics about the protocols used in the storage router network. Use the rip
keyword to display RIP configuration information.
Cisco SN 5428-2 Storage Router Software Configuration Guide
12-208
78-15471-01
Chapter 12
Command Line Interface Reference
ip rip timers
ip rip timers
To configure various RIP timers, use the ip rip timers command.
ip rip timers invalid {nn | default}
Syntax Description
invalid nn
Specifies the maximum time, in seconds, between updates before a route is
expired and made a candidate for removal from the routing table.
default
Keyword, used to return the specified timer to the default value. The default
invalid timer is180 seconds.
Defaults
The RIP invalid timer defaults to 180 seconds.
Command Modes
Administrator.
Command History
Release
Modification
3.2.1
This command was introduced.
Usage Guidelines
Routing Information Protocol (RIP) is an Interior Gateway Protocol (IGP) for dynamic routing and uses
a distance vector algorithm to determine the best route between nodes in an Autonomous System (AS).
The SN 5428-2 Storage Router is a passive, or silent, RIP device; it updates routes based on RIP
advertisements but it does not advertise. The storage router listens for advertised routes, learning routing
information dynamically as it is exchanged in the network. The storage router supports both RIP
version 1 (v1) and RIP version 2 (v2).
The SN 5428-2 RIP implementation runs RIP v2 in broadcast mode. This allows the storage router to
learn from either RIP v1 or RIP v2 hosts that are operating in broadcast mode. The storage router will
not learn routes from RIP v2 hosts operating in multicast mode.
The storage router can learn a maximum of 200 routes. Additional routes that are received are silently
ignored. In the routing table, a static route will always override a dynamic route by default. To modify
this behavior, change the administrative distance of a static route to a value greater than 120.
Timers are used to configure the timing of RIP activities. The invalid timer configures the maximum
amount of time between updates of the internal route table. Use the default keyword to return a RIP
timer to its default value.
Examples
The following example sets the RIP invalid timer to a value of 200 seconds and saves all configuration
changes. This is the maximum amount of time between updates before a route is marked as expired.
[SN5428-2A]# ip rip timers invalid 200
*[SN5428-2A]# save all bootconfig
Cisco SN 5428-2 Storage Router Software Configuration Guide
78-15471-01
12-209
Chapter 12
Command Line Interface Reference
ip rip timers
Related Commands
Command
Description
ip rip enable
Enable the storage router to learn dynamic routing using the routing
information protocol (RIP).
show ip
Display entries from the SN 5428-2 Storage Router routing table, and
statistics about the protocols used in the storage router network. Use the rip
keyword to display RIP configuration information.
Cisco SN 5428-2 Storage Router Software Configuration Guide
12-210
78-15471-01
Chapter 12
Command Line Interface Reference
ip route
ip route
To add a static route to the SN 5428-2 Storage Router routing table, use the ip route command. The
specified IP address is accessed via the gateway specified in the command. To remove a static route from
the routing table, use the no form of this command.
ip route {A.B.C.D/bits | A.B.C.D/1.2.3.4} E.F.G.H [administrative-distance]
no ip route {A.B.C.D/bits | A.B.C.D/1.2.3.4} [E.F.G.H]
Syntax Description
A.B.C.D/bits
The IP address of the static route. A.B.C.D is the dotted quad notation of the
IP address. The /bits specifies the subnet mask in CIDR style.
A.B.C.D/1.2.3.4
The IP address of the static route. A.B.C.D is the dotted quad notation of the
IP address. 1.2.3.4 is the dotted quad notation of the subnet mask.
E.F.G.H
The gateway IP address through which the static route (A.B.C.D/bits or
A.B.C.D/1.2.3.4) is accessed.
administrative-distance (Optional) The administrative distance for the route. Valid values are 0 to
255 inclusive. The default administrative distance is 1.
Defaults
None.
Command Modes
Administrator.
Command History
Release
Modification
3.2.1
This command was introduced.
Usage Guidelines
All IP interfaces in the storage router use the routing table to reach services and networks outside their
local network. Other facilities, such as SNMP and connections to an NTP server or DNS servers, may
also use the routing table. Use the ip route command to specify routes for servers or networks outside
the local networks associated with the storage router IP interfaces.
Use the show ip route command to display the SN 5428-2 Storage Router routing table. Use the
show route command to display all the default routes, included the routes that have been configured but
not added to the routing table.
The administrative distance is used to determine which route to install in the routing table when there
are multiple routes to the same destination. The default administrative distance for static routes is 1; the
administrative distance for dynamic routes created by RIP is 120. The route with the lower
administrative distance is installed in the routing table (as long as the interface used by the route is up).
By default, a static route will always override a dynamic route learned by RIP. To modify this behavior,
change the administrative distance of a static route to a value greater than 120.
Cisco SN 5428-2 Storage Router Software Configuration Guide
78-15471-01
12-211
Chapter 12
Command Line Interface Reference
ip route
Note
Examples
A route is not added to the routing table until the associated IP gateway address is configured. The CLI
displays an informational message if a route is added for an IP address that is not yet configured.
The following command adds a unique route for IP address 10.1.30.0, specifying the subnet mask in
dotted quad notation:
[SN5428-2A]# ip route 10.1.30.0/255.255.255.0 10.1.10.10
The following command adds a unique route for IP address 10.1.40.0, using gateway 10.1.10.10, which
is not yet on a locally connected network. The message indicates that the route has been configured but
has not yet been made operational in the storage router.
[SN5428-2A]# ip route 10.1.40.0/24 10.1.10.10
Oct 25 19:25:17: %UI-4-NMREEO1: Gateway 10.1.10.10 used by route 10.1.40.0/24 is currently
unreachable
The following command adds a unique route for IP address 10.1.20.0 with an administrative distance of
130, in the routing table. If RIP is enabled for the storage router, the route can be overridden by a
dynamically learned route.
[SN5428-2A]# ip route 10.1.20.0/24 10.1.10.10 130
Related Commands
Command
Description
ip default-gateway
Configure a gateway for the default route.
ip domain-name
Assign a domain name to the SN 5428-2 Storage Router.
ip name-server
Specify the IP addresses of a primary (and optional secondary) DNS.
show ip
Display entries from the SN 5428-2 Storage Router routing table, and
statistics about the protocols used in the storage router network.
show route
Display the default routes.
Cisco SN 5428-2 Storage Router Software Configuration Guide
12-212
78-15471-01
Chapter 12
Command Line Interface Reference
ip tacacs sourceinterface
ip tacacs sourceinterface
To specify a single network interface to be used as the source IP address for all outgoing AAA
authentication requests to TACACS+ servers, use the ip tacacs sourceinterface command. To disable
this restriction, use the no form of this command.
ip tacacs sourceinterface if-name
no ip tacacs sourceinterface
Syntax Description
if-name
Defaults
None.
Command Modes
Administrator.
Command History
Release
Modification
3.2.1
This command was introduced.
The name of the interface to which you are restricting all outgoing AAA
authentication requests to TACACS+ servers. When you type the
IP tacacs sourceinterface ? command, the CLI lists the interfaces
available. You cannot specify a nonexistent interface.
Usage Guidelines
Use this command to restrict all outgoing AAA authentication requests to TACACS+ servers to a single
interface.
Examples
The following example restricts all outgoing AAA authentication requests to TACACS+ servers to the
management interface, mgmt:
[SN5428-2A]# ip tacacs sourceinterface mgmt
Cisco SN 5428-2 Storage Router Software Configuration Guide
78-15471-01
12-213
Chapter 12
Command Line Interface Reference
ip tacacs sourceinterface
Related Commands
Command
Description
aaa authentication
enable
Configure AAA authentication services for Administrator mode access to
the SN 5428-2 Storage Router via the CLI enable command.
aaa authentication
iscsi
Configure the AAA authentication services to be used for iSCSI
authentication.
aaa authentication
login
Configure AAA authentication services for Monitor mode access to the
SN 5428-2 Storage Router via the CLI.
restore aaa
Restore AAA authentication services from the named configuration file.
save aaa
Save the current AAA configuration information.
show aaa
Display AAA configuration information.
tacacs-server host
Configure remote TACACS+ servers for AAA authentication services.
Cisco SN 5428-2 Storage Router Software Configuration Guide
12-214
78-15471-01
Chapter 12
Command Line Interface Reference
logging #?
logging #?
To insert a routing rules entry into the logging table before the specified entry, use the logging #?
command.
logging #?
logging #nn level notification-level from facility-name to destination1 [destination2...]
Syntax Description
#?
Request an indexed list of entries in the logging table.
#nn
The index number from the displayed list of entries. The new routing rule
will be inserted before the specified logging table entry.
notification-level
Limit logging to messages of a specified level or lower levels. See
Table 12-10 in the Usage Guidelines section for a list of valid names that
can be used for the notification-level argument.
from facility-name
The name of the facility. A facility is the feature area from which the
message is received. See Table 12-11 in the Usage Guidelines section for a
list of valid facility names. Each facility can have eight notification levels.
Each notification level can have up to seven destination.
to destination1
[destination2...]
At least one of the destinations described in Table 12-12.
Defaults
None.
Command Modes
Administrator.
Command History
Release
Modification
3.2.1
This command was introduced.
Usage Guidelines
Event, trace and debug messages can be routed to various destinations, based on the notification level of
the message and the application area (facility) that generated the message. When a log message is
received by the storage router, the logging table rules are searched by facility name and by message level
until a match is found. The log message is sent to all the destinations specified by the matching rule.
New routing rules are normally appended to the existing rules in the table. Use this command to insert
a routing rule at a specific location within the table.
To display an indexed lists of entries in the logging table, use the number sign (#) character followed by
a question mark (?). That action will cause the routing rules in the logging table to be displayed as a
numbered (indexed) set of lines. The command is displayed at the prompt below the list to the point of
the # keyword. Complete the command by entering the appropriate index number and the desired
keywords and variables to compose the new routing rule. The new routing rule will be added to the table
before the specified entry.
Cisco SN 5428-2 Storage Router Software Configuration Guide
78-15471-01
12-215
Chapter 12
Command Line Interface Reference
logging #?
The level limits logging to messages of the specified notification level or lower levels, based on level
number. Table 12-10 describes the available logging levels.
Table 12-10 Logging Level Notification Levels and Corresponding Numbers
Note
Notification Level
Level Number
Description
emergency
0
System unusable
alert
1
Immediate action needed
critical
2
Critical conditions
error
3
Error conditions
warning
4
Non-fatal warning conditions
notice
5
Normal but significant conditions
info
6
Informational messages only
debug
7
Information for troubleshooting purposes
The debug notification level should be used for specific troubleshooting purposes only. System
performance and HA behavior may be adversely affected by logging at the debug notification level.
Each facility can have up to eight notification levels. Each facility and notification level pair can have
up to seven destinations. Table 12-11 describes the available facility names.
Table 12-11 Logging Level Facilities
Facility Name
Description
all
All facilities.
AUTH
AAA authentication.
CDP
Cisco Discovery Protocol.
CONF
Configuration functions.
FC
Fibre Channel interfaces.
FCIP
FCIP functions.
GE
Gigabit Ethernet interfaces.
HA
High availability cluster functions.
IF
Interface manager.
INVALID
Generic functions.
IP
IP functions.
ISCSI
iSCSI functions.
MON
Hardware monitor.
SLP
Service Location Protocol service functions.
SNMP
Simple Network Management Protocol.
SYSLOG
Syslog functions.
Cisco SN 5428-2 Storage Router Software Configuration Guide
12-216
78-15471-01
Chapter 12
Command Line Interface Reference
logging #?
Table 12-11 Logging Level Facilities (continued)
Facility Name
Description
UI
User interface functions.
VTP
VTP and VLAN functions.
Table 12-12 describes the available logging destinations.
Table 12-12 Logging Level Destinations
Destination
Description
all
Logs to all destinations.
none
No logging occurs.
console
Logs to serial console CLI sessions.
logfile
Logs messages to the storage router log file.
rslog
Logs messages to a remote syslog server. Use the
logging syslog command to specify the IP address
of the remote syslog server.
vty
Logs to all Telnet, SSH, or other virtual terminal
CLI sessions.
Use the save system bootconfig or save all bootconfig commands to save the list of log route entries.
To delete a log route entry by its index number, use the delete logging command.
Examples
The following example displays an indexed list of the routing rules in the logging table, and then inserts
an entry to log anything from the HA facility with notification level of notice (or lower) to all logging
destinations before the third entry. The show logging command displays the newly inserted entry.
[SN5428-2A]# logging #?
[SN5428-2A]# logging #?
Index Level
Priority
1
critical 2
2
debug
7
3
warning
4
Facility
all
SNMP
CDP
Route
console vty logfile
rslog
rslog
[SN5428-2A]# logging #3 level notice from HA to all
[SN5428-2A]# show logging
Logging is enabled
Index
1
2
3
4
Level
critical
debug
notice
warning
Priority
2
7
5
4
Facility
all
SNMP
HA
CDP
Route
console vty logfile
rslog
all
rslog
Syslog host is enabled, ip-address is 10.1.1.144
Cisco SN 5428-2 Storage Router Software Configuration Guide
78-15471-01
12-217
Chapter 12
Command Line Interface Reference
logging #?
Related Commands
Command
Description
clear logging table
Clear the SN 5428-2 Storage Router logging table of all entries, or to reset
the table to factory defaults.
delete logging
Delete a rule from the logging table.
logging level
Add rule entries to route storage router event, debug and trace messages to
various destinations based on facility and notification level.
logging on
Enable or temporarily disable logging of storage router event message.
logging syslog
Identify a remote syslog host to be used to log messages.
save all
Save all configuration information, including the log route entries list.
save system
Save selected system configuration information, including log route entries
list.
show logging
Display the routing rules in the logging table and the contents of the storage
router log file.
show system
Display selected system information.
Cisco SN 5428-2 Storage Router Software Configuration Guide
12-218
78-15471-01
Chapter 12
Command Line Interface Reference
logging level
logging level
To add a routing rule to the logging table, use the logging level command.
logging level notification-level from facility-name to destination1 [destination2...]
Syntax Description
Defaults
notification-level
Limit logging to messages of a specified level or lower levels. See
Table 12-13 in the Usage Guidelines section for a list of valid names that
can be used for the notification-level argument.
from facility-name
The name of the facility. A facility is the feature area from which the
message is received. See Table 12-14 in the Usage Guidelines section for a
list of valid facility names. Each facility can have eight notification levels.
Each notification level can have up to seven destination.
to destination1
[destination2...]
At least one of the destinations described in Table 12-15.
The factory default logging rules are as follows:
•
All messages from all facilities at notice level or lower levels are logged to all destinations.
•
All messages from all facilities at info level or lower levels are logged to the storage router log file.
•
All messages from all facilities at debug level are not logged.
Command Modes
Administrator.
Command History
Release
Modification
3.2.1
This command was introduced
Usage Guidelines
Event, trace and debug messages can be routed to various destinations, based on the notification level of
the message and the application area (facility) that generated the message. When a log message is
received by the storage router, the logging table rules are searched by facility name and by notification
level until a match is found. The log message is sent to all the destinations specified by the matching
rule. When a new routing rule is added, it is appended to the existing list of entries.
Messages are sent in the following format:
<timestamp>: %<facility>-<level_number>-<mnemonic>: <message text>
The following is an example log message, for the SNMP facility:
Mar 18 11:48:05: %SNMP-5-SASAS: SnmpApp starting...
Each facility can have up to eight notification levels. The notification level limits logging to messages
of the specified level or lower levels, based on level number. Table 12-13 describes the available logging
levels.
Each facility and notification level pair can have up to seven destinations. Table 12-14 describes the
available facility names.
Cisco SN 5428-2 Storage Router Software Configuration Guide
78-15471-01
12-219
Chapter 12
Command Line Interface Reference
logging level
Table 12-13 Logging Level Notification Levels and Corresponding Numbers
Note
Notification Level
Level Number
Description
emergency
0
System unusable
alert
1
Immediate action needed
critical
2
Critical conditions
error
3
Error conditions
warning
4
Non-fatal warning conditions
notice
5
Normal but significant conditions
info
6
Informational messages only
debug
7
Information for troubleshooting purposes
The debug notification level should be used for specific troubleshooting purposes only. System
performance and HA behavior may be adversely affected by logging at the debug notification level.
Table 12-14 Logging Level Facilities
Facility Name
Description
all
All facilities.
AUTH
AAA authentication.
CDP
Cisco Discovery Protocol.
CONF
Configuration functions.
FC
Fibre Channel interfaces.
FCIP
FCIP functions.
GE
Gigabit Ethernet interfaces.
HA
High availability cluster functions.
IF
Interface manager.
INVALID
Generic functions.
IP
IP functions.
ISCSI
iSCSI functions.
MON
Hardware monitor.
SLP
Service Location Protocol service functions.
SNMP
Simple Network Management Protocol.
SYSLOG
Syslog functions.
UI
User interface functions.
VTP
VTP and VLAN functions.
Cisco SN 5428-2 Storage Router Software Configuration Guide
12-220
78-15471-01
Chapter 12
Command Line Interface Reference
logging level
Table 12-15 describes the available logging destinations.
Table 12-15 Logging Level Destinations
Destination
Description
all
Logs to all destinations.
none
No logging occurs.
console
Logs to console CLI sessions.
logfile
Logs messages to the storage router log file.
rslog
Logs messages to a remote syslog server. Use the
logging syslog command to specify the IP address
of the remote syslog server.
vty
Logs to all Telnet, SSH, or other virtual terminal
CLI sessions.
Use the save system bootconfig or save all bootconfig commands to save the logging table
To delete a routing rule from the logging table, use the delete logging command.
Note
Examples
Any message that does not have a matching rule in the logging table is discarded.
The following example logs anything from the HA facility with notification level of notice (or lower) to
all logging destinations.
[SN5428-2A]# logging level notice from HA to all
The following example logs messages from all facilities with a notification level of warning or lower to
all destinations. (If this is the only rule in the logging table, any message with a notification level of
debug, info or notice is discarded and not logged.) The log route entries are saved to the bootable
configuration of the storage router.
[SN5428-2A]# logging level warning from all to all
[SN5428-2A]# save system bootconfig
Cisco SN 5428-2 Storage Router Software Configuration Guide
78-15471-01
12-221
Chapter 12
Command Line Interface Reference
logging level
Related Commands
Command
Description
clear logging table
Clear the SN 5428-2 Storage Router logging table of all entries, or to reset
the table to factory defaults.
delete logging
Delete a rule from the logging table.
logging #?
Insert a routing rule entry into the storage router logging table.
logging on
Enable or temporarily disable logging of storage router event message.
logging syslog
Identify a remote syslog host to be used to log messages.
save all
Save all configuration information, including the log route entries list.
save system
Save selected system configuration information, including log route entries
list.
show logging
Display the routing rules in the logging table and the contents of the storage
router log file.
show system
Display selected system information.
Cisco SN 5428-2 Storage Router Software Configuration Guide
12-222
78-15471-01
Chapter 12
Command Line Interface Reference
logging on
logging on
To enable logging of SN 5428-2 Storage Router event messages based on the rules in the logging table,
use the logging on command. To temporarily disable logging of all event messages, use the no form of
this command.
logging on
no logging on
Syntax Description
This command has no arguments or keywords.
Defaults
Logging is enabled by default. The factory default logging rules are as follows:
•
All messages from all facilities at notice level or lower levels are logged to all destinations.
•
All messages from all facilities at info level or lower levels are logged to the storage router log file.
•
All messages from all facilities at debug level are not logged.
Command Modes
Administrator.
Command History
Release
Modification
3.2.1
This command was introduced.
Usage Guidelines
Use the no form of this command to quickly disable logging of all messages. For example, if there is an
error condition that is overwhelming the console with messages, enter no logging on to temporarily
disable logging without changing the logging table. Use the logging on command to re-enable logging
when the problem is resolved.
Examples
The following example temporarily disables logging of all event messages:
[SN5428-2A]# no logging on
Cisco SN 5428-2 Storage Router Software Configuration Guide
78-15471-01
12-223
Chapter 12
Command Line Interface Reference
logging on
Related Commands
Command
Description
clear logging table
Clear the SN 5428-2 Storage Router logging table of all entries, or to reset
the table to factory defaults.
delete logging
Delete a rule from the logging table.
logging #?
Insert a routing rule entry into the storage router logging table.
logging level
Add rule entries to route storage router event, debug and trace messages to
various destinations based on facility and notification level.
logging syslog
Identify a remote syslog host to be used to log messages.
save all
Save all configuration information, including the log route entries list.
save system
Save selected system configuration information, including log route entries
list.
show logging
Display the routing rules in the logging table and the contents of the storage
router log file.
show system
Display selected system information.
Cisco SN 5428-2 Storage Router Software Configuration Guide
12-224
78-15471-01
Chapter 12
Command Line Interface Reference
logging syslog
logging syslog
To identify a remote syslog host to be used to log SN 5428-2 Storage Router event messages, use the
logging syslog command. Use the no form of this command to disable remote logging.
logging syslog A.B.C.D
no logging syslog
Syntax Description
A.B.C.D
Defaults
Remote logging is disabled by default.
Command Modes
Administrator.
Command History
Release
Modification
3.2.1
This command was introduced.
Usage Guidelines
Examples
The IP address of the syslog host to be used for remote logging.
This command identifies a remote syslog host to receive storage router event messages.
•
Use the logging level command with the destination keyword rslog to configure the messages to be
logged to the remote host.
•
Use the no logging syslog command to disable remote logging.
•
Use the delete logging command to remove specific logging table entries.
•
Use the show logging command to display the status of remote logging and the IP address of the
remote syslog server.
The following example identifies the IP address of the remote syslog host as 10.1.1.144 and adds a entry
to the logging table to route all emergency level messages to that remote host.
[SN5428-2A]# logging syslog 10.1.1.144
[SN5428-2A]# logging level emergency from all to rslog
Cisco SN 5428-2 Storage Router Software Configuration Guide
78-15471-01
12-225
Chapter 12
Command Line Interface Reference
logging syslog
Related Commands
Command
Description
clear logging table
Clear the SN 5428-2 Storage Router logging table of all entries, or to reset
the table to factory defaults.
delete logging
Delete a rule from the logging table.
logging #?
Insert a routing rule entry into the storage router logging table.
logging level
Add rule entries to route storage router event, debug and trace messages to
various destinations based on facility and notification level.
logging on
Enable or temporarily disable logging of storage router event message.
save all
Save all configuration information, including the remote logging
configuration.
save system
Save selected system configuration information, including remote logging
information.
show logging
Display the routing rules in the logging table and the contents of the storage
router log file.
show system
Display selected system information.
Cisco SN 5428-2 Storage Router Software Configuration Guide
12-226
78-15471-01
Chapter 12
Command Line Interface Reference
logout
logout
To terminate the current CLI management session, use the logout command.
logout
Syntax Description
This command has no arguments or keywords.
Defaults
None.
Command Modes
Administrator or Monitor.
Command History
Release
Modification
3.2.1
This command was introduced.
Usage Guidelines
Related Commands
•
If you are connected to the storage router in Administrator mode or Monitor mode via a Telnet or
SSH session, the logout command terminates the CLI management session. No CLI commands can
be issued until you log in again.
•
If you are connected to the storage router in Administrator mode via the console interface, the logout
command returns the session to Monitor mode (like the exit command).
•
If you are connected to the storage router in Monitor mode via the console interface, the logout
command has no effect. If console passwords are enabled, you are immediately prompted for the
Monitor mode password.
Command
Description
enable
Enter Administrator mode.
exit
Leave Administrator mode and enter Monitor mode.
Cisco SN 5428-2 Storage Router Software Configuration Guide
78-15471-01
12-227
Chapter 12
Command Line Interface Reference
monitor password
monitor password
To set the password used for view-only access to the SN 5428-2 Storage Router management interface,
use the monitor password command. Access may be via Telnet or SSH (for CLI) or web-based GUI.
monitor password string
Syntax Description
string
Defaults
The default password is cisco.
Command Modes
Administrator.
Command History
Release
Modification
3.2.1
This command was introduced.
Usage Guidelines
A case-sensitive password associated with view-only access to the storage
router management interface. The default password is cisco.
The management interface is password protected. You must enter passwords when accessing the storage
router via the CLI or web-based GUI. (Passwords can also be applied to the console interface. See the
restrict console command for additional information.) The Monitor mode password provides view-only
access to the management interface, while the Administrator mode password allows you to create entities
and make changes to the configuration of the storage router system.
To clear the Monitor mode password, set the password string to “” , effectively setting it to nothing.
Note
If Login authentication is enabled for the storage router, users are prompted for both a user name and a
password when accessing the storage router via a console, Telnet or SSH management session.
In a cluster environment, the Administrator mode and Monitor mode passwords are cluster-wide
configuration elements and apply to all storage routers in a cluster. The password management functions
are handled by a single storage router. To determine which storage router is performing password
management functions, issue the show cluster command. If you issue the monitor password command
from a storage router that is not performing password management functions, the CLI displays an
informational message with the name of the node that is currently handling those functions.
Examples
The following example sets the Monitor mode password to M17g23. All passwords are case sensitive.
[SN5428-2A]# monitor password M17g23
Note
The password is displayed in clear text as the command is entered, but it is changed to a series of number
signs (#####) when the change is acknowledged.
Cisco SN 5428-2 Storage Router Software Configuration Guide
12-228
78-15471-01
Chapter 12
Command Line Interface Reference
monitor password
Related Commands
Command
Description
aaa authentication
login
Configure AAA authentication services for Monitor mode access to the
SN 5428-2 Storage Router via the CLI.
aaa generate password Generate a long random password.
admin password
Set the login password for administrative access to the management
interface.
enable
Enter Administrator mode.
exit
Leave Administration mode and enter Monitor mode.
save all
Save all configuration information, including the Monitor mode password.
save system
Save selected system information, including the Monitor mode password.
setup access
Run the wizard to configure Monitor mode and Administrator mode
passwords.
Cisco SN 5428-2 Storage Router Software Configuration Guide
78-15471-01
12-229
Chapter 12
Command Line Interface Reference
ntp peer
ntp peer
To specify the name or IP address of a Network Time Protocol (NTP) server with which the SN 5428-2
Storage Router will synchronize date and time, use the ntp peer command. To clear the current NTP
server setting, use the no form of this command.
ntp peer{A.B.C.D | server-name}
no ntp peer
Syntax Description
A.B.C.D
The IP address of the NTP server with which the storage router
synchronizes date and time. A.B.C.D is the dotted quad notation of the IP
address.
server-name
The name of the NTP server with which the storage router synchronizes
date and time. In order to specify a server name, the storage router must be
configured to use a DNS server using the ip name-server command.
Defaults
None.
Command Modes
Administrator.
Command History
Release
Modification
3.2.1
This command was introduced.
Usage Guidelines
The storage router must provide accurate date and time information for log files and user interfaces. It
will use the services of the NTP server to keep the date and time synchronized with the rest of the
network.
If the NTP server is outside the storage router management subnet, use the ip route command to add an
appropriate gateway IP address to the routing table.
Examples
The following example sets the IP address of the NTP server for the storage router to 10.1.60.86.
[SN5428-2A]# ntp peer 10.1.60.86
Cisco SN 5428-2 Storage Router Software Configuration Guide
12-230
78-15471-01
Chapter 12
Command Line Interface Reference
ntp peer
Related Commands
Command
Description
clock set
Set the storage router system clock.
clock timezone
Specify the time zone associated with the storage router.
ip route
Add a static route to the SN 5428-2 Storage Router routing table.
save all
Save all configuration information.
save system
Save selected system information, including NTP server name.
setup time
Run the wizard to configure the system date and time.
show clock
Display the current system date and time, including the system time zone.
show system
Display selected system information, including NTP server address.
Cisco SN 5428-2 Storage Router Software Configuration Guide
78-15471-01
12-231
Chapter 12
Command Line Interface Reference
ping
ping
To verify communication with another SN 5428-2 Storage Router or system in the network, use the ping
command.
ping {ip-address | servername} [numpkts nn] [size sn]
Syntax Description
ip-address
The IP address of another system or SN 5428-2 Storage Router.
servername
The name of another server. The storage router must be configured to use
the services of a Domain Name Server (DNS).
numpkts nn
(Optional) The maximum number of pings that may be sent. The default
value is five.
size sn
(Optional) The size of each ping packet, in bytes. The minimum size is 64
bytes; the maximum size is 4096 bytes. The default is 64 bytes.
Defaults
The default setting is to attempt five 64-byte pings.
Command Modes
Administrator or Monitor. The optional numpkts and size keywords are not available in Monitor mode.
Command History
Release
Modification
3.2.1
This command was introduced.
3.3.1
The optional numpkts and size keywords are restricted to Administrator
mode only.
Usage Guidelines
Use this command to verify that there is a TCP/IP communication path to another SN 5428-2 Storage
Router or system in the network.
Examples
The following example attempts to verify the communication path to the IP address 10.1.30.17, using
the default size and maximum number of packets:
[SN5428-2A]# ping 10.1.30.17
The following example attempts to reach the IP address 10.1.30.17 by sending up to three pings, each
consisting of a 120-byte packet. You must be logged on in Administrator mode to execute this command.
[SN5428-2A]# ping 10.1.30.17 numpkts 3 size 120
Related Commands
Command
Description
show ip
Display entries from the SN 5428-2 Storage Router routing table and
statistics about the protocols used in the storage router network.
Cisco SN 5428-2 Storage Router Software Configuration Guide
12-232
78-15471-01
Chapter 12
Command Line Interface Reference
radius-server deadtime
radius-server deadtime
To improve RADIUS response time when some servers might be unavailable, use the
radius-server deadtime command to cause the storage router to skip the unavailable servers
immediately. To set the dead time to 0, effectively preventing the storage router from skipping any
RADIUS server, use the no form of this command.
radius-server deadtime minutes
no radius-server deadtime
Syntax Description
minutes
Defaults
The dead time is set to zero (0) by default.
Command Modes
Administrator.
Command History
Release
Modification
3.2.1
This command was introduced.
Usage Guidelines
The length of time, in minutes, for which a RADIUS server is skipped over
by the storage router when requesting AAA authentication services, up to a
maximum of 1440 minutes (24 hours).
Use this command to cause the storage router to mark as “dead” any RADIUS servers that fail to respond
to authentication requests, thus avoiding the wait for the authentication request to time out before trying
the next configured server. A RADIUS server marked as dead is skipped by additional requests for the
specified number of minutes, unless all RADIUS servers are marked as dead. If all RADIUS servers are
marked as dead, the deadtime setting is ignored.
This is a global command that applies to all configured RADIUS servers. To override the global dead
time setting for a specific group of RADIUS server, use the aaa group server radius deadtime
command.
Examples
The following example specifies a dead time of five minutes for all RADIUS servers that fail to respond
to AAA authentication requests:
[SN5428-2A]# radius-server deadtime 5
The following example effectively sets a dead time of zero minutes for all RADIUS servers. The storage
router will wait for any AAA authentication request to a RADIUS server to time out before
retransmitting or retrying the next configured server.
[SN5428-2A]# no radius-server deadtime
Cisco SN 5428-2 Storage Router Software Configuration Guide
78-15471-01
12-233
Chapter 12
Command Line Interface Reference
radius-server deadtime
Related Commands
Command
Description
aaa group server
radius deadtime
Specify the length of time the storage router can skip a RADIUS server in
the named group that is marked as unavailable.
show aaa
Display AAA configuration information.
Cisco SN 5428-2 Storage Router Software Configuration Guide
12-234
78-15471-01
Chapter 12
Command Line Interface Reference
radius-server host
radius-server host
To specify a RADIUS server to be used for AAA authentication services, use the radius-server host
command. To delete the specified RADIUS server, use the no form of this command.
radius-server host ip-address [auth-port port-number] [timeout seconds] [retransmit retries]
[key key-string]
no radius-server host ip-address [auth-port port-number]
Syntax Description
ip-address
The IP address of the RADIUS server.
auth-port port-number (Optional) The UDP destination port for authentication requests. If
unspecified, the port number defaults to 1645.
timeout seconds
(Optional) The host-specific time interval that the storage router waits for
the RADIUS server to reply before retransmitting. Enter a value in the range
of 1 to 1000. This setting overrides the global value of the
radius-server timeout command. If no timeout value is specified, the
global value is used.
retransmit retries
(Optional) The number of times a RADIUS request is resent to the RADIUS
server, if the server is not responding or responding slowly. Enter a value in
the range of 0 to 100. A value of 0 disables RADIUS request retransmission.
This setting overrides the global setting of the radius-server retransmit
command. If no retransmit value is specified, the global value is used.
key key-string
(Optional) The authentication and encryption key for all RADIUS
communications between the storage router and the RADIUS server. This
key must match the encryption used on the RADIUS daemon. If spaces are
used in the key, enclose the key in quotation marks. This key overrides the
global setting of the radius-server key command. If no key string is
specified, the global value is used.
Defaults
No RADIUS server is specified.
Command Modes
Administrator.
Command History
Release
Modification
3.2.1
This command was introduced.
Cisco SN 5428-2 Storage Router Software Configuration Guide
78-15471-01
12-235
Chapter 12
Command Line Interface Reference
radius-server host
Usage Guidelines
AAA authentication services are used to provide the following authentication types:
•
iSCSI authentication—provides authentication of IP hosts requiring access to storage via SCSI
routing instances
•
Login authentication—provides authentication of users requiring Monitor mode access to the
storage router via the CLI
•
Enable authentication—provides authentication of users requiring Administrator mode access to the
storage router via the CLI enable command
You can use multiple radius-server host commands to specify multiple RADIUS servers. AAA
authentication searches for servers in the order in which you specify them.
Use the aaa group server radius server command to add a RADIUS server to a server group. If you
delete a RADIUS server, delete the server from the RADIUS server using the
no aaa group server radius server command.
If no host-specific timeout, retransmit, or key values are specified, the global values apply to each
RADIUS server.
A retransmit value of zero (0) disables RADIUS request retransmission.
If you use spaces in the key, enclose the key in quotation marks.
Note
Examples
Verification of IP addresses in a server group occurs only at runtime. If a RADIUS server group contains
an IP address that is not defined as a RADIUS server, the authentication process generates error
messages and the IP address is skipped. This could cause unexpected authentication failures.
The following example identifies the server with IP address 10.5.0.53 as the RADIUS server and uses
the default port for authentication:
[SN5428-2A]# radius-server host 10.5.0.53
The following example identifies port 1612 as the destination port for authentication requests on the
RADIUS server 10.6.0.61:
[SN5428-2A]# radius-server host 10.6.0.61 auth-port 1612
The following example identifies the server with IP address 10.5.0.53 as the RADIUS server, uses ports
1612 as the authorization port, sets the timeout value to 6, sets the retransmit value to 5, and sets
“rad123” as the encryption key, matching the key on the RADIUS server:
[SN5428-2A]# radius-server host 10.5.0.53 auth-port 1612 timeout 6 retransmit 5 key rad123
Cisco SN 5428-2 Storage Router Software Configuration Guide
12-236
78-15471-01
Chapter 12
Command Line Interface Reference
radius-server host
Related Commands
Command
Description
aaa authentication
enable
Configure AAA authentication services for Administrator mode access to
the SN 5428-2 Storage Router via the CLI enable command.
aaa authentication
iscsi
Configure the AAA authentication services to be used for iSCSI
authentication.
aaa authentication
login
Configure AAA authentication services for Monitor mode access to the
SN 5428-2 Storage Router via the CLI.
aaa group server
radius
Create a named group of RADIUS servers for AAA authentication services.
aaa group server
radius deadtime
Specify the length of time the storage router can skip a RADIUS server in
the named group that is marked as unavailable.
aaa test authentication Enable testing of the specified AAA authentication list.
radius-server
deadtime
Specify the length of time the storage router can skip a RADIUS server that
is marked as unavailable.
radius-server key
Sets the global authentication and encryption key for all RADIUS
communications between the storage router and the RADIUS daemon.
radius-server
retransmit
Specifies how many times the storage router resends the RADIUS request
to a server before giving up.
radius-server timeout
Sets the interval the storage router waits for a RADIUS server to reply
before retransmitting.
restore aaa
Restore AAA authentication services from the named configuration file.
save aaa
Save the current AAA configuration information.
scsirouter
authentication
Enable iSCSI authentication for the named SCSI routing instance.
show aaa
Display AAA configuration information.
tacacs-server host
Configure remote TACACS+ servers for AAA authentication services.
Cisco SN 5428-2 Storage Router Software Configuration Guide
78-15471-01
12-237
Chapter 12
Command Line Interface Reference
radius-server key
radius-server key
To set the authentication and encryption key to be used for all RADIUS communications between the
SN 5428-2 Storage Router and the RADIUS daemon, use the radius-server key command. To disable
the key, use the no form of this command.
radius-server key key-string
no radius-server key
Syntax Description
key-string
Defaults
None.
Command Modes
Administrator.
Command History
Release
Modification
3.2.1
This command was introduced.
Usage Guidelines
The authentication and encryption key string to be used for all RADIUS
communications, in clear text. If spaces are used in the key, enclose the key
in quotation marks.
Use the radius-server key command to set the global authentication and encryption key to be used by
the storage router for communications with RADIUS servers. The key entered as part of the command
must match the key used on the RADIUS daemon. If the key includes spaces, enclose the key in
quotation marks.
To override the global key for a specific RADIUS server, use the radius-server host command with the
key keyword.
Examples
The following example sets the global authentication and encryption key to my key string:
[SN5428-2A]# radius-server key “my key string”
Cisco SN 5428-2 Storage Router Software Configuration Guide
12-238
78-15471-01
Chapter 12
Command Line Interface Reference
radius-server key
Related Commands
Command
Description
aaa authentication
enable
Configure AAA authentication services for Administrator mode access to
the SN 5428-2 Storage Router via the CLI enable command.
aaa authentication
iscsi
Configure the AAA authentication services to be used for iSCSI
authentication.
aaa authentication
login
Configure AAA authentication services for Monitor mode access to the
SN 5428-2 Storage Router via the CLI.
aaa group server
radius
Create a named group of RADIUS servers for AAA authentication services.
aaa group server
radius deadtime
Specify the length of time the storage router can skip a RADIUS server in
the named group that is marked as unavailable.
aaa test authentication Enable testing of the specified AAA authentication list.
debug aaa
Enable debugging for the AAA authentication services.
radius-server
deadtime
Specify the length of time the storage router can skip a RADIUS server that
is marked as unavailable.
radius-server host
Configure remote RADIUS servers for AAA authentication services.
radius-server
retransmit
Specifies how many times the storage router resends the RADIUS request
to a server before giving up.
radius-server timeout
Sets the interval the storage router waits for a RADIUS server to reply
before retransmitting.
restore aaa
Restore AAA authentication services from the named configuration file.
save aaa
Save the current AAA configuration information.
scsirouter
authentication
Enable iSCSI authentication for the named SCSI routing instance.
show aaa
Display AAA configuration information.
tacacs-server host
Configure remote TACACS+ servers for AAA authentication services.
Cisco SN 5428-2 Storage Router Software Configuration Guide
78-15471-01
12-239
Chapter 12
Command Line Interface Reference
radius-server retransmit
radius-server retransmit
To specify the number of times the SN 5428-2 Storage Router resends the RADIUS request to each
server in the list of configured RADIUS servers after a timeout occurs, use the radius-server retransmit
command. To disable retransmission, use the no form of this command.
radius-server retransmit retries
no radius-server retransmit
Syntax Description
retries
Defaults
The number of possible resends defaults to three.
Command Modes
Administrator.
Command History
Release
Modification
3.2.1
This command was introduced.
Usage Guidelines
The number of times the request can be resent to each server in the list.
Enter a value in the range of 0 to 100. A value of zero (0) disables RADIUS
request retransmission. The default is 3.
If multiple RADIUS servers are configured for AAA authentication, the storage router attempts to reach
each server in the list before incrementing the retransmit count. To disable RADIUS request
retransmission, set the retransmit count to zero.
To override the global retransmit count for a specific RADIUS server, use the radius-server host
command with the retransmit keyword.
Examples
The following example sets the retransmit count to six, meaning the request can be resent up to six times
for every RADIUS server:
[SN5428-2A]# radius-server retransmit 6
The following example disables RADIUS request retransmission by setting the retransmit count to zero:
[SN5428-2A]# radius-server retransmit 0
Cisco SN 5428-2 Storage Router Software Configuration Guide
12-240
78-15471-01
Chapter 12
Command Line Interface Reference
radius-server retransmit
Related Commands
Command
Description
aaa authentication
enable
Configure AAA authentication services for Administrator mode access to
the SN 5428-2 Storage Router via the CLI enable command.
aaa authentication
iscsi
Configure the AAA authentication services to be used for iSCSI
authentication.
aaa authentication
login
Configure AAA authentication services for Monitor mode access to the
SN 5428-2 Storage Router via the CLI.
aaa group server
radius
Create a named group of RADIUS servers for AAA authentication services.
aaa group server
radius deadtime
Specify the length of time the storage router can skip a RADIUS server in
the named group that is marked as unavailable.
aaa test authentication Enable testing of the specified AAA authentication list.
debug aaa
Enable debugging for the AAA authentication services.
radius-server
deadtime
Specify the length of time the storage router can skip a RADIUS server that
is marked as unavailable.
radius-server host
Configure remote RADIUS servers for AAA authentication services.
radius-server key
Sets the global authentication and encryption key for all RADIUS
communications between the storage router and the RADIUS daemon.
radius-server timeout
Sets the interval the storage router waits for a RADIUS server to reply
before retransmitting.
restore aaa
Restore AAA authentication services from the named configuration file.
save aaa
Save the current AAA configuration information.
scsirouter
authentication
Enable iSCSI authentication for the named SCSI routing instance.
show aaa
Display AAA configuration information.
tacacs-server host
Configure remote TACACS+ servers for AAA authentication services.
Cisco SN 5428-2 Storage Router Software Configuration Guide
78-15471-01
12-241
Chapter 12
Command Line Interface Reference
radius-server timeout
radius-server timeout
To set the global interval that the SN 5428-2 Storage Router waits for a RADIUS server to reply, use the
radius-server timeout command. To restore the default, use the no form of this command.
radius-server timeout seconds
no radius-server timeout
Syntax Description
seconds
Defaults
The timeout value defaults to five seconds.
Command Modes
Administrator.
Command History
Release
Modification
3.2.1
This command was introduced.
Usage Guidelines
The global timeout value in seconds. Enter a value in the range of 1 to 1000.
The default is 5.
Use this command to set the number of seconds the storage router waits for a RADIUS server to reply
before timing out.
To override the global timeout value for a specific RADIUS server, use the radius-server host command
with the timeout keyword.
Examples
The following example sets the global timeout value to 10. You may want to increase the timeout value
if you have network problems or if the RADIUS servers are slow to response, which causes consistent
timeouts when a lower timeout value is used.
[SN5428-2A]# radius-server timeout 10
Cisco SN 5428-2 Storage Router Software Configuration Guide
12-242
78-15471-01
Chapter 12
Command Line Interface Reference
radius-server timeout
Related Commands
Command
Description
aaa authentication
enable
Configure AAA authentication services for Administrator mode access to
the SN 5428-2 Storage Router via the CLI enable command.
aaa authentication
iscsi
Configure the AAA authentication services to be used for iSCSI
authentication.
aaa authentication
login
Configure AAA authentication services for Monitor mode access to the
SN 5428-2 Storage Router via the CLI.
aaa group server
radius
Create a named group of RADIUS servers for AAA authentication services.
aaa group server
radius deadtime
Specify the length of time the storage router can skip a RADIUS server in
the named group that is marked as unavailable.
aaa test authentication Enable testing of the specified AAA authentication list.
debug aaa
Enable debugging for the AAA authentication services.
radius-server
deadtime
Specify the length of time the storage router can skip a RADIUS server that
is marked as unavailable.
radius-server host
Configure remote RADIUS servers for AAA authentication services.
radius-server key
Sets the global authentication and encryption key for all RADIUS
communications between the storage router and the RADIUS daemon.
radius-server
retransmit
Specifies how many times the storage router resends the RADIUS request
to a server before giving up.
restore aaa
Restore AAA authentication services from the named configuration file.
save aaa
Save the current AAA configuration information.
scsirouter
authentication
Enable iSCSI authentication for the named SCSI routing instance.
show aaa
Display AAA configuration information.
tacacs-server host
Configure remote TACACS+ servers for AAA authentication services.
Cisco SN 5428-2 Storage Router Software Configuration Guide
78-15471-01
12-243
Chapter 12
Command Line Interface Reference
read script
read script
To read and execute the CLI commands in a command file, use the read script command.
read script command-file [force [parameters]]
Syntax Description
command-file
The name of the command file. The command file must exist in the script
directory.
force
(Optional) Suppress warning prompts and messages and execute the script
immediately.
parameters
(Optional) Pass one or more parameters to the specified script. If the
parameter includes spaces, enclose it in quotation marks.
Defaults
None.
Command Modes
Administrator.
Command History
Release
Modification
3.2.1
This command was introduced.
Usage Guidelines
Use the show bootconfig and show runningconfig commands with the to keyword to create basic files
containing many of the CLI commands that were issued to create the SN 5428-2 Storage Router bootable
or currently running configuration. These files can be modified and used as command files to automate
common tasks.
You can also manually create a command file. If you have a set of CLI commands that you run
periodically, you can place them in a command file, copy that file to the storage router script directory
and use the read script command to execute them when needed.
Each command should be on a separate line or contain a backslash ( \ ) as the line continuation character
at the end of the line. At the end of a continuation sequence, add a blank line as a separator between the
sequence and any following command. Any line beginning with an exclamation mark (!) or a number
sign (#) is considered to be a comment and will not be executed.
When the command is issued without the force keyword, you are reminded that the action may change
the configuration of the storage router and are then prompted to confirm your actions. When the
command is issued with the force keyword, all warning prompts and messages are suppressed and the
script is executed immediately.
You can also pass optional parameters to the script to control processing. Any parameter that includes
spaces must be enclosed in quotation marks. Within the script, use the key character “@” to instruct the
script execution function to substitute the value of the specified parameter. Whenever the execution
function encounters @1, it substitutes the value of the first passed parameter. The value of the second
parameter is substituted for @2, and so forth.
See Chapter 11, “Maintaining and Managing the SN 5428-2 Storage Router,” for additional information
about using scripts to automate tasks.
Cisco SN 5428-2 Storage Router Software Configuration Guide
12-244
78-15471-01
Chapter 12
Command Line Interface Reference
read script
Examples
The following example reads and executes the CLI commands in the command file named myCommands.
[SN5428-2A]# read script myCommands
*** Warning: this script may change your configuration.
Do you want to continue? [yes/no (yes)] yes
Related Commands
Command
Description
show bootconfig
Display the bootable configuration, or create a command file based on the
bootable configuration.
show cli
Display the syntax of CLI commands.
show runningconfig
Display the running configuration, or create a command file based on the
running configuration.
show script
Display the contents of the script directory or the contents of the named
command file.
Cisco SN 5428-2 Storage Router Software Configuration Guide
78-15471-01
12-245
Chapter 12
Command Line Interface Reference
reboot
reboot
To cause the SN 5428-2 Storage Router to shut down and then restart, issue the reboot command.
Note
Rebooting may cause the storage router to run a different version of software. See the software version
command for details.
reboot [force] [fast]
Syntax Description
fast
(Optional) Force a soft reboot of the storage router, bypassing hardware
diagnostics.
force
(Optional) Force an immediate reboot of the storage router.
Defaults
If there are unsaved configuration changes when the command is issued, the default is to save all changes
before rebooting. If the command is issued with the optional force keyword, any unsaved configuration
changes are discarded.
Command Modes
Administrator.
Command History
Release
Modification
3.2.1
This command was introduced.
Usage Guidelines
If the storage router is participating in a cluster, the reboot command will cause any SCSI routing
instances running on this storage router to failover to another node in the cluster. At restart, the cluster
determines any SCSI routing instances that should start on the storage router. If the SN 5428-2 is
identified as the preferred storage router for any SCSI routing instance (via the scsirouter primary
command), that instance will start running on the SN 5428-2 (assuming targets and critical resources are
available).
If the reboot command is issued with no keywords and there are unsaved changes to the current
configuration, you can choose to either save all changes or reboot without saving any changes.
Use the force keyword to cause an immediate reboot of the storage router, discarding any unsaved
configuration changes. Append the optional fast keyword to bypass diagnostics during the reboot
sequence.
Cisco SN 5428-2 Storage Router Software Configuration Guide
12-246
78-15471-01
Chapter 12
Command Line Interface Reference
reboot
Examples
The following prompt is received if you issue a reboot command (without the force keyword) when the
storage router has unsaved configuration changes.
[SN5428-2A]# reboot
*** Warning: This will reboot the system.
Do you want to continue? [yes/no (no)] yes
Changes have been made to the current configuration of the system which
have not been saved.
yes
- all of the configuration data will be saved,
no
- modifications to the configuration data will not be saved.
Save ALL configuration data? [yes/no (yes)] yes
Halting system.........
The following example reboots the storage router (after prompting you to save any unsaved
configuration changes) but bypasses diagnostics during the reboot process:
[SN5428-2A]# reboot fast
Related Commands
Command
Description
halt
Prepare the SN 5428-2 Storage Router to be powered down.
software version
Specify the version of software to run when the storage router is restarted.
Cisco SN 5428-2 Storage Router Software Configuration Guide
78-15471-01
12-247
Chapter 12
Command Line Interface Reference
restore aaa
restore aaa
To cause the AAA authentication configuration to be copied from the specified configuration file into
persistent memory, use the restore aaa command. The configuration file must exist in the savedconfig
directory. To display the contents of the savedconfig directory, issue the show savedconfig command.
Note
If the storage router belongs to a cluster, the restored AAA configuration information will automatically
be propagated to other members of that cluster.
restore aaa from filename
Syntax Description
from filename
Defaults
None.
Command Modes
Administrator.
Command History
Release
Modification
3.2.1
This command was introduced.
Usage Guidelines
Note
Examples
The name of the configuration file containing the information to be
restored. This file must exist in the savedconfig directory.
The restore command overwrites all existing AAA configuration information, including any user name
and passwords in the local username database, RADIUS and TACACS+ configuration information, and
the AAA authentication lists used for iSCSI, Enable, and Login authentication.
In a cluster environment, AAA management functions are handled by a single storage router. To
determine which storage router is performing AAA management functions, issue the show cluster
command. If you issue a restore aaa command from a storage router that is not performing AAA
management functions, the CLI displays an informational message with the name of the node that is
currently handling those functions. See Chapter 11, “Maintaining and Managing the SN 5428-2 Storage
Router,” for more information about operating the storage router in a cluster.
The following example restores the AAA authentication configuration from the saved configuration file
named aaa_backup:
[SN5428-2A]# restore aaa from aaa_backup
Cisco SN 5428-2 Storage Router Software Configuration Guide
12-248
78-15471-01
Chapter 12
Command Line Interface Reference
restore aaa
Related Commands
Command
Description
aaa authentication
enable
Configure AAA authentication services for Administrator mode access to
the SN 5428-2 Storage Router via the CLI enable command.
aaa authentication
iscsi
Configure the AAA authentication services to be used for iSCSI
authentication.
aaa authentication
login
Configure AAA authentication services for Monitor mode access to the
SN 5428-2 Storage Router via the CLI.
aaa generate password Generate a long random password.
aaa group server
radius
Create a named group of RADIUS servers for AAA authentication services.
aaa group server
tacacs+
Create a named group of TACACS+ servers for AAA authentication
services.
aaa test authentication Enable testing of the specified AAA authentication list.
debug aaa
Enable debugging for the AAA authentication services.
delete savedconfig
Remove a saved configuration file from the storage router.
radius-server host
Configure remote RADIUS servers for AAA authentication services.
save aaa
Save the current AAA configuration information.
scsirouter
authentication
Enable iSCSI authentication for the named SCSI routing instance.
show aaa
Display AAA configuration information.
show savedconfig
List the contents of the savedconfig directory or the contents of the named
configuration file.
tacacs-server host
Configure remote TACACS+ servers for AAA authentication services.
Cisco SN 5428-2 Storage Router Software Configuration Guide
78-15471-01
12-249
Chapter 12
Command Line Interface Reference
restore accesslist
restore accesslist
To cause the named access list or all access lists to be copied from the specified configuration file into
persistent memory, use the restore accesslist command. The configuration file must exist in the
savedconfig directory. To display the contents of the savedconfig directory, issue the show savedconfig
command.
Note
If the storage router belongs to a cluster, the restored access list information will automatically be
propagated to other members of that cluster.
restore accesslist {name | all} from filename
Syntax Description
name
The name of the access list to be restored.
all
Keyword to restore all access lists.
from filename
The name of the configuration file containing the information to be
restored. This file must exist in the savedconfig directory.
Defaults
None.
Command Modes
Administrator.
Command History
Release
Modification
3.2.1
This command was introduced.
Usage Guidelines
If the access list currently exists in some form, the restore command does not delete existing
information. The restore command adds missing entries, or overwrites existing entries of the same
name, but never purges or deletes existing access list entries. If necessary, you can delete an access list
and all its entries and then restore it from a saved configuration file.
There is a maximum of 100 access lists per storage router or per storage router cluster. There is a
maximum of 200 access list identification entries across all access lists in the storage router or storage
router cluster.
Note
In a cluster environment, access list management functions are handled by a single storage router. To
determine which storage router is performing access list management functions, issue the show cluster
command. If you issue a restore accesslist command from a storage router that is not performing access
list management functions, the CLI displays an informational message with the name of the node that is
currently handling those functions. See Chapter 11, “Maintaining and Managing the SN 5428-2 Storage
Router,” for more information about operating the storage router in a cluster.
Cisco SN 5428-2 Storage Router Software Configuration Guide
12-250
78-15471-01
Chapter 12
Command Line Interface Reference
restore accesslist
Examples
The following example restores the access list named fooList from the saved configuration file named
accessList_backup:
[SN5428-2A]# restore accesslist fooList from accessList_backup
Related Commands
Command
Description
accesslist
Create an access list entity.
accesslist A.B.C.D/bits Add IP addresses to an access list.
delete accesslist
Delete a specific access list entry or an entire access list.
restore all
Restore all the contents of the named configuration file into memory.
restore scsirouter
Restore the named SCSI routing instance from the named configuration file.
save accesslist
Save configuration data for the named access list or for all access lists.
save scsirouter
Save configuration information for the named SCSI routing instance.
save system
Save selected system configuration information.
scsirouter target
accesslist
Associate an access list with a specific SCSI routing instance target or all
targets.
show accesslist
Display the contents of the named access list or all access lists.
show savedconfig
List the contents of the savedconfig directory or the contents of the named
configuration file.
Cisco SN 5428-2 Storage Router Software Configuration Guide
78-15471-01
12-251
Chapter 12
Command Line Interface Reference
restore all
restore all
To cause all the previously saved configuration information to be copied from the specified configuration
file into persistent memory, use the restore all command. The configuration file must exist in the
savedconfig directory. Use the show savedconfig command to display the contents of the savedconfig
directory.
Note
This command may change the running configuration of the storage router.
restore all from filename
Syntax Description
from filename
Defaults
None.
Command Modes
Administrator.
Command History
Release
Modification
3.2.1
This command was introduced.
Usage Guidelines
The name of the configuration file containing the information to be
restored. This file must exist in the savedconfig directory.
The restore all command restores all information from the named configuration file. Depending on the
information that is restored, the running configuration of the storage router may be changed.
A restore command may overwrite or delete existing items. However, the restore command will not
purge or delete existing items from access lists, but will add missing items or overwrite existing items
of the same name. If necessary, you may delete access lists, or any other item to be restored, before
restoring from a saved configuration file.
The restore all command will not restore the route table and RIP settings, the Fibre Channel (FC) zoning
database, or the logging table. Use the restore system ip-route command to restore a saved route table
and RIP settings, and the restore fcswitch zones command to restore the FC zoning database. Use the
restore system logging command to restore the logging table.
SCSI routing instances and FCIP instances must be stopped before they can be restored. Use the
no scsirouter enable command to stop active SCSI routing instances. Use the no fcip enable command
to stop an active FCIP instance. After the restore is complete, use the scsirouter enable command to
start the restored SCSI routing instances. Restored FCIP instances are automatically restarted.
Cisco SN 5428-2 Storage Router Software Configuration Guide
12-252
78-15471-01
Chapter 12
Command Line Interface Reference
restore all
Note
Examples
In a cluster environment, all AAA, access list, password, and VLAN management functions are handled
by a single storage router. To determine which storage router is performing these management functions,
issue the show cluster command. If you issue the restore all command from a storage router that is not
performing these management functions, the CLI displays an informational message with the name of
the node that is currently handling those functions. See Chapter 11, “Maintaining and Managing the
SN 5428-2 Storage Router,” for more information about operating the storage router in a cluster.
The following example restores all configuration data contained in the configuration file named
foo_backup into persistent memory:
[SN5428-2A]# restore all from foo_backup
Related Commands
Command
Description
failover scsirouter
Cause the named SCSI routing instance to cease running on the storage
router.
restore aaa
Restore AAA authentication services from the named configuration file.
restore accesslist
Restore the named access list or all access lists from the named
configuration file.
restore fcswitch
Restore Fibre Channel configuration information from the named
configuration file.
restore scsirouter
Restore the named SCSI routing instance from the named configuration file.
restore system
Restore selected system information from the named configuration file.
restore vlan
Restore VLAN configuration information from the named configuration
file.
save aaa
Save the current AAA configuration information.
save accesslist
Save configuration data for the named access list or all access lists.
save all
Save all configuration information.
save scsirouter
Save configuration information for the named SCSI routing instance.
save system
Save selected system configuration information.
save vlan
Save configuration information for the named VLAN or all VLANs.
scsirouter enable
Stop or start the named SCSI routing instance.
show savedconfig
List the contents of the savedconfig directory or the contents of the named
configuration file.
Cisco SN 5428-2 Storage Router Software Configuration Guide
78-15471-01
12-253
Chapter 12
Command Line Interface Reference
restore fcip
restore fcip
To cause the previously saved configuration information related to the named FCIP instance to be copied
from the specified configuration file into the bootable configuration, use the restore fcip command. The
configuration file must exist in the savedconfig directory. Use the show savedconfig command to display
the contents of the savedconfig directory.
Note
This does not change the running configuration of the storage router.
restore fcip {name | all} from filename
Syntax Description
name
The name of the FCIP instance to be restored. Valid names are fcip1 and
fcip2.
all
Keyword to restore all FCIP instances.
from filename
The name of the configuration file containing the information to be
restored. This file must exist in the savedconfig directory.
Defaults
None.
Command Modes
Administrator.
Command History
Release
Modification
3.3.1
This command was introduced.
Usage Guidelines
The FCIP instance should be inactive before it is restored. Use the no fcip enable command to stop an
active FCIP instance so it can be restored. After the specified FCIP instance is restored, it is
automatically enabled and the running configuration of the storage router is updated.
A restore command never deletes existing FCIP instances. The restore command will add missing
instances and will overwrite configuration information for existing instances of the same name. If
necessary, you can delete the FCIP instance and then restore it from a saved configuration file.
Examples
The following example restores the FCIP instance fcip1 from the configuration file named
fcip_backup001:
[SN5428-2A]# restore fcip fcip1 from fcip_backup001
Cisco SN 5428-2 Storage Router Software Configuration Guide
12-254
78-15471-01
Chapter 12
Command Line Interface Reference
restore fcip
Related Commands
Command
Description
fcip
Create an FCIP instance.
fcip enable
Stop or start the named FCIP instance.
save fcip
Save configuration information for the named FCIP instance.
show fcip
Display configuration and operational information for the named FCIP
instance.
Cisco SN 5428-2 Storage Router Software Configuration Guide
78-15471-01
12-255
Chapter 12
Command Line Interface Reference
restore fcswitch
restore fcswitch
To cause the previously saved configuration information associated with the SN 5428-2 Storage Router
Fibre Channel (FC) interfaces to be copied from the specified configuration file into the bootable
configuration, use the restore fcswitch command. The configuration file must exist in the savedconfig
directory. Use the show savedconfig command to display the contents of the savedconfig directory.
restore fcswitch {all | config | interface | zones} from filename
Syntax Description
all
Keyword used to restore all global and interface-specific FC configuration
information from the specified configuration file.
Note
Zoning information is not restored.
config
Keyword used to restore global FC configuration information, including
time out values and domain ID.
interface
Keyword used to restore configuration information for the FC interfaces,
including link speed and port type settings.
zones
Keyword used to restore all alias, zone and zone set configuration
information. If the storage router is connected to the FC switched fabric, the
restored zoning database is propagated to the FC switched fabric
from filename
The name of the configuration file containing the information to be
restored. This file must exist in the savedconfig directory.
Defaults
None.
Command Modes
Administrator.
Command History
Release
Modification
3.2.1
This command was introduced.
Usage Guidelines
The restore fcswitch command overwrites the specified FC configuration information.
Use the config keyword to restore global FC configuration information, including:
•
The domain ID and domain ID lock setting
•
Resource allocation timeout value
•
Distributed services timeout value
•
Fabric stability timeout value
•
Error detect timeout value
•
Buffer-to-buffer credit value for all FC ports
•
Zoning management operational settings, including merge mode and level of communication
between the storage router and devices in the fabric when there is no active zone set
Cisco SN 5428-2 Storage Router Software Configuration Guide
12-256
78-15471-01
Chapter 12
Command Line Interface Reference
restore fcswitch
Use the interface keyword to restore configuration information for each FC port, including:
•
State of the interface (enabled or disabled)
•
Fairness algorithm
•
FAN
•
MFS bundling and associated timeout value
•
Transfer rate (linkspeed)
•
Port type
Use the zones keyword to restore the internal zoning database, including:
Caution
Examples
•
Aliases and alias members
•
Zones and zone members
•
Zone sets and zone set members
•
Active zone set information
If the SN 5428-2 Storage Router is connected to the FC switched fabric, the restored zoning database
information is propagated throughout the fabric.
The following example restores the configuration information for all FC interface from the configuration
file named fc_config_08152002:
[SN5428-2A]# restore fcswitch interface from fc_config_08152002
The following example restore all global and interface-specific FC configuration information from the
configuration file named SN5428-2A_L2:
[SN5428-2A]# restore fcswitch all from SN5428-2A_L2
Cisco SN 5428-2 Storage Router Software Configuration Guide
78-15471-01
12-257
Chapter 12
Command Line Interface Reference
restore fcswitch
Related Commands
Command
Description
delete fcalias
Delete the named alias or the specified alias member.
delete zone
Delete the specified Fibre Channel zone or the specified member of the zone
from the zoning database.
delete zoneset
Delete the specified zone from the zone set or to delete the entire named
zone set from the zoning database.
fcalias
Create an alias entity for use in Fibre Channel zoning.
fcswitch domainid
Set the domain ID for the storage router, to be used for FC switched fabric
zoning.
fcswitch dstov
Specify the amount of time the storage router is to wait for Fibre Channel
Distributed Services.
fcswitch edtov
Specify an error detect timeout value for all Fibre Channel interfaces.
fcswitch fstov
Specify the fabric stability timeout value.
fcswitch interop-credit Set the data buffer credit capacity for all FC ports.
fcswitch ratov
Specify a Fibre Channel resource allocation timeout value for the storage
router.
fcswitch zoning
autosave
Enable the SN 5428-2 Storage Router to save zoning changes received from
switches in the fabric.
fcswitch zoning
default
Select the level of communication between the storage router and devices in
the fabric where there is no active zone set.
fcswitch zoning merge Set zoning merge compliance.
interface fc?
al-fairness
Enable the fairness algorithm on the named FC interface.
interface fc?
fan-enable
Enable Fabric Address Notification (FAN) on the named FC interface.
interface fc? linkspeed Set the transfer rate for the named FC interface.
interface fc?
mfs-bundle
Enable Multi-Frame Sequence bundling for the named FC interface.
interface fc? type
Set the port type for the named FC interface.
restore all
Restore all the contents of the named configuration file into memory.
save fcswitch
Save all Fibre Channel configuration, including global configuration
settings and zoning information.
show fcalias
Display information about aliases and their members.
show fcswitch
Display global configuration information for storage router FC interfaces.
show fcswitch eport
Display FSPF protocol information.
show interface
Display operational and configuration information for the specified
interface or all interfaces.
show zone
Display configuration and operational information for Fibre Channel fabric
zones from the local zoning database.
show zoneset
Display configuration and operational information for Fibre Channel fabric
zone sets.
zone
Create a Fibre Channel fabric zone.
zoneset
Create a Fibre Channel fabric zone set.
Cisco SN 5428-2 Storage Router Software Configuration Guide
12-258
78-15471-01
Chapter 12
Command Line Interface Reference
restore scsirouter
restore scsirouter
To cause the previously saved configuration information related to the named SCSI routing instance to
be copied from the specified configuration file into the bootable configuration, use the
restore scsirouter command. The configuration file must exist in the savedconfig directory. Use the
show savedconfig command to display the contents of the savedconfig directory.
Note
This does not change the running configuration of the storage router.
restore scsirouter {name | all} from filename
Syntax Description
name
The name of the SCSI routing instance to be restored.
all
Keyword to restore all SCSI routing instances.
from filename
The name of the configuration file containing the information to be
restored. This file must exist in the savedconfig directory.
Defaults
None.
Command Modes
Administrator.
Command History
Release
Modification
3.2.1
This command was introduced.
Usage Guidelines
A SCSI routing instance must be inactive before it can be restored. Use the no scsirouter enable
command to stop an active SCSI routing instance so it can be restored. After the specified SCSI routing
instance is restored, issue the scsirouter enable command to start the instance and update the running
configuration of the storage router.
A restore command never deletes existing SCSI routing instances. The restore command will add
missing instances and will overwrite configuration information for existing instances of the same name.
If necessary, you can delete a SCSI routing instance and then restore it from a saved configuration file.
Examples
The following example restores the SCSI routing instance foo from the configuration file named
scsi_backup001:
[SN5428-2A]# restore scsirouter foo from scsi_backup001
Cisco SN 5428-2 Storage Router Software Configuration Guide
78-15471-01
12-259
Chapter 12
Command Line Interface Reference
restore scsirouter
Related Commands
Command
Description
failover scsirouter
Cause the named SCSI routing instance to cease running on the storage
router.
restore accesslist
Restore the named access list or all access lists from the named
configuration file.
restore all
Restore the contents of the named configuration file into memory.
save accesslist
Save configuration data for the named access list or all access lists.
save all
Save all configuration information.
save scsirouter
Save configuration information for the named SCSI routing instance.
scsirouter enable
Stop or start the named SCSI routing instance.
scsirouter primary
Identify a storage router as the preferred storage router to run the named
SCSI routing instance.
scsirouter target
maxcmdqueuedepth
Specify the maximum number of commands allowed at any given time from
each iSCSI session to the specified target.
show savedconfig
List the contents of the savedconfig directory or the contents of the named
configuration file.
Cisco SN 5428-2 Storage Router Software Configuration Guide
12-260
78-15471-01
Chapter 12
Command Line Interface Reference
restore system
restore system
To cause previously saved system configuration information to be copied from the specified
configuration file into persistent memory, use the restore system command. The configuration file must
exist in the savedconfig directory. Use the show savedconfig command to display the contents of the
savedconfig directory.
restore system {name | all} from filename
Syntax Description
name
The named system information to be restored. See Table 12-16 in the Usage
Guidelines section for a list of valid names that can be used for the name
argument.
all
Restore all restorable system information (except the route table and RIP
settings, and the logging table) from the saved configuration file. Restorable
system information includes CDP configuration, administrator contact data,
DNS and NTP information, restrict configuration, remote logging data,
SNMP configuration, Telnet and Secure Shell (SSH) settings, and the
default download location for updated storage router software.
Note
from filename
The route table, RIP settings, and the logging table, are not restored.
The name of the configuration file containing the information to be
restored. This file must exist in the savedconfig directory.
Defaults
None.
Command Modes
Administrator.
Command History
Release
Modification
3.2.1
This command was introduced.
Cisco SN 5428-2 Storage Router Software Configuration Guide
78-15471-01
12-261
Chapter 12
Command Line Interface Reference
restore system
Usage Guidelines
Table 12-16 describes the named system information that can be restored.
Table 12-16 Restore System Named System Information
Named System Configuration
Description
cdp
Restore CDP configuration.
contactinfo
Restore administrator contact information.
ip-route
Restore the route table and RIP settings.
logging
Restore the routing rules in the storage router
event message logging table. Restored rules are
appended to the end of the table.
name-server
Restore DNS configuration.
ntp
Restore NTP server configuration.
remotelog
Restore IP address of host used for remote
logging.
restrict
Restore the storage router restrict configuration.
snmp
Restore SNMP configuration.
software
Restore the default software download location
and user name and password information for
HTTP, proxy, and TFTP.
ssh
Restore the Secure Shell (SSH) configuration
information.
telnet
Restores the session timeout value for Telnet and
SSH management sessions.
Some system information that is saved when the save system command is issued is not available for
restoration from a saved configuration file. Use the show savedconfig command to display the contents
of the specified configuration file. The following configuration information is available for display but
cannot be restored:
Examples
•
Management and HA interface IP addresses
•
Gigabit Ethernet interface configuration information
•
Administrator mode and Monitor mode passwords
•
HA configuration mode
The following example restores all restorable system configuration information (except the route table
and the logging table) from the saved configuration file system_backup:
[SN5428-2A]# restore system all from system_backup
The following example restores the route table and RIP settings from the saved configuration file
system_backup:
[SN5428-2A]# restore system ip-route from system_backup
[SN5428-2A]# restore system rip from system_backup
Cisco SN 5428-2 Storage Router Software Configuration Guide
12-262
78-15471-01
Chapter 12
Command Line Interface Reference
restore system
The following example restores the logging table from the saved configuration file system_backup:
[SN5428-2A]# restore system logging from system_backup
The following example restores the SNMP configuration information from the saved configuration file
sys_SN5428-2A:
[SN5428-2A]# restore system snmp from sys_SN5428-2A
Related Commands
Commands
Description
delete savedconfig
Remove a saved configuration file from the storage router.
restore all
Restore the contents of the named configuration file into memory.
save all
Save all configuration information.
save system
Save selected system configuration information.
show savedconfig
List the contents of the savedconfig directory or the contents of the named
configuration file.
Cisco SN 5428-2 Storage Router Software Configuration Guide
78-15471-01
12-263
Chapter 12
Command Line Interface Reference
restore vlan
restore vlan
To cause the specified VLAN to be copied from the named configuration file into persistent memory, use
the restore vlan command. The configuration file must exist in the savedconfig directory. To display the
contents of the savedconfig directory, issue the show savedconfig command.
Note
If the SN 5428-2 Storage Router belongs to a cluster, the restored VLAN configuration information will
automatically be propagated to other members of that cluster.
restore vlan {vid | all} from filename
Syntax Description
vid
The VLAN identification number.
all
Restore all VLAN definitions.
from filename
The name of the configuration file containing the information to be
restored. This file must exist in the savedconfig directory.
Defaults
None.
Command Modes
Administrator.
Command History
Release
Modification
3.2.1
This command was introduced.
Usage Guidelines
Note
Examples
If the VLAN currently exists, the restore vlan command overwrites existing configuration information
with the information from the named configuration file. The restore vlan command also restores the
VTP configuration information.
In a cluster environment, VLAN management functions are handled by a single storage router. To
determine which storage router is performing VLAN management functions, issue the show cluster
command. If you issue a restore vlan command from a storage router that is not performing VLAN
management functions, the CLI displays an informational message with the name of the node that is
currently handling those functions. See Chapter 11, “Maintaining and Managing the SN 5428-2 Storage
Router,” for more information about operating the storage router in a cluster.
The following example restores VLAN 100 from the vlanBackup file:
[SN5428-2A]# restore vlan 100 from vlanBackup
Cisco SN 5428-2 Storage Router Software Configuration Guide
12-264
78-15471-01
Chapter 12
Command Line Interface Reference
restore vlan
Related Commands
Command
Description
save vlan
Save configuration information for the named VLAN or all VLANs
scsirouter serverif
Assign a Gigabit Ethernet interface, IP address, and optionally a VLAN to
the named SCSI routing instance.
show savedconfig
List the contents of the savedconfig directory or the contents of the named
configuration file.
show vlan
Display configuration and operational information for the specified VLAN
or all VLANs.
show vtp
Display configuration and operational information for VTP.
vlan
Configure a non-VTP VLAN on the storage router.
vtp domain
Assign a VTP domain name to the storage router.
vtp mode
Configure the storage router to operate in client or transparent VTP mode.
Cisco SN 5428-2 Storage Router Software Configuration Guide
78-15471-01
12-265
Chapter 12
Command Line Interface Reference
restrict
restrict
To close access to the specified interface via the named service, use the restrict command. To allow
access via the named service, use the no form of this command.
restrict all [service]
restrict interface {service | all}
no restrict all [service]
no restrict interface {service | all}
Syntax Description
Defaults
interface
Restrict access to the specified interface. See Table 12-17 in the Usage
Guidelines section for a list of interface names.
service
Restrict access via the specified service or protocol. See Table 12-18 in the
Usage Guidelines section for a list of service names.
all
Restrict all interfaces or all services.
The following are factory default settings:
•
FTP using port 21 is restricted on all interfaces.
•
HTTP using port 80 is allowed on the management and HA interfaces. It is restricted on the Gigabit
Ethernet interfaces.
•
Remote login (rlogin) using port 513 is restricted on all interfaces.
•
SNMP using port 161 is allowed on the management interface only. It is restricted on the HA and
Gigabit Ethernet interfaces.
•
SSH using port 22 is allowed on the management interface only. It is restricted on the HA and
Gigabit Ethernet interfaces.
•
SSL using port 443 is restricted on all interfaces.
•
Telnet using port 23 is allowed on the management interface only. It is restricted on the HA and
Gigabit Ethernet interfaces.
Command Modes
Administrator.
Command History
Release
Modification
3.2.1
This command was introduced.
Usage Guidelines
Use the restrict command to restrict unauthorized access to storage router interfaces. Use the
show restrict command to display the current interface and service restrictions.
You can restrict access on the interfaces listed in Table 12-17.
Cisco SN 5428-2 Storage Router Software Configuration Guide
12-266
78-15471-01
Chapter 12
Command Line Interface Reference
restrict
Table 12-17 restrict interface
Interface Keyword
Description
ge?
The Gigabit Ethernet interfaces (including all
logical interfaces created by associating a VLAN
with a Gigabit Ethernet IP address for a SCSI
routing instance). All services are restricted on
the Gigabit Ethernet interfaces by default.
ha
The HA interface. This interface is open to HTTP
by default.
mgmt
The management interface. This interface is open
to Telnet, HTTP, SNMP and SSH by default.
You can restrict access to the storage router interfaces by the services or protocols, shown in Table 12-18.
Table 12-18 restrict interface service
Service Keyword
Description
ftp
File Transfer Protocol. FTP access is restricted on
all interfaces, by default.
http
Hypertext Transfer Protocol. HTTP access is
available on the management and HA interfaces,
by default.
rlogin
Remote login on port 513. If rlogin is enabled for
an interface, the setting is only valid until the
storage router is restarted. The rlogin setting is
not retained across a storage router restart; rlogin
returns to a restricted state for all interfaces.
Note
ssh
Secure Shell. SSH can be used as a replacement
for Telnet and remote login. SSH is enabled on the
management interface by default; it is restricted
on all other interfaces.
Note
snmp
Rlogin is designed for debug purposes and
should be used under the guidance of a
Cisco Technical Support professional.
The SSH service is started, by default.
Use the no ssh enable command to stop
the SSH service (disabling access via
SSH) without changing the restrict
settings.
Simple Network Management Protocol. SNMP is
enabled on the management interface by default.
Cisco SN 5428-2 Storage Router Software Configuration Guide
78-15471-01
12-267
Chapter 12
Command Line Interface Reference
restrict
Table 12-18 restrict interface service (continued)
Service Keyword
Description
ssl
Secure Socket Layer. SSL is restricted on all
interfaces by default.
telnet
Telnet. Telnet access is enabled on the
management interface by default; it is restricted
on all other interfaces.
Note
The Telnet server is started by default.
Use the no telnet enable command to
stop the Telnet server (disabling access
via Telnet) without changing the restrict
settings.
To access the GUI using an SSL connection, enable SSL on the appropriate interface and change the
URL to use “https” instead of “http.”
To completely disable the SN 5428-2 GUI, restrict HTTP access to all interfaces.
Examples
The following example restricts HTTP access to the management interface, preventing access to the
web-based GUI from this interface:
[SN5428-2A]# restrict mgmt http
The following example restricts Telnet access to the HA interface:
[SN5428-2A]# restrict ha telnet
The following example restricts access to all interfaces via FTP.
[SN5428-2A]# restrict all ftp
The following example enables SSL on the management interface.
[SN5428-2A]# no restrict mgmt ssl
The following example enables SSH on the Gigabit Ethernet interface, ge1:
[SN5428-2A]# no restrict ge1 ssh
Related Commands
Command
Description
restrict console
Enable or disable password checking on the console interface.
show restrict
Display configurable security settings for the storage router interfaces.
ssh enable
Enable SSH and start the SSH service.
ssh keygen
Generate a Secure Shell (SSH) public and private key pair for the storage
router.
telnet enable
Enable Telnet and start the Telnet server.
Cisco SN 5428-2 Storage Router Software Configuration Guide
12-268
78-15471-01
Chapter 12
Command Line Interface Reference
restrict console
restrict console
To enable password checking on the SN 5428-2 Storage Router console interface, use the
restrict console command. The Administrator mode and Monitor mode passwords will be required
when accessing the storage router via a console connected to the EIA/TIA-232 port. To disable password
checking on the console interface, use the no form of this command.
restrict console
no restrict console
Syntax Description
This command has no arguments or keywords.
Defaults
Passwords are disabled on the console interface.
Command Modes
Administrator.
Command History
Release
Modification
3.2.1
This command was introduced.
Usage Guidelines
Use this command if you need to restrict access to the console interface.
Examples
The following example enables password checking on the console interface:
[SN5428-2A]# restrict console
Related Commands
Command
Description
restrict
Secure access to storage router interfaces by communications protocols and
services.
show restrict
Display configurable security settings for the storage router interfaces.
Cisco SN 5428-2 Storage Router Software Configuration Guide
78-15471-01
12-269
Chapter 12
Command Line Interface Reference
save aaa
save aaa
To save the current AAA settings to nonvolatile memory, use the save aaa command.
save aaa {filename | bootconfig}
Syntax Description
filename
The name of the file where the AAA configuration information will be
written. This file is stored in the savedconfig directory.
bootconfig
Save the AAA settings to the bootable configuration, which is used when
the SN 5428-2 Storage Router is restarted. If the storage router belongs to
a cluster, the saved AAA settings will automatically be propagated to other
members of that cluster.
Defaults
None.
Command Modes
Administrator.
Command History
Release
Modification
3.2.1
This command was introduced.
Usage Guidelines
You must save configuration data from the running configuration to the bootable configuration for it to
be retained in the storage router when it is restarted. Use the filename parameter to save the AAA
configuration to a file. Configurations saved to a file can be moved between storage routers and can be
restored at a later time.
The following information is saved:
Note
•
The AAA authentication lists
•
The username database
•
All RADIUS server configuration information (including server groups)
•
All TACACS+ server configuration information (including server groups)
In a cluster environment, AAA management functions are handled by a single storage router. To
determine which storage router is performing AAA management functions, issue the show cluster
command. If you issue the save aaa command from a storage router that is not performing AAA
management functions, the CLI displays an informational message with the name of the node that is
currently handling those functions. See Chapter 11, “Maintaining and Managing the SN 5428-2 Storage
Router,” for more information about operating the storage router in a cluster.
Cisco SN 5428-2 Storage Router Software Configuration Guide
12-270
78-15471-01
Chapter 12
Command Line Interface Reference
save aaa
Examples
The following example saves the running AAA settings to the bootable configuration, used when the
storage router is restarted:
[SN5428-2A]# save aaa bootconfig
The following example saves the running AAA settings to a file named aaa_SN5428-2A:
[SN5428-2A]# save aaa aaa_SN5428-2A
Related Commands
Command
Description
aaa authentication
enable
Configure AAA authentication services for Administrator mode access to
the SN 5428-2 Storage Router via the CLI enable command.
aaa authentication
iscsi
Configure the AAA authentication services to be used for iSCSI
authentication.
aaa authentication
login
Configure AAA authentication services for Monitor mode access to the
SN 5428-2 Storage Router via the CLI.
aaa group server
radius
Create a named group of RADIUS servers for AAA authentication services.
aaa group server
tacacs+
Create a named group of TACACS+ servers for AAA authentication
services.
aaa test authentication Enable testing of the specified AAA authentication list.
debug aaa
Enable debugging for the AAA authentication services.
delete savedconfig
Remove a saved configuration file from the storage router.
radius-server host
Configure remote RADIUS servers for AAA authentication services.
restore aaa
Restore AAA authentication services from the named configuration file.
save accesslist
Save configuration data for the named access list or for all access lists.
save all
Save all configuration information.
save scsirouter
Save configuration information for the named SCSI routing instance.
save system
Save selected system configuration information.
save vlan
Save configuration information for the named VLAN or all VLANs.
scsirouter
authentication
Enable iSCSI authentication for the named SCSI routing instance.
show aaa
Display AAA configuration information.
show savedconfig
List the contents of the savedconfig directory or the contents of the named
configuration file.
tacacs-server host
Configure remote TACACS+ servers for AAA authentication services.
username password
Add a user name and optional password to the local username database.
Cisco SN 5428-2 Storage Router Software Configuration Guide
78-15471-01
12-271
Chapter 12
Command Line Interface Reference
save accesslist
save accesslist
To save configuration data to nonvolatile memory for the named accesslist or for all access lists, use the
save accesslist command.
save accesslist {name | all} {filename | bootconfig}
Syntax Description
name
The name of the access list to be saved.
all
Save all access lists.
filename
The name of the file where the running access list configuration data will be
written. This file is stored in the savedconfig directory.
bootconfig
Save the access list from the running configuration to the bootable
configuration, used when the SN 5428-2 Storage Router is restarted. If the
storage router belongs to a cluster, the saved access list information will
automatically be propagated to other members of that cluster.
Defaults
None.
Command Modes
Administrator.
Command History
Release
Modification
3.2.1
This command was introduced.
Usage Guidelines
You must save configuration data from the running configuration to the bootable configuration for it to
be retained in the storage router when it is restarted. Configurations saved to a file can be moved between
storage routers, and can be restored at a later time.
There is a maximum of 100 access lists per storage router or per storage router cluster. There is a
maximum of 200 access list identification entries across all access lists in the storage router or storage
router cluster.
Note
In a cluster environment, access list management functions are handled by a single storage router. To
determine which storage router is performing access list management functions, issue the show cluster
command. If you issue the save accesslist command from a storage router that is not performing access
list management functions, the CLI displays an informational message with the name of the node that is
currently handling those functions. See Chapter 11, “Maintaining and Managing the SN 5428-2 Storage
Router,” for more information about operating the storage router in a cluster.
Cisco SN 5428-2 Storage Router Software Configuration Guide
12-272
78-15471-01
Chapter 12
Command Line Interface Reference
save accesslist
Examples
The following example saves the current configuration for all access lists to the bootable configuration,
used when the storage router is restarted:
[SN5428-2A]# save accesslist all bootconfig
The following example saves the access list fooList to a configuration file named fooList_SN5428-2A:
[SN5428-2A]# save accesslist fooList fooList_SN5428-2A
Related Commands
Command
Description
accesslist
Create an access list entity.
accesslist A.B.C.D/bits Add IP addresses to an access list.
delete accesslist
Delete a specific access list entry or an entire access list.
delete savedconfig
Remove a saved configuration file from the storage router.
restore accesslist
Restore the named access list or all access lists from the named
configuration file.
save aaa
Save the current AAA configuration information.
save all
Save all configuration information.
save scsirouter
Save configuration information for the named SCSI routing instance.
save system
Save selected system configuration information.
save vlan
Save configuration information for the named VLAN or all VLANs.
scsirouter target
accesslist
Associate an access list with a specific SCSI routing instance target or all
targets.
show accesslist
Display the contents of the named access list or all access lists.
show savedconfig
List the contents of the savedconfig directory or the contents of the named
configuration file.
Cisco SN 5428-2 Storage Router Software Configuration Guide
78-15471-01
12-273
Chapter 12
Command Line Interface Reference
save all
save all
To save all configuration data for the SN 5428-2 Storage Router to nonvolatile memory, use the save all
command.
save all {filename | bootconfig}
Syntax Description
filename
The name of the file where the configuration data will be written. This file
is stored in the savedconfig directory.
bootconfig
Save the current running configuration information to the bootable
configuration, used when the SN 5428-2 Storage Router is restarted. If the
storage router belongs to a cluster, any saved cluster elements will
automatically be propagated to other members of that cluster.
Defaults
None.
Command Modes
Administrator.
Command History
Release
Modification
3.2.1
This command was introduced.
Usage Guidelines
Note
Examples
You must save configuration data from the running configuration to the bootable configuration for it to
be retained in the storage router when it is restarted. Depending on the deployment, the save all
command saves AAA configuration, SCSI routing instances, FCIP instances, access lists, VLANs,
global Fibre Channel (FC) settings and FC interface configurations, and selected system configuration
information. Configurations saved to a file can be moved between storage routers and can be restored at
a later time.
In a cluster environment, all AAA, access list, password, and VLAN management functions are handled
by a single storage router. To determine which storage router is performing these management functions,
issue the show cluster command. If you issue the save all command from a storage router that is not
performing these management functions, the CLI displays an informational message with the name of
the node that is currently handling the functions. See Chapter 11, “Maintaining and Managing the
SN 5428-2 Storage Router,” for more information about operating the storage router in a cluster.
The following example saves the current running configuration to the bootable configuration:
[SN5428-2A]# save all bootconfig
Cisco SN 5428-2 Storage Router Software Configuration Guide
12-274
78-15471-01
Chapter 12
Command Line Interface Reference
save all
The following example saves the current running configuration to the file named
SN5428-2A_03Nov2001. You may want to do this as a means of archiving the current running
configuration of the storage router on a regular basis.
[SN5428-2A]# save all SN5428-2A_03Nov2001
Related Commands
Command
Description
delete savedconfig
Remove a saved configuration file from the storage router.
restore all
Restore the contents of the named configuration file into memory.
save aaa
Save current AAA configuration information.
save accesslist
Save configuration data for the named access list or for all access lists.
save fcip
Save configuration information for the named FCIP instance.
save fcswitch
Save all Fibre Channel configuration, including global configuration
settings and zoning information.
save scsirouter
Save configuration information for the named SCSI routing instance.
save system
Save selected system configuration information.
save vlan
Save configuration information for the named VLAN or all VLANs.
show savedconfig
List the contents of the savedconfig directory or the contents of the named
configuration file.
Cisco SN 5428-2 Storage Router Software Configuration Guide
78-15471-01
12-275
Chapter 12
Command Line Interface Reference
save fcip
save fcip
To save all configuration data associated with the named FCIP instance to nonvolatile memory, use the
save fcip command.
save fcip {name | all} {filename | bootconfig}
Syntax Description
name
The name of the FCIP instance. Valid names are fcip1 and fcip2.
all
Save configuration data for all FCIP instances.
filename
The name of the file where the configuration data will be written. This file
is stored in the savedconfig directory.
bootconfig
Save the FCIP instance from the running configuration to the bootable
configuration, used when the SN 5428-2 Storage Router is restarted.
Defaults
None.
Command Modes
Administrator.
Command History
Release
Maintenance
3.3.1
This command was introduced.
Usage Guidelines
You must save configuration data from the running configuration to the bootable configuration for it to
be retained in the storage router when it is restarted. Configurations saved to a file can be moved between
storage routers and can be restored at a later time.
Examples
The following example saves all FCIP instances currently running on this SN 5428-2 to the bootable
configuration, used when the storage router is restarted:
[SN5428-2A]# save fcip all bootconfig
The following example saves the FCIP instance named fcip1 to the file named fcip_SN5428-2A:
[SN5428-2A]# save fcip fcip1 fcip_SN5428-2A
Related Commands
Command
Description
fcip
Create an FCIP instance.
fcip enable
Stop or start the named FCIP instance.
restore fcip
Restore the named SCSI routing instance from the named configuration file.
show fcip
Display configuration and operational information for the named FCIP
instance.
Cisco SN 5428-2 Storage Router Software Configuration Guide
12-276
78-15471-01
Chapter 12
Command Line Interface Reference
save fcswitch
save fcswitch
To save all configuration data for the SN 5428-2 Storage Router Fibre Channel (FC) interfaces to
nonvolatile memory, use the save fcswitch command.
save fcswitch {filename | bootconfig}
Syntax Description
filename
The name of the file where the configuration data will be written. This file
is stored in the savedconfig directory.
bootconfig
Save the FC configuration from the running configuration to the bootable
configuration, used when the SN 5428-2 Storage Router is restarted.
Defaults
None.
Command Modes
Administrator.
Command History
Release
Modification
3.2.1
This command was introduced.
Usage Guidelines
You must save configuration data from the running configuration to the bootable configuration for it to
be retained in the storage router when it is restarted. Configurations saved to a file can be moved between
storage routers and can be restored at a later time.
Examples
The following example saves all the FC configuration information to the bootable configuration, used
when the storage router is restarted:
[SN5428-2A]# save fcswitch bootconfig
The following example saves all the FC configuration information to the file named fc_SN5428-2A:
[SN5428-2A]# save fcswitch fc_SN5428-2A
Cisco SN 5428-2 Storage Router Software Configuration Guide
78-15471-01
12-277
Chapter 12
Command Line Interface Reference
save fcswitch
Related Commands
Command
Description
delete fcalias
Delete the named alias or the specified alias member.
delete zone
Delete the specified Fibre Channel zone or the specified member of the zone
from the zoning database.
delete zoneset
Delete the specified zone from the zone set or to delete the entire named
zone set from the zoning database.
fcalias
Create an alias entity for use in Fibre Channel zoning.
fcswitch domainid
Set the domain ID for the storage router, to be used for FC switched fabric
zoning.
fcswitch dstov
Specify the amount of time the storage router is to wait for Fibre Channel
Distributed Services.
fcswitch edtov
Specify an error detect timeout value for all Fibre Channel interfaces.
fcswitch fstov
Specify the fabric stability timeout value.
fcswitch interop-credit Set the data buffer credit capacity for all FC ports.
fcswitch ratov
Specify a Fibre Channel resource allocation timeout value for the storage
router.
fcswitch zoning
autosave
Enable the SN 5428-2 Storage Router to save zoning changes received from
switches in the fabric.
fcswitch zoning
default
Select the level of communication between the storage router and devices in
the fabric where there is no active zone set.
fcswitch zoning merge Set zoning merge compliance.
interface fc?
al-fairness
Enable the fairness algorithm on the named FC interface.
interface fc?
fan-enable
Enable Fabric Address Notification (FAN) on the named FC interface.
interface fc? linkspeed Set the transfer rate for the named FC interface.
interface fc?
mfs-bundle
Enable Multi-Frame Sequence bundling for the named FC interface.
interface fc? type
Set the port type for the named FC interface.
restore fcswitch
Restore Fibre Channel configuration information from the named
configuration file.
show fcalias
Display information about aliases and their members.
show fcswitch
Display global configuration information for storage router FC interfaces.
show fcswitch eport
Display FSPF protocol information.
show interface
Display operational and configuration information for the specified
interface or all interfaces.
show zone
Display configuration and operational information for Fibre Channel fabric
zones from the local zoning database.
show zoneset
Display configuration and operational information for Fibre Channel fabric
zone sets.
zone
Create a Fibre Channel fabric zone.
zoneset
Create a Fibre Channel fabric zone set.
Cisco SN 5428-2 Storage Router Software Configuration Guide
12-278
78-15471-01
Chapter 12
Command Line Interface Reference
save scsirouter
save scsirouter
To save all configuration data associated with the named SCSI routing instance to nonvolatile memory,
use the save scsirouter command.
save scsirouter {name | all} {filename | bootconfig}
Syntax Description
name
The name of the SCSI routing instance.
all
Save configuration data for all SCSI routing instances.
filename
The name of the file where the configuration data will be written. This file
is stored in the savedconfig directory.
bootconfig
Save the SCSI routing instance from the running configuration to the
bootable configuration, used when the SN 5428-2 Storage Router is
restarted.
Defaults
None.
Command Modes
Administrator.
Command History
Release
Maintenance
3.2.1
This command was introduced.
Usage Guidelines
You must save configuration data from the running configuration to the bootable configuration for it to
be retained in the storage router when it is restarted. Configurations saved to a file can be moved between
storage routers and can be restored at a later time.
In a cluster environment, the SCSI routing instance can only be saved on the node that is currently
running that instance.
Examples
The following example saves all SCSI routing instances currently running on this SN 5428-2 to the
bootable configuration, used when the storage router is restarted:
[SN5428-2A]# save scsirouter all bootconfig
The following example saves the SCSI routing instance named foo to the file named foo_SN5428-2A:
[SN5428-2A]# save scsirouter foo foo_SN5428-2A
Cisco SN 5428-2 Storage Router Software Configuration Guide
78-15471-01
12-279
Chapter 12
Command Line Interface Reference
save scsirouter
Related Commands
Commands
Description
delete savedconfig
Remove a saved configuration file from the storage router.
delete scsirouter
Delete the named SCSI routing instance or the specified element of the
SCSI routing instance.
restore scsirouter
Restore the named SCSI routing instance from the named configuration file.
save aaa
Save the current AAA configuration information.
save accesslist
Save configuration data for the named access list or all access lists.
save all
Save all configuration information.
save system
Save selected system configuration information.
save vlan
Save configuration information for the named VLAN or all VLANs.
scsirouter
Create a SCSI routing instance.
scsirouter enable
Stop or start the named SCSI routing instance.
scsirouter serverif
Assign a Gigabit Ethernet interface, IP address, and optionally a VLAN to
the named SCSI routing instance.
scsirouter target
maxcmdqueuedepth
Specify the maximum number of commands allowed at any given time from
each iSCSI session to the specified target.
setup scsi
Run the wizard to configure a SCSI routing instance.
show savedconfig
List the contents of the savedconfig directory or the contents of the named
configuration file.
show scsirouter
Display configuration and operational information for the named SCSI
routing instance.
Cisco SN 5428-2 Storage Router Software Configuration Guide
12-280
78-15471-01
Chapter 12
Command Line Interface Reference
save system
save system
To save selected system configuration information to nonvolatile memory, use the save system
command.
save system {filename | bootconfig}
Syntax Description
filename
The name of the file where the system configuration data will be written.
This file is stored in the savedconfig directory.
bootconfig
Save the current running system configuration to the bootable
configuration, used when the SN 5428-2 Storage Router is restarted.
Defaults
None.
Command Modes
Administrator.
Command History
Release
Modification
3.2.1
This command was introduced.
Usage Guidelines
You must save configuration data from the running configuration to the bootable configuration for it to
be retained in the storage router when it is restarted. Configurations saved to a file can be moved between
storage routers and can be restored at a later time.
The following system configuration data is saved:
•
Monitor and Administrator passwords
•
Administrative contact information
•
Network Time Protocol (NTP) server name
•
Primary and optional secondary Domain Name Server (DNS)
•
Default location for downloading storage router software
•
System and cluster name
•
Management and high availability (HA) interface addresses
•
Static routes
•
RIP settings
•
SNMP settings
•
CDP settings
•
Restrict settings
•
IP address of remote syslog host for logging
•
Logging table
Cisco SN 5428-2 Storage Router Software Configuration Guide
78-15471-01
12-281
Chapter 12
Command Line Interface Reference
save system
Examples
•
Configuration information for the Gigabit Ethernet interfaces
•
Management session timeout value
•
Secure Shell (SSH) settings
The following example saves the current system configuration to the bootable configuration, used when
the storage router is restarted:
[SN5428-2A]# save system bootconfig
The following example copies the current system configuration to the file named sys_SN5428-2A:
[SN5428-2A]# save system sys_SN5428-2A
Related Commands
Commands
Description
delete savedconfig
Remove a saved configuration file from the storage router.
hostname
Specify the storage router system name.
restore system
Restore selected system information from the named configuration file.
save aaa
Save the current AAA configuration information.
save accesslist
Save configuration data for the named access list or all access lists.
save all
Save all configuration information.
save scsirouter
Save configuration information for the named SCSI routing instance.
save vlan
Save configuration information for the named VLAN or all VLANs.
show savedconfig
List the contents of the savedconfig directory or the contents of the named
configuration file.
show system
Display selected system information, including system name.
Cisco SN 5428-2 Storage Router Software Configuration Guide
12-282
78-15471-01
Chapter 12
Command Line Interface Reference
save vlan
save vlan
To save VLAN and VTP configuration information for the specified VLAN or for all VLANs to
nonvolatile memory, use the save vlan command.
save vlan {vid | all} {filename | bootconfig}
Syntax Description
vid
The VLAN identification number of the VLAN configuration to be saved.
all
Save all VLANs associated with this storage router.
filename
The name of the file where the current VLAN configuration data will be
written. This file is stored in the savedconfig directory.
bootconfig
Save the current VLAN configuration to the system’s bootable
configuration, to be used when the storage router is restarted. If the storage
router belongs to a cluster, the saved VLAN information will automatically
be propagated to other members of that cluster.
Defaults
None.
Command Modes
Administrator.
Command History
Release
Modification
3.2.1
This command was introduced.
Usage Guidelines
You must save configuration data from the running configuration to the bootable configuration for it to
be retained in the storage router when it is restarted. Configurations saved to a file can be moved between
storage routers and can be restored at a later time.
VTP mode and domain information is saved, along with the specified VLAN configuration information.
Note
In a cluster environment, VLAN management functions are handled by a single storage router. To
determine which storage router is performing VLAN management functions, issue the show cluster
command. If you issue the save vlan command from a storage router that is not performing VLAN
management functions, the CLI displays an informational message with the name of the node that is
currently handling those functions. See Chapter 11, “Maintaining and Managing the SN 5428-2 Storage
Router,” for more information about operating the storage router in a cluster.
The following example saves the current configuration for all VLANs to the system’s bootable
configuration, to be used when the storage router is restarted:
[SN5428-2A]# save vlan all bootconfig
The following example saves VLAN 12 to the file named vlanbackup:
[SN5428-2A]# save vlan 12 vlanbackup
Cisco SN 5428-2 Storage Router Software Configuration Guide
78-15471-01
12-283
Chapter 12
Command Line Interface Reference
save vlan
Related Commands
Command
Description
restore vlan
Restore VLAN configuration information from the named configuration
file.
save aaa
Save current AAA configuration information.
save accesslist
Save configuration data for the named access list or all access lists.
save all
Save all configuration information.
save scsirouter
Save configuration information for the named SCSI routing instance.
save system
Save selected system configuration information.
show savedconfig
List the contents of the savedconfig directory or the contents of the named
configuration file.
show vlan
Display configuration and operational information for the specified VLAN
or all VLANs.
show vtp
Display configuration and operational information for VTP.
vlan
Configure a non-VTP VLAN on the storage router.
vtp domain
Assign a VTP domain name to the storage router.
vtp mode
Configure the storage router to operate in client or transparent VTP mode.
Cisco SN 5428-2 Storage Router Software Configuration Guide
12-284
78-15471-01
Chapter 12
Command Line Interface Reference
scsirouter
scsirouter
To create a SCSI routing instance, use the scsirouter command.
scsirouter name
Syntax Description
name
Defaults
None.
Command Modes
Administrator.
Command History
Release
Modification
3.2.1
This command was introduced.
Usage Guidelines
The name of the SCSI routing instance created by this command. Enter a
maximum of 31 characters.
SCSI routing is the routing of SCSI requests and responses between IP hosts in an IP network and storage
devices in a Fibre Channel storage network. The SCSI routing instance becomes a binding point for the
association of other configuration parameters. A SCSI routing instance provides IP hosts access to Fibre
Channel storage.
There can be a maximum of 12 SCSI routing instances defined per storage router; if the storage router
is a member of a cluster, no more than 12 instances can be defined across the cluster.
Note
Examples
If the storage router is deployed for transparent SCSI routing, there can be only one SCSI routing
instance. The SCSI routing instance is named transparent and is automatically created during initial
system configuration.
The following command creates a SCSI routing entity named myCompanyWebserver2.
[SN5428-2A]# scsirouter myCompanyWebserver2
Cisco SN 5428-2 Storage Router Software Configuration Guide
78-15471-01
12-285
Chapter 12
Command Line Interface Reference
scsirouter
Related Commands
Command
Description
accesslist
Create an access list entity.
delete scsirouter
Delete the named SCSI routing instance or the specified element of the
SCSI routing instance.
failover scsirouter
Cause the named SCSI routing instance to cease running on the storage
router.
restore accesslist
Restore the named access list or all access lists from the named
configuration file.
restore scsirouter
Restore the named SCSI routing instance from the named configuration file.
save accesslist
Save configuration data for the named access list or all access lists.
save scsirouter
Save configuration information for the named SCSI routing instance.
scsirouter
authentication
Enable iSCSI authentication for the named SCSI routing instance.
scsirouter enable
Stop or start the named SCSI routing instance.
scsirouter serverif
Assign a Gigabit Ethernet interface, IP address, and optionally a VLAN to
the named SCSI routing instance.
setup scsi
Run the wizard to configure a SCSI routing instance.
show scsirouter
Display configuration and operational information for the named SCSI
routing instance.
Cisco SN 5428-2 Storage Router Software Configuration Guide
12-286
78-15471-01
Chapter 12
Command Line Interface Reference
scsirouter authentication
scsirouter authentication
To enable iSCSI authentication using the specified AAA authentication services for the named SCSI
routing instance, use the scsirouter authentication command.
scsirouter name authentication {listname | default | none}
Syntax Description
name
The name of this SCSI routing instance.
listname
Enable AAA authentication using the specified iSCSI authentication list.
default
Enable AAA authentication using the default iSCSI authentication list.
none
Disable AAA authentication for this SCSI routing instance.
Defaults
AAA authentication is disabled.
Command Modes
Administrator.
Command History
Release
Modification
3.2.1
This command was introduced.
Usage Guidelines
Note
Examples
Use the scsirouter authentication command to enable iSCSI authentication for IP hosts requesting
access to storage using the named SCSI routing instance. AAA performs authentication using the
services configured on the specified iSCSI authentication list. Use the aaa authentication iscsi
command to configure the iSCSI authentication list.
If authentication is enabled for a SCSI routing instance using the default iSCSI authentication list, but
no AAA authentication list is available, AAA attempts to use the “local” authentication method. If a list
other than default is specified and not available, AAA authentication will fail for the SCSI routing
instance.
The following example enables iSCSI authentication for the SCSI routing instance named foo, using the
default iSCSI authentication list:
[SN5428-2A]# scsirouter foo authentication default
The following example enables iSCSI authentication of the SCSI routing instance named foo2, using the
iSCSI authentication list named testlab:
[SN5428-2A]# scsirouter foo2 authentication testlab
Cisco SN 5428-2 Storage Router Software Configuration Guide
78-15471-01
12-287
Chapter 12
Command Line Interface Reference
scsirouter authentication
Related Commands
Command
Description
aaa authentication
iscsi
Configure the AAA authentication services to be used for iSCSI
authentication.
debug aaa
Enable debugging for the AAA authentication services.
radius-server host
Configure remote RADIUS servers for AAA authentication services.
restore aaa
Restore AAA authentication services from the named configuration file.
save aaa
Save the current AAA configuration information.
save scsirouter
Save configuration information for the named SCSI routing instance.
show aaa
Display AAA configuration information.
tacacs-server host
Configure remote TACACS+ servers for AAA authentication services.
username password
Add a user name and optional password to the local username database.
Cisco SN 5428-2 Storage Router Software Configuration Guide
12-288
78-15471-01
Chapter 12
Command Line Interface Reference
scsirouter cdbretrycount
scsirouter cdbretrycount
To specify the number of times a failed command should be retried before returning an error on the CDB,
use the scsirouter cdbretrycount command.
scsirouter name cdbretrycount nn
Syntax Description
name
The name of this SCSI routing instance.
nn
The number of CDB retries. nn is an integer from 0 to 512. The default value
is 6. There is one second between retries.
Defaults
The number of CDB retries is 6, by default.
Command Modes
Administrator.
Command History
Release
Modification
3.2.1
This command was introduced.
Usage Guidelines
Use this command to change the number of times a failed CDB will be retried by the storage router
before returning an error on the CDB. Retries occur every second. For example, with the default retry
count value of 6, it would take 6 seconds before a failed command would be returned with an error.
If an intelligent storage array includes multiple paths between hosts and storage, lowering the CDB retry
count value could change the triggering of failover situations.
Note
Examples
In a high availability cluster, the storage router may fail over a SCSI routing instance when some or all
devices accessed through that instance cannot be reached, before the maximum number of CDB retries
occurs.
The following example sets the CDB retry count value to 10:
[SN5428-2A]# scsirouter transparent cdbretrycount 10
Related Commands
Command
Description
show scsirouter
Display configuration and operational information for the named SCSI
routing instance.
Cisco SN 5428-2 Storage Router Software Configuration Guide
78-15471-01
12-289
Chapter 12
Command Line Interface Reference
scsirouter description
scsirouter description
To add user-defined identification information to the named SCSI routing instance, use the
scsirouter description command.
scsirouter name description “user text”
Syntax Description
name
The name of this SCSI routing instance.
“user text”
User-defined identification information associated with this SCSI routing
instance. If the string contains spaces, enclose it in quotes. Enter a
maximum of 64 characters.
Defaults
None.
Command Modes
Administrator.
Command History
Release
Modification
3.2.1
This command was introduced.
Usage Guidelines
The scsirouter description command allows you to add a new description or change an existing
description. Descriptions are site-specific.
Examples
The following example adds the description “Access to WebServer4 WebServer5” to the SCSI routing
instance foo1:
[SN5428-2A]# scsirouter foo1 description “Access to WebServer4 WebServer5”
Related Commands
Command
Description
delete scsirouter
Delete the named SCSI routing instance or the specified element of the
SCSI routing instance.
restore scsirouter
Restore the named SCSI routing instance from the named configuration file.
save scsirouter
Save configuration information for the named SCSI routing instance.
scsirouter
Create a SCSI routing instance.
scsirouter enable
Stop or start the named SCSI routing instance.
scsirouter serverif
Assign a Gigabit Ethernet interface, IP address, and optionally a VLAN to
the named SCSI routing instance.
setup scsi
Run the wizard to configure a SCSI routing instance.
show scsirouter
Display configuration and operational information for the named SCSI
routing instance.
Cisco SN 5428-2 Storage Router Software Configuration Guide
12-290
78-15471-01
Chapter 12
Command Line Interface Reference
scsirouter enable
scsirouter enable
To start the named SCSI routing instance on this SN 5428-2 Storage Router, use the scsirouter enable
command. To stop the named SCSI routing instance, use the no form of this command.
scsirouter {name | all} enable
no scsirouter {name | all} enable
Syntax Description
name
The name of the SCSI routing instance to be started.
all
Start all SCSI routing instances on this storage router.
Defaults
None.
Command Modes
Administrator.
Command History
Release
Modification
3.2.1
This command was introduced.
Usage Guidelines
SCSI routing instances are automatically started by the storage router during the creation process, when
the storage router is restarted, and when they are failed over to another storage router in a cluster. Use
this command to manually control the running state of SCSI routing instances; for example, when a SCSI
routing instance is restored from a saved configuration file.
SCSI routing instances that are in a stopped state are not running anywhere in the cluster. To restart a
stopped SCSI routing instance, use the scsirouter enable command. Use the all keyword to start all
instances on the SN 5428-2. All instances previously stopped on this storage router or available instances
not running elsewhere in the cluster will start on this SN 5428-2.
The SCSI routing instance can only be started from the storage router on which it was stopped. A stopped
SCSI routing instance is no longer known to any other storage router in the cluster.
Use the scsirouter enable command to bring a restored SCSI routing instance into the running
configuration. A restored instance must be started before you can make any additional configuration
changes to that instance.
Examples
The following example starts the SCSI routing instance named foo2. This instance must have been
previously stopped.
[SN5428-2A]# scsirouter foo2 enable
The following example stops all SCSI routing instances running on the storage router:
[SN5428-2A]# no scsirouter all enable
Cisco SN 5428-2 Storage Router Software Configuration Guide
78-15471-01
12-291
Chapter 12
Command Line Interface Reference
scsirouter enable
Related Commands
Command
Description
delete scsirouter
Delete the named SCSI routing instance or the specified element of the
SCSI routing instance.
failover scsirouter
Cause the named SCSI routing instance to cease running on the storage
router.
restore scsirouter
Restore the named SCSI routing instance from the named configuration file.
save scsirouter
Save configuration information for the named SCSI routing instance.
scsirouter
Create a SCSI routing instance.
scsirouter primary
Identify a storage router as the preferred storage router to run the named
SCSI routing instance.
scsirouter serverif
Assign a Gigabit Ethernet interface, IP address, and optionally a VLAN to
the named SCSI routing instance.
setup scsi
Run the wizard to configure a SCSI routing instance.
show scsirouter
Display configuration and operational information for the named SCSI
routing instance.
Cisco SN 5428-2 Storage Router Software Configuration Guide
12-292
78-15471-01
Chapter 12
Command Line Interface Reference
scsirouter failover
scsirouter failover
To build a list of storage routers to be used for failover purposes, use the scsirouter failover command.
scsirouter name failover {primary | secondary} sysname
Syntax Description
name
The name of the SCSI routing instance.
primary sysname
The name of the storage router in the cluster. In case of failure, the specified
SCSI routing instance will be failed over to this storage router.
secondary sysname
(Optional) The name of the storage router in the cluster. If the primary
storage router in the list cannot run the SCSI routing instance, it will be
failed over to this storage router.
Note
Because a high availability cluster consists of two storage routers,
this parameter is not used.
Defaults
None. By default, the HA failover list is not populated.
Command Modes
Administrator.
Command History
Release
Modification
3.2.1
This command was introduced.
Usage Guidelines
Use the scsirouter failover command to build a list of storage routers that will be used during the
failover process. If the specified SCSI routing instance fails over, the cluster attempts to start running
the instance on the storage router designated as the primary in the HA failover list. If that storage router
cannot run the SCSI routing instance, the cluster will attempt to start the instance on the storage router
designated as the secondary in the HA failover list.
If there is no primary or secondary storage router on the HA failover list when the SCSI routing instance
fails over, the cluster uses normal failover algorithms to determine where the SCSI routing instance
should run.
The storage routers specified as primary and secondary should be active in the cluster when the
command is issued. If the specified storage router is not currently active in the cluster, the setting will
not take effect until the node is added to the cluster and the SCSI routing instance is restarted.
Use the clear scsirouter failover command to remove the current primary or secondary storage router
from the HA failover list.
Note
This command causes the SCSI routing instance configuration information to be saved and all nodes in
the cluster to be updated.
Cisco SN 5428-2 Storage Router Software Configuration Guide
78-15471-01
12-293
Chapter 12
Command Line Interface Reference
scsirouter failover
Examples
The following example builds the HA failover list for the SCSI routing instance named foo. The primary
storage router in the HA failover list is SN5428-2A.
[SN5428-2A]# scsirouter foo failover primary SN5428-2A
Related Commands
Command
Description
clear scsirouter
failover
Remove the designated primary or secondary storage router from the HA
failover list for the specified SCSI routing instance.
delete scsirouter
Delete the named SCSI routing instance or the specified element of the
SCSI routing instance.
failover scsirouter
Cause the named SCSI routing instance to cease running on the storage
router.
restore scsirouter
Restore the named SCSI routing instance from the named configuration file.
save scsirouter
Save configuration information for the named SCSI routing instance.
scsirouter
Create a SCSI routing instance.
scsirouter enable
Stop or start the named SCSI routing instance.
scsirouter primary
Identify a storage router as the preferred storage router to run the named
SCSI routing instance.
scsirouter serverif
Assign a Gigabit Ethernet interface, IP address, and optionally a VLAN to
the named SCSI routing instance.
setup scsi
Run the wizard to configure a SCSI routing instance.
show scsirouter
Display configuration and operational information for the named SCSI
routing instance.
Cisco SN 5428-2 Storage Router Software Configuration Guide
12-294
78-15471-01
Chapter 12
Command Line Interface Reference
scsirouter lun reset
scsirouter lun reset
To specify that “LUN reset” rather than “clear task” commands will be sent to the storage resources
opened by the specified SCSI routing instance, use the scsirouter lun reset command.
scsirouter name lun reset {yes | no}
Syntax Description
name
The name of the SCSI routing instance. The specified SCSI routing instance
must be running.
yes
Send “lun reset” to storage resources when they are opened.
no
Send “clear task” to storage resources when they are opened.
Defaults
The default is to send “clear task” commands to storage resources.
Command Modes
Administrator.
Command History
Release
Modification
3.2.1
This command was introduced.
Usage Guidelines
It is preferable to send “LUN reset” commands if the device supports them. The specified SCSI routing
instance must be running.
Examples
The following example enables “LUN resets” to all storage resources opened by the SCSI routing
instance foo2:
[SN5428-2A]# scsirouter foo2 lun reset yes
Cisco SN 5428-2 Storage Router Software Configuration Guide
78-15471-01
12-295
Chapter 12
Command Line Interface Reference
scsirouter lun reset
Related Commands
Command
Description
delete scsirouter
Delete the named SCSI routing instance or the specified element of the
SCSI routing instance.
restore scsirouter
Restore the named SCSI routing instance from the named configuration file.
save scsirouter
Save configuration information for the named SCSI routing instance.
scsirouter
Create a SCSI routing instance.
scsirouter enable
Stop or start the named SCSI routing instance.
scsirouter primary
Identify a storage router as the preferred storage router to run the named
SCSI routing instance.
scsirouter
reserveproxy
Enable the SCSI reserve/release commands for the specified SCSI routing
instance and specify whether these commands are forwarded to the storage
resource.
scsirouter serverif
Assign a Gigabit Ethernet interface, IP address, and optionally a VLAN to
the named SCSI routing instance.
setup scsi
Run the wizard to configure a SCSI routing instance.
show scsirouter
Display configuration and operational information for the named SCSI
routing instance.
Cisco SN 5428-2 Storage Router Software Configuration Guide
12-296
78-15471-01
Chapter 12
Command Line Interface Reference
scsirouter password
scsirouter password
To assign a password to a SCSI routing instance for iSCSI authentication purposes, use the
scsirouter password command.
scsirouter name password {password-string | none}
Syntax Description
name
The name of the SCSI routing instance.
password-string
The password associated with the named SCSI routing instance. If the
password is encrypted (starts with “9”), enter a maximum of 170 characters.
If the password is unencrypted (starts with “0”), enter a maximum of 66
characters. If the password is entered as an unencrypted text string, enter a
maximum of 64 characters.
none
Keyword, removing any existing iSCSI password assigned to the named
SCSI routing instance.
Defaults
None.
Command Modes
Administrator
Command History
Release
Modification
3.2.1
This command was introduced.
Usage Guidelines
Use this command to assign a password to the SCSI routing instance for two-way iSCSI authentication.
Two-way iSCSI authentication allows authentication of the IP host and also allows the IP host, acting as
an iSCSI initiator, to require authentication of the SCSI routing instance, acting as an iSCSI target. The
user name and password assigned to the SCSI routing instance are used by the IP host for iSCSI
authentication purposes.
iSCSI authentication must be enabled for the named SCSI routing instance. If iSCSI authentication is
not enabled, the user name and password assigned to the SCSI routing instance will not be used.
The following rules apply to passwords:
•
Passwords are entered in clear text. However, they are changed to “XXXXX” in the CLI command
history cache, and are stored in the local username database in an encrypted format.
•
If the password contains embedded spaces, enclose it with single or double quotes.
•
After initial entry, passwords display in their encrypted format. Use the show scsirouter command
to display the SCSI routing instance authentication information. The following is an example
display:
SCSI Router Authentication
Router
Authentication
---------- --------------zeus
web1
Information
Username
Password
-------------- -------zeus_lab1
9 ea9bb0c57ca4806d3555f3f78a4204177a
Cisco SN 5428-2 Storage Router Software Configuration Guide
78-15471-01
12-297
Chapter 12
Command Line Interface Reference
scsirouter password
The initial “9” in the example display indicates that the password is encrypted.
•
You can re-enter an encrypted password using the normal scsirouter password command. Enter the
encrypted password in single or double quotes, starting with 9 and a single space. For example,
copying and pasting password "9 ea9bb0c57ca4806d3555f3f78a4204177a" from the example above
into the scsirouter mars password command would assign the SCSI routing instance mars the
same iSCSI password as the SCSI routing instance zeus. This functionality allows passwords to be
restored from saved configuration files.
•
When entering a password, a zero followed by a single space indicates that the following string is
not encrypted; 9 followed by a single space indicates that the following string is encrypted. To enter
a password that starts with 9 or zero, followed by one or more spaces, enter a zero and a space and
then enter the password string. For example, to enter the password “0 123” for the SCSI routing
instance zeus, enter this command:
scsirouter zeus password “0 0 123”
To enter the password “9 73Zjm 5” for SCSI routing instance lab3, use this command:
scsirouter lab3 password ‘0 9 73Zjm 5’
Examples
The following example enables iSCSI authentication, using the default authentication list, for the SCSI
routing instance named lab3 and assigns a user name of lab3-admin and a password of testing to the
instance for two-way authentication:
[SN5428-2A]# scsirouter lab3 authentication default
*[SN5428-2A]# scsirouter lab3 username lab3-admin
*[SN5428-2A]# scsirouter lab3 password testing
Related Commands
Command
Description
scsirouter
authentication
Enable iSCSI authentication for the named SCSI routing instance.
scsirouter username
Assign a user name to a SCSI routing instance for iSCSI authentication
purposes.
show scsirouter
Display configuration and operational information for the named SCSI
routing instance.
Cisco SN 5428-2 Storage Router Software Configuration Guide
12-298
78-15471-01
Chapter 12
Command Line Interface Reference
scsirouter primary
scsirouter primary
To assign the specified system as the preferred storage router for the named SCSI routing instance, use
the scsirouter primary command.
scsirouter name primary sysname
Syntax Description
name
The name of this SCSI routing instance.
primary sysname
The system name of the preferred storage router.
Defaults
None.
Command Modes
Administrator.
Command History
Release
Modification
3.2.1
This command was introduced.
Usage Guidelines
At any given time, a SCSI routing instance can run on only one node in a cluster. If a SCSI routing
instance has the primary attribute set, the specified storage router will take over running that instance
upon system restart or whenever target and critical resources are available.
If the primary attribute is not set, the SCSI routing instance continues running on the node where it was
started until it is explicitly stopped (via a no scsirouter enable command), it automatically fails over to
another node in the cluster because targets or critical resources are unavailable, or an explicit
failover scsirouter command is issued. This is the default behavior.
Use the scsirouter primary command if you always want the specified SCSI routing instance to run on
a specific storage router in a cluster whenever that node is available (assuming target and critical
resources are available). Use the clear scsirouter primary command to remove the currently configured
primary value for the named SCSI routing instance.
Note
Setting the primary attribute saves the SCSI routing instance configuration and circulates those changes
to the high availability cluster. If the specified storage router is available to the cluster and has all target
and critical resources available, the SCSI routing instance will be immediately failed over. If the
specified storage router is not available to the cluster, failover will occur as soon as that storage router
becomes available to the cluster (assuming target and critical resources are available).
See Chapter 10, “Configuring a High Availability Cluster,” and Chapter 11, “Maintaining and Managing
the SN 5428-2 Storage Router,” for more information about HA, cluster configuration, and managing
SCSI routing instances in a cluster environment.
Cisco SN 5428-2 Storage Router Software Configuration Guide
78-15471-01
12-299
Chapter 12
Command Line Interface Reference
scsirouter primary
Examples
The following command designates the SN 5428-2 LabRouter1 as the storage router on which the SCSI
routing instance named foo will always, under normal conditions, run.
[SN5428-2A]# scsirouter foo primary LabRouter1
Related Commands
Command
Description
clear scsirouter
primary
Remove the storage router configured as the primary for the named SCSI
routing instance.
delete scsirouter
Delete the named SCSI routing instance or the specified element of the
SCSI routing instance.
restore scsirouter
Restore the named SCSI routing instance from the named configuration file.
save scsirouter
Save configuration information for the named SCSI routing instance.
scsirouter
Create a SCSI routing instance.
scsirouter enable
Stop or start the named SCSI routing instance.
scsirouter failover
Add the storage router to the HA failover list for the specified SCSI routing
instance.
scsirouter serverif
Assign a Gigabit Ethernet interface, IP address, and optionally a VLAN to
the named SCSI routing instance.
setup scsi
Run the wizard to configure a SCSI routing instance.
show scsirouter
Display configuration and operational information for the named SCSI
routing instance.
Cisco SN 5428-2 Storage Router Software Configuration Guide
12-300
78-15471-01
Chapter 12
Command Line Interface Reference
scsirouter reserveproxy
scsirouter reserveproxy
To configure the SCSI routing instance to track SCSI reserve/release commands and to specify whether
these commands are forwarded to the storage target, use the scsirouter reserveproxy command.
scsirouter name reserveproxy {enable passthru {yes | no} | disable}
Syntax Description
name
The name of the SCSI routing instance.
enable passthru yes
Configure the SCSI routing instance to track SCSI reserve and release
commands and enable forwarding of these commands to storage resources.
enable passthru no
Configure the SCSI routing instance to track SCSI reserve and release
commands but disable forwarding of these commands to storage resources.
disable
Disable the reserve proxy feature for the named SCSI routing instance. The
storage router does not track the SCSI reserve and release commands, which
are sent from the IP host. The IP host manages the SCSI reserve and release
commands.
Defaults
Reserve-proxy passthru is disabled.
Command Modes
Administrator.
Command History
Release
Modification
3.2.1
This command was introduced.
Usage Guidelines
The SCSI reserve/release command allows an initiator to reserve the storage for its own use. Attempts
to access the storage from other initiators are rejected until the first initiator releases the storage. If the
reserve proxy feature is enabled using the scsirouter reserveproxy command, the storage router keeps
track of the reserved status of target LUNs and returns the appropriate SCSI command status to other
initiators that issue SCSI commands to that target LUN.
If passthru is enabled, the storage router forwards the SCSI reserve and release commands to the device.
If passthru is not enabled, the SCSI reserve and release commands are not forwarded, but the storage
router will respond as if the commands had been forwarded.
Note
Examples
This functionality does not apply to operating systems (such as Windows NT) which do not utilize the
SCSI Reserve command.
The following example configures the SCSI routing instance foo2 to track SCSI reserve and release
commands and enables forwarding of these commands to storage resources:
[SN5428-2A]# scsirouter foo2 reserveproxy enable passthru yes
Cisco SN 5428-2 Storage Router Software Configuration Guide
78-15471-01
12-301
Chapter 12
Command Line Interface Reference
scsirouter reserveproxy
Related Commands
Command
Description
delete scsirouter
Delete the named SCSI routing instance or the specified element of the
SCSI routing instance.
restore scsirouter
Restore the named SCSI routing instance from the named configuration file.
save scsirouter
Save configuration information for the named SCSI routing instance.
scsirouter
Create a SCSI routing instance.
scsirouter enable
Stop or start the named SCSI routing instance.
scsirouter failover
Add the storage router to the HA failover list for the specified SCSI routing
instance.
scsirouter lun reset
Configure the named SCSI routing instance to send a “LUN reset”
command when opening all targets.
scsirouter serverif
Assign a Gigabit Ethernet interface, IP address, and optionally a VLAN to
the named SCSI routing instance.
setup scsi
Run the wizard to configure a SCSI routing instance.
show scsirouter
Display configuration and operational information for the named SCSI
routing instance.
Cisco SN 5428-2 Storage Router Software Configuration Guide
12-302
78-15471-01
Chapter 12
Command Line Interface Reference
scsirouter serverif
scsirouter serverif
To assign a Gigabit Ethernet interface and IP address to the named SCSI routing instance, use the
scsirouter serverif command. The specified interface allows IP hosts access to Fibre Channel storage.
scsirouter name serverif ge? {A.B.C.D/bits | A.B.C.D/1.2.3.4} [secondary ge?]
scsirouter name serverif ge? vlan vid {A.B.C.D/bits | A.B.C.D/1.2.3.4} [secondary ge?]
Syntax Description
name
Name of the SCSI routing instance to which you are adding the Gigabit
Ethernet interface.
serverif ge?
The name of the interface. When you type the scsirouter serverif
command, followed by ?, the CLI lists the interfaces available. You cannot
specify a nonexistent interface.
A.B.C.D/bits
The IP address of the named interface. If the keyword vlan is used, the IP
address is part of the specified VLAN. A.B.C.D is the dotted quad notation
of the IP address. The /bits specifies the subnet mask in CIDR style.
Note
A.B.C.D/1.2.3.4
The IP address must be on a unique subnet; you cannot configure an
IP address that is on the same subnet as another storage router
network interface.
The IP address of the named interface. If the keyword vlan is used, the IP
address is part of the specified VLAN. A.B.C.D is the dotted quad notation
of the IP address. 1.2.3.4 is the dotted quad notation of the subnet mask.
Note
The IP address must be on a unique subnet; you cannot configure an
IP address that is on the same subnet as another storage router
network interface.
secondary ge?
(Optional) The name of the Gigabit Ethernet interface to be used as a
secondary interface for the specified IP address. If the primary interface
goes down and remains down for two seconds, the specified IP address will
be moved to the secondary interface.
vlan vid
The keyword and the VLAN identifier.
Defaults
None.
Command Modes
Administrator.
Command History
Release
Modification
3.2.1
This command was introduced.
Cisco SN 5428-2 Storage Router Software Configuration Guide
78-15471-01
12-303
Chapter 12
Command Line Interface Reference
scsirouter serverif
Usage Guidelines
The specified interface IP address is configured on IP hosts requiring access to storage resources through
the SN 5428-2 Storage Router.
Each SCSI routing instance requires two active elements:
•
The serverif element assigns an interface and IP address for use by IP hosts requiring access to
storage resources. The instance becomes active when this interface is added. A SCSI routing
instance can have multiple serverif elements; one IP address per logical interface can be configured
for a SCSI routing instance.
•
The target element is a complex item that specifies the mapping between LUNs on the storage
devices and the host systems.
The scsirouter serverif vlan command is used to associate a VLAN with a SCSI routing instance. All
traffic using the specified Gigabit Ethernet interface will be considered as part of the VLAN; all IP hosts
accessing storage through the SN 5428-2 using the specified Gigabit Ethernet interface IP address must
connect as part of the specified VLAN.
When the SCSI routing instance is started, a logical interface (for example, ge2VLAN100) is created,
which incorporates the physical interface and the VID. This logical interface can be displayed via the
show interface command.
If the secondary keyword is used, both Gigabit Ethernet interfaces must be connected to the same
network segment. If the primary interface goes down and remains down for two seconds, the IP address
will be moved to the secondary interface.
Note
Examples
If you configure a Gigabit Ethernet IP address with a secondary interface, all Gigabit Ethernet IP
addresses on the same subnet must also be configured with the same secondary interface.
The following command adds the Gigabit Ethernet interface ge1, with the IP address 10.1.10.128/24, to
the SCSI routing instance named foo2.
[SN5428-2A]# scsirouter foo2 serverif ge1 10.1.10.128/24
The following command adds the Gigabit Ethernet interface ge2 and VLAN ID 45, with IP address
10.1.30.128/24, to the SCSI routing instance fooA. If the primary interface is not available, the IP address
will be moved to the secondary Gigabit Ethernet interface, ge1. The Gigabit Ethernet interfaces must be
connected to the same network.
[SN5428-2A]# scsirouter fooA serverif ge2 vlan 45 10.1.30.128/24 secondary ge1
Related Commands
Command
Description
delete scsirouter
Delete the named SCSI routing instance or the specified element of the
SCSI routing instance.
restore scsirouter
Restore the named SCSI routing instance from the named configuration file.
save scsirouter
Save configuration information for the named SCSI routing instance.
scsirouter
Create a SCSI routing instance.
scsirouter enable
Stop or start the named SCSI routing instance.
setup scsi
Run the wizard to configure a SCSI routing instance.
show scsirouter
Display configuration and operational information for the named SCSI
routing instance.
Cisco SN 5428-2 Storage Router Software Configuration Guide
12-304
78-15471-01
Chapter 12
Command Line Interface Reference
scsirouter slp enable
scsirouter slp enable
To enable the advertisement of the targets of the named SCSI routing instance with the Service Location
Protocol (SLP) service, use the scsirouter slp enable command. To disable target advertisement, use the
no form of this command.
scsirouter name slp enable
no scsirouter name slp enable
Syntax Description
name
Defaults
Advertising with the SLP Service is enabled for all targets.
Command Modes
Administrator.
Command History
Release
Modification
3.2.1
This command was introduced.
Usage Guidelines
Name of the SCSI routing instance. All targets associated with this SCSI
routing instance are advertised with the SLP service.
SLP is an IP protocol designed to make it easy for network clients to discover available services on a
network and to learn about the configuration of those services. By default, SLP advertisement is enabled
when:
•
A SCSI routing instance is started by the storage router during the creation process.
•
The storage router is restarted.
•
A SCSI routing instance is failed over to another storage router in a cluster.
Use this command to manually disable and re-enable the advertisement of targets with the SLP service.
When target advertisement is disabled, all existing targets for the specified SCSI routing instance are
de-registered, and any new targets that are added will not be advertised.
Examples
The following example disables target advertisement for the SCSI routing instance named foo and
deregisters all of its previously registered targets from the SLP service:
[SN5428-2A]# no scsirouter foo slp enable
The following example re-enables target advertisement for the SCSI routing instance named foo:
[SN5428-2A]# scsirouter foo slp enable
Cisco SN 5428-2 Storage Router Software Configuration Guide
78-15471-01
12-305
Chapter 12
Command Line Interface Reference
scsirouter slp enable
Related Commands
Command
Description
show slp
Display the status of the SLP service and the interface address where the
SLP service is listening for incoming SLP service requests.
slp findattrs
Discover the attributes of a specific SLP registered service.
slp findsrvs
Locate a SLP registered service of a specific type on the local subnet.
slp findsrvtypes
Discover all SLP registered service types on the local subnet.
Cisco SN 5428-2 Storage Router Software Configuration Guide
12-306
78-15471-01
Chapter 12
Command Line Interface Reference
scsirouter target accesslist
scsirouter target accesslist
To associate the named access list with the specified target, use the scsirouter target accesslist
command.
scsirouter name target {name | all} accesslist {name | any | none} [ro | rw]
Syntax Description
name
The name of the SCSI routing instance to which this target belongs.
target name
The name of the storage target to associate with this access list. The target
must already exist.
target all
Associate all targets with the named access list.
accesslist name
The name of the access list to associate with this storage target.
accesslist any
Allow connections and logins for the specified target from any IP host. This
is effectively “open access.”
accesslist none
Prevent any new connections or logins to this target from any IP hosts. This
is effectively “no access.”
ro
(Optional) Allow the IP hosts identified by the specified access list
read-only device access.
rw
(Optional) Allow the IP hosts identified by the specified access list
read/write device access. This is the default.
Defaults
If access type (read-only or read/write) is not specified, the default is read/write.
Command Modes
Administrator.
Command History
Release
Modification
3.2.1
This command was introduced.
Usage Guidelines
An access list identifies the IP hosts allowed to access the associated storage target through the
SN 5428-2 Storage Router. IP hosts can be identified by IP address, CHAP user name, or iSCSI Name.
Access lists are associated with specific storage targets. Each target can be associated with one access
list that provides IP hosts read/write device access and one access list that provides read-only device
access.
When an IP host attempts to access a storage resource, the storage router first looks for a matching entry
using the access list configured to allow read/write device access. If the IP host does not have a matching
entry in the read/write access list, the access list configured for read-only device access (if any) is used.
If the IP host does not have a matching entry on either access list, the IP host is denied access to the
storage resource.
Note
Some host operating systems impose restrictions on the use of read-only access lists. For details, see the
readme files and Release Notes for Cisco iSCSI Driver for your IP host operating system.
Cisco SN 5428-2 Storage Router Software Configuration Guide
78-15471-01
12-307
Chapter 12
Command Line Interface Reference
scsirouter target accesslist
Note
Examples
•
Use the target all form of this command to create an association between the specified access list
and all targets.
•
Use the reserved access list name none to remove any access list associations for the specified target.
This effectively prevents access to this storage target from any IP host.
•
Use the reserved access list name any to allow access to this storage target from any IP host.This is
effectively “open access.”
•
Existing connections and logins are not affected by an access list change. However, if there are
existing connections, the storage router issues a warning message with that information in response
to this command.
When making changes to SCSI routing instances (such as adding or deleting targets or changing access)
be sure to make the complimentary changes to the iSCSI configuration of IP hosts using these services
to access the storage resources. See the readme files for the appropriate iSCSI drivers for additional
details. You can access the latest iSCSI drivers and readme and example configuration files from
Cisco.com.
The following example creates an association between the storage target webserver4 (accessed via SCSI
routing instance foo) and the access list webserver2. By default, the IP hosts identified by the webserver2
access list will be allowed read/write device access to the target.
[SN5428-2A]# scsirouter foo target webserver4 accesslist webserver2
The following example provides the IP hosts identified in the access list named media read-only access
to all targets accessed via SCSI routing instance LabA:
[SN5428-2A]# scsirouter LabA target all accesslist media ro
Note
Some host operating systems impose restrictions on the use of read-only access lists. For details, see the
readme files and Release Notes for Cisco iSCSI Driver for your IP host operating system.
The following example provides the IP hosts identified by the access list webcheck read-only device
access, and provides the IP hosts identified by access list webserver2 read/write device access, to the
target webserver3:
[SN5428-2A]# scsirouter foo target webserver3 accesslist webcheck ro
Setting read-only accesslist to 'webcheck' for scsirouter 'foo' target 'webserver3
*[SN5428-2A]# scsirouter foo target webserver3 accesslist webserver2 rw
Setting read-write accesslist to 'webserver2' for scsirouter 'foo' target 'webserver3
Cisco SN 5428-2 Storage Router Software Configuration Guide
12-308
78-15471-01
Chapter 12
Command Line Interface Reference
scsirouter target accesslist
Related Commands
Command
Description
accesslist
Create an access list entity.
accesslist A.B.C.D/bits Add IP addresses to an access list.
accesslist
chap-username
Add CHAP user name entries to an access list.
accesslist iscsi-name
Add iSCSI Name entries to an access list.
delete accesslist
Delete a specific access list entry or an entire access list.
delete scsirouter
Delete the named SCSI routing instance or the specified element of the
SCSI routing instance.
restore accesslist
Restore the named access list or all access lists from the named
configuration file.
restore scsirouter
Restore the named SCSI routing instance from the named configuration file.
save accesslist
Save configuration data for the named access list or all access lists.
save scsirouter
Save configuration information for the named SCSI routing instance.
scsirouter
Create a SCSI routing instance.
scsirouter enable
Stop or start the named SCSI routing instance.
scsirouter primary
Identify a storage router as the preferred storage router to run the named
SCSI routing instance.
scsirouter serverif
Assign a Gigabit Ethernet interface, IP address, and optionally a VLAN to
the named SCSI routing instance.
scsirouter target crc
Control the usage of iSCSI cyclical redundancy check (CRC) on the
specified target or all targets.
setup scsi
Run the wizard to configure a SCSI routing instance.
show accesslist
Display the contents of the named access list or all access lists.
show scsirouter
Display configuration and operational information for the named SCSI
routing instance.
Cisco SN 5428-2 Storage Router Software Configuration Guide
78-15471-01
12-309
Chapter 12
Command Line Interface Reference
scsirouter target crc
scsirouter target crc
To control the usage of iSCSI cyclical redundancy check (CRC) on the specified target or all targets, use
the scsirouter target crc command.
scsirouter name target {name | all} crc {always | any | never | prefer-off | prefer-on}
Syntax Description
name
The name of the SCSI routing instance to which this target belongs.
target name
The name of the storage target.
target all
Apply the specified iSCSI CRC usage to all targets associated with this
SCSI routing instance.
always
Always force iSCSI CRC on the target.
any
The target supports both CRC and non-CRC modes. The use of CRC is
negotiated to the initiator preference.
never
The use of iSCSI CRC is disabled on this target.
prefer-off
The use of iSCSI CRC is not the preferred mode of operation for this target,
but the target will negotiate the mode if CRC mode is the only mode
supported by the initiator. This is the default setting.
prefer-on
The use of iSCSI CRC is the preferred mode of operation for this target, but
the target will function in non-CRC mode if it is the only mode supported
by the initiator.
Defaults
iSCSI CRC is not the preferred mode of operation for the target.
Command Modes
Administrator.
Command History
Release
Modification
3.2.1
This command was introduced.
Usage Guidelines
CRC codes are shortened cyclic codes used for error detection. A target configured for iSCSI CRC as
the preferred mode of operation (prefer-on) opts for data integrity over performance. A target configured
for non-CRC mode as the preferred mode of operation (prefer-off) opts for performance over data
integrity.
Depending on the initiator and target configurations, the usage of iSCSI CRC is negotiated. Table 12-19
lists the CRC negotiation outcomes for each possible pair of CRC configurations.
Cisco SN 5428-2 Storage Router Software Configuration Guide
12-310
78-15471-01
Chapter 12
Command Line Interface Reference
scsirouter target crc
Table 12-19 iSCSI CRC Negotiation Outcomes
Initiator CRC Mode
Target CRC Mode
CRC Negotiation Outcome
always
always
CRC is enabled.
never
Negotiation is rejected. No session is
established to the target.
prefer-on
CRC is enabled.
prefer-off
CRC is enabled.
any
CRC is enabled.
always
Negotiation is rejected. No session is
established to the target.
never
CRC is disabled.
prefer-on
CRC is disabled.
prefer-off
CRC is disabled.
any
CRC is disabled.
always
CRC is enabled.
never
CRC is disabled.
prefer-on
CRC is enabled.
prefer-off
CRC is disabled.
any
CRC is enabled.
always
CRC is enabled.
never
CRC is disabled.
prefer-on
CRC is enabled.
prefer-off
CRC is disabled.
any
CRC is disabled.
never
prefer-on
prefer-off
Examples
The following example configures the storage target webserver4, accessed through SCSI routing
instanced foo, to always use iSCSI CRC:
[SN 5428-2A}# scsirouter foo target webserver4 crc always
The following example configures all storage targets accessed through SCSI routing instances lab2, to
prefer the use of iSCSI CRC:
[SN 5428-2A}# scsirouter lab2 target all crc prefer-on
Cisco SN 5428-2 Storage Router Software Configuration Guide
78-15471-01
12-311
Chapter 12
Command Line Interface Reference
scsirouter target crc
Related Commands
Command
Description
delete scsirouter
Delete the named SCSI routing instance or the specified element of the
SCSI routing instance.
restore scsirouter
Restore the named SCSI routing instance from the named configuration file.
save scsirouter
Save configuration information for the named SCSI routing instance.
scsirouter target
accesslist
Associate an access list with a specific SCSI routing instance target or all
targets.
scsirouter target
enable
Allow or disallow connections and logins for the named target.
show scsirouter
Display configuration and operational information for the named SCSI
routing instance.
Cisco SN 5428-2 Storage Router Software Configuration Guide
12-312
78-15471-01
Chapter 12
Command Line Interface Reference
scsirouter target description
scsirouter target description
To add a description to the named target, use the scsirouter target description command.
scsirouter name target name description “user text”
Syntax Description
name
The name of the SCSI routing instance to which this target belongs.
target name
The name of the storage target.
“user text”
User-defined identification information associated with this storage target.
If the description contains spaces, enclose the string in quotes. Enter a
maximum of 64 characters.
Defaults
None.
Command Modes
Administrator.
Command History
Release
Modification
3.2.1
This command was introduced.
Usage Guidelines
Target description information is an optional attribute of a SCSI routing instance. Use the
show scsirouter command to display target description information.
Examples
The following example adds a description to the storage target webserver4, accessed through the SCSI
routing instance foo:
[SN5428-2A]# scsirouter foo target webserver4 description “Web databases”
Cisco SN 5428-2 Storage Router Software Configuration Guide
78-15471-01
12-313
Chapter 12
Command Line Interface Reference
scsirouter target description
Related Commands
Command
Description
accesslist
Create an access list entity.
accesslist A.B.C.D/bits Add IP addresses to an access list.
accesslist
chap-username
Add CHAP user name entries to an access list.
accesslist iscsi-name
Add iSCSI Name entries to an access list.
delete accesslist
Delete a specific access list entry or an entire access list.
delete scsirouter
Delete the named SCSI routing instance or the specified element of the
SCSI routing instance.
restore accesslist
Restore the named access list or all access lists from the named
configuration file.
restore scsirouter
Restore the named SCSI routing instance from the named configuration file.
save accesslist
Save configuration data for the named access list or all access lists.
save scsirouter
Save configuration information for the named SCSI routing instance.
scsirouter
Create a SCSI routing instance.
scsirouter enable
Stop or start the named SCSI routing instance.
scsirouter primary
Identify a storage router as the preferred storage router to run the named
SCSI routing instance.
scsirouter serverif
Assign a Gigabit Ethernet interface, IP address, and optionally a VLAN to
the named SCSI routing instance.
scsirouter target
accesslist
Associate an access list with a specific SCSI routing instance target or all
targets.
setup scsi
Run the wizard to configure a SCSI routing instance.
show accesslist
Display the contents of the named access list or all access lists.
show scsirouter
Display configuration and operational information for the named SCSI
routing instance.
Cisco SN 5428-2 Storage Router Software Configuration Guide
12-314
78-15471-01
Chapter 12
Command Line Interface Reference
scsirouter target enable
scsirouter target enable
To allow connections and logins for the named target, use the scsirouter target enable command. To
disallow connections and logins for the named target, use the no form of this command.
scsirouter name target {name | all} enable
no scsirouter name target {name | all} enable
Syntax Description
name
The name of the SCSI routing instance to which this target belongs.
target name
The name of the storage target.
target all
Allow connections for all targets of this SCSI routing instance to be enabled
or disabled.
Defaults
None.
Command Modes
Administrator.
Command History
Release
Modification
3.2.1
This command was introduced.
Usage Guidelines
When you add a target to a SCSI routing instance, it is by default enabled. However, no access list is
associated with the target, thus effectively preventing any access to the storage target from any IP hosts.
When you associate an access list with a target, the specified connections and logins are allowed.
Use this command to control access without changing the target access list association.
Existing connections and logins are not affected by the no form of this command, but future connections
and logins are not allowed. If existing IP hosts are connected, the storage router issues a warning
message with that information in response to this command.
Use the reserved target name all to enable or disable connections for all targets of this SCSI routing
instance.
Note
When making changes to SCSI routing instances (such as adding or deleting targets or changing access)
be sure to make the complimentary changes to the iSCSI configuration of IP hosts using these services
to access the storage resources. See the readme files for the appropriate iSCSI drivers for additional
details. You can access the latest iSCSI drivers and readme and example configuration files from
Cisco.com.
Cisco SN 5428-2 Storage Router Software Configuration Guide
78-15471-01
12-315
Chapter 12
Command Line Interface Reference
scsirouter target enable
Examples
The following example enables connections for all targets of the SCSI routing instance foo.
[SN5428-2A]# scsirouter foo target all enable
The following examples disables connections for the target webservices2 of the SCSI routing instance
named lab2:
[SN5428-2A]# no scsirouter lab2 target webservices2 enable
Related Commands
Command
Description
accesslist
Create an access list entity.
accesslist A.B.C.D/bits Add IP addresses to an access list.
accesslist
chap-username
Add CHAP user name entries to an access list.
accesslist iscsi-name
Add iSCSI Name entries to an access list.
delete accesslist
Delete a specific access list entry or an entire access list.
delete scsirouter
Delete the named SCSI routing instance or the specified element of the
SCSI routing instance.
restore accesslist
Restore the named access list or all access lists from the named
configuration file.
restore scsirouter
Restore the named SCSI routing instance from the named configuration file.
save accesslist
Save configuration data for the named access list or all access lists.
save scsirouter
Save configuration information for the named SCSI routing instance.
scsirouter
Create a SCSI routing instance.
scsirouter enable
Stop or start the named SCSI routing instance.
scsirouter primary
Identify a storage router as the preferred storage router to run the named
SCSI routing instance.
scsirouter serverif
Assign a Gigabit Ethernet interface, IP address, and optionally a VLAN to
the named SCSI routing instance.
scsirouter target
accesslist
Associate an access list with a specific SCSI routing instance target or all
targets.
scsirouter target
maxcmdqueuedepth
Specify the maximum number of commands allowed at any given time from
each iSCSI session to the specified target.
setup scsi
Run the wizard to configure a SCSI routing instance.
show accesslist
Display the contents of the named access list or all access lists.
show scsirouter
Display configuration and operational information for the named SCSI
routing instance.
Cisco SN 5428-2 Storage Router Software Configuration Guide
12-316
78-15471-01
Chapter 12
Command Line Interface Reference
scsirouter target {lunid | serial | wwpn} #?
scsirouter target {lunid | serial | wwpn} #?
To use an index method of mapping a logical target or a logical target and LUN combination to storage,
use the scsirouter target {serial | lunid | wwpn} #? command. This command creates an indexed list of
storage resources, assigning a unique index number to each LUN available. Specify the storage resources
to map by using the appropriate index numbers.
scsirouter name target name wwpn #?
scsirouter name target name [lun nn] wwpn #?
scsirouter name target name lun nn {serial | lunid} #?
scsirouter name target name wwpn #nn [wwpn #nn]
scsirouter name target name lun nn wwpn #nn [wwpn #nn] [force]
scsirouter name target name lun nn {serial | lunid} #nn [force]
Syntax Description
name
Name of the SCSI routing instance to which you are adding the storage
target.
target name
A user-specified name of the logical target. Enter a maximum of
31 characters or a valid iSCSI Name. There is a maximum of 100 targets per
storage router or per high availability cluster.
lun nn
The LUN number associated with the logical target. The LUN number is
optional if mapping to a World Wide Port Name (WWPN) address type. The
LUN number is required if mapping to a serial number or LUN identifier.
#?
Request an indexed list of storage resources available on the Fibre Channel
(FC) network.
serial
Use the serial number for the named storage resource. The storage resource
must support unique serial numbers for each LUN.
wwpn
Use the World Wide Port Name (WWPN) address type for the named
storage resource. You can specify a primary and optional secondary
WWPN.
lunid
Use the unique LUN identifier, assigned when the LUN is discovered by the
FC interface.
#nn
The index number from the displayed list. The storage resource listed after
the number specified is the physical storage address to which the logical
target or logical target and LUN combination is to be mapped.
force
(Optional) Keyword used to allow LUN-mapping of the same storage array
control LUNs in multiple targets.
Defaults
None.
Command Modes
Administrator.
Cisco SN 5428-2 Storage Router Software Configuration Guide
78-15471-01
12-317
Chapter 12
Command Line Interface Reference
scsirouter target {lunid | serial | wwpn} #?
Command History
Usage Guidelines
Release
Modification
3.2.1
This command was introduced.
This command can be used for target-only or target-and-LUN mapping.
When you map a target using WWPN and the target needs to be accessed in a high availability cluster,
you must specify both the primary WWPN (the WWPN of the storage resource as known to the first
storage router in the cluster) and the secondary WWPN (the WWPN of the storage resource as known to
the second storage router in the cluster).
To display the indexed list of storage resources, use the number sign (#) character followed by a question
mark (?). That action will cause a list of devices discovered on the FC network to display as a numbered
(indexed) table. The original command is re-displayed at the prompt below the list to the point of the #
keyword. Complete the command by entering the appropriate index number.
When a target is added, it is by default enabled. However, it is not associated with any access list
(“accesslist none”), effectively disabling access to the target from any IP hosts. Use the
scsirouter target accesslist command to enable access to this storage target for selected IP hosts. See
Chapter 6, “Configuring SCSI Routing,” for more information about configuring SCSI routing on the
SN 5428-2 Storage Router.
Note
When making changes to SCSI routing instances (such as adding or deleting targets or changing access)
be sure to make the complimentary changes to the iSCSI configuration of IP hosts using these services
to access the storage resources. See the readme files for the appropriate iSCSI drivers for additional
details. You can access the latest iSCSI drivers and readme and example configuration files from
Cisco.com.
Use the force keyword to allow target-and-LUN mapping of the same storage array control LUN in
multiple targets. Do not use the force keyword to LUN-map the same data LUN in multiple targets.
LUN-mapping of the same LUN in multiple targets is advised for a control LUN on a storage controller
only.
Examples
The following example displays an indexed list of storage resources available to SCSI routing instance
lab2 and maps the logical target webserver8 to the WWPN storage address represented by index
number 2.
[SN5428-2A]# scsirouter lab2 target webserver8 wwpn #?
Id
--1
2
I/F
----fc1
fc1
Device
WWPN
Lun
Type
Vendor
Product
--- ---------------- ----- ------ -------- ---------------2200001026448a0d 0
Disk
SEAGATE ST217340FC
22000003be3203bc 0
Disk
SEAGATE ST217341FC
*[SN5428-2A]# scsirouter lab2 target webserver8 wwpn #2
Cisco SN 5428-2 Storage Router Software Configuration Guide
12-318
78-15471-01
Chapter 12
Command Line Interface Reference
scsirouter target {lunid | serial | wwpn} #?
Related Commands
Command
Description
accesslist
Create an access list entity.
accesslist A.B.C.D/bits Add IP addresses to an access list.
accesslist
chap-username
Add CHAP user name entries to an access list.
accesslist iscsi-name
Add iSCSI Name entries to an access list.
delete accesslist
Delete a specific access list entry or an entire access list.
delete scsirouter
Delete the named SCSI routing instance or the specified element of the
SCSI routing instance.
restore accesslist
Restore the named access list or all access lists from the named
configuration file.
restore scsirouter
Restore the named SCSI routing instance from the named configuration file.
save accesslist
Save configuration data for the named access list or all access lists.
save scsirouter
Save configuration information for the named SCSI routing instance.
scsirouter
Create a SCSI routing instance.
scsirouter enable
Stop or start the named SCSI routing instance.
scsirouter primary
Identify a storage router as the preferred storage router to run the named
SCSI routing instance.
scsirouter serverif
Assign a Gigabit Ethernet interface, IP address, and optionally a VLAN to
the named SCSI routing instance.
scsirouter target
accesslist
Associate an access list with a specific SCSI routing instance target or all
targets.
scsirouter target
enable
Allow or disallow connections and logins for the named target.
setup scsi
Run the wizard to configure a SCSI routing instance.
show accesslist
Display the contents of the named access list or all access lists.
show scsirouter
Display configuration and operational information for the named SCSI
routing instance.
Cisco SN 5428-2 Storage Router Software Configuration Guide
78-15471-01
12-319
Chapter 12
Command Line Interface Reference
scsirouter target lun lunid
scsirouter target lun lunid
To map a logical target and LUN combination to a unique LUN identifier, use the
scsirouter target lun lunid command. The scsirouter target lun lunid command is a target-and-LUN
mapping method of mapping a logical target to storage.
scsirouter name target name lun nn lunid lun-identifier [force]
Syntax Description
name
Name of the SCSI routing instance to which you are adding the storage
target.
target name
A user-specified name of the logical target. Enter a maximum of
31 characters or a valid iSCSI Name. There is a maximum of 100 targets per
storage router or per high availability cluster.
lun nn
The LUN number associated with the logical target. LUNs are integers
between 0 and 255.
lunid lun-identifier
Use the unique LUN identifier, assigned when the LUN is discovered by the
Fibre Channel interface. Enter either 16 or 32 hex digits.
force
(Optional) Keyword used to allow LUN-mapping of the same storage array
control LUNs in multiple targets.
Defaults
None.
Command Modes
Administrator.
Command History
Release
Modification
3.2.1
This command was introduced.
Usage Guidelines
The scsirouter target lun lunid command specifies a logical target name and LUN number combination
to be mapped to a physical LUN by its unique LUN identifier. The LUN identifier is represented by 16
or 32 hex digits. The digits may be separated by colons.
When a target is added, it is by default enabled. However, it is not associated with any access list
(“accesslist none”), effectively disabling access to the target from any IP hosts. Use the
scsirouter target accesslist command to enable access to this storage target for selected IP hosts.
See Chapter 6, “Configuring SCSI Routing,” for more information about configuring SCSI routing
instances on the SN 5428-2 Storage Router.
Note
When making changes to SCSI routing instances (such as adding or deleting targets or changing access)
be sure to make the complimentary changes to the iSCSI configuration of IP hosts using these services
to access the storage resources. See the readme files for the appropriate iSCSI drivers for additional
details. You can access the latest iSCSI drivers and readme and example configuration files from
Cisco.com.
Cisco SN 5428-2 Storage Router Software Configuration Guide
12-320
78-15471-01
Chapter 12
Command Line Interface Reference
scsirouter target lun lunid
Use the force keyword to allow mapping of the same storage array control LUN in multiple targets. Do
not use the force keyword to LUN-map the same data LUN in multiple targets. LUN-mapping of the
same LUN in multiple targets is advised for a control LUN on a storage controller only.
Examples
The following example maps a logical target and LUN combination for SCSI router instance foo. The
logical target and LUN combination, webserver5 LUN 5, is mapped to the physical LUN represented by
the LUN identifier 200000203719129d.
[SN5428-2A]# scsirouter foo target webserver5 lun 5 lunid 220000203719129d
Related Commands
Command
Description
accesslist
Create an access list entity.
accesslist A.B.C.D/bits Add IP addresses to an access list.
accesslist
chap-username
Add CHAP user name entries to an access list.
accesslist iscsi-name
Add iSCSI Name entries to an access list.
delete accesslist
Delete a specific access list entry or an entire access list.
delete scsirouter
Delete the named SCSI routing instance or the specified element of the
SCSI routing instance.
restore accesslist
Restore the named access list or all access lists from the named
configuration file.
restore scsirouter
Restore the named SCSI routing instance from the named configuration file.
save accesslist
Save configuration data for the named access list or all access lists.
save scsirouter
Save configuration information for the named SCSI routing instance.
scsirouter
Create a SCSI routing instance.
scsirouter enable
Stop or start the named SCSI routing instance.
scsirouter primary
Identify a storage router as the preferred storage router to run the named
SCSI routing instance.
scsirouter serverif
Assign a Gigabit Ethernet interface, IP address, and optionally a VLAN to
the named SCSI routing instance.
scsirouter target
accesslist
Associate an access list with a specific SCSI routing instance target or all
targets.
scsirouter target
enable
Allow or disallow connections and logins for the named target.
setup scsi
Run the wizard to configure a SCSI routing instance.
show accesslist
Display the contents of the named access list or all access lists.
show scsirouter
Display configuration and operational information for the named SCSI
routing instance.
Cisco SN 5428-2 Storage Router Software Configuration Guide
78-15471-01
12-321
Chapter 12
Command Line Interface Reference
scsirouter target lun serial
scsirouter target lun serial
To map a logical target and LUN combination to the serial number of the physical LUN, use the
scsirouter target lun serial command. The scsirouter target lun serial command is a target-and-LUN
mapping method of mapping a logical target and LUN combination to a physical storage resource by the
LUN serial number.
scsirouter name target name lun nn serial serial_number [force]
Syntax Description
name
Name of the SCSI routing instance to which you are adding the storage
target.
target name
A user-specified name of the logical target. Enter a maximum of
31 characters or a valid iSCSI Name. There is a maximum of 100 targets per
storage router or per high availability cluster.
lun nn
The LUN number associated with the target (the iSCSI LUN). iSCSI LUNs
are integers between 0 and 255.
serial serial_number
The serial number of the physical LUN. The storage resource must support
unique serial numbers for each LUN.
force
(Optional) Keyword used to allow LUN-mapping of the same storage array
control LUNs in multiple targets.
Defaults
None.
Command Modes
Administrator.
Command History
Release
Modification
3.2.1
This command was introduced.
Usage Guidelines
The scsirouter target lun serial command requires both a logical target and LUN combination and the
serial number of the physical LUN.
When a target is added, it is by default enabled. However, it is not associated with any access list
(“accesslist none”), effectively disabling access to the target from any IP hosts. Use the
scsirouter target accesslist command to enable access to this storage target for selected IP hosts.
See Chapter 6, “Configuring SCSI Routing,” for more information about configuring SCSI routing
instances on the SN 5428-2 Storage Router.
Note
When making changes to SCSI routing instances (such as adding or deleting targets or changing access)
be sure to make the complimentary changes to the iSCSI configuration of IP hosts using these services
to access the storage resources. See the readme files for the appropriate iSCSI drivers for additional
details. You can access the latest iSCSI drivers and readme and example configuration files from
Cisco.com.
Cisco SN 5428-2 Storage Router Software Configuration Guide
12-322
78-15471-01
Chapter 12
Command Line Interface Reference
scsirouter target lun serial
Use the force keyword to allow mapping of the same storage array control LUN in multiple targets. Do
not use the force keyword to LUN-map the same data LUN in multiple targets. LUN-mapping of the
same LUN in multiple targets is advised for a control LUN on a storage controller only.
Examples
The following example maps the logical target and LUN combination for SCSI routing instance lab2.
The logical target and LUN combination, webserver9 LUN 1, is mapped to the physical LUN with a
serial number of ST318451FC3CC05T3N00007116DLWQ.
[SN5428-2A]# scsirouter lab2 target webserver9 lun 1 serial ST318451FC3CC05T3N00007116DLWQ
Related Commands
Command
Description
accesslist
Create an access list entity.
accesslist A.B.C.D/bits Add IP addresses to an access list.
accesslist
chap-username
Add CHAP user name entries to an access list.
accesslist iscsi-name
Add iSCSI Name entries to an access list.
delete accesslist
Delete a specific access list entry or an entire access list.
delete scsirouter
Delete the named SCSI routing instance or the specified element of the
SCSI routing instance.
restore accesslist
Restore the named access list or all access lists from the named
configuration file.
restore scsirouter
Restore the named SCSI routing instance from the named configuration file.
save accesslist
Save configuration data for the named access list or all access lists.
save scsirouter
Save configuration information for the named SCSI routing instance.
scsirouter
Create a SCSI routing instance.
scsirouter enable
Stop or start the named SCSI routing instance.
scsirouter primary
Identify a storage router as the preferred storage router to run the named
SCSI routing instance.
scsirouter serverif
Assign a Gigabit Ethernet interface, IP address, and optionally a VLAN to
the named SCSI routing instance.
scsirouter target
accesslist
Associate an access list with a specific SCSI routing instance target or all
targets.
scsirouter target
enable
Allow or disallow connections and logins for the named target.
setup scsi
Run the wizard to configure a SCSI routing instance.
show accesslist
Display the contents of the named access list or all access lists.
show scsirouter
Display configuration and operational information for the named SCSI
routing instance.
Cisco SN 5428-2 Storage Router Software Configuration Guide
78-15471-01
12-323
Chapter 12
Command Line Interface Reference
scsirouter target lun wwpn lun
scsirouter target lun wwpn lun
To map a logical target and LUN combination to a primary (and optional secondary) storage address
where each storage address is specified by World Wide Port Name (WWPN) and LUN, use the
scsirouter target lun wwpn lun command. The scsirouter target lun wwpn lun command is a
target-and-LUN mapping method of mapping a logical target to storage.
scsirouter name target name lun nn wwpn xxxxxxxxxxxxxxxx lun nn
[wwpn xxxxxxxxxxxxxxxx lun nn] [force]
Syntax Description
name
Name of the SCSI routing instance to which you are adding the storage
target.
target name
A user-specified name of the logical target. Enter a maximum of
31 characters or a valid iSCSI Name. There is a maximum of 100 targets per
storage router or per high-availability cluster.
lun nn
The first instance is the LUN number associated with the target (the iSCSI
LUN). iSCSI LUNs are integers between 0 and 255. The second instance is
the LUN number associated with the primary WWPN (physical device
LUN). Physical LUNs may be any physical device number, for example
0x51d1 or 123.
wwpn
xxxxxxxxxxxxxxxx
Specify a WWPN for the primary storage address. In a high availability
cluster, this is the WWPN for the storage resource as known to the first
storage router in the cluster.
wwpn
xxxxxxxxxxxxxxxx
(Optional) Specify a WWPN for the secondary storage address, used as an
alternate for mapping if the primary is not available. In a high availability
cluster, this is the WWPN for the storage resource as known to the second
storage router in the cluster.
lun nn
(Optional) Specify the LUN associated with the optional secondary
WWPN. Physical LUNs may be any physical device number, for example
0x51d1 or 123.
force
(Optional) Keyword used to allow LUN-mapping of the same storage array
control LUNs in multiple targets.
Defaults
None.
Command Modes
Administrator.
Command History
Release
Modification
3.2.1
This command was introduced.
Usage Guidelines
The scsirouter target lun wwpn lun command specifies a logical target name and LUN number
combination to be mapped to a physical WWPN and LUN combination in storage.
Cisco SN 5428-2 Storage Router Software Configuration Guide
12-324
78-15471-01
Chapter 12
Command Line Interface Reference
scsirouter target lun wwpn lun
Tips
WWPN address notation is represented by 16 hex digits. The digits may be separated by colons. When
entering WWPN addresses, colons can be omitted or placed anywhere in the address notation as long as
they do not leave one character without a partner character. The entry should be zero-filled from the most
significant (the left-most) character position.
The following examples are correct:
•
0000:0000:1234:5678
•
0A0F2860:02111750
•
0A0F286002111750
The following examples are incorrect:
•
1:234:567:8:91:23:FF:6
•
12:34:56
The secondary WWPN and LUN combination is optional. The secondary combination is mapped to the
logical target name and LUN combination as an alternate, if the primary WWPN and LUN combination
is not available.
When you map a target using WWPN and the target needs to be accessed in a high availability cluster,
you must specify both the primary WWPN (the WWPN of the storage resource as known to the first
storage router in the cluster) and the secondary WWPN (the WWPN of the storage resource as known to
the second storage router in the cluster). The secondary WWPN value may need to be retrieved by
issuing the appropriate commands (such as the show devices command) from the second node in the
cluster, or by temporarily attaching the secondary port of the storage device to the first storage router.
When a target is added, it is by default enabled. However, it is not associated with any access list
(“accesslist none”), effectively disabling access to the target from any IP hosts. Use the
scsirouter target accesslist command to enable access to this storage target for selected IP hosts.
See Chapter 6, “Configuring SCSI Routing,” for more information about configuring SCSI routing
instances on the SN 5428-2 Storage Router.
Note
When making changes to SCSI routing instances (such as adding or deleting targets or changing access)
be sure to make the complimentary changes to the iSCSI configuration of IP hosts using these services
to access the storage resources. See the readme files for the appropriate iSCSI drivers for additional
details. You can access the latest iSCSI drivers and readme and example configuration files from
Cisco.com.
Use the force keyword to allow mapping of the same storage array control LUN in multiple targets. Do
not use the force keyword to LUN-map the same data LUN in multiple targets. LUN-mapping of the
same LUN in multiple targets is advised for a control LUN on a storage controller only.
Cisco SN 5428-2 Storage Router Software Configuration Guide
78-15471-01
12-325
Chapter 12
Command Line Interface Reference
scsirouter target lun wwpn lun
Examples
The following example maps a logical target and LUN combination for SCSI router instance lab3. The
logical target and LUN combination, webserver7 LUN 7, is mapped to the primary WWPN and LUN
combination, 2200002037191505 LUN 0.
[SN5428-2A]# scsirouter lab3 target webserver7 lun 7 wwpn 2200002037191505 lun 0
The following example maps a logical target and LUN combination to a primary and secondary WWPN.
You may need to obtain the secondary WWPN from the storage router to which the secondary port of
the device is attached, or temporarily attach the storage device’s secondary port to the storage router
being configured.
[SN5428-2A]# scsirouter lab4 target webserver8 lun 0 wwpn 2200002037c6756d lun 0 wwpn
2100002037c6747f lun 0
Related Commands
Command
Description
accesslist
Create an access list entity.
accesslist A.B.C.D/bits Add IP addresses to an access list.
accesslist
chap-username
Add CHAP user name entries to an access list.
accesslist iscsi-name
Add iSCSI Name entries to an access list.
delete accesslist
Delete a specific access list entry or an entire access list.
delete scsirouter
Delete the named SCSI routing instance or the specified element of the
SCSI routing instance.
restore accesslist
Restore the named access list or all access lists from the named
configuration file.
restore scsirouter
Restore the named SCSI routing instance from the named configuration file.
save accesslist
Save configuration data for the named access list or all access lists.
save scsirouter
Save configuration information for the named SCSI routing instance.
scsirouter
Create a SCSI routing instance.
scsirouter enable
Stop or start the named SCSI routing instance.
scsirouter primary
Identify a storage router as the preferred storage router to run the named
SCSI routing instance.
scsirouter serverif
Assign a Gigabit Ethernet interface, IP address, and optionally a VLAN to
the named SCSI routing instance.
scsirouter target
accesslist
Associate an access list with a specific SCSI routing instance target or all
targets.
scsirouter target
enable
Allow or disallow connections and logins for the named target.
setup scsi
Run the wizard to configure a SCSI routing instance.
show accesslist
Display the contents of the named access list or all access lists.
show scsirouter
Display configuration and operational information for the named SCSI
routing instance.
Cisco SN 5428-2 Storage Router Software Configuration Guide
12-326
78-15471-01
Chapter 12
Command Line Interface Reference
scsirouter target maxcmdqueuedepth
scsirouter target maxcmdqueuedepth
To specify the maximum number of commands allowed at any given time from each iSCSI session to the
specified target, use the scsirouter target maxcmdqueuedepth command.
scsirouter name target {all | name} maxcmdqueuedepth nn
Syntax Description
name
Name of the SCSI routing instance.
target all
Specify the maximum number of command for all targets.
target name
The name of the storage target.
nn
The maximum number of commands allowed from each iSCSI session. If
the value is set to zero, the feature is disabled.
Defaults
This feature is disabled; maxcmdqueuedepth is set to zero.
Command Modes
Administrator.
Command History
Release
Modification
3.3.1
This command was introduced.
Usage Guidelines
When this value is configured, all current and future iSCSI sessions to the specified target will enforce
the maximum command queue depth. To disable this feature, and allow an unlimited number of
commands to the target from each iSCSI session, set the maxcmdqueuedepth to zero. This is the default
setting.
Use the show scsirouter command with the bootconfig or runningconfig keyword to display the current
maximum command queue depth value.
Note
Examples
Normal limitations, based on the available command buffer space, are always enforced. Setting the
maximum command queue depth does not override these normal limitations.
The following example sets the maximum command queue depth to 20, for all targets associated with
the SCSI routing instance named foo.
[SN5428-2A]# scsirouter foo target all maxcmdqueuedepth 20
The following example disables the maximum command queue depth, allowing an unlimited number of
commands to the target named webservices2, associated with the SCSI routing instance named foo.
[SN5428-2A]# scsirouter foo target webservices2 maxcmdqueuedepth 0
Cisco SN 5428-2 Storage Router Software Configuration Guide
78-15471-01
12-327
Chapter 12
Command Line Interface Reference
scsirouter target maxcmdqueuedepth
Related Commands
Command
Description
delete scsirouter
Delete the named SCSI routing instance or the specified element of the
SCSI routing instance.
restore scsirouter
Restore the named SCSI routing instance from the named configuration file.
save scsirouter
Save configuration information for the named SCSI routing instance.
scsirouter target
enable
Allow or disallow connections and logins for the named target.
show scsirouter
Display configuration and operational information for the named SCSI
routing instance.
Cisco SN 5428-2 Storage Router Software Configuration Guide
12-328
78-15471-01
Chapter 12
Command Line Interface Reference
scsirouter target profile
scsirouter target profile
To disable the use of an initial iSCSI Ready-to-Transfer (R2T) on connections coming to this target, use
the scsirouter target profile command.
scsirouter name target name profile {high | low}
Syntax Description
name
Name of the SCSI routing instance to which you are adding the target
profile.
target name
The name of the storage target.
high
Disable the use of R2T for the specified target. This allows a host that opens
a connection to the specified target to start sending data of a certain length
as if it had received an initial R2T.
low
Enable the use of R2T for the specified target. This prevents a host that
opens a connection to the specified target from sending any data packets to
the target until the target has sent the host an R2T message. This adds
latency to data transfer activities to this target.
Defaults
All targets are configured as high profile targets.
Command Modes
Administrator.
Command History
Release
Modification
3.2.1
This command was introduced.
Usage Guidelines
The SN 5428-2 Storage Router supports up to 16 concurrent connections that do not use an initial R2T.
If there are 16 existing connections to targets configured as high profile, the 17th connection will be
handled as though the target were defined as low profile, causing the connection performance to be a bit
slower.
By default, all targets are defined as high profile targets to provide the best performance. Use the
scsirouter target profile command to configure targets that do not require the additional performance
as low profile targets.
Examples
The following example configures the target labserver8 for SCSI routing instance lab4 as a low profile
target. Any host opening a connection to the labserver8 target cannot send any data to the target until
the target sends the host an R2T.
[SN5428-2A]# scsirouter lab4 target labserver8 profile low
Cisco SN 5428-2 Storage Router Software Configuration Guide
78-15471-01
12-329
Chapter 12
Command Line Interface Reference
scsirouter target profile
Related Commands
Command
Description
delete scsirouter
Delete the named SCSI routing instance or the specified element of the
SCSI routing instance.
restore scsirouter
Restore the named SCSI routing instance from the named configuration file.
save scsirouter
Save configuration information for the named SCSI routing instance.
scsirouter target
enable
Allow or disallow connections and logins for the named target.
show scsirouter
Display configuration and operational information for the named SCSI
routing instance.
Cisco SN 5428-2 Storage Router Software Configuration Guide
12-330
78-15471-01
Chapter 12
Command Line Interface Reference
scsirouter target wwpn
scsirouter target wwpn
To map a logical target to a primary (and, optionally, a secondary) storage address specified by World
Wide Port Names (WWPNs), use the scsirouter target wwpn command. The scsirouter target wwpn
command is a target-only method of mapping a logical target specified by WWPNs.
scsirouter name target name wwpn xxxxxxxxxxxxxxxx [wwpn xxxxxxxxxxxxxxxx]
Syntax Description
name
Name of the SCSI routing instance to which you are adding the storage
target.
target name
A user-specified name of the logical target. Enter a maximum of
31 characters or a valid iSCSI Name. There is a maximum of 100 targets per
storage router or per high availability cluster.
wwpn
xxxxxxxxxxxxxxxx
Specify a WWPN for the primary storage address. In a high availability
cluster, this is the WWPN for the storage resource as known to the first
storage router in the cluster.
wwpn
xxxxxxxxxxxxxxxx
(Optional) Specify a WWPN for the secondary storage address, used as an
alternate for mapping if the primary is not available. In a high availability
cluster, this is the WWPN for the storage resource as known to the second
storage router in the cluster.
Defaults
None.
Command Modes
Administrator.
Command History
Release
Modification
3.2.1
This command was introduced.
Usage Guidelines
Tips
The scsirouter target wwpn command requires only a logical target name to be mapped to a physical
target address—no LUNS are specified. However, all LUNs that are part of the physical target address
are discovered and made apparent as LUNs belonging to the logical target.
WWPN address notation is represented by 16 hex digits. The digits may be separated by colons. When
entering WWPN addresses, colons can be omitted or placed anywhere in the address notation as long as
they do not leave one character without a partner character. The entry should be zero-filled from the most
significant (the left-most) character position.
The following examples are correct:
•
0000:0000:1234:5678
•
0A0F2860:02111750
•
0A0F286002111750
Cisco SN 5428-2 Storage Router Software Configuration Guide
78-15471-01
12-331
Chapter 12
Command Line Interface Reference
scsirouter target wwpn
The following examples are incorrect:
•
1:234:567:8:91:23:FF:6
•
12:34:56
When you map a target using WWPN and the target needs to be accessed in a high availability cluster,
you must specify both the primary WWPN (the WWPN of the storage resource as known to the first
storage router in the cluster) and the secondary WWPN (the WWPN of the storage resource as known to
the second storage router in the cluster). The secondary WWPN value may need to be retrieved by
issuing the appropriate commands (such as the show devices command) from the second node in the
cluster, or by temporarily attaching the secondary port of the storage device to the first storage router.
When a target is added, it is by default enabled. However, it is not associated with any access list
(“accesslist none”), effectively disabling access to the target from any IP hosts. Use the
scsirouter target accesslist command to enable access to this storage target for selected IP hosts.
See Chapter 6, “Configuring SCSI Routing,” for more information about configuring SCSI routing
instances on the SN 5428-2 Storage Router.
Note
Examples
When making changes to SCSI routing instances (such as adding or deleting targets or changing access)
be sure to make the complimentary changes to the iSCSI configuration of IP hosts using these services
to access the storage resources. See the readme files for the appropriate iSCSI drivers for additional
details. You can access the latest iSCSI drivers and readme and example configuration files from
Cisco.com.
The following example maps a logical target for SCSI router instance lab4. The logical target
webserver1 is mapped to the primary WWPN, 22:00:00:20:37:19:15:05.
[SN5428-2A]# scsirouter lab4 target webserver1 wwpn 22:00:00:20:37:19:15:05
The following example maps a logical target to a primary and secondary WWPN. You may need to obtain
the secondary WWPN from the storage router to which the secondary port of the device is attached, or
temporarily attach the storage device’s secondary port to the storage router being configured.
[SN5428-2A]# scsirouter lab5 target webserver9 wwpn 2200002037c6756d wwpn 2100002037c6747f
Cisco SN 5428-2 Storage Router Software Configuration Guide
12-332
78-15471-01
Chapter 12
Command Line Interface Reference
scsirouter target wwpn
Related Commands
Command
Description
accesslist
Create an access list entity.
accesslist A.B.C.D/bits Add IP addresses to an access list.
accesslist
chap-username
Add CHAP user name entries to an access list.
accesslist iscsi-name
Add iSCSI Name entries to an access list.
delete accesslist
Delete a specific access list entry or an entire access list.
delete scsirouter
Delete the named SCSI routing instance or the specified element of the
SCSI routing instance.
restore accesslist
Restore the named access list or all access lists from the named
configuration file.
restore scsirouter
Restore the named SCSI routing instance from the named configuration file.
save accesslist
Save configuration data for the named access list or all access lists.
save scsirouter
Save configuration information for the named SCSI routing instance.
scsirouter
Create a SCSI routing instance.
scsirouter enable
Stop or start the named SCSI routing instance.
scsirouter primary
Identify a storage router as the preferred storage router to run the named
SCSI routing instance.
scsirouter serverif
Assign a Gigabit Ethernet interface, IP address, and optionally a VLAN to
the named SCSI routing instance.
scsirouter target
accesslist
Associate an access list with a specific SCSI routing instance target or all
targets.
setup scsi
Run the wizard to configure a SCSI routing instance.
show accesslist
Display the contents of the named access list or all access lists.
show scsirouter
Display configuration and operational information for the named SCSI
routing instance.
Cisco SN 5428-2 Storage Router Software Configuration Guide
78-15471-01
12-333
Chapter 12
Command Line Interface Reference
scsirouter username
scsirouter username
To assign a user name to a SCSI routing instance for iSCSI authentication purposes, use the
scsirouter username command.
scsirouter name username {user-name | none}
Syntax Description
name
The name of the SCSI routing instance.
user-name
A valid user name. Enter a maximum of 63 characters
none
Keyword, removing any existing iSCSI user name assigned to the named
SCSI routing instance.
Defaults
None.
Command Modes
Administrator.
Command History
Release
Modification
3.2.1
This command was introduced.
Usage Guidelines
Use this command to assign a user name to the SCSI routing instance for two-way iSCSI authentication.
Two way iSCSI authentication allows authentication of the IP host and also allows the IP host, acting as
an iSCSI initiator, to require authentication of the SCSI routing instance, acting as an iSCSI target. The
user name and password assigned to the SCSI routing instance are used by the IP host for iSCSI
authentication purposes.
iSCSI authentication must be enabled for the named SCSI routing instance. If iSCSI authentication is
not enabled, the user name and password assigned to the SCSI routing instance will not be used.
Examples
The following example enables iSCSI authentication, using the default authentication list, for the SCSI
routing instance named lab3 and assigns a user name of lab3-admin and a password of testing to the
instance for two-way authentication:
[SN5428-2A]# scsirouter lab3 authentication default
*[SN5428-2A]# scsirouter lab3 username lab3-admin
*[SN5428-2A]# scsirouter lab3 password testing
Cisco SN 5428-2 Storage Router Software Configuration Guide
12-334
78-15471-01
Chapter 12
Command Line Interface Reference
scsirouter username
Related Commands
Command
Description
scsirouter
authentication
Enable iSCSI authentication for the named SCSI routing instance.
scsirouter password
Assign a password to a SCSI routing instance for iSCSI authentication
purposes.
show scsirouter
Display configuration and operational information for the named SCSI
routing instance.
Cisco SN 5428-2 Storage Router Software Configuration Guide
78-15471-01
12-335
Chapter 12
Command Line Interface Reference
session-timeout
session-timeout
To set the number of minutes a Telnet or SSH management session (or an Administrator mode session
via the EIA/TIA-232 console connection) to the SN 5428-2 Storage Router can be inactive before the
session times out, use the session timeout command. To prevent management sessions from timing out,
use the no form of this command.
session-timeout nn
no session-timeout
Syntax Description
nn
Defaults
There is no timeout for management sessions. This has the same effect as the following command:
The number of minutes the management session can be inactive before it is
terminated. By default, management sessions do not timeout.
session-timeout 0
Command Modes
Administrator.
Command History
Release
Modification
3.2.1
This command was introduced.
Usage Guidelines
Use this command to configure the number of minutes a Telnet or SSH management session (or an
Administrator mode session via the console) can be inactive before it is terminated. By default,
management sessions do not time out.
When an Administrator mode session via the console times out, the console returns automatically to
Monitor mode. If passwords are enabled on the console, the password prompt displays.
A change in the session timeout value is effective at the next time-check interval, and will affect all
currently logged in management sessions as well as future sessions, until the storage router is restarted.
Use the show system command to display the current time out value for management sessions.
Examples
The following example allows management sessions to be inactive for 15 minutes before being
terminated.
[SN5428-2A]# session-timeout 15
The following example disables automatic termination of inactive management sessions:
[SN5428-2A]# no session-timeout
Cisco SN 5428-2 Storage Router Software Configuration Guide
12-336
78-15471-01
Chapter 12
Command Line Interface Reference
session-timeout
Related Commands
Command
Description
show sessions
Display information about active console, Telnet, SSH or GUI sessions to
the storage router.
show system
Display selected system information.
Cisco SN 5428-2 Storage Router Software Configuration Guide
78-15471-01
12-337
Chapter 12
Command Line Interface Reference
setup
setup
To configure the SN 5428-2 Storage Router using the setup configuration wizard, use the setup
command. The Setup configuration wizard runs the Management Interface, Date and Time, Network
Management, Management Access, and SCSI routing (if applicable) individual wizards in sequence.
setup
Syntax Description
This command has no arguments or keywords.
Defaults
For multiple choice questions, the system presents the choices enclosed in brackets, [ ]. Each multiple
choice question has a default answer that is selected when you press Enter or Return. The default is
shown in parentheses, ( ). For example:
Enable High Availability? [yes/no (no)]
For configuration variables, the current value saved in the system is presented in brackets. For example:
Network mask ? [255.255.255.0]
If the configuration variable does not have a value, the system will present a set of “empty” brackets,
[(empty)], or a template that provides the required format of the value. For example:
SN5428-2 system name? [(empty)]
Command Modes
Administrator.
Command History
Release
Modification
3.2.1
This command was introduced.
Usage Guidelines
Initial system configuration and subsequent reconfiguration can be performed via interactive
configuration wizards through the console interface (or via Telnet or SSH once the management interface
has been configured). The configuration wizards prompt you for the necessary information to
accomplish the specific configuration task and may invoke multiple commands to complete their
functions.
The CLI provides the following configuration wizards:
•
Setup—runs the Management Interface, Date and Time, Network Management, Management
Access, and SCSI routing (if applicable) individual wizards in sequence.
•
Management Interface—configures the management interface with a system name, IP address, and
optional DNS server information.
•
Date and Time—configures the time zone, use (or non-use) of daylight savings time, and the NTP
server address (if one is present) or the current date and time.
•
Network Management—configures the use of Telnet, web-based GUI, and SNMP for managing the
storage router over the network.
Cisco SN 5428-2 Storage Router Software Configuration Guide
12-338
78-15471-01
Chapter 12
Command Line Interface Reference
setup
•
Management Access—configures passwords for monitoring and configuring the storage router.
•
SCSI Routing—configures a SCSI routing instance. The wizard is only available when the storage
router is deployed for SCSI routing; it is not available if the storage router is deployed for
transparent SCSI routing.
•
FCIP—configures FCIP instances. The wizard is only available when the storage router is deployed
for FCIP; it is not available if the storage router is deployed for SCSI routing or transparent SCSI
routing.
If the storage router is deployed for SCSI routing, the CLI also provides a Cluster wizard, which
configures the storage router to participate in a high availability cluster. Because the initial configuration
script configures the high availability environment, the Setup configuration wizard does not include the
Cluster wizard. However, the Cluster wizard, using the setup cluster command, can be run after initial
system configuration to change the configuration mode from standalone to clustered, to change
membership from one cluster to another, or to resign from a cluster and run as a standalone storage
router. See Chapter 2, “First-Time Configuration,” for more information about initial system
configuration.
During configuration with the Setup configuration wizard, operational changes take place and are
applied to the currently running system. For example, after the Network Management wizard completes,
SNMP network management will be configured for the storage router. However, these changes are not
saved to the system’s bootable configuration until the end of the entire Setup configuration wizard. To
quit the setup configuration wizard without saving changes, press Ctrl-C at any time before the end of
the wizard, and then reboot the storage router to restore previous values.
Note
Some changes may be retained after a reboot. Be sure to review the values provided in the prompts that
display if you rerun the setup configuration wizard or run each individual wizard.
After entering the Setup configuration wizard, several informational messages display, including the
following prompt:
User level for setup? [novice/expert (expert)]
•
Enter novice to continue with the configuration process. Explanatory text displays before each
prompt in the wizard.
•
Enter expert to continue with the configuration process, suppressing all explanatory text. If you are
an experienced user familiar with the setup configuration wizard, you may prefer this option.
At the end of the Setup configuration wizard, the following prompt displays:
Done with setup.
Note
Only one setup wizard can be active at any given time. Multiple users cannot run multiple setup wizards
concurrently.
Cisco SN 5428-2 Storage Router Software Configuration Guide
78-15471-01
12-339
Chapter 12
Command Line Interface Reference
setup
Examples
The following shows the initial explanatory text for the setup command:
[SN5428-2_A]# setup
You are about to set up the SN5428-2. Running this wizard will modify
the configuration of this system.
During setup, operational changes will take place. However, these changes
are not saved until the end of the script. To quit the setup wizard without
saving changes, ** hit CTRL-C at any time **. Reboot to restore previous values.
For multiple choice questions, the system will present the choices enclosed
in brackets []. Each multiple choice question has a default answer that is
selected when you press return.
Example: [yes/no (no)].
Choices are yes and no. No is the default answer.
For configuration variables, the current value saved in the system is
presented in brackets [varname]. If the configuration variable does not have a
value, the system will present a set of brackets [(empty)] or a template that
provides the expected format of the value.
Example: [mySN5428-2] configuration variable has a value
Example: [(empty)]
configuration variable does not have a value, no template
Example: [A.B.C.D]
template for an IP address.
User level for setup? [novice/expert (expert)]
Related Commands
Command
Description
clear conf
Return most configuration settings to factory defaults.
setup access
Run the wizard to configure Monitor mode and Administrator mode
passwords.
setup cluster
Change the configuration of the high availability environment.
setup fcip
Run the wizard to manually configure FCIP instances.
setup iscsi-port
Run the wizard to manually configure the port used for iSCSI traffic.
setup mgmt
Run the wizard to configure the management interface.
setup netmgmt
Run the wizard to configure network management.
setup scsi
Run the wizard to configure a SCSI routing instance.
setup time
Run the wizard to configure the system date and time.
Cisco SN 5428-2 Storage Router Software Configuration Guide
12-340
78-15471-01
Chapter 12
Command Line Interface Reference
setup access
setup access
To configure passwords for monitoring and administering the SN 5428-2 Storage Router, use the
setup access configuration wizard. The wizard prompts you to enter and confirm new passwords.
setup access [parameter1 parameter2...]
Syntax Description
parameter1 parameter2 (Optional) Enter each parameter that the wizard prompts for. All parameters
...
must be passed. If a parameter includes an embedded space, enclose the
parameter in quotation marks.
Defaults
The factory default password for both Administrator mode and Monitor mode is cisco.
Command Modes
Administrator.
Command History
Release
Modification
3.2.1
This command was introduced.
Usage Guidelines
The wizard prompts you to enter (and confirm by re-entering) the new Monitor password, which allows
view-only access to the storage router. It also prompts you to enter (and confirm by re-entering) the new
Administrator password, which allows changes to be made to the storage router configuration.
Passwords are cluster configuration elements. In a high availability (HA) cluster, the setup access
wizard can only be run from the storage router that is currently performing password management
functions.
Only one setup wizard can be active at any given time. Multiple users cannot run multiple setup wizards
concurrently.
Use the optional parameter arguments to run the setup access wizard from a command script. All
parameters required by the wizard must be included. The setup access wizard will not complete unless
all parameters are passed.
Note
If too many parameters are passed, the setup access wizard will ignore the extra parameters and may
complete. If a parameter is not in the correct format or is otherwise invalid, the next parameter is used
to attempt to fulfill the prompt. In either case, unexpected results could occur. Always check the output
from a setup access command when using the parameter arguments.
Cisco SN 5428-2 Storage Router Software Configuration Guide
78-15471-01
12-341
Chapter 12
Command Line Interface Reference
setup access
Examples
The following example sets the Monitor mode and Administrator mode passwords for the storage router,
but does not apply them to the console interface. Administrator contact information is also configured.
Passwords display as asterisks when entered.
[SN5428-2_PR]# setup access
###############################
## Management Access Setup ##
###############################
The SN5428-2 CLI and GUI are protected by two passwords. The initial password
entered when logging in allows the user to monitor the SN5428-2, but does not
allow changes. The "admin" password allows the user to make configuration
changes.
Enter the current "monitor" password:******
** Password Rules **
A password can contain any combination of numbers and letters, but should
not be something familiar to you and easy to guess.
Enter the new "monitor" password: *****
Enter the new "monitor" password again: *****
Enter the current "admin" password: ******
Enter the new "admin" password: *****
Enter the new "admin" password again: *****
The new passwords will apply to all telnet and web-based GUI sessions.
They will also be applied to the console. If the SN5428-2 console is in
a physically secure location, console passwords are not recommended
since they can be lost or forgotten. If the SN5428-2 is deployed in a
less secure environment, the passwords should be applied. If passwords
are subsequently lost, visit http://www.cisco.com/public/Support_root.shtml
for information on recovery.
Apply passwords to console ? [yes/no (no)] no
The administrative contact is the person or group responsible for
configuration and management of the SN5428-2. The system will store a name,
e-mail address, phone number, and pager number for the system administrator.
Management applications can retrieve this information and provide it to a
support person or directly use it to e-mail or page the administrator.
Input Administrator Info? [yes/no (yes)] yes
Administrator name? [(empty) ] Pat Hurley
Phone? [(empty) ] 123.456.7890
Pager number? [(empty)] 12.456.3444 pin 2234
Email? [(empty)] hurley@abc123z.com
Done with setup.
Cisco SN 5428-2 Storage Router Software Configuration Guide
12-342
78-15471-01
Chapter 12
Command Line Interface Reference
setup access
Related Commands
Command
Description
clear conf
Return most configuration settings to factory defaults.
setup
Run the setup configuration wizard.
setup cluster
Change the configuration of the high availability environment.
setup fcip
Run the wizard to manually configure FCIP instances.
setup iscsi-port
Run the wizard to manually configure the port used for iSCSI traffic.
setup mgmt
Run the wizard to configure the management interface.
setup netmgmt
Run the wizard to configure network management.
setup scsi
Run the wizard to configure a SCSI routing instance.
setup time
Run the wizard to configure the system date and time.
Cisco SN 5428-2 Storage Router Software Configuration Guide
78-15471-01
12-343
Chapter 12
Command Line Interface Reference
setup cluster
setup cluster
To configure the high availability (HA) environment for the SN 5428-2 Storage Router, to add the
storage router to a cluster, or to remove it from an existing cluster, use the setup cluster configuration
wizard. The wizard prompts you to select the appropriate HA configuration mode, enter a cluster name
and (if necessary) an HA interface IP address and subnet mask.
setup cluster [parameter1 parameter2...]
Syntax Description
parameter1 parameter2 (Optional) Enter each parameter that the wizard prompts for. All parameters
...
must be passed. If a parameter includes an embedded space, enclose the
parameter in quotation marks.
Defaults
Defaults or current values are shown in parentheses within the allowable response brackets. In the
following example, the allowable responses are retain and delete, and the default is delete.
Retain or delete applications ? [retain/delete (delete)]
Command Modes
Administrator.
Command History
Release
Modification
3.2.1
This command was introduced.
Usage Guidelines
The HA features of the SN 5428-2 Storage Router are designed around a cluster of systems that back
each other up in case of failure. A cluster consists of two identically configured SN 5428-2s (or one
SN 5428 and one SN 5428-2) that continually exchange HA information over their HA and management
interfaces.
Clusters are defined by name. The setup cluster command prompts you for the appropriate HA
configuration mode and the cluster name.
•
Use the standalone keyword to identify the storage router as not participating in a cluster. A
standalone storage router does not require the management or HA interfaces to be available in order
to complete the system configuration. The MGMT and HA ports do not need to be cabled.
•
Use the clustered keyword to identify the storage router as participating in a cluster. A clustered
SN 5428-2 requires the management and HA interfaces to be available in order to complete the
system configuration. The MGMT and HA ports must be correctly cabled.
The command also prompts you to either retain the SCSI routing instance configurations for this storage
router, merging them with others in the cluster, or to delete the existing SCSI routing instance
configuration data and replace it with cluster data. Retained SCSi routing instance configuration data is
replicated to other storage routers in the cluster. When joining an existing cluster, access list information
and other cluster configuration elements, including VLAN, AAA and password settings, are always
deleted and replaced by the cluster’s access lists and other cluster configuration elements.
Cisco SN 5428-2 Storage Router Software Configuration Guide
12-344
78-15471-01
Chapter 12
Command Line Interface Reference
setup cluster
Caution
Retaining SCSI routing instance configuration data could provide unexpected results.
Changing the cluster name, thereby joining another cluster, has the following effects on its existing
configurations and operations:
•
All SCSI routing instances are failed over to another member in the original cluster.
•
All applications are stopped.
•
The cluster name is changed.
•
If you choose to retain data, any unsaved cluster configuration information is saved.
•
The system reboots. Configuration information is exchanged and the storage router learns AAA,
access list, password, SCSI routing instance and VLAN configuration information from the cluster.
All of the original SCSI routing instances appears in the new cluster, unless you chose to delete
rather than retain data.
•
Access lists that existed on the storage router prior to joining the new cluster are always deleted. To
preserve an existing access list and make it available to the new cluster, you must save the access
list to a configuration file before issuing the setup cluster command. Make the saved configuration
file available to the storage router currently performing access list maintenance functions for the
cluster (via the copy command), and then restore the saved access list to the new cluster from that
configuration file. See Chapter 10, “Configuring a High Availability Cluster,” for more information
about configuring the storage router to participate in a cluster.
•
For cases where the names of SCSI routing instances are duplicated within the new cluster (meaning
instances of the same name are already running in the new cluster), configuration data from the old
cluster is deleted in favor of what is currently running in the new cluster.
Only one setup wizard can be active at any given time. Multiple users cannot run multiple setup wizards
concurrently.
Use the optional parameter arguments to run the setup cluster wizard from a command script. All
parameters required by the wizard must be included. The setup cluster wizard will not complete unless
all parameters are passed.
Note
Examples
If too many parameters are passed, the setup cluster wizard will ignore the extra parameters and may
complete. If a parameter is not in the correct format or is otherwise invalid, the next parameter is used
to attempt to fulfill the prompt. In either case, unexpected results could occur. Always check the output
from a setup cluster command when using the parameter arguments.
The following shows example output and input for the setup cluster command:
[SN5428-2_PR]# setup cluster
The system has the ability to run in a standalone or clustered state.
By default, the system will run in a clustered state and communicate
with other SN5428-2s in the same cluster. If a single SN5428-2 is deployed
and you don't intend to add a second SN5428-2 to provide high availability
features in a clustered configuration, you should configure the SN5428-2 in
standalone mode. Enter CTRL-C at any prompt to cancel changes and return
to the command prompt.
HA configuration? [standalone/clustered (standalone)] clustered
Cisco SN 5428-2 Storage Router Software Configuration Guide
78-15471-01
12-345
Chapter 12
Command Line Interface Reference
setup cluster
If you select HA configuration mode clustered, the wizard prompts you to enter an HA IP address:
To determine the health of other SN5428-2s in a cluster, the SN5428-2 must send
occasional heartbeat packets on at least two interfaces (in case one interface
has problems). By default, the interfaces used are the 10/100 management
interface (already set up) and the 10/100 HA interface. Please select an IP
address and network mask for the HA interface.
HA Interface IP address? [10.1.40.230/24]
After selecting the HA configuration mode, and optionally setting the HA IP address, the wizard prompts
you to enter a cluster name:
When you change the cluster that the SN5428-2 belongs to, you need to
decide if you want the scsirouter instances running on the SN5428-2 to be
deleted or if you want them to be retained and merged with the new cluster.
Change cluster to ? [Cluster1]
For a change from standalone to clustered:
If you retain the configuration, there may be conflicts when the
scsirouter instances are replicated between this SN5428-2 and others in the
new cluster.
For a change from clustered to standalone:
You can retain the configuration without causing any scsirouter instance
conflicts for this SN5428-2 since it will be the only member of the
new cluster.
Retain or delete scsirouter instances ? [retain/delete (delete)] retain
If you choose to retain the existing SCSI routing instance configurations, an additional warning displays:
#########################################################
Please confirm that you want to retain the configuration.
#########################################################
All configuration settings will be saved.
The system will REBOOT if you answer "yes"
** Enter CTRL-C to cancel. **
Are you sure you want to retain the configuration ? [must type "yes"] yes
If you choose to delete your existing configuration, this warning displays:
Retain or delete applications ? [retain/delete (delete)] delete
#########################################################
Please confirm that you want to delete the configuration.
#########################################################
Cluster configuration settings will be saved.
The system will REBOOT if you answer "yes"
** Enter CTRL-C to cancel and abort the cluster change. **
Are you sure you want to delete the configuration ? [must type "yes"] yes
After confirming your selection, the storage router automatically reboots.
Cisco SN 5428-2 Storage Router Software Configuration Guide
12-346
78-15471-01
Chapter 12
Command Line Interface Reference
setup cluster
Related Commands
Command
Description
clear conf
Return most configuration settings to factory defaults.
setup
Run the setup configuration wizard.
setup access
Run the wizard to configure Monitor mode and Administrator mode
passwords.
setup fcip
Run the wizard to manually configure FCIP instances.
setup iscsi-port
Run the wizard to manually configure the port used for iSCSI traffic.
setup mgmt
Run the wizard to configure the management interface.
setup netmgmt
Run the wizard to configure network management.
setup scsi
Run the wizard to configure a SCSI routing instance.
setup time
Run the wizard to configure the system date and time.
Cisco SN 5428-2 Storage Router Software Configuration Guide
78-15471-01
12-347
Chapter 12
Command Line Interface Reference
setup fcip
setup fcip
To configure an FCIP instance, use the setup fcip configuration wizard. The wizard prompts you to
choose the name of the FCIP instance and specify the Gigabit Ethernet IP address and network mask.
Then the wizard prompts you to enter the peer IP address and the connection protocol type. More
extensive configuration of FCIP instances can be performed via the CLI or the web-based GUI.
setup fcip [parameter1 parameter2...]
Syntax Description
parameter1 parameter2 (Optional) Enter each parameter that the wizard prompts for. All parameters
...
must be passed. If a parameter includes an embedded space, enclose the
parameter in quotation marks.
Defaults
Defaults or current values are shown in parentheses within the allowable response brackets. In the
following example, the current default FCIP instance name is fcip1.
Create which FCIP instance ? [fcip1/fcip2 (fcip1)]
Command Modes
Administrator.
Command History
Release
Modification
3.3.1
This command was introduced.
Usage Guidelines
The setup fcip command can only be run when at least one FCIP instance is not currently configured on
the storage router; if both FCIP instances are configured, you cannot run the setup fcip wizard. Only one
setup wizard can be active at any given time. Multiple users cannot run multiple setup wizards
concurrently.
Use the optional parameter arguments to run the setup fcip wizard from a command script. All
parameters required by the wizard must be included. The setup fcip wizard will not complete unless all
parameters are passed.
Note
If too many parameters are passed, the setup fcip wizard will ignore the extra parameters and may
complete. If a parameter is not in the correct format or is otherwise invalid, the next parameter is used
to attempt to fulfill the prompt. In either case, unexpected results could occur. Always check the output
from a setup fcip command when using the parameter arguments.
Cisco SN 5428-2 Storage Router Software Configuration Guide
12-348
78-15471-01
Chapter 12
Command Line Interface Reference
setup fcip
Examples
The following shows example output and input for the setup scsi command:
[techpubs4]# setup fcip
In order to correctly configure this FCIP instance, be sure you know
the configuration of the remote FCIP instance. You will need to know
the IP address and the communication protocol of the remote FCIP instance.
In addition, you will need to ensure that the Fibre Channel domain ID you
assign is different than the Fibre Channel domain ID assigned to the remote
SN 5428-2-K9.
The system enables you to create two FCIP instances. Each instance
uses a different Fibre Channel interface and gigabit Ethernet interface.
Create which FCIP instance ? [fcip1/fcip2 (fcip1)] fcip2
Please specify an IP address and netmask for the gigabit
Ethernet interface.
IP address? [A.B.C.D/nn] 10.1.0.16/24
If both gigabit Ethernet interfaces are cabled to the same network, you
can configure the FCIP instance to failover to the secondary interface
in case of a failure on the primary interface.
Configure secondary interface for the FCIP instance? [yes/no (no)] no
Please enter the IP address of the remote FCIP instance to
which you wish to connect.
IP address of remote FCIP instance? [A.B.C.D] 10.1.0.47
Choose how you want the FCIP instance to communicate with the
remote FCIP instance. If the remote FCIP instance is configured to use raw IP,
select raw as the protocol. If the remote FCIP instance is configured as a TCP
server, select client. If the remote FCIP instance is configured as a TCP client,
select server.
Use which protocol? [raw/client/server] raw
If this is the first FCIP instance to be configured on the storage router, you will be prompted to specify
a Fibre Channel domain ID:
Please specify a domain ID for use by this FCIP instance. This
domain ID must be unique. It can not be assigned to any switch in the Fibre
Channel fabric that this switch is connected to or assigned to any switch
in the remote Fibre Channel network.
Domain ID for the Fibre Channel switch? [1 - 127] 80
set Domain ID on Fibre Channel interfaces to 80
Mar 14 15:08:48: %FC-5-FCIP09: fcip2 has been started
FCIP, fcip2, created
Mar 14 15:08:48: %UI-5-FAFD2: Added FCIP device fci2
Mar 14 15:08:48: %UI-5-NMAOOI: Address 10.1.0.16/24 is now operational on interface ge1
Mar 14 15:08:48: %UI-5-FAFNI: Added FCIP network interface ge2, 10.1.0.16/255.255.255.0
FCIP-2: addPeer raw 10.1.0.47
Mar 14 15:08:48: %UI-5-FAFD: Added FCIP destination dest2 (raw, 10.1.50.50)
Configuration complete.
FCIP instance fcip2 is now configured.
Done with setup.
Cisco SN 5428-2 Storage Router Software Configuration Guide
78-15471-01
12-349
Chapter 12
Command Line Interface Reference
setup fcip
Related Commands
Command
Description
clear conf
Return most configuration settings to factory defaults.
setup
Run the setup configuration wizard.
setup access
Run the wizard to configure Monitor mode and Administrator mode
passwords.
setup cluster
Change the configuration of the high availability environment.
setup iscsi-port
Run the wizard to manually configure the port used for iSCSI traffic.
setup mgmt
Run the wizard to configure the management interface.
setup netmgmt
Run the wizard to configure network management.
setup scsi
Run the wizard to configure a SCSI routing instance.
setup time
Run the wizard to configure the system date and time.
Cisco SN 5428-2 Storage Router Software Configuration Guide
12-350
78-15471-01
Chapter 12
Command Line Interface Reference
setup iscsi-port
setup iscsi-port
To change the default listening port used for iSCSI traffic, use the setup iscsi-port wizard.
setup iscsi-port [parameter1 parameter2...]
Syntax Description
parameter1 parameter2 (Optional) Enter each parameter that the wizard prompts for. All parameters
...
must be passed. If a parameter includes an embedded space, enclose the
parameter in quotation marks.
Defaults
The default listening port used for iSCSI traffic is 3260. This is the port number assigned by IANA.
Command Modes
Administrator.
Command History
Release
Modification
3.2.1
This command was introduced.
Usage Guidelines
If you change the listening port used for iSCSI traffic on the storage router, you must make
corresponding changes to the IP hosts sending iSCSI traffic to the storage router. For example, on a
UNIX system, you must update the /etc/services file. After selecting a new port for iSCSI traffic, the
storage router automatically reboots.
Only one setup wizard can be active at any given time. Multiple users cannot run multiple setup wizards
concurrently.
Use the optional parameter arguments to run the setup iscsi-port wizard from a command script. All
parameters required by the wizard must be included. The setup iscsi-port wizard will not complete
unless all parameters are passed.
Note
Examples
If too many parameters are passed, the setup iscsi-port wizard will ignore the extra parameters and may
complete. If a parameter is not in the correct format or is otherwise invalid, the next parameter is used
to attempt to fulfill the prompt. In either case, unexpected results could occur. Always check the output
from a setup iscsi-port command when using the parameter arguments.
The following shows example output and input for the show iscsi-port command:
[SN5428-2A]# setup iscsi-port
###############################
## iSCSI port Setup Wizard ##
###############################
If you change the iSCSI port number, the system will reboot itself
for the change to take effect. This will cause all scsirouters to
be stopped.
** Enter CTRL-C to cancel. **
Cisco SN 5428-2 Storage Router Software Configuration Guide
78-15471-01
12-351
Chapter 12
Command Line Interface Reference
setup iscsi-port
Do you want to change the iSCSI port number?[yes/no (no)] yes
##########################
## Changing iSCSI port ##
##########################
Now, you will need to enter a new iSCSI port number. The new port
will be used as the iSCSI server listen port. Make sure the new
port is not used by other applications in your network environment.
New port number ? [nn] 5003
#########################################################
## Please confirm that you want to change iSCSI port ##
#########################################################
iSCSI port configuration settings will be saved.
The system will REBOOT if you answer "yes".
** Enter CTRL-C to cancel. **
Proceed to change the iSCSI port?[yes/no (no)] yes
After confirming your intentions, the storage router automatically reboots.
Related Commands
Command
Description
clear conf
Return most configuration settings to factory defaults.
setup
Run the setup configuration wizard.
setup access
Run the wizard to configure Monitor mode and Administrator mode
passwords.
setup fcip
Run the wizard to manually configure FCIP instances.
setup cluster
Change the configuration of the high availability environment.
setup mgmt
Run the wizard to configure the management interface.
setup netmgmt
Run the wizard to configure network management.
setup scsi
Run the wizard to configure a SCSI routing instance.
setup time
Run the wizard to configure the system date and time.
Cisco SN 5428-2 Storage Router Software Configuration Guide
12-352
78-15471-01
Chapter 12
Command Line Interface Reference
setup mgmt
setup mgmt
To configure the SN 5428-2 Storage Router management interface, use the setup mgmt configuration
wizard. The wizard prompts you to enter the system name, management interface IP address and subnet
mask, optional default gateway and DNS information.
setup mgmt [parameter1 parameter2...]
Syntax Description
parameter1 parameter2 (Optional) Enter each parameter that the wizard prompts for. All parameters
...
must be passed. If a parameter includes an embedded space, enclose the
parameter in quotation marks.
Defaults
Defaults or current values are shown in parentheses within the allowable response brackets. In the
following example, the current system name is SN5428-2_Lab1.
SN5428-2 system name? [SN5428-2_Lab1]
Command Modes
Administrator.
Command History
Release
Modification
3.2.1
This command was introduced.
Usage Guidelines
The management interface must be configured before the Telnet interface or web-based GUI can be used
for configuration or monitoring tasks. When the wizard is completed, the system displays notification
that the management interface is operational.
Only one setup wizard can be active at any given time. Multiple users cannot run multiple setup wizards
concurrently.
Use the optional parameter arguments to run the setup mgmt wizard from a command script. All
parameters required by the wizard must be included. The setup mgmt wizard will not complete unless
all parameters are passed.
Note
If too many parameters are passed, the setup mgmt wizard will ignore the extra parameters and may
complete. If a parameter is not in the correct format or is otherwise invalid, the next parameter is used
to attempt to fulfill the prompt. In either case, unexpected results could occur. Always check the output
from a setup mgmt command when using the parameter arguments.
Cisco SN 5428-2 Storage Router Software Configuration Guide
78-15471-01
12-353
Chapter 12
Command Line Interface Reference
setup mgmt
Examples
The following shows example output for the setup mgmt command:
[SN5428-2A]# setup mgmt
################################
## Management Interface Setup ##
################################
Please choose a name for the SN5428-2. This name is associated with the
SN5428-2 Management Interface IP address. If you wish to enable network
management on the SN5428-2, you should add the system name you provide
at this prompt and its IP address to a domain name server (nis, nis+, WINS).
SN5428-2 system name? [SN5428-2A]
The SN5428-2 may be managed using telnet, or a web-based GUI, or SNMP via the
10/100 Ethernet interface labeled "mgmt" on the front panel of the system. This
interface must be assigned an IP address.
Management Interface IP address? [10.1.12.122/24]
If the SN5428-2 is to be managed from a subnet other than the one to which it
is physically attached, a static route is required. The static route format
is "destination/netmask gateway".
Static route for Management Interface? [0.0.0.0/0 10.1.12.1]
If IP addresses are to be entered as host names via any of the SN5428-2
management interfaces, a Domain Name Server must be specified. A secondary
DNS may be specified for use if the primary DNS is not available.
Primary DNS Server? [A.B.C.D]
Secondary DNS Server? [A.B.C.D]
Setting up the management interface ...
Done
The management port is now operational. It may be tested using ping
or telnet from a host on the network.
Done with setup.
Related Commands
Command
Description
clear conf
Return most configuration settings to factory defaults.
setup
Run the setup configuration wizard.
setup access
Run the wizard to configure Monitor mode and Administrator mode
passwords.
setup cluster
Change the configuration of the high availability environment.
setup fcip
Run the wizard to manually configure FCIP instances.
setup iscsi-port
Run the wizard to manually configure the port used for iSCSI traffic.
setup netmgmt
Run the wizard to configure network management.
setup scsi
Run the wizard to configure a SCSI routing instance.
setup time
Run the wizard to configure the system date and time.
Cisco SN 5428-2 Storage Router Software Configuration Guide
12-354
78-15471-01
Chapter 12
Command Line Interface Reference
setup netmgmt
setup netmgmt
To enable network management via any or all of the available interfaces (Telnet, web-based GUI, or
SNMP), use the setup netmgmt configuration wizard. The wizard prompts you to selectively enable the
various interfaces and, if SNMP is enabled, will prompt you to enter the read and write community
information, IP addresses for SNMP traps, and additional SNMP configuration information.
setup netmgmt [parameter1 parameter2...]
Syntax Description
parameter1 parameter2 (Optional) Enter each parameter that the wizard prompts for. All parameters
...
must be passed. If a parameter includes an embedded space, enclose the
parameter in quotation marks.
Defaults
Defaults or current values are shown in parentheses within the allowable response brackets. In the
following example, the default name for the read community is public:
Read Community ? [public]
Command Modes
Administrator.
Command History
Release
Modification
3.2.1
This command was introduced.
Usage Guidelines
All network management interfaces are enabled by default, with SNMP “gets” via the public read
community. Run this wizard to disable any of these interfaces, or to change the SNMP read community,
configure the SNMP write community for SNMP “sets,” or add addresses for SNMP traps.
Only one setup wizard can be active at any given time. Multiple users cannot run multiple setup wizards
concurrently.
Use the optional parameter arguments to run the setup netmgmt wizard from a command script. All
parameters required by the wizard must be included. The setup netmgmt wizard will not complete
unless all parameters are passed.
Note
If too many parameters are passed, the setup netmgmt wizard will ignore the extra parameters and may
complete. If a parameter is not in the correct format or is otherwise invalid, the next parameter is used
to attempt to fulfill the prompt. In either case, unexpected results could occur. Always check the output
from a setup netmgmt command when using the parameter arguments.
Cisco SN 5428-2 Storage Router Software Configuration Guide
78-15471-01
12-355
Chapter 12
Command Line Interface Reference
setup netmgmt
Examples
The following shows example output and input for the setup netmgmt command:
[SN5428-2A]# setup netmgmt
#####################################
## Network Management Access Setup ##
#####################################
This wizard will enable you to configure access to telnet, the web-based
GUI, and configure SNMP. By default, telnet and the web-based GUI are
enabled. SNMP gets via the "public" community are also enabled via the
10/100 management interface. If you want to change these values or configure
other SNMP features, please set up the network management.
Set up Network Management ? [yes/no (yes)] yes
Enable telnet on all interfaces? [yes/no (yes)] yes
Configure SNMP ? [yes/no (yes)] yes
If you select to configure SNMP, the wizard prompts you for the following information:
Read Community ? [public]
Write Community ? [private] mynetmanagers
First IP address for SNMP traps ? [A.B.C.D] 10.1.30.17
Trap version for first IP address? [1/2 (1)]
Second IP address for SNMP traps ? [A.B.C.D] 10.1.30.18
Trap version for second IP address? [1/2 (1)]
Send auth trap when requester specifies
incorrect community? [yes/no (no)] yes
Modify link up/down traps for one or more interfaces? [yes/no (yes)] yes
Send link up/down traps for MGMT interface? [yes/no (yes)] yes
Send link up/down traps for HA interface? [yes/no (yes)] yes
Send link up/down traps for GE interface? [yes/no (yes)] no
Send link up/down traps for fibre
channel interface? [yes/no (yes)] yes
The wizard ends by displaying the following information:
Network Management setup is complete.
By default, these methods of network management will work from any network
which is not separated from the SN5428-2 by a firewall or other traffic-limiting
device. To further specify security requirements, please use the normal
configuration functions of the CLI or GUI after completing this wizard.
Done with setup.
Cisco SN 5428-2 Storage Router Software Configuration Guide
12-356
78-15471-01
Chapter 12
Command Line Interface Reference
setup netmgmt
Related Commands
Command
Description
clear conf
Return most configuration settings to factory defaults.
setup
Run the setup configuration wizard.
setup access
Run the wizard to configure Monitor mode and Administrator mode
passwords.
setup cluster
Change the configuration of the high availability environment.
setup fcip
Run the wizard to manually configure FCIP instances.
setup iscsi-port
Run the wizard to manually configure the port used for iSCSI traffic.
setup mgmt
Run the wizard to configure the management interface.
setup scsi
Run the wizard to configure a SCSI routing instance.
setup time
Run the wizard to configure the system date and time.
Cisco SN 5428-2 Storage Router Software Configuration Guide
78-15471-01
12-357
Chapter 12
Command Line Interface Reference
setup scsi
setup scsi
To configure a SCSI routing instance, use the setup scsi configuration wizard. The wizard prompts you
to enter the name of the SCSI routing instance (maximum 32 characters) and to specify the IP address
and Gigabit Ethernet interface for the SCSI routing instance. Then the wizard discovers all Fibre
Channel devices connected to the SN 5428-2 Storage Router. More extensive configuration of SCSI
routing instances can be performed via the CLI or the web-based GUI.
setup scsi [parameter1 parameter2...]
Syntax Description
parameter1 parameter2 (Optional) Enter each parameter that the wizard prompts for. All parameters
...
must be passed. If a parameter includes an embedded space, enclose the
parameter in quotation marks.
Defaults
Defaults or current values are shown in parentheses within the allowable response brackets. In the
following example, the current default Gigabit Ethernet interface is ge1.
Scsirouter instance GE interface ? [ge1|ge2 (ge1)]
Command Modes
Administrator.
Command History
Release
Modification
3.2.1
This command was introduced.
Usage Guidelines
After the wizard finishes the discovery process, it displays a list of accessible storage resources. Targets
can be explicitly added by using the web-based GUI or CLI commands.
The setup scsi command can only be run when no SCSI routing instance is currently configured on the
storage router. Only one setup wizard can be active at any given time. Multiple users cannot run multiple
setup wizards concurrently.
Use the optional parameter arguments to run the setup scsi wizard from a command script. All
parameters required by the wizard must be included. The setup scsi wizard will not complete unless all
parameters are passed.
Note
If too many parameters are passed, the setup scsi wizard will ignore the extra parameters and may
complete. If a parameter is not in the correct format or is otherwise invalid, the next parameter is used
to attempt to fulfill the prompt. In either case, unexpected results could occur. Always check the output
from a setup scsi command when using the parameter arguments.
Cisco SN 5428-2 Storage Router Software Configuration Guide
12-358
78-15471-01
Chapter 12
Command Line Interface Reference
setup scsi
Examples
The following shows example output and input for the setup scsi command:
[SN5428-2A]# setup scsi
#######################
## scsirouter Setup ##
#######################
This wizard will enable you to set up a scsirouter instance, but will not enable you to
specify a VLAN for the IP interface. If a VLAN is required for the scsirouter instance,
please use CLI commands to configure the scsirouter.
Do you want to configure a scsirouter instance ? [yes/no (no)] yes
scsirouter instance name ? [(empty)] foo
The scsirouter instance communicates with IP hosts via the Gigabit Ethernet interface. To
enable communication, you need to assign an IP address and network mask to the scsirouter
instance for it to use on the Ethernet interface.
IP Address ? [A.B.C.D/nn] 10.1.0.45/24
Enter the name of the GE interface that you want the scsirouter instance to use.
Scsirouter instance GE interface ? [ge1|ge2 (ge1)] ge2
Please wait ...
Now discovering all FC devices connected to the SN 5428-2-K9...
A scsirouter has been created. A list of accessible FC devices
is shown in the table below. Use the "scsirouter" command or the
configuration screen via the GUI to define one or more scsirouter targets.
Access to scsirouter targets will be disabled until access is explicitly
configured using the "scsirouter" command or the configuration
via the GUI.
Fabric Attached Devices detected
Interface WWPN
PortId
--------- ---------------- -------fc1
2200001026448a0d 0x101e1
fc1
22000003be3203bc 0x101e2
Lun Description Table
Interface WWPN
--------- ---------------fc1
2200001026448a0d
fc1
22000003be3203bc
Lun
----0
0
Device Type
----------Disk
Disk
Capacity
-------17GB
17GB
Lun
----0
0
Vendor
-----------SEAGATE
SEAGATE
Lunid Type
-------------IEEE Extended
IEEE Extended
Product
-----------ST217340EB
ST217341EB
Lunid
----2000001026448a0d
20000003be3203bc
Serial
-----2BB01L3J0000600256BW
2DU0537A00006105FGJ6
scsirouter setup is complete.
Done with setup.
Cisco SN 5428-2 Storage Router Software Configuration Guide
78-15471-01
12-359
Chapter 12
Command Line Interface Reference
setup scsi
Related Commands
Command
Description
clear conf
Return most configuration settings to factory defaults.
setup
Run the setup configuration wizard.
setup access
Run the wizard to configure Monitor mode and Administrator mode
passwords.
setup cluster
Change the configuration of the high availability environment.
setup fcip
Run the wizard to manually configure FCIP instances.
setup iscsi-port
Run the wizard to manually configure the port used for iSCSI traffic.
setup mgmt
Run the wizard to configure the management interface.
setup netmgmt
Run the wizard to configure network management.
setup time
Run the wizard to configure the system date and time.
Cisco SN 5428-2 Storage Router Software Configuration Guide
12-360
78-15471-01
Chapter 12
Command Line Interface Reference
setup time
setup time
To set current date and time information and other time-related configuration settings, use the
setup time configuration wizard. The storage router uses date and time information for log files and the
user interface.
setup time [parameter1 parameter2...]
Syntax Description
parameter1 parameter2 (Optional) Enter each parameter that the wizard prompts for. All parameters
...
must be passed. If a parameter includes an embedded space, enclose the
parameter in quotation marks.
Defaults
Defaults or current values are shown in parentheses within the allowable response brackets. In the
following example, the current date is 02/05/2002.
Date (mm/dd/yyyy)? [02/05/2002]
Command Modes
Administrator.
Command History
Release
Modification
3.2.1
This command was introduced.
Usage Guidelines
The wizard prompts you to enter the appropriate time zone (as an offset from Universal/GMT). You can
also enter an optional IP address of an NTP server, to be used by the storage router for date and time
synchronization. If no NTP server address is provided, the wizard prompts you for the current date and
time.
Only one setup wizard can be active at any given time. Multiple users cannot run multiple setup wizards
concurrently.
Use the optional parameter arguments to run the setup time wizard from a command script. All
parameters required by the wizard must be included. The setup time wizard will not complete unless all
parameters are passed.
Note
If too many parameters are passed, the setup time wizard will ignore the extra parameters and may
complete. If a parameter is not in the correct format or is otherwise invalid, the next parameter is used
to attempt to fulfill the prompt. In either case, unexpected results could occur. Always check the output
from a setup time command when using the parameter arguments.
Cisco SN 5428-2 Storage Router Software Configuration Guide
78-15471-01
12-361
Chapter 12
Command Line Interface Reference
setup time
Examples
The following shows example output and input for the setup time command:
[SN5428-2A]# setup time
#########################
## Date and Time Setup ##
#########################
To provide correct information in log files and user interfaces, the SN5428-2
must have a reasonably accurate date and time.
To use Daylight Savings Time or specify time zone by geographic region
use the "clock timezone" command.
The time zone must be entered as an offset from GMT.
0=[0000 GMT]
1=[-0100 WAT]
2=[-0200 AT]
3=[-0300 Brazil] 4=[-0400 AST]
5=[-0500 EST]
6=[-0600 CST]
7=[-0700 MST]
8=[-0800 PST]
9=[-0900 YST]
10=[-1000 AHST] 11=[-1100 NT]
12=[+1200 IDLW] 13=[+1100 WST] 14=[+1000 GST]
15=[+0900 JST]
16=[+0800 CCT] 17=[+0700 WAST]
18=[+0600 ZP6]
19=[+0500 ZP5] 20=[+0400 ZP4]
21=[+0300 BT]
22=[+0200 EET] 23=[+0100 CET]
Time Zone? [0-23] 6
If a Network Time Protocol (NTP) server is in use on a network reachable
via the SN5428-2 management interface, it may be used to keep the SN5428-2 date
and time in sync with the rest of the network.
NTP Server IP Address? [A.B.C.D] 10.1.60.86
If you enter the NTP server IP address, the date and time is synchronized with the network and the wizard
completes. If you do not enter an NTP server IP address, the wizard prompts you for the current date and
time information.
NTP Server IP Address? [A.B.C.D]
Date (mm/dd/yyyy)? [02/05/2002]
Time (hh:mm:ss)? [16:42:38] 10:42:12
Date and time are now configured.
Done with setup.
Cisco SN 5428-2 Storage Router Software Configuration Guide
12-362
78-15471-01
Chapter 12
Command Line Interface Reference
setup time
Related Commands
Command
Description
clear conf
Return most configuration settings to factory defaults.
setup
Run the setup configuration wizard.
setup access
Run the wizard to configure Monitor mode and Administrator mode
passwords.
setup cluster
Change the configuration of the high availability environment.
setup fcip
Run the wizard to manually configure FCIP instances.
setup iscsi-port
Run the wizard to manually configure the port used for iSCSI traffic.
setup mgmt
Run the wizard to configure the management interface.
setup netmgmt
Run the wizard to configure network management.
setup scsi
Run the wizard to configure a SCSI routing instance.
Cisco SN 5428-2 Storage Router Software Configuration Guide
78-15471-01
12-363
Chapter 12
Command Line Interface Reference
show aaa
show aaa
To display AAA configuration information and operational statistics, use the show aaa command.
show aaa [from {filename | bootconfig | runningconfig}]
show aaa [stats]
Syntax Description
from filename
(Optional) The name of the configuration file where the AAA configuration
is stored. This file must exist in the savedconfig directory.
from bootconfig
(Optional) Display the AAA information from the persistent saved
configuration.
from runningconfig
(Optional) Display the AAA information from the currently running
configuration.
stats
(Optional) Display the number of authentication requests received and sent
since the storage router was last rebooted.
Defaults
If no from parameter is specified, the display shows information from the currently running
configuration.
Command Modes
Administrator or Monitor.
Command History
Release
Modification
3.2.1
This command was introduced.
3.3.1
The from, bootconfig, and runningconfig keywords and the filename
argument were added.
Usage Guidelines
Use this command to display the current AAA configuration for the storage router. Use the stats keyword
to display usage statistics. Use the from bootconfig keywords to display the specified AAA
configuration information as it exists in the current saved configuration, used when the storage router
restarts. This may differ from the running configuration.
Examples
The following example output displays the current AAA authentication configuration for the storage
router from the persistent saved configuration. The iSCSI default authentication list indicates that
authentication first tries to contact TACACS+ servers. If no server is found, TACACS+ returns an error
and AAA tries to use the local username database for authentication. If a match is found, the IP host is
allowed access; if no match is found, the IP host is denied access. If this attempt returns an error, the IP
host is not allowed access.
Cisco SN 5428-2 Storage Router Software Configuration Guide
12-364
78-15471-01
Chapter 12
Command Line Interface Reference
show aaa
[SN5428-2A]# show aaa from bootconfig
aaa new-model
aaa authentication iscsi default group tacacs+ local
username "fred" password "9 af4f2428498a41a31e237de1c4a9b9fcef"
username "pat" password "9 7ddbccc3d0daf013f4293c3d3bd94539dd"
username "kris" password "9 0607167520058771e66ab1d379d7e6505f"
username "adrian" password "9 0ad24a3b35dc296d894e512416d572b3ee"
radius-server retransmit 12
radius-server host 10.5.0.53 auth-port 1645
tacacs-server timeout 12
tacacs-server host 10.7.0.22 auth-port 49
The following is example output from the show aaa stats command:
[SN5428-2A]# show aaa stats
authentication requests received
authentication responses sent
authentication requests canceled
authentication requests passed
authentication requests failed
=
=
=
=
=
134
134
0
130
4
RADIUS Server Hosts
IP Address
port timeouts
bad resps
--------------- ----- ---------- ---------10.5.0.53 1645
0
0
TACACS+ Server Hosts
IP Address
port timeouts
bad resps
--------------- ----- ---------- ---------10.7.0.22
49
0
0
Related Commands
Command
Description
aaa authentication
enable
Configure AAA authentication services for Administrator mode access to
the SN 5428-2 Storage Router via the CLI enable command.
aaa authentication
iscsi
Configure the AAA authentication services to be used for iSCSI
authentication.
aaa authentication
login
Configure AAA authentication services for Monitor mode access to the
SN 5428-2 Storage Router via the CLI.
aaa group server
radius
Create a named group of RADIUS servers for AAA authentication services.
aaa group server
tacacs+
Create a named group of TACACS+ servers for AAA authentication
services.
debug aaa
Enable debugging for the AAA authentication services.
radius-server host
Configure remote RADIUS servers for AAA authentication services.
restore aaa
Restore AAA authentication services from the named configuration file.
save aaa
Save the current AAA configuration information.
tacacs-server host
Configure remote TACACS+ servers for AAA authentication services.
username password
Add a user name and optional password to the local username database.
Cisco SN 5428-2 Storage Router Software Configuration Guide
78-15471-01
12-365
Chapter 12
Command Line Interface Reference
show accesslist
show accesslist
To display a list of access lists or the contents of the named access list (or all access lists), use the
show accesslist command.
show accesslist [name | all] [from {filename | bootconfig | runningconfig}]
Syntax Description
name
(Optional) The name of the access list.
all
(Optional) Display all access list entries.
from filename
(Optional) The name of the configuration file where the access list
configuration is stored. This file must exist in the savedconfig directory.
from bootconfig
(Optional) Display the access list information from the persistent saved
configuration.
from runningconfig
(Optional) Display the access list information from the currently running
configuration.
Defaults
If no from parameter is specified, the display shows information from the currently running
configuration.
Command Modes
Administrator or Monitor.
Command History
Release
Modification
3.2.1
This command was introduced.
Usage Guidelines
Examples
•
Use the show accesslist command to display a list of all access lists from the current running
configuration.
•
Use the all keyword to display the contents of all access lists.
•
Use the from bootconfig keywords to display the specified access list information as it exists in the
current saved configuration, used when the storage router restarts. This may differ from the running
configuration.
To display a list of access lists, issue this command:
[SN5428-2A]# show accesslist
To display the contents of all access lists from the current running configuration, issue this command:
[SN5428-2A]# show accesslist all
To display the contents of all access lists as they exist in the current bootable configuration, issue this
command:
[SN5428-2A]# show accesslist all from bootconfig
Cisco SN 5428-2 Storage Router Software Configuration Guide
12-366
78-15471-01
Chapter 12
Command Line Interface Reference
show accesslist
To display the contents of the access list named webserver2 from the current running configuration, issue
this command:
[SN5428-2A]# show accesslist webserver2
To display the contents of the access list named webserver2 as it exists in the saved configuration file
backup_1218, issue this command:
[SN5428-2A]# show accesslist webserver2 from backup_1218
Related Commands
Commands
Description
accesslist
Create an access list entity.
accesslist A.B.C.D/bits Add IP addresses to an access list.
accesslist
chap-username
Add CHAP user name entries to an access list.
accesslist iscsi-name
Add iSCSI Name entries to an access list.
delete accesslist
Delete a specific access list entry or an entire access list.
restore accesslist
Restore the named access list or all access lists from the named
configuration file.
save accesslist
Save configuration data for the named access list or all access lists.
scsirouter target
accesslist
Associate an access list with a specific SCSI routing instance target or all
targets.
Cisco SN 5428-2 Storage Router Software Configuration Guide
78-15471-01
12-367
Chapter 12
Command Line Interface Reference
show admin
show admin
To display the system administrator contact information, use the show admin command.
Syntax Description
This command has no arguments or keywords.
Defaults
None.
Command Modes
Administrator or Monitor.
Command History
Release
Modification
3.2.1
This command was introduced.
Usage Guidelines
Examples
The following information displays:
•
Contact name
•
E-mail address
•
Phone number
•
Pager number
The following example displays the system administrator contact information:
[SN5428-2A]# show admin
Administrator Contact Information
Name: Pat Hurley
Email: phurley@abc123z.com
Phone: 123.456.7890
Pager: 123.456.3444 pin 2234
Related Commands
Command
Description
admin contactinfo
Configure the storage router administrator contact information.
Cisco SN 5428-2 Storage Router Software Configuration Guide
12-368
78-15471-01
Chapter 12
Command Line Interface Reference
show boot
show boot
To display system boot information and startup file parameters, use the show boot command.
show boot
Syntax Description
This command has no arguments or keywords.
Defaults
None.
Command Modes
Administrator or Monitor.
Command History
Release
Modification
3.2.1
This command was introduced.
Usage Guidelines
Use this command to view system boot information, such as the boot device type, path to the boot image,
and path to the file containing the startup commands. The show boot command is designed for debug
purposes, and should be used under the guidance of a Cisco Technical Support professional.
Examples
The following example displays system boot information:
[SN5428-2A]# show boot
Boot Device: ata=0,00
Boot File: /ata0/vxWorks
Startup File: /ata0/NuSpeed.start
Flags: 0x0
Other: fei
Related Commands
Command
Description
show software version
Display a list of software versions available on the storage router, including
the currently running version and the version that will run the next time the
storage router is restarted.
Cisco SN 5428-2 Storage Router Software Configuration Guide
78-15471-01
12-369
Chapter 12
Command Line Interface Reference
show bootconfig
show bootconfig
To display the bootable configuration for the SN 5428-2 Storage Router, or to save the commands used
to create the bootable configuration to a file, use the show bootconfig command.
show bootconfig [to filename]
Syntax Description
to filename
Defaults
None.
Command Modes
Administrator or Monitor.
Command History
Release
Modification
3.2.1
This command was introduced.
Usage Guidelines
Note
(Optional) Save the bootable configuration as a series of CLI commands
and descriptive text to the specified file. The file will be saved in the script
directory.
Use the to keyword to save the bootable configuration as a series of CLI commands and descriptive text
in the specified file. This file is saved in the script directory and can be used as a basis to create command
scripts to automate common tasks. Use the read script command to execute a command script.
A saved configuration file requires editing before it can be used as a command script via the read script
command.
Table 12-20 describes the significant elements that are displayed:
Table 12-20 Elements Displayed for the “show bootconfig” Command
Element
Description
AAA
Authentication, authorization, and accounting method
configuration information.
ACCESSLIST
Access list description and entry information.
ADMIN
The storage router administrator contact information.
ADMIN LOGIN
The Administrator mode password.
CDP
Cisco Discovery Protocol configuration, including timer and
holdtime settings.
CLUSTER
The name of the cluster to which this storage router belongs.
DNS
The name of any defined domain name servers.
FCIP
FCIP instance configuration information.
Cisco SN 5428-2 Storage Router Software Configuration Guide
12-370
78-15471-01
Chapter 12
Command Line Interface Reference
show bootconfig
Table 12-20 Elements Displayed for the “show bootconfig” Command (continued)
Examples
Element
Description
FC PORTS
Operational characteristics of the Fibre Channel interfaces.
FC SWITCH
Global Fibre Channel attributes.
FC ZONE
Zone configuration information.
FC ZONE ALIAS
Zone alias configuration information.
FC ZONE SET
Zone set configuration information.
GE
IP addresses and operational characteristics of the Gigabit Ethernet
interfaces.
HA
HA configuration information.
HA Port
IP address and operational characteristics of the HA interface.
LOGGING ROUTE FACILTIY
The logging table.
Mgmt Port
IP address and operational characteristics of the management
interface.
MONITOR LOGIN
The Monitor mode password.
RESTRICT
Storage router interface restrictions.
RIP
Routing Information Protocol (RIP) configuration information.
ROUTES
The routing table.
SCSIROUTER
Configuration information for each SCSI routing instance,
including name, description, server interface and other
instance-specific configuration information.
SNMP
The SNMP settings.
SNTP
Date and time information, including the address of any associated
NTP server.
SOFTWARE
The default download location for storage router software.
SSH
Secure Shell (SSH) configuration information.
SYSLOG
Remote logging configuration information.
SYSTEM
SN 5428-2 Storage Router name.
TELNET
Session timeout information.
VLAN
VLAN configuration information.
VTP DOMAIN
VTP domain name.
VTP MODE
VTP configuration mode.
The following is example output from the show bootconfig command, for a storage router deployed for
SCSI routing:
[SN5428-2A]# show bootconfig
!
! CLUSTER
!
! cluster Lab1
!
! ACCESSLIST
Cisco SN 5428-2 Storage Router Software Configuration Guide
78-15471-01
12-371
Chapter 12
Command Line Interface Reference
show bootconfig
!
accesslist aegis
accesslist aegis 10.2.0.23/255.255.255.255
accesslist aegis 10.3.0.36/255.255.255.255
accesslist aegis 10.4.0.49/255.255.255.255
accesslist aegis iscsi-name ign.1987-05.com.cisco.08.80342789af73ebcdef123.xxx
accesslist aegis iscsi-name ign.1987-05.com.cisco.08.7125abc9af73ebcdef123.xxx
accesslist aegis iscsi-name ign.1987-05.com.cisco.08.1234abecf9876bac00034.xxx
accesslist aegis chap-username 12h7b.lab2.webservices
accesslist aegis chap-username dorothy
accesslist aegis chap-username lab2servp
!
! VTP DOMAIN
!
vtp domain none
!
! VTP MODE
!
vtp mode client
!
! VLAN
!
! (no vlan(s) found)
!
! SCSIROUTER
!
scsirouter zeus
scsirouter zeus authenticate "none"
scsirouter zeus primary "none"
scsirouter zeus reserve proxy disable
scsirouter zeus failover primary none
scsirouter zeus failover secondary none
scsirouter zeus lun reset no
scsirouter zeus serverIf ge1 10.1.0.45/255.255.255.0
scsirouter zeus target webserver2 wwpn "21:00:00:05:ae:03:6d:6e"
scsirouter zeus target webserver2 enabled
scsirouter zeus target webserver2 accesslist "aegis" rw
scsirouter zeus target webserver2 accesslist “any” ro
!
! SYSTEM
!
hostname SN5428-2A
!
! Mgmt Port
!
interface mgmt ip-address 10.1.10.244/255.255.255.0
!
! HA Port
!
interface ha ip-address 10.1.20.56/255.255.255.0
!
! GE
!
interface ge1 autonegotiation autodetect
interface ge1 mtusize 1500
interface ge1 vlan enable
!
! GE
!
interface ge2 autonegotiation autodetect
interface ge2 mtusize 1500
interface ge2 vlan enable
!
! ROUTES
Cisco SN 5428-2 Storage Router Software Configuration Guide
12-372
78-15471-01
Chapter 12
Command Line Interface Reference
show bootconfig
!
ip route 10.1.30.0/255.255.255.0 10.1.10.201
ip route 10.1.40.243/255.255.255.255 10.1.10.201
ip route 10.1.50.249/255.255.255.255 10.1.10.201
ip default-gateway 10.1.10.201
!
! RIP
!
no ip rip enable
ip rip timers invalid 180
!
! ADMIN
!
admin contactinfo name “pat”
!
! ADMIN LOGIN
!
admin password <password>
!
! MONITOR LOGIN
!
monitor password <password>
!
! SNTP
!
ntp peer 10.1.60.86
clock timezone CST6CDT
!
! SNMP
!
snmp-server community public ro
snmp-server community private rw
no snmp-server host all traps
no snmp-server sendauthtraps
snmp-server linkupdown mgmt
snmp-server linkupdown ge1
snmp-server linkupdown ge2
snmp-server linkupdown fc1
snmp-server linkupdown fc2
snmp-server linkupdown fc3
snmp-server linkupdown fc4
snmp-server linkupdown fc5
snmp-server linkupdown fc6
snmp-server linkupdown fc7
snmp-server linkupdown fc8
!
! DNS
!
ip name-server 10.1.40.243 10.1.50.249
ip domain-name mystoragenet.com
!
! TELNET
!
no session-timeout
!
! SSH
!
ssh enable
!
! SOFTWARE
!
software http url "http://www.cisco.com"
software http username “ciscocustomer” password "<password>"
software proxy username none
Cisco SN 5428-2 Storage Router Software Configuration Guide
78-15471-01
12-373
Chapter 12
Command Line Interface Reference
show bootconfig
!
! HA
!
! ha configuration clustered
!
! SYSLOG
!
logging syslog 10.1.40.251
!
! LOGGING ROUTE FACILITY
!
logging level notice from all to all
logging level info from all to logfile
!
! RESTRICT
!
restrict mgmt ftp
no restrict mgmt telnet
no restrict mgmt http
no restrict mgmt snmp
restrict mgmt ssl
no restrict mgmt ssh
!
restrict ha ftp
restrict ha telnet
no restrict ha http
no restrict ha snmp
restrict ha ssl
restrict ha ssh
!
restrict ge1 ftp
restrict ge1 telnet
restrict ge1 http
restrict ge1 snmp
restrict ge1 ssl
restrict ge1 ssh
!
restrict ge2 ftp
restrict ge2 telnet
restrict ge2 http
restrict ge2 snmp
restrict ge2 ssl
restrict ge2 ssh
!
! CDP
!
cdp enable
cdp timer 60
cdp interface mgmt enable
cdp interface ha enable
cdp interface ge1 enable
cdp interface ge2 enable
!
! FC SWITCH
!
fcswitch ratov 10000
fcswitch edtov 2000
fcswitch dstov 5000
fcswitch fstov 1000
fcswitch zoning default all
fcswitch zoning autosave enable
fcswitch zoning merge SW2
fcswitch domainid 1 force
Cisco SN 5428-2 Storage Router Software Configuration Guide
12-374
78-15471-01
Chapter 12
Command Line Interface Reference
show bootconfig
no fcswitch domainid lock enable
fcswitch interop-credit 12
!
! FC ZONE ALIAS
!
fcalias iscsi
fcalias iscsi member wwpn 280000048aa58710
fcalias iscsi member wwpn 290000048aa58710
fcalias leto
fcalias leto member wwpn 201b00491585c219
!
! FC ZONE
!
zone agamemnon
zone agamemnon member wwpn 201b00491585c219
zone agamemnon member fcalias leto
!
! FC ZONE SET
!
zoneset helen
zoneset helen zone agamemnon
no zoneset helen enable
!
! FC PORTS
!
interface fc1 enable
interface fc1 ms-enable enable
no interface fc1 al-fairness enable
interface fc1 fan-enable enable
interface fc1 ext-credit 0
interface fc1 mfs-bundle enable timeout 10
interface fc1 linkspeed auto
interface fc1 type gl-port
!
interface fc2 enable
interface fc2 ms-enable enable
no interface fc2 al-fairness enable
interface fc2 fan-enable enable
interface fc2 ext-credit 0
interface fc2 mfs-bundle enable timeout 10
interface fc2 linkspeed auto
interface fc2 type gl-port
!
interface fc3 enable
interface fc3 ms-enable enable
no interface fc3 al-fairness enable
interface fc3 fan-enable enable
interface fc3 ext-credit 0
interface fc3 mfs-bundle enable timeout 10
interface fc3 linkspeed auto
interface fc3 type gl-port
!
interface fc4 enable
interface fc4 ms-enable enable
no interface fc4 al-fairness enable
interface fc4 fan-enable enable
interface fc4 ext-credit 0
interface fc4 mfs-bundle enable timeout 10
interface fc4 linkspeed auto
interface fc4 type gl-port
!
Cisco SN 5428-2 Storage Router Software Configuration Guide
78-15471-01
12-375
Chapter 12
Command Line Interface Reference
show bootconfig
interface fc5 enable
interface fc5 ms-enable enable
no interface fc5 al-fairness enable
interface fc5 fan-enable enable
interface fc5 ext-credit 0
interface fc5 mfs-bundle enable timeout 10
interface fc5 linkspeed auto
interface fc5 type gl-port
!
interface fc6 enable
interface fc6 ms-enable enable
no interface fc6 al-fairness enable
interface fc6 fan-enable enable
interface fc6 ext-credit 0
interface fc6 mfs-bundle enable timeout 10
interface fc6 linkspeed auto
interface fc6 type gl-port
!
interface fc7 enable
interface fc7 ms-enable enable
no interface fc7 al-fairness enable
interface fc7 fan-enable enable
interface fc7 ext-credit 0
interface fc7 mfs-bundle enable timeout 10
interface fc7 linkspeed auto
interface fc7 type gl-port
!
interface fc8 enable
interface fc8 ms-enable enable
no interface fc8 al-fairness enable
interface fc8 fan-enable enable
interface fc8 ext-credit 0
interface fc8 mfs-bundle enable timeout 10
interface fc8 linkspeed auto
interface fc8 type gl-port
!
! AAA
!
aaa new-model
username "fred" password "9 af4f2428498a41a31e237de1c4a9b9fcef"
username "pat" password "9 7ddbccc3d0daf013f4293c3d3bd94539dd"
username "kris" password "9 0607167520058771e66ab1d379d7e6505f"
username "adrian" password "9 0ad24a3b35dc296d894e512416d572b3ee"
radius-server retransmit 12
radius-server host 10.5.0.53 auth-port 1645
radius-server host 10.6.0.61 auth-port 1645
radius-server host 10.7.0.62 auth-port 1645
tacacs-server timeout 12
tacacs-server host 10.7.0.22 auth-port 49
aaa group server radius "testradius"
aaa group server radius "testradius" server 10.5.0.53 auth-port 1645
aaa group server radius "testradius" server 10.6.0.61 auth-port 1645
aaa authentication iscsi default local group radius local-case
aaa authentication iscsi test group testradius local
aaa authentication enable default group radius enable
aaa authentication login default group radius monitor
The following example creates a command file called SN5428-2AScript1 in the script directory. It
contains many of the CLI commands that were issued to create the current bootable configuration.
[SN5428-2A]# show bootconfig to SN5428-2AScript1
Cisco SN 5428-2 Storage Router Software Configuration Guide
12-376
78-15471-01
Chapter 12
Command Line Interface Reference
show bootconfig
Related Commands
Command
Description
read script
Read and execute the CLI commands in the named script file.
restore all
Restore the contents of the named configuration file into memory.
save all
Save all configuration information
show runningconfig
Display the running configuration, or create a command file based on the
running configuration.
show savedconfig
List the contents of the savedconfig directory or the contents of the named
configuration file.
show script
Display the contents of the script directory or the contents of the named
command file.
Cisco SN 5428-2 Storage Router Software Configuration Guide
78-15471-01
12-377
Chapter 12
Command Line Interface Reference
show buffers
show buffers
To display buffer pool information for a variety of areas, use the show buffers command.
show buffers
Syntax Description
This command has no arguments or keywords.
Defaults
None.
Command Modes
Administrator or Monitor.
Command History
Release
Modification
3.2.1
This command was introduced.
Usage Guidelines
The display includes the number of free memory buffers for each pool, along with those currently
allocated to various functions. The show buffers command is designed for debug purposes, and should
be used under the guidance of a Cisco Technical Support professional.
Examples
The following is sample output from the show buffers command:
[SN520A]# show buffers
Pool System:
type
--------FREE
:
DATA
:
HEADER :
SOCKET :
PCB
:
RTABLE :
HTABLE :
ATABLE :
SONAME :
ZOMBIE :
SOOPTS :
FTABLE :
RIGHTS :
IFADDR :
CONTROL :
OOBDATA :
IPMOPTS :
IPMADDR :
IFMADDR :
MRTABLE :
TOTAL
:
LOW WTR :
number
-----42086
0
0
14
21
31
0
0
0
0
0
0
0
18
0
0
1
5
0
0
42176
42082
Cisco SN 5428-2 Storage Router Software Configuration Guide
12-378
78-15471-01
Chapter 12
Command Line Interface Reference
show buffers
number of mbufs: 42176
number of times failed to find headers: 0
number of times failed to find clusters: 0
number of times waited for space: 0
number of times drained protocols for space: 0
__________________
CLUSTER POOL TABLE
_______________________________________________________________________________
size
clusters free
usage
low water
------------------------------------------------------------------------------------------------------------------------------------------------------------Pool iSCSI:
type
number
-------------FREE
:
3240
DATA
:
0
HEADER :
0
SOCKET :
0
PCB
:
0
RTABLE :
0
HTABLE :
0
ATABLE :
0
SONAME :
0
ZOMBIE :
0
SOOPTS :
0
FTABLE :
0
RIGHTS :
0
IFADDR :
0
CONTROL :
0
OOBDATA :
0
IPMOPTS :
0
IPMADDR :
0
IFMADDR :
0
MRTABLE :
0
TOTAL
:
3240
LOW WTR :
3240
number of mbufs: 3240
number of times failed to find headers: 0
number of times failed to find clusters: 0
number of times waited for space: 0
number of times drained protocols for space: 0
__________________
CLUSTER POOL TABLE
_______________________________________________________________________________
size
clusters free
usage
low water
------------------------------------------------------------------------------------------------------------------------------------------------------------########## Output from CPP ##########
Pool System:
type
--------FREE
:
DATA
:
HEADER :
SOCKET :
PCB
:
RTABLE :
HTABLE :
ATABLE :
number
-----6240
0
0
31
48
36
0
0
Cisco SN 5428-2 Storage Router Software Configuration Guide
78-15471-01
12-379
Chapter 12
Command Line Interface Reference
show buffers
SONAME :
0
ZOMBIE :
0
SOOPTS :
0
FTABLE :
0
RIGHTS :
0
IFADDR :
12
CONTROL :
0
OOBDATA :
0
IPMOPTS :
5
IPMADDR :
12
IFMADDR :
0
MRTABLE :
0
TOTAL
:
16384
LOW WTR :
16224
number of mbufs: 16384
number of times failed to find headers: 0
number of times failed to find clusters: 0
number of times waited for space: 0
number of times drained protocols for space: 0
__________________
CLUSTER POOL TABLE
_______________________________________________________________________________
size
clusters free
usage
low water
------------------------------------------------------------------------------64
1449
1412
50
1408
128
1688
1643
76660
1637
256
1847
1822
36
1817
512
1941
1910
76646
1904
------------------------------------------------------------------------------Pool Data:
type
number
-------------FREE
:
16800
DATA
:
0
HEADER :
0
SOCKET :
0
PCB
:
0
RTABLE :
0
HTABLE :
0
ATABLE :
0
SONAME :
0
ZOMBIE :
0
SOOPTS :
0
FTABLE :
0
RIGHTS :
0
IFADDR :
0
CONTROL :
0
OOBDATA :
0
IPMOPTS :
0
IPMADDR :
0
IFMADDR :
0
MRTABLE :
0
TOTAL
:
16800
LOW WTR :
16386
number of mbufs: 16800
number of times failed to find headers: 0
number of times failed to find clusters: 0
number of times waited for space: 0
number of times drained protocols for space: 0
__________________
Cisco SN 5428-2 Storage Router Software Configuration Guide
12-380
78-15471-01
Chapter 12
Command Line Interface Reference
show buffers
CLUSTER POOL TABLE
_______________________________________________________________________________
size
clusters free
usage
low water
------------------------------------------------------------------------------64
2832
2832
58994
2816
128
4124
4124
367277
3946
256
901
901
138752
770
512
947
947
67656
857
1024
96
96
37952
68
2048
97
97
1051
96
------------------------------------------------------------------------------Net Buffers:
type
--------FREE
:
USED
:
TOTAL
:
Related Commands
number
-----12798
2
12800
Command
Description
show stack
Display the memory stack on a per-task basis.
show tech-support
Display a variety of diagnostic information for use by Cisco Technical
Support professionals.
Cisco SN 5428-2 Storage Router Software Configuration Guide
78-15471-01
12-381
Chapter 12
Command Line Interface Reference
show cdp
show cdp
To display global Cisco Discovery Protocol (CDP) configuration information for the SN 5428-2 Storage
Router, including timer and holdtime information, use the show cdp command.
show cdp
Syntax Description
This command has no arguments or keywords.
Defaults
None.
Command Modes
Administrator or Monitor.
Command History
Release
Modification
3.2.1
This command was introduced.
Usage Guidelines
This command displays current CDP configuration. Use this command to determine if CDP is enabled,
and view packet timing and holdtime information. CDP allows network applications to learn device-type
information and the SNMP agent address of neighboring devices.
Examples
The following example displays CDP configuration information for the storage router. It shows that CDP
is enabled and packets are sent every minute. The storage router directs its neighbors to hold its CDP
advertisements for 3 minutes (the default CDP holdtime value). The storage router is also enabled to
send CDP version 2 advertisements.
[SN5428-2A]# show cdp
Global CDP information:
CDP is enabled
Sending CDP packets every 60 seconds
Sending a holdtime value of 180 seconds
Sending CDPv2 advertisements are enabled
Table 12-21 describes the significant fields shown in the display.
Table 12-21 Description of Fields in the “show cdp” Command Output
Field
Definition
Sending CDP packets every nn seconds
The interval (in seconds) between transmissions
of CDP advertisements. This field is controlled by
the cdp timer command.
Cisco SN 5428-2 Storage Router Software Configuration Guide
12-382
78-15471-01
Chapter 12
Command Line Interface Reference
show cdp
Table 12-21 Description of Fields in the “show cdp” Command Output (continued)
Related Commands
Field
Definition
Sending a holdtime value of nn seconds
The amount of time (in seconds) the storage
router directs a neighbor to hold the CDP
advertisement before discarding it. This field is
controlled by the cdp holdtime command.
Sending CDPv2 advertisements are enabled
Indicates that CDP version 2 advertisements are
enabled.
Command
Description
cdp enable
Enable or disable CDP on the SN 5428-2 Storage Router.
cdp holdtime
Specify the amount of time the receiving device should hold a CDP packet
from the SN 5428-2 Storage Router before discarding it.
cdp interface
Switch CDP on or off for the specified interface.
cdp timer
Specify the amount of time between transmissions of CDP packets from the
SN 5428-2 Storage Router.
show cdp entry
Display information about a specific neighbor device listed in the CDP
neighbors table.
show cdp interface
Display information about the storage router interfaces on which CDP is
enabled.
show cdp neighbors
Display detailed information about neighboring devices discovered using
CDP.
show cdp traffic
Display information about traffic between devices gathered using CDP.
Cisco SN 5428-2 Storage Router Software Configuration Guide
78-15471-01
12-383
Chapter 12
Command Line Interface Reference
show cdp entry
show cdp entry
To display information about a specific neighboring device or all neighboring devices discovered using
CDP, use the show cdp entry command.
show cdp entry {device-id | all}
Syntax Description
device-id
The device ID of the CDP neighbor about which you want information.
all
Display all CDP neighbors.
Defaults
None.
Command Modes
Administrator or Monitor.
Command History
Release
Modification
3.2.1
This command was introduced.
Usage Guidelines
Use this command to display operational information about CDP neighbors known to the storage router.
Use show cdp neighbors command to display the device ID for the neighbor about which you want
additional information.
Examples
The following is sample output from the show cdp entry command. Information about all neighboring
devices is displayed, including device ID, address and protocol, platform, interface, holdtime, and
version.
[SN5428-2A]# show cdp entry all
---------------------------------------Device ID: SCA0428017Q(lab-SN5428-2A.mylab.com)
Entry address(es):
IP address: 10.2.1.28
Platform: WS-C6509, Capabilities: Trans-Bridge Switch IGMP
Interface: ge2, Remote Port (outgoing port): 4/13
Holdtime : 176 sec
Version :
WS-C6509 Software, Version McpSW: 6.1(1b) NmpSW: 6.1(1b)
Copyright (c) 1995-2000 by Cisco Systems
advertisement version: 1
Cisco SN 5428-2 Storage Router Software Configuration Guide
12-384
78-15471-01
Chapter 12
Command Line Interface Reference
show cdp entry
Related Commands
Command
Description
cdp enable
Enable or disable CDP on the SN 5428-2 Storage Router.
cdp holdtime
Specify the amount of time the receiving device should hold a CDP packet
from the SN 5428-2 Storage Router before discarding it.
cdp interface
Switch CDP on or off for the specified interface.
cdp timer
Specify the amount of time between transmissions of CDP packets from the
SN 5428-2 Storage Router.
show cdp
Display global CDP configuration information for the storage router.
show cdp interface
Display information about the storage router interfaces on which CDP is
enabled.
show cdp neighbors
Display detailed information about neighboring devices discovered using
CDP.
show cdp traffic
Display information about traffic between devices gathered using CDP.
Cisco SN 5428-2 Storage Router Software Configuration Guide
78-15471-01
12-385
Chapter 12
Command Line Interface Reference
show cdp interface
show cdp interface
To display information about the SN 5428-2 Storage Router interfaces on which CDP is enabled, use the
show cdp interface command.
show cdp interface [if-name]
Syntax Description
if-name
Defaults
None.
Command Modes
Administrator or Monitor.
Command History
Release
Modification
3.2.1
This command was introduced.
Display CDP status and operational information for the specified interface.
The following are valid interface names: mgmt, ha, ge1 and ge2.
Usage Guidelines
CDP can be enabled for all storage router interfaces, including the management, high availability, and
Gigabit Ethernet interfaces. Use the show cdp interface command to display a brief summary of all
interfaces on which CDP is enabled. To display status and operational information for a specific
interface, add the interface name argument.
Examples
The following is example output from the show cdp interface command:
[SN5428-2A]# show cdp interface
Port
CDB Status
-------- ---------mgmt
enabled
ha
enabled
ge1
enabled
ge2
enabled
The following is example output for the management interface (mgmt):
[SN5428-2A]# show cdp interface mgmt
Port
CDB Status
-------- ---------mgmt
enabled
Cisco SN 5428-2 Storage Router Software Configuration Guide
12-386
78-15471-01
Chapter 12
Command Line Interface Reference
show cdp interface
Related Commands
Command
Description
cdp enable
Enable or disable CDP on the SN 5428-2 Storage Router.
cdp holdtime
Specify the amount of time the receiving device should hold a CDP packet
from the SN 5428-2 Storage Router before discarding it.
cdp interface
Switch CDP on or off for the specified interface.
cdp timer
Specify the amount of time between transmissions of CDP packets from the
SN 5428-2 Storage Router.
show cdp
Display global CDP configuration information for the storage router.
show cdp entry
Display information about a specific neighbor device listed in the CDP
neighbors table.
show cdp neighbors
Display detailed information about neighboring devices discovered using
CDP.
show cdp traffic
Display information about traffic between devices gathered using CDP.
Cisco SN 5428-2 Storage Router Software Configuration Guide
78-15471-01
12-387
Chapter 12
Command Line Interface Reference
show cdp neighbors
show cdp neighbors
To display detailed information about neighboring devices discovered using CDP, use the
show cdp neighbors command.
show cdp neighbors [interface if-name] [detail]
Syntax Description
interface if-name
(Optional) Keyword and name of the interface connected to the neighbors
for which you want information.
detail
(Optional) Display detailed information about a neighbor (or neighbors)
including network address, enabled protocols, holdtime, and software
version.
Defaults
None.
Command Modes
Administrator or Monitor.
Command History
Release
Modification
3.2.1
This command was introduced.
Usage Guidelines
Use the show cdp neighbors command to display brief or detailed information about neighboring
devices discovered using CDP. Add the interface keyword and the interface name to limit the display to
neighbors connected to that specific interface.
Use the detail keyword to display detailed information about all devices, or devices connected to the
specified interface.
Examples
The following is example output from the show cdp neighbors command:
[SN5428-2A]# show cdp neighbors
Capability Codes: R - Router, T - Trans Bridge, B - Source Route Bridge
S - Switch, H - Host, I - IGMP, r - Repeater
Device-ID
Capability Platform
Remote Port
--------------------------- ---------- --------------------- ----------SCA05600126(kal6-lab-swa.cm TSI
WS-C6509
4/16
SCA05600126(kal6-lab-swa.cm TSI
WS-C6509
4/12
JAB04140GZC(kal6-lab-z4-swa TS
WS-C2948
1/23
Cisco SN 5428-2 Storage Router Software Configuration Guide
12-388
78-15471-01
Chapter 12
Command Line Interface Reference
show cdp neighbors
Table 12-22 describes the significant fields shown in the display.
Table 12-22 Description of Fields in the “show cdp neighbors” Command Output
Field
Description
Capability Codes
The type of device that can be discovered.
Device-ID
The name of the neighbor device and either the MAC address or the serial
number of this device. This field is truncated after 27 characters.
Capability
The type of the device listed in the CDP Neighbors table. Possible values are:
•
R—Router
•
T—Transparent bridge
•
B—Source-routing bridge
•
S—Switch
•
H—Host
•
I—IGMP device
•
r—Repeater
Platform
The product number of the device. This field is truncated after 21 characters.
Remote Port
The outgoing port information.
The following is sample output for one neighbor from the show cdp neighbors detail command. The
output includes additional information about the neighbor, including network address, enabled
protocols, and software version.
[SN5428-2A]# show cdp neighbors detail
---------------------------------------Device ID: TRC0448016Q(lab-sn5428-2a.mlab.com)
Entry address(es):
IP address: 10.2.0.83
Platform: WS-C6509, Capabilities: Trans-Bridge Switch IGMP
Interface: mgmt, Remote Port (outgoing port): 7/48
Holdtime : 138 sec
Version :
WS-C6509 Software, Version McpSW: 6.1(1b) NmpSW: 6.1(1b)
Copyright (c) 1995-2000 by Cisco Systems
advertisement version: 2
VTP Management Domain: 'LAB-SN5428-2A'
Native VLAN: 220
Duplex: half
---------------------------------------Device ID: 000421b45a00(lab32)
Entry address(es):
IP address: 10.2.0.185
Platform: SN5428-2, Capabilities: Router
Interface: mgmt, Remote Port (outgoing port): fei0
Holdtime : 174 sec
Version :
Cisco SN5428-2 Software Version 3.2.1
advertisement version: 2
Cisco SN 5428-2 Storage Router Software Configuration Guide
78-15471-01
12-389
Chapter 12
Command Line Interface Reference
show cdp neighbors
Table 12-23 describes the significant fields shown in the display.
Table 12-23 Description of Fields in the “show cdp neighbors detail” Command Output
Related Commands
Field
Description
Device-ID
The name of the neighbor device and either the MAC address or the
serial number of this device.
Entry address(es)
A list of network addresses of neighbor devices.
IP address
The IP address of the neighboring device.
Platform
The product number of the device.
Capabilities
The device type of the neighbor. This device can be a router, a bridge,
a transparent bridge, a source-routing bridge, a switch, a host, an IGMP
device, or a repeater.
Interface
The storage router interface used to connect to this neighbor.
Remote Port
The outgoing port number.
Holdtime
The remaining amount of time (in seconds) the current device will hold
the CDP advertisement from a sending device before discarding it.
Version
The software version of the neighbor device.
advertisement version
The CDP advertisement version.
VTP Management Domain
The name of the VTP management domain.
Native VLAN
The native VLAN identification number.
Duplex
The duplex state of the connection between the storage router and the
neighbor device.
Command
Description
cdp enable
Enable or disable CDP on the SN 5428-2 Storage Router.
cdp holdtime
Specify the amount of time the receiving device should hold a CDP packet
from the SN 5428-2 Storage Router before discarding it.
cdp interface
Switch CDP on or off for the specified interface.
cdp timer
Specify the amount of time between transmissions of CDP packets from the
SN 5428-2 Storage Router.
show cdp
Display global CDP configuration information for the storage router.
show cdp entry
Display information about a specific neighbor device listed in the CDP
neighbors table.
show cdp interface
Display information about the interfaces on which CDP is enabled.
show cdp traffic
Display information about traffic between devices gathered using CDP.
Cisco SN 5428-2 Storage Router Software Configuration Guide
12-390
78-15471-01
Chapter 12
Command Line Interface Reference
show cdp traffic
show cdp traffic
To display information about traffic between devices gathered using Cisco Discovery Protocol (CDP),
use the show cdp traffic command.
show cdp traffic
Syntax Description
This command has no arguments or keywords.
Defaults
None.
Command Modes
Administrator or Monitor.
Command History
Release
Modification
3.2.1
This command was introduced.
Usage Guidelines
Use this command to view statistics about CDP traffic between the storage router and other devices.
Examples
The following is example output from the show cdp traffic command.
[SN5428-2A]# show cdp traffic
CDP counters :
Total packets output: 4968, Input: 22329
Hdr syntax: 0, Chksum error: 0, Encaps failed: 0
No memory: 0, Invalid packet: 0, Fragmented: 0
CDP version 1 advertisements output: 1242, Input: 9911
CDP version 2 advertisements output: 3726, Input: 12418
Table 12-24 describes the fields shown in the display.
Table 12-24 Description of Fields in the “show cdp traffic” Command Output
Field
Description
Total packets output
The number of CDP advertisements sent by the storage router. This value
is the sum of the “CDP version 1 advertisements output” and “CDP
version 2 advertisements output” fields.
Input
The number of CDP advertisements received by the storage router. This
value is the sum of the “CDP version 1 advertisements input” and “CDP
version 2 advertisements input” fields.
Hdr syntax
The number of CDP advertisements with bad headers received by the
storage router.
Chksum error
The number of times the verification operation failed on incoming CDP
advertisements.
Cisco SN 5428-2 Storage Router Software Configuration Guide
78-15471-01
12-391
Chapter 12
Command Line Interface Reference
show cdp traffic
Table 12-24 Description of Fields in the “show cdp traffic” Command Output (continued)
Field
Description
Encaps failed
The number of times CDP failed to send advertisements on an interface
because of a failure caused by the bridge port of the storage router.
No memory
The number of times the storage router did not have sufficient memory to
store the CDP advertisements in the advertisement cache table when the
storage router attempted to assemble advertisement packets for
transmission or to parse them when receiving them.
Invalid packet
The number of invalid CDP advertisements received and sent by the
storage router.
Fragmented
The number of times fragments or portions of a single CDP
advertisement were received by the storage router instead of the complete
advertisement.
CDP version 1
advertisements output
The number of CDP version 1 advertisements sent by the storage router.
Input
CDP version 2
advertisements output
Input
Related Commands
The number of CDP version 1 advertisements received by the storage
router.
The number of CDP version 2 advertisements sent by the storage router.
The number of CDP version 2 advertisements received by the storage
router.
Command
Description
cdp enable
Enable or disable CDP on the SN 5428-2 Storage Router.
cdp holdtime
Specify the amount of time the receiving device should hold a CDP packet
from the SN 5428-2 Storage Router before discarding it.
cdp interface
Switch CDP on or off for the specified interface.
cdp timer
Specify the amount of time between transmissions of CDP packets from the
SN 5428-2 Storage Router.
show cdp
Display global CDP configuration information for the storage router.
show cdp entry
Display information about a specific neighbor device listed in the CDP
neighbors table.
show cdp interface
Display information about the interfaces on which CDP is enabled.
show cdp neighbors
Display detailed information about neighboring devices discovered using
CDP.
Cisco SN 5428-2 Storage Router Software Configuration Guide
12-392
78-15471-01
Chapter 12
Command Line Interface Reference
show cli
show cli
To display information about the command line interface (CLI), use the show cli command.
show cli [command-keyword] [command-keyword ... command keyword ...]
show cli status
Syntax Description
command-keyword
(Optional) The first keyword in the command displays the CLI command
tree for all varieties of that command.
status
(Optional) Keyword used to display the status of the last CLI command.
Defaults
None.
Command Modes
Administrator or Monitor.
Command History
Release
Modification
3.2.1
This command was introduced.
Usage Guidelines
Use the show cli command to display the complete CLI command tree, along with helpful information
about command parameters and arguments. Use the command-keyword arguments to display information
about a specific set of commands, such as scsirouter or cdp commands. Only valid commands and
keywords will be displayed.
The set of CLI commands and keywords that will be available to you depend on the level of authority
associated with your CLI management session and the deployment option selected for the storage router
during initial configuration.
Use the status keyword to display the status of the last CLI command that was issued. A status of “0”
indicates that the command completed without errors. A status of “-13” indicates that the command
syntax was invalid.
Examples
The following is example output from the show cli command, showing the CLI command tree
information for the ping command.
[SN5428-2A]# show cli ping
ping
<A.B.C.D | servername>
numpkts
<npkts>
size
<sn>
size
<sn>
Send ICMP pings to a host
IP address or hostname to ping
Number of packets to attempt
Integer greater than zero (Default is 5)
Size of packet
Integer (64..4096), default is 64
Size of packet
Integer (64..4096), default is 64
Cisco SN 5428-2 Storage Router Software Configuration Guide
78-15471-01
12-393
Chapter 12
Command Line Interface Reference
show cli
Related Commands
Command
Description
help
Display information about how to use the CLI.
Cisco SN 5428-2 Storage Router Software Configuration Guide
12-394
78-15471-01
Chapter 12
Command Line Interface Reference
show clock
show clock
To display the current system date and time, use the show clock command.
show clock
Syntax Description
This command has no arguments or keywords.
Defaults
None.
Command Modes
Administrator or Monitor.
Command History
Release
Modification
3.2.1
This command was introduced.
Usage Guidelines
Use this command to display the storage router date and time setting.
Examples
The following is example output from the show clock command:
[SN5428-2A]# show clock
Thurs Mar 21 15:54:25 GMT+6 2002
Related Commands
Command
Description
clock set
Set the system clock to the given date and time.
clock timezone
Specify the storage router time zone information.
ntp peer
Specify the name or IP address of the NTP server with which the storage
router will synchronize date and time.
setup time
Run the wizard to configure date and time information (including NTP
server and time zone) associated with the storage router.
Cisco SN 5428-2 Storage Router Software Configuration Guide
78-15471-01
12-395
Chapter 12
Command Line Interface Reference
show cluster
show cluster
To display operational information related to the high availability (HA) cluster, use the show cluster
command.
show cluster
Syntax Description
This command has no arguments or keywords.
Defaults
None.
Command Modes
Administrator or Monitor.
Command History
Release
Modification
3.2.1
This command was introduced.
Usage Guidelines
Use this command to display cluster information for the storage router whether it is in standalone or
clustered mode.
Examples
The following example displays cluster information. In this example, the storage router named
SN 5428-2A belongs to a cluster.
[SN5428-2A]# show cluster
Cluster Name: Weblab
Cluster Changes: 2
Last Change: Tue Mar 19 04:12:51 GMT+6 2002
IP Multicast Address: 224.0.0.101
Operating Message Version: V3
Detected Configuration Errors: None
Local Node: SN5428-2A
HA Configuration: CLUSTERED
HA: up
MGMT Port: up
Sent 19240 heartbeats
Rcvd 19238 heartbeats
Cluster Node List:
System Name
MGMT IP
SN5428-2A
10.1.10.244
SN5428-2B
10.1.10.223
Application List:
Application Name
scsirouter/scsi1
scsirouter/scsi2
HA Port: up
HA IP
10.1.20.56
10.1.20.98
Master on
SN5428-2A
SN5428-2B
Last Heard From
Self
Tue Mar 18 05:17:43
State
Master
Slave
Last Config Update
Mar 18 21:23:45
Mar 18 23:21:10
AAA, Access List, password, & VLAN Management is on SN5428-2B
Cisco SN 5428-2 Storage Router Software Configuration Guide
12-396
78-15471-01
Chapter 12
Command Line Interface Reference
show cluster
The following example displays cluster information about a standalone storage router:
[SN5428-2A]# show cluster
Cluster Name: 630041D
Cluster Changes: 0
Last Change: Mon Nov 19 14:09:18 GMT+6 2001
IP Multicast Address: 224.0.0.101
Operating Message Version: V3
Detected Configuration Errors: None
Local Node: SN5428-2A
HA Configuration: STANDALONE
HA: down
MGMT Port: up
Sent 0 heartbeats
Rcvd 0 heartbeats
Cluster Node List:
System Name
MGMT IP
SN5428-2A
10.1.10.244
Application List:
Application Name
scsirouter/foo
HA Port: down
HA IP
no IP address
Master on
SN5428-2A
Last Heard From
Self
State
Master
Last Config Update
Jan 19 13:05:33
AAA, Access List, password & VLAN Management is on SN5428-2A
Table 12-25 describes the fields shown in the display.
Table 12-25 Description of Fields in the “show cluster” Command Output
Field Name
Description
Cluster Name
The name of the HA cluster.
Cluster Changes
The number of cluster changes made to this storage router since it was
initially configured, or since the last clear conf command was issued.
Last Change
The date and time of the last cluster configuration change.
IP Multicast Address
The IP address used for multicast communications. IANA has
assigned the multicast IP address 224.0.0.101 to the Cisco SN 5428-2
Storage Router.
Operating Message
Version
The version identifier for system messages, including HA messages
exchanged between storage routers in a cluster.
Detected Configuration
Errors
The total number of configuration errors, if any, detected by the
system.
Local Node
The name of the storage router.
HA Configuration
Indicates the configuration of HA in the storage router. Valid
configurations are STANDALONE or CLUSTERED.
HA
Indicates the state of the HA application in the storage router. Valid
states are up or down. If the HA configuration is STANDALONE, the
HA state should be down.
MGMT Port
Indicates the state of the physical management port. Valid states are
up or down.
HA Port
Indicates the state of the physical HA port. Valid states are up or down.
Sent . . . heartbeats
Number of heartbeats transmitted on the HA network.
Recvd . . . heartbeats
Number of heartbeats received on the HA network.
Cisco SN 5428-2 Storage Router Software Configuration Guide
78-15471-01
12-397
Chapter 12
Command Line Interface Reference
show cluster
Table 12-25 Description of Fields in the “show cluster” Command Output (continued)
Field Name
Description
Cluster Node List
A list of storage routers in the cluster.
System Name
The name of the storage router.
MGMT IP
The IP address of the cluster node management interface.
HA IP
The IP address of the cluster node HA interface.
Last Heard From
The date and time the cluster node was last heard from.
Application List
A list of applications running on the storage router.
Application Name
A list of all SCSI routing instances in the cluster.
Master on
The name of the storage router currently running this SCSI routing
instance.
State
The state of the SCSI routing instance on this storage router.
Last Config Update
The date and time of the last configuration change to this SCSI routing
instance.
AAA, Access List, password
& VLAN management is on
Related Commands
The name of the storage router in the cluster that currently handles
access list, VLAN, AAA, and password management functions.
Command
Description
save all
Save all configuration information.
save system
Save selected system configuration information.
setup cluster
Change the configuration of the high availability environment.
show ha
Display HA operational statistics for the storage router or for a specific
application.
show system
Display selected system information, including system name.
Cisco SN 5428-2 Storage Router Software Configuration Guide
12-398
78-15471-01
Chapter 12
Command Line Interface Reference
show cpu
show cpu
To display CPU utilization information, use the show cpu command.
show cpu
Syntax Description
This command has no arguments or keywords.
Defaults
None.
Command Modes
Administrator or Monitor.
Command History
Release
Modification
3.2.1
This command was introduced.
Usage Guidelines
Use this command to view the percentage of CPU utilization for the last five seconds, the last minute,
and the last five minutes. The show cpu command is designed for debug purposes, and should be used
under the guidance of a Cisco Technical Support professional.
Examples
The following is example output from the show cpu command:
[SN5428-2A]# show cpu
CPU Utilization for last 5 seconds: 1%; last 1 minute: 2%; last 5 minutes: 2%
Related Commands
Command
Description
show buffers
Display information about buffer pools.
show memory
Display information about memory and related resources.
show stack
Display the memory stack on a per-task basis.
show tech-support
Display a variety of diagnostic information for use by Cisco Technical
Support professionals.
Cisco SN 5428-2 Storage Router Software Configuration Guide
78-15471-01
12-399
Chapter 12
Command Line Interface Reference
show crash
show crash
To display saved crash trace information or current crash trace information, use the show crash
command.
show crash [current]
Syntax Description
current
Defaults
None.
Command Modes
Administrator or Monitor.
Command History
Release
Modification
3.2.1
This command was introduced.
Usage Guidelines
(Optional) Returns the current crash trace information for the running
system.
The default crash trace file is crash-cpp.txt in the log directory. This file is created if the SN 5428-2
unexpectedly restarts. Use the current keyword to display the crash trace information as it exists for the
currently running system. To save the command output, redirect the output of your console using the
logging facilities for your specific console interface. Depending on your console interface and scroll
buffer size, you may also be able to copy and paste the contents from your console into an ASCII text file.
The show crash command is designed for debug purposes and should only be used under the guidance
of a Cisco Technical Support professional.
Examples
The following example displays the beginning of current crash trace information:
[SN5428-2A]# show crash current
#
# Crash Information (/ata4/log/tmpcrash.txt)
#
Cisco Systems Crash Trace
#
# System Information
#
Time Stamp:
Thu Mar 13 16:04:35 CST 2002
System Model:
SN5428-2
Software Version: 3.3.1-K9
#
# Exception Information
#
intContext: -1
Task:
0xffffffff
Param 1:
0xffffffff
Param 2:
0xffffffff
Cisco SN 5428-2 Storage Router Software Configuration Guide
12-400
78-15471-01
Chapter 12
Command Line Interface Reference
show crash
Panic Msg: NULL
#
# Boot Information
#
VxWorks (for Galileo GT64260/MPC7410) version 5.4.1.
Kernel: WIND version 2.5.
Made on Dec 12 2002, 15:13:30.
Boot line:
ata=0,00(0,0):/ata0/vxWorks e=10.1.10.244:ffffff00 tn=lab2 s=/ata0/NuSpeed.start o=fei
#
#Task List#
#
In the following example, no saved crash trace information exists. This condition occurs when the
command is issued and the storage router has never unexpectedly restarted.
show crash
#
# Crash Information (/ata4/log/crash-cpp.txt)
#
No crash information available
Related Commands
Command
Description
show buffers
Display information about buffer pools.
show memory
Display information about memory and related resources.
show stack
Display the memory stack on a per-task basis.
show tech-support
Display a variety of diagnostic information for use by Cisco Technical
Support professionals.
Cisco SN 5428-2 Storage Router Software Configuration Guide
78-15471-01
12-401
Chapter 12
Command Line Interface Reference
show debug
show debug
To display a variety of debug information or perform specific troubleshooting activities, use the
show debug command.
show debug {mailboxtrace | rawlundatabase} {fci? | all}
show debug portarray fci?
Syntax Description
fci?
The name of the internal Fibre Channel (FC) interface. Valid values are fci1
and fci2. When you type fci?, the CLI lists the interfaces available. You
cannot specify a nonexistent interface.
all
Keyword used to display the specified debug information for all internal FC
interfaces.
mailboxtrace
Display mailbox trace data.
portarray
Display all active virtual ports. This command is only available in systems
deployed for transparent SCSI routing.
rawlundatabase
Display raw inquiry data from all discovered LUNs.
Defaults
None.
Command Modes
Administrator or Monitor.
Command History
Release
Modification
3.2.1
This command was introduced.
Usage Guidelines
Use this command to display debugging information for internal FC interfaces. The show debug
command is designed for debug purposes and should be used under the guidance of a Cisco Technical
Support professional.
Cisco SN 5428-2 Storage Router Software Configuration Guide
12-402
78-15471-01
Chapter 12
Command Line Interface Reference
show debug
Examples
The following example displays raw lun database information for all targets discovered on the internal
FC interface fci1:
[SN5428-2_PR]# show debug rawlundatabase fci1
Entry Address = 0xd047ab4
fabricLoginFailureCode=0x0,fabricLoginExtendedCode=0x0,fabricLoginTimeoutCode=0x0
ReportLunsLLDStatus=0x0,ReportLunsLLDStatusModifier=0x0,ReportLunsSCSIStatus=0x0,ReportLun
sASCASCQ=0x0,ReportLunsLunCount=1
InquiryLLDStatus=0x0,InquiryLLDStatusModifier=0x0,InquiryLastLunWithLLDError=0x0,
InquirySCSIStatus=0x0,InquiryASCASCQ=0x0,InquiryLastLunWithSCSIStatusError=0x0
boolLunsNotSupported=0x0,InquiryLastLunNotSupported=0x0
loopId=0x0,masterState=0x6,slaveState=0x7,loggedIn=1,roles=1,valid=1,portId=0x104e1,scanLu
ns=0x0
numberLuns=0x1,reportAsyncEvent=0x0,node_wwn=0x20000004 0xae4122a6, port_wwn=0x21000004
0xae4322a6
lun=0, wwnn=0x20000020 0x37559b0e, reportAsyncEvent=0x0
stdInquiry data for lun=0x0
bytes0-7=0x00000332 0x8b00700a
vendorId=SEAGATE , product=ST318451FC
, revision=0001 device Type=0x0
DeviceIdPage:bytes0-3= 0x0083000c,bytes4-7= 0x01030008,bytes8-11= 0x20000020
:bytes12-15= 0x37559b0e,bytes16-19=0x00800014,bytes20-23=0x33434330
S/N Page:bytes0-3= 0x00800014 s/n=3CC01M4K0000710367CX
Entry Address = 0xab1603c
fabricLoginFailureCode=0x0,fabricLoginExtendedCode=0x0,fabricLoginTimeoutCode=0x0
ReportLunsLLDStatus=0x0,ReportLunsLLDStatusModifier=0x0,ReportLunsSCSIStatus=0x0,ReportLun
sASCASCQ=0x0,ReportLunsLunCount=1
InquiryLLDStatus=0x0,InquiryLLDStatusModifier=0x0,InquiryLastLunWithLLDError=0x0,
InquirySCSIStatus=0x0,InquiryASCASCQ=0x0,InquiryLastLunWithSCSIStatusError=0x0
boolLunsNotSupported=0x0,InquiryLastLunNotSupported=0x0
loopId=0x1,masterState=0x6,slaveState=0x7,loggedIn=1,roles=1,valid=1,portId=0x101e2,scanLu
ns=0x0
numberLuns=0x1,reportAsyncEvent=0x0,node_wwn=0x20000004 0xae4304cd, port_wwn=0x22000004
0xae4304cd
lun=0, wwnn=0x20000004 0xae4304cd, reportAsyncEvent=0x0
stdInquiry data for lun=0x0
bytes0-7=0x00000312 0x8b00700a
vendorId=SEAGATE , product=ST318452FC
, revision=0002 device Type=0x0
DeviceIdPage:bytes0-3= 0x0083000c,bytes4-7= 0x01030008,bytes8-11= 0x20000004
:bytes12-15= 0xae4304cd,bytes16-19=0x00700014,bytes20-23=0x43465630
S/N Page:bytes0-3= 0x00800014 s/n=3FZ0647A00a06216DVJ7
Entry Address = 0xcb1974c
fabricLoginFailureCode=0x0,fabricLoginExtendedCode=0x0,fabricLoginTimeoutCode=0x0
ReportLunsLLDStatus=0xbfc0,ReportLunsLLDStatusModifier=0x3801,ReportLunsSCSIStatus=0x7fcb,
ReportLunsASCASCQ=0x8c13,ReportLunsLunCou7
InquiryLLDStatus=0x5179,InquiryLLDStatusModifier=0x8492,InquiryLastLunWithLLDError=0x7a90,
InquirySCSIStatus=0xacea,InquiryASCASCQ=0x800b,InquiryLastLunWithSCSIStatusError=0xffe3
boolLunsNotSupported=0x38da7321,InquiryLastLunNotSupported=0xfc51
loopId=0x7e,masterState=0x6,slaveState=0x7,loggedIn=1,roles=0,valid=1,portId=0xfffffe,scan
Luns=0x1
numberLuns=0x0,reportAsyncEvent=0x0,node_wwn=0x10000002 0x3d071161, port_wwn=0x20000002
0x3a171241
Cisco SN 5428-2 Storage Router Software Configuration Guide
78-15471-01
12-403
Chapter 12
Command Line Interface Reference
show debug
Related Commands
Command
Description
debug scsirouter
Enable debugging for the named SCSI routing instance
debug scsirouter
target
Enable debugging for a specific SCSI routing instance target and LUN
combination.
Cisco SN 5428-2 Storage Router Software Configuration Guide
12-404
78-15471-01
Chapter 12
Command Line Interface Reference
show debug fcip
show debug fcip
To display a variety of debug information or perform specific troubleshooting activities for FCIP
instances, use the show debug fcip command.
show debug fcip name {mailboxtrace | packettrace}
Syntax Description
name
The name of the FCIP instance. Valid names are fcip1 and fcip2.
mailboxtrace
Display mailbox trace data.
packettrace
Display packet trace data.
Note
The packet trace mask can be set for the current session using the
debug fcip command. To retain the packet trace mask setting over
a storage router restart, use the fcip destination config command.
Defaults
None.
Command Modes
Administrator.
Command History
Release
Modification
3.3.1
This command was introduced.
Usage Guidelines
Use this command to display debugging information for FCIP instances. The show debug command is
designed for debug purposes and should be used under the guidance of a Cisco Technical Support
professional.
Examples
The following is example mailbox trace data for the FCIP instance named fcip1:
[SN5428-2A]# show debug fcip fcip1 mailboxtrace
qlpt 0xca99f98, unit 1
linkState Down, linkIsUp FALSE
Peer 0.0.0.0, isConnected TRUE
InitBlock values:
Max IOCB Allocation 256, Max Frame Length 2112
Execution Throttle 16, Retry Count 8
Retry Delay 1, Inquiry Data 0
Risc Option 0x8000, Additional Firmware Option 0x10
Special Firmware Option 0x6000
FW_Rev 3.100.101, FW_State 0x4
pktTraceMask 0x0
mboxTracing Yes, cmdCount 0
requestQ: queue_base = 0xca92000
reqinptr = 28, reqoutptr = 0
reqInAbsAddress = 0xca92700, reqOutAbsAddress = 0xca92000
responseQ: queue_base = 0xca8c000
respinptr = 28, respoutptr = 28
respInAbsAddress = 0xca8c700, respOutAbsAddress = 0xca8c700
Cisco SN 5428-2 Storage Router Software Configuration Guide
78-15471-01
12-405
Chapter 12
Command Line Interface Reference
show debug fcip
046: 40 8
0009
047: 41 1
4000
048: 40 8
0009
049: 41 1
4000
050: 40 8
0009
051: 41 1
4000
052: 40 2
0007
...
Related Commands
- 0
9d40
- 0
1111
- 0
9d80
- 0
1111
- 0
9dc0
- 0
1111
- 0
0800
0ca8 b000 0040 0000 0000 0000 0000
2222 3333 4444 5555 6666 7777 ffff
0ca8 b000 0040 0000 0000 0000 0000
2222 3333 4444 5555 6666 7777 ffff
0ca8 b000 0040 0000 0000 0000 0000
2222 3333 4444 5555 6666 7777 ffff
0ca8 b000 0040 0000 0000 0000 0000
Command
Description
debug fcip
Enable debugging for the named FCIP instance.
fcip
Create an FCIP instance.
fcip destination config Configure operational parameters for the named FCIP instance.
show fcip
Display configuration and operational information for the named FCIP
instance.
Cisco SN 5428-2 Storage Router Software Configuration Guide
12-406
78-15471-01
Chapter 12
Command Line Interface Reference
show debug fcswitch
show debug fcswitch
To display internal Fibre Channel (FC) interface parameters, use the show debug fcswitch command.
show debug fcswitch {all | brief | memory | tech-support}
show debug fcswitch clish text
Syntax Description
all
Display all interface parameters for internal FC interfaces fc0, fc15, fci1
and fci2, including all switch log entries.
brief
Display all interface parameters for internal FC interfaces fc0, fc15, fci1
and fci2. Includes only the last 5 switch log entries.
memory
Display memory usage for the integrated FC switch component.
tech-support
Display technical support information for the integrated FC switch
component.
clish text
Display internal operational information for the integrated FC switch
component. The text argument is any valid switch “show” command. If the
text argument includes spaces, enclose it in quotation marks.
Defaults
None.
Command Modes
Administrator or Monitor.
Command History
Release
Modification
3.2.1
This command was introduced.
Usage Guidelines
The show debug fcswitch command is designed for debug purposes, and should be used under the
guidance of a Cisco Technical Support professional.
Use the show debug fcswitch brief or show debug fcswitch all commands to display initiator WWPN
information (fci1 is initiator WWPN1 and fci2 is initiator WWPN2) and other parameters related to the
internal FC interfaces.
Examples
The following example displays various configuration parameters for the internal FC interfaces, and the
last five switch log entries:
[SN5428-2_PR]# show debug fcswitch brief
Interface
--------fc0
fc15
WWPN switch port
---------------200000021e071161
200f00021e071161
Cisco SN 5428-2 Storage Router Software Configuration Guide
78-15471-01
12-407
Chapter 12
Command Line Interface Reference
show debug fcswitch
Initiator
--------WWPN1
WWPN2
Value
---------------280000021e071160
290000021e071160
Global attributes
Value
---------------------- ----Switch Name
SN5428-2
Node WWN
100000021e071151
DomainID
1
Uptime (seconds)
76956
SysLogLevel
Critical
SysLogComp
NameServer MgmtServer Zoning Switch Chassis Blade Port Eport Other
DevLogLevel
Critical
DevLogComp
None
AlarmEntries
1
Display last 5 of 45 syslog entries
[41][Tue Mar 19 05:08:44.280 2002][C][Switch Management:0x3e061163.304.4][User interface
session 3 user cisco@OB-session3 has been ]
[42][Tue Mar 19 05:08:44.290 2002][C][Switch Management:0x3e061163.304.4][User interface
session <4> user <cisco@OB-session4> has t]
[43][Tue Mar 19 05:08:44.290 2002][C][Switch Management:0x3e061163.304.4][User interface
session 4 user cisco@OB-session4 has been ]
[44][Tue Mar 19 05:33:13.792 2002][C][Switch Management:0x3e061163.304.4][Successful login
user cisco@OB-session3 admin 1 address U]
[45][Tue Mar 19 05:33:13.793 2002][C][Switch Management:0x3e061163.304.4][User interface
session 3 has been opened]
Display 4 devlog entries
[1][Tue Mar 19 03:10:11.057 2002][DI][Switch Log Client/0:0x3e061163.0.5][requesting
logging oper data]
[2][Tue Mar 19 03:10:11.059 2002][DI][Switch Log Client/0:0x3e061163.0.5][received,
DS_RESP_STATUS msg,id = -987127616, status = 0x]
[3][Tue Mar 19 03:10:36.797 2002][DI][Switch Log Client/0:0x3e061163.0.5][updating logging
oper data]
[4][Tue Mar 19 03:10:38.713 2002][DC][Management Server:0x3e0671163.314.6][pltdb.cc.620:
database version '2' does not match code ve]
Related Commands
Command
Description
fcswitch devlog
Specify logging parameters for the switch development log file.
fcswitch syslog
Specify logging parameters for the switch system log file.
Cisco SN 5428-2 Storage Router Software Configuration Guide
12-408
78-15471-01
Chapter 12
Command Line Interface Reference
show debug interface fc?
show debug interface fc?
To display debug information for internal Fibre Channel (FC) interface switch ports, use the
show debug interface fc? command.
show debug interface fc? [hosts | stats]
Syntax Description
fc?
Display debug information for the specified internal FC interface switch
ports. When you type the show debug interface fc? command, the CLI lists
the interfaces available. You cannot specify a nonexistent interface.
hosts
Keyword used to display FC hosts information.
stats
Keywords used to display statistics and configuration information.
Defaults
None.
Command Modes
Administrator or Monitor.
Command History
Release
Modification
3.2.1
This command was introduced.
Usage Guidelines
The show debug interface fc? command is designed for debug purposes, and should be used under the
guidance of a Cisco Technical Support professional.
Examples
The following example displays debug information for the internal FC interface switch port fc0:
[SN5428-2_PR]# show debug interface fc0
Operational Data
Interface Stat IP/Netmask
MAC
Options
--------- ---- ------------------------ ------------ ------fc0
up
type Fibre Channel
OperState enabled
PortID 010000
WWN 200000059ba69821
LinkSpeed 2Gb/s
LinkState Active
SyncState SyncAcquired
LoginStatus LoggedIn
Loopback Status Not Running
MaxCredit 12
DonatedToPort None
RunningType f-port
PendingType f-port
InBandMgmt enabled
SFPType NotApplicable
SFPVendor N/A
SFPVendorID N/A
Cisco SN 5428-2 Storage Router Software Configuration Guide
78-15471-01
12-409
Chapter 12
Command Line Interface Reference
show debug interface fc?
SFPPartNumber N/A
SFPRev N/A
Configuration Data
AlExt
FanInterface Status
fairness credit enable
--------- -------- -------- ------ -------fc0
enabled disabled 0
enabled
Related Commands
Link
speed
----2Gb/s
Loopback
type
-------Unknown
Mfsbundle
-------enabled
Time
out
---10
PortPorttype
mode
------- --------f-port
Command
Description
debug interface fc?
Enable IP packet tracing for the specified Gigabit Ethernet interface.
Cisco SN 5428-2 Storage Router Software Configuration Guide
12-410
78-15471-01
Chapter 12
Command Line Interface Reference
show debug interface ge?
show debug interface ge?
To display IP packet trace buffer statistics and contents, use the show debug interface ge? command.
show debug interface ge? trace stats
show debug interface ge? trace [first nn | last nn]
show debug interface ge? trace hex [ascii] [first nn | last nn]
Syntax Description
ge?
Display IP trace information for the specified Gigabit Ethernet interface.
When you type the show debug interface ge? command, the CLI lists the
interfaces available. You cannot specify a nonexistent interface.
trace
Display the entire trace buffer, in hex.
trace stats
Display packet trace statistics and configuration information.
first nn
(Optional) Display the specified number of packets from the start of the
trace buffer.
last nn
(Optional) Display the specified number of packets from the end of the trace
buffer.
trace hex
Display packet trace in hex.
ascii
(Optional) Display packet trace in hex and ASCII.
Defaults
None.
Command Modes
Administrator.
Command History
Release
Modification
3.2.1
This command was introduced.
3.3.1
The hex and ascii keywords were added.
Usage Guidelines
Note
To enable IP packet trace facilities for debugging Gigabit Ethernet interfaces, use the
debug interface ge? command. The show debug interface ge? command is designed for debug
purposes, and should be used under the guidance of a Cisco Technical Support professional.
IP packet tracing must be disabled on the interface before the trace buffer can be displayed.
Cisco SN 5428-2 Storage Router Software Configuration Guide
78-15471-01
12-411
Chapter 12
Command Line Interface Reference
show debug interface ge?
Examples
The following example disables IP packet tracing on the interface ge1 and then displays the full contents
of the trace buffer:
[SN5428-2_PR]# no debug interface ge1 trace enable
[SN5428-2_PR]#
1: RX, len 60,
0000: 01 00 0c
0010: 03 00 00
0020: 68 6f 00
0030: 00 08 7c
Related Commands
show debug interface
time 0.000
cc cc cc 00 08 7c 3c
0c 20 04 01 00 01 00
02 00 05 81 00 03 00
3c 3d 85 00 00 00 00
ge1 trace
3d
0b
05
00
85 00 28 aa aa
64 61 76 65 74
a5 00 04 00 0a
00
Command
Description
debug interface ge?
Enable IP packet tracing for the specified Gigabit Ethernet interface.
Cisco SN 5428-2 Storage Router Software Configuration Guide
12-412
78-15471-01
Chapter 12
Command Line Interface Reference
show debug scsirouter
show debug scsirouter
To display a variety of debug information or perform specific troubleshooting activities for SCSI routing
instances, use the show debug scsirouter command.
show debug scsirouter {name | all} {scsitrace | tfemapping | tfestatus}
show debug scsirouter name tfestatus verbose
show debug scsirouter name target name [lun nn [scsitrace]]
show debug scsirouter name iscsitrace [hex [ascii]] [first nn | last nn]
show debug scsirouter name iscsitrace stats
Syntax Description
scsirouter name
The name of the SCSI routing instance.
all
Display information for all SCSI routing instances.
scsitrace
Display raw SCSI trace information for the specified SCSI routing instance
or target and LUN combination.
tfemapping
Display target to physical device mapping information.
tfestatus
Display the status of the trace configuration for the specified SCSI routing
instance.
verbose
Display detailed information (including management, target management
and LUN management tables for all initiators) about the status of the trace
configuration for the specified SCSI routing instance.
target name
The name of the target associated with the specified SCSI routing instance.
lun nn
The target LUN number.
iscsitrace
Display iSCSI trace facility output.
hex
Display iSCSI trace data in hex.
ascii
Display iSCSI trace data in hex and ASCII.
first nn
Display the specified number of Protocol Data Units (PDUs) from the start
of the trace.
last nn
Display the specified number of PDUs from the end of the trace.
stats
Display iSCSI trace statistics.
Defaults
None.
Command Modes
Administrator or Monitor.
Command History
Release
Modification
3.2.1
This command was introduced.
3.3.1
The iscsitrace, hex, ascii, first, last and stats keywords were added.
Cisco SN 5428-2 Storage Router Software Configuration Guide
78-15471-01
12-413
Chapter 12
Command Line Interface Reference
show debug scsirouter
Usage Guidelines
To enable trace facilities for debugging SCSI routing instances, use the debug scsirouter command. The
show debug scsirouter command is designed for debug purposes, and should be used under the
guidance of a Cisco Technical Support professional.
Examples
The following example displays TFE status data for the SCSI routing instance named foo:
[SN5428-2_PR]# show debug scsirouter foo tfestatus
The following is example output displaying the target to physical device mapping information for the
SCSI routing instance named zeus:
[SN5428-2A]# show debug scsirouter zeus tfemapping
TARGET:0x0:chimaera_apps addressMapType=MAP_TYPE_LUNMAP (lun mapping)
LUN:0x11: iSCSI2ByteLun=0x11, iScsiLun=0x0000000000000000, addressMapType=MAP_TYPE_WWNN
Lun ID Length=8 lun ID=0x200000204819137b 00
I: NO iSCSI Initiators Logged into target:0x0:chimaera_apps
LUN:0x18: iSCSI2ByteLun=0x18, iScsiLun=0x0000000000000000,
addressMapType=MAP_TYPE_WWPN_LUN
WWPN=0x22000020 0x37281505, secWWPN=0x22000020 0x37191505
I: NO iSCSI Initiators Logged into target:0x0:chimaera_apps
LUN:0x1f: iSCSI2ByteLun=0x1f, iScsiLun=0x0000000000000000,
addressMapType=MAP_TYPE_WWPN_LUN
WWPN=0x22000020 0x37447b0e, secWWPN=0x22000020 0x37559b0e
I: NO iSCSI Initiators Logged into target:0x0:chimaera_apps
TARGET:0x1:chimaera_eng addressMapType=MAP_TYPE_LUNMAP (lun mapping)
LUN:0x11: iSCSI2ByteLun=0x11, iScsiLun=0x0000000000000000, addressMapType=MAP_TYPE_WWNN
Lun ID Length=8 lun ID=0x20000004cf4304cd 00
I: NO iSCSI Initiators Logged into target:0x1:chimaera_eng
TARGET:0x2:pegasus_web addressMapType=MAP_TYPE_LUNMAP (lun mapping)
LUN:0x3: iSCSI2ByteLun=0x3, iScsiLun=0x0000000000000000,
addressMapType=MAP_TYPE_SERIAL_NUMBER
lunSerialNumber=LS09311I0000I947ZDB5
I: NO iSCSI Initiators Logged into target:0x2:pegasus_web
TARGET:0x3:pegasus_email addressMapType=MAP_TYPE_WWPN (target mapping)
WorldWidePortName = 0x22000020 0x371912da, Secondary WorldWidePortName 0x22000020
0x371912da
LUN:0x0: iSCSI2ByteLun=0x0, iScsiLun=0x0000000000000000,
addressMapType=MAP_TYPE_WWPN_LUN
WWPN=0x22000020 0x371912da, secWWPN=0x22000020 0x372642da
I: NO iSCSI Initiators Logged into target:0x3:pegasus_email
The following example of an iSCSI trace display for connections to and from the SCSI routing instance
named sr1 shows a simple login exchange. The display is formatted in hex and ASCII.
[SN5428-2A]# show debug scsirouter sr1 iscsitrace hex ascii
1: 10.1.50.12:1912 -> 10.1.50.100:3260, len 252, time 0.000
0000: 43 87 00 00 00 00 00 cb 33 39 63 35 00 00 00 00 C.......39c5....
0010: 00 01 00 00 00 01 00 00 00 00 00 01 00 00 00 00 ................
0020: 00 00 00 00 00 00 00 00 00 00 00 00 00 00 00 00 ................
0030: 54 61 72 67 65 74 4e 61 6d 65 3d 69 71 6e 2e 31 TargetName=iqn.1
0040: 39 38 37 2d 30 35 2e 63 6f 6d 2e 63 69 73 63 6f 987-05.com.cisco
0050: 3a 30 30 2e 36 62 39 35 65 39 33 64 62 62 30 39 :00.6b95e93dbb09
0060: 2e 74 31 00 4d 61 78 52 65 63 76 44 61 74 61 53 .t1.MaxRecvDataS
0070: 65 67 6d 65 6e 74 4c 65 6e 67 74 68 3d 30 78 31 egmentLength=0x1
0080: 30 30 30 30 00 49 6e 69 74 69 61 6c 52 32 54 3d 0000.InitialR2T=
0090: 4e 6f 00 49 6e 69 74 69 61 74 6f 72 4e 61 6d 65 No.InitiatorName
00a0: 3d 69 73 63 73 69 2e 63 69 73 63 6f 2e 64 61 76 =iscsi.cisco.dav
Cisco SN 5428-2 Storage Router Software Configuration Guide
12-414
78-15471-01
Chapter 12
Command Line Interface Reference
show debug scsirouter
00b0:
00c0:
00d0:
00e0:
00f0:
61
6f
73
73
79
76
6d
3d
63
70
68
00
64
6f
65
6f
49
61
2e
3d
2d
6e
76
63
6e
6c
69
61
6f
6f
6e
74
76
6d
72
78
69
68
00
6d
2e
61
6f
53
61
63
74
2d
65
6c
69
6f
6c
73
00
73
72
6e
73
00
63
41
78
69
6f
6c
2e
6f
2e
69
63
6e
63
61
69
54
avho-lnx.cisco.c
om.InitiatorAlia
s=davavho-lnx.ci
sco.com.SessionT
ype=normal..
2: 10.1.50.100:3260 -> 10.1.50.12:1912, len 132, time 0.000
0000: 23 87 00 00 00 00 00 54 33 39 63 35 00 00 00 01 #......T39c5....
0010: 00 01 00 00 00 00 00 00 00 00 00 00 00 00 00 01 ................
0020: 00 00 00 07 00 00 00 00 00 00 00 00 00 00 00 00 ................
0030: 54 61 72 67 65 74 50 6f 72 74 61 6c 47 72 6f 75 TargetPortalGrou
0040: 70 54 61 67 3d 31 00 4d 61 78 52 65 63 76 44 61 pTag=1.MaxRecvDa
0050: 74 61 53 65 67 6d 65 6e 74 4c 65 6e 67 74 68 3d taSegmentLength=
0060: 35 32 34 32 38 38 00 49 6e 69 74 69 61 6c 52 32 524288.InitialR2
0070: 54 3d 4e 6f 00 54 61 72 67 65 74 41 6c 69 61 73 T=No.TargetAlias
0080: 3d 74 31 00
=t1.
Related Commands
Command
Description
debug scsirouter
Enable debugging for the named SCSI routing instance.
debug scsirouter
iscsitrace
Enable iSCSI trace facilities for debugging connections to and from the
specified SCSI routing instance.
debug scsirouter
target
Enable debugging for a specific SCSI routing instance target and LUN
combination.
Cisco SN 5428-2 Storage Router Software Configuration Guide
78-15471-01
12-415
Chapter 12
Command Line Interface Reference
show devices
show devices
To display a list of devices found on the SN 5428-2 Storage Router Fibre Channel (FC) network, use the
show devices command.
show devices [all | brief]
show devices [fc?] [lunid | serial]
show devices rediscover
Syntax Description
all
(Optional) Keyword used to display information for all devices on all FC
interfaces.
brief
(Optional) Keyword used to limit the display to serial number information,
including vendor and product, for all devices on all FC interfaces.
fc?
(Optional) Limit the display to devices on the named FC interface. Valid
values are fc1 through fc8. When you type the show devices fc? command,
the CLI lists the interfaces available. You cannot specify a nonexistent
interface.
lunid
(Optional) Keyword used to limit the display to LUN information for the
devices on the specified interface or all FC interfaces.
serial
(Optional) Keyword used to limit the display to serial number information,
including vendor and product, for devices on the specified interface or all
FC interfaces.
rediscover
(Optional) Begin a new discovery process on the FC network
Defaults
None.
Command Modes
Administrator or Monitor.
Command History
Release
Modification
3.2.1
This command was introduced.
Usage Guidelines
Use this command to display information about all devices discovered on the named FC interface, or all
FC interfaces. This information can be used when assigning targets to SCSI routing instances. The
storage information includes the associated interface, WWPN, port ID, device type, LUN number, LUN
ID type and LUN ID, capacity, vendor, product name, and LUN serial number.
The output of this command is limited to devices that are visible to the FC initiator interfaces (fci1 and
fci2).
Use the rediscover keyword to clear the existing list of devices and begin a new discovery process on
the FC network. Issue the show devices command again to display all discovered devices.
Cisco SN 5428-2 Storage Router Software Configuration Guide
12-416
78-15471-01
Chapter 12
Command Line Interface Reference
show devices
Caution
Examples
The show devices rediscover command flushes existing tables and forces a PLOGI to each device. If IP
hosts are accessing a device, they will be required to wait until this process completes.
The following is example output from the show devices rediscover command, followed by the
show devices command:
[SN5428-2A]# show devices rediscover
Fibre channel discovery kicked off!
[SN5428-2A]# show devices
Fabric Attached Devices detected
Interface WWPN
PortId
--------- ---------------- -------fc1
22000003be3203bc 0x101e2
fc1
2200001026448a0d 0x101e1
Lun Description Table
I