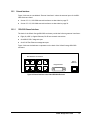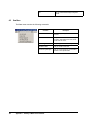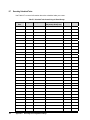
1
xStack Storage TM
D-Link xStack Storage iSCSI SAN Arrays
Managed SAN Solutions
DSN-3200 & DSN-3400
User’s Guide
Version 1.1
© 2006-2007 D-Link Networks, Inc. All Rights Reserved
D-Link Systems, Inc. makes no warranty of any kind with regard to this material, including,
but not limited to, the implied warranties of merchantability and fitness for a particular
purpose. D-Link Systems, Inc. shall not be liable for errors contained herein or for incidental
or consequential damages in connection with the furnishing, performance, or use of this
material.
This document contains proprietary information, which is protected by copyright. No part of
this document may be photocopied, reproduced, or translated into another language without
the prior written consent of D-Link Systems, Inc.
The information is provided “as is” without warranty of any kind and is subject to change
without notice. The only warranties for D-Link products and services are set forth in the
express warranty statements accompanying such products and services. Nothing herein
should be construed as constituting an additional warranty. D-Link shall not be liable for
technical or editorial errors or omissions contained herein.
Copyright © 2006-2007 D-Link Systems, Inc.™
Trademarks
Adobe® and Acrobat® are trademarks of Adobe Systems, Incorporated.
Java™ is a U.S. trademark of Sun Microsystems, Incorporated.
Microsoft Windows is a U.S. registered trademark of Microsoft Corporation.
Oracle® is a registered U.S. trademark of Oracle Corporation, Redwood City, California.
UNIX® is a registered trademark of The Open Group.
All other brand or product names are or may be trademarks or service marks, and are used
to identify products or services, of their respective owners.
D-Link Systems, Inc.
17595 Mount Herrmann Street
Fountain Valley, CA 92708
Safety Information
There is a danger of a new battery exploding if it is incorrectly installed.
Replace the battery pack only with the same or equivalent type recommended
by the manufacturer. Do not dispose of the battery along with household waste.
Contact your local waste disposal agency for the address of the nearest battery
deposit site.
This product also uses a lithium coin cell battery. The lithium coin cell battery is a long-life
battery, and it is very possible that you will never need to replace it. However, should you
need to replace it, consult your service documentation. Do not dispose of the battery along
with household waste. Contact your local waste disposal agency for the address of the
nearest battery deposit site.
Following are the safety agency certifications that the XStack Storage enclosure has met:
CSA 60950-1
UL 60950-1
IEC 60950-1
EN 60950-1
Compliance Information
FCC Class A
CE Class A
C-Tick Class A
VCCI Class A
Notice of Export Controls
Export of technical data contained in this document may require an export license from the
United States government. Please contact D-Link Systems, Inc. for any export compliance
questions.
Document Revision Level
Revision
Date
Version 1.0
August 10, 2006
Version 1.1
March 7, 2007
Notes
Version 1.1, replaces Version 1.0
- Revises drive numbering schema to reflect proper drive numbers 0 through 14
instead of 1 through 15.
XStack Storage User’s Guide
iii
Preface
This User Functional Guide is intended for storage managers and administrators responsible
for configuring and maintaining the XStack Storage unit.
This User Functional Guide assumes that the user:
Is computer literate.
Is familiar with operating Web browser software and working in a windowing
environment.
Has a basic understanding of storage products and concepts.
Typographic Conventions
The following conventions and icons are used in this User Functional Guide.
Notes
Notes provide information that deserves special attention. Notes are preceded by the
following icon:
Cautions
Cautions contain information which, if not followed, can cause damage to the XStack
Storage unit. Cautions are preceded by the following icon:
Warnings
Warnings contain information which, if not followed, can cause damage to the XStack
Storage unit and to the person installing it. Warnings are preceded by the following icon:
iv
Preface
Contact Information
You can find software updates and user documentation on the D-Link website.
D-Link provides free technical support for customers within the United States and within
Canada for the duration of the warranty period on this product.
U.S. and Canadian customers can contact D-Link Technical Support through our website, or
by phone.
Tech Support for customers within the United States:
D-Link Technical Support over the Telephone
Please see our support site for current number:
• http://support.dlink.com
• Monday to Friday 8:00am – 5:00pm PST/PDT
D-Link Technical Support over the Internet:
• http://support.dlink.com
Tech Support for customers within Canada:
D-Link Technical Support over the Telephone
Please see our support site for current number:
• http://support.dlink.ca
• Monday to Friday 7:30am to 9:00pm EST/EDT
D-Link Technical Support over the Internet:
• http://support.dlink.ca
XStack Storage User’s Guide
v
vi
Preface
Contents
Chapter 1
Introduction ..........................................................................................................................15
1.1
1.2
1.3
1.4
1.5
1.6
Chapter 2
Understanding Terminology and Concepts .......................................................................23
2.1
2.2
2.3
2.4
2.5
2.6
Chapter 3
Overview ..........................................................................................24
Understanding iSCSI .............................................................................24
Storage Pools and Drives .......................................................................25
Volumes ...........................................................................................26
Spare Count ......................................................................................28
Tasks ............................................................................................28
Identifying Hardware Components .....................................................................................31
3.1
3.2
Chapter 4
Models ............................................................................................16
Hardware Enclosure .............................................................................16
Benefits ...........................................................................................17
Features...........................................................................................18
System Overview ................................................................................19
Applications ......................................................................................20
1.6.1 Storage Consolidation .................................................................20
1.6.2 Server Consolidation ...................................................................20
1.6.3 Remote Mirroring and Replication ...................................................20
1.6.4 Fast Nearline Backup and Recovery .................................................20
1.6.5 Accelerated Backup Operations......................................................21
Front Panel Components .......................................................................32
3.1.1 LEDs
.................................................................................33
3.1.2 Key Lock and Latches..................................................................33
3.1.3 Drive Bays ...............................................................................34
3.1.4 Front Vents ..............................................................................35
Back Panel Components ........................................................................36
3.2.1 Switches .................................................................................36
3.2.2 External Interfaces.....................................................................37
3.2.3 Rear Vents ...............................................................................40
Installing the XStack Storage Unit ......................................................................................42
4.1
4.2
4.3
4.4
4.5
4.6
4.7
Site Considerations ..............................................................................43
Safety Considerations...........................................................................44
4.2.1 General Safety Guidelines ............................................................44
4.2.2 Electrical Safety Guidelines ..........................................................44
4.2.3 ESD Safety Precautions ................................................................45
4.2.4 Lifting and Reaching Safety Precautions ...........................................45
Unpacking the XStack Storage Unit ...........................................................46
Items Supplied by the User ....................................................................47
Installing the XStack Storage Unit without a Rack .........................................48
Installing the XStack Storage Unit in a Rack ................................................48
4.6.1 Connecting to the XStack Storage DSN-3200 Host Network Connection Ports 49
4.6.2 Connecting to the XStack Storage DSN-3400 Host Network Connection Port .49
Connecting to the XStack Storage Management Port ......................................50
XStack Storage User’s Guide
vii
4.8
4.9
4.10
4.11
Chapter 5
Configuring the XStack Storage Unit..................................................................................55
5.1
5.2
5.3
5.4
5.5
5.6
5.7
Chapter 6
Getting Started .................................................................................. 56
5.1.1 Launching the XStack Storage Management Console ............................. 56
5.1.2 Understanding the Main Screen...................................................... 58
Initial XStack Storage Setup ................................................................... 64
5.2.1 Configuring the Management Interface............................................. 64
5.2.2 Changing the XStack Storage Date and Time ...................................... 66
5.2.3 Configuring for Email Alerts .......................................................... 67
Managing the XStack Storage Unit............................................................ 69
5.3.1 Working with Volumes................................................................. 69
5.3.2 Adding iSCSI Initiators ................................................................. 82
5.3.3 Working with LAGS and VLANS ....................................................... 83
5.3.4 Working with Network Portals ....................................................... 90
5.3.5 Creating iSCSI Target Nodes.......................................................... 93
5.3.6 Logging on to the iSCSI Initiator Computer ........................................ 99
5.3.7 Changing the iSCSI Port Number................................................... 102
5.3.8 Setting the Default Task Priority .................................................. 103
5.3.9 Adding, Viewing, and Deleting IP Route Tables ................................. 104
5.3.10 Modifying System TCP/IP Settings................................................. 106
5.3.11 Setting the Spare Count............................................................. 108
5.3.12 Creating Scheduled Tasks........................................................... 109
5.3.13 Setting the System Battery Policy ................................................. 111
5.3.14 Saving the Event Log ................................................................ 113
Managing User Accounts...................................................................... 114
5.4.1 Setting Up User Accounts ........................................................... 115
5.4.2 Deleting User Accounts ............................................................. 116
Performing Cache Activities ................................................................. 117
5.5.1 Setting Cache Mode.................................................................. 117
Managing XStack Storage Configurations .................................................. 118
5.6.1 Saving the XStack Storage Configuration......................................... 118
5.6.2 Restoring the XStack Storage Configuration ..................................... 119
5.6.3 Restoring Factory Defaults ......................................................... 120
Restarting and Shutting down the XStack Storage ....................................... 121
5.7.1 Restarting the XStack Storage ..................................................... 121
5.7.2 Shutting Down the XStack Storage Management Console...................... 122
5.7.3 Shutting Down the XStack Storage ................................................ 122
Monitoring the XStack Storage .........................................................................................123
6.1
viii
Connecting the Battery Pack .................................................................. 51
Connecting the Power Cords .................................................................. 52
Booting the XStack Storage Unit .............................................................. 53
Configuration Methods ......................................................................... 53
Contents
XStack Storage Screens.......................................................................
6.1.1 Viewing Enclosure Information ....................................................
6.1.2 Viewing Log Messages ...............................................................
6.1.3 Viewing XStack Storage Tasks......................................................
6.1.4 Viewing Server CIM Information ...................................................
6.1.5 Viewing Firmware Image Information ............................................
124
124
126
128
131
132
6.2
6.3
6.4
6.5
Blade A Base Pool Screens ................................................................... 133
6.2.1 Viewing Storage Pool Information ................................................. 134
6.2.2 Viewing Storage Pool Tasks ......................................................... 135
6.2.3 Viewing Information about Volumes in the Blade A Base Pool ................ 137
6.2.4 Viewing Information about Drives in the Blade A Base Pool................... 141
Network Entities Screens..................................................................... 142
6.3.1 Viewing Target Node Information ................................................. 142
6.3.2 Viewing Volume Access Information............................................... 143
6.3.3 Viewing Initiator Access Information.............................................. 144
6.3.4 Viewing LAG Port Information...................................................... 145
6.3.5 Viewing Network Portal Information .............................................. 146
6.3.6 Viewing Connection Information................................................... 147
Initiator Resource Screens ................................................................... 148
6.4.1 Viewing iSCSI Initiator Information ................................................ 148
6.4.2 Viewing LUN Map Information ..................................................... 149
Viewing Ethernet Port Information ......................................................... 150
Appendix A Summary of Menus and Commands.................................................................................151
A.1
A.2
A.3
A.4
A.5
A.6
File Menu ....................................................................................... 151
View Menu ...................................................................................... 152
Storage Menu................................................................................... 153
Network Menu.................................................................................. 154
iSCSI Menu ...................................................................................... 154
Help Menu ...................................................................................... 155
Appendix B Upgrading Firmware...........................................................................................................157
Appendix C, Factory Default Settings ....................................................................................................159
Appendix D, Recording Your Configuration Settings ...........................................................................161
D.1
D.2
D.3
D.4
D.5
D.6
D.7
Recording Volumes ............................................................................ 162
Recording iSCSI Initiators..................................................................... 164
Recording LAGs ................................................................................ 166
Recording Network Portals................................................................... 168
Recording iSCSI Target Nodes ............................................................... 170
Recording IP Routing Tables ................................................................. 172
Recording Scheduled Tasks .................................................................. 174
Appendix E Understanding IP Addresses and Subnet Masking ..........................................................177
E.1
E.2
E.3
E.4
E.5
Understanding IP Addresses.................................................................. 177
Network Classes ............................................................................... 178
Network Masks ................................................................................. 181
Understanding Subnets ....................................................................... 182
Variable Length Subnet Masks ............................................................... 184
Appendix F Hardware Enclosures ..........................................................................................................189
F.1
F.2
Front View ...................................................................................... 189
Back View....................................................................................... 189
XStack Storage User’s Guide
ix
Appendix G Acronyms and Abbreviations............................................................................................190
Index
x
.............................................................................................................................................193
Contents
List of Figures
Figure 1-1 XStack Storage System Diagram ............................................................19
Figure 2-1 Internal Structure of a Volume .............................................................26
Table 2-2 Ways to Organize Volumes...................................................................26
Figure 3-1 Front View of the XStack DSN-3000 Series Enclosure ...................................32
Table 3-1 Front Panel LED indicators on the DSN-3000 series enclosure .........................33
Figure 3-2 Drive and Tray Removal .....................................................................34
Figure 3-3 Drive and Tray Installation ..................................................................35
Figure 3-4 Rear View of the XStack DSN-3200 Enclosure ............................................36
Figure 3-5 Power and Reset Switches ..................................................................36
Figure 3-6 External Interfaces on the XStack DSN-3200 Enclosure ................................37
Figure 3-8 External Interfaces on the XStack DSN-3400 Enclosure ................................39
Figure 4-1 Battery Pack Installed on XStack Controller .............................................51
Figure 4-2 Power Supply ..................................................................................52
Figure 4-3 Power-On Switch and Reset Switch Located on Rear of Enclosure ...................53
Figure 5-1 XStack Storage Log in Screen ...............................................................56
Figure 5-2 XStack Storage Management Console Main Screen ......................................57
Figure 5-3 Parts of the XStack Storage Management Console Main Screen.......................58
Figure 5-4 Menu/Tool Bar Area..........................................................................59
Figure 5-5 Resources Pane ...............................................................................60
Figure 5-6 Main Display Area.............................................................................62
Figure 5-7 Example of the Main Display Area Showing Blade A Base Pool Information .........62
Figure 5-8 Example of Message in the Footer .........................................................63
Figure 5-9 Configure Out of Band Port Dialog Box....................................................65
Figure 5-10 XStack Storage Date and Time Dialog Box ..............................................67
Figure 5-11 Configure Email Notification Dialog Box.................................................68
Figure 5-12 Volume Wizard Screen – Select Volume Type to Create Screen .....................70
Figure 5-13 Volume Wizard Screen – Access and Efficiency Settings Screen .....................71
Figure 5-14 Manual Create Volume Wizard - Select Volume Type to Create Screen............74
Figure 5-15 Manual Create Volume Wizard - Select the Drives Screen............................75
Figure 5-16 Expand Volume Dialog Box ................................................................77
Figure 5-17 Expand Volume Message ...................................................................78
Figure 5-18 Delete Volume Confirmation Message ...................................................79
Figure 5-19 Successful Volume Deletion Message ....................................................79
Figure 5-20 Scan Successfully Started Message .......................................................80
Figure 5-21 Scan Successfully Started Message .......................................................81
Figure 5-22 Add Initiator Wizard – Create Initiator Screen .........................................82
Figure 5-23 Example of Link Aggregation between the XStack Storage and a Gigabit Ethernet
Switch .......................................................................................84
Figure 5-24 Create Link Aggregation Group Wizard - LAG Parameters Screen...................85
Figure 5-25 Create Link Aggregation Group Wizard - Add/Delete Ethernet Ports Screen......86
Figure 5-26 Modify Lag Parameters Dialog Box .......................................................87
Figure 5-27 Add/Remove Ethernet Ports for LAG Wizard - Add/Delete Ethernet Ports screen88
Figure 5-28 Create Network Portal Wizard – Set the IP Address Screen ..........................91
Figure 5-29 Create iSCSI Node Wizard - Enter iSCSI Node Information Screen...................93
Figure 5-30 Create iSCSI Node Wizard - Enter iSCSI Node Information Screen with CHAP
Secret Field Shown........................................................................94
Figure 5-31 Create iSCSI Node Wizard - Configure iSCSI Node Parameters Screen..............94
Figure 5-32 Create iSCSI Node Wizard – iSCSI Network Portal Screen .............................95
Figure 5-33 Create iSCSI Node Wizard – Initiator List Screen .......................................96
XStack Storage User’s Guide
xi
Figure 5-34. Create iSCSI Node Wizard – Volume Access Right Screen............................ 97
Figure 5-35. Set CHAP Secret Dialog Box .............................................................. 98
Figure 5-36. Discovery Tab on the iSCSI Initiator Properties Dialog Box ......................... 99
Figure 5-37. Targets Tab on the iSCSI Initiator Properties Dialog Box .......................... 100
Figure 5-38. Log on to Target Dialog Box............................................................ 100
Figure 5-40. Example of Disks Shown in the Computer Management Screen .................. 101
Figure 5-39. Modify iSCSI Port Dialog Box ........................................................... 102
Figure 5-40. Set Default Task Priority Dialog Box .................................................. 103
Figure 5-41. View Route Table ........................................................................ 104
Figure 5-42. Adding a Route Table ................................................................... 105
Figure 5-43. Modify System TCP/IP Settings Dialog Box........................................... 106
Figure 5-44. Set Spare Count Dialog Box ............................................................ 108
Figure 5-46. Scheduled Task Wizard – Select Date and Time Screen............................ 110
Figure 5-48. Open Dialog Box.......................................................................... 113
Figure 5-49. User Accounts Screen ................................................................... 115
Figure 5-50. Add New User Dialog Box ............................................................... 115
Figure 6-1. Enclosure Information Screen ........................................................... 125
Figure 6-2. Log Messages Screen ...................................................................... 126
Figure 6-3. Example of a Log Messages Details Box................................................ 127
Figure 6-4. Tasks Info Screen.......................................................................... 128
Figure 6-5. Example of a Task Message Details Box................................................ 129
Figure 6-6. Task Popup Menu .......................................................................... 130
Figure 6-7. CIM Server Info Screen ................................................................... 131
Figure 6-8. Firmware Image Info Screen............................................................. 132
Figure 6-9. Storage Group Information .............................................................. 134
Figure 6-10. Tasks Info Screen ........................................................................ 135
Figure 6-11. Example of a Task Message Details Box .............................................. 136
Figure 6-12. Example of Volume Information for a Volume Named SANVOL1 ................. 138
Figure 6-13. Tasks Info Screen ........................................................................ 139
Figure 6-14. Example of the Task Message Details Dialog Box ................................... 140
Figure 6-15. Drive Information Screen ............................................................... 141
Figure 6-16. Target Node Info Screen ................................................................ 142
Figure 6-17. Volume Access Info Screen ............................................................. 143
Figure 6-18. Initiator Access Info Screen ............................................................ 144
Figure 6-20. Portals Info Screen ...................................................................... 146
Figure 6-21. iSCSI Connection Information Screen ................................................. 147
Figure 6-22. Initiator Information Screen ........................................................... 148
Figure 6-24. Physical Port Information............................................................... 150
Figure 6-25. Firmware Upgrade Message ............................................................ 157
Figure 6-26. Example of the Open Dialog Box ...................................................... 158
Figure E-1. IP Address Classes ......................................................................... 179
Figure F- 1 Front View of Enclosure .................................................................. 189
Figure F- 2 Rear View of Enclosure ................................................................... 189
xii
Contents
List of Tables
Table 1-1 XStack Storage Models .......................................................................16
Table 2-1 Types of Storage Pools .......................................................................25
Table 3-2 Power and Reset Switches Function........................................................36
Table 3-3 Host Network Connection LED Indicators on the XStack DSN-3200 Enclosure .......38
Table 3-4 Management Port LED Indicators on the XStack Storage DSN-3200 Enclosure .......38
Table 3-5 Host Network Connection LED Indicators on the XStack DSN-3400 Enclosure .......40
Table 3-6 Management Port LED Indicators on the XStack DSN-3400 Enclosure .................40
Table 4-1 User-Supplied Items to Perform the XStack Storage Installation ......................47
Table 5-1. Volume Organization and Members Based on Redundancy and Access Bandwidth
Weight ......................................................................................72
Table C-1. Configure Out of Band Port Default Settings .......................................... 159
Table C-2. XStack Storage Battery Policy Default Setting ........................................ 159
Table C-3. XStack Storage Date and Time Default Setting........................................ 159
Table C-4. Modify System TCPIP Default Settings .................................................. 159
Table C-5. Set Cache Mode Default Setting ......................................................... 159
Table C-6. Set Default Task Priority Default Setting............................................... 160
Table C-7. Set Spare Count Default Setting ......................................................... 160
Table C-8. Modify iSCSI Port Default Setting ........................................................ 160
Table C-9. Email Notification Support Default Setting ............................................ 160
Table D-1. Volumes Created Using the XStack Storage ............................................ 162
Table D-2. iSCSI Initiators Created Using the XStack Storage .................................... 164
Table D-3. LAGs Created Using the XStack Storage ................................................ 166
Table D-4. Network Portals Created Using the XStack Storage .................................. 168
Table D-5. iSCSI Target Nodes Created Using the XStack Storage ............................... 170
Table D-6. IP Routing Tables Created Using the XStack Storage ................................. 172
Table D-7. Scheduled Tasks Created Using the XStack Storage .................................. 174
Table E-1. Dotted-Decimal Ranges for Each Address Class ....................................... 179
XStack Storage User’s Guide
xiii
xiv
Contents
Chapter 1 Introduction
The XStack Storage controller is an intelligent, high-performance iSCSI Gigabit Ethernet storage
solution designed for businesses that want to improve the reliability, availability, serviceability,
and performance of their storage systems.
Based on an Internet Protocol-Storage Area Network (IP-SAN) architecture, the XStack Storage
controller is built around a custom-designed Application Specific Integrated Circuit (ASIC)solution
combining 10Gbps iSCSI, TCP/IP offload, embedded processors and a storage virtualization
firmware stack controlled by firmware loaded into the on-board flash memory. The controller is
housed in a 19-inch 3U rugged hardware enclosure holding up to 15 internal Serial ATA (SATA)
drives, up to 512MB of system memory and up to 4GB of cache buffer memory. Host connectors
for each model are as follows:
-
DSN-3200 provides eight 1GbE RJ-45 host connectors accessed via the back panel
-
DSN-3400 provides a single 10GbE XFP-transceiver interface (transceiver sold separately)
accessed via the back panel.
The XStack Storage unit back panel also has a 10/100 Mbps management port and an RS-232-C DB9
diagnostic/console port.
Complete configuration and management are available through the intuitive, GUI-based Web
Manager interface. A variety of network configurations are easily established using the XStack
Storage’s volume management, initiator, target, network portal, and Link Aggregation Group
(LAG) features. In addition, the XStack Storage unit features Secure Sockets Layer (SSL), default
task priority, cache, TCP/IP, spare count, and battery policy settings for advanced users.
This chapter provides an introduction to the XStack Storage unit. Topics in this chapter include:
Section 1.1, Models on page 16
Section 1.2, Hardware Enclosure on page 16
Section 1.3, Benefits on page 17
Section 1.4, Features on page 18
Section 1.5, System Overview on page 19
Section 1.6, Applications on page 20
XStack Storage User’s Guide
15
1.1
Models
XStack Storage is available in several models which vary according to the number, speed, and type
of host network connections. Table 1-1 lists XStack Storage model details.
Table 1-1 XStack Storage Models
Model
DSN-3200
Description
Maximum number of host network iSCSI connections: Eight RJ-45 ports
Speed: 1 Gigabit Ethernet (1 GbE)
Maximum number of internal SATA drives: 15
Maximum amount of system memory: 512MB
Maximum amount of cache buffer memory: 4GB
DSN-3400
Maximum number of host network iSCSI connections: One XFP transceiver host network connection
Speed: 10 GbE
Maximum number of internal SATA drives: 15
Maximum amount of system memory: 512MB
Maximum amount of cache buffer memory: 4GB
1.2
Hardware Enclosure
The XStack Storage DSN-3000 series comes in a standard 19-inch 3U rack-mount chassis with 15
hot-swappable drive bays.
16
Chapter 1 Introduction
1.3
Benefits
The XStack Storage line provides a range of benefits that stem from the ability to use familiar,
proven, and widespread networking technologies like IP and Ethernet for storage solutions.
One of the XStack Storage controller’s major benefits is that it is based upon the iSCSI standard
that uses the same Ethernet 802.3 frame format, access control, full-duplex and flow control
technologies already in place in most companies. iSCSI (Internet SCSI) is simply the encapsulation
of SCSI hard drive commands in IP packets which are then passed by means of an Ethernet network
between a server’s iSCSI initiator program and the xStack Storage target. As a result, companies
can effectively leverage their existing Ethernet equipment to upgrade their LANs seamlessly and
painlessly. Equally important, companies can also leverage their existing knowledge base to
install, deploy, and manage XStack Storage-based storage networks. By delivering Ethernet
economics to storage, the XStack Storage product line enables a lower total cost of ownership. It
also empowers companies to rapidly deploy storage for new business applications using
technologies that they already know and trust.
The XStack storage unit can be placed anywhere on the company’s Ethernet LAN (Local Area
Network) backbone, but it is recommended that a dedicated SAN (Storage Area Network) be
created to isolate the high network traffic generated between file servers and the XStack Storage
unit. The proven transport infrastructure provided by Ethernet makes for increased reliability.
Investment protection and reduced training costs follow naturally by using existing network and
storage expertise and a common technology infrastructure.
The XStack Storage unit is suited for scalability over long distances and makes it ideal for remote
data replication and disaster recovery. With 1 GbE and 10 GbE models, the XStack Storage line
provides an easy transition to faster Ethernet connectivity, protecting your current and future
investments.
XStack Storage User’s Guide
17
1.4
Features
The XStack Storage DSN-3000 family has the following features:
High-performance iSCSI storage system
Highly integrated, reliable, multifunction ASIC
Low-latency, high-performance design
Fully featured, integrated storage virtualization
Eight copper 1Gb (802.3ab) Ethernet network ports on the DSN-3200
One XFP-transceiver 10Gb Ethernet port on the DSN-3400. (XFP transceiver sold separately)
Up to 15 hot-swappable SATA disk drives
One standard RJ-45 copper 10/100 (802.3i/802.3u) Ethernet management network port
One standard DB9 RS-232-C diagnostic port
Easy setup and configuration
In-band or out-of-band management via a direct connection or the Web by connecting to the
10/100BaseT Ethernet management port
Three hot-swappable cooling fans
One 760W 3U n+1 auto-switching universal power supply for high availability
Battery pack preserves the contents of the buffer cache in the event of a power failure
(contents will be backed up for approximately 72 hours)
18
Chapter 1 Introduction
1.5
System Overview
Figure 1-1 shows a typical Storage Area Network (SAN) configuration in which XStack Storage can
be used. The Storage Area Network portion of this diagram is a private high-speed Ethernet
network that is dedicated to the exchange of data between the network servers and the XStack
Storage unit. The high bandwidth used by the servers exchanging data with the XStack Storage
unit can easily consume high bandwidth on the LAN (Local Area Network) where users PCs are
attached. Creating a separate network to isolate this traffic avoids bogging down the customer’s
existing LAN and helps improve security.
Figure 1-1 XStack Storage System Diagram
XStack Storage User’s Guide
19
1.6
Applications
The XStack Storage iSCSI solution broadens the options available to organizations for addressing
the availability, performance, and manageability issues caused by continual data growth. And at
its lower overall cost, it creates an appealing argument for transition to networked storage. It also
provides the basis for networked storage solutions in environments where Fibre Channel would not
be cost-effective, such as nearline storage applications in the data centers of small and medium
businesses where low-end servers run midrange enterprise applications. In this environment,
XStack Storage can provide a solid choice for non-mission critical nearline storage applications
such as basic disk-based storage for archive data.
The following sections provide examples of these applications.
1.6.1
Storage Consolidation
Businesses that seek to move beyond Direct Attached Storage (DAS) and are looking for the
benefits offered by SAN will appreciate the XStack Storage solution and its ability to support
multiple servers and efficiently pool storage. IP interfaces can be tied together using existing fast
Ethernet equipment. This reduces costs related to equipment and staff in comparison with serverattached storage. Companies can also better utilize storage capacity by pooling more servers
together in the storage network.
1.6.2
Server Consolidation
With an XStack Storage networked storage infrastructure, companies can link multiple storage
repositories to multiple clients and servers, allowing for better resource utilization, ease of
storage management, and simpler expansion of the storage infrastructure.
In addition to serving as a backbone, the XStack Storage unit can connect to server farms,
workstations, and servers for high-bandwidth applications involving audio or video files.
1.6.3
Remote Mirroring and Replication
With additional software and equipment, XStack Storage can be used to provide remote mirroring
and/or replication of local storage. This could prove invaluable in the event of a local disaster
such as fire or flooding.
1.6.4
Fast Nearline Backup and Recovery
With additional software, XStack Storage offers a solid platform for businesses seeking nearline
storage providing backup of primary storage. It can support immediate backup and recovery versus
tape by emulating a tape device or library and be accessed by the user’s standard backup
software.
20
Chapter 1 Introduction
1.6.5
Accelerated Backup Operations
Using the XStack Storage, backup operations previously restricted to operating across traditional
IP LANs at the file level can now operate across IP storage networks at the block level. This shift
facilitates faster backup times, and provides users with the flexibility to use shared or dedicated
IP networks for storage operations. This wide-area access also means that storage can be backed
up from any location with an IP connection.
This approach leads to significant cost savings and better use of disk space. Companies can also
use readily available IP network security technologies, such as firewalls and encryption and
authentication tools, to prevent unauthorized access into storage and ultimately to data.
With maximum Ethernet speeds of 8x1GbE found in the DSN-3200 and 10 GbE found in the DSN3400, XStack Storage delivers an efficient, relatively inexpensive method for moving data between
networks at speeds surpassing those of Fibre Channel.
XStack Storage User’s Guide
21
22
Chapter 1 Introduction
Chapter 2 Understanding Terminology and Concepts
This chapter provides a background on managing virtual storage, and explains key terms and
concepts associated with virtual storage.
Topics in this chapter include:
Section 2.1, Overview on page 24
Section 2.2, Understanding iSCSI on page 24
Section 2.3, Storage Pools and Drives on page 25
Section 2.4, Volumes on page 26
Section 2.5, Spare Count on page 28
Section 2.6, Tasks on page 28
XStack Storage User’s Guide
23
2.1
Overview
The term “storage virtualization” refers to the process of grouping together independent storage
devices found across a network to create what seems to be a single large storage entity that can
be centrally managed.
The purpose of XStack Storage is to virtualize disk storage for use by a customer’s host computers
(servers). With a SAN, servers connected to that network can access any SAN device (such as an
xStack Storage unit) wherever that device is attached to the storage area network. The user is no
longer aware of, and no longer needs to know, which physical devices contain which data. The
storage has become virtualized. The virtualization of storage provides a more intuitive use of
storage, while the XStack Storage unit quietly manages the storage network in the background.
At its front end, the XStack Storage unit uses the Internet small computer system interface
(iSCSI) protocol over Ethernet to connect to the customer’s servers. At its back end, the XStack
Storage unit contains a bank of SATA disk drives. The XStack Storage unit performs its
virtualization task by presenting volumes that the servers see as disks or drives, depending on the
server operating system’s terminology. Volumes are created by organizing blocks of storage from
the SATA disk drives.
2.2
Understanding iSCSI
iSCSI is an end-to-end storage block protocol that makes it possible to transfer storage data
reliably over any IP-based network, including the Internet. The iSCSI drafts and Request for
Comments (RFCs) are published by the Internet Engineering Task Force (IETF), but based on the
SCSI specifications from the ISO's Technical Committee Ten (T10), the ANSI-accredited body
responsible for developing and maintaining the core SCSI standard. To the committee, iSCSI is
another SCSI transport and is officially sanctioned by them (though technically it's a superset of
SCSI, providing additional functionality through unique commands and data formats used for
secondary services such as authentication).
From the network's perspective, iSCSI is just another service that runs over small computer
system interface/Internet Protocol (TCP/IP). It can use the same networking stack as other
applications, with clients requesting data from servers. The main difference is that its function is
more specialized. Whereas other Layer 7 protocols such as SMTP are agnostic toward the
technologies used at their endpoints, iSCSI is designed as a way to extend an existing storage
technology across IP networks.
For iSCSI purposes, the SCSI protocol is conceptually similar to TCP/IP's client/server
architecture. Every SCSI link involves a host adapter, called an initiator, and a storage device,
called a “target.” The customer's server will act as the initiator and the XStack Storage unit will act
as the target. A local SCSI bus usually connects a single initiator to up to seven targets, but a SAN
allows an unlimited number of each. The initiator's iSCSI stack packs (or encapsulates) SCSI
commands and data into IP packets, which are then unpacked by the target for processing as if
they had originated locally.
24
Chapter 2 Understanding Concepts and Terms
The iSCSI protocol defines two types of iSCSI nodes:
The initiator node
The target node
The iSCSI initiator node consists of a name and a set of properties. The server’s operating system
provides software to define and configure its iSCSI initiator node. The XStack Storage unit serves
as one or more iSCSI target nodes. Section 5.3.5 describes how to use the XStack Storage
management console to define and configure iSCSI target nodes. Within each iSCSI target node,
one or more volumes can be accessed, using a Logical Unit Number (LUN), by one or more iSCSI
initiator nodes. Each iSCSI target node can have up to 256 LUNs. In the XStack Storage unit, the
LUNs available in one target node are independent from the LUNs in other target nodes.
The server (iSCSI initiator) “sees” the volumes by using the XStack Storage’s target node name
and a LUN. This combination creates a “circuit” between the Server operating system’s “disk
drive letter” (or Dynamic Volume) and the XStack Storage volume. XStack Storage is designed to
allow flexibility by granting specific initiator nodes access to specific target nodes. One initiator
can be given access to multiple target nodes, with different security mechanisms to protect
different applications. Access to volumes is controlled by the target node’s list of allowed LUNs.
2.3
Storage Pools and Drives
Storage space is managed on the XStack Storage unit through storage pools. The placement of a
drive in a storage pool controls the way that drive can be used. There are three types of storage
pools (refer to Table 2-1).
Table 2-1 Types of Storage Pools
Storage Pool
Usage
Available Pool
Disk drives available for use, but with no data stored on them at this time. A spare
drive is normally kept in the available pool, so the drive is available for use should
any other drive fail.
Blade A Base Pool
Disk drives currently being used to hold Volume data or ready to be used to hold
volume data.
Unusable Collection
Two types of drives appear in the Unusable Collection:
Drives not available for use either because they have already failed and have
not been removed from the enclosure
Drives inserted into the XStack Storage unit that were found to be used
previously by an XStack Storage unit .
When a new system is installed, all new drives are placed in the available pool. The drives
remain in the available pool until they are needed for use in a volume or dragged and dropped by
the Administrator into the Blade A Base Pool.
XStack Storage User’s Guide
25
If a volume is reduced (for example, if a physical drive fails), the firmware
automatically moves a drive from the available pool to the Blade A Base Pool
and starts the rebuild operation for that volume.
2.4
Volumes
A volume is a set of blocks of storage that are organized and presented for use by a customer’s
server (an iSCSI initiator node). Every volume must be associated with a storage pool, which
limits the drives that can be used to hold data for that Volume (only drives in that pool can be
used for this volume). Only the Blade A Base Pool can be used for volumes.
The iSCSI initiator node sees the volume as a contiguous series of numbered blocks, called Virtual
Logical Block Numbers (VLBNs), in the same way that it would see the storage space on a single
disk drive. The XStack Storage unit constructs a volume from extents, where each extent is a
block of storage from a single drive. A volume typically consists of extents from several drives. A
volume of n blocks is shown in Figure 2-1.
0
n-1
. . .
VLBN
Extent 1
Extent x
Volume
Figure 2-1 Internal Structure of a Volume
Volume can be organized in several ways (refer to Table 2-2).
Table 2-2 Ways to Organize Volumes
Organization
26
Definition
Redundant
Striped
Storage
Cost
JBOD
One copy of the data is written to the selected Extents.
No
No
1x
Mirror
Two copies of all data are written to independent Extents.
Yes
No
2x
Stripe
Distributes one copy of the data among several drives to improve
the speed of access.
No
Yes
1x
Stripe Mirror
Distributes the data among several drives and then keeps a mirror
copy of the blocks on each drive
Yes
Yes
2x
Parity
Distributes one copy of the data among several drives and adds
parity blocks spread throughout the volume to protect against the
loss of any single drive.
Yes
Yes
1x-1.5x
Chapter 2 Understanding Concepts and Terms
For organizations that are striped, the data distributed among multiple drives is organized in a
series of “stripes.” Each stripe consists of a fixed number of blocks on each drive. The fixed
number of blocks used on each drive is called a “chunk.” This can be viewed as an array where
each row is a stripe and each column is a drive. The term “Member” is defined as the number of
columns in this array. The XStack Storage unit can allocate the required space very flexibly (i.e.,
an entire member does need to reside on a single drive). Within each member, extents can be
obtained from as many drives as necessary.
Organizations that are redundant provide protection against loss of data in the event of a failure
of any one drive. This adds a storage cost in that some storage will be used for redundancy rather
than for customer data. Redundancy requires that the volume data be stored on separate drives,
so that data integrity is maintained in the event of a drive failure.
For a parity organization, the XStack Storage unit distributes the volume into the array described
for a stripe organization, and reserves one chunk from each stripe to hold the parity information.
The parity information provides redundancy without having to keep a complete copy of the data.
If any single drive fails, the parity calculation mechanism can be applied to the data on the
remaining drives to provide full access (reading and writing) of all data.
Further, the parity calculation mechanism can be used to recreate the data with fresh parity
protection onto a new drive to re-gain redundancy. However, this protection comes at a cost: the
storage requirement for the volume is increased by one member. For example, if a 10 GB striped
volume was distributed among four members, each member would need 2.5 GB of space. To
make a parity volume of 10 GB using four members, for instance, each member would need 3.33
GB of space: one chunk in each stripe would be used to hold parity. In other words, to hold the
space for parity in a 4-member volume, the XStack Storage unit needs to use 1/3 more space
than the initiator can access. From another point of view, 1/4 of the space used by that volume
is not available to the initiator. The 10 GB volume can also be created using 2.5 GB members if
five members are used.
As a result, the additional storage cost for a parity volume of four members is 25% (i.e., 25% of
the space is not user data, but redundancy data). For a 5-member parity volume, the additional
cost is 20%.
For a mirror organization, the XStack Storage unit divides the volume into two members, each of
which contains one full copy of the data. Each member must be allocated on separate drives. The
cost of a mirror volume is that data must be stored twice (i.e., for a volume of size x bytes, the
XStack Storage unit needs 2x bytes, or 100%).
For a stripe mirror organization, the XStack Storage unit distributes volume into members, as in
a striped organization, and then doubles the number of members to allow for the second data
copy. As in a mirror organization, the storage cost is double.
For each volume, the XStack Storage unit must determine the organization and the size of the
volume. For striped organizations, the XStack Storage unit must further determine the chunk
size, and the number of drives across which the data is to be divided.
There are two ways to create a volume in XStack Storage:
Automatically: The Administrator answers questions about the required redundancy, size, and
usage characteristics of the volume. The XStack Storage unit then determines the remaining
parameters needed to allocate the storage space and create the volume.
XStack Storage User’s Guide
27
Manually: The Administrator selects the organization and all other parameters described
above, and specifies the drives that can be used for the volume. The XStack Storage unit then
finds the storage space on the given drives to allocate and create the Volume.
Disk space is assigned to a volume in extents. The extents that make up a volume can be seen on
the XStack Storage Management console. The extents are organized into members. The definition
of a member varies with the organization:
For a striped organization, a member is defined above.
For a mirror organization, there are two members, one for each copy of the data.
A stripe mirror organization has a member for each stripe, as defined above, plus a second
member (for each stripe) to hold the data copy. Therefore, if a stripe mirror organization has
x stripes, it has 2x members.
2.5
Spare Count
The XStack Storage Administrator can designate a spare count, which is a number of drives to be
kept available in case a drive that holds volume data fails. The spare count default is 0, meaning
that no drives are reserved. If the spare count was 1 in an enclosure with 12 drives installed, 11
drives could be used by the XStack Storage unit for automatic volume creation and one drive
would remain in the available pool. As volumes are created, drives would be moved from the
available pool into the pool in which the volume is created, up to 11 drives. Should any of those
drives fail, the 12th drive would become available to be used in any rebuild task that requires a
drive (the rebuild task is described in Section 2.6).
2.6
Tasks
The XStack Storage unit can automatically, or at the Administrator’s demand, perform activities
that take time and consume the controller’s resources. The Administrator can control, to some
degree, when tasks are performed. Any task can be suspended and resumed by the Administrator.
Some tasks can be cancelled and some can be scheduled on a recurring, periodic interval. All
tasks can have their priority changed, which controls the amount of resources the XStack Storage
unit devotes to a task.
The XStack Storage unit can perform the following tasks:
Initialize a Volume: Some volume organizations (e.g., parity) require Initialization. The
Initialization task performs this action. This task can be performed while an initiator is
accessing (reading and writing) data. An Initialization task can be suspended and resumed,
but cannot be cancelled.
Rebuild a Volume: When a drive fails, every redundant volume that occupied space on that
drive can be rebuilt.
28
–
For mirror protection, data can be copied from the remaining copy.
–
For parity protection, data can be recreated from the remaining data and parity
information.
Chapter 2 Understanding Concepts and Terms
In either case, when the XStack Storage unit finds replacement space on another drive, it
performs one Rebuild task for each extent that used space on the failed drive. If replacement
space is not available on the drives in the pool associated with the volume, and one or more
drives exist in the available pool, a drive is obtained from the available pool and
automatically moved to the volume’s pool. A Rebuild task can be suspended and resumed,
but cannot be cancelled.
Grow (or Expand) Volume: The Administrator can expand the size of a volume. If the
volume’s organization requires initialization, the initialization of the new space is performed
with a Grow task. A Grow task can be suspended and resumed, but cannot be deleted. An
initiator can access the new space while the Grow task is being performed.
Media Scan: The Administrator can scan a non-parity volume for media errors by starting a
Media Scan task. This task reads every block in the volume to ensure there are no errors. If
there are errors, this task fixes them if possible. A Media Scan task can be cancelled,
suspended, and/or resumed by the Administrator. It can also be scheduled for a future time
and/or at a recurring interval.
Parity Scan: The Administrator can scan a parity volume for errors by starting a Parity Scan
task. This task reads every block in the volume looking for errors as described for Media Scan
to ensure that parity is correct. If parity errors are found, this task corrects the errors. A
Parity Scan task can be cancelled, suspended, and/or resumed by the Administrator. It can
also be scheduled for a future time and/or at a recurring interval.
XStack Storage User’s Guide
29
30
Chapter 2 Understanding Concepts and Terms
Chapter 3 Identifying Hardware Components
This chapter describes the XStack Storage hardware components.
Topics in this chapter include:
Section 3.1, Front Panel Components on page 32
Section 3.2, Back Panel Components on page 36
XStack Storage User’s Guide
31
3.1
Front Panel Components
The following sections describe the hardware components on the front of the XStack Storage
enclosure. Figure 3-1 shows the removable front bezel along with the drive bays and major
components.
Figure 3-1 Front View of the XStack DSN-3000 Series Enclosure
When installed, the front bezel uses pipes to pass light from the LEDs behind
it to the front for viewing. The bezel itself is passive and has no active LEDs.
32
Chapter 3 Identifying Hardware Components
3.1.1
LEDs
Figure 3-1 reveals several LEDs that provide useful information about the state of the XStack
Storage unit. The Power LED illuminates when the system is powered. The bicolor Boot and
Fault LED will remain clear during bootup and then green if booting is successful. If the boot
process is unsuccessful, or a system fault occurs, then it will turn red.
Each of the fifteen drive bays has two LEDs associated with it, a bicolor drive activity and
fault LED and a drive power LED. Table 3-1 describes the front panel LEDs and their functions.
Table 3-1 Front Panel LED indicators on the DSN-3000 series enclosure
LED
Meaning
Power
Green ON
Power is applied to the system
Boot and Fault
Green ON
Successful boot. No errors encountered.
Drive Power
Drive Activity and
Fault
3.1.2
Color
Red ON
Remains clear during boot process. If red after boot process
completed, then an error has been encountered. Please see
management GUI for more information.
Blue ON
Drive is powered and operational.
Green Blinking
Red ON
Data being transmitted or received from corresponding SATA drive.
Drive has experienced a fault and is offline
Key Lock and Latches
Figure 3-1 shows the XStack Storage front bezel with key lock and two latches. This bezel can
be locked in place to protect the system from unauthorized drive access and removal.
Bezel Removal: Simply press inwards (as the arrows reveal) on the two latches shown in Figure
3-1. The bezel will come off easily providing access to the drive bays behind it. If the key
lock is in the locked position, then the latches cannot be pressed inwards.
Bezel Installation: Align the bezel in front of the chassis and push forward. The latches are
spring-loaded and will lock into place. If you wish, you can use the key lock to prevent drive
access by turning it to the locked position.
XStack Storage User’s Guide
33
3.1.3
Drive Bays
Figure 3-1 illustrates the fifteen hot-swappable drive bays and their numbering scheme from
left to right (0 through 14).
3.1.3.1
Drive and Tray Removal
A drive/tray assembly can be removed by pressing upwards on the green latch found on the
tray and removing it with the handle as shown in Figure 3-2.
Figure 3-2 Drive and Tray Removal
Removal of a populated drive/tray assembly can have unforeseen effects
including the loss of all data in a volume. A drive can be part of a volume
that may or may not be redundant. Before removing a drive from an
operating XStack Storage system, make sure it is the correct one.
34
Chapter 3 Identifying Hardware Components
3.1.3.2
Drive and Tray Installation
A drive/tray assembly can be installed by inserting the drive/tray assembly into the open
drive bay. Push the tray at the point indicated in Step 1 of Figure 3-3 and push until it is
seated firmly within the bay. As you press, you will see the tray handle begin to move
inwards as the locking mechanism enters the locking slot. When you see this, then you must
push the tray handle inwards as shown in Step 2 until you hear the green locking mechanism
click.
Figure 3-3 Drive and Tray Installation
3.1.4
Front Vents
The enclosure that houses the XStack Storage unit contains a set of three hot-swappable fans
located in the mid-section of the chassis drawing air into vents in the front of the unit, cooling
the hard drive array and other components. This air exits the chassis through a grill located at
the rear of the chassis. It is advised that the unit only be operated with the top cover in
place. When installing the XStack Storage unit, please be sure these vents are not blocked.
A fully loaded array with all drive bays filled can generate a significant
amount of heat. Please be sure the cover is in place to provide the forced
air flow required for proper cooling.
XStack Storage User’s Guide
35
3.2
Back Panel Components
The following sections describe the hardware components on the rear of the XStack Storage
enclosure. Figure 3-4 shows the major components.
Figure 3-4 Rear View of the XStack DSN-3200 Enclosure
3.2.1
Switches
The rear panel of the XStack Storage unit enclosure has two switches as shown in Figure 3-5.
Table 3-2 identifies the switches and their function.
Figure 3-5 Power and Reset Switches
Table 3-2 Power and Reset Switches Function
Switch
36
Description
Power
Applies power to the XStack Storage unit. Pressing this switch for longer than 3 seconds removes power
from the XStack Storage unit and turns off the unit.
Reset
Resets the XStack Storage unit.
Chapter 3 Identifying Hardware Components
3.2.2
External Interfaces
Figure 3-4 shows an area labeled “External Interfaces” where the external ports of the DSN3000 Series are found.
Section 3.2.2.1, DSN-3200 external interfaces are described on page 37.
Section 3.2.2.3, DSN-3400 external interfaces are described on page 39.
3.2.2.1
DSN-3200 External Interfaces
The back of the XStack Storage DSN-3200 enclosure provide the following external interfaces:
Eight (8) 1GbE (1 Gigabit Ethernet) RJ-45 host network connections
One DB9 RS-232-C diagnostic port
One RJ-45 Fast Ethernet management port
Figure 3-6 shows the hardware components on the back of the XStack Storage DSN-3200
enclosure
Host Network Connections
Port
0
Port
2
Port
4
Port
6
Mg m t
Ethernet
Diagnostic Port
Port
1
Port
3
Port
5
Port
7
Figure 3-6 External Interfaces on the XStack DSN-3200 Enclosure
XStack Storage User’s Guide
37
3.2.2.2
DSN-3200 LEDs
Each RJ-45 host network connection on the back of the XStack Storage DSN-3200 enclosure has
two bicolor light-emitting diode (LED) indicators that show the activity and speed for that
port. Table 3-3 describes the host network connection LED indicators on the back of the
XStack Storage enclosures.
Table 3-3 Host Network Connection LED Indicators on the XStack DSN-3200 Enclosure
LED
Color
RJ-45 Port
Activity
Green
Data is being transmitted on the RJ-45 port.
Yellow
Data is being received on the RJ-45 port.
OFF
Data is being sent or received at 10 Mbps.
Green
Data is being sent or received at 100 Mbps.
Yellow
Data is being sent or received at 1 Gbps.
RJ-45 Port
Speed
Description
In addition, the management port has two bicolor LED indicators that show the activity/link
and speed for this port. Table 3-4 describes the management port LEDs and Figure 3-7 shows
their location.
Table 3-4 Management Port LED Indicators on the XStack Storage DSN-3200 Enclosure
LED
Activity/Link
Color
Green ON
Green Blinking
Port Speed
38
Meaning
Link is operational.
Data is being transmitted or received on the RJ-45 port.
Yellow OFF
Connection has been established at 10 Mbps.
Yellow ON
Connection has been established at 100 Mbps.
OFF
Data is being sent or received at 10 Mbps.
Yellow
Data is being sent or received at 100 Mbps.
Chapter 3 Identifying Hardware Components
Host Network Connections
Port
0
Port
2
Port
4
Port
6
Port
1
Port
3
Port
5
Port
7
Mg m t
Ethernet
Diagnostic Port
Activity/Link LED
Speed LED
Figure 3-7 Management Port LED Locations
3.2.2.3
DSN-3400 External Interfaces
The back of the XStack DSN-3400 provides the following external interfaces:
One 10 GbE XFP transceiver host network connection
o
(optical or copper depending on what interface you install)
One DB9 RS-232-C diagnostic port
One RJ-45 Fast Ethernet management port
Figure 3-8 shows the hardware components on the back of the XStack DSN-3400.
Figure 3-8 External Interfaces on the XStack DSN-3400 Enclosure
XStack Storage User’s Guide
39
3.2.2.4
DSN-3400 LEDs
Two LEDs next to the XFP connector show transmit (Tx) and receive (Rx) activity on the host
network interface. Table 3-5 describes the Tx and Rx LED indicators on the back of the XStack
DSN-3400.
Table 3-5 Host Network Connection LED Indicators on the XStack DSN-3400 Enclosure
LED
Tx Link
Color
OFF
Blinks Green
Rx Link
OFF
Description
There is no transmit activity.
There is transmit activity from the XStack DSN-3400.
There is no receive activity.
Solid Yellow
A 10GbE connection has been established.
Blinks Yellow
There is receive activity with the XStack DSN-3400.
In addition, the management port has two bicolor LED indicators that show the activity/link
and speed for this port. Table 3-6 describes the management port LEDs and Figure 3-8 shows
their location.
Table 3-6 Management Port LED Indicators on the XStack DSN-3400 Enclosure
LED
Activity/Link
Color
Green ON
Green Blinking
Port Speed
3.2.3
Meaning
Link is operational.
Data is being transmitted or received on the RJ-45 port.
Yellow OFF
Connection has been established at 10 Mbps.
Yellow ON
Connection has been established at 100 Mbps.
OFF
Data is being sent or received at 10 Mbps.
Yellow
Data is being sent or received at 100 Mbps.
Rear Vents
Figure 3-4 shows air vents that allow the exit of air through the rear of the chassis. Please be
sure these vents are not blocked.
40
Chapter 3 Identifying Hardware Components
XStack Storage User’s Guide
41
Chapter 4 Installing the XStack Storage Unit
This chapter describes how to install the XStack Storage unit.
The topics in this chapter include:
Section 4.1, Site Considerations on page 43
Section 4.2, Safety Considerations on page 44
Section 4.3, Unpacking the XStack Storage Unit on page 46
Section 4.4, Items Supplied by the User on page 47
Section 4.5, Installing the XStack Storage Unit without a Rack on page 48
Section 4.6, Installing the XStack Storage Unit in a Rack on page 48
Section 4.7, Connecting to the XStack Storage Management Port on page 50
Section 4.8, Connecting the Battery Pack on page 51
Section 4.9, Connecting the Power Cords on page 52
Section 4.10, Booting the XStack Storage Unit on page 53
Section 4.11, Configuration Methods on page 53
42
Chapter 4 Installing the XStack Storage
4.1
Site Considerations
The site where you install the XStack Storage unit can affect its performance, Please observe the
following guidelines when setting up the XStack Storage unit.
Install the XStack Storage unit on a sturdy, level surface that can support the unit. A fully
populated XStack Storage unit weighs approximately 75 lbs. (33 kg.).
The power outlet should be within six feet (1.82 meters) of the XStack Storage unit.
For the XStack Storage unit to perform at optimal levels there must be adequate heat
dissipation and ventilation around the unit to avoid overheating.
–
Leave at least six inches (152.3 mm) of space at the front and back of the XStack Storage
unit for ventilation.
–
Do not locate the XStack Storage unit next to, on top off, or below any device that
generates a significant amount of heat or will block the fee flow of air through the
ventilation slots on the XStack Storage unit.
Install the XStack Storage unit in a fairly cool and dry location for the acceptable temperature
and humidity ranges.
Install the XStack Storage unit in a site free from strong electromagnetic field generators
(such as motors), vibration, dust, and direct exposure to sunlight.
For rack installation, the following additional considerations must be observed:
The XStack Storage unit can be mounted in a standard 19-inch rack. The rack-mounting
hardware must be carefully selected to properly support the equipment. Follow the
instructions in the documentation for the rack.
The operating ambient temperature of rack-mounted equipment must not exceed the
maximum rated ambient temperature of 104 degrees F (70 degrees C).
The air flow clearances specified in this guide must be maintained within the rack.
The AC supply circuit for rack-mounted equipment must be capable of supplying the total
current specified on all the labels of the rack-mounted equipment.
All AC power supply connections must be properly earthed. To ensure the integrity of the
earth connection, special attention must be given to connections that are not directly
connected to the branch circuit (for example, power strips).
XStack Storage User’s Guide
43
4.2
Safety Considerations
The following sections provide guidelines to ensure your safety when installing and working with
the XStack Storage unit.
4.2.1
General Safety Guidelines
Observe the following general guidelines to ensure safety:
Keep tools away from walk areas where you and others could trip over them.
Do not wear loose clothing that could get caught in the chassis mounting hardware. Fasten
your tie or scarf to your sleeves.
Wear safety glasses when working under any conditions that might be hazardous to your eyes.
Do not perform any action that creates a potential hazard to people or makes the rack or
equipment unsafe.
4.2.2
Electrical Safety Guidelines
Observe the following electrical guidelines when working with XStack Storage unit.
Do not work on the equipment or disconnect cables under the following conditions:
–
During a thunderstorm
–
When wearing a wool sweater or other heavy wool clothing.
–
When power is applied.
Disconnect all power before installing the XStack Storage unit.
Always make sure that power is off before connecting or disconnecting cables. Never assume
that power is disconnected from a circuit. Always check.
Locate the emergency power-off switch in the room in which you are working. Then, if an
electrical accident occurs, you can quickly shut the power off.
Do not handle the XStack Storage unit when power is applied. Before handling it, unplug the
XStack Storage power cord from the AC outlet or trip the power breaker.
Identify possible hazards in your work area, such as moist floor, ungrounded power-extension
cables, and missing safety grounds. Do not work alone if potentially hazardous conditions
exist.
If an electrical accident occurs, proceed as follows:
Use caution to avoid becoming a victim yourself.
Turn off power to the XStack Storage unit.
If possible, send another person to get medical aid. Otherwise, determine the condition of the
victim and call for help.
Determine whether the victim needs rescue breathing or external cardiac compressions, then
take appropriate action.
44
Chapter 4 Installing the XStack Storage
4.2.3
ESD Safety Precautions
Electrostatic discharge (ESD) can damage equipment and impair electrical circuitry. Static
voltages as low as 30 volts can cause latent damage to circuitry. ESD can result in complete or
intermittent failures. Therefore, observe all standard antistatic procedures (for example, wear a
grounding strap) when handling electronic equipment and components.
Always follow ESD-prevention procedures when handling system components:
Ensure that the chassis is electrically connected to earth ground.
Wear an ESD-preventive wrist strap, ensuring that it makes good skin contact.
Connect the clip to an unpainted surface of the chassis frame to safely channel unwanted ESD
voltages to ground.
To properly guard against ESD damage and shocks, the wrist strap must be used correctly. If
no wrist strap is available, ground yourself by touching the metal part of the chassis.
For safety, periodically check the resistance value of the antistatic strap, which should be
between 1 and 10 megohms (Mohms).
Do not operate the system unless all cards and faceplates are in place. Blank faceplates (filler
panels) serve three important functions:
4.2.4
–
They prevent exposure to hazardous voltages and currents inside the chassis.
–
They contain electromagnetic interference (EMI) that might disrupt other equipment.
–
They direct the flow of cooling air through the chassis.
Lifting and Reaching Safety Precautions
To prevent personal injury or damage to the chassis, never attempt to lift or tilt the chassis using
the handles on modules (such as power supplies, fans, or cards); these types of handles are not
designed to support the weight of the unit. Lift the unit only by using handles that are an integral
part of the chassis, or by grasping the chassis underneath its lower edge.
XStack Storage User’s Guide
45
4.3
Unpacking the XStack Storage Unit
After receiving the XStack Storage unit, perform the following steps to ensure that it and other
contents arrived safely.
To unpack the XStack Storage unit:
1. Inspect the outer shipping container for any damage that may have occurred in shipping.
Report any sign of damage to the appropriate shipping agency.
2. Remove the XStack Storage unit and cables from the shipping container.
3. Save the shipping container, foam, and antistatic bags in case you have to return the XStack
Storage unit. Returning the XStack Storage unit in any other container is not advised.
4. Be sure the following parts are included:
–
XStack Storage unit
–
Three power cords
–
Rackmount rail kit
–
CD including this User Guide
5. Inspect the XStack Storage unit thoroughly. If you see any signs of damage, notify a sales
representative and/or the shipping agency.
46
Chapter 4 Installing the XStack Storage
4.4
Items Supplied by the User
Table 4-1 lists the additional items that you must supply to perform the XStack Storage unit
installation. All users must provide the items in the first row of Table 4-1. Thereafter, the
additional items required for installation depend on the user category into which you fit.
Table 4-1 User-Supplied Items to Perform the XStack Storage Installation
User Category
All XStack Storage
Users
User-Supplied Items
A PC or server with a Network Interface Card (NIC) that will act as the iSCSI initiator. (See Note 1)
A PC with a NIC and Internet access that will access the XStack Storage management console.
(See Note 1)
One or more available AC outlets not controlled by a wall switch.
Optional: An Ethernet switch and Ethernet cable. If you want to use the XStack Storage’s Link
Aggregation feature (refer to Section 5.3.3), the switch must support Link Aggregation Groups
(LAGs).
XStack DSN-3200
Users
An IP address for each XStack Storage host connection RJ-45 data port that will connect to your
SAN. (Each XStack Storage unit’s RJ-45 data port must be on a separate subnet. For more
information, refer to Appendix E.)
An Ethernet cable for each XStack Storage host connection RJ-45 data port that will connect to
your SAN (the XStack Storage unit’s auto-senses the cable type used).
XStack DSN-3400
Users
An IP address for the host network (optical) connection.
Rack-Mount Users
A standard NEMA-compliant 19-inch rack.
A single mode or multimode XFP optical cable to connect the host network connection to your
SAN.
Note 1: For convenience, one PC with three installed NICs can be used instead of separate PCs. In this configuration, one NIC
connects to the XStack Storage management port, a second NIC connects to the Internet, and a third NIC is used with the iSCSI
initiator.
XStack Storage User’s Guide
47
4.5
Installing the XStack Storage Unit without a Rack
When installing the XStack Storage unit on a desktop or shelf, allow enough ventilation space
between the XStack Storage unit and any other objects in the vicinity. In particular, be sure not to
block the air vents on the front and back of the XStack Storage unit enclosure. Install the cables
and power cord according to the procedures in the following sections.
4.6
Installing the XStack Storage Unit in a Rack
The XStack Storage unit can be mounted in a standard 19-inch rack. Use the following procedure,
along with the documentation for the rack, to install the XStack Storage unit in a rack.
The rack cabinet must provide sufficient airflow to the front and back of the
XStack Storage unit to maintain correct cooling. It must include ventilation
sufficient to exhaust the heat generated by equipment installed in the rack.
1. Be sure the XStack Storage unit is turned off and its three power cords are not attached to the
unit.
2. Attach the mounting hardware to the left and right sides of the XStack Storage unit. Refer to
the documentation for your mounting hardware and rack.
3. With the assistance of another person, hold the XStack Storage unit in place in the rack and
secure with the mounting hardware. Refer to the documentation for your mounting hardware
and rack.
4. Install the cables and power cord according to the procedures in the following sections.
48
Chapter 4 Installing the XStack Storage
4.6.1
Connecting to the XStack Storage DSN-3200 Host Network Connection Ports
The XStack Storage DSN-3200 host network connection ports consist of eight RJ-45 data ports.
These ports connect to your SAN using either a straight-through or cross-over RJ-45 Ethernet cable
(the XStack Storage unit auto-senses the type of cable used). You will need one cable for each RJ45 data port you want to connect to your SAN.
To connect the XStack Storage DSN-3200 RJ-45 host network connection ports to your SAN, use the
following procedure (Sections 5.3.3 and 5.3.3.1 describe how the XStack Storage unit is configured
to use these ports).
1. Attach either end of an Ethernet cable to host network connection port 0 on the XStack
Storage unit’s back panel. Facing the back of the XStack Storage unit, the host network
connection ports appear on the left side (see Figure 3-6 on page 37). Connect the other end of
the cable to your SAN.
2. To connect additional XStack Storage RJ-45 host network connection ports to your SAN, repeat
step 1 using another Ethernet cable and the next available XStack Storage port in sequence
(port 1, then port 2, and so on). Do not skip ports when making these connections.
4.6.2
Connecting to the XStack Storage DSN-3400 Host Network Connection Port
The XStack Storage DSN-3400 host network connection port consists of a single 10 GbE host
network XFP optical transceiver interface. This port connects to your SAN using a single mode or
multimode XFP optical cable depending upon the model of transceiver you have installed.
To connect the XStack DSN-3400 host network connection port to your SAN, use the following
procedure.
1. Connect one end of a single mode or multimode XFP optical cable to the XStack Storage
optical host network connection port. Facing the back of the XStack DSN-3400, this port
appears on the left side (see Figure 3-8 on page 39).
2. Connect the other end of the cable to your SAN.
XStack Storage User’s Guide
49
4.7
Connecting to the XStack Storage Management Port
Connecting a PC to the XStack Storage management port lets you configure and manage the
XStack Storage unit. This procedure requires a PC with an installed NIC and an appropriately
configured Ethernet cable.
To connect the PC directly to the XStack Storage management port, use a cross-over cable.
To connect the PC to the XStack Storage unit using a hub or switch, use a straight-through
cable.
To connect to the XStack Storage management port, use the following procedure.
1. Connect either end of an Ethernet cable to a NIC installed in the PC that will be used to
manage and monitor the XStack Storage unit.
2. Connect the other end of the cable into the XStack Storage Mgmt Ethernet port. Facing the
back of the XStack Storage unit, the management port is the rightmost RJ-45 connector:
–
To view this port on the XStack DSN-3200, see Figure 3-6 on page 37.
–
To view this port on the XStack DSN-3400, see Figure 3-8 on page 39.
If you want to configure the XStack Storage unit for email alert notifications,
be sure the management port can communicate via Ethernet with your mail
server.
XStack Storage management and data activities must be separate. This
means you cannot connect the same NIC to the management and host
network connection ports. Rather, one NIC must connect to the management
port and a different NIC, either in the same PC or a different PC, must
connect to the host network connection port(s).
50
Chapter 4 Installing the XStack Storage
4.8
Connecting the Battery Pack
The XStack Storage unit comes equipped with a standard 6-cell battery pack to provide back up of
the buffer cache contents (See Figure 4-1). Since write-back caching is always enabled on the
XStack Storage unit, we recommend you have a battery installed at all times.
Figure 4-1 Battery Pack Installed on XStack Controller
XStack Storage User’s Guide
51
4.9
Connecting the Power Cords
The receptacles for connecting the XStack Storage unit’s three power cords appears on the back
of the unit as seen in Figure 4-2. To connect a power cord for each of the power supplies three
redundant power modules, use the following procedure.
1. Plug the female end of the power cord into one of the three 3-pronged power connectors on
the back of the XStack Storage unit.
2. Plug the other end of the power cord into a working AC outlet that is not controlled by a wall
outlet.
3. Repeat steps 1 and 2 for the remaining two power cords. Installed power cables can be seen
in Figure F- 2.
Figure 4-2 Power Supply
52
Chapter 4 Installing the XStack Storage
4.10 Booting the XStack Storage Unit
To power on the XStack Storage unit, press the power switch on the rear panel as seen in Figure
4-3. When you power-on the XStack Storage unit, the following actions occur:
The front panel Power OK LED goes ON.
The XStack Storage unit runs its startup process, which takes from 4 to 5 minutes to complete.
The front panel Link Status LEDs for the SATA drive LEDs may flash.
If your XStack Storage unit has a boot and fault LED that provides a visual indication of the startup
process, the LED turns green when the XStack Storage unit completes the startup process
successfully. If the process is not completed successfully, the LED turns red. If this occurs, reboot
the XStack Storage unit. If the problem persists, contact Technical Support.
Figure 4-3 Power-On Switch and Reset Switch Located on Rear of Enclosure
4.11 Configuration Methods
When the XStack Storage unit boots for the first time, it automatically loads its factory-default
configuration settings. For a list of these settings, refer to Appendix C. If necessary, you can use
the Web Manager interface to change these settings to suit you requirements.
The Web Manager is a Java-based graphical point-and-click Web interface that can be accessed
from any PC with Internet access. You can also access the Web Manager using a PC connected
directly to the XStack Storage management port (refer to Section 4.7).
For more information about configuring the XStack Storage unit, refer to Chapter 5.
XStack Storage User’s Guide
53
54
Chapter 4 Installing the XStack Storage
Chapter 5 Configuring the XStack Storage Unit
After you install the XStack Storage unit, you can perform the procedures in this chapter to
configure the unit. The XStack Storage unit provides an intuitive graphical Web Manager interface
that allows users to manage the XStack Storage unit in a visual environment. This chapter
describes how to use the Web manager interface to configure and manage the XStack Storage
unit.
The topics in this chapter include:
Section 5.1, Getting Started on page 56
Section 5.2, Initial XStack Storage Setup on page 64
Section 5.3, Managing the XStack Storage Unit on page 69
Section 5.4, Managing User Accounts on page 114
Section 5.5, Performing Cache Activities on page 117
Section 5.6, Managing XStack Storage Configurations on page 118
Section 5.7, Restarting and Shutting down the XStack Storage unit on page 121
XStack Storage User’s Guide
55
5.1
Getting Started
The following sections provide instructions for getting started with the XStack Storage Web
Manager.
5.1.1
Launching the XStack Storage Management Console
The following procedure describes how to launch the XStack Storage Management Console. The
XStack Storage Web Manager requires Java v1.4.2. If the management console does not have this
Java version installed, you can download it using the XStack Storage Login screen. For this
reason, the PC used to manage the XStack Storage should have Internet access.
1. With the XStack Storage powered-up, start a Web browser, such as Microsoft® Internet
Explorer, on the PC connected to the XStack Storage management port.
2. In the browser’s address bar, type the following default IP address for the XStack Storage
management console and press the Enter key:
192.168.1.1
The XStack Storage console management Log in screen appears (see Figure 5-1).
Figure 5-1 XStack Storage Log in Screen
If the XStack Storage management console does not start automatically
return to the HTTP://192.168.1.1 browser window and click on the click
here link. If you are having problems starting the XStack Storage
Management Console you may need to install and or reinstall Java and/or
Java Web start by clicking the lower click here link. (The XStack Storage
works with Java v1.4.2.)
56
Chapter 5
Configuring the XStack Storage
The IP address on your PC's NIC must be on the same IP subnetwork
(192.168.1.x) as the management port. All subnets must be unique
between all ports, including the management port.
3. Enter your username and password in the appropriate text boxes. The first time you log in,
you must use the default username (admin) and password (admin). If you create another
account with admin and add/edit user privileges and then delete the default admin account,
write the new username and password on a piece of paper. Otherwise, if you lose this
information, you will have to return your XStack Storage to DLink for reconfiguration.
If desired, you can click the More button to view the IP address you will be
connecting to and change it if necessary.
4. Click the OK button. A screen appears with a progress bar as the connection is being made to
the XStack Storage. Once the connection is made, the main screen appears (see Figure 5-2).
Figure 5-2 XStack Storage Management Console Main Screen
XStack Storage User’s Guide
57
5.1.2
Understanding the Main Screen
Figure 5-3 shows the areas of the XStack Storage management console main screen. The following
section describes the areas indicated in Figure 5-3.
Menu/Tool Bar
Area
Main Display
Area
Resources
Pane
Footer
Figure 5-3 Parts of the XStack Storage Management Console Main Screen
58
Chapter 5
Configuring the XStack Storage
5.1.2.1
Menu / Tool Bar Area
The Menu/Tool Bar Area appears at the top of the XStack Storage management console window.
This area contains the following components (see Figure 5-4):
Title bar. The title bar shows the name of the application. On the right side of the title bar
are the standard Windows buttons for minimizing, maximizing, and closing the XStack Storage
management console application.
Menu bar. The menu bar is located below the title bar. The menu bar contains the menus
you can select to perform a range of storage tasks. The XStack Storage management console
provides the following menus:
–
File
–
View
–
Storage
–
Network
–
Help
Depending on the activity you are performing, some menus may be gray and unavailable. For
a description of the options in each menu, refer to Appendix A.
Tool bar. The tool bar is located below the menu bar. The tool bar provides convenient
shortcuts for menu options and other operations. The tools that appear on the tool bar vary,
depending on the task you are performing.
Title Bar
Menu Bar
Tool Bar
Figure 5-4 Menu/Tool Bar Area
XStack Storage User’s Guide
59
5.1.2.2
Resources Panel
The resources pane appears along the left side of the XStack Storage management console
window (see Figure 5-5). This pane can show either physical resources (such as drives and
Ethernet connections) or logical resources (such as iSCSI initiator, iSCSI target, and LAG
resources), depending on whether the Physical Resources tab or Logical Resources tab is
selected.
These tabs work the same way Windows Explorer works. A plus sign (+) next to an item, for
example, means that the item contains subitems. To expand the item and see the subitems,
either double-click the item or click the plus sign next to it. When an item is expanded, a minus
sign (-) replaces the plus sign next to the item. Click the minus sign to collapse the item.
In this Guide, you will see references to the “active tab.” The active tab is the tab that is on top
(in front) of the other tab. Only one tab can be active at a time. To switch between the Physical
Resources tab and the Logical Resources tab, click the tab name.
Example of Physical Resources Tab
Example of Logical Resources Tab
Figure 5-5 Resources Pane
60
Chapter 5
Configuring the XStack Storage
5.1.2.2.1
Physical Resources Tab
The Physical Resources tab contains the following entities:
The XStack Storage unit (
).
The physical drives attached to the XStack Storage (
).
The Ethernet ports on the XStack Storage ( ). To enhance viewing, the port icons are color
coded (black = link is down, green = link is up).
5.1.2.2.2
Logical Resources Tab
The Logical Resources tab contains the following entities:
Unusable Collection (
). Shows drives that have been pulled out of the XStack Storage
unit. Initializing a drive in this location moves the drive to the Available Pool to rebuild a
volume if necessary.
Blade A Base Pool (
). Shows volumes that have been created (
) and drives (
).
Available Pool (
). Shows the available drives ( ) that can be added to the storage pool.
The first time the system starts, all drives appear in the Available Pool.
Target Resources. Shows the network entities (
that have been created.
Initiator Resources. Shows the iSCSI initiators (
5.1.2.3
) and Link Aggregation Groups (LAGs) (
) that have been created.
Main Display Area
Some items in the Physical Resources and Logical Resources tabs have storage or system
information associated with them. When you click such an item, the storage or system
information is displayed in one or more “tabbed” screens in the main display area. The tabbed
screens resemble index cards. If you click the top XStack Storage item in the left pane of either
the Physical Resources tab, for example, four tabs appear in the main display area (see Figure
5-6). You can then click the tab to view the information on it.
For more information about the screens that can appear in the main display area, refer to
Chapter 6.
XStack Storage User’s Guide
61
)
Figure 5-6 Main Display Area
Figure 5-7 Example of the Main Display Area Showing Blade A Base Pool Information
62
Chapter 5
Configuring the XStack Storage
5.1.2.4
Footer
The footer appears at the bottom of the XStack Storage management console window. The footer
shows status information when appropriate. If you select Blade A Base Pool in the Logical
Resources tab, for example, the words Blade A Base Pool appear in the footer (see Figure 5-8).
Selecting Blade
A Base Pool
here…
…displays the
selection in the
Footer here
Figure 5-8 Example of Message in the Footer
XStack Storage User’s Guide
63
5.2
Initial XStack Storage Setup
Once a network connection has been established with the XStack Storage unit and an instance of
the Web Manager is open, the following basic configuration tasks are recommended:
Configuring the management interface – described below.
Verifying the XStack Storage’s date and time settings – see Section 5.2.2.
Configuring for email alerts – see Section 5.2.3.
5.2.1
Configuring the Management Interface
Before using the Web Manager, ensure that the XStack Storage’s Ethernet network parameter
settings are correct for your network configuration. The XStack Storage ships with the following
default IP settings:
IP Address: 192.168.1.1
Netmask: 255.255.255.0
Gateway: 0.0.0.0
The following procedure describes how to adjust these settings. As part of this procedure, you
can change the XStack Storage unit’s name. While not required, changing the XStack Storage
name is recommended for identification and troubleshooting purposes.
After you change these settings, you must restart the XStack Storage unit for the new settings to
take effect. If you change the IP address, configure the NIC in the management PC to use the
first three octets of the new IP address; then enter the new IP address in your Web browser to
access the XStack Storage management console.
1. Click the XStack Storage icon at the top of the Physical Resources tab.
2. Perform one of the following steps:
64
–
On the File menu, click Configure Out of Band Port.
–
Right-click and click Configure Out of Band Port.
Chapter 5
Configuring the XStack Storage
Either step displays the Configure Out of Band Port dialog box, with the current settings
shown (see Figure 5-9).
Figure 5-9 Configure Out of Band Port Dialog Box
3. Complete the fields in the dialog box:
–
IP address after restart. Enter an available IP address that will take effect after the
XStack Storage unit restarts.
–
Subnet Mask after restart. Enter the subnet mask that will take effect after the XStack
Storage unit restarts.
–
Host name after restart. The XStack Storage unit is assigned a default host name. If
desired, you can change this name to one that is meaningful to you.
–
Gateway after restart. Enter the gateway that will take effect after the XStack Storage
unit restarts.
XStack Storage User’s Guide
65
For convenience, the current settings appear below the fields where you
enter the new settings.
It is important for you to remember the new IP address, as you will need it
for subsequent logins to the XStack Storage management console. We
recommend that you write the IP address on a piece of paper and store it in
a safe place in case you need to refer to it in the future.
4. On the File menu, click Restart. When the confirmation prompt “Do you want to restart the
system?” appears, click Yes.
5. Wait for the XStack Storage unit to become ready.
6. After the XStack Storage unit has become ready and reboot is complete, launch the browser,
enter the IP address you saved from step 2, and click Go on the browser. The Login Screen
initializes and the User Name and Password must be re-entered.
5.2.2
Changing the XStack Storage Date and Time
The XStack Storage unit maintains the current timezone, date and time. You may need to change
these settings the first time you use the XStack Storage unit or if time changes occur in your
area, After you change these settings, you must restart the XStack Storage for the new settings
to take effect.
1. Click the XStack Storage icon at the top of the Physical Resources tab.
2. Perform one of the following steps:
–
On the File menu, click XStack Storage Date and Time.
–
Right-click and click XStack Storage Date and Time.
Either step displays the XStack Storage unit’s Date and Time dialog box, with the system
timezone, date, or time settings shown (see Figure 5-10).
66
Chapter 5
Configuring the XStack Storage
Figure 5-10 XStack Storage Date and Time Dialog Box
3. Complete the fields in the dialog box:
–
Timezone. Select the appropriate timezone from the drop-down list.
–
System Date. Either use the controls to the right of this field to select the appropriate
system date or click the calendar icon and select a date from the popup calendar.
–
System Time. Use the controls to the right of this field to select the appropriate system
time.
4. Click OK.
5.2.3
Configuring for Email Alerts
You can configure the XStack Storage unit to send notifications by email when an event occurs.
To use this feature, the XStack Storage management port must be able to communicate with your
LAN’s Simple Mail Transfer Protocol (SMTP) server. This procedure assumes that your SMTP server
is set up correctly and that you are able to use it for your normal emails.
1. Click the XStack Storage icon at the top of the Physical Resources tab.
2. On the File menu, click Configure Email Notification. The Configure Email Notification dialog
box appears (see Figure 5-11).
XStack Storage User’s Guide
67
Figure 5-11 Configure Email Notification Dialog Box
3. Complete the fields in the dialog box:
–
Enable Email Notification Support. Click this option to enable email notifications from
the XStack Storage.
–
From Address. Enter an IP address, email address, or other meaningful entry that
identifies the XStack Storage as the source of the email.
–
To Address. Enter the email address where notifications are to be sent. This can be an
individual email address or a distribution list.
–
SMTP Server. Enter the IP address of the mail server through which email notifications
from the XStack Storage will be routed.
–
SMTP Port. Enter the SMTP port on which the mail server will be listening for email alerts
from the XStack Storage (default is 25).
4. Click OK.
68
Chapter 5
Configuring the XStack Storage
5.3
Managing the XStack Storage Unit
The following steps summarize the procedures for configuring and managing storage on the
XStack Storage unit. For more information about a step, refer to the section show in the step.
1. Create one or more volumes on the disks attached to the XStack Storage unit. Refer to
Section 5.3.1.
2. Create one or more iSCSI initiator nodes. Refer to Section 5.3.2.
3. Modify the LAG settings, if desired. Refer to Section 5.3.3
4. Create one or more network portals. Refer to Section 5.3.4.
5. Create one or more iSCSI target nodes. Refer to Section 5.3.5.
6. Perform an iSCSI log on to the iSCSI initiator. Refer to Section 5.3.6.
7. At the end of your session, shut down the XStack Storage management console and Storage
Controller. Refer to Sections 5.7.2 and 5.7.3.
5.3.1
Working with Volumes
The following sections describe how to create, modify, expand, and delete volumes. They also
describe how to perform a perform parity and media scans on a volume.
5.3.1.1
Creating a Volume
Adding volumes defines what volumes are accessible through the target. Using the XStack Storage
management console, you can create volumes automatically or manually.
The automatic method provides the fastest way to create volumes. This method provides a
Create Volume Wizard that lets you create a volume step-by-step using a series of friendly
screens. For more information, refer to Section 5.3.1.1.1.
The manual method provides greater flexibility than the automatic method, allowing you to
customize and fine-tune volumes. For more information, refer to Section 5.3.1.1.2.
XStack Storage User’s Guide
69
5.3.1.1.1
Creating Volumes Automatically
To create volumes automatically with the Create Volume Wizard, use the following procedure. As
you create volumes, record the information in Table D-1 on page 162.
1. In the Logical Resources tab, click Blade A Base Pool.
2. Perform one of the following steps in the Logical Resources tab:
–
Click the Create Volume button on the toolbar:
–
On the Storage menu, click Create Volume.
–
Right-click Blade A Base Pool and click Create Volume:
Any of these steps starts the Create Volume Wizard and displays the Select Volume Type to
Create screen (see Figure 5-12).
Figure 5-12 Volume Wizard Screen – Select Volume Type to Create Screen
70
Chapter 5
Configuring the XStack Storage
3. Complete the fields in the screen:
–
Name. Enter the name of the volume you are creating.
–
Size. Enter the size of the volume you are creating. Do not type a decimal point. Use the
drop-down box to select the volume capacity:
B =
bytes
KB =
kilobytes
MB =
megabytes
GB =
gigabytes
TB =
terabytes
All volumes must be at least 1 MB in size.
–
Data Redundancy. Select whether the volume will have no data redundancy or parity or
mirror redundancy. For an explanation of these selections, refer to Chapter 2.
4. Click the Next button. The Access and Efficiency Settings screen appears (see Figure 5-13).
Figure 5-13 Volume Wizard Screen – Access and Efficiency Settings Screen
XStack Storage User’s Guide
71
5. Use the slider bars to select the access bandwidth and storage efficiency (if displayed)
desired for this volume. The values allowed for each ranges from 0-10. Their meaning, and
usage is as follows:
–
Access Bandwidth Weight: This setting is a measure of how much bandwidth the volume
will use (i.e., how much initiator I/O activity can be expected for the volume). A large
number indicates more I/O. It also means the Administrator wants the initiators to
achieve fast access to the volume, compared to the other volumes stored on the XStack
Storage unit. A large value causes the XStack Storage unit to choose a larger number of
stripe members. The method used by the XStack Storage unit to select the organization
and number of members is described in Table 5-1.
Table 5-1. Volume Organization and Members Based on Redundancy and Access Bandwidth Weight
Redundancy
Access Bandwidth Weight Value
0
1
Large Values
None
JBOD organization (1 member)
Stripe organization with 2
members
Stripe organization with more members
Mirror
Mirror organization (2 members)
Stripe Mirror organization with 2
stripe members
Stripe Mirror organization with more
stripe members
Parity
Parity organization with at least 3
members
In combination with the Storage Efficiency Hint, this selects Parity
organization with more members
In the Stripe Mirror organization, there are always two members for each
stripe member to allow for the duplicate copy of the data.
–
Storage Efficiency Hint: When Parity is selected for Data Redundancy, this additional
setting allows the Administrator to further tailor the XStack Storage’s selection of the
member count. A large value tells the XStack Storage unit that the Administrator wants
to use disk space more efficiently (i.e., use less space for redundancy data). As a result,
a large value for this hint requests a larger number of members (which costs less space
for parity overhead).
Both Access Bandwidth Weight and Storage Efficiency Hint can be left at their default
settings of 5. These settings produce good volume organizations for each redundancy
setting that use some, but not for all XStack Storage’s drive resources.
If you change the default value for either setting, the number of members chosen for the
volume depends on the number of drives available at the time the volume is created.
Small settings tend to use a small number of members. As the setting values increase, the
number of members will increase slowly. When the values reach their maximum, the
XStack Storage unit will use all possible drives in the volume’s pool and the Available
Pool for a volume. (The spare count is the only limit to the number of drives that can be
obtained from the available pool.)
72
Chapter 5
Configuring the XStack Storage
If you selected None or Mirror for Data Redundancy, the Access and
Efficiency Settings screen contains only the Access Bandwidth Weight
setting.
6. Click the Finish button. The main screen reappears and the volume you created appears
under Blade A Base Pool in the Logical Resources tab.
A plus sign appears next to Blade A Base Pool. Click it to see the volume you
created.
5.3.1.1.2
Creating Volumes Manually
You use the Manual Create Volume Wizard to create volumes manually. The following steps
describe this procedure. As you create volumes, record the information in Table D-1 on page 162.
1. In the Logical Resources tab, click the plus sign next to Blade A Base Pool. All drives
available for volume creation appear under Blade A Base Pool.
2. In the Logical Resources tab, click the plus sign next to Available Pool.
3. If drives to be used for this volume are not already in the Blade A Base Pool, those drives
need to be moved to that Pool. To do this, drag one of the desired drives from Available Pool
to Blade A Base Pool. Repeat this step for each additional drive that you want included in
the volume.
4. In the Logical Resources tab, click Blade A Base Pool.
5. Perform one of the following steps in the Logical Resources tab:
–
Click the Manual Create Volume button on the toolbar:
–
On the Storage menu, click Manual Create Volume.
The Manual Create Volume Wizard launches and the Select Volume Type to Create screen
appears (see Figure 5-14).
XStack Storage User’s Guide
73
Figure 5-14 Manual Create Volume Wizard - Select Volume Type to Create Screen
6. Complete the fields in the screen:
–
Name. Enter the name of the volume you are creating.
–
Size. Enter the size of the volume you are creating. Do not type a decimal point. Use the
drop-down box to select the volume capacity:
–
74
B =
bytes
KB =
kilobytes
MB =
megabytes
GB =
gigabytes
TB =
terabytes
Configuration. Select the desired organization:
Chapter 5
Configuring the XStack Storage
Table 2-2 defines the volume organizations.
–
Chunk Size. Select the size of each chunk from one of the commonly used chunk sizes
shown:
If you selected JBOD or Mirror as your configuration setting, the Chunk Size
setting is gray and unavailable.
7. Click the Next button. The Select the Drives screen appears (see Figure 5-15).
Figure 5-15 Manual Create Volume Wizard - Select the Drives Screen
XStack Storage User’s Guide
75
8. In the left box, select the drives from which the volume will be allocated, then click the Add
button. Observe the following guidelines when selecting drives:
–
JBOD volumes support a minimum of 1 drive and can span across additional drives if the
capacity required exceeds that which a single drive can provide.
–
Stripe Mirror volumes support an even number of drives, from 4 to 16.
–
Parity volumes support 3 to 16 drives.
–
Mirror and striped volumes support 2 to 16 drives.
You can select more than one drive in the left box:
To select contiguous drives in the left box, click the first
drive; then hold down the Shift key and click the last drive.
All drives between the first and last drives are selected.
To select noncontiguous drives in the left box, click the first
drive; then hold down the Ctrl key and click each additional
drive you want to select.
To remove the selection from a drive in the left box, hold
down the Ctrl key and click the drive.
If you want to remove a drive from the right box, click the drive in the right
box and click Remove to return the drive to the left box.
9. Click the Finish button. The main screen reappears and the volume you created appears
under Blade A Base Pool in the Logical Resources tab. The drives that make up your volume
appear in the main display.
If you select an unacceptable configuration, the Finish button remains gray
and unavailable until you correct the configuration. Examples of
unacceptable configurations are selecting an odd number of drives for a
Stripe Mirror configuration, selecting 1 or 2 drives for a parity volume, and
selecting 1 drive for a Mirror configuration.
If you specify a volume larger than the selected drives can support, an error
message appears after you click the Finish button. Click OK to remove the
message, then repeat this procedure and specify a smaller volume.
76
Chapter 5
Configuring the XStack Storage
5.3.1.2
Reconfiguring Volumes
There may be times when you need to reconfigure a volume. For example, you may want to
expand a volume to add capacity or delete volumes that are no longer used. To reconfigure a
volume, use the following procedure.
1. In the Logical Resources tab, click the volume you want to reconfigure.
2. Perform one of the following steps:
–
On the Storage menu, click Reconfig Volume.
–
Press the right mouse button and click Reconfig Volume.
Either step starts the Auto Create Volume Wizard and displays the Select Volume Type to
Create screen (see Figure 5-12).
3. Review the settings in the displayed screen and change them as necessary. If you need help,
refer to Section 5.3.1.1.2.
4. Click the Finish button.
5.3.1.3
Expanding a Volume
There may be times when you want to add capacity to a volume. In these cases, you can expand
a volume to increase to add more physical capacity.
To expand a volume, use the following procedure.
1. In the Logical Resources tab, click the volume whose capacity you want to expand.
2. On the Storage menu, click Expand Volume. The Expand Volume appears (see Figure 5-16).
Figure 5-16 Expand Volume Dialog Box
3. Use the New Size slide bar to increase the size of the volume.
4. Click OK. The message in Figure 5-17 appears.
XStack Storage User’s Guide
77
Figure 5-17 Expand Volume Message
5. Click OK to remove the message.
If the selected volume cannot support the size you specified, an error
message appears. If this occurs, specify a smaller size.
5.3.1.4
Deleting Volumes
If you no longer need a volume, use the following procedure to delete it.
You cannot delete a volume on a target node that has an active iSCSI
connection. Target nodes with an active iSCSI connection have a plus sign in
front of their name (the name is prefaced with naa followed by a string of
numbers and letters). If the volume you want to delete has an iSCSI
connection, log out of the target node and then delete the volume on that
target node.
1. In the Logical Resources tab, click the volume you want to delete.
2. Perform one of the following steps:
78
–
On the Storage menu, click Delete Volume.
–
Press the right mouse button and click Delete Volume.
Chapter 5
Configuring the XStack Storage
Either step displays the message in Figure 5-18.
Figure 5-18 Delete Volume Confirmation Message
3. Click Yes to delete the volume. (Or click No to keep the volume.) If you clicked Yes, the
message in Figure 5-19 appears.
Figure 5-19 Successful Volume Deletion Message
4. Click OK to remove the message.
XStack Storage User’s Guide
79
5.3.1.5
Performing a Parity Scan on a Volume
Using the XStack Storage management console, you can scan a parity volume for errors. This task
reads every block in the volume to ensure that parity is correct. If parity errors are found, this
task corrects the errors.
To perform a parity scan on a volume, use the following procedure.
1. Click the volume on which you want to perform the parity scan.
2. Perform one of the following steps:
–
On the Storage menu, click Parity Scan.
–
Right-click and click Parity Scan
Either step starts the scan operation and displays the message in Figure 5-20.
Figure 5-20 Scan Successfully Started Message
3. Click OK to remove the message.
After you start a parity scan task, you can use the Tasks Info screen to view the progress of the
scan operation (refer to Section 6.2.3.2).
80
Chapter 5
Configuring the XStack Storage
5.3.1.6
Performing a Media Scan on a Volume
Using the XStack Storage management console, you can scan a JBOD, stripe, stripe mirror, or
stripe mirror media volume for errors. This task reads every block in the volume looking for
errors as described for Media Scan to ensure that the media is correct. If media errors are found,
this task corrects the errors.
To perform a media scan on a volume, use the following procedure.
1. Click the volume on which you want to perform the media scan.
2. Perform one of the following steps:
–
On the Storage menu, click Media Scan.
–
Right-click and click Media Scan
Either step starts the scan operation and displays the message in Figure 5-21.
Figure 5-21 Scan Successfully Started Message
3. Click OK to remove the message.
After you start a media scan task, you can use the Tasks Info screen to view the progress of the
scan operation (refer to Section 6.2.3.2).
XStack Storage User’s Guide
81
5.3.2
Adding iSCSI Initiators
The following procedure describes how to add iSCSI initiators. Adding initiators defines what
initiators have access to the target. You add iSCSI initiators by running the Add Initiator Wizard.
1. Perform one of the following steps in the Logical Resources tab:
–
Click Initiator Resources. Then, on the iSCSI menu, click Add Initiator.
–
Right-click Initiator Resources and click Add Initiator.
Either step starts the Add Initiator Wizard and displays the Create Initiator screen (see Figure
5-22).
Figure 5-22 Add Initiator Wizard – Create Initiator Screen
2. Complete the fields in the screen:
–
Initiator Name. Enter the name of the iSCSI initiator you are creating. This name must
exactly match the name defined for the iSCSI initiator to which the XStack Storage unit
will connect; otherwise, the connection will fail.
–
Password (optional). To use Challenge Handshake Authentication Protocol (CHAP)
authentication when connecting to an iSCSI target, type the password that will be used
during mutual CHAP authentication when an initiator authenticates a target. For
security, each typed character appears as an asterisk (*).
–
Confirm password. If you typed a password, retype the same one in this field. For
security, each typed character appears as an asterisk (*).
3. Click the OK button. The main screen reappears and the iSCSI initiator you created appears
under Initiator Resources in the Logical Resources tab.
82
Chapter 5
Configuring the XStack Storage
After you add initiators, you can monitor their status using the Initiator
Access Info screen (refer to Section 6.3.3), Initiator Information screen
(refer to Section 6.4.1), and LUN Map Information screen (refer to Section
6.4.2).
5.3.3
Working with LAGS and VLANS
The XStack Storage unit manages the data ports on the enclosure's back panel using the concept
of LAG ports. In a simple configuration, a LAG port associates a single Ethernet port (i.e., a
physical data port) with a network portal that defines an IP address. The LAG port is the entity
that ties an IP address to a data port. Link Aggregation is a way to combine (or “aggregate”)
multiple data ports in parallel to act as a single logical connection with increased bandwidth, and
the XStack Storage unit can do this, too.
Combining two or more data ports increases the overall bandwidth capability between the XStack
Storage unit and your SAN, and creates resilient and redundant links. These capabilities make the
XStack Storage unit ideal for demanding applications that run in high-performance environments,
such as servers in enterprises, Web servers, and intranet servers gain from the high-bandwidth
capabilities of link aggregation.
The following list summarizes the key benefits of LAGs.
Improved performance - Combining the capacity of multiple interfaces into one logical link
improves performance because the capacity of an aggregated link is higher than each
individual link alone.
Intermediate data rates – Link aggregation provides intermediate data rate levels between
the standard network data rates of 10 Mbps, 100 Mbps, and 1000 Mbps, ideal when an
intermediate performance level is more appropriate (such as in environments where a factor
of 10 increase may be overkill).
Increased availability - If a link within a LAG fails or is replaced, the traffic is not disrupted
and communication is maintained (even though the available bandwidth is reduced).
Load sharing - Traffic is distributed across multiple links, minimizing the probability that a
single link be overwhelmed.
Figure 5-23 shows an example of a LAG created between the XStack Storage unit
and a Gigabit Ethernet switch. In this example, multiple workgroups are joined to form one highspeed aggregated link. In this figure, the XStack Storage unit is connected to a Gigabit Ethernet
switch using four 1000 Mbps links. If one link fails between the XStack Storage unit and the
switch, the other links in the LAG take over the traffic and the connection is maintained. This
configuration reduces the number of ports available for connection to external devices.
Aggregation thus implies a trade-off between port usage and additional bandwidth for a given
device pair.
XStack Storage User’s Guide
83
Figure 5-23 Example of Link Aggregation between the XStack Storage and a Gigabit Ethernet Switch
5.3.3.1
Creating LAGS and VLANs
By default, each physical data port on the XStack Storage corresponds to a LAG. For example:
The default number of LAGs for the XStack Storage DSN-3200 is eight.
The default number of LAGs for the XStack Storage DSN-3400 is one.
By default, each data port corresponds to the LAG port of the same number. For example, the
first LAG port (LAG 08000000) corresponds to Ethernet port 0 and to data port 0 on the
enclosure's back panel. Similarly, LAG 08000003 corresponds to Ethernet port 3 and to physical
data port 3.
Using the following procedure, you can change this mapping so that a LAG consists of more than
one physical port, depending on the requirements of the network (i.e., the more ports in the
LAG, the more bandwidth and more redundancy that is available). When you create LAGs, you
can indicate whether the LAG is to support a virtual LAN (VLAN). All XStack Storage models
support eight VLANs, one for each IP address. As you create LAGs, record the information in
Table D-3 on page 166.
1. In the Logical Resources tab, click the plus sign next to Target Resources.
2. Click the plus sign next to Network Entities.
3. Click LAG Resources.
4. Perform one of the following steps:
84
–
On the Network menu, click Create LAG.
–
Right-click and click Create LAG.
Chapter 5
Configuring the XStack Storage
Either step starts the Create Link Aggregation Group Wizard and displays the LAG Parameters
screen (see Figure 5-29).
Figure 5-24 Create Link Aggregation Group Wizard - LAG Parameters Screen
5. Complete the fields in the screen:
–
MTU Size. This is a read-only field.
–
Ethernet Encapsulation. Select the Ethernet frame type to be used for fetching packets
from upper-layer protocols, and placing header and footer information around the data
before it traverses the network. The choices are Ethernet CSMA/CD and IEEE 802.3ad.
–
Ethernet CSMA/CD selects Ethernet_II framing.
–
IEEE 802.3ad selects Ethernet_802.3 framing.
–
VLAN Supported. Check this box if you want the LAG to support a Virtual Network
(VLAN).
–
Auto Negotiation. This option is unavailable.
6. Click the Next button. The Add/Delete Ethernet Ports screen appears (see Figure 5-25).
XStack Storage User’s Guide
85
Figure 5-25 Create Link Aggregation Group Wizard - Add/Delete Ethernet Ports Screen
7. To add Ethernet ports, select one or more ports in the left box and click Add to move them
to the right box.
8. To remove one or more Ethernet ports, select them in the right box and click Remove to
move it to the left box.
9. When you finish adding Ethernet ports, click the Finish button.
After you create LAGs, you can monitor their status using the LAG Port Info
screen (refer to Section 6.3.4).
86
Chapter 5
Configuring the XStack Storage
5.3.3.2
Modifying LAG Parameters
There may be times when you need to modify LAG parameters. Using the XStack Storage
management console, you can view the Maximum Transmission Unit (MTU) size and requested
speed. As you modify LAG parameters, record the information in Table D-3 on page 166.
To modify LAG parameters, use the following procedure.
1. In the Logical Resources tab, click the LAG whose parameters you want to change.
2. Perform one of the following steps:
–
On the Network menu, click Modify LAG Parameters.
–
Right-click and click Modify LAG Parameters.
–
Either step displays the Modify LAG Parameters screen appears (see Figure 5-26).
Figure 5-26 Modify Lag Parameters Dialog Box
3. Complete the fields in the dialog box:
–
MTU Size. This value specifies the maximum size of a packet that can be transferred in
one frame over a network.
–
Requested Speed. This value indicates the requested speed for transmitting and sending
packets. For the XStack Storage4 and XStack DSN-3200, the choices are Auto Detect, 100
Mbps, and 10 Mbps. For the XStack DSN-3400, the only choice is 10Gb.
4. Click OK.
XStack Storage User’s Guide
87
5.3.3.3
Adding or Deleting Physical Ports in a LAG
There may be times when you want to add physical ports to or delete physical ports from a LAG.
The following steps describe this procedure. As you add or remove physical ports, record the
information in Table D-3 on page 166.
1. In the Logical Resources tab, click a LAG whose physical port you want to configure.
2. On the Network menu, click Config Physical Port. The Add/Remove Ethernet Ports for LAG
Wizard starts and the Add/Delete Ethernet Ports screen appears (see Figure 5-27).
Figure 5-27 Add/Remove Ethernet Ports for LAG Wizard - Add/Delete Ethernet Ports screen
3. To add Ethernet ports, select one or more ports in the left box and click Add to move them
to the right box.
4. To remove one or more Ethernet ports, select them in the right box and click Remove to
move it to the left box.
5. When you finish adding Ethernet ports, click the Finish button.
88
Chapter 5
Configuring the XStack Storage
5.3.3.4
Deleting LAGs
If you no longer need a LAG, use the following procedure to delete it.
A warning message does not appear before you delete a LAG. Therefore, be
sure you do not need the LAG before you delete it.
1. In the Logical Resources tab, click the LAG you want to delete.
2. Perform one of the following steps:
–
On the Storage menu, click Delete LAG.
–
Right-click and click Delete LAG.
Either step deletes the selected LAG.
XStack Storage User’s Guide
89
5.3.4
Working with Network Portals
This section describes how to work with network portals. The network portal is the physical
Ethernet port attached to the host. Before you create a network portal, ascertain the IP address
of the iSCSI initiator because the initiator and network portal must have different IP addresses,
yet reside on the same subnet. For more information about IP addresses and subnets, refer to
Appendix E.
5.3.4.1
Ascertaining the IP Address of the iSCSI Initiator
The following procedure describes how to obtain the IP address of the iSCSI initiator using the
Windows Command Prompt window.
1. Click the Start button, point to Programs, point to Accessories, and click Command Prompt.
A Command Prompt window opens.
2. Type ipconfig and press Enter.
3. Find the IP address of the iSCSI initiator and write it on a piece of paper (you will need to
refer to it later in this procedure).
4. Type exit and press Enter to close the Command Prompt window.
5.3.4.2
Creating Network Portals
The following procedure describes how to create network portals. As you create network portals,
record the information in Table D-4 on page 168.
1. In the Logical Resources tab, click the plus sign next to Target Resources.
2. Click the plus sign next to Network Entities.
3. Click the plus sign next to LAG Resources.
4. Under LAG Resources, click a LAG.
5. Perform one of the following steps:
90
–
On the Network menu, click Create Network Portal.
–
In the Logical Resources tab, right-click a LAG and click Create Network Port.
Chapter 5
Configuring the XStack Storage
Either step starts the Create Network Portal Wizard and displays the Set the IP Address
screen (see Figure 5-28).
Figure 5-28 Create Network Portal Wizard – Set the IP Address Screen
3. Complete the fields in the screen:
–
IP Address. Enter the IP address for the network portal. The IP address must be a unique
address that is different than the management port and on the same subnet as the iSCSI
initiator. For more information, refer to Appendix E.
–
Subnet mask. Enter a subnet mask for the network portal or press the Tab key to
automatically set the default subnet mask to 255.255.255.0.
4. Click the Finish button.
XStack Storage User’s Guide
91
After you create network portals, you can monitor their status using the
Portals Information screen (refer to Section 6.3.5).
5.3.4.3
Modifying Network Portal Parameters
There may be times when you need to change the IP address or subnet mask for a network
portal. To modify a network portal’s configuration settings, use the following procedure.
1. Delete the network portal following the steps outlined in section 5.3.4.4
2. Create a new network portal with the desired IP address and subnet mask as outlined in
section 5.3.4.2.
5.3.4.4
Deleting Network Portals
If you no longer need a network portal, use the following procedure to delete it.
A warning message does not appear before you delete a network portal.
Therefore, be sure you do not need the network portal before you delete it.
1. In the Logical Resources tab, click the network portal you want to delete.
2. Perform one of the following steps to delete the network portal:
92
–
On the Network menu, click Delete Network Portal.
–
Right-click and click Delete Network Portal.
Chapter 5
Configuring the XStack Storage
5.3.5
Creating iSCSI Target Nodes
After you create one or more volumes, iSCSI initiators, and LAGs, you have all the prerequisites
to create an iSCSI target node. As you create iSCSI target nodes, record the information in Table
D-5 on page 170.
To create an iSCSI target node, use the following procedure.
1. In the Logical Resources tab, click Target Resources or Network Entities.
2. Perform one of the following steps:
–
On the iSCSI menu, click Create iSCSI Target Node.
–
Right-click and click Create iSCSI Target Node.
Either step starts the Create iSCSI Node Wizard and displays the Enter iSCSI Node Information
screen (see Figure 5-29).
Figure 5-29 Create iSCSI Node Wizard - Enter iSCSI Node Information Screen
3. Complete the fields in the screen:
–
iSCSI Node Alias (optional). An alias string can also be associated with an iSCSI node. The
alias lets an organization associate a user-friendly string with the iSCSI name.
–
Enable CHAP Secret (optional). To use CHAP authentication when connecting to an iSCSI
target, check this box to enable the CHAP secret. Then, in the CHAP Secret field (see
Figure 5-30), type the password that will be used by the target to authenticate an
initiator.
XStack Storage User’s Guide
93
The CHAP secret is case sensitive. For security, each typed character in the
CHAP secret appears as an asterisk (*). If you decide not to specify a CHAP
secret now, you can do so in the future using the Set CHAP Secret command
in the iSCSI menu (refer to Section 5.3.5.1).
Figure 5-30 Create iSCSI Node Wizard - Enter iSCSI Node Information Screen with CHAP Secret Field Shown
4. Click Next. The Configure iSCSI Node Parameters screen appears (see Figure 5-31).
Figure 5-31 Create iSCSI Node Wizard - Configure iSCSI Node Parameters Screen
94
Chapter 5
Configuring the XStack Storage
5. Accept the default settings in the Session Settings and Connection Settings tabs and click
Next. The Modify iSCSI Network Portal screen appears (see Figure 5-32).
Figure 5-32 Create iSCSI Node Wizard – iSCSI Network Portal Screen
6. The left box lists all of the iSCSI network portals that you created. Click the iSCSI network
portal(s) in this list that are allowed to access the volumes through the iSCSI initiator that
you will select.
7. Click Add to move the selected iSCSI network portal(s) to the right box.
If you want to remove an iSCSI network portal from the right box, click the
iSCSI network portal in the right box and click Remove to return the iSCSI
network portal to the left box.
8. Click Next. The initiators list screen appears (see Figure 5-33).
XStack Storage User’s Guide
95
Figure 5-33 Create iSCSI Node Wizard – Initiator List Screen
9. The left box lists all the iSCSI initiators you have defined. Click the iSCSI initiator(s) in this
list that are allowed to access the volumes through the target network portals whose IP
addresses you selected in the previous screen.
10. Click Add to move the selected iSCSI initiator(s) to the right box.
If you want to remove an iSCSI initiator from the right box, click the iSCSI
initiator in the right box and click Remove to return the iSCSI initiator to the
left box.
11. Click Next. The Volume Access Right screen appears (see Figure 5-34).
96
Chapter 5
Configuring the XStack Storage
Figure 5-34. Create iSCSI Node Wizard – Volume Access Right Screen
12. The left box lists all the volumes you have created. Click a volume in this list, then click Add
to move the selected volume to the right box.
You can select more than one volume in the left box:
To select contiguous volumes in the left box, click the first
volume; then hold down the Shift key and click the last
volume. All volumes between the first and last volumes are
selected.
To select noncontiguous volumes in the left box, click the
first volume; then hold down the Ctrl key and click each
additional volume you want to select.
To remove the selection from a volume in the left box, hold
down the Ctrl key and click the volume.
If you want to remove a volume from the right box, click the volume in the
right box and click Remove to return the volume to the left box.
10. Click Finish.
XStack Storage User’s Guide
97
5.3.5.1
Changing the CHAP Secret
When you created an iSCSI target node, you could specify an optional CHAP secret. If desired,
you can change the CHAP secret using the following procedure. If you change the CHAP secret,
record the information in Table D-5 on page 170.
1. Click a network entity (prefaced by naa) in the Logical Resources tab.
2. On the iSCSI menu, click Change CHAP Secret. The Set CHAP Secret dialog box appears (see
Figure 5-35).
Figure 5-35. Set CHAP Secret Dialog Box
3. Complete the fields in the dialog box:
–
CHAP Secret. Enter the CHAP secret.
–
Confirm CHAP Secret. Enter the same CHAP secret.
The CHAP secret is case sensitive. For security, each typed character in
CHAP Secret and Confirm CHAP Secret appears as an asterisk (*).
4. Click OK.
98
Chapter 5
Configuring the XStack Storage
5.3.6
Logging on to the iSCSI Initiator Computer
After you create a volume (Section 5.2.3), an iSCSI initiator (Section 5.3.2), a network portal
(Section 5.3.4), and an iSCSI target nodes (Section 5.3.3), use the following procedure to log on
to the Microsoft iSCSI initiator.
1. Connect the appropriate XStack Storage Ethernet port to the NIC in the iSCSI initiator
computer using an Ethernet RJ-45 cable.
2. Start the Microsoft iSCSI initiator application:
When Microsoft iSCSI Initiator starts, the iSCSI Initiator Properties dialog box appears.
3. Click the Discovery tab.
4. Click Add to add a target portal. The Add Target Portal dialog box appears.
5. Enter the IP address of the target network portal that this iSCSI initiator will use to access
the requested volumes.
6. Click OK. The IP address you entered (192.168.1.115 in the example in Figure 5-36)
appears in the Discovery tab.
Figure 5-36. Discovery Tab on the iSCSI Initiator Properties Dialog Box
XStack Storage User’s Guide
99
6. Click the Targets tab (see Figure 5-37). Notice that the iSCSI initiator software lists the
target node name. It found this name after you entered the IP address or DNS name of the
iSCSI target node.
Figure 5-37. Targets Tab on the iSCSI Initiator Properties Dialog Box
7. Click Log On to display the Log On To Target dialog box (see Figure 5-38).
Figure 5-38. Log on to Target Dialog Box
8. To connect to the iSCSI target node, click OK.
If desired, click Programs > Administrative Tools > Computer Management and verify that the
disk you have configured is shown in the Computer Management screen. In Figure 5-, Disk 2 was
added through the XStack Storage management console. You can also right-click over the new
drive and click Create Partition from the right-click menu to create a partition on the drive. For
more information, refer to your Windows documentation.
100
Chapter 5
Configuring the XStack Storage
Figure 5-40. Example of Disks Shown in the Computer Management Screen
XStack Storage User’s Guide
101
5.3.7
Changing the iSCSI Port Number
The iSCSI port number is the TCP/IP port number on which the iSCSI target is listening. The
standard port number for iSCSI is 3260, but some targets may allow the port number to be
customized. To change the iSCSI port number, use the following procedure.
1. Click the XStack Storage icon at the top of the Physical Resources tab.
2. Perform one of the following steps:
–
On the File menu, click Change iSCSI Port Number.
Right-click and click Change iSCSI Port Number.
Either step displays the Modify iSCSI Port dialog box, with the current iSCSI port number
shown (see Figure 5-39).
Figure 5-39. Modify iSCSI Port Dialog Box
2. Enter a new value for the iSCSI port.
3. Click OK.
102
Chapter 5
Configuring the XStack Storage
5.3.8
Setting the Default Task Priority
You can set the default task priority to specify whether background tasks receive a high or low
priority. By default, the default task priority provides for minimum impact on the foreground
applications performed by the XStack Storage unit. However, you can change this setting if
desired. For example, you may want to specify a higher default task priority for time-critical
tasks such as backups.
By changing the default task priority to a high priority, the XStack Storage
unit will spend more resources performing tasks and fewer resources
performing I/O for its initiators, potentially decreasing its performance (as
observed from the initiators). If you want to change the priority of a single
critical task, you can change the priority of that task without changing all
tasks.
To set the default task priority, use the following procedure.
1. On the File menu, click Set Default Task Priority. The Set Default Task Priority dialog box
appears, with the current setting shown (see Figure 5-40).
Figure 5-40. Set Default Task Priority Dialog Box
2. Use the slider switch to specify the default priority level (0 = highest priority, 10 = lowest
priority).
3. Click OK.
XStack Storage User’s Guide
103
5.3.9
Adding, Viewing, and Deleting IP Route Tables
Routing is the process of deciding the disposition of each incoming and outbound packet that the
XStack Storage handles. Using the XStack Storage management console, you can view the XStack
Storage’s routing table.
If a route being used encounters problems, you can use the XStack Storage management console
to add route tables. Adding a route is also useful if you discover a quick alternative route to the
destination. You can also use the XStack Storage management console to delete routes.
To add, view, and delete IP route tables, use the following procedure.
1. On the View menu, click View Manual Route. The View Route Table appears, with the
current route tables shown (see Figure 5-41).
Figure 5-41. View Route Table
2. To add a route to the routing table, click the Add button. Then, when the dialog box in
Figure 5-42 appears, complete the fields and click OK. As you add route entries, record the
information in Table D-6 on page 172.
104
–
Destination. Enter the IP address of the destination for this route.
–
Netmask. Enter the netmask (also known as a subnet mask) associated with the network
destination or press the Tab key to automatically set the default subnet mask to
255.255.255.0. Because of the relationship between the destination and the subnet
mask in defining routes, the destination cannot be more specific than its corresponding
subnet mask. In other words, there cannot be a bit set to 1 in the destination if the
corresponding bit in the subnet mask is a 0.
–
Gateway. Specifies the forwarding or next hop IP address over which the set of addresses
defined by the network destination and subnet mask are reachable. For locally attached
subnet routes, the gateway address is the IP address assigned to the interface that is
attached to the subnet. For remote routes, available across one or more routers, the
gateway address is a directly reachable IP address that is assigned to a neighboring
router.
Chapter 5
Configuring the XStack Storage
–
Metric. Specifies an integer cost metric (from 1 to 9999) for the route, which is used
when choosing among multiple routes in the routing table that most closely match the
destination address of a packet being forwarded. The route with the lowest metric is
chosen. The metric can reflect the number of hops, the speed of the path, path
reliability, path throughput, or administrative properties.
Figure 5-42. Adding a Route Table
3. To delete a route, click the route in the View Route Table and click the Delete button.
A warning message does not appear before you delete a route. Therefore, be
sure you do not need the route before you delete it.
XStack Storage User’s Guide
105
5.3.10 Modifying System TCP/IP Settings
You can use the XStack Storage management console to view and change the system’s TCP/IP
settings.
To modify the system TCP/IP settings, use the following procedure.
1. Click the XStack Storage icon at the top of the Physical Resources tab.
2. Perform one of the following steps:
–
On the File menu, click Modify System TCP/IP Settings.
Right-click and click Modify System TCP/IP Settings.
Either step displays the Modify System TCP/IP Settings dialog box appears, with the current
setting shown (see Figure 5-43).
Figure 5-43. Modify System TCP/IP Settings Dialog Box
106
Chapter 5
Configuring the XStack Storage
3. Complete the fields in the dialog box:
–
Max Segment Size. This option indicates the maximum size TCP segment that can be
accepted on a TCP/IP connection when the connection is established.
–
Window Scale. This option lets you use large windows during TCP/IP connections. On
fast, high-bandwidth networks, a large TCP window provides greater efficiency by
allowing for a greater amount of unacknowledged data.
–
TCP Timestamp Enabled. This option causes the receiving computer to send a timestamp reply back to the originating computer. Systems can use time-stamp requests and
replies to measure the transmission speed of datagrams on a network.
–
Time to Live (TTL). This option specifies the default time to live (TTL) value for IP
packets generated by the Windows TCP/IP stack.
–
PMTU Enabled. Enabling this option allows the XStack Storage to automatically adapt its
packet size. Disabling this option makes the system keep its default packet size (576
bytes), even when it receives an ICMP request asking it to change its packet size.
Disabling this option can render some remote systems unreachable, because if
intermediate systems on the path to the remote system cannot support the default
packet size, the XStack Storage will ignore their requests to make the packets smaller.
–
Upper Layer Counter Reset. This option resets the TCP/IP upper layer counters.
Resetting the counters simplifies the ability to look at the counters for an accurate
percentage of packets sent or received.
4. Click OK.
XStack Storage User’s Guide
107
5.3.11 Setting the Spare Count
You can specify the number of spares available to the XStack Storage unit. A spare is a drive that
is present in the system but normally unused until another drive fails, at which time the drive is
automatically substituted for the failed drive. For more information about the spare count, refer
to Section 2.5.
To set the spare count, use the following procedure.
1. Click the XStack Storage icon at the top of the Physical Resources tab.
2. Perform one of the following steps:
–
On the File menu, click Set Spare Count.
Right-click and click Set Spare Count.
Either step displays the Set Spare Count dialog box appears, with the current setting shown
(see Figure 5-44).
Figure 5-44. Set Spare Count Dialog Box
3. Enter a value that corresponds to the number of drives.
4. Click OK.
108
Chapter 5
Configuring the XStack Storage
5.3.12 Creating Scheduled Tasks
You can use the XStack Storage management console to set up tasks that you want the Storage
Controller to perform, such as performing parity or media scans. When you create a task, you can
specify the day and time when the task is to be performed and whether the task will repeat
(recur). As you create scheduled tasks, record the information in Table D-7 on page 174.
To create scheduled tasks, use the following procedure.
1. On the View menu, click Create Task. The Scheduled Task Wizard launches and the Volume
and Operation screen appears (see Figure 5-45).
Figure 5-45. Scheduled Task Wizard – Volume and Operation
2. Complete the fields in the screen:
–
Operation Name. Enter a name for the task you are creating.
–
Object. Select the volume on which the scheduled task will be performed.
–
Operation. Select the task that is to be performed.
–
Perform this task. Select how often the scheduled task is to be performed.
3. Click Next. The Select Date and Time screen appears (see Figure 5-46).
XStack Storage User’s Guide
109
Figure 5-46. Scheduled Task Wizard – Select Date and Time Screen
4. Complete the fields in the screen:
–
Start time. Use the controls to specify the time when the scheduled task is to start.
–
Start date. Use the calendar to select the date when the scheduled task is to start. You
can use the controls below the calendar to move to the previous year, previous month,
next month, or next year.
5. Click Finish.
After you schedule a task, you can use the Tasks Info screen to view the task status (refer to
Chapter 6).
110
Chapter 5
Configuring the XStack Storage
5.3.13 Setting the System Battery Policy
The XStack Storage unit can accommodate an optional battery pack (refer to Section 0). Using
the XStack Storage management console, you can specify a battery policy that defines the action
that the XStack Storage unit is to perform if the battery fails.
To set the system battery policy, use the following procedure.
1. Click the XStack Storage icon at the top of the Physical Resources tab.
2. Perform one of the following steps:
–
On the File menu, click Set System Battery Policy.
Right-click and click Set System Battery Policy.
Either step displays the Battery Policy dialog box appears, with the current setting shown
(see Figure 5-47). The icon at the top of the dialog box provides a color-coded indication of
the XStack Storage battery status.
XStack Storage User’s Guide
111
Figure 5-47. Battery Policy Dialog Box
3. Select the appropriate setting that the XStack Storage unit should use if the battery fails. The
choices are:
–
Ignore the status of the battery and do nothing. Use this setting if you will be operating
the XStack Storage from AC power with an uninterruptible power supply.
–
Stop buffering I/O in cache, and directly write data to disk. Use this setting if you want
to write to disk all I/O buffered in cache memory in the event of a battery failure.
If the XStack Storage unit is operating from an uninterruptible power supply
(UPS) and the UPS fails, there may not be sufficient time to write all the
buffered I/O to disk. This can result In lost or unintelligible data.
–
Prevent any reads from or writes to volumes. This setting prevents all read and write
operations from occurring if the battery fails.
4. Click OK.
112
Chapter 5
Configuring the XStack Storage
5.3.14 Saving the Event Log
The event log tracks the XStack Storage informational, warning, and error messages (refer to
Section 6.1.2). Using the XStack Storage management console, you can save the event log as an
unformatted text file to a user-specified folder.
To save the event log, use the following procedure.
1. Be sure the Physical Resources tab is the active tab.
2. On the View menu, click Save Event Log Messages. The Open dialog box appears (see Figure
5-48).
Figure 5-48. Open Dialog Box
3. Using the Open dialog box, navigate to the location where you want the event log text file to
reside.
4. In the File name field, enter a name for the event log text file.
5. Click OK.
XStack Storage User’s Guide
113
5.4
Managing User Accounts
Before a user can access the XStack Storage management console, a user account must be set up
for the user. When you set up a user account, you can specify whether the user can manage
storage and/or add users and define their permissions. For more information, refer to Section
5.4.1.
A user account must be set up for each user who wants to access the XStack Storage management
console. The user account consists of the following:
A unique user name and password.
Determine whether a user can manage storage and/or add or edit user accounts.
Initially, the XStack Storage unit comes with a single user account called admin. By default, the
admin user has permission to manage storage and add and edit user accounts. The admin account
cannot be deleted unless at least one additional account created has been created with admin
and add/edit user privileges; in this case, the admin account can be deleted. However, if you
lose the password for the new account, you will have to return your XStack Storage to the factory
for resetting.
When the admin user sets up a user account, he can specify whether the other user accounts can
also manage storage and add/edit user accounts. These two permissions operate independently,
so the admin could, for example:
Permit a user account to manage storage, without being able to add or edit user accounts.
Permit a user account to add or edit other user accounts, without being able to manage
storage.
Prevent a user account from managing storage and adding and editing user accounts. With
this setting, the user can only view information on the XStack Storage management console
screens. The user would not be able to change any settings on the screens.
114
Chapter 5
Configuring the XStack Storage
5.4.1
Setting Up User Accounts
To set up user accounts, use the following procedure.
1. Be sure the Physical Resources tab is the active tab.
2. On the View menu, click User Accounts. The User Accounts screen appears, with a list of the
user accounts that have been defined (see Figure 5-49).
Figure 5-49. User Accounts Screen
3. Click the Add User button. The Add New User dialog box appears (see Figure 5-50).
Figure 5-50. Add New User Dialog Box
3. Complete the fields in the dialog box:
–
Username. Enter the name of the user whose account you are creating.
–
Password. Enter the password for this user account. This is the case-sensitive password
the user must specify when logging in to the XStack Storage management console.
–
Confirm password. Retype the same case-sensitive password you typed in the Password
field.
XStack Storage User’s Guide
115
For security, each typed character in Password and Confirm password
appears as an asterisk (*).
–
Allow to manage storage. Check this option if you want this user to be able to manage
storage on the XStack Storage.
–
Allow to manage user accounts. Check this option if you want this user to be able to
define and modify user accounts.
If you do not check Allow to manage storage and Allow to manage user
accounts, the user will be able to view the XStack Storage management
console screens, but will not be able to change storage settings or
add/modify user accounts.
4. Click OK. The user you defined appears in the User Accounts screen.
5. Click the Close button to exit the User Accounts screen.
5.4.2
Deleting User Accounts
If you no longer need a user account, use the following procedure to delete it.
1. On the View menu, click User Accounts. The User Accounts screen appears, with a list of the
user accounts that have been defined (see Figure 5-49 on page 115).
2. Click the user whose account you want to delete, then click the Delete User button.
3. When a precautionary message asks whether you want to delete the user account, click Yes.
The selected user account is deleted from the Use Accounts screen.
116
Chapter 5
Configuring the XStack Storage
5.5
Performing Cache Activities
The XStack Storage unit contains cache memory for storing I/O activity and data. The File menu
provides options for setting the cache mode and flushing cache contents.
5.5.1
Setting Cache Mode
The XStack Storage unit is capable of caching write operations. Write-back caching saves the
system from performing many unnecessary write cycles to the system RAM, which can lead to
noticeably faster execution. However, when write-back caching is used, writes to cached
memory locations are only placed in cache and the data is not written to the disks until the
cache is flushed. When caching is disabled, all read and write operations directly access the
physical disks. By default, write-back cache mode is always enabled and cannot be disabled.
XStack Storage User’s Guide
117
5.6
Managing XStack Storage Configurations
The XStack Storage management console provides options for saving and restoring the XStack
Storage configuration. You can also return the XStack Storage unit to its factory-default settings.
5.6.1
Saving the XStack Storage Configuration
To save the current XStack Storage configuration, use the following procedure.
1. On the File menu, click Save XStack Storage Configuration. The Save XStack Storage
Configuration dialog box appears (see Figure 5-51).
Figure 5-51. Save XStack Storage Dialog Box
2. Navigate to the location where you want to save the configuration.
3. In the File name field, type a name for the configuration.
4. Click the Save button.
118
Chapter 5
Configuring the XStack Storage
5.6.2
Restoring the XStack Storage Configuration
If you used the procedure in Section 5.6.1 to save the XStack Storage configuration, you can use
the following procedure to restore the saved configuration.
1. On the File menu, click Restore XStack Storage Configuration. The Restore XStack Storage
Configuration dialog box appears (see Figure 5-52).
Figure 5-52. Restore XStack Storage Configuration Dialog Box
2. Locate the configuration file whose settings you want to load, then select the file and click
the Open button. The message in Figure 5-53 appears.
Figure 5-53. Configuration Restore Message
3. Click Yes to restore the configuration. (Or click No to keep the current configuration.) If you
clicked Yes the XStack Storage restarts and loads the selected configuration.
XStack Storage User’s Guide
119
5.6.3
Restoring Factory Defaults
To return the XStack Storage to its factory-default settings, use the following procedure.
When you return to the factory-default settings, the XStack Storage IP port
reverts to 192.168.1.1.
1. On the File menu, click Restore Factory Defaults. The message in Figure 5-54 appears.
Figure 5-54. Restore Factory Defaults Message
2. Click Yes to restore the factory-default settings. (Or click No to keep the current
configuration.) If you clicked Yes, another dialog box asks whether you want to keep the
current management port configuration settings. Click Yes to keep them and proceed, No to
revert to the default management port settings and proceed (refer to Section 5.2.1), or
Cancel to cancel the operation. If you clicked Yes or No, the XStack Storage loads the
factory-default settings (including those for the management port if you clicked Yes) and the
message in Figure 5-55 appears.
Figure 5-55. Restore to Factory Defaults Succeeded Message
3. Click OK to restart the XStack Storage with the factory-default settings.
120
Chapter 5
Configuring the XStack Storage
5.7
5.7.1
Restarting and Shutting down the XStack Storage
Restarting the XStack Storage
To restart the XStack Storage, use the following procedure.
1. Log off from all iSCSI initiators.
2. Click the XStack Storage icon at the top of the Physical Resources tab.
3. Perform one of the following steps:
–
On the File menu, click Restart System.
–
Right-click and click Restart System.
Either step displays a message that asks whether you are sure you want to restart the system.
4. Click Yes to restart the system (or click No to keep the system running). If you clicked Yes,
your management console session ends and the XStack Storage is restarted. You can then use
the log in procedure in Section 5.1 to log into the XStack Storage management console.
XStack Storage User’s Guide
121
5.7.2
Shutting Down the XStack Storage Management Console
To shut down the XStack Storage management console, use the following procedure.
1. Click the Physical Resources tab.
2. Perform one of the following steps:
5.7.3
–
On the File menu, click Exit.
–
Click the Close control on the title bar.
Shutting Down the XStack Storage
At the end of your session, use the following procedure to shut down the XStack Storage
management console. When you shut down the XStack Storage, the unit powers off
automatically.
1. Log off from all initiators.
2. Click the XStack Storage icon at the top of the Physical Resources tab.
3. Perform one of the following steps:
–
On the File menu, click System Shutdown.
–
Right-click and click System Shutdown.
Either step displays a message that asks whether you are sure you want to shut down the
system.
4. Click Yes to shut down the system (or click No to keep the system running). If you clicked
Yes, your management console session ends and the XStack Storage is powered off.
122
Chapter 5
Configuring the XStack Storage
Chapter 6 Monitoring the XStack Storage
The XStack Storage management console can display a number of screens in the main area for
viewing system and storage information. This chapter shows and describes the screens. Some
screens are available from either the Logical Resources or Physical Resources tab. Other screens
are available from both tabs.
XStack Storage Screens (Physical Resources tabs)
–
Viewing enclosure information — refer to Section 6.1.1.
–
Viewing log messages — refer to Section 6.1.2.
–
Viewing information about tasks — refer to Section 6.1.3.
–
Viewing CIM server information — refer to Section 6.1.4.
–
Viewing firmware image information — refer to Section 6.1.5.
Blade A Base Pool Screens (Logical Resources tab)
–
Viewing information about the storage pool — refer to Section 6.2.1.
–
Viewing information about tasks — refer to Section 6.2.2.
–
Viewing information about volumes — refer to Section 6.2.3.
–
Viewing information about drives — refer to Section 6.2.4.
Network Entities Screens (Logical Resources tab)
–
Viewing information about iSCSI target nodes — refer to Section 6.3.1.
–
Viewing volume access information — refer to Section 6.3.2.
–
Viewing iSCSI initiator access information — refer to Section 6.3.3.
–
Viewing information about LAG ports — refer to Section 6.3.4.
–
Viewing information about network portals — refer to Section 6.3.5.
–
Viewing information about an iSCSI connection — refer to Section 6.3.6.
Initiator Resource Screens (Logical Resources tab)
–
Viewing information about iSCSI initiators — refer to Section 6.4.1.
–
Viewing LUN access information — refer to Section 6.4.2.
Drive Screens (Physical Resources tab)
–
Viewing information about drives — refer to Section 6.2.4.
Ethernet Port Screens (Physical Resources tab)
–
Viewing information about Ethernet ports — refer to Section 6.5.
XStack Storage User’s Guide
123
6.1
XStack Storage Screens
When the top XStack Storage icon is selected in the Physical Resources tab, the main display area
can show the following screens with information about:
The XStack Storage enclosure. Refer to Section 6.1.1.
Log messages. Refer to Section 6.1.2.
Tasks information. Refer to Section 6.1.3.
CIM Server information. Refer to Section 6.1.4.
Firmware image information. Refer to Section 6.1.5.
6.1.1
Viewing Enclosure Information
When the top XStack Storage icon is selected in the Physical Resources tab, you can use the
Enclosure Information screen to view information about the XStack Storage enclosure (see Figure
6-1).
This screen is divided into three areas:
Message Log Summary. The Message Log Summary summarizes the current error, warning,
and information messages in the event log. To enhance visibility, the three message types are
color coded.
–
Error messages are red and indicate something unexpected has occurred that may be a
serious problem.
–
Warning messages are yellow. Warning messages indicate that something appeared wrong
but has been corrected. They also provide notification about things that may be expected
but are of particular interest.
–
Informational messages are green. Informational messages contain information about steps
performed, detected version information, and miscellaneous messages.
For more information about a message, go to the Log Messages screen (refer to Section 6.1.2).
System Settings. The Systems Settings show the spare count, disk line mode, and default BT
priority settings.
TCP/IP Default Parameters. The TCP/IP Default Parameters show the maximum IP
segmentation, TCP window scale, TCP timestamp, and PMTU enabled settings.
124
Chapter 6 Monitoring XStack Storage
Figure 6-1. Enclosure Information Screen
XStack Storage User’s Guide
125
6.1.2
Viewing Log Messages
When the top XStack Storage icon is selected in the Physical Resources tab, you can use the Log
Messages screen to view the entries in the event log (see Figure 6-2).
Figure 6-2. Log Messages Screen
The messages are color coded, making it easy to differentiate among informational, warning, and
error messages. The messages are time- and date-stamped, with the most recent entry appearing
at the top of the screen.
To obtain additional information about a message shown in the Log Messages screen, double-click
the message. A Log Message Details box appears, with detailed information about the message
(see Figure 6-3). The box also provides buttons for moving to the next or previous message in the
message log and an OK button for exiting.
You can save the event log entries as an unformatted text file to disk. For
more information, refer to Section 5.3.14.
126
Chapter 6 Monitoring XStack Storage
Figure 6-3. Example of a Log Messages Details Box
XStack Storage User’s Guide
127
6.1.3
Viewing XStack Storage Tasks
When the top XStack Storage icon is selected in the Physical Resources tab, you can use the Tasks
Info screen to view the XStack Storage tasks (see Figure 6-4). Examples of tasks include bad block
scan and volume initialization activities.
Each row of the Tasks Info screen corresponds to a task. The last column, Recurring, shows
whether the task is recurring and will repeat again in the future.
Figure 6-4. Tasks Info Screen
To obtain additional information about a task shown in the Tasks Info screen, double-click the
task. A Task Message Details box appears, with detailed information about the task (see Figure
6-5).
128
Chapter 6 Monitoring XStack Storage
Figure 6-5. Example of a Task Message Details Box
If you right-click a task in the Tasks Info screen, a popup similar to the one in Figure 6-6 appears.
Depending on the options that are available, you can:
Set a priority for the selected task.
Suspend or resume the task.
Cancel the task to stop the current task from being performed. If the task is recurring, it will
start again automatically when scheduled.
Delete the task.
XStack Storage User’s Guide
129
Figure 6-6. Task Popup Menu
130
Chapter 6 Monitoring XStack Storage
6.1.4
Viewing Server CIM Information
When the top XStack Storage icon is selected in the Physical Resources tab, you can use the CIM
Server Info screen to view Storage Management Initiative (SMI) server and profile information (see
Figure 6-7). The SMI Server Information area has an Edit button you can click to change the SMI
server information if necessary.
Figure 6-7. CIM Server Info Screen
XStack Storage User’s Guide
131
6.1.5
Viewing Firmware Image Information
When the top XStack Storage icon is selected in the Physical Resources tab, you can use the
Firmware Image Info screen to view the currently active firmware image being used by the XStack
Storage (see Figure 6-8). This screen also shows other valid firmware images that have been used
with the XStack Storage.
For information about upgrading the XStack Storage firmware, refer to
Appendix B.
Figure 6-8. Firmware Image Info Screen
132
Chapter 6 Monitoring XStack Storage
6.2
Blade A Base Pool Screens
When Blade A Base Pool is selected in the Logical Resources tab, the main display area can show
the following screens with information about the storage pool:
Storage group information. Refer to Section 6.2.1.
Tasks information. Refer to Section 6.2.2.
You can also display the following screens by clicking the appropriate entity below Blade A Base
Pool:
Volumes. Lets you view information about the volumes that make up the storage pool. Refer
to Section 6.2.3.
Drives. Lets you view information about the drives that make up the storage pool. Refer to
Section 6.2.4.
XStack Storage User’s Guide
133
6.2.1
Viewing Storage Pool Information
When Blade A Base Pool is selected in the Logical Resources tab, you can use the Storage Group
Information screen to view information about the storage pool (see Figure 6-9).
The top-left side of the screen shows the storage pool type, amount of free space, total capacity,
and number of drives. To the right of this information is a pie chart that provides a graphical
representation of the amount of used and unused (free) space in the storage pool. Used space is
shown in gray and unused space is shown in green.
Below this information are rows that correspond to the drives attached to the XStack Storage.
Each row corresponds to a separate drive and shows the drive’s:
Slot number
State (online, offline, etc.). For readability, the state is color coded (green = online, black =
offline.
Capacity
Utilization percentage
Allocation
Figure 6-9. Storage Group Information
134
Chapter 6 Monitoring XStack Storage
6.2.2
Viewing Storage Pool Tasks
When Blade A Base Pool is selected in the Logical Resources tab, you can use the Tasks Info
screen to view tasks scheduled for the storage pool (see Figure 6-10). Examples of tasks include
media scan and drive initialization activities.
Each row of the Tasks Info screen corresponds to a task. The last column, Recurring, shows
whether the task is recurring and will repeat again in the future.
Figure 6-10. Tasks Info Screen
XStack Storage User’s Guide
135
To obtain additional information about a task shown in the Tasks Info screen, double-click the
task. A Task Message Details box appears, with detailed information about the task (see Figure
6-13).
Figure 6-11. Example of a Task Message Details Box
136
Chapter 6 Monitoring XStack Storage
6.2.3
Viewing Information about Volumes in the Blade A Base Pool
When a volume is selected under Blade A Base Pool in the Logical Resources tab, two screens are
available in the main display:
Volume information screen. Refer to Section 6.2.3.1.
Tasks Info screen. Refer to Section 6.2.3.2.
XStack Storage User’s Guide
137
6.2.3.1
Viewing Volume Information
When you click a volume under Blade A Base Pool, you can use the Volume Information screen to
view information about the selected volume.
The name of the volume appears in the tab. Figure 6-12, for example, shows
information for a volume named “SANVOL1.”
The Volume Information screen shows the following information (see Figure 6-12):
The volume’s durable name and size, volume status and cache status, volume type, storage
efficiency and storage bandwidth, and chunk size.
A graphical representation of the drives associated with the volume.
A LUN Map that shows the iSCSI target node(s), LUN Number(s), and Access Mode(s).
Figure 6-12. Example of Volume Information for a Volume Named SANVOL1
138
Chapter 6 Monitoring XStack Storage
6.2.3.2
Viewing Volume Tasks
When you click a volume under Blade A Base Pool, you can use the Task Info screen to view tasks
assigned to the selected volume.
Each row of the Tasks Info screen corresponds to a task assigned to the volume. The information
shown for each task is (see Figure 6-13):
The task name
The object (volume) assigned the task
The task (operation) that is to be performed
The progress of the task
The status of the task
The task’s estimated completion time (ECT)
Whether the task is recurring
Figure 6-13. Tasks Info Screen
XStack Storage User’s Guide
139
To obtain additional information about a task shown in the Tasks Info screen, double-click the
task. A Task Message Details box appears, with detailed information about the task (see Figure
6-14)
Figure 6-14. Example of the Task Message Details Dialog Box
140
Chapter 6 Monitoring XStack Storage
6.2.4
Viewing Information about Drives in the Blade A Base Pool
When a drive is selected under Blade A Base Pool in the Logical Resources or when a drive is
selected on the Physical Resources tab, you can view information about the selected drive (see
Figure 6-15). This screen shows the following information about the selected drive:
Drive number
Vendor model
Physical capacity
State (for example, online or offline)
Microcode level
Figure 6-15. Drive Information Screen
XStack Storage User’s Guide
141
6.3
Network Entities Screens
When a network entity is selected in the Logical Resources tab, the main display area can show
the following screens with information about the selected network entity:
Type Node Info. Refer to Section 6.3.1.
Volume Access Info. Refer to Section 6.3.2.
Initiator Access Info. Refer to Section 6.3.3.
Portals Info. Refer to Section 6.3.5.
6.3.1
Viewing Target Node Information
When a network entity is selected in the Logical Resources tab, you can use the Target Node Info
screen to view the session and connection parameters associated with the selected network
entity.
Figure 6-16. Target Node Info Screen
142
Chapter 6 Monitoring XStack Storage
6.3.2
Viewing Volume Access Information
When a network entity is selected in the Logical Resources tab, you can use the Volume Access
Info screen to view LUN Map information for the volume associated with the selected network
entity.
Figure 6-17. Volume Access Info Screen
XStack Storage User’s Guide
143
6.3.3
Viewing Initiator Access Information
When a network entity is selected in the Logical Resources tab, you can use the Initiator Access
Info screen to view iSCSI initiator and access information associated with the selected network
entity.
Figure 6-18. Initiator Access Info Screen
144
Chapter 6 Monitoring XStack Storage
6.3.4
Viewing LAG Port Information
When a LAG is selected in the Logical Resources tab, the main display shows the LAG Port Info
tab (see Figure 6-19). This tab is divided into the following sections:
LAG port information. This section shows the following information:
–
LAG MAC port address
–
Requested per-port speed
–
Aggregate LAG speed
–
Link status
–
Admin status
–
Ethernet encapsulation
–
VLAN support
–
Auto negotiation
–
MTU
Ethernet Port. This area shows the status of each Ethernet port associated with the LAG port.
To enhance viewing, online ports are shown in green. (In the example, LAG ports 0, 1, 2 and 3
have been trunked together)
IP Address. This area shows the IP addresses and corresponding VLAN IDs, if any, associated
with the LAG port.
Figure 6-19. LAG Port Info Screen
XStack Storage User’s Guide
145
6.3.5
Viewing Network Portal Information
When a network entity is selected in the Logical Resources tab, you can use the Portals Info
screen to view the IP address and port number associated with the selected network entity.
Figure 6-20. Portals Info Screen
146
Chapter 6 Monitoring XStack Storage
6.3.6
Viewing Connection Information
If you select an iSCSI session in the Logical Resources tab, the main display shows the connection
parameters and session information for the selected connection (see Figure 6-21).
Figure 6-21. iSCSI Connection Information Screen
XStack Storage User’s Guide
147
6.4
Initiator Resource Screens
When a network entity is selected in the Logical Resources tab, the main display area can show
the following tabs with information about the selected iSCSI initiator:
Initiator Info. Refer to Section 6.4.1.
LUN Access Info. Refer to Section 6.4.2.
6.4.1
Viewing iSCSI Initiator Information
When an iSCSI initiator is selected in the Logical Resources tab, you can use the Initiator
Information screen to view information associated with the selected iSCSI initiator (see Figure
6-22).
Figure 6-22. Initiator Information Screen
148
Chapter 6 Monitoring XStack Storage
6.4.2
Viewing LUN Map Information
When an iSCSI initiator is selected in the Logical Resources tab, you can use the LUN Map
Information screen to view LUN Map information associated with the selected iSCSI initiator (see
Figure 6-23).
Figure 6-23. LUN Map Information Screen
XStack Storage User’s Guide
149
6.5
Viewing Ethernet Port Information
When an Ethernet port is selected in the Physical Resources tab, the main display area shows the
physical port information for the selected Ethernet port (see Figure 6-24).
Figure 6-24. Physical Port Information
150
Chapter 6 Monitoring XStack Storage
Appendix A
Summary of Menus and Commands
This appendix summarizes the menus and commands available in the XStack Storage
management console.
A.1
File Menu
The File menu contains the following commands.
Command
Description
Shutdown System
Lets you shut down the XStack Storage management
console and Storage Controller.
Restart System
Lets you reboot the XStack Storage management
console and Storage Controller.
Attempt to Bind
Reserved for future use.
XStack Storage Date and Time
Lets you change the system date and time.
Enable SSL
Reserved for future use.
Set OID and Inquiry Data
Reserved for future use.
Configure Out of Band Port
Lets you change the XStack Storage IP address,
subnet mask, hostname, and gateway settings.
Change iSCSI Port Number
Lets you change the iSCSI port number for the
Set Default Task Priority
Lets you set the priority of tasks.
Set Cache Mode
Reserved for future use.
Flush Cache
Reserved for future use.
Configure ISNS Client
Reserved for future use.
Save XStack Storage
Configuration
Lets you save the XStack Storage configuration.
Restore XStack Storage
Configuration
Lets you restore the XStack Storage configuration.
Restore Factory Defaults
Lets you return the unit to its factory-default settings.
Configure System iSNS
Reserved for future use.
Modify System TCP/IP Settings
Lets you change the system TCP/IP settings.
Set Spare Count
Lets you specify the number of spares available to the
XStack Storage.
Configure Disk Line
Reserved for future use.
Set System Battery Policy
Lets you specify the action that the XStack Storage is
to follow if the battery fails.
Configure Email Notification
Configures the XStack Storage to send email alerts
when an event occurs.
XStack Storage User’s Guide
151
Exit
A.2
Lets you exit the XStack Storage management
console.
View Menu
The View menu contains the following commands.
Command
152
Description
User Accounts
Lets you set up, modify, and delete user
accounts.
Create Task
Lets you define tasks that the XStack Storage is
to perform. Tasks defined here can be viewed
on the Tasks Info screen.
Firmware Upgrade
Lets you upgrade the XStack Storage firmware.
View Manual Route
Lets you view the manual route.
Save Event Log Messages
Lets you save the event log as an unformatted
text file to a user-specified folder.
Appendix A Summary of Menus and Commands
A.3
Storage Menu
The Storage menu contains the following commands.
Command
Description
Create Volume
Lets you create a new volume.
Reconfig Volume
Lets you change the settings for a selected
volume.
Delete Volume
Lets you delete a volume.
Parity Scan
Lets you perform a party scan on the selected
drives.
Expand Volume
Lets you increase the capacity of a selected
volume.
Rebuild Volume
Reserved for future use.
Initialize Drive
Lets you initialize a selected drive.
Make Spare
Reserved for future use.
Down Drive
Reserved for future use.
Identify Drive
Reserved for future use.
Manual Create Volume
Lets you create a volume manually.
Media Scan
Lets you perform a media scan on a selected
drive.
XStack Storage User’s Guide
153
A.4
Network Menu
The Network menu contains the following commands.
Command
A.5
Description
Create Network Portal
Lets you create a network portal.
Delete Network Portal
Lets you delete a network portal.
Create LAG
Lets you create a LAG.
Delete LAG
Lets you delete a LAG,
Modify LAG Parameters
Lets you change the settings for a
selected LAG.
Reset Statistics
Reserved for future use.
Modify Network Portal IP Address
Lets you modify a network portal IP
address.
Config Physical Port
Lets you configure a selected
physical port.
View Manual Route
Lets you view the manual route.
iSCSI Menu
The iSCSI menu contains the following commands.
Command
154
Description
Add Initiator
Lets you add an iSCSI initiator.
Delete Initiator
Lets you delete an iSCSI initiator.
Set CHAP Secret
Lets you specify a CHAP secret.
Rename Alias
Reserved for future use.
Create iSCSI Target Node
Lets you create an iSCSI node.
Delete Target Node
Lets you delete an iSCSI target
node.
Modify Target Node Parameters
Lets you change the settings for a
selected iSCSI target.
Modify Initiator List
Lets you change the entries in the
iSCSI initiator list.
Modify Volume Access Mode
Lets you change the settings for a
selected volume.
Modify Network Portal
Lets you change the settings for a
selected network portal.
Appendix A Summary of Menus and Commands
A.6
Help Menu
The Help menu contains the following commands.
Command
Description
Help
Reserved for future use.
About
Shows the XStack Storage management console version
number. A System Properties tab lets you view system
properties.
XStack Storage User’s Guide
155
156
Appendix A Summary of Menus and Commands
Appendix B Upgrading Firmware
D-Link periodically updates the firmware for the XStack Storage. The latest firmware
releases are available at the D-Link Support Web site.
1. Go to the D-Link Support Web site (support.dlink.com).
2. Select your product model number from the pull-down menus.
3. Select the firmware topic.
4. Download the firmware.
5. When prompted to save the firmware file, click Save and save the file to a desired
location.
On a piece of paper, write the location and folder where you download the
firmware file. You will need to access this location later in this procedure.
6. Launch the XStack Storage Web Manager.
7. On the View menu, click Firmware Upgrade. The message in Figure 6-25 appears.
Figure 6-25. Firmware Upgrade Message
8. Click OK to continue. (Or click Cancel to exit without upgrading the firmware.) If you
click OK, the Open dialog box appears (see Figure 6-26).
XStack Storage User’s Guide
157
Figure 6-26. Example of the Open Dialog Box
9. Navigate to the location where the firmware file you downloaded resides.
10. Click the firmware file, then click the Open button. (Or as a shortcut, double-click the
firmware file). The new firmware is installed. A progress bar shows the status of the
installation.
11. After the firmware is installed, a message prompts you to press OK to restart the XStack
Storage to have the new firmware take effect.
12. Click OK to restart the XStack Storage. If additional messages appear, click OK to
remove them.
13. After the XStack Storage restarts, launch your Web browser again and log in to the
XStack Storage management console.
The Firmware Image Info screen shows the current active firmware image
being used by the XStack Storage. For more information, refer to Section
6.1.5.
158
Appendix B Upgrading Firmware
Appendix C, Factory Default Settings
This appendix lists the factory-default settings for the XStack Storage unit.
Table C-1. Configure Out of Band Port Default Settings
Parameter
Default Value
IP Address After Restart
192.168.1.1
Subnet Mask After Restart
255.255.255.0
Hostname After Restart
hn0000003055100002
Gateway After Restart
0.0.0.0.
Table C-2. XStack Storage Battery Policy Default Setting
Parameter
Default Value
If the battery fails, the XStack Storage should
Ignore the status of the battery and do nothing (I have a UPS)
Table C-3. XStack Storage Date and Time Default Setting
Parameter
Timezone
Default Value
UTC
Table C-4. Modify System TCPIP Default Settings
Parameter
Default Value
Max. Segment Size
8960
Window Scale
0
Time To Live (TTL)
64
PMTU Enabled
True
Table C-5. Set Cache Mode Default Setting
Parameter
Write Back
Default Value
Enabled
XStack Storage User’s Guide
159
Table C-6. Set Default Task Priority Default Setting
Parameter
Default Value
Default Priority
5
Table C-7. Set Spare Count Default Setting
Parameter
Default Value
Number of Spare Counts
0
Table C-8. Modify iSCSI Port Default Setting
Parameter
New SCSI Port
Default Value
3260
Table C-9. Email Notification Support Default Setting
Parameter
160
Default Value
Enable Email Notification Support
Disabled
SMTP Server
0.0.0.0
SMTP Port
25
Appendix C Factory-Default Settings
Appendix D, Recording Your Configuration Settings
This appendix contains tables you can use to record the configuration settings for your
XStack Storage.
Use Table D-1 to record the volumes you configure using the XStack Storage.
Use Table D-2 to record the iSCSI initiators you configure using the XStack Storage.
Use Table D-3 to record the LAGs you configure using the XStack Storage.
Use Table D-4 to record the network portals you configure using the XStack Storage.
Use Table D-5 to record the iSCSI target nodes you configure using the XStack Storage.
Use Table D-6 to record the IP routing tables you configure using the XStack Storage.
Use Table D-7 to record the scheduled tasks you configure using the XStack Storage.
XStack Storage User’s Guide
161
D.1
Recording Volumes
Use Table D-1 to record information about the volumes you create.
Table D-1. Volumes Created Using the XStack Storage
Volume
Name
162
Appendix D
Volume
Size
Data Redundancy
(None, Parity, Mirror)
Chunk Size
Recording Your Configuration Settings
Configuration
(JBOD, Stripe, Mirror,
Stripe Mirror, Parity)
Allocated
Drives
Volume
Name
Volume
Size
Data Redundancy
(None, Parity, Mirror)
Chunk Size
Configuration
(JBOD, Stripe, Mirror,
Stripe Mirror, Parity)
Allocated
Drives
XStack Storage User’s Guide
163
D.2
Recording iSCSI Initiators
Use Table D-2 to record information about the iSCSI initiators you create.
Table D-2. iSCSI Initiators Created Using the XStack Storage
Initiator Name
164
Appendix D
Recording Your Configuration Settings
Initiator Password
Initiator Name
Initiator Password
XStack Storage User’s Guide
165
D.3
Recording LAGs
Use Table D-3 to record information about the LAGs you create.
Table D-3. LAGs Created Using the XStack Storage
LAG
Number
(1, 2,…)
166
Appendix D
MTU Size
Ethernet Encapsulation
Recording Your Configuration Settings
VLAN
Supported (Yes
or No)
Physical Ethernet
Ports in This LAG
Requested
Speed
LAG
Number
(1, 2,…)
MTU Size
Ethernet Encapsulation
VLAN
Supported (Yes
or No)
Physical Ethernet
Ports in This LAG
Requested
Speed
XStack Storage User’s Guide
167
D.4
Recording Network Portals
Use Table D-4 to record information about the network portals you create.
Table D-4. Network Portals Created Using the XStack Storage
LAG
Number
(1, 2,…)
168
Appendix D
MTU Size
Ethernet Encapsulation
Recording Your Configuration Settings
VLAN
Supported (Yes
or No)
Physical Ethernet
Ports in This LAG
Requested
Speed
LAG
Number
(1, 2,…)
MTU Size
Ethernet Encapsulation
VLAN
Supported (Yes
or No)
Physical Ethernet
Ports in This LAG
Requested
Speed
XStack Storage User’s Guide
169
D.5
Recording iSCSI Target Nodes
Use Table D-5 to record information about the iSCSI target nodes you create.
Table D-5. iSCSI Target Nodes Created Using the XStack Storage
iSCSI Node Alias
170
Appendix D
Enable CHAP Secret
(Yes/No)
CHAP Secret
(if Enabled)
Recording Your Configuration Settings
Initiators Selected
LUN Number and
Access Mode
iSCSI Node Alias
Enable CHAP Secret
(Yes/No)
CHAP Secret
(if Enabled)
Initiators Selected
LUN Number and
Access Mode
XStack Storage User’s Guide
171
D.6
Recording IP Routing Tables
Use Table D-6 to record information about the IP routing tables you create.
Table D-6. IP Routing Tables Created Using the XStack Storage
Network
Destination
172
Appendix D
Netmask
Gateway
Recording Your Configuration Settings
Interface
Metric
Network
Destination
Netmask
Gateway
Interface
Metric
XStack Storage User’s Guide
173
D.7
Recording Scheduled Tasks
Use Table D-7 to record information about the scheduled tasks you create.
Table D-7. Scheduled Tasks Created Using the XStack Storage
Operation
Name
174
Appendix D
Object
Operation
Task Frequency
(Daily, Weekly, Monthly, Once)
Recording Your Configuration Settings
Start Time
Start Date
Operation
Name
Object
Operation
Task Frequency
(Daily, Weekly, Monthly, Once)
Start Time
XStack Storage User’s Guide
Start Date
175
176
Appendix D
Recording Your Configuration Settings
Appendix E Understanding IP Addresses and Subnet Masking
When you configure the TCP/IP settings on the XStack Storage unit, an IP address, subnet mask,
and default gateway are required. To configure these settings correctly, it is necessary to
understand how TCP/IP networks are addressed and divided into networks and subnetworks. This
appendix provides a brief tutorial about IP addresses and subnetworks.
E.1
Understanding IP Addresses
An IP address is a way to identify a computer or device on a TCP/IP network. Networks using the
TCP/IP protocol route messages based on the IP address of the destination. IP addresses are
expressed as four decimal numbers to make Internet addresses easy for human users to read and
write. These four numbers are called “octets,” because they each have eight positions when
viewed in binary form. Each octet is separated from the next octet by a period (or “dot”). For
this reason, this format is called “dotted-decimal notation.”
If you add all the octet positions (8 positions x 4 octets), you get 32. This is why IP addresses are
considered 32-bit numbers. Since each of the eight positions can have two different states (1 or
0), the total number of possible combinations per octet is 28 or 256. As a result, each octet can
contain any value from 0 to 255. Combine the four octets and you get 232, equivalent to
4,294,967,296 unique values. Out of the almost 4.3 billion possible combinations, certain values
are restricted from use as typical IP addresses. For example, the IP address 0.0.0.0 is reserved
for the default network and the address 255.255.255.255 is reserved for broadcasts.
An example of an IP address is:
192.168.1.1
The binary value that corresponds to the decimal format of this IP address is:
11000000.10101000.00000001.00000001
To calculate the binary octets in an IP address, convert the decimal values as follows:
1. The rightmost (or least-significant bit) of an octet will hold a value of 20.
2. The bit just to the left of that will hold a value of 21.
3. This continues until the leftmost (most-significant) bit, which will hold a value of 27.
Therefore, if all binary bits are a one, the decimal equivalent would be 255 as shown below:
1
1
1
1
1
1
1
1
128
64
32
16
8
4
2
1
(128+64+32+16+8+4+2+1=255)
XStack Storage User’s Guide
177
The following example shows an octet conversion when not all of the bits are set to 1:
0
1
0
0
0
0
0
1
0
64
0
0
0
0
0
1
(0+64+0+0+0+0+0+1=65)
The following example shows an IP address represented in both binary and decimal notations:
decimal
192.
168.
1.
1
binary
11000000
10101000
00000001
00000001
An IP address consists of two components, the network address and the host address.
The network address always contains the first octet. It is used to identify the network to
which a computer belongs.
The host address identifies the particular computer host (or “node”) on the network. The
host address always contains the last octet.
If you take the example 192.168.1.1 and divide it into these two parts you get the following:
Network
192.
168.
1.
Host
1
or
E.2
Network
192.
168.
1.
0
Host
0.
0.
0.
1
Network Classes
The octets serve a purpose other than simply separating the numbers. They are used to create
classes of IP addresses that can be assigned to a particular business, government, or other entity
based on size and need. There are five different classes of networks, designated A, B, C, D, and
E. This appendix describes classes A, B, and C, since classes D and E are reserved and beyond the
scope of this appendix.
Class A - supports 16 million hosts on each of 126 networks
Class B - supports 65,000 hosts on each of 16,000 networks
Class C - supports 254 hosts on each of 2 million networks
The class of an IP address can be determined from the three high-order bits. Figure E-1 shows the
significance in the three high-order bits and the range of addresses that fall into each class.
178
Appendix E Understanding IP Addresses and Subnet Masking
Figure E-1. IP Address Classes
Table E-1 displays the range of dotted-decimal values that can be assigned to each of the three
principle address classes. The “nnn” represents the host-number field of the address that is
assigned by the local network administrator.
Table E-1. Dotted-Decimal Ranges for Each Address Class
Address Class
Dotted-Decimal Notation Ranges
Class A (/8 prefixes)
1.nnn.nnn.nnn through 126.nnn.nnn.nnn
Class B (/16 prefixes)
128.0.nnn.nnn through 191.255.nnn.nnn
Class C (/24 prefixes)
192..0.0.nnn through 223.255.255.nnn
XStack Storage User’s Guide
179
E.2.1
Class A Network Addresses
Class A network addresses are used for very large networks, such as those in major international
companies. Every Class A network address has an 8-bit network prefix, with the highest order bit
set to 0, followed by a seven-bit network number and a 24-bit host-number that identifies each
host. IP addresses with a first octet from 1 to 126 are part of this class. Class A networks are also
referred to as “/8s” since they have an 8-bit network prefix. The
Class A example in Figure E-1 has a major network address of 10. The next 24 bits (octets 2, 3,
and 4) can be divided into subnets and hosts as appropriate.
There are 126 Class A networks, with 16,777,214 (224 -2) possible hosts, for a total of
2,147,483,648 (231) unique IP addresses. Class A networks make up 50% of the total available IP
addresses.
Class A Address Example:
E.2.2
Network
Host
115
24.55.108
Class B Network Addresses
Class B network addresses are used for medium-sized networks that have 256 to 65534 hosts,
such as large college campuses. Every Class B network address has a 16-bit network prefix, with
the two highest order bits set to 1-0, followed by a 14-bit network number and a 16-bit host
number that identifies the host. IP addresses with a first octet from 128 to 191 are part of this
class. Class B networks are also referred to as “/16s” since they have a 16-bit network prefix.
There are 16,384 (214) Class B networks, each with 65,534 (216 -2) possible hosts, for a total of
1,073,741,824 (230) unique IP addresses. Class B networks make up 25% of the total available IP
addresses.
The Class B example in Figure E-1 has a major network address of 172.16. Sixteen bits (octets 3
and 4) are for local subnets and hosts.
Class B Address Example:
180
Network
Host
145.24
52.108
Appendix E Understanding IP Addresses and Subnet Masking
E.2.3
Class C Network Addresses
Class C network addresses are used for small to mid-size businesses. IP addresses with a first
octet from 192 to 223 are part of this class. Every Class C network address has a 24-bit network
prefix, with the three highest order bits set to 1-1-0, followed by a 21-bit network number and
an 8-bit host-number that identifies each host. This means there are 2,097,152 (221) Class C
networks, each with 254 (28 -2) possible hosts, for a total of 536,870,912 (229) unique IP
addresses. Class C networks make up 12.5% (or 1/8th) of the total available IP addresses. Class C
networks are also referred to as “/24s” since they have a 24-bit network prefix.
In a Class C address, the first three octets are the network portion. The Class C example in Figure
E-1 has a major network address of 193.18.9. Eight bits (octet 4) are for local subnets and hosts,
ideal for networks with no more than 254 hosts.
Class C Address Example:
E.3
Network
Host
195.24.54
106
Network Masks
A network mask helps you know which portion of the address identifies the network and which
portion of the address identifies the node. Subnet masks are usually represented in the same
representation used for addresses themselves; in IPv4, dotted decimal notation - four numbers
from zero to 255 separated by periods (for example, 255.128.0.0).
Class A, B, and C networks have the following default masks:
Class A: 255.0.0.0
Class B: 255.255.0.0
Class C: 255.255.255.0
An IP address on a Class A network that has not been subnetted has an address/mask pair similar
to:
8.20.15.1 255.0.0.0
To see how the mask helps to identify the network and node parts of the address, convert the
address and mask to binary numbers.
8.20.15.1 = 00001000.00010100.00001111.00000001
255.0.0.0 = 11111111.00000000.00000000.00000000
Once the address and mask are represented in binary, identifying the network and host addresses
is easy:
Any address bits with a corresponding mask bits set to 1 represent the network address.
Any address bits that have corresponding mask bits set to 0 represent the node address.
XStack Storage User’s Guide
181
8.20.15.1 =
00001000.
00010100.
00001111.
00000001
255.0.0.0 =
11111111.
00000000.
00000000.
00000000
Network ID
Host ID
The network address = 00001000 = 8
The host address = 00010100.00001111.00000001 = 20.15.1
E.4
Understanding Subnets
A subnetwork (or “subnet” for short) allows a single Class A, B, or C network to be divided (or
“subnetted”) into smaller pieces. If you divide a Class A, B, or C network into smaller
subnetworks, it lets you create a network of interconnecting subnetworks where each data link
on the network has a unique ID. Without subnets, only one network from a Class A, B, or C
network could be used, which is an unrealistic restriction for many organizations.
Instead of the classful 2-level hierarchy, subnetting supports a 3-level hierarchy where the
natural mask is extended using bits from the host address portion of the address to create a
subnetwork ID. As the following figure shows, the subnetwork ID consists of two parts:
The subnet number and
The host number on that subnet
Two-Level Classful Hierarchy:
Network Address
Host Address
Three-Level Classful Hierarchy:
Network Address
Subnet Number
Host Number
According to Internet practices, the host-number field of an IP address cannot contain all 0 bits
or all 1 bits. The all-0s host number identifies the base network or subnetwork number, while the
all-1s host number represents the broadcast address for the network or subnetwork.
The following examples assume there are five bits in the host number field of each subnet
address. This means that each subnet represents a block of 30 host addresses (2 5 -2 = 30, note
that the 2 is subtracted because the all-0s and the all-1s host addresses cannot be used). The
hosts on each subnet are numbered 1 through 30.
To define the address assigned to Host #n of a particular subnet, place the binary representation
of n into the subnet's host number field. For example, to define the address assigned to Host #15
on Subnet #1, place the binary representation of 15 (011112 ) into the 5 bits of Subnet #1's hostnumber field.
182
Appendix E Understanding IP Addresses and Subnet Masking
An example of valid host addresses for a subnet called subnet #1 is shown below. In this example:
The italicized part of each address identifies the extended network prefix.
The bold digits identify the 5-bit host-number field:
Subnet #1: 11000001.00000001.00000001.010 00000 = 193.1.1.64/27
Host #1: 11000001.00000001.00000001.010 00001 = 193.1.1.65/27
Host #2: 11000001.00000001.00000001.010 00010 = 193.1.1.66/27
Host #3: 11000001.00000001.00000001.010 00011 = 193.1.1.67/27
Host #4: 11000001.00000001.00000001.010 00100 = 193.1.1.68/27
Host #5: 11000001.00000001.00000001.010 00101 = 193.1.1.69/27
.
.
Host #15: 11000001.00000001.00000001.010 01111 = 193.1.1.79/27
Host #16: 11000001.00000001.00000001.010 10000 = 193.1.1.80/27
.
.
Host #27: 11000001.00000001.00000001.010 11011 = 193.1.1.91/27
Host #28: 11000001.00000001.00000001.010 11100 = 193.1.1.92/27
Host #29: 11000001.00000001.00000001.010 11101 = 193.1.1.93/27
Host #30: 11000001.00000001.00000001.010 11110 = 193.1.1.94/27
Another example of valid host addresses for a subnet (called subnet #2) is shown below. In this
example:
The italicized part of each address identifies the extended-network prefix.
The bold digits identify the 5-bit host-number field:
Subnet #2: 11000001.00000001.00000001.110 00000 = 193.1.1.192/27
Host #1: 11000001.00000001.00000001.110 00001 = 193.1.1.193/27
Host #2: 11000001.00000001.00000001.110 00010 = 193.1.1.194/27
Host #3: 11000001.00000001.00000001.110 00011 = 193.1.1.195/27
Host #4: 11000001.00000001.00000001.110 00100 = 193.1.1.196/27
Host #5: 11000001.00000001.00000001.110 00101 = 193.1.1.197/27
.
.
Host #15: 11000001.00000001.00000001.110 01111 = 193.1.1.207/27
Host #16: 11000001.00000001.00000001.110 10000 = 193.1.1.208/27
.
.
Host #27: 11000001.00000001.00000001.110
Host #28: 11000001.00000001.00000001.110
Host #29: 11000001.00000001.00000001.110
Host #30: 11000001.00000001.00000001.110
11011 = 193.1.1.219/27
11100 = 193.1.1.220/27
11101 = 193.1.1.221/27
11110 = 193.1.1.222/27
XStack Storage User’s Guide
183
The subnet structure of a network cannot be seen outside an organization's private network. The
route from the Internet to any subnet of a given IP address is the same, no matter which subnet
the destination host is on. This is because all subnets of a given network number use the same
network prefix, but different subnet numbers. Devices like the XStack Storage, switches, and
routers within an organization need to differentiate between the individual subnets. However, as
far as the Internet routers are concerned, all subnets in a company are collected into a single
routing table entry. This allows a company to introduce arbitrary complexity into its private
network, without affecting the size of the Internet’s routing tables.
E.5
Variable Length Subnet Masks
A key limitation of supporting only a single subnet mask across a given network prefix (as shown
in the previous examples) is that once the mask is selected, it locks the organization into a fixednumber of fixed-sized subnets.
To further illustrate this point, assume that a network administrator decided to configure the
130.5.0.0/16 network with a /22 extended-network prefix. This arrangement permits 64 subnets,
each of which supports a maximum of 1,022 hosts (210 -2). This is fine for deploying a number of
large subnets, but not if an organization wants a small subnet containing only 20 or 30 hosts.
Since a subnetted network can have only a single mask, the 20 or 30 hosts still have to be
assigned to a subnet with a 22-bit prefix. This wastes approximately 1,000 IP host addresses for
each small subnet deployed and makes for an inefficient use of an organization's address space.
Variable length subnet masks (VLSMs) allow a subnetted network to be assigned more than one
subnet mask. Assume that in the previous example, the organization is also allowed to configure
the 130.5.0.0/16 network with a /26 extended-network prefix. A /16 network address with a /26
extended-network prefix permits 1024 subnets (210), each of which supports a maximum of 62
hosts (2 6 -2). The /26 prefix would be ideal for small subnets with less than 60 hosts, while the
/22 prefix is well suited for larger subnets containing up to 1000 hosts.
The following example shows how VLSMs can be used. This example assumes that an organization
has been assigned the network number 140.25.0.0/16 and plans to deploy VLSM.
1. The first step in the subnetting process divides the base network address into 16 equal-size
address blocks. Since 16 = 2 4, four bits are required to uniquely identify each of the 16
subnets. This means four more bits, or a /20, must be used in the extended-network prefix to
define the 16 subnets of 140.25.0.0/16. Each subnet represents a contiguous block of 2 12 (or
4,096) network addresses.
The 16 subnets of the 140.25.0.0/16 address block are shown below. The subnets are
numbered 0 through 15. The italicized portion of each address identifies the extendednetwork prefix, while the bold digits identify the 4-bits representing the subnet-number
field:
184
Appendix E Understanding IP Addresses and Subnet Masking
Base Network: 10001100.00011001.00000000.00000000 = 140.25.0.0/16
Subnet #0: 10001100.00011001.0000 0000.00000000 = 140.25.0.0/20
Subnet #1: 10001100.00011001.0001 0000.00000000 = 140.25.16.0/20
Subnet #2: 10001100.00011001.0010 0000.00000000 = 140.25.32.0/20
Subnet #3: 10001100.00011001.0011 0000.00000000 = 140.25.48.0/20
Subnet #4: 10001100.00011001.0100 0000.00000000 = 140.25.64.0/20
:
:
Subnet #13: 10001100.00011001.1101 0000.00000000 = 140.25.208.0/20
Subnet #14: 10001100.00011001.1110 0000.00000000 = 140.25.224.0/20
Subnet #15: 10001100.00011001.1111 0000.00000000 = 140.25.240.0/20
2. Define the Sub-Subnets for Subnet #3 (140.25.48.0/20)
Next, examine the host addresses that can be assigned to subnet #3 (140.25.48.0/20). Since
the host-number field of subnet #3 contains 12 bits, there are 4,094 valid host addresses (2
12 -2), numbered 1 through 4,094, in the address block.
The valid host addresses for subnet #3 are shown below. The italicized portion of each
address identifies the extended-network prefix, while the bold digits identify the 12-bit hostnumber field:
Subnet #3: 10001100.00011001.0011 0000.00000000 = 140.25.48.0/20
Host #1: 10001100.00011001.0011 0000.00000001 = 140.25.48.1/20
Host #2: 10001100.00011001.0011 0000.00000010 = 140.25.48.2/20
Host #3: 10001100.00011001.0011 0000.00000011 = 140.25.48.3/20
:
:
Host #4093: 10001100.00011001.0011 1111.11111101 = 140.25.63.253/20
Host #4094: 10001100.00011001.0011 1111.11111110 = 140.25.63.254/20
3. Define the Sub-Subnets for Subnet #14 (140.25.224.0/20)
After the base network address is divided into sixteen subnets, subnet #14 is further
subdivided into 16 equal-size address blocks. Since 16 = 2 4, four more bits are required to
identify each of the 16 subnets. This means the organization must use a /24 as the extended
network prefix length.
The 16 subnets of the 140.25.224.0/20 address block are shown below. The subnets are
numbered 0 through 15. The italicized portion of each sub-subnet address identifies the
extended-network prefix, while the bold digits identify the 4-bits representing the subsubnet-number field:
Subnet #14: 10001100.00011001.1110 0000.00000000 = 140.25.224.0/20
Subnet #14-0: 10001100.00011001.1110 0000.00000000 = 140.25.224.0/24
Subnet #14-1: 10001100.00011001.1110 0001.00000000 = 140.25.225.0/24
Subnet #14-2: 10001100.00011001.1110 0010.00000000 = 140.25.226.0/24
Subnet #14-3: 10001100.00011001.1110 0011.00000000 = 140.25.227.0/24
Subnet #14-4: 10001100.00011001.1110 0100.00000000 = 140.25.228.0/24
:
:
Subnet #14-14: 10001100.00011001.1110 1110.00000000 = 140.25.238.0/24
Subnet #14-15: 10001100.00011001.1110 1111.00000000 = 140.25.239.0/24
XStack Storage User’s Guide
185
4. Define Host Addresses for Subnet #14-3 (140.25.227.0/24)
Examine the host addresses that can be assigned to subnet #14-3 (140.25.227.0/24). Each
subnet of subnet #14-3 has 8 bits in the host-number field. This means that each subnet
represents a block of 254 valid host addresses (28 -2). The hosts are numbered 1 through 254.
The valid host addresses for subnet #14-3 are shown below. The italicized portion of each
address identifies the extended-network prefix, while the bold digits identify the 8- bit hostnumber field:
Subnet #14-3: 10001100.00011001.11100011.00000000 = 140.25.227.0/24
Host #1 10001100.00011001.11100011.00000001 = 140.25.227.1/24
Host #2 10001100.00011001.11100011.00000010 = 140.25.227.2/24
Host #3 10001100.00011001.11100011.00000011 = 140.25.227.3/24
Host #4 10001100.00011001.11100011.00000100 = 140.25.227.4/24
Host #5 10001100.00011001.11100011.00000101 = 140.25.227.5/24
.
.
Host #253 10001100.00011001.11100011.11111101 = 140.25.227.253/24
Host #254 10001100.00011001.11100011.11111110 = 140.25.227.254/24
5. Define the Sub 2 -Subnets for Subnet #14-14 (140.25.238.0/24)
After subnet #14 is divided into 16 subnets, subnet #14-14 is further subdivided into 8 equalsize address blocks. Since 8 = 23 , three more bits are required to identify each of the 8
subnets. This means the organization must use a /27 as the extended-network prefix length.
The eight subnets of the 140.25.238.0/24 address block are shown below. The subnets are
numbered 0 through 7. The italicized portion of each sub-subnet address identifies the
extended-network prefix, while the bold digits identify the 3-bits representing the subnet 2 number field:
Subnet #14-14: 10001100.00011001.11101110.00000000 = 140.25.238.0/24
Subnet#14-14-0: 10001100.00011001.11101110.000 00000 = 140.25.238.0/27 Subnet#1414-1: 10001100.00011001.11101110.001 00000 = 140.25.238.32/27 Subnet#14-14-2:
10001100.00011001.11101110.010 00000 = 140.25.238.64/27 Subnet#14-14-3:
10001100.00011001.11101110.011 00000 = 140.25.238.96/27 Subnet#14-14-4:
10001100.00011001.11101110.100 00000 = 140.25.238.128/27 Subnet#14-14-5:
10001100.00011001.11101110.101 00000 = 140.25.238.160/27 Subnet#14-14-6:
10001100.00011001.11101110.110 00000 = 140.25.238.192/27 Subnet#14-14-7:
10001100.00011001.11101110.111 00000 = 140.25.238.224/27
186
Appendix E Understanding IP Addresses and Subnet Masking
6. Define Host Addresses for Subnet #14-14-2 (140.25.238.64/27)
Examine the host addresses that can be assigned to subnet #14-14-2 (140.25.238.64/27).
Each subnet of subnet #14-14 has 5 bits in the host-number field. This means that each
subnet represents a block of 30 valid host addresses (25 -2). The hosts will be numbered 1
through 30.
The valid host addresses for subnet #14-14-2 are shown below. The italicized portion of each
address identifies the extended-network prefix, while the bold digits identify the 5-bit hostnumber field:
Subnet#14-14-2: 10001100.00011001.11101110.010 00000 = 140.25.238.64/27
Host #1 10001100.00011001.11101110.010 00001 = 140.25.238.65/27
Host #2 10001100.00011001.11101110.010 00010 = 140.25.238.66/27
Host #3 10001100.00011001.11101110.010 00011 = 140.25.238.67/27
Host #4 10001100.00011001.11101110.010 00100 = 140.25.238.68/27
Host #5 10001100.00011001.11101110.010 00101 = 140.25.238.69/27
.
.
Host #29 10001100.00011001.11101110.010 11101 = 140.25.238.93/27
Host #30 10001100.00011001.11101110.010 11110 = 140.25.238.94/27
XStack Storage User’s Guide
187
188
Appendix E Understanding IP Addresses and Subnet Masking
Appendix F Hardware Enclosures
This appendix shows samples of hardware enclosures for the XStack Storage.
F.1
Front View
Figure F- 1 Front View of Enclosure
F.2
Back View
Figure F- 2 Rear View of Enclosure
XStack Storage User’s Guide
189
Appendix G Acronyms and Abbreviations
Administrator
The person responsible for managing storage operations. The administrator is the
user who will use the storage management console provided with the XStack Storage.
CHAP
Challenge Handshake Authentication Protocol. CHAP is a protocol for authenticating
the peer of a connection and is based upon the peers sharing a secret (a security key
similar to a password).
CSMA/CD
Carrier Sense Multiple Access/Collision Detection. The LAN access method used in
Ethernet. When a device wants to gain access to the network, it checks whether the
network is quiet (senses the carrier). If it is not, it waits a random amount of time
before retrying. If the network is quiet and two devices access the line at exactly
the same time, their signals collide. When the collision is detected, they both back
off and each waits a random amount of time before retrying.
Drive
A physical storage drive (usually, but not necessarily, a disk drive) managed by the
XStack Storage system.
802.3
An IEEE standard for a CSMA/CD local-area network access method, which is used in
Ethernet, the most common LAN technology.
Extent
A contiguous set of LBs on a drive. An extent is also called a physical extent.
IETF
Internet Engineering Task Force. The main standards organization for the Internet.
The IETF is a large open international community of network designers, operators,
vendors, and researchers concerned with the evolution of the Internet architecture
and the smooth operation of the Internet. It is open to any interested individual.
Initiator node
An iSCSI node that performs as an iSCSI Initiator in accessing data stored on the
XStack Storage system.
IP
Internet Protocol. IP specifies the format of packets, or “datagrams,” and the
addressing scheme. Most networks combine IP with a higher-level protocol called
Transmission Control Protocol (TCP), which establishes a virtual connection between
a destination and a source. IP by itself is something like the postal system. It allows
you to address a package and drop it in the system, but there's no direct link
between you and the recipient. TCP/IP, on the other hand, establishes a connection
between two hosts so that they can send messages back and forth for a period of
time. The current version of IP is IPv4.
iSCSI
Internet Small Computer System Interface. An IP-based standard for linking data
storage devices over a network and transferring data by carrying SCSI commands over
IP networks. iSCSI supports a Gigabit Ethernet interface at the physical layer that
allows systems supporting iSCSI interfaces to connect directly to standard Gigabit
Ethernet switches and/or IP routers. iSCSI was developed by the IETF and became an
official standard in February 2003.
190
Index
LAG
Link Aggregation Group. The combining of physical network links into a single logical
link for increased bandwidth. A LAG increases capacity and availability of the
communications channel between devices using existing Fast Ethernet and Gigabit
Ethernet technology. LAGs also provide load balancing, where processing and
communications activity is distributed across several links in a trunk, so that no
single link is overwhelmed.
LAN
Local Area Network. A computer network that spans a relatively small area. Most
LANs are confined to a single building or group of buildings. Most LANs connect
workstations and personal computers. Each node (individual computer) in a LAN has
its own CPU with that executes programs, but it can also access data and devices
anywhere on the LAN. This means that many users can share expensive devices, such
as laser printers, as well as data. Users can also use the LAN to communicate with
each other, by sending e-mail or engaging in chat sessions. There are many different
types of LANs. Ethernet is the most common LAN for PCs.
LB
Logical Block. A block of storage stored (and read) by the system.
LUN
Logical Unit Number. According to the SCSI Architectural Model, the number used by
an iSCSI initiator to access a target’s Logical Unit. In the XStack Storage, a logical
unit is a volume.
MAC Address
Media Access Control address. A hardware address that uniquely identifies each node
of a network.
Member
A group of chunks organized vertically in an array.
Mirror
A method for improving reliability of a Volume by providing data redundancy. In a
mirror volume, data redundancy is provided by recoding every data block on more
than one drive.
MPU
Management Processor Unit. The PowerPC CPU used for management processing on
the XStack Storage.
Node
A computer or other device, such as a printer. Every node has a unique network
address, sometimes called a Data Link Control (DLC) address or Media Access Control
(MAC) address.
Parity
A way to improve reliability of a volume by providing data redundancy. In a parity
volume, data redundancy is improved by recording data blocks across multiple drives
and recording one additional parity block on an additional drive. If any single drive
fails, the original data can be reconstructed from the remaining blocks.
PLBN
Physical Logical Block Number. The number of an LB on a drive.
RFC
Request for Comments. A series of notes about the Internet started in 1969. An
Internet Document can be submitted to the IETF by anyone, but the IETF decides if
the document becomes an RFC. If the RFC gains enough interest, it may evolve into
an Internet standard. Each RFC is designated by an RFC number. Once an RFC is
published, it never changes. Modifications to an original RFC are assigned a new RFC
number.
XStack Storage User’s Guide
191
SAN
Storage Area Network. A high-speed subnetwork of shared storage devices that
makes all storage devices available to all servers on a LAN or WAN. As storage
devices are added to a SAN, they will be accessible from any server in the larger
network. In this case, the server merely acts as a pathway between the end user and
the stored data. Because stored data does not reside directly on any network
servers, server power is used for business applications, and network capacity is
released to the end user.
Server
A computer or device on a network that manages network resources. For example, a
network server is a computer that manages network traffic. Servers are often
dedicated, meaning that they perform no other tasks besides their server tasks. On
multiprocessing operating systems, however, a single computer can execute several
programs at once. A server in this case can refer to the program that is managing
resources rather than the entire computer.
Striping
A way to improve I/O performance on a volume by splitting data among multiple
drives.
Storage pool
A collection of drives used as a group for common functions (for example, the space
used by a volume must be allocated from a specific storage pool).
Subnet
A portion of a network that shares a common address component. On TCP/IP
networks, subnets are defined as all devices whose IP addresses have the same
prefix. For example, all devices with IP addresses that start with 100.100.100. are
part of the same subnet.
TCP
Transmission Control Protocol. Pronounced as separate letters, TCP is a main
protocol in TCP/IP networks. Whereas the IP protocol deals only with packets, TCP
enables two hosts to establish a connection and exchange streams of data. TCP
guarantees delivery of data and also guarantees that packets will be delivered in the
same order in which they were sent.
VLBN
Virtual Logical Block Number. The number of an LB within a volume. The LB is used
to store customer data.
Volume
A fixed amount of storage on a disk. The term volume is often used as a synonym for
the storage medium itself, but it is possible for a single disk to contain more than
one volume or for a volume to span more than one disk.
192
Index
Index
A
Accelerated Backup Operations, 21
Accounts, 115
Acronyms and Abbreviations, 195
Adding
iSCSI Initiators, 83
Physical Ports to LAGs, 89
Adding, Viewing, and Deleting IP Route Tables, 105
Applications, 20
Automatically Creating Volumes, 71
B
Back Panel Components, 36
Benefits, 17
Blade A Base Pool
Information on Drives, 144
Screens, 135
Booting the XStack Storage Unit, 53
C
Cache
Setting, 118
Changing
Date and Time, 66
the CHAP Secret, 99
the iSCSI Port Number, 103
CHAP Secret
Changing, 99
CIM Information
Viewing, 133
Class A Networks, 184
Class B Networks, 184
Class C Networks, 185
Configuration
Battery Policy, 112
Cache, 118
Changing Date and Time, 66
CHAP Secret, 99
Default Task Priority, 104
IP Route Tables, 105
iSCSI Initiators, 83
LAGs, 84
Media Scans, 82
Methods, 53
Network Portals, 91
Recording Settings, 165
Restarting the XStack Storage, 122
Restoring Factory Defaults, 121
Restoring the Configuration, 120
Saving, 119
Saving the Configuration, 119
Saving the Event Log, 114
Scheduled Tasks, 110
Shutting Down the XStack Storage, 123
Spare Count, 109
TCP/IP Settings, 107
the iSCSI Port Number, 103
the Management Interface, 64
User Accounts, 115
Volumes, 70
Connecting
the Battery Pack, 51
the Power Cords, 52
to the DSN-3200, 49
to the DSN-3400, 49
to the Management Port, 50
Connection Information Screen, 151
Contact Information, v
Conventions, iv
Creating
a Volume, 70
iSCSI Target Nodes, 94
LAGs, 85
Network Portals, 91
Scheduled Tasks, 110
Volumes Automatically, 71
Volumes Manually, 74
D
Date and Time, 66
Default Settings, 163
Default Task Priority, 104
Deleting
a Volume, 79
LAGs, 90
Network Portals, 93
Physical Ports from LAGs, 89
User Accounts, 117
Drive and Tray
Installation, 35
Removal, 34
Drive Bays, 34
Drive Information Screen, 144
Drives, overview, 25
DSN-3200
External Interfaces, 37
LEDs, 38
DSN-3400
External Interfaces, 39
DSN-3400 LEDs, 40
E
Electrical Safety Guidelines, 44
Email Alerts, 68
Enclosure Information
Viewing, 126
ESD Safety Precautions, 45
Ethernet Port Information, 154
Event Log
Details, 128
Saving, 114
Expanding a Volume, 29, 78
External Interfaces, 37
DSN-3200, 37
DSN-3400, 39
XStack Storage User’s Guide
193
F
Factory Defaults
Restoring, 121
Settings, 163
Fast Nearline Backup and Recovery, 20
Features, 18
Files Menu, 155
Firmware
Upgrading, 161
Firmware Image Information, 134
Front Panel
Components, 32
LED indicators, 33
Front Vents, 35
Front View
DSN-3000 Series, 32
G
General Safety Guidelines, 44
GigaStor screens
LUN Map Information, 153
Portals Info, 150
Growing a Volume, 29
H
Hardware Enclosure
Description, 16
Illustrations, 193
Help Menu, 159
Host Network Connection
LEDs DSN-3200, 38
LEDs DSN-3400, 40
I
Initializing a Volume, 28
Initiator
Access Info Screen, 147
Information Screen, 152
Installation
Desktop or Shelf, 48
in a Rack, 48
Internal Structure of a Volume, 26
IP Address Configuration
Management Interface, 64
IP Addresses Explained, 181
IP Route Tables, 105
iSCSI
Menu, 158
Port Number, 103
Target Node Creation, 94
iSCSI Initiators
Adding, 83
Creation, 83
Logging On, 100
Items Supplied by the User, 47
J
JBOD, 26
194
Index
K
Key Lock and Latches, 33
L
LAG
Modifying Parameters, 88
LAG Port Information, 148
LAGs
Adding Physical Ports, 89
Configuration, 84
Creating, 85
Deleting, 90
Deleting Physical Ports, 89
Launching the Management Console, 56
LEDs (Front), 33
Lifting and Reaching Safety Precautions, 45
List
of Figures, xi
of Tables, xiii
Log Messages
Viewing, 128
Logging On to the iSCSI Initiator, 100
Login Screen, 56
LUN Map Information screen, 153
M
Main Management Console
Footer, 63
Main Display Area, 61
Menu/Toolbar, 59
Resources Panel, 60
Main Screen
Understanding, 58
Management Console, 56
Battery Policy, 112
Cache, 118
Changing Date and Time, 66
CHAP Secret, 99
Default Task Priority, 104
Email Alerts, 68
IP Route Tables, 105
iSCSI Initiators, 83
iSCSI Port Number, 103
iSCSI Target Nodes, 94
LAGs, 84
Media Scan, 82
Network Portals, 91
Parity Scans, 81
Restarting the XStack Storage, 122
Restoring
Factory Defaults, 121
Restoring the Configuration, 120
Saving the Configuration, 119
Saving the Event Log, 114
Scheduled Tasks, 110
Shutting Down, 123
Shutting Down the XStack Storage, 123
Spare Count, 109
TCP/IP Settings, 107
User Accounts, 115
Volumes, 70
Management Interface
Changing the Default IP Address, 64
Management Port LED Locations DSN-3200, 39
Management Port LEDs DSN-3200, 38
Management Port LEDs DSN-3400, 40
Managing Configurations, 119
Managing User Accounts, 115
Managing XStack Storage Configurations, 119
Manually Creating Volumes, 74
Media Scan, 29
Menus
File, 155
Help, 159
iSCSI, 158
Network, 158
Storage, 157
View, 156
Mirror, 26
Models, 16
Modifying LAG Parameters, 88
Modifying Newtork Portal Parameters, 93
Modifying System TCP/IP Settings, 107
N
Network Classes, 182
Class A, 184
Class B, 184
Class C, 185
Network Entities
Screens, 145
Network Masks, 185
Network Menu, 158
Network Portals
Creating, 91
Deleting, 93
Modifying, 93
O
Organize Volumes, 26
P
Parity, 26
Parity Scan, 29
Performing, 81
Performing Cache Activities, 118
Physical Port Information Screen, 154
Physical Ports
Adding to LAGs, 89
Portal Info Screen, 150
Power and Reset Switches, 36
Power and Reset Switches Function, 36
Power Supply, 52
Power-On and Reset Switches, 53
R
Rear Vents, 40
Rear View DSN-3200, 36
Rebuilding a Volume, 28
Reconfiguring Volumes, 78
Recording Your Configuration Settings, 165
Remote Mirroring and Replication, 20
Restarting the XStack Storage, 122
Restoring
Factory Defaults, 121
the Configuration, 120
S
Safety Considerations, 44
Saving the Configuration, 119
Saving the Event Log, 114
Scheduled Tasks, 110
Screens
Blade A Base Pool, 135
Connection Information, 151
Drive Information, 144
Enclosure Information, 126
Firmware Image Info, 134
Initiator Access Info, 147
Initiator Information, 152
LUN Map Information, 153
Network Entities, 145
Physical Port Information, 154
Portals Info, 150
Server CIM Info, 133
Server CIM Info, 133
Storage Group Information, 136
Storage Pool Information, 136
Target Node Info, 145
Tasks Info, 130
Tasks Info Volumes, 142
Volume Access Info, 146
Volume Information, 141
Server CIM Info Screen, 133
Server Consolidation, 20
Setting
Cache Mode, 118
the Battery Policy, 112
the Default Task Priority, 104
the Spare Count, 109
the System Battery Policy, 112
User Accounts, 116
Setting Up User Accounts, 116
Shutting Down the Management Console, 123
Shutting Down the XStack Storage, 123
Site Considerations, 43
Spare Count, 28
Setting, 109
Storage Consolidation, 20
Storage Group Information Screen, 136
Storage Menu, 157
Storage Pool
Information, 136
Task Message Details Screen, 139
Storage Pool Tasks
Viewing, 138
Storage pools, 25
Storage Pools and Drives, 25
Storage Tasks
Viewing, 130
Stripe, 26
XStack Storage User’s Guide
195
Stripe mirror, 26
Subnets, 186
Switches, 36
System Diagram, 19
System Overview, 19
System TCP/IP Settings
Modifying, 107
Systems Settings, 126
T
Target Node Info Screen, 145
Task Message Details
Screen Volumes, 143
TAsk Message Details Screen
Storage Pools, 139
Task Message Details Screen Tasks, 131
Tasks
Creating, 110
Tasks Info Screen, 130
Storage Pools, 138
Volumes, 142
Tasks Overview, 28
TCP/IP Default Parameters, 126
Time and Date, 66
Types of Storage Pools, 25
Typographic Conventions, iv
U
Understanding iSCSI, 24
Understanding the Main Screen, 58
Unpacking the XStack Storage Unit, 46
Upgrading Firmware, 161
User Accounts, 115
Deleting, 117
User-Supplied Items, 47
V
Variable Length Subnet Masks, 188
View Menu, 156
Viewing
Connection Information, 151
Drive Information, 144
Enclosure Information, 126
Ethernet Port Information, 154
Information about Drives in the Blade A Base Pool, 144
Information about Volumes, 140
Initiator Access Information, 147
Initiator Information, 152
LAG Port Information, 148
Log Messages, 128
LUN map information, 153
Message Log Summary, 126
Network Portal Information, 150
Physical Port Information, 154
Portal Information, 150
Server CIM Information, 133
Storage Group Information, 136
Storage Pool Information, 136
Storage Pool Tasks, 138
System Settings, 126
196
Index
Target Node Drive Information, 145
Target Node Information, 145
TCP/IP Default Parameters, 126
Volume Access Information, 146
Volume Information, 141
Volume Tasks, 142
XStack Storage Tasks, 130
Volume Access Info Screen, 146
Volume Information
Viewing, 141
Volume Information Screen, 141
Volume Tasks
Viewing, 142
Volumes
Creating, 70
Creating Automatically, 71
Deleting, 79
Expanding, 78
Manually Creating, 74
Media Scan, 82
Parity Scan, 81
Reconfiguring, 78
Viewing Information About, 140
Volumes Overview, 26
X
XStack
Changing Date and Time, 66
Upgrading Firmware, 161
XStack Factory Default Settings, 163
XStack Screens
CIM Server Info, 133
Connection Information, 151
Drive Information, 144
Enclosure, 127
Firmware
Image Info, 134
Initiator Access Info, 147
Initiator Information, 152
LAG Port Info Screen, 149
Log Messages, 128, 129
Physical Port Information, 154
Storage Group Information, 137
Target Node Info, 145
Task Message Details, 139
Task Message Details (volumes), 143
Tasks Info, 130
Tasks Info Details, 142
Tasks Info Screen, 138
Tasks Message Details, 131
Volume Access Info, 146
Volume Information, 141
XStack Storage
Changing the Name, 64
Models, 16
Screens, 126
XStack Storage User’s Guide
197