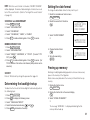
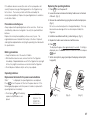
1
This device complies with Part 15 of the FCC Rules. Operation is subject to the
following two conditions: (1) This device may not cause harmful interference, and
(2) this device must accept any interference received, including interference that
may cause undesired operation.
FOR YOUR RECORDS....
WARNING FCC Regulations state that any unauthorized changes or modifications
to this equipment not expressly approved by the manufacturer could void the user's
authority to operate this equipment.
Model Number
For your assistance in reporting this product in case of loss or theft, please record
the model number and serial number (located on the bottom of the case) below.
Please retain this information.
Serial Number
Date of Purchase
Note: This equipment has been tested and found to comply with the limits for a
Class B digital device, pursuant to Part 15 of the FCC Rules.
These limits are designed to provide reasonable protection against harmful
interference in a residential installation. This equipment generates, uses, and can
radiate radio frequency energy and, if not installed and used in accordance with
the instructions, may cause harmful interference to radio communications.
However, there is no guarantee that interference will not occur in a particular
installation. If this equipment does cause harmful interference to radio or television
reception, which can be determined by turning the equipment off and on, the user
is encouraged to try to correct the interference by one or more of the following
measures:
– Reorient or relocate the receiving antenna.
– Increase the separation between the equipment and receiver.
– Connect the equipment into an outlet on a circuit different from that to which the
receiver is connected.
– Consult the dealer or an experienced radio/TV technician for help.
Note: A shielded interface cable is required to ensure compliance with FCC
regulations for Class B certification.
Place of Purchase
LIMITED WARRANTY
SHARP ELECTRONICS CORPORATION warrants to the first consumer purchaser
that this Sharp brand product (the "Product"), when shipped in its original container,
will be free from defective workmanship and materials and agrees that it will, at its
option, either repair the defect or replace the defective Product or part thereof at no
charge to the purchaser for parts or labor for the time period(s) set forth below.
the Product which were caused by repairs or attempted repairs performed by anyone
other than an authorized servicer. Nor shall Sharp be liable, or in any way responsible,
for any incidental or consequential economic or property damage. Some states do
not allow the exclusion of incidental or consequential damages, so the above
exclusion may not apply to you.
This warranty does not apply to any appearance items of the Product nor to the
additional excluded item(s) set forth below nor to any product the exterior of which
has been damaged or defaced, which has been subjected to misuse, abnormal
service or handling or which has been altered or modified in design or construction.
THE WARRANTY GIVES YOU SPECIFIC LEGAL RIGHTS. YOU MAY ALSO HAVE
OTHER RIGHTS WHICH VARY FROM STATE TO STATE.
Your Product :
Electronic Organizer
In order to enforce the rights under this limited warranty, the purchaser should follow
the steps set forth below and provide proof of purchase to the servicer.
Warranty Period for this
Product :
One (1) year parts and labor from date of purchase.
Additional items excluded
from warranty coverage :
Any consumable items such as paper, maintenance
cartridge, ink cartridges supplied with the Product
or to any equipment or any hardware, software,
firmware, fluorescent lamp, power cords, covers,
rubber parts, or peripherals other than the Product.
Where to obtain service :
At a Sharp Authorized Servicer located in the United
States. To find out the location of the nearest Sharp
Authorized Servicer, call Sharp toll free at
800-BE-SHARP.
What to do to obtain service :
Ship (prepaid) or carry in your Product to a Sharp
Authorized Servicer. Be sure to have proof of
purchase available. If you ship or mail the Product,
be sure it is packaged carefully.
The limited warranty described herein is in addition to whatever implied warranties
may be granted to purchasers by law. ALL IMPLIED WARRANTIES INCLUDING
THE WARRANTIES OF MERCHANTABILITY AND FITNESS FOR USE ARE
LIMITED TO THE PERIOD(S) FROM THE DATE OF PURCHASE SET FORTH
BELOW. Some states do not allow limitations on how long an implied warranty
lasts, so the above limitation may not apply to you.
Neither the sales personnel of the seller nor any other person is authorized to make
any warranties other than those described herein or to extend the duration of any
warranties beyond the time period described herein on behalf of Sharp.
The warranties described herein shall be the sole and exclusive warranties granted
by Sharp and shall be the sole and exclusive remedy available to the purchaser.
Correction of defects, in the manner and for the period of time described herein,
shall constitute complete fulfillment of all liabilities and responsibilities of Sharp to
the purchaser with respect to the Product and shall constitute full satisfaction of all
claims, whether based on contract, negligence, strict liability or otherwise. In no
event shall Sharp be liable, or in any way responsible, for any damages or defects in
TO OBTAIN SUPPLY, ACCESSORY OR PRODUCT INFORMATION, CALL 1-800-BE-SHARP.
PARTS NAMES
Command center
Display
Power on/off keys
Cursor movement keys
Search keys
Reset switch
Option port
(4-pin option jack)
Return key
Enter key
1
INTRODUCTION
Congratulations on purchasing the YO-150/YO-170 Electronic
Organizer. Please read this operation manual carefully to familiarize
yourself with all the features of the Organizer and to ensure years of
reliable operation. For quick reference, keep this operation manual on
hand.
NOTES:
• Unless otherwise specified, the text material applies to both models.
• Some of the accessories described in this manual may not be
available at the time you purchase this product.
Check with your local SHARP dealer concerning availability.
• The differences between YO-150/YO-170 are memory capacity.
NOTICE
• SHARP strongly recommends that you keep separate permanent
written records of all important data. Data may be lost or altered in
virtually any electronic memory product under certain circumstances. Therefore, SHARP assumes no responsibility for data lost
or otherwise rendered unusable whether as a result of improper
use, repairs, defects, battery replacement, use after the specified
battery life has expired, or any other case.
• SHARP assumes no responsibility, directly or indirectly, for financial
losses or claims from third persons resulting from the use of this
product and any of its functions, such as stolen credit card
numbers, the loss or alteration of stored data, etc.
• The information provided in this manual is subject to change
without prior notice.
The functions such as Calendar and Schedule in this
product can handle dates from January 1, 1901 to
December 31, 2099.
2
TABLE OF CONTENTS
INTRODUCTION .................................................................................... 2
BEFORE USE ......................................................................................... 3
GETTING STARTED ............................................................................... 4
BASIC ENTRY PROCEDURES ............................................................... 5
USING THE HOME AND WORLD CLOCKS .......................................... 6
USING THE CALENDAR FUNCTION ..................................................... 9
BEFORE USE
Using the Organizer for the first time
Be sure to perform the following procedures before using the Organizer
for the first time.
1. Open the Organizer.
2. Initialize the Organizer.
While holding ON , press the RESET switch. Release the RESET
switch and then release ON . The following display will appear:
USING THE SCHEDULE FUNCTION ................................................... 10
USING THE ANNIVERSARY FUNCTION ............................................. 15
C•CE
CLEAR ALL DATA
ON
USING THE TELEPHONE DIRECTORY ............................................... 17
OK (Y/N) ?
USING THE MEMO FUNCTION ........................................................... 20
USING THE TO DO FUNCTION ........................................................... 22
USING THE EXPENSE FUNCTION ...................................................... 24
R
TE
M
O
C
USING THE CONVERSION FUNCTION .............................................. 27
PU
LI
N
K
USING THE CALCULATOR FUNCTION .............................................. 26
USING THE SECRET FUNCTION ........................................................ 27
USING THE MISCELLANEOUS FUNCTION ........................................ 30
USING THE OPTION FUNCTION ........................................................ 32
NOTE: Under certain conditions the message may appear as “Data
has been impaired! Press [Y] to CLEAR ALL memory”. Proceed to the
next step in either case.
APPENDIX ............................................................................................ 35
3. Press Y .
The Organizer is initialized and the TEL1 directory is displayed.
3
AUTO POWER OFF function
GETTING STARTED
When none of the keys have been pressed for approximately 7
minutes, the Organizer automatically turns the power off to save the
batteries. (The actual time may vary depending on the conditions of
use.) Press ON to resume operation.
Backlight
Pressing BACKLIGHT once illuminates the display and the Backlight
will remain on for as long as you continue to use the Organizer, or when
none of the keys have been pressed for fifteen seconds.
The Backlight may remain on for less than fifteen seconds if the battery
level is very low.
The length of time to turn on the Backlight can be changed. (Refer to
page 31.)
NOTES:
Display symbols
BATT
This symbol appears when the operating battery level is low.
Åñ
The data appearing on the display is secret data accessible
only by password.
S
The secret function is in effect.
A “beep” will sound when a key is pressed.
The specified schedule alarm(s) will sound.
CAPS
Capital (uppercase) letters will be entered. To enter small
(lowercase) letters, turn “CAPS” off by pressing CAPS .
EDIT
The entry on the display may be edited.
Do not use the Backlight unnecessarily.
• Since the Backlight drains power from the operating batteries,
excessive use of the Backlight will significantly reduce your battery life.
• Continuous use of the Backlight will, over time, lead to gradual loss
of brightness.
If the Backlight is on for 10 minutes per day (for example 15 seconds
40 times a day), the brightness will be reduced by half after 10* years
(at an ambient temperature of 25°C/77°F and 65% humidity).
řŴ
* This figure may vary depending on the surrounding environment.
The
Freeing up memory
These keys are used to select capital or small letters or to access the
, press
symbols marked in white above keys. While holding down
the desired key to be entered.
When you turn the power on, the following message may be displayed,
asking you to free up memory by deleting unnecessary space:
“DO YOU WANT TO FREE UP MEMORY? (Yes/No)”
Press Y to delete them. Freeing up memory requires maximum one
minute.
Press N when you wish to start the operation soon.
For more information, refer to page 31, “Freeing up memory”.
4
2nd
2nd has been pressed.
There is more data which is not on the display. The data can
or
.
be displayed by pressing
NOTE: The symbol “★” shown by setting the LCD contrast to DARK is
not used in this product.
keys
Turning the “beep” on and off
While “ ” is displayed, a “beep” will sound when a key is pressed. To
. The “beep” will not
turn the “beep” on and off, press 2nd
sound after “ ” goes off. To turn the “beep” back on, repeat the
process.
Key notations
BASIC ENTRY
PROCEDURES
This manual uses the following notations for key operations and
functions:
Key
CALENDAR
Notation
CALENDAR
MARK
or
MARK
FUNCTION
S
S
or
FUNCTION
7
N
7
N
Note
Entering characters and numbers
Keys with only one function always
appear in the manual with the
function enclosed in a box.
To practice entering characters and numbers, select the MEMO mode.
Keys with multiple functions appear in
the manual with only the contextually
appropriate function boxed; i.e., MARK
will sometimes appear as MARK and
sometimes as
.
Alphabetical keys with multiple
functions appear sometimes as
unboxed letters and sometimes as the
boxed function name.
Numerical keys and alphabetical keys
are noted only with unboxed numbers
and letters.
NOTE: The blue functions and symbols are operated by pressing
2nd
Keys and their functions
: Moves the cursor to the right.
: Moves the cursor to the left.
: Moves the cursor up to the previous line.
: Moves the cursor down to the next line.
INS
: Puts the Organizer into insert mode. Pressing this key again
exits the insert mode.
DEL
: Deletes the character at the cursor.
BS
: Deletes the character to the left of the cursor (“backspace”).
: Moves the cursor to the beginning of the next line (new line).
C•CE
: Clears the data being entered.
CAPS
: Functions as a capslock key. (
way.)
ENTER
: Stores the data being displayed.
functions in the same
and the appropriate keys.
Entering graphic symbols and special characters
Press SMBL to select the symbol entry mode. A total of 90 symbols
can be selected. To select the symbol display containing the desired
or
, then press the number
symbol/special character, press
corresponding to it.
Press SMBL to exit the symbol entry mode.
5
Making corrections
USING THE HOME AND
WORLD CLOCKS
Misspellings and incorrect entries can be corrected using the cursor
keys, INS , and DEL as follows:
Correcting misspellings
1. Press MEMO .
Displaying the HOME time
NEW YARK
2. Enter “NEW YARK”.
3. Press
Press CLOCK to display the HOME time.
.
4. Enter “O”.
Day of the week
month/day/year
Inserting missing letters
1. Press C•CE .
NEW YRK
12:00
NOTE: The date format can be changed. Refer to page 31.
2. Enter “NEW YRK”.
3. Press
HOME
NEW YORK
FRI JAN 1,1999
AM
INS .
Setting the HOME clock
4. Enter “O”.
Setting and changing the HOME city
Deleting unwanted characters
1. Press C•CE .
Set your local city as the HOME city by selecting its zone number.
Zone numbers are based on the distance of the zones from the
international date line (zone number zero). For example, there is a 13hour difference between the date line and London (London is 13 hours
behind), so the zone number for London is 13. (Refer to page 36.)
NEW YOARK
2. Enter “NEW YOARK”.
3. Press
.
4. Press DEL .
1. Display the HOME clock.
CLOCK ( CLOCK )
NOTES:
• Pressing INS sets the insert mode and changes the cursor to “
Press INS again to exit the insert mode.
• Pressing C•CE deletes the data currently being entered.
”.
2. Enter the edit mode.
2nd
EDIT
3. Display the desired city name from the cities stored in the Organizer.
(or
)
4. Set the HOME city.
ENTER
6
NOTES:
• Between step 2 and step 4, the Organizer stops the clock. Be sure to
set the correct time after setting or changing the HOME or WORLD city.
• Some city names are abbreviated on the display as follows:
HONG KONG ........... HONGKONG
NEW DELHI .............. DELHI
RIO DE JANEIRO ..... RIO
LOS ANGELES ......... L.A.
ANCHORAGE ........... ANC.
• For zone numbers 0, 14, and 15, the city name display is blank.
When the time is set on the 12-hour basis, noon and midnight changes
are displayed as below:
11:59AM → 12:00PM (noon) → 12:59PM → 1:00PM
11:59PM → 12:00AM (midnight) → 12:59AM → 1:00AM
Using the WORLD clock
The time in any place in the world can be checked by selecting its
zone number. The default city for the WORLD time is London.
Displaying the WORLD time
Setting the clock
1. Display the HOME clock.
CLOCK ( CLOCK )
2. Enter the edit mode.
2nd
EDIT
Zone number
HOME
[18.0]
NEW YORK
FRI JAN 1,1999
AM
HOME
[18.0]
NEW YORK
FRI JAN 1,1999
PM
1:30
The hours and minutes must be entered using two digits each.
5. Enter the date.
01 10 1999
Enter the month and day using 2 digits and the year using 4 digits. For
single digit months or days, enter “0” before the single digit.
6. Press ENTER to start the clock from 0 seconds of the specified time.
ENTER
The time differences from the HOME city
(The initial WORLD city setting is London.)
12:00
3. Select the time system.
The time can be displayed using either the conventional 12-hour
AM/PM system or the 24-hour system. Pressing 12 24 switches
between them.
4. Set the time. (The date in the example
below is January 10, 1999, 1:30 PM.)
01 30 PM
Display the WORLD clock.
CLOCK ( CLOCK )
WORLD
(+ 5:00)
LONDON
SUN JAN 10,1999
PM
6:30
Changing the city for the WORLD time
1. Display the WORLD clock.
CLOCK ( CLOCK )
The current city setting appears on the display.
2. Enter the edit mode.
2nd
EDIT
3. Follow the procedure for “Setting and changing the HOME city” (from
step 3) on page 6 to select the city name you want.
Changing the time
If you wish to change the current HOME time and date, follow the
procedure under “Setting the clock” mentioned above. Skip step 4 if
you do not want to change the time. Skip step 5 if you do not want to
change the date.
7
Registering a city name not found in the
list
3. Enter the correct DST time.
For example, if you wish to set the city for the WORLD time to Rome
(which is in zone number 12, but is not included in the city list):
“
1. Display the WORLD clock and enter the edit mode.
CLOCK ( CLOCK ) 2nd EDIT
The cursor flashes on the city name line.
To clear
and
to set the zone
2. Use
number to 12 (initially, the city is Paris.)
3. Enter the city name (up to 8 characters).
ROME SPACE
4. Press 2nd ENTER .
” appears on the display and DST is set.
Perform the steps above except for step 3. To clear the DST, set time
other than the DST in step 3.
” disappears and DST is cleared.
“
WORLD
[12.0]
ROME
SUN JAN 10,1999
PM
7:30
NOTE: For HOME clock, the “
2nd
EDIT then 2nd
not changed. After this operation, the clock starts from 0 seconds.
4. Press ENTER to store the name.
WORLD clock:
To set
NOTE: To register a city name for the HOME clock, first display the
1. Display the WORLD clock.
CLOCK ( CLOCK )
HOME clock then 2nd
EDIT followed by
to move the
” display is turned on or off whenever
ENTER are pressed, even if the time setting is
cursor to the city name line.
2. Enter the edit mode and change the setting.
Setting daylight saving time/summer time
“
” appears on the display and DST is set. Setting DST in the
WORLD clock automatically sets the time one hour ahead.
If DST (daylight saving time/summer time) is used, the local time is
advanced once hour during the summer. The HOME clock and the
WORLD clock can be set for DST as follows:
To clear
2nd
HOME clock:
To set
1. Display the HOME clock.
CLOCK ( CLOCK )
2. Enter the edit mode.
2nd
8
EDIT
EDIT
2nd
ENTER
Perform the same steps as those used to set the DST.
“
” disappears and the time for all WORLD cities is one hour back.
NOTES:
• When DST is set for one WORLD city, it is used for all cities displayed
in the WORLD clock.
• DST can be set independently in the HOME and WORLD clocks. For
example, if DST is set for the HOME clock, it does not have to be set
for the WORLD clock.
USING THE CALENDAR
FUNCTION
3. Display the calendar for two months prior
to the month presently on the display.
’98
12
@1 2 3 4 5
6 7 8 9 10 11 12
13 14 15 16 17 18 19
20 21 22 23 24 25 26
27 28 29 30 31
NOTES:
Displaying and changing the monthly
calendar
• When
or
is pressed continuously, the calendar will scroll
forward or backward.
• A “ ’ ” is attached to the years 1901 to 1999 while no mark is
attached to the years 2000 to 2099.
In the CALENDAR mode, the month can be changed by using
and
, or designating the year and month.
4. Press 2nd
Operations of
display
and
during the monthly calendar
The Organizer has a five-line display. The monthly calendar is
displayed occasionally in two separate displays. In this instance,
symbol “ ” appears on the display and the last week will be displayed
several time.
by pressing
Changing the month with
In the CALENDAR mode, the month can be changed by pressing
(to
(to display past months) as follows:
display the upcoming months) and
CALENDAR
’99
1
“ ” indicates that the last week of the
month is hidden below. To display the
until the cursor
last week, press
scrolls into the next screen.
If the display above does not appear, press 2nd
example, January 1999 is displayed.)
2. Display the calendar for the next month.
Recalling a month by designating the date
For example, to display the month of February 1999, perform the steps
below:
1. Select the CALENDAR mode.
2nd
CALENDAR
2. Enter the date entry mode.
C•CE
and
1. Select the CALENDAR mode.
CALENDAR to return the calendar to the current date.
1 2
3 4 5 6 7 8 9
10 11 12 13 14 15 16
17 18 19 20 21 22 23
24 25 26 27 28 29 30
CALENDAR . (In this
MM/DD/YYYY
MONTH :01
DAY :10
YEAR :1999
To change the date, move the cursor with the cursor movement keys.
To clear the displayed date, press C•CE .
3. Enter the date.
02 01 1999
MM/DD/YYYY
MONTH :02
DAY :01
YEAR :1999
To enter a single-digit date or month, enter zero and the digit (that is
“02” or “01").
4. Recall the calendar.
ENTER
The specified monthly calendar will be displayed.
9
USING THE SCHEDULE
FUNCTION
4. Change to the SCHEDULE mode.
SCHEDULE
FRI FEB 19,1999
TIME ?
5. Enter the starting time.
10 AM (“:00AM” will be entered automatically.)
Entering data in the SCHEDULE mode
The date of a schedule item can be selected:
1. By selecting the desired date in the CALENDAR mode.
2. By selecting the desired date in the SCHEDULE mode with
and
.
3. By recalling the desired date directly in the SCHEDULE mode.
Once the date has been selected, actual entry of the schedule item is
the same for all three methods.
NOTE: Multiple items may be scheduled on the same date. If other
items have been previously scheduled for a given date, simply enter
the new appointment over the old one. The Organizer’s display will
clear upon recognition of the new entry.
6. Enter the finishing time.
2 PM
FRI FEB 19,1999
10:00AM~ 2:00PM
DESCRIPTION ?
7. Enter the schedule detail.
(Return) key to change the
Use the
line.
FRI FEB 19,1999
10:00AM~ 2:00PM
ABC Project
meeting in room 23
8. Store the scheduled meeting in the memory.
ENTER
9. Now check to see if the data was
registered in the memory.
’99
2
CALENDAR
1 2 3 4 5 6
7 8 9 10 11 12 13
14 15 16 17 18 19 20
21 22 23 24 25 26 27
28
Entering items from the CALENDAR mode
To enter an item from the CALENDAR mode, such as, “February 19,
1999 10:00AM - 2:00PM ABC Project meeting in room 23”:
1. Select the CALENDAR mode.
2nd
CALENDAR
2. Change the calendar to February 1999.
3. Move the cursor to the 19th of February,
using the cursor movement keys.
Notice the tag ( ) next to “February 19”. It indicates a scheduled item
for that date. Items beginning in the morning result in a tag at the
upper right of the date, while those beginning in the afternoon result in
a tag appearing at the lower right of the date.)
If an anniversary has been set, the tag will appear in the center.
Schedule item beginning in the morning
Anniversary item
’99
2
1 2 3 4 5 6
7 8 9 10 11 12 13
14 15 16 17 18 19 20
21 22 23 24 25 26 27
28
Schedule item beginning after the noon
Entering items from the SCHEDULE mode
There are two methods of selecting the date depending on which is
more convenient.
10
Selecting the date with
and
Scheduling items without times
This method is convenient for entering data into a nearby date. For
example, to enter an item such as, “February 17, 3:00PM - 5:00PM
Sales meeting”:
1. Press SCHEDULE .
2. Recall “February 17”.
or
Press
or
until “February 17” is
recalled.
WED FEB 17,1999
TIME ?
3. Enter the starting and finishing times,
and detail.
WED FEB 17,1999
3:00PM~ 5:00PM
Sales meeting_
4. Store the scheduled meeting in the
memory.
ENTER
Scheduling with
C•CE
and the numerical keys
This method is convenient for entering data into a date that is not close
to the displayed date. For example, to schedule, “February 24, 1999
1:30PM Dr. Wilson visit at Guest room”:
1. Enter the date entry mode.
SCHEDULE
C•CE C•CE
2. Enter the scheduled date. (February 24, 1999)
02 24 1999 ENTER
3. Enter the starting and finishing times,
and detail.
WED FEB 24,1999
1:30PM~
Dr. Wilson visit
at Guest room_
After selecting the schedule date as outlined above, schedule items
can be entered directly without a specified time, except in instances
when the date begins with a number. Simply begin by entering the
letters in the item.
Recalling scheduled data
Scheduled items can be displayed by:
1. Recalling today’s agenda.
2. Recalling scheduled items from the CALENDAR mode.
3. Recalling scheduled items from the SCHEDULE mode with
and
.
4. Recalling only scheduled dates (skip empty dates).
5. Recalling scheduled items from SCHEDULE mode by entering the
date numerically.
6. Recalling scheduled items using the first letter(s) of the item.
7. Recalling scheduled items with a keyword search.
8. Recalling scheduled items using the index display.
Recalling today’s agenda
Press 2nd SCHEDULE .
If nothing has been entered for the day, only the date will be displayed.
Recalling scheduled items from the CALENDAR mode
For example, to recall the schedule for February 19, 1999:
1. Select the CALENDAR mode.
2nd
CALENDAR
’99
2
1 2 3 4 5 6
7 8 9 10 11 12 13
14 15 16 17 18 19 20
21 22 23 24 25 26 27
28
’99
2
1 2 3 4 5 6
7 8 9 10 11 12 13
14 15 16 17 18 19 20
21 22 23 24 25 26 27
28
NOTE: If you don’t know what time a scheduled item, such as a
meeting, will finish, press either
time, then enter the schedule item.
or ENTER following the starting
4. Store the scheduled meeting in the memory.
ENTER
2. Select the 19th with the cursor
movement keys.
11
You may also recall February 19 in the CALENDAR mode by
pressing C•CE , entering the date, and pressing ENTER .
3. Recall the schedule display.
SCHEDULE
1. Enter the date entry mode.
SCHEDULE C•CE C•CE
2. Enter the date.
02 17 1999
3. Recall the agenda for that date.
Recalling scheduled items from the SCHEDULE mode with
and
ENTER
For example, to recall the schedule for January 10, 1999 (today):
Recalling scheduled items using the first letter(s) of the item
1. Select the SCHEDULE mode to display today’s schedule.
For example, to recall the “Dr.”-related items scheduled after January
10, 1999 (today):
2nd
SCHEDULE
2. Recall the schedule for the next day.
The agenda for the next day will be displayed. If there are several
to recall them in chronological order.
items on the same day, use
Recalling only scheduled dates (skip empty dates)
1. Search for all days containing scheduled items.
SCHEDULE
2nd
2. Press 2nd
to recall the next scheduled items.
NOTES:
• After the last scheduled item has been found, “NOT FOUND!” is
displayed, then the previous display reappears. Pressing 2nd
references scheduled items in reverse.
displays the oldest
• Pressing SCHEDULE C•CE C•CE and 2nd
, the most distant future
past scheduled item. If you press 2nd
scheduled item is displayed.
Recalling scheduled items from SCHEDULE mode by
entering the date numerically
This method is handy for recalling scheduled items which are far away.
For example, to recall the schedule for February 17, 1999:
12
1. Select the SCHEDULE mode to display today’s schedule.
2nd
SCHEDULE
2. Enter the first letter(s) and begin the search.
DR.
NOTES:
• This search is not case sensitive.
is pressed, a forward search from the displayed date will
• When
begin for scheduled items beginning with the word “Dr.”
is pressed, a reverse search will take place for items
• If
scheduled before the date presently appearing on the display.
Recalling scheduled items with a keyword search
To search for scheduled items containing the word “meeting” after
January 1, 1999, for example:
1. Recall the schedule for January 1, 1999.
SCHEDULE C•CE C•CE 01 01 1999 ENTER
2. Enter the keyword for the search and begin the search.
MEETING 2nd
The first scheduled item containing the word “meeting” after January 1,
1999 will appear on the display.
2. Display the index.
NOTES:
• The keyword search is not case sensitive.
• To search for additional items containing the word “meeting”, press
2nd
. When no more items containing the word “meeting” are
scheduled, “NOT FOUND!” will appear on the display.
• To browse back through the list of entries containing the keyword,
.
press 2nd
2nd
2/24 Dr. Wilson v
2/25 New products
INDEX
Items scheduled for the specified and any subsequent dates will be
displayed. If there is no scheduled item on the specified or subsequent
dates, the last item will be displayed. If you did not enter the date in step
1 above, the index display will start at the earliest scheduled item.
Recalling scheduled items using the index display
An index of your scheduled entries is available, sorted in chronological
order.
Editing scheduled data
1. Select the SCHEDULE mode and display
the index.
Press 2nd EDIT to enter the edit mode, then use
,
,
,
, INS , DEL or BS to edit the data. For example, to change
“Guest room” within a scheduled item on February 24, to “Meeting room”:
2nd
SCHEDULE
2nd
INDEX
(Up to five entries are displayed at a time.)
2/17
2/19
2/24
2/25
Sales meetin
ABC Project
Dr. Wilson v
New products
The first 12 characters of the first line of each entry are displayed.
2. Enter the edit mode.
2. Select the entry you want to check.
(To move the pointer “ ” up, press
To step to the next or previous page of
or
.)
five entries, press
1. Recall the schedule data to be changed.
SCHEDULE C•CE C•CE 02 24 1999 ENTER
.
2/17
2/19
2/24
2/25
Sales meetin
ABC Project
Dr. Wilson v
New products
2nd
EDIT
WED FEB 24,1999
1:30PM~
Dr. Wilson visit
at Guest room
EDIT
WED FEB 24,1999
1:30PM~
Dr. Wilson visit
at Meeting room
EDIT
3. Move the cursor to the section to be
edited and correct it.
3. Display the details.
ENTER
4. Store the edited data.
NOTE: The entry being displayed when
2nd INDEX is pressed will
appear at the top of the list. If you are at the initial entry display, the
first entry for the day will be at the top of the list. If no entry exists on
that day, the next or the last entry will be at the top.
You can also display an index of entries for a desired date.
1. Select the SCHEDULE mode and enter the date you want to check.
SCHEDULE C•CE C•CE 02 24 1999
ENTER
Copying scheduled data
The copy function operates similarly to the edit mode, instead of
pressing ENTER to store the data, 2nd ENTER are pressed. For
example, if the “ABC Project meeting in room 23” scheduled on
February 19 is also to be held at the same time on March 5, you may
copy it onto the new date as follows:
13
1. Recall the items scheduled for February 19 and enter the edit mode.
SCHEDULE C•CE C•CE 02 19 1999 ENTER 2nd EDIT
2. Change the date.
03 05
EDIT
M/D/Y=03/05/1999
10:00AM~ 2:00PM
ABC Project
meeting in room 23
(You can also change the entire date by pressing
point and re-entering the entire date.)
3. Copy the data.
2nd
C•CE at this
FRI MAR 5,1999
10:00AM~ 2:00PM
ABC Project
meeting in room 23
ENTER
NOTE: You can also delete individual entries from the index display.
Move the pointer “ ” to select the entry you want to delete and press
DEL and Y .
Deleting the agenda for an entire month
For example, to delete the agenda for February 1999:
1. Select the CALENDAR mode and display the calendar for the month
you would like to delete.
CALENDAR C•CE C•CE 02 01 1999 ENTER
2. Delete the agenda for an entire month.
DEL
’99
2
DELETE ? Y/N
Flashing
3. Press
Deleting scheduled data
Y
. (To retain the data, press
1 2 3 4 5 6
7 8 9 10 11 12 13
14 15 16 17 18 19 20
21 22 23 24 25 26 27
N .)
Scheduled data can be erased by:
1. Deleting one agenda item at a time.
2. Deleting the agenda for an entire month.
3. Deleting all of the data in the schedule memory.
Deleting all of the data in the schedule memory
Deleting one agenda item at a time
The Organizer schedule alarm sounds when the time for a scheduled
appointment or other item on the agenda arrives. To stop the alarm
after it starts beeping, simply press C•CE . If C•CE is not pressed, the
alarm will stop automatically after approximately 20 seconds.
For example, to delete the “ABC Project meeting in room 23” scheduled
for March 5:
1. Recall the schedule for that day.
SCHEDULE C•CE C•CE 03 05 1999 ENTER
2. Delete the schedule.
DEL
Flashing
3. Press
Y
. (To retain the data, press
FRI MAR 5,1999
10:00AM~ 2:00PM
ABC Project
meeting in room 23
DELETE ? Y/N
N .)
After deletion, the next agenda item for that day of that date alone will
be displayed.
14
Refer to “Deleting all of the data in each function” on page 30.
Using the schedule alarm
Setting the alarm to ring
The schedule alarm can be set for a scheduled appointment.
1) Select an agenda item and mark it for the alarm with “ ”.
2) Activate the alarm for that item with “ ”.
Once an agenda item has been selected for an alarm and the alarm has
been turned on, the alarm will sound automatically and the relevant item
will be displayed even if the Organizer has been turned off. The alarm
can also be set to sound for secret items without displaying the item.
Setting the schedule alarm
First display the schedule item for which you wish to set the alarm and
press 2nd ALARM . “ ” appears to the left of the starting time for
the scheduled item on the display, to indicate that the alarm has been
set for that item. You can also set the alarm while you schedule an item
on the agenda by pressing 2nd ALARM .
However, when you press 2nd ALARM while “ ” is displayed, the
alarm will be canceled and “ ” will disappear from the display.
For example, to set an alarm for a meeting scheduled on December 17
(“December 17, 1999, 10:00AM - 11:00AM Meeting”) while entering the
schedule item:
1. Enter the date, time, and schedule detail.
2. Set the alarm.
2nd
ALARM
3. Store the item.
ENTER
USING THE ANNIVERSARY
FUNCTION
Anniversaries can be stored in the Organizers by specifying the month
and date (such as wedding anniversaries and birthdays), or month,
week, and day of the week (such as Mother’s Day (second Sunday in
May)). Once a date is designated as an anniversary, the date will be
an anniversary for every year from 1901 to 2099.
Entering anniversaries
FRI DEC 17,1999
10:00AM~11:00AM
Meeting
FRI DEC 17,1999
10:00AM~11:00AM
Meeting
The alarm will sound at the starting time of the meeting.
NOTES:
• “ ” appears or disappears each time 2nd
are pressed.
• If the alarm time you attempt to enter has already passed, the
message “ALARM TIME ELAPSED!” appears briefly. Enter the
correct alarm time.
• After the alarm sound, “ ” will disappear and the scheduled item
will remain in memory without “ ”.
• If “ ” is turned off and the set alarm time has passed, “ ” will
remain in front of the scheduled item.
• The schedule alarm may not sound when the time for a schedule
appointment or other item on the agenda arrives while you are
transferring data or freeing up memory.
For example, to enter “Nancy’s birthday” on February 12:
1. Select the ANNIVERSARY mode.
ANN
1 (MONTH/DAY)
M/D= /
M=MONTH D=DAY
2. Enter the date and label.
02 12 ENTER
FEB 12
–ANN–
Nancy’s birthday
3. Enter the description.
To enter an anniversary specifying the month, week, and day of the week:
1. Press ANN
2
(MONTH/WEEK) to select ANN2.
2. Enter the month, week,
and day of the week.
05 2 0
3. Press ENTER .
WEEK:2
MAY
SUN
M/W/D=05/2/0
M=MONTH W=WEEK
D=DAY 0:S 1:M 2:T
3:W 4:T 5:F 6:S
4. Enter the description, then press ENTER .
Anniversaries are also automatically marked with the tag ( ) in the
center of the monthly calendar. (Refer to page 10.)
15
NOTE: To recall, edit, or delete anniversaries entered in ANN2 (with
month, week, and day of the week specified), select 2 instead of
1 in the procedures below.
Recalling anniversaries
In the ANNIVERSARY mode, anniversaries can be recalled with the
sequential search or in the index display.
Editing anniversaries
To edit an anniversary entry, for example, such as changing “Nancy’s
birthday” to “Cathy’s birthday”:
1. Recall the entry to be changed.
ANN
1 ( 2 )
or
repeatedly until “Nancy’s birthday” appears.)
(Press
2. Enter the edit mode.
2nd
EDIT
1. Select the ANNIVERSARY mode.
ANN
1 ( 2 )
3. Move the cursor to the letter you wish
to change and change it.
2. Recall the anniversary.
Each time
or
is pressed, the next entry will be recalled in
calendar sequence (forward or backward).
Index display
Select the ANNIVERSARY mode and display the index.
ANN
2nd
1
( 2 )
INDEX
Up to five entries are displayed at a time.
2/12
4/ 7
7/ 1
10/10
Nancy’s birt
Founding of
Wedding anni
Mr. Brown’s
The first 12 characters of the first line of each entry are displayed.
Press
or
to move the pointer “ ” down or up to select an
or
to step to the next or previous page of five
entry, or
entries. Press ENTER to display details of the entry.
NOTE:
The entry being displayed when 2nd
appear at the top of the list.
16
FEB 12
–ANN–
Nancy’s birthday
EDIT
Sequential search
INDEX is pressed will
FEB 12
–ANN–
Cathy’s birthday
4. Press ENTER
To change the date, week, or day of the week, first enter the edit mode,
until it flashes. Enter the new date, week, or day of the
then press
week, then press ENTER . To cancel any changes, press C•CE twice
before pressing ENTER .
NOTE: If 2nd ENTER are pressed instead of ENTER after making
changes, data can be copied. (Refer to “Copying scheduled data” on
page 13.)
Deleting anniversaries
Deleting one entry
To delete the “Cathy’s birthday” entry, for example:
1. Recall the entry to be deleted.
ANN
1 ( 2 )
repeatedly until the entry is displayed.)
(Press
2. Delete the entry.
FEB 12
–ANN–
Cathy’s birthday
DELETE ? Y/N
DEL
3. Press
Y
. (To retain the entry, press
N .)
NOTE: You can also delete individual entries from the index display.
Move the pointer “
DEL and Y .
USING THE TELEPHONE
DIRECTORY
” to select the entry you want to delete and press
Deleting all entries
Refer to “Deleting all of the data in each function” on page 30.
The telephone directory can store names, telephone numbers,
addresses, and so on. The Organizer’s telephone directory consists of
TEL1, TEL2, and TEL3 for keeping business, private, and other listings
separately.
Designating the filenames
Filenames for the directories can be input in the miscellaneous function
mode.
1. Recall the miscellaneous function menu.
2nd FUNCTION 4
< TEL FILE
1:[ TEL 1
2:[ TEL 2
3:[ TEL 3
NAME >
2. Store the directory filenames.
(Press ENTER to determine the
filename.)
< TEL FILE
1:[Business
2:[Private
3:[ TEL 3
NAME >
]
]
]
]
]
]
NOTES:
• Use up to 10 letters for designating a filename.
• Not to assign a filename to a directory, skip this step by pressing
ENTER .
• To discontinue the entry of a directory filename, press C•CE twice.
Entering entries
The directories are cycled through each time TEL is pressed:
TEL1 → TEL2 → TEL3 → TEL1 → ...
17
Entering telephone entries into the TEL1 directory
To enter the following sample entry into the TEL1 directory, follow steps
1 to 4 below:
Edwards Bob
201-555-5600
FAX 555-1869
President, ABC Co.
1. Select the TEL mode.
TEL
(When
cal order.)
is pressed, a search of the entries begins in alphabeti-
3. Recall subsequent entries.
Business
NAME ?
NOTE: Pressing
Press TEL repeatedly until the TEL1
directory name appears.
2. Enter the name of the first party, then
press ENTER .
2. Recall the first entry.
Edwards Bob
NUMBER ?
recalls the entries in reverse order.
Recalling an entry with a direct search
To recall an entry which starts with “E” in the TEL1 directory, for example:
1. First select the TEL mode (TEL1 directory).
2. Press C•CE E
3. Enter the party’s telephone number and
fax number.
(To enter hyphen “–”, press SMBL to
display the list and then press 1 , or
– ( U key)).
press 2nd
Edwards Bob
201-555-5600
FAX 555-1869
President,ABC Co.
4. Enter the person’s position and company name, etc.
5. Press ENTER .
Recalling entries
.
Edwards Bob
201-555-5600
FAX 555-1869
President,ABC Co.
Subsequent entries will be recalled in sequential order. If there is no
matching entry which starts with the character you entered, the
subsequent entry found is displayed. This search is not case sensitive.
Recalling an entry with a keyword search
To recall an entry containing the word “ABC Co.” in the TEL1 directory,
for example:
Telephone entries can be recalled using the following four methods:
1. Sequential search, which retrieves the entries in alphabetical order
2. Direct search using the first letter(s) of the party’s name
3. Keyword search, for any word contained in the entry
4. Index display
1. Select the TEL mode (TEL1 directory).
Recalling an entry with a sequential search
Recalling an entry with index search
1. Select the directory.
Entries of a directory can be displayed alphabetically in an index. For
example, to display the index of the TEL1 directory entries:
TEL
(Press TEL repeatedly until the desired directory name appears.)
18
2. Press C•CE ABC SPACE CO. 2nd
.
Pressing 2nd
displays successive entries containing the word
“ABC Co.”. This search is not case sensitive.
1. Press TEL 2nd
INDEX .
Up to five names can be displayed at a
time.
Davis Mike
Edwards Bob
The first 18 characters of the first line of each entry are displayed.
To display the first entry beginning with a particular character, press the
desired character key. If there is no entry for that character, the first
subsequent entry will be displayed.
For example, if
S
or
P
is pressed at the left display below:
Hamilton Olivia
Louis Greg
MacDonald Edith
Scott Teresa
Smith Robert
Scott Teresa
Smith Robert
Weiner Mike
Editing entries
To edit an entry, recall it, then press 2nd EDIT to enter the edit mode.
Use DEL or BS to delete characters. With the cursor “■” you may
type over the characters. Press INS to change the cursor to “ ” and
you may insert new characters. After making changes, press ENTER
to store the new entry.
To cancel any changes, press C•CE twice before pressing ENTER .
NOTE: If 2nd ENTER are pressed instead of ENTER after making
changes, data can be copied. (Refer to “Copying scheduled data” on
page 13.)
Deleting entries
Either a single entry or an entire directory can be deleted.
Deleting a single entry
Pressing
and
scrolls the page forward and backward. To
and
to
see the whole entry, move the pointer “ ” using
select the desired entry, and press ENTER .
NOTES:
• This search is not case sensitive.
• The characters are sorted in the following order:
1. Select the directory containing the entry to be deleted.
TEL (Repeatedly)
2. Recall the entry to be deleted.
Use any of the methods (1 to 3) mentioned above (page 18).
3. Delete the entry.
DEL
4. Press
Y
. (To retain the data, press
N .)
Space
NOTE: You can also delete individual entries from the index display.
Display the index of the desired directory with 2nd INDEX , select the
entry you want to delete with the pointer “ ” and press DEL and Y .
Deleting entire directories (TEL1, TEL2, or TEL3)
Refer to “Deleting all of the data in each function” on page 30.
19
USING THE MEMO
FUNCTION
NOTE: When
is pressed after the last entry is displayed, “NOT
FOUND” is displayed.
Recalling memos with a direct search
For example, to search for a memo beginning with the letter “A”:
The Organizer’s memo function conveniently stores notes or other bits
of information not appropriate for the schedule or other directories.
1. Select the MEMO mode, then search for a memo starting with the
letter “A”.
MEMO A
Entering memos
When the first some letters of the memo are matched with those you
entered, the matched memo is displayed.
For example, to enter “X’mas presents list, Sweater for Jill, Ring for
Mother”:
NOTE: Pressing
or
after the matched data is displayed
searches in the same direction as in the sequential search.
1. Select the MEMO mode.
This search is not case sensitive.
MEMO
2. Store the data.
X’mas presents list
Sweater for Jill
Ring for Mother
2. To search subsequent memos containing the keyword, press:
2nd
.
Recalling memos
This search is not case sensitive.
Memos can be recalled using:
1. Sequential search in the order of entry
2. Direct search for the first letter(s) of the entry
3. Keyword search for a specified letter(s)
4. Index display
Recalling memos using the index display
To view an index of memos, press 2nd
INDEX in the MEMO mode.
Recalling memos with a sequential search
1. Select the MEMO mode and recall the entry.
MEMO
20
For example, to search memos containing the word “Jill”:
1. Enter the keyword in the MEMO mode.
MEMO JILL 2nd
Always press ENTER to store the memo.
2. Press
to display the next memo. (Press
memos in the reverse direction.)
Recalling memos with a keyword search
to search
Price list
Sales figure
Time table-1
Time table-2
How to use new PC
or
The first lines of up to five memos are displayed. Press
to move the pointer “ ” down or up to select the memo, and press
ENTER to view it. Press
and
to step through your list of
memos a page at a time.
NOTE: The memo being displayed when 2nd INDEX is pressed will
appear at the top of the list. Otherwise, the first memo will be
displayed at the top.
Deleting entire memos
Editing memos
Refer to “Deleting all of the data in each function” on page 30.
Memo editing capabilities are similar to those in the SCHEDULE mode.
To edit a memo, recall it, then press 2nd EDIT to enter the edit mode.
Use DEL or BS to delete characters. With the cursor “■” you may
type over the characters. Press INS to change the cursor to “ ” and
you may insert new characters. After making changes, press ENTER
to store the new entry.
To cancel any changes, press C•CE twice before pressing ENTER .
NOTE: If
2nd
NOTE: You can also delete individual entries from the index display.
Display the index of the desired memo with 2nd INDEX , select the
memo to be deleted with the pointer “ ”, and press DEL and Y .
ENTER are pressed instead of ENTER after making
changes, data can be copied. (Refer to “Copying scheduled data” on
page 13.)
Rearranging memos
In the index display the order in which memos are recalled can be
changed.
For example, when there are five memos stored in the order of
“memo1” through “memo5”, to place “memo2” after “memo4”:
1. Select the MEMO mode and go to the
index display.
MEMO
2nd
INDEX
2. Move the pointer to the entry you want to
move and specify it.
Deleting memos
INS
Either a single memo or the entire memo list can be deleted.
(“memo2” is blinking.)
3. Move “memo2” after “memo4”.
Deleting a single memo
For example, to delete the memo “X’mas presents list”:
1. Select the MEMO mode and recall the data.
(“memo2” is blinking.)
memo1
memo2
memo3
memo4
memo5
memo1
memo2
memo3
memo4
memo5
memo1
memo3
memo4
memo2
memo5
MEMO
(Press
appears.)
repeatedly until the memo item “X’mas presents list”
2. Delete the MEMO.
Y
. (To retain the data, press
After the deletion, the next item will appear.
ENTER
NOTES:
DEL
3. Press
4. Store the new order.
N .)
• Press C•CE to cancel any changes.
• If there is any secret entry between “memo4” and “memo5” which is
hidden from view by the SECRET function, “memo2” will be stored
before “memo5” but not immediately after “memo4”. (Refer to
“USING THE SECRET FUNCTION” on page 27.)
21
USING THE TO DO
FUNCTION
The TO DO function is a very convenient and efficient way to keep
track of things you have to do. You can easily recall a list of all the
things you have to do in order of priority.
Entering things to do
For example, if you have to “call Frank about a sales meeting”, but it is
not the most important thing (priority 2), perform the steps below:
1. Select the TO DO mode.
TO DO
TO DO
DESCRIPTION ?
Recalling TO DO entries
TO DO entries can be recalled using:
1. Sequential search in the order of priority
2. Direct search for the first letter(s) contained in the entry
3. Keyword search for word(s) contained in the entry
4. Index display
Sequential search
Use
and
to step sequentially through the entries in the TO
DO mode. If there are no more entries, “NOT FOUND!” is displayed.
Direct search
In the TO DO mode, enter the letter(s) and press
or
to
and
to recall other
search up or down for the entry. Use
entries sequentially. If there is no matching entry, “NOT FOUND!” is
displayed. This search is not case sensitive.
Keyword search
2. Enter a description about the activity, then press ENTER .
3. Enter the priority.
2
Call Frank about a
PRIORITY:2
4. Store the entry.
ENTER
In the TO DO mode, enter the keyword and press 2nd followed by
or
. Press 2nd
or 2nd
to recall subsequent
entries containing the keyword. If there is no matching entry, “NOT
FOUND!” is displayed. This search is not case sensitive.
Using the index display
To display the index, press 2nd
NOTES:
• Press C•CE twice to cancel the entry.
• To begin another entry, press C•CE or simply begin entering the
description for the new entry.
• The priority can be set to any number 0-9 or letter A-Z or just left
blank by pressing ENTER . Small letters cannot be entered.
• Order of priority is from 0-9, A-Z, then space.
22
[2]
[2]
[ ]
[ ]
[ ]
Priority
Use
INDEX in the TO DO mode.
Call Frank abo
Prepare sales
Go to bank!
Mail a bill to
Call Smith
Item
and
to step through pages of entries. Press
and
to move the pointer “ ” to select an entry, then press ENTER to
display the details of the entry.
NOTE: The listing starts from the entry being displayed when you press
2nd
INDEX , or from the first entry if you are at the initial entry display.
Checking off completed items
For example, to check off the sales meeting preparation:
1. Select the TO DO mode and go to the index display.
TO DO
2nd
Entries can be deleted one at a time either directly or through the index
display. Recall the whole entry, or select the entry in the index display.
Press DEL , then Y . (To retain the data, press N .)
2. Move the pointer to select the “Prepare ...” entry.
(
TO DO items can be deleted in three ways.
1. A single entry at a time
2. All checked entries only
3. All entries
Deleting a single entry
INDEX
3. Mark it as done.
Deleting TO DO items
[ ] Prepare sales
Deleting checked entries or all of the entries
Refer to “Deleting all of the data in each function” on page 30.
is the same key as SMBL .)
NOTES:
• Entries marked with “
” have the lowest priority.
• You can check the entry off by recalling it and pressing
.
Editing TO DO items
Recall the entry you want to edit, and press 2nd EDIT to enter the
edit mode. Use DEL or BS to delete characters. With the cursor “■”
you may type over the characters. Press INS to change the cursor to
“ ” and you may insert new characters. After making changes, press
ENTER to store the new entry.
To cancel any changes, press C•CE twice before pressing ENTER .
NOTE: If 2nd ENTER are pressed instead of ENTER after making
changes, data can be copied. (Refer to “Copying scheduled data” on
page 13.)
23
USING THE EXPENSE
FUNCTION
4. Enter the description.
5. Press ENTER .
TUE MAR 9,1999
1,200.00
Flight tickets for
inspection abroad
NOTES:
The EXPENSE function is an easy-to-use method of tracking personal
and business expense information. The expense summaries allow you
to see the total expenses for a single day or for a certain period.
Creating expense records
For example, to create an Expense record, supposing the date is
March 9, 1999, and you have just bought flight tickets for a business
trip for $1,200:
1. Select the EXPENSE mode.
EXPENSE
2. Store the expense date.
03 09 1999 ENTER
EXPENSE
DATE ?
M/D/Y= 1/10/1999
TUE MAR 9,1999
AMOUNT ?
The month and the day must be entered using two digits and the year
using four digits. For single digit months or days, enter “0” before the
single digit.
or
.
The date can be changed by pressing either
Numerical values can be input in up to 10 digits including 2 decimal
places.
3. Enter the expense amount.
1200 ENTER
24
TUE MAR 9,1999
1,200.00
DESCRIPTION ?
• Press C•CE to cancel the entry.
• The description field can be skipped by pressing ENTER .
Recalling expense records
EXPENSE records are sorted and stored in chronological order.
Records can be recalled by:
1. Sequential search by date
2. Specifying the expense date
3. Using the index display
Sequential search by date
In the EXPENSE mode, press
or
or C•CE
tially. Pressing C•CE
record, respectively.
to recall records sequenrecalls the first or the last
Specifying the expense date
Enter the date for which you want to check the expense in the
(do not press ENTER ). The first
EXPENSE mode, then press
to recall
record for the specified date will be displayed. Press
subsequent items.
Using the index display
Expense records are listed with dates and sorted in chronological order
in the index display.
Press 2nd INDEX in the EXPENSE mode
3/ 9 Flight ticke
3/10 Parking
to display the index.
Up to five records can be displayed at a
time.
3/10 Gas
3/11 Rental car
3/12 Taxi
The first 12 characters of the first line of each record are displayed.
or
to move the pointer “ ” down or up, or
or
Press
to step to the next or previous page of five records. Press
ENTER to display details of the record.
NOTE: The record being displayed when 2nd INDEX is pressed will
appear at the top of the list. If you are at the initial entry display, the first
entry for the current date will be at the top of the list. If no entry exists
for that day, the closest entry after or before the day will be at the top.
Editing expense records
NOTES:
• If the secret function (refer to page 27) is turned on, secret records
are invisible and not included in summaries.
• If an inappropriate date is input, no calculation will be made.
Summarizing an expense report for a specific day
1. Display the “EXPENSE REPORT”.
EXPENSE
2nd
EXPENSE
< EXPENSE REPORT >
1:DAILY
2:PERIOD
2. Select “1:DAILY”.
Recall the expense record to be edited, and press 2nd EDIT to edit
the record.
,
,
,
, BS ,
To edit the record in the edit mode, use
INS , and DEL .
To clear a field data, move the cursor to the field, then press C•CE .
After making changes, press ENTER to store the new entry.
To cancel any changes, press C•CE twice before pressing ENTER .
The date specified by the CLOCK mode will be displayed. If that date
is the date desired, press ENTER . Otherwise, enter a date with the
specified format.
NOTE: If
4. Press ENTER to return to the date input display.
2nd
ENTER are pressed instead of ENTER after making
3. Enter a date (March 9, 1999, for
example).
03 09 1999 ENTER
–DAILY–
DATE:MAR 9,1999
1,200.00
changes, data can be copied. (Refer to “Copying scheduled data” on
page 13.)
Summarizing an expense report for a certain period
Deleting expense records
1. Display the “EXPENSE REPORT” by
pressing EXPENSE 2nd EXPENSE ,
then select “2:PERIOD”.
–PERIOD–
FROM: / /
Deleting a single expense record
To delete a single expense record, recall the record or select it in the
index display, then press DEL . To delete the record, press Y . To
retain the record, press N .
Deleting entire expense records
Refer to “Deleting all of the data in each function” on page 30.
Expense summaries
A summary is a collection of records in the Expense memory. Expense
summaries for a specific day and for a certain period can be displayed.
2. Enter the start date (March 9, 1999, for example).
03 09 1999 ENTER
3. Enter the end date (March 15, 1999, for
example).
03 15 1999 ENTER
–PERIOD–
FROM:MAR 9,1999
TO :MAR 15,1999
1,415.25
4. Press ENTER to return to the date input display.
NOTE: If the integer section in the calculation result exceeds 12 digits,
“ ,
,
,
. ” is displayed.
25
USING THE CALCULATOR
FUNCTION
The Organizer’s built-in calculator can perform the four arithmetic
calculations with up to 12 digits.
CALC
Press CALC/CONV to use the calculator
function. Before performing any calculation, press C•CE twice to clear the display.
34 + 57 =
45 + 57 =
34
45
57
The addend
becomes a constant.
91.
102.
68 × 25 =
68 × 40 =
68
25
40
The multiplicand
becomes a constant.
1,700.
2,720.
For subtractions, the subtrahend
becomes a constant. For division,
the divisor becomes a constant.
0.
NOTES:
• Non-zero numbers in the memory cause “-M-” to appear on the
display.
• An error occurs when the integer section of the calculation result
exceeds 12 digits, integer section in the memory exceeds 12 digits,
or a number is divided by zero. (“-E-” is displayed.)
Press C•CE to cancel the error.
When the integer section of the calculation is between 13 digits and
24 digits, a round number is displayed as follows:
Example of a round number
456789012345
-E789
360.406530740
(360.406530740 × 1012 = 360406530740000)
Operation
12 × 3 + 5 =
(–24) ÷ 4 – 2 =
12
24
26
Operation
What is 10% of 200?
200
What percentage is
9 of 36?
9
10
5
4
2
25 – 9 =
(43)2 =
500
25
25.
10
220.
20
400.
4.
9
4
4,096.
0.125
1/8
8
(Summation)
Clear the memory before performing
any calculations
25 × 5 =
–) 84 ÷ 3 =
+) 68 + 17 =
(Total) =
84
68
CM
25
5
3 M–
17 M+
M+
RM
-M-M-M-M-
125.
28.
85.
182.
-M-M-
6.
136.
(Temporary memory)
Display
(answer)
3
What is 500 after a
20% discount?
20.
36
What results from a
10% increase of 200? 200
Example
Display
(answer)
Example
41.
–8.
(14 – 3 × 2) ×
(52 – 35) =
52
(Constant memory)
135 × (12 + 14) =
(12 + 14) ÷ 5 =
135
CM
CM
RM
14
M+
3
35
12
14
RM
5
2
RM
M+
M–
-M26.
-M- 3,510.
-M5.2
USING THE CONVERSION
FUNCTION
USING THE SECRET
FUNCTION
The Organizer supports functions to convert denominations and units
into others.
Setting the currency rate
Conversion display number
The Secret function allows you to protect confidential data with a
password so that no unauthorized person can access it. You may mark
certain entries as private; displaying or modifying such data requires
the password. Data can also be classified from the SCHEDULE, TEL,
MEMO, TO DO, ANNIVERSARY, and EXPENSE modes.
1. Press CALC/CONV ( CALC/CONV ).
2. To select the desired conversion display,
or
repeatedly.
press
3. Press 2nd
CONVERSION
$ £
1
0.
0.
EDIT .
4. Enter the conversion rate.
CONVERSION
$ DM
5. Press ENTER
2
Registering a password
To register “1234” as the password, for example:
1. Display the password entry prompt.
2nd
SET PASSWORD
SECRET
[
]
0.
2. Enter “1234” as the password.
1234
NOTES:
3. Store the password in the memory.
• To change the denomination or unit, press
after step 3 above,
then enter the new denomination or unit. Up to 7 characters can be
entered for an entry.
• Up to 10 digits can be entered for a conversion rate.
• Up to 12 digits can be used for a calculation.
• Setting the currency rate is allowed only for 3 conversion displays
(No.1, 2 and 3).
or
to select the desired conversion display.
2. Enter the amount, then use
denominations or units.
Make sure it is right!
This is the last time you will ever see
the password.
S
PASSWORD
[1234]
IS NOW SET
After the password is registered, the secret function is set to operate
and “ S ” will appear. After rechecking the password, press C•CE .
NOTES:
Performing a conversion
1. Press
ENTER
or
to convert between these
• The password can contain up to 7 letters, numbers, spaces, or
).
symbols (except
• If you forget the password, you will have to erase all your secret data.
27
• If a password has been already registered, after press 2nd
SECRET “ALLOW ACCESS TO SECRET DATA” will be displayed
instead. Refer to “What to do if you forget the password” on page
29, and delete the previous password and all secret data.
Declassifying secret data by removing the secret code
Encoding data as secret data and
declassifying secret data
1. Recall the secret data.
Coding previously stored data as secret data
For example, to convert the “ABC BANK” entry in the MEMO mode to
secret data:
1. Recall “ABC BANK”.
MEMO ABC
S
2. Enter the edit mode, then press
2nd MARK
to put “ ” on the
display.
2nd
2nd
EDIT
S
EDIT
ABC BANK
Chicago Branch
Account No.
272-0011223
ABC BANK
Chicago Branch
Account No.
272-0011223
ENTER
When you press C•CE or any one of the other mode keys, “ABC BANK”
will disappear from the display. This data is invisible unless the secret
function is turned off. (Refer to “Turning off the secret function” on
page 29.)
Encoding new data as secret data
1. Enter new data.
2. Press 2nd
MARK
before storing the data.
” is displayed.
4. Press ENTER to store the data.
28
ABC BANK
Chicago Branch
Account No.
272-0011223
MEMO
2nd MARK
2nd
Only data marked with “ ” will be displayed.
repeatedly until the entry to be declassified
Press 2nd
appears.
2. Turn off “
”.
2nd
EDIT
2nd
MARK
EDIT
ABC BANK
Chicago Branch
Account No.
272-0011223
3. Store the data as non-secret.
ENTER
MARK
3. Store this data as secret data.
3. “
Perform the steps below to declassify “ABC BANK” for example.
However, note that before declassifying secret data, the secret function
must be turned off. (Refer to “Turning off the secret function” described
later.)
Turning on the secret function
The secret function turns on automatically whenever the power is
turned off and back on again. To turn the secret function on manually:
1. Recall the secret function menu.
2nd
SECRET
1:HIDE SECRET
2:DELETE THE
PASSWORD
2. Select “1:HIDE SECRET”.
1
3. “SECRET DATA IS HIDDEN!” is displayed and “ S ” appears.
Turning off the secret function
1. Recall the prompt to turn off the
secret function.
MEMO
S
PASSWORD ?
[
ALLOW ACCESS TO
SECRET DATA
[
2nd
3. Select “2:DELETE THE PASSWORD”.
2
]
]
4. Enter the old password and delete it.
1234 ENTER
SECRET
2. Enter the password. (“1234” is an instance used in the previous
example.)
1234 ENTER
3. “SECRET DATA ACCESSIBLE!” appears and the secret function is
turned off.
NOTES:
• Entering an incorrect password displays “INCORRECT PASSWORD!”
and initial mode screen is displayed.
• The secret function remains on after manual or automatic power off.
5. To register the new password, recall the password entry prompt.
2nd
SECRET
6. Enter the new password, “9876”.
9876 ENTER
Make sure it is right!
This is the last time you will ever see
the password.
S
PASSWORD
[9876]
IS NOW SET
What to do if you forget the password
Recalling secret data
If you forget the password for the secret function, you have to delete
the password. Follow the procedure below to delete the password.
Before recalling secret data, turn off the secret function. After the
secret function is turned off, secret data can be recalled in the same
manner as non-secret data.
To recall secret data only, perform the following steps:
NOTE: When you delete the password, all your secret data is also
deleted.
1. Press 2nd
MARK
2. Press 2nd
.
1. Recall the miscellaneous function menu.
2nd
.
3. Secret data is recalled. (“
” is used as a keyword.)
Deleting and changing the password
For example, to change the password “1234” to “9876”:
1. Turn off the secret function.
2nd SECRET 1234 ENTER
FUNCTION
2. Select “3:DATA DELETION” then display
the second list.
3
< DATA DELETION >
1:TO DO
2:SECRET DATA
3. Select “2:SECRET DATA”.
2
4. Press
Y
. (To retain the data, press
N .)
2. Recall the secret function menu.
2nd
SECRET
29
USING THE MISCELLANEOUS
FUNCTION
• The names “TEL1”, “TEL2”, and “TEL3” may be altered according to
the names you specified. (Refer to “Designating the filenames” on
page 17.)
Adjusting the contrast
The miscellaneous function menu supports functions for MEMORY
CHECK, LCD CONTRAST, DATA DELETION, TEL FILE NAME,
BACKLIGHT SETUP, DATE FORMAT, and FREE UP MEMORY.
NOTE: The menu screen is displayed occasionally in two separate
to display the second screen. Press
displays. Press
return to the initial screen.
1. Recall the miscellaneous function menu.
2nd
FUNCTION
2. Select “2:LCD CONTRAST”.
2
< LCD CONTRAST >
–DARK
–LIGHT
to
or
3. Press
to darken or lighten the display.
4. After adjustment, press C•CE .
Checking the memory capacity
The memory check function indicates how much of the memory is in
use and also the number of entries stored in the respective functions.
To check the memory capacity:
1. Recall the miscellaneous function menu.
2nd
FUNCTION
2. Select “1:MEMORY CHECK”.
1
< FUNCTION >
1:MEMORY CHECK
2:LCD CONTRAST
3:DATA DELETION
4:TEL FILE NAME
TEL 1 :52
TEL 2 :30
TEL 3 :15
E
F
The number of entries in each function and the memory capacity graph
(including unnecessary space) will be displayed. To scroll the screen,
or
. To return to the menu, press C•CE .
press
NOTES:
• When the memory capacity graph indicates almost 100% usage, delete
unnecessary data and free up memory to make room for new entries.
30
Deleting all of the data in each function
All of the data in each mode can be deleted using the miscellaneous
function. For example, to delete all data for TEL1:
1. Recall the miscellaneous function menu.
2nd
FUNCTION
2. Select “3:DATA DELETION”.
3
3. Select “1:TEL ”.
1
4. Select “1:TEL1”.
1
< DATA DELETION >
1:TEL
2:SCHEDULE
3:MEMO
4:EXPENSE
< DATA DELETION >
1: TEL 1
2: TEL 2
3: TEL 3
The names “TEL1”, “TEL2”, and “TEL3” may be altered according to
the names you specified.
5. Press
Y
. (To retain the data, press
N .)
NOTE: When the secret function is turned on, “SECRET ON MODE”
will be displayed. To delete all data relating to a function, be sure to
turn off the secret function. (Refer to “Turning off the secret function”
on page 29.)
SCHEDULE and ANNIVERSARY
1.
2.
3.
4.
5.
Setting the date format
To change the default date format to “day. month. year”:
1. Recall the miscellaneous function menu.
2nd FUNCTION .
2. Recall the second list of functions.
Press 2nd FUNCTION .
Select “3:DATA DELETION”.
Select “2:SCHEDULE”.
Select “1:SCHEDULE”, “2:ANN1”, or “3:ANN2”.
Press Y to delete all relating data. Press N
to cancel.
< FUNCTION >
1:BACKLIGHT SETUP
2:DATE FORMAT
3:FREE UP MEMORY
3. Select “2:DATE FORMAT”.
2
< DATE FORMAT >
4. Change the date format.
< DATE FORMAT >
MEMO/EXPENSE/TO DO
1. Press 2nd FUNCTION .
2. Select “3:DATA DELETION”.
3. Select “3:MEMO”, “4:EXPENSE”, or “1:TO DO”. (To select “1:TO
DO”, press
)
4. Press Y to delete all relating data. Press N to cancel. (For
TO DO, deletion of all entries or all checked (done) entries can be
selected.)
5. Store the new setting.
MONTH/DAY/YEAR
DAY.MONTH.YEAR
MONTH/DAY/YEAR
DAY.MONTH.YEAR
ENTER
Freeing up memory
Refer to “What to do if you forget the password” on page 29.
Deleting or modifying data during operation can leave unnecessary
space in the memory of the Organizer.
Delete unnecessary data when the memory is full and then free up
memory.
Determining the backlight setup
1. Display the function menu.
To determine the time to turn the backlight off automatically, perform
the following steps:
2. Display the function list on the second display.
SECRET
1.
2.
3.
4.
5.
Press 2nd FUNCTION .
Press
to display the following screen.
Select “1:BACKLIGHT SETUP”.
Select the desired seconds using
and
Press ENTER to determine the setup.
2nd
FUNCTION
3. Select “3:FREE UP MEMORY”.
3
.
The message “WORKING...” is displayed indicating that the
memory will be freed up.
31
USING THE OPTION
FUNCTION
NOTES:
• The following situations may display the
DO YOU WANT TO
message shown on the right.
FREE UP MEMORY ?
(It is recommended to press Y to free
(Yes/No)
up memory.)
– When the power is turned on (except
that the power is automatically turned
on with the Schedule alarm).
– When “DATA DELETION” in FUNCTION menu is selected.
• The indication “WORKING...” shown on the side of the receiving
Organizer at the beginning or end of the data transmission means
that the memory has begun to be freed up automatically.
• The indication “Replace the OPERATING batteries!” shown at the
time of freeing up memory means that the operating batteries are
almost exhausted. Replace them with new ones then try again to
free up memory.
• The backlight function does not work while the memory is being
freed up.
The Organizer can transfer data to/from SHARP Organizers and
personal computers. The table below shows the models that can be
connected with the Organizer, and data transfer allowed between the
Organizer and model
Model connected
Direction of data transfer
→ : Data transferred to
YO-150/YO-170
← : Data transferred from
YO-150/YO-170
Remarks
YO-150/170/470
Data can be transferred
by entry or mode (file).
→
←
When the Organizers
are the same model,
data can be transferred to make
backup data and it
can be restored.
PC
Data can be transferred
by mode (file).
→
←
Data can be transferred to make
backup data in a PC
and it can be restored.
Data can be transferred by entry from
the PC to the
Organizer.
NOTES:
• To connect between SHARP Organizers (YO-150/170/470), the cable
CE-300L (optionally available) is required. To connect the Organizer
with a PC, communication software CE-490W (optionally available) is
required.
32
• The indication “WORKING...” shown on the side of the receiving
Organizer at the beginning or end of the data transmission means
that the memory has begun to be freed up automatically.
• The indication “Replace the OPERATING batteries!” shown when
2nd OPTION are pressed means that the operating batteries are
almost exhausted. Replace them with new ones then try again to
transfer data.
Transferring data between Organizers
A single data entry or entire data in a mode (TEL1, 2, 3/SCHEDULE/
MEMO/TO DO/EXPENSE/ANN1, 2) can be transferred between
Organizers.
NOTES:
• Turn both of the Organizers off first before connecting them with the
SHARP-specific cable (CE-300L, optionally available).
Transferring data by entry
To transfer an entry in a mode :
1. Display the entry to be transferred to the other Organizer on the
transmitting Organizer.
2. Set the receiving Organizer to the mode in which the transmitting
Organizer is entered.
3. Press 2nd OPTION on both the
Organizers.
The following OPTION menu is
displayed.
4. Press
2
on the receiving Organizer (to select “RECEIVE”).
5. Press
1
on the transferring Organizer (to select “SEND”).
6. Data transfer is started.
Messages are displayed on the respective Organizers while data is
being transferred. When these messages are no longer displayed,
the data transfer is completed.
To verify data while it is transferred, select
receiving Organizer in step 4.
2
1
3
< UNIT TO UNIT >
1:SEND
4:BACKUP
2:RECEIVE 5:RESTORE
3:VERIFY
3
(VERIFY) on the
Transferring data by mode
To transfer all data in a mode:
1. Enter the mode from which data is to be transferred to the other
Organizer on the transmitting Organizer.
• The following descriptions assume connections between the same
models.
• When an error occurs, the following error
< UNIT TO UNIT >
message is displayed on the receiving or
I/O DEVICE
transmitting unit, or both the units.
ERROR !
Perform steps 2 to 6 described in “Transferring data by entry”.
NOTE: When the secret function is turned on, an error message is
displayed on the receiving or transmitting Organizer, or both the
Organizers. Be sure to turn off the secret function before transferring
data by mode.
33
Transferring data to make backup
All data in the Organizer can be transferred to another Organizer. (The
Organizers must be the same model.) To do this, perform the following
steps:
1. Press 2nd OPTION on both the Organizers.
The OPTION menu is displayed.
2. Press 5 (or 2nd
“RESTORE”).
2 ) on the receiving Organizer (to select
1 ) on the transmitting Organizer (to select
3. Press 4 (or 2nd
“BACKUP”).
A confirmation message is displayed.
4. Press Y to the confirmation on the transmitting Organizer.
Backup data transfer is started. Messages are displayed on the
respective Organizers while the data is being transferred. When
these messages are no longer displayed, the backup data transfer
is completed.
• When the Organizers are not in the same mode before transferring
data by entry or mode, “DATA ERROR!” is displayed and no data
transfer is allowed.
However, directories in the TEL mode are excluded from this rule.
For example, data in the TEL1 directory can be transferred to the
TEL3 directory.
• When the communication cable is disconnected during data transfer,
“I/O DEVICE ERROR!” is displayed. Check that the Organizers are
connected correctly, then start the steps again.
Transferring data between the
Organizer and PC
Use SHARP’s Organizer Link software CE-490W (including the specific
cable) for Windows 95. It enables you to transfer data between your
Organizer and a PC, make a backup copy, or restore the backup into
your Organizer. Use CE-490W to secure your important data or share
data in the Organizer with a PC.
NOTES:
• Press ON to abort data transmission. When backup data transfer is
aborted, data already transferred to the receiving Organizer is cleared.
• When an error occurs during data transfer, press C•CE to clear the
error.
• Turn off the secret function before transferring data by mode. If the
secret function is turned on, data cannot be transferred by mode.
• The Backlight is turned off during data transfer. (When the Backlight
is turned on, it is automatically turned off at the beginning of data
transfer.)
• When “MEMORY FULL” is displayed and data transfer is aborted,
delete unnecessary data on the receiving Organizer, then start the
steps from the beginning.
34
NOTE: SHARP’s CE-490W may not be available when you purchase
the Organizer. Please contact an authorized SHARP dealer for more
information or call SHARP at 800-BE-SHARP.
APPENDIX
Caring for your Organizer
Do not carry the Organizer around in your back
pocket, because sitting on it may break it. The
display is made of glass and is particularly
vulnerable.
Keep the Organizer away from heat (on a car
dashboard or near a heater, for example),
humidity, and dust - these may cause
malfunction.
Do not drop it or allow anything to hit it.
• This product is not waterproof. Do not use it or store it where fluids,
for example water, can splash onto it. Raindrops, water spray, juice,
coffee, steam, perspiration, etc. will also cause malfunction.
• Do not carry the Organizer in your pocket or bag together with sharp
or hard objects, because they may scratch the Organizer.
When trouble occurs
RESET procedure
An impact or a strong external electrical field may disable the keys.
The impact or external electrical field may also erase some or all of
data in the Organizer’s memory. In such a case, press the RESET
switch with the tip of a ball-point pen or similar object, but not anything
breakable (like a pencil point or needle).
ALL RESET procedure
If a problem occurs after replacing the batteries, or if the Organizer
does not function properly even after the RESET procedure above,
perform the following steps:
1. While holding ON , press the RESET switch. Release the RESET
switch first, then ON . The message below is displayed.
CLEAR ALL DATA
C•CE
ON
OK (Y/N) ?
C
Do not press the keys with a sharp pointed
object.
O
M
R
TE
PU
LI
K
N
Clean it with a soft, dry cloth and use no
solvents (no paint thinner or benzine, etc.).
2. Press
N .
CAUTION: Do not press
Y in step 2. Pressing
data and resets the clock.
Y
deletes all
35
Troubleshooting
If the Organizer malfunctions, go through the following checklist before
sending it for repair.
Problem
The names and zone numbers of the
cities in the WORLD clock
Zone
number
Remedy
Nothing is displayed
after pressing ON .
• Adjust the display contrast (page 30)
• Replace the batteries (page 36).
Display contrast is
insufficient.
• Adjust the display contrast (page 30).
• Replace the batteries (page 36).
The display is too dark
(symbols are
displayed faintly).
Adjust the display contrast (page 30).
Keys do not beep
when pressed.
Press 2nd
The Organizer turns on
but the keyboard is
frozen.
Reset the Organizer (page 35).
“MEMORY FULL” is
displayed.
There is no room for the data you want to
store. Delete all unnecessary data first and
then free up memory (Page 31).
Alarm does not sound
at the set time.
Press 2nd
14).
Display dims while
pressing keys.
The operating batteries are becoming
weak. Replace the batteries (page 36).
The Backlight does not
function.
The operating batteries are becoming
weak. Replace the batteries (page 36).
to display “
to display “
” (page 4).
” (page
1
2
3
3.3
4
5
6
6.3
7
7.3
8
8.3
9
9.3
City
AUCKLAND
NOUMEA
SYDNEY
ADELAIDE
TOKYO
HONG KONG
BANGKOK
YANGON
DHAKA
NEW DELHI
KARACHI
KABUL
DUBAI
TEHRAN
Zone
number
10
11
12
13
16
17
18
19
20
21
22
23
24
City
MOSCOW
CAIRO
PARIS
LONDON
RIO DE JANEIRO
CARACAS
NEW YORK
CHICAGO
DENVER
LOS ANGELES
ANCHORAGE
HONOLULU
MIDWAY
Replacing batteries
Batteries used in the Organizer:
Type
Model
Qty.
Use
Lithium battery
Lithium battery
CR2032
CR2032
2
1
Unit operation
Memory backup
The standard built-in clock is powered by the operating batteries.
• Do not remove both the operating and memory backup batteries
simultaneously. Data in the memory is cleared.
• Be sure to write down any important information stored in memory
before replacing the batteries.
36
If the batteries become weaker (the alarm or the key beep does not
sound), the power may go off during operation or the Organizer may
fail to turn on. The memory contents will still be retained by the
memory backup battery. Replace the operating batteries to avoid loss
or alteration of data.
Precautions on battery use
Always replace both operating batteries at the same time. Do not use
an old battery and a new one together. Use only the specified lithium
batteries.
Replace the memory backup battery at lease every 5 years. The
original batteries were installed in the factory at the time of shipment
and might be depleted before satisfying the operating time indicated in
the specifications.
Battery precautions
• Keep the batteries out of the reach of children.
• When batteries become weak, remove them from the Organizer
immediately. If depleted batteries are left in the Organizer for any length
of time, they might leak and cause corrosion inside the Organizer.
• Do not dispose of batteries by fire as they may explode.
Replacing the operating batteries
1. Press OFF to turn the power off.
2. Loosen the screw and remove the battery holder cover on the back
of the unit. (Fig. 1)
3. Remove the used batteries by prying them out with a ball-point pen.
(Fig. 2)
Do not use a mechanical pencil or sharp pointed object. This may
break and cause damage to the mechanical pencil and/or the
Organizer.
4. Install two new batteries with the (+) sides facing up. (Fig. 3)
5. Replace the holder cover and secure it with the screw.
6. Press ON .
The display will appear after approximately 3 seconds. If nothing is
displayed, press the RESET switch on the front of the unit and press
ON again.
7. Set the clock (refer to page 6) and adjust the display contrast (refer
to page 30).
Operating batteries:
Replacement intervals for the power source batteries
When “ BATT ” is displayed, the operating batteries are depleted.
Press OFF to turn the power off, then turn the power back on. If the
following display appears when the power is turned on, replace both
operating batteries immediately:
• Do not press ON until the battery
replacement procedure is completed.
BATT
< CAUTION >
Replace the
OPERATING
batteries !
(Fig. 1)
(Fig. 2)
(Fig. 3)
37
Memory backup battery:
The life of the memory backup battery
The memory backup battery in your Organizer has an effective life of
about 5 years under normal operating conditions. Thus, replace the
memory backup battery every 5 years. After replacement, write down
the date on the label of the Organizer so you know when to replace the
battery next time.
For example, if you replace the battery in January 2005, write:
4. Remove the used battery by prying it out with a
ball-point pen. (Fig. 4)
Do not use a mechanical pencil or sharp pointed
object.
5. Install the new battery with the (+) side facing up.
6. Return the seal in place.
7. Replace the battery holder cover and secure it
with the screw.
8. Press ON .
The display will appear after approximately 3
seconds. If nothing is displayed, press the
RESET switch on the front of the unit and press
ON again.
MONTH
•YEAR
1 2005
NOTE: Extremes of temperature will shorten battery lift and endanger
the memory information.
Replacing the memory backup battery
When replacing the memory backup battery, make sure that the
operating batteries are not depleted. If the operating batteries are
depleted, replace these batteries before replacing the memory backup
battery. If you replace the memory backup battery while the operating
batteries are depleted, all of the data in the memory will be lost.
1. Press OFF to turn the power off.
2. Loosen the screw and remove the battery holder cover on the back
of the unit.
3. Remove the memory backup battery seal.
38
(Fig. 4)
Specifications
Model
YO-150/YO-170
Product name
Electronic Organizer
Display
19 columns × 5 lines
YO-170
128 Kbytes (User area: Approx. 126 Kbytes)
SCHEDULE mode capacity: Approx. 1990 entries
TEL mode capacity: Approx. 3080 entries
MEMO mode capacity: Approx. 920 entries
• The approximate entry capacities above
assume the following average entry size when
all memory is used by a single mode.
The size below is available when the memory
is freed up.
SCHEDULE Description 32 characters/entry
TEL
Name
16 characters/entry
Number
12 characters/entry
MEMO
128 characters/entry
Electronic notebook section
TEL mode
Names, phone numbers, and addresses
SCHEDULE mode Dates, appointment times, and details of
appointments
Automatic day-forward function, schedule alarm
function
ANN mode
Dates and details of anniversaries
CALENDAR mode From January 1901 to December 2099
Schedule mark function distinguishing between
morning and afternoon appointments
Anniversary mark function
Maximum
character string
length per entry
512 characters
Other features
Secret function, data transfer, index display
Calculator
MEMO mode
Everyday memos
Digits
12
TO DO mode
Items, priority assignment
Functions
EXPENSE mode
Expense date, amount, description and summary
Memory capacity
YO-150
64 Kbytes (User area: Approx. 62 Kbytes)
SCHEDULE mode capacity: Approx. 980 entries
TEL mode capacity: Approx. 1520 entries
MEMO mode capacity: Approx. 450 entries
Addition, subtraction, multiplication, division,
constant, square root, percent, memory
calculation, etc.
(With currency conversion function)
Clock:
Crystal
oscillation
frequency
32,768 Hz
39
Clock accuracy
Average variance ± 30 seconds per month (at
25°C/77°F)
• Approx. 1.5 years
When turned off, and the clock is running (at
25°C/77°F).
Display contents
Year, month, day, day of week, hours, minutes,
AM/PM, city names, time zone
Time system
12-hour or 24-hour
Memory backup battery
• Approx. 5 years (if operating batteries are
replaced promptly when exhausted)
World clock
function
Display of date and time for the world cities
Enable/disable control for daylight saving time
display function
Common
Power
Power
consumption
Battery life
Main power supply:
(DC) lithium batteries (CR2032 × 2)
6V
Memory backup power:
3V
(DC) lithium battery (CR2032 × 1)
0.1W
Operating batteries
• Approx. 1200 hours
When data is continuously displayed without
Backlight (at 25°C/77°F).
• Approx. 300 hours
When data is continuously displayed with
Backlight for 2 minutes per hourly use (at
25°C/77°F).
• Approx. 270 hours
When data is searched for 5 minutes, and
displayed for 55 minutes per hourly use and
Backlight is on for 2 minutes per hourly use (at
25°C/77°F).
40
• Approx. 1 years (if operating batteries are
exhausted or not installed)
Operating
temperature
Exterior
dimensions
Open
Closed
0°C to 40°C (32°F to 104°F)
134 (W) × 169 (D) × 9 (H) mm
5 -9/32” (W) × 6 -21/32” (D) × 11/32” (H)
134 (W) × 86.5 (D) × 13.6 (H) mm
5 -9/32” (W) × 3 -13/32” (D) × 17/32” (H)
Weight
Approx. 115g (0.26 lb.)
(including batteries)
Accessories
Lithium batteries (CR2032 × 3: installed in the
factory at the time of shipment), Operation
manual
INDEX
A
Alarms
Schedule 14
Turning off 15
All reset 35
Anniversary function 15
Auto power off 4
B
Backlight 4, 31
BATT symbol 4, 37
Batteries
Memory backup 38
Operating 37
Precautions 37
Replacement 36
C
Calculation examples 26
Calculator function 26
Calendar function 9
Caring for the Organizer 35
Changing
City for World time 7
Clock time 7
Home city 6
Monthly calendar 9
Password 29
Character sorting order 19
Checking the memory capacity
30
Clock 6
Contrast adjustment 30
Conversion function 27
Correcting entries 6
(See also Editing)
D
Data transfer 32
DATA DELETION function 14,
16, 19, 21, 23, 25, 29, 30
DATE FORMAT function 31
Daylight saving time 8
Deleting
All of the data in each
function 30
Anniversaries 16
Expense records 25
Letters 6
Memos 21
Password 29
Scheduled data 14
Telephone entries 19
To do items 23
Designating TEL directory file
names 17
Direct search 18, 20
Directory file names 17
Display
Contrast adjustment 30
Symbols 4
Displaying
Home time 6
Monthly calendar 9
World time 7
E
Editing
Anniversaries 16
Expense records 25
Memos 21
Scheduled data 13
Telephone entries 19
Entering
Anniversaries 15
Characters 5
Expense records 24
Letters 5
Memos 20
Schedule items 10
Symbols 5
Telephone entries 17
Error symbol 26
Expense function 24
F
Freeing up memory 4, 31
H
I
Index display 13, 16, 18, 20,
22, 24
Initializing the Organizer 3
Inserting letters 6
K
Key beep 4
Key functions 5
Key notations 5
Keyword search 18, 20
L
LCD CONTRAST function 30
M
Memo function 20
MEMORY CHECK function 30
Miscellaneous functions 30
Monthly calendar 9
O
Opening the Organizer 1
Option function 32
P
Password
Changing 29
Deleting 29
Registering 27
What to do if forgotten 29
Home city 6
Home time clock 6
41
R
T
Rearranging memos 21
Recalling
Anniversaries 16
Expense records 24
Memos 20
Scheduled data 11
Telephone entries 18
Registering
City names 8
Password 27
Replacing batteries 36
Memory backup batteries
38
Operating batteries 37
Reset procedure 35
TEL FILE NAME function 17
Telephone Directory function
17
TO DO function 22
Transferring data 32, 33, 34
Backup data 34
Between Organizers 33
Between the Organizer and
PC 34
Troubleshooting 36
Turning on/off
Key beep 4
Secret function 28, 29
S
Schedule alarm 14
Schedule function 10
Secret function 27
Sequential search 16, 18, 20,
22, 24
Setting
Currency rate 27
Date format 31
Daylight saving time 8
Home city 6
Home clock 7
Home time and date 7
Schedule alarm 15
Specifications 39
Summarizing expense records
25
42
W
When trouble occurs 35
World time clock 7
MEMO
43
PRODUCT SUPPORT
Sharp Electronics Corporation is dedicated to serving Customer needs. Please fill out
and send the enclosed registration card so that we can keep you up-to-date as new
products and services become available.
If you have read the ORGANIZER operation manual, but you still require product support,
you can:
Call a Sharp Representative
800-BE-SHARP
Visit our Web Site
http://www.sharp-usa.com
Call our Fax-On-Demand Service
630-378-9853
Send an E-mail
CompuServe account: 75300, 3260
America OnLine account: SHARPWIZ
Internet account: pdasupport@sharpsec.com
44
Engage in forum discussions
CompuServe (type Go Sharp)
America Online (type Keyword Sharp)
Fax your questions or comments
630-378-9987
Write to our Customer Assistance Center
1300 Naperville Drive
Romeoville, Illinois 60446
To: Wizard Help