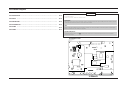
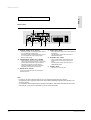
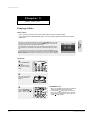
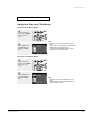
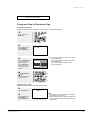
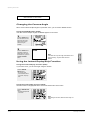
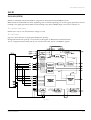
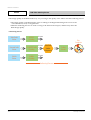
1
DVD PLAYER Chassis : Spino DVD-P355B/XEU, XET, XEE, SED, XEO, XEC, XEL, FOU, XEG, XEH, XEV SERVICE MANUAL SERVICE DVD-P355B DVD PLAYER Manual Merit & Character regarding Product Œ 41mm With LED Module ELECTRONICS ´ Playback MPEG4 DVD-Audio ˇ ZORAN Vaddis7 1-Chip Solution This Service Manual is a property of Samsung Electronics Co.,Ltd. Any unauthorized use of Manual can be punished under applicable international and/or domestic law. © Samsung Electronics Co., Ltd. JUN . 2005 Printed in Korea AK82-0000929A CONTENTS 1. Precautions 1-1 ~ 1-6 1-1 Safety Precautions (1-1) 1-2 Servicing Precautions 1-3 ESD Precautions 1-4 Handling the optical pick-up 1-5 Pick-up disassembly and reassembly (1-3) (1-4) (1-5) (1-6) 2. Product Specification 2-1 Product Specification 2-2 Chassis Product Specification 2-3 Option Product Specification 3. Alignment and Adjustments 3-1 Location of Test Point 3-2 Skew Adjustment 4. Disassembly and Reassembly 2-1 ~ 2-4 (2-1) (2-2) (2-3) 3-1 ~ 3-4 (3-1) (3-2) 4-1 ~ 4-10 4-1 Cabinet and PCB 4-2 Deck (4-1) (4-6) 5. Troubleshooting 5-1 ~ 5-14 6. Exploded View and Parts List 6-1 Cabinet Assembly 6-2 DVD Mechanical Parts 7. Electrical Parts List 6-1 ~ 6-6 (6-2) (6-4) 7-1 ~ 7-6 CONTENTS 8. Block Diagram 8-1 ~ 8-2 9. Wiring Diagram 9-1 ~ 9-2 10. PCB Diagrams 10-1 Main PCB 11. Schematic Diagrams 10-1 ~ 10-4 (10-2) 11-1 ~ 11-8 11-1 Power Drive (11-2) 11-2 Servo (11-3) 11-3 AV-Decoder (11-4) 11-4 Fromt Micom (11-5) 11-5 Audio (11-6) 11-6 Video (11-7) 12. Operating Instructions and Installation 12-1 ~ 12-50 13. Circuit Operating Descriptions 13-1 ~ 13-16 13-1 Power (13-1) 13-2 RF (13-7) 13-3 System Control (13-9) 13-4 Servo (13-10) 13-5 DVD Data Processor (13-13) 13-6 Video (13-14) 13-7 Audio (13-15) CONTENTS 14. Reference Information 14-1 ~ 14-16 14-1 Introduction to DVD (14-1) 14-2 DVD-Video Fromat (14-3) 14-1 DVD-Audio (14-9) 14-2 DivX (14-12) 1. Precautions 1-1 Safety Precautions 1) Before returning an instrument to the customer, always make a safety check of the entire instrument, including, but not limited to, the following items: (1) Be sure that no built-in protective devices are defective or have been defeated during servicing. (1)Protective shields are provided to protect both the technician and the customer. Correctly replace all missing protective shields, including any removed for servicing convenience. (2)When reinstalling the chassis and/or other assembly in the cabinet, be sure to put back in place all protective devices, including, but not limited to, nonmetallic control knobs, insulating fish papers, adjustment and compartment covers/shields, and isolation resistor/capacitor networks. Do not operate this instrument or permit it to be operated without all protective devices correctly installed and functioning. (2) Be sure that there are no cabinet openings through which adults or children might be able to insert their fingers and contact a hazardous voltage. Such openings include, but are not limited to, excessively wide cabinet ventilation slots, and an improperly fitted and/or incorrectly secured cabinet back cover. (3) Leakage Current Hot Check-With the instrument completely reassembled, plug the AC line cord directly into a 120V AC outlet. (Do not use an isolation transformer during this test.) Use a leakage current tester or a metering system that complies with American National Standards institute (ANSI) C101.1 Leakage Current for Appliances and Underwriters Laboratories (UL) 1270 (40.7). With the instrument’s AC switch first in the ON position and then in the OFF position, measure from a known earth ground (metal water pipe, conduit, etc.) to all exposed metal parts of the instrument (antennas, handle brackets, metal cabinets, screwheads, metallic overlays, control shafts, etc.), especially any exposed metal parts that offer an electrical return path to the chassis. Any current measured must not exceed 0.5mA. Reverse the instrument power cord plug in the outlet and repeat the test. See Fig. 1-1. Any measurements not within the limits specified herein indicate a potential shock hazard that must be eliminated before returning the instrument to the customer. (READING SHOULD NOT BE ABOVE 0.5mA) LEAKAGE CURRENT TESTER DEVICE UNDER TEST TEST ALL EXPOSED METER SURFACES 2-WIRE CORD ALSO TEST WITH PLUG REVERSED (USING AC ADAPTER PLUG AS REQUIRED) EARTH GROUND Fig. 1-1 AC Leakage Test (4) Insulation Resistance Test Cold Check-(1) Unplug the power supply cord and connect a jumper wire between the two prongs of the plug. (2) Turn on the power switch of the instrument. (3) Measure the resistance with an ohmmeter between the jumpered AC plug and all exposed metallic cabinet parts on the instrument, such as screwheads, antenna, control shafts, handle brackets, etc. When an exposed metallic part has a return path to the chassis, the reading should be between 1 and 5.2 megohm. When there is no return path to the chassis, the reading must be infinite. If the reading is not within the limits specified, there is the possibility of a shock hazard, and the instrument must be repaired and rechecked before it is returned to the customer. See Fig. 1-2. Antenna Terminal Exposed Metal Part ohm ohmmeter Fig. 1-2 Insulation Resistance Test Samsung Electronics 1-1 Precautions 2) Read and comply with all caution and safety related notes on or inside the cabinet, or on the chassis. 3) Design Alteration Warning-Do not alter or add to the mechanical or electrical design of this instrument. Design alterations and additions, including but not limited to, circuit modifications and the addition of items such as auxiliary audio output connections, might alter the safety characteristics of this instrument and create a hazard to the user. Any design alterations or additions will make you, the servicer, responsible for personal injury or property damage resulting therefrom. 4) Observe original lead dress. Take extra care to assure correct lead dress in the following areas: (1) near sharp edges, (2) near thermally hot parts (be sure that leads and components do not touch thermally hot parts), (3) the AC supply, (4) high voltage, and (5) antenna wiring. Always inspect in all areas for pinched, out-of-place, or frayed wiring, Do not change spacing between a component and the printed-circuit board. Check the AC power cord for damage. 1-2 5) Components, parts, and/or wiring that appear to have overheated or that are otherwise damaged should be replaced with components, parts and/ or wiring that meet original specifications. Additionally, determine the cause of overheating and/or damage and, if necessary, take corrective action to remove any potential safety hazard. 6) Product Safety Notice-Some electrical and mechanical parts have special safety-related characteristics which are often not evident from visual inspection, nor can the protection they give necessarily be obtained by replacing them with components rated for higher voltage, wattage, etc. Parts that have special safety characteristics are identified by shading, an ( )or a ( )on schematics and parts lists. Use of a substitute replacement that does not have the same safety characteristics as the recommended replacement part might create shock, fire and/or other hazards. Product safety is under review continuously and new instructions are issued whenever appropriate. Samsung Electronics Precautions 1-2 Servicing Precautions CAUTION : Before servicing units covered by this service manual and its supplements, read and follow the Safety Precautions section of this manual. Note : If unforseen circumstances create conflict between the following servicing precautions and any of the safety precautions, always follow the safety precautions. Remember: Safety First. 1-2-1 General Servicing Precautions (1) a. Always unplug the instrument’s AC power cord from the AC power source before (1) re-moving or reinstalling any component, circuit board, module or any other instrument assembly, (2) disconnecting any instrument electrical plug or other electrical connection, (3) connecting a test substitute in parallel with an electrolytic capacitor in the instrument. b. Do not defeat any plug/socket B+ voltage interlocks with which instruments covered by this service manual might be equipped. c. Do not apply AC power to this instrument and /or any of its electrical assemblies unless all solid-state device heat sinks are correctly installed. d. Always connect a test instrument’s ground lead to the instrument chassis ground before connecting the test instrument positive lead. Always remove the test instrument ground lead last. (4) An insulation tube or tape is sometimes used and some components are raised above the printed wiring board for safety. The internal wiring is sometimes clamped to prevent contact with heating components. Install such elements as they were. (5) After servicing, always check that the removed screws, components, and wiring have been installed correctly and that the portion around the serviced part has not been damaged and so on. Further, check the insulation between the blades of the attachment plug and accessible conductive parts. 1-2-2 Insulation Checking Procedure Disconnect the attachment plug from the AC outlet and turn the power ON. Connect the insulation resistance meter (500V) to the blades of the attachment plug. The insulation resistance between each blade of the attachment plug and accessible conductive parts(see note) should be more than 1 Megohm. Note : Accessible conductive parts include metal panels, input terminals, earphone jacks, etc. Note : Refer to the Safety Precautions section ground lead last. (2) The service precautions are indicated or printed on the cabinet, chassis or components. When servicing, follow the printed or indicated service precautions and service materials. (3) The components used in the unit have a specified flame resistance and dielectric strength. When replacing components, use components which have the same ratings. Components identified by shading, by( ) or by ( ) in the circuit diagram are important for safety or for the characteristics of the unit. Always replace them with the exact replacement components. Samsung Electronics 1-3 Precautions 1-3 ESD Precautions Electrostatically Sensitive Devices (ESD) Some semiconductor (solid state) devices can be damaged easily by static electricity. Such components commonly are called Electrostatically Sensitive Devices(ESD). Examples of typical ESD devices are integrated circuits and some field-effect transistors and semiconductor chip components. The following techniques should be used to help reduce the incidence of component damage caused by static electricity. (1) Immediately before handling any semiconductor component or semiconductor-equipped assembly, drain off any electrostatic charge on your body by touching a known earth ground. Alternatively, obtain and wear a commercially available discharging wrist strap device, which should be removed for potential shock reasons prior to applying power to the unit under test. (7) Immediately before removing the protective materials from the leads of a replacement ESD device, touch the protective material to the chassis or circuit assembly into which the device will be installed. CAUTION : Be sure no power is applied to the chassis or circuit, and observe all other safety precautions. (8) Minimize bodily motions when handling unpackaged replacement ESD devices. (Otherwise harmless motion such as the brushing together of your clothes fabric or the lifting of your foot from a carpeted floor can generate static electricity sufficient to damage an ESD device). (2) After removing an electrical assembly equipped with ESD devices, place the assembly on a conductive surface such as aluminum foil, to prevent electrostatic charge buildup or exposure of the assembly. (3) Use only a grounded-tip soldering iron to solder or unsolder ESD devices. (4) Use only an anti-static solder removal devices. Some solder removal devices not classified as “anti-static” can generate electrical charges sufficient to damage ESD devices. (5) Do not use freon-propelled chemicals. These can generate electrical charges sufficient to damage ESD devices. (6) Do not remove a replacement ESD device from its protective package until immediately before your are ready to install it.(Most replacement ESD devices are packaged with leads electrically shorted together by conductive foam, aluminum foil or comparable conductive materials). 1-4 Samsung Electronics Precautions 1-4 Handling the optical pick-up The laser diode in the optical pick up may suffer electrostatic breakdown because of potential static electricity from clothing and your body. WRIST-STRAP FOR GROUNDING 1M The following method is recommended. (1) Place a conductive sheet on the work bench (The black sheet used for wrapping repair parts.) (2) Place the set on the conductive sheet so that the chassis is grounded to the sheet. (3) Place your hands on the conductive sheet(This gives them the same ground as the sheet.) (4) Remove the optical pick up block (5) Perform work on top of the conductive sheet. Be careful not to let your clothes or any other static sources to touch the unit. THE UNIT 1M CONDUCTIVE SHEET Fig.1-3 (6) Short the short terminal on the PCB, which is inside the Pick-Up ASS’Y, before replacing the PickUp. (The short terminal is shorted when the PickUp Ass’y is being lifted or moved.) (7) After replacing the Pick-up, open the short terminal on the PCB. ◆ Be sure to put on a wrist strap grounded to the sheet. ◆ Be sure to lay a conductive sheet made of copper etc. Which is grounded to the table. Samsung Electronics 1-5 Precautions 1-5 Pick-up disassembly and reassembly 1-5-1 Disassembly 1-5-2 Assembly 1) Remove the power cord. 2) Disassemble the Deck-Assy. 3) Make solder land 2 points short on Pick-up. (See Fig. 1-4) 4) Disassemble the Pick-up. 1) Replace the Pick-up. 2) Remove the soldering 2 points on Pick-up. 3) Reassemble the Deck-Assy. Note : If the assembly and disassembly are not done in correct sequence, the Pick-up may be damaged. SOLDER LAND 2 POINTS SHORT PICK-UP ASS'Y Fig. 1-4 1-6 Samsung Electronics 2. Product Specification 2-1 Product Specification General Power Requirements AC230V, 50Hz Power Consumption 10W Weight 1.7Kg Dimensions 430mm (W) x 207mm (D) x 42mm (H) Operating Temperature Range +5°C to 35°C Operating Humidity Range 10% to 75% DVD (Digital Versatile Disc) Disc Reading Speed : 3.49 ~ 4.06m/sec. Approx. Play Time (Single Sided, Single Layer Disc) : 135min. CD : 12Cm Reading Speed : 4.8 ~ 5.6m/sec. (Compact Disc) Maximum Play Time : 74min. CD : 8cm Reading Speed : 4.8 ~ 5.6m/sec. (Compact Disc) Maximum Play Time : 20min. VCD : 12Cm Composite Video Reading Speed : 4.8 ~ 5.6m/sec. Maximum Play Time : 74min. (Video+Audio) 1 channel ; 1.0Vp-p (75ohm load) R (Red) : 0.7 Vp-p (75ohm load) G (Green) : 0.7 Vp-p (75ohm load) SCART Jack B (Blue) : 0.7 Vp-p (75ohm load) Composite Video : 1.0 Vp-p (75ohm load) Luminance Signal : 1.0 Vp-p (75ohm load) Video Output Color Signal : 0.3 Vp-p (75ohm load) Y: 1.0 Vp-p (75ohm load) Component Video Pr: 0.70 Vp-p (75ohm load) Pb: 0.70 Vp-p (75ohm load) S-Video Audio Output Luminance Signal : 1.0Vp-p (75ohm load) Chrominance Signal : 0.3Vp-p (75ohm loa) HDMI High Definition Multimedia Interface (576p, 720p, 768p, 1080i) SCART Jack 2 Channel : L(1/L), R(2/R) 2 Channel L(1/L), R(2/R) *Ferquency Response 48KHz Sampling : 4Hz to 22KHz 96KHz Sampling : 4Hz to 44KHz *S/N Ratio 110dB *Dynamic Range 100dB *Total Harmonic Distortion 0.004% * : Nominal specification Samsung Electronics 2-1 Product Specification 2-2 Chassis Product Specification MODEL FLASH RF DRIVE A/V DECODER 6dB_AMP AUDIO DAC AUDIO ADC FRONTMICOM MIC INPUT NTSC Default SCARTOUT PSO DTS D-AUDIO MPEG4 MP3 P-CD WMA VCD SVCD MEMORY CARD 2-2 DVD-P250K/XSS 2M X FAN8026 ZR36862 LA73054 PCM1753 M65855P eFHP5842 1MIC O PAL X MULTI 2CH/DIGI X X O O O O O X DVD-P255K/XSS 2M X FAN8026 ZR36862 LA73054 PCM1753 M65855P eFHP5842 2MIC O PAL X MULTI 2CH/DIGI X X O O O O O X DVD-P350K/XSS 2M Ti-D FAN8026 ZR36778 LA73054 PCM1753 M65855P eFHP5842 1MIC O PAL X MULTI 2CH/DIGI X O O O O O O X DVD-P355K/XAX 2M Ti-D FAN8026 ZR36778 LA73054 PCM1753 M65855P eFHP5842 2MIC O NT X MULTI 2CH/DIGI O O O O O O O X Samsung Electronics Product Specification 2-3 Option Product Specification Description Fig Description Remote Control AK59-00011K Batteries for Remote Control (AAA Size) AC43-12002H User ’s Manual AK68-00632G V ideo/Audio Cable Samsung Electronics Parts No Remark Model Stamdard of DVD-P355B/XEL Model Stamdard of DVD-P355B/XEL S.N.A AC39-42001R Model Stamdard of DVD-P355B/XEL Model Stamdard of DVD-P355B/XEL 2-3 3. Alignment and Adjustment 3-1 Location of Test Point RIC1 SP37239 Pin29 of RIC1 RIC1 SP37239 Fig. 3-1 Location of Test Point Samsung Electronics 3-1 Alignment and Adjustment 3-2 Skew Adjustment 3-2-1 Adjustment Spec. and Test Point ◆ Test Disc ; Service not Available <Table 3-1> Test Disc Adjustment Spec. Test Point Adjustment Location TDV-533 Chapter 14 Flat Waveform “Pin 29 of RIC1” (Main PCB - Component Side) (See Fig. 3-1) Screw A / B Ass’y Deck - Top Side (See Fig. 3-2) Fig. 3-2 Ass’y Deck (Top Side) 3-2 Samsung Electronics Alignment and Adjustment 3-2-2 SKEW Adjustment Method Needed to minimize the variations in Skew of the Pickup unit and to provide optimum match with the recorded signal on the Disc. 1) Connect an Oscilloscope to the “Pin 29 of RIC1” Test Point (See Fig. 3-1) 2) Connect Power, Open the Tray and Play the Ch.14 whish is in the TDV-533 Disc. ◆ Set the Oscilloscope Range as follows : (Voltage ; 20mV/Div., Frequency ; 10m Sec.) 3) Adjust the Screws “A” and “B” (See Fig. 3-2) using a Hex screwdriver until you obtain a Flat Waveform and the picture is stable. Then, go to Chapter 1 and make sure the Waveform is Flat here as well. If not, you have to go back to Chapter 14 and adjust again. If you cannot obtain a Flat waveform, then the unit is defective. Note : The Deck must be in a horizontal position. Use both “A” and “B” screws to adjust. Typical Waveform before Adjustment Waveform after Correct Adjustment Fig.3-3 Envelope Waveform Samsung Electronics 3-3 4. Disassembly and Reassembly 4-1 Cabinet and PCB Note : Reassembly in reverse order. 4-1-1 Top Cabinet Removal 1) Remove 3 Screws Œ the back Top Cabinet. 2) Lift up the Top Cabinet in direction of arrow. Œ 3 SCREWS Fig. 4-1 Top Cabinet Removal Samsung Electronics 4-1 Disassembly and Reaasembly 4-1-2 Door-Tray Removal 1) Supply power and open Tray Œ. 2) Disassemble the Door-Tray ´ in direction of arrow “A”. 3) Close Tray Œ and power off. Note : If Tray Œ doesn’t open, insert a Screw driver ¨ into the Emergency hole ˇ (as shown in detailed drawing) and then push it in the direction of arrow “B”. Open Tray manually. Œ TRAY "B" ´ DOOR-TRAY "A" ¨ SCREW DRIVER ˇ EMERGENCY HOLE Fig. 4-2 Door-Tray Removal 4-2 Samsung Electronics Disassembly and Reaasembly 4-1-3 Ass’y Front-Cabinet Removal 1) Release 6 Hooks Œ, ´, ˇ, ¨ and Remove the Ass’y Front-Cabinet ˆ. ´ 1 HOOK ¨ 2 HOOKS Œ 2 HOOKS ˇ 1 HOOK ˆ A'ssy Front-Cabinet Fig.4-3 Ass’y Front-Cabinet Removal Samsung Electronics 4-3 Disassembly and Reaasembly 4-1-4 Ass’y Deck Removal 1) Disconnect Flat-Cable from DCN1, DCN2 on Main PCB. 2) Remove 3 Screws Œ from the Ass’y Deck and lift it up. Œ 3 SCREWS FLAT-CABLE ASS'Y-DECK DCN1 DCN2 Fig. 4-4 Ass’y Deck Removal 4-4 Samsung Electronics Disassembly and Reaasembly 4-1-5 Main PCB Removal 1) Remove 4 Screws Œ. 2) Lift up the Main PCB ´. Œ 4 SCREWS ´ MAIN PCB Fig. 4-5 Main PCB Removal Samsung Electronics 4-5 Disassembly and Reaasembly 4-2 Deck 4-2-1 Holder Chuck Removal 1) Push 4 Hooks Œ in the direction of arrow “A” and lift up the Holder Chuck ´. Œ 2 HOOKS ´ HOLDER CHUCK "A" Œ 2 HOOKS "A" Fig. 4-6 Holder Chuck Removal 4-6 Samsung Electronics Disassembly and Reaasembly 4-2-2 Tray Disc Removal 1) Insert a Screw Driver Œ into Emergency Hole ´ and push the Slider Housing ˇ in the direction arrow “A”. 2) When the Tray Disc ¨ comes out a little, pull it in the direction arrow “B” by hand. ˇ SLIDER HOUSING ¨ TRAY DISC "B" "A" ´ EMERGENCY HOLE Œ SCREW DRIVER Fig.4-7 Tray Disc Removal Samsung Electronics 4-7 Disassembly and Reaasembly 4-2-3 Assy P/U Deck Removal 1) Remove the 4 Soldering Œ (SL+, SL-, SP+, SP-). 2) Remove the 1 Screw ´ and lift up the Ass’y P/U Deck ˇ ´ 1 SCREW ˇ ASS'Y P/U DECK ¨ CHASSIS SUB <Assembly Point> SP+ SL+ TMTM+ SP- SL- Œ 4 SOLDERING Fig. 4-8 Assy P/U Deck Removal 4-8 Samsung Electronics Disassembly and Reaasembly 4-2-4 Ass’y Housing Removal 1) Remove the 2 Soldering Œ. (TM+, TM-) 2) Push the 2 Hooks ´ in the direction of arrow “A” and remove Ass’y PCB Deck ˇ. 3) Push the Slider Housing ¨ in the direction arrow “B”. 4) Push the 1 Hook ˆ in the direction of arrow “C” and lift up the Slider Housing ¨. 5) Remove the Belt Pulley Ø and 2 Screws ∏, Ass’y Motor Load ”. 6) Push the 1 Hook ’ in the direction of arrow “D” and lift up the Gear Pulley ˝, Gear Tray Ô. ¨ SLIDER HOUSING "B" Ø BELT PULLEY ∏ 2 SCREWS Ô GEAR TRAY ˝ GEAR PULLEY ’ 1 HOOK "D" "C" ˆ 1 HOOK ” ASS'Y MOTOR LOAD ´ 2 HOOKS "A" "A" ˇ ASS'Y PCB DECK Œ 2 SOLDERING Fig. 4-9 Ass’y Housing Removal Samsung Electronics 4-9 Disassembly and Reaasembly 4-2-5 Ass’y Bracket Deck Removal 1) Push the Hook Œ in the direction of arrow “A” and lift up the Gear Feed B ´. 2) Push the Hook ˇ in the direction of arrow “B” and lift up the Gear Feed B ¨. 3) Remove the 2 Screws ˆ and lift up Motor Feed Ass’y Ø. 4) Remove the 2 Screws ∏ and lift down Motor Spindl Ass’y ”. 5) Remove the 3 Screws ’ and remove 3 Holder Cam Skew ˝, Shaft Pick Up Ô, Ass’y Pick Up . 6) Remove the 1 Screws Ú and remove Gear Back Lash Æ. ’ 3 SCREWS ˝ 3 HOLDER CAM SKEW ASS'Y PICK UP Æ GEAR BACK LASH Ô SHAFT PICK UP Ú 2 SCREWS Ø MOTOR FEED ASS'Y ˇ HOOK "B" ∏ 2 SCREWS ˆ 2 SCREWS Œ HOOK "A" CHASSIS SUB ¨ GEAR FEED A ´ GEAR FEED B ” MOTOR SPINDLE Fig. 4-10 Ass’y Bracket Deck Removal 4-10 Samsung Electronics 5. Troubleshooting No focus incoming A FE in ZIC1-181 is within specified range? Yes FIC1-27, 28 output are normal? No Check RIC1 and A, B, C, D input. (FE Waveform) No Check FIC1. Yes Check open state from FIC1 to pick-up. Samsung Electronics 5-1 Troubleshooting No pick-up home positing ZIC1-191(SLED-PWM) output is normal? (1.7V ~ 1.8V) No Check ZIC1. Yes SLED+, SLEDFIC1-13, 14 output are normal? No Check FIC1. Yes Check the Sled Motor and connection. 5-2 Samsung Electronics Troubleshooting NO LD CD ON RIC1-22 is 5V? No Check RIC1 Yes Divide RQ2 emitter terminal voltage and 5V real voltage difference into 10ohm. Yes Current exceeds 0.1A? No Open check in related circuit. Yes LD out pick-up replace. Samsung Electronics 5-3 Troubleshooting No Search Operation MIRR, RIC1-27 output is normal? No MEVO, RIC1-32 output level is normal? No (MIRR Waveform) Yes Yes Check pick-up. Check RIC1 peripheral circuit. Actual velocity occurs at ZIC1-191 terminal? No Check ZIC1 peripheral circuit. Yes Actual velocity occurs at FIC1-13, 14 terminal? No Check FIC1 peripheral circuit. Yes TE occurs in search range? No Focus On? No A (TE Waveform) Yes See "Fine Seek Check" 5-4 Samsung Electronics Troubleshooting FINE SEEK Check FINE SEEK MIRR signal (RIC1-27) is missing? Yes Check RIC1 Peripheral curcuit. No Time out due to many jump counts. No Track incomming is delayed? (TRD Waveform) (TE Waveform) Yes TE is within 2V and 3V? No Yes ZIC1-169(TRD) output is normal? No Yes Check RIC1-6 terminal. (T+,T- Waveform) Pick-up transfer smooth. No Yes FIC1-26, 25(T+, T-) terminal outputs are normal? Yes No Check FIC1 peripheral circuit. Check Deck. Check RIC1 peripheral circuit. Samsung Electronics Check DCN1 and pick-up. 5-5 Troubleshooting Abnormal rotation of disc motor Input of RF SUM signal is normal? (ZIC1-172, 173) No RIC1-54, 55 output is normal? No (SPD Waveform) Yes Yes Check RIC1 peripheral circuit and A, B, C, D. Check path to RIC1 and ZIC1. SPD output is normal? (ZIC1-189) No Yes Check ZIC1 peripheral circuit. FIC1-25 output is normal? No Check FIC1 soldering and power. Yes FIC1-23 signal MON is "H" ? No Check ZIC1. Yes Check or replace disc motor. 5-6 Samsung Electronics Troubleshooting No Tray open/close ZIC1 129,130 Open ; "L" Close ; "H" Yes No Check ZIC1 perpheral circuit. (OPEN, CLOSE Waveform) Check FIC1-13, 14 output at OPEN/CLOSE. No Check FIC1 perpheral circuit. Yes Check signal line state from FIC1-13, 14 to tray motor. Samsung Electronics 5-7 Troubleshooting CD/VCD/DVD L/R output error (Mixed Audio output) Normal DATA 0 is input in AIC1-2? No Check ZIC1-113 output. (DATA0 Waveform) Yes Analog output of AIC1-7,9(Vout) is normal? No Check ZIC1-118 DVD;12.2884MHz Yes AIC5-1, 7 output is normal? No Check AIC5 peripheral circuit. Yes Base terminal level of AQ7, AQ9 are "L"? No Check FMIC-11 mute. Yes Check JACK1 peripheral soldering shot. 5-8 Samsung Electronics Troubleshooting S-Video output error Video output of display setup is "S-VIDEO". No Select video output to "S-VIDEO". Yes C Samsung Electronics 5-9 Troubleshooting Y/Pr/Pb output error Video output of display setup is "I-SCAN". No Select video output to "I-SCAN". Yes C 5-10 Samsung Electronics Troubleshooting Progressive output error Video output of display setup is "Pscan & HDMI". No Select video output to "Pscan & HDMI". Yes C Samsung Electronics 5-11 Troubleshooting CVBS Output Error C Pin of VDDP in ZIC1 has normal level? No Yes 27MHz clock input is normal at pin 142in ZIC1? Check the connection between pin1 in ZIC1 and pin4 in PIC1. (CVBS Waveform) No Check ZY1. Yes Analog output is normal at pin 159 in ZIC1? No Check the soldering of ZIC1. Yes Analog signals are inputted normally VIC1-4 No Check the connection between pin158 in ZIC1 and VIC1. No Check the connection between VIC1-1 and VL6 No Check the connection between VL6 and pin 1in VIC1. Yes Power is normal at VIC1-1, 28 Yes Pin 3,13 in VIC1 is in high state? Yes Peak to peak voltage level of VIC1-20 (VIC-MUTE Waveform) No Check the soldering of VIC1 Yes Video signal of about 1V appears at output jack? No Check the connection between VIC1 and output jack. Yes Check the RCA cable. 5-12 Samsung Electronics Troubleshooting No Power (Standby LED OFF) PFD01 error? Yes Replace fuse. No PDS01 voltage is normal voltage? No Check PDS01 ~ 04. Yes Switching operation of PIC01 is normal? Yes Replace PIC01. Check feed back, 2st voltage. No Replace PIC01 Samsung Electronics 5-13 6. Exploded View and Parts List 6-1 Cabinet Assembly - - - - - - - - - - - - - - - - - - - - - - - - - - - - - - - - - - - - - - - - - 6-2 6-2 DVD Mechanical Parts - - - - - - - - - - - - - - - - - - - - - - - - - - - - - - - - - - - - - - 6-4 Samsung Electronics 6-1 Exploded View and Parts List 6-1 Cabinet Assembly W001 C015 W275 P001 W275 P025 CHASSIS - FRAME(S.N.A) S.N.A : Service Not Available A001 C001 C002 6-2 Samsung Electronics Exploded View and Parts List Loc. No A001 C001 C002 C015 P001 P025 W001 W275 Parts No. AK59-00011J AK97-01225E AK64-01189C AK97-01103D AK92-00680B AK92-00680A AC39-12022K AC39-10019A 6003-000275 6003-001561 Samsung Electronics Description ; Specification REMOCON-ASSY;DVD-P241/XAA,XAA,-,-,36,-,ASSY CABINET-FRONT;HIPS 94 HB,DVD-P355B/ DOOR-TRAY;DVD-P355B/XEL,SEIN,ABS 94 HB,T ASSY CABINET-TOP;PCM T0.55,DVD-P355B/XE ASSY PCB-MAIN;DVD-P355/XEV,MAIN PCB ASSY ASSY PCB-MAIN;DVD-P355/XEO,MAIN PCB ASSY CBF-POWER CORD;AT,,GP2,HOUING(2P),250V,3 CBF-POWER CORD;KKP-419C,H03VVH2-F,VDE/KE SCREW-TAPTITE;BH,+,B,M3,L10,BLK ,SWCH101 SCREW-TAPTITE;BH,+,WT,B,M3,L6,ZPC(YEL),S Q”ty S.N.A 1 1 1 1 1 1 1 1 4 7 SA SA SA SA SA SA SA SA SA SA Remark CIS Only Other Only U.K Only Other Only 6-3 Exploded View and Parts List 6-2 DVD Mechanical Parts W212 H213 H212 H102 W012 H241 H206 H211 H214 H203 W273 H210 W010 H202 W274 W274 H204 H205 H105 H107 H207 H106 H103 W011 H108 H104 H109 6-8 Samsung Electronics Exploded View and Parts List Loc. No H102 H103 H104 H105 H106 H107 H108 H109 H202 H203 H204 H205 H206 H207 H210 H211 H212 H213 H214 H241 W010 W011 W012 W212 W273 W274 Parts No. AK61-00360A AK66-00042A AK97-00608A 6602-001076 AK66-00041A AK66-00045A AK63-00101C AK92-00328C AK73-00005B AH61-50327A AK66-00043A AK66-00044A AK61-00363A AK31-00017A AK31-00005A AK97-01009B AK61-00359A AK61-00357A AK66-00057A AK41-00250B 6003-001157 6001-001370 6002-001086 6003-001251 6003-000233 6001-001730 Samsung Electronics Description ; Specification BODY CLAMPER-DISC;DP-16,POM,T0.7,-,-,-,W GEAR-PULLEY;DP-15,POM,-,-,-,WHT,-,-,ASSY-MOTOR LOAD;-,DP-15,BELT-RECTANGULAR;CR,T1.2,4.3%,1.2X25.1,B GEAR-TRAY;DP-15,POM,-,-,-,WHT,-,-,SLIDER HOUSING;DP-15,POM,-,W17.8,L90,WHT TRAY-DISC;DP-16,ABS,-,W120,L186.3,-,BLK, ASSY PCB-DECK;DP-15,COMBO-A RUBBER-INSULATOR;DP-15,BUTYL,•’12,HS30,H SHAFT-P/U;DP-3,SUS,L84.7,OD3,-,-,GEAR-FEED A;DP-15,POM,-,-,-,-,-,-,GEAR-FEED B;DP-15,POM,-,-,-,-,-,-,HOLDER-CAM SKEW;DP-16,POM,-,-,-,BLK,MOTOR DC-SPINDLE;RF300FA-12350,DP-17,-,MOTOR-FEED ASSY;-,DP-9,-,-,-,-,-,-,-,-,ASSY-PICK UP;-,DP-16,MITSUMI VE HOLDER-CHUCK;DP-16,POM,T3,W140,L96,BLK,SPRING ETC-CLAMPER;-,SUS304CSP,-,-,-,-,GEAR-BACKLASH;DP-16,POM,0.5,-,-,WHT,-,RA FFC-PU;DP-16,HYPER,PET 0.037mm,23P,0. SCREW-TAPTITE;PWH,+,B,M2,L6,ZPC(YEL),SWR SCREW-MACHINE;CH,+,M1.7,L3.0,ZPC(YEL),SW SCREW-TAPPING;PH,+,B,M1.7,L5.0,ZPC(YEL), SCREW-TAPTITE;CH,+,B,M1.7,L3,ZPC(YEL),SW SCREW-TAPTITE;PH,+,B,M2,L6,ZPC(BLK),SWRC SCREW-MACHINE;BH,+,M1.7,L2.5,ZPC(YEL) Q”ty S.N.A 1 1 1 1 1 1 1 1 1 2 1 1 3 1 1 1 1 1 1 1 1 2 3 1 1 4 Remark SA SA SA SA SA SA SA SA SA SA SA SA SA SA SA SA SA SA SA SA SA SA SA SA SA SA 6-5 7. Electrical Parts List Loc.No Part No P001 Description ; Specification Q’ty S.N.A Remark AC100 AC19 AC20 AK92-00680B AK92-00680A 2203-000426 2203-005148 2203-005148 ASSY PCB-MAIN;DVD-P355/XEV,MAIN PCB ASSY ASSY PCB-MAIN;DVD-P355/XEO,MAIN PCB ASSY C-CER,CHIP;0.018NF,5%,50V,C0G,TP,1608 C-CER,CHIP;100nF,10%,16V,X7R,TP,1608 C-CER,CHIP;100nF,10%,16V,X7R,TP,1608 1 1 1 1 1 SA SA SA SA SA AC200 AC21 AC22 AC23 AC25 2203-005148 2203-000315 2203-005148 2203-000125 2203-000315 C-CER,CHIP;100nF,10%,16V,X7R,TP,1608 C-CER,CHIP;0.12NF,5%,50V,C0G,TP,1608 C-CER,CHIP;100nF,10%,16V,X7R,TP,1608 C-CER,CHIP;1.2nF,10%,50V,X7R,TP,1608,C-CER,CHIP;0.12NF,5%,50V,C0G,TP,1608 1 1 1 1 1 SA SA SA SA SA AC28 AC29 AD1 AD2 AD3 2203-001607 2203-000125 0407-000114 0407-000114 0407-000114 C-CER,CHIP;0.22nF,5%,50V,NP0,-,1608 C-CER,CHIP;1.2nF,10%,50V,X7R,TP,1608,DIODE-ARRAY;DAN202K,80V,100mA,CA2-3,SOTDIODE-ARRAY;DAN202K,80V,100mA,CA2-3,SOTDIODE-ARRAY;DAN202K,80V,100mA,CA2-3,SOT- 1 1 1 1 1 SA SA SA SA SA AD4 AD5 ADR1 AE10 AE11 0401-000008 0407-000114 2007-000080 2401-002165 2401-000913 DIODE-SWITCHING;DAN217,80V,100MA,SOT-23, DIODE-ARRAY;DAN202K,80V,100mA,CA2-3,SOTR-CHIP;2Kohm,5%,1/10W,TP,1608 C-AL;100uF,20%,16V,GP,TP,6.3x7,5 C-AL;22uF,20%,16V,GP,TP,5x11,5 1 1 1 1 1 SA SA SA SA SA AE13 AE15 AE16 AE17 AE3 2401-000913 2401-000438 2401-000302 2401-000598 2401-000913 C-AL;22uF,20%,16V,GP,TP,5x11,5 C-AL;10uF,20%,25V,GP,-,5x11,5 C-AL;100uF,20%,25V,GP,TP,6.3x11,5 C-AL;1uF,20%,50V,GP,TP,4x7,5 C-AL;22uF,20%,16V,GP,TP,5x11,5 1 1 1 1 1 SA SA SA SA SA AE5 AE6 AE9 AHC1 AHC2 2401-000913 2401-000913 2401-002594 2203-005148 2203-005148 C-AL;22uF,20%,16V,GP,TP,5x11,5 C-AL;22uF,20%,16V,GP,TP,5x11,5 C-AL;220uF,20%,16V,GP,TP,8x11.5,5 C-CER,CHIP;100nF,10%,16V,X7R,TP,1608 C-CER,CHIP;100nF,10%,16V,X7R,TP,1608 1 1 1 1 1 SA SA SA SA SA AHE10 AHE20 AHIC1 AHR1 AHR2 2401-001250 2401-001250 1201-000163 2007-000102 2007-000102 C-AL;4.7uF,20%,35V,GP,TP,4x5,5 C-AL;4.7uF,20%,35V,GP,TP,4x5,5 IC-OP AMP;4560,SOP,8P,173MIL,DUAL,100V/m R-CHIP;100Kohm,5%,1/10W,TP,1608 R-CHIP;100Kohm,5%,1/10W,TP,1608 1 1 1 1 1 SA SA SA SA SA AHR5 AHR6 AIC1 AIC4 AL2 2007-000075 2007-000075 1002-001395 1201-000163 3301-001419 R-CHIP;220ohm,5%,1/10W,TP,1608 R-CHIP;220ohm,5%,1/10W,TP,1608 IC-D/A CONVERTER;PCM1753,24Bit,SSOP,16P, IC-OP AMP;4560,SOP,8P,173MIL,DUAL,100V/m BEAD-SMD;-,220,-,500,TP,-,0.3 1 1 1 1 1 SA SA SA SA SA AQ1 AQ10 AQ11 AQ2 AQ3 0504-000128 0501-000341 0501-000341 0504-000156 0501-000341 TR-DIGITAL;-,NPN,200MW,22K/22K,SOT-23,TP TR-SMALL SIGNAL;KSC1623-L,NPN,200mW,SOTTR-SMALL SIGNAL;KSC1623-L,NPN,200mW,SOTTR-DIGITAL;KSR2103,PNP,200MW,22K/22K,SOT TR-SMALL SIGNAL;KSC1623-L,NPN,200mW,SOT- 1 1 1 1 1 SA SA SA SA SA AQ4 AQ5 AQ6 AQ7 AQ8 0504-000128 0504-000156 0501-000341 0504-000128 0504-000156 TR-DIGITAL;-,NPN,200MW,22K/22K,SOT-23,TP TR-DIGITAL;KSR2103,PNP,200MW,22K/22K,SOT TR-SMALL SIGNAL;KSC1623-L,NPN,200mW,SOTTR-DIGITAL;-,NPN,200MW,22K/22K,SOT-23,TP TR-DIGITAL;KSR2103,PNP,200MW,22K/22K,SOT 1 1 1 1 1 SA SA SA SA SA AQ9 0501-000002 TR-SMALL SIGNAL;KSA812,PNP,150MW,SOT-23, 1 SA Samsung Electronics CIS Only Other Only Loc.No Part No Description ; Specification Q’ty S.N.A Remark AR100 AR14 AR15 AR16 2007-000113 2007-000090 2007-000075 2007-000075 R-CHIP;33ohm,5%,1/10W,TP,1608 R-CHIP;10Kohm,5%,1/10W,TP,1608 R-CHIP;220ohm,5%,1/10W,TP,1608 R-CHIP;220ohm,5%,1/10W,TP,1608 1 1 1 1 SA SA SA SA AR17 AR28 AR29 AR30 AR31 2007-000078 2007-000090 2007-000075 2007-000075 2007-000078 R-CHIP;1Kohm,5%,1/10W,TP,1608 R-CHIP;10Kohm,5%,1/10W,TP,1608 R-CHIP;220ohm,5%,1/10W,TP,1608 R-CHIP;220ohm,5%,1/10W,TP,1608 R-CHIP;1Kohm,5%,1/10W,TP,1608 1 1 1 1 1 SA SA SA SA SA AR41 AR42 AR43 AR46 AR47 2007-000090 2007-000078 2007-000092 2007-000090 2007-000078 R-CHIP;10Kohm,5%,1/10W,TP,1608 R-CHIP;1Kohm,5%,1/10W,TP,1608 R-CHIP;15Kohm,5%,1/10W,TP,1608 R-CHIP;10Kohm,5%,1/10W,TP,1608 R-CHIP;1Kohm,5%,1/10W,TP,1608 1 1 1 1 1 SA SA SA SA SA AR48 AR52 AR54 AR55 AR58 2007-000092 2007-000078 2007-000102 2007-000077 2007-000491 R-CHIP;15Kohm,5%,1/10W,TP,1608 R-CHIP;1Kohm,5%,1/10W,TP,1608 R-CHIP;100Kohm,5%,1/10W,TP,1608 R-CHIP;470ohm,5%,1/10W,TP,1608 R-CHIP;2.2KOHM,1%,1/10W,TP,1608 1 1 1 1 1 SA SA SA SA SA AR59 AR60 AR61 AR62 AR63 2007-000079 2007-000125 2007-000075 2007-001134 2007-000070 R-CHIP;1.8Kohm,5%,1/10W,TP,1608 R-CHIP;3.9Kohm,5%,1/10W,TP,1608 R-CHIP;220ohm,5%,1/10W,TP,1608 R-CHIP;68ohm,5%,1/10W,TP,1608 R-CHIP;0ohm,5%,1/10W,TP,1608 1 1 1 1 1 SA SA SA SA SA AR64 AR65 AR71 AR72 AR73 2007-000102 2007-000070 2007-000078 2007-000078 2007-000078 R-CHIP;100Kohm,5%,1/10W,TP,1608 R-CHIP;0ohm,5%,1/10W,TP,1608 R-CHIP;1Kohm,5%,1/10W,TP,1608 R-CHIP;1Kohm,5%,1/10W,TP,1608 R-CHIP;1Kohm,5%,1/10W,TP,1608 1 1 1 1 1 SA SA SA SA SA AR74 DCN1 DCN2 DOC4 DOE1 2007-000124 3708-000491 3708-001266 2203-005148 2401-000598 R-CHIP;2.2Kohm,5%,1/10W,TP,1608 CONNECTOR-FPC/FFC/PIC;23P,1mm,STRAIGHT,S CONNECTOR-FPC/FFC/PIC;11P,1MM,STRAIGHT,S C-CER,CHIP;100nF,10%,16V,X7R,TP,1608 C-AL;1uF,20%,50V,GP,TP,4x7,5 1 1 1 1 1 SA SA SA SA SA DOIC2 DOL1 DOL2 DOR3 DQ1 3707-001065 2901-001273 3301-001419 2007-000075 0501-000341 CONNECTOR-OPTICAL;PLUG,GP1FA550TZ,6dB,2. FILTER-EMI SMD;50V,2A,-,220pF,3.2x1.6x0. BEAD-SMD;-,220,-,500,TP,-,0.3 R-CHIP;220ohm,5%,1/10W,TP,1608 TR-SMALL SIGNAL;KSC1623-L,NPN,200mW,SOT- 1 1 1 1 1 SA SA SA SA SA DQ2 DQ3 DR1 DR2 DR3 0501-000341 0501-000341 2007-000090 2007-000090 2007-000463 TR-SMALL SIGNAL;KSC1623-L,NPN,200mW,SOTTR-SMALL SIGNAL;KSC1623-L,NPN,200mW,SOTR-CHIP;10Kohm,5%,1/10W,TP,1608 R-CHIP;10Kohm,5%,1/10W,TP,1608 R-CHIP;18ohm,5%,1/10W,TP,1608 1 1 1 1 1 SA SA SA SA SA DR4 DR5 DR6 FC1 FC10 2007-000122 2007-000090 2007-001134 2203-000257 2203-005148 R-CHIP;1.2Kohm,5%,1/10W,TP,1608 R-CHIP;10Kohm,5%,1/10W,TP,1608 R-CHIP;68ohm,5%,1/10W,TP,1608 C-CER,CHIP;10nF,10%,50V,X7R,TP,1608 C-CER,CHIP;100nF,10%,16V,X7R,TP,1608 1 1 1 1 1 SA SA SA SA SA FC11 FC12 2203-001222 2203-005148 C-CER,CHIP;0.82NF,10%,50V,X7R,TP,1608 C-CER,CHIP;100nF,10%,16V,X7R,TP,1608 1 1 SA SA This Document can not be used without Samsung’s authorization 7-1 Electrical Parts List Loc.No Part No Description ; Specification Q’ty S.N.A Remark Loc.No Part No Description ; Specification Q’ty S.N.A Remark FC2 FC3 FC4 2203-001607 2203-000257 2203-000669 C-CER,CHIP;0.22nF,5%,50V,NP0,-,1608 C-CER,CHIP;10nF,10%,50V,X7R,TP,1608 C-CER,CHIP;27nF,10%,25V,X7R,TP,1608,- 1 1 1 SA SA SA KQ11 KQ12 KQ13 0501-000279 0501-000279 0501-000279 TR-SMALL SIGNAL;KSA1182-Y,PNP,150mW,SOTTR-SMALL SIGNAL;KSA1182-Y,PNP,150mW,SOTTR-SMALL SIGNAL;KSA1182-Y,PNP,150mW,SOT- 1 1 1 SA SA SA FC5 FC6 FC8 FC9 FE1 2203-000140 2203-000669 2203-005148 2203-000257 2401-002144 C-CER,CHIP;1.5nF,10%,50V,X7R,1608 C-CER,CHIP;27nF,10%,25V,X7R,TP,1608,C-CER,CHIP;100nF,10%,16V,X7R,TP,1608 C-CER,CHIP;10nF,10%,50V,X7R,TP,1608 C-AL;47uF,20%,16V,GP,TP,5x11,5 1 1 1 1 1 SA SA SA SA SA KQ14 KQ15 KQ16 KQ17 KQ2 0501-000279 0501-000279 0501-000279 0501-000341 0501-000341 TR-SMALL SIGNAL;KSA1182-Y,PNP,150mW,SOTTR-SMALL SIGNAL;KSA1182-Y,PNP,150mW,SOTTR-SMALL SIGNAL;KSA1182-Y,PNP,150mW,SOTTR-SMALL SIGNAL;KSC1623-L,NPN,200mW,SOTTR-SMALL SIGNAL;KSC1623-L,NPN,200mW,SOT- 1 1 1 1 1 SA SA SA SA SA FE2 FE3 FIC1 FR1 FR10 2401-002144 2401-002144 1003-001735 2007-000130 2007-000092 C-AL;47uF,20%,16V,GP,TP,5x11,5 C-AL;47uF,20%,16V,GP,TP,5x11,5 IC-MOTOR DRIVER;FAN8026G3,SSOPH,28P,18.4 R-CHIP;39Kohm,5%,1/10W,TP,1608 R-CHIP;15Kohm,5%,1/10W,TP,1608 1 1 1 1 1 SA SA SA SA SA KQ3 KQ4 KQ5 KQ6 KQ7 0501-000341 0501-000341 0501-000341 0501-000341 0501-000341 TR-SMALL SIGNAL;KSC1623-L,NPN,200mW,SOTTR-SMALL SIGNAL;KSC1623-L,NPN,200mW,SOTTR-SMALL SIGNAL;KSC1623-L,NPN,200mW,SOTTR-SMALL SIGNAL;KSC1623-L,NPN,200mW,SOTTR-SMALL SIGNAL;KSC1623-L,NPN,200mW,SOT- 1 1 1 1 1 SA SA SA SA SA FR11 FR12 FR13 FR14 FR15 2007-000129 2007-000329 2007-000094 2007-000078 2007-000129 R-CHIP;27Kohm,5%,1/10W,TP,1608 R-CHIP;11Kohm,5%,1/10W,TP,1608 R-CHIP;22Kohm,5%,1/10W,TP,1608 R-CHIP;1Kohm,5%,1/10W,TP,1608 R-CHIP;27Kohm,5%,1/10W,TP,1608 1 1 1 1 1 SA SA SA SA SA KQ8 KQ9 KR1 KR10 KR100 0501-000341 0501-000341 2007-000074 2007-000072 2001-000527 TR-SMALL SIGNAL;KSC1623-L,NPN,200mW,SOTTR-SMALL SIGNAL;KSC1623-L,NPN,200mW,SOTR-CHIP;100ohm,5%,1/10W,TP,1608 R-CHIP;47ohm,5%,1/10W,TP,1608 R-CARBON;22OHM,5%,1/8W,AA,TP,1.8X3.2MM 1 1 1 1 1 SA SA SA SA SA FR16 FR19 FR2 FR23 FR24 2007-007277 2007-000090 2007-000090 2007-000086 2007-000086 R-CHIP;392ohm,1%,1/10W,TP,1608 R-CHIP;10Kohm,5%,1/10W,TP,1608 R-CHIP;10Kohm,5%,1/10W,TP,1608 R-CHIP;5.6Kohm,5%,1/10W,TP,1608 R-CHIP;5.6Kohm,5%,1/10W,TP,1608 1 1 1 1 1 SA SA SA SA SA KR11 KR12 KR13 KR14 KR15 2007-000124 2007-000078 2007-000078 2007-000078 2007-000078 R-CHIP;2.2Kohm,5%,1/10W,TP,1608 R-CHIP;1Kohm,5%,1/10W,TP,1608 R-CHIP;1Kohm,5%,1/10W,TP,1608 R-CHIP;1Kohm,5%,1/10W,TP,1608 R-CHIP;1Kohm,5%,1/10W,TP,1608 1 1 1 1 1 SA SA SA SA SA FR25 FR26 FR28 FR3 FR31 2007-000086 2007-000094 2007-007277 2007-000098 2007-000134 R-CHIP;5.6Kohm,5%,1/10W,TP,1608 R-CHIP;22Kohm,5%,1/10W,TP,1608 R-CHIP;392ohm,1%,1/10W,TP,1608 R-CHIP;56Kohm,5%,1/10W,TP,1608 R-CHIP;33Kohm,5%,1/10W,TP,1608 1 1 1 1 1 SA SA SA SA SA KR16 KR17 KR18 KR19 KR2 2007-000078 2007-000078 2007-000078 2007-000078 2007-000090 R-CHIP;1Kohm,5%,1/10W,TP,1608 R-CHIP;1Kohm,5%,1/10W,TP,1608 R-CHIP;1Kohm,5%,1/10W,TP,1608 R-CHIP;1Kohm,5%,1/10W,TP,1608 R-CHIP;10Kohm,5%,1/10W,TP,1608 1 1 1 1 1 SA SA SA SA SA FR33 FR34 FR36 FR37 FR39 2007-000091 2007-000134 2007-000091 2007-000084 2007-000084 R-CHIP;12Kohm,5%,1/10W,TP,1608 R-CHIP;33Kohm,5%,1/10W,TP,1608 R-CHIP;12Kohm,5%,1/10W,TP,1608 R-CHIP;4.7Kohm,5%,1/10W,TP,1608 R-CHIP;4.7Kohm,5%,1/10W,TP,1608 1 1 1 1 1 SA SA SA SA SA KR20 KR21 KR22 KR23 KR24 2007-000078 2007-000078 2007-000078 2007-000078 2007-000078 R-CHIP;1Kohm,5%,1/10W,TP,1608 R-CHIP;1Kohm,5%,1/10W,TP,1608 R-CHIP;1Kohm,5%,1/10W,TP,1608 R-CHIP;1Kohm,5%,1/10W,TP,1608 R-CHIP;1Kohm,5%,1/10W,TP,1608 1 1 1 1 1 SA SA SA SA SA FR4 FR41 FR42 FR43 FR44 2007-000129 2007-000090 2007-000491 2007-000491 2007-000091 R-CHIP;27Kohm,5%,1/10W,TP,1608 R-CHIP;10Kohm,5%,1/10W,TP,1608 R-CHIP;2.2KOHM,1%,1/10W,TP,1608 R-CHIP;2.2KOHM,1%,1/10W,TP,1608 R-CHIP;12Kohm,5%,1/10W,TP,1608 1 1 1 1 1 SA SA SA SA SA KR25 KR26 KR27 KR28 KR29 2007-000078 2007-000078 2007-000071 2007-000071 2007-000071 R-CHIP;1Kohm,5%,1/10W,TP,1608 R-CHIP;1Kohm,5%,1/10W,TP,1608 R-CHIP;22ohm,5%,1/10W,TP,1608 R-CHIP;22ohm,5%,1/10W,TP,1608 R-CHIP;22ohm,5%,1/10W,TP,1608 1 1 1 1 1 SA SA SA SA SA FR5 FR7 FR8 FR9 KC1 2007-000086 2007-000086 2007-000086 2007-000090 2203-005148 R-CHIP;5.6Kohm,5%,1/10W,TP,1608 R-CHIP;5.6Kohm,5%,1/10W,TP,1608 R-CHIP;5.6Kohm,5%,1/10W,TP,1608 R-CHIP;10Kohm,5%,1/10W,TP,1608 C-CER,CHIP;100nF,10%,16V,X7R,TP,1608 1 1 1 1 1 SA SA SA SA SA KR3 KR30 KR31 KR32 KR33 2007-000074 2007-000071 2007-000071 2007-000071 2007-000071 R-CHIP;100ohm,5%,1/10W,TP,1608 R-CHIP;22ohm,5%,1/10W,TP,1608 R-CHIP;22ohm,5%,1/10W,TP,1608 R-CHIP;22ohm,5%,1/10W,TP,1608 R-CHIP;22ohm,5%,1/10W,TP,1608 1 1 1 1 1 SA SA SA SA SA KC2 KC3 KC4 KE1 KE2 2203-005065 2203-000140 2203-000440 2401-002144 2401-000414 C-CER,CHIP;1000nF,+80-20%,10V,Y5V,1608 C-CER,CHIP;1.5nF,10%,50V,X7R,1608 C-CER,CHIP;1nF,10%,50V,X7R,TP,1608,C-AL;47uF,20%,16V,GP,TP,5x11,5 C-AL;10uF,20%,16V,GP,TP,4x7,5 1 1 1 1 1 SA SA SA SA SA KR34 KR35 KR36 KR37 KR4 2007-000084 2007-000084 2007-000124 2007-000071 2007-000090 R-CHIP;4.7Kohm,5%,1/10W,TP,1608 R-CHIP;4.7Kohm,5%,1/10W,TP,1608 R-CHIP;2.2Kohm,5%,1/10W,TP,1608 R-CHIP;22ohm,5%,1/10W,TP,1608 R-CHIP;10Kohm,5%,1/10W,TP,1608 1 1 1 1 1 SA SA SA SA SA KE3 KIC1 KIC2 KIR1 KML1 2401-002165 AK09-00075B 1203-003526 0609-001188 AK07-00030A C-AL;100uF,20%,16V,GP,TP,6.3x7,5 IC MICOM;eFHP5842,SPINO,24PIN,-0.3V ~ 6 IC-VOL. DETECTOR;KA75290,TO-92,3P,4.58x4 MODULE REMOCON;VERTICAL,9.6MM,TR LED DISPLAY;BCD-9030B,DVD-P250K,-,7,7,27 1 1 1 1 1 SA SA SA SA SA KR5 KR6 KR7 KR8 KR9 2007-000083 2007-000123 2007-000084 2007-000090 2007-000090 R-CHIP;3Kohm,5%,1/10W,TP,1608 R-CHIP;1.5Kohm,5%,1/10W,TP,1608 R-CHIP;4.7Kohm,5%,1/10W,TP,1608 R-CHIP;10Kohm,5%,1/10W,TP,1608 R-CHIP;10Kohm,5%,1/10W,TP,1608 1 1 1 1 1 SA SA SA SA SA KQ1 KQ10 0501-000341 0501-000279 TR-SMALL SIGNAL;KSC1623-L,NPN,200mW,SOTTR-SMALL SIGNAL;KSA1182-Y,PNP,150mW,SOT- 1 1 SA SA KSW1 KSW2 3404-001261 3404-001261 SWITCH-TACT;15V DC,20mA,100gf,7.4X7.95X1 SWITCH-TACT;15V DC,20mA,100gf,7.4X7.95X1 1 1 SA SA 7-2 This Document can not be used without Samsung’s authorization Samsung Electronics Electrical Parts List Loc.No Part No Description ; Specification Q’ty S.N.A Remark Loc.No Part No Description ; Specification Q’ty S.N.A Remark KSW3 KSW4 KSW5 3404-001261 3404-001261 3404-001261 SWITCH-TACT;15V DC,20mA,100gf,7.4X7.95X1 SWITCH-TACT;15V DC,20mA,100gf,7.4X7.95X1 SWITCH-TACT;15V DC,20mA,100gf,7.4X7.95X1 1 1 1 SA SA SA PES62 PES63 PFD01 2401-001370 2401-002438 3601-001123 C-AL;470uF,20%,16V,GP,TP,8x11.5,5 C-AL;47uF,20%,50V,WT,TP,6.3x11,5 FUSE-CARTRIDGE;250V,1.6A,TIME-LAG,CERAMI 1 1 1 SA SA SA KSW6 KSW7 LED1 PBR11 PBS01 3404-001261 3404-001261 0601-001587 3301-000297 AC27-92001M SWITCH-TACT;15V DC,20mA,100gf,7.4X7.95X1 SWITCH-TACT;15V DC,20mA,100gf,7.4X7.95X1 LED;ROUND,RED,3.1mm,635nm,3.8x5.2m BEAD-AXIAL;25ohm,3.6x1.2x5.7mm,-,TP,-,-, COIL-INDUCTOR;RH3.5X6.5RS,BEAD(RADIAL),- 1 1 1 1 1 SA SA SA SA SA PIC1 PIC2 PICS1 PICS2 PICS3 1203-002730 1203-002779 0604-001028 AC14-12006D 1203-000122 IC-PWM CONTROLLER;ICE2B0565,PDIP,8P,9.52 IC-POSI.FIXED REG.;G952T63U,SOT-223,3P,6 PHOTO-COUPLER;TR,50-600%,250mW,DIP-4,ST IC;KA431Z,TO-92,TAPING IC-NEGA.FIXED REG.;7908,TO-220,3P,-,PLAS 1 1 1 1 1 SA SA SA SA SA PC1 PC3 PC4 PC5 PC6 2203-000257 2203-000257 2203-005148 2203-005148 2203-005148 C-CER,CHIP;10nF,10%,50V,X7R,TP,1608 C-CER,CHIP;10nF,10%,50V,X7R,TP,1608 C-CER,CHIP;100nF,10%,16V,X7R,TP,1608 C-CER,CHIP;100nF,10%,16V,X7R,TP,1608 C-CER,CHIP;100nF,10%,16V,X7R,TP,1608 1 1 1 1 1 SA SA SA SA SA PICS4 PICS5 PLS01 PLS31 PPS12 1203-000293 1203-002185 AC29-00003A AC27-12001N 2003-000994 IC-POSI.FIXED REG.;7808,TO-220,3P,-,PLAS IC-POSI.FIXED REG.;3RD13,TO-220,4P,402MI FILTER LINE NOISE;-,20mH MIN,-,-,COIL CHOKE;10UH-15%,RA,K-30,Q80,150KHZ,R-METAL OXIDE(S);33Kohm,5%,2W,AF,TP,3.9x 1 1 1 1 1 SA SA SA SA SA PCD01 PCD02 PCD11 PCD12 PCF01 2201-000963 2201-000963 2305-001029 2201-000129 2301-001719 C-CERAMIC,DISC;1NF,20%,400V,Y5U,TP,9.5X6 C-CERAMIC,DISC;1NF,20%,400V,Y5U,TP,9.5X6 C-FILM,LEAD-PEF;10nF,10%,630V,TP,12x9x12 C-CERAMIC,DISC;0.1NF,10%,1KV,Y5P,TP,7X4M C-FILM,LEAD;100nF,10%,275V,TP,17.5*6*12m 1 1 1 1 1 SA SA SA SA SA PQS58 PQS59 PQS63 PQS64 PQS65 0501-000362 0501-000362 0501-000362 0504-000156 0504-000128 TR-SMALL SIGNAL;KSC2328A-Y,NPN,1000MW,TO TR-SMALL SIGNAL;KSC2328A-Y,NPN,1000MW,TO TR-SMALL SIGNAL;KSC2328A-Y,NPN,1000MW,TO TR-DIGITAL;KSR2103,PNP,200MW,22K/22K,SOT TR-DIGITAL;-,NPN,200MW,22K/22K,SOT-23,TP 1 1 1 1 1 SA SA SA SA SA PCF02 PCF11 PCF20 PCNS2 PCS32 2301-001719 2401-002608 2201-000379 3711-000203 2301-000129 C-FILM,LEAD;100nF,10%,275V,TP,17.5*6*12m C-AL;33uF,20%,35V,GP,TP,5x11,5 C-CERAMIC,DISC;22NF,+80-20%,50V,Y5V,TP,9 CONNECTOR-HEADER;1WALL,2P,1R,7.92MM,STRA C-FILM,LEAD-PEF;100nF,5%,50V,TP,10X9X4.3 1 1 1 1 1 SA SA SA SA SA PQS66 PR2 PR3 PR4 PRD31 0501-000303 2001-000546 2001-000546 2001-000546 2007-000078 TR-SMALL SIGNAL;KSA733,PNP,250mW,TO-92,T R-CARBON;270KOHM,5%,1/4W,AA,TP,2.4X6.4M R-CARBON;270KOHM,5%,1/4W,AA,TP,2.4X6.4M R-CARBON;270KOHM,5%,1/4W,AA,TP,2.4X6.4M R-CHIP;1Kohm,5%,1/10W,TP,1608 1 1 1 1 1 SA SA SA SA SA PDF13 PDS01 PDS02 PDS03 PDS04 0402-001195 0402-001196 0402-001196 0402-001196 0402-001196 DIODE-RECTIFIER;F1T4,400V,1A,DO-204AC,TP DIODE-RECTIFIER;1T5,600V,1A,TS-1,TP DIODE-RECTIFIER;1T5,600V,1A,TS-1,TP DIODE-RECTIFIER;1T5,600V,1A,TS-1,TP DIODE-RECTIFIER;1T5,600V,1A,TS-1,TP 1 1 1 1 1 SA SA SA SA SA PRD32 PRF01 PRF10 PRF11 PRF17 2007-000075 2002-000121 2006-000262 2001-000527 2001-000527 R-CHIP;220ohm,5%,1/10W,TP,1608 R-COMPOSITION;1Mohm,10%,1/2W,AA,TP,3.5x9 R-CEMENT;2.7ohm,10%,2W,CB,TP,7.5x11x20. R-CARBON;22OHM,5%,1/8W,AA,TP,1.8X3.2MM R-CARBON;22OHM,5%,1/8W,AA,TP,1.8X3.2MM 1 1 1 1 1 SA SA SA SA SA PDS11 PDS31 PDS33 PDS34 PDS35 0402-000012 0402-001195 0402-001194 0402-001439 0402-001195 DIODE-RECTIFIER;UF4007,1KV,1A,DO-41,TP DIODE-RECTIFIER;F1T4,400V,1A,DO-204AC,TP DIODE-RECTIFIER;SHG2D,200V,2A,-,TP DIODE-RECTIFIER;-,100V,3A,SHK75-11,BK DIODE-RECTIFIER;F1T4,400V,1A,DO-204AC,TP 1 1 1 1 1 SA SA SA SA SA PRF20 PRF21 PRS13 PRS32 PRS33 2003-000119 2001-000290 2003-000994 2007-000078 2007-000043 R-METAL OXIDE;0.68ohm,5%,2W,AE,TP,6x16mm R-CARBON;10KOHM,5%,1/8W,AA,TP,1.8X3.2MM R-METAL OXIDE(S);33Kohm,5%,2W,AF,TP,3.9x R-CHIP;1Kohm,5%,1/10W,TP,1608 R-CHIP;1Kohm,1%,1/10W,TP,1608 1 1 1 1 1 SA SA SA SA SA PDS51 PDS59 PE1 PE2 PE3 0401-000101 0401-000101 2401-002165 2401-002165 2401-002165 DIODE-SWITCHING;1N4148,75V,150MA,DO-35,T DIODE-SWITCHING;1N4148,75V,150MA,DO-35,T C-AL;100uF,20%,16V,GP,TP,6.3x7,5 C-AL;100uF,20%,16V,GP,TP,6.3x7,5 C-AL;100uF,20%,16V,GP,TP,6.3x7,5 1 1 1 1 1 SA SA SA SA SA PRS34 PRS52 PRS55 PRS56 PRS57 2007-000256 0402-000127 2001-000062 2001-000449 2007-000491 R-CHIP;1.6Kohm,1%,1/10W,TP,1608 DIODE-RECTIFIER;1N4002,100V,1A,DO-41,TP R-CARBON;470OHM,5%,1/4W,AA,TP,2.4X6.4MM R-CARBON;2.2KOHM,5%,1/8W,AA,TP,1.8X3.2M R-CHIP;2.2KOHM,1%,1/10W,TP,1608 1 1 1 1 1 SA SA SA SA SA PE4 PE5 PEF12 PEF14 PER10 2401-001479 2401-002165 2401-000598 2401-002608 2401-004086 C-AL;470uF,20%,10V,GP,TP,6.3*11mm,5 C-AL;100uF,20%,16V,GP,TP,6.3x7,5 C-AL;1uF,20%,50V,GP,TP,4x7,5 C-AL;33uF,20%,35V,GP,TP,5x11,5 C-AL;68uF,°æ20%,450V,GP,BK,25.4x20m 1 1 1 1 1 SA SA SA SA SA PRS58 PRS59 PRS60 PRS61 PTD1 2007-000102 2007-000491 2001-000290 2001-000449 AK26-00018B R-CHIP;100Kohm,5%,1/10W,TP,1608 R-CHIP;2.2KOHM,1%,1/10W,TP,1608 R-CARBON;10KOHM,5%,1/8W,AA,TP,1.8X3.2MM R-CARBON;2.2KOHM,5%,1/8W,AA,TP,1.8X3.2M TRANS SWITCHING;EER2828,DVD-P243K,-,FREE 1 1 1 1 1 SA SA SA SA SA PES31 PES33 PES34 PES35 2401-004087 2401-003477 2401-003059 2401-003480 2401-000302 C-AL;68uF,°æ20%,400V,GP,BULK,22x20m C-AL;330UF,20%,25V,LZ,TP,10X12.5MM, C-AL;1000UF,20%,16V,WT,TP,10X16,5 C-AL;1000UF,20%,10V,LZ,TP,10X16MM,5 C-AL;100uF,20%,25V,GP,TP,6.3x11,5 1 1 1 1 1 SA SA SA SA SA PZD11 PZD21 PZS51 RC10 RC11 0403-001318 0403-000752 0403-000717 2203-005148 2203-005148 DIODE-ZENER;MTZJ4.3B,4.17-4.43V,500MW,DO DIODE-ZENER;MTZJ22C,21.08-22.17V,500MW,D DIODE-ZENER;MTZJ5.1B,4.94-5.2V,500MW,DOC-CER,CHIP;100nF,10%,16V,X7R,TP,1608 C-CER,CHIP;100nF,10%,16V,X7R,TP,1608 1 1 1 1 1 SA SA SA SA SA PES38 PES52 PES54 PES55 PES57 2401-001358 2401-000598 2401-002144 2401-001358 2401-002144 C-AL;470uF,20%,10V,WT,TP,8x11.5mm,5 C-AL;1uF,20%,50V,GP,TP,4x7,5 C-AL;47uF,20%,16V,GP,TP,5x11,5 C-AL;470uF,20%,10V,WT,TP,8x11.5mm,5 C-AL;47uF,20%,16V,GP,TP,5x11,5 1 1 1 1 1 SA SA SA SA SA RC12 RC13 RC14 RC15 RC16 2203-001126 2203-005148 2203-005148 2203-001662 2203-001662 C-CER,CHIP;0.68nF,10%,50V,X7R,1608 C-CER,CHIP;100nF,10%,16V,X7R,TP,1608 C-CER,CHIP;100nF,10%,16V,X7R,TP,1608 C-CER,CHIP;5.6NF,10%,50V,X7R,TP,1608 C-CER,CHIP;5.6NF,10%,50V,X7R,TP,1608 1 1 1 1 1 SA SA SA SA SA PES58 PES59 2401-002438 2401-002144 C-AL;47uF,20%,50V,WT,TP,6.3x11,5 C-AL;47uF,20%,16V,GP,TP,5x11,5 1 1 SA SA RC17 RC18 2203-001662 2203-001052 C-CER,CHIP;5.6NF,10%,50V,X7R,TP,1608 C-CER,CHIP;0.56nF,10%,50V,X7R,TP,1608 1 1 SA SA Samsung Electronics CIS Only Other Only This Document can not be used without Samsung’s authorization 7-3 Electrical Parts List Loc.No Part No Description ; Specification Q’ty S.N.A Remark Loc.No Part No Description ; Specification Q’ty S.N.A Remark RC19 RC2 RC20 2203-000815 2203-005148 2203-000491 C-CER,CHIP;0.033NF,5%,50V,C0G,TP,1608 C-CER,CHIP;100nF,10%,16V,X7R,TP,1608 C-CER,CHIP;2.2nF,10%,50V,X7R,TP,1608,- 1 1 1 SA SA SA SCC2 SCC3 SCC4 2203-005148 2203-000236 2203-000236 C-CER,CHIP;100nF,10%,16V,X7R,TP,1608 C-CER,CHIP;0.1NF,5%,50V,C0G,TP,1608 C-CER,CHIP;0.1NF,5%,50V,C0G,TP,1608 1 1 1 SA SA SA RC21 RC22 RC23 RC24 RC25 2203-000491 2203-002041 2203-000491 2203-005148 2203-000491 C-CER,CHIP;2.2nF,10%,50V,X7R,TP,1608,C-CER,CHIP;0.47nF,10%,50V,X7R,TP,1608 C-CER,CHIP;2.2nF,10%,50V,X7R,TP,1608,C-CER,CHIP;100nF,10%,16V,X7R,TP,1608 C-CER,CHIP;2.2nF,10%,50V,X7R,TP,1608,- 1 1 1 1 1 SA SA SA SA SA SCC49 SCE49 SCE55 SCE70 SCE71 2203-000257 2401-002165 2401-001479 2401-000414 2401-000414 C-CER,CHIP;10nF,10%,50V,X7R,TP,1608 C-AL;100uF,20%,16V,GP,TP,6.3x7,5 C-AL;470uF,20%,10V,GP,TP,6.3*11mm,5 C-AL;10uF,20%,16V,GP,TP,4x7,5 C-AL;10uF,20%,16V,GP,TP,4x7,5 1 1 1 1 1 SA SA SA SA SA RC28 RC29 RC30 RC31 RC32 2203-000257 2203-000257 2203-000257 2203-005148 2203-001662 C-CER,CHIP;10nF,10%,50V,X7R,TP,1608 C-CER,CHIP;10nF,10%,50V,X7R,TP,1608 C-CER,CHIP;10nF,10%,50V,X7R,TP,1608 C-CER,CHIP;100nF,10%,16V,X7R,TP,1608 C-CER,CHIP;5.6NF,10%,50V,X7R,TP,1608 1 1 1 1 1 SA SA SA SA SA SCIC2 SCIC3 SCJ1 SCL1 SCL2 1204-002139 1204-001927 3722-001359 2703-000125 2703-000125 IC-AUDIO PROCESSOR;MM1508,SOT,6P,-,PLAST IC-AUDIO PROCESSOR;MM1501,SOT,6P,-,PLAST JACK-SCART;21P,-,SN,BLK,#20-28 INDUCTOR-SMD;10uH,10%,2012 INDUCTOR-SMD;10uH,10%,2012 1 1 1 1 1 SA SA SA SA SA RC33 RC34 RC35 RC36 RC37 2203-001662 2203-000440 2203-000257 2203-001662 2203-001662 C-CER,CHIP;5.6NF,10%,50V,X7R,TP,1608 C-CER,CHIP;1nF,10%,50V,X7R,TP,1608,C-CER,CHIP;10nF,10%,50V,X7R,TP,1608 C-CER,CHIP;5.6NF,10%,50V,X7R,TP,1608 C-CER,CHIP;5.6NF,10%,50V,X7R,TP,1608 1 1 1 1 1 SA SA SA SA SA SCQ1 SCQ2 SCQ3 SCQ4 SCQ5 0504-000128 0504-000128 0501-000002 0504-000128 0501-000002 TR-DIGITAL;-,NPN,200MW,22K/22K,SOT-23,TP TR-DIGITAL;-,NPN,200MW,22K/22K,SOT-23,TP TR-SMALL SIGNAL;KSA812,PNP,150MW,SOT-23, TR-DIGITAL;-,NPN,200MW,22K/22K,SOT-23,TP TR-SMALL SIGNAL;KSA812,PNP,150MW,SOT-23, 1 1 1 1 1 SA SA SA SA SA RC4 RC5 RC6 RC7 RC8 2203-005148 2203-005148 2203-001103 2203-001634 2203-001607 C-CER,CHIP;100nF,10%,16V,X7R,TP,1608 C-CER,CHIP;100nF,10%,16V,X7R,TP,1608 C-CER,CHIP;6.8nF,10%,50V,X7R,TP,1608,C-CER,CHIP;33nF,10%,50V,X7R,TP,1608,1.6m C-CER,CHIP;0.22nF,5%,50V,NP0,-,1608 1 1 1 1 1 SA SA SA SA SA SCR1 SCR15 SCR19 SCR2 SCR20 2007-000078 2007-001164 2007-000119 2007-000120 2007-000119 R-CHIP;1Kohm,5%,1/10W,TP,1608 R-CHIP;75ohm,1%,1/10W,TP,1608 R-CHIP;560ohm,5%,1/10W,TP,1608 R-CHIP;680ohm,5%,1/10W,TP,1608 R-CHIP;560ohm,5%,1/10W,TP,1608 1 1 1 1 1 SA SA SA SA SA RC9 RD1 RE1 RE2 RE5 2203-005148 0407-000116 2401-002165 2401-002165 2401-002144 C-CER,CHIP;100nF,10%,16V,X7R,TP,1608 DIODE-ARRAY;DAP202K,80V,100mA,CK2-3,SOTC-AL;100uF,20%,16V,GP,TP,6.3x7,5 C-AL;100uF,20%,16V,GP,TP,6.3x7,5 C-AL;47uF,20%,16V,GP,TP,5x11,5 1 1 1 1 1 SA SA SA SA SA SCR21 SCR3 SCR35 SCR36 SCR37 2007-000120 2007-000078 2007-001164 2007-001164 2007-001164 R-CHIP;680ohm,5%,1/10W,TP,1608 R-CHIP;1Kohm,5%,1/10W,TP,1608 R-CHIP;75ohm,1%,1/10W,TP,1608 R-CHIP;75ohm,1%,1/10W,TP,1608 R-CHIP;75ohm,1%,1/10W,TP,1608 1 1 1 1 1 SA SA SA SA SA RIC1 RL3 RL5 RQ1 RQ2 AK13-00005A 2703-000398 2703-000398 0501-000279 0501-000279 IC ASIC;SP3723DE0PM,EXINO2,64,5,+135,Q INDUCTOR-SMD;10uH,10%,3225 INDUCTOR-SMD;10uH,10%,3225 TR-SMALL SIGNAL;KSA1182-Y,PNP,150mW,SOTTR-SMALL SIGNAL;KSA1182-Y,PNP,150mW,SOT- 1 1 1 1 1 SA SA SA SA SA SCR38 SCR39 SCR4 SCR6 VC10 2007-000102 2007-000102 2007-000074 2007-000074 2203-005148 R-CHIP;100Kohm,5%,1/10W,TP,1608 R-CHIP;100Kohm,5%,1/10W,TP,1608 R-CHIP;100ohm,5%,1/10W,TP,1608 R-CHIP;100ohm,5%,1/10W,TP,1608 C-CER,CHIP;100nF,10%,16V,X7R,TP,1608 1 1 1 1 1 SA SA SA SA SA RR10 RR11 RR12 RR13 RR14 2007-000234 2007-000234 2007-000234 2007-000084 2007-000084 R-CHIP;1.3Kohm,5%,1/10W,TP,1608 R-CHIP;1.3Kohm,5%,1/10W,TP,1608 R-CHIP;1.3Kohm,5%,1/10W,TP,1608 R-CHIP;4.7Kohm,5%,1/10W,TP,1608 R-CHIP;4.7Kohm,5%,1/10W,TP,1608 1 1 1 1 1 SA SA SA SA SA VC11 VC17 VC20 VC50 VC6 2203-005148 2203-005148 2203-005148 2203-005148 2203-005148 C-CER,CHIP;100nF,10%,16V,X7R,TP,1608 C-CER,CHIP;100nF,10%,16V,X7R,TP,1608 C-CER,CHIP;100nF,10%,16V,X7R,TP,1608 C-CER,CHIP;100nF,10%,16V,X7R,TP,1608 C-CER,CHIP;100nF,10%,16V,X7R,TP,1608 1 1 1 1 1 SA SA SA SA SA RR15 RR16 RR17 RR18 RR2 2007-000084 2007-000091 2007-007549 2007-000052 2007-000078 R-CHIP;4.7Kohm,5%,1/10W,TP,1608 R-CHIP;12Kohm,5%,1/10W,TP,1608 R-CHIP;4.99Kohm,1%,1/10W,TP,1608 R-CHIP;10Kohm,1%,1/10W,TP,1608 R-CHIP;1Kohm,5%,1/10W,TP,1608 1 1 1 1 1 SA SA SA SA SA VC7 VC8 VC9 VCC1 VE1 2203-005148 2203-005148 2203-005148 2203-000783 2401-002165 C-CER,CHIP;100nF,10%,16V,X7R,TP,1608 C-CER,CHIP;100nF,10%,16V,X7R,TP,1608 C-CER,CHIP;100nF,10%,16V,X7R,TP,1608 C-CER,CHIP;0.33NF,5%,50V,C0G,TP,1608 C-AL;100uF,20%,16V,GP,TP,6.3x7,5 1 1 1 1 1 SA SA SA SA SA RR20 RR21 RR22 RR3 RR4 2007-000312 2007-000134 2007-001010 2007-000078 2007-000312 R-CHIP;10ohm,5%,1/4W,TP,3216 R-CHIP;33Kohm,5%,1/10W,TP,1608 R-CHIP;51Kohm,5%,1/10W,TP,1608 R-CHIP;1Kohm,5%,1/10W,TP,1608 R-CHIP;10ohm,5%,1/4W,TP,3216 1 1 1 1 1 SA SA SA SA SA VE2 VE4 VE5 VE6 VE7 2401-000913 2401-001479 2401-001479 2401-002165 2401-002165 C-AL;22uF,20%,16V,GP,TP,5x11,5 C-AL;470uF,20%,10V,GP,TP,6.3*11mm,5 C-AL;470uF,20%,10V,GP,TP,6.3*11mm,5 C-AL;100uF,20%,16V,GP,TP,6.3x7,5 C-AL;100uF,20%,16V,GP,TP,6.3x7,5 1 1 1 1 1 SA SA SA SA SA RR5 RR7 SCC1 SCC14 SCC15 2007-000084 2007-000381 2203-005148 2203-005148 2203-005148 R-CHIP;4.7Kohm,5%,1/10W,TP,1608 R-CHIP;13Kohm,5%,1/10W,TP,1608 C-CER,CHIP;100nF,10%,16V,X7R,TP,1608 C-CER,CHIP;100nF,10%,16V,X7R,TP,1608 C-CER,CHIP;100nF,10%,16V,X7R,TP,1608 1 1 1 1 1 SA SA SA SA SA VE8 VIC1 VIC2 VJ5 VJ7 2401-001479 1204-001978 1204-001748 2007-000070 2007-000070 C-AL;470uF,20%,10V,GP,TP,6.3*11mm,5 IC-VIDEO PROCESS;LA73054,-,36P,-,SSOP,7V IC-SELECTOR;MM1503XN,SOP,6P,63MIL,PLASTI R-CHIP;0ohm,5%,1/10W,TP,1608 R-CHIP;0ohm,5%,1/10W,TP,1608 1 1 1 1 1 SA SA SA SA SA SCC17 SCC18 2203-001607 2203-001607 C-CER,CHIP;0.22nF,5%,50V,NP0,-,1608 C-CER,CHIP;0.22nF,5%,50V,NP0,-,1608 1 1 SA SA VJACK1 VQ4 3722-002297 0501-000341 JACK-PIN;7P+1P(VHS),SN,BA-RD-BU-GR/RD-W TR-SMALL SIGNAL;KSC1623-L,NPN,200mW,SOT- 1 1 SA SA 7-4 This Document can not be used without Samsung’s authorization Samsung Electronics Electrical Parts List Loc.No Part No Description ; Specification Q’ty S.N.A Remark Loc.No Part No Description ; Specification Q’ty S.N.A Remark VR28 VR29 VR30 2007-000070 2007-000084 2007-001164 R-CHIP;0ohm,5%,1/10W,TP,1608 R-CHIP;4.7Kohm,5%,1/10W,TP,1608 R-CHIP;75ohm,1%,1/10W,TP,1608 1 1 1 SA SA SA ZC6 ZC7 ZC8 2203-005148 2203-005148 2203-005148 C-CER,CHIP;100nF,10%,16V,X7R,TP,1608 C-CER,CHIP;100nF,10%,16V,X7R,TP,1608 C-CER,CHIP;100nF,10%,16V,X7R,TP,1608 1 1 1 SA SA SA VR31 VR33 VR34 VR35 VR36 2007-001164 2007-001164 2007-001164 2007-001164 2007-001164 R-CHIP;75ohm,1%,1/10W,TP,1608 R-CHIP;75ohm,1%,1/10W,TP,1608 R-CHIP;75ohm,1%,1/10W,TP,1608 R-CHIP;75ohm,1%,1/10W,TP,1608 R-CHIP;75ohm,1%,1/10W,TP,1608 1 1 1 1 1 SA SA SA SA SA ZC9 ZE1 ZE2 ZE3 ZE4 2203-005148 2401-002144 2401-002144 2401-002144 2401-002144 C-CER,CHIP;100nF,10%,16V,X7R,TP,1608 C-AL;47uF,20%,16V,GP,TP,5x11,5 C-AL;47uF,20%,16V,GP,TP,5x11,5 C-AL;47uF,20%,16V,GP,TP,5x11,5 C-AL;47uF,20%,16V,GP,TP,5x11,5 1 1 1 1 1 SA SA SA SA SA VR37 VR38 VR41 ZC10 ZC100 2007-000084 2007-000119 2007-000074 2203-005148 2203-000041 R-CHIP;4.7Kohm,5%,1/10W,TP,1608 R-CHIP;560ohm,5%,1/10W,TP,1608 R-CHIP;100ohm,5%,1/10W,TP,1608 C-CER,CHIP;100nF,10%,16V,X7R,TP,1608 C-CER,CHIP;0.01NF,0.25PF,50V,C0G,TP,1608 1 1 1 1 1 SA SA SA SA SA ZE5 ZE6 ZE7 ZE8 ZE9 2401-001507 2401-001507 2401-001479 2401-001479 2401-001479 C-AL;47uF,20%,16V,GP,TP,6.3x5,5 C-AL;47uF,20%,16V,GP,TP,6.3x5,5 C-AL;470uF,20%,10V,GP,TP,6.3*11mm,5 C-AL;470uF,20%,10V,GP,TP,6.3*11mm,5 C-AL;470uF,20%,10V,GP,TP,6.3*11mm,5 1 1 1 1 1 SA SA SA SA SA ZC11 ZC12 ZC14 ZC15 ZC16 2203-005148 2203-005148 2203-005148 2203-005148 2203-005148 C-CER,CHIP;100nF,10%,16V,X7R,TP,1608 C-CER,CHIP;100nF,10%,16V,X7R,TP,1608 C-CER,CHIP;100nF,10%,16V,X7R,TP,1608 C-CER,CHIP;100nF,10%,16V,X7R,TP,1608 C-CER,CHIP;100nF,10%,16V,X7R,TP,1608 1 1 1 1 1 SA SA SA SA SA ZIC1 ZIC2 ZIC3 ZIC5 ZKR1 1204-002307 1105-001305 1107-001502 1103-001134 2007-000084 IC-DECODER;ZR36778,PQFP,208P,28x28mm,PLA IC-DRAM;4S641632,1MX16X4BIT,TSOP,54P,4 IC-FLASH MEMORY;29LV160M,2Mx8Bit,TSOP,48 IC-EEPROM;24C040,512x8,SOP,8P,5.13x3.95m R-CHIP;4.7Kohm,5%,1/10W,TP,1608 1 1 1 1 1 SA SA SA SA SA ZC17 ZC18 ZC19 ZC2 ZC20 2203-005148 2203-000815 2203-000815 2203-005148 2203-000815 C-CER,CHIP;100nF,10%,16V,X7R,TP,1608 C-CER,CHIP;0.033NF,5%,50V,C0G,TP,1608 C-CER,CHIP;0.033NF,5%,50V,C0G,TP,1608 C-CER,CHIP;100nF,10%,16V,X7R,TP,1608 C-CER,CHIP;0.033NF,5%,50V,C0G,TP,1608 1 1 1 1 1 SA SA SA SA SA ZL1 ZL2 ZL3 ZL30 ZL32 3301-001419 3301-001419 3301-001419 3301-000314 3301-000314 BEAD-SMD;-,220,-,500,TP,-,0.3 BEAD-SMD;-,220,-,500,TP,-,0.3 BEAD-SMD;-,220,-,500,TP,-,0.3 BEAD-SMD;120ohm,1.6x0.8x0.8mm,150mA,,,, BEAD-SMD;120ohm,1.6x0.8x0.8mm,150mA,,,, 1 1 1 1 1 SA SA SA SA SA ZC21 ZC22 ZC23 ZC24 ZC25 2203-000815 2203-005148 2203-005148 2203-005148 2203-005148 C-CER,CHIP;0.033NF,5%,50V,C0G,TP,1608 C-CER,CHIP;100nF,10%,16V,X7R,TP,1608 C-CER,CHIP;100nF,10%,16V,X7R,TP,1608 C-CER,CHIP;100nF,10%,16V,X7R,TP,1608 C-CER,CHIP;100nF,10%,16V,X7R,TP,1608 1 1 1 1 1 SA SA SA SA SA ZL33 ZL4 ZL5 ZR10 ZR100 3301-000314 3301-001419 3301-000314 2007-001164 3301-001309 BEAD-SMD;120ohm,1.6x0.8x0.8mm,150mA,,,, BEAD-SMD;-,220,-,500,TP,-,0.3 BEAD-SMD;120ohm,1.6x0.8x0.8mm,150mA,,,, R-CHIP;75ohm,1%,1/10W,TP,1608 BEAD-SMD;47OHM,1608,500,TP,-,-,0.3 1 1 1 1 1 SA SA SA SA SA ZC26 ZC27 ZC28 ZC29 ZC3 2203-005148 2203-005148 2203-005148 2203-005148 2203-005148 C-CER,CHIP;100nF,10%,16V,X7R,TP,1608 C-CER,CHIP;100nF,10%,16V,X7R,TP,1608 C-CER,CHIP;100nF,10%,16V,X7R,TP,1608 C-CER,CHIP;100nF,10%,16V,X7R,TP,1608 C-CER,CHIP;100nF,10%,16V,X7R,TP,1608 1 1 1 1 1 SA SA SA SA SA ZR11 ZR12 ZR13 ZR14 ZR15 2007-001164 2007-001164 2007-001164 2007-001164 2007-001164 R-CHIP;75ohm,1%,1/10W,TP,1608 R-CHIP;75ohm,1%,1/10W,TP,1608 R-CHIP;75ohm,1%,1/10W,TP,1608 R-CHIP;75ohm,1%,1/10W,TP,1608 R-CHIP;75ohm,1%,1/10W,TP,1608 1 1 1 1 1 SA SA SA SA SA ZC30 ZC31 ZC32 ZC33 ZC34 2203-005148 2203-005148 2203-005065 2203-005148 2203-005148 C-CER,CHIP;100nF,10%,16V,X7R,TP,1608 C-CER,CHIP;100nF,10%,16V,X7R,TP,1608 C-CER,CHIP;1000nF,+80-20%,10V,Y5V,1608 C-CER,CHIP;100nF,10%,16V,X7R,TP,1608 C-CER,CHIP;100nF,10%,16V,X7R,TP,1608 1 1 1 1 1 SA SA SA SA SA ZR16 ZR17 ZR18 ZR19 ZR2 2007-001164 2007-007277 2007-000113 2007-000113 2007-000070 R-CHIP;75ohm,1%,1/10W,TP,1608 R-CHIP;392ohm,1%,1/10W,TP,1608 R-CHIP;33ohm,5%,1/10W,TP,1608 R-CHIP;33ohm,5%,1/10W,TP,1608 R-CHIP;0ohm,5%,1/10W,TP,1608 1 1 1 1 1 SA SA SA SA SA ZC35 ZC36 ZC37 ZC39 ZC4 2203-005148 2203-005148 2203-000552 2203-000552 2203-005148 C-CER,CHIP;100nF,10%,16V,X7R,TP,1608 C-CER,CHIP;100nF,10%,16V,X7R,TP,1608 C-CER,CHIP;0.02NF,5%,50V,C0G,TP,1608 C-CER,CHIP;0.02NF,5%,50V,C0G,TP,1608 C-CER,CHIP;100nF,10%,16V,X7R,TP,1608 1 1 1 1 1 SA SA SA SA SA ZR20 ZR21 ZR22 ZR23 ZR24 2007-000113 2007-000113 2007-000074 2011-000816 2007-000109 R-CHIP;33ohm,5%,1/10W,TP,1608 R-CHIP;33ohm,5%,1/10W,TP,1608 R-CHIP;100ohm,5%,1/10W,TP,1608 R-NET;100OHM,5%,1/16W,L,CHIP,8P,TP R-CHIP;1Mohm,5%,1/10W,TP,1608 1 1 1 1 1 SA SA SA SA SA ZC40 ZC41 ZC42 ZC43 ZC44 2203-000257 2203-005148 2203-005148 2203-005148 2203-005148 C-CER,CHIP;10nF,10%,50V,X7R,TP,1608 C-CER,CHIP;100nF,10%,16V,X7R,TP,1608 C-CER,CHIP;100nF,10%,16V,X7R,TP,1608 C-CER,CHIP;100nF,10%,16V,X7R,TP,1608 C-CER,CHIP;100nF,10%,16V,X7R,TP,1608 1 1 1 1 1 SA SA SA SA SA ZR26 ZR27 ZR28 ZR35 ZR36 2007-000070 2007-000074 2007-000074 2007-000084 2007-000084 R-CHIP;0ohm,5%,1/10W,TP,1608 R-CHIP;100ohm,5%,1/10W,TP,1608 R-CHIP;100ohm,5%,1/10W,TP,1608 R-CHIP;4.7Kohm,5%,1/10W,TP,1608 R-CHIP;4.7Kohm,5%,1/10W,TP,1608 1 1 1 1 1 SA SA SA SA SA ZC45 ZC46 ZC47 ZC48 ZC5 2203-005148 2203-005148 2203-005148 2203-005148 2203-005148 C-CER,CHIP;100nF,10%,16V,X7R,TP,1608 C-CER,CHIP;100nF,10%,16V,X7R,TP,1608 C-CER,CHIP;100nF,10%,16V,X7R,TP,1608 C-CER,CHIP;100nF,10%,16V,X7R,TP,1608 C-CER,CHIP;100nF,10%,16V,X7R,TP,1608 1 1 1 1 1 SA SA SA SA SA ZR45 ZR46 ZR49 ZR50 ZR56 2007-000084 2007-000074 2007-000084 2007-000084 2007-000084 R-CHIP;4.7Kohm,5%,1/10W,TP,1608 R-CHIP;100ohm,5%,1/10W,TP,1608 R-CHIP;4.7Kohm,5%,1/10W,TP,1608 R-CHIP;4.7Kohm,5%,1/10W,TP,1608 R-CHIP;4.7Kohm,5%,1/10W,TP,1608 1 1 1 1 1 SA SA SA SA SA ZC51 ZC52 2203-005148 2203-005148 C-CER,CHIP;100nF,10%,16V,X7R,TP,1608 C-CER,CHIP;100nF,10%,16V,X7R,TP,1608 1 1 SA SA ZR61 ZR62 2007-000074 2007-000074 R-CHIP;100ohm,5%,1/10W,TP,1608 R-CHIP;100ohm,5%,1/10W,TP,1608 1 1 SA SA Samsung Electronics This Document can not be used without Samsung’s authorization 7-5 Electrical Parts List Loc.No Part No Description ; Specification Q’ty S.N.A Remark ZR8 ZR9 ZY1 3301-001309 2007-001164 2801-003554 BEAD-SMD;47OHM,1608,500,TP,-,-,0.3 R-CHIP;75ohm,1%,1/10W,TP,1608 CRYSTAL-UNIT;27MHz,10ppm,28-AAM,12pF,40o 1 1 1 SA SA SA H100 H401 DSW1 S.N.A S.N.A AK97-01011A AK61-00358A 3403-001026 AH97-00448B AK97-01005A ASSY-DVD DECK;DP-17V,LEFT,BLACK FRAME-MAIN;DP-17,ABS,SR-0320,94HB,BLK,T3 SWITCH-PUSH;5V,0.7mA,DPST,OFF-ON-OFF,ASSY-SUB MATERIAL;DP-7S,-,ASSY-HOUSING;DP-17,LEFT,BLACK 1 1 1 1 1 SNA SNA SA SNA SNA S.N.A S.N.A S.N.A S.N.A S.N.A AK97-01006A AK97-01105A 0205-001033 0205-001048 AK97-01106A ASSY-HOLDER CHUCK;-,DP-16,ASSY-P U DECK;-,DP-16S,GREASE;PL-30G,W050030019,GREASE-BEARING;G-754,BRN,1Kg/6 ASSY-SUB DECK;-,DP-16S,SEM 1 1 0.5 0.01 1 SNA SNA SNA SNA SNA S.N.A S.N.A S.N.A S.N.A S.N.A AK41-00249A AK41-00251A AH31-00025A AK66-00058A AK61-00362A FFC-DECK;DP-17,-,-,11P,-,1mm PCB-DECK;DP-17,PHENOL,1,-,T1.6,-,-,-,-, MOTOR-LOADING;RF-300EA-1D390,DP-7,170mA, PULLEY-MOTOR;DP-17,POM,-,BLK,I3.5,O7.0,H BRACKET-DECK OUTSERT;DP-16,POM,T1.2,-,-, 1 1 1 1 1 SNA SNA SNA SNA SNA S.N.A S.N.A S.N.A W010 W012 AH66-00077A AK31-00006A AK61-00361A 6003-001157 6002-001086 GEAR-FEED MOTOR;-,POM M90-44,-,-,-,-,-,MOTOR-FEED;RF-300EA-1D390,DP-9,90MA,-,-, BRACKET-DECK;DP-16,SECC T1.2,T1.2,-,-,GR SCREW-TAPTITE;PWH,+,B,M2,L6,ZPC(YEL),SWR SCREW-TAPPING;PH,+,B,M1.7,L5.0,ZPC(YEL), 1 1 1 1 2 SNA SNA SNA SA SA A001 VS001 VS052 C643 S.N.A AK59-00011K AK61-00138K AK61-00139A AK64-00330A AK64-00332F REMOCON-ASSY;DVD-P240/XAA,XAA,-,-,36,-,CASE-TOP;DVD-P240/XAA,ABS 94 HB,-,-,-,G CASE-BOTTOM;VR-6036,ABS 94 HB,,,,GRY, DOOR-BATTERY;VR-6036,ABS 94 HB,,,,-,GRY, BUTTON-RUBBER;DVD-P241/XAA,SILICONE,-,-, 1 1 1 1 1 SA SNA SNA SNA SNA S.N.A AK97-00472A AD99-40085Q 2203-000236 2203-000236 2203-005148 ASSY COMMON-REMOCON;VR-6036,-,ASSY COMMON-REMOCON,c;VR-6036,-,C-CER,CHIP;0.1NF,5%,50V,C0G,TP,1608 C-CER,CHIP;0.1NF,5%,50V,C0G,TP,1608 C-CER,CHIP;100nF,10%,16V,X7R,TP,1608 1 1 1 1 1 SNA SNA SA SA SA CT1 AH09-00039C AK41-00133A 2007-000070 AD99-50056U 2401-002206 IC MICOM;S3C1860-XXXX,-,20P,1.8~3.6V,-, PCB;P4101-000097A,PHENOL,1,01,1.6, R-CHIP;0ohm,5%,1/10W,TP,1608 ASSY COMMON-REMOCON,t;VR-6036,-,C-AL;47uF,20%,6.3V,GP,TP,5x7,5mm 1 1 1 1 1 SNA SNA SA SNA SA LDT1 S.N.A S.N.A S.N.A AD99-90091P 0601-000519 6902-000422 AC68-51211A AK61-00154A ASSY COMMON-REMOCON,m;VR-6036,-,LED-IR;ROUND,5mm,170mW,4V,940nm,BAG PE;LDPE,T0.08,W80,L300,TRP,-,-PE LABEL-PASSED;REMOCON,ARP PAPER,-,-,-,-,SPRING ETC-REMOCON A(+);VR-6036,CS NI-CO 1 1 1 1 1 SNA SA SNA SNA SNA S.N.A S.N.A C457 XT01 AK61-00155A AK61-00156A AK64-00331A 2802-000148 SPRING ETC-REMOCON B(-);VR-6036,CS NI-CO SPRING ETC-REMOCON C;VR-6036,CS NI-CO S WINDOW-REMOCON;VR-6036,PC,-,-,-,-,VIO,RESONATOR-CERAMIC;455KHz,0.4%,BK,7.0x3.5 1 1 1 1 SNA SNA SNA SNA S.N.A W001 W275 AC39-42001R 6003-000275 6003-001561 CABLE-A/V;PVC,-,-,3P,-,-,SCREW-TAPTITE;BH,+,B,M3,L10,BLK ,SWCH101 SCREW-TAPTITE;BH,+,WT,B,M3,L6,ZPC(YEL),S 1 4 7 SA SA SA CT2 CT3 CT4 IC01 PCB RT1 7-6 Loc.No Part No I/B P-CASE AK68-00632G AK69-00355E Description ; Specification Q’ty S.N.A Remark MANUAL USERS;DVD-P355,XEL,GER/FRA/NL/ENG PACKING CASE;DVD-P355B/XEL,SW-2,FLEXO,T5 This Document can not be used without Samsung’s authorization 1 1 SA SA Samsung Electronics 8. Block Diagram DECK ASS'Y (DP-16V) Key Control Remote Control LED Module(KML1) DISPLAY BCD-9030B KAIC1 Front Controller (eFHP5842) Pick-up & I/V Amp OP/CL Motor Disc Motor Feed Motor Post Filter MODE S/W Post Filter Post Filter Post Filter VIC1 S/W & 6dB amp (LA73054) Yout Cout CVBS Y Pb Pr ZIC3 2M FLASH MEMORY FIC1 Disc Motor & Actuator (FAN8026) RIC1 R/F IC (ZR3723D) ZIC1 ZORAN (Vaddis-7) (ZR36778QC) Scart Jack A/V Decoder & DVD-Audio MAIN-MICOM Optical Coaxial AIC2 Audio DAC (PCM 1753) LPF/AMP Lt LPF/AMP Rt ZIC2 SDRAM 64MB 16Bit Samsung Electronics This Document can not be used without Samsung’s authorization. 8-1 9. Wiring Diagram Samsung Electronics 9-1 11. Schematic Diagrams Note 11-1 Power Drive - - - - - - - - - - - - - - - - - - - - - - - - - - - - - - - - - - - - - - - - - - - 11-2 11-2 Servo - - - - - - - - - - - - - - - - - - - - - - - - - - - - - - - - - - - - - - - - - - - - - - - 11-3 11-3 AV-Decoder - - - - - - - - - - - - - - - - - - - - - - - - - - - - - - - - - - - - - - - - - - - 11-4 11-4 Fromt Micom - - - - - - - - - - - - - - - - - - - - - - - - - - - - - - - - - - - - - - - - - - 11-5 11-5 Audio - - - - - - - - - - - - - - - - - - - - - - - - - - - - - - - - - - - - - - - - - - - - - - - 11-6 11-6 Video - - - - - - - - - - - - - - - - - - - - - - - - - - - - - - - - - - - - - - - - - - - - - - - - 11-7 For schematic Diagram - Resistors are in ohms, 1/8W unless otherwise noted. Special note : Most semiconductor devices are electrostatically sensitive and therefore require the special handling techniques described under the “electrostatically sensitive (ES) devices” section of this service manual. Note : Do not use the part number shown on this drawing for ordering. The correct part number is shown in the parts list (may be slightly different or amended since this drawing was prepared). Important safety notices : Components identified with the mark Use only the same type. have the special characteristics for safety. When replacing any of these components. Block Identification of PCB Main PCB (Component Side) Samsung Electronics This Document can not be used without Samsung’s authorization. 11-1 Schematic Diagrams 11-1 Power Drive ON/ OFF Standby: 0V Play: 3.3V 11-2 This Document can not be used without Samsung’s authorization. Samsung Electronics Schematic Diagrams 11-2 Servo These are the waveforms of DVD-P355B. Caution) There can be some differences (Voltage, Frequency, etc.) among cameras. ¨ ¨ RF Waveform Typical Waveform before Adjustment Waveform after Correct Adjustment Samsung Electronics This Document can not be used without Samsung’s authorization. 11-3 Schematic Diagrams 11-3 AV-Decoder Analog Video Data F/M, A/V Decoder Audio Data ´ ˇ ´ GCLK-27MHz Waveform ˇ PCLK-135MHz Waveform These are the waveforms of DVD-P355B. Caution) There can be some differences (Voltage, Frequency, etc.) among cameras. 11-4 This Document can not be used without Samsung’s authorization. Samsung Electronics Schematic Diagrams 11-4 Fromt Micom F/M Decoder Interface MRST , ON/OFF MRST Standby: 0V Play: 3.3V ON/OFF Standby: 0V Play: 3.3V Œ FSCL, FSDA Waveform Œ These are the waveforms of DVD-P355B. Caution) There can be some differences (Voltage, Frequency, etc.) among cameras. Samsung Electronics This Document can not be used without Samsung’s authorization. 11-5 Schematic Diagrams 11-5 Audio Audio Data Ø Ø XCK Waveform (DVD Play 12.288MHz) Ø XCK Waveform (CD Play 11.289MHz) These are the waveforms of DVD-P355B. Caution) There can be some differences (Voltage, Frequency, etc.) among cameras. 11-6 This Document can not be used without Samsung’s authorization. Samsung Electronics Schematic Diagrams 11-6 Video These are the waveforms of DVD-P355B. Caution) There can be some differences (Voltage, Frequency, etc.) among cameras. ˆ CVBS Waveform Analog Video Data ˆ Samsung Electronics This Document can not be used without Samsung’s authorization. 11-7 Schematic Diagrams MEMO 11-8 This Document can not be used without Samsung’s authorization. Samsung Electronics 12. Operating Instructions SETUP Description Front Panel Controls 4 5 6 7 EZ VIEW STANDBY/ON 12 3 9 8 1. STANDBY/ON ( ) When STANDBY/ON is pressed on, the indicator goes out and the player is turned on. 6. EZ VIEW The aspect ratio of a picture can easily be adjusted to your TV's screen size (16:9 or 4:3). 2. STANDBY indicator When the unit is first plugged in, this indicator lights. 7. OPEN/CLOSE ( ) Press to open and close the disc tray. 3. SKIP ( / ) SEARCH Allow you to search forward/backward through a disc. Use to skip the title, chapter or track. STOP ( ) Stops disc play. 8. DISPLAY Operation indicators are displayed here. 9. DISC TRAY Place the disc here. 4. 5. PLAY/PAUSE ( ) Begin or pause disc play. Front Panel Display 1 1. Chapter/Track number indicator 2. Total playing time/Displays various messages concerning operations such as PLAY, STOP, LOAD ... no DISC: No disc loaded. OPEN: The disc tray is open. LOAD: Player is loading disc information. 2 ENG-8 Samsung Electronics 12-1 Operating Instructions SETUP Setup Rear Panel 1 1 3 2 4 5 1. DIGITAL AUDIO OUT JACKS - Use either an optical or coaxial digital cable to connect to a compatible Dolby Digital receiver. - Use either an optical or coaxial digital cable to connect to an A/V Amplifier that contains a Dolby Digital, MPEG2 or DTS decoder. 2. COMPONENT VIDEO OUT JACKS - Use these jacks if you have a TV with Component Video in jacks. These jacks provide PR, PB and Y video. - If Component(P-SCAN) Video Output is selected in Setup Menu, progressive scan mode will work. - If Component(I-SCAN) Video Output is selected in Setup Menu, interlaced scan mode will work. 3. 6 4. VIDEO OUT JACK - Use a video cable to connect to the Video input jack on your television. - The Video Output in Setup Menu must be set to COMPOSITE/S-VIDEO. 5. S-VIDEO OUT JACK - Use the S-Video cable to connect this jack to the S-Video jack on your television for higher picture quality. - The Video Output in Setup Menu must be set to COMPOSITE/S-VIDEO. 6. SCART JACK - Connect to a TV scart input jack. AUDIO OUT JACKS Connect to the Audio input jacks of your television or audio/video receiver. Note - Consult your TV User’s Manual to find out if your TV supports Progressive Scan (P-SCAN). If Progressive Scan is supported, follow the TV User’s Manual regarding Progressive Scan settings in the TV’s menu system. - If Component (P-SCAN) Video Output is selected in Setup Menu, Video and S-Video Outputs do not work. - See pages 53 ~ 54 to get more information on how to use the setup menu. ENG-9 12-2 Samsung Electronics Operating Instructions SETUP Tour of the Remote Control 1 11 1. DVD POWER Button Turns the power on or off. 2. NUMBER Buttons 3. PROG Button Allows you to program a specific order. 4. STEP Button Advances play one frame at a time. 5. SEARCH/SKIP Buttons ( , / / Allow you to search forward/backward through a disc. Use to skip the title, chapter or track. 2 3 4 12 13 14 5 6 7 15 16 8 17 18 6. STOP Button ( 7. MENU Button Brings up the DVD player’s menu. 8. RETURN Button Returns to a previous menu. 9. REPEAT A-B Button Allows you to repeat play A-B disc. ) ) 10. SUBTITLE Button 11. OPEN/CLOSE ( ) Button To open and close the disc tray. 12. CLEAR Button Use to remove menus or status displays from the screen. 9 19 10 20 21 22 13. INSTANT REPLAY Button This function is used to replay the previous 10 seconds of a movie from the current position. 14. INSTANT SKIP Button This function skips playback ahead 10 seconds. 15. PLAY/PAUSE Button ( Begin/Pause disc play. ) 16. INFO Button Displays the current disc mode. 17. DISC MENU Button Brings up the Disc menu. …†œ √ Buttons 18. ENTER/… This button functions as a toggle switch. 19. EZ VIEW Button The aspect ratio of a picture can easily be adjusted according to the screen size of your TV (16:9 or 4:3). 20. REPEAT Button Allows you to repeat play a title, chapter, track, or disc. 21. ANGLE Button Use to access various camera angles on a DVD. 22. AUDIO Button Use this button to access various audio functions on a disc. ENG-10 Samsung Electronics 12-3 Operating Instructions Chapter 2 CONNECTIONS The following shows examples of connections commonly used to connect the DVD player with a TV and other components. Before Connecting the DVD Player - Always turn off the DVD player, TV, and other components before you connect or disconnect any cables. - Refer to the user’s manual of the additional components (such as a TV) you are connecting for more information on those particular components. Connections Choosing a Connection Connecting to a TV (SCART) - Using the SCART, connect the SCART (EXT) terminal on the rear of the DVD Player to the SCART(IN) terminal of your TV. - If your TV is not equipped with a SCART you can select one of the following alterative connections: Connection to a TV (Video CVBS) 1 Using video/audio cables, connect the VIDEO (yellow)/AUDIO (red and white) OUT terminals on the rear of the DVD player to the VIDEO (yellow)/AUDIO (red and white) IN terminals of your TV. 2 Turn on the DVD player and TV. RED WHITE Audio Cable RED WHITE YELLOW Video Cable YELLOW 3 Press the input selector on your TV remote control until the Video signal from the DVD player appears on the TV screen. Note - Noise may be generated if the audio cable placed too close to the power cable. - If you want to connect to an Amplifier, please refer to the Amplifier connection page. (See pages 15 to 16) - The number and position of terminals may vary depending on your TV set. Please refer to the user's manual of your TV. - If there is one audio input terminal on the TV, connect it to the [AUDIO OUT][left] (white) terminal of the DVD player. ENG-11 12-4 Samsung Electronics Operating Instructions CONNECTIONS Connection to a TV (S-Video) - Connecting to your TV using an S-Video cable. - You will enjoy high quality images. S-Video separates the picture element into black and white(Y) and color(C) signals to present clearer images than regular video input mode. (Audio signals are delivered through the audio output.) 1 Using an S-Video cable (not included), connect the S-VIDEO OUT terminal on the rear of the DVD player to the S-VIDEO IN terminal of your TV. 2 Using the audio cables, connect the AUDIO (red and white) OUT terminals on the rear of the DVD player to the AUDIO (red and white) IN terminals of your TV. Turn on the DVD player and TV. RED 3 Press the input selector on your TV remote control until the S-Video signal from the DVD player appears on your TV screen. WHITE Audio Cable RED S-Video Cable (not included) WHITE 4 Set the Video Output to COMPOSITE/S-VIDEO in the Display Setup menu. (See pages 53 to 54) Note - If you want to connect to an Amplifier, please refer to the Amplifier connection page. (See pages 15 to 16) - The number and position of terminals may vary depending on the TV set. Please refer to the user's manual of your TV. ENG-12 Samsung Electronics 12-5 Operating Instructions CONNECTIONS Connection to a TV (Interlace) Connections - Connecting to your TV using Component video cables. - You will enjoy high quality and accurate color reproduction images. Component video separates the picture element into black and white(Y), blue(PB), red(PR) signals to present clear and clean images. (Audio signals are delivered through the audio output.) 1 Using component video cables (not included), connect the COMPONENT VIDEO OUT terminals on the rear of the DVD player to the COMPONENT IN terminals of your TV. 2 Using the audio cables, connect the AUDIO (red and white) OUT terminals on the rear of the DVD player to the AUDIO (red and white) IN terminals of your TV. Turn on the DVD player and TV. RED 3 BLUE RED Press the input selector on your TV remote control until the Component signal from the DVD player appears on the TV screen. GREEN WHITE Audio Cable Component cable (not included) RED WHITE RED BLUE GREEN 4 Set the Video Output to Component (I-SCAN) in the Display Setup menu. (See pages 53 to 54) Note - If Video output is incorrectly set to COMPOSITE/S-VIDEO with the Component cables connected, the screen will turn red. - If you want to connect to an Amplifier, please refer to the Amplifier connection page. (See pages 15 to 16) - The component terminal of your TV may be marked “R-Y, B-Y, Y” or “Cr, Cb, Y” instead of “PR, PB, Y” depending on the manufacturer. The number and position of terminals may vary depending on the TV set. Please refer to the user's manual of your TV. ENG-13 12-6 Samsung Electronics Operating Instructions CONNECTIONS Connection to a TV (Progressive) 1 Using component video cables (not included), connect the COMPONENT VIDEO OUT terminals on the rear of the DVD player to the COMPONENT IN terminals of your TV. 2 Using the audio cables, connect the AUDIO (red and white) OUT terminals on the rear of the DVD player to the AUDIO (red and white) IN terminals of your TV. Turn on the DVD player and TV. RED 3 BLUE RED Press the input selector on your TV remote control until the Component signal from the DVD player appears on the TV screen. GREEN WHITE Audio Cable Component cable (not included) RED WHITE RED BLUE GREEN 4 Set the Video Output to Component (P-SCAN) in the Display Setup menu. (See pages 53 to 54) To see the progressive video output, -You Consult your User’stheManual to find need a TV set TV supporting progressive scanout inputif your TV supports Progressive Scan. If Progressive Scan isup supported, function. And you have to set the TV menufollow to the the TV User’s Manual regarding Progressive Scan settings in the TV’s progressive scanmenu input. system. - Depending on your TV, the connection method may differ from the illustration above. Note - What is "Progressive Scan"? Progressive scan has twice as many scanning lines as the interlace output method. Progressive scanning method provides better and clearer picture quality. ENG-14 Samsung Electronics 12-7 Operating Instructions CONNECTIONS Connection to an Audio System (2 Channel Amplifier) Connections 1 Using the audio cables, connect the AUDIO (red and white) OUT terminals on the rear of the DVD player to the AUDIO (red and white) IN terminals of the Amplifier. 2 Using the video signal cable(s), connect the VIDEO, S-VIDEO or COMPONENT OUT terminals on the rear of the DVD player to the VIDEO, S-VIDEO or COMPONENT IN terminal of your TV as described on pages 11 to 14. 3 RED Turn on the DVD player, TV, and Amplifier. WHITE Audio Cable RED WHITE 2-Channel stereo amp 4 Press the input select button of the Amplifier to select external input in order to hear sound from the DVD player. Refer to your Amplifier's user manual to set the Amplifier's audio input. Note - Please turn the volume down when you turn on the Amplifier. Sudden loud sound may cause damage to the speakers and your ears. - Please set the audio in the menu screen according to the Amplifier. (See pages 51 to 52) - The position of terminals may vary depending on the Amplifier. Please refer to the user's manual of the Amplifier. ENG-15 12-8 Samsung Electronics Operating Instructions CONNECTIONS Connection to an Audio System (Dolby digital, MPEG2 or DTS Amplifier) 1 If using an optical cable (not included), connect the DIGITAL AUDIO OUT (OPTICAL) terminal on the rear of the DVD player to the DIGITAL AUDIO IN (OPTICAL) terminal of the Amplifier. If using a coaxial cable (not included), connect the DIGITAL AUDIO OUT (COAXIAL) terminal on the rear of the DVD player to the DIGITAL AUDIO IN (COAXIAL) terminal of the Amplifier. 2 Using the video signal cable(s), connect the VIDEO, S-VIDEO or COMPONENT OUT terminals on the rear of the DVD player to the VIDEO, S-VIDEO or COMPONENT IN terminal of your TV as described on pages 11 to 14. or 3 Coaxial Cable (not included) Optical Cable (not included) Turn on the DVD player, TV, and Amplifier. Dolby digital or DTS amp 4 Press the input select button of the Amplifier to select external input in order to hear sound from the DVD player. Refer to your Amplifier's user manual to set the Amplifier's audio input. Note - When you connect the DVD player to DTS Amplifier and play a DTS disc, set the DTS to On in Audio Setup menu. If it is set to Off, sound will not be heard, or there will be a loud sound. - Please turn the volume down when you turn on the Amplifier. Sudden loud sound may cause damage to the speakers and your ears. - Please set the audio in the menu screen according to the Amplifier. (See pages 51 to 52) - The position of terminals may vary depending on the Amplifier. Please refer to the user's manual of the Amplifier. ENG-16 Samsung Electronics 12-9 Operating Instructions Chapter 3 BASIC FUNCTIONS Playing a Disc Before Play - Turn on your TV and set it to the correct Video Input on the TV's remote control. - If you connected an external Audio System, turn on your Audio System and set it to the correct Audio Input. Press Touche Drücken Sie Pulsar Basic Functions After plugging in the player, the first time you press the DVD POWER button, this screen comes up: If you want to select a language, press a NUMBER button. (This screen will only appear when you plug in the player for the first time.) If the language for the startup screen is not set, the settings may change whenever you turn the power on or off. Therefore, make sure that you select the language you want to use. Once you select a menu language, you can change it by pressing the button on the front panel of the unit for more than 5 seconds with no disc in the unit. Then the SELECT MENU LANGUAGE window appears again where you can reset your preferred language. 1 for English 2 pour Français 3 für Deutsch 4 para Español Premere 5 per Italiano Druk op 6 voor Nederlands Playback 1 Press the OPEN/CLOSE ( ) button. The STANDBY indicator light goes out and the tray opens. 2 Place a disc gently into the tray with the disc’s label facing up. ▼ 3 RESUME function When you stop disc play, the player remembers where you stopped, so when you press PLAY/PAUSE ( ) button again, it will pick up where you left off. (unless the disc is removed or the player is unplugged, or if you press the STOP ( ) button twice.) Press the PLAY/PAUSE ( ) button or OPEN/CLOSE ( ) button to close the disc tray. ENG-17 12-10 Samsung Electronics Operating Instructions BASIC FUNCTIONS 4 Stopping Play Press the STOP ( ) button during play. Note - If the player is left in the stop mode for more than one minute without any user interaction, a screen saver will be activated. Press the PLAY/PAUSE ( ) button to resume normal play. - If the player is left in the stop mode for more than 30 minutes, the power will automatically turn off. (Automatic Power-Off Function) 5 Removing Disc Press the OPEN/CLOSE ( ) button. ▼ 6 Pausing Play Press the PLAY/PAUSE ( ) or STEP button on the remote control during play. Screen stops, no sound. To resume, press the PLAY/PAUSE ( once again. ) button Note If the player is left for about 5 minutes in pause mode, it will stop. ▼ Each time the button is pressed, a new frame will appear. No sound is heard during STEP mode. Press the PLAY/PAUSE ( ) button to resume normal play. You can only perform step motion play in the forward direction. ▼ No sound is heard during slow mode. Press the PLAY/PAUSE ( ) button to resume normal play. Reverse slow motion play will not work. 7 Step Motion Play (Except CD) Press the STEP button on the remote control during play. 8 Slow Motion Play (Except CD) Press and hold the SEARCH ( ) button to choose the play speed between 1/8, 1/4 and 1/2 of normal during PAUSE or STEP mode. Note This ( ) icon indicates an invalid button press. ENG-18 Samsung Electronics 12-11 Operating Instructions BASIC FUNCTIONS Using the Search and Skip Functions During play, you can search quickly through a chapter or track, and use the skip function to jump to the next selection. Searching through a Chapter or Track ▼ During play, press the SEARCH ( or ) button on the remote control for more than 1 second. If you want to search at a faster speed on the DVD, VCD or CD, press and hold the button. DVD 2X, 8X, 32X, 128X VCD 4X, 8X CD 2X, 4X, 8X - The speed marked in this function may be different from the actual playback speed. - No sound is hearing during search mode (Except CD). Basic Functions Note Skipping Tracks During play, press the SKIP ( or ) button. - When playing a DVD, if you press the SKIP ( ) button, it moves to the next chapter. If you press the SKIP ( ) button, it moves to the beginning of the chapter. One more press makes it move to the beginning of the previous chapter. - When playing a VCD 2.0 in Menu Off mode, or a VCD 1.1 or a CD, if you press the SKIP ( ) button, it moves to the next track. If you press the SKIP ( ) button, it moves to the beginning of the track. One more press makes it move to the beginning of the previous track. - If a track exceeds 15 minutes when playing a VCD and you press the button, it moves forward 5 minutes. If you press the button, it moves backward 5 minutes. Note When playing VCD 2.0, this function works only when the menu is off. ENG-19 12-12 Samsung Electronics Operating Instructions BASIC FUNCTIONS Using the Display Function When Playing a DVD/VCD/CD/MPEG4 ▼ You can select Info in the function menu by pressing the MENU button. ▼ When playing VCD 2.0, this function works only when the menu is off. 1 During play, press the INFO button on the remote control. 2 DVD Press the …/† buttons to select the desired item. 01 02 0:00:13 ENG 5.1CH Off VCD 01 0:00:43 CD 01 0:00:48 MPEG4 01 0:00:13 MP3 1/8 None 640x272 ENG-20 Samsung Electronics 12-13 Operating Instructions BASIC FUNCTIONS ▼ 3 Press the œ/√ buttons to make the desired setup and then press the ENTER button. You may use the number buttons of the remote control to directly access a title, chapter or to start the playback from a desired time. 4 Basic Functions To make the screen disappear, press the INFO button again. Note To access the desired title when there is more than one in the disc. For example, if there is more than one movie on a DVD, each movie will be identified. Most DVD discs are recorded in chapters so that you can quickly find a specific passage (similar to tracks on an audio CD). Allows playback of the film from a desired time. You must enter the starting time as a reference. The time search function does not operate on some discs. Refers to the film's soundtrack language. In the example, the soundtrack is played in English 5.1CH. A DVD disc can have up to eight different soundtracks. The MP3, AC3 and WMA are supported.(DivX) Refers to the subtitle languages available in the disc. You will be able to choose the subtitle languages or, if you prefer, turn them off from the screen. A DVD disc can have up to 32 different subtitles. (DivX) File Size has a relationship with resolution of a title. The larger file size is, the higher resolution is displayed. If the file resolution is small, it scales up automatically. So you can see the larger screen. ENG-21 12-14 Samsung Electronics Operating Instructions BASIC FUNCTIONS Using the Disc and Title Menu Using the Disc Menu (DVD) 1 During the playback of a DVD disc, press the MENU button on the remote control. 2 Press the …/† buttons to select Disc Menu, then press the √ or ENTER button. Press ENTER key for Disc Menu Note - Depending on a disc, the Disc Menu may not work. - You can also use the Disc Menu, using the DISC MENU button on the remote control. - In VCD 2.0 the DISC MENU button is used to select Menu On or Menu Off mode. Using the Title Menu (DVD) 1 During the playback of a DVD disc, press the MENU button on the remote control. 2 Press the …/† buttons to select Title Menu, then press the √ or ENTER button. Press ENTER key for Title Menu Note - Depending on a disc, the Title Menu may not work. - Title Menu will only be displayed if there are at least two titles in the disc. ENG-22 Samsung Electronics 12-15 Operating Instructions BASIC FUNCTIONS Using the Function Menu Using the Function Menu (DVD/VCD) 1 Press the MENU button during playback. Basic Functions 2 Press the …/† buttons to select Function, then press the √ or ENTER button. - Info (See pages 20 to 21) - Zoom (See page 34) - Bookmark (See pages 32 to 33) - Repeat (See pages 24 to 25) - EZ View (See pages 27 to 28) Zoom Bookmark Repeat EZ View ▼ 3 Info Press the …/† buttons to select one of the five functions. Then press the √ or ENTER button to access the function. You can also directly select these functions using their respective buttons on the remote control. - INFO - EZ VIEW - REPEAT ENG-23 12-16 Samsung Electronics Operating Instructions BASIC FUNCTIONS Repeat Play Repeat the current track, chapter, title, a chosen section (A-B), or all of the disc. When playing a DVD/VCD/CD 1 Press the REPEAT button on the remote control. Repeat screen appears. ▼ 2 DVD Press the œ/√ buttons to select Chapter, Title, or A-B, then press the ENTER button. Off 01 T 01 A-B REPEAT ENTER 01 A-B REPEAT ENTER VCD/CD Off T 01 D DVD repeats play by chapter or title, CD and VCD repeat play by disc or track. Chapter ( ): repeats the chapter that is playing. Title ( ): repeats the title that is playing. Disc ( ): repeats the disc that is playing. Track ( ): repeats the track that is playing. A-B: repeats a segment of the disc that you select. Using the A-B Repeat function 1. Press the REPEAT A-B button at the point where you want repeat play to start (A). B is automatically highlighted. 2. Press the REPEAT A-B button at the point where you want the repeat play to stop (B). - To return to normal play, press the CLEAR button. Note A-B REPEAT does not allow you to set point (B) until at least 5 seconds of playback time has elapsed after point (A) has been set. 3 To return to normal play, press REPEAT button again, then press the œ/√ buttons to select Off and press ENTER button. DVD Off 01 T 01 A-B REPEAT ENTER VCD/CD Off T 01 D 01 A-B REPEAT ENTER Note - Depending on a disc, the Repeat function may not work. - When playing VCD 2.0, this function works only when the menu is off. ENG-24 Samsung Electronics 12-17 Operating Instructions BASIC FUNCTIONS Slow Repeat Play This feature allows you slowly to repeat scenes containing sports, dancing, musical instruments being played etc., so you can study them more closely. When playing a DVD/VCD 1 During play, press the PLAY/PAUSE ( ) button. Basic Functions 2 Press and hold the SEARCH ( ) button to choose the play speed between 1/8, 1/4 and 1/2 of normal during PAUSE or STEP mode. ▼ The disc will play from A to B repeatedly at the speed you chose. ▼ 3 To set A-B REPEAT, set (A) first, then set (B) after the following slow play time has elapsed: 1/8x: wait 40 seconds, then press B Press the REPEAT button on the remote control. Press the œ/√ buttons to select A-B. 4 Press the ENTER button at the point where you want repeat play to start (A). B is automatically highlighted. Press the ENTER button at the point where you want the repeat play to stop (B). 1/4x: wait 20 seconds, then press B 1/2x: wait 10 seconds, then press B 5 To return to normal play, press the CLEAR button and then press the PLAY/PAUSE ( ) button. Note When playing VCD 2.0, this function works only when the menu is off. ENG-25 12-18 Samsung Electronics Operating Instructions BASIC FUNCTIONS Program Play & Random Play Program Play (CD) Program Play allows you to select the order in which you want tracks to play. 1 During play, press the PROG button. 2 Press the œ/√ buttons to select PROGRAM. Press the ENTER button. PROGRAM œ√ RANDOM ▼ 3 Press the …/†/œ/√ buttons to select the first track to add to the program. Press the ENTER button. The selection numbers appear in the Program Order box. PROGRAM 01 Track 01 05 09 13 02 06 10 14 03 07 11 15 Program Order 04 08 12 16 ------ ------ ------ ------ - To return to the previous menu screen, press the RETURN button. - To cancel the selected program order, press the CLEAR button. - This unit can support a maximum of 20 programmed tracks. 4 Press the PLAY/PAUSE ( ) button. The disc will be played in programmed order. Random Play (CD) Random Play plays a disc's tracks in random order. 1 Press the PROG button. 2 Press the œ/√ buttons to select RANDOM. Press the ENTER button. PROGRAM œ√ RANDOM Note - Depending on a disc, the Program and Random Play functions may not work. - While in playback mode, press the CLEAR button on the remote control to cancel Program Play or Random Play. ENG-26 Samsung Electronics 12-19 Operating Instructions Chapter 4 A D VA N C E D F U N C T I O N S Adjusting the Aspect Ratio (EZ View) To play back using aspect ratio (DVD) ▼ WIDE SCREEN EZ VIEW To make the aspect ratio bar disappear, press the CLEAR button. Advanced Functions Press the EZ VIEW button. - The screen size changes when the button is pressed repeatedly. - The screen zoom mode operates differently depending on the screen setting in the Display Setup menu. - To ensure correct operation of the EZ VIEW button, you should set the correct aspect ratio in the Display Setup menu. (See pages 52 to 53). If you are using a 16:9 TV For 16:9 aspect ratio discs For 4:3 aspect ratio discs - WIDE SCREEN Displays the content of the DVD title in 16:9 aspect ratio. - Normal Wide Displays the content of the DVD title in 16:9 aspect ratio. The picture will look horizontally stretched. - SCREEN FIT The top and bottom portions of the screen are cut off. When playing a 2.35:1 aspect ratio disc, the black bars at the top and bottom of the screen will disappear. The picture will look vertically stretched. (Depending on a type of disc, the black bars may not disappear completely.) - ZOOM FIT The top, bottom, left and right of the screen are cut off and the central portion of the screen is enlarged. - SCREEN FIT The top and bottom portions of the screen are cut off and the full screen appears. The picture will look vertically stretched. - ZOOM FIT The top, bottom, left and right portions of the screen are cut off and the central portion of the screen is enlarged. - Vertical Fit When a 4:3 DVD is viewed on a 16:9 TV, black bars will appear at the left and right of the screen in order to prevent the picture from looking horizontally stretched. ENG-27 12-20 Samsung Electronics Operating Instructions A D VA N C E D F U N C T I O N S If you are using a 4:3 TV For 16:9 aspect ratio discs For 4:3 aspect ratio discs - 4:3 Letter Box Displays the content of the DVD title in 16:9 aspect ratio. The black bars will appear at the top and bottom of the screen. - Normal Screen Displays the content of the DVD title in 4:3 aspect ratio. - 4:3 Pan Scan The left and right portions of the screen are cut off and the central portion of the 16:9 screen is displayed. - SCREEN FIT The top and bottom portions of the screen are cut off and a full screen appears. The picture will look vertically stretched. - SCREEN FIT The top and bottom portions of the screen are cut off and the full screen appears. The picture will look vertically stretched. - ZOOM FIT The top, bottom, left and right portions of the screen are cut off and the central portion of the screen is enlarged. - ZOOM FIT The top, bottom, left and right of the screen are cut off and the central portion of the screen is enlarged. Note This function may behave differently depending on the type of disc. ENG-28 Samsung Electronics 12-21 Operating Instructions A D VA N C E D F U N C T I O N S Selecting the Audio Language You can select a desired audio language quickly and easily with the AUDIO button. Using the AUDIO button (DVD/VCD/CD/MPEG4) 1 Press the AUDIO button. The Audio changes when the button is pressed repeatedly. - The audio languages are represented by abbreviations. DVD ENG DOLBY DIGITAL 5.1CH AUDIO Stereo Advanced Functions VCD/CD When playing a VCD or CD, you can select among Stereo, Right or Left. AUDIO MPEG4 Press the œ/√ buttons to select the desired Audio on a MPEG4 then press the ENTER . PCM 1/2 2 To remove the AUDIO icon, press the CLEAR or RETURN button. Note - This function depends on audio languages are encoded on the disc and may not work. - A DVD disc can contain up to 8 audio languages. - To have the same audio language come up whenever you play a DVD; Refer to “Using the Audio Language” on page 48. ENG-29 12-22 Samsung Electronics Operating Instructions A D VA N C E D F U N C T I O N S Selecting the Subtitle Language You can select a desired subtitle quickly and easily with the SUBTITLE button. Using the SUBTITLE button (DVD/MPEG4) 1 Press the SUBTITLE button. The subtitle changes when the button is pressed repeatedly. The subtitle languages are represented by abbreviations. DVD Off SUBTITLE MPEG4 Press the œ/√ buttons to select the desired subtitle language on a MPEG4 then press the ENTER . 2 To remove the SUBTITLE icon, press the CLEAR or RETURN button. NONE Note - Depending on DVDs, you have to change the desired subtitle in the Disc Menu. Press the DISC MENU button. - This function depends on what subtitles are encoded on the disc and may not work on all DVDs. - A DVD disc can contain up to 32 subtitle languages. - To have the same subtitle language come up whenever you play a DVD; Refer to “Using the Subtitle Language” on page 49. ENG-30 Samsung Electronics 12-23 Operating Instructions A D VA N C E D F U N C T I O N S Changing the Camera Angle When a DVD contains multiple angles of a particular scene, you can use the ANGLE function. Using the ANGLE button (DVD) If the disc contains multiple angles, the ANGLE appears on the screen. 1 Press the ANGLE button, then the ANGLE icon will appear with the current angle number and the number of angles available. 2 4/6 ANGLE Note If the disc has only one angle, this feature won’t work. Currently, very few discs have this feature. Using the Instant Replay/Skip Function Advanced Functions Press the ANGLE button repeatedly to select the desired angle. To remove the ANGLE icon, press the CLEAR or RETURN button. Using the Instant Replay function (DVD) If you miss a scene, you can see it again using this function. Press the INSTANT REPLAY button. - The current scene moves backward about 10 seconds, and plays back. Using the Instant Skip function (DVD) Use this function to skip playback about 10 seconds ahead of the current scene. Press the INSTANT SKIP button. - Playback will skip ahead 10 seconds. Note Depending on the disc, these functions may not work. ENG-31 12-24 Samsung Electronics Operating Instructions A D VA N C E D F U N C T I O N S Using the Bookmark Function This feature lets you bookmark sections of a DVD or VCD (Menu Off mode) so you can quickly find them at a later time. Using the Bookmark Function (DVD/VCD) 1 During play, press the MENU button on the remote control. 2 Press the …/† buttons to select Function, then press the √ or ENTER button. Info Zoom Bookmark Repeat EZ View 3 Press the …/† buttons to select Bookmark, then press the √ or ENTER button. Info Zoom Bookmark Repeat EZ View 4 When you reach the scene you want to mark, press the ENTER button. Up to three scenes may be marked at a time. Note - When playing VCD 2.0, this function works only when the menu is off. - Depending on a disc, the Bookmark function may not work. ENG-32 Samsung Electronics 12-25 Operating Instructions A D VA N C E D F U N C T I O N S Recalling a Marked Scene 1~3 The first 1~3 steps are the same as those for “Using the Bookmark Function” on page 32. 4 Press the œ/√ buttons to select a marked scene. Advanced Functions 5 Press the PLAY/PAUSE ( ) button to skip to the marked scene. Clearing a Bookmark 1~3 The first 1~3 steps are the same as those for “Using the Bookmark Function” on page 32. 4 Press the œ/√ buttons to select the bookmark number you want to delete. 5 Press the CLEAR button to delete a bookmark number. ENG-33 12-26 Samsung Electronics Operating Instructions A D VA N C E D F U N C T I O N S Using the Zoom Function Using the Zoom Function (DVD/VCD) 1 During play or pause mode, press the MENU button on the remote control. 2 Press the …/† buttons to select Function, then press the √ or ENTER button. Info Zoom Bookmark Repeat EZ View 3 Press the …/† buttons to select Zoom, then press the √ or ENTER button. Info Zoom Bookmark Repeat EZ View ▼ 4 Press the …/† or œ/√ buttons to select the part of the screen you want to zoom in on. Press the ENTER button. During DVD play, press ENTER to zoom in 2X/4X/2X/Normal in order. During VCD play, press ENTER to zoom in 2X/Normal in order. Note When playing VCD 2.0, this function works only when the menu is off. ENG-34 Samsung Electronics 12-27 Operating Instructions A D VA N C E D F U N C T I O N S DVD AUDIO Playback 1 Open the disc tray. Place the DVD AUDIO disc on the tray. - Place the DVD AUDIO disc with the labeled side up. Close the tray. - The tray closes and disc plays. ▼ You can select Info in the function menu by pressing the MENU button. ▼ When playing VCD 2.0, this function works only when the menu is off. ▼ You may use the number buttons of the remote control to directly access a Group, Track, Page or to start the playback from the desired time. 2 During play, press the INFO button on the remote control. Press the …/† buttons to select the desired item. DVD-AUDIO 01 01 Advanced Functions 3 01 0:00:13 4 Press the œ/√ buttons to make the desired setup and then press the ENTER button. 5 To make the screen disappear, press the INFO button again. ENG-35 12-28 Samsung Electronics Operating Instructions A D VA N C E D F U N C T I O N S Note (DVD-AUDIO) Most DVD AUDIO discs are recorded in Groups you can change Groups with this Function. Bonus Group playback. Some DVD AUDIO discs have Bonus groups. If you want to play a Bonus group, you must enter the Bonus Group code. The code is usually on the DVD AUDIO disc case. (DVD-AUDIO) To access the desired Track when there is more than one on the DVD AUDIO disc. (DVD-AUDIO) If pages are included with the DVD-AUDIO disc, you can see this icon. To access the desired page, you can use this Function. Slide (DVD-AUDIO) If a slide show is included with the DVD-AUDIO disc, you can see this icon. V-zone (DVD-AUDIO) If a video zone is included with the DVD-AUDIO disc, you can see this icon. (DVD-AUDIO) Allows playback of music from a desired time by using the number buttons. Page, Index Function 1 Note Depending on a disc, this function may not work. Use Page icon of display function to Skip the Page when there is more than one in a group. - Some DVD-AUDIO discs include a slide show. In the slide show mode, this function can not be used. - PAGE is still images. You can see the still images when a DVDAUDIO disc is played back. ENG-36 Samsung Electronics 12-29 Operating Instructions A D VA N C E D F U N C T I O N S REPEAT Play 1 Press the REPEAT button on the remote control. Repeat screen appears. Title ( ): repeats the title that is playing. Group ( ): repeats the group that is playing. ▼ Press the œ/√ buttons to select Title, Group, then press the ENTER button. ▼ 2 - LPCM : Linear Pulse Code Modulation. Not compressed Audio data format. - PPCM : Packet Pulse Code Modulation. Lossless compressed Audio data format. DVD-AUDIO Off 01 01 Advanced Functions AUDIO Format Display 1 During DVD AUDIO playback, press the AUDIO button to see AUDIO Format information. DVD-AUDIO PPCM 5.1CH Note Some DVD-AUDIO discs don’t allow audio down-mixing. ENG-37 12-30 Samsung Electronics Operating Instructions A D VA N C E D F U N C T I O N S Clips Menu for MP3/WMA/JPEG/MPEG4 Discs with MP3/WMA/JPEG/MPEG4 contain individual songs and/or pictures that can be organized into folders as shown below. They are similar to how you use your computer to put files into different folders. Open the disc tray. Place the disc on the tray. Close the tray. The tray closes and this screen displays. Off ROOT ROOT WMA JPEG MP3 MPEG4 Parent Folder, Current Folder Folders and Files in Current Folder and Peer Folders - : Name of currently playing file. - : MP3 file icon. - : Current Playback Time. - : WMA file icon. - : Current Playback Mode : There are four modes. They can be selected in order by pressing the REPEAT button. - Off: Normal Playback - Track: Repeats the current track. - Folder: Repeats the current folder. - Random: Files in the disc will be played in random order. - : JPEG file icon. - : AVI file icon. - : Folder icon. - : Current Folder icon. Folder Selection The folder can only be selected in the Stop mode. - To select the Parent Folder Press the RETURN button to go to the parent folder, or press the …/† buttons to select “..” and press ENTER to go to the parent folder. - To select the Peer Folder Press the œ/√ buttons to highlight the left window. Press the …/† buttons to select the desired folder, then press ENTER. Root WMA JPEG Parent Folder MP3 MUSIC - To select the Sub-Folder Press the œ/√ buttons to highlight the right window. Press the …/† buttons to select the desired folder, then press ENTER. Current Folder 1st Sub-Folders 2nd SONG FILE 1 Peer Folders SONG FILE 2 SONG FILE 3 MPEG4 FILES ENG-38 Samsung Electronics 12-31 Operating Instructions A D VA N C E D F U N C T I O N S MP3/WMA Playback 1 Open the disc tray. Place the disc on the tray. Close the tray. Off ROOT ROOT WMA JPEG MP3 MPEG4 ▼ 2 Press the …/† or œ/√ buttons to select a song file. Press ENTER to begin playback of the song file. When a disc that contains both MP3 and WMA files, only one type will play, not both. Off 00:00:23 B e c a u s e Yo u .. WMA B e c a u s e Yo u JPEG MP3 MPEG4 Advanced Functions ROOT Cactus Sad Dayu Wonderful Repeat/Random playback 1 Press the REPEAT button to change the playback mode. There are four modes: Off, Track, Folder and Random. - Off: Normal Playback - Track: Repeats the current song file. - Folder: Repeats the song files which have the same extension in the current folder. - Random: Song files which have the same extension will be played in random order. To resume normal play, press the CLEAR button. ENG-39 12-32 Samsung Electronics Operating Instructions A D VA N C E D F U N C T I O N S CD-R MP3/WMA file When you record MP3 or WMA files on CD-R, please refer to the following. - Your MP3 or WMA files should be ISO 9660 or JOLIET format. ISO 9660 format and Joliet MP3 or WMA files are compatible with Microsoft's DOS and Windows, and with Apple's Mac. This format is the most widely used. - Use a decompression transfer rate of at least 64Kbps when recording WMA files. Sound quality with WMA files basically depends on the rate of compression/decompression you choose. Getting CD audio sound requires an analog/digital sampling rate, that is conversion to WMA format, of at least 64Kbps and up to 192Kbps. Conversely, files with decompression rates below 64Kbps or over 192Kbps will not be played properly. - When naming your MP3 or WMA files, do not exceed 8 characters, and enter “.mp3, .wma” as the file extension. General name format : Title.mp3. or Title.wma. When composing your title, make sure that you use 8 characters or less, have no spaces in the name, and avoid the use of special characters including: (.,/,\,=,+). - Do not try recording copyright protected MP3 files. Certain "secured" files are encrypted and code protected to prevent illegal copying. These files are of the following types: Windows MediaTM (registered trade mark of Microsoft Inc) and SDMITM (registered trade mark of The SDMI Foundation). You cannot copy such files. - Use a decompression transfer rate of at least 128 Kbps when recording MP3 files. Sound quality with MP3 files basically depends on the rate of compression/decompression you choose. Getting CD audio sound requires an analog/digital sampling rate, that is conversion to MP3 format, of at least 128 Kbps and up to 160 Kbps. However, choosing higher rates, like 192 Kbps or more, only rarely give better sound quality. Conversely, files with decompression rates below 128 Kbps will not be played properly. - Important: The above recommendations cannot be taken as a guarantee that the DVD player will play MP3 recordings, or as an assurance of sound quality. You should note that certain technologies and methods for MP3 file recording on CD-Rs prevent optimal playback of these files on your DVD player (degraded sound quality and in some cases, inability of the player to read the files). - This unit can play a maximum of 3000 files and 300 folders per disc. ENG-40 Samsung Electronics 12-33 Operating Instructions A D VA N C E D F U N C T I O N S MPEG4 Playback MPEG4 Play Function AVI files are used to contain the audio and video data. Only AVI format files with the “.avi” extensions can be played. 1 Open the disc tray. Place the disc on the tray. Close the tray. Off ROOT ROOT WMA JPEG MP3 MPEG4 2 Press the …/† or œ/√ buttons to select an avi file (DivX/XviD), then press the ENTER button. Advanced Functions Off ROOT .R. O O T WMA WMA JPEG JPEG MP3 MP3 MPEG4 MPEG4 Repeat Playback 1 Press the REPEAT button to change playback mode. There are 4 modes, such as Off, Folder, Title and A-B (a distance between two points appointed by user). - Folder : Repeats the AVI files which have the same extension in the current folder. - Title : repeats the title that is playing. - A-B : repeats a segment of the file that you select. ENG-41 12-34 Samsung Electronics Operating Instructions A D VA N C E D F U N C T I O N S MPEG4 Function Description Function Description During play, press the or button, it moves forward ) or backward 5 minutes. During play, press the SERACH ( or ) button and press Search again to search at a faster ( or ) speed. Allows you to search at a faster speed in an AVI file. (2X, 4X, 8X) Allows you to search at a Slow Motion slower speed in an AVI file. Play (1/8X, 1/4X, 1/2X) Each time the STEP button Step Motion is pressed, a new frame will Play appear. Skip ( or ZOOM 2X/4X/2X/Normal in order CD-R AVI file Reference page - - P 18 This unit can play the following video compression formats within the AVI file format: - DivX 3.11 contents - DivX 4 contents (Based on MPEG4 Simple Profile) - DivX 5 contents (MPEG4 simple profile plus additional features such as bi-directional frames. Qpel and GMC are also supported.) - XviD MPEG4 compliant Contents. This unit supports all resolutions up to maximum below. P 18 P 34 - These functions may not work depending on MPEG4 file. DivX3.11 & DivX4 & XviD DivX5 Bitrate may fluctuate: Device may skip decoding the high bitrate portions and begin decoding again when Bitrate returns to normal. 720 x 480 @30fps 720 x 576 @25fps : Maximum bitrate : 4Mbps Note - Some MPEG4 files created on a personal computer may not be play back. That is why Codec Type, Version and Higher resolution over specification is not supported. - This unit supports CD-R/RW written in MPEG4 in accordance with the “ISO9660 format”. ENG-42 Samsung Electronics 12-35 Operating Instructions A D VA N C E D F U N C T I O N S Picture CD Playback Off 1 Select the desired folder. ROOT ROOT WMA JPEG MP3 MPEG4 2 Off Press the …/† buttons to select a Picture file in the clips menu and then press the ENTER button. ROOT .. WMA 1 JPEG 2 MP3 3 MPEG4 3 Note - If no buttons on the remote control are pressed for 10 seconds, the menu will disappear. ENTER RETURN Press the INFO button to display the menu. Press the œ/√ buttons to select the menu you want to view, then press the ENTER button. - Press the STOP button to return to the clips menu. - When playing a Kodak Picture CD, the unit displays the Photo directly, not the clips menu. • TIMER: : Returns to the Album Screen. • To see the next six pictures, press the • To see the previous six pictures, press the Changing Setup Menu Slide Show Album Screen ENTER RETURN button. button. Rotation • : Each time the ENTER button is pressed, the picture rotates 90 degrees clockwise. : The unit enters slide show mode. • Before beginning the Slide Show, the picture interval must be set. Press the œ/√ buttons to select a desired icon, then press the ENTER button. Zoom : Press the …/† or œ/√ buttons to select the part of the screen you want to zoom in on. Press the ENTER button. Each time the ENTER button is pressed, the picture is enlarged up to 4X. (2X ➝ 4X ➝ 2X ➝ Normal) • : The pictures change automatically with about a 6 second interval. • : The pictures change automatically with about a 12 second interval. • : The pictures change automatically with about a 18 second interval. Note - Depending on a file size, the amount of time between each picture may be different from the set interval time. - If you don’t press any button, the slide show will start automatically in about 10 seconds by default. ENG-43 12-36 Samsung Electronics Operating Instructions A D VA N C E D F U N C T I O N S CD-R JPEG Discs - Only files with the “.jpg” and “.JPG” extensions can be played. - If the disc is not closed, it will take longer to start playing and not all of the recorded files may be played. - Only CD-R discs with JPEG files in ISO 9660 or Joliet format can be played. - The name of the JPEG file may not be longer than 8 characters and should contain no blank spaces or special characters (. / = +). - Only a consecutively written multi-session disc can be played. If there is a blank segment in the multi-session disc, the disc can be played only up to the blank segment. - A maximum of 3000 images can be stored on a single CD. - Kodak Picture CDs are recommended. - When playing a Kodak Picture CD, only the JPEG files in the pictures folder can be played. - Kodak Picture CD: The JPEG files in the pictures folder can be played automatically. - Konica Picture CD: If you want to see the Picture, select the JPEG files in the clips menu. - Fuji Picture CD: If you want to see the Picture, select the JPEG files in the clips menu. - QSS Picture CD: The unit may not play QSS Picture CD. - If the number of files in 1 Disc is over 3000, only 3000 JPEG files can be played. - If the number of folders in 1 Disc is over 300, only JPEG files in 300 folders can be played ENG-44 Samsung Electronics 12-37 Operating Instructions Chapter 5 CHANGING SETUP MENU Using the Setup Menu The Setup menu lets you customize your DVD player by allowing you to select various language preferences, set up a parental level, even adjust the player to the type of television screen you have. 1 With the unit in Stop mode, press the MENU button on the remote control. Press the …/† buttons to select Setup, then press the √ or ENTER button. Setup Language Setup √ Audio Setup √ Display Setup √ Parental Setup : √ DivX(R) Registration √ Œ ´ ˇ Language Setup : Setup of the Language. Audio Setup : Setup of the Audio Options. Display Setup : Setup of the Display Options. Use to select which type of screen you want to watch and several display options. ¨ Parental Setup : Setup of the Parental Level. Allows users to set the level necessary to prevent children from viewing unsuitable movies such as those with violence, adult subject matter, etc. ˆ DivX(R) Registration : Please use the Registration code to register this player with the DivX(R) Video On Demand format. To learn more go to www.divx.com/vod. Changing Setup Menu 2 Press the …/† buttons to access the different features. Press the √ or ENTER button to access the sub features. 3 To make the setup screen disappear after setting up, press the MENU button again. Note Depending on the disc, some Setup Menu selections may not work. ENG-45 12-38 Samsung Electronics Operating Instructions CHANGING SETUP MENU Setting Up the Language Features If you set the player menu, disc menu, audio and subtitle language in advance, they will come up automatically every time you watch a movie. Using the Player Menu Language 1 With the unit in Stop mode, press the MENU button. 2 Press the …/† buttons to select Setup, then press the √ or ENTER button. Setup Language Setup √ Audio Setup √ Display Setup √ Parental Setup : √ DivX(R) Registration √ Language Setup √ Audio Setup √ Display Setup √ Parental Setup : √ DivX(R) Registration √ 3 Press the …/† buttons to select Language Setup, then press the √ or ENTER button. Setup 4 Press the …/† buttons to select Player Menu, then press the √ or ENTER button. LANGUAGE SETUP Player Menu : English √ Disc Menu : English √ Audio : English √ Subtitle : Automatic √ DivX Subtitle : Western √ ▼ 5 Press the …/† buttons to select the desired language, then press the √ or ENTER button. PLAYER MENU LANGUAGE Player Menu English - The language is selected and the screen returns to Language Setup menu. - To make the setup menu disappear, press the MENU button. Français Deutsch Español Italiano Nederlands ENG-46 Samsung Electronics 12-39 Operating Instructions CHANGING SETUP MENU Using the Disc Menu Language This function changes the text language only on the disc menu screens. 1 With the unit in Stop mode, press the MENU button. 2 Press the …/† buttons to select Setup, then press the √ or ENTER button. Setup Language Setup √ Audio Setup √ Display Setup √ Parental Setup : √ DivX(R) Registration √ Language Setup √ Audio Setup √ Display Setup √ Parental Setup : √ DivX(R) Registration √ 3 Press the …/† buttons to select Language Setup, then press the √ or ENTER button. Setup Press the …/† buttons to select Disc Menu, then press the √ or ENTER button. Changing Setup Menu 4 LANGUAGE SETUP Player Menu : English √ Disc Menu : English √ Audio : English √ Subtitle : Automatic √ DivX Subtitle : Western √ ▼ 5 Press the …/† buttons to select the desired language, then press the √ or ENTER button. DISC MENU LANGUAGE English Disc Menu - Select “Others” if the language you want is not listed. - If the selected language is not recorded on the disc, the original pre-recorded language is selected. Français Deutsch Español Italiano Nederlands Others - The language is selected and the screen returns to Language Setup menu. - To make the setup menu disappear, press the MENU button. ENG-47 12-40 Samsung Electronics Operating Instructions CHANGING SETUP MENU Using the Audio Language 1 With the unit in Stop mode, press the MENU button. 2 Press the …/† buttons to select Setup, then press the √ or ENTER button. Setup Language Setup √ Audio Setup √ Display Setup √ Parental Setup : √ DivX(R) Registration √ Language Setup √ Audio Setup √ Display Setup √ Parental Setup : √ DivX(R) Registration √ 3 Press the …/† buttons to select Language Setup, then press the √ or ENTER button. Setup 4 Press the …/† buttons to select Audio, then press the √ or ENTER button. LANGUAGE SETUP Player Menu : English √ Disc Menu : English √ Audio : English √ Subtitle : Automatic √ DivX Subtitle : Western √ ▼ 5 Press the …/† buttons to select the desired language, then press the √ or ENTER button. AUDIO LANGUAGE Audio English Français Deutsch Español Italiano Nederlands Original Others - Select “Original” if you want the default soundtrack language to be the original language the disc is recorded in. - Select “Others” if the language you want is not listed. - If the selected language is not recorded on the disc, the original pre-recorded language is selected. - The language is selected and the screen returns to Language Setup menu. - To make the setup menu disappear, press the MENU button. ENG-48 Samsung Electronics 12-41 Operating Instructions CHANGING SETUP MENU Using the Subtitle Language 1 With the unit in Stop mode, press the MENU button. 2 Press the …/† buttons to select Setup, then press the √ or ENTER button. Setup Language Setup √ Audio Setup √ Display Setup √ Parental Setup : √ DivX(R) Registration √ Language Setup √ Audio Setup √ Display Setup √ Parental Setup : √ DivX(R) Registration √ 3 Press the …/† buttons to select Language Setup, then press the √ or ENTER button. Setup 4 : English √ Disc Menu : English √ Audio : English √ Subtitle : Automatic √ DivX Subtitle : Western √ Changing Setup Menu Press the …/† buttons to select Subtitle, then press the √ or ENTER button. LANGUAGE SETUP Player Menu ▼ 5 Press the …/† buttons to select the desired language, then press the √ or ENTER button. SUBTITLE LANGUAGE Subtitle Automatic English Français Deutsch Español Italiano Nederlands Others - Select “Automatic” if you want the subtitle language to be the same as the language selected as the audio language. - Select “Others” if the language you want is not listed. Some discs may not contain the language you select as your initial language; in that case the disc will use its original language setting. - The language is selected and the screen returns to setup menu. - To make the setup menu disappear, press the MENU button. ENG-49 12-42 Samsung Electronics Operating Instructions CHANGING SETUP MENU Using the DviX Subtitle Language 1 With the unit in Stop mode, press the MENU button. 2 Press the …/† buttons to select Setup, then press the √ or ENTER button. Setup Language Setup √ Audio Setup √ Display Setup √ Parental Setup : √ DivX(R) Registration √ Language Setup √ Audio Setup √ Display Setup √ Parental Setup : √ DivX(R) Registration √ 3 Press the …/† buttons to select Language Setup, then press the √ or ENTER button. Setup 4 Press the …/† buttons to select DivX Subtitle, then press the √ or ENTER button. LANGUAGE SETUP Player Menu : English √ Disc Menu : English √ Audio : English √ Subtitle : Automatic √ DivX Subtitle : Western √ ▼ 5 Press the …/† buttons to select the desired language, then press the √ or ENTER button. DivX SUBTITLE LANGUAGE DivX Subtitle - The language is selected and the screen returns to setup menu. - To make the setup menu disappear, press the MENU button. Westren Central Greek Cyrillic Western English, Breton, Catalan, Danish, Dutch, Faroese, Finnish, French, Gaelic, German, Icelandic, Irish, Italian, Norwegian, Portuguese, Spanish and Swedish Central English, Albanian, Croatian, Czech, Hungarian, Polish, Romanian, Slovak, Slovene and Serbian(Latin) Greek English and modern Greek Cyrillic English, Russian, Bulgarian, Belorussian, Macedonian, Moldavian, Serbian(Cyrillic), Ukrainian ENG-50 Samsung Electronics 12-43 Operating Instructions CHANGING SETUP MENU Setting Up the Audio Options Audio Options allows you to setup the audio device and sound status settings depending on the audio system in use. 1 With the unit in Stop mode, press the MENU button. 2 Press the …/† buttons to select Setup, then press the √ or ENTER button. Setup Language Setup √ Audio Setup √ Display Setup √ Parental Setup : √ DivX(R) Registration √ Language Setup √ Audio Setup √ Display Setup √ Parental Setup : √ DivX(R) Registration √ 3 Press the …/† buttons to select Audio Setup, then press the √ or ENTER button. Setup : PCM MPEG-2 Digitla Out : PCM DTS : Off Dynamic Compression : On PCM Down Sampling : On To make the setup menu disappear, press the MENU button. Changing Setup Menu Press the …/† buttons to select the desired item, then press the √ or ENTER button. AUDIO SETUP Dolby Digital Out ▼ 4 ENG-51 12-44 Samsung Electronics Operating Instructions CHANGING SETUP MENU Œ Dolby Digital Out - PCM : Converts to PCM(2CH) audio. - Bitstream : Outputs Dolby Digital Bitstream via digital output. Select Bitstream when connecting to a Dolby Digital Decoder. Note - There is no analog audio output when you play a DTS disc. ´ MPEG-2 Digital Out - PCM : Converts to PCM(2CH) audio. - Bitstream : Converts to MPEG-2 Digital Bitstream (5.1CH or 8CH). Select Bitstream when using the Digital Audio Output. ˇ DTS - Off : Doesn’t output digital signal. - On : Outputs DTS Bitstream via digital output only. Select DTS when connecting to a DTS Decoder. ¨ Dynamic Compression - On : To select dynamic compression. - Off : To select the standard range. ˆ PCM Down Sampling - On : Select this when the Amplifier connected to the player is not 96KHz compatible. In this case, the 96KHz signals will be down converted to 48KHZ. - Off : Select this when the Amplifier connected to the player is 96KHz compatible. In this case, all signals will be output without any changes. Note Even when PCM Down sampling is Off • Some discs will only output down sampled audio through the digital outputs. Manufactured under license from Dolby Laboratories. “Dolby” and the double-D symbol are trademarks of Dolby Laboratories. “DTS” and “DTS Digital Out” are trademarks of Digital Theater Systems, Inc. ENG-52 Samsung Electronics 12-45 Operating Instructions CHANGING SETUP MENU Setting Up the Display Options Display options enable you to set various video functions of the player. 1 With the unit in Stop mode, press the MENU button. 2 Press the …/† buttons to select Setup, then press the √ or ENTER button. Setup Language Setup √ Audio Setup √ Display Setup √ Parental Setup : √ DivX(R) Registration √ Language Setup √ Audio Setup √ Display Setup √ Parental Setup : √ DivX(R) Registration √ 3 Press the …/† buttons to select Display Setup, then press the √ or ENTER button. Setup Press the …/† buttons to select the desired item, then press the √ or ENTER button. DISPLAY SETUP TV Aspect : Wide Still Mode : Auto Screen Messages : On Black Level : Off TV System : PAL Video Output : SCART √ √ To make the setup menu disappear, press the MENU button. Changing Setup Menu ▼ 4 ENG-53 12-46 Samsung Electronics Operating Instructions CHANGING SETUP Œ MENU TV Aspect Depending on a type of television you have, you may want to adjust the screen setting (aspect ratio). - 4:3 Letter Box : Select when you want to see the total 16:9 ratio screen DVD supplies, even though you have a TV with a 4:3 ratio screen. Black bars will appear at the top and bottom of the screen. - 4:3 Pan Scan : Select this for conventional size TVs when you want to see the central portion of the 16:9 screen. (Extreme left and right side of movie picture will be cut off.) - 16:9 Wide : You can view the full 16:9 picture on your wide screen TV. - PAL : In case of using PAL disc • If your TV system only has NTSC-Video input, you must choose “NTSC”. • If your TV system only has PAL input, you must choose “PAL ”. Ø TV ASPECT 4:3 Lettre Box 4:3 Pan Scan 16:9 Wide ´ Still Mode These options will help prevent picture shake in still mode and display small text clearer. - Auto : When selecting Auto, Field/Frame mode will be automatically converted. - Field : Select this feature when the screen shakes in the Auto mode. - Frame : Select this feature when you want to see small letters more clearly in the Auto mode. Video Output Select Video Output. - COMPOSITE/S-VIDEO : Select when you want to use Video and S-Video Out. - Component (I-SCAN) : Select when you want to use Component Interlace (525i) Out. - Component (P-SCAN) : Select when you want to use Component Progressive (525p) Out. - SCART Output : Select when you want to use Scart Out. • RGB : Select when you want to use SCART RGB Out. • Video : Select when you want to use SCART Video Out. • If the Yes/No selection in the Display Setup sub Menu is not made within 10 seconds, the screen returns to the previous menu. DISPLAY SETUP TV Aspect : Wide Still Mode : Auto Screen Messages : On Black Level : Off √ TV System : PAL Video Output : SCART √ DISPLAY SETUP COMPOSITE/S-VIDEO ˇ Component (I-SCAN) Screen Messages Use to turn on-screen messages On or Off. Component (P-SCAN) SCART Output √ RGB S-Video Video ¨ Black Level Adjusts the brightness of the screen. (On or Off) It does not function in Progressive mode. ˆ TV System - NTSC : In case of using NTSC disc • If your TV system only has PAL-Video input, you must choose “PAL”. When you choose “PAL”, Interlace output format is PAL 60 Hz output. • If your TV system only has NTSC, input you must choose “NTSC ”. • Consult your TV User’s Manual to find out if your TV supports Progressive Scan. If Progressive Scan is supported, follow the TV User’s Manual regarding Progressive Scan settings in the TV’s menu system. • If Video Output is set incorrectly, the screen may be blocked. ENG-54 Samsung Electronics 12-47 Operating Instructions CHANGING SETUP MENU Setting Up the Parental Control The Parental Control function works in conjunction with DVDs that have been assigned a rating, which helps you control the types of DVDs that your family watches. There are up to 8 rating levels on a disc. 1 With the unit in Stop mode, press the MENU button. 2 Press the …/† buttons to select Setup, then press the √ or ENTER button. Setup Language Setup √ Audio Setup √ Display Setup √ Parental Setup : √ DivX(R) Registration √ Language Setup √ Audio Setup √ Display Setup √ Parental Setup : √ DivX(R) Registration √ 3 Press the …/† buttons to select Parental Setup, then press the √ or ENTER button. Setup Press the √ or ENTER button to select Yes if you want to use a password. The Enter Password screen appears. Changing Setup Menu 4 PARENTAL SETUP Use Password : No ▼ 5 Enter your password. The Re-enter Password screen appears to confirm the password. Enter your password again. The player is locked ( ). CREATE PASSWORD To make the setup menu disappear, press the MENU button. Enter Password ---- CREATE PASSWORD Re-enter Password ---- ENG-55 12-48 Samsung Electronics Operating Instructions CHANGING SETUP MENU Setting Up the Rating Level 1 With the unit in Stop mode, press the MENU button. 2 Press the …/† buttons to select Setup, then press the √ or ENTER button. Setup Language Setup √ Audio Setup √ Display Setup √ Parental Setup : √ DivX(R) Registration √ Language Setup √ Audio Setup √ Display Setup √ Parental Setup : √ DivX(R) Registration √ 3 Press the …/† buttons to select Parental Setup, then press the √ or ENTER button. Setup 4 PASSWORD CHECK Enter your password. Enter Password ---- 5 Press the …/† buttons to select Rating Level, then press the √ or ENTER button. PARENTAL SETUP Use Password : Yes Rating Level :8 Change Password √ √ ▼ 6 Press the …/† buttons to select the Rating Level you want, then press the √ or ENTER button. e.g) Setting up in Level 6. RATING LEVEL Level Level Level Level Level Level Level Level 8 Adult 7 6 5 4 3 2 1 Kids Safe To make the setup menu disappear, press the MENU button. For example, if you select up to Level 6, discs that contain Level 7,8 will not play. ENG-56 Samsung Electronics 12-49 Operating Instructions CHANGING SETUP MENU Changing the Password 1 With the unit in Stop mode, press the MENU button. 2 Press the …/† buttons to select Setup, then press the √ or ENTER button. Setup Language Setup √ Audio Setup √ Display Setup √ Parental Setup : √ DivX(R) Registration √ Language Setup √ Audio Setup √ Display Setup √ Parental Setup : √ DivX(R) Registration √ 3 Press the …/† buttons to select Parental Setup, then press the √ or ENTER button. The Enter Password screen appears. Enter your password. Setup ▼ Press the …/† button to select Change Password, then press the √ or ENTER button. Enter your new password. Re-enter the new password again. PARENTAL SETUP Use Password : Yes Rating Level :8 To make the setup menu disappear, press the MENU button. Changing Setup Menu 4 √ √ Change Password CHANGE PASSWORD Enter New Password ---- CHANGE PASSWORD Re-enter Password ---- Note If you have forgotten your password, see “Forgot Password” in the Troubleshooting Guide. ENG-57 12-50 Samsung Electronics 13. Circuit Operating Descriptions 13-1 Power 13-1-1 Comparsion between Linear Power Supply and S.M.P.S. 13-1-1 (a) Linear Vin Vreg REGULATOR + Vp (Np) – Common power (Ex.120V 60Hz) + + Vs – (Ns) Fig.13-1 Linear Power Supply ◆ Waveform/Description Vp 0 Input : Common power to transformer (Vp). t Fig. 13-2 Vs 0 The output Vs of transformer is determined by the ratio of 1st Np and 2nd Ns. Vs = (Ns/Np) x Vp t Fig. 13-3 Vout 0 t Vout is output (DC) by diode and condensor. Fig. 13-4 Samsung Electronics 13-1 Circuit Operating Descriptions ◆ Advantages and disadvantages of linear power supply Change by common power 1) Advantages : Little noise because the output waveform of transformer is sine wave. 2) Disadvantages : Œ Additional margin is required because Vs is changed (depending on power source). (The regulator loss is caused by margin design). ´ Greater core size and condensor capacity are needed, because the transformer works on a single power frequency. v Vout Vreg 0 t Regulator loss Fig. 13-5 13-1-1 (b) S.M.P.S. (Pulse Width Modulation) Vin Transformer (Np) (Ns) + + (Vp) (Vs) — — REGULATOR + + Vin Vout + — PICF1 CTL IC PWM CTL + MOS Fet Fig. 13-6 ◆ Terms 1) 1st : Common power input to 1st winding. 2) 2nd : Circuit followings output winding of transformer. 3) f (Frequency) : Switching frequency (T : Switching cycle) 4) Duty : (Ton/T) x 100 13-2 Samsung Electronics Circuit Operating Descriptions 13-1-2 Circuit description [FLY-Back PWM(Pulse Width Modulation)] Control 13-1-2 (a) AC Power Rectification/Smoothing Terminal 1) PDS01, PDS02, PDS03, PDS04 : Convert AC power to DC(Full wave rectification). 2) PER10 : Smooth the voltage converted to DC. 3) PCD01, PCD02, PBS01 : Noise removal at power input/output. 4) PVA1 : SMPS protection at power surge input. 13-1-2 (b) SNUBBER Circuit : PDS11, PCD12, PRS13, PCD11, PPS12 1) Prevent residual high voltage at the terminals of switch during switch off/Suppress noise. High inverted power occurs at switch (PQR11) off, because of the 1st winding of transformer : (V=-L1 xdi/dt. L1 : Leakage Induction) A very high residual voltage exist on both terminals of PIC1 4, 5~8pin because dt is a very short. Vswitch Inverted power by leakage inductance dt 0 t 2) SNUBBER circuit protects PQR11 from damage through leakage voltage suppression by RC, (Charges the leakage voltage to PDS11, PER13, PCD12 and discharges to PRS11, PRS12). Toff Fig. 13-7 13-1-2 (c) Driving circuit When Vin supplied, driving current Ig occurs throuhg the PICF1. By this I1 (=Hfe x Ig) occurs throug the PIC1 and the Vb is inducted to base winding coil NB. By inducted Vb, Ib start flow and the VCC voltage of PQR11 is sustained stable. Ib is constant and I1 increases in Proportion to time. After constant time passed Ib become to shortage and PIC1 is cut OFF (S/W OFF). Samsung Electronics 13-3 Circuit Operating Descriptions PTDI PDS34 Vout NP Ns Ig R Ig Vin Snubber R Vs + PES34 I2 GND D + Ib C VB VB Ib Vb Drain VCC Softs POWER-CTL I2 C R FB Mos-Fet I1 GND VD-G 0 < Off < C < ON < Icease R PICF1 Fig. 13-8 Driving Circuit 13-4 Samsung Electronics Circuit Operating Descriptions 13-1-2 (d) Feedback Control Circuit PTDI PDS34 Vout NP Ns Ig Vin Snubber R Ig R Vs I2 + PES34 GND D + Ib C VB VB Drain VCC Softs POWER-CTL C R FB Mos-Fet GND Icease R C A K PICF1 Fig.13-9 ◆ Operation descriptions 1) Internal OP-Amp ‘+’ base potential of PICS2 is 2.5V and external “-” input potential is connected with PRS33 and PRS34 to maintain Vout of 4.4V. 2) If load of 4.4V terminal increase (or AC inout voltage decrease) and Vout decrease over 4.4V, Then : PICS2 “R” potential decrease over 2.5V --> PICS2 A-K BASE Current decrease --> PICS2 A-K Current decrease --> PICS1 DIODE Current decrease --> PICS1 C-E Current decrease --> PICS1 C-E Voltage increase --> PICS1 F-B Voltage increase --> OUT DUTY increase TRANS Primary Cuttent Increase --> TRANS Primary Power increase --> Vout increase --> Vout maintain 4.4V - PRD31, PRD32 : Reduce 4.4V overshoot. - PRS32, PCS32 : Prevent PICS2 oscillation (for phase correction). Samsung Electronics 13-5 Circuit Operating Descriptions 13-1-3 Internal Block Diagram ◆ Internal Block Diagram Smoothing Circuit Noise Removal (SNUBBER) 3.3V Rectified Smoothing Circuit 3.3V Rectified VoltageCircuit 5V Rectified Smoothing Circuit 5V Rectified VoltageCircuit (x2) Converter Rectified Circuit Line Filter Motor 8V 1 Port PWM IC Control Circuit 8V Rectified Smoothing Circuit Feed Back Circuit O U T P U T 12V Rectified VoltageCircuit Power IN (AC85V~240V) Fig.13-10 13-6 Samsung Electronics Circuit Operating Descriptions 13-2 RF 13-2-1 RIC1 (SP3723) SP3723 is combined with Zoran Vaddis 6 as bipolar IC developed for DVD SERVO system. Main features include DVD waveform equalizing, CD waveform equalizing, focus error signal generation, 3-beam tracking error signal generation, DPD 1-beam tracking error, defect, MIRR output, Laser Power Control, etc. 13-2-1 (a) Basic Potentiometer SP3723 Uses 3.5V to 5.5V and reference voltage is 1.65V. 13-2-1(b) RF signal Fig. 13-11 shows the flow of signal generated by the pick-up. RF signal detected from pick-up is converted in to RF signal via RF interface and attennuators. A, B, C, D signals detected from pick-up are converted in to FE, TE, PI, CE, DEFECT signals. Fig. 13-11 Samsung Electronics 13-7 Circuit Operating Descriptions Fig.13-12 shows the waveform-equalizing block diagram for the RF signal. RF signal from the pick-up is the input of RF equalizer module of RIC1 (SP3723). 103 103 H AIP AIN RFSIN G RF EQ RFAC CAR K SIGR RF (FROM P/U) h FCCR 102 J ATON ATOP j Fig.13-12 13-8 Samsung Electronics Circuit Operating Descriptions 13-3 System Control 13-3-1 Outline The main micom peripheral circuit is composed of 1Mbyte Flash Memory (ZIC3) for Microcode and data save, 2Kbit EE-PROM (ZIC5) for permanent storage of data needed at power off, 64Mbit SDRAM (ZIC2) for temporary data read and write. The Micom (ZIC1 ; Vaddis 7) mounted in main board analizes the key commands of front panel or instructions of remote control and controls the devices on board to execute the corresponding commands after initializing the devices connected with micom on board at power on. 13-3-2 Block Diagram RIC1 RF AMP (SP3723) AIC1 D/A CONVERTER (DSD1608) ZIC1 MPEG DECODER CPU (VADDIS 7) DATA BUS ZIC5 EEPROM (4K bit) ZIC3 FLASH MEMORY 2 Mbyte ADDRESS Fig. 13-13 Samsung Electronics 13-9 Circuit Operating Descriptions 13-4 Servo 13-4-1 Outline SERVO system of DVD is Compoced of Focusing SERVO, Tracking SERVO, SLED Linked SERVO and CLV SERVO (DISC Motor Control SERVO). 1) Focusing SERVO : Focuses the optical spot output from object lens onto the disc surface. Maintains a uniform distance between object lens of Pick-up and disc (for surface vibration of disc). 2) Tracking SERVO : Make the object lens follow the disc track in use of tracking error signal (created from Pick-up). 3) SLED Linked SERVO : When the tracking actuator inclines outwardly as the object lens follows the track during play, the SLED motor moves slightly (and counteracts the incline). 4) CLV SERVO (DISC Motor Control SERVO) : Controls the disc motor to maintain a constant linear velocity (necessary for RF signal). 13-4-2 Block Diagram 7 26 25 13 14 28 27 1 OPEN 2 5 6 CLOSE 7 TM1 4 TM+ SP+ SP- 3 10 11 LED FIC1 POWER 11 GND 7 ZIC1(Vaddis 6E) 10 ZIC1(Vaddis 6E) TM+ TM1 SP+ SP- 6 4 18 17 15 20 16 8 9 Fig.13-14 13-10 Samsung Electronics Circuit Operating Descriptions 13-4-3 Operation 1) FOCUSING SERVO (1) FOCUS INPUT The focus loop is changed from open loop to closed loop, and the triangular waveform moves the object lens up and down (at pin 167 of ZIC1 during Focus SERVO ON.) At that time, S curve is input to pin 181 of ZIC1. PZ (pin 183 of ZIC1) signal, summing signal of PD A, B, C, D, is generated, and zero cross(1.65V) point occurs when S curve is focused and ABCD signal exceeds a preset,constant value. The focus loop is changed to closed loop, and the object lens follows the disc movement, maintaining a constant distance from the disc. (these operations are same in CD and DVD). Pin 167 of ZIC1 (FOD) Vref Pin 181 of ZIC1 (FE) Vref Pin 183 of ZIC1 (AAF_PZ) 1.5V Fig. 13-15 (2) PLAY When focus loop closes the loop during focus servo on, both are controlled by VREF voltage (approx. 1.65V). 2) TRACKING SERVO (1) NORMAL PLAY MODE Œ For DVD Composite : The signal output from PD A, B, C, D of Pick-up, the tracking error signal (pin39 of RIC1) uses the phase difference of A+C and B+D in RIC1, and inputs to ZIC1. Then, it is output to ZIC1 pin 169 via digital equalizer, and applied to the tracking actuator through FIC3. Pin 69 of ZIC1 is controlled by VREF(approx. 1.65V) during normal play. Meanwhile, DVD repeats the track jump from 1 to 4 in inner direction at normal play (because data- read speed from disc is faster than data output speed on screen). ´ For CD, VCD Receive the signal output through E, F of Pick-up, from ZIC1. The tracking error signal is similar to DVD. Samsung Electronics 13-11 Circuit Operating Descriptions (2) SEARCH Mode : Search mode : Fine seek,(Moving the tracking actuator slightly little below 255 track) and coarse search, moving much in use of sled motor. The coarse search will be described in sled linked servo and now, the fine seek is explained shortly. If the object lens is located near target, cut off the tracking loop and give the control signal as many as desired count to move the tracking actuator via ZIC1 pin 169 terminal(TRD). 3) SLED LINKED SERVO • Normal play mode Move SLED motor slightly by means of PWM signal in ZIC1 pin 191, as the tracking actuator moves along with track during play. Control to move the entire Pick-up as the tracking actuator moves. • Coarse serach mode In case of long-distance search (such as chapter serach), ZIC1 uses MIRR and Global sense signal. Then, read ID and compute the existing track count after input of next track. If the existing track count is within fine seek range, tracking begins using fine seek. 4) CLV SERVO(DISC MOTOR CONTROL SERVO) Input RF signal (from Pick-up) to ZIC1 pin 172, 173. Detect SYNC signal from RF in ZIC1, and output PWM signal to ZIC1 pin 189 for constant linear velocity. 13-12 Samsung Electronics Circuit Operating Descriptions 13-5 DVD Data Processor 13-5-1 Outline The Vaddis 7(highly-integrated device) includes the full front-end disc controller, back-end decoder functions as well as the host control CPU. The principal off-chip components include the disc drive with its optical pickup, tray, sled and spindle drivers and motors, 16Mbits of flash MEMORY, 128Mbits of SDRAM, and the audio Digital-to-Analog converters some applications. In case of general disc refresh, the memory is almost filled up periodically. It is because Write rate to memory after disc playback and signal process is faster than Read of A/V decoder. When the memory is filled, this status is reported by interrupt to main micom, which controls the servo to kick back the pick-up to the previous track after memorizing the last data read from disc until now. It takes some times to jump to the previous track and return to the original(jump location) again. The memory will have an empty space because A/V decoder reads out data of memory. When the memory has an empty space, where data can be processed and written and the pick-up correctly gets to the original location(before kick back location) again, it reads data again avoids the interrupt of data read previously. The basic operation repeats to perform as described above. 13-5-2 Block Diagram 68M bit 4 8026 16M bit Fig.13-16 Samsung Electronics 13-13 Circuit Operating Descriptions 13-6 Video 13-6-1 Outline ZIC1(A/V decoder with video encoder) diverges from the 27MHz crystal, then generates VSYNC and HSYNC. ZIC1(A/V decoder with video encoder) does RGB encoding, copy guard processing and D/A conversion of 8bit video data internally inputted from video decoder block by ZIC1. Video signal converted into analog signal is outputted via amplifier of analog part. Video data A/V Decoder Vaddis 7 With Video Encoder ZIC1 CVBS CVBS Y/R/V Y C/B/U C CVBS/G/Y Y CVBS Y LOW PASS FILTER (6MHz) 6dB AMP & 75ohm Drive C Y Pb Pr Pb Pr MM1623 SCART Jack ZR36721 HDMI Digital Video data Fig. 13-17 Video Output Block Diagram 13-6-2 NTSC/PAL Digital Encoder (VADDIS 7 ; Built in video encode) ZIC1 inputted from pin 161 with 27MHz generates HSYNC and VSYNC which are based on video signal. ZIC1 is synchronous signals with decoded video signal and control the output timing of 8bit video signal. The separate signal is encoded to NTSC by control of ZIC1. The above signals, which are CVBS (Composite Video Burst Synchronized)/G (GREEN)/Y, Y (S_VIDEO)/R (RED)/Pr and C (S_VIDEO)/B (BLUE)/Pb [PIN162], are selectively outputted CVBS +S_VIDEO, RGB/Component by the rear switch. In Course of encoding, 8bit data can extend to 10bit or more. To convert the extended data to quantization noise as possible, ZIC1 adopts 10bit D/A converter. ZIC1 perform video en-coding as well as copy protection. 13-6-3 Amplifier (VIC1: LA73054) VIC1 is 6dB amplifier. Based on CVBS signal, the final output level must be 2Vpp without 75ohm terminal resitance. Because the level of video encoder output is only 1.1Vpp, the level is adjusted with the special amplifier. When mute of pin 5 is high active, if the pin is floating and connecte to power, the output signal is never ouputted. CVBS, Y, C, R, Pb(B), Pr(R) outputted from video encoder are inputted to VIC1 (Pin 2, 8, 6, 16, 14). The signal to which gain is adjusted by amplifier is outputted from jack via 75ohm Resistance (VR11~VR16). 13-14 Samsung Electronics Circuit Operating Descriptions 13-7 Audio 13-7-1 Outline A/V decoder (ZIC1 ; Vaddis 7) is supply to DATA 0 for 2-channel mixed audio output. The audio data transmitted from A/V decoder (ZIC1 ; Vaddis 7) are converted into analog signal via audio D/A converter and outputted via post filter and amplifier. CD and VCD are outputted with only 2 channels audio data and transmit them to Data 0. If DVD of multichannel Source disc, if is downmixed and transmit them to Data0. If you want to listen to the multichannel output, you have to connect digital output with AC-3 amp or MPEG/DTS amp. Mixed Audio Output (2-Channel) ZIC1 (Vaddis 7) A/V Decoder DATA0 LRCK BCK AIC1 PCM1753 D/A CONVERTER POST FILTER AMP L POST FILTER AMP R Fig. 13-18 Audio Output Block Diagram Samsung Electronics 13-15 Circuit Operating Descriptions MEMO 13-16 Samsung Electronics 14. Reference Information 14-1 Introduction to DVD 14-1-1 The Definition of DVD DVD is the next generation medium and is the acronym of the Digital Versatile Disc or thr Digital Video Disc, which maximizes the saving density of the disk surface using the MPEG-2 compression technology to enable the storage of 17G bytes of data on the same size CD. 1) 7 times the storage capacity of the conventional CD •Minimized the track pitch and pit size to 1/2 of conventional CD. •Uses red laser with short-wavelenght of 650nm (635nm). • DVD Vs. CD-ROM CD-ROM CD-R/RW DVD-ROM DVD-R/RW DVD-RAM Disc Thickness 1.2mm 1.2mm 0.6*2mm 0.6*2mm 0.6*2mm Lens NA 0.45 0.45(0.5) 0.6 0.6 0.6 Laser wavelenght 780um 780um 650um 650um 650um Track pitch 1.6pm 1.6pm 0.74pm 0.74pm 0.615pm Capacity 0.65GB 0.65GB 4.7GB 4.7GB 4.7GB Track structure Pit train Groove Pit train Groove Land/Groove 2) Disc Formats DVD consists of two 0.6mm discs attached together, enabling access to the upper and lower side of the disk, and 4 sides could be used at maximum. Single Layer : 4.7GByte Label Polycarbonate Bonding layer Reflective layer Polycarbonate Dual Side Single Layer : 9.5GByte Polycarbonate Reflective layer Bonding layer Reflective layer Polycarbonate Samsung Electronics Dual Layer : 8.5GByte Label Polycarbonate Reflective layer Bonding layer Semi-reflective layer Polycarbonate Dual Side Dual Layer : 17GByte Polycarbonate Semi-reflective layer Reflective layer Bonding layer Reflective layer Semi-reflective layer Polycarbonate 14-1 Reference Information 14-1-2 DVD Types FORMAT TYPE DVD-Video Playback Only DVD-ROM Read Only DVD-Audio Playback Only DVD-R 1 Time Recording Rewritable APPLICATIONS High quality image and sound for movies and other video media. Multi-functional, multi-media software that requires large storage capacity. High quality sound that exceeds the CD, multi-channel Audio. As with CD-R, write only once This can be virtually used as hard-disk, with a random DVD-RAM (more than 100,000times) Rewritable read-write access Similar to DVD-RAM except than its technology features DVD-RW (About 1000times) 14-2 a separated read-write access more like phonograph than a hard disk. Samsung Electronics Reference Information 14-2 DVD-Video Fromat 14-2-1 Main Features 1) Able to store up to 160 minutes of Movie by utilizing the MPEG-2 compression technology. ( Aver. 133min.) 2) Enables more than 500 lines of horizontal resolution. (Class corresponding to the Master Tapes used in broadcasting stations) 3) Provides Dolby Digital 5.1ch Surround 3D sound, which enables theater quality sound (NTSC area). • For PAL areas, 1 of either MPEG-2 Audio or Dolby Digital must be selected. 4) Multi-Language • Able to store up to 8 languages of dubbing. • Able to store up to 32 subtitle languages. 5) Multi-Aspect Ratio 3TV Mode alternatives ; 16:9 Wide Screen (DVD Basic)/4:3 Pan & Scan/Letter Box. 6) Multi-Story Possible to implement Interactive Viewing which enables the user to select the scenario. 7) Multi-Angle Able to view the camera angle you selected among the scenes recorded with multiple camera angles. Note ; The above media features must have the DVD Title that contains the appropriate contents to function properly. 14-2-2 Audio & Video Specifications Classification VIDEO DVD-Video Video-CD Compression MPEG-2 MPEG-1 Pixel 720 x 480 352 x 240 Horizontal resolution Max. 500 Lines Max. 250 Lines Compression rate 1/40 1/140 Transmission speed Max. 9.8Mbps (variable) 1.15Mbps (fixed) TV aspect 16:9 / 4:3 Audio Max. 8 streams Recording type AUDIO 4:3 2CH stereo Dolby Digital Linear PCM MPEG-1 Layer 2 Transmission rate 448Kbps/stream 6.144Mbps/stream 224Kbps Channel 5.1CH/stream 8CH/stream 2CH Sampling frequency 48KHz 16, 20, 24Bit/48, 96KHz 16Bit/44.1KHz Samsung Electronics LD Analog Max.420 Lines Analog 4:3 2 Analog CH. 2 Digital CH. (16Bit/44.1KHz) or 1 Analog CH. 1 Stream of Dolby Digital 2 Digital CH. (16Bit/44.1KHz) 14-3 Reference Information 14-2-3 Detailed Feature DVD-Video Feature 1 When Developing the DVD Software, various addition and modification is possible. As the storage capacity increases, the DVD-Video separates the main data and the additional data such as the Multi-Function into different data areas, enabling the control of time-data ratio to provide the format that enables the flexible Software development • 1 Movie (3.5Mbps) + Subtitle (1 Language) + Surround Audio (1 Language) = 160min storage (4.673Gbytes) • 1 Movie (3.5Mbps) + Subtitle (4 Language) + Surround Audio (4 Language) = 160min storage (4.680Gbytes) • 1 Music Video (4Mbps) + 2ch High quality Audio (96kHz/24bit) = 72min storage (4.648Gbytes) DVD-Video Feature 2 Application of the MPEG-2 compression technology. DVD-Video uses the variable compresion technology, the MPEG-2 to compress the moving image optimally, minimizing the Data loss to Provide a clear, natural screen while increasing the storage time. • MPEG-2 (Variable compression : Max. 1/40) Amount of data • Field unit compression. • Compression rate change according to the amount of Data. DVD-Video •Differentiates the still image and the moving image compression rate, reducing Data loss and enables efficient compression. • MPEG-1 (Fixed compression : Max. 1/140) Video-CD Amount of data Loss area • Frame unit compression. • Compresses all data using the same ratio. - Fast movements are jagged, and unnatural 14-4 Time Time Samsung Electronics Reference Information DVD-Video Feature 3 High quality surround audio. DVD-Video can store the audio using the 5.1ch Dolby Digital compression or the advanced Liner PCM method, providing the better-than-CD quality and theater like audio quality. • DTS (Digital Theater System) Home theatre and music playback in the home, DTS provides high quality 5.1-channel surround sound with many extras not offered by other consumer formats. As well as handling DTS-branded releases from a growing number of music labels and consumer software producers, DTS provides enhanced 6.1 matrix and DTS 6.1 discrete decoding that envelopes the listener in sound. DTS technology is featured in a wide cross section of receiver/pre-amplifiers, DVD players and and add-on components from leading consumer audio vendors • Dolby Digital (AC-3) • Unlike the traditional Dolby pro-Logic method, the Dolby Digital method separates all 5 main channels (Front L/R, Center, Surround (Rear) L/R)and the Sub woofer to provide live surround audio. • Using the Down Mix method, the conventional Dolby Pro-Logic and Stereo are all compatible. • Each separated channels are played back at CD quality sound. (Frequency band: 20Hz ~ 20KHz) • Linear PCM (Pulse Code Modulation) • Provides the high quality Digital sound without the audio data compression. • Various Digital Recordings are possible as shown in the table to the right. Sampling Frequency Bit Rate 16bit 48KHz 20bit 24bit 16bit 96KHz 20bit 24bit • Dolby Digital compatible Audio Mode Channel Format Audio Coding Mode Front L 1/0 R L O 3/0 O 2/1 O 3/1 O 2/2 O 3/2 O Mono O O O O Remark R O 2/0 Samsung Electronics C Surround (Rear) Stereo O O Mono O Mono Surround O O O O O O 14-5 Reference Information DVD-Video Feature 4 Multi-Language • Audio Dubbing - Max. 8 Languages • Subtitle - Max. 32 Languages. Capable of storing, and selectiong. • Linear PCM (Pulse Code Modulation) DVD-Video Feature 5 Multi-Aspect • Unlike the conventional VCD or LD, DVD-Video has the default of 16:9 Wide, and can be viewed using the conventional 4:3 TV, enabling the expansion of viewer selection capabilities. • 16 : 9 TV : Wide Mode (16:9 Wide Full Screen) • 4 : 3 TV : Letter Box Mode, Pan & Scan Mode 16:9 Wide 4:3 Pan & Scan 4:3 Letter Box Note ; This function is disc-dependent, may not work on all DVDs. DVD-Video Feature 6 Multi-Angle • Up to 9 angles of view may be stored, enabling the viewer to select a specific viewpoint at a given time. --> Especially, for the Music Video and Sports Title, this provides a more lively image of the scene. Note ; This function is disc-dependent, may not work on all DVDs. 14-6 Samsung Electronics Reference Information DVD-Video Feature 7 Multi-Story • DVD-Video provides the enviroment suitable for the bi-directional Software develoment, providing multiple scenarios. This feature enables the Multi-Story function. OPTION Parental Lock • For the titles that are not suitable for children viewing, Parental Locks are set, requesting user defined passwords for viewing • Parential Locks may be set on specific frames of the Title, enabling the player to skip those frames during playback. COPYRIGHT Regional Code & Macrovision • Classify the world into 6 regions, and if the DVD Title and the Player’s “Reginal Code” do not agree, playback is prohibited. • Regionnal Coding is optional for the Soft developers (Region 0 All Code), but the Hardware developers must adopt the appropriate regionnal code for sale. • Region 1 : The United States and its territories, Canada. • Region 2 : Europe, Japan, Greenland, Egypt, South Africa, the Middle East. • Region 3 : Taiwan, Hongkong, Korea, South East Asia. • Region 4 : Mexico, South America, Australia, New Zealand. • Region 5 : Russia, Eastern Europe, India, Africa. • Region 6 : China. • Region 0 : Worldwide (All Code) ˆ Œ ´ Ø Œ ´ Œ ˇ ¨ ´ ˆ ¨ • Adoptation of the Macrovision System disables the copying on to other media. Samsung Electronics 14-7 Reference Information Remark DVD-Video Authoring Process • The image quality of the DVD-Video may vary accoring to the quality of the Master and the Authoring Process • The image quality of the DVD-Video varies according to the Digital Mastering Source such as the conventional LD, VCD, or Original Film. • Different Authoring Process are used accoring to the Software developers, and this may affect the DVD image quality. • Authoring Process Video/Audio Master MPEG-2 Encoding Surround Audio Master AC-3/MPEG Audio Encoding Subtitle Master Subtitle Encoding bit stream Disc Production bit stream Video/Audio Subtitle Multiplexing Cutting Master bit stream Authoring Process 14-8 Samsung Electronics Reference Information 14-3 DVD-Audio The TheLogical LogicalStructure Structureof ofDVD-AUDIO DVD-AUDIO • Album – Each side of a DVD-Audio disc contains one • Group – Essentially a playlist specifying the playback order of a number of Tracks – 9 per Album •Track – As on a CD, a Track may be thought of as a single audio program (I.e. a song) – Audio attributes such as channel assignment, sample rate, and word-length may be changed on Track boundaries – There may be no more than 99 tracks total within a single Group • Index – A reference point to a portion of an audio Track (Cell) – There may be up to 99 indices within a single Track Audio AudioStill StillVideo Video - Still pictures playback with audio. #1 #3 #2 Loading Music(Track) Non-mute Non-mute time Samsung Electronics 14-9 Reference Information Real RealTime TimeText Text -Supports Text data with audio Audio Text AG Happy birthday to you. AG Happy birthday, dear ... AG Happy birt DVD-VIDEO DVD-VIDEOData Datain inDVD-AUDIO DVD-AUDIODisc. Disc. Only DVD-Audio Player DVD-Audio Visual Menu DVD-Video Visual Menu DVD-Audio Data DVD-Video Data (DVD-Audio Additinal )Data DVD-Audio Player, DVD-Video Player Only DVD-Video Player DVD-Audio Disc 14-10 Samsung Electronics Reference Information Unused Area Protected content prerecorded by media manufacturer Encrypted using key: Hash[Media Key, Album ID, CCI] Other data prerecorded by media manufacturer Media Key Block Media Key Album ID (album-unique, not copyable) Lead-in Area Individual keys for each device supplied to manufacturer by licensing entity Device calculates Media Key from Media Key Block and device keys, and uses in forming content decryption key DVD-VIDEO DVD-VIDEOData Datain inDVD-AUDIO DVD-AUDIODisc. Disc. Only DVD-Audio Player DVD-Audio Visual Menu DVD-Video Visual Menu DVD-Audio Data DVD-Video Data (DVD-Audio Additional Data ) DVD-Audio Player, DVD-Video Player Only DVD-Video Player DVD-Audio Disc Samsung Electronics 14-11 Reference Information 14-4 DivX • DivX: Most successful MPEG-4 video compression technology in history. – standard for digital video (‘MP3 of Video’). – Internet’s 3rd most downloaded application, – MPEG-4 video codec. – Secure, MPEG-4, DVD-quality VOD products. • Powerful technology… – DVD quality: ~784Kbps. – NTSC/PAL: <500Kbps. – 720P HD: <4Mbps. – 1080p HD: <7Mbps. – 32Kbps to Digital Cinema. – 80+ hours of portable video. • There are many different MPEG-4 profiles. –‘Simple Profile’ (SP) is the most basic; other profiles are SP pl us other tools. • Advanced Simple Profile (ASP) is emerging as the standard for consumer and CE applications. Basic Video Compression Toolset Basic Video Compression Toolset BVOP GMC QPel Simple Profile MPEG-4 14-12 Advanced Simple Profile MPEG-4 Samsung Electronics Reference Information • DivX 3.11 is a legacy technology that is not MPEG-4 compatible –Requires different decoding algorithms – cannot be decoded by a generic MP 4 decoder. –Constitutes about 45% of the DivX content on the Internet today. • Open DivX is a MPEG-4 Simple Profile Implementation. –Released to the Internet community in Jan/2001 • DivX 4.x is a highly optimized MPEG-4 Simple Profile Implementation. –Released Aug/2001. • DivX 5.0 – 5.02 is a MPEG-4 Advanced Simple Profile Implementation. –Released Mar/2002. • DivX 5.1 is a MPEG-4 Advanced Simple Profile Implementation stabilized an d optimized for CE devices. –Released Nov/2002; GMC and QPel support are not required for certification. • DivX 5.2.1 is the latest version until now •DivX remains MPEG-4 compatible: –A generic MPEG-4 Simple Profile decoder can decode Open DivX and DivX 4.x content –A generic MPEG-4 Advanced Simple profile decoder can decode content encoded with Open DivX, DivX 4.x and DivX 5.x. Samsung Electronics 14-13 Reference Information • DivX 5.X decoder advantages: – Fully MPEG-4 ASP compliant (superior to all Simple Profile decoders). – DivX 3.11 decoder (critical for existing DivX content on the Internet). – DivX proprietary post-processing (improves all files). – DivX advanced tools (interlace, PVM, telecine, etc). – DivX DRM – And the standard DivX advantages of users, content, and brand). DivX DRM, Tools, and Film FX Basic Video Compression Toolset Basic Video Compression Toolset Basic Video Compression Toolset BVOP ASP Tools: BVOP, GMC, QPel GMC DivX 3.11 Decoder QPel Post-Processing Simple Profile Decoder Advanced Simple Profile Decoder DivX 5.02 ASP Decoder • All Versions of DivX require DivX DRM to be implemented in IC. • DivX content is protected in numerous ways to ensure security. – Content never exists in an unencrypted form. • The DivX DRM system quickly identifies and responds to security attacks. • Content owners have maximum flexibility to set usage rules and to enforce Digit al Millennium Copyright Act (DMCA) rights. • All DivX Certified CE devices require DivX DRM. • • • • 14-14 Pre-Encryption Key Rotation Encryption Rotation Static Watermarking • • • • • Dynamic Watermarking Central Business Rule(s) Server Key Management Secure Channels Tamper Resistance Samsung Electronics Reference Information DivX Certification helps CE makers get high-quality devices to market. Samsung Electronics 14-15