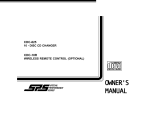
1
CDC-MCR2
FM MODULATOR / WIRED COMMANDER
FOR CD CHANGER SYSTEMS
CDC-10R
WIRELESS REMOTE CONTROL
OWNER'S
MANUAL
OPERATING INSTRUCTIONS
SETTING UP FOR OPERATION
Following the instructions in the owner’s manual of the compatible
CD changer, load the desired number of discs into the CD
magazine and insert the magazine into the changer.
Turn on the car stereo and select FM band operation. Tune the
radio to either 88.7 or 89.1 MHz. (depending on the frequency to
which the installer has set the unit) or push the pre-set memory
pushbutton that has been set as per the above description.
The CDC-MCR2 FM Modulator/Wired Commander is designed to
permit operation of compatible SPS/Audiovox CD changers through
the FM section of any car stereo system. Please check with your
SPS/Audiovox car stereo specialist for recommendations of the
CD changer models that will work with the CDC-MCR2. The
specific details on the handling of discs and the use of the CD
magazine (loading, removal, etc.) will be found within the Owner’s
Manual of the compatible changer.
Since the CDC-MCR2/CD changer system will operate through the
FM stereo section of your existing sound system, adjustment of the
audio functions (volume, tone, balance etc.) is made by using the
controls on the car stereo. Control of disc play is by the wired
commander of the CDC-MCR2 which can be conveniently mounted
to the dashboard, as well as by the CDC-10R wireless remote
control. The output from the FM modulator of the CDC-MCR2 is
at 88.7 or 89.1 MHz. (set by the installer) on the FM band. To
simplify operation of the system, it is recommended that a pre-set
memory pushbutton on the radio be set to the selected output
frequency of the modulator. Consult the operating instructions of
the car stereo for directions on setting the memory pushbuttons.
2
Turn on the changer system by pressing the Play/Pause button
on the commander. The display panel on the commander will
illuminate and play of the first disc in the magazine will begin.
Adjust the volume, tone, and balance to your taste by using the
controls on the car stereo.
When the last track on a disc has played, the unit will automatically
advance to and begin play of the next disc in the magazine. When
the last track on the last disc in the magazine has been played, the
unit will automatically return to the first disc and begin play again.
1
3
POWER OFF SWITCH (OFF)
Press this switch to turn the CD changer off and return to normal
WIRED COMMANDER OPERATION
1
FM reception.
9 8 7m
b bl
4
DISC SELECT ( - + )
The Disc Select function is used to select the desired disc for play
as shown on the LCD panel. The unit will automatically load the
selected disc and begin play. To advance to a higher number disc,
press the + side of the button. To return to a lower number, press
the - side.
REMOTE
SENSOR
1
4
56
3
5
TRACK SELECT (
)
The Track Select function is used to quickly access the beginning
of a particular track. Press Forward Track Select ( ) or Backward
Track Select ( ) to locate the desired track as shown by the track
number indication on the LCD panel.
2
LCD DISPLAY
The LCD Display Panel will illuminate when the CD changer is
operating. Different symbols will appear depending on the function
and operation in use. Each display is explained in the applicable
function explanation below.
6
TRACK SEARCH (
)
High-speed audible search to any section of the disc can be made
by the search functions. Press and hold the
button to advance
quickly in the forward direction or press and hold the
button
to advance rapidly in the backward direction. During search
operation, the rotating disc symbol will turn faster and the appropriate symbol (
) or (
) will flash on the LCD panel. When
the forward search (
) button is held down and the end of the
last track is reached, or the backward search (
) is held down
and the unit reaches the beginning of the first track on the disc, the
unit will enter the Pause mode until the button is released.
2
PLAY / PAUSE ( / )
Pressing this button turns on the CD changer, illuminates the LCD
panel and begins play of disc #1 if a new CD magazine has been
loaded into the changer. If a magazine was already in the changer,
play will resume from the track on the disc previously in play. Play
of the disc is shown by the indication
and the rotating disc
symbol on the LCD panel. Pressing the button again will temporarily stop play of the disc. The pause indication
will be shown
on the LCD panel and the disc symbol will stop rotating and flash
instead. Press the button again to resume play of the disc.
NOTE: If left in the PAUSE mode for 5 minutes, the unit will
automatically shut off.
7
TRACK / DISC SHUFFLE (SFL)
When the Shuffle button is pressed, the indication “SFL” will
appear on the LCD panel and the tracks on the disc will be played
2
5
in a random, shuffled order. The Track Select function will also
select tracks in the shuffled order instead of the normal progression. The Track Shuffle mode can be cancelled by pressing the
Shuffle button again, or by activating the Scan or Repeat
functions.
When the Shuffle button is pressed and held longer than 2
seconds, the "SFL" and "DISC" indications will appear on the LCD
panel and the discs in the magazine will be played in a random
shuffled order, as well as the tracks on each disc. When all the
tracks on the selected disc have been played, the next disc will be
selected in shuffled order and its tracks will be played in shuffled
order. The Disc Shuffle mode can be cancelled by pressing the
Shuffle button again, or by activation the Scan
or Repeat
functions.
disappear from the display). Track Scan mode will be cancelled by
activating any other function (Repeat, Shuffle, Disc Select, Track
Select, or Track Search).
appear on the LCD panel and play of the selected track will be
continuously repeated until the Track Repeat mode is cancelled by
pressing the Repeat button again or by activating the Scan or
Shuffle
functions.
When the Repeat button is pressed and held longer than 2
seconds, the "RPT" and “DISC” indications will appear on the LCD
panel and play of the selected disc will be continuously repeated
until the Disc Repeat mode is cancelled by pressing the Repeat
button again or by activating the Scan or Shuffle functions.
bm
RESETBUTTON
A reset button is located on the front panel of the wired commander
7
9
8
9
8
bl
REMOTE SENSOR
The sensor for the infrared signal from the optional wireless remote
8
TRACK / DISC REPEAT (RPT)
When the Repeat button is pressed, the indication “RPT” will
control is located behind this lens. For optimal operation of the
remote control, keep the lens clean and do not allow objects to
block it.
9
7
When the Scan button is pressed and held for longer than 2
seconds, the "SCN" and "DISC" indications will appear on the LCD
panel and the first 10 seconds of the first track of each disc in the
magazine will be played. When the desired disc is reached, press
the Scan button again and play of that disc will continue ("SCN" and
"DISC" will disappear from the display). Disc Scan mode will also
be cancelled by activating any other function (Repeat, Shuffle, Disc
Select, Track Select, or Track Search).
which must be activated with a pen or other thin object as it is
recessed to prevent accidental engagement. The reset circuitry is
provided to protect the unit's microprocessor and laser pick-up
system and should only be activated under the following circumstances:
1. Initial installation after all wiring is completed.
2. If abnormal disc operation is encountered, the reset button may
be pressed to clear the system and return to normal operation.
TRACK / DISC SCAN (SCN)
When the Scan button is pressed, the indication “SCN” will appear CAUTION: Avoid use of Reset buttons after initial use unless you
on the LCD panel and the first 10 seconds of each track on the disc
have a definite abnormal disc operation. Use the
will be played in order. When a desired track is reached, press the
EJECT button on the changer to remove the CD
Scan button again and play of that track will continue (“SCN” will 3
magazine for normal operation.
9
9
7
WIRELESS REMOTE CONTROL
The CDC-10R Wireless Remote Control is capable of operating
all functions of the wired commander. Each button on the remote
control functions in the same way as the comparable button on the
wired commander. For optimal operation of the remote control,
always aim it toward the Remote Sensor
on the wired commander.
9
2
CD
OFF
3
DISC
TRACK
bl
1
1 PLAY / PAUSE (
/
See Wired Commander
45
2 POWER OFF SWITCH (OFF)
See Wired Commander
8
7
SCN
RPT
)
2
3 DISC SELECT (-
+)
See Wired Commander
SHF
6
4 TRACK SELECT (
See Wired Commander
3
4
5
)
5 TRACK SEARCH FUNCTIONS (
See Wired Commander
BATTERY COMPARTMENT
6
6 TRACK/DISC SHUFFLE (SHF)
See Wired Commander
4
7
)
7 TRACK/DISC REPEAT (RPT)
See Wired Commander
8 TRACK/DISC (SCN)
See Wired Commander
NOTES ON REMOTE CONTROL USE:
8
The remote control operates on a 3 volt lithium battery (type
CR-2025). Install the battery into the compartment at the
bottom of the remote control, making sure to observe
correct polarity (match “+” side of battery to “+” indication on
compartment).
9
9
INFRARED SENDER
The wireless signal from the remote control is sent from this lens.
If remote control fails to operate, always check battery
condition and replace if necessary before servicing the unit.
For optimal range and performance of the remote control, always
aim the Sender at the Remote Sensor
on the wired commander. Do not let your finger interfere with the signal and make
sure the lens does not become blocked by dirt, dust, etc. If
necessary, clean the lens with a soft dry cloth or cotton swab.
bl
Dispose of batteries properly. Do not heat, disassemble, or
throw batteries into a fire.
Keep the remote control away from areas where it may be
exposed to heat, moisture or sunlight.
5
ERROR SIGNS
If a problem should develop while operating the CD changer, the following error signs may be displayed on the LCD panel:
E - 01 : Indicates abnormal disc change function. Contact the place of purchase for further service advise.
E - 30 : Indicates excessive temperature conditions. The error sign will go off and play will resume when
the changer temperature returns to normal range.
- - - - : Magazine is not loaded in the changer.
0 - 0 0 : No discs are loaded in the magazine.
1 - - - : No disc is loaded in magazine slot #1. (2--- indication for slot #2, etc.)
TROUBLESHOOTING
An error made in operation or during installation of this product may be mistaken for a system malfunction. Please perform
the checks described below before contacting your dealer or service facility.
Symptom
Possible Cause
Remedy
Blown fuse
Check fuses in vehicle fuse box and changer system.
Replace as necessary with fuse of same type and rating as
original. If fuse blows again, consult with service facility.
Incorrect connection
Check all wiring and correct as necessary.
Magazine cannot be
installed
Magazine is inserted in wrong
direction
Insert magazine in proper direction.
CD is not played
Disc is loaded incorrectly in magazine
Load disc correctly in the magazine.
Noise, skipping, or
intermittent sound
during playback.
Scratches on disc or warped disc
Check sound on another disc. If sound from second disc is
OK, first disc is defective.
Extremely dirty disc
Clean disc
Mounting angle adjustment is not
correct
Set the mounting angle adjustment to the correct position as
per the installation instructions of the CD changer.
No power
6
36 MONTH LIMITED WARRANTY
Applies
to
Compact
Disc
Changers
AUDIOVOX CORPORATION (the Company) warrants to the original retail purchaser of this product that should this product or any part
thereof, under normal use and conditions, be proven defective in material or workmanship within 36 months from the date of original purchase,
such defect(s) will be repaired or replaced with new or reconditioned product (at the Company's option) without charge for parts and repair
labor. During the first year of the warranty, there will be no charge for removing or reinstallation of a defective product. After the first year,
a labor charge may be assessed for removal and reinstallation.
If Warranty Service is required, please use the exclusive TRAVELER'S WARRANTY SERVICE (U.S.A. and Canada only):
1-800-645-4994
Simply call toll free to our control office for reference to the Authorized Warranty Station in your area, and to obtain an Authorization Number.
No repairs or replacements will be allowed without a valid Authorization Number.
This Warranty does not extend to the elimination of car static or motor noise, to correction of antenna problems, to costs incurred for removal
or reinstallation of the product, or damage to compact discs, speakers, accessories, or vehicle electrical systems.
This Warranty does not apply to any product or part thereof which, in the opinion of the Company, has suffered or been damaged through
alteration, improper installation, mishandling, misuse, neglect, accident, or by removal or defacement of the factory serial number/bar code
label(s). THE EXTENT OF THE COMPANY'S LIABILITY UNDER THIS WARRANTY IS LIMITED TO THE REPAIR OR REPLACEMENT
PROVIDED ABOVE AND, IN NO EVENT, SHALL THE COMPANY'S LIABILITY EXCEED THE PURCHASE PRICE PAID BY PURCHASER
FOR THE PRODUCT.
This Warranty is in lieu of all other express warranties or liabilities. ANY IMPLIED WARRANTIES, INCLUDING ANY IMPLIED WARRANTY
OF MERCHANTABILITY, SHALL BE LIMITED TO THE DURATION OF THIS WRITTEN WARRANTY. ANY ACTION FOR BREACH OF ANY
WARRANTY HEREUNDER INCLUDING ANY IMPLIED WARRANTY OF MERCHANTABILITY MUST BE BROUGHT WITHIN A PERIOD
OF 48 MONTHS FROM DATE OF ORIGINAL PURCHASE. IN NO CASE SHALL THE COMPANY BE LIABLE FOR ANY CONSEQUENTIAL
OR INCIDENTAL DAMAGES FOR BREACH OF THIS OR ANY OTHER WARRANTY, EXPRESS OR IMPLIED, WHATSOEVER. No person
or representative is authorized to assume for the Company any liability other than expressed herein in connection with the sale of this product.
Some states do not allow limitations on how long an implied warranty lasts or the exclusion or limitation of incidental or consequential damage
so the above limitations or exclusions may not apply to you. This warranty gives you specific legal rights and you may also have other rights
which vary from state to state.
128-4245E
© 1997 AUDIOVOX CORP., HAUPPAUGE, N.Y.
Form. No. 128-5120