Download ABA840 user manual V4.2015
Transcript
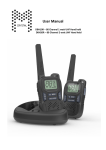
MODEL NUMBER: ABA840 DIGITAL AM / FM STEREO HEADPHONE RADIO WITH BLUETOOTH & AUX-IN JACK USER MANUAL 1. Antenna 2. Down Button 3. Up Button 4. LCD 5. Mode Button 6. Bluetooth/Band Selector 7. Auxiliary Jack 8. Volume On/Off Knob 9. Microphone 10. Micro USB Recharge Port When the headset is turned on, all settings are resumed to the last (previous) settings. For Australian users, 9 kHz is recommended. To select 9 or 10 kHz for AM, the procedure is as shown here below: ! Keep unit in OFF position. ! During time setting mode, press BT/Band button (6) for 2 seconds. ! 9 kHz will be shown on the display. ! Press Down (2) or Up (3) button to select 10 kHz. ! After selection, press BT/Band (6) button to confirm the setting. Insert Battery ! Turn off the headset. Open the battery door, insert 3 “AAA” sized batteries. Close the battery door. *Lithium Batteries are also compatible allowing you to recharge your device. Time Setting ! Turn off the headset by turning the volume knob in anti clockwise direction. Press Down (2) or Up (3) button to select 12 or 24-hours mode. ! Turn off the headset by turning the volume knob in anti clockwise direction. Press Mode (5) button. When time is flashing, press Down (2) or Up (3) button to adjust the hour, then press Mode (5) to confirm. Then adjust minutes, apply same procedure as above, then press Mode (5) button to confirm the setting. Radio Mode ! Turn on the headset by tuning the Power ON/OFF (8) Knob (which combines with Volume Control) in clockwise direction. ! Tap quickly the BT/Band (6) button to toggle between FM/AM/BT Setting. Set to AM or FM to listen to radio. ! Manual search: Press Down (2) or Up (3) buttons step by step until it reaches your desired station. ! Auto Scan: Press Down (2) or Up (3) button for 2 seconds, then release the button when seeking starts. Auto scan will stop on clear radio stations. ! Preset Station: 10 preset stations in AM band and FM band. Total is 20 preset stations. Hold Mode (5) button, then release the button when M and the preset station number are flashing. Press Down (2) or Up (3) button to save the station to your desired position. Press Mode (6) button to confirm your setting. ! Listen to the preset status by pressing the Mode (5) button once to select preset stations M[1] to M[10]. BT Mode ! Turn on the Bluetooth function on your mobile phone or any other external Bluetooth devices. ! Tap the BT/Band (6) button to toggle between FM/AM/BT Setting. Select Bluetooth ( activate the function. ! In your Bluetooth device, seek HP-53RBJ and pair. After paired, “- on -” is shown on the LCD. ! To disable Bluetooth function, press and hold the BT/Band (6) button for 2 seconds. OFF will shown on the display. ! Press Mode (5) to play/pause the music or answer the call. Tap Down (2) or Up (3) button to forward/rewind the songs. To reject the call, tap BT/Band (6) button. ) to ! Hold BT/Band (6) button for 2 seconds, breaks the current BT connection (this function is disabled during phone call). ! After paired, user still receives and answers call while in Radio and Aux-in mode. BT + Radio ! After paired the Bluetooth device, tap the BT/Band (6) button to select AM or FM. ! When there is an incoming call, a telephone ring tone is heard. Press Mode (5) button to answer the call or BT/Band (6) to reject the call. After call ending, radio will be resumed automatically. Auxiliary Jack Operation ! Using a ø3.5 mm cable to connect the headset with external audio device. ! Aux in appears in the screen when it is plugged. BT + Auxiliary Jack Operation ! Activate BT function to pair the headset and mobiles. Plug into the auxiliary jack by using a ø3.5 mm cable to connect with the cell phone or other audio devices. When there is an incoming call, a telephone ring tone is heard. Press Mode (5) button to answer the call or BT/Band (6) button to reject the call. ADJUST THE FIT Put on the ear muffs with the controls over your right ear. Brush hair from beneath the cushions with your hand as much as possible. With the headband over the crown of your head, position the muffs to completely enclose your ears. The muffs only provide hearing protection when worn with the headband over the crown of your head. Slide the muffs up or down to adjust for a firm, comfortable fit. Ensure the cushions seal tightly against your head with no interference from foreign objects between the ear cup and your head (such as pencils or eyeglass temple arms). Spread the ear cups only enough to clear the ears. Do not reform or reshape the headband. PLEASE NOTE For best performance, the ear-muffs should be used in accordance with these instructions. It is important to wear the ear muffs at all times in noisy surroundings to avoid the risk of hearing damage. The ear muffs are required to be inspected regularly to maintain serviceability. WARNING If the recommendations given above are not adhered to, the protection provided by the ear-muffs will be severely impaired. PLEASE NOTE The ear-muff provides audio signal sound pressure level limitation and limits the entertainment audio signal to 82 dB(A); Radio reception quality may be slightly distorted depending on surroundings; To prevent damage to the radio, do not use in a high-temperature or high-humidity environment for prolonged periods of time; To prevent damage to the hearing protector and radio function, do not subject it to rough handling.; This ear-muff is provided with an entertainment audio facility and electrical audio input. The wearer should check correct operation before used. If distortion or failure is detected, the wearer should refer to the manufacturer’s advice; The audibility of warning signals at specific workplace may be impaired while using the entertainment facility. WARNING Do not use this product for prolonged periods of time. PRECAUTIONS AND WARNINGS: ! The radio reception may be distorted during moving. ! Interference and fault may happen when turn on the TV, fluorescent light or other electrical appliances. ! When the volume begins to fade, replace or recharge batteries. ! This model of ear muffs has satisfied the optional requirement between -20ºC to +50 ºC. Should not use the headset under a high temperature or high humidity environment as it may damage the receiver. Exposure to direct sunlight in places where may cause the case of the unit to warp or malfunction. The temperature should not exceed + 55℃. ! This product may be adversely affected by certain chemical substances. Simply wipe it with a soft cloth moistened with a mild soap or water. Do not dip into the water. ! Remove the batteries from the unit to prevent battery leakage when not in use for extended periods. ! Failure to follow these instructions may result in personal injury and/or damage to the equipment. ! If the recommendation given in Fitting Instruction is not adhered to, the protection afforded by the ear-muffs will be severely impaired. ! Headband and cushion is non-replaceable, do not tear it off as it will damage the headset. TROUBLESHOOTING If the radio stops working: 1. Check for correct battery installation. 2. Ensure the hearing protector is dry. 3. Install new batteries. TECHNICAL DATA Weight Approx. 386 g without batteries Operating temperature Between 50 °C to 0 °C Power Supply DC 3.6 - 4.5V (3 x AA sized battery) Frequency Range Radio AM 540 Sound Volume Max. 82 dB(A) Material in Ear Cushion Sponge Material in Headband Cushion PU & Foam Material in Headband Frame Metal Size Range of the Headband S, M and L 1700 kHz; FM 88 108 MHz ATTENUATION TABLE Frequency (Hz) 63 125 250 500 1000 2000 4000 8000 MF (dB) 17.5 15.2 20.8 26.0 34.0 31.4 35.3 33.6 SHF (dB) 4.8 4.0 2.6 3.0 3.4 3.5 3.4 6.1 APV (dB) 13.3 11.5 18.0 23.3 30.5 26.8 314.9 28.0 SNR = 28 dB H-value = 29 dB M-value = 26 dB L-value = 19 dB AM/FM RADIO Sound Pressure Mean (dB) : 73.2 Standard Deviation (dB): 0.8 Mean + Standard: 74.0 AUDIO INPUT 75 dB(A) at -24 dBm (49mV) input voltage NOTES This product may be adversely affected by certain chemical substances. Further information should be sought from the manufacturer or authorized representative; The fitting of hygiene covers to the cushions may be affected the acoustic performance of the earmuffs; Do not tear the cushion off from headset as the cushion is non-replaceable. Technical Assistance If you need assistance setting up or using your Bullant product now or in the future, call Bullant Support. TDJ Australia TEL: 03 – 8587 8898 FAX: 03 – 8587 8866 Mon-‐Fri 9am – 5pm AEST. Please retain this user guide for future reference.


