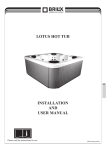
Download lotus de luxe hot tub installation and user manual
Transcript
EN
POOL EQUIPMENT
KLIN GOTHIC ITC DEMI-13,3 b
zlatá
černá
PANTONE 871 U
LOTUS
DE LUXE HOT TUB
PANTONE 426 U
INSTALLATION
AND
USER MANUAL
i
Please read the instructions for use
Illustration photo
EN
Table of Contents
1. POOL EQUIPMENT
KLIN GOTHIC ITC1.1
DEMI-13,3
b
2. 3. 4. 4.1 4.2 4.3 4.4 4.5 5. Hot tub parameters...........................................................................3
Jets..................................................................................................................................................................................... 3
Basic features.....................................................................................3
Indication via LED diodes................................................................4
Overview and description of controls.............................................5
Two-speed pump 1 operation............................................................................................................................................. 5
Auxiliary equipment (AUX, Pump 2)............................................................................................................................... 5
Controlling the Variable Speed Blower............................................................................................................................. 5
Controlling the variable colour light................................................................................................................................. 5
Temperature settings.......................................................................................................................................................... 5
zlatá
PANTONE 871 U
černáfeatures.
PANTONE
426 U
Pump
...................................................................................6
5.1 5.2 Two-speed pump 1............................................................................................................................................................. 6
Cleaning cycle................................................................................................................................................................... 6
6. 7. Auxiliary equipment (AUX) on/off (Pump 2).................................7
Variable speed blower (SPVSB).......................................................7
7.1 8. 8.1 8.2 8.2.1 9. 9.1 9.2 9.3 9.4 9.5 9.6 9.6.1 9.6.2 9.7 9.7.1 9.7.2 9.7.3 9.8 9.8.1 9.8.2 9.8.3 9.8.4 9.9 9.9.1 9.9.2 9.9.3 9.9.4 9.9.5 9.9.6 9.9.7 9.10 9.10.1 9.10.2 9.10.3 9.10.4 9.10.5 9.11 10. 10.1 10.2 10.3 10.4 10.5 10.6 11. Blower (SPVSB) variable speed mode.............................................................................................................................. 8
Variable colour light (SPVCL).........................................................8
Adjustable light brightness mode...................................................................................................................................... 9
Light effect mode............................................................................................................................................................... 9
Light effect mode speed settings..................................................................................................................................... 10
Menus............................................................................................... 11
Main menu....................................................................................................................................................................... 12
Set temperature (temperature controls)........................................................................................................................... 13
User Timer....................................................................................................................................................................... 13
Clock................................................................................................................................................................................ 14
Clock setup...................................................................................................................................................................... 15
User alarms .................................................................................................................................................................... 15
Configuring the user alarm.............................................................................................................................................. 16
Deactivating the user alarm............................................................................................................................................. 17
Sleep mode timer............................................................................................................................................................. 17
Configuring the sleep mode............................................................................................................................................. 17
Deactivating the sleep mode period................................................................................................................................. 19
Cleaning the pipework..................................................................................................................................................... 20
Maintenance timers.......................................................................................................................................................... 20
Configuring the maintenance timer................................................................................................................................. 20
Confirming the maintenance timer.................................................................................................................................. 21
Configuring the maintenance timer................................................................................................................................. 22
Deactivating the maintenance timer................................................................................................................................ 22
Key clicks (on/off)........................................................................................................................................................... 22
Main display.................................................................................................................................................................... 23
Changing the main display.............................................................................................................................................. 23
Colour and brightness of the panel light.......................................................................................................................... 23
Changing the control panel backlighting colour.............................................................................................................. 23
Changing the control panel backlighting brightness....................................................................................................... 23
Synchronisation of panel and hot tub lighting (on/off)................................................................................................... 24
Activating/deactivating lighting synchronisation............................................................................................................ 24
Advanced options sub-menu........................................................................................................................................... 24
Heating controls/management......................................................................................................................................... 25
Changing the heating control setting............................................................................................................................... 25
Automatic filtration/disinfection..................................................................................................................................... 26
Adjusting the filtration time............................................................................................................................................ 26
Adjusting the filtration frequency.................................................................................................................................... 26
Factory settings................................................................................................................................................................ 27
Additional Features........................................................................28
Control panel key lock..................................................................................................................................................... 28
Activating the key lock.................................................................................................................................................... 28
Deactivating the key lock................................................................................................................................................ 28
Adjusting the control panel display contrast................................................................................................................... 28
Reversing the display....................................................................................................................................................... 29
Language selection.......................................................................................................................................................... 29
Radio receiver with MP3 player....................................................30
11.1
Radio/MP3 controls......................................................................................................................................................... 30
12. 13. 14. Self-diagnostic error codes.............................................................31
Installation instructions..................................................................33
Caring for your hot tub..................................................................35
14.1 Filtration cartridges (installation, removal, maintenance)............................................................................................... 35
15. 16. 17. Winter and summer use.................................................................36
Troubleshooting...............................................................................38
Safety instructions...........................................................................39
2
EN
Thank you for choosing our product and trusting our company. To ensure the use of this product brings
you joy, please read these instructions carefully and follow the user‘s manual precisely before using the
POOL EQUIPMENT
equipment to prevent damage to the equipment or needless injuries.
KLIN GOTHIC ITC DEMI-13,3 b
1. Hot tub parameters
Seat
zlatá
černá
PANTONE 871 U
3 U
PANTONE 426
Preparation for thermal pump
√
Couch
2
Heating
3 kW
Dimensions (cm)
208 x 208 x 88
Cartridge filter
2 units
Weight
340 kg
Ozone generator
√
Water quantity
1900 l
Blower with aromatherapy
√
Aristech acrylic
√
Ergonomic head rest
1
Chemically treated wooden frame
√
Head rest*
2
API panelling
√
Diversion valve
1
Arctic reinforced thermal cover
√
Air valve
2
Shell thermal insulation
√
Light
1
Panel thermal insulation
4 cm
Jet with LED light
16
2-tone RD stainless steel jets
47
MP3 player
√
3 hp 1-speed Davey pump
1
Speakers
2
3 hp 2-speed Davey pump
1
Waterfall
√
* Headrests are located inside the spa, fixed by heater unit (cabinet panel right beneath the control panel).
1.1 Jets
The rate of flow of water through the jets can be adjusted by turning them clockwise (right to open, left to
close). Therefore, water not coming out of a jet may not be a defect: the jet may just be closed. Not all the
jets can be adjusted like this.
2. Basic features
The control panel has a large display with four digits and two rows of text. The display normally shows
three figures: the current hot tub temperature, the set (required) hot tub temperature, and the time (day of the
week and time). As the default, the current hot tub temperature is shown in the digits and the time and the set
temperature are in the two rows of text. The user may change this configuration if a different arrangement
is preferred.
Whenever you press the control panel, the two text rows describe the newly selected state briefly.
Likewise, when the control panel is busy performing a task, it displays a text explaining what is going
on (e.g., sleep mode, pump cleaning and pump priming with water before start-up). Each such report
and the associated features are described in the following chapters.
3
EN
Light
36.75
POOL EQUIPMENT
KLIN GOTHIC ITC DEMI-13,3 b
Sleep mode
Blower
Mon
°C
Auto
Pump 1
on/off/auto
12:00 PM
Set temp 37.00
Aux
zlatá
černá
Pump 1
speed change
PANTONE 871 U
PANTONE 426 U
Ozone
generator E
Light
change
Up
Down
Scroll
Heating
3. Indication via LED diodes
Auto
This diode shines green if the automatic control is activated, and is off when pump 1 is controlled manually. In
the automatic „PUMP AUTO“ setting, pump 1 runs as needed to warm up the hot tub and ensure observance
of the minimum filtration times. If the diode flashes, the water sensor has detected no water in the heater
housing. In that case, the LCD display also reads „WATER PRIMING, PLEASE WAIT“.
Heating
This diode indicates when the heater is on. The heater comes on and goes off as needed whenever
the pump is running.
Sleep mode
This diode is on whenever the control panel is in a predefined sleep mode. This diode shines green when
the control panel is in a sleep mode. If it is „woken“ manually, the diode changes to orange. During the
sleep mode, the LCD display also reads „SLEEPING, PRESS ANY KEY“.
Ozone
This diode shines green whenever the ozone generator is on. The ozone generator may switch off automatically when any button on the control panel is pressed. If this happens, the ozone generator does not come
on again sooner than approx. 30 minutes after the last control panel button was pressed.
4
EN
4. Overview and description of controls
4.1 Two-speed pump 1 operation
POOL EQUIPMENT
KLIN GOTHIC ITC DEMI-13,3 b
Pump 1 button: Press it to change the pump mode
(PUMP AUTO, PUMP ON, PUMP OFF)
zlatá
871Press
U it to change the pump speed (LOW, HIGH)
Pump
1 speed PANTONE
change button:
černá
PANTONE 426 U
See Chapter 5 for more detailed information.
4.2 Auxiliary equipment (AUX, Pump 2)
Press the button to activate/deactivate the Aux outlet.
See Chapter 6 for more detailed information.
4.3 Controlling the Variable Speed Blower
Press this button to activate/deactivate the blower and select its speed.
Use the UP and DOWN buttons to set the blower speed.
See Chapter 7 for more detailed information.
4.4 Controlling the variable colour light
Brightness button: Press this button to activate/deactivate the light and change its brightness.
Light mode button: Press this to change the light effects.
See Chapter 6 for more detailed information.
----
4.5 Temperature settings
Press SCROLL once to display the Main
Menu (see below).
( )
MAIN MENU
(ESC)
38.00
Press UP once to display the Set Temp menu
(see below).
( )
1. SET TEMP
(SET)
( )
°C
( )
Press SCROLL to change the temperature or use the Up and Down
buttons to
select the desired temperature. Press the SCROLL button to select the desired temperature.
See Chapter 9.2 for more detailed information.
5
EN
5. Pump features
5.1 Two-speed pump 1
POOL EQUIPMENT
KLIN GOTHIC ITC DEMI-13,3 b
Pump 1 is controlled by two buttons on the control panel: one switches the pump on and off, while the other
changes its speed. When the hot tub is in the PUMP AUTO mode. The pump speed selected by these buttons
is shown on the LCD display for several seconds and is also depicted by several diodes. The AUTO diode
shines green when the PUMP AUTO mode is active, and is off when the mode is PUMP OFF. Likewise,
the Pump 2 diodes
green, red 871
or are
zlatá shinePANTONE
U off when the pump is in the low speed, high speed or off.
černá
PANTONE 426 U
Press once (pump on)
The LCD reads „PUMP LOW“; the AUTO diode is off, the button diode shines green. This
mode is used for activating pump 1 even though the system is in the sleep mode or does not need
the pump to run in the auto mode for heating or filtration.
Press once (pump high speed)
The LCD reads „PUMP High“; the button can be used to change the pump speed.
Press twice (pump low speed)
The LCD reads „PUMP Low“; the button can be used to change the pump speed.
Press twice (pump off)
The LCD reads „PUMP OFF“; the AUTO diode is off, the button diode is off.
This mode is used for deactivating pump 1.
Press 3 times (pump auto mode)
The LCD reads „PUMP AUTO“; the AUTO diode shines green. This is the default start mode,
in which pump 1, heating and filtration are controlled automatically. Pressing the high/low speed
button in this mode has the same effect as pressing the On/Off button.
Notes:
1. If the pump speed change button is left activated in the Pump High position, it is deactivated
automatically after 25 minutes.
2. If the heater is on, the operation of the pump may cause the heater to load the circuit interrupter and
switch off.
If this happens, the heater resumes operation about 5 seconds after the pump mode is cancelled.
5.2 Cleaning cycle
If necessary, you can activate the cleaning cycle, which filters the water after using the hot tub. To do it,
simply press the pump on/off button to leave the AUTO mode and activate the pump. The pump will run for
a fixed period of time (90 minutes), and the water will circulate through the filter cartridges. The system then
reverts to the AUTO mode and maintains the water temperature ready for the next use of the hot tub. Press
the pump 1 speed change button
to enter PUMP LOW, and the 90-minute cleaning cycle starts.
6
EN
Comments:
1.The heating will start and stop as needed whenever pump 1 is running in either the PUMP AUTO or
POOL EQUIPMENT PUMP ON mode.
KLIN GOTHIC ITC DEMI-13,3 b
2. The PUMP AUTO mode will be activated after 90 minutes while the control panel is not activated, as long
as it is left in the PUMP ON or PUMP OFF mode.
zlatá
PANTONE
871 U
6. Auxiliary
equipment
(AUX) on/off (Pump 2)
černá
PANTONE 426 U
Pressing the AUX button twice controls the equipment functioning as follows:
First pressing (auxiliary equipment on)
the display reads „Aux on“; the button diode shines green
Second pressing (auxiliary equipment off)
the display reads „Aux off“; the button diode is off
Comments:
If the auxiliary equipment is left on, it turns off automatically after 25 minutes.
1.If the heater is on, the operation of this equipment may cause the heater to load the disconnector and
switch off.
2.If this happens, the heater will resume operation about 5 seconds after the „Aux“ mode is deactivated.
7. Variable speed blower (SPVSB)
The Blower (Air) button controls the variable speed blower (if installed). It is used to activate/deactivate the blower
and choose from the different operating modes. Pressing the Blower button four times controls the blower as
follows:
1st pressing (Blower On)
The LCD reads „BLOWER ON HIGH“; the blower is in the highest speed
2nd pressing (Blower Ramping)
The LCD reads „BLOWER RAMPING“; speeds alternate
3rd pressing (Blower Speed)
The LCD reads „BLOWER SPEED“ and a bar chart depicts the current speed setting; the blower
speed is adjustable (see below)
4th pressing (Blower Off)
The LCD reads „BLOWER OFF“; the blower is off (default state)
The Blower is fitted with two non-return valves to prevent inundation of the Blower air piping. The Blower
is fitted with an outlet for potential dripping water. The outlet is situated and discharges at the bottom of
the right-hand corner viewed from the control panel. Minor quantities of water may issue from this outlet,
which is a normal feature and cannot be claimed under warranty.
7
EN
7.1 Blower (SPVSB) variable speed mode
In the variable speed mode, the UP and DOWN buttons are used to set the blower to one of the 9 different
speeds. When the UP/DOWN buttons are pressed for the first time, the LCD reads „BLOWER SPEED“ with
a bar chart depicting the current speed setting. In this display, press UP and DOWN to adjust the speed as
needed. Hold either of the two buttons down to automatically repeat the pressing. This setting is saved and
will be restored automatically when you select the variable speed mode again.
POOL EQUIPMENT
KLIN GOTHIC ITC DEMI-13,3 b
Down and Up
zlatá
Comments: černá
PANTONE 871 U
PANTONE 426 U
1. The UP and DOWN buttons are shared by the Light, Light Change, SPVSB Speed, and the entire system
menu. While not in the system menu, the current function of the UP and DOWN buttons depends on
which of the 3 features was last adjusted by the button, whether Light, Light Change or Blower.
2. Pressing the Blower (Air) button when the blower is running will only browse through the available
options; the LCD will show the current option/selection. This makes it possible to set the function for
the UP and DOWN buttons with 1 pressing of the Blower button and display the current blower setting
without actually changing the setting.
3. Pressing either UP or DOWN in the full speed mode or the variable speed mode, the SPVSB automatically
switches into the adjustable speed mode.
4. If it is left on, the accessory turns off automatically after 25 minutes.
5. If the heater is on, the activation of the SPVSB may cause the heater to load the interrupter and switch off.
If this happens, the heater will resume operation approx. 5 seconds after the SPVSB is turned off.
8. Variable colour light (SPVCL)
The variable colour light is controlled via two buttons on the control panel: Light and Light Change
(Light brightness and Light effect mode). If the SPVCL is not installed, the buttons can still be used
to produce light effects in the control panel as if the light were installed. The Light button selects the light
brightness, and the Light Change button selects the light colour and effect. Pressing the Light button five
times selects the light brightness as follows:
Press once (High)
The LCD reads „LIGHT HIGH“; 100% light brightness
Press twice (Medium)
The LCD reads „LIGHT MEDIUM“; 66% light brightness
Press 3 times (Low)
The LCD reads „LIGHT LOW“; 33% light brightness
Press 4 times (Adjust)
The LCD reads „LIGHT ADJUST“; adjustable brightness mode, the button diode colour changes
with the settings when the Up or Down button is pressed. (green 2-32, orange 34-66, red 68-100%)
8
EN
Press 5 times (Off)
The LCD reads „LIGHT OFF“; the light is off.
POOL EQUIPMENT
KLIN GOTHIC ITC DEMI-13,3 b
Pressing UP or DOWN in the High, Medium or Low mode will automatically take you to the adjustable
mode.
8.1 Adjustable light brightness mode
In the adjustable light brightness mode, the UP and DOWN buttons are used to adjust the light between 2%
zlatá
PANTONE 871 U
and 100% of the maximum brightness (intensity). When the UP/DOWN buttons are pressed for the first
černá
PANTONE 426 U
time, the LCD reads „LIGHT ADJUST“ with a bar chart depicting the current setting. In this display, press
UP and DOWN to adjust the brightness as needed. Hold either of the two buttons down to automatically
repeat the pressing. This setting is saved and will be restored automatically when you select the adjustable
light brightness mode again.
Press 4 times (Light Adjust)
Down and Up
36,75
°C
./.
8.2 Light effect mode
In addition to changing light colours, the hot tub can also produce various light effects. The Light Change
mode and the UP and DOWN buttons are used for choosing the light effect or a preferred colour.
Pressing the Light Change mode button
seven times will control the light mode adjustment as
follows:
Press once
The LCD reads „FIXED WHITE“; the light is pure white with no light effects. Press either UP or DOWN
to select the Preset Colour mode (see below).
Press twice
The LCD reads „PRESET COLOUR“; the light colour depends on the previous selection (white as default).
Use UP and DOWN to choose a different available colour. The colour you choose is saved and will be
automatically restored when you select the Preset Colour mode again.
Press 3 times
The LCD reads „SMOOTH CHANGE“; the light cycles through all its colours perpetually, without staying
any of the colours for too long. Use the UP and DOWN buttons to change the speed of light effect alternations
(see chapter 6.2.1 below).
Press 4 times
The LCD reads „FADE up/down“; the light cycles through all its colours one by one. Each of the colours
comes on from zero brightness (light off) and then fades back to zero brightness. Use the UP and DOWN
buttons to change the speed of light effect alternations (see chapter 8.2.1 below).
9
EN
Press 5 times
The LCD reads „BURST up/down“; the light colours alternate one by one. Very similar setting, FADE
POOL EQUIPMENT
up/down, only the colour appears very fast and fades slowly. Use the UP and DOWN buttons to change
KLIN GOTHIC ITC DEMI-13,3 b
the speed of light effect alternations (see chapter 8.2.1 below).
Press 6 times
The LCD reads „DELAYED CHANGE“; the light colours alternate one by one. Each colour is shown for
a short while, then the light switches to the next colour quickly. Use the UP and DOWN buttons to change
zlatáeffect alternations
PANTONE 871
the speed of light
(seeUchapter 8.2.1 below).
černá
PANTONE 426 U
Press 7 times
The LCD reads „STEP CHANGE“; the light colours alternate one by one. Use the UP and DOWN buttons
to change the speed of light effect alternations (see chapter 8.2.1 below).
This setting is saved and will be restored automatically when you turn the light on again.
8.2.1 Light effect mode speed settings
Once you have selected a light effect mode („SMOOTH CHANGE“ to „STEP CHANGE“; see above),
you can manually adjust the speed at which the available colours alternate. When the UP/DOWN buttons are
pressed for the first time, the LCD reads „EFFECT SPEED“ with a bar chart depicting the current setting.
In this display, press UP and DOWN to adjust the cycle speed as needed. Hold one of the buttons down to
automatically repeat the pressing. In the highest setting, 100%, the speed is about 40 times faster than in
the lowest, 2%, and about 6 times faster than in the default setting, 50%. The settings for each light effect is
saved separately and will be restored the next time you choose the light effect mode.
36,75
Down and Up
°C
EFFECT SPEED:
100%
Comments:
1.The UP and DOWN buttons are shared by the Light, Light Change, SPVSB Blower Speed, and the entire
system menu. While not in the system menu, the current function of the UP and DOWN buttons depends
on which of the 3 features was last adjusted by the button, whether Light, Light Change or Blower.
2.Pressing either Light or Light Change when the light is on will only browse through the available
options; the LCD will show the current option/selection. This makes it possible to set the function for
the UP and DOWN buttons and display the current Light or Light Change setting without actually
changing the setting.
3.Pressing Light Change when the light is off will switch the light on using the Light High setting.
4.As the default, the control panel backlighting reflects the spa setting, but this feature can be deactivated.
See chapter 9.9.5.
10
EN
9. Menus
mAIN MENU
POOL EQUIPMENT
KLIN GOTHIC ITC DEMI-13,3 b
SET TEMP
USER TIMER
zlatá
černá
PANTONE
871 U
CLOCK
PANTONE 426 U
USER ALARM
SLEEP TIMES
MAINTENANCE TIMERS
MISCELLANEOUS OPTIONS
ADVANCED OPTIONS
LOAD DEFAULTS
SUB MENU
Key Clicks
Main Display
Panel Light Colour
Panel Light Intensity
Panel&Pool Light
Sync
*2
SUB MENU
Heat Control
Filt Period*1
Filt Time*2
SUB MENU
General Service
Cabinet Service
Replace Filter
Ozonator
Custom 1
Custom2
Custom3
Custom4
Custom5
SUB MENU
Sleep Timer 1
|
|
|
|
|
|
|
Sleep Timer 9
SUB MENU
User Alarm 1
|
|
|
|
|
|
|
User Alarm 9
*1 Does not apply for installations with a circulation pump for 24 hours
*2 Does not apply unless the SPVCL is installed
Navigating through the system menu
The system menu offers a simple interface for displaying and adjusting most of the user settings. They
include, e.g., the preset temperature, sleep mode periods, and filtration time and frequency. The entire system
menu only uses three control panel buttons: DOWN, SCROLL and UP. Generally speaking, while in the
system menu, the bottom text row on the display will show the function of each of these buttons.
To access the main menu from the default display, press SCROLL. The display switches to showing the main
menu name. Each menu consists of the menu name and several menu items: the menu items are numbered,
the menu name is not. Use the UP and DOWN buttons to scroll through the main menu. If you do not press
any of the control panel buttons for more than a minute while in the system menu, the display automatically
reverts to the default screen. However, you need not wait a minute to revert. If you wish to leave the system
menu quickly, use the UP and DOWN buttons to highlight the current menu name, and press SCROLL.
11
EN
Note that the text „(ESC)“ is displayed over the SCROLL button when the menu name is displayed,
which means you can use the SCROLL button to escape from that menu. The action invoked by pressing
POOL EQUIPMENT
the SCROLL button depends on what menu item is highlighted, and that is shown in the display text over
KLIN GOTHIC ITC DEMI-13,3 b
the SCROLL button.
The system menu consists of five sub-menus: the User Timer Menu, the Sleep Mode Menu, the Maintenance
Timer Menu, the Miscellaneous Options Menu, and the Advanced Options Menu. These sub-menus are
accessed via items 4 to 8 from the main menu, in the stated sequence. Simply select one of these items
in the main menu and press SCROLL. This will get you into the desired sub-menu. Scroll through
PANTONE
the sub-menuzlatá
as you would
through871
theUmain menu: the interface works just the same. To select any other
item either inčerná
the main PANTONE
menu or in426
anyUof the sub-menus, simply highlight the desired menu item using
the UP and DOWN buttons and then press SCROLL.
9.1 Main menu
The main menu is the highest level of the system menu. It provides fast access to temperature, user timer and
clock settings. The five sub-menus are accessed via items 4 to 8 from the main menu.
To access the main menu from the default display, simply press SCROLL. Read the chapter „Navigating
through the system menu“ above, if you have not done so yet.
Press once
---( )
MAIN MENU
(ESC)
( )
1. SET TEMP
2. USER TIMER
3. CLOCK
4. USER ALARM
5. SLEEP TIMES
6. MAINT TIMERS
7. MISC OPTIONS
8. ADV. OPTIONS
9. LD. DEFAULTS
Press SCROLL to make the setting.
12
EN
9.2 Set temperature (temperature controls)
Select the MAIN menu, then press UP once.
POOL EQUIPMENT
KLIN GOTHIC ITC DEMI-13,3 b
Set with the Scroll button.
zlatá
černá
PANTONE 871 U
PANTONE 426 °CU
38.00
( )
1. SET TEMP
(SET)
( )
1. SET TEMP
2. USER TIMER
3. CLOCK
4. USER ALARM
5. SLEEP TIMES
6. MAINT TIMERS
7. MISC OPTIONS
8. ADV. OPTIONS
9. LD. DEFAULTS
The hot tub has an automatically controlled pump and heater for water filtration and maintaining the water
at the required user-defined temperature. The user may leave the system to take care of the hot tub and know
that the water will have the right temperature whenever they decide to use the hot tub. When you invoke
the set temperature menu item, the current set temperature is shown with four digits in degrees Centigrade
(37.00 is the default). The setting range is from 10.00 to 41.50 with a 0.25°C step.
To change the setting, press SCROLL when the set temperature menu item is displayed. The current setting
will flash and indicate that the value can be changed. Use the UP and DOWN buttons to adjust the set
temperature as required. Hold one of the buttons down to automatically repeat the pressing. Press SCROLL
once the required temperature has been set. Press SCROLL once again to return to the default display
(outside the system menu); the new setting is valid immediately.
Note: The temperature in the hot tub will be maintained close to the set temperature, but how close depends
on the „Heat Control“ setting; see chapter 9.10.1 for more information.
9.3 User Timer
The User Timer is a timer counting down minutes that can be preset to start the countdown anywhere between
1 and 99 minutes. You can set it when you enter the hot tub to remind you when it is time to get out. The timer
will count down the preset time and display the minutes and seconds remaining until the end on the LCD.
You will hear two beeps at the turn of every last 10 seconds, and eventually one long beep will sound and
the message „USER TIMER FINISHED“ will be displayed when the timer has finished the countdown.
13
EN
To use the user timer, first select it in the main menu. The total time will flash on the LCD (30 minutes as
the default). Use the UP and DOWN buttons to set the time as needed. Hold one of the buttons down to
POOL EQUIPMENT
automatically repeat the pressing. Press the SCROLL button when the required time is reached. This starts
KLIN GOTHIC ITC DEMI-13,3 b
the timer and the display reads „TIMER STARTED (STOP)“. When this message is displayed, you can stop
the timer immediately by pressing SCROLL again. Otherwise, wait for about five seconds till the message
disappears and you return to the default display, where the timer runs in the background. Select the MAIN
menu, then press UP twice.
zlatátwice PANTONE 871 U
Press
černá
PANTONE 426 U
30:00
( )
2. user timer
(start)
( )
1. SET TEMP
2. USER TIMER
3. CLOCK
4. USER ALARM
5. SLEEP TIMES
6. MAINT TIMERS
7. MISC OPTIONS
8. ADV. OPTIONS
9. LD. DEFAULTS
9.4 Clock
36.75
Mon
°C
12:00 PM
Usr timer 29:59
User timer
countdown
The hot tub has a real time clock, which retains the correct time even during short power failures. The clock
allows the user to read time comfortably, and is also used for timing the sleep mode periods, filtration and
user timers.
The clock can be configured to work in either a 12-hour or 24-hour mode. This setting also defines how
the user alarms and sleep mode start and end times are displayed.
Press 3 times
PM
( )
12:00
3. clock
(SET)
( )
1. SET TEMP
2. USER TIMER
3. CLOCK
4. USER ALARM
5. SLEEP TIMES
6. MAINT TIMERS
7. MISC OPTIONS
8. ADV. OPTIONS
9. LD. DEFAULTS
14
EN
9.5 Clock setup
1.Select the menu item Clock in the main menu.
2.Press SCROLL to start setting the clock.
3.Use the UP and DOWN buttons to choose the required clock mode (12 or 24 hour).
4.Press the SCROLL button to confirm the current setting and go to the next field.
5.Use the UP and DOWN buttons to set the highlighted field as needed. Hold one of the buttons down to
automatically repeat the pressing.
6.Repeat until the mode, hours, minutes and day of the week are set.
POOL EQUIPMENT
KLIN GOTHIC ITC DEMI-13,3 b
PM
( )
PM
( )
PM
( )
PM
( )
zlatá
černá
12:00
[12HR]
[MON]
(SET)
PANTONE 871 U
PANTONE 426 U
[12HR]
( )
12:00
[12HR]
[MON]
(SET)
12
00
( )
12:00
[12HR]
[MON]
(SET)
Press SCROLL to make the setting.
( )
12:00
[12HR]
[MON]
(SET)
Press SCROLL to make the setting.
Press SCROLL to make the setting.
[MON]
( )
Press SCROLL to make the setting.
When you press SCROLL to set the day of the week, the display reverts to the default screen.
9.6 User alarms
These alarms work like a normal alarm clock, the advantage being you can specify on which days the alarm
should be active.
When the alarm goes off, the control panel beeps and displays the current time and a text with the active
alarm number. The beep lasts for a minute or until you press a button on the control panel. This has no effect
on any other equipment such as the pumps, the blower, the light, etc.
The alarms are only active within an hour of the last pressing of a button on the control panel. If you do not
use the spa for more than an hour, no sound is made.
15
EN
9.6.1 Configuring the user alarm
Select the MAIN menu, then press UP four times.
POOL EQUIPMENT
KLIN GOTHIC ITC DEMI-13,3 b
Press 4 times
zlatá
černá
1. SET TEMP
2. USER TIMER
3. CLOCK
4. USER ALARM
5. SLEEP TIMES
6. MAINT TIMERS
7. MISC OPTIONS
8. ADV. OPTIONS
9. LD. DEFAULTS
----
PANTONE 871 U
PANTONE
426ALARMS
U
4. USER
( )
(SUBMENU)
( )
1. Select the USER ALARMS sub-menu by pressing SCROLL.
----
( )
USER ALARMS
(ESC)
( )
2. Press UP or DOWN to select the required days of the week when the user alarm will be active. You can
choose from 15 different days of the week settings from Monday to Sunday and various combinations of
each setting.
----
USER ALARM 1
DAYS
[ ------------------]
Press SCROLL to make the setting.
3. Press the SCROLL button to confirm the current setting and
go to the next field.
4. Repeat steps 2 and 3 to set the alarm hours and minutes.
5. Press the SCROLL button to save the new setting and return
to the user alarm sub-menu.
16
[ – – – ]– – – –
[ MT W TF S S ]
[ M – – –]– – –
[ T– –] – – – –
[ –W
–
–] – – –
[ – T – –] – – –
[ – –F– –] – –
[ – –S– –] – –
[ – – S– – ]– –
[ MT W TF –] –
[ – – S– S–] –
[ MT W TF S–]
[ MT W– –] – –
– –S ]
–
[ –TF
[ M –W– F– ]– –
[ –T T S
–] – –
[ – – – –] – – –
EN
9.6.2 Deactivating the user alarm
To deactivate the user alarm, follow the above procedure up to step 4. In that
step, use the UP and DOWN buttons to adjust the days of the week settings until
no day is selected (see display image).
POOL EQUIPMENT
KLIN GOTHIC ITC DEMI-13,3 b
----
USER ALARM 1
DAYS
[ ------------------]
Press the SCROLL button to save the new setting and return to the user alarm sub-menu. This deactivates
the user alarm completely. When the user alarm is deactivated in this way, the alarm time (hour and minute)
is still retained and will be restored when you reactivate the user alarm by selecting one or more days of
zlatá
PANTONE 871 U
the week.
černá
PANTONE 426 U
9.7 Sleep mode timer
The sleep mode is a very good feature used to quieten the hot tub during your sleep period. When the hot
tub is in the sleep mode, neither the automatic heating nor the filtering comes on, yet you can still use
the hot tub in the manual regime without having to change settings. You can programme up to 9 different
sleep mode times, each of which can occur on one or more specified calendar days. You can use any number
of sleep mode intervals.
As the default, the hot tub is set to a sleep mode between 11 pm and 7 am, Monday to Sunday. This is only
achieved by applying sleep mode interval no. 1; the other 8 sleep mode intervals are deactivated.
You can view the current sleep mode setting by simply selecting the sleep mode sub-menu from the main
menu.
In the sub-menu, use the UP and DOWN buttons to scroll through each of the nine sleep mode intervals.
Each of these intervals consists of a day of the week, a start time and an end time of the sleep mode. These
three settings are displayed using the 2 items in the sleep mode sub-menu: “#. SLEEP START” and “#.
SLEEP STOP” (where # is the sleep mode number from 1 to 9).
9.7.1 Configuring the sleep mode
Follow the below procedure to set a currently unused sleep mode interval or adjust an activate interval.
Select the MAIN menu, then press UP five times.
Press 5 times
----
5. SLEEP TIMES
( )
(SUBMENU)
( )
1. Select the SLEEP TIMES sub-menu by pressing SCROLL.
----
( )
SLEEP TIMES
(ESC)
17
( )
1. SET TEMP
2. USER TIMER
3. CLOCK
4. USER ALARM
5. SLEEP TIMES
6. MAINT TIMERS
7. MISC OPTIONS
8. ADV. OPTIONS
9. LD. DEFAULTS
EN
2. Use the UP and DOWN buttons to choose the required sleep mode interval.
POOL EQUIPMENT
KLIN GOTHIC ITC DEMI-13,3 b
PM
11:00
1. SLEEP start
DAYS:
zlatá
černá
[MTWTFSS]
Sleep mode (1-9)
PANTONE 871 U
PANTONE 426 U
3. Press the SCROLL button to start setting the sleep mode start day.
4. Use the UP and DOWN buttons to choose the required days of the week when the sleep mode should
be on. You can choose from 15 different days of the week settings from Monday to Sunday and various
combinations of each setting.
5. Press the SCROLL button to confirm the current setting and go to the next field.
PM
11:00
1. SLEEP start
DAYS:
[MTWTFSS]
[– – – – – – – ]
[ MT W TF S S ]
[M–––––– ]
[ –T – – – – – ]
[ – –W – – – – ]
[– – –T – – – ]
[ – – – –F – – ]
[ – – – – –S – ]
[– – – – – –S ]
Press SCROLL to make the setting.
18
[ MT W TF – – ]
[ – – – – – SS]
[ MT W TFS – ]
[ MT W T– – – ]
[ – – – TFS – ]
[ M –W – F – – ]
[ – T– T – S – ]
[– – – – – – – ]
EN
6. Repeat steps 4 and 5 to set the hours and minutes of the sleep mode start and the hours and minutes of
the sleep mode end. Tip: The sleep mode duration hours change as you change the sleep mode end time; use
POOL EQUIPMENT
this opportunity to check that your new settings are correct.
KLIN GOTHIC ITC DEMI-13,3 b
PM
11:00
1. SLEEP start
11
11:00
1. SLEEP start
11
7:00
1. SLEEP start
7
7:00
7
DAYS:
PM
DAYS:
AM
DAYS:
AM
zlatá
[MTWTFSS] PANTONE 871 U
černá
PANTONE 426 U
DAYS:
Press SCROLL to make the setting.
[MTWTFSS]
[MTWTFSS]
1. SLEEP start
Press SCROLL to make the setting.
[MTWTFSS]
Press SCROLL to make the setting.
Press SCROLL to make the setting.
9.7.2 Deactivating the sleep mode period
To deactivate the sleep mode period, follow the instructions in „Configuring
the sleep mode“ up to step 4. In that step, use the UP and DOWN buttons to
adjust the days of the week setting until no day is selected (see adjacent image).
Press the SCROLL button to save the new setting and return to the sleep mode
sub-menu. This deactivates the sleep mode period completely.
When the sleep mode period is deactivated, its start time is displayed (see below)
and its stop time cannot be selected in the sleep mode sub-menu.
----
1. SLEEP start
DAYS
[
]
-------------------
When you deactivate the sleep mode in this way, the start and stop times are retained and will be restored
when you reactivate the sleep mode period by choosing one or more days of the week.
19
EN
9.7.3 Cleaning the pipework
When the system is reactivated after a sleep period, it automatically lets each auxiliary pump run one
after another and then the blower for 10 seconds to clean the pipework. This prevents stagnant water from
accumulating in the pipes when the hot tub is not in use for longer periods. The display reads „PURGING
PUMPS, PLEASE WAIT“ while the pipework cleaning is in progress.
POOL EQUIPMENT
KLIN GOTHIC ITC DEMI-13,3 b
Notes:
1.For the sleep mode to work correctly, check that the clock is set correctly. You will have to set it if
zlatá
PANTONE 871 U
the control panel is activated for the first time or has been off for a long time.
černálengthPANTONE
426
U (uninterrupted) is 23 hours and 59 minutes. This is achieved if
2. The maximum
of the sleep
mode
the end is set 1 minute before the start. If both the times are identical, the sleep mode will not commence.
3.It is normal that the hot tub runs for a long time after a sleep period to compensate for the overnight
temperature loss. Therefore, we advise you configure the hot tub so that is „wakes up“ at least one hour
before the intended use.
9.8 Maintenance timers
The hot tub control panel has 9 programmable maintenance cleaners to remind you when it is time for
periodical maintenance. Each timer can be configured to elapse after 1 to 255 weeks, or deactivated completely.
All 9 timers are deactivated as the default, unless they are set by the manufacturer or installation technician.
The first 4 timers have specific names for specific purposes, but the other 5 are general. The hot tub installation
technician may have chosen one or more of the programmes set as needed for maintenance items not included
in the specific timers. After the time set in the timer is reached, the control panel will inform you thereof in
two ways:
1. If the hot tub has not been in use for more than an hour, the first pressing of a button will result in a long
beep and displaying of a text indicating which timer has reached its set time. You will have to press
the SCROLL button once or repeatedly to clear the message.
2. If you are not in the system menu and the control panel is not active for about 10 seconds, the control panel
LCD periodically displays a text indicating which timer has reached its set time. This text is shown in
place of the default main display text and does not impede the normal control panel interface.
In either case, the text displayed will read „MAINT REQD:“ and the maintenance timer name.
9.8.1 Configuring the maintenance timer
The installation or servicing technician or the hot tub owner may complete the following table to help keep
track of the settings entered into the control panel.
1. General service
Overall maintenance
2. Cabinet service
Switchboard maintenance
3. Replace filter
Filter replacement
4. Ozonator
Ozone generator
5. Custom #1
Up to own choice
6. Custom #2
7. Custom #3
8. Custom #4
9. Custom #5
20
EN
9.8.2 Confirming the maintenance timer
When a timer reaches its set time, you have to clear it manually - it will not be cleared automatically. Proceed
as indicated below to clear a timer that has reached its set time.
POOL EQUIPMENT
KLIN GOTHIC ITC DEMI-13,3 b
1. Select the MAIN menu, then press UP six times.
Press 6 times
zlatá
černá
PANTONE 871 U
PANTONE 426 U
----
6. MAINT TIMERS
( )
(SUBMENU)
( )
2. Press SCROLL and then UP as needed to select
the maintenance timer to clear.
----
1. GENERAL SRVC
( )
(options)
( )
1. SET TEMP
2. USER TIMER
3. CLOCK
4. USER ALARM
5. SLEEP TIMES
6. MAINT TIMERS
7. MISC OPTIONS
8. ADV. OPTIONS
9. LD. DEFAULTS
1. GENERAL SRVC
2. CABINET SRVC
3. REPLACE FLTR
4. OZONATOR
5. CUSTOM #1
6. CUSTOM #2
7. CUSTOM #3
8. CUSTOM #4
9. CUSTOM #5
Press SCROLL to make the setting.
3. Press the SCROLL button to start adjusting the timer options.
----
008/008 weeks
(CLR)
4. Press DOWN to reset the number of weeks to zero.
Reset to zero
5. Press the SCROLL button
to confirm and go to the next field.
21
(ESC)
(CFG)
----
000/008 weeks
(ESC)
(CFG)
EN
9.8.3 Configuring the maintenance timer
Follow the below procedure to change the total number of weeks or the number of weeks elapsed in
the relevant maintenance job timer:
POOL EQUIPMENT
KLIN GOTHIC ITC DEMI-13,3 b
1. Select the sub-menu MAINT TIMERS.
2. Press UP or DOWN to select the required maintenance timer.
3. Press SCROLL once to display the maintenance timer options.
4. Press UP once to begin configuring the timer. The Total Weeks field starts to flash.
zlatá
PANTONE 871 U
5. Use the UP and DOWN buttons to set the highlighted field as needed. Hold either of the two buttons down
černá
PANTONE
to automatically
repeat the
pressing.426 U
6. Press the SCROLL button to confirm the current setting and go to the next field.
7. Repeat steps 5 and 6 to set the number of weeks elapsed. In most cases, you will want to leave this field at
0 - beginning of the countdown period.
8. Press SCROLL once to return to the maintenance timer sub-menu.
9.8.4 Deactivating the maintenance timer
To deactivate the maintenance timer, follow the above procedure up to step 5. In that step, hold down
the DOWN button until the Total Weeks field turns to 0. Then press SCROLL once to save the new setting
and return to the maintenance timer options screen. This deactivates the maintenance timer completely.
Notes:
1. Timers of the lowest number are of the highest priority and are the first displayed if two or more timers
reach the set time simultaneously. After the first maintenance timer is cleared, the control panel reports
that the next-highest priority timer has reached its set time.
2. The maintenance timers will not count down when the control panel is off.
9.9 Key clicks (on/off)
The control panel can be set to beep whenever a button is pressed (a beep for every click of the keys); this
can be activated and deactivated as needed following the below procedure.
1. Select the MISC OPTIONS sub-menu from the main menu.
2. Select the menu item KEY CLICKS.
3. Press the SCROLL button.
4. Use the UP and DOWN buttons to switch on and off.
5. Press SCROLL to make the setting.
Note: Deactivating key clicks does not turn down timer beeps etc.
22
EN
9.9.1 Main display
The hot tub LCD display comprises four digits and two rows of text. The display normally shows three
figures: the hot tub temperature, the set hot tub temperature, and the time information (day of the week
and time). As the default, the current hot tub temperature is shown in the digits and the time and the set
temperature are in the two rows of text. If the user prefers a different arrangement, this configuration can be
changed so that the main display either shows the set temperature or the clock (4 digits) instead of the smaller
text rows. In addition, you can choose a cycling mode, with each of the three available displays shown for
10 seconds. Available options:
POOL EQUIPMENT
KLIN GOTHIC ITC DEMI-13,3 b
zlatá
černá
POOL TEMP
PANTONE 871 U
PANTONE 426 U
the default setting; set temperature and clock in the text rows
SET TEMP
clock and hot tub temperature in the text rows
CLOCK
set temperature and hot tub temperature in the text rows
CYCLING
above settings 1-3 alternating periodically for 10 seconds each
9.9.2 Changing the main display
1. Select the MISC OPTIONS sub-menu from the main menu.
2. Select the menu item MAIN DISPLAY.
3. Press the SCROLL button to start choosing the heating control settings (see table).
4. Use the UP and DOWN buttons to set the heating setting.
5. Press the SCROLL button to confirm the current setting and return to the MISC OPTIONS sub-menu.
9.9.3 Colour and brightness of the panel light
The user can change the colour and brightness of the display backlighting to a setting of the user‘s choice.
Remember that these manual settings will only work either when the hot tub light is off or when the panel
and pool light synchronisation feature is deactivated.
9.9.4 Changing the control panel backlighting colour
1. Select the MISC OPTIONS sub-menu from the main menu.
2. Select the menu item PANEL LIGHT COLOUR.
3. Press the SCROLL button to start choosing the light colour.
4. Use the UP and DOWN buttons to set the required colour.
5. Press the SCROLL button to confirm the current setting and return to the MISC OPTIONS sub-menu.
9.9.5 Changing the control panel backlighting brightness
1. Select the MISC OPTIONS sub-menu from the main menu.
2. Select the menu item PANEL LIGHT INTENSITY.
3. Press the SCROLL button to start adjusting the light brightness.
4. Use the UP and DOWN buttons to set the required brightness.
5. Press the SCROLL button to confirm the current setting and return to the MISC OPTIONS sub-menu.
Note that the backlighting brightness setting only works while the hot tub is in use. The backlighting
brightness reverts automatically to the default setting of 34% after 90 minutes of not using the control panel
(no button pressed). The reason for this is to ensure the long life of the backlighting diodes. As soon as you
press a button on the control panel, the default factory setting is restored.
23
EN
9.9.6 Synchronisation of panel and hot tub lighting (on/off)
The control panel backlighting can reflect the colour and brightness of the Spa Power Variable Colour Light
(SPVCL) inner hot tub lighting. This feature is the most noticeable when the light effect mode is applied and
the light colours alternate quickly.
When the light inside the hot tub is off, the display backlighting stays the colour selected by the user. If you
wish to, you can deactivate the synchronisation/reflection feature and the control panel will permanently be
the same colour even when the light in the tub is on.
POOL EQUIPMENT
KLIN GOTHIC ITC DEMI-13,3 b
zlatá
černá
PANTONE 871 U
PANTONE 426 U
9.9.7 Activating/deactivating lighting synchronisation
1. Select the MISC OPTIONS sub-menu from the main menu.
2. Select the menu item PANEL & POOL LT. SYNC
3. Press the SCROLL button to change the light synchronisation setting.
4. Use the UP and DOWN buttons to switch on and off.
5. Press SCROLL to make the setting.
Note: This option is only active if the hot tub has a SPVCL (Spa Power Variable Colour Light).
9.10 Advanced options sub-menu
The advanced options sub-menu contains settings that you should only change after you are well familiar
with the basic features of your hot tub. In principle, the default settings will be satisfactory and there will
probably be no need to change them.
Select the MAIN menu, then press UP eight times.
----
Press 8 times
8. ADV. OPTIONS
( )
(SUBMENU)
( )
1. SET TEMP
2. USER TIMER
3. CLOCK
4. USER ALARM
5. SLEEP TIMES
6. MAINT TIMERS
7. MISC OPTIONS
8. ADV. OPTIONS
9. LD. DEFAULTS
----
( )
ADV. OPTIONS
(ESC)
11:00
1. HEAT CONTROL
Press SCROLL to make the setting.
( )
(SET)
24
( )
( )
1. HEAT CONTROL
2. FILT. PERIOD*
3. FILT. TIME*
*N/A circulation pump installations
EN
9.10.1 Heating controls/management
In addition to the temperature settings, the user may choose one of the four heating control settings.
The set temperature defines the maximum temperature before the hot tub turns off the heater, while
the heating control setting defines how deep down the temperature has to drop before the heater comes
on again. In other words, the heating control setting defines how close to the set temperature the hot tub
maintains the water temperature. The four setting options are as follows:
POOL EQUIPMENT
KLIN GOTHIC ITC DEMI-13,3 b
TIGHT
zlatá
PANTONE 871 U
černá
PANTONE 426 U
NORMAL (default setting)
0,25
2,50
0,50
3,00
LOOSE
0,75
3,50
EXTRA LOOSE
1,00
4,00
The figures shown in the table for each of the settings indicate the actual temperature drop in the hot
tub below the set point for the heater to come on. The two columns of figures are arranged as follows:
0.25-1.00 and 2.50-4.00. The first column is applied in general. There is a direct connection between how
often the hot tub switches off and on and how close to the set temperature the actual temperature is maintained.
If you chose the TIGHT setting, you will maintain the temperature very close to the set temperature but this
also means that the hot tub will often switch off and on. In contrast, if you choose the EXTRA LOOSE
setting, it will entail a much broader deviation in the water temperature, but the hot tub will switch off and on
much less often. Determining accurately how often the hot tub will switch on and off in each of the settings
is a complex function of ambient conditions and the hot tub thermal characteristics: the set temperature, the
tub insulation, the thermal cover insulation, the heating capacity, etc. We advise you start with the default
NORMAL setting and change to a different setting only if you find you prefer a different connection between
the cycle frequency and the temperature deviation.
9.10.2 Changing the heating control setting
1. Select the ADV. OPTIONS sub-menu from the main menu.
2. Select the menu item HEAT CONTROL.
3. Press the SCROLL button to start choosing the heating control settings.
4. Use the UP and DOWN buttons to set the heating setting (see table).
5. Press the SCROLL button to confirm the current setting and return to the ADV. OPTIONS sub-menu.
Notes:
1. When the hot tub is in use, the heating is reduced automatically to no more than 0.5°C to ensure the water
does not run cold too fast.
2. The start of the filtration cycle always activates the heater if the temperature is below the set point,
regardless of the heating control setting.
25
EN
9.10.3 Automatic filtration/disinfection
Automatic filtration is designed to ensure that the water in the hot tub is filtered for at least a minimum period
of time every day, regardless of how often the hot tub is used or for how long the pump runs to maintain
the temperature. If the pump has not run long enough during normal operation, the system will automatically
let it run for the additional required period of time to observe the user-defined minimum filtering time. This
feature is of special utility in warmer climates, where very little automatic water heating (thus filtering) is
needed to maintain the set water temperature.
The automatic filtration has two user-adjustable settings: the filtration time and the filtration frequency.
zlatá
PANTONE 871 U
These settings are found in the advanced options sub-menu.
POOL EQUIPMENT
KLIN GOTHIC ITC DEMI-13,3 b
černá
PANTONE 426 U
9.10.4 Adjusting the filtration time
Filtration time adjustments define the minimum filtering time and can be set to between 0 and 30 minutes per
hour (effectively 0 to 12 hours a day); the default is 10 minutes. The 0 minutes setting completely deactivates
automatic filtration.
1. Select the sub-menu ADV. OPTIONS from the main menu.
2. Select the menu item FILT. TIME.
3. Press the SCROLL button to start altering the filtration time.
4. Use the UP and DOWN buttons to set the required filtration time in minutes per hour.
5. Press the SCROLL button to confirm the current setting and return to the ADV. OPTIONS sub-menu.
9.10.5 Adjusting the filtration frequency
Adjust the filtration frequency for how often the system should let the pump run to ensure observance of
the minimum filtration time. The available settings are 1, 2, 3, and 4 hours. With the 1 hour default setting,
the pump is activated no more than once an hour to ensure that the filtration times are observed; analogously,
the 4-hour setting means the filtration will take place once every 4 hours.
1. Select the ADV. OPTIONS sub-menu from the main menu.
2. Select the menu item FILT. PERIOD.
3. Press the SCROLL button to start altering the filtration frequency.
4. Use the UP and DOWN buttons to set the required filtration frequency.
5. Press the SCROLL button to confirm the current setting and return to the ADV. OPTIONS sub-menu.
Note that even though the filtration frequency limits how often the filtration itself is activated, normal heating
(temperature maintenance) may occur in between the filtering periods. If this happens, it may seem as if
the filtration frequency setting does not work correctly, but this is the normal performance. Excessive
repetition of the hot tub cycle will not be eliminated by reducing the filtration frequency; read „Heating
controls/management“ for more information.
Notes:
1.The ambient temperature is different every day in the year. As a result, the hot tub pump will run for
different periods of time in different parts of the day, differently each day, depending on how often
the pump runs to warm the water.
2.Any modifications to the filtration settings (either time or frequency) will reset the current filtration timing
and the automatic filtration will not resume sooner than on the 1st hour of the next filtration period.
3.The filtration cycles always activate the heating if the hot tub water temperature is below the temperature
setting, regardless of the heating setting mode.
4.The filtration does not work when the system is in the sleep mode.
26
EN
9.11 Factory settings
The Factory settings option allows you to restore all the default factory settings. They include parameters
such as set temperature and sleep periods as well as the preferred light mode settings, light effects and blower
speed, which will be restored to their defaults as preset by the manufacturer. Only use this option when you
are absolutely sure that it is necessary.
POOL EQUIPMENT
KLIN GOTHIC ITC DEMI-13,3 b
1. Select the item LD. DEFAULTS from the main menu (see below for details).
2. Press the SCROLL button. Note that the confirmation period is very short (about 3 seconds), so you will
zlatá
PANTONE 871 U
have to perform the following steps relatively quickly.
černá
PANTONE
U
3. Press the UP
or DOWN
button to426
highlight
„YES“.
4. Press the SCROLL button to load the default settings. The display will read „DEFAULTS LOADED“
temporarily to confirm that the default values have been loaded.
5. Select the MAIN menu, then press UP nine times.
3. The filtration cycles always activate the heating if the hot tub water temperature is below the temperature
setting, regardless of the heating setting mode.
4. The filtration does not work when the system is in the sleep mode.
Press 9 times
----
9. LD. DEFAULTS
( )
(SET)
( )
1. SET TEMP
2. USER TIMER
3. CLOCK
4. USER ALARM
5. SLEEP TIMES
6. MAINT TIMERS
7. MISC OPTIONS
8. ADV. OPTIONS
9. LD. DEFAULTS
----
ARE YOU SURE?
( )
[NO]
( )
Pro nastavení stiskněte SCROLL
Notes:
1. After applying the default settings, which takes about 10 seconds, the control panel saves them. Do not
disconnect the power supply during that period.
2. The hours, minutes and day of the week in the clock are reset after applying the default settings.
27
EN
10. Additional Features
10.1 Control panel key lock
POOL EQUIPMENT
KLIN GOTHIC ITC DEMI-13,3 b
The hot tub control panel buttons can be locked to prevent unauthorised persons from using the hot tub or
changing the settings. When the key lock is active, any pressing of the buttons is ignored but the LCD display
shows „KEYS LOCKED“ temporarily to inform the user that the key lock has been activated.
10.2 Activating
lock 871 U
zlatá the key
PANTONE
To activate thečerná
key lock,PANTONE
hold down426
the DOWN,
SCROLL and UP buttons simultaneously. While doing so,
U
the LCD display will read „HOLD KEYS TO ACTIVATE LOCK“. You will have to hold the keys down
for about 3 seconds to activate the key lock. Then the control panel beeps and reads „KEYS LOCKED“.
10.3 Deactivating the key lock
Once the key lock is activated, the buttons have to be pressed in sequence in order to deactivate it. Press
the buttons in the sequence shown, one at a time.
The control panel beeps and reads „KEYS UNLOCKED“ temporarily once
the buttons are pressed in the correct order.
If you remember which button you pressed last, or if you press one of the
buttons incorrectly, please start again.
The unlocking sequence: DOWN, SCROLL, DOWN, UP, SCROLL.
Note:
If the control panel is off while the key lock is active, the key lock is not resumed
after the control panel is switched on again.
Press once
Press twice
Press 3 times
Press 4 times
Press 5 times
10.4 Adjusting the control panel display contrast
The control panel display contrast/brightness can be adjusted manually if the display seems too dark or too
bright.
Follow the below procedure to adjust contrast:
1. Hold down the LIGHT button. The light will be as bright as always, but you have to hold the button down
before you proceed to the next steps.
2. While still holding down the LIGHT button, press UP or DOWN to brighten or darken the contrast as
needed. Hold one of the buttons down to automatically repeat the pressing.
3. When you have finished adjusting the contrast, release the LIGHT button and the new setting will be
saved.
28
EN
10.5 Reversing the display
The display can be reversed so that it can be read from both inside and outside the tub; the display reverts
to the default mode after 30 minutes of inactivity. To reverse the display, press the UP and DOWN buttons
simultaneously.
To revert the display to the original facing, press UP and DOWN again.
POOL EQUIPMENT
KLIN GOTHIC ITC DEMI-13,3 b
Default display facing
PANTONE 871 U
PANTONE 426 U
Set temp 37.00
12:00 PM
36.75
Mon
°C
Mon
36.75
zlatá
černá
Reverse display facing
12:00 PM
Set temp 37.00
°C
10.6 Language selection
The hot tub control panel can display English (default), French, German, Spanish, Dutch, and Japanese.
To select your language, hold down the DOWN button for 4 seconds.
Choose the language by pressing UP or DOWN; make the setting by pressing SCROLL.
Press SCROLL to save the setting.
----
Press SCROLL to make the setting.
( )
[ - english - ]
(set)
29
( )
EN
11. Radio receiver with MP3 player
The hot tub is equipped with a radio receiver with an MP3 player, which has a USB port.
POOL EQUIPMENT
KLIN GOTHIC ITC DEMI-13,3 b
zlatá
černá
On/off
PANTONE 871 U
PANTONE 426 U
Display
Down
Up
Range selection/start/pause
Playback modes
Turning down the volume
Turning up the volume
11.1 Radio/MP3 controls
On/off button.
Down button for changing radio frequency and jumping to the previous MP3 file.
Up button for changing radio frequency and jumping to the next MP3 file.
Button for turning up and down the volume.
Button for switching between FM/AM frequency ranges and starting and pausing MP3 playback.
Button for switching between radio/MP3/AUX inputs.
30
EN
12. Self-diagnostic error codes
The hot tub has extensive self-diagnostic capabilities. In the event of trouble, it will report a warning or error,
depending on the nature of the trouble. If a warning is reported, the hot tub will go on functioning, but errors
require user intervention or servicing.
POOL EQUIPMENT
KLIN GOTHIC ITC DEMI-13,3 b
Errors
When the alarm goes off in the error status, it can be turned down by pressing SCROLL. The alarm will go
zlatá
PANTONE 871 U
silent automatically after four minutes.
černá
PANTONE 426 U
Error 1 („PRIME FAILED“) Pump has not been primed with water
Priming the pump with water before start-up is a special case. This may not necessarily be a problem with
the hot tub, but means that no water has been detected in the heater housing. Press the DOWN button to
activate the main pump for 10 seconds to try and bring water to the heater. If this succeeds, normal running
is restored. Failing that, the error reappears on the display.
Note: When this error appears, you will be offered the option to let the hot tub run in the demo mode;
this option is not designed for end users. If you select the demo mode by mistake, please reset the hot tub (see
below) to start it up over again.
In the event of any of errors 3-8, the hot tub operation is halted and will not resume until the controls
are reset. The controls can only be reset by simultaneously pressing the buttons Light, Light Change,
Pump 1 and Blower. The control panel remains in the error status even if the main switch is reset; the control
panel will only resume normal operation after simultaneously pressing the buttons Light, Light Change,
Pump 1 and Blower.
36.75
Mon
°C
12:00 PM
Set temp 37.00
Error 3 („STUCK BUTTON“) Button jammed
This error indicates that at least one of the control panel buttons has become stuck or been held down for
over a minute. It may be caused by the hot tub cover pressing against the control panel, or water having got
inside the control panel, or the control panel having been damaged. Try resetting the hot tub. If the problem
persists, please contact your hot tub supplier.
Error 4 (“NO WATER SENSOR”) Sensor for no water
This error indicates a problem with the optical water sensor by the heater. The problem may be caused by
sensor disconnection or damage. Try resetting the hot tub. If the problem persists, please contact your hot
tub supplier.
31
EN
Error 5 („OVER TEMP“) Temperature too high
This error indicates that one of the digital temperature sensors, either by the heater or inside the hot tub, has
POOL EQUIPMENT
detected a temperature of or over 45°C. It may be caused by excessive use of the pump in hot weather or
KLIN GOTHIC ITC DEMI-13,3 b
a pump failure. Turn off the hot tub and wait till the water cools down; then press the buttons Light, Light
Change, Pump 1 and Blower simultaneously. If the problem persists, please contact your hot tub supplier.
Error 6 („THERMAL CUT OUT“) Thermal fuse has been activated
This error indicates that the safety electromechanical thermal fuse in the heater has been activated.
zlatá causedPANTONE
871of
U air in the heater, high temperature during use, or pump failure.
It may have been
by a pocket
PANTONE
426 U
The automaticčerná
thermal trip
is only deactivated
once the heater cools down below approx. 38°C. This device
then has to be reset before it starts working again; press the buttons Light, Light Change, Pump 1 and Blower
simultaneously.
If the problem persists, please contact your hot tub supplier.
Error 7 („STUCK RELAY“) Relay jammed
This error indicates a problem with the heating control circuitry inside the device. Please contact your hot
tub supplier.
Error 8 („NO TEMP DATA“) No Temperature Data
This error indicates a problem with the digital temperature sensor in the heater or the hot tub wall. The sensor
may have disconnected or been damaged. Try resetting the hot tub. If the problem persists, please contact
your hot tub supplier.
Error 9 („CLOCK FAULT“) Defect in the real time clock
This error indicates a problem with the real time clock in the hot tub. Try resetting the hot tub. If the problem
persists, please contact your hot tub supplier.
Warnings:
Warning 1 (“TEMP SENSOR FAILURE”) - Temperature sensor failure
This warning indicates that one of the two digital temperature sensors, either by the heater or inside the hot
tub, no longer works correctly. The hot tub may still function, employing the other sensor, but a failure has
likely occurred. Please contact your hot tub supplier.
If this warning appears when the equipment is first put into operation, you may have to restore the controls
to the default factory settings. See Chapter 9.11 for loading the default factory settings.
32
EN
13. Installation instructions
Performance parameters
Rated voltage: three-phase
three-phase 230/400 V 50/60 Hz
Maximum working current: 3x 16 A
Voltage resilience: 1250 V/min without breakdown
Insulation resistance >= 200 MΩ
zlatá
PANTONE 871 U
Water resistance (protection) IPX5
černá
PANTONE 426 U
Protection against electric shock: first degree
POOL EQUIPMENT
KLIN GOTHIC ITC DEMI-13,3 b
Loading capacity
Heating: 230 V / 3 kW / 13.6 A
Ozone generator: 230 V / 50-60 Hz / 80 mA
Blower: 230 V / 0.9 kW / 6.3 A
Two-speed pump 1: S1 - 230 V / 2.2 kW / 10 A S2 - 230 V / 0.45 kW /3.2 A
AUX pump 2 : 230 V / 2.2 kW / 10 A
Total power input: 8.1 kW/hour
Protection class: 1
Underwater bulb lamp: 12 V AC / 10 W
Radio: frequency range (FM: 87.0-108.0 MHz)
maximum output power: 20 W
speakers resistant to moisture
Electrical connection preparation and options
• alternating three-phase current 3x 400 V / 16 A
Make sure that the hot tub is always connected to a circuit protected with an earth-leakage trip with a residual
current of 0.03 A. If a fuse has to be replaced, always use a fuse of the same type and rated current.
!!! THE DEVICE MAY ONLY BE CONNECTED BY A PERSON WITH PROFESSIONAL
ELECTRICAL QUALIFICATIONS IN COMPLIANCE WITH DECREE NO. 50/1978 COLL. !!!
Hot tub installation
Preparing the site for hot tub installation
General: The hot tub must be installed on a level foundation slab of sufficient strength with respect to
the load-bearing capacity of the structure. If installing the hot tub in the exterior, we recommend making
a concrete monolithic foundation slab at least 10 cm thick. The load-bearing capacity of the foundation slab
must also be designed with respect to the size and weight of the hot tub; consult your construction supervisor.
The weight of the hot tub is shown in its technical specifications.
1. Interior hot tub installation
If installing the hot tub in the interior, make sure you observe the safety precautions. The chief requirements
for safe hot tub operation include non-slip flooring and a drained installation site for the event of water
pouring or spillage. Also remember that the air humidity will increase in the tub area. For these reasons, you
are advised to adjust the installation site to these requirements.
33
EN
2. Exterior hot tub installation
If installing the hot tub in the exterior, make sure you observe the safety precautions. The chief requirements
POOL EQUIPMENT
for safe hot tub operation include non-slip tiling (flooring), and a drained installation site for the event of rain
KLIN GOTHIC ITC DEMI-13,3 b
or water pouring or spillage over the hot tub rim. For these reasons, you are advised to adjust the installation
site to these requirements.
Preparation for the power connection
For connection to three-phase alternating current, make sure you use a 16 A circuit breaker with characteristic
PANTONE
871 U connected to a circuit protected with an earth-leakage trip with
C. Make surezlatá
that the hot
tub is always
černá
a residual current
of 0.03PANTONE
A. If a fuse426
has U
to be replaced, always use a fuse of the same type and rated current.
Hot tub installation
Note: The hot tub has to be located in accordance with standards in force in your country; in the Czech
Republic it is ČSN 33 2000-7-701.
General: You are advised to take advantage of the professional services of qualified and trained technicians
for the installation, power connection and first startup. If you decide to install the hot tub by your own
devices, please follow the advice below.
1.Carefully remove all the packaging in which the hot tub was delivered, and position the hot tub on
the pre-rendered installation site.
2.Remove the front panel, situated at the side of the hot tub control panel. Remove the upper power
switchboard cover, under which the circuit breaker, the earth-leakage trip and earth connector are situated.
The connection using the appropriate power cord may only be performed by a person with professional
qualifications.
3.Since your hot tub was thoroughly tested during the manufacturing process, meaning some proportion of
impurities may have remained in the hot tub equipment parts and on its surface, you are advised to first
clean the hot tub surface in an appropriate way. We recommend using lukewarm water for this cleaning.
As a rule, clean the surface using suitable soft towels; avoid using any coarse abrasives and fabrics, which
might cause damage to the spa surfaces. If you choose to use any detergent, make sure it is not aggressive
to the spa surfaces.
1. Filling the hot tub with water
Fill the hot tub with a sufficient amount of water. The water level in the hot tub may never decrease below
the skimmer level. If you detect any water leakage when filling the hot tub, interrupt the filling until
the defect is eliminated.
2. Activating the power supply for the hot tub
If the hot tub is connected via a flexible cord, the power cord must not be exposed to any burdening with
sharp objects or other effects. If that is the case, we advise you lay the power cord inside a protective sleeve.
Switch on the circuit breaker reserved for the hot tub.
3. Rules for hot tub water quality maintenance
Several rules have to be followed to ensure the trouble-free operation of your hot tub. One of these rules
is to periodically replace the entire bulk of water in the spa. We recommend changing the water at least
once every 3 months, with respect to the frequency of operation and use of the hot tub. Spa water quality is
best determined using testers, which can be obtained from your retailer. The tester allows you to measure
(analyse) the total alkalinity (TA), calcium hardness (CH) and pH; these values have to be maintained.
34
EN
Values recommended by the manufacturer: TA up to 125 ppm, CH up to 150 ppm, and pH 7.0-7.6. Under
normal European circumstances, water for the common user will have been treated by the water utility that
POOL EQUIPMENT
delivers it through the mains, so the alkalinity and calcium hardness are usually within the required limits.
KLIN GOTHIC ITC DEMI-13,3 b
Yet it may be the case that the pH is not within our recommended range, that is pH 7.0-7.6. In most cases,
the pH will be above the recommended range. To reduce the pH, you can use a chemical preparation known
as pH-. Practical tip: We advise you carry out any measurements of water quality in the spa after the normal
filtration and water cleaning cycle has ended (at least 2 hours) - never make any measurements immediately
after using the hot tub. If you test the water quality immediately „after a bath“, the pH and other values will
zlatá
PANTONE 871 U
be markedly distorted.
černá
PANTONE 426 U
4. Programme the hot tub control unit using the control display
If everything is in order, you can start programming the hot tub control unit. After programming, cover
the hot tub and allow its temperature to stabilise. Check the water level in the hot tub periodically.
14. Caring for your hot tub
General information
If the hot tub is in the exterior, we advise you prevent direct sunlight from acting upon the hot tub by, e.g.,
installing the hot tub under a pergola. Under no circumstances should you expose the hot tub to direct
sunlight if it is waterless. Use the thermal cover for this purpose; it may have been supplied with your tub.
The procedure for shutting down the hot tub, especially in winter, is described in Chapter 12, Winter and
summer use.
Operating rules
The hot tub is not designed for commercial use. Under no circumstances is it permissible that the pump be
activated without a sufficient water level in the hot tub. The water level must be kept at the indicated height.
The user is not allowed to generate overpressure or negative pressure in the equipment by blocking the jets
or the skimmer while the pump(s) is/are running, provided the hot tub has any. It is also impermissible to
shut valves in the circuit, etc. Prevent foreign objects from entering the skimmer suction area. Make yourself
thoroughly familiar with the Operating Instructions before first use. Always have the Instructions within easy
reach. The manufacturer has introduced the client to the technical parameters of the hot tub and pointed out
its advantages and drawbacks. Under certain circumstances, water aeration may alter slightly in hot tubs - in
the circulation jets.
1.No unqualified interference with the hot tub equipment and wiring is permissible. Please contact
a professional service provider in the event of any defect. Unqualified interference with the above may
result in injury and loss of warranty.
2.Maintain overall spa cleanness periodically. The frequency of cleaning the hot tub depends on the frequency
of using the spa.
3.Perform cleaning of the filter cartridges depending on the frequency of your use of the hot tub.
14.1 Filtration cartridges (installation, removal, maintenance)
Remove any packaging off the cartridges before installing them. Push the suction (skimmer) housing
upwards. Remove the rough dirt basket. The suction area has two holes with a threaded section (thread)
in the suction bottom. The cartridge has a thread at the bottom too. Screw the cartridge into the threaded
suction part, clockwise, and tighten it gently. Reverse the installation procedure for replacing the cartridges.
35
EN
Used cartridges may be reused repeatedly. Used cartridges have to be cleaned thoroughly before reuse.
They should be cleaned with pressurised water; we advise you disinfect the cartridges using an appropriate
POOL EQUIPMENT
disinfectant. After cleaning, all mechanical and other impurities should be removed from the cartridge.
KLIN GOTHIC ITC DEMI-13,3 b
Note: Hot water tends to swell the assembly, so do not worry if it is a bit difficult to remove it.
Maintenance of the spa frame surface finish
Minor scratches that do not penetrate the surface (acrylic) paint may be removed using high-quality car
PANTONE
871 U the acrylic top coat require renewal of the surface finish. Seek
polish. Major zlatá
scratches that
have penetrated
PANTONE 426 U
the advice of ačerná
hot tub retailer.
Hot tub thermal cover
Using the hot tub cover helps reduce the energy costs by minimising heat loss and evaporation. The attractive
cover is an effective device to prevent leaves and other contaminants from getting into the hot tub when not
in use. Please follow the instructions for using the hot tub and caring for the hot tub and the thermal cover.
Note: The hot tub cover is not designed to support weight. Nor is it an approved safety device that might be
substitute for fencing around the bathing area. In order to protect the thermal cover and maintain safety, do
not sit, stand or lie on the cover. Do not put any objects on it.
Caring for the hot tub thermal cover and maintenance instructions
Proper care for the cover is important: clean and tend it as necessary. Tend the surface in an appropriate
way. If you use any common chemical detergent for the maintenance and cleaning, first make sure that
the detergent does not damage the tended surface. We advise you make a cleaning test on a hidden spot.
1.Improper maintenance of hot tub water quality may affect the service life of the hot tub cover. Take
consistent care of the hot tub water quality.
2.Vent the hot tub for several hours periodically by opening the thermal cover: this will prevent adverse
effects on the thermal cover. We also advise you remove the thermal cover off the hot tub several times
a year to allow it to dry thoroughly.
3.We advise you adhere to the above advice; no claims shall be accepted as justified if you fail to adhere to
these rules.
15. Winter and summer use
Shutting down the hot tub in winter - procedure recommended by the supplier. When shutting down the hot
tub for winter, it is absolutely imperative that all water is drained from the hot tub and removed from all
the equipment (piping, pumps, etc.). We advise you take advantage of our professional services for these
jobs. If you choose to take advantage of our professional services, please order them well in advance. If you
shut down the hot tub for winter by yourself, always do so at ambient temperatures above freezing point. If
the hot tub is being shut down for winter at temperatures below freezing point, the shutting down may turn
out to be very difficult.
36
EN
Winter season - operating the hot tub, year-round operation
If you decide to operate the hot tub in any mode in winter, please follow the advice below. However, winter
POOL EQUIPMENT
operation is limited by ambient temperatures:
KLIN GOTHIC ITC DEMI-13,3 b
a) temperatures do not drop below -5°C
b) temperatures drop below -5°C
a) If the ambient temperature does not drop below -5°C, you can follow the Installation and User Manual
for the hot tub, that is, use the automatic mode. The automatic mode makes sure the circulation pump and
zlatá switch
PANTONE
U
the electrical heater
on (when871
temperatures
drop below +5°C) until the water in the tub reaches 10°C,
PANTONE
U off automatically; the cycle is repeated when the temperature
when both thečerná
pump and
the heater426
switch
drops again. However, this mode of operation imperatively requires absolutely clean filter cartridges; we
advise you remove one of the filter cartridges. Should the filter cartridges be clogged beyond a certain limit,
the water flow through the circulation pump would decrease or stop, and the hot tub control unit would
interpret the low or zero flow by automatically switching off both the circulation pump and the heater. If that
happens, there is a risk of total freezing of water inside the equipment, which may result in serious damage
to the entire hot tub equipment. Therefore, we advise you check the hot tub functioning on a daily basis to
prevent damage to your hot tub. During the check, refill the water from time to time as needed. The water
level may decrease due to natural water evaporation. This mode of operating the hot tub is not recommended
by the supplier.
b) If the ambient temperature drops below -5°C, the water temperature inside the hot tub has to be kept at
20°C. Both the filter cartridges can be in operation in this mode as long as they are checked for cleanness
on a daily basis. Should the filter cartridges be clogged beyond a certain limit, the water flow through
the circulation pump would decrease or stop, and the hot tub control unit would interpret the low or zero
flow by automatically switching off both the circulation pump and the heater. If that happens, there is
a risk of total freezing of water inside the equipment, which may result in serious damage to the entire
hot tub equipment. Also, check the water level in the hot tub on a daily basis: the water level must not
decrease below the control sensor. If the water level decreases below the sensor, the control unit disengages
the circulation pump and thus also the electrical heater, meaning the water could freeze in the equipment,
which may seriously damage the hot tub. Therefore, we advise you check the hot tub functioning on a daily
basis to prevent damage to your hot tub. During the check, refill the water from time to time as needed.
The water level may decrease due to natural evaporation.
If the above is not respected and the hot tub gets damaged, such damage cannot be claimed under
warranty.
Summer season
Do not expose the hot tub to the direct effects of solar radiation; do not use inappropriate detergents for
maintenance. Prevent direct contact of the hot tub frame with chemicals and scratching of the surface with
sharp objects. Ensure the safety of children with adult supervision. The accessories may only be operated by
instructed and fit persons over 18 years of age, who may also handle the chemicals, which have to be put out
of reach of children.
37
EN
16. Troubleshooting
POOL EQUIPMENT
KLIN GOTHIC ITC DEMI-13,3 b
Problem
Turbid water
zlatá
černá
Likely causes
Solution
Dirty filters
Neglected hygiene
Dispersed particles / organic substances
Water used for too long
PANTONE 871 U
Too many organic
in the water.
PANTONE
426substances
U
Clean the filters.
Treat the spa with a disinfectant.
Add disinfectant.
Adjust the pH and/or alkalinity as recommended.
Turn on the massage pumps and clean the filters.
Drain the spa and refill it.
Neglected hygiene.
pH too low.
Treat the spa with a disinfectant.
Add disinfectant.
Adjust the pH, then refill the spa.
Chlorine odour
Too much free chlorine.
pH too low.
Replace 1/3 of the spa water.
Adjust the pH as recommended.
Musty odour
Bacteria or algae propagating.
Treat the spa with a disinfectant.
If the problem is visible or lasting, drain the spa,
clean it and refill it.
Organic sediment/circle
of scum around the spa
Deposition of oils and dirt.
Wipe the spa with a clean cloth. If there is too much
scum, drain the spa. Remove the scum with
a detergent and refill the spa. Treat the spa with
a disinfectant and adjust the pH.
Algal growth
pH too high.
Too little disinfectant.
Treat the spa with a disinfectant and keep
its concentration.
Reduced transparency
pH too low.
Too little disinfectant.
Adjust the pH.
Treat the spa with a disinfectant and keep
its concentration.
Limescale
Too much calcium in the water;
too much total alkalinity and pH too high.
If scale needs removing, drain the spa, remove
the scale, refill the spa
and balance the water composition.
Hot tub does not work
as a whole
Water level too low.
Power supply failure.
Heater off.
Add water. Check the power supply. Restart the
heater. Disconnect the power supply for at least
30 seconds for the security thermostat to restart.
If reset is impossible, check the filters for clogging.
If the hot tub keeps switching off, call maintenance.
The hot tub does not
warm up and the light
is on (readiness and
power indicators blinking).
Water level too low.
Security thermostat off.
Integrated pressure switch interrupted.
Circulation pump thermal trip off.
Dirty filters.
Check the filters. The integrated pressure switch
restarts when water flow through the heater is
restored. Call maintenance if the heater switches
off too often. Checks the filters and piping leaks.
Disconnect the hot tub from the power supply and
allow the circulation pump to cool down.
The circulation pump thermal trip restarts when
the pump cools down and the power supply is
reactivated.
Call maintenance if the circulation pump
thermal trip switches off too often.
Reduced pump performance.
Water level too low.
Dirty filters.
Air controls shut.
Add water.
Clean the filters.
Open the air controller.
Light not on.
Faulty wiring or light assembly.
Call maintenance.
Water odour
38
EN
17. Safety instructions
Preventing risk to children
1.To reduce the risk of children getting injured, do not allow children to use this hot tub without continuous
close supervision.
2.To reduce the risk of children getting injured, lower temperatures are recommended for younger children.
Before allowing children to enter the hot tub, check the water temperature with your hands and make sure
it is suitable for children.
zlatá
PANTONE 871 U
3.Remember that wet surfaces may be slippery. Remind children to be careful when entering and leaving the
černá
PANTONE 426 U
hot tub.
4.Do not allow children to step on the hot tub thermal cover.
POOL EQUIPMENT
KLIN GOTHIC ITC DEMI-13,3 b
Preventing risk to adults
1.To reduce the risk of adults getting injured, do not remove or lose any of the suction fittings. Never operate
the hot tub if any of the suction fittings are damaged or missing.
2.Remember that wet surfaces may be extremely slippery. Be aware of the danger of slipping and falling
when entering or leaving the hot tub.
3.For medical reasons, people with infectious diseases are not allowed to use the hot tub.
4.Do not bring loose clothing or pendant jewels close to the rotating parts of the hot tub (rotary massage
jets).
5.The use of alcohol, drugs, or medication before or during hot tub use may lead to sudden unconsciousness
with the possibility of drowning. People who use medication have to consult a physician before using
the hot tub; some drugs may cause drowsiness in the user, while others may affect the heart, blood pressure
and circulation.
6.Pregnant women have to consult a physician before using the hot tub.
Preventing the risk of electrocution
THE DEVICE MAY ONLY BE CONNECTED BYA PERSON WITH PROFESSIONAL ELECTRICAL
QUALIFICATIONS IN COMPLIANCE WITH DECREE NO. 50/1978 COLL.
1.Test the functionality of the earth-leakage trip before use. Press the TEST button. The device must trip.
Restore the power supply by switching it on again. The hot tub must always be connected via an earthleakage trip with a residual current of 0.03 A.
2.Do not permit any electrical appliances such as lights, telephones, radios or television sets, within 1.5 m
of the hot tub. Failure to observe the safe distance may lead to death or serious injury by electric current,
should the appliance fall into the hot tub.
3.Install the hot tub in a way that the drain is as far from the electrical box and all the electrical components
as possible.
4.Before servicing any of the electrical components, disconnect the hot tub from the power supply.
Tip: Your hot tub is equipped with two pumps: a single-speed one and a two-speed one, which make it
possible to operate each half of the jet system separately or both at the same time. Do not connect the power
supply to an empty hot tub. Otherwise it may get damaged.
39
EN
Warranty terms and conditions
The warranty conditions are governed by your supplier‘s trade and warranty terms and conditions.
POOL EQUIPMENT
KLIN GOTHIC ITC DEMI-13,3 b
Safe product disposal at the end of its service life
When the product comes to the end of its service life, make sure it is disposed of ecologically
by a professional company.
Claims and servicing
zlatá by applicable
PANTONEconsumer
871 U protection laws. If you find an irreparable defect, please contact
Claims are governed
černá
your supplier in
writing. PANTONE 426 U
Date: ................................................................
Supplier
40
POOL EQUIPMENT
KLIN GOTHIC ITC DEMI-13,3 b
zlatá
černá
PANTONE 871 U
PANTONE 426 U
POOL EQUIPMENT
KLIN GOTHIC ITC DEMI-13,3 b
zlatá
černá
PANTONE 871 U
PANTONE 426 U


