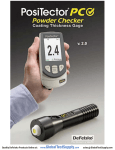
Download PortableTesters Catalog 2014
Transcript
DAKOTA ULTRASONICS Power, Performance & Perfection! Perfection! The CMX Series Material & Coating Thickness Gauges ELECTRONIC PLATFORM (What’s inside the box): u Powered by a 100MHz DSP platform using FPGA technology. u Two Channels - Dual pulsers and receivers. u Up to 140Hz pulse repetition rate. u Display update rate of 25 times per second. u Adjustable gain settings - vlow, low, med, hi, vhi. u Automatic gain control (AGC). u Time corrected gain (TCG). u Massive data storage (32 Megabit of non-volatile RAM). FEATURES: u Measurement modes: Pulse-Echo, Pulse-Echo w/Coating, Pulse-Echo w/Temperature Compensation, Echo-Echo, Echo-Echo Verify & Coating Only. u Automatic: probe zero, probe recognition, and temperature compensation. u Stores up to 64 custom setups for specific applications. u High Speed Scan of up to 50 readings per second. u Audible/visual alarm with hi and lo limit settings. u Built-in differential mode for QC inspections. u Time based B-Scan feature for cross section material scans. u Data storage formats: Alpha numeric grid and sequential w/auto identifier. u u S O U N D Windows PC software included. 2 year limited warranty. S O L U T I O N S CMX/CMX DL SPECIFICATIONS Physical Power Source Size: Width (2.5in/63.5 mm) Height (6.5 in/165 mm) Depth (1.24 in/31.5 mm) Weight: 13.5 ounces (with batteries). Keyboard: Membrane switch pad with twelve tactile keys. Operating Temperature: 14 to 140F (-10C to 60C) Case: Extruded aluminum body with nickel-plated aluminum end caps (gasket sealed). Data Output:: Bi-directional RS232 serial port. Windows® PC interface software. Display: 1/8in VGA grayscale display (240 x 160 pixels). Viewable area 2.4 x 1.8in (62 x 45.7mm). EL backlit (on/off/auto). Ultrasonic Specifications Measurement Modes: Coating Off: Pulse-Echo (P-E) Coating On: Pulse-Echo Coating (PECT) Temp Comp: Pulse-Echo Temperature Compensation (PETP) Thru-Paint: Echo-Echo (E-E) Thru-Paint Verify: Echo-Echo Verify (E-EV) Coating Only: Coating (CT) Pulser: Dual square wave pulsers. Receiver: Dual receivers - manual or AGC gain control with 110dB range (limited). Timing: Precision 25 MHz TCXO with single shot 100 MHz 8 bit ultra low power digitizer. Display: Three 1.5V alkaline or 1.2V NiCad AA cells. Typically operates for 150 hours on alkaline and 100 hours on NiCad (charger not included.) Auto power off if idle 5 min. Battery status icon. Measuring Range: Pulse-Echo Mode (P-E) - (Pit & Flaw Detection) measures from 0.025 to 19.999 inches (0.63 to 508 millimeters). Pulse-Echo Coating Mode (PECT) - (Material, Coating, Pit & Flaw Detection): Material: 0.025 to 19.999 inches (0.63 to 508 millimeters). Coating: 0.001 to 0.100 inches (0.01 to 2.54 millimeters). Pulse-Echo Temp Comp Mode (PETP) - (Pit & Flaw Detection) Auto temperature compensation measures from 0.025 to 19.999 inches (0.63 to 508 millimeters). Echo-Echo Mode (E-E) - (Thru Paint & Coatings) measures from 0.100 to 4.0 inches (2.54 to 102 millimeters). Range will vary +/depending on the coating. Coating Only Mode (CT) (Coating Thickness) Measures from 0.0005 to 0.100 inches (0.0127 to 2.54 millimeters). Range will vary +/- depending on the coating. Resolution: +/- 0.001 inches (0.01 mm) Velocity Range: 0.0492 to 0.5510 in/ms 1250 to 13995 meters/sec Single and Two point calibration option for material & coating, or selection of basic material types. English & Metric Distributed by: S O N A T E S T N D E Data Logger (CMX DL) Log Formats: Grid (alpha numeric) Sequential (auto identifier) Cell contents: Graphics On: 16,000 readings ,BScan image, & gauge settings for every reading. Graphics Off: 210,000 readings (coating, material, min & max) OBSTRUCT to indicate inaccessible locations. Memory: 32 megabit non-volatile ram. Transducer Transducer Types: Dual Element (1 to 10 MHz). Locking quick disconnect “00” LEMO connectors. Standard 4 foot cable. Custom transducers and cable lengths available for special applications. Certification Factory calibration traceable to national standards. Warranty Units: A Large Digits - Standard thickness view. Digit Height: 0.700 inches (17.78 millimeters). B-Scan - Time based cross section view. Display speed of 15 secs per screen. Scan Bar Thickness - 6 readings per second. Viewable in B-Scan and Large Digit views. Repeatability Bar Graph - Bar graph indicates stability of reading. Feature Status Bar - Indicates features currently active. 2 year limited G R O U P C O M P A N Y Please feel free to call for more information DAKOTA ULTRASONICS 1500 Green Hills Road, #107 Scotts Valley, CA 95066 Ph (831) 431-9722 Fax (831) 431-9723 Website: www.dakotaultrasonics.com Email: info@dakotaultrasonics.com Vibration Pens : PVM 100 and PVM 200 Extremely reliable and portable, these are low cost instruments specifically designed for on-site maintenance in the plant or workshop. PVM 100 measures vibration level by Velocity RMS. PVM 200 measures vibration level by Velocity RMS, Displacement Peak-Peak & Acceleration Peak. PVM 100 and PVM 200 feature one-button operation, holding function and automatic power-off. Both PVM 100 and PVM 200 units have a remote switch and a magnetic base to avoid the handheld problem and thereby provide reliable and consistent data. Technical specs: Model Parameter PVM 100 PVM 200 Velocity RMS (mm/s) Acceleration, Velocity, Displacement PVM 100/200 0.2 to 199.9 mm/s Acceleration:0.2 to 199.9m/s2 (peak) Testing Velocity: Velocity: 0.1mm/s to199.9 mm/s(RMS) range 0.1mm/s ~ 199.9mm/s Displacement: 0.001mm to1.999 mm (peak-peak) Frequency range Accuracy Acceleration: 10Hz to kHz Velocity:10Hz to 1kHz Displacement: 10Hz to 1000Hz ±5% ±2 4 Display Velocity: 10Hz to 1kHz digit ±5% ±2 LCD; interval refresh about 0.5 4 digit LCD second Power supply ½ AA, 3.6V Battery >100 hours working capacity continuously Operating ½ AA, 3.6V >100 hours working continuously 0⁰C to 50℃ 0⁰C to 50⁰C <85% <85% Dimension 160mm×25mm × 17mm 160mm × 25mm × 17mm Dimension Aluminum case Weight 120g Temperature Environment humidity (with battery) Aluminum case 120g (with battery) Standard Delivery ●Main unit with pouch 1 ●Extra-long needle probe 1 ●Remote control 1 ●Magnetic base 1 1 1 ●Battery ●Instruction manual UT-310 Thru-Paint Ultrasonic Thickness Gauge Features: -Pocket-size, easy to operate. - Three measurement modes: pulse-echo (P-E), echo-echo (E-E) and scan - Through-coating thickness measurement using (E-E) - Measuring Range: E-E: 0.12 to 1 inch (3 to 25mm) P-E: 0 . 0 2 5 t o 1 5 . 7 5 i n c h e s ( 0.65 to 400 mm) Range depends on probe/material combination. - Automatic probe zero - Automatic probe identification or recognition - Memory: 5,000 readings with location number - Data output: USB to PC - Up to nine material velocities may be stored for selection, or a new velocity manual inputted Specifications: P-E -Standard measurement: for normal thickness measurement. -Minimum measurement: for curved surface -Differential measurement: displays the difference from the actual thickness -Measurement or from a user entered reference value Measurement mode -Average measurement : 2-9 point selectable -Limit measurement: Min. Max setting and alarm E-E The metal wall thickness is accurately and quickly measured through surface coating Scan Thickness value at 10 measurements per second while also display actual thickness (Ideal for high temp. thickness readings) Probe identify Automatic Probe zero Automatic at power up and continuously during the measurement Gain adjust Automatic gain adjustment Manual gain adjustment: low, standard and high Memory 5,000 groups (reading plus location number) Output USB to PC Measuring Range E-E : 3 to 25mm P-E: 0.65 to 400mm (range depends on probe/material combination) Resolution 0.01mm (0.001 in) for thickness up to 99.99mm (3.93 in) 0.1mm ( 0.01 in) for thickness above 99.99mm (3.93 in) Information Display Measurement reading, Probe type, Velocity, Measurement mode, Measurement symbol, Battery-life indication Velocity range Nine material velocities are stored for selection; alternatively, manually enter the new velocity (1000m/s to 9999m/s) Vel. measurement Simply calibrate when a material’s velocity is unknown Display 128 x 64 graphics LCD monochrome Battery Type 2 AAA Alkaline Battery life Up to 50 hours (without using backlight) Shut off Selectable: auto, 2 min., 5 min. or never Work. Temperature -20℃ to +50℃ Unit mm or inch Dimensions 115mm x 64mm x 27mm Weight 220g Standard Delivery: - Main unit - Standard 5-MHz transducer (D5301) - Built-in calibration block (4mm thick) - Couplant (4 oz) - Two AAA batteries - Calibration certificate - Operation manual - Carrying case Optional transducers: D7004 10.0MHz 0.65 to 20mm range (P-E mode) <60⁰ C D7006 7.5MHz 0.65 to 50mm range (P-E mode) <60⁰ C D2012 2.0 MHz 2.0 to 400mm range (P-E mode) <60⁰ C D5113 5.0MHz 2.0 to 200mm range (P-E mode) <350⁰ C D5008 5.0MHz <60⁰ C Standard 0.8 to 400mm range (P-E mode) UT-210 DIGITAL ULTRASONIC THICKNESS GAUGE Brief This state of the art, digital Ultrasonic Thickness Tester UT-210 is a menu-driven, fully functional unit offering everything from the basic measurement to extended memory (5000 readings storage) and USB output capabilities. This dynamic gauge is designed to measure the thickness of metallic and non-metallic materials such as steel, aluminum, titanium, plastics, ceramics, glass and any other good ultrasonic wave conductor as long as it has parallel top and bottom surfaces. The UT-210 is a quite versatile model which can be easily equipped with any of the low & high frequency probes as well as a high temperature probe. Technical Data: Display type: 4-digit LCD Display resolution: 0.001 inches or 0.01mm Measurement range: 0.040-15.75 inches (1 to 400mm) in steel w/standard probe Memory capacity: 5000 readings Automatic recognition of probes with different frequencies Automatic zeroing of the unit Ten measurements per second in the scan mode Enlarged LCD (128 x 64 mm) with back light Sound velocity range: 3280-32805 ft/s (1000-9999 m/s) Operating temperature: 32°F-122°F (0°C-50°C) Output: USB communication cable with software Power supply: two AAA alkaline batteries Battery life: Approx. 250 hours Dimensions: 4-5/8 x 2-3/8 x 1-1/8 inch Weight: 7.7 ounces with batteries Standard package: UT-210 unit, standard 5MHz probe D5008, built-in calibration block, coupling agent, two AAA batteries, operation manual, software, cable and carrying case. Optional accessories: Small diameter probe D7006 (7.5MHz), High frequency probe D7004 (10MHz), Low frequency probe D2012 (2.0MHz), High temperature probe D5113 (5MHz) Home About Us Products Services Contact Us Payment Info Terms & Conditions UT-110 Digital Ultrasonic Thickness Gauge The UT-110 Ultrasonic Thickness Gauge is our new and improved basic readout unit with automatic probe recognition, automatic zeroing and a larger, more easily read LCD. This instrument can measure with very high resolution (0.01 mm or 0.001 inches) the thickness of metallic and non-metallic materials such as steel, aluminum, titanium, plastics, ceramics, glass and any other good ultrasonic wave conductor. The UT-110 accurately displays readings in either inches or millimeters. Features: Accurately displays readings in either inches or millimeters Simple calibration to either a known thickness or a sound velocity Technical Specifications: Display type: 4-digit LCD Display resolution: 0.001 inches or 0.01mm Measuring range: 0.04 to 1 5.75 inches (1 to 400mm) in steel Automatic recognition of probes with different frequencies Automatic zeroing of the unit Enlarged LCD (128 x 64 mm) with back light Sound velocity range: 3280-32800 ft/s (1000-9999 m/s) Operating temperature: 14°F to122°F (-10°C to 50°C) Power supply: two AAA batteries Battery life: approx. 250 hours with one battery set Dimensions: 4-5/8 x 2-3/8 x 1-1/8 inches Weight: 7.7 ounces with batteries Standard Package: UT-110 processor, Standard 5MHz probe D5008 Built-in calibration block Two AAA batteries Coupling agent Operation manual and calibration certificate Carrying case Standard & Optional Probes: Probe Part # Frequency (MHz) Measuring Range Application D5008 Standard 5 MHz 1.0 to 400 mm Standard D7006 Optional 7.5 MHz 0.65 to 50 mm Thin materials D2012 Optional 2 MHz 2.0 to 400 mm Coarse-grained materials and rough surfaces D5113 Optional 5 MHz 2.0 to 200 mm High temperature environment up to 350° C UT-110 Digital Ultrasonic Thickness Gauge | UT-210 Ultrasonic Thickness Gauge | MMX-6 Multi-Mode Ultrasonic Thickness Gauge | CMX Material & Coating Thickness Gauge | MVX A/B Scan Ultrasonic Thickness Gauge | PX-7 Precision Thickness Gauge Copyright 2011 by PortableTesters.com LLC 412.683.2515 | info@portabletesters.com http://www.portabletesters.com/portabletesters/Products/UltrasonicThicknessGauges/UT110DigitalUltrasonicThicknessGauge.aspx[4/23/2011 6:38:10 PM] Home About Us Products Services Contact Us Payment Info TR200 Surface Roughness Tester Features Measures metal and non-metal parts Menu operation, digital display, multi-parameters Graphical display on large LCD Stylus position indicator Automatic cut-off RS 232 interface to PC or printer Technical Specifications Roughness parameters Assessed profiles Ra, Rz, Ry, Rq (RMS), Rt, Rp, Rmax, Rm, R3z, S, Sm, Sk, tp Primary profile (P), Roughness profile (R), tp curve (material ratio Mr) Profile recording magnification Vv: 200x to 20000x Standards Measuring mode Vh: 20x, 50 x, 200 x Conforms to ISO / DIN /JIS / ANSI Metric (μm) and English (μ inch) Display resolution 0.001 μm or 0.04 μ inch Accuracy Error less than 10% of reading Display Dimensions of LCD Display features LCD 128 x 64 dot-matrix with backlight 50 x 30mm screen Stylus position indicator Battery level indicator Direct display of parameters and profiles Direct printing LCD brightness adjustment Auto-off after 5 minutes with auto-store Calibration through internal software for each cut-off setting Display languages Data output English, German, French, Italian, Spanish, Dutch RS232; direct to printer TA220 or PC (requires optional software) Range Ra, Rq: 0.01 to 40 μm Rz, Ry, Rp, Rt, R3z: 0.02 to 160 μm Sm, S: 2 to 4000 μm tp: 1 to 100% (%Ry) Cut-off lengths 0.25mm / 0.8mm / 2.5mm / auto Evaluation length Ln 1 to 5 cut-off lengths (selectable) Tracing length Lt Digital filter Stylus Measurement of a bore Power Battery capacity Charger Working temperature Dimensions Weight (1 to 5 cut-off lengths) + (2 cut-off lengths) RC, PC-RC GAUSSIAN, D-P Standard model TS100, inductive; diamond tip with a 5μm radius Minimum diam. of 6.0mm, measure to depth of 15mm (TS100) Li-Ion battery, rechargeable 1000mAh (>3000measurements) 220V, 50Hz and 120V, 60Hz 5⁰ to 40⁰C 141mm x 56mm x 48mm 440g Standard Package Main processing unit TS100 stylus Adjustable leveler and protection nose Charger: 220V, 50Hz or 120V, 60Hz RS232 connection cable Screwdriver Ra roughness standard Dataview software Operating manual Calibration certificate Carrying case Optional Accessories Special styluses (see following table) Operating stand TA610 Connection board for attachment to platform Extending rod for stylus Dataview software TA220 mini -printer Precision Reference Standard Certified ( NIST traceable) Optional Styluses for TR200 Stylus Characteristic TS100 Standard For flat surfaces TS110 Optional For curved surfaces such as convex and concave TS120 Optional For roughness measurement in bores TS130 Optional For roughness measurement in grooves TR100 SURFACE ROUGHNESS TESTER Brief: The TR1OO surface roughness tester is designed with an advanced microprocessor, performs data acquisition, data processing and display of all test measurements. This instrument features an integrated processor, display and sensor, and allows for user selectable roughness units in Ra and Rz. In addition to measuring the surface roughness of flat, round and sloping planes, and TR1OO measures grooves and depressions up to 3.1 x 1 .2 inches (80 x 30 mm). Features: • • • • • • Handheld, Electronic, Digital Ra and Rz parameters standard available at the push of a button Adjustable cut-off lengths according to DIN / ISO standard Measurements in both English and Metric unit mode Calibration fully adjustable at the key-board "Beep" sound after each measurement to inform the user that the measuring procedure is complete Technical Specification • • • • • • • • • • • • Measures flat, outer-cylinder and sloping surfaces Measures metal and non-metal processed parts Roughness parameters: Ra, Rz Measuring accuracy: < 10% of reading Measuring range: Ra: O.O5um to 10.Oum; Rz: O.1um- 5Oum Cut-off length: O.OO9 in, O.O3 in, O.O9 in ( O.25mm, O.8 mm, 2.5mm) Tracing length: O.23 in (6mm) Measuring length: O.O6 in, O.16 in, O.2 in (1.25mm, 4.Omm, 5.Omm) Dimensions: 4.9 x 2.8 x 1 .O in (125 x 73 x 26mm) Power supply: 3.6V (Two NiMH batteries) Working temperature: 32⁰F to 1O40⁰ F (0⁰ to 4O⁰C) Weight: O.4lb (2OOg) Standard Package • • • • Processor with integrated pick-up Roughness standard Battery charger Carrying case DAKOTA ULTRASONICS The PX Series THE PX SERIES of Precision Thickness Gauges utilize state-of -the-art digital technology to produce fast and accurate readings. The gauges are designed with the user in mind. They are PACKAGED in an all aluminum sealed case making it resistant to the working environment. The gauges are simple to operate and are loaded with the FEATURES you have requested: Alarm Mode, Differential Mode, Internal Data-Logging and RS-232 data output port to interface with a computer or other data acquisition system. The gauges have a MEASURING RANGE from 0.0060 to 1.0000 inch, (0.15 to 25.40 mm). Using a single element delay tip transducer, the gauges will measure thin TO-E ECHO MODE and materials in ECHO-T automatically switch to INTERFACE ECHO MODE when measuring thicker materials and plastics. THE PX-7 7’’S echo-tto-e echo mode offers the user the ability to measure the thickness of materials without removing the paint or the coating. TECHNOLOGY WITH A PURPOSE THE PX SERIES PRECISION THICKNESS GAUGES DAKOTA ULTRASONICS PX Series has arrived. The variety of features offered in 7 and PX-7 7DL allow the user to select a quality tool that will meet or exceed their the PX-7 specific application needs. In the Echo-to-Echo Mode you have the ability to measure the thickness of materials without removing the paint or the coating. Our 5 year limited warranty indicates how we feel about the reliability and durability of the PX S ERIES. S P E C I F I C A T I O N S Physical Measuring Power Source Weight: 10 ounces (with batteries). Two 1.5V alkaline or 1.2V NiCad AA cells. Size: 2.5 W x 4.5 H x 1.24 D inches (63.5 W x 114.3 H x 31.5 D mm). Typically operates for 150 hours with alkaline and 100 hours with NiCad. Operating Temperature: -20 to 120 F (-30 to 50 C). Display flashes when battery is low. Unit turns off automatically when battery is too low to operate reliably. Case: Extruded aluminum body with nickel-plated aluminum end caps. Sealed connectors and end caps. Keypad Sealed membrane that is resistant to both water and petroleum products. 9 tactile-feedback keys. Transducer Single element with delay tip. 10 to 22 MHz frequency range. Locking quick disconnect LEMO connector. 4 foot cable. Custom transducers available for special applications. Warranty 5 year limited. Display Range: Measures from 0.0060 to 1.0000 inch (0.15 to 25.40 millimeters). Switch to select English or Metric units. Resolution: 0.0001 inch (0.001 millimeter) Velocity Range: 0.0492 to .3937 in./µs. (1250 to 10,000 meters/second). Measuring Modes Multi-function 4.5 digit liquid crystal display with 0.500 inch numerals, backlit for use in poor light conditions. Backlight is selectable on / off / auto (illuminates only when taking a measurement). Measurements displayed in inches, inches/microsecond, millimeters, and meters/second. Bar graph indicates stability of reading. Certification Factory calibration traceable to national standards. Internal Data Logger (PX-7 7DL only) Automatic Data Logging System 1000 reading capacity, (10 files of 100 readings each). OBST indicates no reading. Complete with data acquisition software and cable. Distributed by: Interface to Echo, Echo-tto-E Echo, (through paint), Plastics, and Auto-S Switchable. Four readings per second for single point measurements or 8 per second in Scan Mode— captures the minimum thickness. Single point calibration. Features Differential Mode: Enter acceptable thickness value, unit will display +/- the difference from the value entered. Alarm Mode: Enter a minimum acceptable thickness value. If measurement falls outside Hi/Lo limits, red LED will illuminate and sounds beeper. If measurement is between Hi/Lo limits, green LED will illuminate. Data Output:: RS-232 output sends data to a serial printer, a computer or other external storage device. ULTRASO TA S NIC DAKO Please feel free to call for more information SOUND SOLUTIONS DAKOTA ULTRASONICS 300 El Pueblo Road, #100 Scotts Valley, CA 95066 Ph (831) 431-9722 Fax (831) 431-9723 Website: www.dakotaultrasonics.com Email: info@dakotaultrasonics.com Coating Thickness Gages for ALL Metal Substrates WiFi The Measure of Quality Gage Selection... All Gages Feature... Select Substrate Simple F — for ferrous metals (steel and cast iron) N — for non-ferrous metals (aluminum, copper, etc.) FN — for all metal substrates—Gage automatically recognizes the substrate and takes a measurement ■ ■ ■ ■ Ready to measure—no adjustment required for most applications Enhanced one-handed menu navigation Flashing display—ideal in a noisy environment RESET feature instantly restores factory settings Select Standard or Advanced Features Standard Models Durable ■ ■ ■ ■ Solvent, acid, oil, water and dust resistant—weatherproof Wear-resistant probe tip Shock-absorbing, protective rubber holster with belt clip Two year warranty on gage body AND probe ■ ■ Accurate ■ ■ ■ ■ Advanced Models Certificate of Calibration showing traceability to NIST included Built-in temperature compensation ensures measurement accuracy Hi-RES mode increases displayed resolution for use on applications that require greater precision Conforms to national and international standards including ISO and ASTM Versatile ■ ■ ■ ■ ■ ■ ■ PosiTector body universally accepts all PosiTector 6000, 200, SPG, DPM and UTG probes easily converting from a coating thickness gage to a surface profile gage, dew point meter or ultrasonic wall thickness gage Multiple calibration adjustment options including 1 point, 2 point, known thickness, average zero Selectable display languages Hi Contrast backlit display for bright or dark environments Flip Display enables right-side-up viewing Extended cables available (up to 75 m/250 ft) for remote measuring Uses alkaline or rechargeable batteries (built-in charger) Powerful ■ ■ ■ ■ ■ ■ ■ ■ ■ Includes ALL features as shown on left plus... Monochrome display with transflective technology enhances sunlight readability Storage of 250 readings—stored readings can be viewed or downloaded Continually displays/updates average, standard deviation, min/max thickness and number of readings while measuring Screen Capture—save screen images for record keeping and review HiLo alarm audibly and visibly alerts when measurements exceed user-specified limits FAST mode—faster measurement speed for quick inspection USB port for fast, simple connection to a PC and to supply continuous power. USB cable included PosiSoft USB Drive—stored readings and graphs can be accessed using universal PC/Mac web browsers or file explorers. No software required Every stored measurement is date and time stamped Software updates via internet keep your gage current Connects to PosiSoft.net (see far right panel) ■ ■ ■ ■ ■ ■ ■ ■ ■ ■ Includes ALL features as shown on left plus... Hi Contrast reversible color LCD Storage of 100,000 readings in up to 1,000 batches and sub-batches Onscreen help, real time graphing, picture prompting and more Batch annotation—add notes and change batch names with onscreen QWERTY keyboard WiFi technology wirelessly synchronizes with PosiSoft.net, downloads software updates and connects with mobile devices for expanded functionality Data transfer via USB to a PC or via Wireless Technology to a PC or printer Scan mode—take continuous readings without lifting the probe Multiple stored calibration adjustments for measuring on a variety of substrate conditions SSPC-PA2 feature determines if film thickness over a large area conforms to user-specified min/max levels PSPC 90/10 feature determines if a coating system complies with an IMO performance standard for protective coatings Select from a variety of measurement ranges and probe styles (see back page ordering guide) Heavy-duty, gold-plated locking connector for industrial environments Separate Probe Style Removable Probes can be detached and replaced with any one of our wide variety of probes including separate probes and microprobes Probes available for a variety of applications Built-in Probe Style FKS For measuring paint, powder, etc. on all metals... ...and for measuring galvanizing, plating, anodizing and more. 90 ˚ 0˚ 45 ˚ Regular ® PosiSoft ... FREE SOLUTIONS for Rugged Features... viewing, analyzing and reporting data: Sealed USB Port for communicating with a PC or Mac PosiSoft USB Drive Connect to a PC/Mac using the supplied USB cable to access and print stored readings, graphs, photos, notes and screen captures. No software or internet connection required. Water and dust resistant PosiSoft.net A web-based application offering secure centralized management of PosiTector readings. Access your data from any webconnected device. Hi resolution color LCD SY N C PosiSoft.net PosiSoft Software Newly updated version 3.0 desktop software for PC or Mac. Available as a free download. Scratch/solvent/impact resistant lens Synchronize, Share, Report, Export, Archive PosiSoft Mobile Access readings, graphs, capture photos and update annotations using WiFi enabled devices such as tablets, smart phones and computers. (Advanced models only ) Multi-function navigation button Solvent, acid, oil resistant, high grade, industrial strength housing Advanced Model shown in Memory Mode WiFi Quality high-flex cable and strain relief PosiTector bodies accept all 6000, 200, SPG, DPM and UTG probes Stainless steel probe with knurled finger grip Strong wear-resistant ruby-tipped probe All Regular Separate Probes are suitable for underwater use Xtremee Prob ™ Standard model shown in Statistics Mode with shock-absorbing, protective rubber holster FHXS Probe with Alumina wear face and braided cable for hot or rough surfaces Flip Display enables right-side-up viewing Microprobe series for small parts and hard-to-reach areas Our most popular Removable Built-in and Regular Separate probe models 90˚ Regular probe for tight spots Ideal for anodized aluminum Removable Built-in and Separate probes for thick protective coatings; epoxy, rubber, intumescent fireproofing and more Microprobes – Our smallest probes for small parts or hard-to-reach areas O RDERING G UIDE FERROUS PROBES Standard F1 FS1 FRS1 F0S1 F45S1 F90S1 FT1 FTS1 FHXS1* FKS1 FLS1 Advanced F3 FS3 FRS3 F0S3 F45S3 F90S3 FT3 FTS3 FHXS3* FKS3 FLS3 NON-FERROUS PROBES Standard N1 NS1 NRS1 NAS1 N0S1 N45S1 N90S1 Advanced N3 NS3 NRS3 NAS3 N0S3 N45S3 N90S3 COMBINATION PROBES Standard FN1 FNS1 FNRS1 FNTS1 FNGS1** Advanced FN3 FNS3 FNRS3 FNTS3 FNGS3** Range Accuracy † 0–60mils 0–1500μm Ferrous: 0–45mils and 0–1150μm Non-Ferrous: 0–25mils and 0–625μm ±(0.05mil+1%) 0–2mils ±(0.1mil+1%) >2mils NKS1 NKS3 0–400mils 0–10,000μm 0–500mils 0–13mm ±(0.02mil+1%) 0–4mils ±(0.1mil+3%) >4mils ±(0.5mil+1%) 0–100mils ±(0.5mil+3%) >100mils ±(0.1mil+3%) ±(1mil+3%) ±(1μm+1%) 0–50μm ±(2μm+1%) >50μm ±(0.5μm+1%) 0–100μm ±(2μm+3%) >100μm ±(0.01mm+1%) 0–2.5mm ±(2μm+3%) ±(0.02mm+3%) ±(0.01mm+3%) >2.5mm STDS1 STDA1 STDS2 STDA2 Matching DeFelsko Calibration Standards 0–250mils 0–6mm STDP1 STDP7 STDP5 0–1.5inches 0–38mm 0–2.5inches 0–63.5mm ±(0.01in.+3%) ±(0.2mm+3%) STDP8 STDP8 (included) Ferrous probes measure non-magnetic coatings on ferrous metals. Non-Ferrous probes measure non-conductive coatings on non-ferrous metals. *FHXS Xtreme probe with Alumina wear face and braided cable measures non-conductive coatings on steel. Ideal for rough or hot surfaces up to 250˚ C (500˚ F). **FNGS probe measures non-conductive coatings on all metals. † Accuracies are stated as a fixed value plus a percentage of the gage’s actual reading. Probe Details (All probe details can be found online at www.defelsko.com/p6000/probes) REMOVABLE BUILT-IN REGULAR & FTS 90˚ REGULAR F0S & N0S WITH ADAPTER F45S & N45S Quick Release Adapter for 0˚ Probe Side View ALL GAGES COME COMPLETE with precision plastic shim(s), protective rubber holster with belt clip, wrist strap, 3 AAA alkaline batteries, instructions, protective lens shield, convenient carrying case, Long Form Certificate of Calibration traceable to NIST, USB cable, PosiSoft.net account, two (2) year warranty. SIZE: 137 x 61 x 28 mm (5.4" x 2.4" x 1.1" ) Bluetooth Printer receives data from Advanced models AC Power Kit for continuous operation or battery charging— works in any country Coating Thickness Standards to fulfill both ISO and in-house quality control requirements WEIGHT: 140 g (4.9 oz.) without batteries Conforms to ISO 2178/2360/2808, ISO 19840, ASTM B499/D1186/ D1400/D7091/E376/G12, BS3900-C5, SSPC-PA2 and others The Measure of Quality Options Rechargeable Batteries—a set of eneloop NiMH AAA batteries Extended Cables for underwater or remote measuring. Specify length when ordering. D E F E L S K O C O R P O R AT I O N 802 Proctor Ave., Ogdensburg, New York 13669-2205 USA Toll Free 1-800-448-3835 Tel: +1-315-393-4450 Fax: +1-315-393-8471 techsale@defelsko.com www.defelsko.com © DeFelsko Corporation USA 2013. All Rights Reserved. Technical Data subject to change without notice. • Printed in USA • P6000.v.LW/W1308 F90S & N90S Learn more at www.DeFelsko.com/PosiSoft PosiSoft® Solutions Suite of Software The PosiSoft suite of software solutions offers 4 FREE ways to view and report your data, ranging from dedicated desktop software for PC and Mac computers to cloud-based PosiSoft.net. PosiSoft® 3.0 Desktop Software PosiSoft® USB Drive Newly updated version 3.0 desktop software for PC or Mac computers Access your PosiTector as a flash drive n n n n n Import (download) measurement data via USB (all gages) or WiFi (PosiTector Advanced models only) Customize reports by adding pictures, logos, screen captures, notes and more Measurement data is copied (imported) from the instrument to a user selectable location — ideal for storing and sharing data on a network or cloud-drive Create custom layouts using a simple drag and drop Template Design toolbox; save layouts for future use Downloaded data is stored in comma-separated text files which can easily be imported into supporting applications such as documents, spreadsheets and databases n n The Measure of Quality FN 150617 Cal 1 81 6.29 1.21 4.5 9.4 75 76 77 n 5.9 mils 4.7 mils 9.1 mils 11:35:57 11:36:00 11:36:03 1 5.9 mils 2013-05-28 11:31:3879 78 5.9 mils 6.7 mils 11:36:09 2 6.1 mils 11:31:4180 6.2 mils 11:36:11 3 4.8 mils 11:31:4481 5.8 mils 11:36:14 4 8.4 mils 11:31:46 5 6.7 mils B1 Chart 11:31:57 6 5.5 mils 11:32:00 7 8.4 mils 11:32:02 8 9 10 5.9 mils 6.0 mils 5.9 mils 11:32:05 11:32:07 6.8 mils 11:32:12 4.5 mils 11:32:15 13 5.4 mils 11:32:18 14 8.4 mils 11:32:20 15 16 5.8 mils 5.9 mils 5.8 mils 11:32:23 11:32:25 11:32:28 18 5.8 mils 11:32:30 19 6.8 mils 11:32:33 20 21 6.8 mils 8.5 mils 11:36:06 11:32:10 11 12 17 11:32:36 11:32:38 22 8.6 mils 11:32:41 23 4.6 mils 11:32:43 Home n Gage-based software application featured in all PosiTector Advanced instruments. Access readings, graphs, capture photos and update notations using WiFi enabled devices such as tablets, smart phones and computers n 702530 CAL: B1 Readings A cloud-based application offering secure centralized management of PosiTector readings. Access your data from any web-connected device anywhere in the world. n 2013-05-28 11:30:11 Probe S/N: B1 Summary PosiSoft® Mobile Synchronize measurement data when connected via USB, Bluetooth or WiFi wireless technology Generate reports with graphs, annotations and images Share measurement data with authorized users via a secure login from any computer or web-enabled device Export data to popular formats such as XML, .CSV (comma-separated values), and CQATK for further analysis n Securely stores data in the cloud n Synchronize images and batch notes to your PosiTector n Compatible with PosiTector SPG/DPM/6000/200/UTG Standard & Advanced instruments n Internet connection required Created: Gage S/N: Probe Type: View and print readings and graphs using universal PC/Mac web browsers or file explorers Measurement data is stored in commaseparated text files which can easily be imported into supporting applications such as documents, spreadsheets and databases Simple file management - copy and paste HTML reports are data from the PosiTector to a local folder Preformatted stored in the gage. on your computer, network or cloud-drive PosiSoft®.net (formerly PosiTector.net) n B1 Information n n n n n n Browse stored measurement data including notes, images, statistics and charts Update batch names/notes using your mobile device’s keyboard Insert images directly into gage batches using your mobile device’s camera or image library Remotely view the live display of a working PosiTector Email data as PDF reports or .CSV comma-separated text files Accessible from any WiFi enabled computer or smart device using a standard web browser including PC/Mac, Windows Phone/Mobile, Blackberry, Android, Apple iOS and more PosiSoft Mobile Manager is a discovery tool that searches your local area WiFi network for WiFi enabled PosiTector Advanced instruments. n Available for Apple iOS and Android users DeFelsko Corporation 802 Proctor Ave., Ogdensburg, New York 13669-2205 USA Toll Free: 1-800-448-3835 Tel: +1-315-393-4450 Fax: +1-315-393-8471 techsale@defelsko.com www.defelsko.com ©DeFelsko Corporation USA 2013. All Rights Reserved. Technical Data subject to change without notice. Printed in USA. PSoft.v.LW/W1306 Coating Thickness Gages for measuring on Concrete, Wood, Plastic and more... Advanced models measure up to 3 layers with graphics The Measure of Quality Gage Selection... All Gages Feature... Select Standard or Advanced Features Simple Standard Models ■ ■ ■ ■ Ready to measure—no adjustment required to measure most coatings Enhanced one-handed menu navigation Flashing display—ideal in a noisy environment RESET feature instantly restores factory settings ■ ■ ■ Includes ALL features as shown on left plus... Measure the total thickness of a coating system Monochrome display with transflective technology enhances sunlight readability Storage of 250 readings—stored readings can be viewed or downloaded Durable ■ ■ ■ Solvent, acid, oil, water and dust resistant—weatherproof Shock-absorbing, protective rubber holster with belt clip Two year warranty on gage body AND probe Accurate ■ ■ ■ Certificate of Calibration showing traceability to NIST included Responsive transducers provide fast, accurate readings Proven non-destructive ultrasonic technique conforms to ASTM D6132 and ISO 2808 Versatile ■ ■ ■ ■ ■ ■ PosiTector body universally accepts all PosiTector 200, 6000, SPG, DPM and UTG probes easily converting from a coating thickness gage to a surface profile gage, dew point meter or ultrasonic wall thickness gage Mils/Microns switchable Selectable display languages Hi Contrast backlit display for bright or dark environments Flip display enables right-side-up viewing Uses alkaline or rechargeable batteries (built-in charger) ■ ■ ■ ■ ■ ■ ■ ■ ■ Powerful ■ Advanced Models ■ Continually displays/updates average, standard deviation, min/max thickness and number of readings while measuring Screen Capture—record and save screen images into memory for record keeping and review. USB port for fast, simple connection to a PC and to supply continuous power. USB cable included. PosiSoft USB Drive—stored readings and graphs can be accessed using universal PC/Mac web browsers or file explorers. No software required. Every stored measurement is date and time stamped Software updates via the internet keep your gage current Connects to PosiSoft.net (see far right panel) ■ ■ ■ ■ Includes ALL features as shown on left plus... Measure the total thickness of a coating system or up to 3 individual layer thicknesses in a multi-layer system. Also features graphic display for detailed analysis of the coating system Hi Contrast reversible color LCD Storage of 100,000 readings in up to 1,000 batches Onscreen help, real time graphing, picture prompting and more Batch annotation—add notes and change batch names with onscreen QWERTY keyboard WiFi technology wirelessly synchronizes with PosiSoft.net, downloads software updates and connects with mobile devices for expanded functionality Data transfer via USB to a PC or via Wireless Technology to a PC or printer Graphics mode with Screen Capture Easy-to-read graphic display provides clear, detailed analysis of coatings. Select from a variety of measurement ranges (see back page ordering guide) Standard model Advanced model Adjustable measuring range Screen Capture Adjust cursor to identify additional layer thicknesses Each distinct layer interface appears as a peak Individual Layer Thickness B Probe for measuring polymer coatings on wood, plastic, etc. C Probe for measuring coatings on concrete, fiberglass, etc. Total Thickness Advanced model shown in Graphics mode Rugged Features... ® PosiSoft ... FREE SOLUTIONS for Sealed USB Port for communicating with a PC or Mac viewing, analyzing and reporting data: Water and dust resistant— weatherproof PosiSoft USB Drive Connect to a PC/Mac using the supplied USB cable to access and print stored readings, graphs, photos, notes and screen captures. No software or internet connection required. Hi resolution color LCD Chart multiple layers PosiSoft.net A web-based application offering secure centralized management of PosiTector readings. Access your data from any web-connected device. Scratch/solvent/impact resistant lens Advanced model shown in Memory mode Multi-function navigation button Solvent, acid, oil resistant, hi-grade, industrial strength housing SY N C PosiSoft.net Shock-absorbing, protective rubber holster with belt clip and wrist strap Synchronize, Share, Report, Export, Archive Plastic-tipped probe will not scratch surface t Comfortable, ergonomic finger grip osiSof ™ PosiSoft Software Desktop Software re for downloading, viewing and printing your ur measurement data. P Quality high-flex cable and strain relief PosiSoft Mobile Access readings, graphs, capture photos and update annotations using WiFi enabled devices, such as tablets, smart phones and computers. (Advanced models only ) D Probe ideal for measuring polyurea. Ordering Guide PosiTector 200 Model Measures Total Thickness B/Std B/Adv C/Std C/Adv D/Std D/Adv x x x x x x Measures Individual Layers x x x Graphic Display x x x Typical Applications Range* Polymer coatings on wood, plastic, etc. Coatings on concrete, fiberglass, etc. Thick, soft coatings such as polyurea, asphaltic neoprene, very thick polymers, etc. 13 – 1000 microns 0.5 – 40 mils 50 – 3800 microns 2 – 150 mils 50 – 7600 microns 2 – 300 mils Accuracy ± (2 microns + 3% of reading) ± (0.1 mil + 3% of reading) Minimum Individual Layer Thickness** 13 microns 0.5 mil Matching DeFelsko Thickness Standards STDA3 ± (20 microns + 3% of reading) ± (1 mil + 3% of reading) 50 microns 2 mils STDP6 500 microns 20 mils STDP1 *Range limits apply to polymer coatings. D Probe polyurea range is 50–5000 microns (2–200 mils). **For multiple layer applications only. Dependent on material being measured. Body accepts all PosiTector 6000, SPG, DPM, UTG and 200 Probes Surface Profile Ultrasonic Coating Thickness Probe Details Coating Thickness Ultrasonic Wall Thickness Environmental B and C Probes Accessories ALL GAGES COME COMPLETE with body and probe, couplant (ultrasonic gel), precision plastic shims, protective rubber holster, belt clip, wrist strap, 3 AAA alkaline batteries, instructions, nylon carrying case with shoulder strap, protective lens shield, Long Form Certificate of Calibration traceable to NIST, USB cable, PosiSoft.net account, two (2) year warranty Bluetooth Printer receives data from Advanced models Ultrasonic Gel— additional 4 oz. bottles available (case of 12) Rechargeable Batteries—set of eneloop NiMH AAA batteries Coating Thickness Standards to fulfill both ISO and in-house quality control requirements AC Power Kit for continuous operation or battery charging— works in any country Protective Lens Shields protect the display from overspray SIZE: 135 x 61 x 28 mm (5.25" x 2.4" x 1.1" ) WEIGHT: 140 g (4.9 oz.) without batteries Conforms to ASTM D6132 and ISO 2808 The Measure of Quality D Probe PosiSoft for Windows Analysis Software— downloads stored readings to a PC (FREE) D E F E L S K O C O R P O R AT I O N 802 Proctor Ave., Ogdensburg, New York 13669-2205 USA Toll Free 1-800-448-3835 Tel: +1-315-393-4450 Fax: +1-315-393-8471 techsale@defelsko.com www.defelsko.com © DeFelsko Corporation USA 2012. All Rights Reserved. Technical Data subject to change without notice. • Printed in USA • PT200.v.LW/W1211 DAKOTA U LT R A S O N I C S MVX A/B A/B Scan Scan Ultrasonic Ultrasonic Thickness Thickness Gauge Gauge R The physical size, weight, and display resolution are just a few of the benefits of the MVX. R The adjustable square wave pulser provides the flexibility necessary for both high resolution and penetration requirements. R The MVX is equipped with multiple viewing options to provide users with a complete set of inspection tools: (RF waveform, +/- Rectified waveform, Time based B-Scan, and Large Digits). R The A-Scan rectified mode is commonly used for detecting flaws/pits in pulse-echo mode and measuring thru-paint and coatings in echo-echo mode. R The time-based B-Scan feature of the MVX displays a cross section of the test material. It is commonly used to display the profile of the bottom surface of the test material. R Built-in hardware AGC gain control for thrupaint measurements in multi-mode operation. R The variety of calibration options is just one more example of MVX’s overall versatility. R The MVX has the ability to store 64 custom user-defined setups. All factory setups can be selected, edited and saved to any setup location. R MVX is equipped with an alpha-numeric data logger to provide increased versatility for those custom reporting needs. R The built-in transducer types offer increased linearity between transducers. R The high speed scan feature speeds up the inspection process by making 32 measurements per second. Remove transducer from the test material and display the minimum measurement scanned. R Visual alarm with Hi and Lo limit settings for specific application tolerances. R Use the find feature to locate the detection point, while automatically adjusting the display to bring the signal into view. R MVX also comes complete with our Windows® PC software for transferring data to and from a PC. R A basic Flaw Prove-Up Mode for use with angle beam style transducers. R Multiple language support R 2 year limited warranty S O U N D S O L U T I O N S M V X S P E C I F I C AT I O N S Physical Power Source Data Logger (Internal) Weight: 13.5 ounces (with batteries) Three 1.5V alkaline or 1.2V NiCad AA cells. 12,000 readings and waveforms (alpha numeric storage). Size: 2.5 W x 6.5 H x 1.24 D inches (63.5 W x 165 H x 31.5 D mm) Typically operates for 150 hours on alkaline and 100 hours on NiCad (charger not included). OBSTRUCT to indicate inaccessible locations. Operating Temperature: -14˚ to 140˚F (-10˚ to 60˚C). Auto power off if idle 5 minutes. Keyboard: Membrane switch with twelve tactile keys. Data Output: Bi-directional RS232 serial port; Windows® PC interface software. Display: 1/8in VGA grayscale display (240 x 160 pixels); viewable area 2.4 x 1.8in (62 x 45.7mm); EL backlit (on/off/auto invert). Ultrasonic Specifications Measurement Modes: Pulse-Echo (flaws, pits) Echo-Echo (thru-paint) Pulser: Square wave pulser with adjustable pulse width (spike, thin, wide). Receiver: Manual or AGC gain control with 40dB range, depending on mode selected. Timing: 20 MHz with ultra low power 8 bit digitizer. Certification Factory calibration traceable to national standards. Transducer Types: Dual Element (1 to 10 MHz). Range: Pulse-Echo Mode: (Pit & Flaw Detection) measures from 0.025 9.999 inches (0.63 to 254 millimeters). Echo-Echo Mode: (Thru Paint & Coatings) measures from 0.050 to 4.0 inches (1.27 to 102 millimeters). Range will vary +/- depending on the thickness of coating. Resolution: +/- .001 inches (0.01 mm) Velocity Range: .0492 to .3936 inches/ms 1250 to 9999 meters/sec Locking quick disconnect “00” LEMO connectors. Standard 4 foot cable. Custom transducers and cable lengths are available for special applications. Features: Setups: 64 custom user-definable setups; Factory setups can also be edited by the user. Gates: Single and Two point calibration option, or selection of basic material types Single gate in pulse-echo mode, or single gate with holdoff in echo-echo mode; Adjustable threshold. Units: English & Metric Selectable Transducers: Display Selectable transducer types with built-in dual path error correction for improved linearity. Display Views: A-Scan Rectified +/- (flaw view) RF (full waveform view) . B-Scan Cross section view; display speed of 15 secs per screen. Large Digits Standard thickness view; Digit Height: 0.400 in (10mm). Scan Bar Thickness 6 readings per second; Viewable in B-Scan and Large Digit views. Alarm Mode: Set Hi and Lo tolerances with audible beeper and visual LEDs. Fast-Scan Mode: Takes 32 readings per second and displays the minimum reading found when the transducer is removed. A S O N A T E S T P L C G R O U P C O M P A N Y DAKOTA ULTRASONICS 300 El Pueblo Road, Suite 100 Scotts Valley, CA 95066 TELEPHONE: 831.431.9722 FAX: 831.431.9723 WEB SITE: www.dakotaultrasonics.com E-MAIL: info@dakotaultrasonics.com 9/05 (05-103/2.5M) Repeatability Bar Graph Bar graph indicates stability of reading. 2 year limited Distributed by: 16 megabit non-volatile ram Transducer Measuring Case: Extruded aluminum body with nickel-plated aluminum end caps (gasket sealed). Warranty Battery status icon. Memory: DAKOTA ULTRASONICS MMX Multi-Mode Thickness Gauges Two Words Words:: Versatility & Convenience The MMX Series has arrived! These gauges are the answer to both versatility and convenience in every way! The MMX series defines versatility by combining features like: Fast Scan, Alarm (audible/visual), and data logging, along with multi-mode for reading through and eliminating the thickness of painted or coated materials. The MMX demonstrates convenience by making all these features available to the user with just the touch of a button. Conveniently toggle between pulse-echo mode (detect flaws & pits), and echo-echo mode (eliminate paint & coating thickness), to cover all your inspection requirements. No need to remove or allow for errors due to paint and coatings. The MMX gauges use a highly damped dual element style transducer for both modes, eliminating the need to switch between transducer types. The MMX gauges are packaged in an all aluminum sealed case, making them rugged and resistant to the working environment— Dakota’s trademark. 5 Year Limited Warranty S O U N D S O L U T I O N S THE MMX SERIES DAKOTA ULTRASONICS’ has succeeded in adding the final touches to the rugged MX line with the new multi-mode MMX series. The MMX-6 and MMX-6DL have not only been combined with all the durability and features of the MX series gauges, but have also been equipped with the ability to measure through painted or coated materials and eliminate the thickness of the paint or coating. Our 5 year limited warranty indicates how we feel about the reliability and durability of the new MMX Series. APPLICATIONS: Corrosion & Pitting • Tube & Pipe • Tanks • Boilers • Glass • Variety of Applications S P E C I F I C A T I O N S Physical Power Source Measuring Weight: 10 ounces (with batteries). Two 1.5V alkaline or 1.2V NiCad AA cells. Range: Size: 2.5 W x 4.5 H x 1.24 D inches (63.5 W x 114.3 H x 31.5 D mm). Typically operates for 200 hours on alkaline and 130 hours on NiCad. Operating Temperature: -20Þ to 120ÞF (-30Þ to 50ÞC). Case: Extruded aluminum body with nickel-plated aluminum end caps (gasket sealed). Display flashes when battery is low. Unit turns off automatically when battery is too low to operate reliably. Display Pulse-Echo Mode (Pit & Flaw Detection) measures from 0.025 to 19.999 inches (0.63 to 500 millimeters). Echo-Echo Mode (Through Paint & Coatings) measures from 0.1 to 1 inch (2.54 to 25.4 millimeters). Extended range modification available on request: .2 to 4 inch ( 5 to 100 mm ). Switch to select English or Metric units. Keypad Multi-function 4.5 digit liquid crystal display with 0.500 inch numerals, backlit for use in poor light conditions. Sealed membrane that is resistant to both water and petroleum products. Backlight is selectable on/off/auto (illuminates only when taking a measurement). Nine tactile-feedback keys. Transducer Measurements displayed in inches, inches/microsecond, millimeters, and meters/second. Dual-element (transmit and receive). Bar graph indicates stability of reading. 1 to 10 MHz frequency range. Internal Data Logger Special high-damped transducers available for Through Paint & Coating measurements. (MMX-6DL only) Features Automatic numeric Data Logging system 1 to 1000 readings. Multi-Mode: Toggle between Pit & Flaw Detection (Pulse Echo Mode), and Through Paint & Coatings (Echo-Echo Mode) with the single press of a button. Locking quick disconnect LEMO connectors. OBST indicates no reading. 4 foot cable. Certification Custom transducers available for special applications. Factory calibration traceable to national standards. Warranty 5 year limited. A S O N A T E S T P L C Resolution: 0.001 inch (0.01 millimeter) Velocity Range: 0.0492 to .3937 in./µs. ( 1250 to 10,000 meters/second) Built in: Stainless steel reference disk for probe zeroing. Four readings per second for single point measurements or 16 per second in Scan Mod e—captures the minimum thickness. Single and two point calibration option included. Alarm Mode: Enter a minimum acceptable thickness value. If measurement falls below mini mum, red LED will illuminate and sound beeper. If measurement is above mini mum value, green LED will illuminate. Data Output: RS232 output sends data to a serial printer, a computer or other external storage device. G R O U P C O M P A N Y Distributed by: DAKOTA ULTRASONICS 300 El Pueblo Road, #100 Scotts Valley, CA 95066 Ph (831) 431-9722 Fax (831) 431-9723 Website: www.dakotaultrasonics.com Email: info@dakotaultrasonics.com 1/2 M500 PORTABLE METALLURGICAL MICROSCOPE Description The M5OO is a self-contained portable metallurgical microscope that is ideal for use in the laboratory as well as in-situ examination. With its compact design and unique magnetic stand, the M5OO can be attached to the curved surface of ferrous material at a range of angles to the horizontal as well as to a flat surface. A polished and etched surface area can be viewed with this instrument at magnifications up to 15OOX, and the M5OO can be used with a digital camera or CCD image process system to download the image to a PC for data transfer, analysis, storage or printout. Features • Compact design facilitates in-situ metallographic inspection of large or heavy items. • Magnetic stand may be attached to ferrous materials at desired angle to the horizontal. • • • • X- and Y-axis slide movement allow careful examination of area of interest. Essentially nondestructive metallographic examination; no cutting of specimens. Easily adapted for microphotography. Economically priced. Specifications Total magnification: 1OO to 5OOX (extendable to 15OOX) Illuminator (halide): 6 volt, 15 watt Eyepiece magnification: 1OX, 12.5X (extendable to 15X) Power supply: 12O VAC, 6O Hz Objective magnification: 1OX, 4OX (extendable to 1OOX) Stand: on-off magnetic base Photo objective: 15X Size: 21O x 16O x 95 mm 2/2 Slide movement: X-direction: 15 mm, Y-direction: 12 mm Weight: 2.5 kg Standard Package • • • • • • Main microscope body Two eyepieces: 1OX, 12.5X Two objectives: 1OX, 4OX Illuminator Power supply Carrying case Optional accessories Battery for portable use Stand for small Adaptor for Canon digital camera Eyepieces: 5X, 15X Objectives: 4 X, 2OX, 8 0 X, 1OOX Spare bulb Mini grinder Electrolytic polisher H4000 PORTABLE HARDNESS TESTER Description: The H4000 Portable Hardness Tester is a rebound device capable of measuring the hardness of a variety of metals and alloys with either flat or round surfaces. This instrument has an easy-toread digital LCD display, memory function (storage capacity: 999 readings) and readily interchangeable impact probes While obtaining data at the test site, the built-in printer can be actuated to obtain a printout, or the unit can be connected to a computer to analyze and/or print data as desired. Leebs hardness numbers can be automatically converted to HLD, HRC, HRB, HB, HV, and HS for a menu of selected metals and alloys. An optional program is available for producing and adding to the menu custom conversions for other metals and alloys of the customer’s choosing. Features: ·Menu operation ·Large LCD display with back-light ·High accuracy ·Automatic mean value display ·Accommodation for all impact devices:D,DC,D+15,G,C, DL, E; no recalibration required ·Display of hardness values in HL,HRC,HRB,HB, HV & HS ·Testing can be performed at any angle ·Integral micro-printer ·USB interface to PC ·Conforms to ASTM A956 ·Optional software for adding custom hardness info Technical Specifications: Hardness scale Impact devices Accuracy Display Printer Statistics function Memory Output Maximum hardness value Minimum sample weight Minimum thickness coupled Battery indicator Power supply Charger Charging time Operating temperature Dimensions Weight HL, HRC, HRB, HB, HV and HS convertible D (standard), DL, DC, D+15, C, G (optional) ±0.5 % 320 x 240 matrix LCD display with back light Built-in printer Average / Max. / Min. value calculation Limits setting and alarm 999 data USB connection 999HV (Impact device D/DC/DL/D+15/C) 68HRC (Impact device D/DC/DL/D+15/C) 680HB (Impact device G) 2kg on solid support / 0.2kg with couplant paste 5 mm (Impact device D/DC/DL/D+15) 3 mm (Impact device C) 10 mm (Impact device G) Battery low indication 4 AA rechargeable batteries 6 V D.C. 1000mA 2 hours -20°C to 40 ° C 215 mm×145 mm×46 mm 600g Standard package: H4000 main processor with built-in micro-printer Impact device D LD test block Calibration certificate Software with USB communication cable Rechargeable battery pack with charger Cleaning brush Instruction manual and carrying case Optional accessories: Support rings for curved surfaces Impact device DC, C, D+15, G, DL Program for custom alloy/hardness conversions Impact Devices D DC DL Impact device C D+15 E G D/DC/DL D+15 C G E 11 Nmm 11Nmm 2.7Nmm 90Nmm 11Nmm 5.5g/5.5g/7.3g 7.8g 3.0g 20g 5.5g Hardness of spherical test tip 1600HV 1600HV 1600HV 1600HV 5000HV Diameter of spherical test tip Material of spherical test tip 3mm Tungsten carbide 20mm 147/86mm/202m m 75/50g 940/940/950 HV Ra :2m 3mm Tungsten carbide 20mm 162mm 3mm Tungsten carbide 20mm 141mm 5mm Tungsten carbide 30mm 254mm 3mm Diamond 80g 940HV Ra :2m 75g 1000HV Ra :0.4m 250g 650HB Ra :7m 80g 1200HV Ra :2m 5kg 2kg 0.1kg 5kg 2kg 0.1kg 1.5kg 0.5kg 0.02kg 15kg 5kg 0.5kg 5kg 2kg 0.1kg 3mm 0.8mm 3mm 0.8mm 1mm 0.2mm 10mm 1.2mm 3mm 0.8mm Impacting energy Mass of impacting body Diameter of impact device Length of impact device Weight of impact device Max. hardness of the test piece Average surface roughness of the test piece Min. weight of test piece Direct measuring Stable support Compact coupling Min. thickness of test piece Compact coupling Min. case hardened depth 20mm 155mm Applications for Special Impact Devices: Application: Holes, Bores Grooves, Reduced energy (25%), Thin materials Enlarged test tip and increased energy. Low demands on measuring surface finish. For Castings (GC Iron, NC Iron etc.) only. Extremely confined spaces, the base of grooves and of special components such as gear wheels. DC D+15 C G DL H2000 PORTABLE HARDNESS TESTER Description: The H2000 is an advanced Leeb’s-type hand-held digital metal hardness tester with high accuracy, wide measuring range and easy operation. It is suitable for testing the hardness of many metals and alloys and is especially useful for on-site testing of large structures or assembled components. Leeb’s-type rebound hardness testers are widely used in manufacturing plants, testing laboratories and engineering companies. Features: Menu operation ·Large LCD display with back-light ·High accuracy ·Automatic mean-value display ·Accommodation for all impact devices:D,DC,D+15,G,C, DL, E; no recalibration required ·Display of hardness values in HL,HRC,HRB,HB, HV &HS ·Testing can be performed at any angle ·Output to PC or micro-printer ·Conforms to ASTM A956 Technical specifications: Hardness scale Impact devices Accuracy Display Statistics function Data storage with Output Maximum hardness value Minimum sample weight Minimum thickness coupled Battery indicator Power supply Operating temperature Dimensions Weight Standard package: H2000 main processor Impact device D LD test block Calibration Certificate Leather pouch Software with connection cable Battery pack and cleaning brush Instruction manual and carrying case Optional accessories: Micro printer Support rings for curved surfaces Impact device DC, C, D+15, G, DL HL, HRC, HRB, HB, HV and HS convertable D (standard); D, DC, D+15, C, G (optional) ±0.5 % LCD display with back light Average / Max. / Min. value calculation Limits setting and alarm Data view software & RS232 cable 999HV (Impact device D/DC/DL/D+15/C) 68HRC (Impact device D/DC/DL/D+15/C) 680HB (Impact device G) 2kg on solid support / 0.2kg with couplant paste 5 mm (Impact device D/DC/DL/D+15) 3 mm (Impact device C) 10 mm (Impact device G) Battery low indication 2 AAA batteries -20°C to 40 ° C 108mm×62mm×25mm 180g H1800 Portable Hardness Tester The H1800 Integrated Hardness Tester utilizes state-of-the-art micro-electronic technology. This uniquely designed pocket-size instrument incorporates an impact probe, microprocessor and data display in a single, compact unit. The principal new features of the H1800 include data display with statistics, enlarged storage capacity, USB interface for both recharging as well as data transfer to your PC or printer, backlight display for use in dark areas, and much more. The H1800 conforms to A STM A956 and provides exceptional reliability for a wide measuring range, and is capable of automatically converting into and displaying measurements as Brinell, Rockwell, Leebs, Vickers and Shore hardness values. Typical applications • Testing of large and/or heavy components, including installed machine parts and components. • Testing of products during manufacture, especially mass produced components. • Testing of items and materials in warehouses or stores for material identification. • Testing of materials and components located in difficult to access or confined spaces. Technical Data • Measuring accuracy: +/- 0.5% • Impact device: Model D • Hardness measurement values include HRC, HRB, HRA, HB, HV, HS and HLD • Automatic calculation of average and mean test values • Storage capacity: 1250 • USB 2.0 interface • Impact direction: any angle • Impact energy: 8 ft-lbs (11Nmm) • Test tip: Tungsten Carbide • Dimensions: 158 x 41 x 26 mm • Weight: 120g • Operating temperature: 0°C - 50°C Standard package • Processor integrated with impact device D • Calibration certificate • Standard test block • Software • USB cord • Battery charger • Support ring • Cleaning brush • Carrying case Measuring range: Materials ST & CAST ST CWT STEEL STAINLESS GC IRON NC IRON CAST ALUM BRASS BRONZES COPPER HL 300~900 300~940 300~800 360~650 400~660 174~560 200~550 300~700 200~690 HRC 20.0~68.0 20.4~67.1 19.6~62.4 HRB 38.4~99.5 46.5~100.7 2 30D 80~647 HB 2 85~656 90~334 131~367 13.5~95.3 HS HV 32.5~99.5 80~940 80~898 85~802 10D 20~190 40~173 60~290 45~315 GLOSS METERS: PG SERIES Features: - Small and light, easy to use Gloss measurement of paint, coatings, plastics, ceramics and metal surfaces. Auto calibration Auto range (0 to 99.9, 100 to 2000 Gu) Statistics – Mode USB data transfer - Available single degree gloss meters: 20 ⁰, 45 ⁰, 60 ⁰, 60 ⁰curve, 75 ⁰ and 85⁰ - Conform to DIN 67530, ISO2813, ASTM D 523 Specification PG 60 600 Incidence Angle Auto Range (Gu) 0-99.9, 100-1000 600 0-99.9 0-99.9 100-2000 100-1000 Repeatability (Gu) 0.2(0-99), 0.2% (100-2000) Reproducibility (Gu) 0.5 (0-99), 0.5% (100-2000) Resolution (Gu) 0.1 Output USB Power 1.5 V AA battery; can be used for 60 hours Dimension (mm) 114X 32X64 143 X 32 X 64 Weight (g) 280 390 Standard Delivery: - PGM Tri-gloss 200 Gloss Meter Black Crystal Board & White Ceramics Board USB Cable and Software Lens Cloth Calibration Certificate User’s Manual Carrying Case 850 0-99.9 100-160 Model Features PG 60 deg single Paint / Coating / Printing Auto calibration Auto measuring range (0 – 99.9, 100 – 1000 Gu) Statistics model Data logging with analysis Software with USB communication cable Conforms to ASTM D 523, ISO 2813, DIN 67530 PGM Tri-gloss (20 deg, 60 deg and 85 deg) For High, Semi and Low gloss on all Paint / Coating / Printing Menu driven, LDC display with backlight Auto calibration for all three angles Auto measuring range: 20 deg: 0 – 99.9, 100 – 2000 Gu 60 deg: 0 – 99.9, 100 – 1000 Gu 85 deg: 0 – 99.9, 100 – 160 Gu Statistics model Data logging with analysis Software with USB communication cable Conforms to ASTM D 523, ISO 2813, DIN 67530 PG 45 deg single Plastic and Film Auto calibration Auto measuring range (0 – 99.9, 100 – 1000 Gu) Statistics model Data logging with analysis Software with USB communication cable Conforms to ASTM D 523, ISO 2813, DIN 67530 PG 75 deg single Paper Auto calibration Auto measuring range (0 – 99.9, 100 – 1000 Gu) Statistics model Data logging with analysis Software with USB communication cable Conforms to ASTM D 523, ISO 2813, DIN 67530 PG 20 deg single High gloss on Paint / Coating / Printing Auto calibration Auto measuring range (0 – 99.9, 100 – 2000 Gu) Statistics model Data logging with analysis Software with USB communication cable Conforms to ASTM D 523, ISO 2813, DIN 67530 PG 85 deg single Low gloss on Paint / Coating / Printing Auto calibration Auto measuring range (0 – 99.9, 100 – 160 Gu) Statistics model Data logging with analysis Software with USB communication cable Conforms to ASTM D 523, ISO 2813, DIN 67530 Digital Ultrasonic Flaw Detector FD580 Features: Automatic transducer calibration, zero offset and/or velocity Automatic gain control, peak hold and peak memory Automatic display of precise flaw location Ten independent setups; any criterion can be input freely, no test block required for proceeding Manual B-Scan High-speed capture and very low noise Two gate settings and alarm indication Automatic generation of DAC and AVG curves Display-freeze capability Angles and K-values may be inputted Lock/unlock system parameters Auto power-off and screen savers Electronic clock calendar Solid metal housing High contrast viewing of the waveform from bright, direct sunlight to complete darkness and easy to read from all angles Large memory of 300 A-Scan waveforms and 30,000 thickness values. RS232 communication interface ; reports may be exported to Excel Powerful embedded software which can be online-updated Li battery Specifications: Function Scanning Technical Data Range: 2.5mm to 10,000mm Stage: 2.5, 5, 10, 20, 30, 40, 50, 60, 70, 80, 90, 100, 150, 200, 250, 300, 350, 400, 450, 500, 600, 700, 800, 900, 1,000, 2,000, 3,000, 4,000, 5,000, 6,000, 7,000, 8,000, 9,000 and 10,000mm Step:0.1mm (from 2.5 mm to 99.9mm),1mm (from 100mm to10,000mm) D-delay range: -20 to +3400µs Display delay Stage: -20, -10, 0.0, 10, 20, 50, 100, 150, 200, 250, 300, 350, 400, 450, 500, 600, 700, 800, 900, 1,000, 1,500, 2,000, 2,500, 3,000 and 3,400µs. Step: 0.1µs (from -20s to +999.9s), 1µs (from 1,000s to 3,400s) P-delay range: 0.0 to 99.99µs Probe delay Step: 0.01µs Sound velocity range: 1,000 to 9,999m/s Sound velocity in material Seven fixed velocities or stages: 2,260, 2,730, 3,080, 3,230, 4,700, 5,900 and 6,300 Step: 1m/s Working methods Frequency ranges Single probe (P/R), dual probe (transceiver) or transmission probe Low frequency: 0.2 to 1MHz, middle frequency: 0.5 to 4MHz, high frequency: 2 to 20MHz, three steps optional Range: 0 to 110dB Gain Step: 0.0, 0.2, 0.5, 1, 2, 6 and, 12dB Linear suppression 0% to 80% of screen height, step:1% Vertical linear error Less than 3% Horizontal linear error Less than 1% within scanning range Detection sensitivity margin Dynamic scope Alarm 60dB 32dB Traveling-wave alarm, evanescent-wave alarm Two gates represented by a horizontal thick line with adjustable start point, width and height. Starting point(mm): horizontal pixels from 0 to 208 with the display value relating to scanning range. Step(mm): quantity corresponding to one pixel (relating to scanning range) Monitoring gate Width(mm): horizontal pixels from 4 to 212 with the display value relating to scanning range. Step(mm): quantity corresponding to one pixel (relating to scanning range) Height: vertical scale from 2% to 90% Step: 1% Display EL highlight dot matrix 4 background colors available A-Scan display Full screen or part A-Scan display of freezing and unfreezing A-Scan image Wave display All wave Detecting channels 10 Data storage 300 A-Scan waveforms (30 for each channel) 30,000 thickness values (300 groups) Communication port with PC RS232 Measuring Units mm or in; time in µs Power adaptor Input: 100 to 240VAC @ 50 Hz to 60Hz Output: 9 to12VDC @ 3 to 4A Power Four 3.6V lithium batteries, 4,000mAhr Ambient temperature 0 to 40⁰C Ambient humidity 20 to 90%RH Interface BNC Dimensions of processor 240 × 173 × 50mm Weight of processor 2.2kg


