Download Using Flipper - Enhanced Vision
Transcript
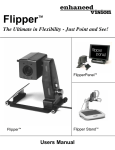
The Flipper Family
TM
The Ultimate in Flexibility Just Point and See!
FlipperPort
TM
FlipperPanel
Flipper
TM
TM
Flipper Stand
Users Manual
TM
About Enhanced Vision Products
Congratulations on your purchase of one of the Flipper family of products.
Enhanced Vision products are designed to give you the highest quality and
convenience available.
Flipper products can enable people with low vision to read, write and to see
objects at any distance. The unique design of these products are the ultimate
in flexibility and offer a large range of magnification with multiple viewing
options that make reading easier than ever. Simply connect them to any
television, Enhanced Vision LCD glasses, a LCD flat screen, a computer monitor
or laptop computer (additional hardware may be required).
Prior to using this system, please carefully read and follow the instructions
provided within this booklet. A thorough understanding of the functionality
will allow you to fully benefit from the flexibility and great features of this
device.
If you have any questions, please contact an eyecare professional or the
supplier from whom you have acquired the unit.
Table of Contents
Important Safety Precautions ..........................................................................
4
Flipper.............................................................................................................
Flipper Package Contents & Controls ....................................................
Flipper Installation..................................................................................
Using Flipper..........................................................................................
7
8
10
12
FlipperPort ......................................................................................................
FlipperPort Package Contents & Controls ..............................................
Using FlipperPort ...................................................................................
Power Supply .........................................................................................
17
18
20
23
FlipperPanel ....................................................................................................
FlipperPanel Package Contents & Controls ............................................
Using FlipperPanel .................................................................................
Using LCD Power Pack ..........................................................................
25
26
28
30
Flipper Stand ...................................................................................................
Using Flipper Stand ................................................................................
33
34
Common Questions.........................................................................................
Flipper ...................................................................................................
FlipperPort..............................................................................................
FlipperPanel ...........................................................................................
Flipper Stand ..........................................................................................
38
38
39
39
41
Warranty Statement ........................................................................................
43
Enhanced Vision Products ...............................................................................
44
Contact Information........................................................................................
45
Important Safety Precautions
To obtain the maximum benefits from your Flipper product, please read these
safety precautions carefully.
SYSTEM WARNINGS
The Flipper family of products are designed to improve the quality of life for
sight impaired individuals. The extent to which Flipper products can
improve the ability to see images depends on an individual’s condition and
level of vision. These products are not designed to restore vision, correct eye
conditions or halt degenerative vision loss. An eyecare professional can
determine the suitability of Flipper products for a patient's condition.
SYSTEM PRECAUTIONS
■
Avoid exposing Flipper products to extreme or rapid changes in
temperature or humidity as these conditions may cause fogging or
damage to products. Flipper products should never be placed near a
radiator or heat register.
■
Do not smoke while using Flipper products. Cigarette, cigar and pipe
smoke release abrasive particles which are potentially damaging to the
Flipper optics.
■
Do not use this product near water, i.e., near a bathtub, kitchen
sink, swimming pool, etc.
■
Do not place this product on an unstable cart, stand or table, as the
product may fall, causing serious damage.
4
Important Safety Precautions
■
Always place the excess cord in an area where it will not be damaged
by persons walking on it.
■
To avoid the risk of electrical shock, do not disassemble this product.
Return it to the place of purchase if service or repair work is required.
Any attempt to disassemble your Flipper product will void the warranty.
■
Always use the power supply provided within your package. Do not
attempt to use any other power supply, doing so will void the warranty.
CARING FOR FLIPPER PRODUCTS
■
Always turn the power OFF when you are not using the system.
■
Make sure the power is OFF or unplug your Flipper product from an
outlet before cleaning. Do not use liquid cleaners.
■
The plastic surfaces of your Flipper product may be dusted with a dry
cloth.
■
The optical surfaces should be cleaned as needed for best performance.
Dampen a lens cleaning tissue with a small amount of lens cleaning
solution and gently wipe the optical surfaces clean.
Never apply lens cleaning solution directly on any surface of your
Flipper products.
5
Flipper
TM
Flipper Package Contents & Controls
Your Flipper is packaged in a convenient box for storage and transport. All
required accessories for operation are included.
FLIPPER IS COMPRISED OF:
1.
Camera: captures and enlarges the image.
2.
Control Box: connects the camera to the television set and turns
Flipper ON/OFF.
3.
Viewing Options Button: for switching between color, black & white,
high contrast positive or high contrast negative viewing modes.
4.
Magnification Dial: ten preset magnification levels.
5.
Light Button: turns the base light ON/OFF. The light is only used when
the ambient lighting is not sufficient. For reading, writing and near use.
6.
Video Cable: connects Flipper to the TV via the “Video Input” jack.
7.
Power Supply: connects Flipper to a power outlet.
8
Flipper Package Contents & Controls
1
3
6
4
5
2
7
9
Flipper Installation
Basic TV Connection Using Video Cable and "Video Input" Jack (Refer to
Figure 1)
1. Remove Flipper and the Control Unit from the package.
2. Remove the Video Cable from the package. (This is the thin cable that is
not attached to any other component and has the same plug at both
ends.) Plug one end of the Video Cable into the black Control Box Jack
labeled "VIDEO."
3. Plug the other end of the Video Cable into the yellow "VIDEO INPUT"
jack of your TV. This jack could be located on either the front or back of
your TV.
4. Remove the Power Supply from the package. Plug one end of the Power
Supply into the black Control Box Jack labeled "POWER." Be sure the
plug is fully inserted into the Control Box. Then plug in the other end
of the Power Supply into an outlet.
5. Turn the power on. The ON and OFF switch is on the side of the black
control box. Turn the TV ON.
You can switch between using Flipper and your TV with the TV remote
control by changing between "Video" and "TV" mode.
If you have a TV with a built in VCR, you can switch between using
Flipper and your TV by pushing the “Input” button on your remote.
Now you can go to the Using Flipper section on page 12 to begin using your
Flipper.
10
Flipper Installation
FIGURE 1
VIDEO IN on
Back or Front
of TV.
Video
Cable
Flipper
Power Supply
Plugs to Wall
Outlet
POWER
CHANNEL
ON
OFF
VIDEO
Control Box
11
Using Flipper
Now that you have successfully installed your Flipper you can enjoy the ease
of use and operation.
Flipper can be used to view objects at a distance, up close, and at any range
in between. To maximize your usage, here are some of the things you can do
with Flipper.
•
•
•
•
•
•
Read
Write
View Distance
Work on Hobbies
See Self Image
Participate in Class
The following steps will give you a quick start on using Flipper and practicing
rotating the camera head.
1.
Turn the Power ON
On the side of the black Control Box, there is a switch that turns the
power ON and OFF. Turn the power ON. Make sure the TV is also ON.
2.
View the Magnified Image
Simply point the camera in the desired direction and view the magnified
image. The control knobs allow you to change the magnification level
and contrast.
12
Using Flipper
3. Reading with Flipper
There are three ways that you can
magnify and read using Flipper.
A. Reading with an Upright Book Stand
(highly recommended)
Place your reading material on a stand
and place Flipper in front of the stand.
Rotate the camera head and point it at
the material. Magnify as needed using
the Magnification dial. Roll Flipper from
left to right, scanning across the page.
When you reach the end of a line, roll
back to the beginning of the line and
rotate the camera down to the next line.
There is no need to pick up or move
the camera base. Just by rotating the
camera and rolling Flipper from left to
right, you will be able to cover the
entire page.
NOTE: The highest magnification B. Reading without an Upright Book Stand
setting is for distance viewing
Simply place the Flipper on top of the
only. (from at least 3 feet away)
page and roll the unit left to right on its
rollers. Once you reach the end of the
line, roll Flipper back to the beginning
of the line and rotate the camera to
read the next line.
C. Reading with Flipper Stand
Please see page 37 for details.
13
Using Flipper
You can repeat the above action
and read more than half of the
page by just rotating the camera
head. Once you have read half of
the page, move the unit and place
it in the middle of the page and
repeat the rotation of the camera
head to cover the rest of the page.
4.
Writing with Flipper
Simply place the material in front
of the Flipper, rotate the camera
head and point it to the material.
Adjust magnification using the
magnification knob. Start writing
and as you are writing, roll the unit
left to right on its rollers. Repeat
this action as needed.
5.
Practice Using Flipper
Practice the motion of rotating the
camera head in different directions.
Moving the camera head away
from you is generally used for
viewing distance, doing hobbies
and reading. Moving the camera
head towards you is generally used
for writing and or reading.
14
Using Flipper
SELECTING A VIEWING OPTION
You can choose a viewing option by pushing
the round white button on the Flipper labeled
“Viewing Options.” Each push will change
your viewing option. Push the button to cycle
through all of the options.
VIEWING OPTIONS FOR FLIPPER
Full Color Image
This mode is used most often because it gives
you a true color representation of the image
that is being magnified. This mode is ideal for
viewing objects at any distance and for
reading, writing and looking at pictures.
Black and White Image
Based on your preference, you can choose the
B&W mode for viewing objects at any distance.
Crisp, Clear
Text Images!
High-Contrast Positive Image
This mode provides a white background with
black foreground for text. This mode increases
the contrast to offer crisp text images for
reading. This mode is not appropriate for
distance viewing.
Crisp, Clear
Text Images!
High-Contrast Negative Image
This mode provides a black background
with a white foreground for text. This mode
increases the contrast to offer crisp text images
for reading. This mode is not appropriate for
distance viewing.
15
Using Flipper
The magnification control for Flipper is very easy to use. The magnification
control is a round dial that has ten preset magnification levels for you to
select from.
Changing the Magnification
To increase the magnification, slowly turn the
round knob clockwise until you feel a click.
Each click will increase the magnification.
Please note, the highest magnification
setting is for distance viewing only. (from
at least 3 feet away)
To decrease the magnification, slowly turn
the round knob counter clockwise until you
feel a click. Each click will decrease the
magnification.
Lighting Option
When reading with the camera facing down,
Flipper has a built in light source that may
be turned ON to enhance High Contrast
Positive and Negative viewing modes.
The light is only used when the
ambient lighting is not sufficient.
The On/Off switch for the light is located on
the Flipper right above the light panel.
16
FlipperPort
TM
The Ultimate In Portability
FlipperPort Package Contents & Controls
Your FlipperPort is packaged in a sturdy case that is convenient for storage
and transport. All required accessories for operation are included.
FlipperPort Is Comprised Of:
1.
FlipperPort Glasses: displays crisp images without refection or glare.
2.
Adjustable Nose Piece: supports the glasses on your nose.
3.
Power Button: turns FlipperPort ON and OFF.
4.
Brightness Control: changes the brightness of the display.
5.
Rechargeable Battery: energy source for 3 hours of continuous
reading.
6.
Control Unit: powers the system.
7.
Viewing Options Button: changes the viewing option.
8.
Magnification Dial: changes the level of magnification.
9.
Camera: rotates 225 degrees to capture and enlarge the image.
Accessories Included:
10. Battery Charger: recharges the battery.
11. Power Supply: plugs FlipperPort into an outlet.
12. RCA Cable: plugs FlipperPort into a television set.
Additional options (not included, please refer to page 45):
13. Color or Black & White Max Camera: attaches to control unit (for
reading only).
18
FlipperPort Package Contents & Controls
9
5
4
6
7
3
8
1
2
10
19
11
12
Using FlipperPort
FlipperPort can be used to view objects at a distance, up close, and at any
range in between. To maximize your usage, here are some ideas of things
you can do just about anywhere with FlipperPort.
•
•
•
Reading
Writing
Distance Viewing
•
•
Hobbies
Self Image
The following steps will give you a quick start on using FlipperPort and
practice rotating the camera head.
1. Turn the Power ON
On the control unit, press the power
button once. The button lights up green
to show that the power is ON.
Automatic SHUT OFF
To conserve power usage,
your FlipperPort will
automatically turn off after
120 minutes (2 hours). To
turn it back on, simply press
the power button on the
control unit.
To turn the power OFF, press the button
once again. However, leave the power
ON for now.
2. View the Magnified Image
To view the magnified image, put on
your FlipperPort glasses and simply
point the camera in the desired
direction and view the magnified
image. The control knobs allow you
to change the magnification level
and contrast.
For more information on how to use
the Flipper camera, please refer back
to page 12 “Using Flipper”.
20
Using FlipperPort
3.
Use FlipperPort with Your Prescription
Glasses
If you wear glasses to view distance, you
will need to keep them on when using
FlipperPort. To use FlipperPort with your
glasses, gently pull out the nose piece on
the FlipperPort glasses. Then put the
FlipperPort glasses over the glasses you
normally wear to view distance.
If you pull the nose piece too far out it may
come off. But don’t worry, you can put it
back on without any damage to the system.
4.
Adjust the FlipperPort Glasses
When you put on the FlipperPort glasses,
you should adjust the placement of it on
your face. This will give you a better
image. You can move the FlipperPort
glasses up or down. You can also adjust
the nose piece as shown above to set the
glasses closer or farther from your face.
21
Using FlipperPort
Controlling the Brightness
You can change the brightness of the display
to meet your reading requirement by slowly
rolling the dial on the side of the Control Unit.
To increase brightness, roll the dial away
from you. To decrease brightness, roll the dial
towards you.
Connecting FlipperPort to a TV Set
VIDEO IN on front
or back of TV
To use FlipperPort with your TV set, plug one
end of the RCA cable into the yellow jack on
the Control Unit and the other end into the
yellow “VIDEO INPUT” jack of your TV.
This jack could be located either on the front
or back of your TV. Then switch your TV to
Video Mode. This will automatically allow
you to view magnified images on your TV
screen.
RCA Cable
CONTROL UNIT
22
Power Supply
REMOVING AND INSTALLING THE BATTERY
Removing the Battery from the Control Unit
The battery sits directly on top of the Control
Unit. To remove, push the small tab at the end
of the Control Unit and slide the battery away
from the Power Button.
Installing the Battery on the Control Unit
To install the battery, place its grooved edge
against the raised end of the Control Unit.
Gently press down on the battery and slide it
into place.
FLAT END
The grooved end of the battery must slightly
touch the raised end of the Control Unit for
you to slide the battery in.
RAISED END
+
Installing the Battery on the Charger
The charger also has a raised end and flat end.
To install, place the grooved end of the battery
against the raised end of the charger. Then
slide the battery into place.
Removing the Battery from the Charger
To remove, slide the battery away from the
raised end of the charger.
23
Power Supply
Recharging the Battery
To recharge, remove the battery from the
Control Unit. Plug the charger into an outlet,
then install the battery onto the charger. The
yellow charging light turns on.
When the battery is fully charged, the yellow
light turns off. Remove the battery and install
it onto the Control Unit. You are ready for
another 3 hours of continuous operation.
You can purchase additional batteries
for back-up.
Using the AC Power Supply
Power Outlet
Power Supply
Control Unit
The AC Power Supply allows you to plug
FlipperPort directly into an outlet when you do
not want to use the rechargeable Battery.
Plug the AC Power Supply into the yellow jack
on the Control Unit and plug the other end
into a power source.
NOTE: The battery does not recharge on the
Control Unit. To recharge, refer to “Recharging
the Battery” section above.
24
FlipperPanel
TM
FlipperPanel Package Contents & Controls
Your FlipperPanel is packaged in a soft case that is convenient for storage
and transportation. All required accessories for operation are included.
FlipperPanel is comprised of:
1.
10” LCD Screen.
2.
LCD Screen adjustable knob.
3.
LCD Power Pack.
4.
Rechargeable Battery: energy source for 3 to 5 hours.
5.
On/Off Switch for LCD Power Pack.
6.
Flipper Camera: rotates 225 degrees to capture and enlarge the image.
7.
Viewing Options Button: changes viewing options from color, black &
white, high contrast positive and high contrast negative.
8.
Magnification Dial: provides 10 different levels of magnification.
Accessories included:
9.
Power Supply: connects to LCD Power Pack and power cord.
10. Power Cord: connects to power supply and outlet.
11. 6-foot RCA Video Cable: connects LCD Power Pack to a TV.
12. Lens Cloth: used to clean the Flipper camera and LCD screen.
13. Soft Carrying Case.
Additional options (not included):
14. Additional Rechargeable Battery: energy source for 3 to 5 hours.
15. Color or Black & White Max Camera: attaches to power pack (for
reading only).
26
FlipperPanel Package Contents & Controls
1
5
6
7
3
8
4
9
10
2
12
11
27
13
Using FlipperPanel
1. Turning the power ON
On the right side of the LCD Power Pack flip
the switch from 0 to l (see figure 1). The LCD
screen and Flipper camera will automatically
turn on in a few seconds. An image of what
the camera is pointing at should appear on
the LCD screen.
Turn the power off by flipping the same switch
back to the 0 position. However, leave the
power on for this training section.
Figure 1
Note: If the battery is charged, there is no
need to plug in the power supply and cord. If
the battery is not charged, then refer to
“Recharging the Battery” section on page 32.
2. Adjusting the LCD screen
It is important to orient the LCD screen to provide the best viewing angle as
possible. The LCD screen can be adjusted both vertically and horizontally by
gently rotating the frame up, down or left or right (see figure 2-4).
Figure 2
Figure 3
28
Figure 4
Using FlipperPanel
You can adjust the height of the LCD screen by loosening the knob on the
back of LCD screen (counter clockwise) and sliding the screen up or down
to the desired location (see figure 5). Then tighten the knob (clockwise) (see
figure 6).
Note: The LCD screen settings have been preset by the manufacturer for
optimal setting.
Figure 5
Figure 6
3. Using Flipper Camera
To use the Flipper camera, point the camera at your desired object and use
the control knobs on the Flipper to adjust the magnification and contrast.
The camera will automatically focus. The highest magnification is used for
distance viewing only.
Note: For more information on how to use the Flipper Camera, please refer
back to page 12 “Using Flipper”.
29
Using LCD Power Pack
Connecting Flipper or Max to the LCD Power Pack
If you have purchased the Flipper camera or separate from the LCD Power
Pack, you will need to connect them together. To do so, simply plug the end of
the cable connector which looks like a telephone
connector coming from the Flipper camera into
the open jack labeled “Camera” on the back of the
LCD Power Pack (see figure 1). Once this is done
refer to Using FlipperPanel on page 28.
Connecting LCD Power Pack to a TV Set with
Video In
Figure 1
To connect the LCD Power Pack to a TV set with
video in you will need the 6-foot RCA video cable listed on page 26. Plug
one end of the RCA cable into the yellow jack on the back of the LCD Power
Pack labeled “Video Out” and the other end into the yellow “Video Input”
jack on the front or back of your TV. Then switch your TV to Video Mode.
This will allow you to view magnified images on your TV screen (see figure 2).
Note: The LCD Power Pack video output standard is the same as the Flipper
camera used (NTSC or PAL version).
Yellow VIDEO IN
on front or back
of TV
Video Out Display
Camera
Figure 2
RCA Video Cable
30
Using LCD Power Pack
Using the LCD Power Pack with an outlet
You should always leave a battery in the LCD Power Pack. Once you are
sure the battery is in the LCD power pack, then connect the power supply
and power cord together (see items on page 26 and Figure 1)
Connect the power cord to an outlet and the other end of the power supply
to the back of the LCD power pack where it says “18 VDC 3AMPS” (see
figure 2 & 3). A green LED light will appear on the front top right corner of
the power pack. If the light is solid then the battery is fully charged. If the
light is blinking then refer to “Recharging the Battery” on page 32. You can
not “overcharge” the battery.
Note: The battery will drain if you leave the power switch ON when you
are not using the LCD Power Pack.
Figure 1
Figure 2
Figure 3
18 VDC 3AMPS
31
Using LCD Power Pack
Recharging the Battery
The battery recharges in the LCD Power Pack. All you need to do is plug in
the power supply to the LCD Power Pack and then an outlet and the battery
will automatically start charging. If the light is solid then the battery is fully
charged. If the light is blinking then the battery is not fully charged. The
battery will charge while in use as long as the system is plugged into an outlet. The battery will charge at the same rate whether the LCD Power Pack is
ON or OFF. You cannot overcharge the battery. The battery has no memory
so you can charge it at anytime. However, the more charge cycles, the shorter
the battery life. Approximate charge time is 4 hours.
Removing and inserting Battery from LCD Power Pack
It is recommended to always keep a battery in the LCD Power Pack. The only
reason you need to take the battery out is when you are changing batteries.
To remove the battery, push down on the “RELEASE” button on the front top
right of the LCD Power Pack (see figure 1). The battery should release from
the LCD Power Pack so you can slide it out.
To insert the battery, gently place the battery, label facing up, into the base of
the LCD Power Pack. Make sure the battery is fully inserted. You should
hear a click (see figure 2).
Figure 1
Figure 2
32
Flipper Stand
TM
Using Flipper Stand
Using Your Flipper Stand
1. Place the Flipper Stand on a secure table with the X-Y table and
platform facing you.
X-Y Table
Platform
2. With the magnification knob and control cable to your left (A), rotate
the flipper camera away from you in a horizontal position (B).
B
A
34
Using Flipper Stand
3. Pick up the Flipper and slide it on the platform from left to right.
Make sure the base of the Flipper fits snug against the back and right
side of the platform.
Side
Back
4. In this position you can view objects at any distance. Simply turn the
knob on the left side of Flipper for your preferred magnification (A),
rotate the platform side-to-side (B) and keep the camera head away from
you in a horizontal position (C). Moving the camera head and rotating
the platform side-to-side enables you to scan various objects around
the room.
C
A
B
B
35
Using Flipper Stand
Using the X-Y Table on the Flipper Stand
1. Rotate the camera head downward until it stops in the vertical position.
The camera will be aiming down towards the X-Y table. In this position
the Flipper automatically increases its magnification level for reading
and writing.
2. The X-Y table can be locked to maintain a steady viewing position or
unlocked to allow you to scan across a page for reading and viewing
various objects.
3. To lock the X-Y table, slide the lever all the way to the right until it
clicks and locks (A). Unlock the X-Y table by sliding the lever to the
right again and release the lever (B).
B
A
36
Using Flipper Stand
4. Use the X-Y table to move reading materials under the camera, rather
than moving the material manually, except small items such as a check
book or a business card. New users should use two hands when moving
the X-Y table for reading, until they become comfortable using one hand
with the table.
Tips for reading
For easy reading with Flipper and its Desktop Stand please follow these steps:
1. Unlock the X-Y table and place a book, newspaper, etc., on the table
with the top of the page against the back lip of the table.
2. Set the Flipper to its lowest magnification level and move the X-Y table
to position the start of your reading in the approximate center of the
monitor screen.
3. Increase the magnification level to enlarge the image to a comfortable size.
4. Glide the X-Y table to the left, which will make the words flow across
the screen for reading. When you have reached the end of a line, glide
the table back to the beginning of the line. Move the table away from
you slightly to display the start of the next line of type.
Tips for writing
For writing with Flipper and its Desktop Stand please follow these steps:
1. Lock the X-Y table and place the item you are going to write on, on the
table. Beginners should start at a lower magnification size and increase
magnification as they become more comfortable. The smaller the
magnification size the bigger you will write; the higher the magnification
size the smaller you will write.
2. Use a pen that makes a bold line, such as a heavy point roller ball pen
or felt-tip marker for easier visibility. It may be helpful to use lined
paper to find and keep your place.
3. Begin by writing a few words at a time, them move the X-Y table and
write again, rather than moving continually as you write. You can write
in either color, black-and-white or enhanced positive viewing modes.
37
Common Questions
Flipper:
Q. Reading with Flipper on top of the literature is difficult. Is there other
method I can use for reading?
A. Another method for reading with Flipper is to place the reading material
on an upright bookstand. This method allows the camera to be pointed
directly forward at the reading material. The camera can then be rolled left
to right to scan the reading material. Refer to page 13.
Q. The image appears dim on my television. How can I adjust the images
brightness or contrast?
A. There are no external adjustments on our products. However changes can
be made through an adjustment menu or external button on your TV. Please
consult your TV’s manufacturer user manual for additional information.
Q. I have my product connected properly, but I’m still not seeing an image.
What am I doing wrong?
A. If your system is connected to the TV’s “video in” port, check to see that
your television is on the proper “video” mode, usually located on your
remote control or your TV’s menu options.
Some remote controls access this channel by pressing a TV/Video, Input,
auxiliary (AUX), External (EXT), Game, or source. (Please note this channel
differs depending on the TV maker. Please consult your TV manufacturer’s
user manual for additional information).
Q. My TV does not have the necessary Yellow Video In jack. How can I
connect my Flipper to my TV?
A. A product known as a “Video RF Modulator” is available at neighborhood electronic stores which connects to your TV’s antenna terminal to the
Flipper’s control box. (Examples include Steren Video RF Modulator, P/N
203-101 or Terk RF Modulator Video Converter.)
38
Common Questions
FlipperPort:
Q. I adjusted the FlipperPort’s brightness but the image on the TV is not
affected. Is there something wrong with the FlipperPort?
A. The brightness controls on the FlipperPort’s control unit only affect the
image being viewed inside the Flipper’s glasses. Any brightness adjustment
needed when using the FlipperPort with a TV needs to be made with the
TV’s brightness control function.
Q. If I use the provided A/C Power Supply with the battery still in the
FlipperPort control unit, will it harm the battery? Can the battery be
charged while in the control unit?
A. No. The A/C power adapter will override the battery if it is in the control
unit. Leaving the battery in place will not harm it.
Q. In case of a problem, how can I get my system serviced?
A. For questions or to arrange for product service, please contact Enhanced
Vision’s customer service team, Monday through Friday from 8am-5pm PST
at (800) 440-9476 or evsupport@enhancedvision.com. We will contact you
within 24 hours to provide instructions and a return authorization number.
Q. How long does the battery included with my FlipperPort last per
charge?
A. A series 750 battery is included with your FlipperPort. The series 750
battery will last approximately 3-1/2 hours per charge.
Q. How long does it take to completely recharge my battery?
A. The 750 series battery can take up to 5-1/2 hours of charging time.
FlipperPanel:
Q. How long will the battery last?
A. The battery will last approximately 3 - 5 hours per complete charge.
Q. How long does it take for the battery to recharge?
A. The battery needs approximately 4 hours to recharge.
39
Common Questions
Q. How does the battery recharge?
A. There is no separate battery charger included with the FlipperPanel. Keep
the battery inserted into the panel. Connect the Power Supply to the
FlipperPanel and plug it into an outlet. The battery will recharge while in
the panel. The battery will also continue to charge if the panel is in use.
Q. Can I use the FlipperPanel without the battery?
A. Yes. The FlipperPanel comes with a Power Supply that can be connected
to an outlet or power strip. Doing this will run the FlipperPanel and also
recharge to battery at the same time. (please note the system will also
operate in the case where no battery is inserted and the wall adapter is
used.)
Q. Does the battery have to be completely discharged before I recharge it?
A. No. The FlipperPanel has a lithium ion battery that does not need to be
completely discharged before recharging it again. The battery cannot be
over charged. However, the fewer the charging cycles, the longer the battery
life.
Q. Can I connect the FlipperPanel to a TV or monitor?
A. Yes. The FlipperPanel includes an RCA cable that will allow it to connect
to a TV. The FlipperPanel can also be connected to a PC monitor through
use of an adapter (not included). To connect the FlipperPanel to the TV set
you will need the RCA video cable. Plug one end of the RCA cable into the
yellow jack on the back of the power pack labeled “Video Out” and the
other end into the yellow “Video Input” jack on the front or the back of your
TV. Then switch your TV to Video Mode.
Q. Is the LCD screen adjustable?
A. Yes. The LCD screen can be adjusted both vertically and horizontally by
gently rotating the frame up, down, left or right.
40
Common Questions
Q. Can I adjust the height of the LCD screen?
A. Yes, by loosening the knob on the back of the LCD screen and sliding the
screen up or down to the desired location. However, we don’t recommend
tampering with this as the system is set at the ideal height when shipped.
Q. Can I adjust the LCD screen settings?
A. No, the settings have been preset and cannot be changed.
Flipper Stand:
Q. What is the advantage of using Flipper Stand?
A. When used with any TV, the Flipper Stand allows the Flipper to be used
as a desktop video magnifier. The stand has a table that can be moved in
any direction or be simply locked in place. This enables the user to place
text, writing implements, photos, or any hobby or craft object and work with
them under the Flipper camera. The object can be magnified and viewed on
a TV, depending on how the Flipper is configured.
The Flipper Stand is a great advantage to students. The student can point the
camera down to work with schoolwork on the moving table and also point
outward or towards the blackboard and see the instructor.
41
Common Questions
Q. Can I connect the Flipper Stand directly to my TV?
A. No. You will need to connect the Flipper directly to a TV as normally
required. The Flipper Stand has no video out capability.
Q. How does my Flipper work with the Flipper Stand?
A. The Flipper Stand is fitted with a “cradle” that sits above the moving
table. the cradle has the ability to rotate side-to-side. A small magnet that is
built into the Flipper allows the camera to adjust to work at the height that
the cradle holds the Flipper above the table. The Flipper sets into the cradle
allowing the camera to point down toward the table. If desired, the camera
can also be positioned to view an object located at a distance. The
side-to-side rotation of the cradle provides the ability to scan the area being
viewed with the camera.
Q. How can I make it easier for me to write using the Flipper Stand?
A. Method or writing with the stand will vary from person to person. A good
way to start is at the lowest level of magnification slowly increasing as
needed. Using lined paper is also very helpful for writing. Another method
is to place your finger under the camera until you see it on the TV. Then
take the point of your pen/pencil and meet it up with your finger. Now you
have found your starting point.
Q. What is the best way to read using the Flipper Stand?
A. Place the book, magazine or paper on the table. Make certain that the
locking mechanism is unlocked. Adjust the magnification as necessary.
Glide the table from right to left until you come to the end of the line. Move
the table back to the beginning of the next line and repeat.
42
Warranty Statement
Warranty Information (Warranty Form enclosed)
Enhanced Vision products are designed to give you the highest quality,
convenient features, ease-of-use and reliability. Flipper products have been
inspected and tested prior to shipping. Enhanced Vision warrants the
Flipper, FlipperPort, FlipperPanel and Flipper Stand against manufacturer
defects in material and workmanship under normal use, for one year from
the date of purchase.
Enhanced Vision at its option, will at no charge either repair or replace the
defective product during the warranty period. There are no other expressed
or implied warranties accompanying this product.
This warranty does not cover the following:
1. Defects or damage from misuse, use in other than normal and
customary manner, accident or neglect.
2. Defects or damage from improper operation, maintenance, installation,
adjustment, alterations or modification.
3. Defects or damage from spills of food or liquid.
4. All plastic surfaces and all other externally exposed parts that are
scratched or damaged due to normal use.
5. Damage due to operation of Flipper products with equipment not
supplied by Enhanced Vision.
Service Process
In the event that technical support or repair service is needed, please contact
your local Enhanced Vision representative or the Enhanced Vision warranty
service center.
If warranty service is required, please contact Enhanced Vision at
(800) 440-9476 Monday through Friday, between 8 a.m. and 5 p.m. Pacific
Standard Time (PST) to request a return authorization number. Warranty
repairs will not be accepted without a valid return authorization number.
You may wish to keep the original product packaging in case warranty service
is required. The manufacturer cannot provide packaging for warranty repairs.
43
Enhanced Vision Products
Jordy – Two Low Vision Systems in One
For distance, intermediate and near viewing.
Magnification: 1X – 30X
Four viewing modes for optimum visibility:
Color, Black/White, Enhanced Positive,
Enhanced Negative
Jordy Docking Stand (optional)
Magnification: 4X – 40X
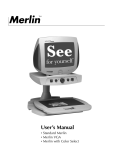
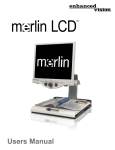
Merlin LCD & Merlin Plus
Merlin LCD is a video magnifier that pivots and
swivels to the most comfortable viewing position.
This product includes all the same features as the
Merlin but with a sleek ergonomic design.
Merlin Plus offers the same advanced features as
the Merlin but is compatible with most computer
workstations and offers a split screen mode. This
mode lets the user view magnified images and
computer files concurrently.
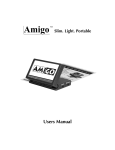
Amigo
Amigo is a truly portable desktop magnifier.
Optimal viewing is achieved with a tilting 6.5 inch
viewing screen. Amigo provides 3.5 to 14x digital
magnification and the lightest weight in its class.
Amigo is battery operated and can be taken anywhere.
44
Enhanced Vision Products
Max – Powerful Magnifier
A powerful magnifier for reading. Connects to any
TV in seconds.
Magnification: 17X – 25X on a 20" Television
Available in Color or Black & White
ACCESSORIES
Smart Video
Connects Enhanced Vision low vision devices to a computer monitor or
laptop compuetr.
MaxTrak
An essential accessory to keep your Max rolling in a straight line across a
page.
Batteries
Rechargeable batteries for Enhanced Vision portable products, including
Jordy, FlipperPort, MaxPort, FlipperPanel and MaxPanel.
Portable
Non-Panel
Panels Only
CONTACT INFORMATION
www.enhancedvision.com
Toll Free: (800) 440-9476
Voice:
(714) 374-1829
Fax:
(714) 374-1821
45
Flipper Family of products are designed to enlarge and enhance
images to offer improvement in the quality of life for people
with visual impairment. The extent to which Flipper products
can improve the ability to see images depends on a person’s
individual condition and level of vision. Flipper products are
not designed to restore vision, correct eye conditions or halt
degenerative vision loss. An eyecare professional can
determine the suitability of Flipper products for a patient’s
individual condition. Flipper products are designed to be worn
while sitting or standing still, and are not designed to be worn
while walking, driving, or during mobility of any kind.
www.enhancedvision.com
(800) 440-9476
(714) 465-3400
FLIPPER
REV04/06
© 2005 All rights reserved. Product specifications subject to change without prior notice.


