1
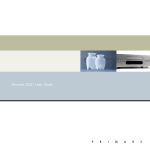
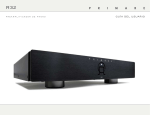
Primare T23 Tuner User Guide Copyright and acknowledgments Copyright © 2006 Primare Systems AB. All rights reserved. Primare Systems AB Renvägen 1 SE-352 45 Växjö Sweden http://www.primare.net Issue: T23/1 The information in this guide is believed to be correct as of the date of publication. However, our policy is one of continuous development and so the information is subject to change without notice, and does not represent a commitment on the part of Primare Systems AB. Primare is a trademark of Primare Systems AB. This guide was produced by Human-Computer Interface Ltd, http://www.interface.co.uk Safety compliance This product has been designed to meet the IEC 60065 international electrical safety standard. CAUTION ATTENTION RISK OF ELECTRIC SHOCK DO NOT OPEN RISQUE DE CHOC ELECTRIQUE NE PAS OUVRIR CAUTION: To reduce the risk of electrical shock do not remove cover (or back). No user serviceable parts inside. Refer servicing to qualified service personnel. WARNING: To reduce the risk of fire or electrical shock, do not expose this apparatus to rain or moisture. CAUTION: In Canada and the USA, to prevent electric shock, match the wide blade of the plug to the wide slot in the socket and insert the plug fully into the socket. The lightning flash with an arrowhead symbol within an equilateral triangle, is intended to alert the user to the presence of uninsulated 'dangerous voltage' within the product's enclosure that may be of sufficient magnitude to constitute a risk of electric shock to persons. The exclamation point within an equilateral triangle is intended to alert the user to the presence of important operating and maintenance (servicing) instructions in the literature accompanying the product. Important safety instructions This product is designed and manufactured to meet strict quality and safety standards. However, you should be aware of the following installation and operation precautions. 1. Take heed of warnings and instructions You should read all the safety and operating instructions before operating this appliance. Retain this handbook for future reference and adhere to all warnings in the handbook or on the appliance. 6. Climate The appliance has been designed for use in moderate climates. 12. Power lines Locate any outdoor antenna/aerial away from power lines. 7. Racks and stands Only use a rack or stand that is recommended for use with audio equipment. If the equipment is on a portable rack it should be moved with great care, to avoid overturning the combination. 13. Non-use periods If the unit has a stand-by function, a small amount of current will continue to flow into the equipment in this mode. Unplug the power cord of the appliance from the outlet if left unused for a long period of time. 8. Cleaning Unplug the unit from the mains supply before cleaning. 2. Water and moisture The presence of electricity near water can be dangerous. Do not use the appliance near water – for example next to a bathtub, washbowl, kitchen sink, in a wet basement or near a swimming pool, etc. The case should normally only require a wipe with a soft, damp, lint-free cloth. Do not use paint thinners or other chemical solvents for cleaning. We do not advise the use of furniture cleaning sprays or polishes as they can cause indelible white marks if the unit is subsequently wiped with a damp cloth. 3. Object or liquid entry Take care that objects do not fall and liquids are not spilled into the enclosure through any openings. Liquid-filled objects such as vases should not be placed on the equipment. 9. Power sources Only connect the appliance to a power supply of the type described in the operating instructions or as marked on the appliance. 4. Ventilation Do not place the equipment on a bed, sofa, rug or similar soft surface, or in an enclosed bookcase or cabinet, since ventilation may be impeded. We recommend a minimum distance of 50mm around the sides and top of the appliance to provide adequate ventilation. This is a Class 1 device and must be earthed. 10. Power-cord protection Power supply cords should be routed so that they are not likely to be walked on or pinched by items placed upon or against them, paying particular attention to cords and plugs, and the point where they exit from the appliance. 5. Heat Locate the appliance away from naked flames or heat producing equipment such as radiators, stoves or other appliances (including other amplifiers) that produce heat. 11. Grounding Ensure that the grounding means of the appliance is not defeated. ii 14. Abnormal smell If an abnormal smell or smoke is detected from the appliance, turn the power off immediately and unplug the unit from the wall outlet. Contact your dealer immediately. 15. Servicing You should not attempt to service the appliance beyond that described in this handbook. All other servicing should be referred to qualified service personnel. 16. Damage requiring service The appliance should be serviced by qualified service personnel when: A. the power-supply cord or the plug has been damaged, or B. objects have fallen, or liquid has spilled into the appliance, or C. the appliance has been exposed to rain, or D. the appliance does not appear to operate normally or exhibits a marked change in performance, or E. the appliance has been dropped or the enclosure damaged. Welcome Welcome to the Primare T23! Your T23 is a combined high-quality FM and DAB receiver. This page shows how to set up your T23 in five simple steps: DAB/FM aerial AERIAL AERIAL DIGITAL OUTPUTS ANALOG OUTPUTS R Analog outputs 1 Unpack the T23 Your T23 is supplied with the following components: • • • Mains cable. C22 remote control. Two batteries for the remote control. If any of these items are missing please contact your supplier. We recommend you retain the packaging in case you need to transport the unit at a later date. IR L Digital outputs RS232 IR 2 Connect to a preamplifier Analogue outputs The T23 is designed to be connected to the line input of a preamplifier. Connect the ANALOG OUTPUTS to a suitable line input using a pair of analogue RCA leads. Digital outputs The T23 also provides both optical and coax digital outputs, to allow you to connect the T23 to a digital surround processor or digital preamplifier with digital inputs, or record from the T23 to a digital recorder. The T23 includes an analogue to digital converter, so FM is also available on the digital output. RS232 Power 3 Connect an aerial 5 Tune to a DAB station The T23 includes a combined FM/DAB (Digital Audio Broadcasting) radio receiver, and to receive stations on either of the DAB or FM wavebands you need to connect a suitable aerial to the aerial connector on the back panel. The FM/DAB aerial connector is an F-type screw connector. • Connect the aerial by pushing the pin into the hole in the center of the connector, then screwing the sleeve onto the outside. For more information about connecting and positioning the aerial for best reception see Using the radio, page 7. DAB autoscan full... 4 Connect power • Connect using an optical cable or coax digital cable as appropriate. Plug one end of the mains cable supplied with the T23 into the power connector on the back panel, and connect the other end to a wall socket. If this cable is not suitable for your power outlets please contact your supplier for an alternative cable. WARNING: Always disconnect the T23 from the mains power before connecting or disconnecting any cables. • Switch on the T23, using the switch under the right-hand end of the front panel. The standby indicator will light up on the front panel. Press d on the front panel, or TUNER on the remote control, until the display shows: DAB The first time you select the DAB receiver it scans for stations, and the display will show: with a progress bar showing the progress of the scan and the number of stations found. The tuner will then select the first station found, in alphabetical order. Using the T23 This page explains how to operate your T23, with an explanation of the function of each of the front panel controls. P R I M A R E $!"#LASSIC 3ERIOUS#LASSICS Display Next Previous FM/DAB Preset Select Display Standby Front panel controls Listening to DAB radio Listening to FM radio Changing the display Previous V To select the DAB tuner To select the FM tuner In tune mode displays the previous station (DAB) or tunes down manually (FM). In preset mode selects the previous preset. • • The T23 allows you to adjust the display brightness between four options: off, dim, medium, or bright. DAB FM Next A When you first select the DAB tuner, the tuner scans to locate all the stations in your neighbourhood, and the display shows: For more information see FM, page 5. In tune mode displays the next station (DAB) or tunes up manually (FM). In preset mode selects the next preset. Select R Selects the displayed DAB station. Press d on the front panel, or TUNER on the remote control, until the display shows: DAB autoscan full... with a progress bar showing the number of stations found. For more information see DAB, page 5. FM/DAB d Switches between FM and DAB. Display i Changes the displayed information. Preset mode p Switches the function of the A and V keys between tune mode and preset mode. Standby O Press to put the T23 into standby. The display shows: -OFFPress again to switch the T23 on. Press d on the front panel, or TUNER on the remote control, until the display shows: • Press DIM on the remote control to step between the options. If you turn the display off, it will light up for a short time each time you change a setting. Using the remote control This page explains how to use the C22 remote control to operate the T23, and how to fit the batteries into the remote control. Dim display Switch on/off You can operate all the functions of the T23 using the C22 remote control: Enter preset number Clear number entry Fitting the batteries Before using the remote control you need to insert the two AAA batteries supplied with the C22. • Gently slide open the cover on the back of the remote control: • Insert the two batteries, observing the polarity printed on the bottom of battery compartment: • Slide back the cover until it clips into place: Enter number >10 Switch between FM and DAB Increase volume of preamplifier/processor Next preset Decrease volume of preamplifier/processor Previous station (DAB) Manual tune down (FM) Next station (DAB) Manual tune up (FM) Select DAB station or option Previous preset Search down (FM) Search up (FM) Display option Save preset Tune mode (DAB), Auto/Mono (FM) Note: Replace only with alkaline batteries type AAA, LR03, or equivalent. Dispose of old batteries considerately. Using DAB and FM This page gives information about using DAB and FM, including scanning for stations, stepping between stations, and defining presets. DAB FM Using presets (DAB or FM) The DAB tuner covers the main Digital Audio Broadcasting bands, Band III (174-240MHz) and L-Band (1452-1492MHz). The FM tuner covers the FM Waveband, 87.5108MHZ. It includes RDS (Radio Data System) to display text associated with many FM stations. You can define up to 10 preset stations on DAB and 40 preset stations on FM. DAB broadcasts provide the benefits of a wide choice of stations, high-quality digital audio (depending on the station), and a range of associated text information. The display shows the name of the station on the first line and the genre on the second line. For example: Classic FM Serious Classics To save the current station as a preset To scan for a station • Press ] on the remote control to scan up in frequency or [ to scan down in frequency. The FM tuner will stop when it finds a station. To select a station by name To perform an autoscan • To tune manually You may wish to autoscan periodically to locate new stations. • Press A or V on the front panel, or > or < on the remote control, to step through the stations in alphabetical order. The second line of the display shows each station name; for example: Classic FM • Press R on the front panel or SELECT on the remote control to select the station. To tune manually • Press MODE on the remote control. The display shows: < Manual tune >> • Press SELECT to select Manual tune. • Press MODE on the remote control. The display shows: < Manual tune >> • Press > to select Autoscan local or Autoscan full. Autoscan full rescans the entire waveband to find any new stations. • • Press SELECT to start scanning. A progress bar shows the progress of the scan, together with the number of stations found. At each step the display shows the channel number and frequency; for example: To change the text display • Press SELECT to select it. The display shows the frequency and signal quality (SQ) for the channel, between 0 and 100 (maximum); for example: 225.648 • SQ: • Press i on the front panel or DISP on the remote control. When you have displayed the channel you want to select: 64 Press SELECT to tune the T23 to that channel. The display shows: NOW TUNING... It will then start playing. To select mono You can reduce the noise on weak stations by selecting mono mode. The tuner then selects the first station found in alphabetical order. 225.64MHz 89.10MHz The display steps between the following options: • • • • • • • • • Genre Station name Time and date Channel and frequency Bit rate and stereo/mono Blank Scrolling text display Signal meter Quality meter Press the MODE button to switch between AUTO, which automatically selects stereo for strong signals, or MONO. To change the text display • Press i on the front panel or DISP on the remote control. Press MEM on the remote control. The display shows the last preset number you used, and the station name or frequency; for example: DAB P04 Classic 10 Save? • The display shows the current frequency; for example: Autoscan local rescans the current suite of stations. You can then step between the predefined DAB frequencies using < and > on the remote control. 12B Press A or V on the front panel, or > or < on the remote control. • Press A or V on the remote control to select a preset number, or type the preset number on the remote control, and press MEM or SELECT to save it. To select a preset using the remote control • Press A or V to display the preset number, or type the preset number on the remote control pressing +10 first to enter a number greater than 10. After a short delay the preset will be selected. To select a preset using the front panel • • Press p to switch to preset mode. Press A or V to step between presets. To delete a preset (FM only) The display steps between the following options: When listening to the preset: • • • • • • Programme type Radio text Clock time Blank Frequency and mono/stereo Hold down C on the remote until the display shows: Delete? • Press SELECT to delete the preset. Additional information Technical specification Analogue output DAB receiver RCA connector, 2.5V RMS, 100Ω. Tuning range: Band III 174-240MHz, L-Band 14521492MHz Digital outputs Optical output: TOSlink connector. Performing a factory reset If the T23 is moved to another location you may need to clear the DAB memory and presets in order to receive any new local stations. In this case perform a factory reset as follows: Usable sensitivity: Band III 29dBuV, L-Band 30dBuV. Number of presets: 10 • • Coax output: SPDIF (RCA connector), 75Ω. PCM Sample Rate 48kHz. FM tuner Frequency range: 87.5-108MHz Switch the T23 to standby. While holding down the V button press STANDBY until the display shows: Set Factory Default? 1:FM 2:DAB 3:FM+DAB Usable sensitivity: FM Mono 10dBuV, FM stereo 20dBuV • Number of presets: 40 Antenna: 50Ω Using the remote control press 1 to use FM only, 2 to use DAB only, or 3 to use FM and DAB. The display will confirm that a factory reset has been performed. General WARNING: This will delete all the DAB and FM presets and settings. Supply voltage: 100/120 or 230V AC (must be set internally). IR input Power consumption: Standby 14W, operational 16W. The T23 normally receives remote control commands from an infra-red eye on the front panel. If you want to control the T23 remotely you can connect the IR socket on the back panel to an infra-red eye or multi-room system infra-red output. Size: 430 x 385 x 106mm (WxDxH) Weight: 7.5kg To enable the IR socket • Turn on the main power switch while holding down the i button on the front panel. The display will show: BACK IR RS232 The RS232 connector allows your dealer to upgrade the firmware on your T23, or control the T23 as part of a multi-room system. Do not connect anything to this socket unless instructed by your dealer. Connecting an aerial The type of aerial you need for DAB and/or FM reception depends on the quality of the signal in your area and your listening preferences. For best results from both DAB and FM reception you will need separate DAB and FM aerials, with an aerial combiner to combine the signals from both aerials into the connector on the back panel of the T23. DAB In an area with good reception you should get good results with a simple dipole aerial, with two elements or wires arranged in a T. The aerial should be mounted with the elements pointing vertically as the transmissions are vertically polarised. FM In an area of strong FM reception a dipole aerial should also give good results with FM. Arrange the elements horizontally as FM receptions are horizontally polarised. In an area of poor reception you will need a roof or loft mounted FM aerial; contact your local dealer for information and advice. Primare Systems AB, Renvägen 1, SE-352 45 Växjö, Sweden. http://www.primare.net