1
RD – SI
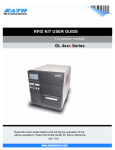
RFID XML Printer
User Manual
System Name:Customized Special Specification
Model
:CL408e RFID
Confirmed Specification
Fifth Released 10-November-2005
© 2005 SATO Corporation
R&D Div – SI
Document Changed History
Version
Page
Item
Content
1
2005.01.07
2
2005.01.14
10
11
13
14
1
2
3
4
Added comments on Maximum number of formats (999)
Added comments on Maximum number of formats (999)
LCD displays for Test Print Mode
Sample print of expanded memory printout
3
2005.03.10
4
2.3
6
3
7
12
4
6.3
13
6.4
17
8
Added comments on XML enabled printer for Formats
storing in both SRAM card and internal Flash ROM
Changed LCD displays flowchart for XML/SBPL Mode
Select in Advanced mode
Added sect. 4 Storage Media Select in Advanced mode
Added sect. 6.3 on sample data sent from Label Gallery
(Proposed solution for Variable Name matching)
Added sec. 6.4 on sample data sent to printer to recall
format (Proposed solution for Variable Name matching)
Added Appendix A on <ESC>/X command
4
2005.11.09
5
2005.11.10
First Released
Edit and Update Manual with new RFID functions, 2D
barcode support and new LCD screens options (under
Advanced Mode)
3
3
Storage Media Type default change to ROM from Card
Document Changed History-1
1
Content
1
2
Outline....................................................................
System Structure...........................................................
2.1 Host Computer ...........................................................
2.2 Data Analyze ............................................................
2.3 Format (only in XML mode) ...............................................
2.4 XML (only in XML mode) ..................................................
2.5 Merge (only in XML mode) ................................................
2.6 2.6 Print Label .........................................................
3 XML Related LCD Options....................................................
4 XML Data Stream............................................................
4.1 Document Type Definition (DTD) ..........................................
4.2 XML Data Stream Sample ..................................................
5 Label Gallery (LG) Plus Software...........................................
1
2
2
2
2
2
2
2
3
4
4
5
6
5.1 Creation of Label Format ................................................ 6
5.2 LG Printer Setting ...................................................... 7
5.3 Sample Format – Store ................................................... 8
5.4 Sample Format -Recall .................................................. 9
6 Registered Formats Verification........................................... 10
6.1 Via Test Print Mode .................................................... 10
6.2 Via <ESC>FP command (only in SBPL mode) ................................ 11
7 XML support for 2D Barcodes............................................... 12
7.1 Data Matrix ............................................................ 12
7.2 MAXI Code .............................................................. 12
7.3 PDF417 ................................................................. 12
7.4 QR Code (model 1) ...................................................... 12
7.5 QR Code (model 2) ...................................................... 13
7.6 QR Code (micro QR) ..................................................... 13
8 RFID module commands...................................................... 14
8.1 SAMsys module (UCODE only) ............................................. 14
8.2 Alien module ........................................................... 15
9 Appendix A (<ESC>/X command).............................................. 16
10
Appendix B (<ESC>IP0 command) ........................................... 17
11
Appendix C (Oracle XML Data Stream Sample) .............................. 19
12
Appendix D (SAP XML Data Stream Sample) ................................. 20
0
1 Outline
This specification gives explanation on the new RFID XML printer. Printer models are as follow:
Model Name
New Firmware Version
CL408e RFID
05.98.01.00A
Based Firmware Version
05.96.01.00F (Standard RFID),
05.97.00.00C (Alien XML),
05.98.00.00C (SAMSys XML),
05.99.00.00C (Standard XML)
About Special Specification
This special specification is about the consolidation of all currently available XML firmware (Alien,
SAMSys and Standard) into the latest 2-in-1 RFID standard firmware. Hence, both Alien and SAMSys
RFID user can now use the same firmware for XML data processing and printing while simply select
their module type from the LCD option. Like the previous XML firmware, this new RFID XML firmware
will also compile to the Oracle and SAP standard/requirements. This firmware has also been further
enhanced with new 2D barcode support and selectable format no. deletion.
To simplify the usage of this newly consolidated RFID XML printer, the following shall looked into:
On XML
New XML related LCD screen options
Oracle and SAP compliance XML data streams that combine with stored LG format (inside the
printer ROM/external card) for printing
Label Gallery (LG) software for creating the XML format design
Checking registered format procedures
New 2D barcode XML support (i.e. to allow 2D barcode printing)
On RFID
RFID commands used for data encoding
Note:
Due to combination of RFID module in this printer, user has to select their RFID module (Alien
or SAMSys) under the new RFID Mode. More options like Data Type, Data Size, etc can also be
selected from the new RFID Mode. Please kindly refer to combined RFID Specification for more
information.
1
2 System Structure
RFID XML
Step 3:
Step 2:
Data
Printer
Format Input or
Store
Analyze
Step 5:
Merge Format with
Step 4:
Step 1:
Host Computer
Step 6:
Print Label
XML data
XML Data Input
to Call Form
For SBPL Mode
2.1 Host Computer
Host computer is used to transfer Format and XML data stream to printer for printing
or storage
2.2 Data Analyze
In Data Analyze, the data sent will be checked to identify whether it is SBPL or XML
data. Only the matching data type set in the Mode Type (under Advance Mode) can be accepted.
For example, if SBPL mode selected only SBPL data will be accepted and XML data will
not have any effect to the printer.
2.3 Format (only in XML mode)
Under Format, all input formats will be stored either inside external SRAM card or printer
internal Flash ROM selectable by the Storage Media type option (under Advance Mode).
2.4 XML (only in XML mode)
When the XML data stream follows the Document Type Definition (DTD) semantics, it contains
a <labels> or <label> element with a _FORMAT attribute. The RFID XML printer parses the
XML print job data stream for format attribute, label quantity, and variable field data.
2.5 Merge (only in XML mode)
When XML data stream been sent to request print, the printer will call the respective
format from memory (either card or flash ROM) and match with the corresponding variables
inside the XML data stream. Eventually, the merged data will be converted to SBPL data.
2.6 Print Label
Here the printer will process the input SBPL data for label printing
2
3 XML Related LCD Options
The figure below illustrated all of the XML related LCD options under the Advanced Mode
(see shaded boxes).
Mode Select
-to select Printer Mode either XML or SBPL. (Default: XML mode)
Storage Media -to select the storage media for XML formats storage. (Default: ROM)
Format No to Del – to select Format No. for deletion. (Default: 000)
Power On
LINE+POWER ON
Advanced Mode
FEED
DARKNESS RANGE
A B
CHARACTER PITCH
PROP
FIXED
FEED
FEED
ZERO SLASH
YES
NO
COVEROPEN SENSOR
YES
NO
FEED
FEED
AUTO ONLINE
YES
NO
MODE SELECT
XML SBPL
FEED
FEED
PRINT OFFSET
V:+0000 H:+000
STORAGE MEDIA
CARD ROM(INT)
FEED
FEED
IGNORE CR/LF
YES
NO
FORMAT NO TO DEL
000
FEED
FEED
Important: Format Deletion will take some time to clear. Please kindly wait till the
Format Delete Completed LCD message appears before power off printer.
3
4 XML Data Stream
4.1 Document Type Definition (DTD)
An XML DTD defines the XML tags’ structure used in the XML file. The host system will
generate the XML files according to this DTD. RFID XML printer will translate the XML
according to this DTD (see example below). Here, the example defines the elements that
are used in the XML data stream and a list of their attributes and the next level elements.
<!ELEMENT labels (label)*>
<!ATTLIST labels _FORMAT CDATA #IMPLIED>
Line 2
<!ATTLIST labels _JOBNAME CDATA #IMPLIED>
<!ATTLIST labels _QUANTITY CDATA #IMPLIED>
<!ATTLIST labels _DUPLICATES CDATA #IMPLIED>
<!ATTLIST labels _PAGES CDATA #IMPLIED>
Line 4
<!ATTLIST labels _PRINTERNUMBER CDATA #IMPLIED>
<!ATTLIST labels _PRINTERNAME CDATA #IMPLIED>
<!ELEMENT label (variable)*>
<!ATTLIST label _FORMAT CDATA #IMPLIED>
<!ATTLIST label _JOBNAME CDATA #IMPLIED>
<!ATTLIST label _QUANTITY CDATA #IMPLIED>
<!ATTLIST label _DUPLICATES CDATA #IMPLIED>
<!ATTLIST label _PAGES CDATA #IMPLIED>
<!ATTLIST label _PRINTERNUMBER CDATA #IMPLIED>
Line 18
<!ATTLIST label _PRINTERNAME CDATA #IMPLIED>
<!ELEMENT variable (#PCDATA)>
<!ATTLIST variable name CDATA #IMPLIED>
Line 2 -If the XML data follows DTD semantics, it will contain the <labels> elements
identifying the default attributes used by printer for label creation. The _Format
attribute identifies the appropriate stored label format.
Line 4 -Other attributes can be processed as well; for instance, the _QUANTITY attribute
can be used to set the print quantity of the particular label.
Line 18 – Here the <variable> elements with name attribute contains the variable name,
it corresponds to the variable field in the label format. The <variable> element text
contains the data that is placed in the variable field in the label format.
4
4.2 XML Data Stream Sample
General Information
Below is an Oracle XML data sample with its content lies between <labels> and </labels>.
Hence, each <label> and </label> corresponds to the information needed to print each
group of individual label like values of each variables (enclosed by <variable> and
</variable>).
As for the default printer name, label format, and duplicate quantities, they are provided
within the <labels> tag. Those default values can be overridden by each individual <label>
tag for a specific printer name, label format, and/or duplicate quantities for that
particular label print request. Without overriding tags, default parameters will be used
throughout the whole XML data.
XML Data Stream Sample
<?xml version=”1.0” standalone=”no”?>
<!DOCTYPE labels SYSTEM “label.dtd”>
<labels _FORMAT=”Materiallabel” _QUANTITY=”1” _PRINTERNAME=”Printer1” _JOBNAME=”LBL101”>
<label>
<variable name= “ITEM”>AS5488</variable>
<variable name= “ITEMDESC”>Desktop</variable>
See Description Below
<variable name= “QTY”>2</variable>
<variable name= “UOM”>EA</variable>
</label>
<label _FORMAT=”LotLabel” _PRINTERNAME=”Printer2” >
<variable name= “ITEM”>AS12345</variable>
<variable name= “ITEMDESC”>Mouse</variable>
<variable name= “LOT”>10200</variable>
<variable name= “QTY”>10</variable>
<variable name= “UOM”>Bx</variable>
</label>
</labels>
Description of the above sample
Under <labels> element:
_FORMAT element recalls the name of the stored XML-enabled format from printer memory
_QUANTITY element determines the number of labels to be printed
Under <label> element:
LOT is one of variable data fields, and the value 10200, are the variable data used
by printer to match with the variables set inside the prestored format for printing
5
5 Label Gallery (LG) Plus Software
5.1 Creation of Label Format
As explained earlier, we need to send in a label format for data merging with XML data
stream. This can be done easily by Label Gallery Plus software (see above).
Upon the completion of label design, the user is able to select an “Export to Form” option
under the File option in which the Form along with its corresponding variables are sent
to the printer and stored under a particular Format Number.
6
5.2 LG Printer Setting
In order to allow LG formats to be send into our RFID XML printer, below are some of
the steps needed to set accordingly.
For example, if you like to set 23 as the Format Number used to store inside the RFID
XML printer, please kindly enter 23 inside the Format Number box (under Advanced Setup
inside Printer Settings option) as shown above.
Note: Selection of Slot 1 implies that Format 23 will be stored inside the memory card
residing in the printer.
Important:
Maximum number of Formats allowed inside the memory card is 999. However, if the sizes
of each format are larger, the maximum number of Formats might not be achievable.
7
5.3 Sample Format – Store
A CC1 YS,1 %0 H0025 V0019 FW0808V0120H0785 %0 H0077 V0053 L0306 P02 ULocation
Label %0 H0031 V0166 L0304 P02 USub: %0 H0032 V0248 L0303 P02 UDescription: %0 H0036
V0375 L0303 P02 USubStatus: %0 H0036 V0513 L0305 P02 ULoc: %0 H0036 V0599 L0303 P02
ULoc Status: %0 H0035 V0869 L0408 P02 UOracle Warehouse
Management /X,01,99,organization %0 H0482 V0059 L0304 P02 U /X,02,99,subinventory_co
de %0 H0170 V0170 L0303 P02 U /X,03,99,subinventory_description %0 H0033 V0308 L0303
P02 U /X,04,99,subinventory_status %0 H0036 V0430 L0303 P02 U /X,05,99,locator %0 H
0174 V0521 L0303 P02 U /X,06,99,locator_status %0 H0036 V0657 L0303 P02 U /X,07,99,b
arcodefield %0 H0036 V0713 B101118 Z
The above table is a LG format sample used to store inside the printer memory. As we can
see above, <ESC>/X command has been created to support Variable Name matching function
(see Appendix A for more details on <ESC>/X command).
Description of the above sample
<ESC>A command marks the start of code processing like SBPL.
<ESC>CC command issued next to select either card or internal memory to call the desired
LG Format. Note: CC1=Slot 1 (can be Card or Internal Memory depends on the LCD option
selected under the Card Mode).
<ESC>YS command issued to store the desired format into printer memory.
<ESC>/X commands issued to specify field numbers, data length and Variable Name of
each field inside the format. Note: Horizontal and vertical positions, rotation angle
and font size are also set inside the <ESC>/X command.
<ESC>Z command marks the end of code processing.
‘ ’ character implies the <ESC> character.
Important (only for XML mode):
1. A short beep will be heard when the format been successfully downloaded into the printer.
2. Maximum number of fields per format can be registered is 99.
This depends on the available memory size at the time of registration too.
8
5.4 Sample Format - Recall
A CC1 YR,1 Q1 Z
The above table shows a sample of data that is used to recall a Format residing in the
printer’s memory.
Description of the above sample
<ESC>A command marks the start of code processing.
<ESC>CC command issued next to select either card or internal memory to retrieve the
desired format.
<ESC>YR command issued to tell the printer to recall the desired format from memory.
<ESC>Q command issued to set labels quantity for printing.
<ESC>Z command marks the end of code processing.
‘ ’ character implies the <ESC> character.
After the above format recall sent, RFID XML printer will convert the XML data into SBPL
for printing.
9
6 Registered Formats Verification
6.1 Via Test Print Mode
LCD Options
As illustrated below is the LCD option (select Memory under Test Print Mode) used to print
out a label (see below) indicating how many formats are registered in the memory.
Power On
FEED+POWER ON
TEST PRINT MODE
CONFIGURATION
FEED
TEST PRINT MODE
BARCODE
FEED
TEST PRINT MODE
HEADCHECK
FEED
TEST PRINT MODE
MEMORY
FEED
TEST PRINT MODE
FACTORY
FEED
Memory Test Print Label Sample
The sample below shows that there are 999 formats registered in the SRAM card.
Note
10
6.2 Via <ESC>FP command (only in SBPL mode)
The user is able to check the number of Formats registered in memory by using the following
method.
A CC1 FP Q1 Z
The <ESC>FP command prints a label (see below) showing how many formats have been
registered up to that point in time. This label also shows the number of graphics, PCX,
True Type Fonts, Form Overlay, BMP and Download Fonts registered in the memory. Note:
‘ ’ character implies the <ESC> character.
11
7 XML support for 2D Barcodes
Now, RFID XML printer can support variable data printing for most of the 1D/2D barcodes,
depending on Label Gallery support. Please refer to SBPL Manual for more information.
7.1 Data Matrix
The SBPL command to define a Data Matrix barcode is <ESC>BX and the following code
snippet is showing how the barcode is defined and stored in a Format.
<ESC>/X,01,99,barcode_field <ESC>V100 <ESC>H200 <ESC>BX01100202000000001 <DC>1234567890
As we can see from the code snippet above, The <ESC>BX command is used to define the
various barcode parameters while the <ESC>DC command defines the initial data stream.
7.2 MAXI Code
The SBPL command to define a MAXI Code barcode is <ESC>BV and the following code
snippet is showing how the barcode is defined and stored in a Format.
<ESC>/X,01,99,barcode_field <ESC>V100 <ESC>H200 <ESC>BV1,1,2,123456789,001,002,SAHTHA
As above, the <ESC>BV command defines, not only the various parameters that make up the
barcode, but also the initial data too.
7.3 PDF417
The SBPL command to define a PDF417 barcode is <ESC>BK and the following code snippet
is showing how the barcode is defined and stored in a Format.
<ESC>/X,01,99,barcode_field <ESC>V100 <ESC>H200 <ESC>BK0309303180010PDF1234567
As above, the <ESC>BK command defines, not only the various parameters that make up the
barcode, but also the data count and initial data too.
7.4 QR Code (model 1)
The SBPL command to define a QR Code (model 1) barcode is <ESC>2D31 and the following
code snippet is showing how the barcode is defined and stored in a Format.
<ESC>/X,01,99,barcode_field <ESC>V100 <ESC>H200 <ESC>2D31, L, 05, 1, 0 <ESC>DN6, 012345
As above, the <ESC>2D31 command defines the various parameters that make up the
barcode whereas the <ESC>DS command defines the input mode and the data.
12
7.5 QR Code (model 2)
The SBPL command to define a QR Code (model 2) barcode is <ESC>2D31 and the following
code snippet is showing how the barcode is defined and stored in a Format.
<ESC>/X,01,99,barcode_field <ESC>V100 <ESC>H200 <ESC>2D30, L, 05, 1, 0 <ESC>DN6, 012345
As above, the <ESC>2D30 command defines the various parameters that make up the
barcode whereas the <ESC>DS command defines the input mode and the data.
7.6 QR Code (micro QR)
The SBPL command to define a QR Code (micro QR) barcode is <ESC>2D32 and the
following code snippet is showing how the barcode is defined and stored in a Format.
<ESC>/X,01,99,barcode_field <ESC>V100 <ESC>H200 <ESC>2D32, L, 04 <ESC>DN6, 012345
As above, the <ESC>2D32 command defines the various parameters that make up the
barcode whereas the <ESC>DS command defines the input mode and the data.
*Note 1: Once the parameters of a barcode command is fixed and downloaded to the printer,
only the data can be updated or changed through the use of XML data file. There is
no way to change the parameters of the barcode other than deleting the stored
format and re-downloading the format with the new barcode parameters into the
printer again.
*Note 2: Another thing to note is that if there is no XML data supplied to the barcode in the
XML file, the default data registered initially in the Format is used instead.
13
8 RFID module commands
8.1 SAMsys module (UCODE only)
<ESC>IP0 command
RFID XML printer supports the <ESC>IP0 command of the SAMsys RFID module (UCODE only).
The <ESC>IP0 command can now be exported and stored inside the printer memory as part
of a particular format. This means that the <ESC>IP0 command can be recalled from memory
to encode a RFID tag. The code snippet below shows the <ESC>IP0 command being exported
by Label Gallery to the RFID XML printer for storage into a Format.
<ESC>/X,01,99,EPC <ESC>IP0,0,0
As we can see from the code snippet above, the variable name of the <ESC>/X command is
“EPC” and the parameters of the <ESC>IP0 command are all set to zeroes when exported
initially. Whenever a XML data is sent to the printer, it will get the data of the variable
name that matches the one stored in the printer and in this case, the variable name is
“EPC”. The printer will then fill in the parameters of the <ESC>IP0 command based on the
rules listed in the table below (Please refer to Appendix B for more information on the
specifications of the IP0 command):
<ESC>IP0, X, Y, Z (X=Selection of EPC type, Y=Selection of number of characters, Z=data)
S/No
1
Item Description
X is set to “2” when the first two characters of the data received is
“30” (SGTIN96)
X is set to “0” when the first two characters of the data received is
“31” (SSCC96)
2
Y is set to “0” when the length of the data is 28 digits
Y is set to “1” when the length of the data is 24 digits
Y is set to “2” when the length of the data is 18 digits
3
Note that Z is the actual data to be encoded. The data can be 28, 24,
or 18 digits long
With reference to the above table, two samples of the encoding scheme are shown below:
Sample #1 SGTIN96 : <ESC>IP0, 2, 1, 30740C43FC162E8000000000
Sample #2 SSCC96 : <ESC>IP0, 0, 1, 3194BEF97B65C0363E000000
14
<ESC>IP2 command
Besides the <ESC>IP0 command, the RFID XML printer also supports the use of <ESC>IP2
or Tag Lock command. The code snippet below shows the <ESC>IP0 and <ESC>IP2 commands
being exported by Label Gallery to the printer for storage into a Format.
<ESC>/X,01,99,EPC <ESC>IP0,0,0<ESC>IP200
As seen above, the password to lock the Tag is set to “00” for the <ESC>IP2 command. Upon
receiving an XML file, the printer will check for the correct variable name to extract
the data and encode it onto the Tag. The Tag will then be locked with a password of “00”.
8.2 Alien module
<ESC>IP0 command
The RFID XML printer supports the <ESC>IP0 command of the Alien RFID module. The <ESC>IP0
command can now be exported and stored inside the printer memory as part of a particular
format. This means that the <ESC>IP0 command can be recalled from memory to encode a
RFID tag. The code snippet below shows the <ESC>IP0 command being exported by Label
Gallery to the printer for storage into a Format.
<ESC>/X,01,99,EPC <ESC>IP0
As above, the variable name of the <ESC>/X command is “EPC” and whenever a XML data is
sent into the printer, it will get the data of the variable name that matches the one
stored in the printer and in this case, the variable name is “EPC”.
<ESC>IP2 command
Besides the <ESC>IP0 command, the printer supports the use of <ESC>IP2 or Tag Lock command.
The code snippet below shows the <ESC>IP0 and <ESC>IP2 commands being exported by Label
Gallery to the printer for storage into a Format.
<ESC>/X,01,99,EPC <ESC>IP0<ESC>IP200
As we can see from the above code snippet, the password to lock the Tag is set to “00”
for the <ESC>IP2 command. Upon receiving an XML data, the printer will check for the
correct variable name to extract the data and encode it onto the Tag. The Tag will then
be locked with a password of “00”.
15
9 Appendix A (<ESC>/X command)
Command
<ESC>/X,aa,bb,cc...c{.....}
Structure
aa
= Field number to be stored (0199)
bb
= Length of field to be stored (0199)
cc...c
= Variable name to be stored (Maximum up to 60 characters)
{.....} = Command stream describing the field to be stored
Command
Example:
<ESC>YS,01<ESC>/X,01,99,organization
Placement:
Immediately after the <ESC>CC slot select command.
Default:
None.
To store a format field description in the memory card
Function
Printer Input
<ESC>A
<ESC>CC1
<ESC>YS,01<ESC>/X,01,99,item<ESC>V0100<ESC>H0100<ESC>XB1
<ESC>/X,02,99,lot<ESC>V0200<ESC>H0200<ESC>XB1
<ESC>Z
Printer Output
There is no printer output as a result of this command. The <ESC>YR Format
recall command is used together with this command
Special Notes
a. This command requires the Memory Card option.
b. This command is similar to the <ESC>/N command and the
restrictions placed on <ESC>/N command are also applicable
to the <ESC>/X command.
16
10 Appendix B (<ESC>IP0 command)
For SAMSys Module Only:
IP0,X,Y,Z
X = Selection of EPC type
0 : SSCC96 * Printer does mapping only
1 : SSCC64 * Printer does mapping only (Reserve)
2 : SGTIN96 * Printer does mapping only
3 : SGTIN64 * Printer does mapping only (Reserve)
a : EAN128 SSCC 96 * Printer does calculation ePC code to be sent to the printer from
NVE and then mapping
b : EAN128 SSCC 64 * Printer does calculation ePC code to be sent to the printer from
NVE and then mapping (Reserve)
c : EAN13 SGTIN 96 * Printer does calculation ePC code to be sent to the printer from
EAN13 and then mapping
d : EAN13 SGTIN 64 * Printer does calculation ePC code to be sent to the printer from
EAN13 and then mapping (Reserve)
Y = Selection of number of characters
0 : 28 digits (Encode data to addresses 02h07h and 10h17h)
1 : 24 digits (Encode data to addresses 02h07h and 10h15h)
2 : 18 digits(Encode data to addresses 02h07h and 10h17h
Z = data
17
*In the case of “X”= a
Z = (aa,bb,cd∼d(17 digits or 18 digits))
aa
= Number of digits of Company Prefix
(12 digits – 6 digits )
bb
= Number of digits of Serial Reference
(5 digits -11 digits)
c
= Filter Value (0 -7)
d – d
= Data (Company Prefix + Serial Reference must be 17 digits)
Note : Company Prefix + Serial Reference must be 17digits, otherwise the printer makes
error
*In the case of “X”= c
Z = (aa,bb,c,dd,ee)
aa
= Number of digits of Company Prefix
(12 digits – 6 digits )
bb
= Number of digits of Item Reference
(1 digits -7 digits)
c
= Filter Value (0 -7)
d – d = Data (Company Prefix + Item Reference must be 13 digits)
e -e
= Serial Number (Max. 12 digits)
We would have another parameter after “Z” for a selection of data type among ASCII, HEX
and binary.
18
11 Appendix C (Oracle XML Data Stream Sample)
<?xml version=”1.0” standalone=”no”?>
<!DOCTYPE labels SYSTEM “label.dtd”>
<labels _FORMAT=”Materiallabel” _QUANTITY=”1” _PRINTERNAME=”Printer1” _JOBNAME=”LBL101”>
<label>
<variable name= “ITEM”>AS5488</variable>
<variable name= “ITEMDESC”>Desktop</variable>
<variable name= “QTY”>2</variable>
<variable name= “UOM”>EA</variable>
</label>
<label _FORMAT=”LotLabel” _PRINTERNAME=”Printer2” >
<variable name= “ITEM”>AS12345</variable>
<variable name= “ITEMDESC”>Mouse</variable>
<variable name= “LOT”>10200</variable>
<variable name= “QTY”>10</variable>
<variable name= “UOM”>Bx</variable>
</label>
</labels>
19
12 Appendix D (SAP XML Data Stream Sample)
<?xml version=”1.0” encoding=”UTF8”?>
<Command xmlns:xsi=”http://www.w3.org/2001/XMLSchemainstance”
xsi:noNamespaceSchemaLocation=”Command.xsd”>
<WriteTagData readerID=”Writer_Device”>
<Item>
<FieldList format=”C:Label.PL” jobName=”Writer_Device20040929165746” quantity=”1”>
<Field name= “EPC”>3074024220403B8000000008</Field>
<Field name= “EPC_TYPE”>SGTIN96</Field>
<Field name= “EPC_URN”>urn:autoid:tag:sgtin96:3.5.0037000.065774.8</Field>
<Field name= “PRODUCT”>SGPROD</Field>
<Field name= “PRODUCT_DESCRIPTION”>Test product</Field>
</FieldList>
</Item>
</WriteTagData>
</Command>
20