Download Manual JIB4 GB ohne EG7-18 _4_ 1
Transcript
JIB 4
JOBO HD Sports Camera
www.jobo.com
1
www.jobo.com
2
Contents
Page
Precautions
Product Certification
Functions Features
Product Structure
Start up and check the power
Operating Instructions
Setting of Camcorder parameter
Setting of camera parameter
Video recording
Photo shooting
Voice recording
Play the video
Browse photo file
Play the audio file
Remote control (optional
accessories)
4
5
6
8
10
11
14
17
21
22
24
25
25
26
27
Page
Standby mode
AV output connection
10. AV output connection
11. HDMI output connection
12. USB connection
13. Prompt of key tone
14. Prompt of laser light
15. Turn On/Off TFT Display
Fcc Notices
File Storage and Play
Backup Battery Installation
Specifications & Parameters
Notices for Waterproof Casing
Cautions in Using 3M Double-Sided
Foam Sticker
28
28
28
29
29
29
30
30
30
31
32
36
37
37
www.jobo.com
3
Precautions
1 This camera is a precision product Please do not drop it or hit it physically.
2 Keep the camera away from any object with a strong magnetic field, like magnet or electromotor, or any object
emitting strong radio waves, like antenna, as a strong magnetic field may cause failure to JIB 4 or cause damage to
image and audio data.
3 Do not expose the camera to high temperature or sunlight direct.
4 Keep the Micro SD card away from the strong magnetic field of TV, speaker, or magnet. Do not put it in any place
with potential static, or the data stored in it may be lost.
5 If the camera overheats, smokes or smell in charging, please disconnect the power supply immediately to avoid the
risk of fire.
6 Put JIB 4 beyond the reach of any child for charging, as the power cord may cause an accidental suffocation or
electric shock to the child.
7 Please keep this product in a cool, dry, and dust-free place.
www.jobo.com
4
Product Certification
As certified by such authoritative organizations as FCC and CE, this product complies with the recommended standards
and thus guarantees the user's safety. Thanks for purchasing AEE hands-free mini high-definition digital camera JIB 4
With small size and integrated design, hands-free JIB 4 is easy to operate, User-Friendly Interface Supported by
high-definition and dynamic image capturing technology, it can record real scenes and various activities anytime
anywhere, so that you can share wonderful recording experiences with your family and friends. This manual specifies
how to use and install JIB 4 and provides detailed information, including the instructions on use, operation and
installation as well as the technical specifications. Please read this Manual carefully to understand it before use and
keep it well for long-term reference.
Product Over view
As a multifunctional non-handheld high-definition digital sports video camera, this product can perform many leading
functions such as high-definition digital photographing, voice storage, real-time display, photo shooting, time display,
remote control, digital zoom, TFT colour screen, multi-functional keys, laser indicating, high-speed USB data
transmission, HDMI high-definition output function, low power prompt, memory card space prompt and USB charging
Supplemented by the accessories, this product integrating multiple patented technologies can be used to photograph
anything, anytime, anywhere.
Do not litter! Please recycle them!
www.jobo.com
5
Functions & Features
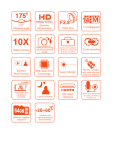
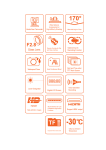
170° extra-large wide-angle lens Aperture f/30.
Specialized HD Camera, supporting 1080I/1080P/960P/720P high-definition video recording.
Photo shooting function, supporting 8 Mega.
10X digital zoom function.
Various shooting modes available: Single shooting, three photos continuous shooting, auto continuous shooting.
Self-timer function.
Voice recording function.
Wireless remote control function. (optional accessory)
Photo rotation at a maximum of 180°.
Laser indicating function.
Video loop coverage function.
With LCD segment screen and split TFT main screen, to display various working states in real time.
With waterproof case, the waterproof grade is IP68, the waterproof depth is up to 60 meters.
TFT display screen, to play and recall videos, and shoot.
With built-in dismountable high-capacity lithium battery, it can be re-charged.
Better image effect, three video output modes available for your selection.
1080i (1920x1080) 60fps/s, 1080P (1920x1080) 30fps/s, 960P (1280x960) 30f/s, 720P (1280x720) 60f/s, 720P
www.jobo.com
6
(1280x720) 30f/s, WVGA (848x480) 120f/s, WVGA (848x480) 60f/s.
Battery power detection and Micro SD card free space detection.
High-speed dynamic video recording, supporting an instant response to bright and dark environments.
Three photo metering modes for various shooting circumstances.
HDMI interface and AV output interface, to connect a high-definition display device or TV to view files.
Supporting a Micro SD card of 64G max.
High-quality colour fidelity, clearer and more realistic image.
It can remote control video recording, stopping and shooting of JIB 4 by using wireless remote control unique code
pairing function, avoiding interference of other remote control. (optional accessory)
Recording MOV videos, to be directly played by PC or uploaded onto video websites.
Auto standby power-saving function.
Supporting fast forward and fast rewind (1/4x/1/2x/2x/4x/8x/16x), and skipping of contents in the next segment
(when connecting with TFT screen player).
Supporting time setting (RTC function) and time superposition function.
Supporting USB20.
Built-in microphone, forming high-quality voice recording effect.
Steady shot: maintain the normal function after being dropped or stricken.
www.jobo.com
7
Product Structure
www.jobo.com
8
1 TFT display screen
2 MENU key
3 Up key
11 SD card slot
12 Right key
13 AV output
4 Left key
5 Down key 6Recall key
7 OK key
8 Push button of TFT display screen clip
9 Lanyard hole
10 Buzzer
14 Record
15 Green indicator of video recording
16 Power switch
17 Microphone
18 Red indicator of working/charging
19 LCD segment screen
20 Shutter
21 Stop key
22 Camera Lens
23 Indicator for video
recording (blue)
24 Laser transmitter
25 HDMI output
26 USB output
27 Thread
1. JIB 4 can be either handheld or realized non-hand-held use combining with various non-hand-held accessories
The camera can be installed in where you want or the camera can be installed in the water by the waterproof case
to photograph scene in the water.
www.jobo.com
9
The installation is shown as follows:
Installation and removal of TFT display screen and
Installation of waterproof case and main body
main body
2. Installation of remote control (optional accessory)
There is a separate remote control attached to JIB 4. Please install the remote control onto the correct position
based on the accessories below:
1 Velcro
2 Clip
3 Binding tape (optional)
www.jobo.com
10
Operating Instructions:
Preparations before use:
(1)Start up and check the power of JIB 4
Turn the power switch to „ON”, the system comes into play after the red indicator is bright constantly, the
corresponding icons on LCD segment screen will be lightened to enter normal preview state
At this time, it can view the following items on LCD segment screen:
A. Record mode: The current record mode can be viewed on the top left corner of LCD segment screen, „
„
indicates the video recording mode and „ „ indicates the voice recording mode.
B. Photo shooting prompt: The shooting icon „
„ can be viewed on the LCD segment screen. The icon will twinkle
once when shooting one photo.
C. Power icon: The power icon „ „ can be viewed on the top right corner of LCD segment screen The icon will be
bright constantly after the system coming into play and the disappearance of the icon means JIB 4 is shut down or
enters the standby state.
D. Video recording duration: Duration of the current video recording file is displayed on the middle line of LCD
segment screen, such as „
„ The video recording duration will start displaying when pressing „Record” key
once and it will stop when pressing „stop“ key once again.
Note: The video recording duration respectively on LCD segment screen and TFT display screen is displayed
synchronously.
www.jobo.com
11
E. Indication of battery power: The battery power icon „
„ can be viewed on the bottom left corner of LCD segment
screen and it will indicate the current battery power after starting up. More black grids indicate the higher power,
and it is lower conversely.
Note: The battery power indication icon will not display under standby or shutdown state.
F.USB connection: The USB mode icon „
„ can be viewed on the LCD segment screen and it indicates whether the
machine is connected with the computer. The green indicator light on left side will blink for the time of the USB
connection. The icon will be lightened after connecting with computer in start-up state and it will not be displayed
when not connecting with computer.
G. Micro SD card capacity indication: The micro SD card capacity icon „ „ can be viewed on the bottom right corner
of LCD segment screen to indicate the capacity of micro SD card. More black grids indicate the higher spare capacity,
and it is lower conversely. The green indicator light on the left remains on when the card is out of memory.
At this time, it can view the following items on TFT display screen:
A. Work mode: The video recording icon „ „ on the top left corner of TFT display screen indicates that it is in video
recording standby state.
B. Battery power: The battery power icon „ „ on the bottom left corner of TFT display screen indicates the spare
power of battery.
C. Resolution of video recording: 1080P/1080i/960P/720P/WVGA on the bottom left corner of TFT display screen
indicates that the system is in 1080P/1080i/960P/720P/WVGA resolution video recording standby state.
D. Spare storage capacity: Information of whether it has external card „
or „ and spare storage capacity „ „ can
www.jobo.com
12
be viewed on the bottom right corner of TFT display screen.
E. It cannot respond to operations of „<„ and „>„ under the preview state.
F. JIB 4 can be charged with the attached power supply or USB cable. The „Red Indicator of Working/Charging“on the
top of the machine will twinkle slowly in charging and it will be bright constantly after fully charging. The charging
duration is about 3h.
Note: Before use, please check if there is enough battery power. In case of a low battery power, please charge JIB 4 via
the attached power supply or USB cable. The „Red Indicator of Working/charging “will twinkle slowly in charging
and remain red with the battery icon “ ” displayed on the TFT display screen after charging.
(2) Format the Micro SD card
Please select a high-speed Micro SD card only and format it on JIB 4 before recording any video and voice or
shooting any photo if the Micro SD card has ever been used on other devices, please format it on JIB 4 before any
operation for normal usage.
Note: Please confirm whether files in internal memory of JIB 4 and in Micro SD card are needed before operating.
Locked files of JIB 4 also can be formatted to remove.
(3) Set the date/time
In preview mode, press „M” key to enter the menu interface, press „>„ key to shift to the setup interface „ „, press „ + „
or „ - „ key to select the menu „Date/Time“, and then press „OK” key to enter the setup interface of „Date/Time“ Then press
„OK” key again to finish. Characters/numbers showing date or time turns blue when the cursor appears Press „+“ or „-“ to
reset the date or time Press „OK” to confirm the revision Press „M” to exit from setting interface
www.jobo.com
13
Parameter Settings:
In preview mode, press „M” key to enter the menu interface, press „<„ or „>„ key to move the cursor left and right,
and press „+“or „-“key to move the cursor up and down After selecting the menu, press „OK“key to set the selected
menu and to press „M“key again can exit (The parameters set this will resume even in case the product needs to be
powered off or restarted in order to have a different mode, please ret the product manually)
(1) Setting of Camcorder parameter:
a. Video image resolution: Select 1080P, 1080i, 960P, 720P, WGA
PAL
1920x1080P
1920x1080i
1280x960P
1280x720P
1280x720P
848x480P
848x480P
25 fps 16:9
50 fps 16:9
25 fps 4:3
50 fps 16:9
25 fps 16:9
100 fps 16:9
50 fps 16:9
NTSC
1920x1080i
1280x960P
1280x720P
1280x720P
848x480P
848x480P
1920x1080P
30 fps 16:9
60 fps 16:9
30 fps 4:3
60 fps 16:9
30 fps 16:9
120 fps 16:9
60 fps 16:9
b. View. The camera support three visual angle (default setting is „Broad View „)
Broad View
Medium View
Narrow View
www.jobo.com
14
Same image with different visual angles:
Broad View
Medium View
Narrow View
Comparison of same scene with different View
www.jobo.com
15
c. Bit Rate: The camera supply two options (high bit rate " „and normal "
„.(default setting is „high“)
Note: Clear images require high bit rate and large file size at the same time.
d. Laser SYNC video: Turn on ( ) or turn off (
) the laser transmitter. (Default setting is „OFF“)
e.Exe: Select video „
„ or audio only „ „.
f. Pre-video: in preview status, press „M” to enter mode selecting interface and select „Pre-video“. Press REC key once
to enter Pre-video status when no video is saved. Press REC key again to start video recording and the clips taken in
last few seconds in Pre-video status can be saved as the beginning of the video.
g. Auto video: in preview status, press „M” to enter mode selecting interface. Select „Auto video“ mode and choose
one option from „OFF“, „5 Seconds“, „10 Seconds“ or „20 Seconds“ to set the time before video recording so that the
product will start recording after countdown.
h.180°photo rollover: in preview status, press „M” to enter mode selecting interface and select „180°photo
rollover“ to have upward photos when the camera is in reverse position.
I. Display time: In preview status, press „M” to enter video setting interface. If „Display time“ is activated, the shooting
date and time will automatically appear at the right bottom of the screen during video recording. Shooting date and
time will not appear on the screen in case „Display time” is not activated.
Notes:
a. Under the audio only Press „Record” key once, the system starts recording, voice recording duration is displayed on
the bottom of TFT display screen and the green indicator twinkles slowly; if press „Stop” key , the system will stop
and save the current audio file recorded, the green indicator is off and the red indicator remains bright (the
www.jobo.com
16
corresponding operating prompt is on LCD segment screen), and it returns to the audio mode.
b. During sound recording, the product is responsive only when pressing „Stop“, „Off“ or „M” key. The user may switch
to video recording and the sound recording will automatically stop and saved.
c. The laser icon will be displayed on the top left corner of the preview interface when turning on the function of laser
synchronous shooting, which indicates the system is in this shooting mode. At this time, the laser will be turned on
when starting recording and it will be turned off when stopping recording.
d. When Pre-video and Auto video are both activated, press REC key during Pre-video to start Auto video countdown.
Press REC key again to start self recording and the clips taken in last few seconds in Pre-video status can be saved as
the beginning of the video.
(2) Setting of camera parameter:
a. Image resolution: Select 3M, 5M or 8M;
b. Single shot: To press „Shutter” once can take one photo;
c. Continuous capture (three): To press „Shutter” once can take three photos continuously;
d. Auto cont capture: Take one photo every 1s/2s/3s/5s/10s/20s, till to press key to stop or the card is full, or the
power is run out.
e. Timed shooting: the user may select time to count down („3s”, „5s” or „10s”) and press „M” to return to preview
status. Press „Camera” once and the countdown starts. The self-timer indicator light flashes after the countdown to
take a snapshot. The timed shooting remains activated as default. In order to switch to single snapshot mode,
please manually turn off timed shooting.
www.jobo.com
17
f. Display time: In preview status, press „M” to enter camera setting interface. If „Display time“ is activated, the
shooting date and time will automatically appear at the right bottom of the screen during shooting. Shooting date
and time will not appear on the screen in case „Display time“ is not activated.
Notes: 1. The timed shooting remains activated as default. In order to switch to single snapshot mode, please manually
turn off timed shooting.
2. The timed shooting and auto cont capture cannot be activated at the same time.
(3) Setting of system parameter:
a. Warning tone: Turn on or turn off the key tone.
Note: Voice of photo shooting and video recording cannot be turned off through this item. It only turns off the key
operation voice and there is no switch to turn off voice of photo shooting and video recording in the machine
system.
b. Status indicator: please turn it on or off before self timing; the default setting is „ON” .
c. Video content loop: The video/audio file will be auto saved in segment once every 15 minutes when setting „Video
content loop“; and if it is not set, the video/audio file will be auto saved in segment once every 30 minutes.
Note: The current actual segment file is determined by the file size set, but not determined by the true time, that is to
say, the file will be segmented more than 15/30 minutes at a dark environment.
d. Auto to standby: Select the auto standby time of off, 2 minutes, 5 minutes or 10 minutes. In case of no any mission
and operation after selecting, the system will start timing and JIB 4 will turn off input and output to enter the
standby mode at the end of the time set. If there is any operation in timing, the system will re-time. If the video
www.jobo.com
18
recording or shutter is operated in the standby process, JIB 4 will be waked up. The default standby time is 5
minutes when selecting to restore the factory default.
e. TV output format: NTSC or PAL; the video format outputted to TV can be selected. If the selected format is changed,
please unplug the AV cable and then reinsert it to update the parameters.
f. Contrast: the product is preset with standard contrast. If necessary, the contrast can be increased for a better night
shot.
g. ISO Sensitivity: the preset ISO sensitivity is activated as default. If necessary, ISO800 can be set for a better
nightshot.
h. Metering: even metering is activated as default to achieve good exposure of the entire photo. In case the scene
looks dark in comparison with light surroundings, the user may choose central area. In case the scene looks light in
comparison with dark surroundings, the user may choose central spot.
i. Language: „English“, can be selected via left or right key;
j. Date/Time: Time can be adjusted and changed. It will be displayed on the bottom right corner of the video file or
photo file when recording or shooting;
k. Format: After confirming that all files recorded are not needed to be saved, all files can be removed by formatting.
Note: If there is no card inserted, the memory of the machine will be formatted; after inserting card, the system will
format the card inserted, but not format the memory of the machine;
l. Recover factory setting: The operation restores the parameter settings to factory default. After restoring, the system
will set the display mode of submenu of the „Menu” in English state. Press „M” key to enter the menu selection,
www.jobo.com
19
press „ < „ or „ > „ key to enter the menu „Setup“, press „-“ key to select the option „Language“, and then it can set in
Chinese state. The system will set the time at 01.01.2012 after restoring factory default;
Note: To press „M” key under the submenu may exit from it.
1. Insert the Micro SD card.
Note: Please select branded Micro SD card such as SD card of Toshiba etc.
2. Turn the power switch to „ON” to turn on JIB 4, and the red indicator will be lightened and JIB 4 will enter the
preview mode.
Note: a. In case of low battery power, you will find the battery icon „ „ and the message „Low Power“ on the TFT
screen.
b. If no Micro SD card is inserted, you will find the Micro SD card icon „ „ on the TFT screen.
www.jobo.com
20
3. Video recording:
(1)Manual recording:
Press „ Record“ key once in preview state, the system will start recording, the video recording duration will be
displayed on the top right of TFT display screen, the „Green Indicator of Video/Voice Recording“ and the frontal „
Video Recording/Shooting Indicator (Red)“ will twinkle slowly, and the recording duration on LCD segment screen is
displayed normally. The video recording process only respond to operations of zoom in („+” key)/zoom out („-“ key)
function if press „stop“ key, the system will stop and save the current video recording file, the frontal green
indicator of video recording will be off, JIB 4 will return to the preview state, and the recording duration on LCD
segment screen will be stopped displaying.
Note: a. Turn the powers switch to „OFF” in video recording, the system will save the current file recorded and then
shut down.
b. If the battery power is low in video recording, the system will save the current file recorded and give the
message „Low Battery“ on TFT display screen until JIB 4 is turned off or auto enters standby mode.
c. If the memory space gets full in video recording, the system will save the current file recorded, give the
message „card full“ on TFT display screen, and go back to the preview mode. The video recording duration on
LCD segment screen also will be stopped displaying.
d. In cyclic recording mode, the system will auto save a file every 15 minutes .(The self-timer mode and
continuous shooting mode cannot be activated at the same time.)
e. After it is fully charged, it can continuously record time is about 2.5 hours. The continuous voice recording time
www.jobo.com
21
is about 3 hours.
f. To press „+“ or „-“ key in voice recording mode cannot execute voice increasing/reducing operation however,
to press „+“ or „-“ key when recalling audio file can execute voice increasing/reducing operation.
g. Connect the machine to high-definition display device with HDMI cable in preview state, the basic operation of
the machine can be finished on the high-definition display device.
4. Photo shooting
You can set the image resolution before shooting photos. Press „M” key to enter the setup interface, pres or key to
move the cursor to „
„, select the menu „Image Resolution“, and press „OK” key to enter the resolution setup
menu. There are three resolution modes available for your selection:
3M: Photo shooting resolution of 2048x1536.
5M: Photo shooting resolution of 2592x1944.
8M: Photo shooting resolution of 3200x2400.
a. Single shoot:
In preview mode, press „Shutter” once to shoot a photo with a „Click“ sound, and the frontal red indicator will
twinkle once (the photo shooting icon on LCD segment screen will twinkle once) and it will return to the preview
state.
www.jobo.com
22
b. Continuous capture (three):
Press „M” key to enter the camera setup interface, press key to move the cursor to „
„, and then press „+“or
„-“ key to select the menu „Three Photos Continuous Shooting“, and press „OK” key to confirm. Press „M” key to
exit the setup interface after setting. Press „Shutter” once at this time, and JIB 4 will continuously shoot three
photos.
c. Auto cont capture:
Press „M” key to enter the camera setup interface, press „>„ key to move the cursor to „
„, and then press “+”or
„-“ key to select the menu „Continuous Shooting“, and press „OK” key to set the continuous shooting interval time
as 1s,2s,3s,5s, 10s,20s. Press „M” key to exit the setup interface after setting the interval time. Press „Shutter” at
this time, and JIB 4 will start shooting one photo every 1s,2s,3s,5s, 10s,20s, till to press „Shutter” key again to stop.
d. Timed shooting:
Press „M” key to enter the camera setup interface, press „>„or „<„ key to move the cursor to „
„, and then press
„+“or „-“ key to select the menu „Self-timer“, and press „OK” key to set the delay time as 3s,5s or 10s. Press „M” key
to exit the setup interface after setting the delay time. Press „Shutter” once at this time, and JIB 4 will start the timer
and shoot a photo at the end of the delay time.
Note: a. If the memory space gets full, the system will give the message „card is full“
(Viewing on TFT display screen), and go back to the preview mode.
b. The setting of self-timer delay time is in effective once.
www.jobo.com
23
5. Audio only
Press „M” key to enter the Camcorder interface, select the menu „Exe“, press „OK” key to enter the selection
interface, press „<„ or „>„ key to select „ „, press „OK” key to confirm your selection, and finally press „M” key to
exit the setup interface. Press „Record” key to start recording, and the green indicator twinkles slowly, the
TFT screen displays the voice recording icon, and the timer is started. The voice recording duration will be displayed
on the top right of TFT display screen, the „ Blue Indicator of Video/Voice Recording“ and the frontal „ Video
Recording/Shooting Indicator (Red)“ will twinkle slowly, and the recording duration on LCD segment screen is
displayed normally. if press „stop“ key, the system will stop and save the current voice recording file, the frontal
green indicator of voice recording will be off, JIB 4 will return to the preview state, and the recording duration on
LCD segment screen will be stopped displaying.
After sound recording, press „M” to return to system setting interface. Click „Capture Mode” menu and press „OK” to
enter the selection interface. Press „<„ or „>„ key select „ „ to exit the voice mode and return the preview interface.
Note: In case of re-starting, it will recover to video recording mode setting.
6. File recall
You can view the audio files, video files and photo files on JIB 4. Press „ „ key to enter the recall selection
interface and press it again to exit. Select video file interface „ „ to view video files, select photo file interface
„ „ to view the photo files, If select mixed file interface „ „ to view all video/audio files and photos. In case of
many recalling files, time entering the preview interface will be extended.
www.jobo.com
24
1) Play the video
Enter „ „ interface and all files appear on the screen. Select the video file by pressing „>„ or „<„ and press
„OK” to play. In playing audio files, the user may use the following functions.
Increase Volume
Decrease Volume
+
Fast rewind
Fast forward
<
>
1. Reset the playing from the beginning. 2.Press
Play / Pause
OK
it again to return to recall interface
Note: Fast Forward/Reverse can be set as 1/4X, 1/2X, 2X, 4X, 8X, 16X.
2).Browse photo file
Enter „ „ interface and all files appear on the screen. Select the photo file by pressing „>„ or „<„ and press
„OK” to view. In browse photo files, the user may use the following functions.
1. Zoom 2.In zoom in mode, press „OK” to move 1. Zoom 2.In zoom in mode, press „OK” to move
+
the photo downward
the photo downward
Move Photos Right
Move Photos Left
<
>
Return to recall interface
In zoom in mode, the photo can be zoomed in or
OK
out by pressing „+“ or „-“.
www.jobo.com
25
3) Play the audio file.
Enter „ „ interface and all files appear on the screen. Select the audio file by pressing „>„ or „<„ and press
„OK” to play. In playing audio files, the user may use the following functions.
Increase Volume
Decrease Volume
+
No function
No function
<
>
1. Reset the playing from the beginning. 2.Press
Play / Pause
OK
it again to return to recall interface
Note: Do not set this function about Fast Forward/Reverse.
7. In recall mode, select the file ,and then press „M” key, you can execute operations as blew:
1). Delete file. (enter the delete file interface) Delete single: The deletion selection of „ „ and „ „ will appear after
pressing „OK” key and select „ „ to delete. Delete all: Delete all photo files under no protection
2). File protection: All files can be protected and unlocked. (Enter the protect file interface)
Protect single: protect the single file. (Press „OK” to enter the protection mode selection interface. Select protecting
single file and press „OK” to return to replay interface.)
Protect all: protect all file.(Press „OK” to enter the protection mode selection interface. Select protecting all file and
press „OK” to return to replay interface.)
Unlock single: unlock the protected file. (Press „OK” to enter the protection mode selection interface. Select
unlocking single file and press „OK” to return to replay interface.)
www.jobo.com
26
Unlock All: unlock the entire protected file. (Press „OK” to enter the protection mode selection interface. Select
unlocking all file and press „OK” to return to replay interface.)
Note: For Lock files, the icon „ „ will appear on the Bottom left corner of this file preview interface. For unlock files,
the icon „ „ will appear on the Bottom left corner of this file preview interface no operation can delete the
protected files except formatting
3).Auto play: Auto play the photo files in the folder at an interval of 5s. (Default setting is „OFF”)
8. Remote control (optional accessories)
Turn off JIB 4, press and hold „Record” key, turn the power switch to „ON”, and then release „Record” key. Press both
„Record” and „Stop” key on the remote control once within 3s to finish the remote control code pairing process.
JIB 4 will tick twice after coding the remote control successfully.
Record
Shutter
Stop
Long press „Shutter” key for 3s can turn on and turn off the laser function.
www.jobo.com
27
Note: a. Use wireless remote control to control JIB 4 can check whether the code pairing is successful. The control
functions include: Video recording starting/stopping, photo shooting, waking in standby mode, and laser light
turning on/off. JIB 4 will tick once for each operation. In case of video recording stopping or laser light turning
off, JIB 4 will tick twice.
b. Remote control range: Remote control within 10 meters in any angle horizontally without barriers.
c. To press „Record” , „Shutter” or „Stop“ key on the remote control in standby mode can wake up the system.
9. Standby mode:
Turn the power switch to „ON” , the system will start working and it will enter preview state after finishing
initialization. In case of no any mission and operation, the system will auto enter standby power-saving mode at the
end of the auto standby time set. Press „Record” or „Shutter” key at this time, or remote control any key on the
remote control, the system will be waked up.
Note: a: To press keys on TFT screen in standby mode cannot wake up the system.
b: The LCD segment screen does not display anything in standby mode.
10. AV output connection:
In preview state, connect JIB 4 with the display device with AV cable, and then all functions of JIB 4 can be operated.
Note: After connecting with audio and video display device, TFT screen on JIB 4 and the voice will be turned off, and the
audio and video will be displayed on the display device. LCD segment screen on JIB 4 will display the
corresponding function operations normally.
11. HDMI output connection:
www.jobo.com
28
In preview state, connect JIB 4 with the high-definition display device with HDMI cable, and then functions of
JIB 4 can be operated.
Note: a. After connecting with HDMI display device, TFT screen on JIB 4 and the voice will be turned off, and the audio
and video will be displayed on the display device.
b. JIB 4 may be in abnormal state if the HDMI cable is inserted or unplugged improperly when connecting. It can
be recovered after re-starting and LCD segment screen will display the corresponding function operations normally.
12. USB connection:
a. When there is no preset battery in JIB 4, use USB power adapter to connect with JIB 4, all functions can be operated (meanwhile,
LCD segment screen and TFT display screen will display the corresponding operation prompts).
b. In start-up state, use USB cable to connect with the computer, data stored in JIB 4 memory and the Micro SD card can be read
(at this time, LCD segment screen will display the USB connection state icon).
c. JIB 4 may be in abnormal state if the USB cable is inserted or unplugged improperly when connecting, and restart to recover.
13. Prompt of key tone
a. Press „Record” or „Shutter” key once in normal using, JIB 4 will tick once to indicate the effective operation.
b. When stopping video recording, JIB 4 will tick twice.
c. JIB 4 will tick twice to indicate the successful code pairing.
d. Press „Shutter” key in video recording, JIB 4 will not give prompt.
e. When operating on TFT display screen, press „Menu“ key in preview state, press „>„ or „<„ key to enter the menu
www.jobo.com
29
„Setup“, press „+“ or „-“ key to select the menu „Key Tone“, and then you can turn on or turn off the key tone.
f. If the system is in video recording, press „Stop“ key on the remote control once, JIB 4 will tick twice to indicate the
video recording stopping.
g. If the system is in video recording, press „Shutter” key on the remote control once, JIB 4 and horn on TFT display
screen will not give any prompt.
h. Press any key on the remote control in standby state, JIB 4 will tick once to wake up the main system.
14. Prompt of laser light
a. After starting up, long press „Record” key for 3s in any state, the system will lighten the laser light.
b. Long press „Record” key for 3s when turning on laser light, the system will turn off the laser light.
c. The laser light turning on/off also can be operated in standby state.
d. The wireless remote control can execute laser light turning on/off operation.
Note: The function of long pressing „Record” key for 3s to turn on/off laser light does not interfere with the setting of
turning on „Laser Synchronous Shooting“ under the camera parameter setting.
15. Turn On/Off TFT Display
a. In any status, long pressing Shutter key for 3 second to turn on or off TFT display.
b. TFT display can’t be turned on or off by pressing Shutter key on remote control.
File Storage and Play
(1) USB Cable
You can copy or cut the recorded video files to your computer via the USB cable, or remove the Micro SD card and
www.jobo.com
30
insert it into a card reader to read the video data. Then, you can select our software from the attached CD or such
recommended software’s as Media Player and KM Player to play the videos.
Note:
(1)Please turn off the JIB 4 before inserting or
unplugging the USB cable.
(2)Turn the power switch to „OFF“before
charging JIB 4.The red indicator will twinkle
slowly in charging.
(3)You can directly copy or cut the recorded files
to your computer when the power switch is
turned to „ON“.
www.jobo.com
31
(2).HDMI Cable and AV Cable you can also use the HDMI cable or AV cable to connect JIB 4 to a TV or monitor with
HDMI interface, in order to play the recorded files.
Note:
(1) After connecting JIB 4 to the monitor via the HDMI
cable, please select the input source for the monitor to
display the data from JIB 4.
(2) If you select the AV cable, please connect each of its
terminals to the relevant TV or monitor terminal in the
same color.
(3) Please adjust the parameters of the monitor to
optimize the image effect.
Backup Battery Installation
1. Installation: the external battery can be directly installed in the product for power supply. (Please see below figure).
www.jobo.com
32
2. Viewing battery power: press this button to view the power of back up battery. When the green, blue or red
indicator light flashes for 3 seconds, it means the battery is full of power, enough power for use or a critical low
battery error.
3. Charging battery: please connect the product and battery attached with this product via USB port to charge the
battery, or connect backup battery with a computer via USB cable to charge the battery (as per the figure).
This backup battery has automatic protection against overcharging and short circuit. The red indicator light keeps
flashing when charging the battery and the green indicator light is on when the battery is fully charged.
(The battery can be charged for 500 times.)
1. It is not allowed to randomly take of the backup battery.
2. If the product is not used frequently, it is suggested to charge the product once in six month to prolong the
service life of backup battery.
www.jobo.com
33
This product always conforms to the authenticated AC adapter. The adapter should be marked one
NOTICE: When using the power adapter, make sure the rating voltage on it is compatible with that of the device to
avoid potential damages resulting from incorrect usage of power supply.
Main body
TFT Display screen
Accessory for
bicycle
Waterproof case
Battery
External battery
www.jobo.com
34
Accessory for
flat installation
Flat accessory
Curve
accessory
Bracket
Adapter
USB Cable
Pouch
User Manual
screw
Micro SD card
(optional)
Note: (1): The actual items may be different from the pictures. Package is subject to change without prior notice.
(2): The actual accessories may vary with configuration listed here, depending on the configuration of the
product you purchase.
www.jobo.com
35
Specifications & Parameters
View Angle
170°
Picture resolution
8,0M. 5,0M. 3,0M
Battery
1000mAh Lithium Battery
1100mAh Backup Battery
650 mAh 3,7V (max)
Power Consumption
Video Recording Duration
Voice Recording Duration
Voice Control
standby Duration
Charging Duration
Micro SD Card Capacity
Operating Humidity
4 h (max)
7 h (max)
200 h (max)
Storage Temperature
-20°C to 60°C
Operating Temperature
-10°C to 50°C
File Storage
Normal: 30 Minutes/Segment.
loop: 15Minutes/Segment
3h
64GB SDHC Max
15~85%RH
Video Recording
1080P 1920×1080P@30fps
1080I 1920×1080I@60fps
960P 1280×960P@30fps
720 1280×720P@60fps
720 1280×720P@30fps
WVGA848×480P@120fps
WVGA848×480P@60fps
Video Format
Voice Format
MOV
WAV
Photo Shooting
USB Port
Remote Control
Range
Operating
System
Weight
File format JPG
USB 2
10m
Dimension
Windows XP /Win 7/Mac OS
80g (without screen)
105g (with screen)
60 mm X 53 mm X 42mm
with screen
NOTICE: Specifications are subject to minor change with upgrade and update. Please base on real object.
www.jobo.com
36
Notices for Waterproof Casing
The water-proof casing shall be installed precisely.
Please notice following items during operation.
1. Do not disassemble and refix the sealing ring of casing, keys and lens cover by yourself. Otherwise, the sealing of
water-proof casing may be affected.
2. Do not place the casing in those environments where exist corrosive gas such as strong acid or alkali and keep it
away from chemicals and other corrosives.
3. Do not put water-proof casing in high (above 50°C) or low (-10°C) temperatures for long period of time to avoid
casing deformation.
4. Do not expose the casing under direct sunshine for a long time to avoid deteriorating its waterproofing
performance.
5. Before using the casing, it's advised to check whether the seal rings are under good condition, whether there are
foreign objects at the sealing joints, whether the casing is well sealed and tightly buckled.
6. After using the casing in sea water, please clean and flush it by fresh water firstly, and then use a dry cloth to wipe
the surface and put the device in a cool and ventilated place.
Cautions in Using 3M Double-Sided Foam Sticker
1. Please choose a suitable curved surface or flat surface to make sure the 3M double-sided foam sticker is fixed on
such surface.
2. Please make sure the surface is clean and smooth before affixing 3M double-sided foam sticker on the surface.
www.jobo.com
37
3. If necessary, such as under low temperature (under 20°C), it is suggested to let the surface of 3M double-sided foam
sticker heat up (with hair drier or something else) before sticking.
Tips
1. The surface of camera might be warmed up after a long working time.
2. If the camera would not be used for a long time, it’s advised to take out batteries and charge every six months to
keep them in good working condition.
3. The function of digital zoom shall reduce the image quality slightly.
4. The angle of view might vary with different working modes.
5. it’s advised to play larger video files by computer or other professional players to realize smooth playing.
FCC Notices
1. The manufacturer is not responsible for any radio or TV interference caused by unauthorized modifications to this
equipment. Such modifications could void the user's authority to operate the equipment.
2. This device complies with Part 15 of the FCC Rules. (1) This device may not cause harmful interference, and (2) this
device must accept any interference received, including interference that may cause undesired operation.
NOTE: This equipment has been tested and found to comply with the limits for a Class B digital device, pursuant to part
15 of the FCC Rules. These limits are designed to provide reasonable protection against harmful interference in a
residential installation. This equipment generates uses and can radiate radio frequency energy and, if not installed and
used in accordance with the instructions, may cause harmful interference to radio communications. However, there is no
guarantee that interference will not occur in a particular installation. If this equipment does cause harmful interference
to radio or television reception, which can be determined by turning the equipment off and on, the user is encouraged to
try to correct the interference by one or more of the following measures:
--Reorient or relocate the receiving antenna.
--Increase the separation between the equipment and receiver.
--Connect the equipment into an outlet on a circuit different from that to which the receiver is connected.
www.jobo.com
38
--Consult the dealer or an experienced radio/TV technician for help.
Warranty conditions
This product is subject to the legal warranty periods relating to manufacturing faults and defects.
Substance of the warranty:
1. In the event of malfunctioning caused by manufacturing defects JOBO will repair or replace the defective product at
its own discretion.
2. JOBO and its suppliers do not assume any liability for data losses occurring during operation of the device or
consequential damage resulting from this. Under no circumstances will JOBO assume liability for any direct, concrete or
special damage or consequential damage like for example damage to or loss of property or devices, loss of profits or
sales, costs for spare parts, expenditure or inconvenience caused by the interruption of service or any other damage. The
user will be exclusively responsible for the loss, damage or destruction of data during the operation of a JOBO product.
Under no circumstances will JOBO be liable for the recreation of such data. Under no circumstances can claims be lodged
that exceed the purchase price of the product.
3.
-
The following repairs are not covered by the warranty and must be paid for separately:
Malfunctions after the end of the legal warranty periods.
Change of battery after the end of the warranty period.
Malfunctions due to incorrect operation by the user (if device is not used as described in the manual).
Malfunctions caused by other devices.
Changes or damage to the device not caused by the manufacturer. Especially, warranty claims will lapse if the device
has been opened by anyone other than by a JOBO repair workshop.
Damage caused by natural disasters (acts of God).
If you want to make any claims under the warranty you are asked to contact the Technical Service of JOBO. You will be
expected to quote the serial number of the JOBO product and may also have to submit proof of purchase to show that
the warranty period has not yet elapsed.
www.jobo.com
39
Contact/Service
If you have any questions on or need help with our products please do not hesitate to get in touch with our Technical
Service:
JOBO International GmbH
Kölner Straße 58 A
D-51645 Gummersbach
www.jobo.com
10. Waste Management
Packaging
To avoid damage and pollution of the product the Camera will be delivered within a packaging. These
Packaging can be recycled. Disposal of WEEE (Waste Electrical and Electronic Equipment)
Devices marked with the WEEE logo are subject to the European Community Directive 2002/96/EC.
Waste Electrical and Electronic Equipment must be separated from household rubbish and disposed at sites
that collect WEEE.
By orderly disposing you will avoid damage to be caused to the environment.
To guarantee a product always at the best standard this manual as well as the product itself
are subject to alterations.
www.jobo.com
40


