Download Chapter 1 Basic Operation
Transcript
The user manual is installed at the devices internal
memory and can be accessed over the main menu.
Please refer to the user manual for detailed instructions
and support information’s.
If you have questions about the unit or its operation, you
should contact our hotline at
support@odys.de or by phone: 02154-8826101.
Learn e.g. also what video formats the device supports.
Chapter 1 Basic Operation
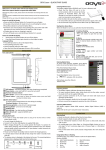
1.1 Top View
Turning On/Off
To turn on the device, press and hold the Power button on
the unit until you see the boot-up screen then release. It may
take a few minutes to start up the system, please wait before
you proceed.
1
To turn off the device, press and hold the Power button
until you see the option “Power Off”, tap on “Power Off” and
then tap on “OK”.
Tip: This device will sleep with the screen off if it stays
inactive for a few seconds. You can briefly press the Power
button to turn on the screen and wake it up.
Power On and Off the Display
- Shortly press the [Power] button to turn off the display.
- Press the [Power] button again shortly turn the display on
again.
2
Delivery content
- Power supply - Headphones w. Micro - AC Adapter - USB
cable
Tip: it is compatible replacement headset from Nokia.
Note: Please use the supplied original accessories
Language Setting
- Press [Menu] button to call out the Option Menu.
- Tap on [Settings] and select [Language & Keyboard]
Tap on [Select Language] and select your desired language
1.2 Left View
1
2
2
3
1. Speaker
2. Volume: Adjust volume, press [+] to increase volume and
[-] to decrease volume.
3. Reset: Reset the player if it should freeze and not
respond or otherwise malfunction.
3
1.3 Right View
1 2 3
4
1. speaker
2. 3.5mm Headphone Jack.
3. Power input
- Charge the battery at least 5 hours prior to its first time.
- Please only use the charger which is provided.
4. USB slot: Use the USB cable to get into USB mode.
1.4 Bottom View
1
2
3
1. Microphone
2. SD slot (Card not included)
- Turn off the unit.
1)
Locate the SD card slot, then insert the SD card with
its gold contacts facing down and its cut-off corner facing
out the card slot.
4
3. SIM card slot (Card not included)
- Turn off the unit.
1) Locate the SIM card slot, then insert the SIM card with its
gold contacts facing down and its cut-off corner facing out
the card slot.
2) To remove the SIM card, please turning off the product,or
it will be damage to SIM card.
1.5 Front View
1
2
3
4
5
2. Function button:
1) Search button: press it to search web/
Application / SMS/ contacts/ music.
2) Home button: press it to return to the home
screen.
3) Menu button: at any interface, press it to
open menu option.
4) Back button: press to go back.
2. Home Screen
Main screen contains five screens, horizontal sliding
switch to the extended screen
Main screen include: status bar, notice column,
applications tab, function buttons;
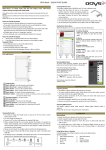
2.1 Status Bar
Status bar will display various status information, as
follows:
6
z
2G/3G signal:
z
Network signal:
z
fly mode active:
z
Battery level:
z
Charging:
z
Silent mode
z
Vibrate :
z
Alarm set:
z
GPS Active:
z
up-/Download data
z
Wi-Fi active:
7
2.3 Function Button
Followed from left to right in Status bar:
1) Phone key
2)
3)
Application key
Browser key
2.4 Power Settings
Wipe away by finger from right to left to become the
power settings on the second page
Chapter 3 Network
Bluetooth Headphone
1.Open setting;
2. Select wireless & network setting;
3.touch Bluetooth to turn on Bluetooth;
4.touch and enter Bluetooth settings ;
5.Select to connect Bluetooth device.
8
WIFI Function
1.Open setting
2.Select wireless & network setting;
3.Touch Wi-Fi to turn on Wi-Fi
4.Touch and enter WIFI settings ;
5.Select SSID you want to connect;
Note:
Please take care when entering the password is case-sensitive.
Please use the encryption WPA or WPA2 and make sure that
your network is always visible.
3G Functions
The device support WCDMA protocol. Please make sure
that you device is turned off, then insert or remove the SIM
card.
Steps:
1. Power off, insert USIM or SIM card;
2. Power on;
3. Open setting, select wireless & networks;
4. Select mobile network ,enter access point names
interface
9
5. touch menu button, select New APN;
6. Tap access points and now the menu button and
select "New APN".
7. fEnter the data as described earlier.
8. example:
Enter the provider O2, the following values:
Name: O2
APN: internet
MCC: 262 (262 for Germany)
MNC (07 for O2) 07
Authentication Type: PAP or CHAP
9. Press the Menu button and select "Save" to save the
settings.
10. Check whether the active APN is currently installed
(green dot).
Turn on the tap by APN otherwise
10


