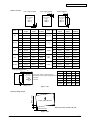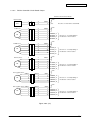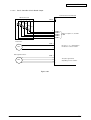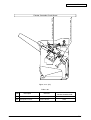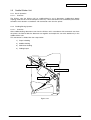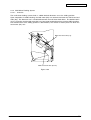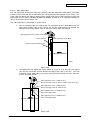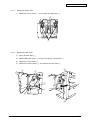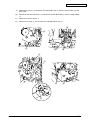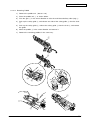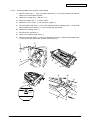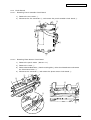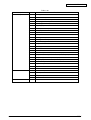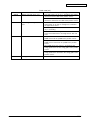
1
Oki Data CONFIDENTIAL
PRINTING SOLUTIONS
C9600/C9800/ES3640
Finisher Maintenance
Manual
051108A
Oki Data CONFIDENTIAL
INTRODUCTION
Meaning of Symbols
The symbols below are used in this manual.
Symbol
Meaning
Denotes general caution, warning or danger.
Denotes caution against electrical shock.
Denotes caution against fire.
Denotes prohibition in the case where disassembling the machine may result in
electrical shock or other damage.
Denotes prohibition in the case where the machine must be unplugged before
starting a task.
42872701TH Rev.1
3/
Oki Data CONFIDENTIAL
Overview of Manual
This service manual provides basic information necessary for servicing the finisher to maintain its quality
and functions.
Each chapter of the manual contains information below.
Chapter 1. Overview:
Features and specification
Chapter 2. Operation:
Operating principles and timing of the mechanical system
and electric system classified by function.
Electric circuit configuration and its summary
Chapter 3. Parts replacement:
Mechanical configuration and procedures for disassembly,
assembly and adjustment
Chapter 4. Maintenance & inspection: Periodical replacement parts list, expendable parts durability guide list, and periodical servicing list
Chapter 5. Troubleshooting:
Standards, adjustment and troubleshooting, etc.
Appendix:
Overall timing chart, signal name/abbreviation list, overall
circuit diagram, etc.
This service manual doesn’t contain the installation procedure. The installation guide is enclosed in
the package of each machine.
This service manual provides explanations on the basis of rules below.
1.Each chapter summarizes the purpose and role of each function, its relation to electric and mechanical
systems, and operation timing of each component and part.
In the schematic diagrams, the symbol (
symbol is accompanied by an arrow (
the electricity.
) represents transmission of mechanical drive. If this
) and a signal name, the symbol represents the flow of
As used in this manual, “turn on power” means supply power to the machine by turning on the power
switch, closing the front door, or closing the paper delivery door.
2.In the explanation of the digital circuits of this machine, “1” represents the high voltage level of the
signal and “0” represents the low voltage level. The voltage values differ from circuit to circuit.
This machine uses a CPU. The explanation of the CPU operation, however, is omitted in the service
manual, since it is practically impossible to check the CPU internal operation. Also, the manual
provides only the summary of the PCB circuits using block diagrams, because the printed circuit
boards are not supposed to be repaired at a customer’s place. The circuits explained in this manual
include those from the sensors to the inputs on the circuit boards for control and drive, those from
the outputs on these circuit boards to loads, and block diagram of each function.
42872701TH Rev.1
4/
Oki Data CONFIDENTIAL
Table of contents
1.
Overview ...........................................................................................................9
1.1
1.2
1.3
1.4
2.
Features.......................................................................................................................... 9
Specification ................................................................................................................. 10
1.2.1 Specification .................................................................................................... 10
1.2.1.1 Finisher/Saddle-Stitcher Unit .......................................................... 10
1.2.1.2 Puncher (Optional) .......................................................................... 13
Names of Parts ............................................................................................................ 15
1.3.1 Sectional View ................................................................................................. 15
1.3.1.1 Finisher Unit .................................................................................... 15
1.3.1.2 Saddle-Stitcher Unit ........................................................................ 15
1.3.1.3 Puncher Unit (Optional)................................................................... 16
User Maintenance ........................................................................................................ 17
Operation ........................................................................................................18
2.1
2.2
2.3
2.4
2.5
Basic Operation ............................................................................................................
2.1.1 Specification ....................................................................................................
2.1.2 Electric Circuit Overview .................................................................................
2.1.3 Finisher Controller Circuit Board Input/Output ................................................
2.1.3.1 Finisher Controller Circuit Board Input ............................................
2.1.3.2 Finisher Controller Circuit Board Output .........................................
2.1.3.3 Finisher Controller Circuit Board Input/Output ................................
2.1.4 Punch Controller Circuit Board Input/Output (Optional) ..................................
2.1.4.1 Punch Controller Circuit Board Input/Output ...................................
2.1.4.2 Punch Controller Circuit Board Output ............................................
Feeding/Driving Systems .............................................................................................
2.2.1 Overview .........................................................................................................
2.2.1.1 Standard Output ..............................................................................
2.2.2 Feeding and Output .........................................................................................
2.2.2.1 Overview .........................................................................................
2.2.3 Job Offsetting ..................................................................................................
2.2.3.1 Overview .........................................................................................
2.2.3.2 Paper Stacking for Jog Tray ............................................................
2.2.3.3 Offsetting .........................................................................................
2.2.3.4 Multi-Sheet Output ..........................................................................
Stapling .........................................................................................................................
2.3.1 Overview .........................................................................................................
2.3.2 Stapling ...........................................................................................................
2.3.3 Paper Output after Stapling .............................................................................
2.3.4 Stapler Unit ......................................................................................................
2.3.4.1 Stapler Unit Movement Control .......................................................
Tray Operation .............................................................................................................
2.4.1 Overview .........................................................................................................
Saddle-Stitcher Unit .....................................................................................................
2.5.1 Basic Operation ...............................................................................................
2.5.1.1 Overview .........................................................................................
2.5.2 Feeding/Driving Systems ................................................................................
2.5.2.1 Overview .........................................................................................
2.5.3 Paper Infeeding System ..................................................................................
2.5.3.1 Overview .........................................................................................
42872701TH Rev.1
18
18
19
20
20
22
24
25
25
26
27
27
28
32
32
35
35
36
36
37
38
38
39
40
41
43
46
46
47
47
47
47
47
50
50
5/
Oki Data CONFIDENTIAL
2.5.4
2.6
2.7
2.8
3.
Multi-Sheet Feeding System ...........................................................................
2.5.4.1 Overview .........................................................................................
2.5.5 Folding/Output System ....................................................................................
2.5.5.1 Overview .........................................................................................
2.5.5.2 Paper Folding ..................................................................................
[Paper Folding Start Position] ..........................................................................
Puncher Unit (Optional) ...............................................................................................
2.6.1 Basic Operation ...............................................................................................
2.6.1.1 Overview .........................................................................................
2.6.2 Punching .........................................................................................................
2.6.2.1 Overview .........................................................................................
2.6.2.2 Punching .........................................................................................
2.6.2.3 Side Registration .............................................................................
Jam Detection ..............................................................................................................
2.7.1 Overview .........................................................................................................
2.7.1.1 Paper Delay Jam at Inlet Sensor (1011) .........................................
2.7.1.2 Paper Stopped Jam at Inlet Sensor (1021) .....................................
2.7.1.3 Paper Delay Jam at Fold Position Sensor (1012) ...........................
2.7.1.4 Paper Stopped Jam at Fold Position Sensor (1022) .......................
2.7.1.5 Residual Jam (1007) .......................................................................
2.7.1.6 Door Open Jam (1008) ...................................................................
2.7.1.7 Staple Jam (1006) ...........................................................................
2.7.1.8 Non-ejection Jam ............................................................................
Power Supply System .................................................................................................
2.8.1 Finisher/Saddle-Stitcher Unit ...........................................................................
2.8.1.1 Overview .........................................................................................
2.8.1.2 Protective Function .........................................................................
2.8.2 Puncher Unit (Optional) ...................................................................................
2.8.2.1 Overview .........................................................................................
2.8.2.2 Protective Function .........................................................................
51
51
52
52
52
53
55
55
55
56
56
58
61
63
63
64
64
64
65
65
65
65
65
66
66
66
66
67
67
67
Parts Replacement ........................................................................................68
3.1
Finisher/Saddle-Stitcher Unit .......................................................................................
3.1.1 Exterior Controlling Parts ................................................................................
3.1.1.1 Removing Output Tray ....................................................................
3.1.1.2 Removing Front Cover ....................................................................
3.1.1.3 Removing Rear Cover.....................................................................
3.1.1.4 Removing Top Cover .......................................................................
3.1.1.5 Removing Jog Tray Top Cover ........................................................
3.1.1.6 Removing Top Right Cover Unit ......................................................
3.1.1.7 Removing Side Guide .....................................................................
3.1.2 Feeding Parts ..................................................................................................
3.1.2.1 Removing Stapler Unit ....................................................................
3.1.2.2 Synchronizing Stapler Motions ........................................................
3.1.2.3 Synchronizing Gears of Saddle-Stitcher Unit ..................................
3.1.2.4 Removing Saddle-Stitcher Unit .......................................................
3.1.2.5 Removing Jog Tray Unit ..................................................................
3.1.2.6 Removing Paddle Unit ....................................................................
3.1.2.7 Removing Staple/Fold Drive Unit ....................................................
3.1.2.8 Removing Feed Motor Unit .............................................................
3.1.2.9 Removing Feed Roller ....................................................................
3.1.2.10 Removing Multi-Sheet Delivery Roller (Top) ...................................
3.1.2.11 Removing Paddle ............................................................................
3.1.2.12 Removing Multi-Sheet Delivery Roller (Bottom)/Delivery Belt ........
3.1.3 Circuit Boards ..................................................................................................
3.1.3.1 Removing Finisher Controller Circuit Board ....................................
3.1.3.2 Removing Slide Home Position Circuit Board .................................
42872701TH Rev.1
68
68
69
69
70
70
71
71
72
73
73
74
77
78
79
80
81
83
84
85
86
87
89
89
90
6/
Oki Data CONFIDENTIAL
3.2
4.
91
91
91
91
92
94
94
94
95
96
96
Maintenance and Inspection .......................................................................97
4.1
4.2
4.3
5.
Puncher Unit (Optional) ...............................................................................................
3.2.1 Puncher Driving Parts .....................................................................................
3.2.1.1 Removing Punch Motor...................................................................
3.2.1.2 Removing Side Registration Motor .................................................
3.2.1.3 Removing Puncher Unit ..................................................................
3.2.2 Circuit Boards ..................................................................................................
3.2.2.1 Removing Punch Controller Circuit Board ......................................
3.2.2.2 Removing Photo Sensor Circuit Board ...........................................
3.2.2.3 Removing LED Circuit Board ..........................................................
3.2.2.4 Removing Dust Full Photo Sensor Circuit Board ............................
3.2.2.5 Removing Dust Full LED Circuit Board ...........................................
Periodical Replacement Parts .....................................................................................
4.1.1 Finisher/Saddle-Stitcher Unit ...........................................................................
4.1.2 Puncher Unit (Optional) ...................................................................................
Expendable Parts Durability Guide .............................................................................
4.2.1 Finisher/Saddle-Stitcher Unit ...........................................................................
Periodical Maintenance ................................................................................................
97
97
97
97
97
97
Troubleshooting ............................................................................................98
5.1
5.2
5.3
5.4
Standards and Adjustment .......................................................................................... 98
5.1.1 Electrical System, Finisher/Saddle-Stitcher Unit ............................................. 98
5.1.1.1 Adjusting Fold Position.................................................................... 98
5.1.1.2 Adjusting Saddle-Stitch Double Stapling Position ........................... 99
5.1.2 Electrical System, Puncher Unit (Optional) ................................................... 100
5.1.2.1 Adjusting Punch Hole Position (Feeding Direction) ...................... 100
5.1.2.3 Registering Number of Punch Holes ............................................. 100
5.1.2.4 Procedure after Replacement of EEP-ROM (IC1002) .................. 101
Electrical Parts Layout ............................................................................................... 102
5.2.1 Finisher/Saddle-Stitcher Unit ......................................................................... 102
5.2.1.1 Sensors, Microswitches and Clutch .............................................. 102
5.2.1.2 Motors and Circuit Board .............................................................. 104
5.2.2 Puncher Unit (Optional) ................................................................................. 105
5.2.2.1 Sensors ......................................................................................... 105
5.2.2.2 Motors ........................................................................................... 106
5.2.2.3 Circuit Boards ................................................................................ 106
LED/Check Pin List by PCB ..................................................................................... 107
5.3.1 Finisher Controller circuit Board .................................................................... 107
5.3.2 Punch Controller Circuit Board ...................................................................... 108
Troubleshooting .......................................................................................................... 109
5.4.1 Troubleshooting Procedure (Finisher/Saddle-Stitcher Unit) .......................... 109
5.4.1.1 186 - Failure in communications with printer................................. 109
5.4.1.2 096-09 - Failure of finisher unit backup memory ........................... 109
5.4.1.3 096-01 - Feed motor failure........................................................... 109
5.4.1.4 096-05 - Delivery motor failure ....................................................... 110
5.4.1.5 096-03 - Rear jog plate motor failure ............................................. 110
5.4.1.6 096-03 - Front jog plate motor failure ............................................. 111
5.4.1.7 096-04 - Staple/fold motor failure ................................................... 111
5.4.1.8 096-04 - Staple/fold motor failure ................................................... 112
5.4.1.9 096-04 - Staple/fold motor failure ................................................... 112
5.4.1.10 096-04 - Staple/fold motor failure ................................................... 113
5.4.1.11 096-06 - Slide motor failure ............................................................ 113
5.4.1.12 096-02 - Shift motor failure............................................................. 114
5.4.1.13 096-02 - Shift motor failure............................................................. 114
5.4.1.14 096-02 - Shift motor failure............................................................. 115
5.4.1.15 096-07 - Paddle motor failure......................................................... 115
42872701TH Rev.1
7/
Oki Data CONFIDENTIAL
5.4.2
5.5
Troubleshooting Procedure (Optional Puncher Unit) ...................................... 116
5.4.2.1 096-0C - Failure in communications with puncher ......................... 116
5.4.2.2 096-0E - Failure of puncher unit backup memory .......................... 116
5.4.2.3 096-0D - Puncher unit power supply failure ................................... 116
5.4.2.4 096-0A - Punch motor failure ......................................................... 117
5.4.2.5 096-0F, 096-10 - Punch sensor (side registration) failure .............. 117
5.4.2.6 096-11 - Punch sensor (dust full) failure ........................................ 118
5.4.2.7 096-0B - Side registration motor failure ......................................... 118
Self-Diagnosis............................................................................................................. 119
5.5.1 Overview ........................................................................................................ 119
5.5.2 Error ............................................................................................................... 119
5.5.2.1 Finisher/Saddle-Stitcher Unit ......................................................... 119
5.2.2.2 Puncher Unit (Option) ................................................................... 121
5.5.3 Alarm ............................................................................................................. 122
5.5.3.1 Finisher/Saddle-Stitcher Unit ........................................................ 122
5.5.3.2 Puncher Unit (Optional)................................................................. 122
Appendix A Overall Timing Chart ...................................................................123
Appendix B Signal Name/Abbreviation List ...................................................126
Appendix C Jam Code/Stack Paper Code List .............................................128
Appendix D Solvents/Oils List .........................................................................129
42872701TH Rev.1
8/
Oki Data CONFIDENTIAL
1.
OVERVIEW
1.1
Features
1)
Use of Through-Type Stapler
As a through-type stapler is used, saddle-stitch stapling is available without changing the
stapler.
2)
Three Auto Staple Functions
There are three stapling positions (front single, rear single, and center double).
3)
Saddle-Stitch Function
The finisher saddle-stitches or V-folds up to 7 sheets of paper.
4)
Punch Function (Optional)
Using the puncher unit, holes for a binder can be punched in paper (available for paper
weighing 65 to 128 g/m2 and not available for OHP films).
42872701TH Rev.1
9/
Oki Data CONFIDENTIAL
1.2
Specification
1.2.1 Specification
1.2.1.1
Finisher/Saddle-Stitcher Unit
Table 1-01 (1/2)
Item
Specification
Stacking method
Stacking in 2 places [1] Descending output tray (1 tray)
Face-down/up stacking [2] Fixed booklet tray
Paper feed
reference position
Center
Stacking paper
size
A3, A4-LEF, A4, A5, B4, B5-LEF, B5, A6,
279mm×432mm(11×17), LGL, Exective, LTR-LEF, LTR
Paper weight
Finisher: 65 g/m2 to 90 g/m2
Saddle-stitcher: 65 g/m2 to 80 g/m2 (65 g/m2 to 128 g/m2
(Thick paper: One-sheet is possible only for a cover.))
Operation mode
Non-sort, Sort, Staple, and Booklet
Stacking capacity
(Note 1)
Non-sort staple
Stacking of mixed
sizes
Mixed sizes: 500 sheets (note 3)
Mixed stapling: 30 sets (in the same order)
Paper detection
Output tray:
Booklet tray:
Operating unit
N/A
Display unit
N/A
Dimensions
636.5 (W) × 603 (D) × 464 (H) mm
Weight
Approximately 27 kg
Power supply
A voltage of 24 VDC is supplied from the inverter.
Maximum power
consumption
Standby: 13 W / During operation: 84 W (staple-sort)
Stapling method
Driving staples using the rotary cam.
Stapling position
See Figure 1-01.
Stapling capacity
Finisher:
Staple loading
Staple cartridge designed for the finisher
Applicable staple
Staples designed for the finisher (5000 staples)
Staple empty
detection
Available (nearly empty: 40 staples left)
Paper size for
stapling
Front single stapling: A3, A4-LEF, A4, B4, B5-LEF,
279 mm×432 mm (11×17), LGL, LTR-LEF, LTR
Rear single stapling: A3, A4-LEF, B4, B5-LEF,
Center double stapling: A3, A4-LEF, A4, B4, B5-LEF,
279 mm×432 mm (11×17), LGL, LTR-LEF, LTR
Saddle-stitch double stapling: A3, A4, B4,
279 mm×432 mm (11×17), LTR, A4-LEF, B5-LEF,
LGL, LTR-LEF
42872701TH Rev.1
Remarks
Large size: A3, B4, 279 mm ×
432 mm (11×17), LGL
Large size: 500 sheets
Small size: 1000 sheets (note 2)
Staple-sort Large size: 30 sets or 500 sheets
Small size: 30 sets or 1000 sheets
Booklet
6 to 7 sheets/set: 10 sets
2 to 5 sheets/set: 20 sets
Available
Available
Large size: 22 sheets
Small size: 45 sheets
Saddle-stitcher: 7 sheets
The mounting kit is not included.
80 g/m2 or equivalent
80 g/m2 or equivalent
80 g/m2 or equivalent
When the saddle-stitcher is
used.
10 /
Oki Data CONFIDENTIAL
Table 1-01 (2/2)
Item
Specification
Remarks
Manual stapling
Not available.
Folding method
Folding paper by pressing with a roller
Folding mode
V-folding (with one unstapled sheet)
Folding position
Paper center
A margin of at least 5 mm each
must be left from the center of
paper.
Paper size for
saddle-stitching
A3, A4, B4, 279mm×432mm(11×17), LTR
Special paper cannot be
used.
Model No.
N31240A
Note 1: The stacking capacity above is a rough estimate using paper weight of 80 g/m2.
Note 2: When more than 500 sheets are stacked, the stacking registration is not guaranteed.
Note 3: When documents of mixed sizes are stacked, the stackability is not guaranteed.
42872701TH Rev.1
11 /
Oki Data CONFIDENTIAL
Staple Position
Front single stapling
Rear single stapling
Double stapling
Paper orientation
direction
Paper orientation
direction
Y1
Y2
Paper orientation
direction
X1
Y1
X1
Size
Direction
A3
A4-LEF
A4
B4
B5-LEF
Y1
X1
Front single Rear single
staple
staple
Double
stapling
X1
5.0±2
5.0±2
5.0±2
Y1
4.5±2
4.5±2
83±4
Y2
—
—
X1
5.0±2
Y1
Size
Direction
Front single Rear single
staple
staple
Double
stapling
X1
5.0±2
5.0±2
5.0±2
Y1
4.5±2
4.5±2
26.6±4
203±4
Y2
—
—
146.6±4
5.0±2
5.0±2
X1
5.0±2
5.0±2
5.0±2
4.5±2
4.5±2
83±4
Y1
4.5±2
4.5±2
74.2±4
Y2
—
—
203±4
Y2
—
—
194.2±4
X1
5.0±2
5.0±2
5.0±2
X1
5.0±2
5.0±2
5.0±2
Y1
4.5±2
4.5±2
39.5±4
Y1
4.5±2
4.5±2
42.5±4
Y2
—
—
159.5±4
Y2
—
—
162.5±4
X1
5.0±2
5.0±2
5.0±2
X1
5.0±2
5.0±2
5.0±2
Y1
4.5±2
4.5±2
74.2±4
Exective
Ledger
Legal
LetterLEF
Y1
4.5±2
4.5±2
63±4
Y2
—
—
183±4
Y2
—
—
194.2±4
X1
5.0±2
5.0±2
5.0±2
X1
5.0±2
5.0±2
5.0±2
Y1
4.5±2
4.5±2
63±4
Y1
4.5±2
4.5±2
42.5±4
Y2
—
—
183±4
Y2
—
—
162.5±4
Letter
Stapling/Folding position
X1
X2
X1±1.5mm (Staple to folding position)
X2±2mm (Top of the paper to folding position)
Y1±4mm
Y2±4mm
X1
X2
Y1
Y2
A3
0
210
83
203
A4
0
B4
0
Ledger
0
215.9 74.2 194.2
Letter
0
139.7 42.5 162.5
148.5 39.5 159.5
182
63
183
Y1
Y2
Paper orientation
direction
when booklet
making
Size
Folding position
Figure 1-01
40 mm or less
Stacking Registration
Paper output direction
* Measure on the vertical-wall side.
20 mm or less
Figure 1-02
42872701TH Rev.1
12 /
Oki Data CONFIDENTIAL
1.2.1.2
Puncher (Optional)
Table 1-02
Item
Specification
Punch method
Reciprocating system (punching one by one)
Paper size
2 holes (puncher unit •2H):
A3, A4, A4R, B4, B5, B5R
2 or 3 holes (puncher unit •2/3H): 2 holes for LGL and LTRR
3 holes for 279 mm x 432 mm (11 × 17) and LTR
4 holes (puncher unit •4HF/4HS): A3, A4
Paper weight
65g/m2 ~ 128g/m2
Punch hole
diameter
2 holes (puncher unit •2H):
6.5 mm
2 or 3 holes (puncher unit •2/3H): 2 holes / 8.0 mm
3 holes / 8.0 mm
4 holes (puncher unit •4HF/4HS): 6.5 mm
Punch dust
capacity
2 holes (puncher unit •2H):
10,000 sheets
2 or 3 holes (puncher unit •2/3H): 2 holes / 3000 sheets
3 holes / 3000 sheets
4 holes (puncher unit •4HF/4HS): 5000 sheets
Dimensions
90 (W) × 560 (D) × 170 (H) mm
Weight
Approximately 2.5 kg
Power supply
A voltage of 24 VDC is supplied from the finisher unit.
Power
consumption
Standby: 2 W or less
During operation: 21 W or less (punching)
Model No.
N31260A (puncher unit •2H)
N31261A (puncher unit •2/3H)
N31262A (puncher unit •4HF)
N31263A (puncher unit •4HS)
42872701TH Rev.1
Remarks
Not available for envelopes,
postcards and OHP films
80g/m2 or equivalent
13 /
Oki Data CONFIDENTIAL
Hole Position
[1] 2 Holes (Puncher Unit •2H)
χ1
80±1mm
12±3mm
χ1
A3/A4-LEF
Executive
B5-LEF/B4
A4
B5
Ledger/LTR-LEF
LGL/LTR
108.5±3mm
93.35±3mm
88.5±3mm
65±3mm
51±3mm
99.5±3mm
68±3mm
[2] 2 or 3 Holes (Puncher Unit •2/3H)
χ1
LGL/LTR-LEF/
Ledger
73±3mm
χ1
70±1mm
12±3mm
108±1mm 108±1mm
χ1
χ1
279mm × 432mm
(11 × 17)/LTR-LEF
A3/A4-LEF
31.5±3mm
40.5±3mm
χ1
A3/A4-LEF
28.5±3mm
χ1
A3/A4-LEF
B5-LEF/B4
A4
B5
Executive
Ledger/LTR-LEF
LGL/LTR
92.5±3mm
72.5±3mm
49±3mm
35±3mm
36.1±3mm
83.5±3mm
52±3mm
12±3mm
[3] 4 Holes (Puncher Unit •4HF)
80±1mm
80±1mm
80±1mm
χ1
12±3mm
[4] 4 Holes (Puncher Unit •4HS)
21±1mm
70±1mm
21±1mm
χ1
12±3mm
Figure 1-03
42872701TH Rev.1
14 /
Oki Data CONFIDENTIAL
1.3
Names of Parts
1.3.1 Sectional View
1.3.1.1
Finisher Unit
Jog plate (front/rear)
Paddle
Jog tray stopper
Feed roller
Delivery roller
Puncher unit (optional)
Output tray
Delivery belt
Multi-sheet
delivery roller
Stapler
Saddle-stitcher unit
Figure 1-04
1.3.1.2
Saddle-Stitcher Unit
Multi-sheet feed roller
Paper pressure plate
Paper folding roller
Booklet stopper
Booklet tray
Booklet delivery roller
Figure 1-05
42872701TH Rev.1
15 /
Oki Data CONFIDENTIAL
1.3.1.3
Puncher Unit (Optional)
Cam
Die
Punch
Punch dust receptacle
Figure 1-06
42872701TH Rev.1
16 /
Oki Data CONFIDENTIAL
1.4
User Maintenance
Table 1-03
No.
Item
Timing
1
Staple cartridge replacement
The indicator lamp lights up (operation panel on the printer).
2
Punch dust disposal (optional)
The indicator lamp lights up (operation panel on the printer).
42872701TH Rev.1
17 /
Oki Data CONFIDENTIAL
2.
OPERATION
2.1
Basic Operation
2.1.1 Specification
The finisher outputs paper fed from a machine connected to it with non-sort stacking, job off-setting
or stapling. The saddle-stitcher built in the finisher V-folds a set of documents sent from the finisher
unit. These movements are controlled by the finisher controller circuit board and the commands sent
from the connected machine.
The optional puncher unit is installed in the paper feeder of the finisher and it makes holes in paper
sent from the connected machine. This movement is controlled by the puncher controller circuit board
and the finisher controller circuit board.
Control system
Puncher unit
driving system
(optional)
Jog driving system
Stapler driving system
Delivery driving system
Feeder driving system
Tray driving system
Saddle-stitcher
driving system
Figure 2-01
Note!
Job off-setting is stacking document sets slightly offset from one another in the direction
of output to make it easier to sort them out.
42872701TH Rev.1
18 /
Oki Data CONFIDENTIAL
2.1.2 Electric Circuit Overview
The finisher’s operational sequence is controlled by the finisher controller circuit board. The finisher
controller circuit board uses a 16-bit micro computer (CPU) for sequence control and serial communications with the connected machine.
The finisher controller circuit board drives the motors or other components according to a command
transmitted from the connected machine over the serial communications line. The finisher controller
circuit board also notifies the connected machine of information on the sensors and switches over the
serial communications line.
The ICs mounted on the finisher controller circuit board serve the functions below.
• IC13 (CPU)
Sequence control
• IC11 (expansion port)
Input/output-port expansion
• IC12 (EEP-ROM)
Settings backup
• IC1 (Regulator IC)
5V voltage generation
• IC6 (EP-ROM)
Sequence program
Figure 2-02 shows the flow of signals between the finisher and the optional controller.
Finisher unit
To Inverter
Finisher controller
PCB
Motor
IC13
CPU
IC12
EEP-ROM
IC11
Expansion port
IC6
EP-ROM
Clutch
Switch
Sensor
Puncher unit (optional)
Punch controller
PCB
Sensor
IC1
Regulator IC
Motor
Figure 2-02
42872701TH Rev.1
19 /
Oki Data CONFIDENTIAL
2.1.3 Finisher Controller Circuit Board Input/Output
2.1.3.1
Finisher Controller Circuit Board Input
Finisher Controller Circuit Board
PI1
Inlet sensor
PI2
Paddle home
position sensor
Rear jog plate
home position
sensor
CN51-1
-3
-2
CN9-1 +5V
-3 PDL_HP
-2
Becomes "1" when the
sensor detects paper.
Becomes "1" when the
paddle is in home position.
CN55-3 CN54-1
-3
-1
-2
-2
PI4
CN23-3
-1
-2
CN4 +5V
-3 FJOG_HP
-2
Becomes "1" when the front
jog plate is in home position.
CN36-3
-1
-2
CN5-13 +5V
-15 RJOG_HP
-14
Becomes "1" when the rear
jog plate is in home position.
PI5
PI6
Jog tray sensor
CN30-3 CN29-1
-3
-1
-2
-2
CN53-3
-1
-2
CN28-9
-7
-8
CN9-7
+5V
Becomes "1" when the swing
-9
BDL_ROL_HP guide is in home position.
-8
CN5-1 +5V
-3
ADJ_TRAY_S
-2
Becomes "1" when the
sensor detects paper.
PI7
CN31-3
-1
-2
-4
-6
-5
-6
-4
-5
-4 +5V
Becomes "1" when the
-6
EJCT_BLT_HP delivery belt is in home position.
-5
PI8
CN32-3
-1
-2
-7
-9
-8
-3
-1
-2
-7 +5V
-9 TRY_EMPS
-8
Delivery belt home
position sensor
Tray paper sensor
PI9
Paper level sensor
PI10
Fold position
sensor
CN42-3 CN16-10 +5V
-1
-12 ENT_S
-11
-2
PI3
Swing guide home
position sensor
Front jog plate
home position
sensor
CN44-3 CN43-1
-3
-1
-2
-2
Becomes "1" when the tray
contains paper.
CN35-3 CN34-1
-3
-1
-2
-2
CN33-3 CN5-10 +5V
-12 LVL_S
-1
-2
-11
Becomes "1" when the
sensor detects paper surface.
CN39-3 CN38-1
-2
-2
-3
-1
CN37-9 CN16-1 +5V
-2
-8
BIND_P
-7
-3
BIND_L
Becomes "0" when the sensor
detects paper and "1" when
LED lights up.
Figure 2-03 (1/2)
42872701TH Rev.1
20 /
Oki Data CONFIDENTIAL
Finisher Controller Circuit Board
PI11
CN40-3
-1
-2
CN38-4
-6
-5
CN37-6
-4
-5
PI12
CN41-3
-1
-2
-7
-9
-8
-3
-1
-2
PI13
CN47-3
-1
-2
CN15-1
+5V
-3
BIND_EMPS
-2
Becomes "1" when the sensor
detects paper.
CN52-1
-2
-3
CN9-6 +5V
-5 BIND_CLK
-4
Repeats "1" and "0" while the
staple/fold motor is running.
CN50-3
-1
-2
CN15-10 +5V
-12 SIFT_UPLMT
-11
Becomes "1" when the tray
reaches the upper limit.
CN49-3
-1
-2
CN15-7 +5V
-9
SIFT_DNLMT
-8
Becomes "1" when the tray
reaches the lower limit.
CN48-3
-1
-2
CN15-4 +5V
-6
SIFT_CLK
-5
Repeats "1" and "0" while the
shift motor is running.
CN25-3
-1
-2
CN4-7 +5V
-9 FDOOR_S
-8
Becomes "1" when the front
door is open.
CN24-3
-1
-2
CN4-4 +5V
-6 TOPCOV_S
-5
Becomes "1" when the top
cover is open.
Folding home
position sensor
Multi-sheet feed
roller (top) home
position sensor
Booklet tray sensor
PI14
Staple/fold motor
clock sensor
PI15
Shift upper limit
sensor
PI16
Shift lower limit
sensor
PI17
Shift motor
clock sensor
PI22
Front door sensor
PI23
Top cover sensor
PI24
Paper full sensor
Joint switch
MS2
N. O.
MS1
N. O.
Front door switch
Staple safety
switch
MS3
N. O.
CN73-3
-1
-2
CN16-4 +5V
-6 BIND_HP
-5
-7 +5V
-9
BIND_ROL_HP
-8
CN19-1 +5V
-3 PAPER_F
-2
Becomes "0" when the unit is
in home position for folding.
Becomes "1" when the
multi-sheet feed roller (top) is
in home position.
Becomes "1" when the tray
is full.
+24VP
CN69-2
CN8-6
-1
-5
CN68-2
CN8-4
-1
-3
CN66-2
CN8-2
-1
-1
JOINT SW
Becomes "1" when the
finisher is connected to
the machine to connect.
FRONT SW
Becomes "1" when the
front door is closed.
STPLSAFE SW
Becomes "1" when the
swing guide is closed.
Figure 2-03 (2/2)
42872701TH Rev.1
21 /
Oki Data CONFIDENTIAL
2.1.3.2
Finisher Controller Circuit Board Output
Finisher Controller Circuit Board
+24V
-1
CN72
Booklet clutch
-2
CN18-1
-1
-2
CL1
-2
Feed motor
-6
-1
CN10-1
-5
-2
-2
-4
-3
-3
-4
-4
-2
-5
-5
-1
-6
-6
-6
-1
CN10-7
-5
-2
-8
-4
-3
-9
-4
-10
-2
-5
-11
-1
-6
-12
-6
-1
CN13-1
-5
-2
-2
-4
-3
-3
-4
-4
-2
-5
-5
-1
-6
-6
B_CLU
Becomes "1" when drive is transmitted.
M1
-3
CN56
+24V
FEEDMTR_A
FEEDMTR_*A
FEEDMTR_B
Becomes "1" or "0" depending on
the direction of motor rotation.
FEEDMTR_*B
M2
-3
CN57
+24V
Paddle motor
PDLMTR_A
PDLMTR_*A
PDLMTR_B
Becomes "1" or "0" depending on
the direction of motor rotation.
PDLMTR_*B
M3
-3
CN59
+24V
Delivery motor
EJCTMTR_A
EJCTMTR_*A
EJCTMTR_B
Becomes "1" or "0" depending on
the direction of motor rotation.
EJCTMTR_*B
+24V
Front jog plate motor CN63-1
CN62-5
CN3-1
-2
-4
-2
-3
-3
-3
-4
-2
-4
-5
-1
-5
M4
FJOGMTR_A
FJOGMTR_*A
FJOGMTR_B
Becomes "1" or "0" depending on
the direction of motor rotation.
FJOGMTR_*B
+24V
Rear jog plate motor CN65-1
CN64-5
CN3-6
-2
-4
-7
-3
-3
-8
-4
-2
-9
-5
-1
-10
M5
RJOGMTR_A
RJOGMTR_*A
RJOGMTR_B
Becomes "1" or "0" depending on
the direction of motor rotation.
RJOGMTR_*B
Figure 2-04 (1/2)
42872701TH Rev.1
22 /
Oki Data CONFIDENTIAL
Finisher Controller Circuit Board
M6
-1
-2
-2
-1
-1
CN70
-2
CN70
Shift motor
-2
CN6-1
SIFTMTR_1
-1
-2 SIFTMTR_0
Becomes "+" or "-" depending on the
direction of motor rotation.
-2
M7
-1
CN71
Staple/fold motor
-2
CN6-3
BINDMTR_1
-1
-4 BINDMTR_0
Becomes "+" or "-" depending on the
direction of motor rotation.
Figure 2-04 (2/2)
42872701TH Rev.1
23 /
Oki Data CONFIDENTIAL
2.1.3.3
Finisher Controller Circuit Board Input/Output
Stapler Unit
Finisher controller Circuit Board
Slide home position
sensor
+5V
PI18
CN72-5 CN72A-5
CN72A-5 CN11-3 SLID_HP
Becomes "1" when the stapler is in
home position.
CN72-4 CN72A-4
CN72A-4 CN11-4 STPL_HP
Becomes "0" when the stapler is in
home position for stapling.
CN72-3 CN72A-3
CN72A-3 CN11-5
HOOK_S
Becomes "0" when the cartridge
contains staples.
CN72-2 CN72A-2
CN72A-2 CN11-6
SELF_P
Becomes "0" when a staple is at the
top of the stapler.
CN72-6 CN72A-6
CN72A-6 CN11-2
CN72-1 CN72A-1
CN72A-1 CN11-7
CN72-7 CN72A-7
CN72A-7 CN11-1
CN72-10 CN72B-5
CN72B-5 CN7-3
SLIDMTR_A
CN72B-4 CN7-4 SLIDMTR_*A
Staple home position
sensor
+5V
PI19
Staple empty sensor
+5V
PI20
Staple top position
sensor
+5V
PI21
+5V
Slide motor
+5V
CN72-11 CN72B-4
M8
STPL_CNCT
CN72-12 CN72B-3
CN72B-3 CN7-5
CN72-13 CN72B-2
CN72B-2 CN7-6 SLIDMTR_*B
SLIDMTR_B
Becomes "0" when the stapler is
connected.
Becomes "1" or "0" depending on
the direction of motor rotation.
CN17-1
-2
Communications line
Rxd
-3
Txd
-4
SEN - Inverter discharge sensor
Inverter
+24V
CN1-1
-3
Figure 2-05
42872701TH Rev.1
24 /
Oki Data CONFIDENTIAL
2.1.4 Punch Controller Circuit Board Input/Output (Optional)
2.1.4.1
Punch Controller Circuit Board Input/Output
Punch Controller Circuit Board
PI1P
J2008-3
-1
-2
J1006-4
+5V
-6
PUNCH
-5
PI2P
J2007-3
-1
-2
J1006-1 +5V
-3
SLIDE
-2
PI3P
J2009-3
-1
-2
J1006-7
+5V
-9
CLOCK
-8
Punch home
position sensor
Side registration
home position
sensor
Punch motor
clock sensor
Dust full LED circuit board
Becomes "0" when the punch
is in home position.
Becomes "1" when the punch
slide unit is in home position.
Repeats "1" and "0" while the
punch motor is running.
+5V
J1005-1
LED121
-2
DUSTLED
Becomes "0" when the light is
blocked.
Dust full photo sensor circuit board
PT131
J1005-3
DUSTPTR
4
Photo sensor circuit board
+5V
+5V
PT1
PT2
PT3
PT4
PT5
J1007-12
-11
-10
-9
-8
-7
SREG1*
SREG2*
SREG3*
SREG4*
PAEND*
Becomes "0" when paper is
detected.
-13
Figure 2-06
42872701TH Rev.1
25 /
Oki Data CONFIDENTIAL
2.1.4.2
Punch Controller Circuit Board Output
Punch Controller Circuit Board
LED circuit board
+5V
J1007-6
LED5
LED4
LED3
LED2
LED1
-1
-5
-4
-3
-2
LEDON5
LEDON4
LEDON3
LEDON2
LEDON1
When an output is "1", the LED
is ON.
Punch motor
J1002-1
Becomes "+" or "-" depending on
the direction of motor rotation.
M1P
-2
Side registration motor
J1001-1
-2
M2P
-3
-4
A
B
A*
The pulse signal varies
depending on motor rotation.
B*
Figure 2-07
42872701TH Rev.1
26 /
Oki Data CONFIDENTIAL
2.2
Feeding/Driving Systems
2.2.1 Overview
This finisher delivers documents sent from the printer to the output tray with simple stacking, job
offsetting, stapling or V-folding in accordance with commands sent from the printer.
When the optional puncher unit is installed, documents are punched before delivered to the output tray.
Including the punching, there are five paper output methods all together.
Paper output method
Standard output
Punching
Simple stacking
Job offsetting
Stapling
Front single stapling
Rear single stapling
Center double stapling
Saddle-stitch output
42872701TH Rev.1
Stitching
Saddle-stitch double stapling
27 /
Oki Data CONFIDENTIAL
2.2.1.1
Standard Output
1)
Simple Stacking
Documents are drawn onto the jog tray and then delivered to the output tray.
Tray
Paper
Figure 2-08
42872701TH Rev.1
28 /
Oki Data CONFIDENTIAL
2)
Job Offset
Before delivered to the output tray, a sheet is drawn onto the jog tray and moved to the
front or rear. When 2 sheets stack on the jog tray, the set of the sheets are output together.
Paper output in 4-set job offsetting
4th set
3rd set
2nd set
1st set
Direction of output
Figure 2-09
42872701TH Rev.1
29 /
Oki Data CONFIDENTIAL
3)
Stapling
Documents fed from the connected machine are stacked on the jog tray. When one set
of documents stack on the tray, the finisher staples them together and sends out the
stapled set to the output tray.
Figure 2-10
42872701TH Rev.1
30 /
Oki Data CONFIDENTIAL
4)
Saddle-Stitch Output
A set of documents stacked on the jog tray are stapled together (double stapling in the
center) and then sent to the saddle-stitcher unit. The saddle-stitcher V-folds the stapled
set and delivers it to the booklet tray.
Figure 2-11
42872701TH Rev.1
31 /
Oki Data CONFIDENTIAL
2.2.2 Feeding and Output
2.2.2.1
Overview
The finisher feeds documents sent from the printer to the output tray, the jog tray or the saddle-stitcher
unit depending on output mode. When documents are fed to the jog tray or the saddle-stitcher unit,
they are offset, stapled or V-folded in accordance with the command sent from the printer.
Table 2-01 shows the motors relating to paper feeding and jogging. These motors rotate forward or
backward by the control of the micro computer (CPU) on the finisher controller circuit board.
Table 2-02 shows the sensors installed in the paper feeding path. These sensors detect the arrival
or passing of paper.
If paper fails to arrive at or pass a sensor within the specified time, the finisher controller circuit board
determines that a paper jam has occurred. The finisher stops operation and notifies the printer of the
jam.
Table 2-01
Code
Description
Remarks
Connector on the
finisher controller PCB
M1
Feed motor
Stepping motor
CN10
M2
Paddle motor
Stepping motor
CN10
M3
Delivery motor
Stepping motor
CN13
M4
Front jog plate motor
Stepping motor
CN3
M5
Rear jog plate motor
Stepping motor
CN3
M7
Staple/fold motor
Brush DC motor
CN6
42872701TH Rev.1
32 /
42872701TH Rev.1
M5
M2
Staple/fold motor clock
detection signal BIND_CLK
SLIDMTR
M4
Staple/fold motor
drive signal BINDMTR
Slide motor drive signal
EJCTMTR
SIFTMTR
Delivery motor drive signal
Shift motor drive signal
Feed motor drive
signal FEEDMTR
Booklet clutch drive
signal B_CLU
Paddle motor drive
signal PDLMTR
Rear jog plate motor
drive signal RJOGMTR
Front jog plate motor
drive signal FJOGMTR
Oki Data CONFIDENTIAL
Finisher Controller Circuit Board (1/2)
M1
M3
CL
M6
M8
PI14
M7
Finisher Controller Circuit Board (2/2)
Figure 2-12 (1/2)
33 /
Oki Data CONFIDENTIAL
Fold position detection signal
Inlet paper detection signal
BIND_P
ENT_S
Finisher Controller Circuit Board
PI1
PI10
Figure 2-12 (2/2)
Table 2-02
Code
Description
Remarks
Connector on the
finisher controller PCB
Pl1
Inlet sensor
Photo interrupter
CN16
Pl10
Fold position sensor
Photo reflector
CN16
42872701TH Rev.1
34 /
Oki Data CONFIDENTIAL
2.2.3 Job Offsetting
2.2.3.1
Overview
The Job offset function sorts out documents by moving each set of documents to the front or the rear
before sending them out to the output tray.
The documents are moved to the front or the rear by the front or rear jog plate. After passing the
delivery roller, paper is fed onto the jog tray and sent towards the stopper by the paddle.
The swing guide is in its upper position, while paper is drawn onto the jog tray and jogged. The guide
is in its lower position during multi-sheet feeding, multi-sheet delivery, and stapling.
When power is turned on, the finisher controller circuit board drives the front jog plate motor (M4) and
the rear jog plate motor (M5) to return the two jog plates to home position.
Table 2-03
Sensor
Code Connector
Function
Motor
Code
Front jog plate home position sensor
PI4
CN4-3
Drive the front jog plate. Front jog plate motor
M4
Rear jog plate home position sensor
PI5
CN5-15
Drive the rear jog plate. Rear jog plate motor
M5
Swing guide home position sensor
PI3
CN9-9
Drive the swing guide.
Paddle motor
M2
CN9-3
Drive the paddle
(feed paper).
Paddle motor
M2
Paddle home position sensor
PI2
Rear jog plate
Rear jog plate home position
sensor (PI5)
Shield plate
Front jog plate motor (M4)
Rear jog plate motor (M5)
Front jog plate
(Front)
Shield plate
Paper
Front jog plate home
position sensor (PI4)
Figure 2-13
42872701TH Rev.1
35 /
Oki Data CONFIDENTIAL
2.2.3.2
Paper Stacking for Jog Tray
After passing through the ejector roller, the paper is fed to the processing tray. The paddle then presses
against* the upper surface of the paper to align the rear edge of the paper with the processing-tray
stopper.
* Number of cycles:
Non-staple mode: Twice for the first sheet; once for each subsequent sheet
Staple mode:
Once or three times, as selected by a command from the main unit
Paper
Jog plate
Paddle
Multi-sheet delivery roller (top)
Swing guide
Jog tray stopper
Delivery belt
Multi-sheet delivery roller (bottom)
Figure 2-14
2.2.3.3
Offsetting
The front or rear jog plate moves documents to the front or rear. Offsetting is performed every time
a document is drawn onto the jog tray.
Rear jog plate
Paper to be offset
Tray
Front jog plate
Figure 2-15 (1/2) Moving to Front
Rear jog plate
Paper to be offset
Tray
Front jog plate
Figure 2-15 (2/2) Moving to Rear
42872701TH Rev.1
36 /
Oki Data CONFIDENTIAL
2.2.3.4
Multi-Sheet Output
Every time 2 large-size sheets or 2 small-size sheets have stacked on the jog tray, they are output
all together from the tray.
The paddle motor starts running and the swing guide is lowered, which causes the top and bottom
multi-sheet delivery rollers to sandwich the stack of documents. The delivery motor rotates forward
and the documents sandwiched between the multi-sheet delivery rollers are fed in the output direction.
The delivery belt home position sensor is turned off and, after the delivery motor runs for the specified
number of pulses, the swing guide goes up. The delivery motor continues to run and the documents
are output by the claw that rotates in synchronization with the rotation of the bottom multi-sheet delivery
roller.
Swing guide
Figure 2-16 (1/2)
Job Offset Sequence
Action start signal
Delivery signal of connected machine
Inlet sensor (PI1)
Jog tray sensor (PI6)
Feed motor (M1)
Delivery motor (M3)
Delivery belt home
position sensor (PI7)
Paddle motor (M2)
360msec*
360msec*
360msec*
360msec*
Paddle home position
sensor (PI2)
Swing guide home
position sensor (PI3)
Staple safety switch
(MS3)
Front jog plate motor (M4)
30msec
60msec*
220msec
Front jog plate home
position sensor (PI4)
Rear jog plate motor (M5)
Rear jog plate home
position sensor (PI5)
: Forward motor rotation
: Backward motor rotation
*: Varies depending on the paper size
Figure 2-16 (2/2)
42872701TH Rev.1
37 /
Oki Data CONFIDENTIAL
2.3
Stapling
2.3.1 Overview
The stapling function does stapling of the specified number of documents using the stapler unit. The
stapling positions vary depending on the staple mode and paper size.
After power is turned on or when the front door is opened and closed, the finisher controller circuit
board drives the slide motor (M8) to return the stapler unit to home position. The stapler unit begins
to move towards the front of the stapler frame. The stapler unit stops, when the slide home position
sensor (PI18) on the slide circuit board at the bottom of the stapler unit detects the shield plate. The
slide motor is driven for the specified number of pulses. The stapler unit begins to move again and
stops in the standby position in the rear.
Table 2-04
Sensor
Code Connector
Function
Remarks
-
Slide home position sensor
PI18
CN11-3
Detects stapler home position
in movement to the front and
the rear.
Staple home position sensor
PI19
CN11-4
Detects stapling home position. Inside the stapler
Staple empty sensor
PI20
CN11-5
Detects if the cartridge contains Inside the stapler
staples.
Staple top position sensor
PI21
CN11-6
Detects the staple at the top
of the stapler.
Function
Motor
Inside the stapler
Code Remarks
Driving for stapler movement
Slide motor
M8
-
Driving for stapling
Staple/fold motor
M7
-
Stapler
Paper
(Output direction)
Shield plate
Slide motor
(M8)
Slide home position sensor (PI18)
Figure 2-17
42872701TH Rev.1
38 /
Oki Data CONFIDENTIAL
2.3.2 Stapling
The finisher controller circuit board, upon completion of stacking onto the jog tray and jogging, runs
the paddle motor backward to lower the swing guide. Lowering the swing guide, the top and bottom
multi-sheet delivery rollers sandwich the documents set.
The finisher controller circuit board moves the stapler in accordance with the specified stapling position
and the stapler staples the documents (the stapler is not moved for rear single stapling and it does
stapling in its standby position). When the stapler is moved to the front, the jog tray stopper is knocked
down.
Paper
Swing guide
Multi-sheet delivery roller (top)
Jog tray stopper
Stapler
Output tray
Multi-sheet
delivery roller
(bottom)
Figure 2-18 (1/2)
Paddle motor (M2)
Swing guide home
position sensor (PI3)
Shield plate
Staple safety switch
(MS3)
Swing guide
Multi-sheet delivery
roller (top)
Multi-sheet delivery
roller (bottom)
Figure 2-18 (2/2)
42872701TH Rev.1
39 /
Oki Data CONFIDENTIAL
2.3.3 Paper Output after Stapling
After stapling is completed, the finisher controller circuit board runs the delivery motor forward to feed
a set of documents sandwiched between the multi-sheet delivery rollers in the output direction. The
delivery belt home position sensor is turned off. After the delivery motor has run for the specified
number of pulses, the swing guide goes up. As soon as the swing guide goes up, the slide motor
begins to run and the stapler is returned into the standby position in the rear. The delivery motor
continues to run and the document set is output by the claw that rotates in synchronization with the
rotation of the bottom multi-sheet delivery roller.
Paper
Swing guide
Stapler
Output tray
Delivery belt
Multi-sheet
delivery roller
(bottom)
Figure 2-19 (1/2)
Swing guide home position
sensor (PI3)
Paddle motor (M2)
Shield plate
Staple safety
switch (MS3)
Swing guide
Multi-sheet delivery
roller (top)
Multi-sheet delivery roller (bottom)
Figure 2-19 (2/2)
42872701TH Rev.1
40 /
Oki Data CONFIDENTIAL
2.3.4 Stapler Unit
The stapling movement is produced by the staple/fold motor (M7). As the motor rotates the cam one
revolution, the stapler does stapling. The cam’s home position is detected by the staple home position
sensor (PI19).
The staple/fold motor is controlled by the microcomputer (IC13) on the finisher controller circuit board
whether it rotates forward or backward.
When the staple home position sensor is off, the finisher controller circuit board runs the staple/fold
motor forward until the sensor is turned on to return the staple cam into the initial state.
The staple empty sensor (PI20) detects whether there is a staple cartridge or staples in the cartridge.
The staple top position sensor (PI21) detects whether a staple is pushed to the top of the cartridge.
The finisher controller circuit board doesn’t drive the staple/fold motor (M7) unless the staple safety
switch (MS3) is on (the swing guide is closed). This is to ensure safety, for example, in case an operator
puts his/her finger in the stapler.
42872701TH Rev.1
41 /
42872701TH Rev.1
Staple/fold motor drive signal
Staple top position detection signal
Staple empty detection signal
Staple drive home position detection signal
Oki Data CONFIDENTIAL
Figure 2-20 (1/2)
M7
Finisher Controller Circuit Board
Figure 2-20 (2/2)
42 /
Oki Data CONFIDENTIAL
2.3.4.1
Stapler Unit Movement Control
The stapler unit is moved by the slide motor (M8). Its home position is detected by the slide home
position sensor (PI18). The stapler stands by in the rear of the stapler frame in any staple mode and
for any paper size. After documents have been stacked on the jog tray, upon receipt of a command
for stapling from the printer, the stapler moves into the specified stapling position.
Figures from 2-21 below show the stapler’s standby position and stapling positions according to staple
mode.
1)
Front Single Stapling
The stapler stands by in the rear. The stapler moves to the stapling position and then
comes back to the standby position every time it does stapling.
Standby position
Stapler
Feeding direction
Stopper
Stapling position
Figure 2-21
2)
Rear Single Stapling
The stapler stands by in the rear. The stapling position is the same as the standby position.
Standby position
Stapling position
Stapler
Feeding direction
Stopper
Figure 2-22
42872701TH Rev.1
43 /
Oki Data CONFIDENTIAL
3)
Center Double Stapling
The stapler stands by in the rear. The stapler moves to the stapling position and then
comes back to the standby position every time it does stapling. Documents are stapled
in the rear first and then in the front.
Standby position
Stapler
Stapling position
Stopper
Feeding direction
Stapling position
Figure 2-23
4)
Saddle-Stitch Double Stapling (in booklet mode)
The stapler stands by in the rear. The stapler moves to the stapling position and then
comes back to the standby position every time it does stapling. Documents are stapled
in the rear first and then in the front.
Standby position
Stapler
Stapling position
Stopper
Feeding direction
Stapling position
Figure 2-24
42872701TH Rev.1
44 /
Oki Data CONFIDENTIAL
Stapling Sequence
Two-Sheet Rear Single Stapling
Action start signal
Delivery signal of connected machine
Stapling Multi-sheet delivery
Inlet sensor (PI1)
Jog tray sensor (PI6)
Feed motor (M1)
Delivery motor (M3)
Delivery belt home
position sensor (PI7)
Paddle motor (M2)
10msec
360msec*
360msec*
Paddle home position
sensor (PI2)
Swing guide home
position sensor (PI3)
Staple safety switch
(MS3)
Front jog plate motor (M4)
Front jog plate home
position sensor (PI4)
20msec
Staple/fold motor (M7)
Staple home position
sensor (PI19)
: Forward motor rotation
: Backward motor rotation
*: Varies depending on the paper size
Figure 2-25
42872701TH Rev.1
45 /
Oki Data CONFIDENTIAL
2.4
Tray Operation
2.4.1 Overview
The finisher has the output tray in the finisher unit and the booklet tray in the saddle-stitcher unit.
The booklet tray in the saddle-stitcher unit is a fixed tray. All the bound document sets are output
to this tray. The booklet tray is equipped with the booklet tray sensor (PI13) for detecting paper on
the tray.
The output tray in the finisher unit moves up and down, driven by the shift motor (M6). The finisher
unit has the tray paper sensor (PI8) for detecting paper on the output tray.
The home position of the output tray is detected by the paper level sensor (PI9). The home position
is where the top surface of paper stack is detected, if documents are stacked on the output tray. It
is where the edge of the output tray is detected, if no paper is stacked on the tray. When power is
turned on, the finisher controller circuit board drives the shift motor (M6) to return the output tray to
home position.
When paper is delivered from the jog tray to the output tray, the shift motor runs for the specified number
of clock signals and the output tray is lowered. The clock signals are detected by the shift motor clock
sensor (PI17). The output tray returns to home position for next stacking.
The shift upper limit sensor (PI15) detects the upper limit of the output tray. When the shift upper
limit sensor (PI15) is turned on, the finisher controller circuit board stops the drive (ascent) of the shift
motor (M6).
The shift lower limit sensor (PI16) detects the lower limit of the output tray. When the shift lower limit
sensor (PI15) is turned on, the finisher controller circuit board stops the drive (descent) of the shift
motor (M6).
The finisher unit also has the paper full sensor (PI24) to detect over-stacking due to large-size or mixedsize paper stacking.
Shift upper limit sensor
(PI15)
Paper full sensor
(PI24)
Shift lower limit sensor
(PI16)
Tray paper sensor (PI8)
Paper level sensor (PI9)
Edge
Shift motor clock sensor
(PI17)
Output tray
Shift motor (M6)
Figure 2-26
42872701TH Rev.1
46 /
Oki Data CONFIDENTIAL
2.5
Saddle-Stitcher Unit
2.5.1 Basic Operation
2.5.1.1
Overview
The finisher, after the finisher unit has saddle-stitched a set of documents (saddle-stitch double
stapling), folds the set in two and outputs it to the tray. These movements are controlled by the finisher
controller circuit board in accordance with commands sent from the printer.
2.5.2 Feeding/Driving Systems
2.5.2.1
Overview
After saddle-stitching documents sent from the finisher unit in accordance with commands sent from
the printer, the finisher folds the document set together and outputs the set to the booklet tray in the
saddle-stitcher unit.
This movement is divided into four steps below.
1)
Paper infeeding
2)
Saddle-stitching
3)
Multi-sheet feeding
4)
Folding/output
1) Paper infeeding
2) Saddle-stitching
3) Multi-sheet feeding
4) Folding/output
Figure 2-27
42872701TH Rev.1
47 /
Oki Data CONFIDENTIAL
1)
Paper Infeeding
A set of documents, after jogged on the jog tray, are sandwiched between the multi-sheet
delivery rollers and then fed in towards the saddle-stitcher by the rotation of the multi-sheet
delivery rollers.
Multi-sheet delivery roller (top)
Document set
Multi-sheet delivery
roller (bottom)
Figure 2-28
2)
Saddle-Stitching
When the document set is further fed and its center (position to be saddle-stitched) reaches
the stapler’s staple position, the document set stops and the stapler saddle-stitches it in
the center.
Staple
Stapler (top)
Stapler (bottom)
Figure 2-29
42872701TH Rev.1
48 /
Oki Data CONFIDENTIAL
3)
Multi-Sheet Feeding
The multi-sheet feed roller feds the document set into the multi-sheet folding/delivery
position. The multi-sheet folding/delivery position is where the center of the document set
(saddle-stitched position) is aligned with the paper pressure plate and the nip of the paper
folding rollers.
Multi-sheet feed roller (top)
Paper pressure plate
Multi-sheet feed roller (bottom) Paper feed roller
Figure 2-30
4)
Folding/Output
The paper pressure plate presses the center of the document set towards the paper folding
rollers. The paper folding rollers sandwich the document set and V-fold it. The paper
folding rollers then the booklet delivery rollers feed the document set to the booklet tray.
Booklet delivery roller
Paper folding roller
Figure 2-31
42872701TH Rev.1
49 /
Oki Data CONFIDENTIAL
2.5.3 Paper Infeeding System
2.5.3.1
Overview
The paper infeeding system feeds further a document set sent from the finisher unit and stops it where
its center (position to be saddle-stitched) in the stapler’s staple position for saddle-stitching and paper
folding in the next process.
Upon completion of paper stacking on the jog tray and jogging, the paddle motor (M2) begins to run
backward to lower the swing guide. As the swing guide is lowered, the document set is sandwiched
between the top and bottom multi-sheet delivery rollers. The delivery motor (M3) runs backward and
the multi-sheet delivery rollers rotate, and the document set will be fed to the saddle-stitcher unit. When
the edge of the document set reaches the fold position sensor (PI10), the finisher controller circuit board
drives the delivery motor for the specified number of motor pulses and stops the center of the document
set (position to be saddle-stitched) in the stapler’s staple position. Before the document set passes
the multi-sheet feed rollers, the multi-sheet feed roller (bottom) is rotated by the drive of the feed motor
(M1) to prevent the edges of the documents from bending.
Multi-sheet delivery roller (top)
Document set
Fold position sensor
Multi-sheet delivery roller
(bottom)
Multi-sheet feed roller (bottom)
Figure 2-32
42872701TH Rev.1
50 /
Oki Data CONFIDENTIAL
2.5.4 Multi-Sheet Feeding System
2.5.4.1
Overview
The multi-sheet feeding system feeds a saddle-stitched document set to the folding position.
Upon completion of saddle-stitching, the feed motor (M1) runs backward to lower the multi-sheet feed
roller (top). The document set is sandwiched between the multi-sheet feed rollers. The booklet clutch
(CL1) is turned on and the feed motor (M1) runs forward to feed the document set to the folding position.
The feed distance to the folding position is determined by the number of motor pulses for which the
feed motor (M1) runs.
Multi-sheet feed roller (top)
Fe
ed
dis
tan
ce
Multi-sheet feed roller (bottom)
Figure 2-33
42872701TH Rev.1
51 /
Oki Data CONFIDENTIAL
2.5.5 Folding/Output System
2.5.5.1
Overview
The paper folding mechanism consists of the guide plate, paper folding rollers, and paper pressure
plate. The guide plate, paper folding rollers, and paper pressure plate are all driven by the staple/
fold motor (M7) via the gears and cam. The motor driving is monitored by the staple/fold motor clock
sensor (PI14).
The guide plate covers the paper folding rollers until a document set is fed into the folding position.
The guide plate helps feed the documents to the saddle-stitcher and also prevents them from touching
the paper folding rollers.
The folding home position sensor (PI11) is used to detect the positions of the paper folding rollers and
paper pressure plate.
After V-folded by the paper folding rollers, the document set is output by the booklet delivery rollers.
The booklet delivery rollers are also driven by the staple/fold motor (M7).
On the booklet tray, the booklet tray sensor (PI13) is provided. This sensor detects document sets
on the tray but it doesn’t detect a paper jam.
2.5.5.2
Paper Folding
Paper folding is performed by the paper folding rollers and the paper pressure plate.
As soon as the paper folding rollers begin to rotate, the paper pressure plate begins to move and pushes
the document set into the nip of the paper folding rollers. When the paper folding rollers continue to
rotate and the document set is sandwiched approximately 10 mm between the paper folding rollers,
the paper pressure plate returns to home position. The document set sandwiched between the paper
folding rollers is delivered by the paper folding rollers and then by the booklet delivery rollers to the
booklet tray.
One semicircular part of each paper folding roller is made hollow except for the center and both ends
of the roller. This hollow semicircular parts of the top and bottom paper folding rollers touch each other
only in the center and on both ends. This makes the rollers do paper feeding only and prevents crease
in the paper. The other semicircular parts of the top and bottom paper folding rollers touch each other
fully. Paper folding begins on these surfaces. The rollers feed the document set while folding it.
Sensor flag
Folding home position sensor (PI11)
Cam
Paper pressure plate
Document set
Paper folding roller (top)
Staple/fold M7
motor
Paper folding roller (bottom)
Figure 2-34 (1/4)
42872701TH Rev.1
52 /
Oki Data CONFIDENTIAL
Folding home position sensor (PI11)
Paper pressure plate
Paper folding roller (top)
Staple/fold M7
motor
Paper folding roller (bottom)
Document set
Figure 2-34 (2/4)
[Paper Folding Start Position]
Document set
Paper inlet
Paper pressure plate
Paper outlet
Fold/feed the documents.
Feed the documents.
Figure 2-34 (3/4)
42872701TH Rev.1
53 /
Oki Data CONFIDENTIAL
Feed motor (M1)
Stapling
Folding/delivery
Delivery motor (M3)
Paddle motor (M2)
Paddle home position
sensor (PI2)
Swing guide home position
sensor (PI3)
Staple safety switch (MS3)
Slide motor (M8)
13571msec*
Staple/fold motor (M7)
Staple home position
sensor (PI19)
50msec
Fold position sensor (PI10)
Multi-sheet feed roller (top)
home position sensor (PI12)
Booklet clutch (CL1)
Folding home position
sensor (PI11)
Booklet tray sensor (PI13)
: Forward motor rotation
: Backward motor rotation
*: Varies depending on the paper orientation speed.
Figure 2-34 (4/4)
42872701TH Rev.1
54 /
Oki Data CONFIDENTIAL
2.6
Puncher Unit (Optional)
2.6.1 Basic Operation
2.6.1.1
Overview
The optional puncher unit is installed in the paper feeder of the finisher. The puncher unit doesn’t
have a paper feeding mechanism. Paper sent from the connected machine passes the puncher unit
and then it is fed by the finisher feeding system. When the tail end of the paper reaches the puncher
unit, paper stops temporarily. The punch shaft rotates and the puncher punches the paper at its tail.
These movements are controlled by the punch controller circuit board and commands from the finisher
controller circuit board.
Punch driving
system
Finisher unit control system
Side registration
driving system
Punch controller
circuit board
Figure 2-35
42872701TH Rev.1
55 /
Oki Data CONFIDENTIAL
2.6.2 Punching
2.6.2.1
Overview
The puncher unit is installed in the paper feeder of the finisher and it punches holes in paper when
the paper sent from the connected machine stops temporarily. When the tail end of the paper reaches
the puncher unit, the inlet roller of the finisher unit stops the paper and the puncher punches the paper
at its tail.
The puncher unit consists of the die and the punch (punch blade). The punch is driven by the punch
motor (M1P). The punch is fastened to the eccentric cam of the punch shaft. The rotational motion
of the punch shaft is converted to the reciprocating motion for punching.
The punch motor (M1P) is a DC motor. The home position of the punch shaft is detected by the punch
home position sensor (PI1P). In order to stop the DC punch motor accurately in home position, the
punch motor clock sensor (PI3P) counts the number of clock signals. When it reaches the specified
number, the punch motor is stopped. As the punch shaft rotates 180 degrees from home position,
the puncher makes the punching movement once.
In the inlet paper feeding path of the puncher unit, five light receiving transistors (photo sensor circuit
board) are installed at the top and five LED (LED circuit board) are installed at the bottom. These
serve as five sensors. The front pair (LED5 and PT5) is the paper end sensor and used for detecting
the tail end of paper. The remaining 4 pairs (LED1 to LED4 and PT1 to PT4) are the side registration
sensors and used for detecting the rear of paper to determine the punching position.
The punch motor, punch and the sensors above make up the punch slide unit. The unit moves forward
and backward according to paper size. This movement is driven by the side registration motor (M2P).
The home position of the punch slide unit is detected by the side registration home position sensor
(PI2P). The side registration motor (M2P) is a stepping motor.
Driving of the punch motor and the side registration motor is controlled by the punch controller circuit
board and commands sent from the finisher controller circuit board.
Punch dust is collected in the punch dust receptacle. Whether the receptacle is full is detected by
the LED 121 on the dust full LED circuit board and PT131 on the dust full photo sensor circuit board.
42872701TH Rev.1
56 /
42872701TH Rev.1
4
2
Punch home position (PI1P) detection signal PUNCHHP
4
Side registration home position
(PI2P) detection signal SREGHP
2
Dust full detection signal
(LED121, PT131) DFULL
Punch motor clock (PI3P)
detection signal PUNCHCLK
LED121
Side registration motor
(M2P) drive signal
Punch motor (M1P) drive
signal
Side registration detection signal
(LED1 to 4, PT1 to 4) SREG1~4
Paper end detection signal
(LED5, PT5) PAEND
Oki Data CONFIDENTIAL
Punch Controller Circuit Board (1/2)
3
PT1
5
3
LED1
5
PT131
Punch Controller Circuit Board (2/2)
Figure 2-36
57 /
Oki Data CONFIDENTIAL
2.6.2.2
Punching
The punch is driven by the punch motor (M1P). The home position of the punch is detected by the
punch home position sensor (PI1P).
There are four types of puncher units; J1 for 2 holes, K1 for 2/3 holes, G1 and H1 for 4 holes. With
the 2-hole and 4-hole puncher units, the punch is reciprocated once for punching as the punch shaft
is rotated 180 degrees from home position. Also with the 2/3-hole puncher unit, the punch is reciprocated once for punching as the punch shaft is rotated 180 degrees from home position. Only a
semicircular part of the punch shaft is used for 2-hole punching and the other semicircular part is used
for 3-hole punching.
1)
2-Hole and 4-Hole Puncher Units
The puncher unit is in home position, when the punch home position sensor is on.
Punching of the first sheet is completed, when the punch shaft rotates 180 degrees forward
and the punch home position sensor is turned on. Punching of the second sheet is
completed, when the punch shaft rotates 180 degrees backward and the punch home
position sensor is turned on.
The puncher unit works as shown below to punch two sheets of paper.
a) Punching a Hole in the First Sheet at Its Tail
Sensor flag
Punch home
position sensor
(PI1P)
Punch shaft
Eccentric cam
Die
Punch
Paper
Punch dust
Die
[Punch shaft at a standstill/ [Punch shaft 90 degrees
Home position]
forward/A punch hole is
made.]
[Punch shaft 180 degrees
forward/Punching is
completed.]
Figure 2-37 (1/2)
b) Punching a Hole in the Second Sheet at Its Tail
[Punch shaft at a standstill/ [Punch shaft 90 degrees [Punch shaft 180 degrees
Home position]
backward/A punch hole backward/Punching is
is made.]
completed.]
Figure 2-37 (2/2)
42872701TH Rev.1
58 /
Oki Data CONFIDENTIAL
2)
2-Hole/3-Hole Puncher Unit
The puncher unit is in home position, when the punch home position sensor is on. When
two punch holes are to be made, punching of the first sheet is completed, when a
semicircular part of the punch shaft rotates 180 degrees forward and the punch home
position sensor is turned on. On the other semicircular part of the punch shaft, the 3hole punch is reciprocated once in the direction away from the paper (ascending direction).
Punching of the second sheet is completed, when the former semicircular part of the punch
shaft rotates 180 degrees backward and the punch home position sensor is turned on.
On the other semicircular part of the punch shaft, again, the 3-hole punch is moved in
the direction away from the paper (ascending direction). When three holes are to be made,
the 2-hole punch is reciprocated once in the direction away from the paper (ascending
direction).
The puncher unit works as shown below to punch two holes in two sheets of paper.
a) Punching a Hole in the First Sheet at Its Tail
Sensor flag
Punch home
position sensor
(PI1P)
Punch shaft
Eccentric cam
Die
Punch
Paper
Punch dust
Die
[Punch shaft at a standstill/ [Punch shaft 90 degrees
Home position]
forward/A punch hole is
made.]
[Punch shaft 180 degrees
forward/Punching is
completed.]
Figure 2-38 (1/4)
When two holes are made, the 3-hole punch is reciprocated in the direction away from
the paper (ascending direction) as shown below.
[Punch shaft at a standstill/ [Punch shaft 90 degrees
[Punch shaft 180 degrees
Home position]
forward/Punch ascends to forward/Punch returns.]
its highest position.]
Figure 2-38 (2/4)
42872701TH Rev.1
59 /
Oki Data CONFIDENTIAL
b) Punching a Hole in the Second Sheet at Its Tail
[Punch shaft at a standstill/ [Punch shaft 90 degrees [Punch shaft 180 degrees
Home position]
backward/A punch hole is backward/Punching is
made.]
completed.]
Figure 2-38 (3/4)
When two holes are made, the 3-hole punch is reciprocated in the direction away from
the paper (ascending direction) as shown below.
[Punch shaft at a standstill/ [Punch shaft 90 degrees [Punch shaft 180 degrees
Home position]
backward/Punch ascends backward/Punch returns.]
to its highest position.]
Figure 2-38 (4/4)
42872701TH Rev.1
60 /
Oki Data CONFIDENTIAL
2.6.2.3
Side Registration
The side registration of the punch slide unit is driven by the side registration motor (M2P). The home
position of the punch slide unit is detected by the side registration home position sensor (PI2P). The
punch slide unit detects the edges of paper using the paper end sensor (LED5 and PT5) and the side
registration sensors (LED1 to LED4 and SREG1 to SREG4) and moves to an appropriate position at
the tail of the paper for the paper size.
The side registration is performed as shown below.
1)
Once the leading edge of the paper from the connected device is detected by the rear
edge sensor (LED5, PT5) on the puncher unit and the specified time has elapsed, the
horizontal resist motor (M2P) starts to move the punch slide unit forward.
Side registration home position sensor (PI2P)
Punch slide unit
Side registration motor (M2P)
Paper end sensor (LED5 & PT5)
Paper output direction
Paper
Figure 2-39
2)
The appropriate side registration sensor (LED1 to 4, PT1 to 4) for the paper size signal
sent from the connected machine detects the edge of the paper in the rear. The side
registration motor (M2P) drives the punch slide unit further towards the front and stops
it in the specified position.
Side registration sensor 1 (LED1 & PT1);
Detects the edge of A3, A4, LTR or 279 mm x 432 mm (11x17).
Side registration sensor 2 (LED2 & PT2);
Detects the edge of B4, B5, LTRR or LGL.
Side registration sensor 3 (LED3 & PT3);
Detects the edge of A4R.
Side registration sensor 4 (LED4 & PT4);
Detects the edge of B5R.
Figure 2-40
42872701TH Rev.1
61 /
Oki Data CONFIDENTIAL
3)
When the paper end sensor (LED5 and PT5) detects the tail end of paper, the feed motor
(M1) of the finisher unit stops running and the paper stops. The punch motor (M1P) begins
to run and the paper is punched.
Punch
Figure 2-41
4)
After punching has been completed, the feed motor (M1) of the finisher unit begins to run.
At the same time, the side registration motor (M2P) runs backward to return the punch
slide unit to home position and stop the unit.
5)
If documents come in succession, the punch slide unit returns to home position and repeats
the steps 1 to 4 for every document.
Paper end sensor
(LED5 & PT5)
Side registration sensors
(LED1 to 4 & PT1 to 4)
Punch home position
sensor (PI1P)
Side registration home
position sensor (PI2P)
Side registration motor
(M2P)
Punch motor (M1P)
Feed motor (M1)
: Forward motor rotation
: Backward motor rotation
Figure 2-42
42872701TH Rev.1
62 /
Oki Data CONFIDENTIAL
2.7
Jam Detection
2.7.1 Overview
Check timings for detection of a jam in the finisher, saddle-stitcher or puncher (optional) unit are stored
in the microcomputer (CPU) on the finisher controller circuit board. The finisher controller circuit board
sees whether there is paper at sensors at these timings to determine that a paper jam has occurred.
If a jam has occurred, the finisher controller circuit board transmits a code for the jam to the connected
machine. The code is viewed in the service mode on the connected machine.
PI1
PI10
PI1: Inlet sensor
PI10: Fold position sensor
Figure 2-43
42872701TH Rev.1
63 /
Oki Data CONFIDENTIAL
2.7.1.1
Paper Delay Jam at Inlet Sensor (1011)
About 10 seconds have passed since the delivery signal was sent from the connected machine but
the inlet sensor hasn’t detected paper.
Delivery signal from connected machine
Delivery signal from connected machine
Approx. 10 sec.
Approx. 10 sec.
Jam check
Jam check
Normal
Inlet sensor (PI1)
Jam
Inlet sensor (PI1)
Feed motor (M1)
Feed motor (M1)
Figure 2-44
2.7.1.2
Paper Stopped Jam at Inlet Sensor (1021)
If the paper does not pass the inlet sensor within approximately 0.85 seconds of the rear edge arriving
at the connection position of the finisher and main unit.
Approx. 0.85 sec.
Approx. 0.85 sec.
Jam check
Jam check
Normal
Inlet sensor (PI1)
Feed motor (M1)
Jam
Inlet sensor (PI1)
Feed motor (M1)
Figure 2-45
2.7.1.3
Paper Delay Jam at Fold Position Sensor (1012)
Some 1200 ms have passed since the finisher began to feed paper from the jog tray to the saddlestitcher during saddle-stitch operation but the fold position sensor hasn’t detected paper.
Jam check
Fold position sensor (PI10)
Delivery motor (M3)
1200ms
Normal
Jam check
Fold position sensor (PI10)
1200ms
Jam
Delivery motor (M3)
Figure 2-46
42872701TH Rev.1
64 /
Oki Data CONFIDENTIAL
2.7.1.4
Paper Stopped Jam at Fold Position Sensor (1022)
About 10.5 seconds have passed since the staple/fold motor began to run during saddle-stitch operation
but paper hasn’t left the fold position sensor.
Approx. 10.5 sec.
Approx. 10.5 sec.
Jam check
Fold position
sensor (PI10)
Staple/fold motor
(M7)
Jam check
Normal
Fold position
sensor (PI10)
Staple/fold motor
(M7)
Jam
Figure 2-47
2.7.1.5
Residual Jam (1007)
If paper is detected inside the finisher when the power is turned on or when initialization has begun
Residual jams include inlet-feed-unit residual jams, processing-unit residual jams, and folding-unit
residual jams.
2.7.1.6
Door Open Jam (1008)
The finisher is disconnected from the printer, or the front door or the top cover is opened during
operation (paper is being fed).
2.7.1.7
Staple Jam (1006)
Some 600 ms have passed since the stapler was driven but the staple home position sensor (PI19)
hasn’t switched off or the stapler hasn’t returned to home position (the position in which the sensor
is turned on).
2.7.1.8
Non-ejection Jam
This occurs when the paper-ejection belt does not return to the home position within approximately
3 seconds after the paper-ejection motor has started, or when the home position has not been reached
within approximately 1.1 seconds after tray ejection and the consequent operation of the paper-ejection
motor.
42872701TH Rev.1
65 /
Oki Data CONFIDENTIAL
2.8
Power Supply System
2.8.1 Finisher/Saddle-Stitcher Unit
2.8.1.1
Overview
When power of the inverter is turned on, 24 VDC is supplied to the finisher controller circuit board from
the inverter. Voltage of 24 V DC is used to drive the motor clutch and to generate 5 V DC, which
in turn is used to drive the ICs on the sensor circuit boards. The 5 V is also used to power the punchcontroller circuit board when the optional puncher unit is installed.
The 24 VDC for driving some of the motors will be shut off, if the joint switch (MS2), the front door
switch (MS1) or the staple safety switch (MS3) is turned off.
Figure 2-48 shows a block diagram of the power supply.
Joint switch
(MS2)
Front door switch
(MS1)
Staple safety switch
(MS3)
24V
24V
Motor
Motor
24VP
24V
Inverter
Clutch
Finisher controller
circuit board
5V
Sensor system
(IC1)
5V
Regulator IC
Logic system
Punch controller circuit board
(puncher unit (optional))
Figure 2-48
2.8.1.2
Protective Function
The 24-V drive units, including the feed motor (M1), paddle motor (M2), and paper-ejection motor (M3),
incorporate fuses that trip if an overcurrent flows.
42872701TH Rev.1
66 /
Oki Data CONFIDENTIAL
2.8.2 Puncher Unit (Optional)
2.8.2.1
Overview
The voltages of 24 V and 5 V are supplied to the puncher unit, when power of the inverter is turned
on. The 24 V power supply is used for driving the motors. The 5 V power supply is used for driving
the sensors and the ICs on the punch controller circuit board.
The 24 V power supply for the motors won’t be supplied, if the joint switch (MS2) or front door switch
(MS1) of the finisher unit is off.
Figure 2-49 shows a block diagram of the power supply.
24V
Finisher
controller
circuit board
24V
Motor system
Punch controller circuit board
5V
5V
5V
Sensor system
Logic system
Figure 2-49
2.8.2.2
Protective Function
Fuses are built in for the 24 V power supply for driving the punch motor (M1P) and the side registration
motor (M2P). If an excessive current flows, the fuses will be blown.
42872701TH Rev.1
67 /
Oki Data CONFIDENTIAL
3.
PARTS REPLACEMENT
3.1
Finisher/Saddle-Stitcher Unit
3.1.1 Exterior Controlling Parts
Tray (2)
Top right cover unit (4)
Top door
Rear cover (3)
Jam removal cover
Front door
Front cover (5)
A number in parentheses represents the number of screws.
42872701TH Rev.1
68 /
Oki Data CONFIDENTIAL
3.1.1.1
Removing Output Tray
1)
Remove the four screws 1 and remove the output tray 2.
2
1
3.1.1.2
Removing Front Cover
1)
Open the front door 1.
2)
While holding the claws 2, remove the fold jam removal dial 3.
3)
Remove the two screws 4.
4)
Remove the three screws 5 and remove the front cover 6.
6
1
4
3
5
2
4
5
42872701TH Rev.1
69 /
Oki Data CONFIDENTIAL
3.1.1.3
Removing Rear Cover
1)
Remove the two screws 1 on the paper feed side and the screw 2 on the delivery side.
Remove the rear cover 3.
3
3
1
3.1.1.4
2
Removing Top Cover
1)
Open the top cover 1. Turn the cover band clip 2 clockwise and remove the clip.
2)
Remove the cover band 3.
3)
Remove the screw 4, the jog tray rear cover 5 and then the top cover 6.
1
6
2
3
5
4
42872701TH Rev.1
70 /
Oki Data CONFIDENTIAL
3.1.1.5
Removing Jog Tray Top Cover
1)
Remove the front cover. (See 3.1.1.2.)
2)
Remove the rear cover. (See 3.1.1.3.)
3)
Remove the top cover. (See 3.1.1.4.)
4)
Disconnect the connector 1 and remove the screw 2.
5)
While lifting the jog tray top cover 3, disconnect the connector 4 and remove the jog
tray top cover 3.
3
2
4
1
3.1.1.6
Removing Top Right Cover Unit
1)
Remove the front cover. (See 3.1.1.2.)
2)
Remove the rear cover. (See 3.1.1.3.)
3)
Remove the two screws in the front 1 and the two screws in the rear 2. Remove the
top right cover unit 3.
3
1
3
2
42872701TH Rev.1
71 /
Oki Data CONFIDENTIAL
3.1.1.7
Removing Side Guide
1)
Remove the output tray. (See 3.1.1.1.)
2)
Remove the front cover. (See 3.1.1.2.)
3)
Remove the rear cover. (See 3.1.1.3.)
4)
Push the front and rear output tray support plates 1 and 2 away from the rail grooves.
5)
Remove the four screws 3.
6)
Slightly pull down the side guide 4 to the front. Disengage the paper level detection lever
(rear) 5 and then remove the side guide 4.
Note!
When fastening the side guide, fit the paper level detection lever (rear) 5 into the groove
in the paper level detection lever (center) 6. Push each paper level detection lever several
times to make sure that the levers are tightly engaged.
3
3
2
1
5
3
3
4
5
6
5
6
42872701TH Rev.1
72 /
Oki Data CONFIDENTIAL
3.1.2 Feeding Parts
3.1.2.1
Removing Stapler Unit
1)
Open the front door 1.
2)
While pressing the stopper lever 2, draw out the stapler unit 3.
Note!
Do not remove the stapler from the shaft of the stapler frame. If the stapler is removed
from the shaft, that may upset the alignment of the position in which the staple driver (the
lower stapler unit) 4 thrusts out a staple with the position in which the staple clincher (the
upper stapler unit) 5 receives the staple.
1
5
4
3
2
42872701TH Rev.1
73 /
Oki Data CONFIDENTIAL
3.1.2.2
Synchronizing Stapler Motions
When you have replaced the gear at the front of the stapler or the timing belt, or when you have removed
the stapler for some reason, the driving motion of the staple driver (the lower stapler unit) will go out
of phase with the clinching motion of the staple clinching (the upper stapler unit). Synchronize these
stapler motions in the procedure below.
Gear
Timing belt
Gear
1)
Remove the gear cover 2 of the staple driver 1.
2)
Remove the E-ring 3 and remove the side cover 5 of the staple clincher 4.
3)
Remove the two E-rings 6 and remove the staple jam removal gear 7, the timing belt
8 and then the intermediate gear 1 9. Also, remove the spacer and spring behind the
staple jam removal gear.
4)
Remove the screw 0 and the spring A and remove the belt tensioner B.
5)
Remove the timing belt C.
6)
Remove the E-ring D and remove the staple position check gear E.
4
3
E
5
7
2
D
1
8
6
A
9
0
B
42872701TH Rev.1
C
74 /
Oki Data CONFIDENTIAL
7)
Turn the gear F to align the round hole G in the staple driver with the round hole behind
it.
8)
Insert a pin with a diameter of about 2 mm H (a 2-mm hex key wrench, for example) into
the round holes to fix the gear.
9)
Turn the gear I to align the round hole J in the staple clincher cam with the round hole
behind it.
10)
Insert a pin with a diameter of about 2 mm K (a 2-mm hex key wrench, for example) into
the round holes to fix the cam.
F
G
H
I
K
J
42872701TH Rev.1
75 /
Oki Data CONFIDENTIAL
11)
With the gear and the cam fixed, put the timing belt L on the gear M and the gear N.
12)
Fasten the staple position check gear Q with its blue mark O aligned with the round hole
P in the frame.
Note!
Be sure to fasten the staple position check gear in correct position. The position in which
the blue mark is aligned with the round hole is the home position for the staple driving
motion. If the staple jam removal dial is rotated, the stapler unit will deviate from this home
position and the staple cartridge will be stuck in the unit. In that case, this blue mark is
used to return the unit into home position.
13)
Remove the pins fixing the gear and the cam.
14)
Put the spring R, the spacer S, the staple jam removal gear T, the timing belt U and
the intermediate gear 1 V back in place and fasten them with the E-rings W.
M
P
O
Q
L
N
R
U
S
V
T
W
42872701TH Rev.1
76 /
Oki Data CONFIDENTIAL
3.1.2.3
Synchronizing Gears of Saddle-Stitcher Unit
When you have replaced the gear at the front of the saddle-stitcher unit, the paper folding rollers or
when you have removed these parts for some reason, synchronize the gears in the procedure below.
1)
Position the paper folding rollers 1 and the saddle cam 2 in the saddle-stitcher unit as
shown below.
2)
Keeping the paper folding rollers and the saddle cam in position, fasten the gears as shown
below.
• Align the triangle mark (▲) (either of the two marks) on the saddle cam drive gear 3
with the triangle mark (▲) on the intermediate gear 4 (one on the semicircle with shorter
teeth).
• Also, align the other triangle mark (▲) on the intermediate gear 4 with a rib of the paper
folding roller drive gear 5.
2
1
3
4
5
42872701TH Rev.1
77 /
Oki Data CONFIDENTIAL
3.1.2.4
Removing Saddle-Stitcher Unit
1)
Remove the front cover. (See 3.1.1.2.)
2)
Remove the rear cover. (See 3.1.1.3.)
3)
Open the jam removal cover 1 and remove the two screws 2 and the right stay 3.
4)
Rotate the fold jam removal dial 4 to move the paper pressure plate 5 inwards.
5)
Remove the stop ring 6 and remove the timing belt 7.
6)
Disconnect the two connectors 8.
7)
Remove the three screws 9 and slightly draw out the stapler unit 0.
8)
Draw out the saddle-stitcher unit A.
3
5
2
4
2
1
6
0
9
8
7
A
9
42872701TH Rev.1
78 /
Oki Data CONFIDENTIAL
3.1.2.5
Removing Jog Tray Unit
1)
Remove the jog tray top cover. (See 3.1.1.5.)
2)
Remove the side guide. (See 3.1.1.7.)
3)
Remove the two screws 1 and disconnect the five connectors 2.
4)
Pull the jog tray stopper base 3 and release the front click 5 and the rear click 6 of
the jog tray stopper 4.
5)
Disconnect the three connectors 7.
6)
Release the two cable clamps 8 and remove the motor bundled cable 9.
7)
Remove the stop ring 0 and remove the timing belt A.
8)
Disconnect the connector B and remove the bundled cable D from the edge saddle C.
9)
Remove the two screws E. Slide the jog tray unit F towards the rear and then lift it up
to remove the unit.
1
6
4
5
4
2
2
2
1
3
9
F
8
B
D
A
7
0
C
E
42872701TH Rev.1
79 /
Oki Data CONFIDENTIAL
3.1.2.6
Removing Paddle Unit
1)
Remove the jog tray unit. (See 3.1.2.5.)
2)
Place the jog tray unit 1 as shown below.
Note!
Be careful not to damage the jog plates 2.
3)
Remove the timing belt 3 and remove the two screws 4.
4)
Separate the paddle unit 6 from the jog tray unit 5.
4
6
1
5
2
3
4
42872701TH Rev.1
80 /
Oki Data CONFIDENTIAL
3.1.2.7
Removing Staple/Fold Drive Unit
1)
Open the front door 1 and slightly draw out the stapler unit 2.
2)
Remove the screw 3 and remove the interface cable bracket 4.
3)
Release the six cable clamps 5 and disconnect the connector 6.
4)
Release the bundled cable 7 from the cable clamp 5.
5)
Release the bundled cable 7 from the edge saddle 8 and disconnect the two connectors
9.
6)
Release the cable clamp 0 and disconnect the connector A.
7)
Release the bundled cable B from the cable clamp 0.
8)
Release the bundled cable B from the edge saddle C and disconnect the two connectors
D.
9
1
8
7
2
6
5
7
5
4
D
3
5
7
A
B
0
C
42872701TH Rev.1
81 /
Oki Data CONFIDENTIAL
9)
Remove the screw E and release the cable guide click G from the square hole F of the
base plate.
10)
Disconnect the two connectors H and release the bundled cable J from the edge saddle
I.
11)
Remove the three screws K.
12)
Remove the screw L and remove the staple/fold drive unit M.
H
E
I
G
F
J
H
K
K
L
M
K
42872701TH Rev.1
82 /
Oki Data CONFIDENTIAL
3.1.2.8
Removing Feed Motor Unit
1)
Remove the rear cover. (See 3.1.1.3.)
2)
Open the cable clamp 1 and disconnect the two connectors 2.
3)
Remove the screw 3 and remove the cable guide 4.
4)
Remove the three screws 5 and remove the feed motor unit 6.
3
5
5
4
6
2
1
42872701TH Rev.1
83 /
Oki Data CONFIDENTIAL
3.1.2.9
Removing Feed Roller
1)
Remove the top cover. (See 3.1.1.4.)
2)
Remove the top right cover unit. (See 3.1.1.6.)
3)
Remove the feed motor unit. (See 3.1.2.6.)
4)
Remove the screw 1.
5)
Remove the stop ring 2 and remove the bearing 3.
6)
Remove the two screws 4.
7)
Remove the gear 5. While opening the claw, remove the gear 6.
8)
Remove the stop ring 7 and remove the bearing 8.
9)
Remove the screw 9 and remove the inlet sensor 0.
10)
Remove the paper guide A.
11)
Remove the feed rollers B.
4
8
5
9
0
A
6
7
1
3
2
B
42872701TH Rev.1
84 /
Oki Data CONFIDENTIAL
3.1.2.10 Removing Multi-Sheet Delivery Roller (Top)
1)
Remove the paddle unit. (See 3.1.2.6.)
2)
Place the paddle unit 1 as shown below.
3)
Turn the gear 2 in the arrow direction to raise the multi-sheet delivery roller (top) 3.
4)
Push up the multi-sheet delivery roller (top) 4 and release the multi-sheet delivery roller
(top) 4 from the shaft 5.
5)
Swing open the multi-sheet delivery roller (top) 4, push it down and remove it.
6)
Remove the multi-sheet delivery roller (top) at the front 6 in the same way.
1
3
4
2
5
6
4
42872701TH Rev.1
85 /
Oki Data CONFIDENTIAL
3.1.2.11 Removing Paddle
1)
Remove the paddle unit. (See 3.1.2.6.)
2)
Place the paddle unit 1 as shown below.
3)
Turn the gear 2 in the arrow direction to raise the multi-sheet delivery roller (top) 3.
4)
Push up the safety guide 4 and release one side of the safety guide 4 from the shaft
5.
5)
Push up the safety guide 4, release the safety guide 4 from the shaft 5 and remove
the guide.
6)
Move the paddle 6 in the arrow direction and remove it.
7)
Remove the remaining paddles in the same way.
1
3
5
4
2
4
1
5
42872701TH Rev.1
86 /
Oki Data CONFIDENTIAL
3.1.2.12 Removing Multi-Sheet Delivery Roller (Bottom)/Delivery Belt
1)
Remove the paddle unit and separate the jog tray unit from it. (See 3.1.2.6.)
2)
Slide the jog plate (front) 2 and the jog plate (rear) 3 of the jog tray unit 1 outwards
and remove them.
3)
Remove the jog tray stopper 4.
4
1
3
2
4)
Remove the screw 5. While releasing the two clicks F, remove the paper guide (front)
7.
5)
Remove the screw 8. While releasing the click 9, remove the paper guide (rear) 0.
5
8
7
0
6
9
6)
Remove the two stop rings A and move the two bearings B inwards.
7)
Remove the four screws C, lift up the multi-sheet delivery roller (bottom) D and remove
it.
B
C
A
C
A
42872701TH Rev.1
D
B
87 /
Oki Data CONFIDENTIAL
8)
Remove the multi-sheet delivery roller (bottom) E and the two delivery belts F.
F
E
Note!
When the delivery belts have been put back on, make sure that the tips G of the clicks
of the delivery belts are aligned.
G
42872701TH Rev.1
88 /
Oki Data CONFIDENTIAL
3.1.3 Circuit Boards
3.1.3.1
Removing Finisher Controller Circuit Board
1)
Remove the rear cover. (See 3.1.1.3.)
2)
Disconnect the 17 connectors 1 and remove the screw 2.
3)
Release the circuit board clip 3 and remove the finisher controller circuit board 4.
3
2
1
1
1 4
42872701TH Rev.1
1
89 /
Oki Data CONFIDENTIAL
3.1.3.2
Removing Slide Home Position Circuit Board
1)
Open the front door 1. Turn the stapler slide knob 2 in the arrow direction to slide the
stapler to its forwardmost position.
2)
Remove the stapler unit. (See 3.1.2.1.)
3)
Place the stapler unit 3 as shown below.
4)
Remove the two screws 4 and remove the guide 5.
5)
Turn the stapler slide knob 2 in the arrow direction until the locking screw 7 of the slide
home position circuit board 6 is seen through the round hole.
6)
Remove the locking screw 7.
7)
Disconnect the connector 8.
8)
Remove the flexible cable clamp 9.
9)
Move the connector lock 0 in the arrow direction to release it. Remove the flexible cable
A and remove the slide home position circuit board B.
2
1
3
4
5
4
2
8
0
A
6
7
B
42872701TH Rev.1
9
90 /
Oki Data CONFIDENTIAL
3.2
Puncher Unit (Optional)
3.2.1 Puncher Driving Parts
3.2.1.1
Removing Punch Motor
1)
Remove the two screws 1.
2)
Disconnect the connector 2 and remove the punch motor 3.
2
3
1
3.2.1.2
Removing Side Registration Motor
1)
Disconnect the connector J1001 1.
2)
Release the bundled cable 3 from the cable guide 2.
3)
Remove the two screws 4 and remove the side registration motor 5.
5
4
3
1
2
42872701TH Rev.1
91 /
Oki Data CONFIDENTIAL
3.2.1.3
Removing Puncher Unit
1)
Remove the punch dust receptacle.
2)
Remove the screw 1 and remove the jam removal cover 2.
3)
Disconnect the connector J1005 3.
4)
Release the bundled cable 5 from the cable guide 4.
1
2
3
5
4
5)
Disconnect the connector 6.
6)
Remove the screw 7 and remove the sensor
support plate 8.
7)
Remove the screw 9 and washer 0.
8)
Disconnect the connector A.
9)
Remove the two screws B and remove the
base cover C.
9
0
6
C
7
8
42872701TH Rev.1
A
B
92 /
Oki Data CONFIDENTIAL
10)
Remove the four screws D and remove the transmissive sensor unit units (top)E and
(bottom) F.
11)
Remove the puncher unit H from the side registration motor unit G.
E
D
42872701TH Rev.1
D
F
G
H
D
93 /
Oki Data CONFIDENTIAL
3.2.2 Circuit Boards
3.2.2.1
Removing Punch Controller Circuit Board
1)
Remove the two screws 1.
2)
Disconnect the five connectors 2 and remove the punch controller circuit board 3.
2
3
2
2
1
3.2.2.2
Removing Photo Sensor Circuit Board
1)
Remove the punch motor. (See 3.2.1.1.)
2)
Remove the screw 1.
3)
Release the bundled cable 3 from the cable guide 2 of the circuit board cover and remove
the circuit board cover 4.
4)
Disconnect the connector 5 and remove the photo sensor circuit board 6.
1
4
6
3
5
2
42872701TH Rev.1
94 /
Oki Data CONFIDENTIAL
3.2.2.3
Removing LED Circuit Board
1)
Remove the punch dust receptacle.
2)
Disconnect the connector J1005 1.
3)
Release the bundled cable 3 from the cable guide 2.
4)
Remove the screw 4 and washer 5.
5)
Disconnect the connector 6.
6)
Remove the screw 7 and remove the base cover 8.
7)
Remove the screw 9.
8)
Disconnect the connector 0 and remove the LED circuit board A.
4
1
5
8
3
2
6
7
0
9
A
42872701TH Rev.1
95 /
Oki Data CONFIDENTIAL
3.2.2.4
Removing Dust Full Photo Sensor Circuit Board
1)
Remove the punch controller circuit board. (See 3.2.2.1.)
2)
Remove the two screws 1 and remove the circuit board film 2.
3)
Disconnect the connector 3 and remove the dust full photo sensor circuit board 4.
3
2
1
3.2.2.5
4
Removing Dust Full LED Circuit Board
1)
Remove the screw 1.
2)
Disconnect the connector 2 and remove the LED circuit board 3.
2
1
3
42872701TH Rev.1
96 /
Oki Data CONFIDENTIAL
4.
MAINTENANCE AND INSPECTION
4.1
Periodical Replacement Parts
4.1.1 Finisher/Saddle-Stitcher Unit
These units use no parts requiring periodical replacement.
4.1.2 Puncher Unit (Optional)
This unit uses no parts requiring periodical replacement.
4.2
Expendable Parts Durability Guide
The parts listed in the table below can be deteriorated or broken, requiring replacement, at least once
during the warranty period of the product. These parts, however, need to be replaced only when
problem has occurred.
4.2.1 Finisher/Saddle-Stitcher Unit
Table 4-01
No.
Parts Name
Parts No.
Quantity
Durability
Remarks
1
Stapler
43223350
1
300,000
operations
About 5000 stapling operations with one
cartridge
4.3
Periodical Maintenance
Table 4-02
Item
Interval
Detail
Remarks
Paper feeder roller
Printer minimum maintenance interval
Cleaning
Wipe with a damp cloth.
Paper feeder roller
Printer minimum maintenance interval
Cleaning
Wipe with a damp cloth.
Feed path/guide
Printer minimum maintenance interval
Cleaning
Wipe with a damp cloth.
Transmissive sensor
Printer minimum maintenance interval
(optional puncher unit)
Cleaning
Wipe with a dry cloth.
42872701TH Rev.1
97 /
Oki Data CONFIDENTIAL
5.
TROUBLESHOOTING
5.1
Standards and Adjustment
(Can be adjusted using a command from the main unit)
5.1.1 Electrical System, Finisher/Saddle-Stitcher Unit
5.1.1.1
Adjusting Fold Position
To adjust the fold position, bring the fold position into the stapling position. Make this adjustment, when
the finisher controller circuit board has been replaced or when the fold position has to be changed for
some reason.
1)
Set the SW1 on the finisher controller circuit board as shown below.
ON
1
2)
2
3
4
5
6
7
8
Press the PSW1 or PSW2 on the finisher controller circuit board for the appropriate number
of times to adjust the fold position. When the switch is pressed once, the fold position
is moved about 0.16 mm.
• Press the PSW1 to move the fold position in the “minus direction.”
• Press the PSW2 to move the fold position in the “plus direction.”
• Press the PSW1 and PSW2 simultaneously to clear the set correction.
Minus direction
Plus direction
3)
After a correction for the fold position has been set, turn off all the bits of the SW1 on
the finisher controller circuit board.
4)
Perform the booklet mode of the connected machine to see if the fold position is adjusted
properly. If not, make adjustment again.
42872701TH Rev.1
98 /
Oki Data CONFIDENTIAL
5.1.1.2
Adjusting Saddle-Stitch Double Stapling Position
To adjust the stapling position, bring the stapling position into the fold position. Make this adjustment,
when the finisher controller circuit board has been replaced or when the stapling position has to be
changed for some reason.
1)
Set the SW1 on the finisher controller circuit board as shown below.
ON
1
2)
2
3
4
5
6
7
8
Press the PSW1 or PSW2 on the finisher controller circuit board for the appropriate number
of times to adjust the fold position. When the switch is pressed once, the stapling position
is moved about 0.14 mm.
• Press the PSW1 to move the stapling position in the “minus direction.”
• Press the PSW2 to move the stapling position in the “plus direction.”
• Press the PSW1 and PSW2 simultaneously to clear the set correction.
Minus direction
Plus direction
3)
After a correction for the stapling position has been set, turn off all the bits of the SW1
on the finisher controller circuit board.
4)
Perform the booklet mode of the connected machine to see if the stapling position is
adjusted properly. If not, make adjustment again.
42872701TH Rev.1
99 /
Oki Data CONFIDENTIAL
5.1.2 Electrical System, Puncher Unit (Optional)
5.1.2.1
Adjusting Punch Hole Position (Feeding Direction)
This adjustment is available in the service mode only. The correction is set within the range from 3 to 3 and the hole position is moved in an increment of 1 mm. If the correction setting is increased,
the hole position moves towards the leading end of paper. (See the service manual for the connected
machine.)
5.1.2.2 Adjusting Sensor Output
Make this adjustment, when the punch controller circuit board, the side registration sensor (photo sensor
circuit board/LED circuit board), or the dust full sensor (dust full photo sensor circuit board/dust full
LED circuit board) is replaced.
1)
Set the bits 1 to 4 of the DIPSW1001 on the punch controller circuit board as shown below.
ON
1
2)
2
3
4
Press the SW1002 or SW1003 on the punch controller circuit board. Pressing these
switches, the sensor output is automatically adjusted.
• Adjustment is complete when all the LED1001, LED1002 and LED1003 on the punch
controller circuit board light up.
3)
5.1.2.3
Turn off all the bits of the DIPSW1001.
Registering Number of Punch Holes
The number of punch holes is registered in the IC on the punch controller circuit board so that the
finisher recognizes what type of puncher is installed. The registration is needed, when the punch
controller circuit board is replaced.
1)
Set the bits 1 to 4 of the DIPSW1001 on the punch controller circuit board as shown below.
2)
Press the SW1002 on the punch controller circuit board to choose the number of holes.
• Every time the SW1002 is pressed, the indications below change in order from top to
bottom.
Number of Punch Holes
3)
LED 1001
LED 1002
LED 1003
2 holes (Puncher unit •2H)
ON
OFF
OFF
2/3 holes (Puncher unit •2/3H)
ON
ON
OFF
4 holes (Puncher unit •4HF)
OFF
OFF
OFF
4 holes (Puncher unit •4HS)
OFF
OFF
ON
Press the SW1003 on the punch controller circuit board twice. Pressing the switch, the
number of punch holes is registered in the punch controller circuit board.
• Press the SW1003 once, and the solid light above changes to blinking light. Press the
SW1003 once again, and the blinking light returns to solid light and the registration is
complete.
4)
Turn off all the bits of the DIPSW1001.
42872701TH Rev.1
100 /
Oki Data CONFIDENTIAL
5.1.2.4
Procedure after Replacement of EEP-ROM (IC1002)
1)
Turn off power of the connected machine.
ON
1
2
3
4
2)
Set the bits 1 to 4 of the DIPSW1001 on the punch controller circuit board.
3)
Press the SW1002 and SW1003 on the punch controller circuit board simultaneously.
• This initializes the EEP-ROM. After the initialization has been completed, the LED1001,
LED1002 and LED1003 all light up.
4)
Adjust the sensor output and register the number of punch holes.
42872701TH Rev.1
101 /
Oki Data CONFIDENTIAL
5.2
Electrical Parts Layout
5.2.1 Finisher/Saddle-Stitcher Unit
5.2.1.1
Sensors, Microswitches and Clutch
MS3
PI14
PI16
PI24
PI23
PI4
MS1
MS2
PI19
PI20
PI21
PI13
PI15
PI18
PI22
PI5
PI3
PI2
PI17
PI7
PI1
PI12
PI8
CL1
PI6
PI11
PI10
PI9
Figure 5-01
42872701TH Rev.1
102 /
Oki Data CONFIDENTIAL
Table 5-01
Description
Photo interrupter
Microswitch
Clutch
42872701TH Rev.1
Code
Function
PI1
Inlet paper detection
PI2
Paddle home position detection
PI3
Multi-sheet roller home position detection
PI4
Front jog plate home position detection
PI5
Rear jog plate home position detection
PI6
Jog tray paper detection
PI7
Delivery belt home position detection
PI8
Tray paper detection
PI9
Paper level detection
PI10
Fold position detection
PI11
Folding home position detection
PI12
Folding roller home position detection
PI13
Booklet tray paper detection
PI14
Staple/fold motor clock detection
PI15
Shift upper limit detection
PI16
Shift lower limit detection
PI17
Shift motor clock detection
PI18
Slide home position detection (in the stapler)
PI19
Staple drive home position detection (in the stapler)
PI20
Staple empty detection (in the stapler)
PI21
Staple top position detection (in the stapler)
PI22
Front door open detection
PI23
Top cover open detection
PI24
Paper full detection
MS1
Front door open detection
MS2
Joint open detection
MS3
Staple safety detection
CL1
Booklet clutch
103 /
Oki Data CONFIDENTIAL
5.2.1.2
Motors and Circuit Board
M2
M1
M8
M5
M7
M3
M4
1
M6
Figure 5-02
Table 5-02
Description
Motor
Finisher controller circuit
board
42872701TH Rev.1
Code
Function
M1
Feed motor
M2
Paddle motor
M3
Delivery motor
M4
Front jog plate motor
M5
Rear jog plate motor
M6
Shift motor
M7
Staple/fold motor
M8
Slide motor
1
Control of the finisher
104 /
Oki Data CONFIDENTIAL
5.2.2 Puncher Unit (Optional)
5.2.2.1
Sensors
PI3P
PI1P
PI2P
Figure 5-03
Table 5-03
Description
Photo interrupter
42872701TH Rev.1
Code
Function
Pl1P
Punch home position detection
Pl2P
Side registration home position detection
Pl3P
Punch motor clock detection
105 /
Oki Data CONFIDENTIAL
5.2.2.2
Motors
M1
M2
Figure 5-04
Table 5-04
Description
Code
Motor
5.2.2.3
Function
M1P
Punch motor
M2P
Side registration motor
Circuit Boards
1
4
2
5
3
Figure 5-05
Table 5-05
Code
42872701TH Rev.1
Function
1
Punch controller circuit board
2
Photo sensor circuit board
3
LED circuit board
4
Dust full photo sensor circuit board
5
Dust full LED circuit board
106 /
Oki Data CONFIDENTIAL
5.3
LED/Check Pin List by PCB
This section lists the LEDs and check pins that are necessary for servicing this finisher at a customer’s
place.
Note!
Check pins not shown on the list must be used at the factory only, as the adjustments and
inspections using these pins need special tools or instruments and very high accuracy is
required. Never touch these check pins during servicing at a customer’s place.
5.3.1 Finisher Controller circuit Board
4
CN6
1
1
CN10
12
1
CN3
6
CN13
10
1
1
CN15
CN16
LED3 LED2 LED1
12
1 5
CN19
3
CN12
1
7
CN5
CN2
15
1
1 1
5
CN14
CN4
1
9
7
CN1
3
CN7
CN8
1
2
1 CN18
1
1
6
12
1
PSW3 PSW2 PSW1
CN9
CN17
6
1
1
SW1
9
7
CN11
1
Figure 5-06
Table 5-06
Switch
42872701TH Rev.1
Function
SW1
Adjustment of fold position/saddle-stitch double stapling
PSW1
Adjustment of fold position/saddle-stitch double stapling
PSW2
Adjustment of fold position/saddle-stitch double stapling
PSW3
Factory mode
107 /
Oki Data CONFIDENTIAL
5.3.2 Punch Controller Circuit Board
13
J1005
4
91
1
J1006
J1007
J1004
J1003
1
1
SW1003
LED1001
LED1002
LED1003
J1002
1
2
SW1002
J1001
51
SW1001
10 1
5
Figure 5-07
Table 5-07
Switch
Function
SW1001
Registration of number of punch holes/adjustment of sensor output
SW1002
Registration of number of punch holes/adjustment of sensor output
SW1003
Registration of number of punch holes/adjustment of sensor output
42872701TH Rev.1
108 /
Oki Data CONFIDENTIAL
5.4
Troubleshooting
5.4.1 Troubleshooting Procedure (Finisher/Saddle-Stitcher Unit)
5.4.1.1
186 - Failure in communications with printer
Table 5-08
Finisher controller PCB/Inverter DC controller PCB
1) Is the problem solved when the power switch of the printer is turned off and then on?
YES: Completed.
Wiring
2) Is the wiring between the finisher controller circuit board and the inverter DC controller circuit
board installed properly?
NO:
Correct the wiring.
Finisher controller PCB/Inverter DC controller PCB
3) Is the problem solved when the finisher controller circuit board and inverter DC controller circuit
board are replaced?
YES: Completed.
5.4.1.2
096-09 - Failure of finisher unit backup memory
Table 5-09
Finisher controller PCB
1) Is the problem solved when the power switch of the printer is turned off and then on?
YES: Completed.
NO:
5.4.1.3
Replace the finisher controller circuit board.
096-01 - Feed motor failure
Table 5-10
Multi-sheet feed roller (top) home position sensor (PI12)
1) Check the multi-sheet feed roller (top) home position sensor. Is the sensor working properly?
NO:
Replace the sensor.
Wiring
2) Is the wiring between the finisher controller circuit board and the feed motor installed properly?
NO:
Correct the wiring.
Feed roller
3) Rotate the multi-sheet feed roller (top) shaft by hand. Is the multi-sheet feed roller (top) is
raised and lowered properly?
NO:
Adjust the mechanical mechanism.
Feed motor (M1)/Finisher controller PCB
4) Is the problem solved when the feed motor is replaced?
YES: Completed.
NO:
42872701TH Rev.1
Replace the finisher controller circuit board.
109 /
Oki Data CONFIDENTIAL
5.4.1.4
096-05 - Delivery motor failure
Table 5-11
Delivery belt home position sensor (PI7)
1) Check the delivery belt home position sensor. Is the sensor working properly?
NO:
Replace the sensor.
Wiring
2) Is the wiring between the finisher controller circuit board and the delivery motor installed
properly?
NO:
Correct the wiring.
Multi-sheet delivery roller
3) Rotate the multi-sheet delivery roller by hand. Does the roller rotate smoothly?
NO:
Adjust the mechanical mechanism.
Delivery motor (M3)/Finisher controller PCB
4) Is the problem solved when the delivery motor is replaced?
YES: Completed.
NO:
5.4.1.5
Replace the finisher controller circuit board.
096-03 -Rear jog plate motor failure
Table 5-12
Rear jog plate home position sensor (PI5)
1) Check the rear jog plate home position sensor. Is the sensor working properly?
NO:
Replace the sensor.
Wiring
2) Is the wiring between the finisher controller circuit board and the rear jog plate motor installed
properly?
NO:
Correct the wiring.
Rear jog plate
3) Is there a hitch in the jog plate travel path?
YES: Adjust the mechanical mechanism.
Rear jog plate motor (M5)/Finisher controller circuit board
4) Is the problem solved when the rear jot plate motor is replaced?
YES: Completed.
NO:
42872701TH Rev.1
Replace the finisher controller circuit board.
110 /
Oki Data CONFIDENTIAL
5.4.1.6
096-03 - Front jog plate motor failure
Table 5-13
Front jog plate home position sensor (PI4)
1) Check the front jog plate home position sensor. Is the sensor working properly?
NO:
Replace the sensor.
Wiring
2) Is the wiring between the finisher controller circuit board and the front jog plate motor installed
properly?
NO:
Correct the wiring.
Front jog plate
3) Is there a hitch in the jog plate travel path?
YES: Adjust the mechanical mechanism.
Front jog plate motor (M4)/Finisher controller circuit board
4) Is the problem solved when the front jot plate motor is replaced?
YES: Completed.
NO:
5.4.1.7
Replace the finisher controller circuit board.
096-04 - Staple/fold motor failure
Table 5-14
Wiring
1) Is the wiring between the finisher controller circuit board and the staple/fold motor installed
properly?
NO:
Correct the wiring.
Stapler unit
2) Rotate the staple jam removal dial. Is there a hitch in the rotation?
YES: Adjust the mechanical mechanism.
Staple/fold motor (M7)/Finisher controller PCB
3) Is the problem solved when the staple/fold motor is replaced?
YES: Completed.
NO:
42872701TH Rev.1
Replace the finisher controller circuit board.
111 /
Oki Data CONFIDENTIAL
5.4.1.8
096-04 - Staple/fold motor failure
Table 5-15
Staple/fold clock sensor (PI14)
1) Check the staple/fold clock sensor. Is the sensor working properly?
NO:
Replace the sensor.
Finisher control PCB/Stapler unit
2) Does the staple/fold motor operate at the specified timing?
YES: Replace the finisher controller circuit board.
NO:
Check the stapler unit drive mechanism and adjust it if there is problem. If
not, go to the step 3.
Staple/fold motor (M7)/Finisher controller PCB
3) Is the problem solved when the staple/fold motor is replaced?
YES: Completed.
NO:
5.4.1.9
Replace the finisher controller circuit board.
096-04 - Staple/fold motor failure
Table 5-16
Folding home position sensor (PI11)
1) Check the folding home position sensor. Is the sensor working properly?
NO:
Replace the sensor.
Wiring
2) Is the wiring between the finisher controller circuit board and the staple/fold motor installed
properly?
NO:
Correct the wiring.
Saddle-stitcher unit
3) Rotate the fold jam removal dial. Is there a hitch in the rotation?
YES: Adjust the mechanical mechanism.
Staple/fold motor (M7)/Finisher controller PCB
4) Is the problem solved when the staple/fold motor is replaced?
YES: Completed.
NO:
42872701TH Rev.1
Replace the finisher controller circuit board.
112 /
Oki Data CONFIDENTIAL
5.4.1.10 096-04 - Staple/fold motor failure
Table 5-17
Staple/fold clock sensor (PI14)
1) Check the staple/fold clock sensor. Is the sensor working properly?
NO:
Replace the sensor.
Finisher control PCB/Saddle-stitcher unit
2) Does the staple/fold motor operate at the specified timing?
YES: Replace the finisher controller circuit board.
NO:
Check the saddle-stitcher unit drive mechanism and adjust it if there is
problem. If not, go to the step 3.
Staple/fold motor (M7)/Finisher controller PCB
3) Is the problem solved when the staple/fold motor is replaced?
YES: Completed.
NO:
Replace the finisher controller circuit board.
5.4.1.11 096-06 - Slide motor failure
Table 5-18
Slide home position sensor (PI18)
1) Check the slide home position sensor. Is the sensor working properly?
NO:
Replace the sensor circuit board.
Wiring
2) Is the wiring between the finisher controller circuit board and the slide motor installed properly?
NO:
Correct the wiring.
Stapler unit
3) Is there a hitch in the stapler travel path?
YES: Adjust the mechanical mechanism.
Slide motor (M8)/ Finisher controller circuit board
4) Is the problem solved when the slide motor is replaced?
YES: Completed.
NO:
42872701TH Rev.1
Replace the finisher controller circuit board.
113 /
Oki Data CONFIDENTIAL
5.4.1.12 096-02 - Shift motor failure
Table 5-19
Paper level sensor (PI9)
1) Check the paper level sensor. Is the sensor working properly?
NO:
Replace the sensor.
Tray elevator mechanism
2) Check the tray elevator mechanism. Is the mechanism working properly?
NO:
Adjust the mechanism.
Finisher controller PCB
3) Power of 24 VDC is supplied to the shift motor from the finisher controller circuit when the tray
is to be driven.
NO:
Replace the finisher controller circuit board.
Shift motor (M6)/Wiring
4) Check the wiring between the finisher controller circuit board and the shift motor. Is the wiring
installed properly?
YES: Replace the shift motor.
NO:
Correct the wiring.
5.4.1.13 096-02 - Shift motor failure
Table 5-20
Tray position
1) Has the tray reached the shift upper limit sensor?
YES: Lower the tray position.
Shift upper limit sensor (PI15)
2) Check the shift upper limit sensor. Is the sensor working properly?
NO:
Replace the sensor.
Finisher controller PCB/Wiring
3) Check the wiring between the finisher controller circuit board and the shift upper limit sensor. Is
the wiring installed properly?
YES: Replace the finisher controller circuit board.
NO:
42872701TH Rev.1
Correct the wiring.
114 /
Oki Data CONFIDENTIAL
5.4.1.14 096-02 - Shift motor failure
Table 5-21
—
1) Is the tray raised?
YES: Go to the step 4.
NO: Go to the step 2.
Finisher controller PCB
2) Power is supplied to the finisher controller circuit board motor when the tray is to be raised or
lowered?
YES: Go to the step 3.
NO:
Replace the finisher controller circuit board.
Tray elevator mechanism/Shift motor (M6)
3) Is there problem with the tray elevator mechanism?
YES: Adjust the tray elevator mechanism.
NO:
Replace the tray elevator motor.
Shift motor clock sensor (PI17)/ Finisher controller circuit board
4) Check the shift motor clock sensor. Is the sensor working properly?
YES: Replace the finisher controller circuit board.
NO:
Replace the sensor.
5.4.1.15 096-07 - Paddle motor failure
Table 5-22
Paddle home position sensor (PI2)
1) Check the paddle home position sensor. Is the sensor working properly?
NO:
Replace the sensor.
Swing guide home position sensor (PI3)
2) Check the swing guide home position sensor. Is the sensor working properly?
NO:
Replace the sensor.
Wiring
3) Is the wiring between the finisher controller circuit board and the paddle motor installed
properly?
NO:
Correct the wiring.
Paddle/swing guide
4) Rotate the paddle motor forward and backward by hand. Is there a hitch in rotation of the
paddle or up/down movement of the swing guide?
YES: Adjust the mechanical mechanism.
Paddle motor (M2)/Finisher controller circuit board
5) Is the problem solved when the paddle motor is replaced?
YES: Completed.
NO:
42872701TH Rev.1
Replace the finisher controller circuit board.
115 /
Oki Data CONFIDENTIAL
5.4.2 Troubleshooting Procedure (Optional Puncher Unit)
5.4.2.1
096-0C - Failure in communications with puncher
Table 5-23
Finisher controller PCB/Punch controller PCB
1) Is the problem solved when the power switch of the printer is turned off and then on?
YES: Completed.
Wiring
2) Is the wiring between the finisher controller circuit board and the punch controller circuit board
installed properly?
NO:
Correct the wiring.
Power supply
3) Measure the voltage between CN14-5(+) and CN14-3(-) on the finisher controller circuit board.
Is it 24 VDC?
NO:
Replace the finisher controller circuit board.
YES: Replace the punch controller circuit board.
5.4.2.2
096-0E - Failure of puncher unit backup memory
Table 5-24
EEP-ROM (IC1002)
1) Is the problem solved when the EEP-ROM on the punch controller circuit board is initialized?
YES: Completed.
Punch controller PCB
2) Is the problem solved when the power switch of the printer is turned off and then on?
YES: Completed.
NO:
5.4.2.3
Replace the punch controller circuit board.
096-0D - Puncher unit power supply failure
Table 5-25
Finisher controller PCB/Connected machine DC controller PCB
1) Is the problem solved when the power switch of the printer is turned off and then on?
YES: Completed.
Wiring
2) Is the wiring between the finisher controller circuit board and the punch controller circuit board
installed properly?
NO:
Correct the wiring.
Power supply
3) Measure the voltage between CN14-5(+) and CN14-3(-) on the finisher controller circuit board.
Is it 24 VDC?
YES: Replace the punch controller circuit board.
NO:
42872701TH Rev.1
Replace the finisher controller circuit board.
116 /
Oki Data CONFIDENTIAL
5.4.2.4
096-0A - Punch motor failure
Table 5-26
Punch home position sensor (PI1P)
1) Check the punch home position sensor. Is the sensor working properly?
NO:
Replace the sensor.
Punch motor clock sensor (PI3P)
2) Check the punch motor clock sensor. Is the sensor working properly?
NO:
Replace the sensor.
Wiring
3) Is the wiring between the finisher controller circuit board and the sensors installed properly?
NO:
Correct the wiring.
Punch mechanism/Punch motor (M1P)
4) Is there problem with the punch mechanism?
YES: Adjust the punch mechanism.
NO:
Replace the punch motor.
Punch controller PCB/Finisher controller PCB
5) Is the problem solved when the punch controller circuit board is replaced?
YES: Completed.
NO:
5.4.2.5
Replace the finisher controller circuit board.
096-0F, 096-10 - Punch sensor (side registration) failure
Table 5-27
Side registration sensor (photo sensor PCB/LED PCB)
1) Check the side registration sensor. Is the sensor working properly?
NO:
Replace the sensor.
Wiring
2) Is the wiring between the punch controller circuit board and the side registration sensor
installed properly?
NO:
Correct the wiring.
Punch controller PCB/Finisher controller PCB
3) Is the problem solved when the punch controller circuit board is replaced?
YES: Completed.
NO:
42872701TH Rev.1
Replace the finisher controller circuit board.
117 /
Oki Data CONFIDENTIAL
5.4.2.6
096-11 - Punch sensor (dust full) failure
Table 5-28
Dust full sensor (Dust full photo sensor PCB/Dust full LED PCB)
1) Check the dust full sensor. Is the sensor working properly?
NO:
Replace the sensor.
Wiring
2) Is the wiring between the punch controller circuit board and the dust full sensor installed
properly?
NO:
Correct the wiring.
Punch controller PCB/Finisher controller PCB
3) Is the problem solved when the punch controller circuit board is replaced?
YES: Completed.
NO:
5.4.2.7
Replace the finisher controller circuit board.
096-0B - Side registration motor failure
Table 5-29
Side registration home position sensor (PI2P)
1) Check the side registration home position sensor. Is the sensor working properly?
NO:
Replace the sensor.
Wiring
2) Is the wiring between the finisher controller circuit board and the side registration home position
sensor installed properly?
NO:
Correct the wiring.
Side registration mechanism/Side registration motor (M2P)
3) Is there problem with the side registration mechanism?
YES: Adjust the side registration mechanism.
NO:
Replace the side registration motor.
Punch controller PCB/Finisher controller PCB
4) Is the problem solved when the punch controller circuit board is replaced?
YES: Completed.
NO:
42872701TH Rev.1
Replace the finisher controller circuit board.
118 /
Oki Data CONFIDENTIAL
5.5
Self-Diagnosis
5.5.1 Overview
This finisher has the self-diagnosis function for examining the state of the machine using the CPU on
the finisher controller circuit board. The finisher performs the self-diagnosis as necessary. If it detects
a problem, the finisher transmits the “code” and the “detail code” of the problem to the printer. The
printer displays the code on the operating unit. The detail code is viewed in the service mode of the
printer.
5.5.2 Error
5.5.2.1
Finisher/Saddle-Stitcher Unit
Table 5-30 (1/2)
CU error code
186
Error
Detection Timing
Interface error
• Communications is cut off between the printer and
the finisher. This error is detected by the printer.
096-09
Backup RAM data error
• There is an error in the checksum of the finisher
controller circuit board when power is turned on.
096-01
Paper eject motor error
• The feed motor has run for 2 seconds but the multisheet feed roller (top) hasn't left the multi-sheet feed
roller (top) home position sensor.
• The feed motor has run for 2 seconds but the multisheet feed roller (top) hasn't returned to the multisheet feed roller (top) home position sensor.
096-05
Batch processing motor error
• The delivery motor has run for 3 seconds but the
delivery belt hasn't left the delivery belt home position
sensor.
• If the paper-ejection belt does not return to the
paper-ejection-belt home-position sensor within 1.1
seconds after the paper-ejection motor has started
096-03
096-04
Aligning motor error
Staple motor (stapling/folding)
error
• If alignment-motor errors are detected in the frontalignment and rear-alignment motors.
• If the stapler does not move away from the staple
home-position sensor within approximately 0.6
seconds after the staple/folding motors have started.
• If the stapler does not return to the staple homeposition sensor within approximately 0.6 seconds after
the staple/folding motors have started.
• The staple/fold motor is running but the staple/fold
clock sensor hasn't detected a clock signal more than
0.1 seconds.
• If the folding roller does not move away from the
folding home-position sensor within approximately 0.7
seconds after the staple/folding motors have started.
• If the folding roller does not return to the folding
home-position sensor within approximately 10 seconds after the staple/folding motors have started the
first time, within approximately 4 seconds after they
have started the second time, and within approximately 19 seconds after initialization.
• If the clock is interrupted for 0.1 seconds or more
while the staple/folding motors are operating.
42872701TH Rev.1
119 /
Oki Data CONFIDENTIAL
Table 5-30 (2/2)
CU error code
096-06
Error
Stapler unit feed motor error
Detection Timing
• The slide motor has run for 1 second but the stapler
unit hasn't left the slide home position sensor.
• The slide motor has run for 6 seconds but the stapler
unit hasn't returned to the slide home position sensor
096-02
Tray raising/lowering motor
error
• More than 10 seconds have passed after the shift
motor began to run but no change has occurred in
the paper level sensor.
• The shift upper limit sensor is turned on while the
tray is ascending.
• The shift motor is running but the shift motor clock
sensor hasn't detected a clock signal more than 50
msec.
096-07
Paddle motor error
• The paddle motor has run for 2 seconds but the
paddle hasn't left the paddle home position sensor.
• The paddle motor has run for 2 seconds but the
paddle hasn't returned to the paddle home position
sensor.
• The paddle motor has run for 2 seconds but the
swing guide hasn't left the swing guide home position
sensor.
• The paddle motor has run for 2 seconds but the
swing guide hasn't returned to the swing guide home
position sensor.
096-08
42872701TH Rev.1
Folding sensor error
120 /
Oki Data CONFIDENTIAL
5.2.2.2
Puncher Unit (Option)
Table 5-31
CU error code
Error
Detection Timing
096-0C
Punch interface error
• Communications with the puncher is cut off.
096-0E
Punch backup RAM data error
• There is an error in the checksum of the punch
controller circuit board when power is turned on.
096-0D
Punch power failure error
• Power of 24 VDC is not supplied from the finisher
unit but the puncher has received the start signal.
096-0A
Punch motor error
• The punch motor has run for 250 msec. but the
puncher hasn't returned to the punch motor home
position sensor.
• The punch motor is running but the punch motor
clock sensor hasn't detected a clock signal more than
60 msec.
096-0F
Punch resist sensor error
• During automatic sensor output adjustment, the light
emitting voltage is set to 4.4 V but the light receiving
voltage doesn't exceed 2.5 V.
• During automatic sensor output adjustment, the light
emitting voltage is set to 0 V but the light receiving
voltage exceeds 2.5 V.
• After automatic sensor output adjustment, the light
emitting voltage setting is higher than 4.4 V.
096-10
Punch horizontal resist sensor
error
• During automatic sensor output adjustment, the light
emitting voltage is set to 4.4 V but the light receiving
voltage doesn't exceed 2.5 V.
• During automatic sensor output adjustment, the light
emitting voltage is set to 0 V but the light receiving
voltage exceeds 2.5 V.
• After automatic sensor output adjustment, the light
emitting voltage setting is higher than 4.4 V.
096-11
Punch debris sensor error
• During automatic sensor output adjustment, the light
emitting voltage is set to 4.4 V but the light receiving
voltage doesn't exceed 2.5 V.
• During automatic sensor output adjustment, the light
emitting voltage is set to 0 V but the light receiving
voltage exceeds 2.5 V.
• After automatic sensor output adjustment, the light
emitting voltage setting is higher than 4.4 V.
096-0B
Punch feed motor error
• The side registration motor has run for 1000 msec.
but the puncher hasn't left the side registration home
position sensor.
• The side registration motor has run for 1000 msec.
but the puncher hasn't returned to the side registration home position sensor.
42872701TH Rev.1
121 /
Oki Data CONFIDENTIAL
5.5.3 Alarm
5.5.3.1
Finisher/Saddle-Stitcher Unit
Table 5-32
Error
Alarm Condition
No staple
The staple cartridge
becomes empty.
Always monitored.
The operation can
be continued,
although that depends on command
from the printer.
Replace the
staple cartridge
or set it properly.
Over-stacking
on outlet tray
The number of
documents on the
output tray exceeds
the stackable
number of sheets/
sets.
When documents
exceeding the limit
have been output.
The operation can
be continued.
Remove the
documents on
the output tray.
Over-stacking
on booklet
tray
The number of
document sets on
the booklet tray
exceeds 10 sets.
When documents
sets exceeding the
limit have been
output.
The operation can
be continued.
Remove the
documents on
the booklet tray.
5.5.3.2
Detection Timing
Mechanism Operation
Reset
Puncher Unit (Optional)
Table 5-33
Error
Punch dust
full
42872701TH Rev.1
Alarm Condition
The punch dust
accumulation has
reached the limit for
the receptacle.
Detection Timing
During punching
Mechanism Operation
The operation can
be continued.
Reset
Remove the
punch dust.
122 /
42872701TH Rev.1
Paddle motor (M2)
5
6
Staple safety switch (MS3)
Front jog plate home position
sensor (PI4)
Staple home position sensor
(PI19)
16 Tray paper sensor (PI8)
15 Paper level sensor (PI9)
14 Shift motor (M6)
13
12 Staple/fold motor (M7)
11
10 Front jog plate motor (M4)
9
7
Paddle home position
sensor (PI2)
Swing guide home position
8
sensor (PI3)
Delivery motor (M3)
Delivery belt home position
sensor (PI7)
Feed motor (M1)
3
260msec
Paddle rotation
260msec
Paddle rotation
Down
Stapling
Up
: Forward motor rotation
Multi-sheet delivery
: Backward motor rotation
APPENDIX A
4
Jog tray sensor (PI6)
2
Action
Inlet sensor (PI1)
1.
1
Action start signal
Delivery signal of connected machine
Oki Data CONFIDENTIAL
OVERALL TIMING CHART
Finisher Unit
Staple-A4, Two-Sheet Rear Single Stapling
123 /
42872701TH Rev.1
Feed motor (M1)
Delivery motor (M3)
Paddle motor (M2)
3
4
5
Front jog plate motor (M4)
Front jog plate home position
sensor (PI4)
9
10
Rear jog plate home position
sensor (PI5)
Staple home position sensor
(PI19)
Multi-sheet feed roller (top)
home position sensor (PI12)
20 Booklet tray sensor (PI13)
(PI11)
19 Folding home position sensor
18 Booklet clutch (CL1)
17
16 Fold position sensor (PI10)
15
14 Staple/fold motor (M7)
13 Slide motor (M8)
12
11 Rear jog plate motor (M5)
Staple safety switch (MS3)
8
6
Paddle home position sensor
(PI2)
Swing guide home position
7
sensor (PI3)
Jog tray sensor (PI6)
2
Action
Inlet sensor (PI1)
Paddle rotation
270msec
Down
Up
Down
Stapling (rear/front)
Up
Folding & delivery
: Forward motor rotation
: Backward motor rotation
2.
1
Action start signal
Delivery signal of connected machine
Oki Data CONFIDENTIAL
Saddle-Stitcher Unit
Booklet-LTR, Two Sheets One Set
124 /
42872701TH Rev.1
Punch home position sensor
(PI1P)
Side registration home position
sensor (PI2P)
Side registration motor (M2P)
Punch motor (M1P)
Inlet sensor (PI1)
Jog tray sensor (PI6)
Feed motor (M1)
3
4
5
6
7
8
9
Delivery belt home position
sensor (PI7)
Paddle home position sensor
(PI2)
Front jog plate home position
sensor (PI4)
Rear jog plate home position
sensor (PI5)
22 Tray paper sensor (PI8)
21 Paper level sensor (PI9)
20 Shift motor (M6)
19
18 Rear jog plate motor (M5)
17
16 Front jog plate motor (M4)
15 Staple safety switch (MS3)
sensor (PI3)
14 Swing guide home position
13
12 Paddle motor (M2)
11
10 Delivery motor (M3)
Side registration sensor
(LED 1 to 4, PT 1 to 4)
2
Action
Paper end sensor
(LED5 & PT5)
260msec
Paddle rotation
Punching
Paddle rotation
70msec
Punching
Down
Up
: Forward motor rotation
Paddle rotation Paddle rotation
70msec
Multi-sheet delivery Punching
260msec
Punching
Up
: Backward motor rotation
Down
3.
1
Action start signal
Delivery signal of connected machine
Oki Data CONFIDENTIAL
Puncher Unit (Optional)
Punch-A4, Two-Sheet Two Sets, Job Offset
125 /
Oki Data CONFIDENTIAL
APPENDIX B
SIGNAL NAME/ABBREVIATION LIST
The list below shows the signal names and their abbreviations used in this chapter and the circuit
diagrams.
Reference: The abbreviations enclosed in brackets are analog electric signals that cannot be expressed
by “1” or “0.” All others are digital signals expressed by “1” or “0.”
1.
Finisher/Saddle-Stitcher Unit
ADJ_TRAY_S
JOG TRAY PAPER DETECT Signal
B_CLU
BIND CLUTCH DRIVE Signal
BDL_ROL_HP
SWING GUIDE HP DETECT Signal
BIND_CLK
STAPLE/FOLD MOTOR CLOCK DETECT Signal
BIND_EMPS
BIND TRAY PAPER DETECT Signal
BIND_HP
FOLDING HP DETECT Signal
BIND_L
FOLD POSITION LED ON Signal
BINDMTR
STAPLE/FOLD MOTOR DRIVE Signal
BIND_P
FOLD POSITION PAPER DETECT Signal
BIND_ROL_HP
BUNDLE FEED ROLLER HP DETECT Signal
EJCT_BLT_HP
EJECT BELT HP DETECT Signal
EJCTMTR
EJECT MOTOR DRIVE Signal
ENT_S
INLET PAPER DETECT Signal
FDOOR_S
FRONT DOOR OPEN DETECT Signal
FEEDMTR
FEED MOTOR DRIVE Signal
FJOG_HP
FRONT JOG PLATE HP DETECT Signal
FJOGMTR
FRONT JOG MOTOR DRIVE Signal
FRONT_SW
FRONT DOOR SWITCH Signal
HOOK_S
HOOK EMPTY DETECT Signal
JOINT_SW
JOINT SWITCH Signal
LVL_S
PAPER SURFACE DETECT Signal
PAPER_F
PAPER FULL DETECT Signal
PDL_HP
PADDLE HP DETECT Signal
PDLMTR
PADDLE MOTOR DRIVE Signal
RJOG_HP
REAR JOG PLATE HP DETECT Signal
RJOGMTR
REAR JOG MOTOR DRIVE Signal
SELF_P
HOOK TOP POSITION DETECT Signal
SEN
INVERTER DISCHARGE SENSOR
SIFT_CLK
SIFT MOTOR CLOCK DETECT Signal
SIFT_DNLMT
SIFT DOWN LIMIT DETECT Signal
SIFTMTR
SIFT MOTOR DRIVE Signal
SIFT_UPLMT
SIFT UPPER LIMIT DETECT Signal
SLID_HP
SLIDE HP DETECT Signal
SLIDMTR
SLIDE MOTOR DRIVE Signal
STPL_CNCT
STAPLER CONNECT DETECT Signal
STPL_HP
STAPLE HP DETECT Signal
STPLSAFE_SW
STAPLE SAFETY SWITCH Signal
TOPCOV_S
TOP COVER OPEN DETECT Signal
TRY_EMPS
TRAY PAPER DETECT Signal
42872701TH Rev.1
126 /
Oki Data CONFIDENTIAL
2.
Puncher Unit (Optional)
CLOCK
PUNCH MOTOR CLOCK DETECT Signal
DUSTLED
DUST LED ON Signal
DUSTPTR
DUST FULL DETECT Signal
PAEND
PAPER END DETECT Signal
PUNCH
PUNCH HP DETECT Signal
SLIDE
SIDE REGISTRATION HP DETECT Signal
SREG1
SIDE REGISTRATION DETECT Signal 1
SREG2
SIDE REGISTRATION DETECT Signal 2
SREG3
SIDE REGISTRATION DETECT Signal 3
SREG4
SIDE REGISTRATION DETECT Signal 4
LEDON1
LED1 ON Signal
LEDON2
LED2 ON Signal
LEDON3
LED3 ON Signal
LEDON4
LED4 ON Signal
LEDON5
LED5 ON Signal
42872701TH Rev.1
127 /
Oki Data CONFIDENTIAL
APPENDIX C
JAM CODE/STACK PAPER CODE LIST
Jam code list
No.
Jam Code
Indication
1
596
2
592, 593, 594
3
595
Door Open Jam
4
590
Paper Delay Jam at Inlet Sensor
5
597
Paper Delay Jam at Fold Position Sensor
6
591
Paper Stopped Jam at Inlet Sensor
7
598
Paper Stopped Jam at Fold Position Sensor
8
599
Sets of Paper Jam
Staple Jam
Residual Paper Jam
Stack paper code list
42872701TH Rev.1
No.
Operation panel code
Paper position
1
643
Feeding part
2
644
Post-processing part
3
645
Sets of paper part
4
646
Folding part
128 /
Oki Data CONFIDENTIAL
APPENDIX D
No.
Name
SOLVENTS/OILS LIST
Application
Ingredient
Remark
1
BUCLEAN C-17
Cleaning
Ex.) Glass
Plastics
Rubbers
External covers
Fluorine hydrocarbon
Alcohols
Surfactant
Water
• Keep from flame.
• Substitute
IPA (isopropyl alcohol)
2
Lubricating oil
Driving part
Sliding part
Lead cam
Silicon oil
• PERMALVE G2 (Nihon
Koyu Co., Ltd.)
42872701TH Rev.1
129 / 129