1
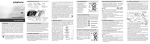
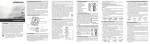
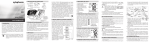
User's Guide
Copyright © 2010-All Rights Reserved by Rossmax
International Ltd.
Table of Contents
Important Information ............................................................................................................ 4
Important Information ......................................................................................................... 4
Before You Begin .................................................................................................................. 5
Operation Environment Requirement ................................................................................. 5
Installing the Software ........................................................................................................... 6
Installing Step .................................................................................................................... 6
Patient Information ................................................................................................................ 8
Patient Information Window ............................................................................................... 8
Create New Patient Information ......................................................................................... 8
Save “Create and Edit Patient Information” ........................................................................ 9
Edit Patient Information.....................................................................................................10
Cancel “Create or Edit Patient Information”.......................................................................10
Delete “Create or Edit Patient Information” .......................................................................10
Search Patient Information................................................................................................10
Patient Information Transfer to Word File..........................................................................10
Print Patient Information ...................................................................................................11
Data Transfer .......................................................................................................................12
Blood Pressure Data Transfer...........................................................................................12
The Result of the Transferring Blood Pressure Data .........................................................12
Save the Data ...................................................................................................................13
Table Information .................................................................................................................15
Table Information Page.....................................................................................................15
Create the Table Column ..................................................................................................15
Sort the Table Information.................................................................................................16
Sift the Table Information ..................................................................................................16
Average the Table Information ..........................................................................................17
Delete the Table Information .............................................................................................18
Table Information Transfer to Word File ............................................................................18
Print Table Information......................................................................................................18
Diagram Information .............................................................................................................20
Diagram Information Page ................................................................................................20
Graph ...............................................................................................................................20
Sift the Graph Information .................................................................................................20
2
Change the Graph Size ....................................................................................................22
Shift the Graph Information ...............................................................................................22
Histogram .........................................................................................................................22
Sift the Histogram .............................................................................................................23
Correlation ........................................................................................................................25
Sift the Correlation ............................................................................................................25
Shift the Correlation Information........................................................................................27
Pie ....................................................................................................................................27
Sift the Pie ........................................................................................................................28
Diagram Information Transfers to Word File......................................................................29
Print Diagram Information .................................................................................................29
Setting ..................................................................................................................................31
Setting Page .....................................................................................................................31
Set General Preferences ..................................................................................................31
Set Pie-Correlation SYS./DIA............................................................................................31
Select Language ...............................................................................................................33
Export the Information.......................................................................................................33
Import the Information .......................................................................................................33
Help......................................................................................................................................34
Operation Instruction.........................................................................................................34
Exit .......................................................................................................................................35
Exit the software ...............................................................................................................35
3
Important Information
Important Information
•
•
•
•
•
It is prohibited to use or copy all or part of this software and Help Manual without
permission from Axapharm AG and Rossmax International Ltd.
Please use the Microsoft Windows - Microsoft Office - Adobe Acrobat Reader with
license agreement.
The screen images printed in this Help Manual may slightly differ from the images
displayed by the software.
The specifications of this software and the description in this Help Manual are subject to
change without prior notice.
Based on real time to setup the date and time of the blood pressure monitor and the
software.
4
Before You Begin
Operation Environment Requirement
Supported Operating System:
•
•
•
•
•
•
•
•
•
•
•
•
•
Microsoft Windows 2000 Professional (SP4)
Microsoft Windows XP Home Edition (SP2)
Microsoft Windows XP Professional (SP2)
Microsoft Windows Vista Home Basic
Microsoft Windows Vista Home Premium
Microsoft Windows Vista Business
Microsoft Windows Vista Enterprise
Microsoft Windows Vista Ultimate
Microsoft Windows 7 Home Basic
Microsoft Windows 7 Home Premium
Microsoft Windows 7 Professional
Microsoft Windows 7 Enterprise
Microsoft Windows 7 Ultimate
NOTE: Please operate or setup BP Manager 6.0 software language in the relative language family supported
system.
Supported Microsoft Office System:
•
•
•
•
Microsoft Office 2000
Microsoft Office XP
Microsoft Office 2003
Microsoft Office 2007
NOTE: The tool program, sharing function and the Office Word of Microsoft Office need to setup completely.
Other Software Requirements:
•
•
Adobe Acrobat Reader 5.0 or upgrade
Microsoft Internet Explorer 6.0 Service Pack 1 or upgrade
System Requirements:
•
•
•
•
CPU: 800 MHz or more
Memory: A minimum of 512 MB (megabytes) free memory.
Hard Disk Space: 200 MB or more of available hard disk space.
Monitor: 1024 × 768 or large is recommended
Other:
•
•
CD-ROM *1
USB Interface*1 (USB 1.1or upgrade)
5
Installing the Software
Installing Step
•
•
Please shut off other applications when running BP (Blood Pressure) Manager Setup.
Download the BP Manager Software from www.axapharm.ch. After the file is
downloaded, please double click to start the installation.
Please follow the directions to install BP Manager.
Click on folder
•
Install the BP manager in the languages you prefer:
•
Install software by clicking on this icon
•
BP Manager 6.0 software setup dialog box, click Next
•
•
NOTE: The NET Framework 2.0 setup dialog box will appear informing you setup it if the NET Framework 2.0
didn’t setup completely, click Accept to setup NET Framework 2.0, the BP Manager 6.0 setup dialog box will
appear after the NET Framework 2.0 setup ready.
6
•
Select BP Manager 6.0 setup destination and user, click Next or enter your preferred
Installation Folder
•
Click Next
•
The BP Manager 6.0 setup, click Close
7
Patient Information
BP Manager 6.0 can create more than one patient information to process blood pressure
management individually.
Patient Information Window
Click Patient
Patient
list
Create New Patient Information
Click New, then enter patient’s information.
For example:
8
NOTE: Enter the Date of Birth
day and year from drop down list.
press the number of “Month” and “Year” to select the patient’s birth month,
Click month to quick select birth month
Click year to quick select birth year
NOTE: The dialog box will appear if you enter the same patient’s ID in creating New Patient Information
Click Yes to save as a new file and add _serial number after the repetition patient’s ID.
Click No to cover the repetition patient’s ID information.
Click Cancel to cancel Create New Patient Information.
Save “Create and Edit Patient Information”
Click Save to save the Create or Edit patient information under “Create” or” Edit” patient
information module.
NOTE: The dialog box will appear if you didn’t input First Name or Last Name and patient ID before “Save” it.
9
Edit Patient Information
Click patient’s name to enter the patient information, then click Edit to modify the patient
information.
NOTE: You cannot change the patient’s ID.
Cancel “Create or Edit Patient Information”
Click Cancel to cancel the Create or Edit patient information under “Create” or” Edit” patient
information module.
Delete “Create or Edit Patient Information”
Click patient’s name to enter the patient information, then click Delete to appear dialog box.
Select YES to delete the patient’s information, select NO to cancel delete the patient
information.
Search Patient Information
Enter patient’s name or ID to quick search patient information.
Patient Information Transfer to Word File
Click patient’s name to enter the patient information, then click Save to document to appear
“save as” setting window. Select Save to export the information to Word file. Select Cancel
to cancel exporting the information to Word file.
10
After data transmit, the information will be saved as word file in your indication file.
Print Patient Information
Click patient’s name to enter the patient information, then click Print to appear select printer
window, the print preview window will appear after click Print.
print preview window:
1. Click
to print.
2. Click
to select AUTO / 500% / 200% / 150% / 100% / 75% / 50% / 25% / 10%
9 types zoom in and zoom out of display size.
3. Click
to select one page / two pages / three pages / four pages /
six pages
5 types of preview.
4. Click Close to close the print preview window directly.
5. Page select ▲ shows page down; ▼ shows page up.
NOTE: ▼ will not be action when it in the first page; ▲ will not be action when it in the final page.
11
Data Transfer
Blood Pressure Data Transfer
NOTE: Data transferring is supported by blood pressure monitor with time function.
•
•
•
•
Make sure blood pressure monitor has power source (batteries or adapter).
Plug the USB jack of the cable into PC USB port.
Open the BP Manager 6.0 software.
Connect USB cable enter ear phone plug into blood pressure monitor data link port, and
then click M Key of blood pressure monitor enter data transfer mode.
Click Data connect to transfer the data.
NOTE: The database must have patient information or it will appear the below information
The Result of the Transferring Blood Pressure Data
NOTE: Error message will be shown when the data date is 2/29 except the leap year. The transfer result will skip
the error data.
1. USB cable disconnection will appear the below information.
NOTE: Please close the BP Manager 6.0, and then open the BP Manager 6.0 after USB cable connection.
12
2. USB cable loses connection will appear the below information.
NOTE: Please close the BP Manager 6.0, and then open the BP Manager 6.0 after USB cable connecting.
3. Failure data transfer will appear the below information.
NOTE: Please try again transfer step.
4. No data of blood pressure monitor will appear the below information.
5. Successful Transfer: only the first memory zone has data will appear Memory zone 1.
6. Successful Transfer: only the second memory zone has data will appear Memory zone
2.
7. Successful Transfer: Both the first and second memory zone have data will appear
Memory zone 1 and Memory zone 2.
Save the Data
After successful transfer, the blood pressure information window will appear.
13
For example Memory zone 1
4
3
2
1
Mark 1: The blood pressure data of the blood pressure monitor.
Mark 2: Select patient ID to save blood pressure data.
Mark 3: Total number of the blood pressure data.
Mark 4: Click Save to save the blood pressure data.
Click Exit to quit the window.
NOTE: Save data according to patient ID.
14
Table Information
Table Information Page
Click Table
Patient
name &
Patient ID
Create the Table Column
The Table Column can be added MAP / IHB / BBP / HSD column.
MAP: Mean Arterial Pressure
NOTE: Shows the mean arterial pressure value.
15
IHB: Irregular Heart Beat
NOTE: Shows it’s a IHB data.
BBP: Basic Blood Pressure
NOTE: Shows it’s a BBP data.
HSD: Hemodynamic Stability Determination
NOTE: Shows it’s a instability measuring data.
Sort the Table Information
Click DATE / TIME / SYS. / DIA. / PULSE / MAP / IHB / BBP / HSD, and then the data will
be sorted up to down or converse.
Sift the Table Information
Date appointment area
1.
2.
3.
4.
5.
6.
7.
8.
Time appointment area
View all data + None: All data list.
View all data + View morning data: Morning data list.
View all data + View evening data: Evening data list.
View all data + Time period: The appointed time data list.
Date period + None: The appointed date data list.
Date period + View morning data: The morning data list of the appointed date.
Date period + View evening data: The evening data list of the appointed date.
Date period + Time period: The appointed date and time data list.
NOTE1: the Morning time= 00:00-11:59;the Evening time= 12:00-23:59
NOTE2: In Date period, click
to show date, select From / To date.
16
Click month to quick select birth month
Click year to quick select birth year
NOTE 3: To date must ≧ From date
Average the Table Information
Information Selection:
1.
2.
3.
4.
None: Delete all selection data.
Average data: Select an appointed range data.
Average all data: Select all data.
Random select: Move the mouse cursor to the information which you selected, then the
information will turn into blue.
Data Average:
After select data, click Average to calculate the mean, maximum, minimum value of SYS. /
DIA. / PULSE.
NOTE: If you have not selected any data, it will show
17
Delete the Table Information
Click delete and then appoint Delete one for single data or Delete from<To for a serial
data.
Click
and then click Yes to delete data; click No to quit the window.
Start to delete data
Table Information Transfer to Word File
Click Save to document to appoint trans from all or trans from ..To
Click
to appear “save as” setting window. Select “Save” to export the information to
Word file. Select “Cancel” to cancel exporting the information to Word file.
After data transmit, the information will be saved as word file in you indication file.
Print Table Information
Click Print to appoint Print all or Print from ...To
18
Click
click Print.
to appear select printer window, the print preview window will appear after
Print Preview window:
1. Click
to print.
2. Click
to select AUTO / 500% / 200% / 150% / 100% / 75% / 50% / 25% / 10%
9 types zoom in and zoom out of display size.
3. Click
to select one page / two pages / three pages / four pages /
six pages
5 types of preview.
4. Click Close to close the print preview window directly.
5. Page select ▲ shows page down; ▼ shows page up.
NOTE: ▼ will not be action when it in the first page; ▲ will not be action when it in the final page.
19
Diagram Information
Diagram Information Page
Click Chart
Graph
The Graph type can show the SYS., DIA. and PULSE value
Click Graph
Patient name & Patient ID
Sift the Graph Information
The Graph sifts from 3 areas.
Date appointment area
1.
2.
3.
4.
Time appointment area 1
Time appointment area 2
View all data + None + None: The entire Graph list
View all data + View morning data + None: The morning Graph list.
View all data + View evening data + None: The evening Graph list.
Date period + None + None: The entire Graph list of the appointed date.
20
5. Date period + View morning data + None: The morning Graph list of the appointed
date.
6. Date period + View evening data + None: The evening Graph list of the appointed date.
NOTE 1: 1 / 2 / 3 / 4 / 5 / 6 shows SYS. (Blue line), DIA. (Green line) and PULSE (Yellow line)
7. View all data + View morning data with the evening data + None: The morning and
evening Graph.
8. View all data + None + Weekly: The weekly average Graph.
9. View all data + None + Monthly: The monthly average Graph.
10. Date period + View morning data with the evening data + None: The morning and
evening Graph of the appointed date.
11. Date period + None + Weekly: The weekly average Graph of the appointed date.
12. Date period + None + Monthly: The monthly average Graph of the appointed date.
NOTE 2: 7 / 8 / 9 / 10 / 11 / 12 shows SYS, DIA. and PULSE areas from up to down, each area shows the
morning Graph (Blue line) and the evening Graph (Green line).
NOTE3: the Morning time= 00:00-11:59;the Evening time= 12:00-23:59
NOTE4: In Date period, click
to show date, select From / To date.
21
Click month to quick select birth month
Click year to quick select birth year
NOTE5: To date must ≧ From date
Change the Graph Size
Click
to enlarge the Graph; Click
to reduce the Graph.
Shift the Graph Information
Every page shows 120 data, click Last 120 data to shift to last 120 data; click Next 120 data
to shift to next 120 data.
NOTE: Last 120 data will not be action when it in the first data; Next 120 data will not be action when it in the
final data.
Histogram
The Histogram shows SYS., DIA. and PULSE (%).
22
Click Histogram
Patient name & Patient ID
Sift the Histogram
Date appointment area
Time appointment area 1
1.
2.
3.
4.
5.
6.
7.
Time appointment area 2
View all data + None + None: The entire Histogram.
View all data + View morning data + None: The morning Histogram.
View all data + View evening data + None: The evening Histogram.
View all data + None + Weekly: The weekly average Histogram.
View all data + None + Monthly: The monthly average Histogram.
Date period + None + None: The entire Histogram of the appointed date.
Date period + View morning data + None: The morning Histogram of the appointed
date.
8. Date period + View evening data + None: The evening Histogram of the appointed
date.
9. Date period + None + Weekly: The weekly average Histogram of the appointed date.
10. Date period + None + Monthly: The monthly average Histogram of the appointed date.
NOTE1:
SYS. (Blue): Range: 0-300 mmHg,20 mmHg per section, %.
DIA. (Green): Range: 0-300 mmHg,20 mmHg per section, %.
PULSE (Yellow): Range: 0-200 pulse/min,20 mmHg per section, %.
23
NOTE2: the Morning time= 00:00-11:59;the Evening time= 12:00-23:59
NOTE3: In Date period, click
to show date, select From / To date.
Click month to quick select birth month
Click year to quick select birth year
NOTE4: To date must ≧ From date
24
Correlation
The Correlation shows the points ( blue point) of SYS. and DIA..
The hypertension class is separated with color.
NOTE: The color areas are changed with Set Pie-Correlation SYS./DIA. which in Settings.
Click Correlation
Patient name & Patient ID
Sift the Correlation
Date appointment area
1.
2.
3.
4.
5.
6.
Time appointment area 1
Time appointment area 2
View all data + None + None: The entire Correlation.
View all data + View morning data + None: The morning Correlation.
View all data + View evening data + None: The evening Correlation.
View all data + None + Weekly: The weekly average Correlation.
View all data + None + Monthly: The monthly average Correlation.
Date period + None + None: The entire Correlation of the appointed date.
25
7. Date period + View morning data + None: The morning Correlation of the appointed
date.
8. Date period + View evening data + None: The evening Correlation of the appointed
date.
9. Date period + None + Weekly: The weekly average Correlation of the appointed date.
10. Date period + None + Monthly: The monthly average Correlation of the appointed date.
NOTE1: the Morning time= 00:00-11:59;the Evening time= 12:00-23:59
NOTE2: In Date period, click
to show date, select From / To date.
Click month to quick select birth month
Click year to quick select birth year
NOTE3: To date must ≧ From date
26
Shift the Correlation Information
Every page shows 20 data, click Last 20 data to shift to last 20 data; click Next 20 data to
shift to next 20 data.
NOTE: Last 20 data will not be action when it in the first data; Next 20 data will not be action when it in the final
data.
Pie
The Pie shows SYS. and DIA. point. The hypertension class is separated with color.
NOTE: The color areas are changed with Set Pie-Correlation SYS./DIA. which in Settings.
Click Pie
Patient name & Patient ID
27
Sift the Pie
Date appointment area
Time appointment area
1 Time appointment area 2
1. View all data + None + None: The entire Pie.
2. View all data + View morning data + None: The morning Pie.
3. View all data+ View evening data + None: The evening Pie.
4. View all data + None + Weekly: The weekly average Pie.
5. View all data + None + Monthly: The monthly average Pie.
6. Date period + None + None: The entire Pie of the appointed date.
7. Date period + View morning data + None: The morning Pie of the appointed date.
8. Date period + View evening data + None: The evening Pie of the appointed date.
9. Date period + None + Weekly: The weekly average Pie of the appointed date.
10. Date period + None + Monthly: The monthly average Pie of the appointed date.
NOTE1: the Morning time= 00:00-11:59;the Evening time= 12:00-23:59
NOTE2: In Date period, click
to show date, select From / To date.
Click month to quick select birth month
Click year to quick select birth year
28
NOTE3: To date must ≧ From date
Diagram Information Transfers to Word File
Click
to appear “save as” setting window. Select “Save” to export the information to
Word file. Select “Cancel” to cancel exporting the information to Word file.
After data transmit, the information will be saving as word file in you indication file.
Print Diagram Information
Click Print to appear select printer window, the print preview window will appear after click
Print.
Print preview window:
1. Click
to print.
2. Click
to select AUTO / 500% / 200% / 150% / 100% / 75% / 50% / 25% / 10%
9 types zoom in and zoom out of display size.
3. Click
to select one page / two pages / three pages / four pages /
six pages
5 types of preview.
4. Click Close to close the print preview window directly.
5. Page select ▲ shows page down; ▼ shows page up.
29
NOTE: ▼ will not be action when it in the first page; ▲ will not be action when it in the final page.
30
Setting
Setting Page
Click Setting
NOTE: Please click OK after setting
Set General Preferences
Date format: you can select yyyy/MM/dd, dd/MM/yyyy or MM/dd/yyyy
Time format: you can select 12-hours or 24-hours.
NOTE: 12-hours will only show in the Table Information area, others are showed 24-hours.
Metric format: you can select kg/cm, lb/in.
Set Pie-Correlation SYS./DIA.
You can select JNC 7standard or Setting
1. JNC 7 standard: Click
JNC standard, the value can’t be modified.
31
2. Setting: Skip JNC standard, and you can modify the value.
NOTE: Setting must obey the rule.
1. A ≦ B ≦ C
2. D ≦ E ≦ F
3. SYS. ≧ DIA.
Normal
Borderline
Hypertension 1
SYS.
A
B
C
DIA.
D
E
F
If fail in set, click OK to return original value.
If the setting value:
1.
2.
3.
4.
Hypertenstion 2
SYS. (A / B / C) less than 40 mmHg.
SYS. (A / B / C) more than 300 mmHg.
DIA. (D / E / F) less than 40 mmHg.
DIA. (D / E / F) more than 200 mmHg.
Click OK to return original value.
32
Select Language
9 types of languages selection
1. ENGLISH English
2. DEUTSCH German
3. PORTUGUÊS Portuguese
4. FRANCAIS French
5. ITALIANO Italian
6. ESPAÑOL Spanish
7. РУССКИЙ Russian
8. 繁體中文 Traditional Chinese
9. 简体中文 Simple Chinese
Export the Information
Click Export to export all the patient information, table information and diagram
information of the BP Manager to an indication file.
Then click OK to export the data; click Cancel to cancel exportation.
Note: The file name must be patient.xml
Import the Information
Click Import to Import all the patient information, table information and diagram
information into the BP Manager from an indication file.
Then click OK to import the data; click Cancel to cancel importation.
Note: The file name must be patient.xml
Successful import
Failure import
33
Help
Operation Instruction
Click Help to view the BP Manager 6.0 Help Manual.
Note: The operation environment is the Adobe Acrobat Reader 5.0 or upgrade.
If you want to setup the Acrobat Reader, click OK.
34
Exit
Exit the software
1. Click Exit.
2. Click
to close the dialog box.
Click Yes to exit BP manager 6.0.
35