1
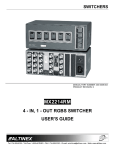
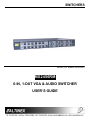
SWITCHERS
MANUAL PART NUMBER: 400-0099-002
MX2456RM
6-IN, 1-OUT VGA & AUDIO SWITCHER
USER’S GUIDE
SWITCHERS
TABLE OF CONTENTS
Page
PRECAUTIONS / SAFETY WARNINGS ................ 2
GENERAL........................................................... 2
RACK MOUNT SAFETY GUIDELINES............... 2
INSTALLATION .................................................. 2
CLEANING ......................................................... 2
FCC / CE NOTICE .............................................. 2
ABOUT YOUR MX2456RM.................................... 3
TECHNICAL SPECIFICATION............................... 3
DESCRIPTION OF MX2456RM ............................. 4
VIDEO SELECT MODE ...................................... 5
AUDIO BREAK AWAY MODE............................. 5
EQUALIZATION MODE ...................................... 5
AUTO SWITCH MODE ....................................... 5
AUTO ROTATION MODE ................................... 5
AUDIO VOLUME CONTROL .............................. 5
SYNC DELAY MODE.......................................... 5
RESET MODE .................................................... 5
FACTORY RESET MODE .................................. 5
APPLICATION DIAGRAM ...................................... 6
INSTALLING YOUR MX2456RM ........................... 7
OPERATION .......................................................... 7
CONTROL PANEL.............................................. 7
RS-232 CONTROL ............................................. 8
ACCESSORIES ................................................... 12
FREQUENTLY ASKED QUESTIONS .................. 13
TROUBLESHOOTING GUIDE ............................. 13
ALTINEX POLICY ................................................ 13
1
SWITCHERS
1
•
Please read this manual carefully before using your
MX2456RM Switcher. Keep this manual handy for
future reference. These safety instructions are to
ensure the long life of your MX2456RM and to
prevent fire and shock hazard. Please read them
carefully and heed all warnings.
•
PRECAUTIONS / SAFETY WARNINGS
1.1 GENERAL
•
•
Unauthorized personnel shall not open the unit
since there are high-voltage components
inside.
Qualified ALTINEX service personnel, or their
authorized representatives must perform all
service.
•
•
1.2 SAFETY GUIDELINES FOR THE RACKMOUNTING OF THE MX2456RM
•
•
•
•
•
1.4 CLEANING
•
Maximum operating ambient temperature is 35
(degrees C).
Never restrict the air flow through the devices’
fan or vents.
When installing equipment into a rack,
distribute the units evenly. Otherwise,
hazardous conditions may be created by an
uneven weight distribution.
Connect the unit to a properly rated supply
circuit.
Reliable Earthing (Grounding) of Rack-Mounted
Equipment should be maintained.
•
•
Unplug the MX2456RM power cord before
cleaning. Clean surfaces with a dry cloth. Never
use strong detergents or solvents, such as
alcohol or thinner. Do not use a wet cloth or
water to clean the unit.
1.5 FCC / CE NOTICE
•
•
1.3 INSTALLATION
•
Do not place heavy objects on top of the
MX2456RM. If the MX2456RM is to be
mounted to a table or wall, use only ALTINEXmade mounting accessories, such as rack
mount shelf DA1298RM or rack mount ears
DA1292FC and cables for optimum setup.
To turn off the main power, be sure to remove
the cord from the power outlet. The power
outlet socket should be installed as near to the
equipment as possible, and should be easily
accessible.
Do not pull the power cord or any cable that is
attached to the MX2456RM Switcher.
If the MX2456RM Switcher is not used for an
extended period, disconnect the power cord
from the power outlet.
For best results, place the MX2456RM Switcher
on a flat, level surface in a dry area away from
dust and moisture.
To prevent fire or shock, do not expose this unit
to rain or moisture. Do not place the
MX2456RM Switcher in direct sunlight, near
heaters or heat radiating appliances, or near
any liquid. Exposure to direct sunlight, smoke,
or steam can harm internal components.
Handle the MX2456RM Switcher carefully.
Dropping or jarring can damage internal
components.
2
This device complies with part 15 of the FCC
Rules. Operation is subject to the following two
conditions: (1) This device may not cause
harmful interference, and (2) this device must
accept any interference received, including
interference that may cause undesired
operation.
This equipment has been tested and found to
comply with the limits for a Class A digital
device, pursuant to Part 15 of the FCC Rules.
These limits are designed to provide
reasonable
protection
against
harmful
interference when the equipment is operated in
a commercial environment. This equipment
generates, uses, and can radiate radio
frequency energy and, if not installed and used
in accordance with the instruction manual, may
cause
harmful
interference
to
radio
communications. Operation of this equipment in
a residential area is likely to cause harmful
interference in which case the user will be
SWITCHERS
•
required to correct the interference at his own
expense.
Any changes or modifications to the unit not
expressly approved by ALTINEX, Inc. could
void the user’s authority to operate the
equipment.
ABOUT YOUR MX2456RM
MECHANICAL
MX2456RM
Width (inches)
1.75in (44mm)
Height (inches)
17.00 in (432mm)
Depth (inches)
9.00in (229mm)
Weight (pounds)
5lbs (2.28kg)
Finish
Gray
Front/Rear Panel
Lexan
T° Maximum
50°C
Humidity
90% non-condensing
MTBF (calculations)
40,000 hrs (min)
Table 2. MX2456RM Mechanical
2
The MX2456RM is a video and audio switcher with
six VGA inputs, which can be connected to a single
VGA output and six stereo or balanced audio inputs,
which can be connected to a single stereo or
balanced audio output. It allows the nonsimultaneous connection of up to six computers or
six video and six audio sources to a monitor or
projector and to any audio system.
ELECTRICAL
Input Signal
Differential
Analog
Composite Video
Impedance
The MX2456RM can pass a variety of video signal
types: RGBHV, RGBS, RGsB, Component Video (Y,
R-Y, B-Y), S-Video and Composite Video. The
MX2456RM is controllable by using its built-in front
panel or through RS-232.
CMRR
Input Sync
Signals
Composite,
Horizontal, &
Vertical
Output Signals
Analog
Fall/ Rise Time
Impedance
Crosstalk
Differential
Signal to Noise
Ratio
Bandwidth
Stereo Signal
Separation
Output Sync
Signals
Impedance
Power
Each of the VGA inputs is ground loop isolated and
can promote individual equalization of video gain
according to different cable lengths.
The MX2456RM has a video bandwidth of 300 MHz
and an audio bandwidth of 40 kHz.
TECHNICAL SPECIFICATION
3
FEATURES/
Audio
RGBHV
DESCRIPTION
GENERAL
Inputs
6
6
Input
Six 5 conductor
Six 15-pin HD-F
Connector
terminal blocks
Outputs
1
1
Output
One 5 conductor
One BNC Female
Connector
terminal block
Compatibility Stereo or balanced VGA, RGBHV,
audio
RGBS,RGsB, &
C-Video
(Y, R-Y, B-Y)
Table 1. MX2456RM General
Audio
RGBHV
1.8V p-p
10 k Ohms
80dB @ 10 Hz to
20k Hz
1.2V p-p
75 Ohms
-
-
TTL (+/-)
600 Ohms
80 dB @ 1kHz
1.8Vp-p
1.2V p-p
less than 2.4ns
75 Ohms
-48dB @ 10 MHz
-
More than 95 dB
-
10 Hz – 40 kHz
More than 60dB
@ 20 kHz
300MHz
-
22 Ohms
-
90V AC to 260V AC 50/60Hz
External Power
Power
14 watts max.
Consumption
Table 3. MX2456RM Electrical
3
SWITCHERS
4.6 AUDIO VOLUME CONTROL MODE
There are two sections on the front panel of the
MX2456RM: input select and switcher control. The
buttons within the input select section allow for the
actual switching of the source signals. The buttons
within the switcher control section allow access to
the switcher setup features.
This button allows the user to control the audio
volume using the UP or DOWN buttons. To
increase the volume, push the UP button and to
decrease the volume, push the DOWN button.
4.7. SYNC DELAY MODE
4.1. VIDEO SELECT MODE
The default SYNC DELAY mode button in the
“OFF” position means that the video portion of the
video signal and the sync portion of the video
signal are connected to the output simultaneously.
The MX2456RM Switcher can operate in SYNC
DELAY mode to avoid a “glitch” effect typically
associated with switching between video sources.
Sync delay time is the amount of time when sync is
connected to the output before the video portion of
the video signal is transmitted. The user may select
a time from 0.5 seconds to 2 seconds.
Default video and audio inputs connect to video
and audio outputs simultaneously, but if needed the
user may select video and audio inputs separately
using AUDIO BREAK AWAY mode. The user can
select any video input by using the input select
buttons located on the front panel.
4.2. AUDIO BREAK AWAY MODE
This mode allows independent selection of video
and audio inputs. After selecting AUDIO BREAK
AWAY mode, the user may select any audio input
for switching when the power is turned ON.
4.8. BEEP ON/OFF MODE
If the BEEP ON/OFF mode is selected, each
control on the control panel, except the RESET
mode will be without an accompanying beeper
sound.
4.3. EQUALIZATION MODE
Video signals are connected from input to output
through a video amplifier along with an equalization
circuit. This allows the user to equalize video
signals for each of the inputs according to the
distance (cable length) from the video source (PC)
to the switcher.
4.9. RESET MODE
RESET mode sets the memory, which was
previously set by the factory and resets the
Switcher. To reset the switcher, press the RESET
button. In RESET mode, video input 1 and audio
input 1 will be active. AUTO SWITCH mode will be
disabled if previously active. BEEP ON/OFF mode
will return to the ON position if previously in the
OFF position. The RESET mode button does not
affect Audio Volume, Video Equalization, Auto
Rotate or the Sync Delay mode.
4.4. AUTO SWITCH MODE
If AUTO SWITCH mode is turned ON, the input
which was previously selected by the incoming
video signal will connect to the output
automatically.
If the user does not previously select the AUDIO
BREAK AWAY mode, the same number of audio
inputs will be connected to the audio output.
4.10 FACTORY RESET MODE
4.5. AUTO ROTATION MODE
This mode clears all data from memory, which was
previously set by the user and returns the switcher
to the factory-preset position. To return the switcher
to the FACTORY PRESET mode, turn OFF the
power, press the RESET button, turn power ON
and then release the RESET button.
The user may select AUTO ROTATION mode with
a preset rotation time. If this mode is selected, then
all video inputs connected to the video output will
be selected alternately. Audio inputs will
simultaneously connect to the audio output along
with video inputs if the user did not previously
select AUDIO BREAK AWAY mode.
5
SWITCHERS
INSTALLING YOUR MX2456RM
6
OPERATION
Step 1. Make sure that the power input is set to the
proper AC voltage for the country of usage.
An incorrect setting may result in unit
damage not covered by warranty.
7
7.1 CONTROL PANEL
1. When a button is pressed and released a beeper
will sound once. If a button is pressed and held, a
beeper will sound several times.
Step 2. Connect the power cord to the unit and
plug it into the power outlet.
2. Default video and audio inputs are selected
simultaneously by pressing and releasing one of
the video input buttons. LED’s that represent
selected inputs on the control panel and
connector board should turn ON.
Step 3. Connect the cables from the video sources
and the audio sources (computers, VCR,
etc.) to the input channels and connect the
display devices (monitor or projector) and
the appropriate audio equipment (mixer,
amplifier, etc.) to the outputs. For better
results use shielded, high-quality coaxial
cables.
3. When selecting audio inputs and video inputs
independently, press the AUDIO BREAK AWAY
mode button. If at any time you need to return the
MX2456RM Switcher to the previous mode
position, press the AUDIO BREAK AWAY mode
button.
Step 4. Test all the required switching features. If
you experience difficulties or abnormal
switching, you may wish to reset the unit to
the factory defaults to make sure that you
have not entered an incorrect operation
mode. To reset the switcher, turn the
power ON and OFF. Then turn the power
ON again while pressing and holding the
“RESET” button. After a brief delay, all
LED’s should blink ON and OFF. A
beeping sound will be heard several times
indicating that the switcher has been
factory reset.
4. Before setting the VIDEO EQ mode, you must
determine the length of cable that is connected to
each of the video inputs. To select the
appropriate equalization, follow steps a-d below.
a) Select Video Input
b) Press and release the VIDEO EQ UP button
as many times as needed to turn the video
equalizer to the correct position. Each time
this button is pressed, it equalizes for the
next 25 ft of cable. (For equalization of 100ft
of cable, press the button four times; for
cable 150ft, press button six times; and for
cable 375ft, press the button fifteen times
and so on.)
Step 5. Verify that the display and audio equipment
operates properly and results in perfect
images and sound.
c) To set the selected equalization to memory,
press and hold the VIDEO EQ UP and
DOWN buttons simultaneously for 2
seconds.
d) Repeat step b and c for equalization of any
video input.
5. To set the AUTO ROTATE mode, use the
AUTO ROTATE Up and Down buttons to select
the appropriate rotation time. Video inputs will
rotate as they connect to the output within the
selected auto rotation time. Audio inputs will also
rotate, if AUDIO BREAK AWAY mode was not
previously selected. Equalization is still active.
7
SWITCHERS
6. If necessary, select the SYNC DELAY UP or
DOWN button. To activate and set the SYNC
DELAY mode to memory, press and hold the UP
or DOWN button. LED’s that represent the
selected time should light.
7. To activate the AUTO SWITCH mode, press the
AUTO SWITCH button. The LED that represents
the AUTO SWITCH mode should light. If the
AUTO ROTATE mode was selected previously,
it will cancel. Audio inputs will follow video inputs
if the AUDIO BREAK AWAY mode was not
selected previously.
Figure 1. RS-232 Terminal Block
PIN No.
1
8. The AUDIO VOLUME mode will control the
audio stereo volume when the VOLUME UP or
DOWN button is pressed and released. The
AUDIO VOLUME UP or DOWN button is
between a maximum volume of +6dB and a
minimum volume of –6dB. From the minimum to
maximum volume, there are fifteen points. Each
point represents 0.8dB. After selecting the
volume, press and hold the UP and DOWN
buttons simultaneously.
2
3
4
Table 4. PIN Designations
PIN Designation
+5V (not needed for
RS-232 connection)
GND (Ground)
RCV (Receive)
XMT (Transmit)
The terminal block is labeled with the appropriate
contact designations: Transmit (XMT), Receive
(RCV), and Ground (GND). Always remember that
the Transmit pin from the control system or
computer must be connected to the Receive pin on
the switcher control port; do not connect Transmit
to Transmit or Receive to Receive.
9. To turn OFF the beeping sound, press and hold
the BEEP ON/OFF button. The LED that
represents this button should light. To activate
sound, press and hold the BEEP ON/OFF button
again.
Note: the contact labeled +5V is not used for
RS-232 connections. This contact is used to
provide DC voltage to other equipment installed
within close proximity of the MX2456RM.
10. To return the switcher to factory preset, press
the RESET button. After a brief delay, all LED’s
should blink ON and OFF. A beeping sound will
be heard several times indicating that the
switcher has been reset.
Typically, a control system or computer will offer
RS-232 connections on a 9-pin D connector.
The following are typical cable pin-out designations
for RS-232 connections on a 9-pin D connector.
Always verify that the pin-outs for your system are
correct to ensure the proper wiring.
7.2 RS-232 CONTROL
The MX2456RM Switcher offers remote control
capabilities
through
RS-232;
the
primary
communication standard used by control systems
and computers.
MX2456RM
Contact
3
RX
2
TX
7
GND
Connection of IBM-PC 25-pin D to the MX2456RM
Terminal Block
IBM PIN No.
In fact, the MX2456RM offers more features using
RS-232 than are currently available from the front
panel of the unit.
The MX2456RM offers a terminal block using
solder-free, screw-down contacts, making it
extremely easy to connect the switcher to a control
system or a computer in the field.
8
SWITCHERS
7.2.2 PROGRAMMING COMMANDS
MX2456RM
Contact
2
TX
3
RX
5
GND
Connection of IBM-PC 9-pin D to the MX2456RM
Terminal Block
IBM PIN No.
NOTE:
These programming commands are used for
programming the switcher; they should not be
used as part of a program to operate the
switcher. The programming setting changes
done through these commands are stored in a
non-volatile
memory.
Typically,
these
commands can be issued 10,000 times before
the memory needs to be replaced.
Port setting preferences for the control system or
computer being used to control the switcher should
be set as follows:
BAUD RATE (Bits per second)
Data bits
9600
8
Parity
None
Stop Bits
1
1.
This is the main command of the video input
Switcher. The [# SW n1 n2 n3 n4 n5 n6]
command contains all the information needed by
the switcher to activate the video sources that
are connected to the unit.
7.2.1 RS-232 PROTOCOL
The RS-232 protocol for the MX2456RM
Switcher uses a simple ASCII character format.
1.
2.
3.
4.
[# SW n1 n2 n3 n4 n5 n6] - Video Switch Input
# = Switch number (No. from 1 to 9, Default =
0)
Square brackets “[“ & “]” are part of the
command.
Use uppercase letters for all commands.
Make sure that the transmit pin of the
control system is connected to the
receive pin of the switcher and
connection done as per Table 5.
Make sure that there is a delay of 50 ms
between two consecutive commands.
n1 = Video input number (No. from 0 to 6)
n2 = Break Away code (0 = On , 1 = OFF)
n3 = 0 (video key pressed)
n4 = Sync Delay (No. from 0 to 4)
n5 = Video Equalizer (Hexadecimal No. from 0
to F)
The factory default settings is 9600 baud, 8 bits,
1 stop, and no parity. There is no software or
hardware flow control implemented.
n6 = Audio Gain (Hexadecimal No. from 0 to F)
The MX2456RM Switcher requires 50ms of
processing time after each command is sent.
So, please keep a 50ms delay between two
consecutive commands.
Sending the [8SW61040F] command will
activate switcher module 8, video input number 6
and audio input 6. Since the break away code is
1, the zero (0) alerts the switcher that the video
key was pressed. The video key has an interval
of 4 (2 seconds). The video equalizer is OFF,
and the maximum volume is F. Zero means
OFF, and the default is 8 for normal volume or
video.
Example:
The RS-232 input has a 16-character buffer and
will not execute any command longer than 16characters. Any additional commands are
ignored until the previous command is fully
processed. After processing a valid command,
an [OK] string will be returned if requested by
the feedback command.
2.
[# SW n1 n2 n3 n4 n5 n6] - Audio Switch Input
This is the main command of the audio input
switcher, which contains all the information
9
SWITCHERS
Example:
needed by the switcher to activate the audio
sources that are connected to the unit.
Sending the [8RO] command resets the
switcher module in the Reset Mode with ID
number eight.
# = Switch number (No. from 1 to 9, default = 0)
n1 = Audio input number (No. from 0 to 6)
5.
n2 = Break Away code (0 = On , 1 = OFF)
This command controls how audio and video
input are selected. The [# SA n] command
allows the user to control audio input and video
input independently or simultaneously.
n3 = 1 (audio key pressed)
n4 = Sync Delay (No. from 0 to 4)
n5 = Video Equalizer (Hexadecimal no. from 1
to F).
# = switch number (Default no. is 0)
n = 1 (ON) Breakaway Audio Input from Video
Input and switchers can be activated
independently.
n6 = Audio Gain (Hexadecimal no. from 1 to F).
Example:
Sending the [8SW6012F8] command will
activate switcher module 8 and audio input 6
only. Since the break away code is zero (0), 1
alerts the switcher that the audio key was
pressed with an interval of 2 (1 second). The
video equalizer is set to a maximum and a
normal volume of 8 (0 = OFF, default is 8 for
normal volume or video).
3.
n = 0 (OFF). In this mode the switchers are
activated simultaneously. For example, if
Video Input 2 is pressed Audio Input 2 will
be pressed automatically.
Example:
Sending the [1SA1] command will allow the
user to press Audio Input or the Video Input
independently.
[#RF] - Factory Reset
6.
[#CSDn] - Sync Delay
This command will replace all settings stored in
the memory of the switcher module. This is
indicated by the factory default settings. All
previous settings will be lost.
This command allows time delay between
switching from one video source to another by
avoiding an overlap of communication problems.
# = switch number (default is 0)
# = Switcher module ID number (Default is 0)
Example:
n = the time delay interval between video
sources and switching inputs
Sending the command [8RF] command will
reset the Switcher module to the factory settings
with ID number eight.
4.
[# SA n] - Audio Breakaway
n= 0
n= 1
n= 2
n= 3
n=4
[#RO] - Operation Reset
The [#RO] command will reset audio and video
to input #1, Auto Switch to OFF and Beep OFF
to Beep ON. However, this command will not
affect audio volume, video equalization, auto
rotation, and sync delay.
Sync Delay is Off (no delay)
0.5 second delay
1.0 s
1.5 s
2.0 s
Example:
Sending the [8CSD4] command sets a 2-second
time delay between input selection of the
connected switcher module with an ID number
of 8.
# = Switch number (Default no. is 0)
10
SWITCHERS
7.
[#Bn] - Beep ON/OFF
In addition, by default the switchers still have
an ID number of zero.
This command activates or deactivates the
beeping sound when a key is pressed on the
switcher module.
10. [#CA n1 n2 ] - Audio Gain Control Save
Settings
This command will save the volume settings for
a specified audio input.
# = Switcher module ID number (Default is 0)
n = ON/OFF switch
n = 1, turns switcher Beep ON
# = Switch number (No. from 1 to 9, Default is 0)
n = 0, turns switcher Beep OFF
n1 = Audio input number (No. from 0 to 6)
n2 = Audio Gain (Hexadecimal no. from 1 to F).
Example:
Sending the [8B1] command sets the beeper to
the ON position in the connected Switcher
module with an ID number of eight.
8.
Example:
After executing the [8CA6F] command,
switcher module 8 and audio input number 6
will have a maximum volume of F (0 = OFF,
default is 8 or normal volume).
[OASn] - Auto Switch
The [OASn] command sets the switcher module
to the ON position to detect incoming audio or
video signals automatically. Using this
command, the user may also operate the
switcher manually.
11. [#CA n1 n2 ] – Video Equalization Save
Settings
This command saves the settings of the
equalized video signal to compensate for cable
distance from the video source to the switcher.
n = ON/OFF switch
n = 1 (turns auto switcher ON)
9.
n = 0 (turns auto switcher OFF)
# = Switch number (Default is 0. No. from 1 to
9).
Example:
n1 = Video input number (No. from 0 to 6).
Sending the [OAS1] command will set the auto
switch feature to the ON position to detect the
incoming video signal automatically.
n2 = Video equalization (Hexadecimal no. from
1 to F).
[0I#] - Change Identification Number
After executing the [8CA58] command,
switcher module 8 and video input number 5
will have a medium equalization range of 8 (0 =
OFF).
Example:
This command sets a unique ID number to
each MX2456RM Switcher being used. A
maximum of 9 unit ID’s can be assigned.
12. [#VR] - Firmware Version
0 = Zero
This command displays the firmware revision
number installed into the microprocessor.
# = New switcher module ID number. (no. from
1 to 9)
Example:
# = Switch number (No. from 1 to 9. Default is
0).
Sending the command [0I8] will reset the active
Switcher module with a new ID number eight.
11
SWITCHERS
Example:
ACCESSORIES
After executing the [8VR] command, the system
will return the version number 8R1.0. If the
user sends the [0VR] command, the system
will return the version number 8R1.0.
Model No.
TM1276
If multiple switchers are used, this command
sets a unique ID number for each of the
MX2456RM Switchers. Multiple switcher
modules can be controlled through a single RS232 port.
DA1298RM
DA1292RM
In order to control multiple modules
independently with one RS-232 port, the unit ID
must be used. Setting the unit ID allows the
user to send the same command to multiple
modules, but the module processes that
command with the indicated ID number only.
The factory default unit ID is1.
CB4200MR
CB4203MR
CB4206MR
CB4212MR
CB4225MR
CB4250MR
CB4275MR
CB42100MR
CB42150MR
CB4400MR
CB4406MR
CB4412MR
CB4425MR
CB4450MR
CB4475MR
CB44100MR
CB44150MR
PC5301US
PC5302US
PC5303US
PC5304US
12
8
Description
TABLE MOUNT HARDWARE
Table Mount bracket for 2U ½ RackWide
RACK MOUNTING ACCESSORIES
Rack mount shelf for two units side by
side
Rack mount ears for single unit.
HIGH RESOLUTION 5 BNC to 5 BNC
COAXIAL CABLE
Bulk Cable 5 coaxes (500ft minimum)
3 feet, 5 BNC to 5 BNC coaxial cable
6 feet, 5 BNC to 5 BNC coaxial cable
12 feet, 5 BNC to 5 BNC coaxial cable
25 feet, 5 BNC to 5 BNC coaxial cable
50 feet, 5 BNC to 5 BNC coaxial cable
75 feet, 5 BNC to 5 BNC coaxial cable
100 feet, 5 BNC to 5 BNC coaxial cable
150 feet, 5 BNC to 5 BNC coaxial cable
SUPER HIGH RESOLUTION 5 BNC to
5 BNC COAX
Bulk Cable 5 coaxes (500ft minimum)
6 feet, 5 BNC to 5 BNC coaxial cable
12 feet, 5 BNC to 5 BNC coaxial cable
25 feet, 5 BNC to 5 BNC coaxial cable
50 feet, 5 BNC to 5 BNC coaxial cable
75 feet, 5 BNC to 5 BNC coaxial cable
100 feet, 5 BNC to 5 BNC coaxial cable
150 feet, 5 BNC to 5 BNC coaxial cable
POWER CABLES
Power cable for US
Power cable for UK
Power cable for Australia
Power cable for Germany
SWITCHERS
FREQUENTLY ASKED QUESTIONS
No:
1.
2.
3.
4.
5.
Question
How do I
know which
input is
connected to
which output?
Can the
MX2456RM
be rack
mounted?
How is the
MX2456RM
controlled?
Why is sync
delay
switching
useful?
Can the
MX2456RM
Switcher be
used outside
of the United
States?
TROUBLESHOOTING GUIDE
9
•
Answer
LED’s that represent
connected video and audio
sources will light.
•
Yes, the MX2456RM can be
rack mounted by itself or
with two units side by side.
The width of the unit is 1-U
high. ALTINEX offers rack
mount ears for single unit
mounting (part #
DA1292RM) and rack shelf
for mounting two units (part
# DA1298RM).
Control can be made
through RS-232 or through
the connector panel.
It eliminates the glitch
normally associated with
switching between highresolution RGB type
sources. This is
accomplishing by
disconnecting the sync
portion of a signal before
the incoming video–making
the glitch take place offscreen. The Sync Delay
feature is only designed to
work with RGBS and
RGBHV signal formats.
Yes, the MX2456RM uses a
universal internal power
supply, enabling it to be
used throughout the world.
Please make sure to use
the proper adapter cables
for the country of usage.
Adapter cables for several
countries are available
through ALTINEX.
•
•
•
Please make sure, that input signal formats are
the same for the input (source) and the output
(display).
Please make sure that the input signal
amplitude levels are as follows:
1. RED, GREEN, and BLUE channels are less
than 1.5V p-p.
2. SYNC is the TTL level.
3. Please use the appropriate input voltage
90 VAC to 260 VAC.
Please make sure that the proper quality of
cables is used. We recommended ALTINEXmade cables for the best results.
If a problem arises after continuous usage at
higher voltage, higher temperature, higher
humidity, or at other extreme environmental
conditions, please correct the problem.
If a problem exists with the MX2456RM
Switcher, please reset the unit by pressing the
RESET mode button for more than 2 seconds.
ALTINEX POLICY
11.1 LIMITED WARRANTY
See Altinex Inc. web site for complete details.
11.2 RETURN POLICY
See Altinex web site for complete details.
11.3 CONTACT INFORMATION
ALTINEX, INC.
592 Apollo Street
Brea, CA 92821 USA
TEL: 714-990-2300
TOLL FREE: 1-800-ALTINEX
WEB: www.altinex.com
E-MAIL: solutions@altinex.com
FAX: 714-990-3303.
13
10
11