1
LIMITED WARRANTY
Radio Shack warrants for a period of 90 days from the date of delivery to
customer that the computer hardware described herein shall be free from
defects in material and workmanship under normal use and service. This
warranty shall be void if the computer case or cabinet is opened or if the unit is
altered or modified. During this period, if a defect should occur, the product
must be returned to a Radio Shack store or dealer for repair. Customer's sole
and exclusive remedy in the event of defect is expressly limited to the correction
of the defect by adjustment, repair or replacement at Radio Shack's election and
sole expense, except there shall be no obligation to replace or repair items which
by their nature are expendable. No representation or other affirmation of fact,
including but not limited to statements regarding capacity, suitability for use, or
performance of the equipment, shall be or be deemed to be a warranty or
representation by Radio Shack, for any purpose, nor give rise to any liability or
obligation of Radio Shack whatsoever.
EXCEPT AS SPECIFICALLY PROVIDED IN THIS AGREEMENT, THERE
ARE NO OTHER WARRANTIES, EXPRESS OR IMPLIED, INCLUDING, BUT
NOT LIMITED TO, ANY IMPLIED WARRANTIES OF MERCHANTABILITY
OR FITNESS FOR A PARTICULAR PURPOSE AND IN NO EVENT SHALL
RADIO SHACK BE LIABLE FOR LOSS OF PROFITS OR BENEFITS, INDIRECT, SPECIAL, CONSEQUENTIAL OR OTHER SIMILAR DAMAGES ARISING OUT OF ANY BREACH OF THIS WARRANTY OR OTHERWISE.
IMPORTANT NOTICE
ALL RADIO SHACK COMPUTER PROGRAMS ARE DISTRIBUTED ON AN
"AS IS" BASIS WITHOUT WARRANTY
Radio Shack shall have no liability or responsibility to customer or any other
person or entity with respect to any liability, loss or damage caused or alleged to
be caused directly or indirectly by computer equipment or programs sold by
Radio Shack, including but not limited to any interruption of service, loss of
business or anticipatory profits or consequential damages resulting from the use
or operation of such computer or computer programs.
NOTE: Good data processing procedure dictates that the user test the
program, run and test sample sets of data, and run the system in
parallel with the system previously in use for a period of time adequate
to insure that results of operation of the computer or program are
satisfactory.
©Copyright 1978, by Radio Shack, A Division of Tandy Corporation, Ft. Worth, Texas 76102
A DIVISION OF TANDY CORPORATION
One Tandy Center
Fort Worth, Texas 76102
Second Edition - 1979
Second Printing - 1979
All rights reserved. Reproduction or use, without
express permission, of editorial or pictorial
content, in any manner, is prohibited. No patent
liability is assumed with respect to the use of the
information contained herein. While every
precaution has been taken in the preparation of
this book, the publisher assumes no responsibility
for errors or omissions. Neither is any liability
assumed for damages resulting from the use of the
information contained herein.
© Copyright 1979, Radio Shack
A Division of Tandy Corporation,
Fort Worth, Texas 76102, U.S.A.
Software Copyright Notice
LEVEL II BASIC software is copyrighted by Radio
Shack. Any duplication of LEVEL II BASIC
software, in whole or in part, in print or in any
other storage-and-retrieval system, is forbidden.
Printed in the United States of America
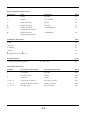
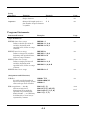
CONTENTS
Setting up the System.................................................................................................. i-iii
1 / General Information ........................................................................................... 1/1-10
2 / Commands............................................................................................................... 2/1-7
3 / Input-Output ........................................................................................................ 3/1-13
4 / Program Statements ........................................................................................... 4/1-22
5 / Strings.................................................................................................................... 5/1-13
6 / Arrays....................................................................................................................... 6/1-7
7 / Arithmetic Functions ........................................................................................... 7/1-5
8 / Special Features .................................................................................................. 8/1-17
9 / Editing ..................................................................................................................... 9/1-8
10 / Expansion Interface ......................................................................................... 10/1-7
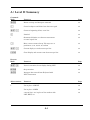
11 / Saving Time and Space .................................................................................... 11/1-2
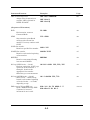
A / Level II Summary ...............................................................................................A/1-17
B / Error Codes ............................................................................................................B/1-3
C / TRS-80 Character Codes .....................................................................................C/1-8
D / Memory Map ......................................................................................................... D/1-2
E / Internal Codes for BASIC Keywords................................................................E/1-2
F / Derived Functions ................................................................................................... F/1
G / Base Conversions ................................................................................................ G/1-3
H / User Programs ................................................................................................... H/1-10
I / Converting LEVEL I Programs............................................................................I/1-2
J / Important Information for Cassette Users...................................................... J/1-3
Index
This Reference Manual and You
We've prepared this Reference Manual with the assumption that you - the
user - already have considerable experience with programming in BASIC.
Our LEVEL I User's Manual was written for the total beginner - and has
been greeted with wide acclaim. We freely admit this Manual has not been
written from the same perspective.
If this is your first experience with programming, you may want to use
the LEVEL I Users Manual to get the "hang" of it. First, read Chapter 1 in
this book, to learn about powering up and to get an overview. Then go to the
LEVEL I Users Manual, and start trying the early examples in that book.
Remember, there are important differences between LEVEL I and LEVEL II.
If a LEVEL I example doesn't work, look up the BASIC keyword in this book
(using the Index at the back). You'll soon learn how to make LEVEL I
examples work on the LEVEL II computer. After that, you're ready to explore
the LEVEL II language directly, using this book as a guide.
If you've had experience with other forms of the BASIC language (other
microcomputers or time share systems) then you should be ready for our
Reference Manual for LEVEL II.
LEVEL II is a far more powerful version of BASIC than was LEVEL I. If you
have been working with LEVEL I for some time, be prepared for some
pleasant surprises - and some differences that might throw you for awhile
(for example, LEVEL I programs won't run as-is on a LEVEL II machine . . .
you'll have to modify them). This Manual is a complete reference guide - it is
not intended to be a complete step-by-step training manual or an applications
book (that will come later).
If you have suggestions…criticism…questions…concerning this Manual or
your TRS-80 — we'd be glad to hear from you.
Call Customer Service, (817) 390-3583 or write:
TRS-80 Customer Service
Radio Shack
P.O. Box 185
Fort Worth, TX 76102
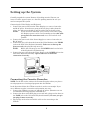
Setting up the System
Carefully unpack the system. Remove all packing material. Be sure you
locate all cables, papers, tapes, etc. Save the packing material in case you
need to transport the system.
Connecting the Video Display and Keyboard:
1. Connect the power cord from the Video Display to a source of 120 volts,
60 Hz AC power. Note that one prong of the AC plug is wider than the
other - the wide prong should go into the widest slot of the AC socket.
If you use an AC extension cord, you may not be able to plug
NOTE:
the Display's power cord in. Do not attempt to force this wide
prong into the extension cord; use a wall outlet if at all
possible.
2. Connect the power cord of the Power Supply to a source of 120 volts, 60
Hz AC power.
3. Connect the gray cable from the front of the Video Monitor to the VIDEO
jack on the back of the Keyboard Assembly. Take care to line up the
pins correctly (the plug fits only one way).
Before the next step, be sure the POWER switch on the back
NOTE:
of the Keyboard is off (button out).
4. Connect the gray cable from the Power Supply to the POWER jack on the
back of the Keyboard Assembly. Again, take care to mate the
connection correctly.
Connecting the Cassette Recorder:
NOTE: You do not need to connect the Cassette Recorder unless you plan to
record programs or to load taped programs into the TRS-80.
In the directions below, the CTR-80 recorder is used as an example. If you
use a different recorder, connection and operation may vary.
1. Connect the CTR-80 to a source of 120 volt AC power. (Batteries are not
recommended for using Recorder with TRS-80.)
2. Connect the short cable (DIN plug on one end and 3 plugs on the other) to
the TAPE jack on the back of the Keyboard Assembly. Be sure you get
the plug to mate correctly.
3. The 3 plugs on the other end of this cable are for connecting to the
CTR-80.
i
A. Connect the black plug into the EAR jack on the side of the CTR-80.
This connection provides the output signal from the CTR-80 to the
TRS-80 (for loading Tape programs into the TRS-80).
B. Connect the larger gray plug into the AUX jack on the CTR-80. This
connection provides the recording signal to record programs from the
TRS-80 onto the CTR-80's tape.
Leave the AUX plug in whether you are recording or playing
back cassette data.
C. Connect the smaller gray plug into the smaller MIC jack on the
CTR-80. This allows the TRS-80 to automatically control the
CTR-80's motor (turn tape motion on and off for recording and
playing tapes.)
NOTE:
Do not plug a remote microphone or a dummy plug into the
larger MIC jack.
Notes on Using the Recorder
There are a number of things you should be aware of as you use the Cassette
Tape System
1. To play a tape (load a taped program into the TRS-80, you must have
the CTR-80's Volume control set to middle levels (approximately
4). Then press the CTR-80's PLAY key and then type CLOAD on the
TRS-80 and ENTER this command. This will start the tape motion. An *
will appear on the top line of the Monitor; a second * will blink, indicating
the program is loading. When loading is done, the TRS-80 will
automatically turn the CTR-80 off and flash READY on the screen. You
are then ready to RUN the program (type in RUN and hit [ENTER]).
2. To record a program from the TRS-80, press the ENTER RECORD and
PLAY keys simultaneously. Then type CSAVE followed by a one-letter
"file-name" in quotes and [ENTER] this command. When the program has
been recorded the TRS-80 will automatically turn the CTR-80 off and
display READY on the screen. Now you have your program on tape (it
still is in the TRS-80 also). Many computer users make a second or even a
third recording of the tape, just to be sure they have a good recording.
3. Use the CTR-80's Tape Counter to aid you in locating programs on the
tapes.
4. For best results, use Radio Shack's special 10 minute per side Computer
Tape Cassettes (especially designed for recording computer programs). If
you use standard audiotape cassettes, be sure to use top quality, such as
Realistic SUPERTAPE. Keep in mind that audiocassettes have lead-ins
on both ends (blue nonmagnetic Mylar material) — you can not record
on the leader portion of the tape. Advance the tape past the leader
before recording a program.
ii
5. When you are not going to use a CTR-80 for loading or recording
programs, do not leave RECORD or PLAY keys down (press STOP).
6. REWIND and FAST-FORWARD are not under remote control; simply
press the appropriate key until the tape has moved to the desired
position.
7. If you want to save a taped program permanently, break off the erase
protect tab on the cassette (see CTR-80 Manual).
8. Do not expose recorded tapes to magnetic fields. Avoid placing your tapes
near the Power Supply.
9. To check if a tape has a program recorded on it, you can disconnect the
plug from the EAR jack (also disconnect the REM plug so you can control
the CTR-80 with the keys) and Play the tape; you'll hear the program
material from the speaker.
10. For the best results when using a Recorder with the Computer, you
should keep the Recorder's heads and tape handling mechanism very
clean. A new Recorder should be cleaned before it is used the first time,
and cleaned again after every four hours' use. In addition, the tape heads
should be demagnetized periodically.
A complete line of recorder accessories (cleaning solution, cotton tipped
swabs, demagnetizer-cassettes, etc.) is available at your local Radio
Shack store.
Special Notes:
1) Before attempting to load a program from tape into the Computer, be
sure the cassette is rewound to a blank portion of the tape preceding the
program. If you try to start the load in the middle of a preceding program,
you probably will get the Computer "hung up" (in which case you'll have
to press Reset and start over). The same rule applies when you're using
the CLOAD? command to compare a taped program with one stored in
the Computer.
2) For best results when re-using tapes, erase the old program with a bulk
tape eraser (such as Radio Shack Catalog Number 44-210).
WARNING
In dry climates, and especially in winter, static electricity can play havoc
with computer data tapes. Handling a cassette when you are "charged"
with static electricity can put clicks on the tape and make its data
unreadable by the Computer.
Under such conditions, be sure to ground yourself (by touching a metal
surface, etc.) before handling cassettes. You may also remove some of the
causes of static electricity buildup, by using anti-static sprays on rugs,
humidifying the air, etc.
iii
1 / General Information
This chapter will provide you with an overview of LEVEL II
BASIC - what some of its special features are, how it differs
from LEVEL I, and generally, what you need to get going. In
addition, there's a short glossary at the end of the chapter.
Power-Up
Connect Keyboard-Computer, Video Display and Power Supply as explained
in the previous section. Plug Video Display and Power Supply into 120-volt
AC outlets. If you have a Recorder connected to the TRS-80, be sure it is in
the Stop mode (not in Play, Rewind, etc.) during power-up. This will
prevent unnecessary wear of the tape control relay inside the TRS-80.
Press POWER buttons on Video Display and at the back of the Keyboard.
Give the video tube a few seconds to warm up.
MEMORY SIZE? will appear on the screen.
This is your chance to protect a segment of memory so that machine-language
programs may be loaded, using a special command, SYSTEM. You must
[ENTER] 3 a value greater than or equal to 17430. (For more information on
loading and executing machine-language programs, see page 2/6, SYSTEM
command, and page 8/8, USR(x) command.)
For normal applications, you won't want to protect any memory, so just press
the [ENTER] key without typing in any numbers. This will allow you to write
BASIC programs using the full memory capacity of your Computer (for 4K
Level II machines, that's 3284 bytes, for 16K LEVEL II machines, it's 15,572
bytes).
NOTE: In general, whenever you have typed something in via the keyboard
and you want the Computer to "act" on your input, you must first hit the
[ENTER] key just as you did with the Level I TRS-80. There are ways to have
the Computer respond as soon as you hit a key (without [ENTER]), but these
will be covered later.
1-1
RADIO SHACK LEVEL II BASIC
READY
>_
will appear on the screen. You are now ready to use LEVEL II BASIC.
Reset
The Reset button is on the back of the keyboard on the left side, next to the
Expansion Card Edge. If your TRS-80 "freezes up" (you can't type anything)
you can press Reset to return to the MEMORY SIZE? question. Any BASIC
program in memory will be lost.
NOTE: If you have the Expansion Interface connected and you need to Reset
the Computer, hold down the BREAK key before pressing Reset and keep it
down until you release Reset.
Operating Modes
There are four operating modes: Command, Execute, Edit and Monitor.
Command and Execute Modes are just like LEVEL I BASIC. In the
Command Mode, the Computer responds to commands as soon as they are
entered. This is the level you use to write programs and perform
computations directly ("calculator mode" of LEVEL I). Whenever the >_
appears on the Display, you're in the Command Mode.
The Execute Mode is usually entered by typing RUN; this causes BASIC
programs to be executed. Unlike LEVEL I, LEVEL II initializes all numeric
variables to zero and sets all strings to null when you enter the command
RUN.
The Edit Mode is a real timesaving feature of LEVEL II. It allows you to edit
(alter, add to or delete) the contents of program lines. Instead of retyping an
entire program line, you change just the part that needs changing.
NOTE: Whenever Computer encounters a Syntax error during execution, it
will go into Edit Mode for that line. To get out of Edit Mode, type "Q" (without
quotes).
The Monitor Mode lets you load machine language "object files" into memory.
These routines or data can then be accessed by your BASIC programs, or they
may be completely independent programs.
1-2
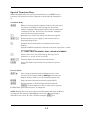
Special Function Keys
LEVEL II BASIC offers the same special function keys as LEVEL I plus a
few extras. The function of the key depends on what mode the Computer is
in.
Command Mode:
[ENTER]
Effects a carriage return; Computer "looks at" line just typed
in and acts accordingly. If line just typed in has no line
number, Computer will interpret and execute the statements
contained in the line. If Line has a line number, Computer
stores the line in program memory.
[\À\]
Backspaces the cursor and deletes last character typed in.
[SHIFT] [\À\]
Deletes the line you are typing in, and returns cursor to
beginning of logical line.
[\Ã\]
Linefeed; moves cursor down to next physical line on the
Display.
:
Separates BASIC statements contained on the same logical line, to allow
multi-statement lines.
E.g., PRINT "FIRST STATEMENT":PRINT "SECOND STATEMENT"
[\Â\]
Moves cursor over to the next tab stop. Tab stops are at
positions 0, 8, 16, 24, 32, 40, 48 and 56.
[SHIFT] [\Â\]
Converts display to 32 character-per-line format.
[CLEAR]
Clears the Display and returns it to 64 character-per line
format.
Execute Mode:
[SHIFT] @
Pause; stops program execution. Hitting any key causes
execution to be resumed. Hitting SHIFT @ also freezes the
Display during a LIST so you can examine program lines.
[BREAK]
Stops execution. Resume execution by typing CONT.
[ENTER]
When Computer is awaiting input from the keyboard,
[ENTER] causes Computer to "look at" what you've typed in.
For Edit Mode special function keys, see Chapter 9.
NOTE: Shifted characters aren't always interchangeable with their unshifted
counterparts. For example, shifted @ isn't the same as @ even though it
looks OK on the screen. So, take care when using the [SHIFT] key.
1-3
Variable Names
Variable names must begin with a letter (A-Z) and may be followed by
another letter or digit (0-9). So the following are all valid and distinct
variable names:
A
ZZ
Z1
A2
AA
AZ
G9
GP
M
MU
Variable names may be longer than two characters, but only the first two
characters will be used by the computer to distinguish between variables. For
example "SUM", "SUB" and "SU" will be treated as one and tile same
variable by LEVEL II BASIC.
As you can imagine, this gives you plenty of variable names to use in LEVEL
II (in the neighborhood of 900). However, you cannot use variable
names, which contain words with special meaning in the BASIC
language. For example, "XON" cannot be used as a variable name, since it
contains the BASIC keyword "ON". The complete list of "reserved words"
which cannot be used in variable names appears in Appendix A of this
Manual.
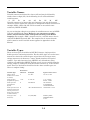
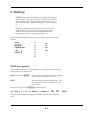
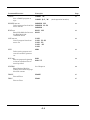
Variable Types
There are four types of variables in LEVEL II: integer, single precision,
double precision, and string variables. The first three types are used to store
numerical values with various degrees of precision; the last type stores
strings (sequences) of characters - letters, blanks, numbers and special
symbols - up to 255 characters long. LEVEL I only allowed two string
variables, A$ and B$ -but LEVEL II allows you to use any variable name for
strings, simply by adding the string declaration character, $, to the variable
name. There are declaration characters for the other variable types, too:
Here's a complete listing:
Declaration
Character
Examples
Typical values stored
integer (whole
numbers from -32768
to +32767)
%
A%, B9%
-30, 123, 3, 5001
single precision
(6 significant figures)
! or E
A!, AA!, Z1!
1, -50, .123456,
353421, 1.23E-5
double precision
(16 significant
figures)
#
A#, ZZ#, C#
-300.12345678
3.141592653589
1.000000000000001
double precision with D
scientific notation (for
entering constants or
during output of large
or small numbers)
"A#=1.2345678901D+12"
1.2345678901 x 10¹²
string (up to 255
characters)
A1$, GT$, HI$
"JOHN Q. DOE",
"WHISTLE-STOP"
"1+2=?"
Variable Type
$
1-4
The same variable name may be used for different variable types, and the
Computer will still keep them distinct, because of the type declaration
character: For example, A$, A%, A!, A# are distinct variable names.
Variables without declaration characters are assumed to be single-precision;
this assumption can be changed with DEFine statements (Chapter 4).
Arrays
Any valid variable name can be used to name an array in LEVEL II BASIC;
and arrays are not limited to one dimension. The DIMension statement is
used to define arrays at the beginning of a program. Depending on the
variable type used, an array may contain strings, integers, double precision
values, etc. A whole chapter of this Manual is devoted to arrays:
Examples: A$(X,Y,Z) would be a three-dimensional array
containing string values
G3(I,J) would be a two-dimensional array containing
numerical single-precision values
G#(I) would be a one dimensional array of double
precision values.
Arithmetic Operators
LEVEL II uses the same arithmetic operators as LEVEL I: + (addition),
-(subtraction), * (multiplication) and / (division).
And there's a new, very handy operator: ↑ (exponentiation: 2 ↑ 3 = 8).
The ↑ operation is generally accurate to 6 significant digits. For example, to
compute 6*21/3: PRINT 6*2 ↑ (1/3)
NOTE: Some TRS-80's generate a [ character instead of the ↑ arrow.
1-5
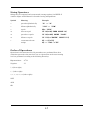
Relational Operators
These are the same as LEVEL I.
< (less than)
> (greater than)
=(equal to)
<> (not equal to)
<=(less than or equal to)
>=(greater than or equal to)
These operators are useful both for IF … THEN statements and for logical arithmetic.
Example:
100 IF C<=0 THEN C=127
Logical Operators
In LEVEL I BASIC, * and + were used to represent the logical operators AND
and OR. In LEVEL II, we don't use symbols, we use AND and OR directly.
We also have another operator, NOT.
Examples:
50 IF Q = 13 AND R2 = 0 THEN PRINT "READ"
100 Q = (G1<0) AND (G2<L)
Q = 1 if both expressions are
True; otherwise Q = 0
200 Q = (G1<0) OR (G2<L)
Q = –1 if either expression is
True; otherwise Q = 0
300 Q = NOT(C>3)
Q = 1 if the expression is
False; Q = 0 if it is True
400 IF NOT (P AND Q) THEN PRINT "P AND Q ARE NOT BOTH EQUAL TO -1"
500 IF NOT (P OR Q) THEN PRINT "NEITHER P NOR Q EQUALS-1"
1-6
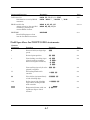
String Operators
Strings may be compared and concatenated ("strung together") in LEVEL ll.
A whole chapter of this Manual is devoted to string manipulations.
Symbol
Meaning
Example
<
precedes alphabetically
"A" < "B"
>
follows alphabetically
"JOE" > "JIM"
=
equals
B$= "WIN"
<>
does not equal
IF A$<>B$ THEN PRINT A$
<=
precedes or equals
IF A$<=AZ$ PRINT "DONE"
>=
follows or equals
IF L1$>="SMITH" PRINT L1$
+
concatenate the two
strings
A$ = C$+C1$
A$ = "TRS-"+"80"
Order of Operations
Operations in the innermost level of parentheses are performed first, then
evaluation proceeds to the next level out, etc. Operations on the same nesting
level are performed according to the following hierarchy:
Exponentiation:
A↑B
Negation:
–X
*, / (left to right)
+, – (left to right)
<, > , =, <=, >=, <> (left to right)
NOT
AND
OR
1-7
Intrinsic Functions
Most of the subroutines in the LEVEL I manual are built-in to LEVEL II.
They are faster, more accurate (to seven digits generally), and much easier to
use. For example, SIN(X), COS(X), TAN(X) can be computed directly.
Graphics
Level II has the same SET, RESET and POINT functions as LEVEL I for
turning graphics blocks on and off and determining whether an individual
block is on or off. (There are a few differences - see Chapter 8.)
A big feature of LEVEL II is the selectable display – either 64 characters per
line or 32 characters per line (c/l). When the machine is turned on it is in the
64 c/1 mode; hit SHIFT and → simultaneously to change to 32 c/l. Display
will return to 64 c/l whenever a CLS or NEW is executed or CLEAR key is hit.
You can also shift to 32 c/l by executing a PRINT CHR$ (23). More on this in
Chapter 5.
Error Messages
LEVEL I pointed out errors by printing HOW?, WHAT? or SORRY along with
the offending program line with a question mark inserted at the point of
error. LEVEL II gives you much more specific information about what type of
error occurred, using a set of Error Codes (see Appendix). The offending
program line is also pointed out, but it's up to you to locate the error in the
line.
Abbreviations
Very few abbreviations are allowed in LEVEL II. Ex-LEVEL I users will have
to forget about R., L., P., etc. Although LEVEL II doesn't allow these
short-forms, it stores the programs more efficiently than LEVEL I did, so you
can still pack a lot of program into a small amount of memory space.
LEVEL II abbreviations are:
?
'
.
for PRINT, and
for : REM
for last line entered, listed, edited, or in which an error occurred.
1-8
Keyboard Rollover
With the LEVEL I TRS-80 (and many other computers) you have to release
one key before the Computer will allow entry of another key. LEVEL II lets
you hit the second key before you have released the first key. This is great for
you touch typists.
This feature also makes some of the LEVEL II keyboards susceptible to
"keybounce", multiple entries for a single keystroke. To eliminate this
annoyance, use the machine-language program, KBFIX, included on tape
with affected LEVEL II computers. Loading instructions are included with
the tape.
1-9
Glossary for LEVEL II BASIC
address a value specifying the location of a byte in memory; decimal values
are used in LEVEL II
alphanumerics the set of letters A-Z, the numerals 0-9, and various
punctuation marks and special characters
argument the value which is supplied to a function and then operated on to
derive a result
array an arrangement of elements in one or more dimensions
ASCII American Standard Code for Information Interchange; in LEVEL II
BASIC, decimal values are used to specify ASCII codes
assembler a program that converts a symbolic-language program into a
machine-language program
BASIC Beginners All-purpose Symbolic Instruction Code
baud signaling speed in bits per second; LEVEL II's cassette interface
operates at 500 baud (500 bits per second)
binary number a number represented in the base-two number system using
only binary digits "0" and "1"
bit binary-digit, the smallest memory cell in a computer
byte the smallest memory unit that can be addressed in BASIC, consisting of
8 consecutive bits
decimal number a number represented in the base-ten number system
using the digits 0-9
expression a combination of one or more operations, constants and variables
file an organized collection of related data
hexadecimal number a number represented in the base-16 number system
using the digits 0-9 plus A, B, C, D, E, F
intrinsic function a function (usually a complicated function) that may be
"built-in" to the Computer's ROM and may be used directly in a BASIC
statement
logical expression an expression which is either True or False: if True, -1 is
returned; if False, 0 is returned
machine language the language used directly by the Computer, written as
binary-coded instructions
port one of 256 channels through which data can be input to or output from
the Computer
RAM Random Access Memory; memory available to the user for writing
programs and storing data. RAM addresses start at 16384.
ROM Read Only Memory; memory which is permanently programmed and
may be read but not written into; LEVEL II BASIC is stored in ROM,
starting at address 0.
routine a sequence of instructions to carry out a certain function
statement a complete instruction in BASIC
string a sequence of alphanumeric characters ranging in length from zero
(the "null" string) to 255
subroutine a sequence of instructions for performing a desired function;
may be accessed many times from various points in a program
variable a quantity that can take on any of a given set of values
variable name the label by which a given variable is addressed
1-10
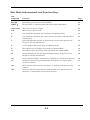
2 / Commands
Whenever a prompt > is displayed, your Computer is in the Command Mode.
You can type in a command, [ENTER] it, and the Computer will respond
immediately. This chapter describes the commands you'll use to control the
Computer – to change modes, begin input and output procedures, alter
program memory, etc. All of these commands – except CONT – may also
be used inside your program as statements. In some cases, this is useful;
other times it is just for very specialized applications.
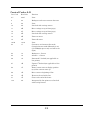
The commands described in this chapter are:
AUTO
CLEAR
CLOAD
CLOAD?
CONT
CSAVE
DELETE
EDIT
LIST
NEW
RUN
SYSTEM
TROFF
TRON
AUTO line number, increment
Turns on an automatic line numbering function for convenient entry of
programs – all you have to do is enter the actual program statements. You
can specify a beginning line number and an increment to be used between
line numbers. Or you can simply type AUTO and hit [ENTER], in which case
line numbering will begin at 10 and use increments of 10. Each time you hit
[ENTER], the Computer will advance to the next line number.
Examples:
to use line numbers
AUTO
AUTO 5,5
AUTO 100
AUTO 100,25
10, 20, 30, …
5, 10, 15, …
100, 110, 120, …
100, 125, 150, …
To turn off the AUTO function, hit the BREAK key. (Note: When AUTO
brings up a line number, which is already being used, an asterisk will appear
beside the line number. If you do not wish to re-program the line, hit the
BREAK key to turn off AUTO function.)
2-1
CLEAR n
When used without an argument (e.g., type CLEAR and hit [ENTER]), this
command resets all numeric variables to zero, and all string variables to null.
When used with an argument (e.g., CLEAR 100), this command performs a
second function in addition to the one just described: it makes the specified
number of bytes available for string storage.
Example: CLEAR 100 makes 100 bytes available for strings. When you turn
on the Computer a CLEAR 50 is executed automatically.
CLOAD "file name"
Let's you load a BASIC program stored on cassette. Place recorder/player in
Play mode (be sure the proper connections are made and cassette tape has
been re-wound to proper position). The file name may be any single character
except the double-quotes (").
NOTE: In LEVEL II, CLOAD and CSAVE operate at a transfer rate of 500
baud. This is twice as fast as. LEVEL I's cassette transfer rate. Therefore, the
Volume setting used during CLOAD should be correspondingly lower. For
example, if you're using Radio Shack's CTR-80 Cassette Recorder, try a
setting of between 4 and 6 on the Volume control when loading programs or
data you placed on the tape. For loading pre-recorded programs, a higher
Volume level may be required. Do a little experimenting.
Entering CLOAD will turn on the cassette machine and load the first
program encountered. LEVEL II also lets you specify a desired "file" in your
CLOAD command. For example, CLOAD "A" will cause the Computer to
ignore programs on the cassette until it comes to one labeled "A". So no
matter where file "A" is located on the tape, you can start at the beginning of
the tape; file "A" will be picked out of all the files on the tape and loaded. As
the Computer is searching for file "A", the names of the files encountered will
appear in the upper right corner of the Display, along with a blinking "*".
Only the first character of the file name is used by the Computer for CLOAD,
CLOAD?, and CSAVE operations.
Loading a program from tape automatically clears out the previously stored
program. See also CSAVE.
See page 10/ 1 if you have the Expansion Interface for loading from 2
recorders.
2-2
CLOAD? "file name"
Lets you compare a program stored on cassette with one presently in the
Computer. This is useful when you have dumped a program onto tape (using
CSAVE) and you wish to check that the transfer was successful. If you
labeled the file when you CSAVEd it, you may specify CLOAD? "file-name".
Otherwise, if you don't specify a file-name, the first program encountered will
be tested. During CLOAD?, the program on tape and the program in memory
are compared byte for byte. If there are any discrepancies (indicating a bad
dump), the message "BAD" will be displayed. In this case, you should CSAVE
the program again. (CLOAD?, unlike CLOAD, does not erase the program
memory.)
Be sure to type the question mark or the Computer will interpret your
command as CLOAD. It may record over your file instead of verifying it. See
page 10/2 for verifying when you have 2 recorders.
CONT
When program execution has been stopped (by the BREAK key or by a STOP
statement in the program), type CONT and [ENTER] to continue execution at
the point where the stop or break occurred. During such a break or stop in
execution, you may examine variable values (using PRINT) or change these
values. Then type CONT and [ENTER] and execution will continue with the
current variable values. CONT, when used with STOP and the BREAK key,
is primarily a debugging tool.
NOTE: You cannot use CONT after EDITing your program lines or otherwise
changing your program. CONT is also invalid after execution has ended
normally. See also STOP.
2-3
CSAVE "file name"
Stores the resident program on cassette tape. (Cassette recorder must be
properly connected, cassette loaded, and in the Record mode, before you enter
the CSAVE command.) You must specify a file-name with this command.
This file-name may be any alphanumeric character other than double-quotes
("). The program stored on tape will then bear the specified file-name, so that
it can be located by a CLOAD command, which asks for that particular
file-name. You should always write the appropriate file-names on the cassette
case for later reference.
Examples:
CSAVE"1"
CSAVE"A"
dumps resident program and attaches label "1"
dumps resident program and attaches label "A"
See page 10/2 for saving programs when you have 2 recorders.
See also CLOAD.
DELETE line number-line number
Erases program lines from memory. You may specify an individual line or a
sequence of lines, as follows:
DELETE line number
erases one line as specified
DELETE line number-line number
erases all program lines starting with
first line number specified and ending
with last number specified
DELETE-line number
erases all program lines up to and
including the specified number
The upper line number to be deleted must be a currently used number.
Examples:
DELETE 5
DELETE 11-18
erases line 5 from memory (error if line 5 not
used)
erases lines 11, 18 and every line in between
If you have just entered or edited a line, you may delete that line simply by
entering DELETE. (use a period instead of the line number).
2-4
EDIT line number
Puts the Computer in the Edit Mode so you can modify your resident
program. The longer and more complex your programs are, the more
important EDIT will be. The Edit Mode has its own selection of
subcommands, and we have devoted Chapter 9 to the subject.
LIST line number-line number
Instructs the Computer to display all program lines presently stored in
memory. If you enter LIST without an argument, the entire program will
scroll continuously up the screen. To stop the automatic scrolling, press
SHIFT and @ simultaneously. This will freeze the display. Press any key to
release the "pause" and continue the automatic scrolling.
To examine one line at a time, specify the desired line number as an
argument in the LIST command. To examine a certain sequence of program
lines, specify the first and last lines you wish to examine.
Examples
LIST 50
LIST 50-150
LIST 50LIST.
LIST -50
displays line 50
displays line 50, 150 and everything in between
displays line 50 and all higher-numbered lines
displays current line (line just entered or edited)
displays all lines up to and including line 50
NEW
Erases all program lines, sets numeric variables to zero and string variables
to null. It does not change the string space allocated by a previous CLEAR
number statement. NEW is used in the following program to provide
password protection.
10 INPUT A$: IF A$<>"E" THEN 65520
.
.
(The rest of your program follows here)
.
65520 NEW
You can't run the rest of the program until you enter the correct password, in
this case an E. Most of the other commands can also be used within a
program.
2-5
RUN line number
Causes Computer to execute the program stored in memory. If no line
number is specified, execution begins with lowest numbered program line. If
a line number is specified, execution begins with the line number. (Error
occurs if you specify an unused line number.) Whenever RUN is executed,
Computer also executes a CLEAR.
Examples:
RUN
RUN 100
execution begins at lowest-numbered line
execution begins at line 100
RUN may be used inside a program as a statement; it is a convenient way of
starting over with a clean slate for continuous-loop programs such as games.
To execute a program without CLEARing variable, use GOTO. See page 4/7.
SYSTEM
Puts the Computer in the Monitor Mode, which allows you to load object files
(machine-language routines or data). Radio Shack offers several
machine-language software packages, such as the IN-MEMORY
INFORMATION SYSTEM. You can also create your own object files using
the TRS-80 EDITOR/ASSEMBLER, which is itself an object file.
To load an object file: Type SYSTEM and [ENTER].
*? will be displayed. Now enter the file name (no quotes are necessary) and
the tape will begin loading. During the tape load, the familiar asterisks will
flash in the upper right-hand corner of the Video Display. When loading is
complete, another
*? will be displayed. Type in a slash-symbol / followed by the address (in
decimal form) at which you wish execution to begin. Or you may simply hit
the slash-symbol and [ENTER] without any address. In this case, execution
will begin at the address specified by the object file.
NOTE: LEVEL II object files are stored as blocks rather than as continuous
files as in LEVEL I. Further, each block has its own check sum. Should a
check sum error occur while loading, the leftmost asterisk will change into
the letter C. If this occurs you will have to reload the entire object file. (If the
tape motion doesn't stop, you must first Reset the Computer.)
2-6
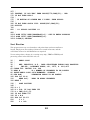
TROFF
Turns off the Trace function. See TRON.
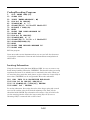
TRON
Turns on a Trace function that lets you follow program-flow for debugging
and execution analysis. Each time the program advances to a new program
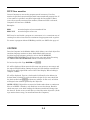
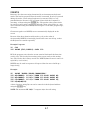
line, that line number will be displayed inside a pair of brackets.
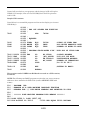
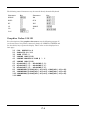
For example, enter the following program:
10
20
30
40
PRINT "START"
PRINT "GOING"
GOTO 20
PRINT "GONE"
Now type in TRON, [ENTER], and RUN, [ENTER].
<10>
<20>
<30>
<30>
START
GOING
<20> GOING
<20> GOING
etc.
(Press SHIFT and @ simultaneously to pause execution and freeze display.
Press any key to continue with execution.) As you can see from the display,
the program is in an infinite loop.
The numbers show you exactly what is going on. (To stop execution, hit
BREAK key.)
To turn off the Trace function, enter TROFF. TRON and TROFF may be used
inside programs to help you tell when a given line is executed.
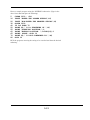
For example
50
60
70
TRON
X=X*3.14159
TROFF
might be helpful in pointing out every time line 60 is executed (assuming
execution doesn't jump directly to 60 and bypass 50). Each time these three
lines are executed, <60> <70> will be displayed. Without TRON, you wouldn't
know whether the program was actually executing line 60. After a program is
debugged, TRON and TROFF lines can be removed.
2-7
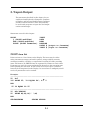
3 / Input-Output
The statements described in this chapter let you
send data from Keyboard to Computer, Computer
to Display, and back and forth between Computer
and the Cassette interface. These will primarily
be used inside programs to input data and output
results and messages.
Statements covered in this chapter:
PRINT
@ (PRINT modifier)
TAB (PRINT modifier)
USING (PRINT formatter)
INPUT
DATA
READ
RESTORE
PRINT # (Output to Cassette)
INPUT # (Input to Cassette)
PRINT item list
Prints an item or a list of items on the Display. The items may be either
string constants (messages enclosed in quotes), string variables, numeric
constants (numbers), variables, or expressions involving all of the preceding
items. The items to be PRINTed may be separated by commas or semi-colons.
If commas are used, the cursor automatically advances to the next print zone
before printing the next item. If semi-colons are used, no space is inserted
between the items printed on the Display. In cases where no ambiguity would
result, all punctuation can be omitted.
Examples:
-------------------------------------------------50 X=5
100 PRINT 25; "IS EQUAL TO"; X ↑ 2
RUN
25 IS EQUAL TO 25
-------------------------------------------------10 A$="STRING"
20 PRINT A$;A$,A$;" ";A$
RUN
STRINGSTRING
STRING STRING
3-1
-------------------------------------------------30 X=25
40 PRINT 25 "IS EQUAL TO" X
RUN
25 IS EQUAL TO 25
-------------------------------------------------70 A=5:B=10:C=3
80 PRINT ABC
RUN
0
-------------------------------------------------Positive numbers are printed with a leading blank (instead of a plus sign);
all numbers are printed with a trailing blank; and no blanks are inserted
before or after strings (you can insert them with quotes as in line 20.
In lines 30 and 40 no punctuation is needed; but in lines 70 and 80 zero will
print out because ABC is interpreted as a single variable which has not been
assigned a value yet.
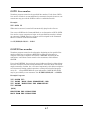
-------------------------------------------------10 PRINT "ZONE 1","ZONE 2","ZONE 3","ZONE 4","ZONE 1 ETC"
RUN
ZONE 1
ZONE 1 ETC
ZONE 2
ZONE 3
ZONE 4
There are four 16-character print zones per line.
-------------------------------------------------10 PRINT "ZONE 1"„"ZONE 3"
RUN
ZONE 1
ZONE 3
The cursor moves to the next print zone each time a comma is encountered.
-------------------------------------------------10 PRINT "PRINT STATEMENT #10 ";
20 PRINT "PRINT STATEMENT #20"
RUN
PRINT STATEMENT #10 PRINT STATEMENT #20
A trailing semi-colon over-rides the cursor-return so that the next PRINT
begins where the last one left off (see line 10).
If no trailing punctuation is used with PRINT, the cursor drops down to the
beginning of the next line.
3-2
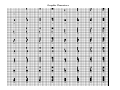
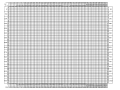
PRINT @ position, item list
Specifies exactly where printing is to begin. (AT was used in LEVEL I
BASIC.) The @ modifier must follow PRINT immediately, and the location
specified must be a number from 0 to 1023. Refer to the Video Display
worksheet, Appendix C, for the exact position of each location 0-1023:
100 PRINT @ 550, "LOCATION 550"
RUN this to find out where location 550 is.
Whenever you PRINT @ on the bottom line of the Display, there is an
automatic line-feed, causing everything displayed to move up one line. To
suppress this, use a trailing semi-colon at the end of the statement.
Example:
104 PRINT @ 1000, 1000;
NOTE: Be sure not to use a shifted @, as this will cause a syntax error.
PRINT TAB (expression)
Moves the cursor to the specified position on the current line (modulo 64 if
you specify TAB positions greater than 63). TAB may be used several times
in a PRINT list.
The value of expression must be between 0 and 255 inclusive.
Example:
10 PRINT TAB(5)"TABBED 5";TAB(25)"TABBED 25"
No punctuation is required after a TAB modifier
-------------------------------------------------5 X=3
10 PRINT TAB(X) X; TAB(X ↑ 2) X ↑ 2; TAB(X ↑ 3) X ↑ 3
Numerical expressions may be used to specify a TAB position. This makes
TAB very useful for graphs of mathematical functions, tables, etc. TAB
cannot be used to move the cursor to the left. If cursor is beyond the specified
position, the TAB is ignored.
3-3
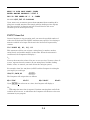
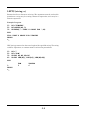
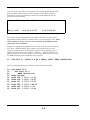
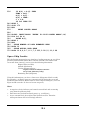
PRINT USING string; item list
PRINT USING – This statement allows you to specify a format for printing
string and numeric values. It can be used in many applications such as
printing report headings, accounting reports, checks … or wherever a specific
print format is required.
The PRINT USING statement uses the following format:
PRINT USING string; value
String and value may be expressed as variables or constants. This statement
will print the expression contained in the string, inserting the numeric value
shown to the right of the semicolon as specified by the field specifiers.
The following field specifiers may be used in the string:
#
This sign specifies the position of each digit located in the
numeric value. The number of # signs you use establishes the
numeric field. If the numeric field is greater than the number of
digits in the numeric value, then the unused field positions to
the left of the number will be displayed as spaces and those to
the right of the decimal point will be displayed as zeros.
The decimal point can be placed anywhere in the numeric field
established by the # sign. Rounding-off will take place when
digits to the right of the decimal point are suppressed.
The comma – when placed in any position between the first
digit and the decimal point - will display a comma to the left of
every third digit as required. The comma establishes an
additional position in the field.
**
Two asterisks placed at the beginning of the field will cause all
unused positions to the left of the decimal to be filled with
asterisks. The two asterisks will establish two more positions in
the field.
$$
Two dollar signs placed at the beginning of the field will act as a
floating dollar sign. That is, it will occupy the first position
preceding the number.
**$
If these three signs are used at the beginning of the field, then
the vacant positions to the left of the number will be filled by
the * sign and the $ sign will again position itself in the first
position preceding the number.
↑↑↑↑
Causes the number to be printed in exponential (E or D) format.
3-4
+
When a + sign is placed at the beginning or end of the field, it
will be printed as specified as a + for positive numbers or as a for negative numbers.
–
When a – sign is placed at the end of the field, it will cause a
negative sign to appear after all negative numbers and will
appear as a space for positive numbers.
% spaces % To specify a string field of more than one character, % spaces %
is used. The length of the string field will be 2 plus the number
of spaces between the percent signs.
!
Causes the Computer to use the first string character of the
current value.
Any other character that you include in the USING string will be displayed
as a string literal.
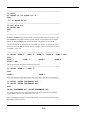
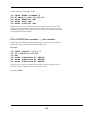
The following program will help demonstrate these format specifiers:
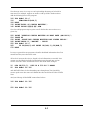
10 INPUT A$, A
20 PRINT USING A$;A
30 GOTO 10
RUN this program and try various specifiers and strings for A$ and various
values for A.
For Example:
RUN
?##.##,12.12
12.12
?###.##,12.12
12.12
?##.##,121.21
%121.21
The % sign is automatically printed if the field is not large enough to contain
the number of digits found in the numeric value. The entire number to the
left of the decimal will be displayed preceded by this sign.
?##.##,12.127
12.13
Note that the number was rounded to two decimal places.
3-5
? +##.##,12.12
+12.12
? "THE ANSWER IS "+##.##,-12.12
THE ANSWER IS -12.12
? ##,##+,12.12
12.12+
? "THE ANSWER IS ##.##+.",-12.12
THE ANSWER IS 12.12-.
? "THE ANSWER IS ##.##-.",12.12
THE ANSWER IS 12.12.
? ##.##-,-12.12
12.12? "**## IN TOTAL.",12.12
** 12 IN TOTAL.
? **##.##,1212.12
1212.12
? $$##.##,12.12
$12.12
? "##,####",12121.2
12,121
? "####,# IN TOTAL.",12121.2
12,121 IN TOTAL.
? "### IN TOTAL.",1212
% 1212 IN TOTAL.
Another way of using the PRINT USING statement is with the string field
specifiers "!" and % spaces %.
Examples:
PRINT USING "I"; String
PRINT USING "%
%"; string
The "!" sign will allow only the first letter of the string to be printed. The "%
spaces %" allows spaces +2 characters to be printed. Again, the string and
specifier can be expressed as string variables. The following program will
demonstrate this feature:
10 INPUT A$, B$
20 PRINT USING A$; B$
30 GOTO 10
and RUN it:
? !, ABCDE
A
? %%, ABCDE
AB
? % %, ABCD
ABCD
3-6
Multiple strings or string variables can be joined together (concatenated) by
these specifiers. The "!" sign will allow only the first letter of each string to be
printed. For example:
10 INPUT A$, B$, C$
20 PRINT USING "!";A$;B$;C$
And RUN it .…
? ABC,DEF,GHI
ADG
By using more than one "!" sign, the first letter of each string will be printed
with spaces inserted corresponding to the spaces inserted between the "!"
signs. To illustrate this feature, make the following change to the last little
program:
20 PRINT USING "! ! !";A$,B$,C$
And RUN it . . .
? ABC,DEF,GHI
A D G
Spaces now appear between letters A, D and G to correspond with those
placed between the three "!" signs.
Try changing "! ! !" to "%%" in line 20 and run the program.
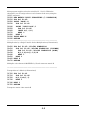
The following program demonstrates one possible use for the PRINT USING
statement.
10 CLS
20 A$ = "**$##,######.## DOLLARS"
30 INPUT "WHAT IS YOUR FIRST NAME"; F$
40 INPUT "WHAT IS YOUR MIDDLE NAME"; M$
50 INPUT "WHAT IS YOUR LAST NAME"; L$
60 INPUT "ENTER THE AMOUNT PAYABLE"; P
70 CLS: PRINT "PAY TO THE ORDER OF ";
80 PRINT USING "!! !! "; F$; "."; M$; ".";
90 PRINT L$
100 PRINT: PRINT USING A$;P
110 GOTO 110
RUN the program. Remember, to save programming time, use the "?" sign for
PRINT. Your display should look something like this:
WHAT IS YOUR FIRST NAME? JOHN
WHAT IS YOUR MIDDLE NAME? PAUL
3-7
WHAT IS YOUR LAST NAME? JONES
ENTER AMOUNT PAYABLE? 12345.6
PAY TO THE ORDER OF J. P. JONES
*******$12,345.60 DOLLARS
If you want to use an amount greater than 999,999 without rounding off or
going into scientific notation, then simply add the double precision sign (#)
after the variable P in Lines 60 and 100. You will then be able to use
amounts up to 16 decimal places long.
INPUT item list
Causes Computer to stop execution until, you enter the specified number of
values via the keyboard. The INPUT statement may specify a list of string or
numeric variables to be input. The items in the list must be separated by
commas.
100 INPUT X$, X1, Z$, Z1
This statement calls for you to input a string-literal, a number, another
string literal, and another number, in that order. When the statement is
encountered, the Computer will display a
?_
You may then enter the values all at once or one at a time. To enter values all
at once, separate them by commas. (If your string literal includes leading
blanks, colons, or commas, you must enclose the string in quotes.)
For example, when line 100 (above) is RUN and the Computer is waiting for
your input, you could type
([ENTER])
JIM,50,JACK,40
The Computer will assign values as follows:
X$="JIM"
X1=50
Z$="JACK"
Z1=40
If you [ENTER] the values one at a time, the Computer will display a
??_
… indicating that more data is expected. Continue entering data until all the
variables have been set, at which time the Computer will advance to the next
statement in your program.
3-8
Be sure to enter the correct type of value according to what is called for by
the INPUT statement. For example, you can't input a string-value into a
numerical variable. If you try to, the Computer will display a
?REDO
?_
and give you another chance to enter the correct type of data value, starting
with the first value called for by the INPUT list.
NOTE: You cannot input an expression into a numerical value you must
input a simple numerical constant. (LEVEL I allowed you to input an
expression or even a variable into a numerical variable.)
Example:
100 INPUT X1,Y1$
200 PRINT X1,Y1$
RUN
?_
[you type:]
? REDO
?_
[you type:]
7+3 ([ENTER])
??_
"THIS IS A COMMA:,"
[you type:]
10
10 ([ENTER])
THIS IS A COMMA:,
It was necessary to put quotes around "THIS IS A COMMA:," because the
string contained a comma.
If you [ENTER] more data elements than the INPUT statement specifies, the
Computer will display the message
?EXTRA IGNORED
and continue with normal execution of your program.
If you press [ENTER] without typing anything, the variables will have the
value they were previously assigned.
You can also include a "prompting message" in your INPUT statement. This
will make it easier to input the data correctly. The prompting message must
immediately follow "INPUT", must be enclosed in quotes, and must be
followed by a semi-colon.
3-9
Example:
100 INPUT "ENTER YOUR NAME AND AGE (NAME,AGE)";N$,A
(RUN)
ENTER YOUR NAME AND AGE (NAME,AGE)?_
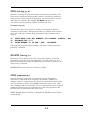
DATA item list
Lets you store data inside your program to be accessed by READ statements.
The data items will be read sequentially, starting with the first item in the
first DATA statement, and ending with the last item in the last DATA
statement. Items in a DATA list may be string or numeric constants - no
expressions are allowed. If your string values include leading blanks, colons
or commas, you must enclose these values in quotes.
It is important that the data types in a DATA statement match up with the
variable types in the corresponding READ statement. DATA statements may
appear anywhere it is convenient in a program. Generally, they are placed
consecutively, but this is not required.
Examples:
500 READ N1$,N2$,N1,N2
1000 DATA "SMITH, J.R.","WILSON, T.M."
2000 DATA 150,175
See READ, RESTORE.
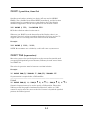
READ item list
Instructs the Computer to read a value from a DATA statement and assign
that value to the specified variable. The first time a READ is executed, the
first value in the first DATA statement will be used; the second time, the
second value in the DATA statement will be read. When all the items in the
first DATA statement have been read, the next READ will use the first value
in the second DATA statement; etc. (An Out-of-Data error occurs if there are
more attempts to READ than there are DATA items.) The following program
illustrates a common application for READ/DATA statements.
3-10
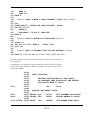
50
100
110
120
130
140
150
160
170
PRINT "NAME","AGE"
READ N$
IF N$="END" PRINT "END OF LIST":END
READ AGE
IF AGE < 18 PRINT N$,AGE
GOTO100
DATA "SMITH, JOHN",30,"ANDERSON,T.M.",20
DATA "JONES, BILL", 15,"DOE,SALLY",21
DATA "COLLINS,W.P.",17,END
RUN
NAME
JONES, BILL
COLLINS,W.P.
END OF LIST
AGE
15
17
READY
>_
The program locates and prints all the minors' names from the data supplied.
Note the use of an END string to allow READing lists of unknown length.
See DATA, RESTORE
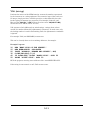
RESTORE
Causes the next READ statement executed to start over with the first item in
the first DATA statement. This lets your program re-use the same DATA
lines.
Example:
100
110
120
130
140
READ X
RESTORE
READ Y
PRINT X,Y
DATA 50,60
RUN
50
READY
>_
50
Because of the RESTORE statement, the second READ statement starts over
with the first DATA item.
See READ, DATA
3-11
PRINT #-1, item list
Prints the values of the specified variables onto cassette tape. (Recorder must
be properly connected and set in Record mode when this statement is
executed.) The PRINT # statement must always specify a device number.
This is because the TRS-80 can actually input/output to two cassette
machines, once you've added the Expansion Interface described in Chapter
10. For normal use with just one recorder connected, the device number must
be -1, e.g., PRINT #-1 (followed by a comma and then the item list).
Example:
5 A1=-30.334:B$="STRING-VALUE"
10 PRINT*-1,A1,B$,"THAT'S ALL"
This stores the current values of Al and B$, and also the string-literal
"THAT'S ALL". The values may be input from tape later using the INPUT#
statement. The INPUT# statement must be identical to the PRINT#
statement in terms of number and type of items in the PRINT#/INPUT#
lists. See INPUT#.
Special Note:
The values represented in item list must not exceed 248 characters total;
otherwise, all characters after the first 248 will be truncated.
For example, #-1, A#, B#, C#, D#, E#, F#, G#, H#, I#, J#, A$ will probably
exceed the maximum record length if A$ is longer than about 75 characters.
If you have a lengthy list, you should break it up into two or more PRINT#
statements.
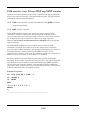
INPUT #-1, item list
Inputs the specified number of values stored on cassette and assigns them to
the specified variable names. Like the PRINT# statement, INPUT# requires
that you specify a device number. (This will make more sense when you have
added the Expansion Interface and are using a dual cassette system. See
Chapter 10.) Use Device number -1 for normal applications without the
Expansion Interface. e.g., INPUT#-1, list.
Example:
50 INPUT #-1,X,P$,T$
3-12
When this statement is executed, the Computer will turn on the tape
machine, input values in the order specified, then turn off the tape machine
and advance to the next statement. If a string is encountered when the
INPUT list calls for a number, a bad file data error will occur. If there are not
enough data items on the tape to "fill" the INPUT statement, an Out of Data
error will occur.
The Input list must be identical to the Print list that created the
taped data-block (same number and type of variables in the same
sequence.)
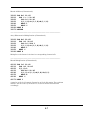
Sample Program
Use the two-line program supplied in the PRINT# description to create a
short data file. Then rewind the tape to the beginning of the data file, make
all necessary connections, and put cassette machine in Play mode. Now run
the following program.
10
20
30
40
INPUT#-1,A1,B$,L$
PRINT A1,B$,L$
IF L$="THAT'S ALL"END
GOTO 10
This program doesn't care how long or short the data file is, so long as:
1)
the file was created by successive PRINT# statements identical in
form to line 10
2)
the last item in the last data triplet is "THAT'S ALL".
3-13
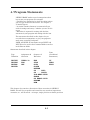
4 / Program Statements
LEVEL II BASIC makes several assumptions about
how to run your programs. For example:
* Variables are assumed to be single-precision (unless
you use type declaration characters - see Chapter 1,
"Variable Types").
* A certain amount of memory is automatically set
aside for strings and arrays - whether you use all of it
or not.
* Execution is sequential, starting with the first
statement in your program and ending with the last.
The statements described in this chapter let you
over-ride these assumptions, to give your programs
much more versatility and power.
NOTE: All LEVEL II statements except INPUT and
INPUT# can be used in the Command Mode as well as
in the Execute Mode.
Statements described in this chapter:
Tests
(Conditional
Statements)
Type
Definition
Assignment &
Allocation
Sequence of
Execution
DEFINT
DEFSNG
DEFDBL
DEFSTR
CLEAR it
DIM
LET
END
IF
STOP
THEN
GOTO
ELSE
GOSUB
RETURN
ON ... GOTO
ON ... GOSUB
FOR-NEXT-STEP
ERROR
ON ERROR GOTO
RESUME
REM
This chapter also contains a discussion of data conversion in LEVEL II
BASIC; this will let you predict and control the way results of expressions,
constants, etc., will be stored - as integer, single precision or double precision.
4-1
DEFINT letter range
Variables beginning with any letter in the specified range will be stored and
treated as integers, unless a type declaration character is added to the
variable name. This lets you conserve memory, since integer values take up
less memory than other numeric types. And integer arithmetic is faster than
single or double precision arithmetic. However, a variable defined as integer
can only take on values between -32768 and +32767 inclusive.
Examples:
10
DEFINT A,I,N
After line 10, all variables beginning with A, I or N will be treated as
integers. For example, Al, AA, 13 and NN will be integer variables. However,
A1#, AA#, I3# would still be double precision variables, because of the type
declaration characters, which always over-ride DEF statements.
10
DEFINT I-N
Causes variables beginning with I, J, K, L, M or N to be treated as integer
variables.
DEFINT may be placed anywhere in a program, but it may change the
meaning of variable references without type declaration characters.
Therefore it is normally placed at the beginning of a program.
See DEFSNG, DEFDBL, and Chapter 1, "Variable Types".
4-2
DEFSNG letter range
Causes any variable beginning with a letter in the specified range to be
stored and treated as single precision, unless a type declaration character is
added. Single precision variables and constants are stored with 7 digits of
precision and printed out with 6 digits of precision. Since all numeric
variables are assumed to be single precision unless DEFined otherwise, the
DEFSNG statement is primarily used to re-define variables which have
previously been defined as double precision or integer.
Example:
100 DEFSNG I,W-Z
Causes variables beginning with the letter I or any letter W through Z to be
treated as single precision. However, I% would still be an integer variable,
and I# a double precision variable, due to the use of type declaration
characters.
See DEFINT, DEFDBL, and Chapter 1, "Variable Types".
DEFDBL letter range
Causes variables beginning with any letter in the specified range to be stored
and treated as double-precision, unless a type declaration character is added.
Double precision allows 17 digits of precision; 16 digits are displayed when a
double precision variable is PRINTed.
Example:
10
DEFDBL S-Z, A-E
Causes variables beginning with one of the letters S through Z or A through
E to be double precision.
DEFDBL is normally used at the beginning of a program, because it may
change the meaning of variable references without type declaration
characters.
See DEFINT, DEFSNG, and Chapter 1, "Variable Types".
4-3
DEFSTR letter range
Causes variables beginning with one of the letters in the specified range to be
stored and treated as strings, unless a type declaration character is added. If
you have CLEARed enough string storage space, each string can store up to
255 characters.
Example:
10
DEFSTR L-Z
Causes variables beginning with any letter L through Z to be string
variables, unless a type declaration character is added. After line 10 is
executed, the assignment L1 = "WASHINGTON" will be valid.
See CLEAR n, Chapter 1, "Variable Types", and Chapter 5.
CLEAR n
When used with an argument n (n can be a constant or an expression), this
statement causes the Computer to set aside n bytes for string storage. In
addition, all variables are set to zero. When the TRS-80 is turned on, 50 bytes
are automatically set aside for strings.
The amount of string storage CLEARed must equal or exceed the greatest
number of characters stored in string variables during execution; otherwise
an Out of String Space error will occur.
Example:
10
CLEAR 1000
Makes 1000 bytes available for string storage.
By setting string storage to the exact amount needed, your program can
make more efficient use of memory. A program which uses no string variables
could include a CLEAR 0 statement, for example. The CLEAR argument
must be non-negative, or an error will result.
DIM name (dim1, dim2, …, dimK)
Lets you set the "depth" (number of elements allowed per dimension) of an
array or list of arrays. If no DIM statement is used, a depth of 11 (subscripts
0-10) is allowed for each dimension of each array used.
4-4
Example:
10
DIM A(5),B(2,3),C$(20)
Sets up a one-dimension array A with subscripted elements 0-5; a
two-dimension array B with subscripted elements 0,0 to 2,3; and a
one-dimension string array C$ with subscripted elements 0-20. Unless
previously defined otherwise, arrays A and B will contain single-precision
values.
DIM statements may be placed anywhere in your program, and the depth
specifier may be a number or a numerical expression.
Example:
40
50
INPUT "NUMBER OF NAMES";N
DIM NA(N,2)
To re-dimension an array, you must first use a CLEAR statement, either with
or without an argument. Otherwise, an error will result.
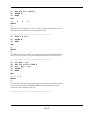
Example Program:
10
20
AA(4) = 11.8
DIM AA(7)
RUN
?DD ERROR IN 20
See Chapter 6, ARRAYS.
LET variable = expression
May be used when assigning values to variables. RADIO SHACK LEVEL II
does not require LET with assignment statements, but you might want to use
it to ensure compatibility with those versions of BASIC that do require it.
Examples:
100 LET A$="A ROSE IS A ROSE"
110 LET B1=1.23
120 LET X=X-Z1
In each case, the variable on the left side of the equals sign is assigned the
value of the constant or expression on the right side.
4-5
END
Terminates execution normally (without a BREAK message). Some versions
of BASIC require END as the last statement in a program; with LEVEL 11 it
is optional. END is primarily used to force execution to terminate at some
point other than the physical end of the program.
Example:
10
20
.
.
.
99
100
110
INPUT S1,S2
GOSUB 100
END
H=SQR(S1*S1+S2*S2)
RETURN
The END statement in line 99 prevents program control from "crashing" into
the subroutine. Now line 100 can only be accessed by a branching statement
such as 20 GOSUB 100.
STOP
Interrupts execution and prints a BREAK IN line number message. STOP is
primarily a debugging aid. During the break in execution, you can examine or
change variable values. The command CONT can then be used to re-start
execution at the point where it left off. (If the program itself is altered during
a break, CONT cannot be used.)
Example:
10
15
20
X=RND(10)
STOP
GOSUB 1000
RUN
BREAK IN 15
READY
>_
Suppose we want to examine what value for X is being passed to the
subroutine beginning at line 1000. During the break, we can examine X with
PRINT X. (You can delete line 15 after the program is debugged.)
4-6
GOTO line number
Transfers program control to the specified line number. Used alone, GOTO
line number results in an unconditional (or automatic) branch; however, test
statements may precede the GOTO to effect a conditional branch.
Example:
200 GOTO 10
When 200 is executed, control will automatically jump back to line 10.
You can use GOTO in the Command Mode as an alternative to RUN. GOTO
line number causes execution to begin at the specified line number, without
an automatic CLEAR. This lets you pass values assigned in the Command
Mode to variables in the Execute Mode.
See IF,THEN,ELSE,ON … GOTO.
GOSUB line number
Transfers program control to the subroutine beginning at the specified line
number and stores an address to RETURN to after the subroutine is
complete. When the Computer encounters a RETURN statement in the
subroutine, it will then return control to the statement, which follows
GOSUB.
If you don't RETURN, the previously stored address will not be deleted from
the area of memory used for saving information, called the Stack. The Stack
might eventually overflow, but, even more importantly, this address might be
read incorrectly during another operation, causing a hard-to-find program
error. So . . . always RETURN from your subroutines. GOSUB, like GOTO
may be preceded by a test statement. See IF,THEN,ELSE,ON … GOSUB.
Example Program:
100
110
200
210
GOSUB 200
PRINT "BACK FROM SUBROUTINE":END
PRINT "EXECUTING THE SUBROUTINE"
RETURN
(RUN)
EXECUTING THE SUBROUTINE
BACK FROM THE SUBROUTINE
4-7
Control branches from line 100 to the subroutine beginning at line 200. Line
210 instructs Computer to return to the statement immediately following
GOSUB, that is, line 110.
RETURN
Ends a subroutine and returns control to statement immediately following
the most recently executed GOSUB. If RETURN is encountered without
execution of a matching GOSUB, an error will occur. See GOSUB.
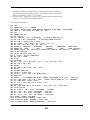
ON n GOTO line number, …, line number
This is a multi-way branching statement that is controlled by a test variable
or expression. The general format for ON n GOTO is:
ON expression GOTO 1st line number, 2nd line number, …, Kth line number
expression must be between 0 and 255 inclusive.
When ON … GOTO is executed, first the expression is evaluated and the
integer portion … INT(expression) … is obtained. We'll refer to this integer
portion as J. The Computer counts over to the Jth element in the line-number
list, and then branches to the line number specified by that element. If there
is no Jth element (that is, if J > K or J=0 in the general format above), then
control passes to the next statement in the program.
If the test expression or number is less than zero, or greater than 255, an
error will occur. The line-number list may contain any number of items. For
example,
100 ON MI GOTO 150, 160, 170, 150, 180
says "Evaluate MI.
If integer portion of MI equals 1 then go to line 150;
If it equals 2, then go to 160;
If it equals 3, then go to 170;
If it equals 4, then go to 150;
If it equals 5, then go to 180;
If the integer portion of MI doesn't equal any of the
numbers 1 through 5, advance to the next statement
in the program."
4-8
Sample Program Using ON n GOTO
100
200
220
230
240
INPUT "ENTER A NUMBER";X
ON SGN(X)+2 GOTO 220,230,240
PRINT "NEGATIVE":END
PRINT "ZERO":END
PRINT "POSITIVE":END
SGN(X) returns -1 for X less than zero; 0 for X equal to zero; and +1 for X
greater than 0. By adding 2, the expression takes on the values 1, 2, and 3,
depending on whether X is negative, zero, or positive. Control then branches
to the appropriate line number.
ON n GOSUB line number, …, line number
Works like ON n GOTO, except control branches to one of the subroutines
specified by the line numbers in the line-number list.
Example:
100
105
110
200
300
400
INPUT "CHOOSE 1,2 OR 3";I
ON I GOSUB 200,300,400
END
PRINT "SUBROUTINE #1":RETURN
PRINT "SUBROUTINE #2":RETURN
PRINT "SUBROUTINE #3":RETURN
The test object n may be a numerical constant, variable or expression. It
must have a non-negative value or an error will occur.
See ON n GOTO.
4-9
FOR counter = exp TO exp STEP exp NEXT counter
Opens an iterative (repetitive) loop so that a sequence of program statements
may be executed over and over a specified number of times. The general form
is (brackets indicate optional material):
line #
.
.
.
line #
FOR counter-variable = initial value TO final value [STEP increment]
[program statements]
NEXT [counter-variable]
In the FOR statement, initial value, final value and increment can be
constants, variables or expressions. The first time the FOR statement is
executed, these three are evaluated and the values are saved; if the variables
are changed by the loop, it will have no effect on the loop's operation.
However, the counter variable must not be changed or the loop will not
operate normally.
The FOR-NEXT-STEP loop works as follows: the first time the FOR
statement is executed, the counter is set to the "initial value." Execution
proceeds until a NEXT statement is encountered. At this point, the counter is
incremented by the amount specified in the STEP increment. (If the
increment has a negative value, then the counter is actually decremented.) If
STEP increment is not used, an increment of 1 is assumed.
Then the counter is compared with the final value specified in the FOR
statement. If the counter is greater than the final value, the loop is completed
and execution continues with the statement following the NEXT statement.
(If increment was a negative number, loop ends when counter is less than
final value.) If the counter has not yet exceeded the final value, control passes
to the first statement after the FOR statement.
Example Programs:
10
20
30
FOR I=10 TO 1 STEP -1
PRINT I;
NEXT
RUN
10 9 8 7 6 5 4 3 2 1
READY
>_
--------------------------------------
4-10
10
20
30
FOR K=0 TO 1 STEP.3
PRINT K;
NEXT
RUN
0
.3
READY
>_
.6
.9
After K=.9 is incremented by .3, K=1.2. This is greater than the final value 1,
therefore loop ends without ever printing final value.
-------------------------------------10
20
30
FORK = 4 TO 0
PRINT K;
NEXT
RUN
4
READY
>_
No STEP is specified, so STEP 1 is assumed After K is incremented the first
time, its value is 5. Since 5 is greater than the final value 0, the loop ends.
-------------------------------------10
20
25
30
40
J=3 K=8 : L=2
FOR 1=J TO K+1 STEP L
J=0 : K=0 : L=0
PRINT I;
NEXT
RUN
3 5 7
READY
>_
9
The variables and expressions in line 20 are evaluated once and these values
become constants for the FOR-NEXT-STEP loop. Changing the variable
values later has no effect on the loop.
--------------------------------------
4-11
FOR-NEXT loops may be "nested":
10
20
30
40
50
60
FOR I=1TO3
PRINT"OUTER LOOP"
FOR J=1 TO 2
PRINT" INNER LOOP"
NEXT J
NEXT I
RUN
OUTER LOOP
INNER LOOP
INNER LOOP
OUTER LOOP
INNER LOOP
INNER LOOP
OUTER LOOP
INNER LOOP
INNER LOOP
Note that each NEXT statement specifies the appropriate counter variable;
however, this is just a programmer's convenience to help keep track of the
nesting order. The counter variable may be omitted from the NEXT
statements. But if you do use the counter variables, you must use them in
the right order; i.e., the counter variable for the innermost loop must come
first. It is also advisable to specify the counter variable with NEXT
statements when your program allows branching to program lines outside the
FOR-NEXT loop.
Another option with nested NEXT statements is to use a counter variable
list.
Delete line 50 from the above program and change line 60:
60
NEXT J,I
Loops may be nested 3-deep, 4-deep, etc. The only limit is the amount of
memory available.
4-12
ERROR code
Lets you "simulate" a specified error during program execution. The major
use of this statement is for testing an ON ERROR GOTO routine. When the
ERROR code statement is encountered, the Computer will proceed exactly as
if that kind of error had occurred. Refer to Appendix B for a listing of error
codes and their meanings.
Example Program:
100 ERROR 1
RUN
?NF ERROR
READY
>_
1 is the error code for "attempt to execute NEXT statement without a
matching FOR statement".
See ON ERROR GOTO, RESUME.
ON ERROR GOTO line number
When the Computer encounters any kind of error in your program, it
normally breaks out of execution and prints an error message. With ON
ERROR GOTO, you can set up an error-trapping routine, which will allow
your program to "recover" from an error and continue, without any break in
execution. Normally you have a particular type of error in mind when you use
the ON ERROR GOTO statement. For example, suppose your program
performs some division operations and you have not ruled out the possibility
of division by zero. You might want to write a routine to handle a
division-by-zero error, and then use ON ERROR GOTO to branch to that
routine when such an error occurs.
Example:
5
10
ON ERROR GOTO 100
C = 1/0
In this "loaded" example, when the Computer attempts to execute line 10, a
divide-by-zero error will occur. But because of line 5, the Computer will
simply ignore line 10 and branch to the errorhandling routine beginning at
line 100.
NOTE: The ON ERROR GOTO must be executed before the error occurs or
it will have no effect.
4-13
The ON ERROR GOTO statement can be disabled by executing an ON
ERROR GOTO 0. If you use this inside an error-trapping routine, BASIC will
handle the current error normally.
The error handling routine must be terminated by a RESUME statement.
See RESUME.
RESUME line number
Terminates an error handling routine by specifying where normal execution
is to resume.
RESUME without a line number and RESUME 0 cause the Computer to
return to the statement in which the error occurred.
RESUME followed by a line number causes the Computer to branch to the
specified line number.
RESUME NEXT causes the Computer to branch to the statement following
the point at which the error occurred.
Sample Program with an Error Handling Routine
5
10
20
30
100
110
ON ERROR GOTO 100
INPUT"SEEKING SQUARE ROOT OF";X
PRINT SQR(X)
GOTO 10
PRINT "IMAGINARY ROOT:";SQR(-X);"*I"
RESUME 10
RUN the program and try inputting a negative value.
You must place a RESUME statement at the end of your error trapping
routine, so that later errors may also be trapped.
4-14
REM
Instructs the Computer to ignore the rest of the program line. This allows you
to insert comments (REMarks) into your program for documentation. Then,
when you (or someone else) look at a listing of your program, it'll be a lot
easier to figure out. If REM is used in a multi-statement program line, it
must be the last statement.
Examples Program:
10
20
30
40
50
60
70
80
90
REM ** THIS REMARK INTRODUCES THE PROGRAM **
REM ** AND POSSIBLY THE PROGRAMMER, TOO. **
REM **
**
REM ** THIS REMARK EXPLAINS WHAT THE
**
REM ** VARIOUS VARIABLES REPRESENT:
**
REM ** C = CIRCUMFERENCE R = RADIUS
**
REM ** D = DIAMETER
**
REM
INPUT"RADIUS";R: REM THIS IS FIRST EXECUTABLE LINE
The above program shows some of the graphic possibilities of REM
statements. Any alphanumeric character may be included in a REM
statement, and the maximum length is the same as that of other statements:
255 characters total.
IN LEVEL II BASIC, an apostrophe '(SHIFT 7) may be used as an
abbreviation for: REM.
100 'THIS TOO IS A REMARK
IF true/false expression THEN action-clause
Instructs the Computer to test the following logical or relational expression.
If the expression is True, control will proceed to the "action" clause
immediately following the expression. If the expression is False, control will
jump to the matching ELSE statement (if there is one) or down to the next
program line. In numerical terms, if the expression has a non-zero value, it is
always equivalent to a logical True. Examples:
100 IF X>127 THEN PRINT "OUT OF RANGE": END
If X is greater than 127, control will pass to the PRINT statement and then to
the END statement. But if X is not greater than 127, control will jump down
to the next line in the program, skipping the PRINT and END statements.
4-15
100 IF 0<=X AND X<=90 THEN Y=X+180
If both expressions are True then Y will be assigned the value X+180.
Otherwise, control will pass directly to the next program line, skipping the
THEN clause.
NOTE: THEN is optional in the above and similar statements. However,
THEN is sometimes required to eliminate an ambiguity.
For example, 400 IF Y=M THEN M=O won't work without THEN.
500 INPUT A$: IF A$="YES" THEN 100
600 INPUT A$: IF A$="YES" GOTO 100
The two statements have the same effect. THEN is not optional in line 500
and other IF expression THEN line number statements.
100 IF A>0 AND B>0 PRINT "BOTH POSITIVE"
The test expression may be composed of several relational expressions joined
by logical operators AND and OR.
See THEN, ELSE.
THEN statement or line number
Initiates the "action clause" of an IF-THEN type statement. THEN
is optional except when it is required to eliminate an ambiguity,
as in IF A<0 THEN 100. THEN should also be used in
IF-THEN-ELSE statements.
4-16
ELSE statement or line number
Used after IF to specify an alternative action in case the IF test fails. (When
no ELSE statement is used, control falls through to the next program line
after a test fails.)
Examples:
100 INPUT A$: IF A$="YES" THEN 300 ELSE END
In line 100, if A$ equals "YES" then the program branches to line 300. But if
A$ does not equal "YES", program skips over to the ELSE statement which
then instructs the Computer to end execution.
200 IF A<B PRINT"A<B"ELSE PRINT"B<=A"
If A is less than B, the Computer prints that fact, and then proceeds down to
the next program line, skipping the ELSE statement. If A is not less than B,
Computer jumps directly to the ELSE statement and prints the specified
message. Then control passes to the next statement in the program.
200 IF A>.001 THEN B=1/A: A=A/5: ELSE 260
If A >001 is True, then the next two statements will be executed, assigning
new values to B and A. Then the program will drop down to the next line,
skipping the ELSE statement. But if A >.001 is
False, the program jumps directly over to the ELSE statement, which then
instructs it to branch to line 260. Note that GOTO is not required after
ELSE.
IF-THEN-ELSE statements may be nested, but you have to take care to
match up the IFs and ELSEs.
10
20
30
INPUT "ENTER TWO NUMBERS";A,B
IF A<=B THEN IF A<B PRINT A;:ELSE PRINT "NEITHER";:ELSE PRINT B;
PRINT"IS SMALLER"
RUN the program, inputting various pairs of numbers. The program picks
out and prints the smaller of any two numbers you enter.
Note that the THEN statements and the colons may be omitted from
line 20.
4-17
Data Conversion
Every number used during execution must be typed as either integer, single
precision or double precision. Often this typing involves converting a number
from one form to another. This may produce unexpected, confusing results unless you understand the rules governing such automatic typing and type
conversion.
Typing of Constants
Constants are the actual numbers (not the variable names) used by LEVEL
II BASIC during execution. They may appear in your program (as in X=1/3,
the right side of the equation) or they may be temporary (intermediate)
constants created during the evaluation of an expression. In any case, the
following rules determine how a constant is typed:
I.
If a constant contains 8 or more digits, or if D is used in the
exponent, that number is stored as double precision. Adding a #
declaration character also forces a constant to be stored as double
precision.
II.
If the number is not double-precision, and if it is outside the range
-32768 to +32767 or if it contains a decimal point, then the number
is stored as single-precision. If number is expressed in exponential
notation with E preceding the exponent, the number is single
precision.
III.
If neither I nor II is true of the constant, then it is stored as an
integer.
Example Program
10
PRINT 1.234567, 1.2345678
RUN
1.23457
READY
>_
1.2345678
The first constant contains 7 digits; so by Rules I and II, it becomes a
single-precision number. Single precision numbers are printed as 6 digits
with the least significant digit properly rounded. But the second constant
contains 8 digits, therefore by Rule I it becomes a double precision number,
stored internally as 1.2345678000000000. The number is printed out with all
eight significant digits showing, and all the trailing zeros suppressed.
4-18
Type Conversion
When operations are performed on one or two numbers, the result must be
typed as integer, double or single-precision.
When a +, -, or * operation is performed, the result will have the same degree
of precision as the most precise operand. For example, if one operand is
single-precision, and the other double-precision, the result will be double
precision. Only when both operands are integers will a result be integer. If
the result of an integer *, -, or + operation is outside the integer range, the
operation will be done in single precision and the result stored as single
precision.
Division follows the same rules as +, * and -, except that it is never done at
the integer level: when both operators are integers, the operation is done in
single precision with a single-precision result.
During a compare operation (< , >,=,etc.) the operands are converted to the
same type before they are compared. The less precise type will always be
converted to the more precise type.
If you are using logical operators for bit manipulations or Boolean operations
(see Chapter 8, "Logical Operators"), you'll need to read the next paragraph;
otherwise, skip it.
The logical operators AND, OR and NOT first convert their operands to
integer form. If one of the operands is outside the allowable range for integers
(-32768 to +32767) an overflow error occurs. The result of a logical operation
is always an integer.
4-19
Effects of Type Conversions on Accuracy
When a number is converted to integer type, it is "rounded down"; i.e., the
largest integer, which is not greater than the number is used. (This is the
same thing that happens when the INT function is applied to the number.)
When a number is converted from double to single precision, it is "4/5
rounded" (the least significant digit is rounded up if the fractional part > =5.
Otherwise, it is left unchanged).
In the following examples, keep in mind that single precision variables are
stored with 7 digits of precision, but printed out with 6 digits (to allow for
proper rounding). Similarly, double precision values are stored with 17 digits
but printed out with only 16.
Example Programs:
10
20
30
40
A#=1.6666666666666667
B!=A#
C%=A#
PRINT B!,C%
RUN
1.66667
READY
>_
1
When a single precision number is converted to double precision, only the
seven most significant digits will be accurate. And if the single precision
number didn't contain seven significant digits, watch out!
Examples:
10 A!=1.3
20 A#=A!
30 PRINT A#
RUN
1.299999952316284
READY
>_
---------------------------------10
20
A#=2/3
PRINT A#
RUN
4-20
.6666666865348816
READY
>_
2/3 is converted to a single precision constant; therefore only the first seven
digits of A# are accurate.
---------------------------------10
20
A#=2/3#
PRINT A#
RUN
.66666666666666667
READY
>_
Since the expression 2/3# is evaluated as a double precision constant, all 16
digits of A# are accurate, with the least significant properly 4/5- rounded.
When assigning a constant value to a double precision variable, be sure to
include as many significant digits as possible (up to 17). If your constant has
seven or less significant digits, you might as well use single precision. Your
constant will only be accurate for as many significant digits as you include,
up to 17.
Examples:
10
20
PI#=3.1415926535897932
E#=2.7182818284590452
If you combine the # or other declaration character with a constant to force it
to a certain type, you cannot space after the declaration character.
Examples:
10
20
30
40
PRINT
PRINT
PRINT
PRINT
87.2345432117896#+90.35762#
87.23658!-90.32!
87.23658#/90.35762#
87.23658!*90.35762!
You can't use the % (integer) declaration character in this way at all.
4-21
Assigning Double-Precision Values
Here are three ways to be sure double-precision values are stored without
any trailing "garbage digits". The first two (lines 10 and 20) are for entering
constants (either in assignment statements or via INPUT responses); the
third (line 30) is for converting from singleprecision to double-precision
values.
10
20
30
40
A#=0.1D0
B#=0.1000000
C#=VAL(STR$(0.1))
PRINT A#,B#,C#
RUN
.1
.1
.1
Line 30 forces BASIC to take a single-precision value (in this case, the
constant 0.1 – but you could. use any variable), convert it to a string
representation, and then re-interpret this string as a doubleprecision value.
4-22
5 / Strings
"Without string-handling capabilities, a computer is just a
super-powered calculator." There's an element of truth in that
exaggeration; the more you use the string capabilities of
LEVEL II, the truer the statement will seem.
LEVEL I BASIC offered two string variables, which could be
input and output to make your programs look "friendly" (as in
HELLO, BOB!). In LEVEL II you can do much more than
that. First of all, you're not limited to two strings – any valid
variable name can be used to contain string values, by the
DEFSTR statement or by adding a type declaration character
to the name. And each string can contain up to 255
characters.
Moreover, you can compare strings in LEVEL II, to
alphabetize them, for example. You can take strings apart
and string them together (concatenate them). For background
material to this chapter, see Chapter 1, "Variable Types" and
"Glossary", and Chapter 4, DEFSTR.
Subjects and functions covered in this chapter:
"String Input/Output"
"String Comparisons"
"String Operations"
"String Space"
FRE(string)
INKEY$
LEN
MID$
RIGHT
STR$
ASC
CHR$
LEFT$
STRING$
VAL
INSTRING Subroutine
NOTE: Whenever string is given as a function argument, you can use a
string expression or constant.
5-1
String Input/Output
String constants -sequences of alphanumeric characters - may be input to a
program just as numeric constants are input, using INPUT, READ/DATA,
and INPUT # (input from cassette). They may generally be input without
quotes:
10
20
30
INPUT "YES OR NO";R$
IF R$="YES"PRINT"THAT'S BEING POSITIVE!": END
PRINT "WHY NOT?"
RUN
YES OR NO?_ [you type] YES [ENTER]
THAT'S BEING POSITIVE!
READY
>_
However, to input a string constant, which contains commas, colons,
or leading blanks, the string must be enclosed in quotes.
10
20
INPUT "LAST NAME, FIRST NAME";N$
PRINT N$
RUN
LAST NAME, FIRST NAME?_ [you type:] "SMITH,JOHN"
[ENTER]
SMITH,JOHN
READY
>_
The same rule regarding commas, colons and leading blanks applies to values
input via DATA statements and INPUT # statements.
10
20
30
40
READ T$,N$,D$
PRINT T$;N$;D$
DATA "TOTAL IS: ","ONE THOUSAND,TWO HUNDRED "
DATA DOLLARS.
T$ requires quotes because of the colon;
N$ requires quotes because of the comma.
5-2
String Comparisons
Strings may be compared for equality or alphabetic precedence. When they
are checked for equality, every character, including any leading or trailing
blanks, must be the same or the test fails.
600 IF Z$="END"THEN999
Strings are compared character-for-character from left to right. Actually, the
ASCII codes for the characters are compared, and the character with the
lower code number is considered to precede the other character. (See
Appendix C, ASCII Codes.)
For example, the constant "A!" precedes the constant "A#", because "!" (ASCII
code: decimal 33) precedes "#" (ASCII code: decimal 35). When strings of
differing lengths are compared, the shorter string is precedent if its
characters are the same as those in the longer string. For example, "A"
precedes "A ".
The following relational symbols may be used to compare strings;
Note: Whenever a string constant is used in a comparison expression or an
assignment statement, the constant must be enclosed in quotes:
A$="CONSTANT"
IF A$="CONSTANT" PRINT A$
(The quotes are required in both cases.)
5-3
String Operations
Not including the functions described below, there is only one string
operation - concatenation, represented by the plus symbol +.
Example Programs:
10
20
30
40
50
CLEAR 75
A$="A ROSE"
B$=" IS A ROSE"
C$=A$+B$+B$+B$+".'
PRINT C$
RUN
A ROSE IS A ROSE IS A ROSE IS A ROSE.
READY
>_
In line 40, the strings are concatenated - strung together.
10
20
30
40
50
T$="100"
SUB$="5"
CODE="32L"
LC$=T$+"."+SUB$+CODE$
PRINT LC$
RUN
100.532L
READY
>_
String Space
50 bytes of memory are set aside automatically to store strings. If you run out
of string space, you will get an OS error and you should use the CLEAR n
command to save more space. See page 2/2.
To calculate the space you'll need, multiply the amount of space each variable
takes (See page 8/13 VARPTR) by the number of string variables you are
using, including temporary variables.
Temporary variables are created during the calculation of string functions. In
the first example above, line 40, C$ is the result of four calculations. For each
of these four, the Computer uses memory space from the string storage area
to store the temporary result. Therefore, even if you have only a few short
string variables assigned in your program, you may run out of string space if
you concatenate them several times.
5-4
ASC (string)
Returns the ASCII code (in decimal form) for the first character of the
specified string. The string-argument must be enclosed in parentheses. A
null-string argument will cause an error to occur.
100 PRINT ASC("A")
110 T$="AB": PRINT ASC(T$)
Lines 100 and 110 will print the same number.
The argument may be an expression involving string operators and functions:
200 PRINT ASC(RIGHT$(T$,1))
Refer to the ASCII Code Table, Appendix C. Note that the ASCII code for a
lower-case letter is equal to that letter's upper-case ASCII code plus 32. So
ASC may be used to convert upper-case values to lower-case values - useful in
case you have a line printer with lowercase capabilities and the proper
interfacing hardware /software).
ASC may also be used to create coding/decoding procedures (see example at
end of this chapter).
CHR$ (expression)
Performs the inverse of the ASC function: returns a one-character string
whose character has the specified ASCII, control or graphics code. The
argument may be any number from 0 to 255, or any variable expression with
a value in that range. Argument must be enclosed in parentheses.
100 PRINT CHR$(35)
prints a number-sign #
Using CHR$, you can even assign quote-marks (normally used as
string-delimiters) to strings. The ASCII code for quotes - is 34. So
A$=CHR$(34) assigns the value " to A$.
100 A$=CHR$(34)
110 PRINT"HE SAID, ";A$;"HELLO.";A$
RUN
HE SAID, "HELLO."
READY
>_
5-5
CHR$ may also be used to display any of the 64 graphics characters.
(See Appendix C, Graphics Codes.)
10
20
30
40
50
CLS
FOR I=129 TO 191
PRINT I;CHR$(I),
NEXT
GOT0 50
(RUN the program to see the various graphics characters.)
Codes 0-31 are display control codes. Instead of returning an actual display
character, they return a control character. When the control character is
PRINTed, the function is performed. For example, 23 is the code for 32
character-per-line format; so the command, PRINT CHR$(23) converts the
display format to 32 characters per line. (Hit CLEAR, execute CLS, or
execute PRINT CHR$(28) to return to 64 character-per-line format.)
FRE (string)
When used with a string variable or string constant as an argument, returns
the amount of string storage space currently available. Argument must be
enclosed in parentheses. FRE causes BASIC to start searching through
memory for unused string space. If your program has done a lot of string
processing, it may take several minutes to recover all the "scratch pad" type
memory.
500 PRINT FRE(A$),FRE(L$),FRE("Z")
All return the same value.
The string used has no significance; it is a dummy variable. See Chapter 4,
CLEAR n.
5-6
INKEY$
Returns a one-character string determined by an instantaneous keyboard
strobe. The last key pressed before the strobe is returned. If no key is pressed
during the strobe, a null string (length zero) is returned. This is a very
powerful function because it lets you input values while the Computer is
executing - without using the [ENTER] key. The popular video games which
let you fire at will, guide a moving dot through a maze, play tennis, etc., may
all be simulated using the INKEY$ function (plus a lot of other program logic,
of course).
Characters typed to an INKEY$ are not automatically displayed on the
screen.
Because of the short duration of the strobe cycle (on the order of
microseconds) INKEY$ is invariably placed inside some sort of loop, so that
the Keyboard is scanned repeatedly.
Example Program:
10 CLS
100 PRINT @540,INKEY$: GOTO 100
RUN the program; notice that the screen remains blank until the first time
you hit a key. The last key hit remains on the screen until you hit another
one. (The last key hit is always saved. The INKEY$ function uses it until it is
replaced by a new value.)
INKEY$ may be used in sequences of loops to allow the user to build up a
longer string.
Example:
90
100
110
120
130
PRINT "ENTER THREE CHARACTERS"
A$=INKEY$: IF A$=""THEN 100 ELSE PRINT A$;
B$=INKEY$: IF B$=""THEN 110 ELSE PRINT B$;
C$=INKEY$: IF C$=""THEN 120 ELSE PRINT C$;
D$=A$+B$+C$
A three-character string D$ can now be entered via the keyboard without
using the [ENTER] key.
NOTE: The statement IF
A$="" compares A$ to the null string.
5-7
LEFT$ (string, n)
Returns the first n characters of string. The arguments must be enclosed in
parentheses. string may be a string constant or expression, and n may be a
numeric expression
Example Program
10
20
30
A$="TIMOTHY"
B$=LEFT$(A$,3)
PRINTB$;"--THAT'S SHORT FOR ";A$
RUN
TIM--THAT'S SHORT FOR TIMOTHY
READY
>_
LEN (string) returns the character length of the specified string. The string
variable, expression, or constant must be enclosed in parentheses.
10
20
30
40
A$=""
B$="TOM"
PRINT A$,B$,B$+B$
PRINT LEN(A$),LEN(B$),LEN(B$+B$)
RUN
0
READY
>_
TOM
3
TOMTOM
6
5-8
MID$ (string, p, n)
Returns a substring of string with length n and starting at position p. The
string name, length and starting position must be enclosed in parentheses.
string may be a string constant or expression, and n and p may be numeric
expressions or constants. For example, M 1 D$(L$,3,1) refers to a
one-character string beginning with the 3rd character of L$.
Example Program:
The first three digits of a local phone number are sometimes called the
"exchange" of the number. This program looks at a complete phone number
(area code, exchange, last four digits) and picks out the exchange of that
number.
10
20
30
INPUT"AREA CODE AND NUMBERS (NO HYPHENS, PLEASE)";PH$
EX$=MID$(PH$,4,3)
PRINT"NUMBER IS IN THE ";EX$;" EXCHANGE."
If no argument is specified for the length n, the entire string beginning at
position p is returned.
RIGHT$ (string, n)
Returns the last n characters of string. string and n must be enclosed in
parentheses. string may be a string constant or variable, and n may be a
numerical constant or variable. If LEN(string) is less than or equal to n, the
entire string is returned.
RIGHT$(ST$,4) returns the last 4 characters of ST$.
STR$ (expression)
Converts a numeric expression or constant to a string. The numeric
expression or constant must be enclosed in parentheses. STR$(A), for
example, returns a string equal to the character representation of the value
of A. For example, if A=58.5, then STR$(A) equals the string " 58.5". (Note
that a leading blank is inserted before "58.5" to allow for the sign of A). While
arithmetic operations may be performed on A, only string operations and
functions may be performed on the string "58.5".
PRINT STR$(X) prints X without a trailing blank; PRINT X prints X with a
trailing blank.
5-9
Example Program
10
20
30
40
50
A=58.5: B=-58.5
PRINT STR$(A)
PRINT STR$(B)
PRINT STR$(A+B)
PRINT STR$(A)+STR$(B)
RUN
58.5
-58.5
0
58.5-58.5
READY
>_
Note that the leading blank is filled by the minus sign in STR$(B).
STRING$ (n, "character" or number)
Returns a string composed of n character-symbols. For example,
STRING $(30,"*") returns "******************************"
STRING$ is useful in creating graphs, tables, etc.
The argument n is any numerical expression with a value of from zero to 255.
character can also be a number from 0-255; in this case, it will be treated as
an ASCII, control, or graphics code.
Example:
STRING$(64,191) returns a string composed of 64 graphics blocks.
5-10
VAL (string)
Performs the inverse of the STR$ function: returns the number represented
by the characters in a string argument. The numerical type of the result can
be integer, single precision, or double precision, as determined by the rules
for the typing of constants (see page 4/18). For example, if A$="12" and
B$="34" then VAL(A$+ "."+B$) returns the value 12.34. VAL(A$+"E"+B$)
returns the value 12E34, that is 12 x 1034.
VAL operates a little differently on mixed strings - strings whose values
consist of a number followed by alphanumeric characters. In such cases, only
the leading number is used in determining VAL; the alphanumeric remainder
is ignored.
For example: VAL("100 DOLLARS") returns 100.
This can be a handy short-cut in examining addresses, for example.
Example Program
10
15
20
30
40
50
REM "WHAT SIDE OF THE STREET?"
REM EVEN=NORTH. ODD=SOUTH
INPUT "ADDRESS: NUMBER AND STREET"; AD$
C=INT(VAL(AD$)/2)*2
IF C=VAL(AD$) PRINT "NORTH SIDE": GOTO 20
PRINT "SOUTH SIDE": GOTO 20
RUN the program, entering street addresses like "1015 SEVENTH AVE".
If the string is non-numeric or null, VAL returns a zero.
5-11
Coding/Decoding Program
5
10
20
30
40
60
70
80
90
100
110
120
130
140
150
160
170
CLS: PRINT CHR$(23)
CLEAR 1000
INPUT "ENTER MESSAGE"; M$
FOR K=1 TO LEN(M$)
T$=MID$(M$, K, 1 )
CD=ASC(T$)+5: IF CD>255 CD=CD-255
NU$=NU$ + CHR$(CD)
NEXT
PRINT "THE CODED MESSAGE IS"
PRINT NU$
FOR K=1 TO LEN(NU$)
T$=MID$(NU$, K, 1)
CD=ASC(T$)-5: IF CD < 0 CD=CD+255
OLDS=OLD$+CHR$(CD)
NEXT
PRINT "THE DECODED MESSAGE IS"
PRINT OLD$
RUN the program.
Lines 30-80 and 110-150 demonstrate how you can "peel off"' the characters
of a string for examination. Lines 60 and 130 demonstrate manipulation of
ASCII codes.
Instring Subroutine
Using the intrinsic string functions MID$ and LEN, it's easy to create a very
handy string-handling subroutine, INSTRING. This function takes two string
arguments and tests to see whether one is contained in the other. When you
are searching for a particular word, phrase or piece of data in a larger body of
text or data, INSTRING can be very powerful. Here's the subroutine:
999
1000
1010
1020
END 'THIS IS A PROTECTIVE END-BLOCK
FOR I=1 TO LEN(X$)-LEN(Y$)+1
IF Y$=MID$(X$,I,LEN(Y$)) RETURN
NEXT: I=0 : RETURN
To use the subroutine, first assign the value of the larger string (the "search
area") to X$, and the value of the desired substring to Y$. Then call the
subroutine with GOSUB. The subroutine will return a value of I which tells
you the starting position of Y$ in the larger string X$; or if Y$ is not a
substring of X$, I is returned with a value of zero.
5-12
Here's a sample program using the INSTRING subroutine. (Type in the
above lines 999-1020 plus the following.)
5
10
20
30
40
50
55
60
65
70
80
CLEAR 1000 : CLS
INPUT "ENTER THE LONGER STRING";X$
INPUT "NOW ENTER THE SHORTER STRING";Y$
GOSUB 1000
IF I=0 THEN 70
PRINT Y$;" IS A SUBSTRING OF ";X$
PRINT "STARTING POSITION:";I,
PRINT "ENDING POSITION: ";I+LEN(Y$)-1
PRINT: PRINT: GOTO 10
PRINT Y$;" IS NOT CONTAINED IN ";X$
GOTO 10
RUN the program, entering the string to be searched and then the desired
substring.
5-13
6 / Arrays
An array is simply an ordered list of values. In LEVEL II
these values may be either numbers or strings, depending on
how the array is defined or typed. Arrays provide a fast and
organized way of handling large amounts of data. To
illustrate the power of arrays, this chapter traces the
development of an array to store checkbook data: check
numbers, dates written, and amounts for each check.
In addition, several matrix manipulation subroutines are
listed at the end of this chapter. These sequences will let you
add, multiply, transpose, and perform other operations on
arrays.
Note: Throughout this chapter, zero-subscripted elements
are generally ignored for the sake of simplicity. But you
should remember they are available and should be used for
the most efficient use of memory. For example, after DIM
A(4), array A contains 5 elements: A(0), A(1), A(2), A(3), A(4).
For background information on arrays, see Chapter 4, DIM,
and Chapter 1, "Arrays".
A Check-Book Array
Consider the following table of checkbook information:
Check #
Date Written
Amount
025
026
027
028
029
030
1-1-78
1-5-78
1-7-78
1-7-78
1-10-78
1-15-78
10.00
39.95
23.50
149.50
4.90
12.49
Note that every item in the table may be specified simply by reference to two
numbers: the row number and the column number. For example, (row 3,
column 3) refers to the amount 23.50. Thus, the number pair (3,3) may be
called the "subscript address" of the value 23.50.
6-1
Let's set up an array, CK, to correspond to the checkbook information table.
Since the table contains 6 rows and 3 columns, array CK will need two
dimensions: one for row numbers, and one for column numbers. We can
picture the array like this:
A(1,1)=025
.
.
.
.
A(6,1)=030
A(1,2)=1.0178
.
.
.
.
A(6,2)=1.1578
A(1,3)=10.00
.
.
.
.
A(6,3)=12.49
Notice that the date information is recorded in the form mm.ddyy. where
mm=month number, dd=day of month, and yy = last two digits of year. Since
CK is a numeric array, we can't store the data with alpha-numeric
characters such as dashes.
Suppose we assign the appropriate values to the array elements. Unless we
have used a DIM statement, the Computer will assume that our array
requires a depth of 10 for each dimension. That is, the Computer will set
aside memory locations to hold CK(7,1), CK(7,2), …, CK(9,1), CK(9,2) and
CK(9,3). In this case, we don't want to set aside this much space, so we use
the DIM statement at the beginning of our program:
10
DIM CK(6,3) 'SETUP A 6 BY 3 ARRAY (EXCL. ZERO SUBSCRIPTS)
Now let's add program steps to read the values into the array CK:
20
30
40
50
90
91
92
93
94
95
FOR ROW=1 TO 6
FOR COL=1 TO 3
READ CK(ROW,COL)
NEXT COL,ROW
DATA 025, 1.0178, 10.00
DATA 026, 1.0578, 39.95
DATA 027, 1.0778, 23.50
DATA 028, 1.0778, 149.50
DATA 029, 1.1078, 4.90
DATA 030, 1.1578, 12.49
6-2
Now that our array is set up, we can begin taking advantage of its built-in
structure. For example, suppose we want to add up all the checks written.
Add the following lines to the program:
100
110
120
130
140
FOR ROW=1 TO 6
SUM=SUM+CK(ROW,3)
NEXT
PRINT"TOTAL OF CHECKS WRITTEN";
PRINT USING"$$###.##";SUM
Now let's add program steps to print out all checks that were written on a
given day.
200
210
230
240
250
260
270
PRINT "SEEKING CHECKS WRITTEN ON WHAT DATE (MM.DDYY)";
INPUT DT
PRINT :PRINT"ANY CHECKS WRITTEN ARE LISTED BELOW:"
PRINT"CHECK #","AMOUNT" : PRINT
FOR ROW=1 TO 6
IF CK(ROW,2)=DT PRINT CK(ROW,1),CK(ROW,3)
NEXT
It's easy to generalize our program to handle checkbook information for all 12
months and for years other than 1978.
All we do is increase the size (or "depth") of each dimension as needed. Let's
assume our checkbook includes check numbers 001 through 300, and we
want to store the entire checkbook record. Just make these changes:
10
20
DIM CK(300,3) 'SET UP A 300 BY 3 ARRAY
FOR ROW=1 TO 300
and add DATA lines for check numbers 001 through 300. You'd probably
want to pack more data onto each DATA line than we did in the above DATA
lines.
And you'd change all the ROW counter final values:
100 FOR ROW=1 TO 300
.
.
250 FOR ROW=1 TO 300
6-3
Other Types of Arrays
Remember, in LEVEL II the number of dimensions an array can have (and
the size or depth of the array), is limited only by the amount of memory
available. Also remember that string arrays can be used. For example, C$(X)
would automatically be interpreted as a string array. And if you use DEFSTR
A at the beginning of your program, any array whose name begins with A
would also be a string array. One obvious application for a string array would
be to store text material for access by a string manipulation program.
10
20
CLEAR 1200
DIM TXT$(10)
would set up a string array capable of storing 10 lines of text. 1200 bytes
were CLEARed to allow for 10 sixty-character lines, plus 600 extra bytes for
string manipulation with other string variables.
Array/Matrix Manipulation Subroutines
To use this subroutine, your main program must supply values for two
variables N1 (number of rows) and N2 (number of columns). Within the
subroutine, you can assign values to the elements in the array row by row by
answering the INPUT statement.
30100
30110
30120
30130
30140
30160
30170
REM MATRIX INPUT SUBROUTINE (2 DIMENSION)
FOR I=1 TO N1
PRINT "INPUT ROW";I
FOR J=1 TO N2
INPUT A(I,J)
NEXT J,I
RETURN
-----------------------------------------------
6-4
To use this subroutine, your main program must supply values for three
variables N1 (size of dim#1), N2 (size of dim#2) and N3 (size of dim#3).
Within the subroutine, you can assign values to each element of the array
using READ and DATA statements. You must supply I x J x K elements in
the following order: row by row for K=1, row by row for K=2, row by row for
K=3, and so on for each value of N3.
30200 REM MATRIX READ SUBROUTINE (3 DIMENSION)
30205 REM REQUIRES DATA STMTS.
30210 FOR K=1 TO N3
30220
FOR I=1 TO N1
30230
FOR J=1 TO N2
30240
READ A(I,J,K)
30270 NEXT J,I,K
30280 RETURN
----------------------------------------------Main program supplies values for variables N1, N2, N3, etc. The subroutine
sets the value of each element to zero.
30300 REM MATRIX ZERO SUBROUTINE (3 DIMENSION)
30310 FOR K=1 TO N3
30320
FOR J=1 TO N2
30330
FOR I=1 TO N1
30340
A(I,J,K)=0
30370 NEXT I,J,K
303$0 RETURN
----------------------------------------------Main program supplies values for variables N1, N2, N3. The subroutine
prints the array.
30400
30410
30420
30430
30440
30450
30460
30470
30480
REM MATRIX PRINT SUBROUTINE (3 DIMENSION)
FOR K=1 TO N3
FOR I=1 TO N1
FOR J=1 TO N2
PRINT A(I,J,K),
NEXT J:PRINT
NEXT I:PRINT
NEXT K:PRINT
RETURN
6-5
Main program supplies values for variables N1 , N2, N3. Within the
subroutine, you can assign values to each element of the array using the
INPUT statement.
30500 REM MATRIX INPUT SUBROUTINE (3 DIMENSION)
30510 FOR K=1 TO N3
30520 PRINT "PAGE";K
30530
FOR I=1 TO N1
30540
PRINT "INPUT ROW";I
30550
FOR J=1 TO N2
30560
INPUT A(I,J,K)
30570
NEXT J
30580
NEXT I
30590 PRINT:NEXT K
30595 RETURN
----------------------------------------------Multiplication by a Single Variable: Scalar Multiplication (3 Dimensional)
30600 FOR K=1 TO N3:'N3=3RD DIMENSION
30610
FOR J=1 TO N2:'N2=2ND DIMENSION (COLUMNS)
30620
FOR I=1 TO N1:'N1=1ST DIMENSION (ROWS)
30630
B(I,J,K)=A(I,J,K)*X
30640
NEXT I
30650
NEXT J
30660 NEXT K
30670 RETURN
Multiplies each element in MATRIX A by X and constructs matrix B
----------------------------------------------Transposition of a Matrix (2 Dimensional)
30700 FOR I=1 TO N1
30710
FOR J=1 TO N2
30720
B(J,I)=A(I,J)
30730
NEXT J
30740 NEXT I
30750 RETURN
Transposes matrix A into matrix B
6-6
Matrix Addition (3 Dimensional)
30800 FOR K=1 TO N3
30810
FOR J = 1 TO N2
30820
FOR I=1 TO N1
30830
C(I,J,K)=A(I,J,K)+B(I,J,K)
30840
NEXT I
30850
NEXT J
30860 NEXT K
30870 RETURN
----------------------------------------------Array Element-wise Multiplication (3 Dimensional)
30900 FOR K=1 TO N3
30910
FOR J=1 TO N2
30920
FOR I=1 TON I
30930
C(I,J,K)=A(I,J,K)*B(I,J,K)
30940
NEXT I
30950
NEXT J
30960 NEXT K
Multiplies each element in A times its corresponding element in B.
----------------------------------------------Matrix Multiplication (2 Dimensional)
40000 FOR I=1 TO N1
40010
FOR J=1 TO N2
40020
C(I,J)=0
40030
FOR K=1 TO N3
40040
C(I,J)=C(I,J)+A(I,K)*B(K,I)
40050
NEXT K
40060
NEXT J
40070 NEXT I
A must be an N1 by N3 matrix; B must be an N3 by N2 matrix. The resultant
matrix C will be an N1 by N2 matrix. A, B, and C must be dimensioned
accordingly.
6-7
7 / Arithmetic Functions
LEVEL II BASIC offers a wide variety of intrinsic ("built-in")
functions for performing arithmetic and special operations.
The special-operation functions are described in the next
chapter.
All the common math functions described in this chapter
return single-precision values accurate to six decimal
places. ABS, FIX and INT return values whose precision
depends on the precision of the argument.
The conversion functions (LINT, CDBL, etc.) return values
whose precision depends on the particular function. Trig
functions use or return radians, not degrees. A radian-degree
conversion is given for each of the functions.
For all the functions, the argument must be enclosed in
parentheses. The argument may be either a numeric variable,
expression or constant.
Functions described in this chapter:
ABS
ATN
CDBL
CINT
COS
CSNG
EXP
FIX
INT
LOG
RANDOM
RND
SGN
SIN
SQR
TAN
ABS (x)
Returns the absolute value of the argument. ABS(X)=X for X greater than or
equal to zero, and ABS(X)=-X for X less than zero.
100 IF ABS(X)<1E-6 PRINT "TOO SMALL"
ATN (x)
Returns the arctangent (in radians) of the argument; that is, ATN(X) returns
"the angle whose tangent is X". To get arctangent in degrees, multiply
ATN(X) by 57.29578.
100 Y=ATN(B/C)
7-1
CDBL (x)
Returns a double-precision representation of the argument. The value
returned will contain 17 digits, but only the digits contained in the argument
will be significant.
CDBL may be useful when you want to force an operation to be done in
double-precision, even though the operands are single precision or even
integers. For example CDBL (I%)/J% will return a fraction with 17 digits of
precision.
100 FOR I%=1 TO 25: PRINT 1/CDBL(I%),: NEXT
CINT (x)
Returns the largest integer not greater than the argument. For example,
LINT (1.5) returns 1; CINT(-1.5) returns -2. For the CINT function, the
argument must be in the range -32768 to + 32767. The result is stored
internally as a two-byte integer.
CINT might be used to speed up an operation involving single or
double-precision operands without losing the precision of the operands
(assuming you're only interested in an integer result).
100 K%=CINT(X#)+CINT(Y#)
COS (x)
Returns the cosine of the argument (argument must be in radians). To obtain
the cosine of X when X is in degrees, use CGS(X*.01745329).
100 Y=COS(X+3.3)
CSNG (x)
Returns a single-precision representation of the argument. When the
argument is a double-precision value, it is returned as six significant digits
with "4/5 rounding" in the least significant digit. So
CSNG(.6666666666666667) is returned as .666667;
CSNG(.3333333333333333) is returned as .333333.
100 PRINT CSNG(A#+B#)
7-2
EXP (x)
Returns the "natural exponential" of X, that is, ex. This is the inverse of the
LOG function, so X=EXP(LOG(X)).
100 PRINT EXP(-X)
FIX (x)
Returns a truncated representation of the argument. All digits to the right of
the decimal point are simply chopped off, so the resultant value is an integer.
For non-negative X, FIX(X)=lNT(X). For negative values of X,
FIX(X)=INT(X)+1. For example, FIX(2.2) returns 2, and FIX(-2.2) returns -2.
100 Y=ABS(A-FIX(A))
This statement gives Y the value of the fractional portion of A.
INT(x)
Returns an integer representation of the argument, using the largest whole
number that is not greater than the argument. Argument is not limited to the
range -32768 to +32767. The result is stored internally as a single-precision
whole number. INT(2.5) returns 2; INT(-2.5) returns -3; and INT(1000101.23)
returns 10000101.
100 Z=INT(A*100+.5)/100
Gives Z the value of A rounded to two decimal places (for nonnegative A).
LOG(x)
Returns the natural logarithm of the argument, that is, loge(argument ). This
is the inverse of the EXP function, so X=LOG(EXP (X)). To find the logarithm
of a number to another base b, use the formula logb(X) = loge(X)/loge(b). For
example, LOG(32767)/LOG(2) returns the logarithm to base 2 of 32767.
100 PRINT LOG(3.3*X)
7-3
RANDOM
RANDOM is actually a complete statement rather than a function. It reseeds
the random number generator. If a program uses the RND function, you may
want to put RANDOM at the beginning of the program. This will ensure that
you get an unpredictable sequence of pseudo-random numbers each time you
turn on the Computer, load the program, and run it.
10
20
.
.
.
80
RANDOM
C=RND(6)+RND(6)
GOTO 20 'RANDOM NEEDS TO EXECUTE JUST ONCE
RND(x)
Generates a pseudo-random number using the current pseudo-random "seed
number" (generated internally and not accessible to user). RND may be used
to produce random numbers between 0 and 1, or random integers greater
than 0, depending on the argument.
RND(0) returns a single-precision value between 0 and 1. RND(integer)
returns an integer between 1 and integer inclusive (integer must be positive
and less than 32768). For example, RND(55) returns a pseudo-random
integer greater than zero and less than 56. RND(55.5) returns a number in
the same range, because RND uses the INTeger value of the argument.
100 X=RND(2): ON X GOTO 200,300
SGN(x)
The "sign" function: returns -1 for X negative, 0 for X zero, and +l for X
positive.
100 ON SGN(X)+2 GOTO 200,300,400
SIN(x)
Returns the sine of the argument (argument must be in radians). To obtain
the sine of X when X is in degrees, use SIN(X*.01745329).
100 PRINT SIN(A*B-B)
7-4
SQR(x)
Returns the square root of the argument. SQR(X) is the same as X↑(1/2), only
faster.
100 Y=SQR(X↑
↑2-H↑
↑2)
TAN(x)
Returns the tangent of the argument (argument must be in radians). To
obtain the tangent of X when X is in degrees, use TAN(X*.01745329).
100 Z=TAN(2*A)
NOTE: A great many other functions may be created using the above
functions. See Appendix F, "Derived Functions".
7-5
8 / Special Features
LEVEL II BASIC offers some unusual functions and
operations that deserve special highlighting. Some may seem
highly specialized; as you learn more about programming and
begin to experiment with machine-language routines, they
will take on more significance. Other functions in the chapter
are of obvious benefit and will be used often (for example, the
graphics functions). And then there are a couple of features,
INP and OUT, that will be used primarily with the TRS-80
Expansion Interface.
Functions, statements and operators described in this chapter:
Graphics:
SET
RESET
CLS
POINT
Error-Routine
Functions:
Other Functions
and Statements:
ERL
ERR
INP
MEM
OUT
PEEK
POKE
POS
USR
VARPTR
Logical Operators:
AND
OR
NOT
SET(x,y)
Turns on the graphics block at the location specified by the coordinates x and
y. For graphics purposes, the Display is divided up into a 128 (horizontal) by
48 (vertical) grid. The x-coordinates are numbered from left to right, 0 to 127.
The y-coordinates are numbered from top to bottom, 0 to 47. Therefore the
point at (0,0) is in the extreme upper left of the Display, while the point at
(127,47) is in the extreme lower right corner. See the Video Display
Worksheet in Appendix C.
The arguments x and y may be numeric constants, variables or expressions.
They need not be integer values, because SET(x,y) uses the INTeger portion
of x and y. SET (x,y) is valid for:
0<=x<128
0<=y<48
8-1
Examples:
100 SET(RND(128)-1,RND(48)-1)
Lights up a random point on the Display.
100 INPUT X,Y: SET(X,Y)
RUN to see where the blocks are.
RESET(x,y)
Turns off a graphics block at the location specified by the coordinates x and y.
This function has the same limits and parameters as SET(x,y).
200 RESET(X,3)
CLS
"Clear-Screen" – turns off all the graphics blocks on the Display and moves
the cursor to the upper left corner. This wipes out alphanumeric characters
as well as graphics blocks. CLS is very useful whenever you want to present
an attractive Display output.
5
10
20
CLS
SET(RND(128)-1,RND(48)-1)
GOTO 10
POINT(x, y)
Tests whether the specified graphics block is "on" or "off". If the block is "on"
(that is, if it has been SET), then POINT returns a binary True (-1 in LEVEL
II BASIC). If the block is "off", POINT returns a binary False (0 in LEVEL II
BASIC). Typically, the POINT test is put inside an IF-THEN statement.
100 SET(50,28): IF POINT(50,28) THEN PRINT "ON" ELSE PRINT "OFF"
This line will always print the message, "ON", because POINT(50,28) will
return a binary True, so that execution proceeds to the THEN clause. If the
test failed, POINT would return a binary False, causing execution to jump to
the ELSE statement.
8-2
ERL
Returns the line number in which an error has occurred. This function is
primarily used inside an error-handling routine accessed by an ON ERROR
GOTO statement. If no error has occurred when ERL is called, line number 0
is returned. However, if an error has occurred since power-up, ERL returns
the line number in which the error occurred. If error occurred in direct mode,
65535 is returned (largest number representable in two bytes).
Example Program using ERL
5
10
20
30
40
.
.
.
999
1000
1005
1010
1015
1020
1025
CLEAR 10
ON ERROR GOTO 1000
INPUT"ENTER YOUR MESSAGE";M$
INPUT"NOW ENTER A NUMBER";N: N=1/N
REM REST OF PROGRAM BEGINS HERE
END
IF ERL=20 THEN 1010 ELSE IF ERL=30 THEN 1020
ON ERROR GOTO 0
PRINT "TRY AGAIN--KEEP MESSAGE UNDER 11 CHARACTERS"
RESUME 20
PRINT"FORGOT TO MENTION: NUMBER MUST NOT BE ZERO"
RESUME 30
RUN the program. Try entering a long message; try entering zero when the
program asks for a number. Note that ERL is used in line 1000 to determine
where the error occurred so that appropriate action may be taken.
8-3
ERR /2+1
Similar to ERL, except ERR returns a value related to the code of the error
rather than the line in which the error occurred. Commonly used inside an
error handling routine accessed by an ON ERROR GOTO statement. See
Appendix B, "Error Codes."
ERR/2+1 = true error code
(true error code -1)*2=ERR
Example Program
10
20
30
40
50
100
999
1000
1010
ON ERROR GOTO 1000
DIM A(15): I=1
READ A(1)
I=I+1: GOTO 30
REM REST OF PROGRAM
DATA 2,3,5,7,1,13
END
IF ERR/2+1=4 RESUME 50
ON ERROR GOTO 0
Note line 1000: 4 is the error code for Out of Data.
INP(port)
Returns a byte-value from the specified port. The TRS-80 Expansion
Interface is required to use INP effectively (with user-supplied peripheral
hardware). There are 256 ports, numbered 0-255. For example
100 PRINT INP(50)
inputs a byte from port 50 and prints the decimal value of the byte.
The only port used for TRS-80 is FF(hex), or 255 (decimal), used for the
cassette recorder. For a discussion of how to interface special-purpose
hardware to the other ports and how to program this hardware using INP
and OUT, see the TRS-80 Microcomputer Technical Reference
Handbook, Catalog Number 26-2103.
8-4
MEM
Returns the number of unused and unprotected bytes in memory. This
function may be used in the Command Mode to see how much space a
resident program takes up; or it may be used inside the program to avert OM
(Out of Memory) errors by allocating less string space, DIMensioning smaller
array sizes, etc. MEM requires no argument.
Example:
100 IF MEM < 80 THEN 900
110 DIM A(15)
.
.
.
Enter the command PRINT MEM (in Command Mode) to find out the amount
of memory not being used to store programs, variables, strings, stack, or
reserved for object-files.
OUT port, value
Ouputs a byte value to the specified port. OUT is not a function but a
statement complete in itself. It requires two arguments separated by a
comma (no parenthesis): the port destination and the byte value to be sent.
Example:
OUT 250,1 0
sends the value "10" to port 250. Both arguments are limited to the range
0-255.
OUT, like INP, becomes useful when you add the TRS-80 Expansion
Interface. See INP.
8-5
PEEK(address)
Returns the value stored at the specified byte address (in decimal form). To
use this function, you'll need to refer to two sections of the Appendix: the
Memory Map (so you')) know where to PEEK) and the Table of Function,
ASCII and Graphics Codes (so you'll know what the values represent).
If you're using PEEK to examine object files, you'll also need a microprocessor
instruction set manual (one is included with the TRS-80 Editor/Assembler
Instruction Manual).
PEEK is valuable for linking machine language routines with LEVEL II
BASIC programs. The machine language routine can store information in a
certain memory location, and PEEK may be used inside your BASIC program
to retrieve the information. For example,
A = PEEK(17999)
returns the value stored at location 17999 and assigns that value to the
variable A.
Peek may also be used to retrieve information stored with a POKE
statement. Using PEEK and POKE allows you to set up very compact,
byte-oriented storage systems. Refer to the Memory Map in the Appendix to
determine the appropriate locations for this type of storage. See POKE,
USR.
POKE address, value
Loads a value into a specified memory location. POKE is not a function but a
statement complete in itself. It requires two arguments: a byte address (in
decimal form) and a value. The value must be between 0 and 255 inclusive.
Refer to the Memory Map in the Appendix to see which addresses you'd like
to POKE.
To POKE (or PEEK) an address above 32767, use the following formula: -1 *
(65536-desired address) = POKE OR PEEK address. For example, to POKE
into address 32769, use POKE -32767, value
POKE is useful for LEVEL II graphics. Look at the Video Display Worksheet
in the Appendix. In each of the 1024 PRINT locations there are 6
subdivisions. If we call each PRINT position a byte, then the smaller boxes
are bits. We know that there are 8 bits per byte; so what happened to the
other 2? One is used to identify the byte as a graphics or ASCII code. The
other bit is not used. The remaining 6 bits contain either an ASCII, graphics
or control code.
8-6
We can use POKE to turn on the entire PRINT position (6 bits) at one time.
When we use SET, only 1 bit is turned on. Therefore POKE is about 6 times
faster than SET. The following program demonstrates this speed.
10
20
30
40
50
CLS
FOR X=15360 TO 16383
POKE X,191
NEXT
GOT0 50
RUN the program to see how fast the screen is "painted" white. (191 is the
code for "all bits on". 15360 to 16383 are the Video Display memory
addresses.)
Since POKE can be used to store information anywhere in memory, it is very
important when we do our graphics to stay in the range for display locations.
If we POKE outside this range, we may store the byte in a critical place. We
could be POKEing into our program, or even in worse places like the stack.
Indiscriminate POKEing can be disastrous. You might have to reset or power
off and start over again. Unless you know where you are POKEing - don't.
See PEEK, USR, SET, and Chapter 4, CHR$ for background material.
POS(x)
Returns a number from 0 to 63 indicating the current cursor position on the
Display. Requires a "dummy argument" (any numeric expression).
100 PRINT TAB(40) POS(0)
prints 40 at position 40. (Note that a blank is inserted before the "4" to
accommodate the sign; therefore the "4" is actually at position 41.) The "0" in
"POS(0)" is the dummy argument.
100 PRINT "THESE" TAB(POS(0)+5)"WORDS" TAB(POS(0)+5)"ARE";
110 PRINT TAB(POS(0)+5)"EVENLY" TAB(POS(0)+5)"SPACED"
RUN
THESE
READY
>_
WORDS
ARE
EVENLY
8-7
SPACED
USR (x)
This function lets you call a machine-language subroutine and then continue
execution of your BASIC program.
"Machine language" is the low-level language used internally by your
Computer. It consists of Z-80 microprocessor instructions. Machine-language
subroutines are useful for special applications (things you can't do in BASIC)
and simply because they can do things very fast (like white-out the Display).
Writing such routines requires familiarity with assembly-language
programming and with the Z-80 instruction set. For more information on this
subject, see the Radio Shack book, TRS-80 Assembly-Language
Programming, by William Barden, Jr., and the instruction manuals for Radio
Shack's TBUG (26-2001) and EDITOR-ASSEMBLER (26-2002).
Getting the USR routine into memory
1. You should first reserve the area in high memory where the routine will
be located. This is done immediately after power-up by answering the
MEMORY SIZE? question with the address preceding the start
address of your USR routine. For example, if your routine starts at
32700, then type 32699 in response to MEMORY SIZE?.
2. Then load the routine into memory.
A. If it is stored on tape in the SYSTEM format (created with
EDITOR-ASSEMBLER or TBUG), you must load it via the SYSTEM
command, as described in Chapter 2. After the tape has loaded press
[BREAK] to return to the BASIC command mode.
B. If it is a short routine, you may simply want to POKE it into high
memory.
Telling BASIC where the USR routine starts
Before you can make the USR call, you have to tell BASIC the entry address
to the routine. Simply POKE the two-byte address into memory locations
16526-16527: least significant byte (LSB) into 16526, most significant byte
(MSB) into 16527.
8-8
For example, if the entry point is at 32700:
32700 decimal = 7FBC hexadecimal
LSB = BC hexadecimal = 188 decimal
MSB = 7F hexadecimal = 127 decimal
So use the statements:
POKE 16526, 188
POKE 16527, 127
to tell BASIC that the USR routine entry is at 32700.
Making the USR call
At the point in your BASIC program where you want to call the subroutine,
insert a statement like
X = USR(N)
where N can be an expression and must have a value between -32768 and
+32767 inclusive. This argument, N, can be used to pass a value to your
routine (see below) or you can simply consider it a dummy argument and not
use it at all.
When BASIC encounters your X=USR(N) statement, it will branch to the
address stored at 16526-16527. At the point in your USR routine where you
want to return to the BASIC program, insert a simple RET instruction –
unless you want to return a value to BASIC, in which case, see below.
Passing an argument to the USR routine
If you want to pass the USR(N) argument to your routine, then include the
following CALL instruction at the beginning of your USR routine:
CALL 0A7FH
This loads the argument N into the HL register pair as a two-byte signed
integer.
Returning an argument from the USR routine
To return an integer value to the USR(N) function, load the value (a two-byte
signed integer) into HL and place the following jump instruction at the end of
your routine:
JP
0A9AH
8-9
Control will pass back to your program, and the integer in HL will replace
USR(N). For example, if the call was X=USR(N) then X will be given the
value in HL.
Sample USR routines
Listed below is an assembled program to white out the display (an "inverse"
CLEAR key!).
00100
00110
00120
7D00
00130
00140
00150
00160
3C00
00170
00BF
00180
03FF
00190
00200
00210
00220
7D00 21003C 00230
7D03 36BF
00240
7D05 11013C 00250
7D08 01FF03 00260
7D0B EDB0
00270
00280
7D0D C9
00290
7D00
00300
;
; ZAP OUT SCREEN USR FUNCTION
;
ORG
7D00H
;
; EQUATES
;
VIDEO
EQU
3C00H
;START OF VIDEO RAM
WHITE
EQU
0BFH
;ALL WHITE GRAPHICS BYTE
COUNT
EQU
3FFH
;NUMBER OF BYTES TO MOVE
;
; PROGRAM CHAIN MOVES X'BF' INTO ALL OF VIDEO RAM
;
ZAP
LD
HL,VIDEO
;SOURCE ADDRESS
LD
(HL),WHITE ;PUT OUT 1ST BYTE
LD
DE,VIDEO+1 ;DESTINATION ADDRESS
LD
BC,COUNT
;NUMBER OF ITERATIONS
LDIR
;DO IT TO IT!!!
RET
ENDZAP
;RETURN TO BASIC
This routine can be POKEd into RAM and accessed as a USR routine,
as follows.
NOTE: The following two BASIC programs require that you reserve memory
addresses above 31999 for the USR Code. (Answer MEMORY SIZE? with
31999.)
100
110
115
120
130
140
150
160
' PROGRAM: USR
' EXAMPLE OF A USER MACHINE LANGUAGE FUNCTION
' DEPRESS THE '@' KEY WHILE NUMBERS ARE PRINTING TO STOP
'
' ******* POKE MACHINE PROGRAM INTO MEMORY *******
'
POKE 16526,0: POKE 16527,125
FOR X=32000 TO 32013
'71300 HEX EQUAL 32000 DECIMAL
8-10
170
180
190
192
194
196
200
205
210
220
225
230
240
250
260
270
280
290
300
310
320
330
READ A
POKE X,A
NEXT X
'
' ******* CLEAR SCREEN & PRINT NUMBERS 1 THRU 100 *******
'
CLS
PRINT TAB(15);"WHITE-OUT USER ROUTINE": PRINT
FOR X=1 TO 100
PRINT X;
A$=INKEY$: IF A$="@" THEN END
NEXT X
'
' ******* JUMP TO WHITE-OUT SUBROUTINE *******
'
X=USR (0)
FOR X=1 TO 1000: NEXT X
'DELAY LOOP
GOTO 200
'
' ******* DATA IS DECIMAL CODE FOR HEX PROGRAM *******
'
DATA 33,0,60,54,191,17,1,60,1,255,3,237,176,201
RUN the program. An equivalent BASIC white out routine takes a long time
by comparison!
Listed below is an assembled machine-language routine that will accept the
argument from the USR call in BASIC, left-shift it one position, and return
the result to BASIC.
7D00
0A7F
0A9A
7D00
00100
00110
00120
00130
00140
00150
00160
00170
00180
00190
00200
00210
00220
00230
CD7F0A 00240
;
; SHIFT FUNCTION
;
;
MACHINE CODE PROGRAM TO LEFT SHIFT
;
AN ARGUMENT SENT FROM BASIC AND RETURN
;
THE RESULT BACK TO BASIC
;
ORG
7D00H
;
; EQUATES AND ENTRY POINTS
;
GETARG EQU
0A7FH
;GET ARGUMENT FROM BASIC
PUTANS EQU
0A9AH
;RETURN ANSWER TO BASIC
;
SHIFT
CALL
GETARG
;GET NUMBER FROM BASIC
8-11
7D03 CB15
00250
7D05 CB14
00260
7D07 C39A0A 00270
00280 ;
7D00
00290
RL
RL
JP
L
H
PUTANS
END
SHIFT
;SHIFT L
;SHIFT H - ANSWER IN HL
;RETURN TO BASIC W/ANSWER
The following program includes the decimal code for the SHIFT routine. The
code is POKEd into RAM and then accessed as a USR routine. RUN the
program; to stop, enter a value of zero.
100
110
120
130
140
150
160
170
180
190
200
210
220
230
240
250
260
270
280
290
300
310
320
330
340
' PROGRAM: SHIFT
' MACHINE LANGUAGE USER FUNCTION TO LEFT SHIFT
'
' ******* MACHINE CODE AT 71300 HEX *******
'
POKE 16526,0: POKE 16527,125
'
' ******* POKE USER PROGRAM INTO MEMORY *******
'
FOR X=32000 TO 32009 '71300 HEX EQUALS 32000 DECIMAL
READ A
POKE X,A
NEXT X
'
' ******* GET VALUE FROM USER *******
'
CLS: PRINT TAB(15);"USR LEFT-SHIFT FUNCTION"
PRINT: INPUT"ENTER INTEGER VALUE";V
IF V=0 THEN END
PRINT: "LEFT SHIFTED VALUE =";TAB(32);USR(V)
GOTO 270
'
' ******* DATA IS DECIMAL CODE FOR HEX PROGRAM *******
'
DATA 205,127,10,203,21,203,20,195,154,10
USR routines are automatically allocated up to 8 stack levels or 16 bytes (a
high and low memory byte for each stack level). If you need more stack space,
you can save the BASIC stack pointer and set up your own stack. However,
this gets complicated; be sure you know what you're doing. See Chapter 2,
SYSTEM, and this chapter, PEEK, POKE.
8-12
VARPTR (variable name)
Returns an address-value, which will help you locate where the variable
name and its value are stored in memory. If the variable you specify has not
been assigned a value, an FC error will occur when this function is called.
If VARPTR(integer variable) returns address K:
Address K contains the least significant byte (LSB) of 2-byte integer.
Address K+1 contains the most significant byte (MSB) of integer.
You can display these bytes (two's complement decimal representation) by
executing a PRINT PEEK (K) and a PRINT PEEK (K+1).
If VARPTR(single precision variable) returns address K:
(K)* = LSB of value
(K+1) = Next most sig. byte (Next MSB)
(K+2) = MSB with hidden (implied) leading one. Most significant bit is the
sign of the number
(K+3) = exponent of value excess 128 (128 is added to the exponent).
If VARPTR(double precision variable) returns K:
(K)
= LSB of value
(K+1) = Next MSB
(K+…) = Next MSB
(K+6) = MSB with hidden (implied) leading one. Most significant bit is the
sign of the number.
(K+7) = exponent of value excess 128 (128 is added to the exponent).
For single and double precision values, the number is stored in normalized
exponential form, so that a decimal is assumed before the MSB. 128 ,is added
to the exponent. Furthermore, the high bit of MSB is used as a sign bit. It is
set to 0 if the number is positive or to 1 if the number is negative. See
examples below.
You can display these bytes by executing the appropriate PRINT PEEK(x)
where x = the address you want displayed. Remember, the result will be the
decimal representation of byte, with bit 7 (MSB) used as a sign bit. The
number will be in normalized exponential form with the decimal assumed
before the MSB. 128 is added to the exponent,
If VARPTR(string variable,) returns K:
K
= length of string
(K+1) = LSB of string value starting address
(K+2) = MSB of string value starting address
* (K) signifies "contents of address K"
8-13
The address will probably be in high RAM where string storage space has
been set aside. But, if your string variable is a constant (a string literal), then
it will point to the area of memory where the program line with the constant
is stored, in the program buffer area. Thus, program statements like
A$="HELLO" do not use string storage space.
For all of the above variables, addresses (K-1) and (K-2) will store the TRS-80
Character Code for the variable name. Address (K-3) will contain a descriptor
code that tells the Computer what the variable type is. Integer is 02; single
precision is 04; double precision is 08; and string is 03.
VARPTR(array variable) will return the address for the first byte of that
element in the array. The element will consist of 2 bytes if it is an integer
array; 3 bytes if it is a string array; 4 bytes if it is a single precision array;
and 8 bytes if it is a double precision array.
The first element in the array is preceded by:
1. A sequence of two bytes per dimension, each two-byte pair indicating the
"depth" of each respective dimension.
2. A single byte indicating the total number of dimensions in the array.
3. A two-byte pair indicating the total number of elements in the array.
4. A two-byte pair containing the ASCII-coded array name.
5. A one-byte type-descriptor (02=Integer, 03 = String, 04 =
Single-Precision, 08 = Double-Precision).
Item (1) immediately precedes the first element, Item (2) precedes Item (1),
and so on.
The elements of the array are stored sequentially with the first
dimension-subscripts varying "fastest", then the second, etc.
8-14
Examples
A! = 2 will be stored as follows
2 = 10 Binary, normalized as .1 E2 = .1 x 22
So exponent of A is 128+2 = 130 (called excess 128)
MSB of A is 10000000;
however, the high bit is changed to zero since the value is positive (called
hidden or implied leading one).
So A! is stored as
Exponent (K+3) MSB (K+2) Next MSB (K+l)
130
0
0
LSB (K)
0
A!= -.5 will be stored as
Exponent (K+3) MSB (K+2) Next MSB (K+1)
128
128
0
LSB (K)
0
A!= 7 will be stored as
Exponent (K+3) MSB (K+2) Next MSB (K+1)
131
96
0
LSB (K)
0
A!= -7
Exponent (K+3) MSB (K+2) Next MSB (K+1)
131
224
0
LSB (K)
0
Zero is simply stored as a zero-exponent. The other bytes are insignificant.
Logical Operators
In Chapter 1 we described how AND, OR and NOT can be used with
relational expressions. For example,
100 IF A=C AND NOT(B>40) THEN 60 ELSE 50
AND, OR and NOT can also be used for bit manipulation, bitwise
comparisons, and Boolean operations. In this section, we will explain how
such operations can be implemented using LEVEL II BASIC. However, we
will not try to explain Boolean algebra, decimal-to-binary conversions, binary
arithmetic, etc. If you need to learn about these subjects, Radio Shack's
Understanding Digital Computers (Catalog Number 62-2027) would be a
good place to start.
AND, OR and NOT convert their arguments to sixteen-bit, signed
two's-complement integers in the range -32768 to +32767. They then perform
the specified logical operation on them and return a result within the same
range. If the arguments are not in this range, an "FC" error results.
8-15
The operations are performed in bitwise fashion; this means that each bit of
the result is obtained by examining the bit in the same position for each
argument.
The following truth tables show the logical relationship between bits:
OPERATOR
AND
OPERATOR
OR
OPERATOR
NOT
ARGUMENT I
1
0
1
0
ARGUMENT I
1
1
0
0
ARGUMENT
1
0
ARGUMENT 2
1
1
0
0
ARGUMENT 2
1
0
1
0
RESULT
1
0
0
0
RESULT
1
1
1
0
RESULT
0
1
EXAMPLES:
(In all of the examples below, leading zeroes on binary numbers are not
shown.)
63 AND 16 = 16
Since 63 equals binary 111111 and 16 equals binary
10000, the result of the AND is binary 10000 or 16.
15 AND 14 = 14
15 equals binary 1111 and 14 equals binary 1110, so 15
and 14 equals binary 1110 or 14.
-1 AND 8 = 8
-1 equals binary 1111111111111111 and 8 equals binary
1000, so the result is binary 1000 or 8 decimal.
4 AND 2 = 0
4 equals binary 100 and 2 equals binary 10, so the result
is binary 0 because none of the bits in either argument
match to give a 1 bit in the result.
4 OR 2 = 6
Binary 100 OR'd with binary 10 equals binary 110, or 6
decimal.
10 OR 10 = 10
Binary 1010 OR'd with binary 1010 equals binary 1010,
or 10 decimal.
-1 OR -2 = -1
Binary 1111111111111111 (-1) OR'd with binary
1111111111111110 (-2) equals binary
1111111111111111, or-1.
8-16
NOT 0 = -1
The bit complement of binary 0 to 16 places is six-teen
ones (1111111111111111) or-1. Also NOT -1=0.
NOT X
NOT X is equal to -(X+1). This is because to form the
sixteen bit two's complement of the number, you take
the bit (one's) complement and add one.
NOT 1 = -2
The sixteen bit complement of 1 is
1111111111111110, which is equal to -(1+1) or -2.
A typical use of the bitwise operators is to test bits set in the TRS-80's input
ports which reflect the state of some external device. This requires the
TRS-80 Expansion Interface.
Bit position 7 is the most significant bit of a byte, while position 0 is the least
significant.
For instance, suppose bit 1 of I/O port 5 is 0 when the door to Room X is
closed, and 1 if the door is open. The following program will print "Intruder
Alert" if the door is opened:
10 IF INP(5) AND 2 THEN PRINT "INTRUDER ALERT": GOTO 100
20 GOTO 10
See Chapter 1, "Logical Operators".
8-17
9 / Editing
LEVEL I users undoubtedly spent lots of time retyping long
program lines, all because of a typo, or maybe just to make a
minor change. Once a line had been entered, there was no
way to alter the line - without starting all over and retyping
it.
LEVEL II's editing features eliminate much of this extra
work. In fact, it's so easy to alter program lines, you'll
probably be able to do much more experimenting with
multi-statement lines, complex expressions, etc.
Commands, subcommands, and special function keys described in this
chapter:
EDIT
[ENTER]
nSpace-Bar
n←
SHIFT ↑
L
X
I
A
E
Q
H
nD
nC
nSc
nKc
EDIT line number
This command puts you in the Edit Mode. You must specify which line you
wish to edit, in one of two ways:
EDIT line-number [ENTER]
Lets you edit the specified line. If line number
is not in use, or an FC error occurs
EDIT.
Lets you edit the current program line - last
line entered or altered or in which an error
has occurred.
For example, type in and [ENTER] the following line:
100 FOR I = 1 TO 10 STEP.5 : PRINT I, I↑
↑2, I↑
↑3 : NEXT
This line will be used in exercising all the Edit subcommands described
below.
9-1
Now type EDIT 100 and hit [ENTER]. The Computer will display:
100 _
You are now in the Edit Mode and may begin editing line 100.
NOTE: EDITing a program line automatically clears all variable values and
eliminates pending FOR/NEXT and GOSUB operations. If BASIC encounters
a syntax error during program execution, it will automatically put you in the
EDIT mode. Before EDITing the line, you may want to examine current
variable values. In this case, you must type Q as your first EDIT command.
This will return you to the command mode, where you may examine variable
values. Any other EDIT command (typing E, pressing ENTER, etc.) will clear
out all variables.
ENTER key
Hitting [ENTER] while in the Edit Mode causes the Computer to record all
the changes you've made (if any) in the current line, and returns you to the
Command Mode.
nSpace-bar
In the Edit Mode, hitting the Space-bar moves the cursor over one space to
the right and displays any character stored in the preceding position. For
example, using line 100 entered above, put the Computer in the Edit Mode so
the Display shows:
100 _
Now hit the Space-Bar. The cursor will move over one space, and the first
character of the program line will be displayed. If this character was a blank,
then a blank will be displayed. Hit the SpaceBar until you reach the first
non-blank character:
100 F_
is displayed. To move over more than one space at a time, hit the desired
number of spaces first, and then hit the space-bar. For example, type 5 and
hit Space-bar, and the display will show something like this (may vary
depending on how many blanks you inserted in the line):
100 FOR I=_
9-2
Now type 8 and hit the Space-bar. The cursor will move over 8 spaces to the
right, and 8 more characters will be displayed.
n ←(Backspace)
Moves the cursor to the left by n spaces. If no number n is specified, the
cursor moves back one space. When the cursor moves to the left, all
characters in its "path" are erased from the display, but they are not
deleted from the program line. Using this in conjunction with D or K or C
can give misleading Video Displays of your program lines. So, be careful
using it! For example, assuming you've used nSpace-Bar so that the Display
shows:
100 FOR I=1 TO 10_
type 8 and hit the ← key. The Display will show something like this:
100 FOR I=_
(will vary depending on number of blanks in your line
100 )
SHIFT ↑
Hitting SHIFT and ↑ keys together effects an escape from any of the Insert
subcommands listed below: X, I and H. After escaping from an Insert
subcommand, you'll still be in the Edit Mode, and the cursor will remain in
its current position. (Hitting [ENTER] is another way to exit these Insert
subcommands).
9-3
L (List Line)
When the Computer is in the Edit Mode, and is not currently executing one of
the subcommands below, hitting L causes the remainder of the program line
to be displayed. The cursor drops down to the next line of the Display,
reprints the current line number, and moves to the first position of the line.
For example, when the Display shows
100 _
hit L (without hitting [ENTER] key) and line 100 will be displayed:
100 FOR I=1 TO 10 STEP .5 : PRINT I, I↑
↑2, I↑
↑3 : NEXT
100 _
This lets you look at the line in its current form while you're doing the
editing.
X (Extend Line)
Causes the rest of the current line to be displayed, moves cursor to end of
line, and puts Computer in the Insert subcommand mode so you can add
material to the end of the line. For example, using line 100, when the Display
shows
100 _
hit X (without hitting [ENTER]) and the entire line will be displayed; notice
that the cursor now follows the last character on the line:
100 FOR I=1 TO 10 STEP .5 : PRINT I, I↑
↑2, I↑
↑3 : NEXT_
We can now add another statement to the line, or delete material from the
line by using the ← key. For example, type PRINT"DONE" at the end of the
line. Now hit [ENTER]. If you now type LIST 100, the Display should show
something like this:
100 FOR I=1 TO 10 STEP .5 : PRINT 1, 1↑
↑2, 1↑
↑3 : NEXT : PRINT"DONE"
9-4
I (Insert)
Allows you to insert material beginning at the current cursor position on the
line. (Hitting ← will actually delete material from the line in this mode.) For
example, type and [ENTER] the EDIT 100 command, then use the Space Bar
to move over to the decimal point in line 100. The Display will show:
100 FOR I=1 TO 10 STEP ._
Suppose you want to change the increment from .5 to .25. Hit the I key (don't
hit [ENTER]) and the Computer will now let you insert material at the
current position. Now hit 2 so the Display shows:
100 FOR I=1 TO 10 STEP .2
You've made the necessary change, so hit SHIFT ↑ to escape from the Insert
Subcommand. Now hit L key to display remainder of line and move cursor
back to the beginning of the line:
100 FOR I=1 TO 10 STEP .25 : PRINT I, I↑
↑2, I↑
↑3 : NEXT : PRINT"DONE"
100 _
You can also exit the Insert subcommand and save all changes by hitting
[ENTER]. This will return you to Command mode.
A (Cancel and Restart)
Moves the cursor back to the beginning of the program line and cancels
editing changes already made. For example, if you have added, deleted, or
changed something in a line, and you wish to go back to the beginning of the
line and cancel the changes already made: first hit SHIFT ↑ (to escape from
any subcommand you may be executing); then hit A. (The cursor will drop
down to the next line, display the line number and move to the first program
character.
E (Save Changes and Exit)
Causes Computer to end editing and save all changes made. You must be in
Edit Mode, not executing any subcommand, when you hit E to end editing.
9-5
Q (Cancel and Exit)
Tells Computer to end editing and cancel all changes made in the current
editing session. If you've decided not to change the line, type Q to cancel
changes and leave Edit Mode.
H (Hack and Insert)
Tells Computer to delete remainder of line and lets you insert material at the
current cursor position. Hitting ← will actually delete a character from the
line in this mode. For example, using line 100 listed above, enter the Edit
Mode and space over to the last statement, PRINT"DONE". Suppose you
wish to delete this statement and insert an END statement. Display will
show:
100 FOR I=1 TO 10 STEP .25 : PRINT I, I↑
↑2, I↑
↑3 : NEXT :_
Now type H and then type END. Hit [ENTER] key. List the line:
100 FOR I=1 TO 10 STEP .25 : PRINT I, I↑
↑2, I↑
↑3 : NEXT : END
should be displayed.
nD (Delete)
Tells Computer to delete the specified number n characters to the right of the
cursor. The deleted characters will be enclosed in exclamation marks to show
you which characters were affected. For example, using line 100, space over
to the PRINT command statement:
100 FOR I=1 TO 10 STEP .25 :_
Now type 19D. This tells the Computer to delete 19 characters to the right of
the cursor. The display should show something like this:
100 FOR I=1 TO 10 STEP .25 : !PRINT I, I↑
↑2, I↑
↑3 :!_
When you list the complete line, you'll see that the PRINT statement has
been deleted.
9-6
nC (Change)
Tells the Computer to let you change the specified number of characters
beginning at the current cursor position. If you type C without a preceding
number, the Computer assumes you want to change one character. When you
have entered n number of characters, the Computer returns you to the Edit
Mode (so you're not in the nC Subcommand). For example, using line 100,
suppose you want to change the final value of the FOR-NEXT loop, from " 10"
to " 15". In the Edit Mode, space over to just before the "0" in "10".
100 FOR I=1 TO 1_
Now type C. Computer will assume you want to change just one character.
Type 5, then hit L. When you list the line, you'll see that the change has been
made.
100 FOR I=1 TO 15 STEP .25 : NEXT : END
would be the current line if you've followed the editing sequence in this
chapter.
The ← does not work as a backspace under the C command in Edit mode.
Instead, it replaces the character you want to change with a backspace. So it
should not be used. If you make a mistake while typing in a change, Edit the
line again to correct it, instead of using ←.
nSc (Search)
Tells the Computer to search for the nth occurrence of the character c, and
move the cursor to that position. If you don't specify a value for n, the
Computer will search for the first occurrence of the specified character. If
character c is not found, cursor goes to the end of the line. Note: The
Computer only searches through characters to the right of the cursor.
For example, using the current form of line 100, type EDIT 100 ( [ENTER] )
and then hit 2S: . This tells the Computer to search for the second occurrence
of the colon character. Display should show:
100 FOR I=1 TO 15 STEP.25 : NEXT _
You may now execute one of the subcommands beginning at the current
cursor position. For example, suppose you want to add the counter variable
after the NEXT statement. Type I to enter the Insert subcommand, then type
the variable name, I. That's all you want to insert, so hit SHIFT ↑ to escape
from the Insert subcommand. The next time you list the line, it should
appear as:
100 FOR I=1 TO 15 STEP.25 : NEXT I : END
9-7
nKc (Search and "Kill")
Tells the Computer to delete ail characters up to the nth occurrence of
character c, and move the cursor to that position. For example, using the
current version of line 100, suppose we want to delete the entire line up to
the END statement. Type EDIT 100 ( [ENTER] ), and then type 2K: . This
tells the Computer to delete all characters up to the 2nd occurrence of the
colon. Display should show:
100 !FOR I=1 TO 15 STEP .25 : NEXT I!_
The second colon still needs to be deleted, so type D . The Display will now
show:
100 !FOR I=1 TO 15 STEP .25 : NEXT I!!:!_
Now hit [ENTER] and type LIST 100 ( [ENTER] ).
Line 100 should look something like this:
100 END
9-8
10 / Expansion Interface
An Expansion Interface is available for the TRS-80 LEVEL II
Computer. This interface will allow the use of additional
Input/Output devices. There is also a provision for adding
RAM memory. The Interface will allow four major additions
to the TRS-80:
1.
2.
3.
4.
An additional cassette deck
A TRS-80 Line Printer
Up to four Mini-Disks
Up to 48K bytes of RAM Memory
(32K in the Expansion Interface)
These devices are available through your Radio Shack store
or dealer. To set up the Expansion Interface and any of the
external devices, see the Expansion Interface instructions.
When the Expansion Interface is hooked up to the TRS-80, the Computer
assumes that a Mini-Disk is interfaced. The Mini Disk will allow the use of
additional commands and statements listed later. Even if you don't have a
Mini Disk, the Computer will assume you do (because of the presence of the
Disk Controller) and will try to input special instructions from the Disk
Controller. Therefore, to use the Interface without a Mini Disk, hold down the
BREAK key as you turn on the TRS-80. This will override the mini-disk mode
and allow normal LEVEL II operation. Whenever you need to press the Reset
button, you must also hold down the BREAK key.
Dual Cassettes
The use of two cassettes will allow a much more efficient and convenient
manner of updating data stored on tape. For example, if you have payroll
data stored on tape, the information can be read in one item at a time from
cassette # 1 then changed or added and written out on cassette #2, one item
at a time. The routine might look like this:
10
20
30
40
50
60
70
INPUT #-1,A,B,C,D
PRINT "MAKE CORRECTIONS HERE: RETYPE LINE"
INPUT A,B,C,D
PRINT "THE LINE NOW READS:" A,B,C,D
PRINT "STORING ON TAPE #2..."
PRINT #-2,A,B,C,D
GOTO 10
10-1
This is a very simple application; however, very powerful routines can be
constructed to allow input and output of data using two tapes
simultaneously.
Commands can also be given the device numbers to allow you to control the
cassette decks. The cassette related commands are CLOAD, CSAVE, and
CLOAD? When given the cassette numbers (1 or 2) they will specify the
cassette that is to operate. For example:
CLOAD #-1,"A"
(the position of the comma is very important) will load the file "A" from
cassette # 1.
CSAVE #-2, "A"
will transfer the resident program to cassette tape #2.
CLOAD #-2,?"A"
will verify a program on cassette #2.
See Chapter 2, CLOAD, CLOAD?, CSAVE,
Line Printer
A line printer can give you a hard copy of information generated by your
TRS-80. There are several commands which allow various line printer
applications. If you attempt to execute these commands when a line printer is
not connected (or is turned off) the Computer will "freeze up". Either turn on
the line printer, or if one isn't connected, Reset the Computer. If you have the
Expansion Interface, you must hold down the Break key while you press
Reset. Reset with the Expansion Interface connected will cause BASIC to lose
your program.
10-2
LLIST
Works like LIST, but outputs to the Printer
LLIST
List current program to printer.
LLIST 100-
Will list line 100 to the end of the program to the line
printer.
LLIST 100-200
Will list line 100 through 200 to the line printer.
LLIST.
Lists current line to the line printer.
LLIST-100
Lists all lines up to and including line 100 to the line
printer.
See Chapter 2, LIST.
LPRINT
This command or statement allows you to output information to the Line
Printer. For example, LPRINT A will list the value of A to the line printer.
LPRINT can also be used with all the options available with PRINT except
PRINT @.
Examples:
LPRINT variable or expression lists the variable or expression to the line
printer.
LPRINT USING prints the information to the line printer using the form at
specified.
LPRINT TAB will move the line printer carriage position to the right as
indicated by the TAB expression.
The maximum TAB value for an LPRINT statement is 63. But there's a
simple way to tab past column 63 on a line printer using the STRING$
function.
Example:
10 LPRINT TAB(5)"NAME" TAB(30)"ADDRESS" STRING$(63,32)"BALANCE"
will print NAME at column 5, ADDRESS at column 30, and BALANCE at
column 100.
See Chapter 3, PRINT.
10-3
Codes
Several codes are used to control the output of the line printer. You can
LPRINT CHR$(n) where n is the TRS-80 Control Code from the chart below
to execute these functions.
LPRINT CHR$(10)
will generate a line feed.
CODE
10
11
12
13
138
FUNCTION
line feed with carriage return
move carriage to top of form (page)
move carriage to top of form (page)
line feed with carriage return
interpreted as a carriage return/line feed
For example:
10 LPRINT "LINE ONE" CHR$(10) "LINE TWO" CHR$(10) "LINE THREE"
produces
LINE ONE
LINE TWO
LINE THREE
NOTE: At the end of a line, a line feed is automatically generated unless a
semi-colon is used at the end of the PRINT statement.
The top of form code (11 or 12) must be the first item in an LPRINT list. Any
preceding items will be ignored. For example, use
LPRINT CHR$(11) "THIS IS THE FIRST LINE" and not
LPRINT "THIS IS THE FIRST LINE" CHR$(11). In the second case, the
sentence will be ignored.
The linefeed/carriage return codes (10 or 13) should not be placed at the
beginning of an LPRINT or they will be ignored.
NOTE: CHR$(138) will produce a carriage return wherever it is used in an
LPRINT list.
The top of form codes (11 or 12) are passive codes. The Computer does not
sense when it is at the end of a page and automatically advance to the next
page. You must tell it each time you want it to advance using these codes.
But once you do this, the Computer will calculate the correct number of lines
it needs to space to get to the next page. It keeps track of the number of lines
that have already been printed on this page in the line counter, address
16425. At address 16424, it stores the number of lines allowed per page. By
subtracting the number of lines already printed from the number allowed per
10-4
page, it figures the number of lines to leave blank and then it spaces down
this amount to start the next page.
When the Computer is first powered up, the page size is initialized to 66 lines
per page, but you can change this by using the POKE command to change the
value stored at address 16424.
For example:
POKE 16424,40
changes the size to 39 lines per page. The value at 16424 = page length + 1.
At the beginning of your program you should set the line counter to 1. This
only needs to be done once. The Computer will reset it to 1 each time you
execute a form feed, LPRINT CHR$(11). Initialize it by executing a POKE
16425,1.
The line printer will print 6 lines per inch. If each page is 11 inches high
POKE 16424,67 for 66 lines/page. In general, multiply 6 by the number of
inches in height of the page you are using and add 1 to get the value you
should POKE into address 16424.
Some printers will respond to additional Control Codes in a similar way,
using LPRINT CHR$(control code). Check your printer manual to find out
what functions it will perform and the decimal number control code to use
them.
The line printer will print 6 lines per inch and 66 lines per page. If this
format is not suitable, the number of lines per page can be changed by
POKEing the new number of lines into memory location 16424.
Example:
POKE 16424,40
POKE 16425,0
This instructs the Line Printer to print 39 lines per page, and resets the line
counter to zero.
10-5
Mini-Disks - (DISK BASIC)
The TRS-80 Mini Disk System is a small version of a floppy disk. The disk
allows vast file storage space and much quicker access time than you get with
tape storage. Drive 0 will contain about 58,880 bytes of free space for files.
Each additional disk will have 83,060 bytes of file space. The disk system has
its own set of commands, which allow manipulations of files and expanded
abilities in file use. The TRS-80 Mini Disk System allows both sequential and
random access. The disks will also allow use of several additional BASIC
commands and functions, including:
Commands:
CLOSE
FIELD
GET
KILL
LSET
NAME
OPEN
PRINT
PUT
RSET
MERGE
LOAD
SAVE
CVD
CVI
CVS
EOF
LOF
MKD$
MKI$
MKS$
I/O Functions
Additions to LEVEL II
Ten USR calls – USR0 through
USR9
INSTR (performs function of
INSTRING subroutine
– see Chapter 4)
&H (hex constants)
&O (octal constants)
TIME$ (Date and 24-Hr.
Real-Time Clock.)
DEFUSR
LINE INPUT
DEF FN (User Defined Functions)
MID$ (on left side of equation)
For explanation of these commands functions, see the TRS-80 Disk Operating
System Manual.
10-6
Expansion of RAM Memory
The TRS-80 Expansion Interface has provisions for adding extra RAM
memory. This is done by adding RAM memory chips. You can add up to
32,768 additional bytes of memory. For price information and free
installation, see your Radio Shack store or dealer.
10-7
11 / Saving Time and Space
Most LEVEL II programs are faster and take up less memory
space than their LEVEL I counterparts. But even with its
inherently more efficient features, LEVEL II can be further
streamlined by following a few simple guidelines when
constructing your program.
Saving Memory Space
1) When your program is operating properly, delete all unnecessary REM
statements from your running version.
2) Do not use unnecessary spaces between statements, operators, etc.
3) When possible, use multiple-statement program lines (with a colon
between each two statements). Each time you enter a new line number it
costs you 5 bytes.
4) Use integer variables whenever possible, for example,
FOR I% = 1 TO 10
Integers take only five bytes. Single precision takes 7 and double precision
takes 11 bytes.
5) Using subroutines will save program space if the operation is called from
different places several times. If a routine is always called from the same
place, use unconditional branches (GOTO's). Each active GOSUB takes 6
bytes; a GOTO takes none at Run time.
6) Structure your calculations so as to use as few parentheses as possible
(refer to Chapter 1, "Arithmetic Operators"). It takes 4 bytes to process
parentheses. And since these operations inside parentheses are done first,
the result of each parenthetical expression must be stored (this takes 12
bytes).
7) Dimension arrays sparingly. When you set up a matrix, the Computer
reserves 11 subscript addresses for each DIMension, even if the space is not
filled. Use the zero subscripted elements, since they are always available.
8) Use DEF statements when you will be working with values other than
single precision (strings, integers and double precision). A DEF statement
takes 6 bytes but this is made up for fairly quickly since you don't need to use
type declaration characters with the variable names.
11-1
Speeding Up Execution
The speed at which a program is processed will depend on the complexity of
the operations and the number of instructions. In most simple programs,
speed will not be a factor. It will seem as though the answer is returned the
moment you enter RUN. However, as you begin writing longer and more
intricate programs, speed will become a significant factor. Here are some
suggestions to guide you in designing speedier programs.
1) Delete all unnecessary lines in the program (REM statements, etc.)
2) Combine multi-statement program lines when practical.
3) Use variables rather than constants in operations (very important). Your
TRS-80 normally operates using floating decimal point values. It takes a lot
less time to access a variable than to convert a constant to floating point
representation. For example: if you will use π a lot in a program, define π as a
variable (PI=3.14159) and use the variable (PI) in the operations.
4) Use POKE graphics. This can speed up your graphics displays by a factor
of 6.
5) Define the most commonly used variables first. When a variable is
defined it is located at the top of the variable table. The second will be just
below that. When variables are accessed, the table will be searched to find
the variable. Therefore, you will save time by locating frequently used
variables at the top of the table (by defining them first). The Computer will
not have to look as far to find them.
6) Use integer variables, especially in FOR-NEXT loops, when possible. This
is most important of all.
11-2
Appendix
A / Level II Summary
Command
Mode
Function
Page
[ENTER]
Return carriage and interpret command
1/3
[\À\]
Cursor backspace and delete last character typed
1/3
[SHIFT] [\À\]
Cursor to beginning of line; erase line
1/3
[\Ã\]
Linefeed
1/3
:
Statement delimiter; use between statements
on same logical line
1/3
[\Â\]
Move cursor to next tab stop. Tab stops are at
positions 0, 8, 16, 24, 32, 48, and 56.
1/3
[SHIFT] [\Â\]
Convert display to 32 characters per line
1/3
[CLEAR]
Clear Display and convert to 64 characters per line
1/3
Execute
Mode
Function
Page
[SHIFT] [\@\]
Pause in execution; freeze display during LIST
1/3
[BREAK]
Stop execution
1/3
[ENTER]
Interpret data entered from Keyboard with
INPUT statement
1/3
Abbreviations
Function
Page
?
Use in place of PRINT.
1/8
'
Use in place of :REM
1/8
.
"current line"; use in place of line number with
LIST, EDIT, etc.
1/8
A-1
Type Declaration Characters
Character
Type
Examples
Page
$
String
A$, ZZ$
1/4
%
Integer
A1%, SUM%
1/4
!
Single-Precision
B!, N1!
1/4
#
Double-Precision
A#, 1/3#
1/4
D
Double-Precision
(exponential notation)
1.23456789D-12
1/4
E
Single-Precision
(exponential notation)
1.23456E+30
1/4
Arithmetic Operators
Page
+ add
1/5
- subtract
1/5
* multiply
1/5
/ divide
1/5
↑ exponentiate (e.g., 2↑
↑3 = 8)
1/5
String Operator
page
+ concatenate (string together)
"2" + "2"= "22"
1/7
Relational Operators
Symbol
in numeric expressions
in string expressions
Page
<
is less than
precedes
1/6-7
>
is greater than
follows
1/6-7
=
is equal to
equals
1/6-7
< = or = <
is less than or equal to
precedes or equals
1/6-7
> = or = >
is greater than or equal to
follows or equals
1/6-7
< > or > <
does not equal
does not equal
1/6-7
A-2
Order of Operations
Page
↑ (Exponentiation)
1/7
– (Negation)
1/7
*, /
1/7
+, -
1/7
Relational operators
1/7
NOT
1/7
AND
1/7
OR
1/7
Precedence order is from left to right for operators on the same level
1/7
Commands
Command/Function
Examples
Page
AUTO mm,nn
Turn on automatic line
numbering beginning with
mm, using increment of nn.
AUTO
AUTO 10
AUTO 5,5
AUTO.,10
CLEAR
2/1
CLEAR n
Same as CLEAR but also sets
aside n bytes for strings.
CLEAR 500
CLEAR MEM/4
2/2
CLOAD
Load a BASIC program from
tape
CLOAD"A"
CLOAD#-1,"A"
CLOAD?
Verifies BASIC program on
tape to one in memory
CLOAD?"A"
CLOAD#-2,?"A" (with expansion interface
2/3
CONT
CONT
2/3
CLEAR
Set numeric variables to zero,
strings to null.
Continue after BREAK or
STOP in execution.
A-3
2/2
2/2
(with expansion interface)
Command/Function
Examples
Page
CSAVE
CSAVE "A"
CSAVE #-2,"A"
2/4
Save a BASIC program on
tape
(with expansion interface)
DELETE mm-nn
Delete program line from line
mm to line nn.
DELETE 100
DELETE 10-50
DELETE .
2/4
EDIT mm
Enter Edit Mode for line mm.
See Edit Mode Subcommands below.
EDIT 100
EDIT .
2/5
LIST mm-nn
List all program lines from
mm to nn.
LIST
LIST
LIST
LIST
LIST
2/5
NEW
NEW
2/5
RUN mm
Execute program beginning
at lowest numbered line or
mm if specified.
RUN
RUN 55
2/6
SYSTEM
Enter Monitor Mode for
loading of machine-language
file from cassette.
See Chapter 2
2/6
TROFF
TROFF
2/7
TRON
2/7
Delete entire program and
reset all variables, pointers
etc.
Turn off Trace
TRON
Turn on Trace
30-60
30-90
.
A-4
Edit Mode Subcommands and Function Keys
SubCommand
Function
Page
ENTER
End editing and return to Command Mode.
9/2
SHIFT ↑
Escape from X, I, and H subcommands and remain in Edit Mode.
9/3
nSpace-Bar
Move cursor n spaces to right.
9/2
n←
Move cursor n spaces to left.
9/3
L
List remainder of program line and return to beginning of line.
9/4
X
List remainder of program line, move cursor to end of line, and start Insert
subcommand.
9/4
I
Insert the following sequence of characters at current cursor position; use
Escape to exit this subcommand.
9/5
A
Cancel changes and return cursor to beginning of line
9/5
E
End editing, save all changes and return to Command Mode.
9/5
Q
End editing, cancel all changes made and return to Command Mode.
9/6
H
Delete remainder of line and insert following sequence of characters; use
Escape to exit this subcommand.
9/6
nD
Delete specified number of characters n beginning at current cursor position.
9/6
nC
Change (or replace) the specified number of characters n using the next n
characters entered.
9/7
nSc
Move cursor to nth occurrence of character c, counting from current cursor
position.
9/7
nKc
Delete all characters from current cursor position up to nth occurrence of
character c, counting from current cursor position.
9/8
A-5
Input/Output Statements
Statement/Function
Examples
PRINT exp*
Output to Display the value of
exp. Exp may be a numeric or
string expression or constant,
or a list of such items.
PRINT A$
PRINT X+3
PRINT "D=" D
Page
3/1-2
Comma serves as a PRINT
modifier. Causes cursor to
advance to next print zone.
PRINT 1,2,3,4
PRINT "1","2"
PRINT 1,,2
Semi-colon serves as a PRINT
modifier. Inserts a space after a
numeric item in PRINT list.
Inserts no space after a string
item. At end of PRINT list,
suppresses the automatic
carriage return.
PRINT X;"=ANSWER"
PRINT X;Y;Z
PRINT "ANSWER IS";
PRINT @ n
PRINT modifier; begin
PRINTing at specified display
position n.
PRINT @540,"CENTER"
PRINT @N+3,X*3
3/3
PRINT TAB n
Print modifier: moves cursor to
specified Display position n
(expression).
PRINT TAB(N)N
3/3
PRINT USING string;exp
PRINT format specifier; output
exp in form specified by string
field (see below).
PRINT USING A$;X
PRINT USING "#.#";Y+Z
3/4-8
INPUT "message ";variable
Print message (if any) and
await input from Keyboard.
INPUT"ENTER NAME";A$
INPUT"VALUE";X
INPUT"ENTER NUMBERS";X,Y
INPUT A,B,C,D$
3/8-10
PRINT #-1
Output to Cassette #1.
PRINT #-1,A,B,C,D$
3/12
INPUT #-1
Input from Cassette #1.
INPUT #-1,A.B,C,DS
3/12-13
*exp may be a string of numeric constant or variable, or a list of such items.
A-6
Statement/Function
Examples
Page
DATA item list
Hold data for access by READ
statement
DATA 22,33,11,1.2345
DATA "HALL ","SMITH ","DOE
3/10
READ variable list
Assign value(s) to the specified
variable(s), starting with
current DATA element.
READ A,A1,A2,A3
READ A$,B$,C$,D
3/10-11
RESTORE
Reset DATA pointer to first
item in first DATA statement.
RESTORE
3/11
Field Specifiers for PRINT USING statements
Numeric
Character
Function
Example
Page
#
Numeric field (one digit digit
per #).
###
3/4
.
Decimal point position.
##.###
3/4
+
Print leading or trailing signs
(plus for positive numbers,
minus for negative numbers).
+#.###
#.###+
-#.###
#.###-
3/5
–
Print trailing sign only if value
printed is negative.
###.##-
3/5
**
Fill leading blanks with
asterisk.
**###.##
3/4
$$
Place dollar sign immediately
to left of leading digit
$$####.##
3/4
**$
Dollar sign to left of leading
digit and fill leading blanks
with asterisks.
**$####.##
3/4
↑↑↑↑
Exponential format, with one
significant digit to left of
decimal.
#.##↑↑↑↑
↑↑↑↑
3/4
A-7
String
Character
Function
Example
Page
!
Single character.
!
3/5
%spaces%
String with length equal to 2
plus number of spaces between
% symbols.
% %
3/5
Program Statements
Statement/Function
Examples
Page
DEFDBL letter list or range
Define as double-precision all
variables beginning with
specified letter, letters or range
of letters.
DEFDBL J
DEFDBL X,Y,A
DEFDBL A-E,J
4/3
DEFINT letter list or range
Define as integer all variables
beginning with specified letter,
letters or range of letters.
DEFINT A
DEFINT C,E,G
DEFINT A-K
4/2
DEFSNG letter list or range
Define as single-precision all
variables beginning with
specified letter, letters or range
of letters
DEFSNG L
DEFSNG A-L,Z
DEFSNG P,R,A-K
4/3
DEFSTR letter list or range
DEFSTR A-J
4/4
CLEAR n
Set aside specified number of
bytes n for string storage. Clears
value and type of all variables.
CLEAR 750
CLEAR MEM/10
CLEAR 0
4/4
DIM array(dim#1, …,dim#k)
Allocate storage for kdimensional array with the
specified size per dimension:
dim#1, dim#2, …, etc. DIM may
be followed by a list of arrays
separated by commas.
DIM
DIM
DIM
DIM
4/4-5
(Type Definition)
(Assignment and Allocation)
A(2,3)
A1(15),A2(15)
B(X+2),C(J,K)
T(3,3,5)
A-8
6/1-7
Statement/Function
Examples
Page
LET variable=expression
Assign value of expression to
variable. LET is optional in
LEVEL II BASIC.
LET A$="CHARLIE"
LET B1=C1
LET A%=I#
4/5
99 END
4/6
100 STOP
4/6
GOTO line-number
Branch to specified line-number.
GOTO 100
4/7
GOSUB line-number
Branch to sub-routine beginning
at line-number.
GOSUB 3000
4/7
RETURN
Branch to statement following
last-executed GOSUB.
RETURN
4/8
ON exp GOTO line#1, …,line#k
Evaluate expression; if INT (exp)
equals one of the numbers 1
through k, branch to the
appropriate line number.
Otherwise go to next statement.
ON K+1 GOTO 100,200,300
4/8
ON exp GOSUB line#1, …,line#k
Same as ON … GOTO except
branch is sub-routine beginning
at line#1, line#2, …, or line#k,
depending on exp.
ON J GOSUB 330,700
4/9
FOR var=exp TO exp STEP exp
Open a FOR-NEXT loop. STEP
is optional; if not used,
increment of one is used.
FOR I=1 TO 50 STEP 1.5
FOR M%=J% TO K%-1
4/10-12
(Sequence of Execution)
END
End execution, return to
Command Mode.
STOP
Stop execution, print Break
message with current line
number. User may continue with
CONT.
A-9
Statement/Functions
Examples
Page
NEXT variable
Close FOR-NEXT loop. Variable
may be omitted. To close nested
loops, a variable list may be
used. See Chapter 4.
NEXT
NEXT I
NEXT I,J,K
4/10-12
ERROR (code)
Simulate the error specified by
code (See Error Code Table).
ERROR (14)
4/ 13
ON ERROR GOTO line-number
If an error occurs in subsequent
program lines, branch to error
routine beginning at linenumber.
ON ERROR GOTO 999
4/13
RESUME n
Return from error routine to line
specified by n. If n is zero or not
specified, return to statement
containing error. If n is "NEXT",
return to statement following
error-statement.
RESUME
RESUME 0
RESUME 100
RESUME NEXT
4/14
RANDOM
Reseeds random number
generator.
RANDOM
7/4
REM
REM A IS ALTITUDE
4/15
IF A=0 THEN PRINT "ZERO"
ELSE PRINT "NOT ZERO"
4/15-17
REMark indicator; ignore rest of
line.
(Tests - Conditional Statements)
IF exp-1 THEN statement-1
ELSE statement-2
Tests exp-1: If True, execute
statement-1 then jump to next
program line (unless statement1 was a GOTO). If exp-1 is False,
jump directly to ELSE
statement and execute
subsequent statements.
A-10
Statement/Function
Examples
Page
CLS
8/2
RESET(x,y)
Turn off the graphics block with
horizontal coordinate x and
vertical coordinate y,
0 <= X < 128 and 0 <= Y < 48
RESET (8+B,11)
8/2
SET(x,y)
Turn on the graphics block
specified by coordinates x and y.
Same argument limits as
RESET
SET(A*2,B+C)
8/1-2
POKE location, value
Load value into memory location
(both arguments in decimal
form) 0 <= value <=255.
POKE 15635,34
POKE 17770,A+N
8/6
OUT port, value
Send value to port (both
arguments between 0 and 255
inclusive)
OUT 255,10
OUT 55,A
8/5
(Graphics Statements)
CLS
Clear Video Display
(Special Statements)
A-11
String Functions
Function
Operation
Examples
Page
ASC(string)
Returns ASCII code of first character
in string argument.
ASC(B$)
ASC ("H")
5/5
CHR$(code exp)
Returns a one-character string defined
by code. If code specifies a control
function, that function is activated.
CHR$(34)
CHR$(I)
5/5-6
FRE(string)
Returns amount of memory available
for string storage Argument is a
dummy variable.
FRE(A$)
5/6
INKEY$
Strobes Keyboard and returns a onecharacter string corresponding to key
pressed during strobe (null string if no
key is pressed).
INKEY$
5/7
LEFT$(string,n)
Returns first n characters of string.
LEFT$(A$,1)
LEFT$(L1$+C$,8)
LEFT$(A$,M+L)
5/8
LEN(string)
Returns length of string (zero for null
string).
LEN(A$+B$)
LEN("HOURS")
5/8
MID$(string,p,n)
Returns substring of string with length
n and starting at position pin string.
MID$(M$,5,2)
MID$(M$+B$,P,L-1)
5/9
RIGHTS(string,n)
Returns last n characters of string.
RIGHT$(NA$,7)
RIGHT$(AB$,M2)
5/9
STR$(numeric exp)
Returns a string representation of the
evaluated argument.
STR$(1.2345)
STR$(A+B*2)
5/9-10
STRING$(n,char)
Returns a sequence of n char symbols
using first character of char.
STRING$(30,".")
STRING$(25,"A")
STRING$(5,C$)
5/10
VAL(string)
Returns a numeric value corresponding
to a numeric-valued string.
VAL("1"+A$+"."+C$)
VAL(A$+B$)
VAL(G1$)
5/11
*string may be a string variable, expression, or constant:
A-12
Arithmetic Functions*
Function
Operation (unless noted otherwise,
-1.7E+38<= exp < =1.7E+38)
ABS(exp)
Examples
Page
Returns absolute value.
ABS(L*.7)
ABS(SIN(X))
7/1
ATN(exp)
Returns arctangent in radians.
ATN(2.7)
ATN(A*3)
7/1
CDBL(exp)
Returns double-precision
representation of exp.
CDBL(A)
CDBL(A+1/3#)
7/2
CINT(exp)
Returns largest integer not greater
than exp. Limits:
-32768 <= exp <+32768.
CINT(A#+B)
7/2
COS(exp)
Returns the cosine of exp; assumes exp
is in radians.
COS(2*A)
COS(A/57.29578)
7/2
CSNG(exp)
Returns single-precision
representation, with 5/4 rounding in
least significant decimal when exp is
double-precision.
CSNG(A#)
CSNG(.33*B#)
7/2
EXP(exp)
Returns the natural exponential,
eexp =EXP(exp).
EXP(34.5)
EXP(A*B*C-1)
7/3
FIX(exp)
Returns the integer equivalent to
truncated exp (fractional part of exp is
chopped off).
FIX(A-B)
7/3
INT(exp)
Returns largest integer not greater
than exp.
INT(A+B*C)
7/3
LOG(exp)
Returns natural logarithm (base e) of
exp. Limits: exp must be positive.
LOG(12.33)
LOG(A* B+B)
7/3
RND(0)
Returns a pseudo-random number
between 0.000001 and 0.999999
inclusive.
RND(0)
7/4
RND(exp)
Returns a pseudo-random number
between 1 and INT(exp) inclusive.
Limits: 1 <= exp 32768.
RND(40)
RND(A+B)
7/4
*exp is any numeric-valued expression or constant.
A-13
Function
Operation
Examples
Page
SGN(exp)
Returns -1 for negative exp; 0 for zero
exp; +1 for positive exp.
SGN(A*B+3)
SGN(COS(X))
7/4
SIN(exp)
Returns the sine of exp; assumes exp is
in radians.
SIN(A/B)
SIN(90/57.29578)
7/4
SQR(exp)
Returns square root of exp. Limits: exp
must be non-negative.
SQR(A*A-B*B)
7/5
TAN(exp)
Returns the tangent of exp; assumes
exp is in radians.
TAN(X)
TAN(X*.01745329)
7/5
Special Functions
Function
Operation and Limits
Examples
Page
ERL
Returns line number of current error.
ERL
8/3
ERR
Returns a value related to current
error code (if error has occurred).
ERR=(error code-1)*2. Also:
(ERR/2)+1=error code.
ERR/2+1
8/4
INP(port)
Inputs and returns the current value
from the specified port. Both argument
and result are in the range 0 to 255
inclusive.
INP(55)
8/4
MEM
Returns total unused and unprotected
bytes in memory. Does not include
unused string storage space.
MEM
8/5
PEEK(location)
Returns value stored in the specified
memory byte. location must be a valid
memory address in decimal form (see
Memory Map in Appendix D).
PEEK(15370)
8/6
POINT(x,y)
Checks the graphics block specified by
horizontal coordinate x and vertical
coordinate y. If block is "on", returns a
True (-1); if block is "off", returns a
False (0).
Limits: 0 <= x < 128; 0 <= y < 48.
POINT(A*2,B+C)
8/2
POS(0)
Returns a number indicating the current cursor position. The argument "0"
is a dummy variable.
POS(0)
8/7
A-14
Function
Operation and Limits
Examples
Page
USR(n)
Branches to machine language subroutine. See Chapter 8.
USR(0)
8/8-12
VARPTR(var)
Returns the address where the specified VARPTR(A$)
variable's name, value and pointer are
VARPTR(N1 )
stored, var must be a valid variable
name.
A-15
8/13-15
LEVEL II Reserved Words*
@
ABS
AND
ASC
ATN
AUTO
CDBL
CHR$
CINT
CLEAR
CLOCK
CLOSE
CLS
CMD
CONT
COS
CSNG
CVD
CVI
CVS
DATA
DEFDBL
DEFFN
DEFINT
DEFSNG
DEFUSR
DEFSTR
DELETE
DIM
EDIT
ELSE
END
EOF
ERL
ERR
ERROR
EXP
FIELD
FIX
*
FIX
FOR
FORMAT
FRE
FREE
GET
GOSUB
GOTO
IF
INKEY$
INP
INPUT
INSTR
INT
KILL
LEFT $
LET
LSET
LEN
LINE
LIST
LOAD
LOC
LOF
LOG
MEM
MERGE
MID$
MKD$
MKI$
MKS$
NAME
NEW
NEXT
NOT
ON
OPEN
OR
OUT
PEEK
POINT
POKE
POS
POSN
PRINT
PUT
RANDOM
READ
REM
RENAME
RESET
RESTORE
RESUME
RETURN
RIGHT $
RND
RSET
SAVE
SET
SGN
SIN
SQR
STEP
STOP
STRING$
STR$
TAB
TAN
THEN
TIME$
TO
TROFF
TRON
USING
USR
VAL
VARPTR
VERIFY
Many of these words have no function in LEVEL II BASIC; they are
reserved for use in LEVEL II DISK BASIC. None of these words can be
used inside a variable name. You'll get a syntax error if you try to use
these words as variables.
A-16
Program Limits and Memory Overhead
RANGES
Integers
Single Precision
Double Precision
-32768 to +32767 inclusive
-1.701411E±38 to +1.701411E±38 inclusive
-1.701411834544556E+38 to +1.701411834544556E+38 inclusive
String Range: Up to 255 characters
Line Numbers Allowed:
0 to 65529 inclusive
Program Line Length:
Up to 255 characters
MEMORY OVERHEAD
Program lines require 5 bytes minimum, as follows:
Line Number - 2 bytes
Line Pointer - 2 bytes
Carriage Return - 1 byte
In addition, each reserved word, operator, variable name, special character
and constant character requires one byte.
DYNAMIC (RUN-TIME) MEMORY ALLOCATION
Integer variables:
5 bytes each
(2 for value, 3 for variable name)
Single-precision variables:
7 bytes each
(4 for value, 3 for variable name)
Double-precision variables:
11 bytes each
(8 for value, 3 for variable name)
String variables:
6 bytes minimum
(3 for variable name, 3 for stack and variable pointers, 1 for each character)
Array variables:
12 bytes minimum
(3 for variable name, 2 for total size, 1 for number of dimensions,
2 for size of each dimension, and 2, 3, 4 or 8 [depending on array type]
for each element in the array)
Each active FOR-NEXT loop requires 16 bytes.
Each active (non-returned) GOSUB requires 6 bytes.
Each level of parentheses requires 4 bytes plus 12 bytes for each temporary value.
A-17
B / Error Codes
CODE
ABBREVIATION
ERROR
1
NF
NEXT without FOR
2
SN
Syntax error
3
RG
Return without GOSUB
4
OD
Out of data
5
FC
Illegal function call
6
OV
Overflow
7
OM
Out of memory
8
UL
Undefined line
9
BS
Subscript out of range
10
DD
Redimensioned array
11
/0
Division by zero
12
ID
Illegal direct
13
TM
Type mismatch
14
OS
Out of string space
15
LS
String too long
16
ST
String formula too complex
17
CN
Can't continue
18
NR
NO RESUME
19
RW
RESUME without error
20
UE
Unprintable error
21
MO
Missing operand
22
FD
Bad file data
23
L3
Disk BASIC only
B-1
Explanation of Error Messages
NF
NEXT without FOR: NEXT is used without a matching FOR statement. This error may also
occur if NEXT variable statements are reversed in a nested loop.
SN
Syntax Error: This usually is the result of incorrect punctuation, open parenthesis, an illegal
character or a mis-spelled command.
RG
RETURN without GOSUB: A RETURN statement was encountered before a matching GOSUB
was executed.
OD
Out of Data. A READ or INPUT # statement was executed with insufficient data available.
DATA statement may have been left out or all data may have been read from tape or DATA.
FC
Illegal Function Call: An attempt was made to execute an operation using an illegal
parameter. Examples: square root of a negative argument, negative matrix dimension,
negative or zero LOG arguments, etc. Or USR call without first POKEing the entry point.
OV
Overflow: The magnitude of the number input or derived is too large for the Computer to
handle. NOTE: There is no underflow error. Numbers smaller than ± 1.701411E-38 single
precision or ± 1.701411834544556E-38 double precision are rounded to 0. See /0 below.
OM
Out of Memory: All available memory has been used or reserved. This may occur with very
large matrix dimensions, nested branches such as GOTO, GOSUB, and FOR-NEXT Loops.
UL
Undefined Line: An attempt was made to refer or branch to a non-existent line.
BS
Subscript out of Range: An attempt was made to assign a matrix element with a subscript
beyond the DIMensioned range.
DD
Redimensioned Array: An attempt was made to DIMension a matrix, which had previously
been dimensioned by DIM or by default statements. It is a good idea to put all dimension
statements at the beginning of a program.
/0
Division by Zero: An attempt was made to use a value of zero in the denominator. NOTE: If
you can't find an obvious division by zero check for division by numbers smaller than allowable
ranges. See OV above and RANGES page A/17.
ID
Illegal Direct: The use of INPUT as a direct command.
TM
Type Mismatch: An attempt was made to assign a non-string variable to a string or vice-versa.
OS
Out of String Space: The amount of string space allocated was exceeded.
B-2
LS
String Too Long: A string variable was assigned a string value which exceeded 255
characters in length.
ST
String Formula Too Complex: A string operation was too complex to handle. Break up the
operation into shorter steps.
CN
Can't Continue: A CONT was issued at a point where no continuable program exists, e.g.,
after program was ENDed or EDITed.,
NR
No RESUME: End of program reached in error-trapping mode.
RW
RESUME without ERROR: A RESUME was encountered before ON ERROR GOTO was
executed.
UE
Unprintable Error: An attempt was made to generate an error using an ERROR statement
with an invalid code.
MO
Missing Operand: An operation was attempted without providing one of the required
operands.
FD
Bad File Data: Data input from an external source (i.e., tape) was not correct or was in
improper sequence, etc.
L3
DISK BASIC only: An attempt was made to use a statement, function or command which is
available only when the TRS-80 Mini Disk is connected via the Expansion Interface.
Hard-To-Find Errors
Shifted-characters aren't always interchangeable with their unshifted
counterparts. For example, PRINT @ won't work with a shifted-@ even
though it looks OK on the Video.
If you can't find anything wrong with a line that causes a syntax error, try
retyping it and watch out for the SHIFT key.
Spaces are sometimes important in LEVEL II BASIC. For example,
IF D<0D=0
will not work because 0D in the middle is interpreted as double precision
zero. Change it to
IF D<0 THEN D=0
B-3
C / TRS-80 Character Codes
Bit-Pattern Codes
The following table illustrates the bit pattern for each of the 128 TRS-80
characters. The remaining 128 codes represent special graphics and space
compression characters, as described later.
See Notes.
To use the table: Combine the most significant and least significant
bit-patterns for a given character. For example, the character Q is
represented by the pattern: 1010001 (decimal 81).
MOST SIGNIFICANT BITS
(b7 - b5)
000
001 010 011 100 101 110 111
0000 NULL
OLE
SP
0
@
P
@
p
0001 BREAK
DC1
!
1
A
Q
a
q
LEAST 0010
STX
DC2
"
2
B
R
b
r
SIGNIF.
0011 ETX
DC3
#
3
C
S
c
s
BITS
EOT
DC4
$
4
D
T
d
t
(b4 - b1) 0100
0101 ENO
NAK
%
5
E
U
e
u
0110 ACK
SYN
&
6
F
V
f
v
0111 BEL
ETB
'
7
G
W
g
w
1000 BKSP
CAN
(
8
H
X
h
x
1001
HT
EM
)
9
I
Y
i
y
1010
LF
SUB
*
:
J
Z
j
z
1011
VT
ESC
+
;
K
k
↑
↑
1100
FF
HOME
,
<
L
I
↓
↓
1101
CR
BOL
–
=
M
m
←
←
1110 CURON EREOL .
>
N
n
→
→
1111 CUROFF EREOF /
?
O
_
o DEL
C-1
Decimal/Hexadecimal Codes
Dec.
Code
0
1
2
3
4
5
6
7
8
9
10
11
12
13
14
15
16
17
18
19
20
21
22
23
24
25
26
27
28
29
30
31
Hex.
Code
00
01
02
03
04
05
06
07
08
09
0A
0B
0C
0D
0E
0F
10
11
12
13
14
15
16
17
18
19
1A
1B
1C
1D
1E
1F
Char.
NULL
BREAK
STX
ETX
EOT
ENO
ACK
BEL
BKSP
HT
LF
VT
FF
CR
CURON
CUROF
DLE
DC1
DC2
DC3
DC4
NAK
SYN
ETB
CAN
EM
SUB
ESC
HOME
BOL
EREOL
EREOF
Dec.
Code
32
33
34
35
36
37
38
39
40
41
42
43
44
45
46
47
48
49
50
51
52
53
54
55
56
57
58
59
60
61
62
63
Hex.
Code
20
21
22
23
24
25
26
27
28
29
2A
2B
2C
2D
2E
2F
30
31
32
33
34
35
36
37
38
39
3A
3B
3C
3D
3E
3F
Char.
SPACE
!
"
#
$
%
&
'
(
)
*
+
,
.
/
0
1
2
3
4
5
6
7
8
9
:
;
<
=
>
?
Dec.
Code
64
65
66
67
68
69
70
71
72
73
74
75
76
77
78
79
80
81
82
83
84
85
86
87
88
89
90
91
92
93
94
95
Hex.
Code
40
41
42
43
44
45
46
47
48
49
4A
4B
4C
4D
AE
4F
50
51
52
53
54
55
56
57
58
59
5A
5B
5C
5D
5E
5F
Note: 96-127 (hex 60-7F) are lower-case counterparts to 64-95 (hex
40-5F).; however, only upper-case characters are displayable.
Notes
The TRS-80 character set may be subdivided into the following functional
groups:
decimal code
0-31
32-95
96-127
hex code
00-1F
20-5F
60-7F
128-191
192-255
80-BF
C0-FF
function
Control characters
Keyboard /display characters
Non-displayable (code-32 is displayed instead);
can be printed as lower case on a line printer that
handles lower case characters.
Graphics characters
Space-compression codes
C-2
Char.
@
A
B
C
D
E
F
G
H
I
J
K
L
M
N
O
P
Q
R
S
T
U
V
W
X
Y
Z
↑
↓
←
→
Control Codes: 0-31
Dec. Code
Hex Code
Function
0-7
00-07
None
8
08
Backspace and erases current character
9
09
None
10
0A
Line feed with carriage return
11
0B
Move carriage to top of form (page)
12
0C
Move carriage to top of form (page)
13
0D
Line feed with carriage return
14
0E
Turns on cursor
15
0F
Turns off cursor
16-22
10-16
None
23
17
Converts to 32 character/line mode
(Certain features work differently in 32
cpl. CHR$(25) spaces only one-half to the
right.)
24
18
Backspace ← Cursor
25
19
Advance. → Cursor
26
1A
Downward ↓ linefeed (not applicable to
line printer)
27
1B
Upward ↑ linefeed (not applicable to line
printer)
28
1C
Home, return cursor to display position
(0,0) Also converts to 64 cpl
29
1D
Move cursor to beginning of line
30
1E
Erases to the end of the line
31
1F
Clear to the end of the frame
138
8A
Interpreted by line printer as a line feed
with carriage return
C-3
The following control characters may be entered directly from the Keyboard:
Character
Key
Character
Key
BREAK
[BREAK]
EM
[SHIFT] [\À\]
BKSP
[\À\]
SUB
[SHIFT] [\À\]
HT
[\Â\]
ESC
[SHIFT] [\À\]
LF
[\Á\]
EREOF
[CLEAR]
CR
[ENTER]
SP
[SPACE–BAR]
CAN
[SHIFT] [\À\]
Graphics Codes: 128-191
For a description of the graphics characters, run the following program. If
you do not have a line printer connected, change all LPRINTs to PRINTS and
use the shift-@ key to pause the display. These codes are also displayed on a
later page.
10
20
30
35
40
45
50
60
70
80
90
100
110
CLS: DEFINT A-Z
FORI=128 TO 191
POKE 15360,1
LPRINT CHR$(138)
LPRINT"GRAPHICS CODE # ": I
LPRINT CHR$(138)
A1=POINT(0,0): A2=POINT(1,0)
A3=POINT(0,1): A4=POINT(1,1)
A5=POINT(0,2): A6=POINT(1,2)
LPRINTTAB(8)CHR$(A1*(-40)+48);CHR$(A2*(-40)+48)
LPRINTTAB(8)CHR$(A3*(-40)+48);CHR$(A4*(-40)+48)
LPRINTTAB(8)CHR$(A5*(-40)+48);CHR$(A6*(-40)+48)
NEXT
C-4
Space Compression Codes: 192 to 255
Decimal
Codes
Hex
Codes
Function
192-255
C0-FF
Tabs for 0 to 63 spaces, respectively
The space-compression codes provide a compact means of representing
strings of blanks from zero to 63 blanks.
For example,
PRINT CHR$(192) produces zero blanks;
PRINT CHR$(193), one blank;
PRINT CHR$(194), two blanks; …
PRINT CHR$(225), 63 blanks.
C-5
Graphic Characters
D / Memory Map
Decimal Address
0
Hex Address
0000
LEVEL II ROM
12287
12288
15359
15360
RESERVED FOR MEMORY-MAPPED
I /O
3000
3001
3BFF
3C00
VIDEO MEMORY
16383
16384
16405
16413
16421
16429
16870
17129
BASIC VECTORS (RST's 1-7)
KEYBOARD DCB
3FFF
4000
4015
4010
VIDEO DCB
LINE PRINTER DCB
4025
402D
RESERVED
41EC
I/O BUFFER
BASIC PROGRAM TEXT
42E9
SIMPLE VARIABLES
ARRAYS
FREE MEMORY
STACK
STRING SPACE
RESERVED WITH
MEM. SIZE OPTION
20479
32767
49151
65535
END "4K" SYSTEMS
END "16K" SYSTEMS
END "32K" SYSTEMS
END "48K" SYSTEMS
D-1
4FFF
7FFF
BFFF
FFFF
Important Addresses
Decimal
Hexadecimal
14302
14303
14304
14305
14308
14312
14316
16405
16406
16407
16408
16409
16410
16411
16412
16413
16414
16415
16416
16417
16418
16419
16420
16421
16422
16423
16424
16425
16426
16427
16428
16464
16466
16478
17128
37DE
37DF
37E0
37E1
37E4
37E8
37EC
4015
4016
4017
4018
4019
401A
401B
401C
401D
401E
401F
4020
4021
4022
4023
4024
4025
4026
4027
4028
4029
402A
402B
402C
4050
4052
405E
42E8
Communication Status Address
Communication Data Address
Interrupt Latch Address
Disk Drive Select Latch
Cassette Select Latch
Line Printer Address
Floppy Disk Controller Address
DCB Type
Driver Address (LSB)
Driver Address (MSB)
0
Keyboard Device
0
Control Block
0
'K' (Character Code 75)
'I' (Character Code 73)
DCB Type
Driver Address (LSB)
Driver Address (MSB)
Cursor Position N (LSB)
Display Device
Cursor Position N (MSB)
Control Block
Cursor Character
'D' (Character Code 68)
'O' (Character Code 79)
DCB Type
Driver Address (LSB)
Driver Address (MSB)
Lines/Page
Printer Device
Line Counter
Control Block
0
'P' (Character Code 80)
'R'(Character Code 82)
FDC Interrupt Vector
Communications Interrupt Vector
25 mSec Heartbeat Interrupt
Always Zero
D-2
E / Internal Codes for BASIC Keywords
The following are the internal codes that the Computer uses to store BASIC
keywords. If you PEEK at the program buffer area (starting at address 17129
in decimal) you will find your program stored in the following codes.
Dec.
Code
BASIC Keyword
Dec.
Code
BASIC Keyword
129
130
131
132
133
134
135
136
137
138
139
140
141
142
143
144
145
146
147
148
149
150
151
152
153
154
155
156
157
158
159
160
161
162
163
164
165
166
FOR
RESET
SET
CLS
CMD
RANDOM
NEXT
DATA
INPUT
DIM
READ
LET
GOTO
RUN
IF
RESTORE
GOSUB
RETURN
REM
STOP
ELSE
TRON
TROFF
DEFSTR
DEFINT
DEFSNG
DEFDBL
LINE
EDIT
ERROR
RESUME
OUT
ON
OPEN
FIELD
GET
PUT
CLOSE
167
168
169
170
171
172
173
174
175
176
177
178
179
180
181
182
183
184
185
186
187
188
189
190
191
192
193
194
195
196
197
198
199
200
201
202
203
204
LOAD
MERGE
NAME
KILL
LSET
RSET
SAVE
SYSTEM
LPRINT
DEF
POKE
PRINT
CONT
LIST
LLIST
DELETE
AUTO
CLEAR
CLOAD
CSAVE
NEW
TAB
TO
FN
USING
VARPTR
USR
ERL
ERR
STRING$
INSTR
POINT
TIME$
MEM
INKEY$
THEN
NOT
STEP
E-1
Dec.
Code
205
206
207
208
209
210
211
212
213
214
215
216
217
218
219
220
221
222
223
224
225
226
227
228
229
230
BASIC Keyword
+
–
*
/
↑
AND
OR
>
=
<
SGN
INT
ABS
FRE
INP
POS
SQR
RND
LOG
EXP
COS
SIN
TAN
ATN
PEEK
CVI
Dec.
Code
231
232
233
234
235
236
237
238
239
240
241
242
243
244
245
246
247
248
249
250
BASIC Keyword
CVS
CVD
EOF
LOC
LOF
MKI$
MKS$
MKD$
CINT
CSNG
CDBL
FIX
LEN
STR$
VAL
ASC
CHR$
LEFT$
RIGHT$
MID$
E-2
F / Derived Functions
Function
Function Expressed in Terms of Level II Basic Functions
SECANT
COSECANT
COTANGENT
INVERSE SINE
INVERSE COSINE
INVERSE SECANT
INVERSE COSECANT
INVERSE COTANGENT
HYPERBOLIC SINE
HYPOBOLIC COSINE
HYPERBOLIC TANGENT
HYPERBOLIC SECANT
HYPERBOLIC COSECANT
HYPERBOLIC COTANGENT
INVERSE HYPERBOLIC
SINE
INVERSE HYPERBOLIC
COSINE
INVERSE HYPERBOLIC
TANGENT
INVERSE HYPERBOLIC
SECANT
INVERSE HYPERBOLIC
COSECANT
INVERSE HYPERBOLIC
COTANGENT
SEC(X) = 1/COS(X)
CSC(X) = 1/SIN(X)
COT(X) = 1/TAN(X)
ARCSIN(X) = ATN(X/SQR(-X*X+1))
ARCCOS(X) = -ATN(X/SQR(-X*X+1))+1.5708
ARCSEC(X) = ATN(SQR(X*X-1))+(SGN(X)-1)*1.5708
ARCCSC(X) = ATN(1 /SQR(X*X-1))+(SGN(X)-1)* 1.5708
ARCCOT(X) = -ATN (X)+1.5708
SINH(X) = (EXP(X)-EXP(-X))/2
COSH(X) = (EXP(X)+EXP(-X))/2
TANH(X) = -EXP(-X)/(EXP(X)+EXP(-X)*2+1
SECH(X) = 2/(EXP(X)+EXP(-X))
CSCH(X) = 2/(EXP(X)-EXP(-X))
COTH(X) = EXP(-X)/(EXP(X)-EXP(-X)) *2+1
ARGSINH(X) = LOG(X+SQR(X*X+1))
ARGCOSH(X) = LOG(X+SQR(X*X-1))
ARGTANH(X) = LOG((1+X)/(1-X))/2
ARGSECH(X) = LOG((SQR(-X*X+1)+1)/X)
ARGCSCH(X) = LOG((SGN(X)*SQR(X*X+1)+1)/X)
ARGCOTH(X) = LOG((X+1)/(X-1))/2
F-1
G / Base Conversions
The following table lists base conversions for all one-byte values.
DEC.
BINARY
HEX.
OCT.
DEC.
BINARY
HEX.
OCT.
0
1
2
3
4
5
6
7
8
9
10
11
12
13
14
15
16
17
18
19
20
21
22
23
24
25
26
27
28
29
30
31
32
33
34
35
36
37
38
39
40
00000000
00000001
00000010
00000011
00000100
00000101
00000110
00000111
00001000
00001001
00001010
00001011
00001100
00001101
00001110
00001111
00010000
00010001
00010010
00010011
00010100
00010101
00010110
00010111
00011000
00011001
00011010
00011011
00011100
00011101
00011110
00011111
00100000
00100001
00100010
00100011
00100100
00100101
00100110
00100111
00101000
00
01
02
03
04
05
06
07
08
09
0A
0B
0C
0D
0E
0F
10
11
12
13
14
15
16
17
18
19
1A
1B
1C
1D
1E
1F
20
21
22
23
24
25
26
27
28
000
001
002
003
004
005
006
007
010
011
012
013
014
015
016
017
020
021
022
023
024
025
026
027
030
031
032
033
034
035
036
037
040
041
042
043
044
045
046
047
050
41
42
43
44
45
46
47
48
49
50
51
52
53
54
55
56
57
58
59
60
61
62
63
64
65
66
67
68
69
70
71
72
73
74
75
76
77
78
79
80
81
00101001
00101010
00101011
00101100
00101101
00101110
00101111
00110000
00110001
00110010
00110011
00110100
00110101
00110110
00110111
00111000
00111001
00111010
00111011
00111100
00111101
00111110
00111111
01000000
01000001
01000010
01000011
01000100
01000101
01000110
01000111
01001000
01001001
01001010
01001011
01001100
01001101
01001110
01001111
01010000
01010001
29
2A
2B
2C
2D
2E
2F
30
31
32
33
34
35
36
37
38
39
3A
3B
3C
3D
3E
3F
40
41
42
43
44
45
46
47
48
49
4A
4B
4C
4D
4E
4F
50
51
051
052
053
054
055
056
057
060
061
062
063
064
065
066
067
070
071
072
073
074
075
076
077
100
101
102
103
104
105
106
107
110
111
112
113
114
115
116
117
120
121
G-1
DEC.
BINARY
HEX.
OCT.
DEC.
BINARY
HEX.
OCT.
82
83
84
85
86
87
88
89
90
91
92
93
94
95
96
97
98
99
100
101
102
103
104
105
106
107
108
109
110
111
112
113
114
115
116
117
118
119
120
121
122
123
124
125
126
127
128
01010010
01010011
01010100
01010101
01010110
01010111
01011000
01011001
01011010
01011011
01011100
01011101
01011110
01011111
01100000
01100001
01100010
01100011
01100100
01100101
01100110
01100111
01101000
01101001
01101010
01101011
01101100
01101101
01101110
01101111
01110000
01110001
01110010
01110011
01110100
01110101
01110110
01110111
01111000
01111001
01111010
01111011
01111100
01111101
01111110
01111111
10000000
52
53
54
55
56
57
58
59
5A
5B
5C
5D
5E
5F
60
61
62
63
64
65
66
67
68
69
6A
6B
6C
6D
6E
6F
70
71
72
73
74
75
76
77
78
79
7A
7B
7C
7D
7E
7F
80
122
123
124
125
126
127
130
131
132
133
134
135
136
137
140
141
142
143
144
145
146
147
150
151
152
153
154
155
156
157
160
161
162
163
164
165
166
167
170
171
172
173
174
175
176
177
200
129
130
131
132
133
134
135
136
137
138
139
140
141
142
143
144
145
146
147
148
149
150
151
152
153
154
155
156
157
158
159
160
161
162
163
164
165
166
167
168
169
170
171
172
173
174
175
10000001
10000010
10000011
10000100
10000101
10000110
10000111
10001000
10001001
10001010
10001011
10001100
10001101
10001110
10001111
10010000
10010001
10010010
10010011
10010100
10010101
10010110
10010111
10011000
10011001
10011010
10011011
10011100
10011101
10011110
10011111
10100000
10100001
10100010
10100011
10100100
10100101
10100110
10100111
10101000
10101001
10101010
10101011
10101100
10101101
10101110
10101111
81
82
83
84
85
86
87
88
89
8A
8B
8C
8D
8E
8F
90
91
92
93
94
95
96
97
98
99
9A
9B
9C
9D
9E
9F
A0
A1
A2
A3
A4
A5
A6
A7
A8
A9
AA
AB
AC
AD
AE
AF
201
202
203
204
205
206
207
210
211
212
213
214
215
216
217
220
221
222
223
224
225
226
227
230
231
232
233
234
235
236
237
240
241
242
243
244
245
246
247
250
251
252
253
254
255
256
257
G-2
DEC.
BINARY
HEX.
OCT.
DEC.
BINARY
HEX.
OCT.
176
177
178
179
180
181
182
183
184
185
186
187
188
189
190
191
192
193
194
195
196
197
198
199
200
201
202
203
204
205
206
207
208
209
210
211
212
213
214
215
10110000
10110001
10110010
10110011
10110100
10110101
10110110
10110111
10111000
10111001
10111010
10111011
10111100
10111101
10111110
10111111
11000000
11000001
11000010
11000011
11000100
11000101
11000110
11000111
11001000
11001001
11001010
11001011
11001100
11001101
11001110
11001111
11010000
11010001
11010010
11010011
11010100
11010101
11010110
11010111
B0
B1
B2
B3
B4
B5
B6
B7
B8
B9
BA
BB
BC
BD
BE
BF
C0
C1
C2
C3
C4
C5
C6
C7
C8
C9
CA
CB
CC
CD
CE
CF
D0
D1
D2
D3
D4
D5
D6
D7
260
261
262
263
264
265
266
267
270
271
272
273
274
275
276
277
300
301
302
303
304
305
306
307
310
311
312
313
314
315
316
317
320
321
322
323
324
325
326
327
216
217
218
219
220
221
222
223
224
225
226
227
228
229
230
231
232
233
234
235
236
237
238
239
240
241
242
243
244
245
246
247
248
249
250
251
252
253
254
255
11011000
11011001
11011010
11011011
11011100
11011101
11011110
11011111
11100000
11100001
11100010
11100011
11100100
11100101
11100110
11100111
11101000
11101001
11101010
11101011
11101100
11101101
11101110
11101111
11110000
11110001
11110010
11110011
11110100
11110101
11110110
11110111
11111000
11111001
11111010
11111011
11111100
11111101
11111110
11111111
D8
D9
DA
DB
DC
DD
DE
DF
E0
E1
E2
E3
E4
E5
E6
E7
E8
E9
EA
EB
EC
ED
EE
EF
F0
F1
F2
F3
F4
F5
F6
F7
F8
F9
FA
FB
FC
FD
FE
FF
330
331
332
333
334
335
336
337
340
341
342
343
344
345
346
347
350
351
352
353
354
355
356
357
360
361
362
363
364
365
366
367
370
371
372
373
374
375
376
377
G-3
H / User Programs
Special Keyboard Input Routine
Here's a general-purpose keyboard input routine (lines 100-175) for use in any
program where the user will need to input a specific number of characters. Lines
1000-1040 contain a demonstrator program, which calls the routine.
When the main program asks for the field length, you can type in either a negative or
positive number. If you type a negative number, the input routine will only let you
enter numeric characters (including a leading + or _ sign-character, one decimal point,
and the digits 0-9). If you type a positive number for the field length, only any
alphanumeric characters may be input.
The routine returns the input string in the variable IN$.
1 ' EXAMPLE OF RADIO SHACK'S INKEY ROUTINE
2 '
5 CLS: CLEAR 500: GOTO 1000
70 '
80 ' *** INKEY ROUTINE - LINES 100 THROUGH 175
90 '
100 IN$="":W$=INKEY$:W=14:WD=0:WS=WD:WL%=WD:IFFL=WDTHENFL=1
105 PRINTSTRING$(BBS(FL),136);STRING$(RBS(FL),24);
110 PRINTCHR$(W);:FORW%=1TO25:W$=INKEY$:IFW$<>""THEN115ELSENEXT:
PRINTCHR$<i5);:FORW%=1TO25:W$=INKEY$:IFW$<>""THEN115ELSENEXT:
GOT0110
115 PRINTCHR$(W);:IFABS(FL)=WL%THEN125
ELSEIFFL>0ANDW$>=" "ANDW$<="Z"THEN170
ELSEIFFL<0ANDW$>"/"ANDW$<":"THEN17O
117 IFW$=","THENPRINTW$;:WL%=WL%+1:GOT0175
120 IFW$="."ANDWD=0THENWD=1:GOTO170
123 IF(W$="-"ORW$="+")ANDWS=0ANDWL%=OTHENWS=1:GOT0170
125 IFW$<>CHR$(B)THEN150ELSEIFWL%=0THEN110ELSEPRINTCHR$(24);:
IFFL>0THEN135ELSEIFPEEK(16418)=44THEN140
130 IFPEEK(16418)=46THENWD=0:GOT0135
ELSEIFPEEK(16418)=43ORPEEK(16418)=45THENWS=0
135 IN$=LEFT$(IN$,LEN(IN$)-1)
140 WL%=WL$-1:POKE16418,136:GOTO110
150 IFW$=CHR$(24)THENPRINTSTRING$<WL%,CHR$(24));:GOTO100
155 IFW$<>CHR$(13)THEN110ELSEPRINTSTRING$(ABS(FL)-WL%,32);
160 PRINTCHR$(15);:W%=25:NEXT:RETURN
170 PRINTW$;:IN$=IN$+W$:WL%=WL%+1
175 IFABS(FL)=1THEN166ELSE110
H-1
700 '
800 '
*** MAIN PROGRAM ***
900 '
1000 PRINT: FL$="": INPUT"FIELD-LENGTH (FL) = ";FL$
1005 IF FLT<>"" THEN FL=VAL(FL$) ELSE PRINTTAB(20);CHR$(27);FL
1006 IF ABS(FL) > 63 THEN PRINT
"ENTER A VALUE IN THE RANGE <-63,+63>": GOTO 1000
1007 IF FL=0 THEN END
1010 GOSUB 100: PRINT: PRINT TAB(16)"LENGTH ="LEN(IN$)
1020 PRINT TAB(16)"STRING = "CHR$(136)IN$;CHR$(136)
1030 PRINT TAB(16)" VALUE = "VAL(IN$)
1040 GOTO 1000
Storing a USR Routine in a String
This program illustrates a special technique for storing machine language
routines inside strings, instead of POKEing them into high memory. You do
not need to reserve memory via MEMORY SIZE to use this technique.
However, you must not change the string variable, which contains the
machine-language code. In other words, don't re-assign another value to this
string (in this program, P$ is used).
For the sake of example, (this user routine accomplishes a "partial scroll":
only the bottom half of the screen is scrolled as you input text, leaving the top
unchanged. Don't input more than two lines without pressing [ENTER].
10 ' EXAMPLE OF A MACHINE LANGUAGE ROUTINE IN A STRING VARIABLE
20 '
50 '
THIS DATA IS THE DECIMAL EQUIVALENT OF THE MACHINE
53 '
LANGUAGE PROGRAM & PERFORMS A HALF-SCROLL OF VIDEO
55 '
60 DATA 33,128,62,17,64,62,1,128,1,237,176,201
70 '
90 CLS: CLEAR 200: DEFINT A-Z
100 CLS: PRINTTAB(15)"HALF-SCROLL PROGRAM": PRINT: PRINT
110 PRINT"
NOTE THAT THE UPPER PART OF THE SCREEN WILL NEVER
120 PRINT"CHANGE AS YOU ENTER LINES Or TEXT BELOW. THE BOTTOM OF
130 PRINT"SCREEN WILL SCROLL INDEPENDENTLY OF THE TOP OF THE SCREEN
140 PRINT"WHEN IT IS FULL.
150 PRINT@512,STRING$(64,176);: N=0
151 '
152 ' *** READ MACHINE LANGUAGE PROGRAM INTO P$ ***
153 '
155 P$="": FOR I=1 TO 12: READ J: P$=P$+CHR$(J): NEXT
H-2
157 '
160 INPUTA$: IF A$="END" THEN PRINT@576,CHR$(31);: END
170 IF N<6 THEN N=N+1
174 '
175 ' IF BOTTOM OF SCREEN HAS 6 LINES. THEN SCROLL
176 '
180 IF N=6 THEN GOSUB 1000: PRINT@896,CHR$(31);
190 GOT0160
700
800 ' *** SCROLL ROUTINE ***
900 '
1000 POKE 16526 PEEK(VARPTR<P$)+1)' SET UP ENTRY ADDRESS
1010 POKE 16527,PEEK(VARPTRCP$)+2)
1020 J=USR(I):RETURN
Sort Routine
This program sorts any set of numbers, and prints them out from smallest to
largest. Simply store the number of items to be sorted in line 350, and the
actual data in line 370. Add DATA lines as required.
To sort string values, change A( ) to string array A$( ), TEMP to TEMP$, and
put string values in the data lines 370, etc.
10 '
SHELL SORT
20 '
30 '
REF: BERZTISS, R.T., DATA STRUCTURES THEORY AND PRACTICE
40 '
2ND ED., ACADEMIC PRESS, NY, 1975, P. 464,465
60 CLEAR 500: DEFINT I-N: CLS
70 READ N
'N = NUMBER OF ELEMENTS TO BE SORTED
80 PRINT"SHELL SORT OF"N"ELEMENTS. STANDBY . . ."
90 DIM A<N)
'DIMENSION ARRAY TO BE SORTED
100 FOR I=1 TO N
110
READ A<I) 'READ IN ARRAY ELEMENTS
120 NEXT I
130 '
SORT ROUTINE
140 '
150 D = 1
160 D = 2*D: IF D<N THEN 160
170 D = INT((D-1)/2)
180 IF D=0 THEN 270
190 IT = N-D
200 FOR I=1 TO IT
210
J = I
220
L = J+D
H-3
230
240
250
260
270
280
290
300
310
320
330
340
350
360
370
IF A(L) < A(J) THEN
TEMP = RtJ):
A(J) = A(L):
A(L) = TEMP:
J = J-D:
IF J>0 THEN 220
NEXT I
GOTO 170
END
'
PRINT SORTED ARRAY
'
PRINT: INPUT"PRESS 'ENTER' TO LIST SORTED ARRAY";A$
FOR I=1 TO N
PRINT A(I),
NEXT I
END
' STORE NUMBER OF DATA ELEMENTS HERE
DATA 10
' STORE ACTUAL DATA HERE
DATA 10.8,9,8.7,8.3,7,3.333,2.010,2,10,0.98
Space-Ship Lander
This challenging program lets you simulate a landing sequence on any of four
planetary bodies: Earth, Moon, Mars, and the asteroid Vesta. Before each
10-second "burn" interval, you are given the following information:
Elapsed Time (seconds)
Altitude (kilometers)
Velocity (kilometers/hour –
negative amount indicates motion
away from planetary body)
Remaining Fuel (kilograms)
Using this information, you select a "burn rate" (kilograms of fuel/ second).
For example, a 10 Kg/sec burn rate consumes 100 Kg during the 10-second
mandatory burn interval. Burns must be in the range 0-100 Kg/sec, (over 100
Kg/sec would cause the "G" force to become too great.)
Hints:
•
•
•
A negative velocity indicates you burned too much fuel and are moving
away from the planetary body.
Fuel burns may include fractional parts (e.g., 15.5 Kg/sec)
As you consume fuel, the weight of the lander decreases. Therefore
subsequent burns will be increasingly effective
H-4
•
•
Landing conditions are different for each planetary body because each
has its own particular gravity: Earth = 980 cm/sect ; Moon = 162 cm/sect :
Mars = 372 cm/sect ; Vesta = 17.5 cm/sect .
The up arrow ↑ appears as a left bracket [ in this printout. Remember to
enter it as an up arrow (for exponentiation).
Good luck, Commander!
100 CLS
110 PRINT@ 20, " * * * LANDER
120 PRINT : PRINT "TYPE 1 FOR EARTH 2 FOR MOON 3 FOR MARS, 4 FOR VESTA"
140 INPUT X : ON X GOTO 500, 600, 700, 800
145 CLS
147 PRINT@ 980, A$;
150 G2 = G1/36,
160 G3 = SQR(G2) * 100 : G3=FIX(G3) : IF G3<175 THEN G3=175
170 G4 = G3 * 55 : G4=FIX(G4) : IF G4<10000 THEN G4=10000
180 G5 = G4 * (LOG(G1)/20) + 10000
190 A1 = -6400 : A2 = 5000 : A3 = 15000 : A4 = 10
200 84 = A4 : B2 = A2 : N3 = G3 : N4 = G4
205 PRINT@ 0, "ELAPSED
ALTITUDE
VELOCITY
REMAINING
INPUT FUEL":
206 PRINT@ 64, "TIME
(KM)
(KM/HR)
FUEL
BURN:(KG/SEC)";
210 PRINT@ 128+Q , T1; TAB(10) N3; TAB(24) B2; TAB(39) N4: TAB(53) ;: INPUT F
250 IF F=0 GOTO 280
260 IF F<0 OR F>100 GOTO 320
270 T = N4/F : IF T<10 THEN B4=T
280 N4 = N4 - (F*B4)
285 V1=B3
286 T1=T1+B4
290 B5 = (G2+ ((G2 * N3)/(A5 * -2))) - <(F * G5)/(A3 + N4))
295 B3 = B2 + (B5 * B4)
298 N5=N3
300 N3 = N3+ <((B3 + B2) / A1) * B4)
305 B2=B3
307 IF N3<0 GOTO 450
310 IF N4 <= 0 GOTO 400
312 Q=Q+64 : IF Q + 128 > 960 THEN Q=832
315 GOTO 205
320 PRINT " -->> ILLEGAL FUEL BURN - DUMMY!--TRY AGAIN (0 TO 100)" : GOTO 210
400 V2 = SQR (B2[2 + N3 * G2 * 5650) : PRINT "OUT OF FUEL AT"; T1 :"SECONDS"
410 V3 = ABS(V2) * 10000 / 3600
420 T1 = T1 + LOG ((V3 * N3 * 10000) / G1)
430 GOTO 1000
450 V2 = SQR (ABS (N5 / (26 * B5))) * (26 * B5) + V1 : GOTO 1000
460 T1=T1-(10-B4)
500 G1 = 980.7 : A5 = 6371 : A$="EARTH" : GOTO145
600 G1 = 162 : A5 = 1738 : A$="MOON" : GOTO 145
700 G1 = 374 : A5 = 3380 : A$="MARS" : GOTO 145
800 G1 = 17.5 : A5 = 195 : A$="VESTA" : GOTO 145
1000 PRINT : PRINT "YOU HAVE ";
1010 IF V2<20 PRINT "LANDED" : GOTO 1100
1020 IF V2<100 PRINT "CRASHED" : GOTO 1140
1030 IF V2<250 PRINT "BEEN OBLITERATED" : GOTO 5000
H-5
1040
1050
1100
1110
1120
1140
1150
1160
5000
5010
5020
IF V2<5000 PRINT "MADE A NEW CRATER" : GOTO 5000
IF V2>4999 PRINT "BORED A HOLE INTO THE PLANET" : GOTO 5000
IF V2<1 PRINT "NICE TOUCH--VERY GOOD" : GOTO 5000
IF V2<5 PRINT "NOT T00 BAD" : GOTO 5000
PRINT "KIND OF ROUGH" : GOTO 5000
IF V2<30 PRINT "YOU WILL NOT BE ABLE TO TAKE OFF" : GOTO 5000
IF V2<45 PRINT "YOU ARE INJURED. THE LANDER IS ON FIRE" : GOTO 5000
PRINT "THERE ARE NO SURVIVORS"
PRINT "VELOCITY AT IMPACT * * *" TAB(40); ABS(V2) ;"KM/HR"
PRINT "ELAPSED TIME * * * * * *" TAB(40); T1 ;"SECONDS"
END
Customer Information
This program allows you (or your customers) to store information in a file for
future reference. It stores Name, Address and Phone Number; the file can be
recalled, modified, etc., by specifying the desired action using the "Menu"
(Table of Commands).
This would be a handy way to create a mailing/phone list.
10 CLEAR 1000 :CLS :DIM N$(50) :DIM A$(50) :DIM P$(50)
20 CLS :PRINT@ 10,"* * MENU * *" :PRINT :PRINT
30 PRINT "TO BUILD A FILE TYPE 1
40 PRINT "TO SEE THE ENTIRE FILE TYPE 2
50 PRINT "TO SEE AN INDIVIDUAL NAME TYPE 3
60 PRINT "TO MAKE CORRECTIONS TYPE 4
70 PRINT "TO SAVE THE CURRENT FILE ON TAPE TYPE 5
80 PRINT "TO INPUT A FILE FROM TAPE TYPE 6
90 INPUT Q : ON Q GOTO 100, 200, 300, 400, 500, 600
100 INPUT"WHEN READY, HIT ENTER (TO CLOSE THE FILE TYPE 9999 FOR NAME)";X
110 FOR I=1 TO 50 :CLS :PRINT"ENTER YOUR NAME (LAST FIRST NO COMMAS PLEASE)
112 PRINT"THEN HIT THE 'ENTER' KEY" ;:INPUT N$(I)
115 IF N$(I)="9999" THEN P1=I :GOTO150
120 INPUT"ENTER YOUR ADDRESS (NO COMMAS)"; A$(I)
130 INPUT"ENTER YOUR PHONE # "; P$(I)
135 IF FRE(X$) < 100 GOTO150
140 NEXT
150 PRINT"FILE CLOSED --" :INPUT"TO SEE THE MENU HIT ENTER": X
160 GOTO20
200 CLS :FOR I=1 TO P1 :PRINT N$(I). A$(I). P$(I) :NEXT
210 INPUT"TO SEE THE MENU HIT ENTER": X :GOTO20
300 CLS :INPUT"ENTER THE NAME. LAST FIRST (NO COMMAS)"; N$
310 FOR I=1 TO P1 :IF N$(I)=N$ THEN330
315 NEXT
320 PRINT"NAME NOT IN FILE" :GOTO340
330 PRINT N$(I), A$(I), P$(I)
340 PRINT :PRINT"FOR ANOTHER NAME TYPE 1. OTHERWISE 0"; :INPUT X
350 IF X=1 GOTO300 ELSE20
400 CLS :PRINT"ENTER THE NAME FOR THE LINE YOU WISH TO CHANGE (NO COMMAS)"
405 INPUT N$
H-6
410
415
420
430
440
450
460
470
480
500
510
520
530
540
550
600
610
620
630
640
FOR I=1 TO P1 :IF N$=N$(I) GOTO430
NEXT
PRINT"NAME NOT IN FILE" :GOTO460
PRINT"ENTER THE CORRECTED INFO.: NAME, ADDRESS, PHONE"
INPUT N$(I), A$(I), P$(I)
PRINT"THE LINE NOW READS :" :PRINT N$(I), A$(I), P$(I)
INPUT"FOR ANOTHER CORRECTION TYPE 1. OTHERWISE 0"; X
IF X=1 GOTO400
GOTO20
CLS :INPUT "MAKE PREPARATIONS FOR CASSETTE WHEN READY HIT ENTER": X
PRINT"COPYING..."
PRINT #-1, P1
FOR I=1 TO P1 :PRINT #-1, N$(I), A$(I), P$(I) :NEXT
PRINT"COMPLETE -- NOTE TAPE LOCATION"
INPUT"TO SEE THE MENU, HIT ENTER"; X :GOTO20
CLS :INPUT"WHEN READY, HIT ENTER"; X
PRINT"INPUTING ...
INPUT #-1, P1
FOR I=1 TO P1 :INPUT #-1, N$(I), A$(I), P$(I) :NEXT
PRINT"COMPLETE":INPUT"TO SEE MENU, HIT ENTER"; X :GOTO20
Triangle Computation with Graphics
This program illustrates the use of math functions as well as graphics. It's a
great way to investigate the geometry of triangles (might be good for
high-school students). (Note: up arrow ↑ = [ in this printout.)
10 CLS
100 PRINT"THIS PROGRAM CALCULATES THE AREA OF A TRIANGLE
110 PRINT"GIVEN 3 PARAMETERS AND DRAWS THE TRIANGLE TO SCALE
120 PRINT:PRINT"FOR 3 SIDES TYPE: SSS. FOR 2 SIDES AND 1 ANGLE TYPE: SAS,
130 PRINT"FOR 1 SIDE AND 2 ANGLES TYPE: ASA.
140 INPUT At :IF AS="SAS" GOSUB300
150 IF A$="ASA" GOSUB400
200 `SSS
210 PRINT"ENTER 3 SIDES (LONGEST SIDE FIRST):
220 INPUT L1, L2, L3
225 IF L2>L1 OR L3>L1 PRINT "* * * LONGEST FIRST PLEASE ..." : PRINT : GOTO 210
230 S=(L1+L2+L3)/2
235 IF S <= L1 PRINT " * * * NOT A TRIANGLE * * *" : PRINT : GOTO 210
240 Y3 = 2 * SQR( S * (S-L2) * (S-L1) * (S-L3)) / L1
250 A = Y3/L2 :A = ATN( A / SQR(-A * A+1))
260 X3 = COS(A) * L2
270 AR = (L1 * Y3) /2
280 GOTO500
300 'SRS
310 PRINT"ENTER 2 SIDES AND 1 ANGLE: AB, AC, THETA:(LARGEST SIDE FIRST)
320 INPUT L1, L2, T
325 T = (T * 3.14159) / 180
330 Y3 = L2 * SIN(T)
340 X3 = COS(T) * L2
350 AR = (L1 * Y3) /2
360 GOT0500
H-7
400 'ASA
410 PRINT"ENTER 2 ANGLES AND 1 SIDE: THETA1, THETR2, AB:
420 INPUT T1, T2, L2
425 T1 = (T1 * 3.14159) / 180 : T2 = (T2 * 3.14159) / 180
430 Y3 = L2 * SIN(T1)
440 B1 = COSC(T1) * L2
450 B2 = Y3 / TAN(T2)
460 L1 = B1 + B2 : X3 = B1 : IF L2 > L1 THEN X = L1 : L1 = L2 : L2 = X
470 AR = (L2 * Y3) / 2
500 CLS : F=1 : IF L1>50 OR Y3>30 OR L2>50 THEN GOSUB708
510 VC = (3.14159 * ( L1 * F - X3 * F) * (Y3 * F) C2) / 3
520 VS = (3.14159 (X3 * F) * (Y3
F) [2) /3: VT = VC + VS
525 IF F=6 GOTO610
530 S1=Y3 / X3 : S2=Y3 / (X3 - L1)
532 IF INT(X3) = 0 THEN1100
533 IF INT<X3) = INT(L1) THEN1000
534 IF X3<0 THEN1299
535 IF X3>L1 THEN1199
537 IF X3=L2 THEN1000
540 FOR Y=20 TO L1 * 2+20 STEP 2 : SET (Y , Y3+5) : NEXT
550 FOR X=0 TO X3 : SET (X * 2+20 , S1 * (X3-X) +5) : NEXT
560 FOR X=X3 TO L1 : SET (X * 2+20 , Y3+ (S2 * (L1-X) +5)) : NEXT
590 PRINT@ 64 * INT((Y3+5) / 3) + 69. "A(0,0)" : TAB(L1); "BC": L1 * F : ",0)"
600 PRINT@ <X3 + 20) / 2, "C (": X3 * F : ",": Y3 * F ;")"
610 PRINT@ 832, "AREA ="; AR ;" SQ UNITS"
620 PRINT@ 896, "THE VOLUME OF THE SOLID CREATED BY REVOLVING THE TRIANGLE ":
625 PRINT"ABOUT THE X AXIS (LINE AB) =";VT;"CUBIC UNITS";
630 PRINT@ 768, "*" ;: INPUT "TO RUN AGAIN, TYPE 1": B6 : IF B6=1 THEN10
640 STOP : GOTO10
700 IF L1<100 THEN F=2 : GOTO750
710 IF L1<150 THEN F=3 : GOTO750
720 IF L1<200 THEN F=4 : GOTO750
730 IF L1<250 THEN F=5 : GOTO750
740 PRINT "SORRY SCALE T00 LARGE TO BE DRAWN" ;: F=6 : GOTO510
750 L1=L1/F : Y1=Y1/F : Y2=Y2/F : Y3=Y3/F : X1=X1/F : X2=X2/F : X3=X3/F
760 RETURN
1000 FOR Y=5 TO Y3+5 : SET(X3 * 2 + 20 , Y) : NEXT : GOTO540
1100 FOR Y=5 TO Y3+5 : SET(20 , Y) : NEXT : GOTO540
1199 IF X3>127 GOSUB700
1200 FOR X=L1 TO X3 : SET(X * 2 + 20 , Y3 + (S2 * (L1-X) +5)) : NEXT : GOTO540
1299 IF X3 < -10 GOSUB700
1300 FOR X=X3 TO 0 : SET(X * 2 + 20 , Y3+ (S1 * (0-X) +5)) : NEXT : GOTO540
Target Practice
This program uses the INKEY$ function to simulate one of the popular "video
games". Notice how few lines are required. This program could easily be
"dressed up" - let the user choose a Fast Target, Slow Target; keep score,
print special messages, etc. To change the speed of the target, change line 40
as follows: instead of "RND(10)/10", use "RND(0)*S1". For a slow-moving
target, let S1 be small (less than 1); for a faster target, let S1 be greater than
1. S1 should not exceed 1.5 or the target will advance to the next line.
H-8
1 CLS:PRINT : PRINT CHR$(23) ; "HIT 'Z' KEY TO AIM LEFT."
2 PRINT "HIT '/' KEY TO RIM RIGHT."
3 PRINT "HIT SPACE BAR TO FIRE."
4 FOR I = 1 TO 5000 : NEXT
10 CLS : CA=928 : I=1 : PRINT @ CA, "*" ; : PRINT @ 991, "***";
20 F=0
30 IF I >= 15 PRINT @ 124, "
"; : I=1
40 PRINT @ 64 + I * 4, "
"; : I=I+RND(10)/10 : PRINT@ 64+I*4," --> ";
50 IF F=0 THEN 200
60 RESET(MX,MY) : MX=MX-MD : MY=MY-8 : IF MX<=0 OR MX>=127 THEN20
70 IF MY>2 SET(MX,MY) : GOTO 30
80 IF ABS( I*8-MX)>4 THEN 20
90 FOR J=1 TO 6 : PRINT@ 64+4*I,"****"; : FOR K=1 TO 50 : NEXT
95 PRINT@ 64+4* I, "
" : FOR K=1 TO 50 : NEXT K,J
100 GOTO10
200 Y$=INKEY$
205 IF F=1 STOP
210 IF Y$<>"Z" THEN 250
220 IF CA < 922 THEN 30
230 PRINT@ CA, " "; : CR=CA-1 : GOTO 280
250 IF Y$<>"/" THEN 300
260 IF CA>934 THEN 30
270 PRINT@ CA, " "; : CA=CA+1
280 PRINT@ CA, "*"; : GOTO30
300 IF Y$<>" " THEN 30
310 F=1 : MD=928-CA : MY=40 : MX=64-3*MD : SET(MX,MY) : GOTO30
311 END
Ready-Aim-Fire (Bouncing Dot Revisited)
Remember the LEVEL I Bouncing Dot program? This program takes that
idea and turns it into a game for one or more players by means of the
INKEY$ function. The object is to enter the correct 3-digit combination that
will cause your missile to destroy the bouncing dot. (The 3-digit number
corresponds to the X-axis of the display and therefore should be in the range
001 to 126 - and be sure to enter leading zeros for 1- or 2-digit numbers.)
The Computer always takes the first shot; then it's Player Number 1's turn.
5 DIM N$(4)
6 CLS : INPUT "ENTER THE NO. OF PLAYERS"; X1 : PRINT"ENTER"; X1 ;"1ST NAMES :"
7 FOR XI=1 TO X1 : INPUT N$(XI) : NEXT : XI=1
10 CLS
20 FOR M=0 TO 127 : SET(M,0) : SET(M,47) : NEXT
30 FOR M=0 TO 47 : SET(0,M) : SET(127,M) : NEXT
35 FOR X=1 TO 121 STEP 10 : RESET(X,0) : NEXT
40 RANDOM : Y= RND(40) +1 : X= RND(110) +4
50 D=1 : Q=1 : Z=64
60 RESET (Z,Y-D) : RESET (X- Q * 4, 24)
70 SET (Z, Y) : SET (X, 24) : GOSUB 500
80 Y=Y+D : X=X+Q
90 IF X=123 OR X=4 THEN GOSUB 700
H-9
100 IF Y=47 THEN 120
105 IF Y=0 GOSUB 900
110 IF Y <> -1 OR X <> -1 THEN 60
120 Y= Y- 2 * D : D= -D : GOTO 60
500 IF X=Z OR X=Q+Z OR X=2 * Q+Z OR X=3 * Q+Z OR X=Q * 4+Z THEN IF Y=24 GOSUB 600
510 IF Y=23 OR Y=24 OR Y=25 THEN IF X=Z GOSUB 600
520 RETURN
600 X=1
610 FOR Z=1 TO 50 : PRINT@ 550,"HIT !!!"; : NEXT
620 FOR Z=1 TO 25 : PRINT@ 550,"
";: NEXT
630 X=X+1 : IF X<5 GOTO 610
640 GOTO 2000
700 X=X-2 * Q : Q= -Q : RETURN
900 T$ = INKEY$ : A$ = "" : B$ = "" : C$ = ""
1000 A$= INKEY$ : IF LEN(A$) = 0 THEN 1000
1005 PRINT@ 0, A$;
1010 B$= INKEY$ : IF LEN(B$)=0 THEN 1010
1015 PRINT@ 1, B$;
1020 C$= INKEY$ : IF LEN(C$)=0 THEN 1020
1025 PRINT@ 2, C$;
1030 RESET(Z,1) : X$= A$+B$+C$ : Z=VAL(X$) : IF Z>126 GOTO 1100
1033 PX=PX+1
1035 GOTO120
1040 RETURN
1100 FOR X=1 TO 50 : PRINT@ 70, "TOO LARGE, TRY AGAIN" : NEXT
1110 PRINT@ 70, "
" : Z=1 : GOTO 1000
2000 IF PX=0 GOSUB 3000
2010 CLS : PRINT "
* * * "; N$(XI) :" * * *" : PRINT : PRINT
2017 PX(XI) = PX+PX(XI) : PH(XI) = PH(XI)+1
2020 PRINT, "SHOTS
HITS
PERCENTAGE"
2030 PRINT : PRINT "THIS ROUND "; TAB(17) PX; TAB(28)"1"; TAB(42) (1/PX) * 100
2035 IFPX(1)=OTHENPX(1)=1
2040 PRINT : PRINT "TOTAL
"; TAB(17) PX(XI);
2042 PRINT TAB(28) PH(XI): TAB(42) (PH(XI) / PX(XI)) * 100
2045 FOR X=1 TO 2500 : NEXT
2050 XI=XI+1
2060 IF XI>X1 THEN XI=1
2065 PX=0
2070 GOTO10
2115 IF PX=0 GOSUB 3000
3000 PRINT@ 0, "WHAT LUCK !!!" : PX=1 : RETURN
H-10
I / Converting LEVEL I Programs
Because of the differences between LEVEL I BASIC and LEVEL II BASIC,
you will need to use the CONV program to translate LEVEL I programs to
run under LEVEL II BASIC. Even after converting a program, you'll need to
make minor changes in punctuation, syntax and function arguments before
the program will run. The following is a list of the kinds of changes you'll
need to make on the converted program.
1. Change commas following TAB functions to semi-colons or omit
punctuation altogether. Example:
change
PRINT TAB(10), "HELLO"
to
PRINT TAB(10) "HELLO"
2. Every IF statement should be followed by an explicit THEN statement.
Example:
change
IF A=B B=0
to
IF A=B THEN B=0
3. Be sure PRINT AT is converted to PRINT@. There are some LEVEL I
constructions which will cause CONV to leave PRINT AT unchanged. examples:
change
PRINT AT 475,"CENTER"
to
PRINT@475,"CENTER"
change
PRINT AT 0,"FIRST"; AT 30,"SECOND"
to
PRINT@0,"FIRST":PRINT@30,"SECOND"
4. Graphics functions SET(x,y), RESET(x,y) and POINT(x,y) will not "wrap
around" in LEVEL II. Therefore be sure to restrict the arguments x and y
as follows:
0 <= x < 128
0 <= y < 48
5. If your LEVEL I program uses the array A( ) with subscripts higher than
10, you will need to add a DIM A(x) statement to the beginning of your
converted program (where x is the highest subscript used). Example:
DIM A(30)
I-1
This statement would allow you to use array elements A(0) through
A(30). Of course, you can use any variable name as an array name in
LEVEL II BASIC.
6. In LEVEL I, an INPUT statement allows you to type in variables and
expressions, not just constants. In LEVEL 11, you have to type in a
constant, either string or numeric, depending on the INPUT variable.
Example:
change
to
Y=1: N=0: INPUT "YES OR NO (Y/N)";R
IF R=1 THEN PRINT "THAT'S BEING POSITIVE!"
INPUT "YES OR NO (Y/N)";R$
IF R$="Y" THEN PRINT "THAT'S BEING POSITIVE!"
7. In LEVEL II, DATA statements must contain constants only no variables
or expressions.
8. In LEVEL I, a True logical expression is evaluated as a 1; in LEVEL II,
the same expression has the value -1. Therefore if your LEVEL I program
uses such expressions, you need to change them accordingly in the
converted program. Example, to compute MAX(A,B):
change
M = (A<B)*B + (B<A)*A
to
M = (A<B)*B - (B<A)*A
9. In LEVEL I, POINT(x,y) returns 1 when graphics block (x,y) is ON, and 0
when it is OFF. But in LEVEL II, POINT (x,y) returns -1 for (x,y) ON,
and 0 for (x,y) OFF. So be sure to allow for this difference. Example:
change
C = C + POINT(X,Y)
to
C = C - POINT(X,Y)
if you want to increment C each time (x,y) is ON.
I-2
J / Important Information for Cassette Users
Free Modification for LEVEL II Units
A modification that helps cassette loads in LEVEL II computers is available
free to TRS-80 LEVEL II owners. This modification makes the volume setting
less critical so that variations in different tapes usually will not require
volume readjustments.
Some of the more recent LEVEL II Keyboard units have had this
modification factory-installed. To see if the modification has been included in
your computer, look at the catalog number on the bottom of the keyboard
case. The modification has been made if the number ends in -1. For example,
if the number is 26-1004-1, the modification has already been installed; if the
number is 26-1004, the modification has not been installed.
If the number does not end in -l and you have not already had the cassette
modification installed by Radio Shack, you may arrange for installation at
your local Radio Shack store.
Using Your Cassette Deck
Many factors affect the performance of a cassette system. The most
significant one is volume. Too low a volume may cause some of the
information to be missed. Too high a volume may cause distortion and result
in the transfer of background noise as valid information.
Three different cassette models have been supplied with the TRS-80 system
the CTR-40, CTR-41 and CTR-80. Each model has its own loading
characteristics. The table on the next page gives suggested volume ranges for
each of the CTR models. Figures are for systems without the CLOAD
modification.
J-1
Notice that volume ranges for LEVEL I and LEVEL II are different. This is
because the LEVEL II data transfer rate is faster (500 baud vs. 250 baud).
Also, notice that pre-recorded Radio Shack programs need a slightly higher
volume setting than that required by your own CSAVEd tapes. The
prerecorded tapes are produced with high-speed audio equipment at a
slightly lower level than the CSAVE process provides.
RECORDER
MODEL
CTR-40
CTR-41
CTR-80
USER-GENERATED TAPES PRE-RECORDED RADIO SHACK TAPES
LEVEL I
LEVEL II
LEVEL I
LEVEL II
YELLOW LINE
RED LINE
YELLOW LINE
RED LINE
6-8
4-6
6½ - 8½
5-7
4½ - 6½
3-5
5½ - 7½
2½ - 5
Recommended Volume Settings for RADIO SHACK Cassette Decks
(With CTR-40 and CTR 80, to increase volume, turn the control to the left.
With CTR-41, turn control to the right.)
When information is being loaded from the cassette tape, two asterisks will
appear on the screen. The one on the right will flash on or off each time a new
line of data or program is read in. With SYSTEM tapes, the right asterisk
blinks slowly. If the asterisks do not appear, or the one on the right does not
flash, then the volume setting is probably too low. If the asterisks appear but
one is not flashing, try increasing the volume setting. Use the reset button to
stop the cassette and return control to you if loading problems occur.
Radio Shack programs are recorded at least twice on each tape (usually twice
on each side). You should do the same when you record programs on tape.
This will give you a back-up if one does not load properly or if it becomes
damaged.
Important Note: The CTR-41 requires that you keep the supplied "dummy
plug" in the MIC jack at all times. However, the CTR-40 and the CTR-80
should never be used with the "dummy plug."
2
LEVEL I
Sometimes you will get an error message during an attempted CLOAD. This
means that some information was lost or garbled. Adjust the volume level
slightly and try again.
LEVEL II
In case of an error message, proceed as above. With SYSTEM tapes, a "C"
will appear in place of one asterisk. In LEVEL II, there is also a rare case in
which the program has not loaded correctly even though no error is generated.
So after CLOADing a program, be sure to LIST it. If some data was garbled,
at some point in the listing the display will be filled with meaningless words
and characters. Adjust the volume and try again.
Hints and Tips
Computer tapes should be stored in a relatively dust-free area (a cassette
case is recommended) and protected from high temperatures. Magnetic and
electrical fields may alter recorded information, so avoid them (i.e. household
appliances, power sources such as transformers and television sets, etc.).
The cassette deck supplied with the TRS-80 is very compatible with the
system and will perform its duties with great success. To keep the cassette
deck in top condition and thus minimize your problems, you should
periodically perform some routine maintenance on it. Dirty heads can cause
as much as a 50% loss in volume. Also, heads become magnetized with use
and may cause distortion. We recommend that you clean the head, capstan
and pinch roller after every four hours of operation. Heads on new recorders
should always be cleaned before use.
Note: Cassette cleaning and demagnetizing accessories are available from
your local Radio Shack store.
J-3
Index
Index
Subject
Page
Subject
Page
Accuracy...................................................4/18 4/21
Constants
Precision of .................................4/20-4/22
Typing of............................................. 4/18
Conversion of...................................... 4/19
AND ................................................. 1/6, 8/15-8/17
CONT................................................................ 2/3
Arithmetic Functions ..................................7/1-7/5
Control Codes ................................................... C/3
Arithmetic Operators........................................1/5
COS.......................................................... 7/2, A/13
Arrays ...............................................................1/5
size (DIM) .......................................4/4-4/5
subroutine examples ......................6/1-6/7
Counter Variable.....................................4/10-4/12
Abbreviations ....................................................1/8
ABS ....................................................................7/1
CSAVE............................................................... 2/4
CSNG ................................................................. 7/2
ASC ....................................................................5/5
DATA ............................................................... 3/10
Assignment Statements....................................4/1
Declaration Characters .................................... 1/4
ATN....................................................................7/1
Definition Statements
DEFDBL............................................... 4/3
DEFINT................................................ 4/2
DEFSNG............................................... 4/3
DEFSTR ............................................... 4/4
AUTO .................................................................2/1
Base Conversions
decimal/binary/octal/hex.............. G/1-G/3
BASIC Keywords
internal storage ............................ E/1-E/2
DELETE ............................................................ 2/4
Cassette
connection ............................................. i-ii
operation...................................ii-iii, J/1-3
dual .............................................10/1-10/2
DIM................................................. 4/4-4/5,6/1-6/7
CDBL ...................................................... 7/2, A/13
Edit Mode ..............................................1/2,9/1-9/8
Character Codes ........................................ C/1-C/6
EDIT .................................................................. 2/5
CHR$............................................................5/5-5/6
ELSE................................................................ 4/17
CINT ..................................................................7/2
END ................................................................... 4/6
CLEAR n............................................................4/4
ERL .................................................................... 8/3
CLOAD...............................................................2/2
ERR.................................................................... 8/4
CLOAD? .............................................................2/3
ERROR ............................................................ 4/13
CLS.....................................................................8/2
Error Codes and Messages ........................B/1-B/3
Command Mode
defined ..................................................1/2
special characters.................................1/3
commands .......................................2/1-2/7
Execute Mode
Defined ................................................. 1/2
Special keys .......................................... 1/3
Execution Time .................................. 11/2
Concatenate (+) ..........................................1/7,5/4
EXP .................................................................... 7/3
Conditional Tests ....................................4/15-4/17
Expansion Interface................................10/1-10/7
Documentation of your programs (REM) ...... 4/15
Double Precision ........................ 1/4-1/5,4/18-4/22
Field Specifiers, PRINT USING ................3/4-3/5
1
Index
Subject
Page
Subject
Page
Logical Operators..............................1/6,8/15-8/17
LPRINT ................................................... 10/3-10/5
File Name ....................................................2/2-2/4
FIX ..................................................................... 7/3
Machine Language Call......................2/6,8/8-8/12
FOR TO STEP NEXT .............................4/10-4/12
MEM .................................................................. 8/5
Forbidden Words............................................ A/16
Memory
allocation .................................... 4/18-4/21
available ............................................... 8/5
important addresses ........................... D/2
map ...................................................... D/1
size (see USR, SYSTEM)..................... 1/1
FRE .................................................................... 5/6
Functions
derived ..................................................F/1
intrinsic ................................................ 1/8
Glossary ........................................................... 1/10
MID$.................................................................. 5/9
GOSUB .............................................................. 4/7
Mini-disk ......................................................... 10/6
GOTO................................................................. 4/7
Monitor Mode (see SYSTEM)..................... 1/2,2/6
Graphics ......................................................8/1-8/2
codes...............................................C/4,C/7
Multiple Statements on One Line ........... 1/3,11/1
IF THEN ELSE............................................... 4/15
NEW .................................................................. 2/5
INKEY$ ............................................................. 5/7
NEXT ...................................................... 4/10-4/12
INP..................................................................... 8/4
NOT ...................................................1/7,8/15-8/17
INPUT .......................................................3/8-3/10
Object Files (Machine Language) ......2/6,8/8-8/12
Input/Output .............................................3/1-3/13
ON ERROR GOTO ......................................... 4/13
INPUT#-1 ............................................... 3/12-3/13
ON n GOSUB .................................................... 4/9
Instring ....................................................5/12-5/13
ON n GOTO....................................................... 4/8
INT..................................................................... 7/3
On-Off Switches ................................................ 1/1
Integer Precision ....................................... 1/4,4/18
Operators
arithmetic............................................. 1/5
logical.................................................... 1/6
relational .............................................. 1/6
string .................................................... 1/7
Keyboard Rollover............................................. 1/9
LEFT$................................................................ 5/8
LEN.................................................................... 5/8
Operating Modes
Command ............................................. 1/2
Edit ....................................................... 1/2
Execute ................................................. 1/2
Monitor ................................................. 1/2
LET .................................................................... 4/5
LEVEL I to LEVEL II Conversion..............I/1-I/2
Limits, Program and Memory....................... A/17
Line Numbers.................................................... 2/1
OR ......................................................1/6,8/15-8/17
Line Printer.............................................10/2-10/5
Order of Operations.......................................... 1/7
LIST ................................................................. 2/5
OUT ................................................................... 8/5
LLIST.............................................................. 10/3
Parentheses..................................................... 11/1
LOG................................................................... 7/3
PEEK ................................................................. 8/6
2
Index
Subject
Page
Subject
Page
POINT................................................................8/2
Specifications ................................................. A/17
POKE .................................................................8/6
Speeding Up Execution .................................. 11/2
Port (see INP and OUT) .............................8/4,8/5
SQR.................................................................... 7/5
POS ....................................................................8/7
Statement ..................................................4/1-4/22
Power On ...........................................................1/1
STEP........................................................4/10-4/12
Precision ..........................................................4/20
STOP.................................................................. 4/6
PRINT ..........................................................3/1-3/2
Strings
comparisons.......................................... 5/3
functions .......................................5/5-5/13
input/output ......................................... 5/2
operators............................................... 5/4
storage space ........................................ 5/4
PRINT @ ............................................................3/3
PRINT TAB .......................................................3/3
PRINT USING ............................................3/4-3/8
PRINT #-1........................................................3/12
STRING$ ......................................................... 5/10
Print Zones ..................................................3/1-3/2
STR$ ..........................................................5/9-5/10
Program Examples..................................H/1-H/10
Subroutine ......................................................... 4/7
Program Statements .................................4/1-4/17
Syntax Error....................................... 1/2, B/1-B/2
RANDOM...........................................................7/4
SYSTEM ............................................................ 2/6
READ .......................................................3/10-3/11
TAB .................................................................... 3/3
Relational Operators...................................1/6-1/7
Tab Codes ......................................................... C/5
REM .................................................................4/15
TAN.................................................................... 7/5
Reserved Words.............................................. A/16
THEN.......................................................4/15-4/17
RESET ...............................................................8/2
TO ............................................................4/10-4/12
RESTORE........................................................3/11
TROFF ............................................................... 2/7
RESUME .........................................................4/14
TRON................................................................. 2/7
RETURN............................................................4/8
Type Conversion .....................................4/19-4/21
RIGHT$ ............................................................ 5/9
USING .........................................................3/4-3/8
RND ...................................................................7/4
USR............................................................8/8-8/12
RUN .............................................................1/2,2/6
VAL .................................................................. 5/11
Sequence of Execution .................................4/6/17
Variables...................................................... 1/4,4/1
SET...............................................................8/1-8/2
VARPTR ..................................................8/13-8/15
Setting Up........................................................i,1/1
Video Display .............................................C/1-C/8
SGN....................................................................7/4
SIN .....................................................................7/4
Single Precision................................ 1/4,4/18-4/22
Space Compression Codes ............................... C/5
3
RADIO SHACK
A DIVISION OF TANDY CORPORATION
U.S.A.: FORT WORTH, TEXAS 76102
CANADA: BARRIE, ONTARIO L4M 4W5
TANDY CORPORATION
2980086
AUSTRALIA
BELGIUM
U.K.
280-316 VICTORIA ROAD
RYDALMERE, N.S.W. 2116
PARC INDUSTRIEL DE NANINNE
5140 NANINNE
BILSTON ROAD WEDNESBURY
WEST MIDLANDS WS10 7JN
Printed in U.S.A.