1
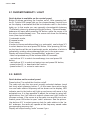
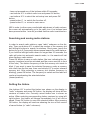
VARIO
User manual
VARIO ENG
1. IMPORTANT SAFETY
• CAUTION: Never allow children to use the bath/shower cabin without adult supervision to avoid accidents.
• CAUTION: Physically challenged people must exercise extreme caution and/or use
assistance if necessary when using bath/shower cabin.
• CAUTION: Do not use external electrical devices while taking a bath or shower. Devices located at the bath’s vicinity, being connected into electricity network, must be
fastened in such a way as to avoid their accidental falling.
• CAUTION: Upon failure/damage or abnormal functioning of any appliances of the
bath/shower cabin a technical maintenance professional must be called. Use of damaged product or product with failure of any type is strictly forbidden.
• Before using the bath, check the water temperature in the bath. Suitable is water
temperatures up to 40ºC. Pouring over 60ºC water into the bath/shower cabin may
damage the material.
• Do not use the bath/shower cabin when being intoxicated with alcohol or drugs.
• Take care when entering or leaving the bath/shower cabin to avoid injuries.
• Consult your physician before using the bath when you’re pregnant or suspect pregnancy.
• Consult your physician before using the bath when being sick.
• All the openings of the bath/shower cabin must be clean and unobstructed.
2. OPERATION
To switch the display on, press on/off button A. For a moment the display will indicate
time, temperature and all the icons of currently inactive functions (chromo/light B,
steam D, radio C, hydromassage F, and setup).
To deactivate all functions, pressing on/off button A again, display enters into standby
mode. The clock reading after connecting the product to the power network is 00:00.
In order to adjust the clock reading (00:00), you need to set the time (see Section
2.6.). In case of power failure the clock reading will reset to 00:00 (unless the power
failure lasts less than 5 minutes).
All functions become inactive and the display will enter into stand-by mode (only the
indicator of errant time is lit on the display) 60 minutes after pressing any button or 20
minutes after deactivating the last function. If the product is connected to the power
network, the control panel will show the so-called errant time.
All functions can be activated after pressing button A to switch on the steam sauna.
In order to switch a function on:
1) use a quick button,
2) use buttons X/Y to select the icon of deactivated function and press OK button.
2
VARIO ENG
LED indicator
Time
A
Quick button ON/OFF
B
Quick button CHROMO/LIGHT
D
Quick button STEAM
C
Quick button RADIO
F
Quick button HYDROMASSAGE
E
Quick button SCOTTISH SHOWER
Chromo/light
Temperature
Radio frequency
Radio
Volume
Steam
Hydromassage
Timer
Setup
Steamgenerator
service
Y
V
P
X
3
VARIO ENG
2.1 CHROMOTHERAPY / LIGHT
Quick button is available on the control panel.
Button B allows switching the function on/off. After pressing button B, 3 white LED lamps light up, the chromotherapy function icon
on the display is activated and the led indicator next to the button
lights up. In this mode you can manually choose/switch between
(7 different) colours by pressing left/right buttons. “Chromotherapy”
submenu will open after pressing OK button, while the cursor is at
the active chromotherapy icon. The screen will show the following
icons (from top to bottom):
1) automatic mode,
2) manual mode,
3) exit setup
In order to choose suitable setting (e.g. automatic), use buttons X/Y
to select desired icon and press OK button. After pressing OK button the function will be set to automatic mode, activation of which is
indicated by rotating chromotherapy/light icon in the main menu.
Display will stop showing “chromotherapy” submenu if you:
- have not pressed any of the buttons within 20 seconds,
- use buttons X/Y to select chromotherapy icon and press OK
button,
- use buttons X/Y to select exit setup icon and press OK button,
- press button B, i.e. deactivate the function,
- press button E, i.e. return to main menu.
2.2. RADIO
Quick button on the control panel.
Press button C to switch the function on/off.
The radio will play the two most recently selected stations (used
last time) when pressing button C. At the same time active radio
icon and radio station frequency will be shown on the display, LED
indicator next to the button will light up and cursor will move to the
activated icon. It is then possible to adjust the volume by using left/
right buttons. Use ‘left’ button to reduce volume and ‘right’ button to
increase volume. If the cursor is at the radio icon and the icon is activated, press OK button to open “radio” submenu. See the picture.
Use buttons X/Y to select memory slots for radio station in the “radio” submenu, the radio will operate at the frequency saved under
corresponding memory slot.
Display will stop showing “radio” screen if you:
4
Exit
VARIO ENG
- have not pressed any of the buttons within 20 seconds,
- use buttons X/Y to select radio icon and press OK button,
- use buttons X/Y to select the exit setup icon and press OK
button,
- press button C, i.e. switch the function off,
- press button E, i.e. return to main menu.
NB! In order to allow more comfortable adjustment of radio volume,
the cursor will automatically go to the radio icon if no buttons have
been pressed within 1 minute, provided that the radio is switched on.
Searching and saving radio stations
In order to search radio stations, open “radio” submenu on the display. Then use buttons X/Y to select the number of the memory slot
and left/right buttons to search for stations. Short press (press the
button for up to 2.5 seconds) allows manual search for radio stations.
If you hold the left/right button down for longer than 2.5 seconds, the
radio will enter into automatic search mode, i.e. the search will halt
when finding a radio station.
Press OK button to save a radio station (the icon indicating the frequency (numbers) must be activated and the cursor must be in front
of the icon). The station frequency of the first memory slot starts to
blink. If you want to save the selected frequency under a memory
slot other than the first one, then use buttons X/Y to select relevant
memory slot. After selecting a memory slot (station frequency is
blinking), press OK button. The frequency is saved and the radio will
continue broadcasting the selected station.
(closed position).
Setting the timbre
Use buttons X/Y to select the timbre icon shown on the display in
“radio” submenu and press OK button, the display will show all four
versions of timbre icon. Currently saved timbre icon is shown as
active. When selecting corresponding timbre versions by using left/
right buttons, the timbre will change immediately, but it will not be
saved. Press OK button to save the selected timbre. After pressing
OK button, the display will continue showing the icon of the version
of saved timbre (in “radio” submenu).
5
VARIO ENG
Colour music
Use buttons X/Y to select the colour music icon displayed in “radio” submenu and press OK button, the function will switch on (i.e.
the chromotherapy lamps in steam sauna will light up according to
the sound) and the icon of four different versions of colour music
will be displayed. At the same time the chromotherapy/light icon on
the main screen will be activated and the LED indicator next to the
chromotherapy/light quick button will light on. When selecting corresponding four versions of the function by using left/right buttons, the
settings will change immediately, but the change will not be saved.
Press OK button to save the selected version. After pressing OK
button the display will continue showing the icon of the selected
version of colour music.
Colour music function will switch off after using quick button to
switch off chromotherapy/light (button B) or radio (button C).
2.3. STEAM
Quick button on control panel.
Press button D to switch this function on/off. When pressing button
D (to switch the function on), the display will show active icon of
the steam function, the LED indicator next to the button will light up
and the cursor will move to the activated icon and the temperature
reading will start to blink. Blinking reading will indicate preselected
temperature. Blinking will continue for 10 seconds after switching
the function on. Then the reading will start to show current temperature.
Press button D again to switch off steam function. The steam function icon will be deactivated and the LED indicator next to the button
will turn off.
Temperature setup
Temperature can only be adjusted if the function is switched on.
Use X/Y buttons to select activated steam function icon shown on
the display, and press OK button, “steam function“ submenu will be
shown on the display. See the picture.
In order to set the steam temperature, use buttons X/Y to select
the temperature reading and then use left/right buttons to adjust
the reading. Press ‘left’ button to reduce the temperature (min
35°C) and press ‘right’ button to increase (max 50° C). Press OK
6
VARIO ENG
button to save the selected temperature. Display will stop showing
“steam function” submenu if you:
- have not pressed any of the buttons within 20 seconds,
- use buttons X /Y to select exit setup icon and press OK button,
- press button D, i.e. deactivate the function,
- press button E, i.e. return to main menu.
The most recently set temperature will be saved in the memory.
Indication for achieving the selected
temperature
Achieving the selected temperature is indicated (provided that the
indication for achieving the selected temperature is switched on
(see Section 2.6. Setup)) by green ceiling light when reaching the
temperature 5°C lower than the set temperature. Green light will be
on until pressing any button. After pressing any button the light turns
white. Light can be switched off by pressing button B.
Display messages related to steam functions
After switching on the steam, the steam icon starts to blink. If you
bring the cursor to steam icon and press OK, the steam submenu
will appear on the display.
- If display shows E1, the steam generator is not dispensing water.
- If display shows E3, there is a problem with the power supply of
steam generator. SERV – see Section 2.6.
2.4. SCOTTISH SHOWER
Quick button on control panel.
When pressing and holding down button E, only cold water will start
to run from the ceiling shower, (only) active Scottish shower icon will
be shown on the display and the LED indicator next to the button
will light up. The function only works when the display shows main
menu!
NB! Press button E while in submenu to return to main menu, i.e.
back/escape.
7
VARIO ENG
2.5. HYDROMASSAGE
Use Button F to switch the function on/off. In order to use this function, the mixer should be in open position and the water diverter
should be in the ‘Massage’ position. After pressing button F the display will show active hydromassage icon, the LED indicator next to
the button will light up, the cursor will move to the activated icon,
and “hydromassage” submenu will be shown on the display (at that
moment none of the programmes are functioning yet). The following
icons will be shown:
1) COMFORT 1
2) COMFORT 2
3) COMFORT 3
4) COMFORT 4
5) THERAPY 1
6) THERAPY 2
7) THERAPY 3
8) THERAPY 4
9) EXIT SETUP
Suitable programme can be activated by using buttons X/Y. Press
OK button to start the massage programme. The display will simultaneously show massage speed (1 to 3) under functioning (activated)
massage programme. Massage speed can be changed by using
left/right buttons. Programme will always start at speed 2. Speed
can be changed while the programme is activated. Speed cannot be
saved. In order to stop activated massage programme:
- press OK button,
- press button F.
Display will stop showing ”hydromassage” submenu if you:
- have not pressed any of the buttons within 20 seconds, provided
that none of the massage programs are activated.
- use buttons X/Y to select exit setup icon and press OK button,
- switch massage function off by pressing button F,
- press button E, i.e. return to main menu.
8
VARIO ENG
2.6. SETUP
Icon on the display. No quick button!
Time setup
Open ”setup” screen to set the time. Use buttons X/Y to select the
setup icon shown on the display and press OK button, “setup” submenu will open. See the picture.
Use X/Y buttons to select time setup icon and then press OK button, the hour reading will start blinking. Blinking hour reading can
be adjusted by using buttons X/Y. After setting the hour reading to
desired number you may also set the minutes reading by pressing
button P. Only the minute reading will start blinking after pressing
button P. blinking minute reading can be adjusted by using buttons
X/Y. In order to save the time set in blinking mode, press OK button.
If the time has been in setup (blinking) mode for 20 seconds and no
buttons have been pushed, the time will automatically restore to the
settings used before entering into setup mode and display will stop
showing ”setup” screen.
Display will stop showing ”setup” screen if you:
- have not pressed any of the buttons within 20 seconds,
- use buttons X/Y to select exit setup icon and press OK button.
- press button E, i.e. return to main menu
NB! Time always needs to be set after:
- connecting the product to the power network,
- power failure
The need to set the time is indicated by reading 00:00 on the display.
Setting timer for steam function
In order to set the timer, you need to open ”setup” submenu. Use
X/Y buttons to select setup icon shown on the display, press OK
button and ”setup” submenu will open. See the figure.
Use buttons X/Y to select steam function timer icon and press OK
button, the hour reading of the timer will start to blink. The blinking
reading shows the most recently set time. Blinking hour reading can
be adjusted by using buttons X/Y. After setting the hour reading
you may also set the minute reading by pressing button P. Only the
minute reading will start to blink after pressing button P. The blinking minute reading can be adjusted at 5 minute intervals, by using
buttons X/Y.
The icon shown on the timer row is either on or off (depending on
9
VARIO ENG
whether the timer is switched on or off). In blinking mode the on/
off icon can be changed by using buttons X/Y. Press OK button to
switch the timer on, if there is icon “ON” behind the time reading.
You can select on/off icon by pressing button P.
If the timer is switched on, the timer icon will be shown next to the
steam function icon on the main screen and the timer icon will also
be shown behind the time reading in standby mode.
NB! The user may, if so desired, use the steam before the time
previously set for switching on the steam, but the preset automatic
switch-on will be deactivated! If timer reading has been in the setup
(blinking) mode for 20 seconds without pressing OK button, the timer setup will halt and display will stop showing ”setup” submenu.
Display will stop showing ”setup” submenu if you:
- have not pressed any of the buttons within 20 seconds,
- use buttons X/Y to select exit setup icon and press OK button.
- pressing button E, i.e. return to main menu.
NB!
a) Timer for steam function can be set maximum 24 hours in advance!
b) If the steam function is turned on by using timer setting and the
temperature of 33° C is not achieved within 15 minutes, the steam
function will be switched off!
Setting the indication of achieving the selected
temperature
In order to set the indication of achieving the selected temperature,
open ”setup” submenu. Use buttons X/Y to select the setup icon
shown on the display and press OK button, and ”setup” submenu
will open on the display. See the picture. Use buttons X/Y to select the icon of indication of achieving the selected temperature and
press OK button, the on or off icon shown on the same row will start
to blink (depending on whether the settings are switched on or off).
In blinking mode the on/off icon can be changed by using buttons
X/Y. Confirm the selection by pressing OK button.
If the on/off icon of achieving the selected temperature has been in
the setup (blinking) mode for 20 seconds without pressing OK button, the setup will halt and return to previously set mode.
Display will stop showing ”setup” screen if you:
- have not pressed any of the buttons within 20 seconds,
- use buttons X/Y to select exit setup icon and press OK button.
- press button E, i.e. return to main menu.
NB! Default (factory) settings have the indication of achieving selected temperature switched on. The indication of achieving the se-
10
VARIO ENG
lected temperature resets to default (factory) settings after:
- connecting the product to power network,
- power failure
Steam generator service - SERV
The need for steam generator service is indicated by showing the
SERV text on the display when switching on the steam function or
when the function is active.
In order to service the steam generator, open “setup” submenu. For
that purpose, use buttons X/Y to select the setup icon shown on the
display and press OK button, which will open ”setup” submenu. See
the picture.
Use buttons X/Y to select steam generator service (SERV) icon and
press OK button, the SERV icon on the display starts blinking and
the steam generator is ready for service. Steam function is blocked
and cannot be switched on. Then pour 500 ml of special service liquid in the generator through a corresponding orifice. Service cycle
will last 3 hours and the SERV icon will be blinking on the display
during the entire cycle. Steam generator service is completed, if the
SERV icon is no longer shown on the display.
Display will stop showing ”setup” submenu if you:
- have not pressed any of the buttons within 20 seconds,
- use buttons X/Y to select exit setup icon and press OK button,
- press button E, i.e. return to main menu.
NB! All the other functions beside steam function can be used when
performing the service!
11
VARIO ENG
2.7. USING THE MIXER
2.8. JETS
12
VARIO ENG
3. MAINTAINANCE
Xonyx™ solid surface baths and shower trays are finished with a silky surface finish.
Xonyx™ is a very durable product that will last for years with simple care. Follow the
recommendations below to properly clean Xonyx™ solid surface product.
3.1. EVERYDAY CARE
• It is recommended to clean the bathtub/shower cabin immediately after every use
with thorough rinse of warm water and dry with soft and dry cloth to avoid water
stains.
• Washing with soap or hand dishwashing liquid and water is usually sufficient to remove surface dirt or stains.
• Upon need of thorough cleaning wide variety of bath cleaning sprays sold with
safety labelling allowing the cleaning of such surface or commercially available solid
surface cleaners are effective.
• Drying is an important step, preventing a build-up of soap film or cleaning residue,
which can create the appearance of light scratches over time.
3.2. PREVENTING DAMAGE
Some chemicals are not compatible with Solid Surface materials, and could permanently harm the surface beyond repair. Avoid surface contact with:
• Strong chlorinated solvents
• Chloroform
• Ketones
• Methylene chloride, acetone, turpentine (paint removers, nail polish remover)
• Very strong acids such as concentrated sulfuric and hydrochloric acids
• Acid drain cleaners, stove and toilet cleaning products should not be used
• Other unknown chemicals or chemicals not allowed for cleaning of Solid Surface
materials
Surfaces exposed to these chemicals should be promptly flushed with water; contact
may cause spots that may require extensive repairs. Remove nail polish with a nonacetone-based nail polish remover and flush with water.
• Avoid subjecting Xonyx™ Solid Surface to extreme hot temperatures or hot objects.
Solid Surface has excellent heat resistant properties. However, placing heat-generating appliances or hot objects, can damage the surface.
• Avoid exposing Xonyx™ Solid Surface to strong chemicals listed above.
• Never cut on a Solid Surface surface to avoid scratching the surface.
• Avoid dropping heavy and/or sharp objects on the surface as it may harm the surface or altogether break the product beyond repair
13
VARIO ENG
3.3. DISINFECTING
Solid surface is not manufactured with any material that would promote the growth of
any bacteria such as mold or mildew.
3.4. CLEANING OF DRAINAGE SYSTEM
The drainage system is assembled from standard plastic drain components. To remove a possible clog up a standard household drainage cleaning agent may be used
that is allowed for such purpose. Remove the drain cover by turning it contra clockwise (baths) or pull it up/off (shower trays) and pour carefully the cleaning agent to the
drain tube not spilling the pipe cleaner over product surfaces.
3.5. STEAM GENERATOR SERVICE
Look section 2.6, Steam generator service - SERV!
3.6. REPAIRS
For possible need of repair of the product please contact the dealer for further information. Minor damage that may accidentally occur is most often repairable.
3.7.LIMITED MANUFACTURERS’ WARRANTY
• Limited Manufacturers’ Warranty covers the product against concealed defects and/
or other defects that appear only if the product has been used according to this installation manual.
• Limited Manufacturers Warranty is limited only to repairs and or replacement of defective parts and the Manufacturer does not accept any further liabilities of any kind
beyond that.
• Limited Manufacturers’ Warranty only applies if all shipping, storing, installation,
operation and maintenance/cleaning conditions have been duly followed.
• Limited Manufacturers’ Warranty covers only the replacement of the subparts suffering the defects and does not cover any shipping and/or replacement charges.
• Limited Manufacturers’ Warranty does not cover normal wear of the unit upon intensive use or any damage to the unit or its sub-parts in result of improper and/or blatant
use of the unit.
• Limited Manufacturers’ Warranty for any parts in contact with water does not cover
the defects and/or malfunction arising from water hardness, or impurity, or negligent
cleaning problems.
• Limited Manufacturers’ Warranty does not cover any indirect losses and/or loss of
profits, nor does cover any indirect or related costs arising from the defect or malfunction of the unit.
• Gloss reduction, scratching, and staining on solid surfaces incurred over time due
to use is NOT a manufacturing defect but is considered normal wear and tear – The
forgoing is NOT covered under the Limited Warranty. However, the product can be
re-sanded and repolished. For possible need of repair/repolish of the product please
contact the dealer for further information.
14
VARIO ENG
P.S.Manufacturer reserves the right
to change technical aspects on the
products without prior notice.
4. TECHNICAL DATA
Electrical equipment
- Voltage: 230 V
- Frequency: 50 Hz
- Rated power: 3150 W
- Rated current: 13.5 A
218
- Frequency range: 76-108 Hz
168
79
15
AS Balteco, Jälgimäe, 76401 Harjumaa, Estonia
Phone +372 6 718 237, Fax +372 6 718 236
www.balteco.com